Nokia Bell G240WG 7368 ISAM ONT User Manual 7368 ISAM ONT G 240W C Product Guide
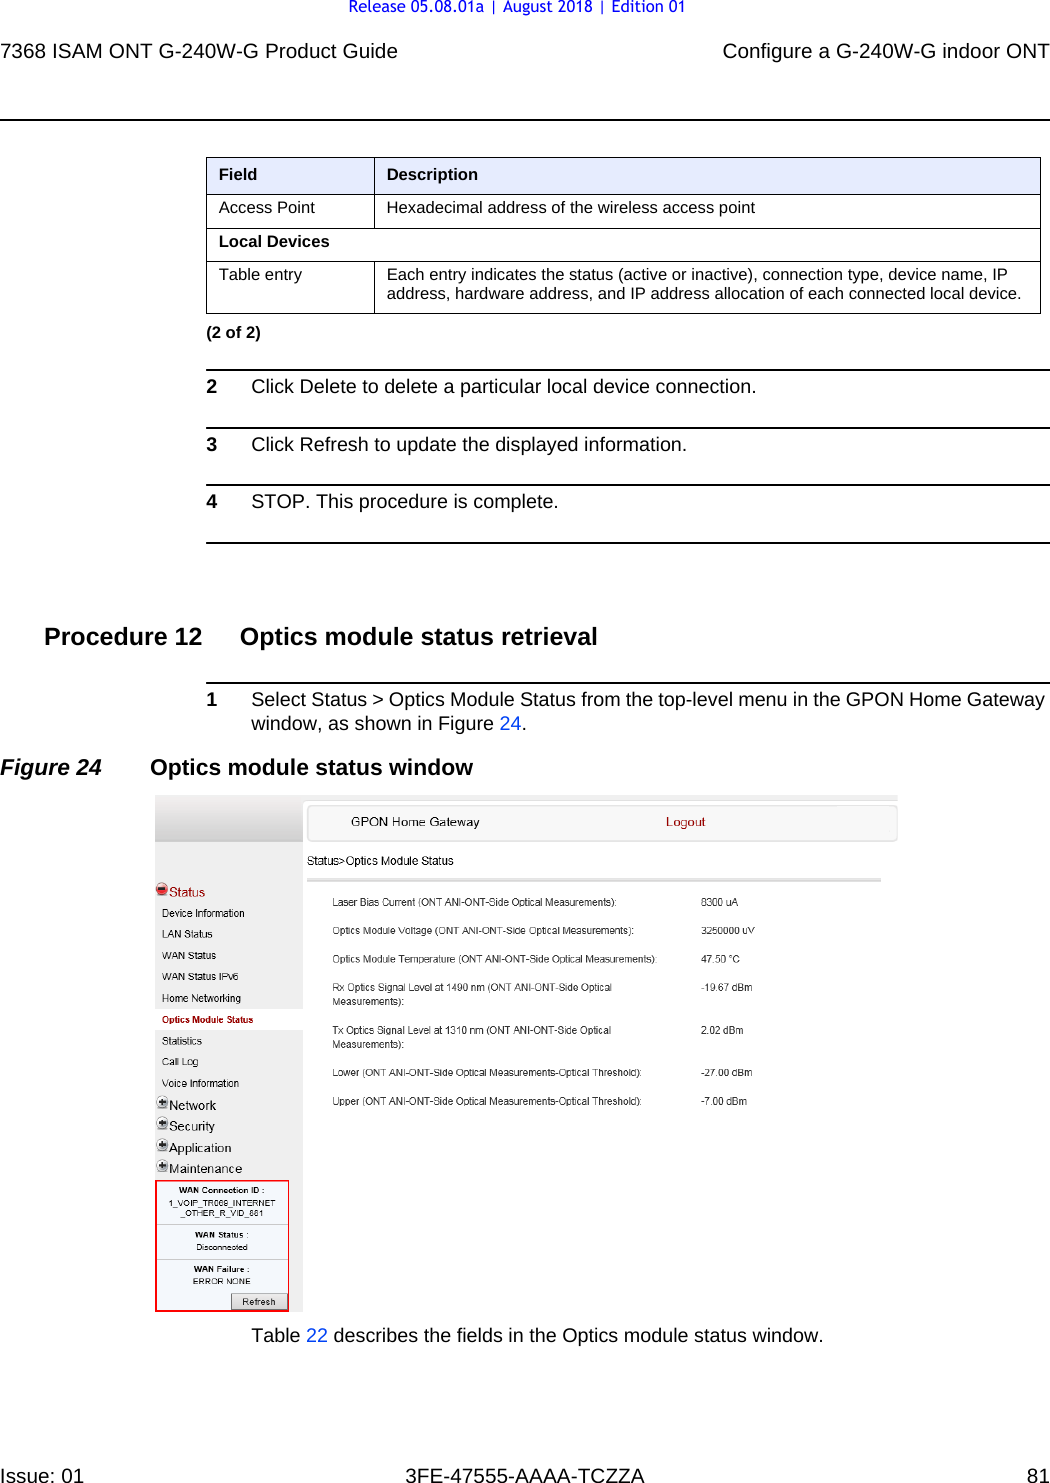
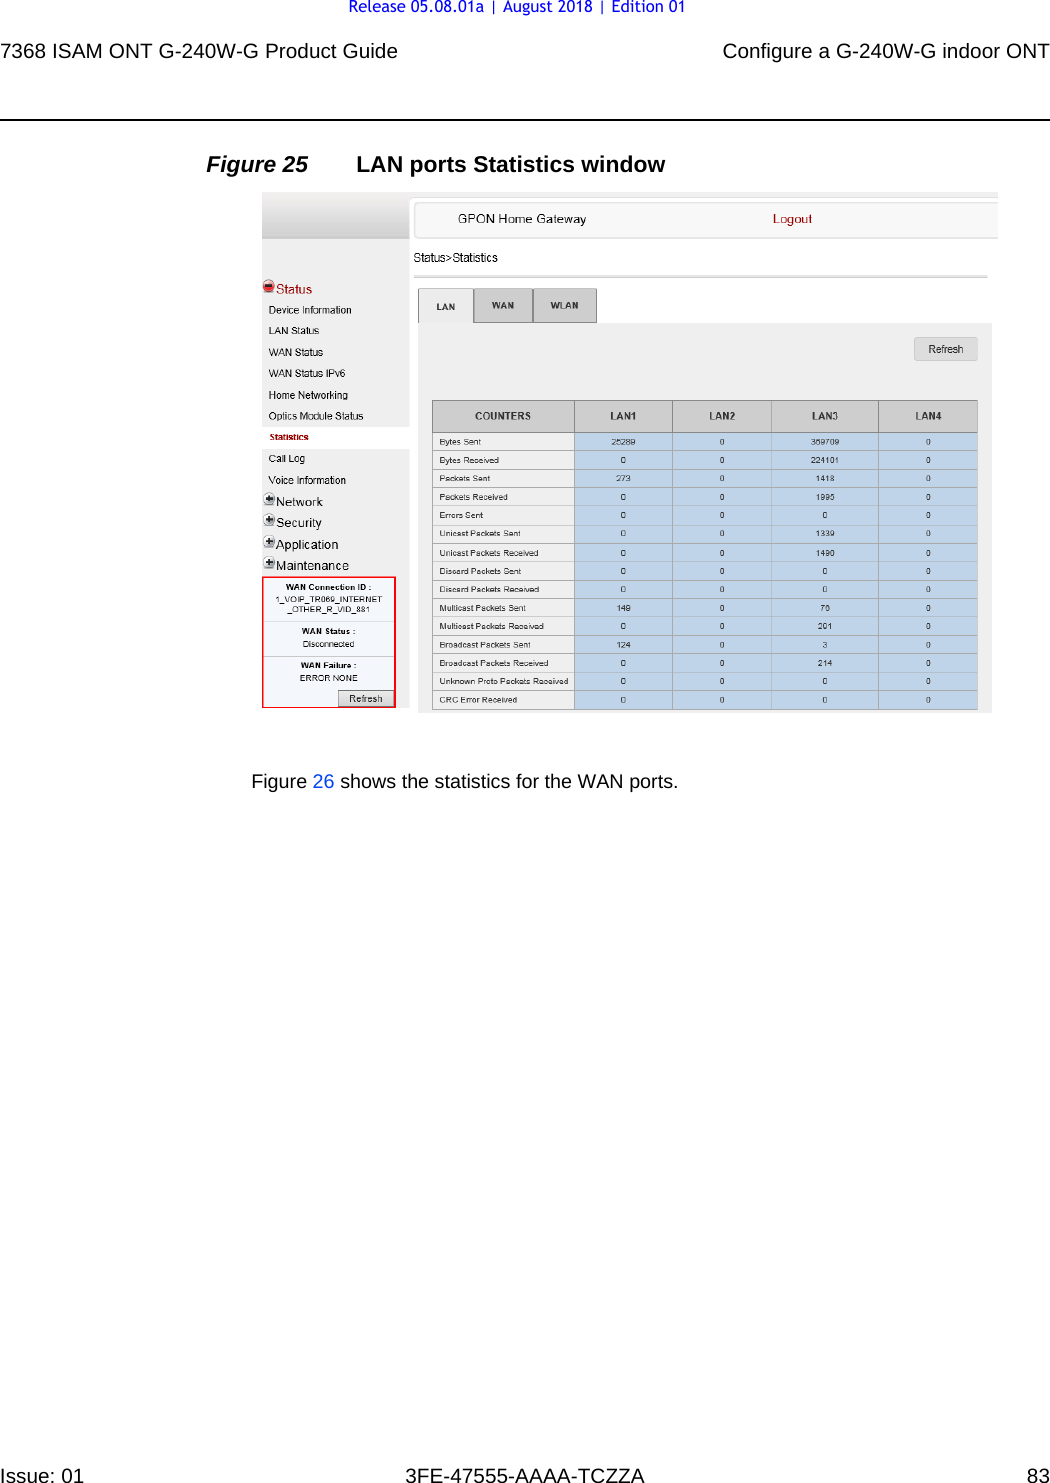
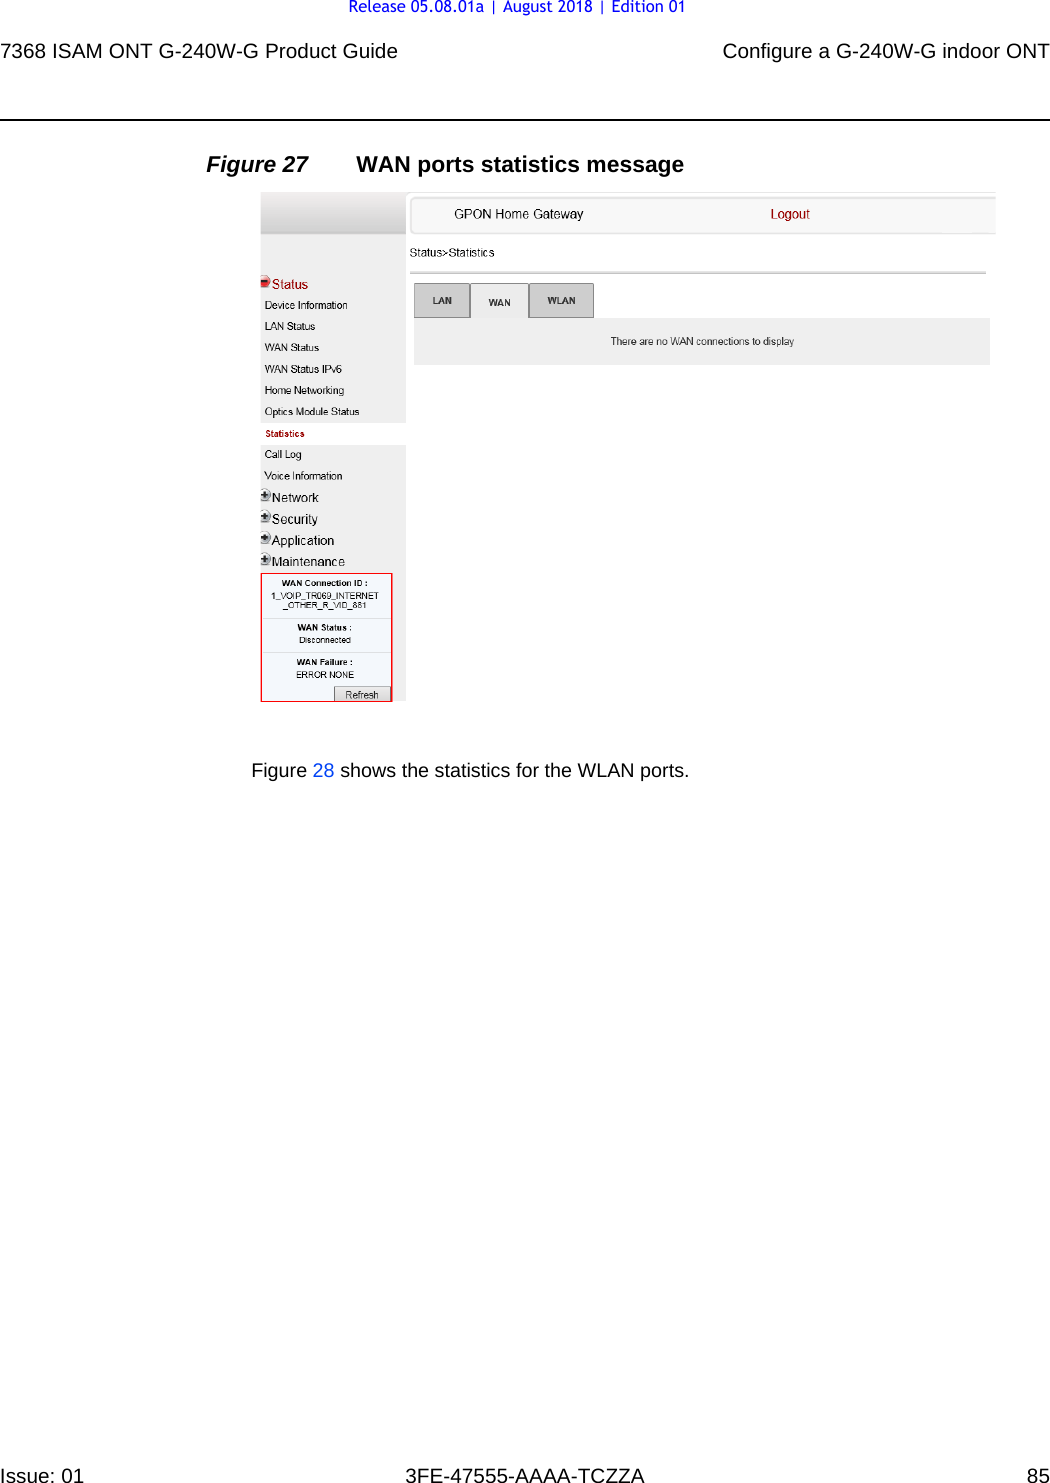
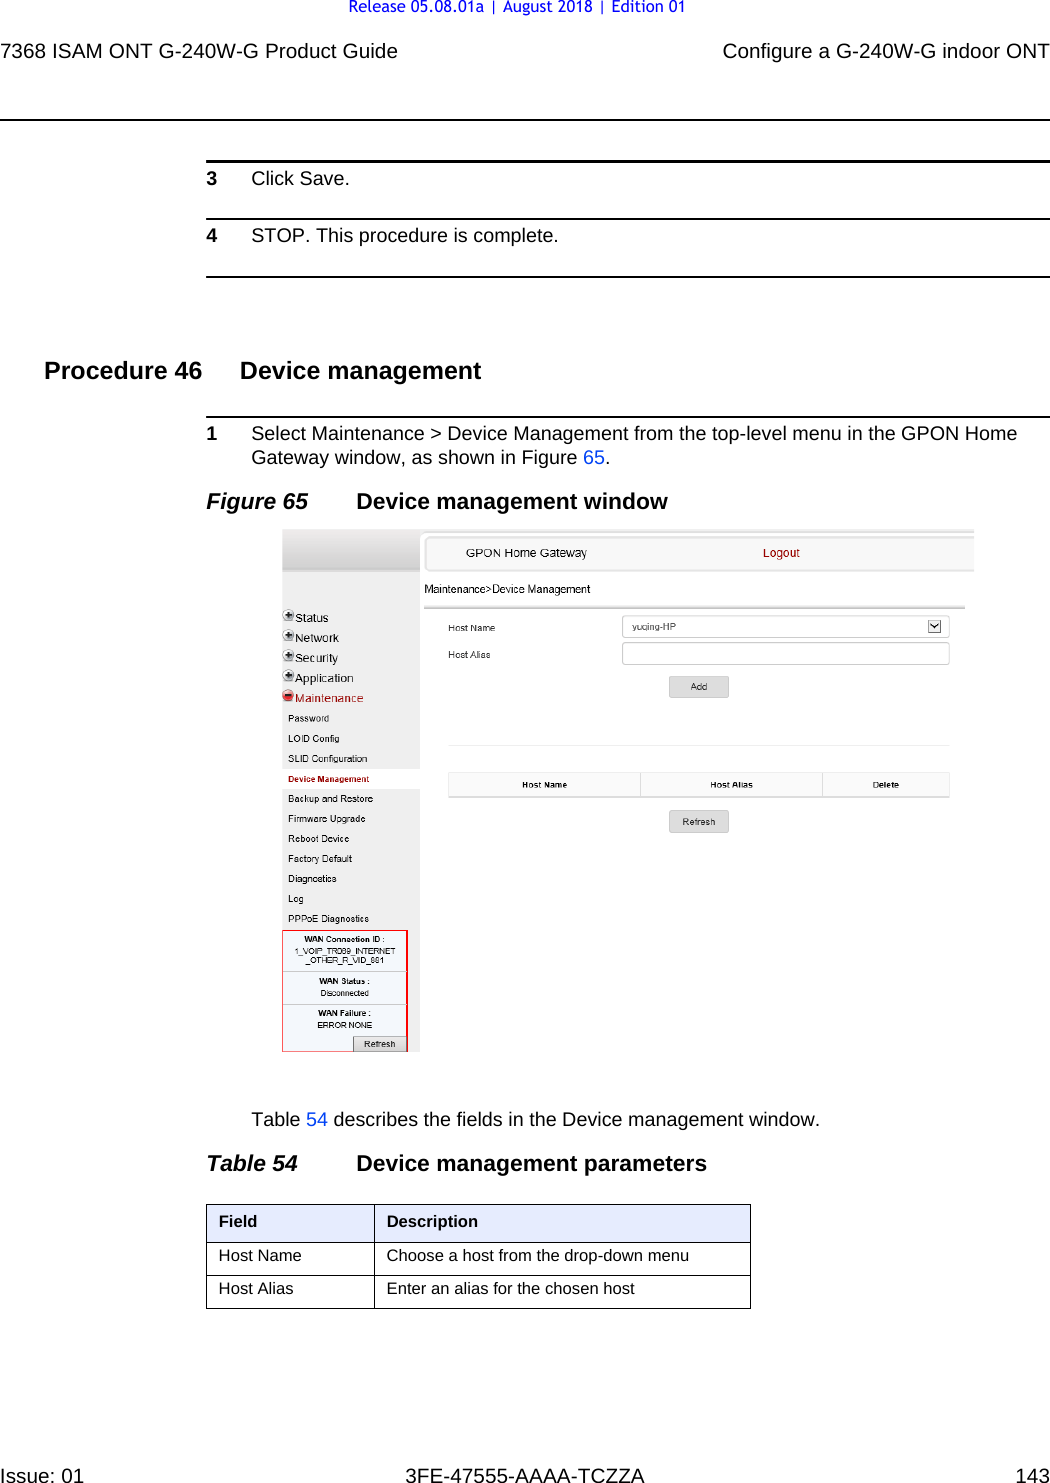
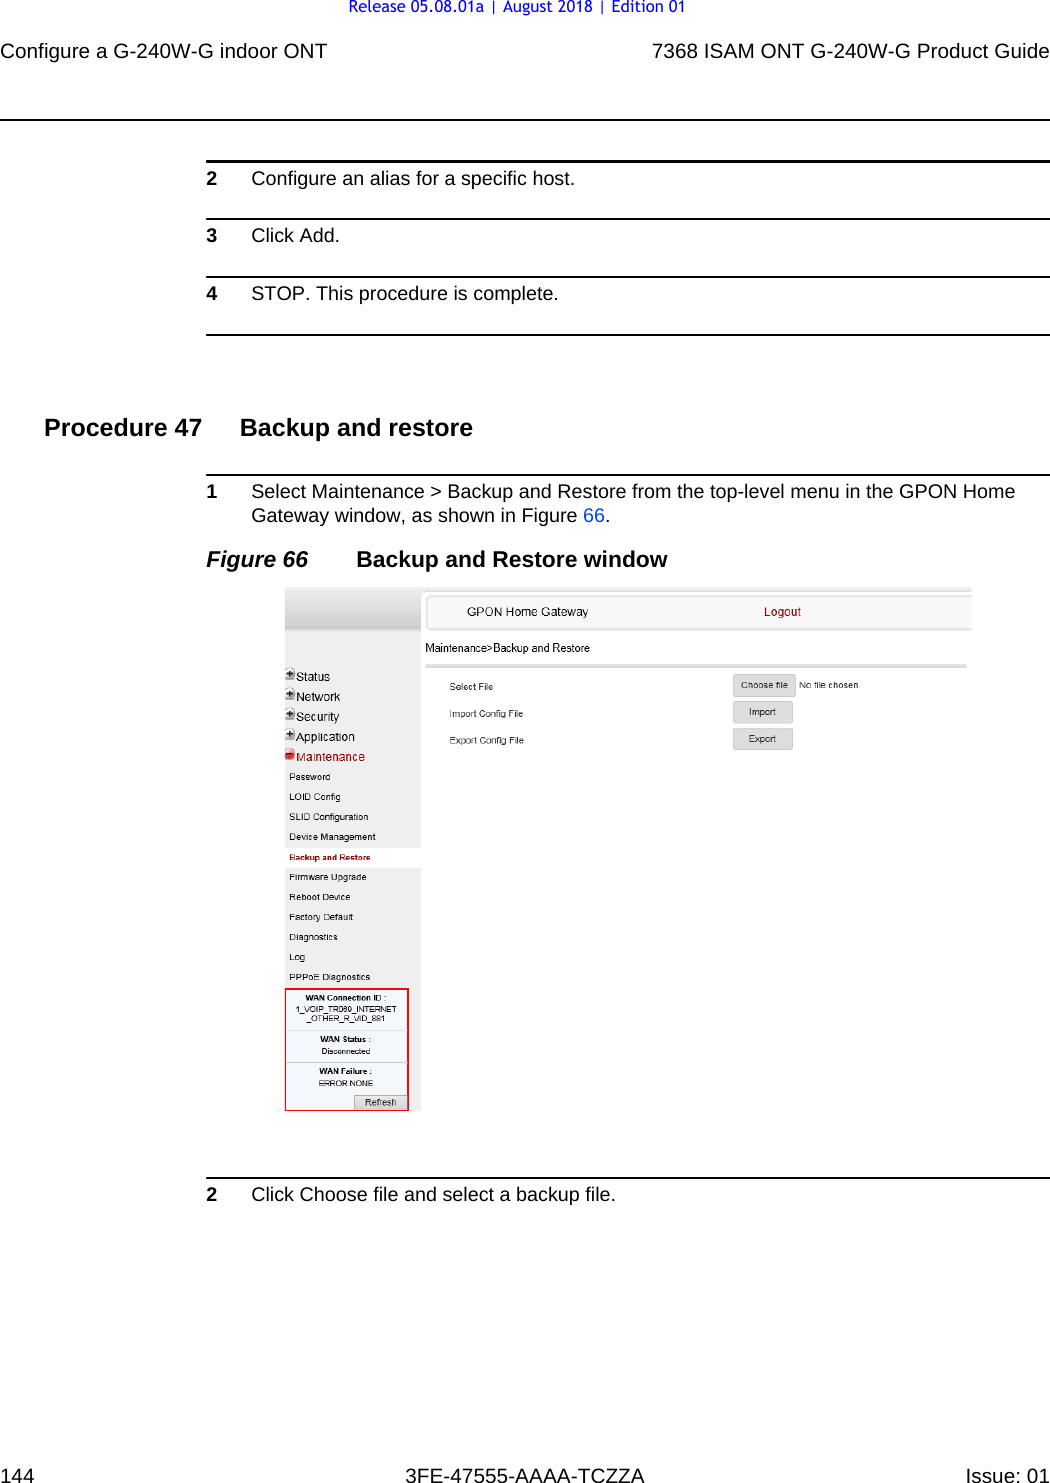
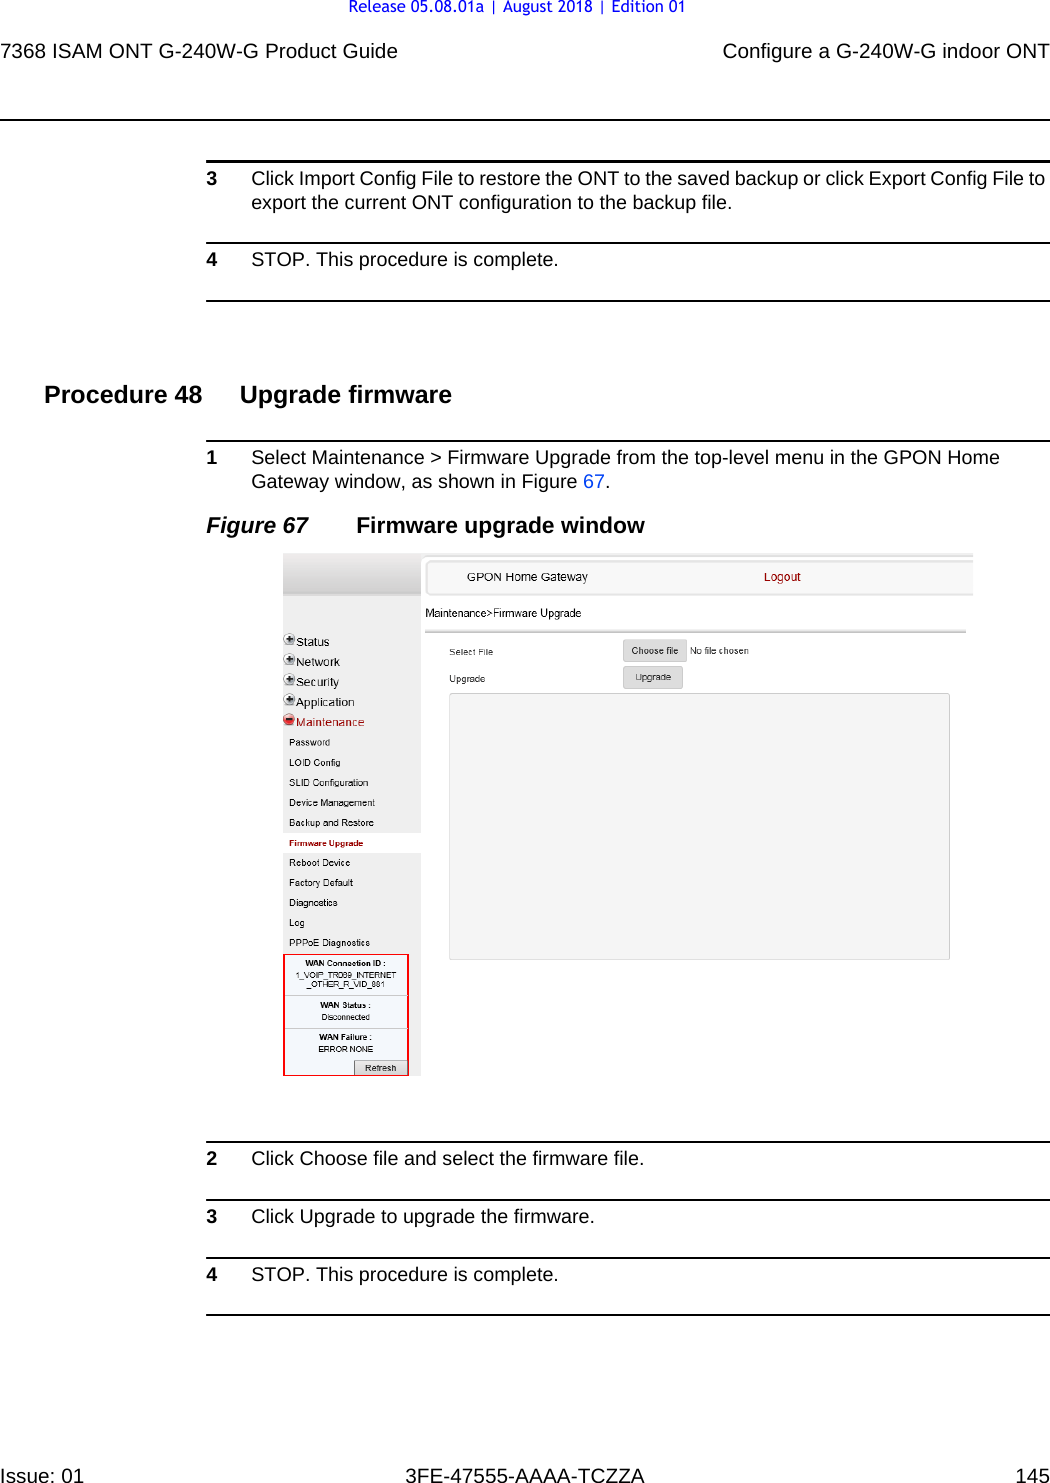
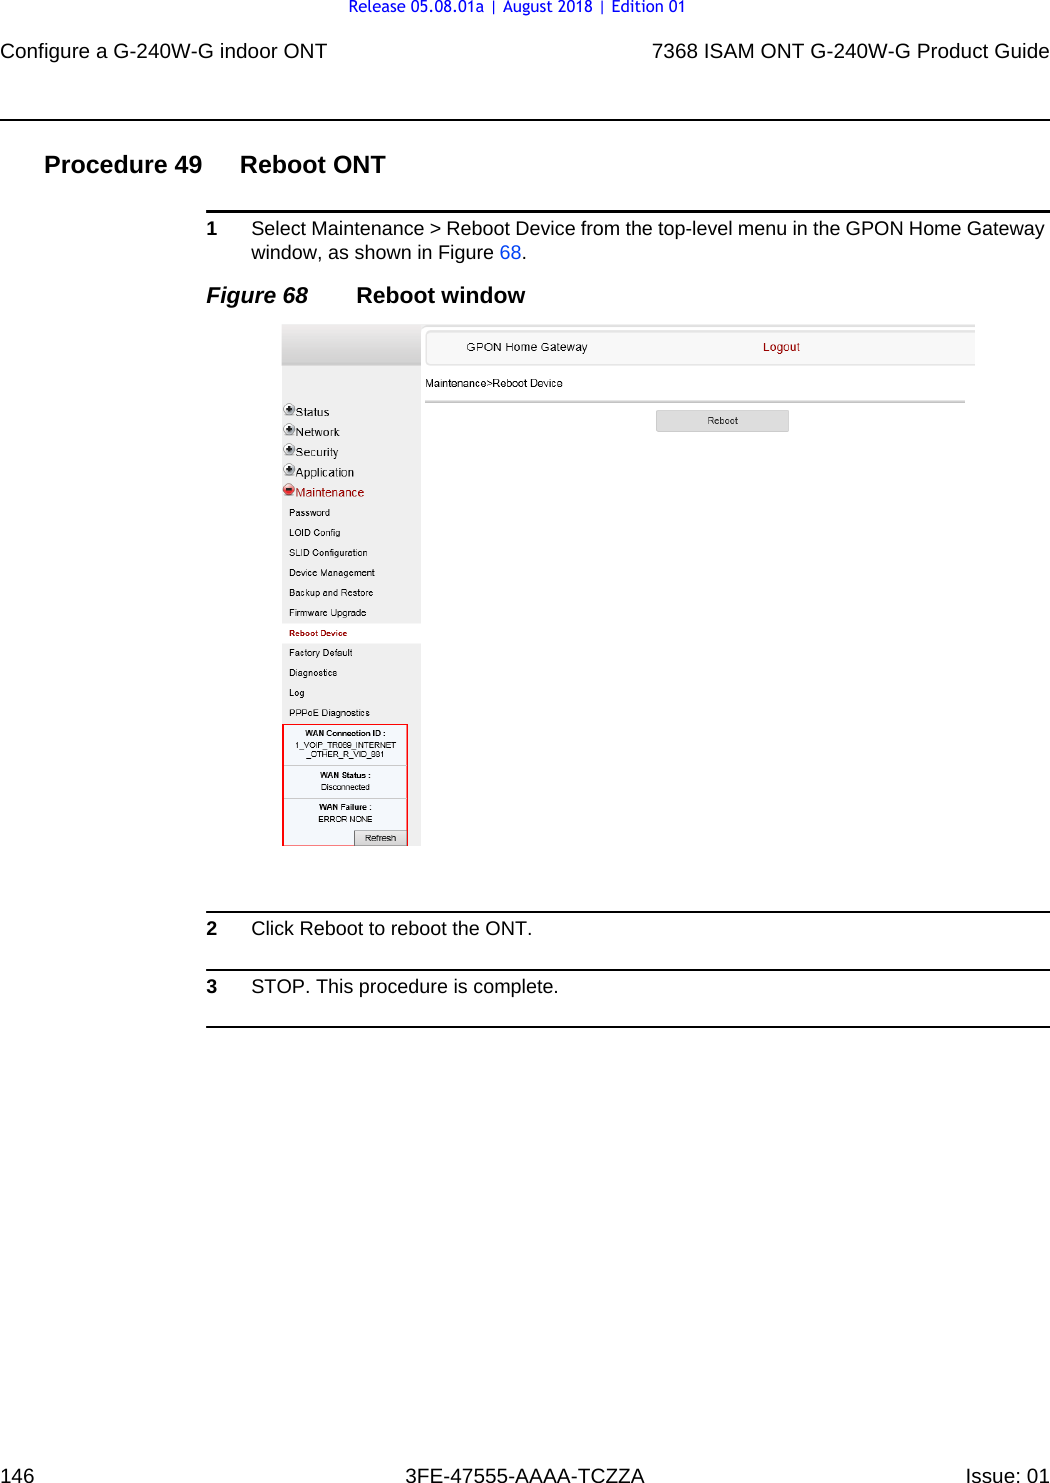
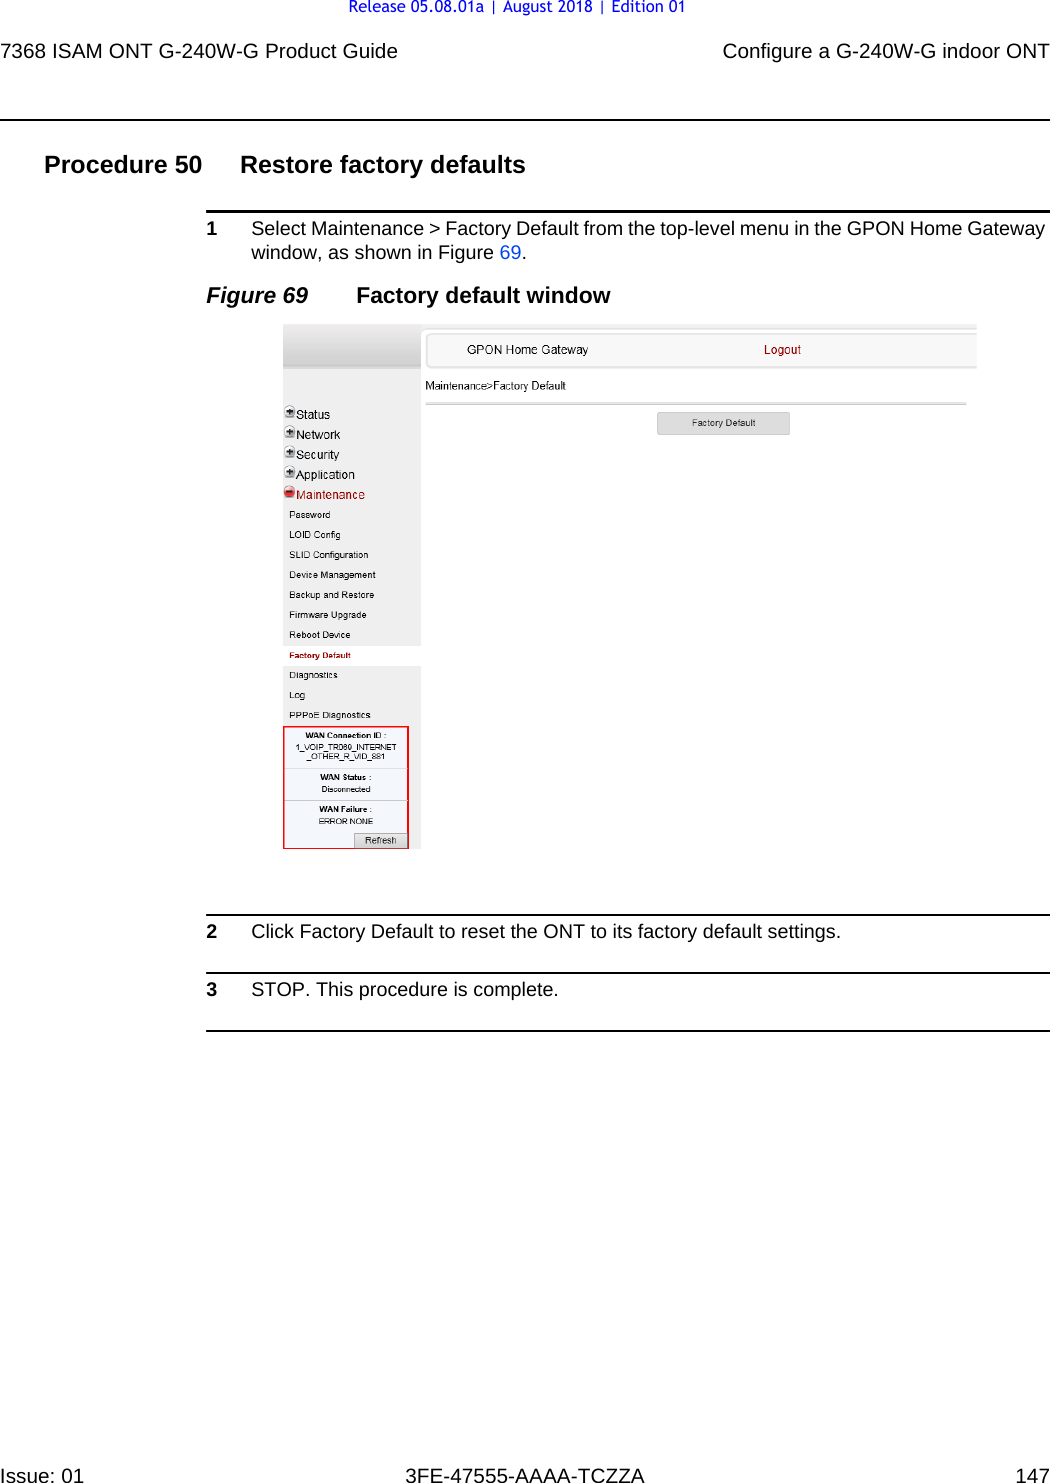
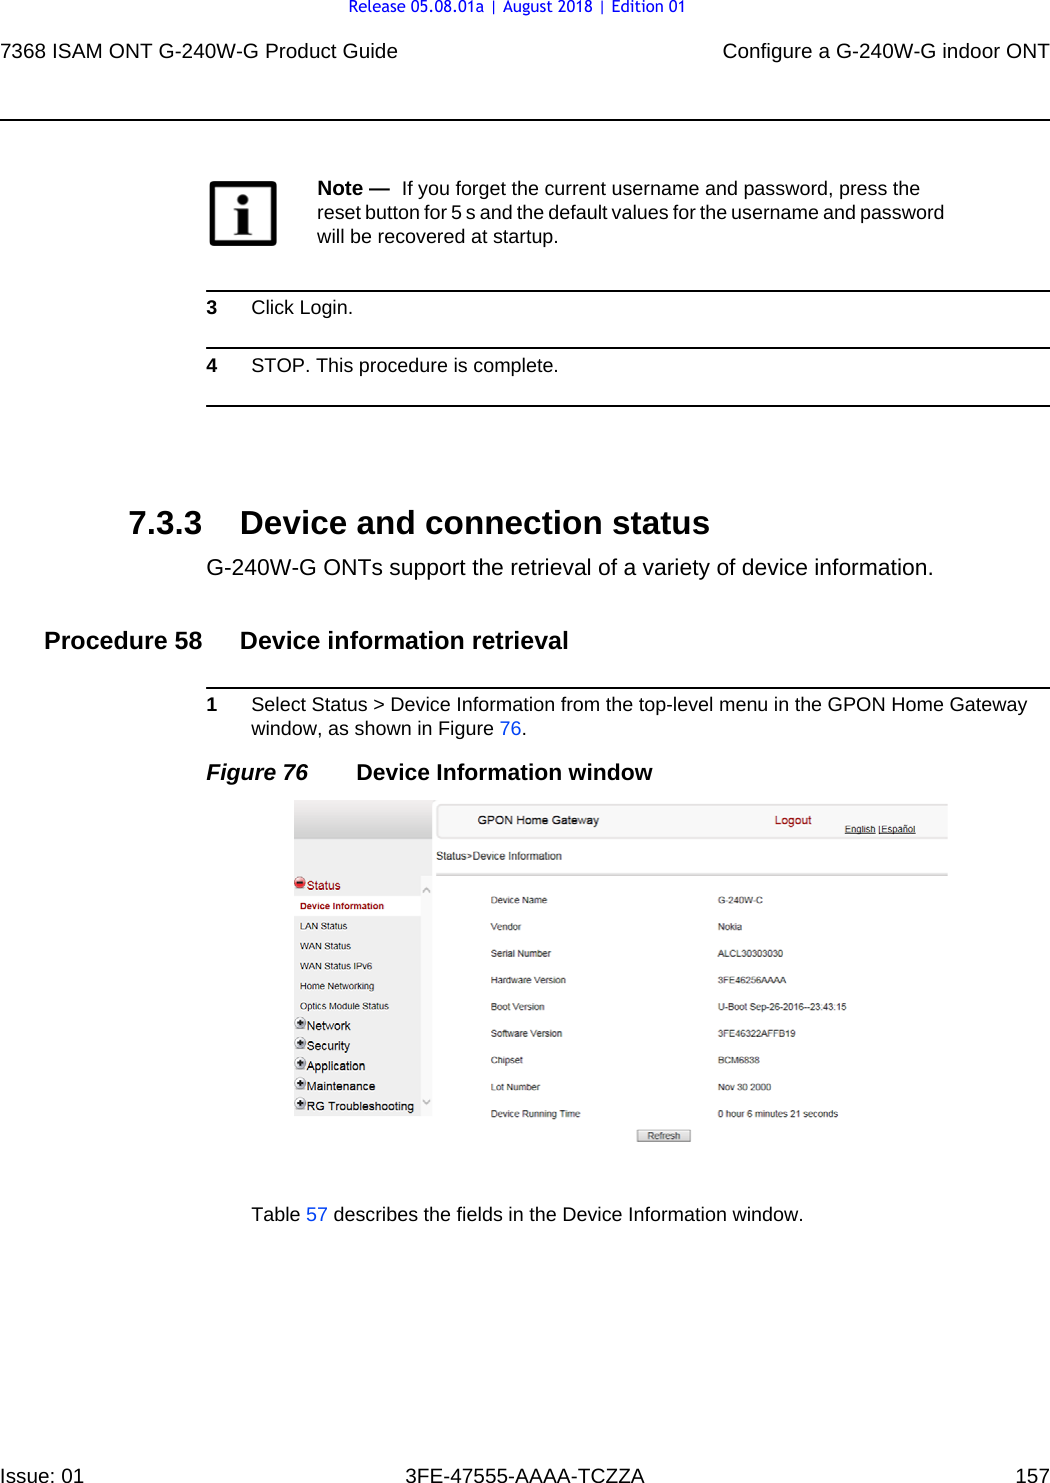
Nokia Shanghai Bell Co. Ltd. 7368 ISAM ONT 7368 ISAM ONT G 240W C Product Guide
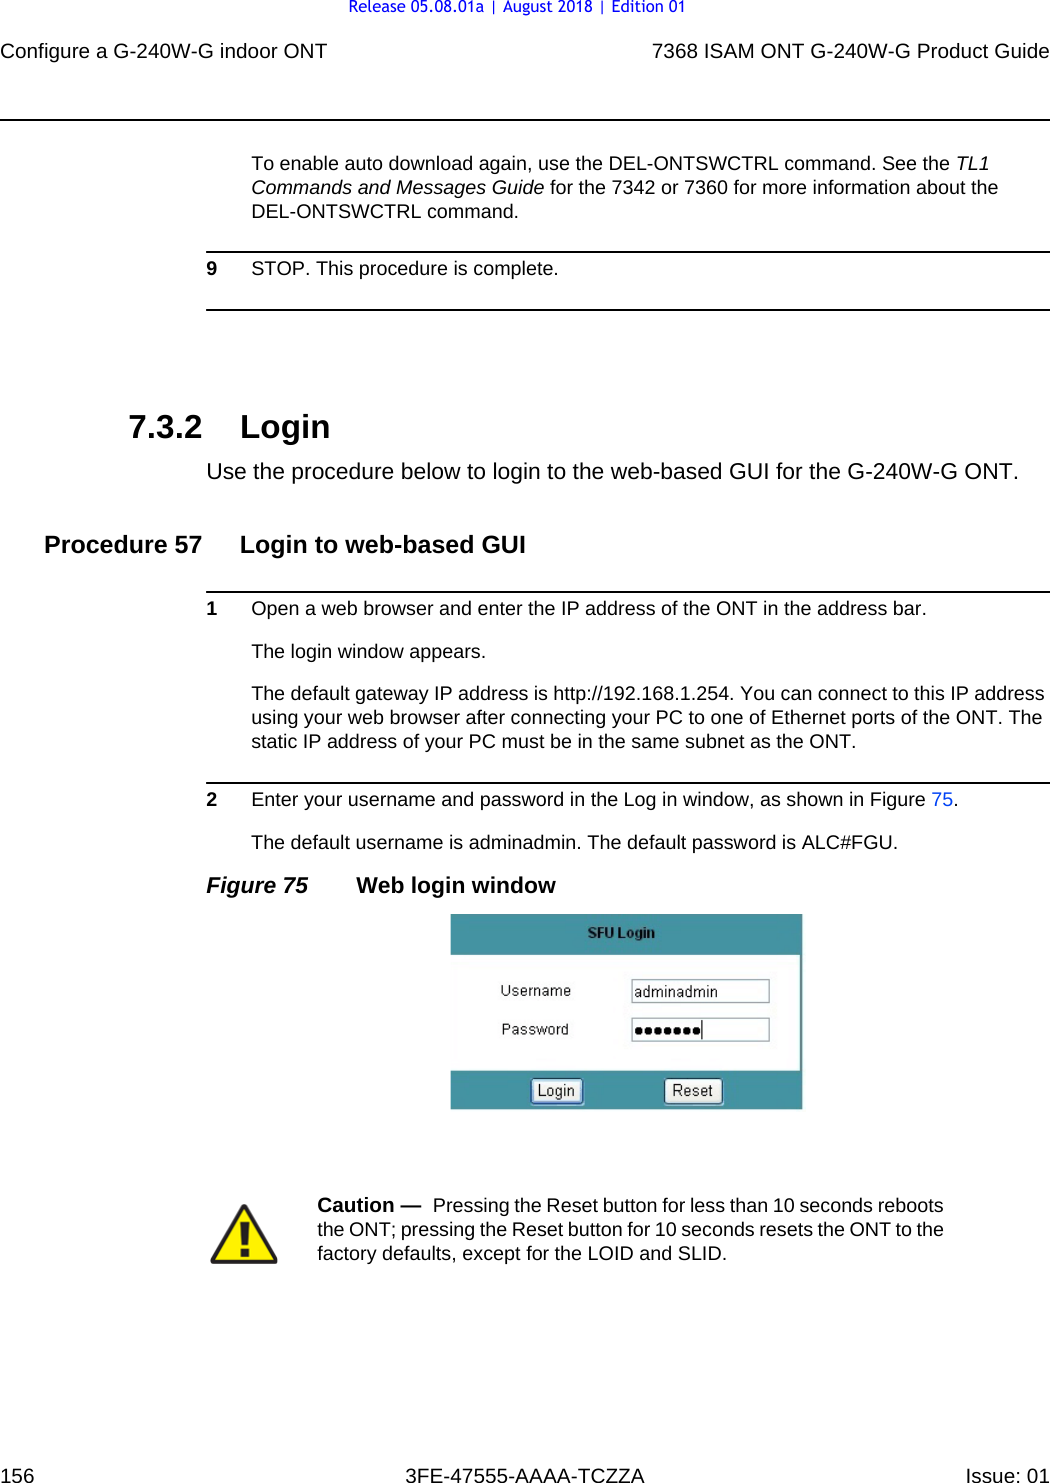
UserManual.wiki
>
Nokia Bell
>
G240WG User Manual
Product_Guide
Navigation menu
Upload a User Manual
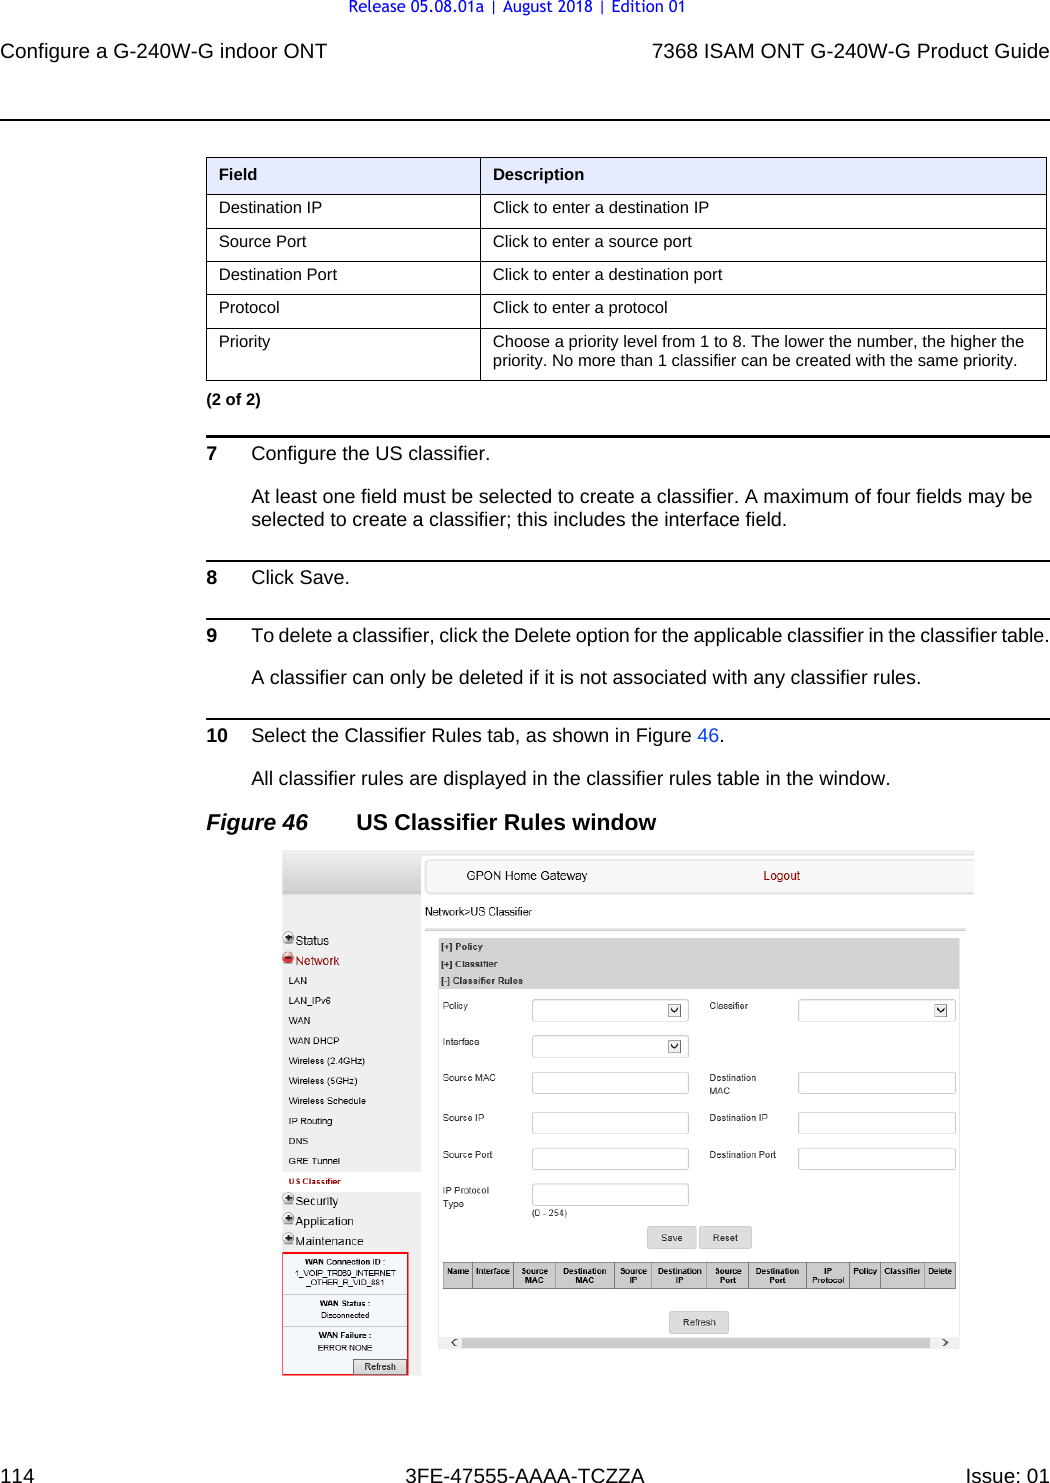
Namespaces
Wiki Guide
HTML
PDF
Info
Views
User Manual
Discussion / Help
Navigation


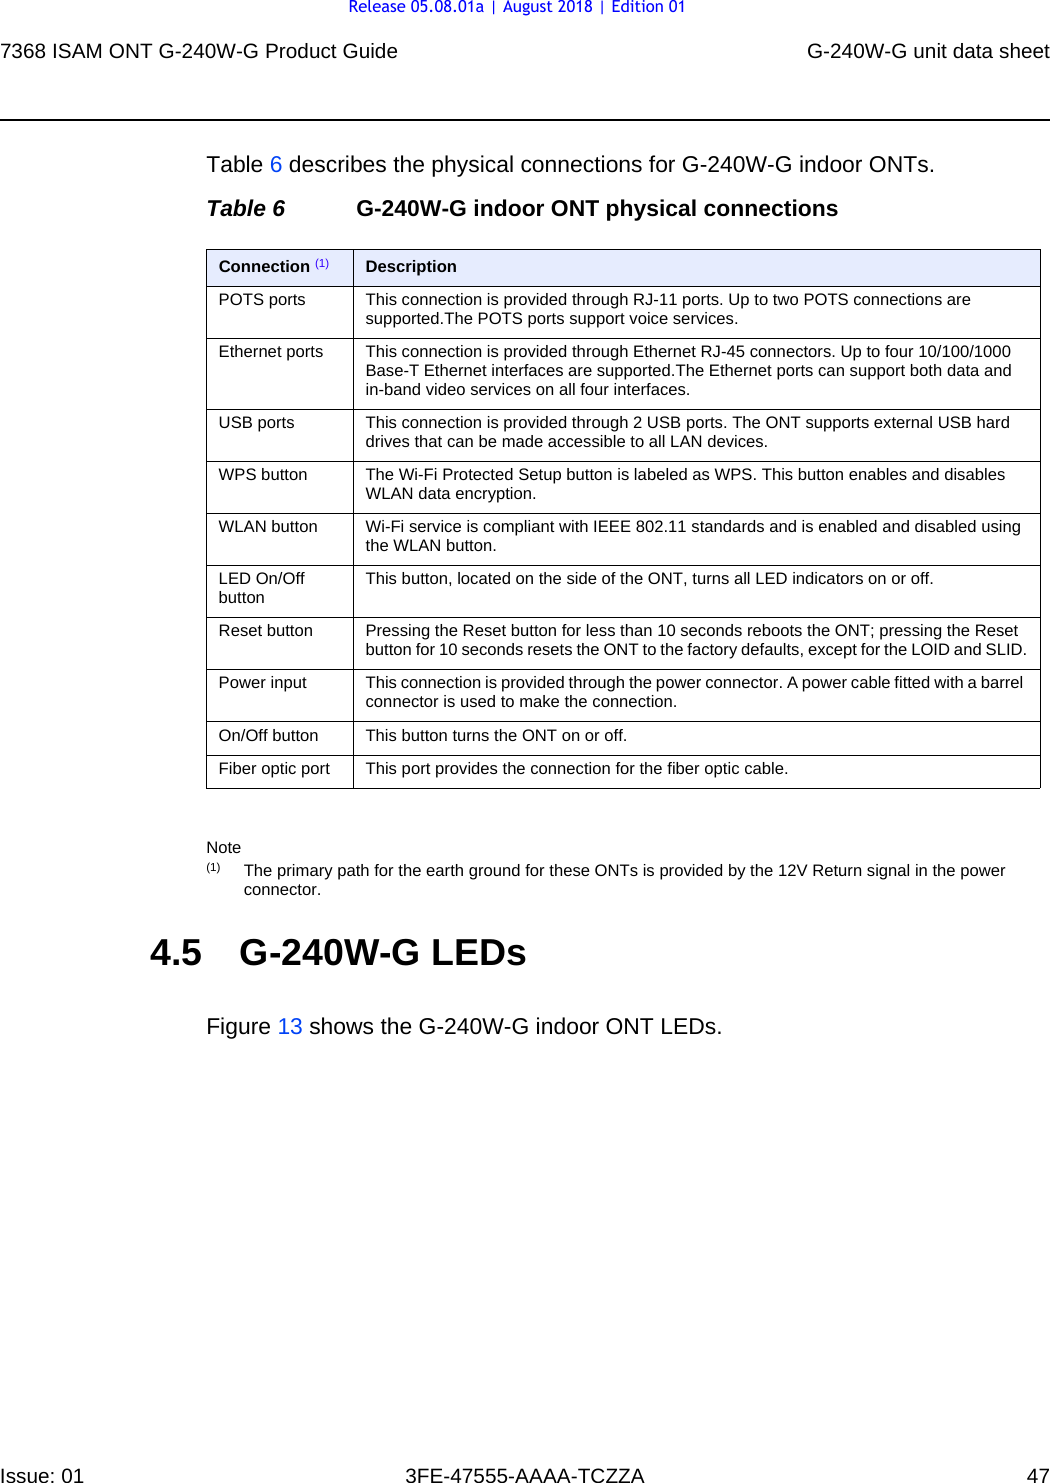
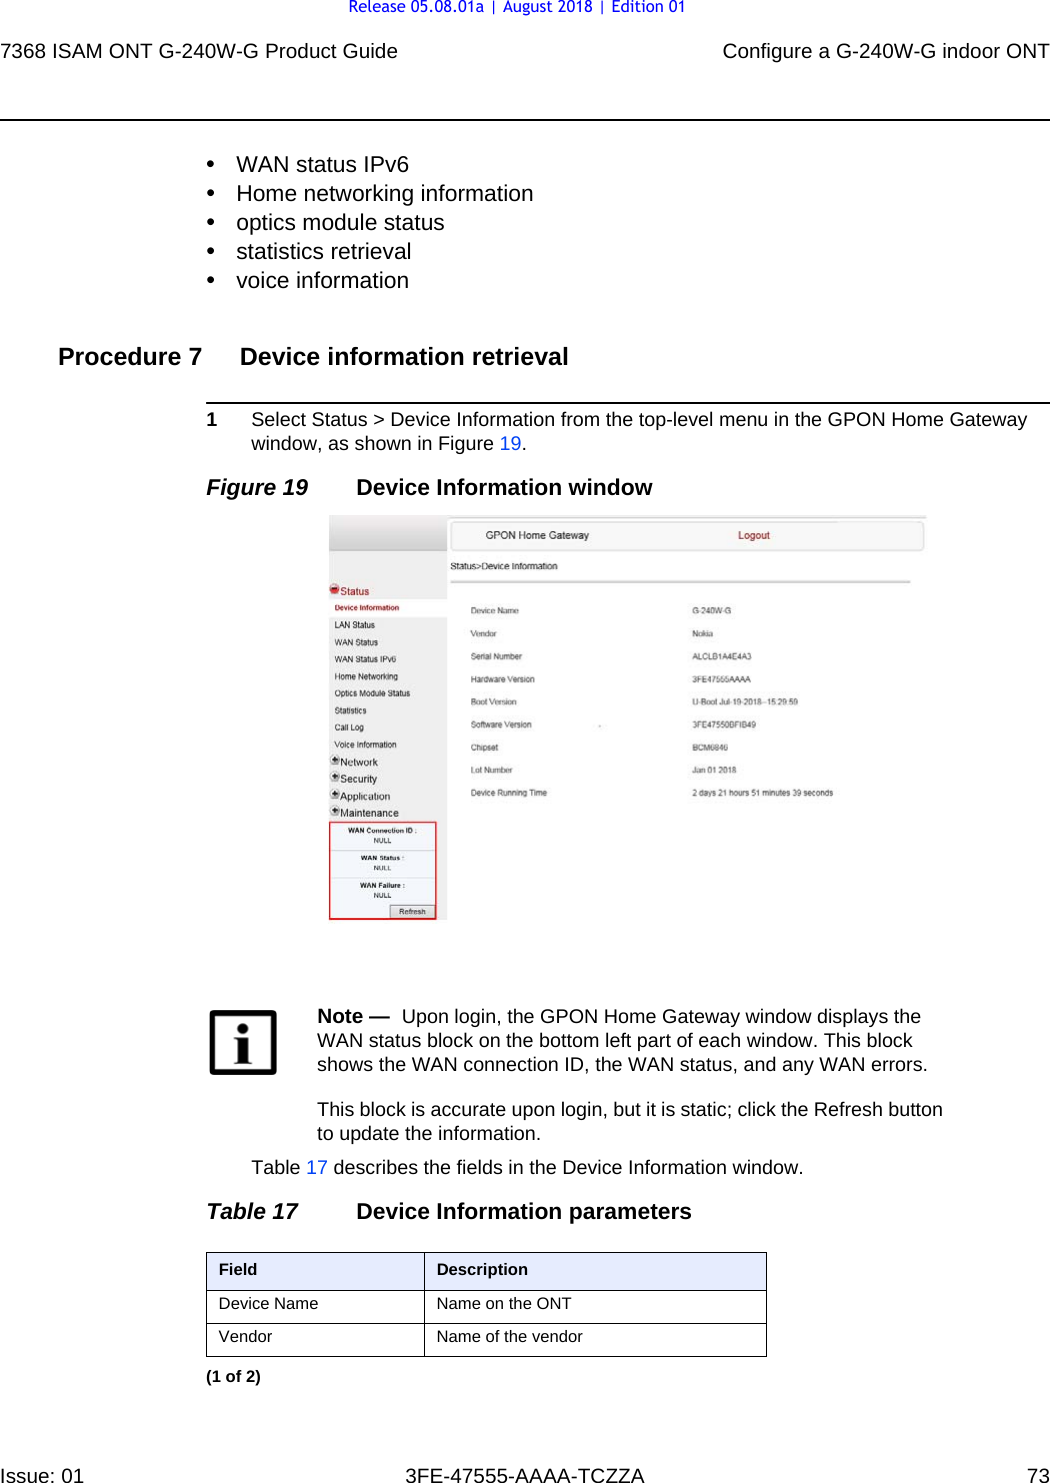
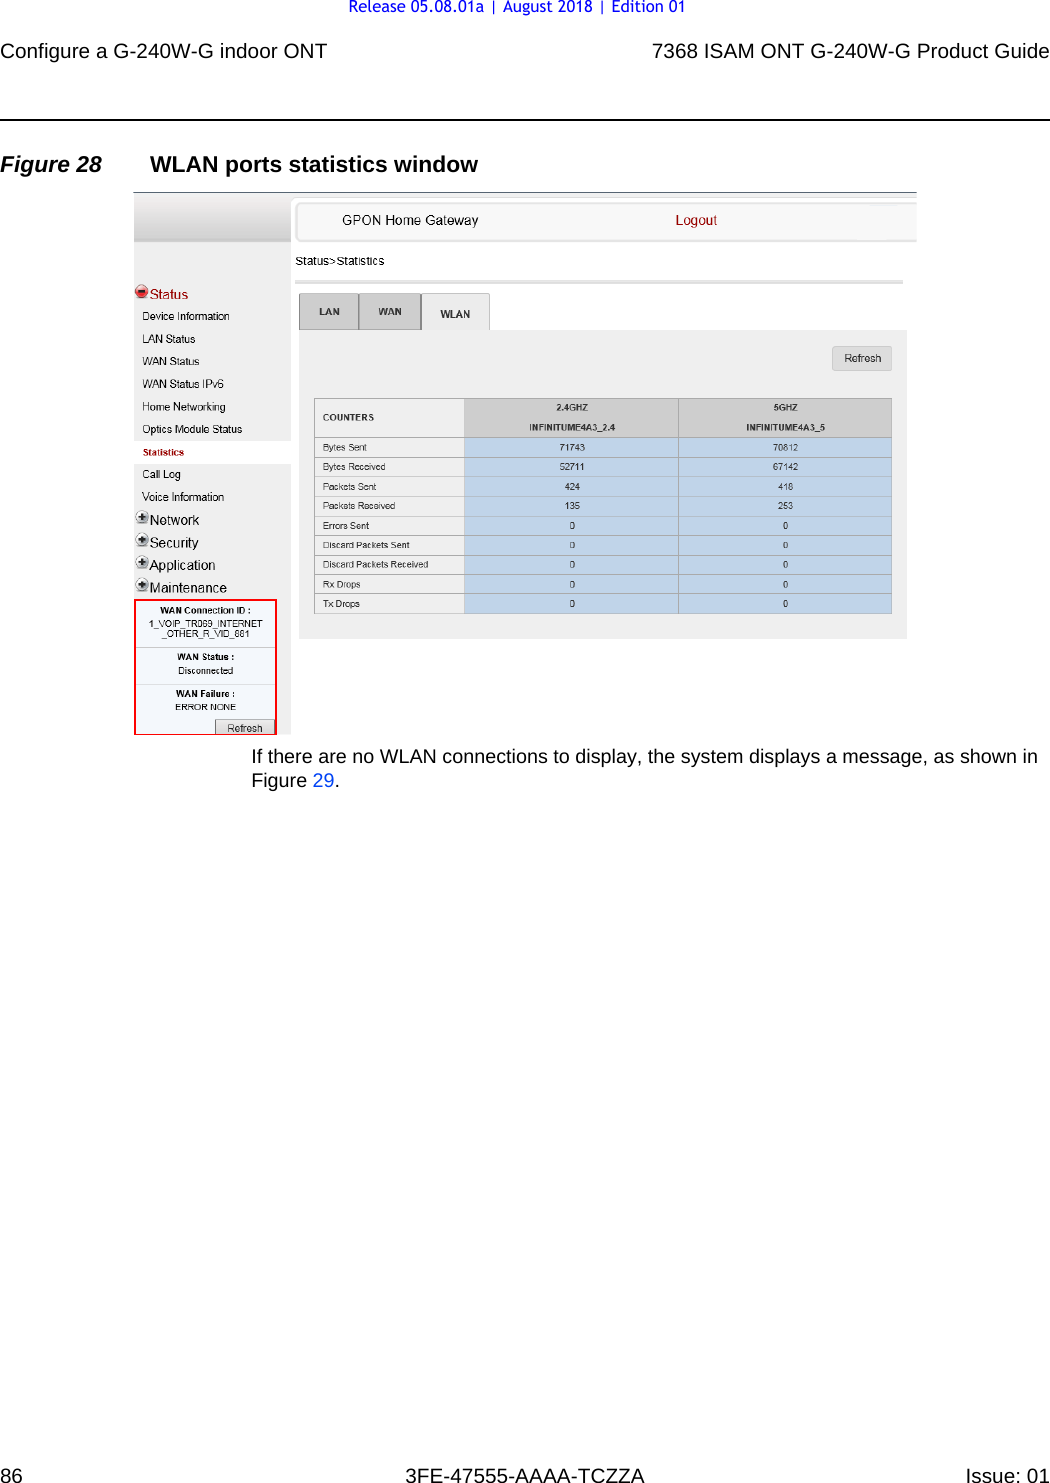
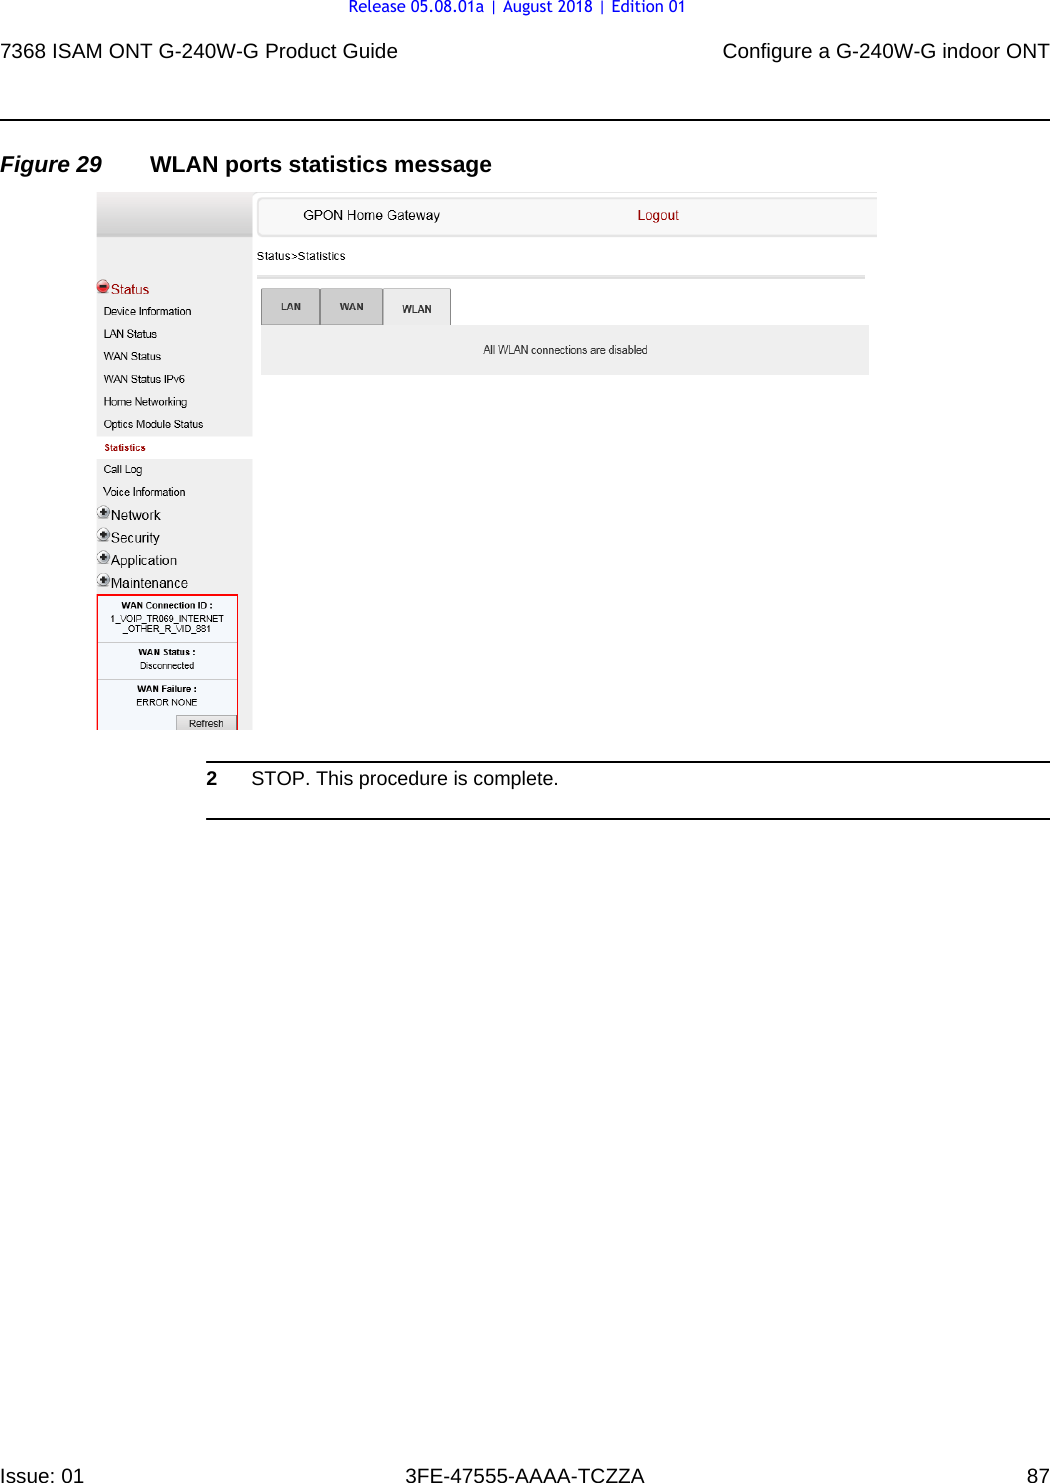
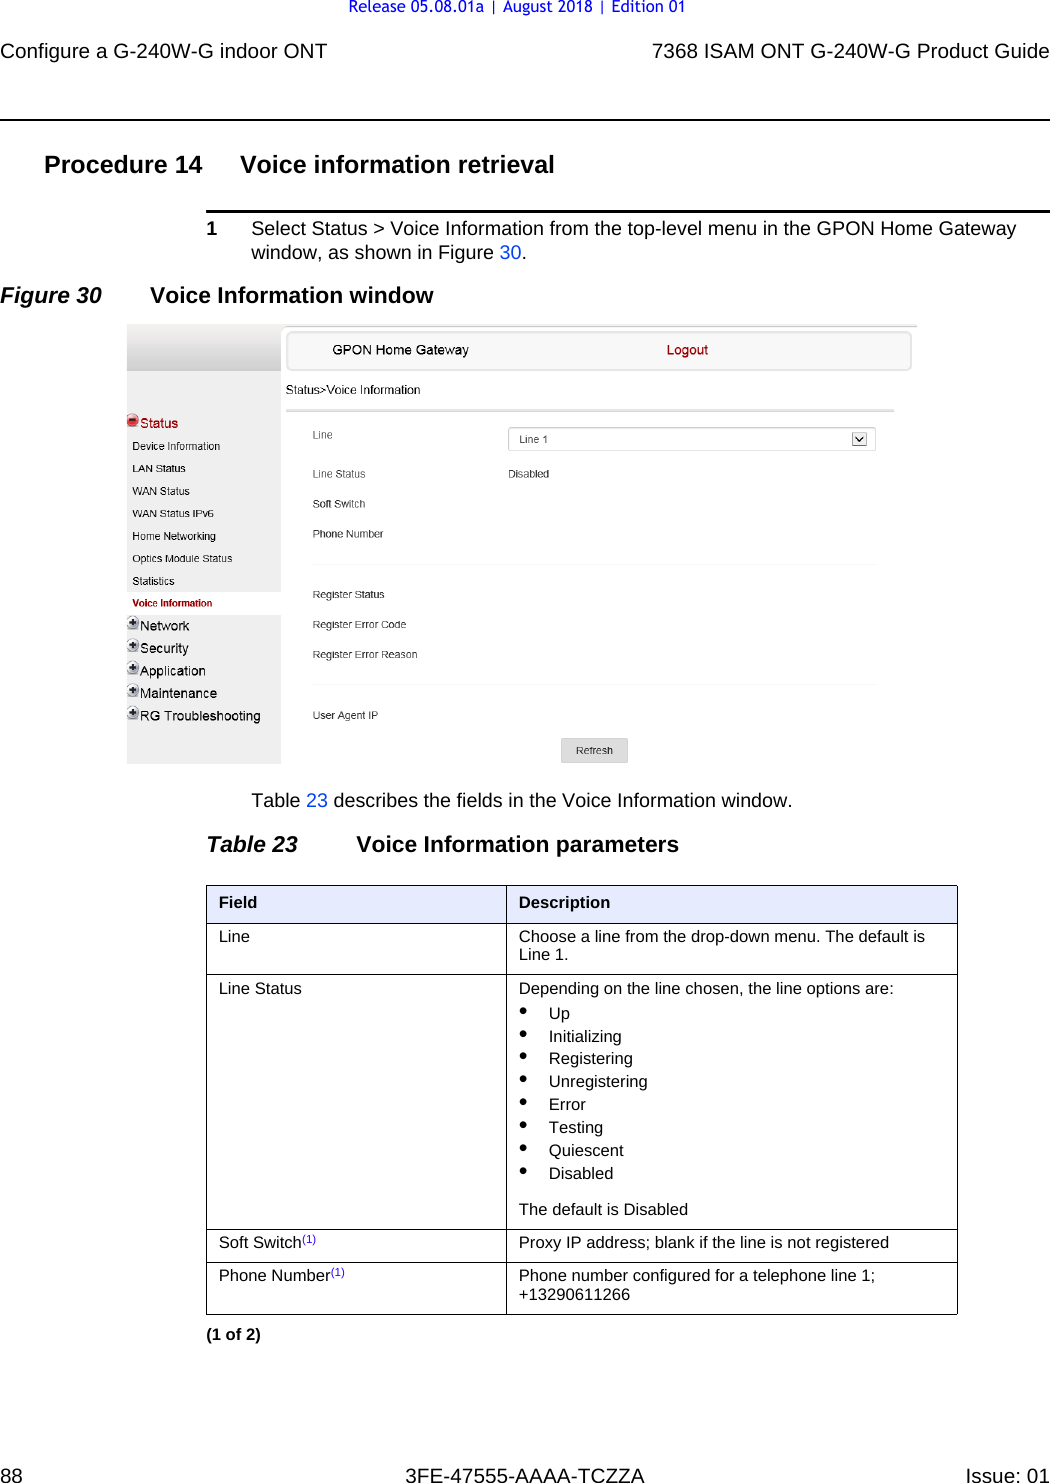
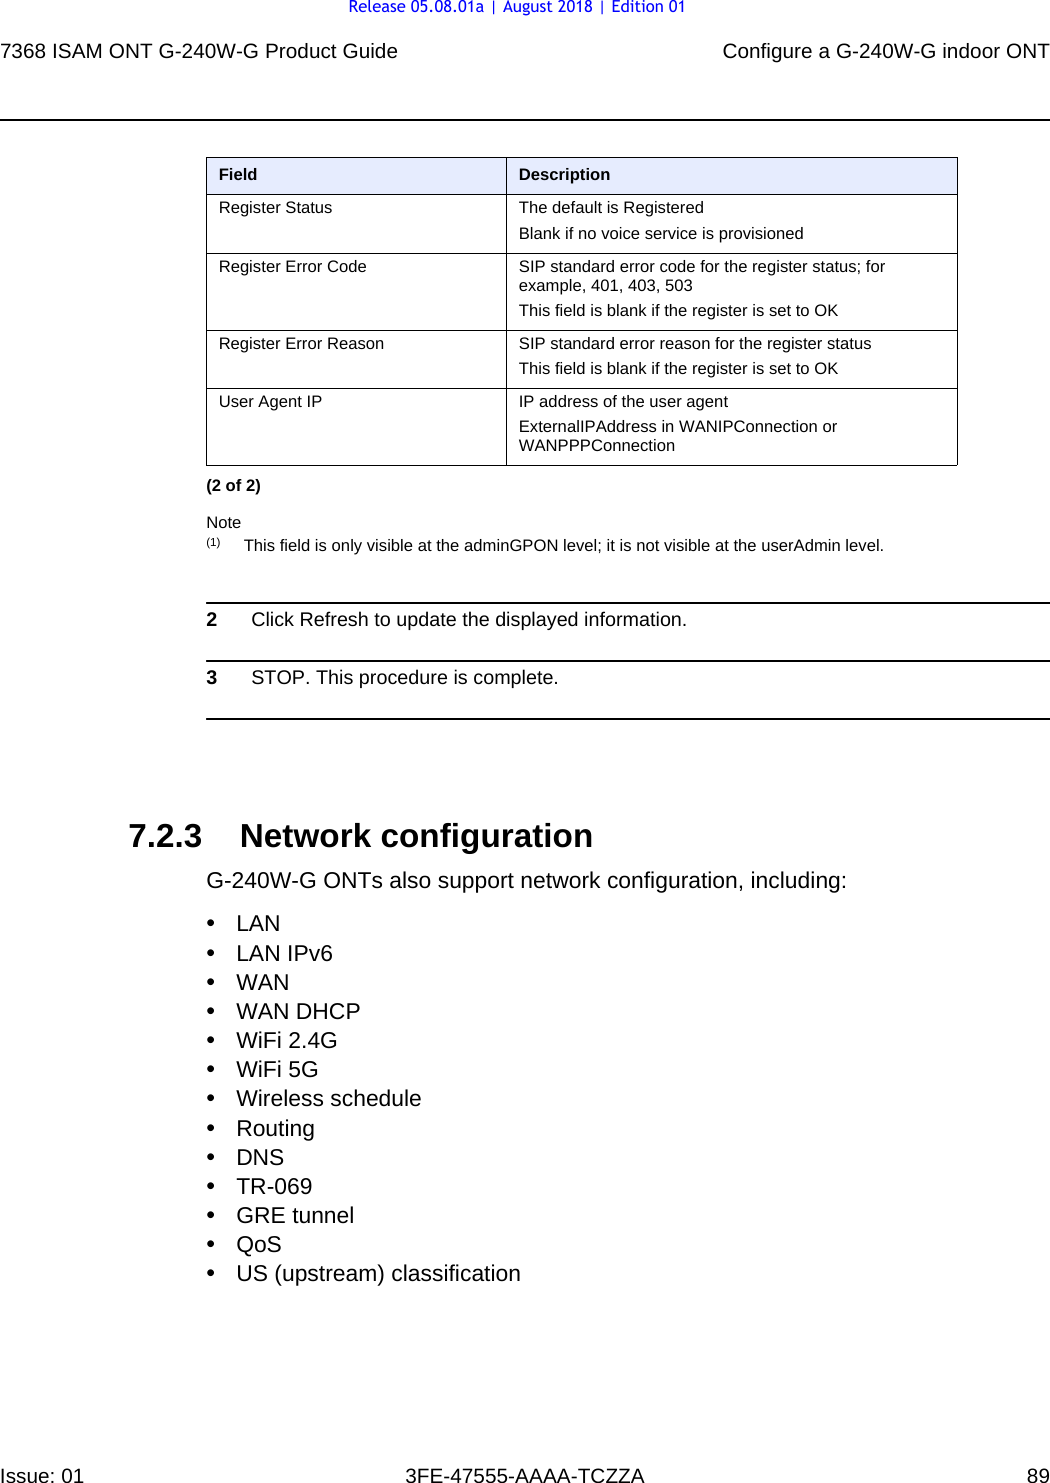
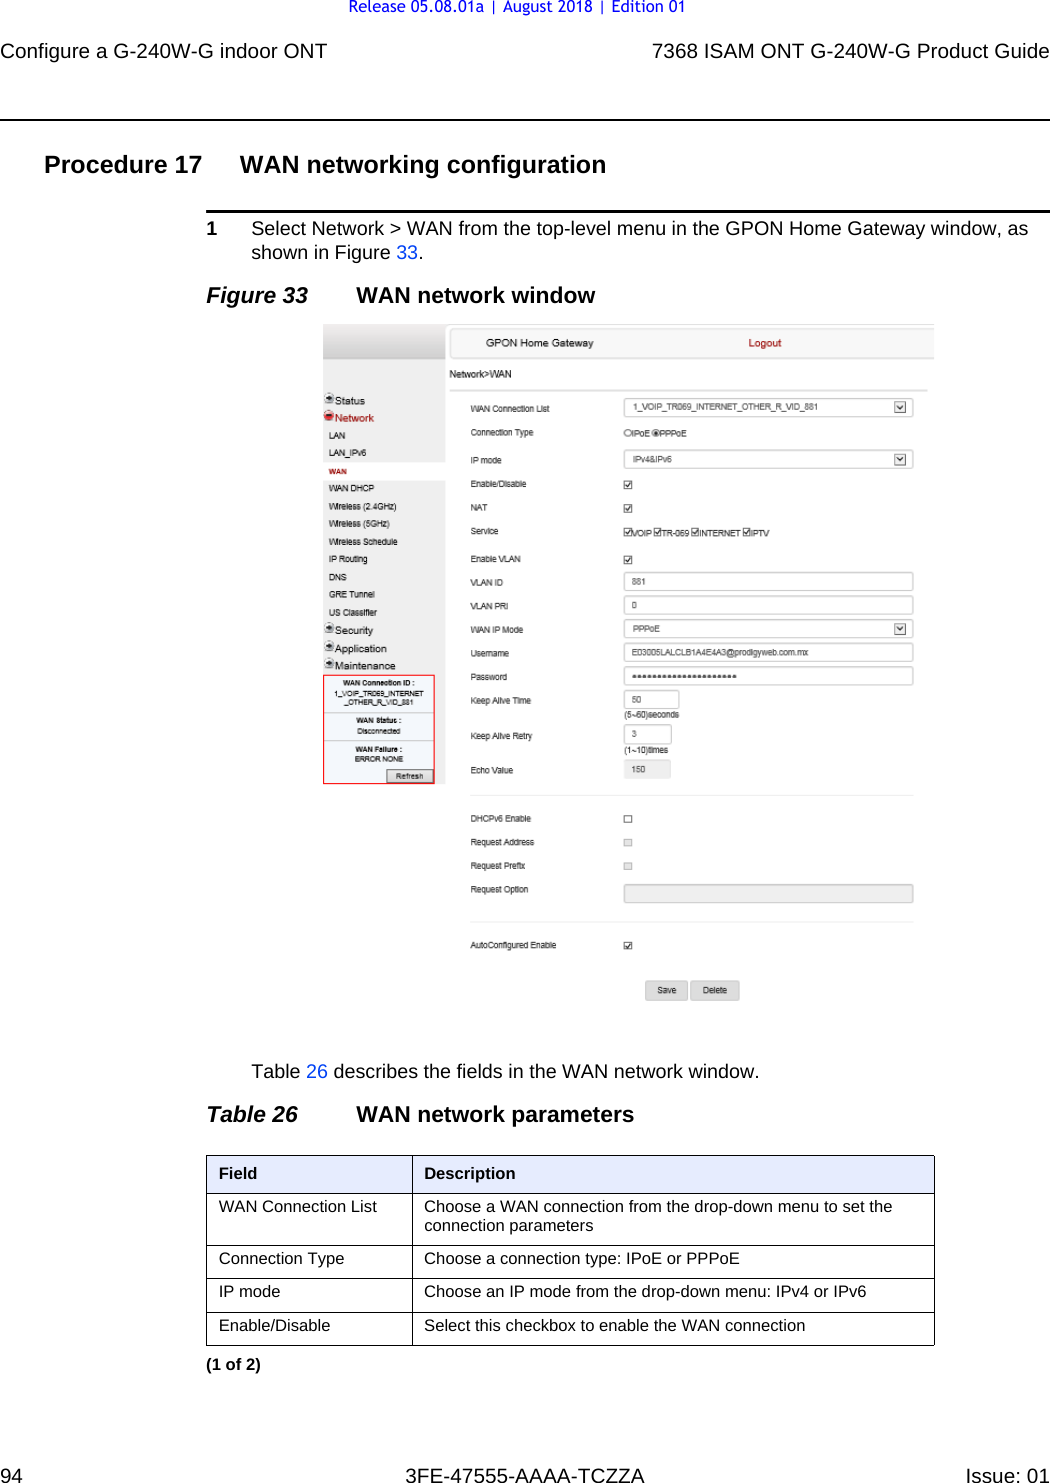
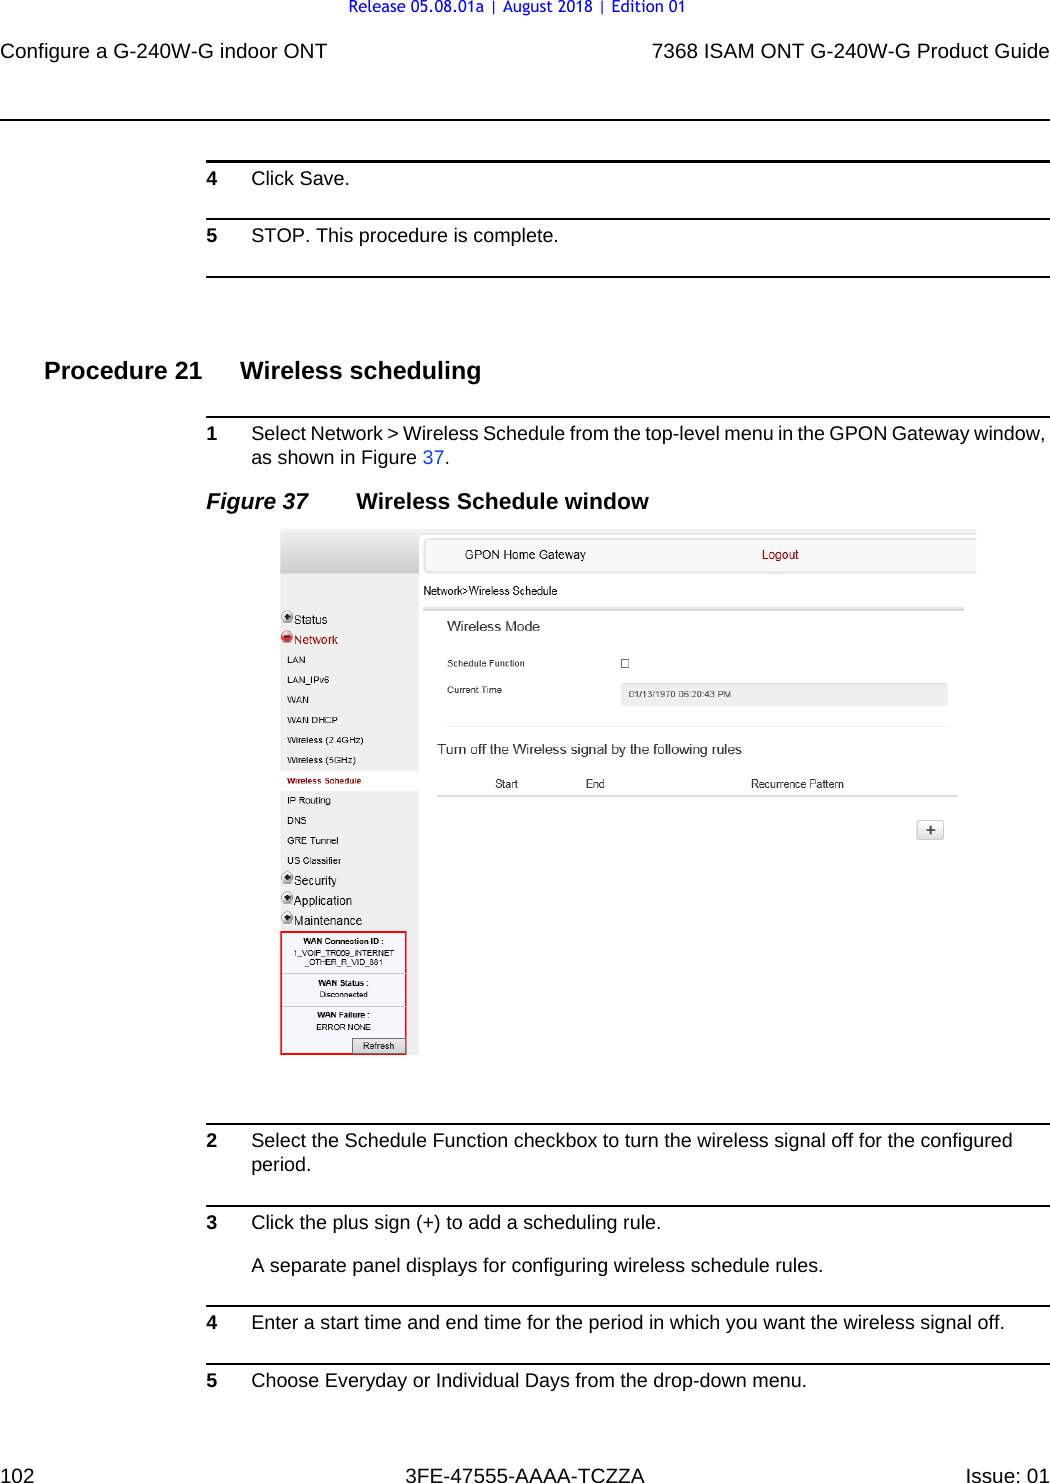
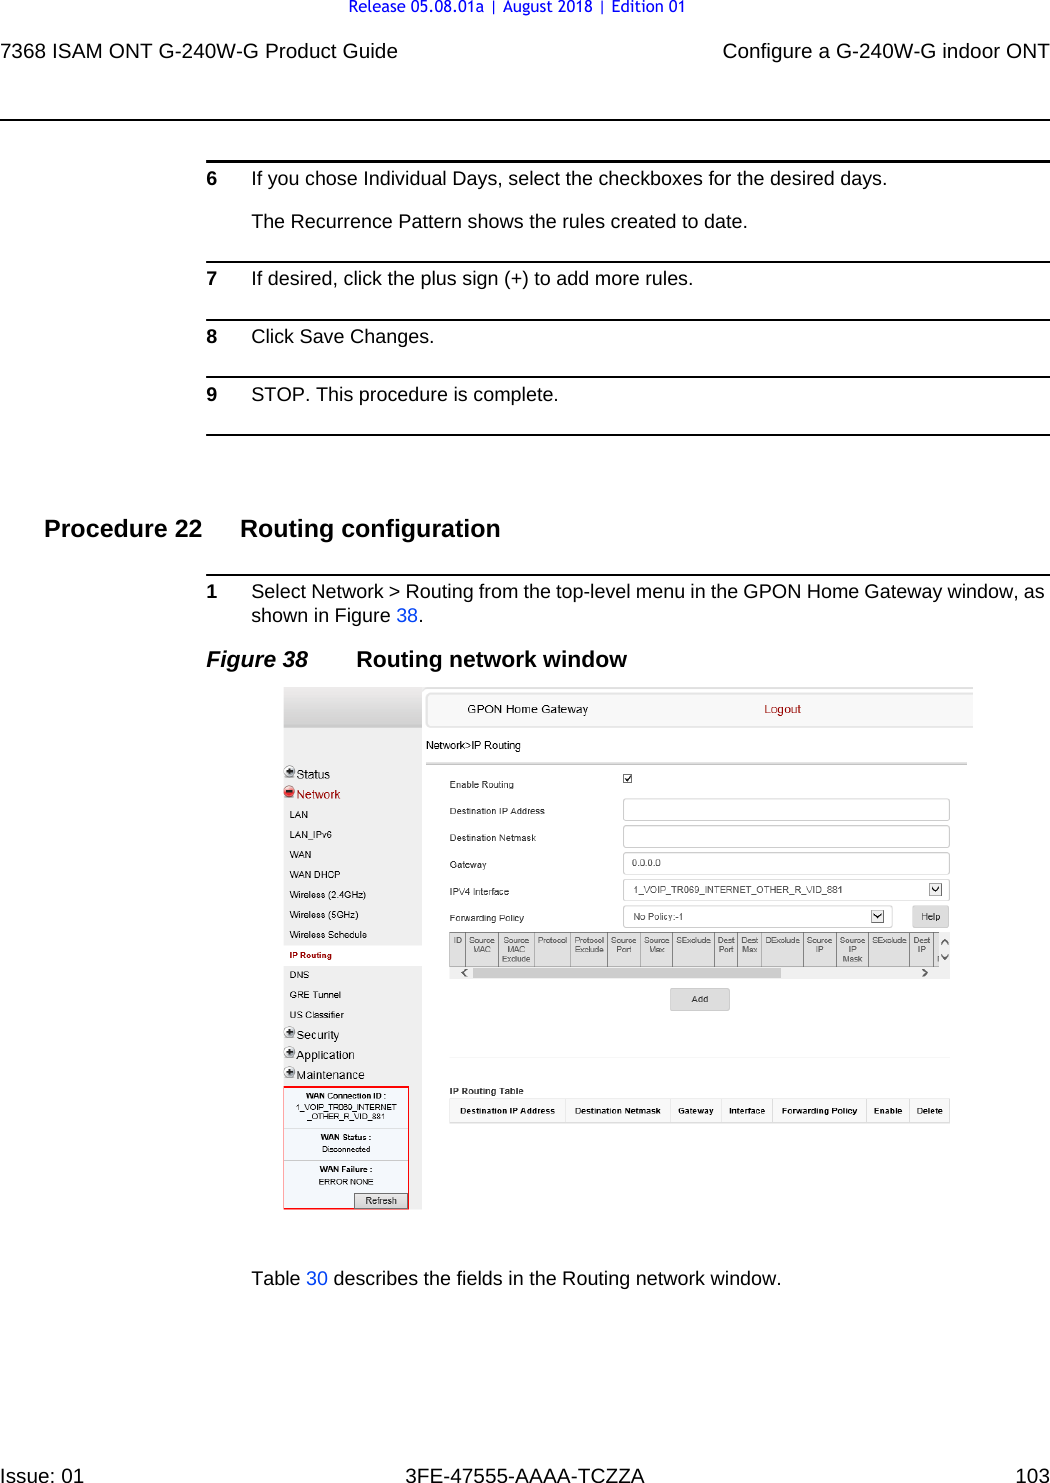
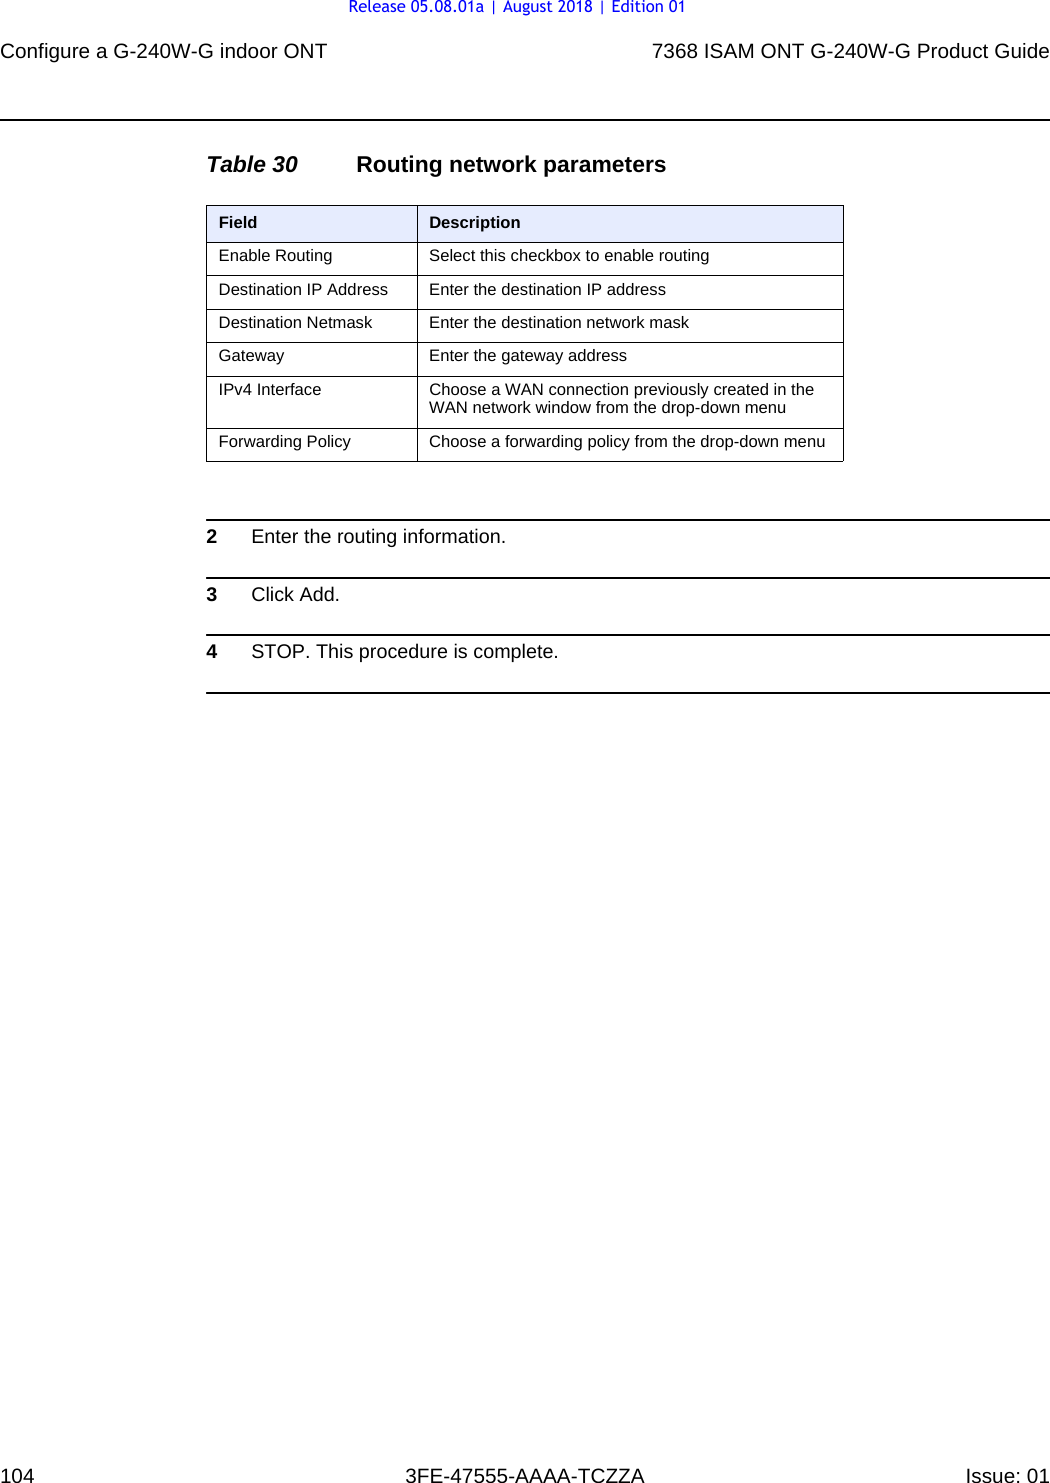
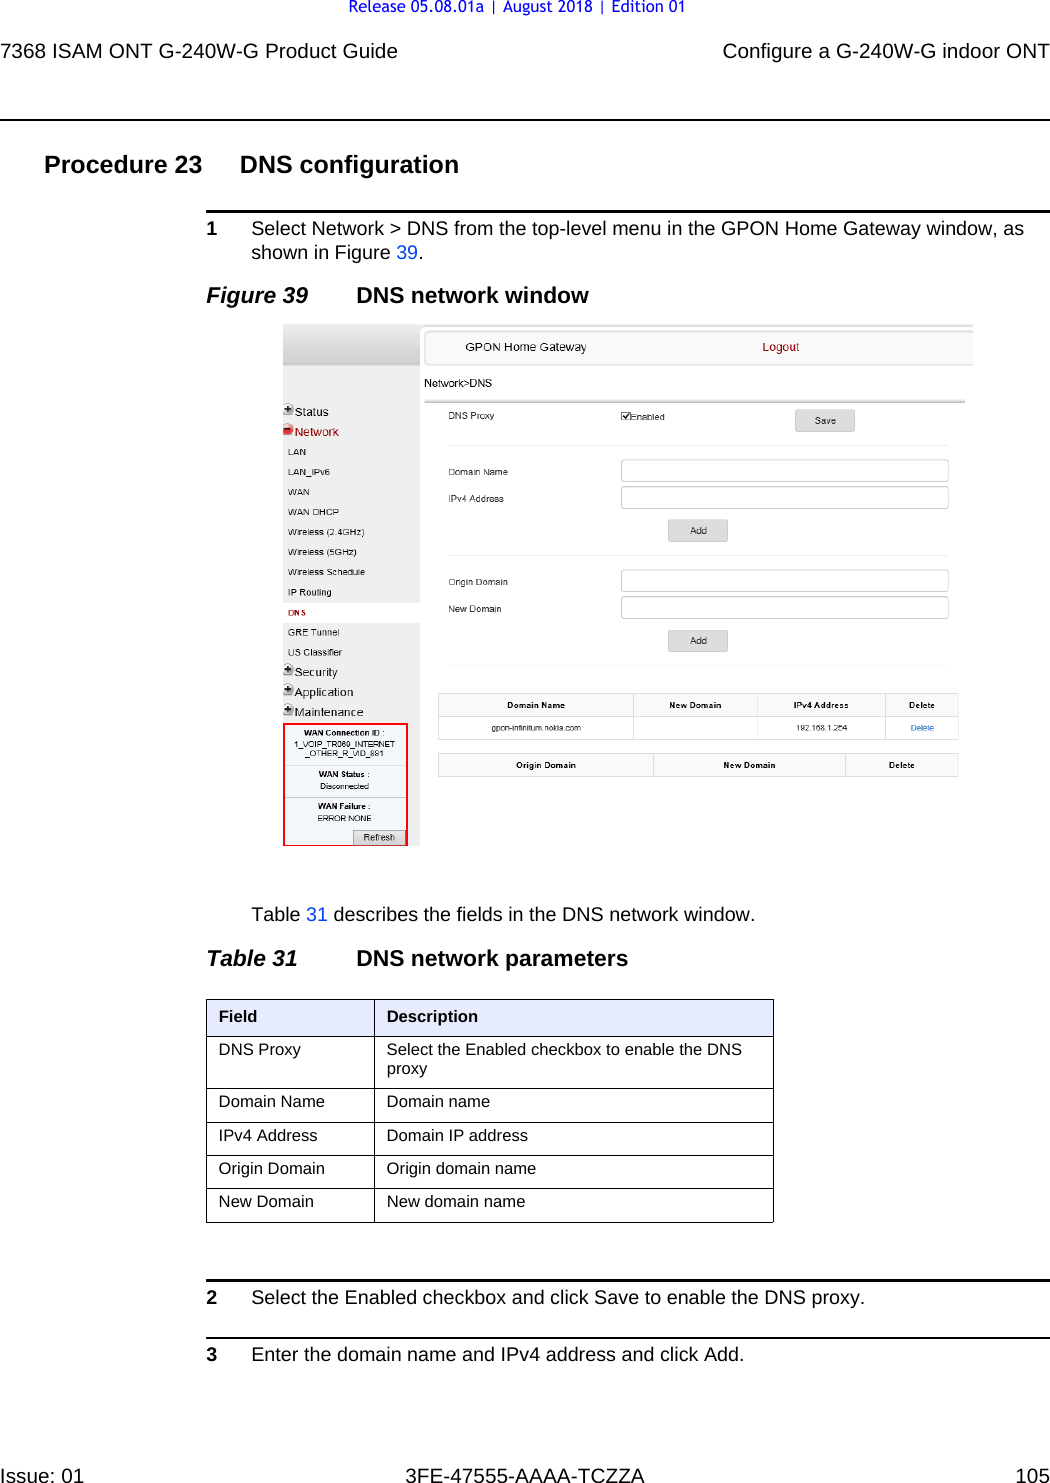
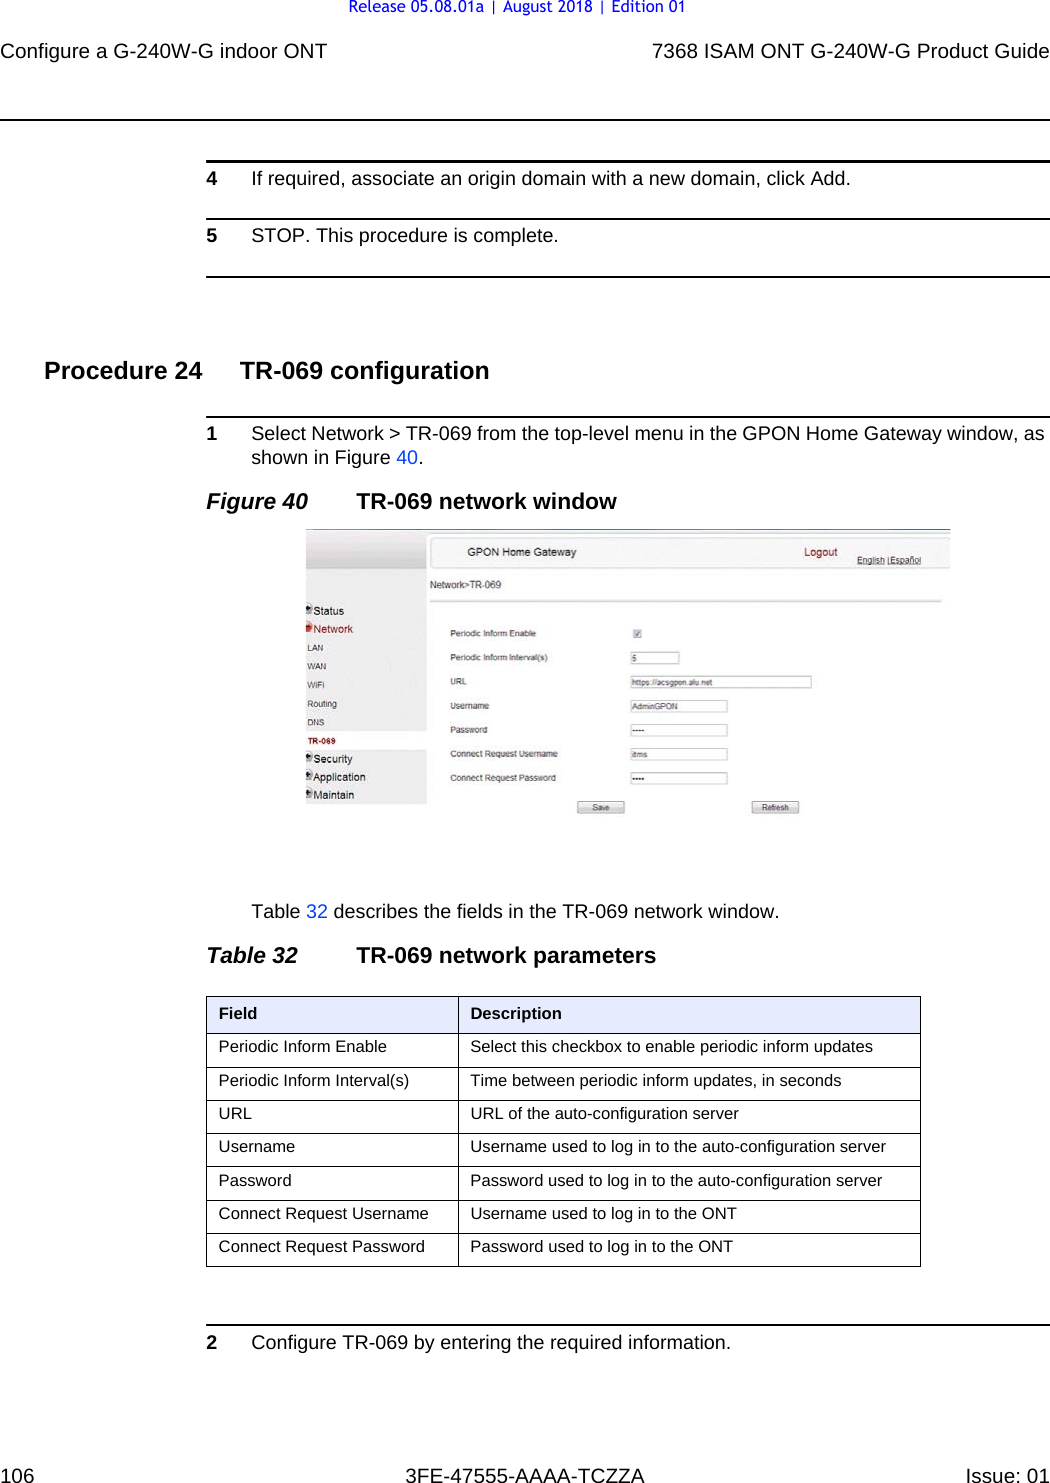
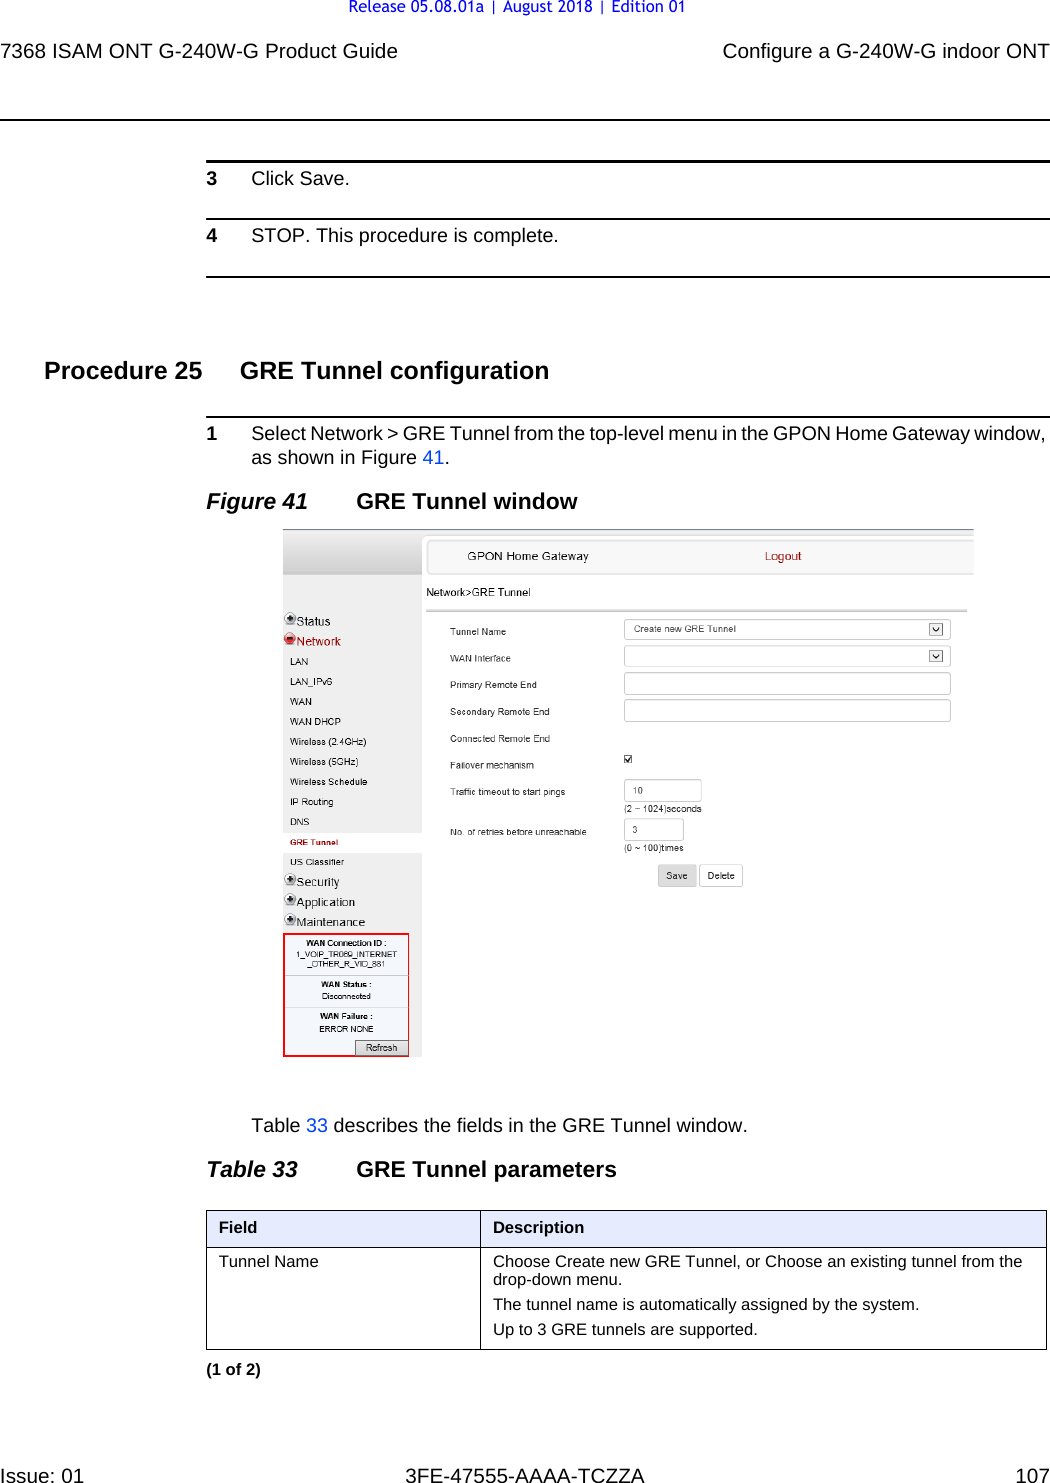
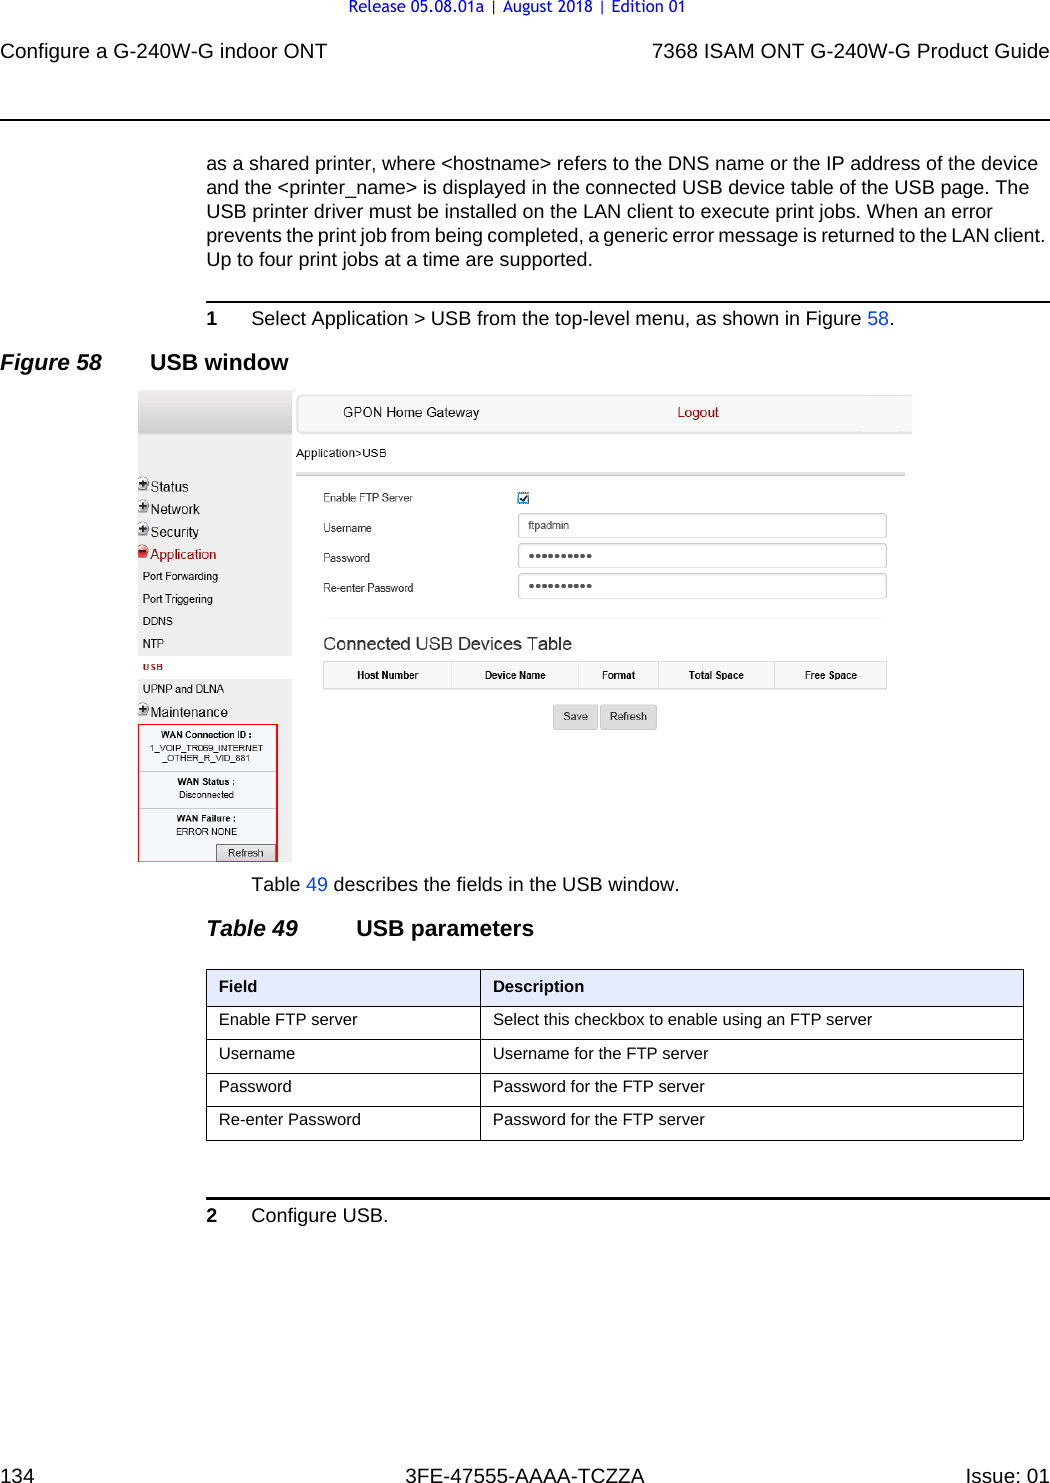
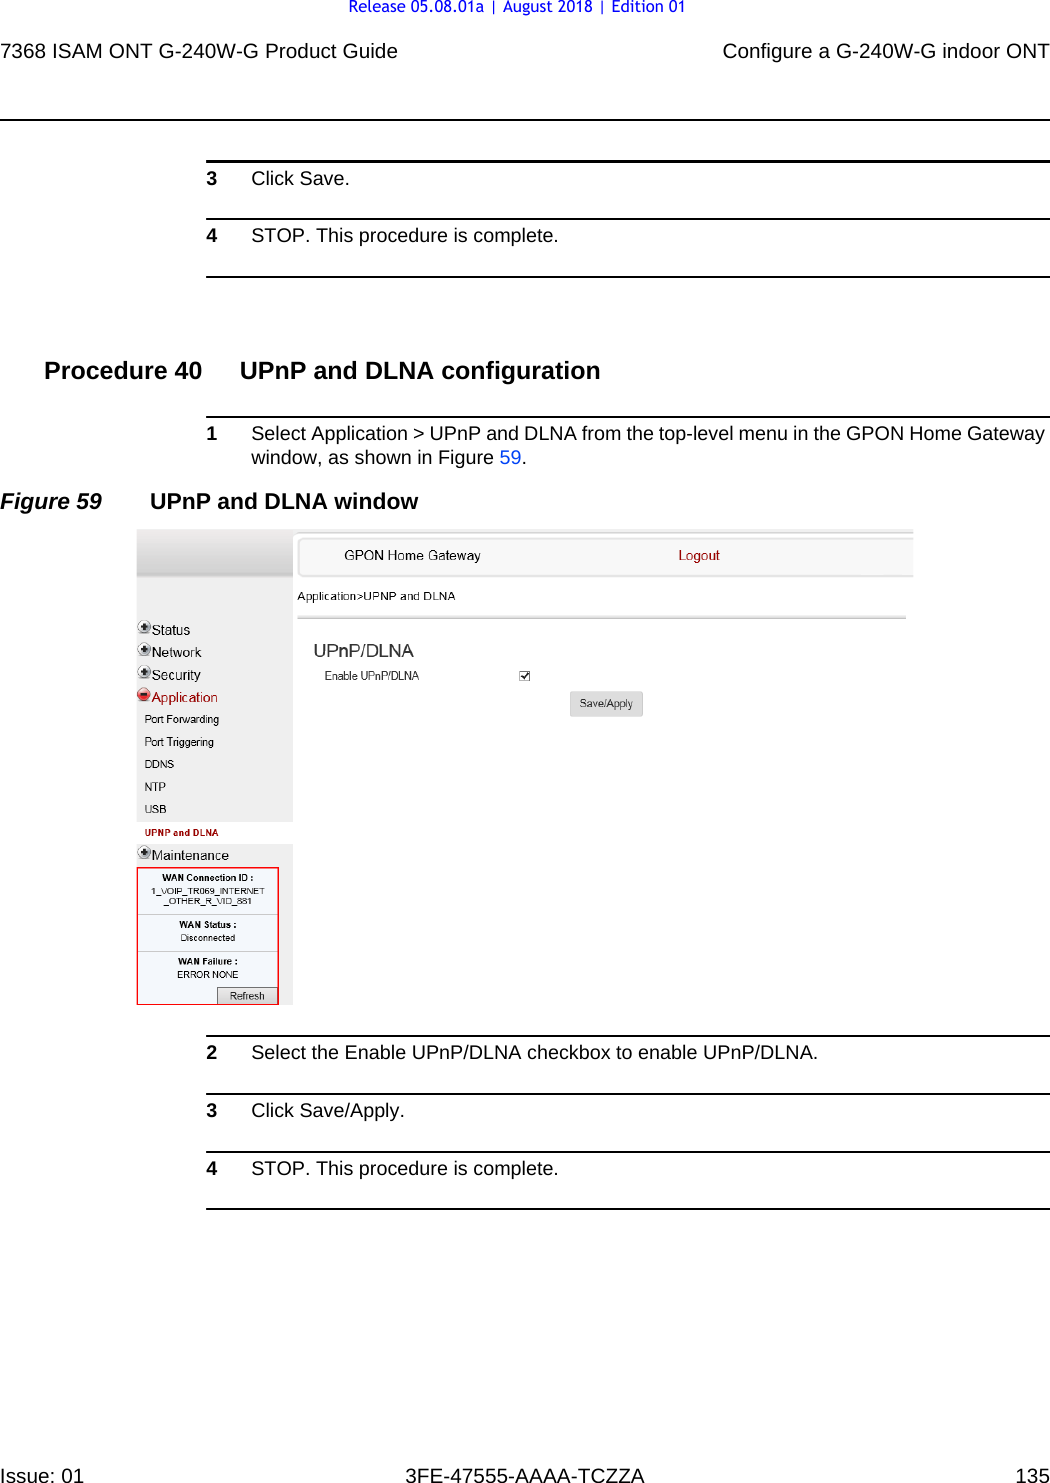
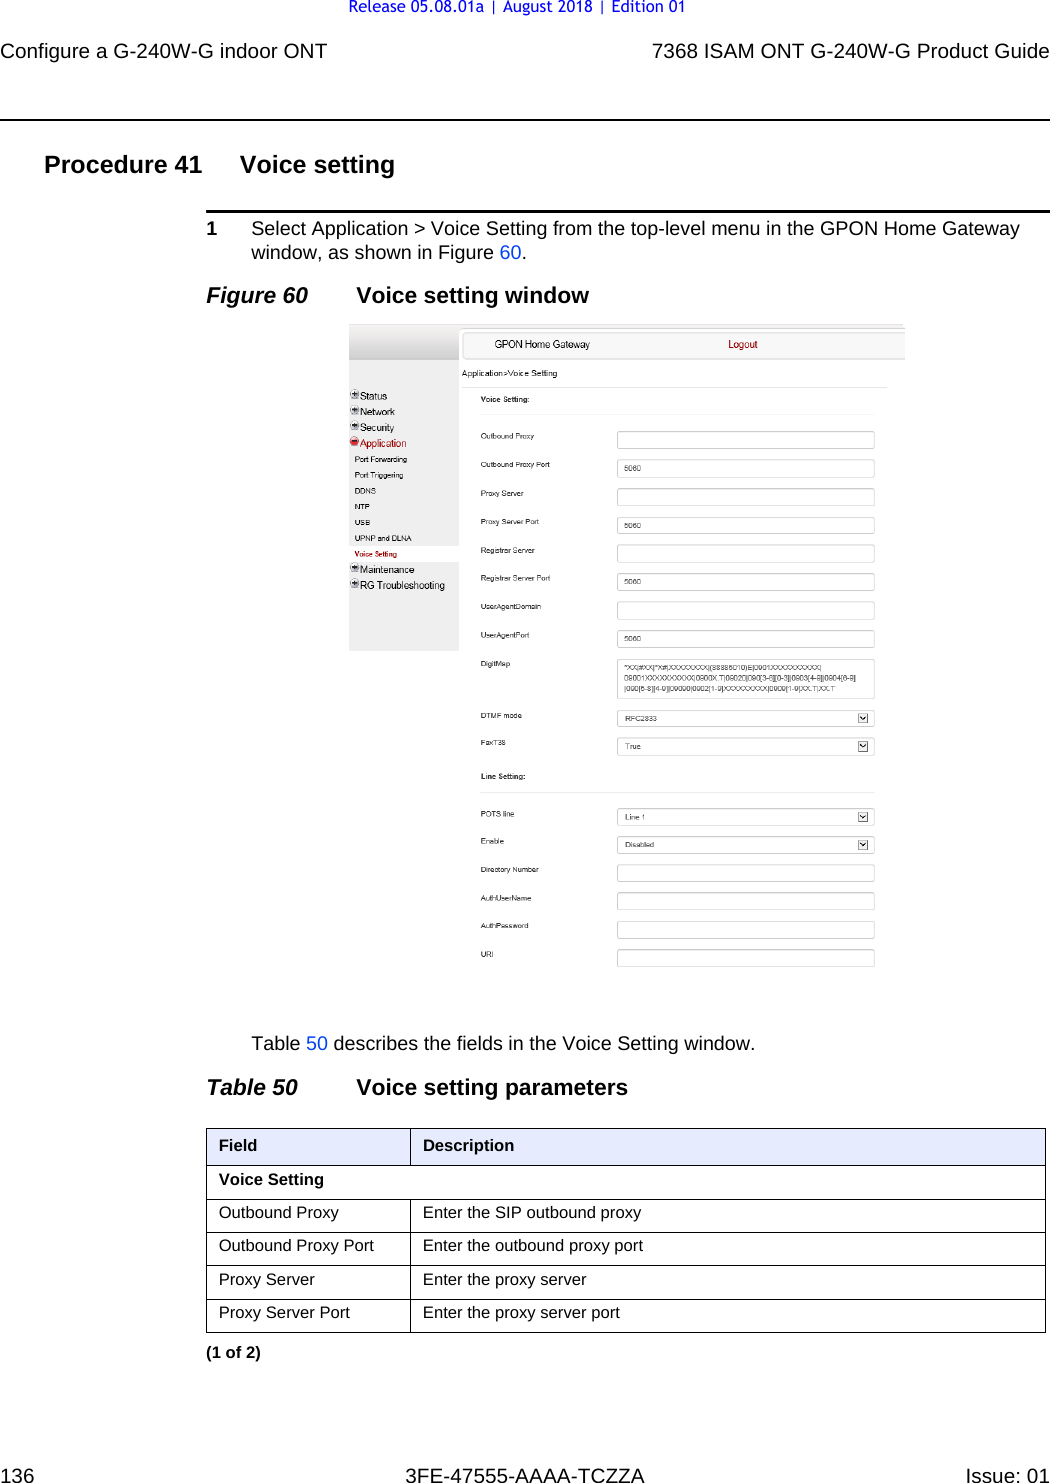
1.23 lb (0.558 kg)Release 05.08.01a | August 2018 | Edition 01](https://usermanual.wiki/Nokia-Bell/G240WG/User-Guide-4042739-Page-49.png)


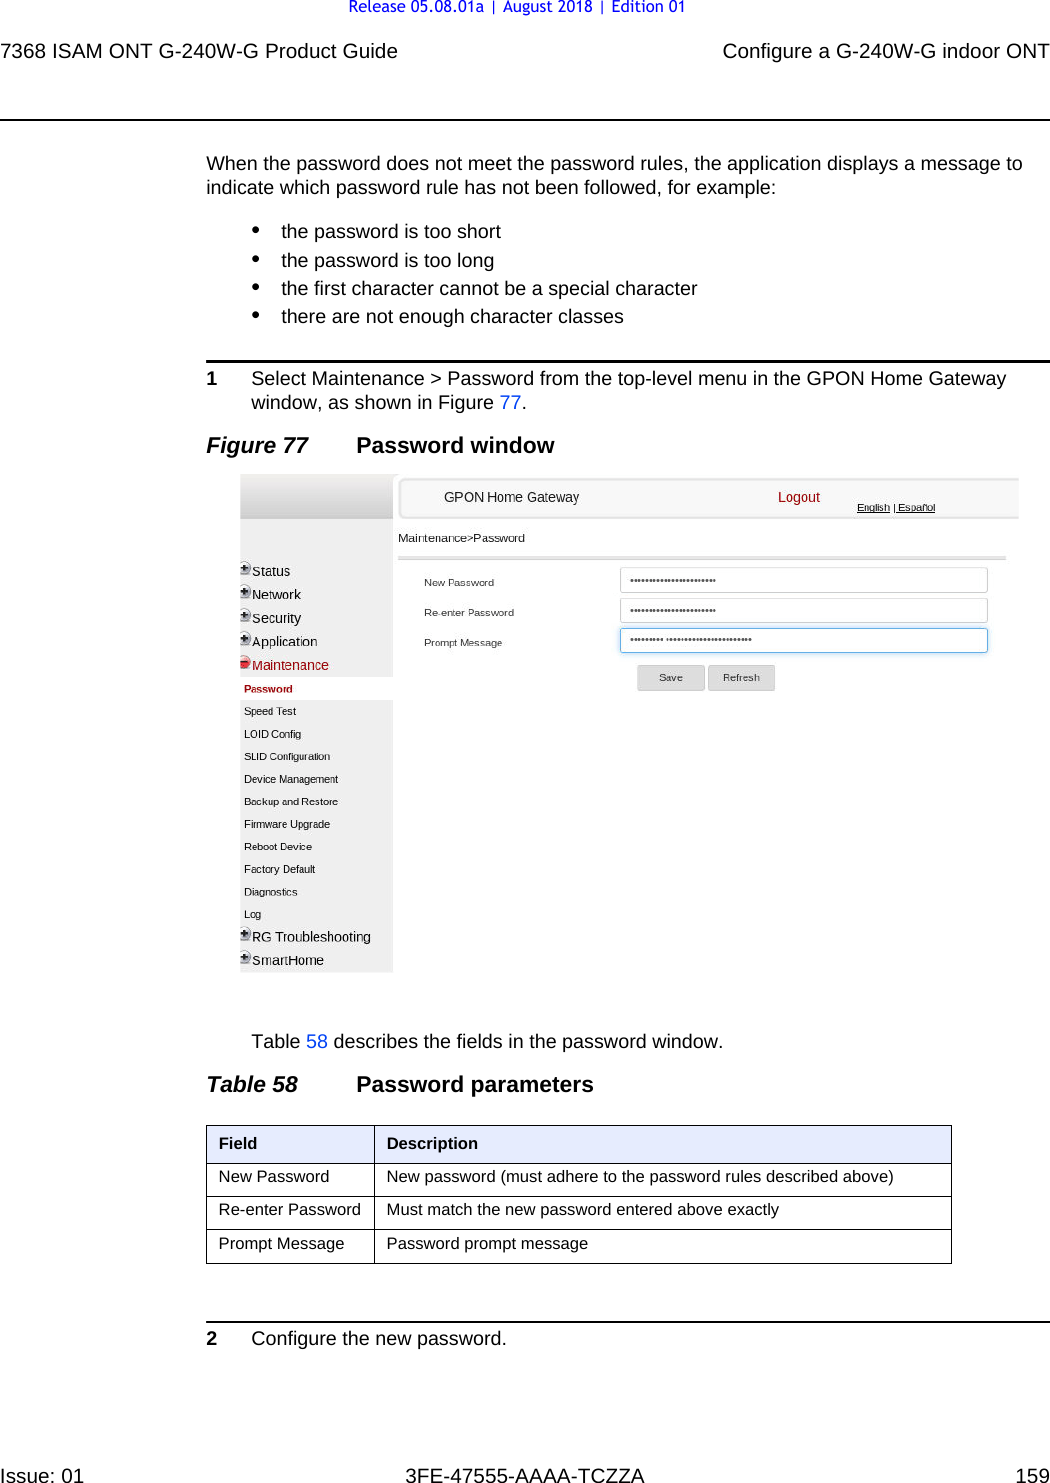
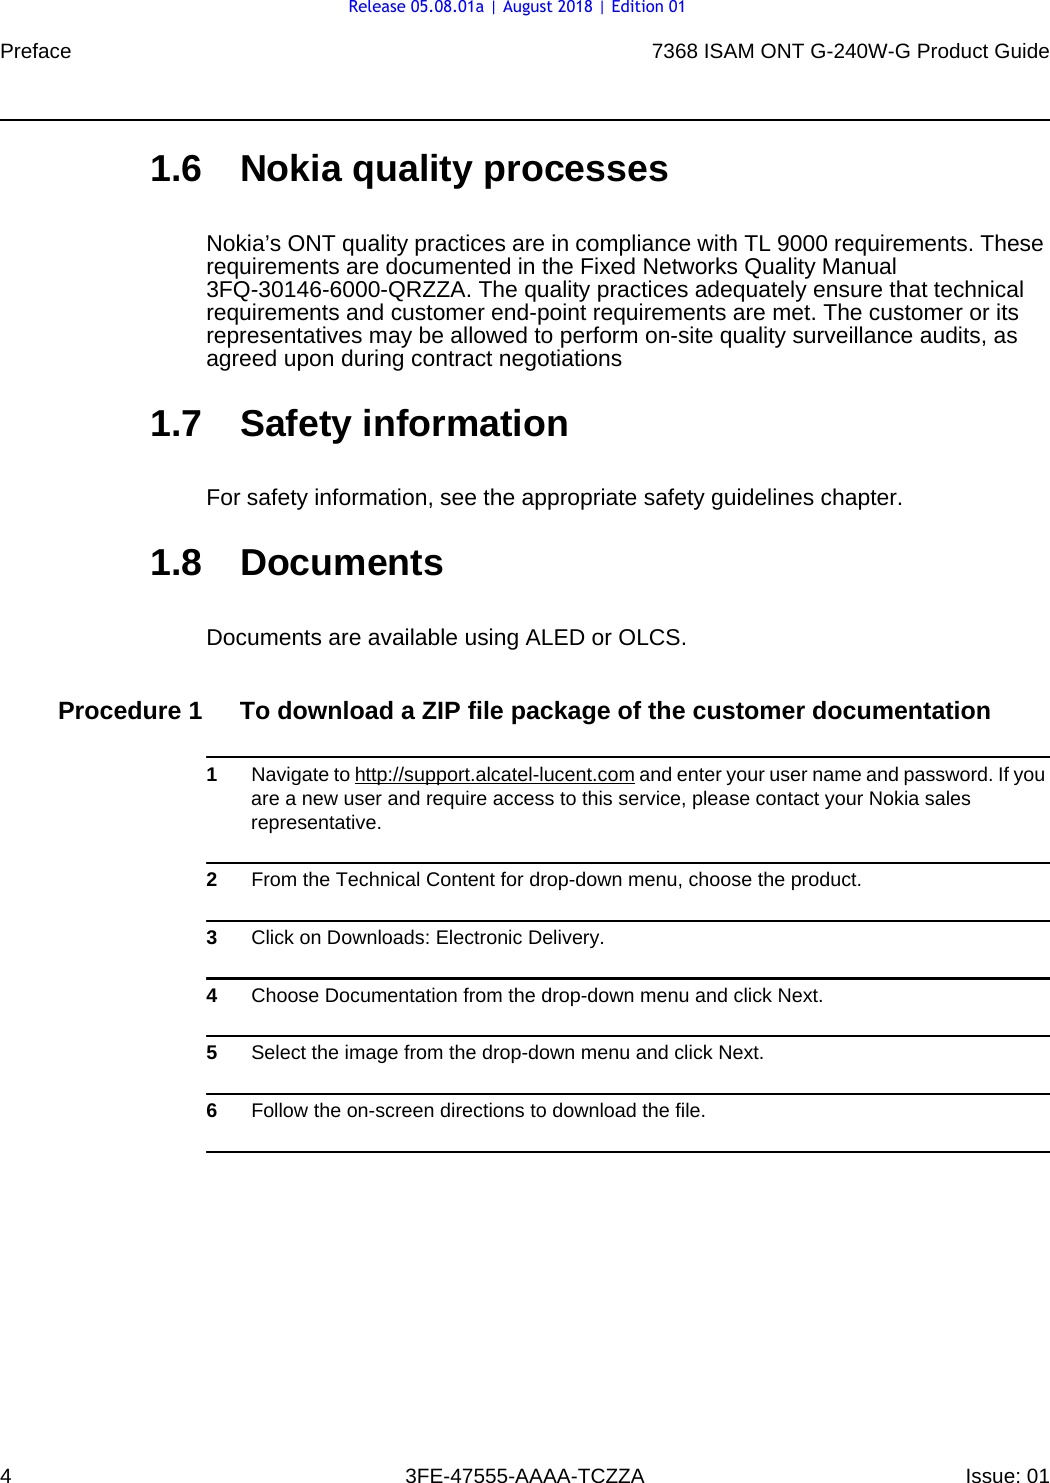
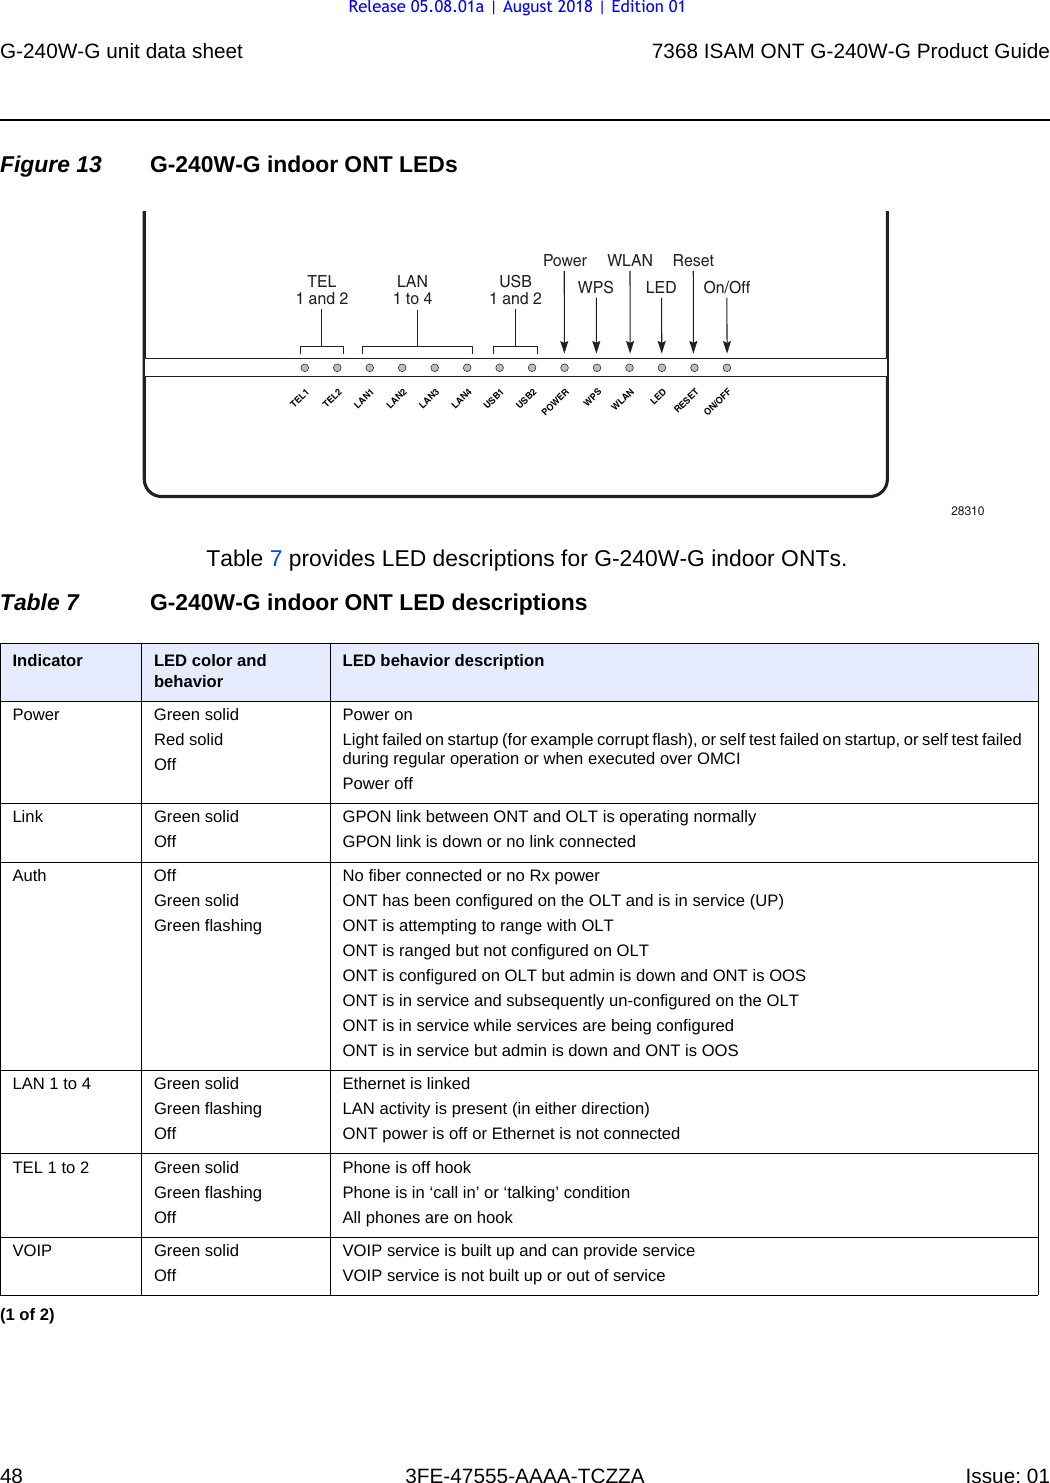
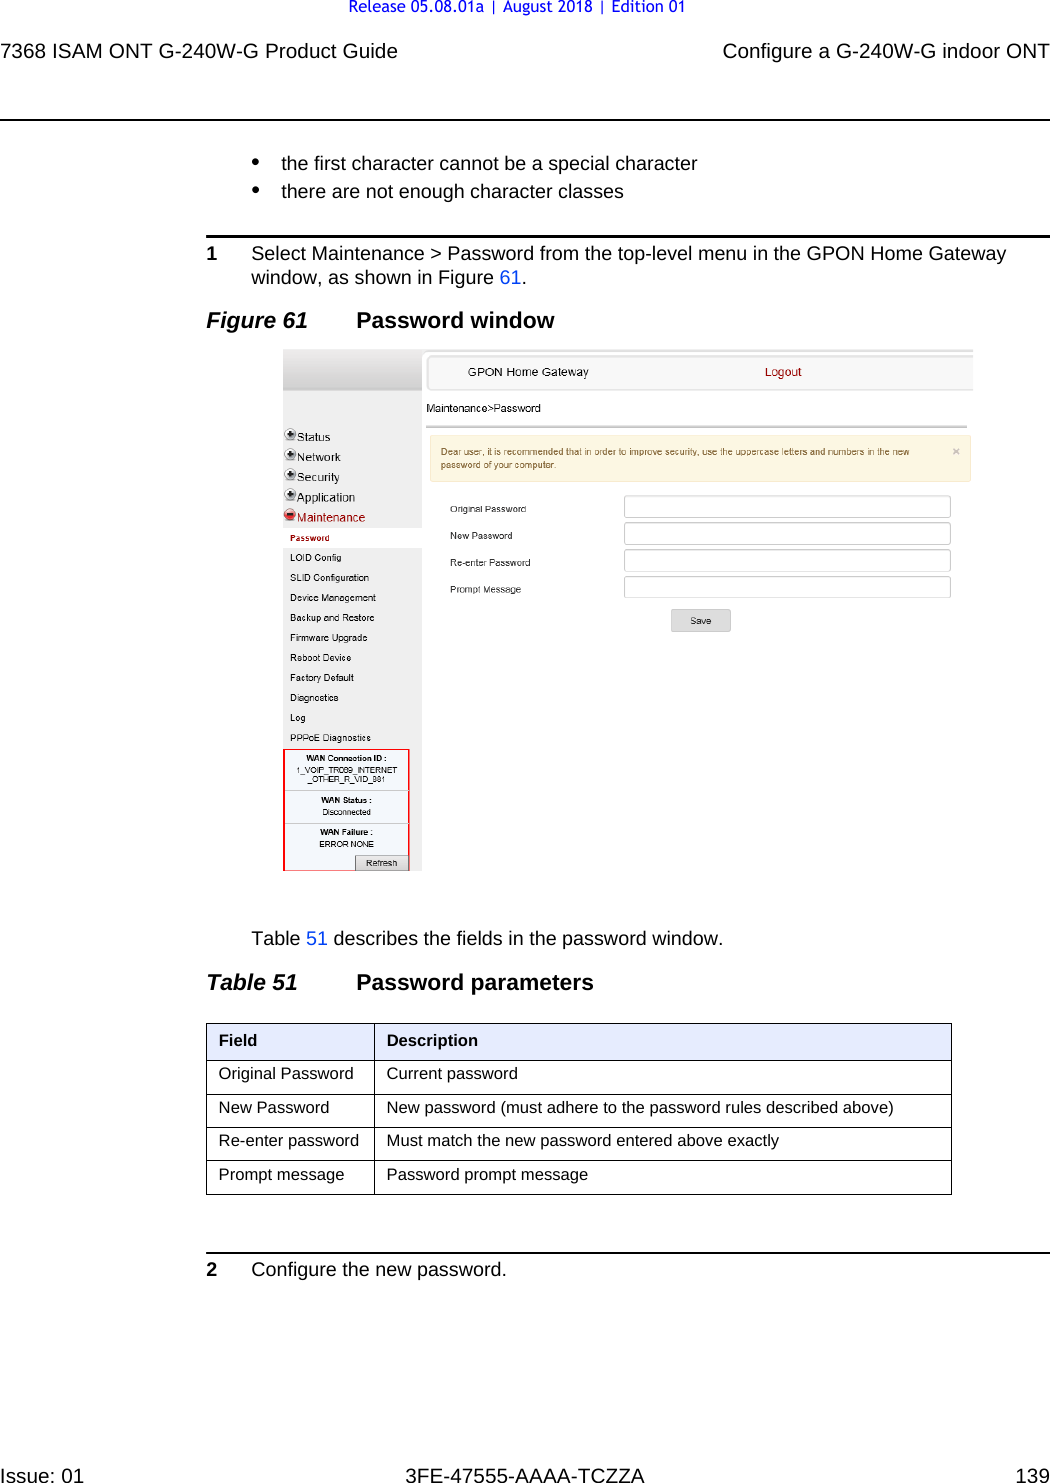
![Configure a G-240W-G indoor ONT1387368 ISAM ONT G-240W-G Product Guide3FE-47555-AAAA-TCZZA Issue: 01 •view log•diagnose PPPoE connectionProcedure 42 Password configurationA password must adhere to the password rules, which are as follows:•the password may consist of uppercase letters, lowercase letters, digital numbers, and the following special characters ! # + , - / @ _ : = ]•the password length must be from 8 to 24 characters•the first character must be a digital number or a letter•the password must contain at least two types of characters: numbers, letters, or special characters•the same character must not appear more than 8 times in a rowWhen the password meets the password rules, the application displays the message “Your password has been changed successfully”.When the password does not meet the password rules, the application displays a message to indicate which password rule has not been followed, for example:•the password is too short•the password is too longRelease 05.08.01a | August 2018 | Edition 01](https://usermanual.wiki/Nokia-Bell/G240WG/User-Guide-4042739-Page-138.png)

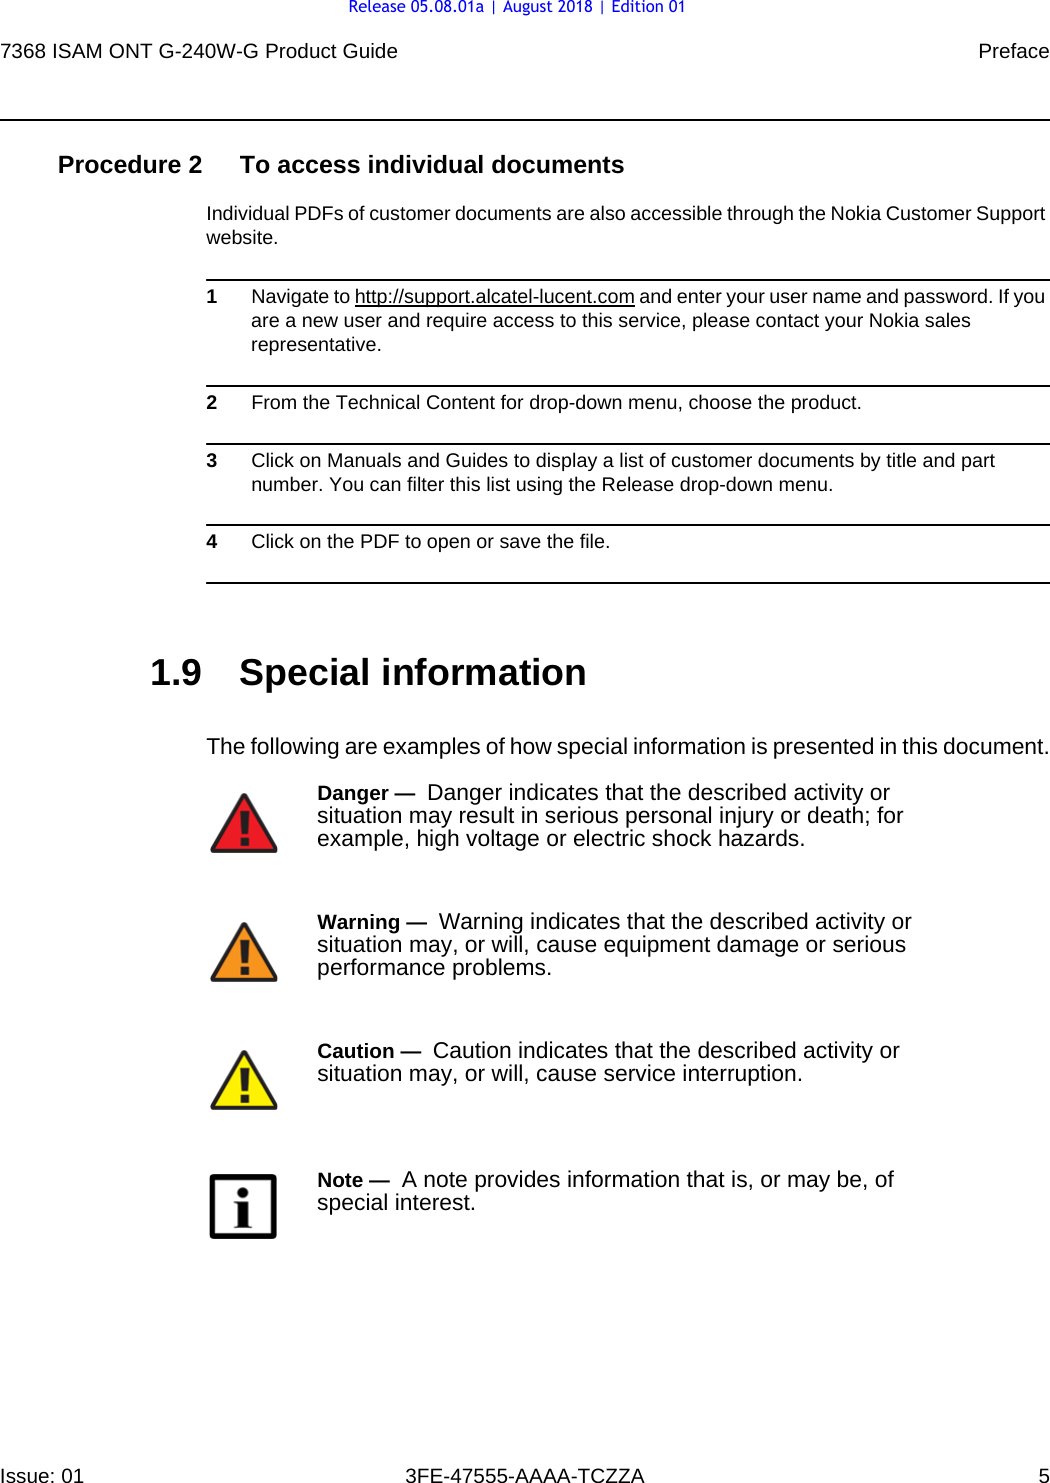
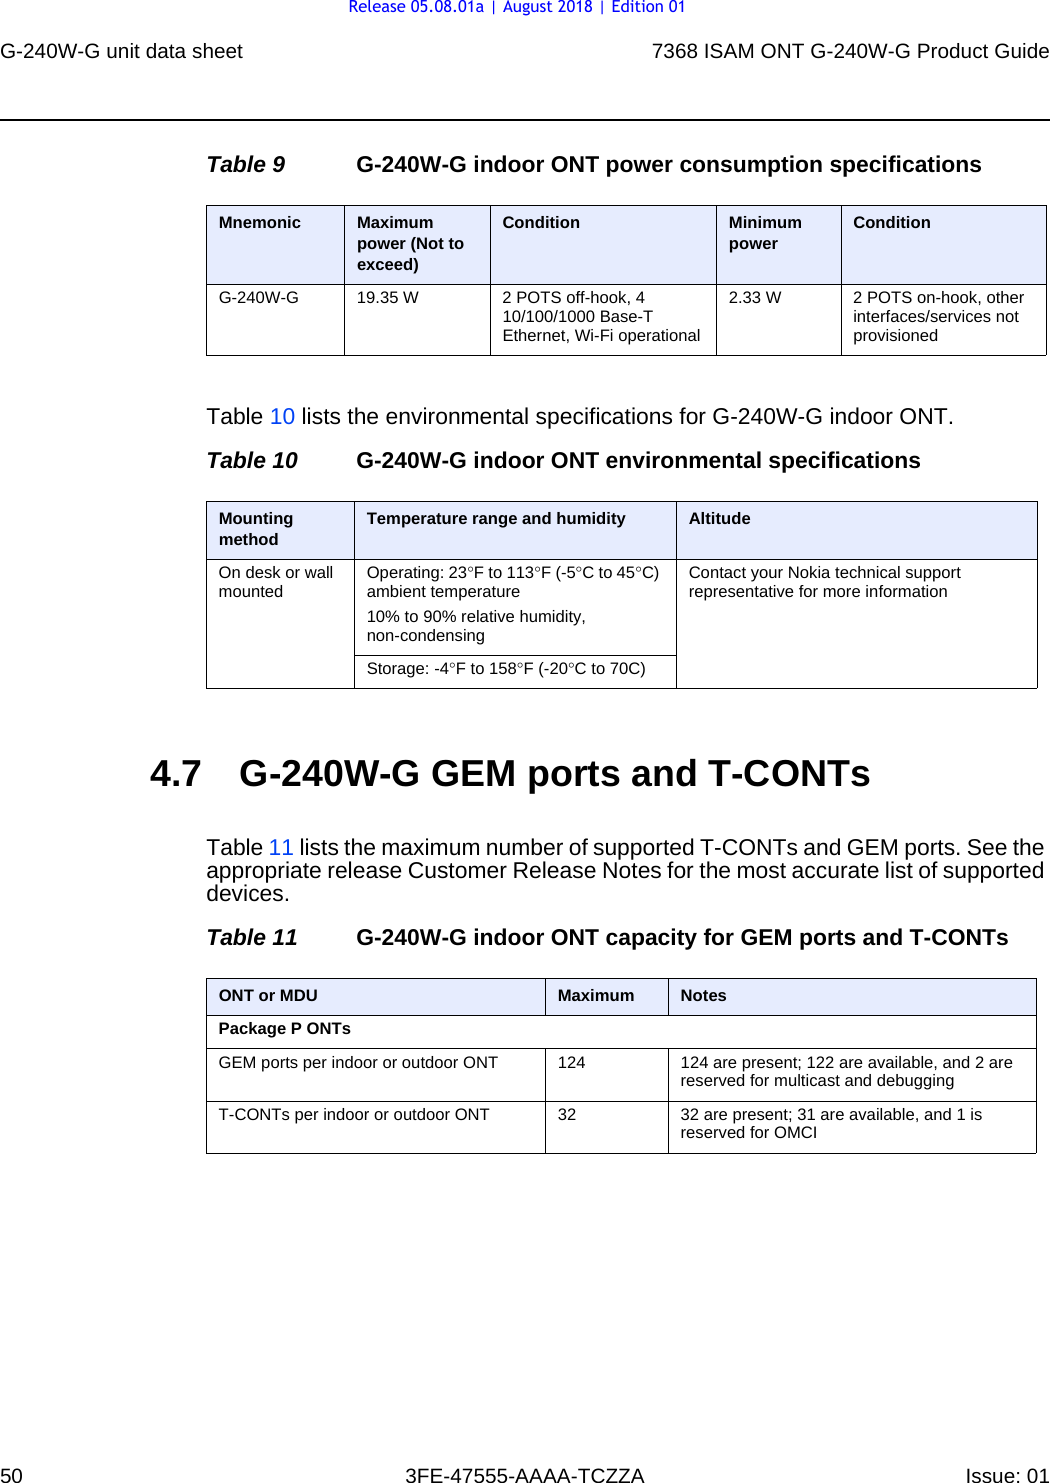
![Configure a G-240W-G indoor ONT1587368 ISAM ONT G-240W-G Product Guide3FE-47555-AAAA-TCZZA Issue: 01 Table 57 Device Information parameters2Click Refresh to update the displayed information. 3STOP. This procedure is complete.7.3.4 MaintenanceG-240W-G ONTs also support maintenance tasks, including:•password change•LOID configuration•SLID configurationProcedure 59 Password configurationA password must adhere to the password rules, which are as follows:•the password may consist of uppercase letters, lowercase letters, digital numbers, and the following special characters ! # + , - / @ _ : = ]•the password length must be from 8 to 24 characters•the first character must be a digital number or a letter•the password must contain at least two types of characters: numbers, letters, or special characters•the same character must not appear more than 8 times in a rowWhen the password meets the password rules, the application displays the message “Your password has been changed successfully”.Field DescriptionDevice Name Name on the ONTVendor Name of the vendorSerial Number Serial number of the ONTHardware version Hardware version of the ONTBoot version Boot version of the ONTSoftware version Software version of the ONTChipset Chipset of the ONTDevice Running Time Amount of time the device has run since last reset in hours, minutes, and secondsRelease 05.08.01a | August 2018 | Edition 01](https://usermanual.wiki/Nokia-Bell/G240WG/User-Guide-4042739-Page-158.png)