Nolangroup S p A NCOM5 Motorcycle helmet communication system with BT transceiver User Manual 2 B1v03 ENG
Nolangroup S.p.A. Motorcycle helmet communication system with BT transceiver 2 B1v03 ENG
Contents
- 1. user manual
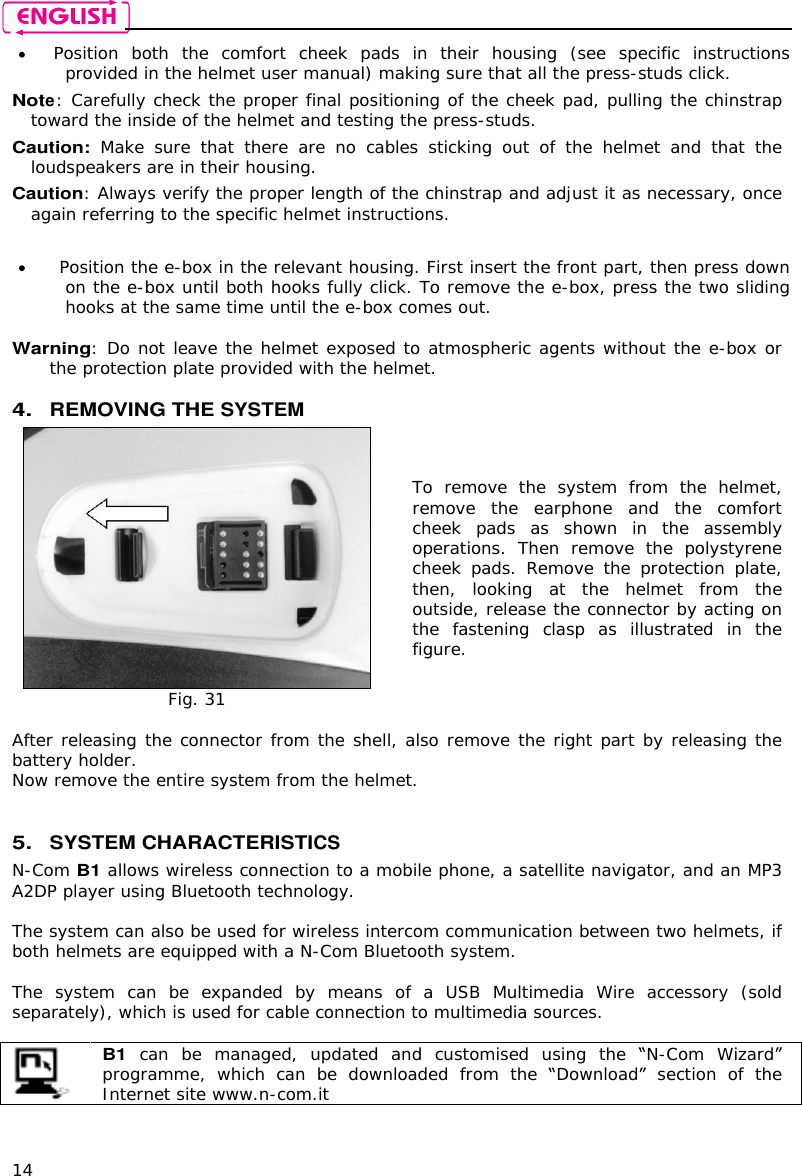
- 2. user manual statment
- 3. FCC Statment
user manual