Northfield Telecommunications d b a Advanced Wireless Communications TB208 FM UHF PTT RADIO TRANSCEIVER User Manual TB208USL OWNER S MANUAL
Northfield Telecommunications, Inc. d/b/a Advanced Wireless Communications FM UHF PTT RADIO TRANSCEIVER TB208USL OWNER S MANUAL
Contents
- 1. USERS MANUAL
- 2. OWNERS MANUAL
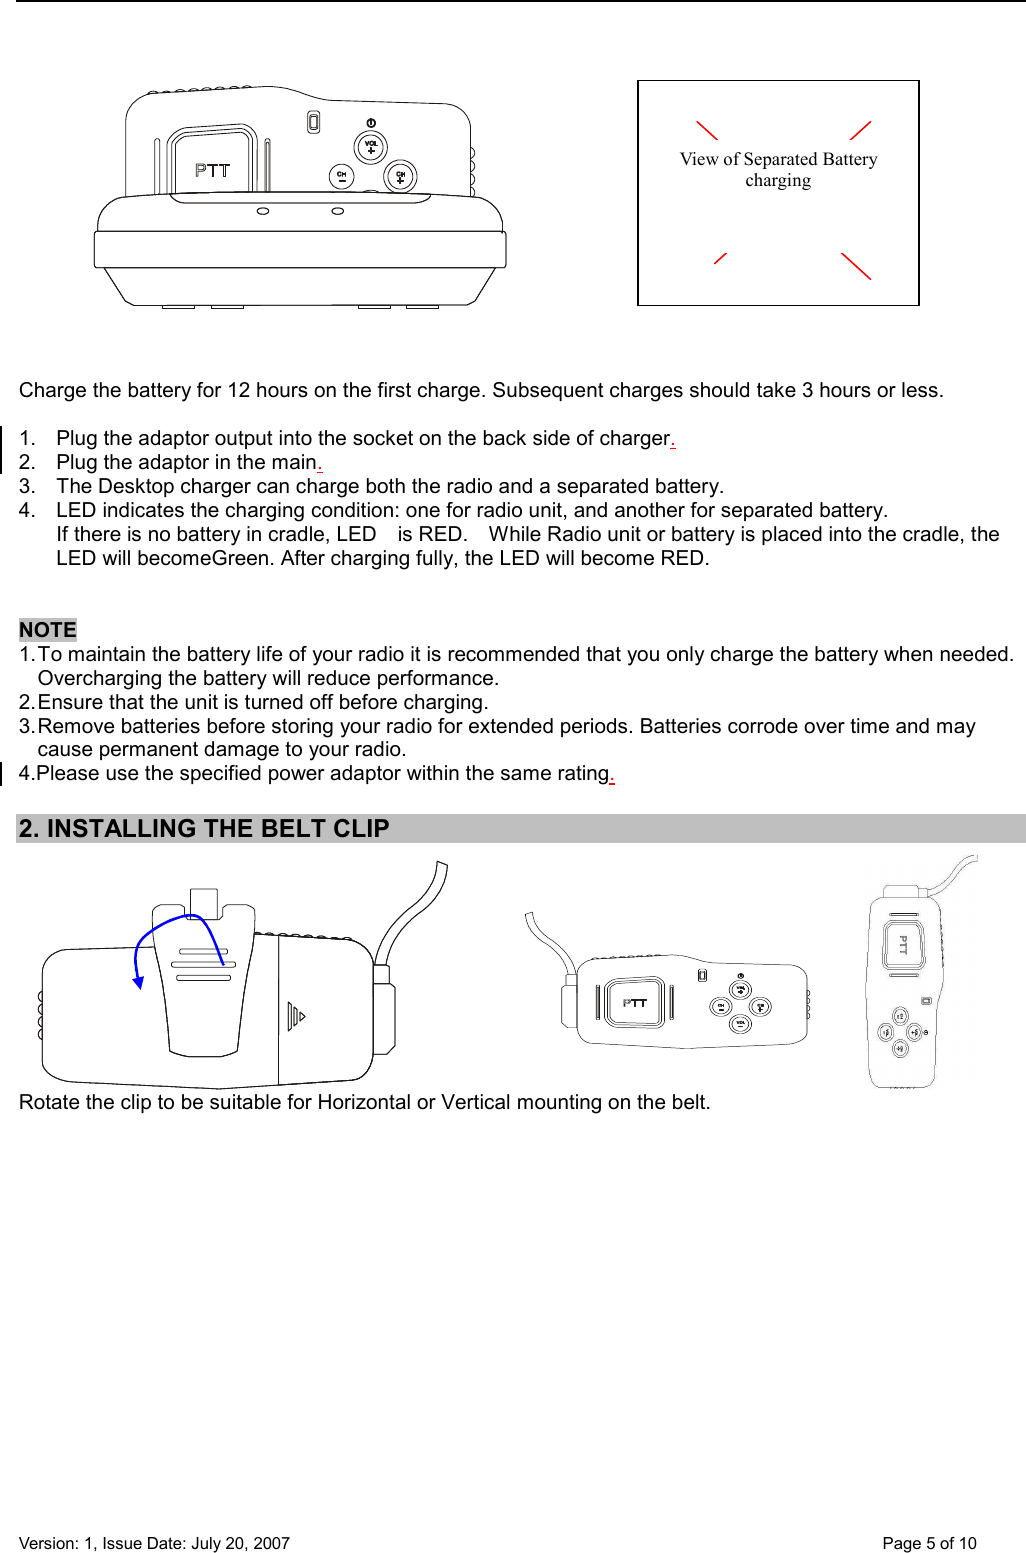
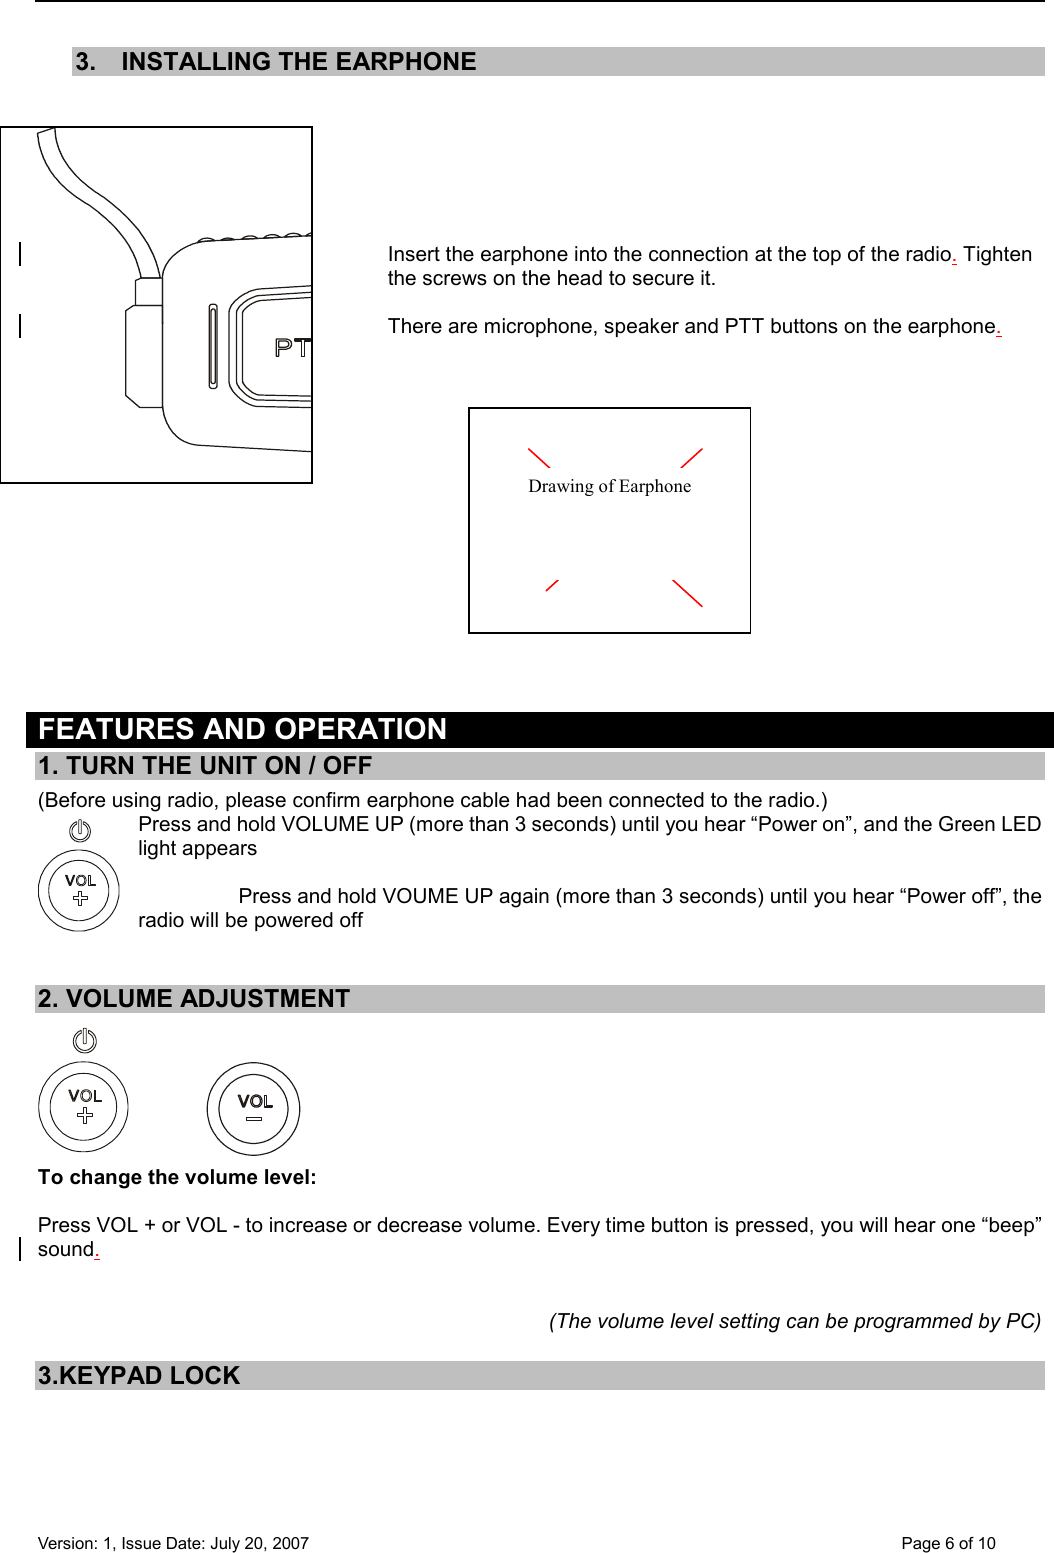
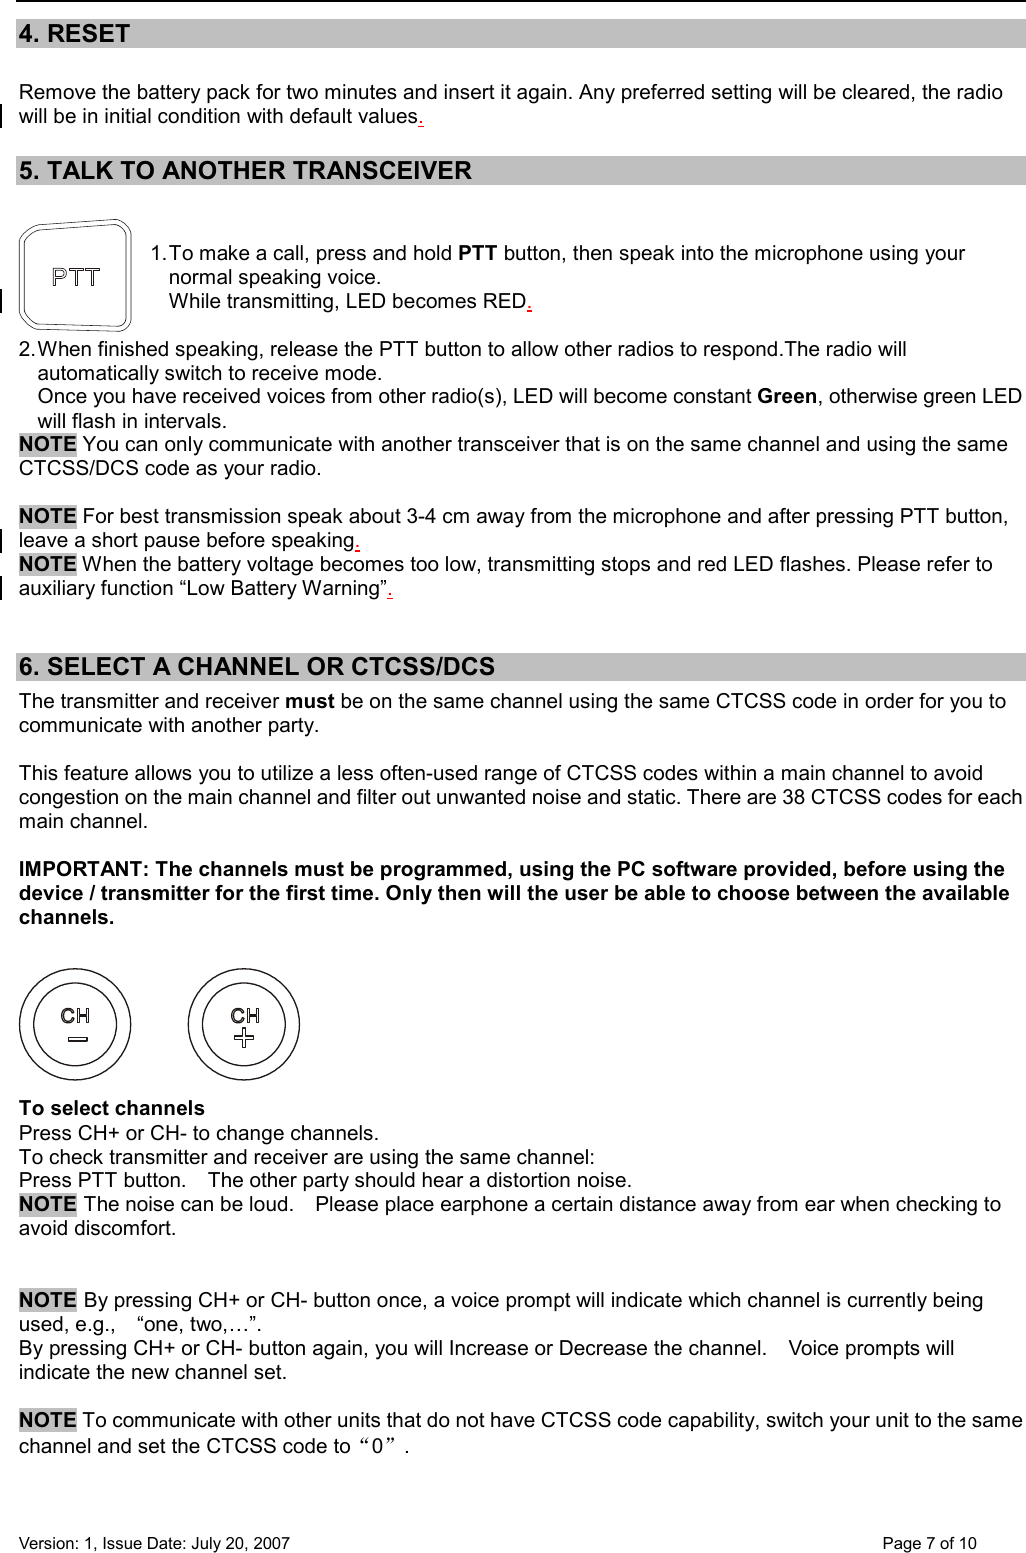
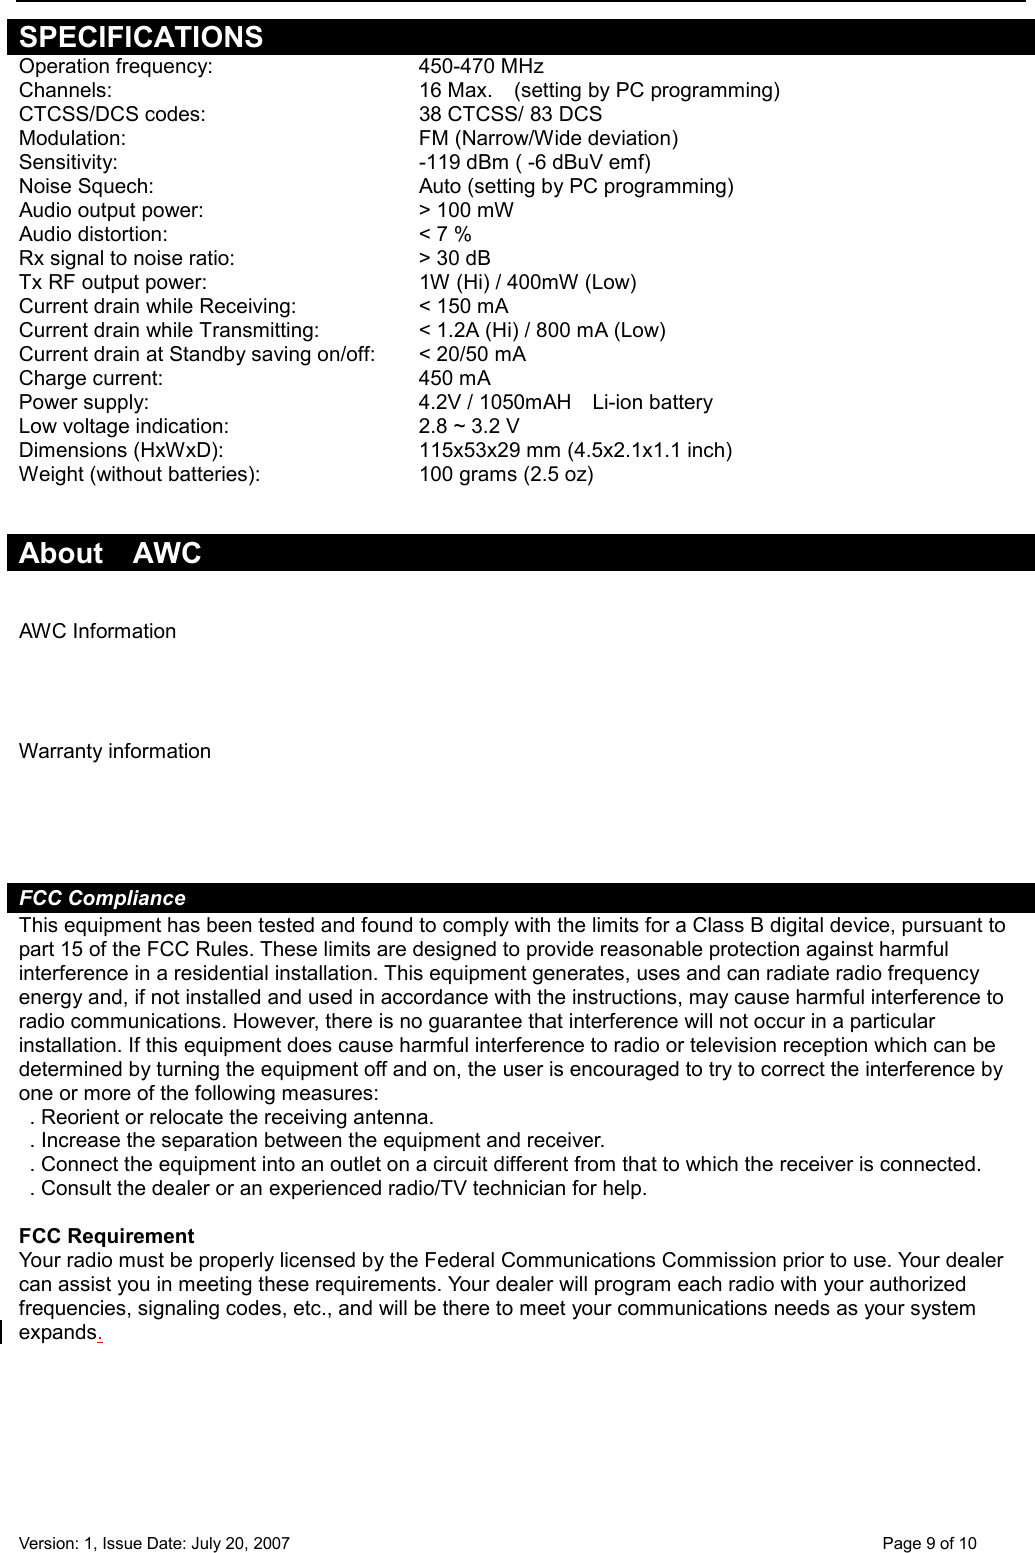
OWNERS MANUAL