Nyce Sensors Z30111 Garage Door Sensor User Manual Manual
Nyce Sensors Inc. Garage Door Sensor Manual
Contents
- 1. Users Manual
- 2. Manual
Manual

How to Install a NYCE Control
Garage Door Sensor
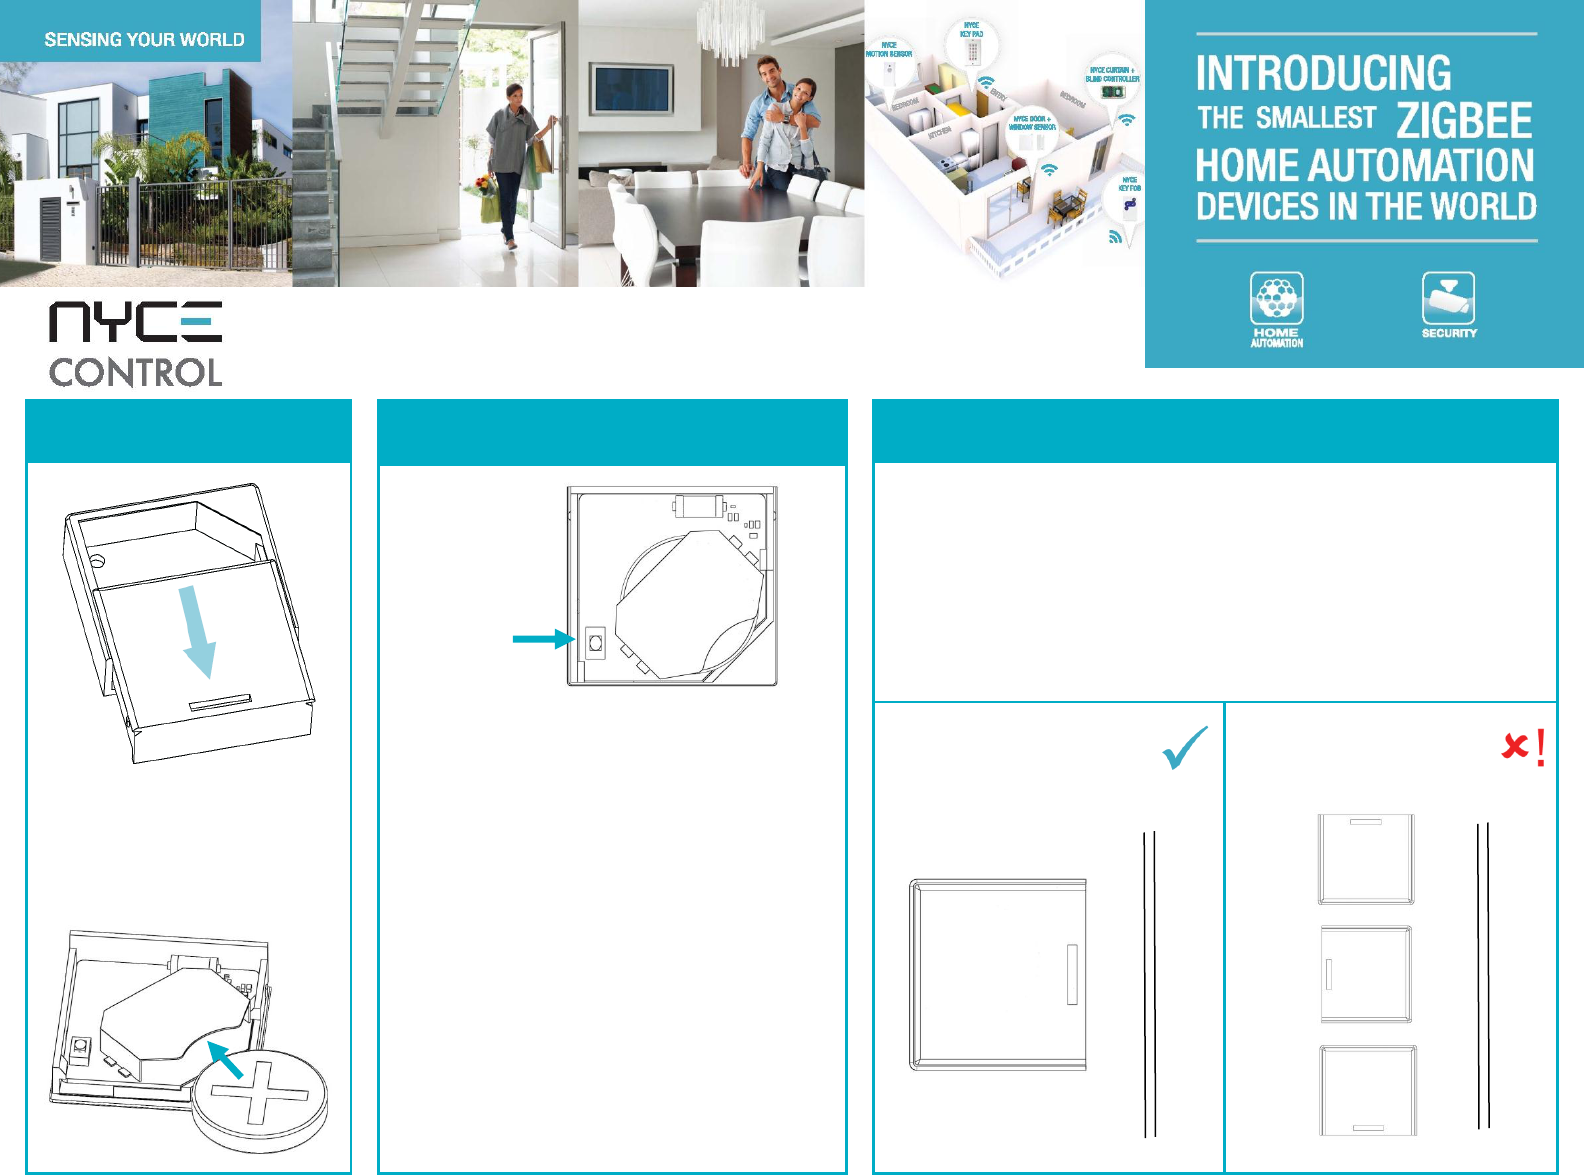
STEP 1: INSTALL BATTERY
STEP 2: INSTALL DRIVER + IDENTIFY
STEP 3: PROPER LOCATION / ORIENTATION OF SENSOR
Mount the Garage Door Sensor on a horizontal pane of the
garage door. The Sensor should be mounted on the bottom
pane (fully closed) or top pane (fully open), depending on the
desired operation.
A pair of sensors can be used on both bottom and top panes for
full garage door reporting, if desired.
Ensure that the Garage Door Sensor is oriented with the bar
symbol vertically, parallel to the edge of the garage door, as
shown in the diagram below on the left.
Install the Sensor’s driver:
GarageSensor_zb_nyce_3014.c4i
Download driver from:
www.nycecontrol.com/support or from
Control4’s online database
Copy to My Documents\Control4\Drivers
Open Composer and add the device to the
project (Manufacturer = “Nyce Control”)
Identify the Sensor by pressing the button 4
times while its identify window is open.
The Sensor’s 64-bit address should appear in
the identify window’s text box.
Add a Generic Garage Door Driver to the
project “My Drivers\Sensors\Garage Door
(Sensor)” and bind the two drivers together
in Connections -> Control/AV
CORRECT ORIENTATION
INCORRECT ALIGNMENT
Slide open the Garage Door
Sensor’s housing. Install the
CR2032 battery in the top part
as shown below.
Garage Door Sensor
Button
Right edge of Garage Door
Right edge of Garage Door

Please visit our website if you have any installation questions www.nycecontrol.com/support
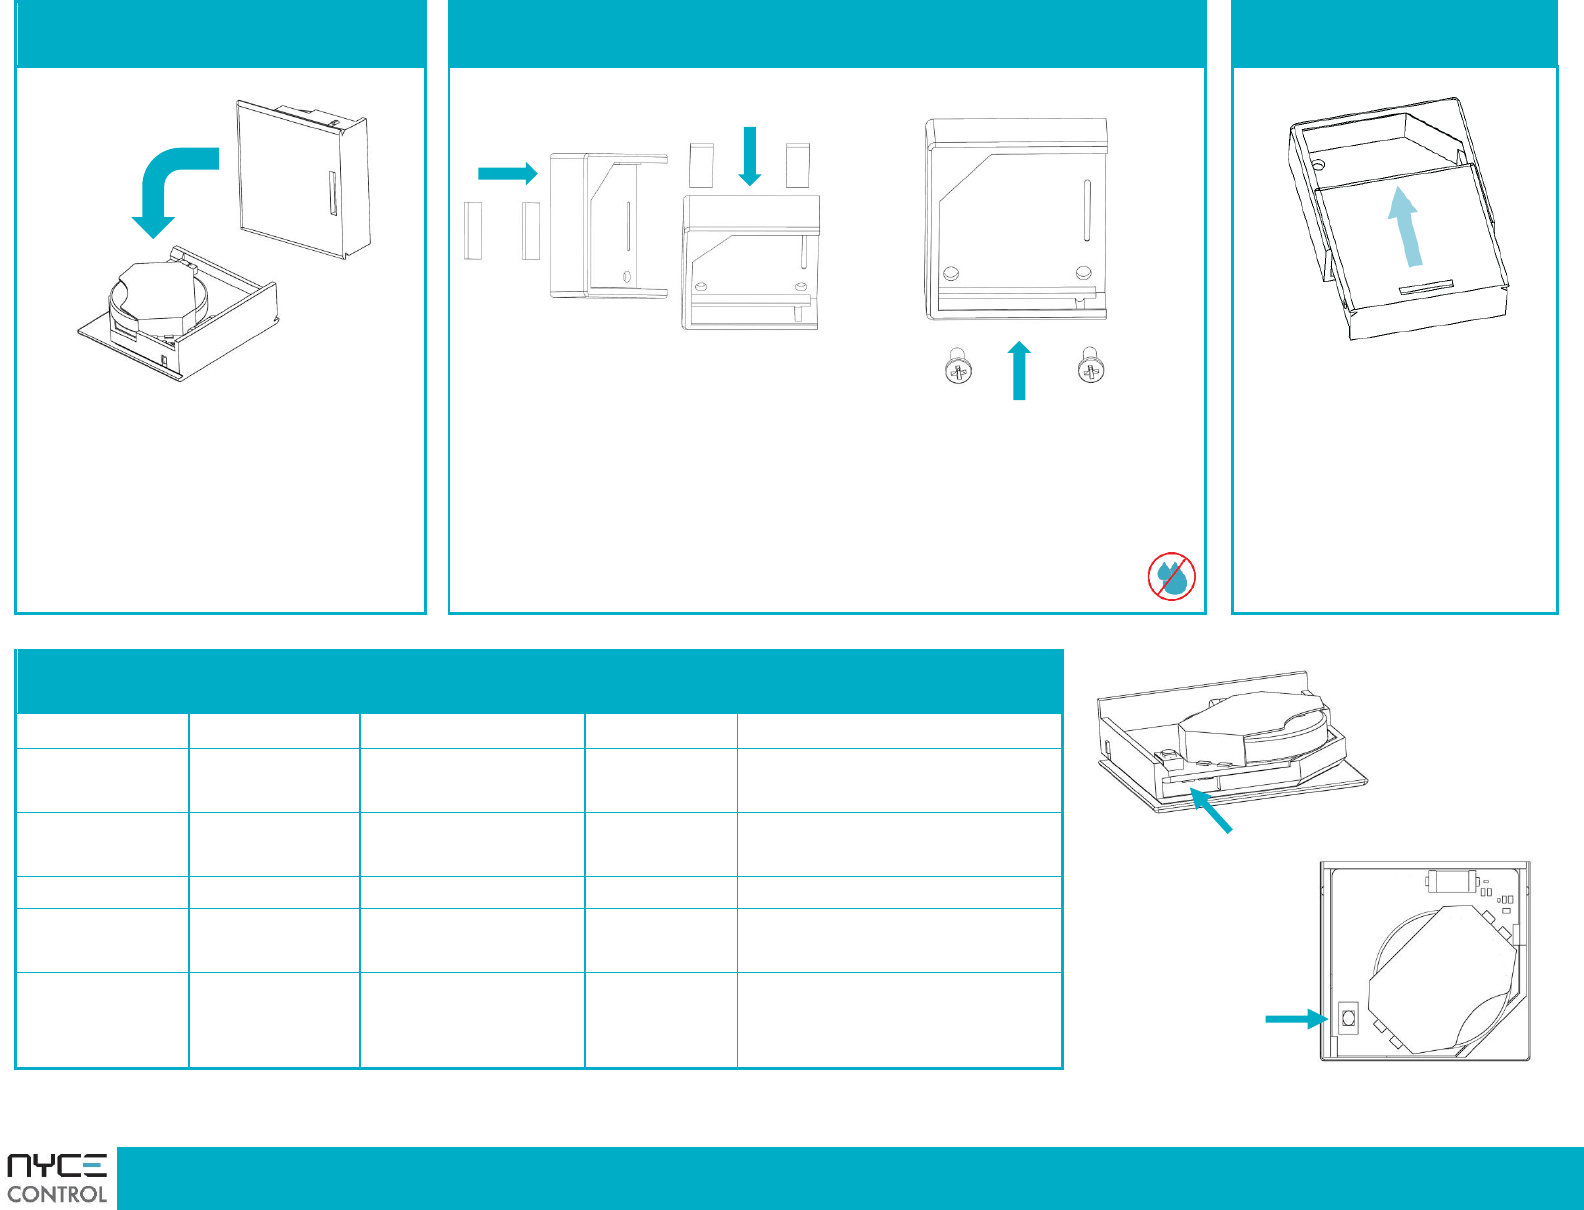
STEP 4: TEST THE SENSOR
STEP 5: INSTALL THE GARAGE DOOR SENSOR
STEP 6: CLOSE COVER
OPTION 1: DOUBLE-SIDED TAPE
OPTION 2: #2 SCREWS
Test the Sensor from the desired
location before permanently
installing it by flipping it forward as
shown above, this is the same action
as the garage door opening.
Check that the icon in Navigator’s or
Composer’s List View updates with a
“Closed” and “Open” icon.
Using the methods shown
above, install the Garage Door
Sensor bottom housing on a
clean surface using the double-
sided tape or the two #2
screws provided.
Notes:
Installation on metal surfaces can
reduce transmission range.
Ensure that the device is installed
in a dry location away from
water, moisture and rain.
Once you have installed
the bottom housing and
confirmed the Sensor is
properly communicating,
close the Sensor housing
as shown in the diagram
above.
PRODUCT FUNCTION + LED INDICATORS
Button Press
LED w/Press
Action
LED Action
Description
2 Times
Network Status
Not Joined
Joined
4 Times
Network Join
Join Successful
Join Unsuccessful
6 Times
Network Leave
Leave Successful
10 Times
Restore Defaults
Leave (if joined) and
Defaults Restored
No Action
Unsupported Command
Network Error, retry
Device Busy
Button
LED