ORION ELECTRIC M2A3A DVD/VCR User Manual Manual
ORION ELECTRIC CO., LTD. DVD/VCR Manual
UserManual.wiki
>
ORION ELECTRIC
>
M2A3A User Manual
Manual
Navigation menu
Upload a User Manual
Namespaces
Wiki Guide
HTML
PDF
Info
Views
User Manual
Discussion / Help
Navigation
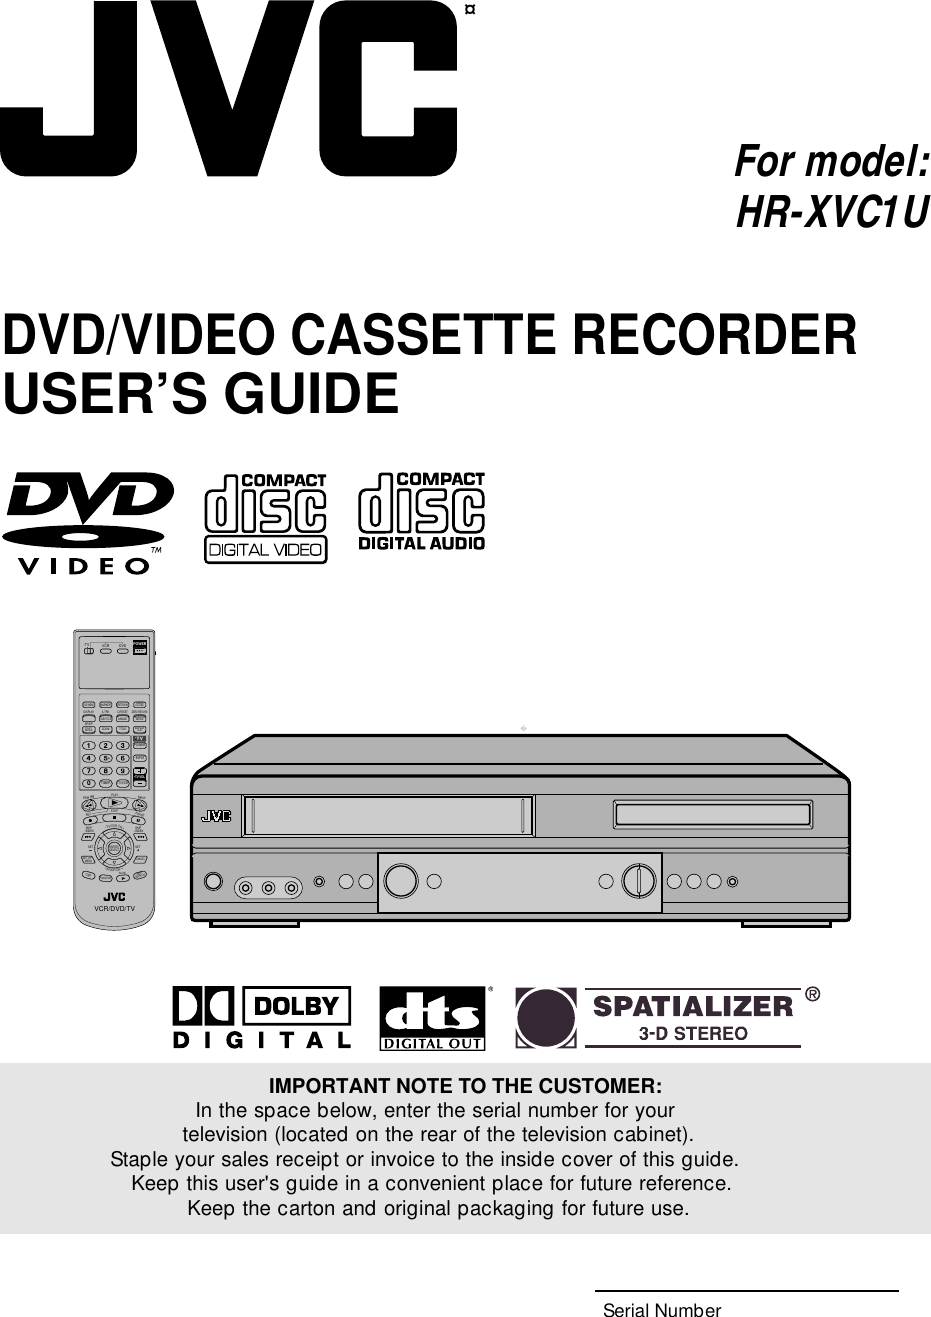
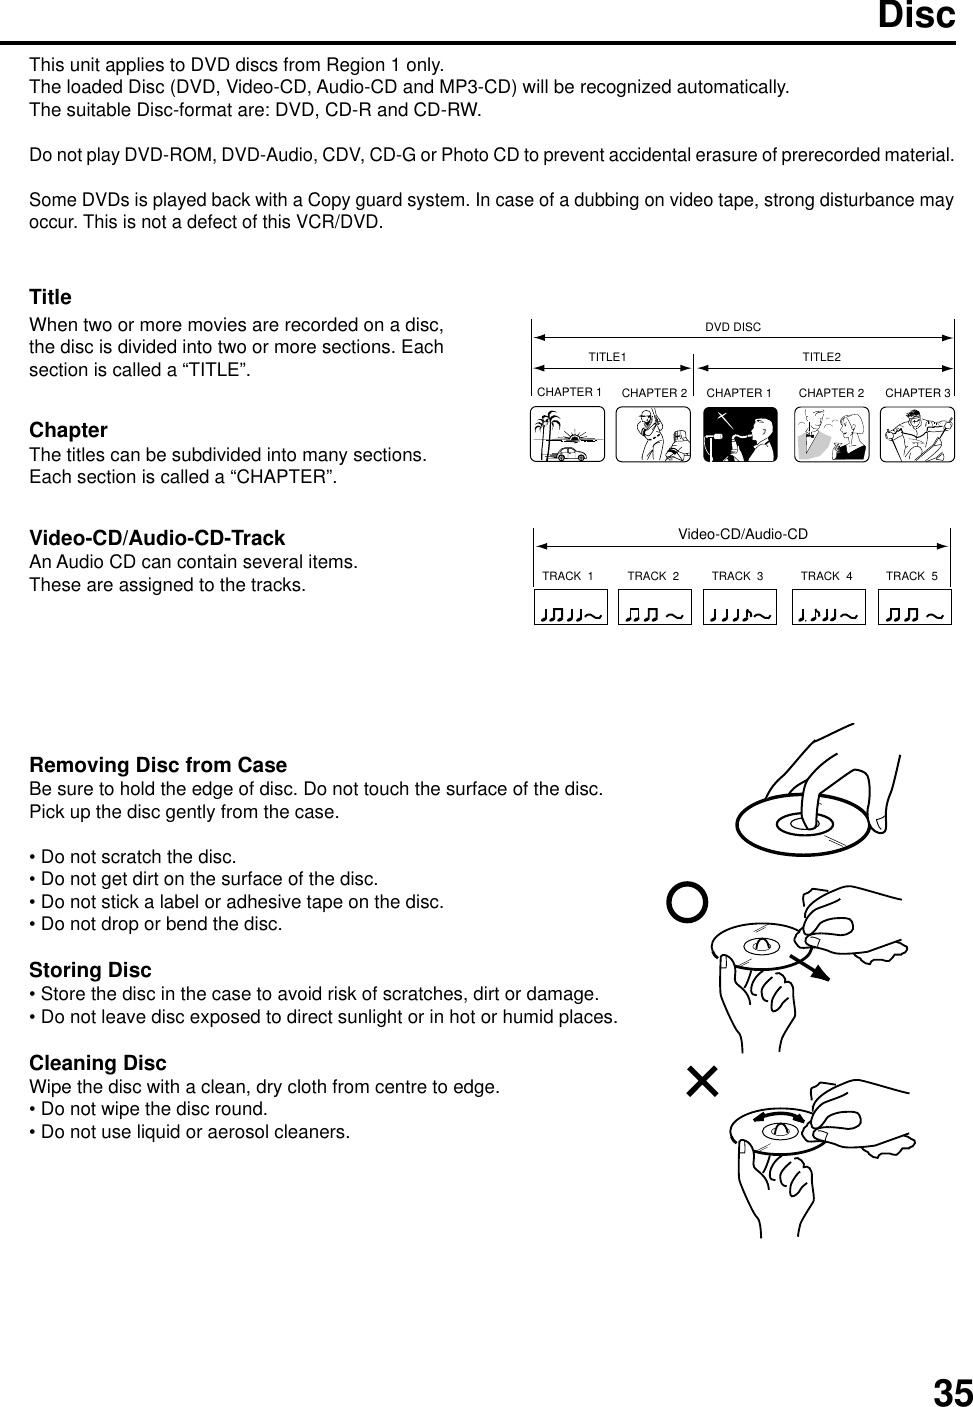
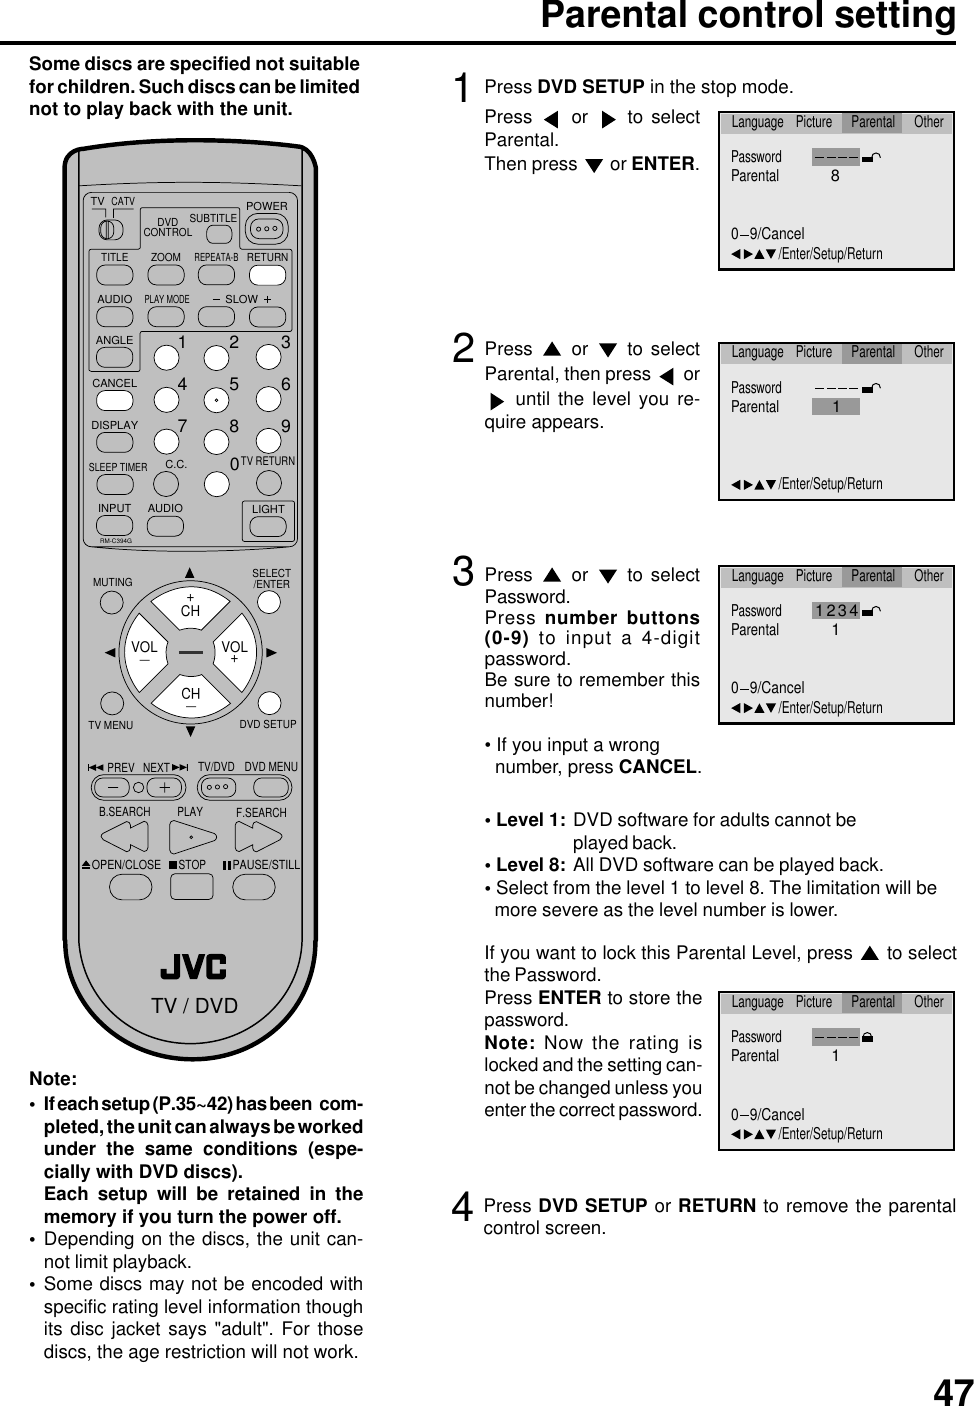
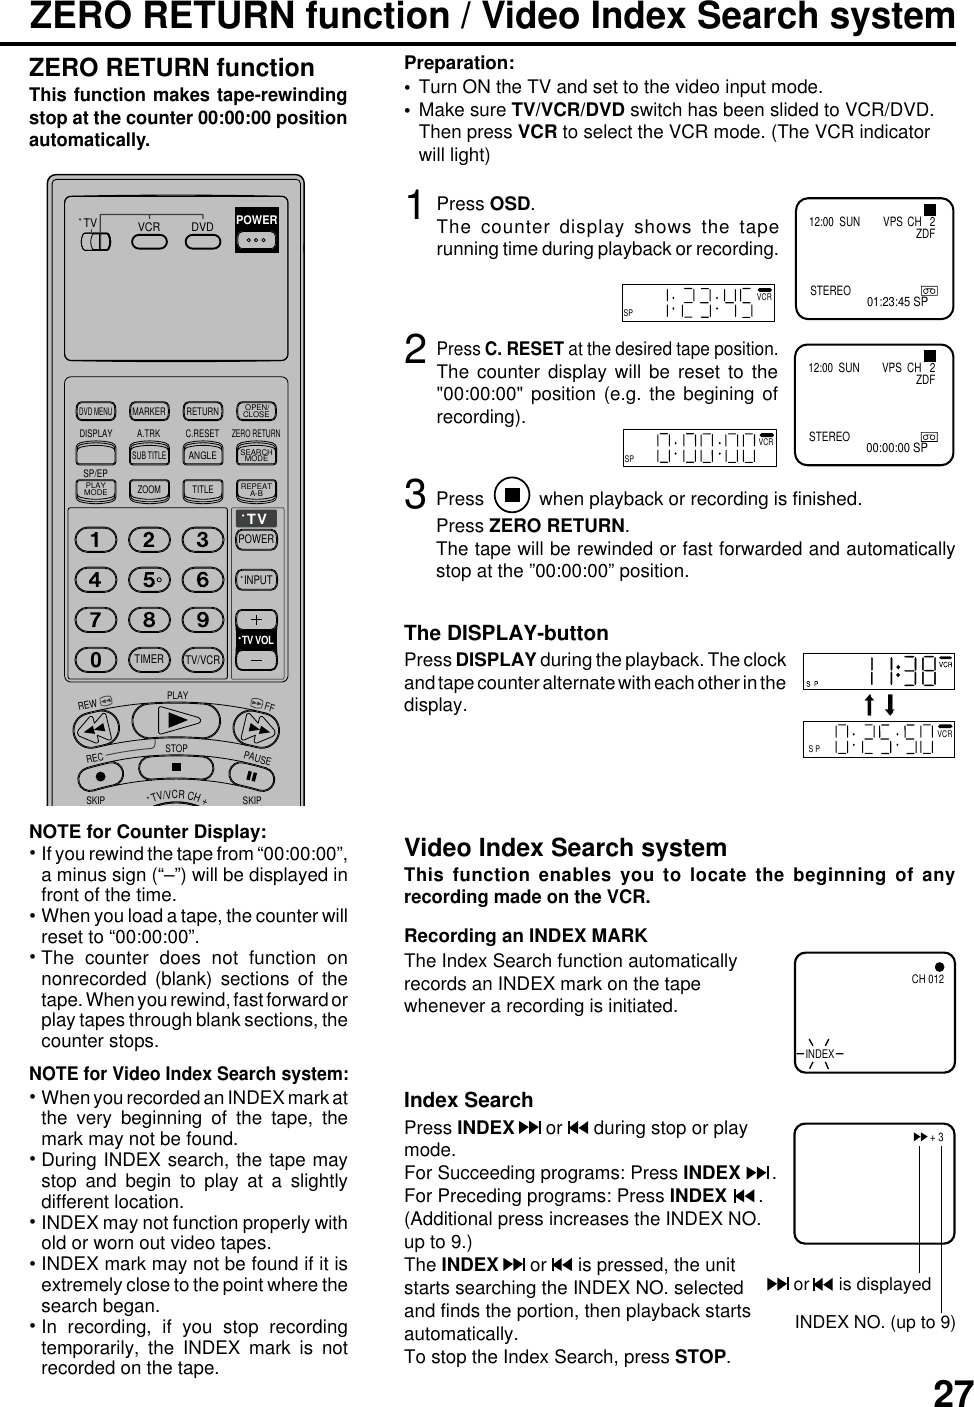
![9No. Display DescriptionVCR mode12345671 2 34765PlaybackStopStill pictureFrame advanced playbackForward slowmotionBackward slowmotionFast Forward playbackReview playbackSkip chapter to forwarddirectionSkip chapter to reversedirectionOpen or Close the trayAuto resumeDirection button’s markA-B repeatSubtitle languageSoundtrack languageAngleZoomParental level lockedParental level unlockedScreen size: Normal TVScreen size: PAN SCANScreen size: WIDEShows Prohibited actOutput sound for Video-CDABExplanation for On-Screen-Symbol:Display891011VCRDVDCDPM10 : 0001 : 002c36LTRKRECCH2Playback (lights) / Auto resume (flashes)Still pictureDVD disc is inserted.Audio CD is inserted.Display for afternoon (lights out in the morning)Clock display (colon[ : ] flashes)Counter display by hour/minute at VCR/DVD / by minute/second at CDTrack number display for CDTV channel display for VCRCATV channel displayExternal input displayTimer recording displayVideo tape is in the unitTrack display for CDNormal recording display (flashes during Instant Timer Recording - ITR)Note:Some discs may be displayed wrong or e.g. chapter number, playback time, etc. may not be displayed.891011](https://usermanual.wiki/ORION-ELECTRIC/M2A3A/User-Guide-178742-Page-9.png)
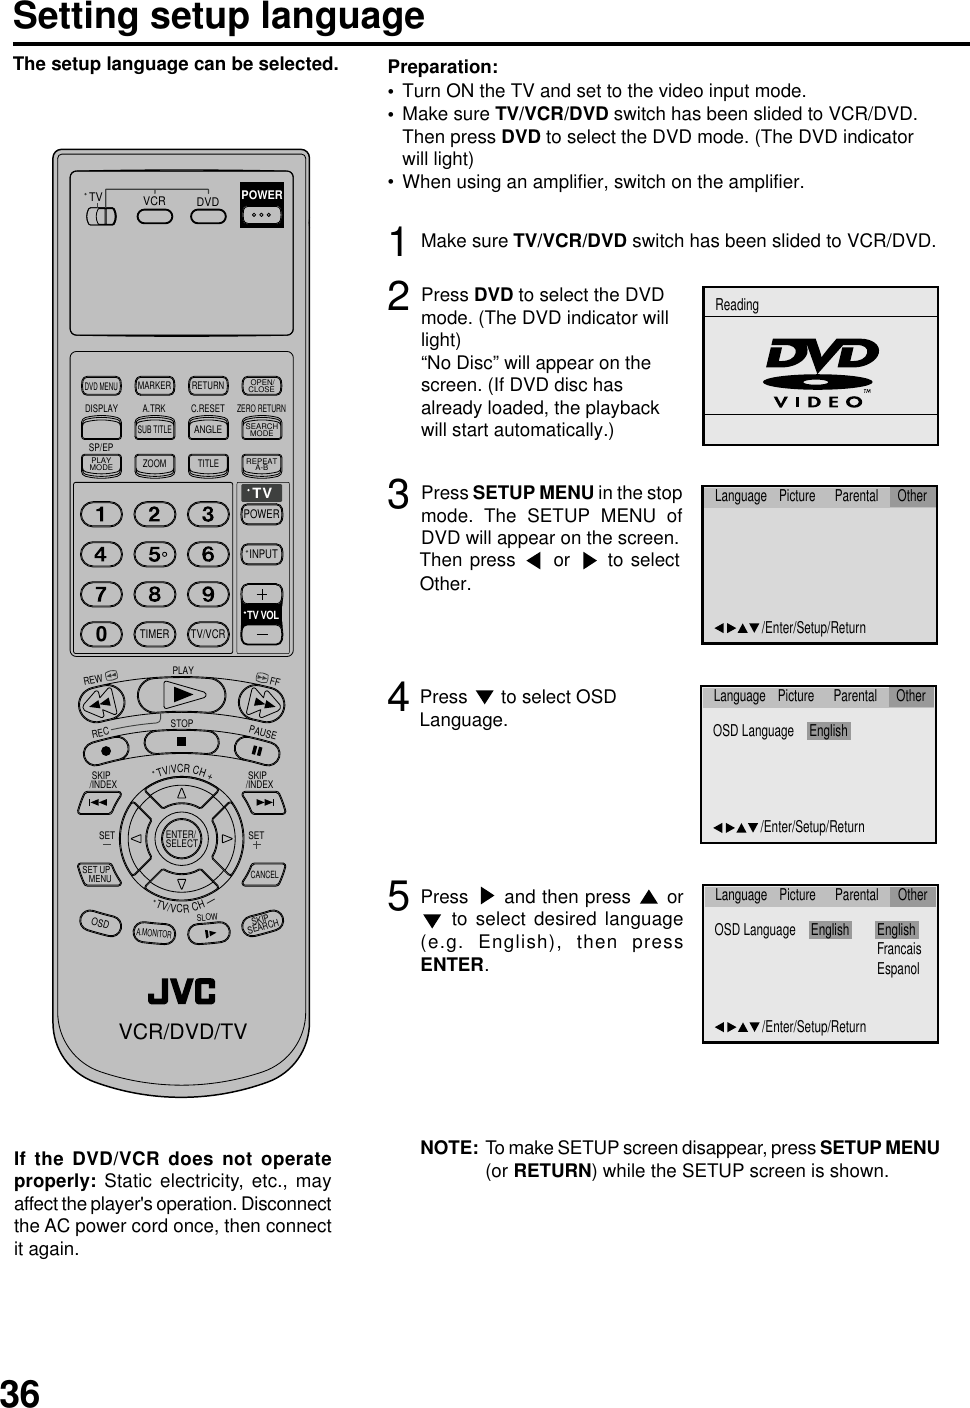
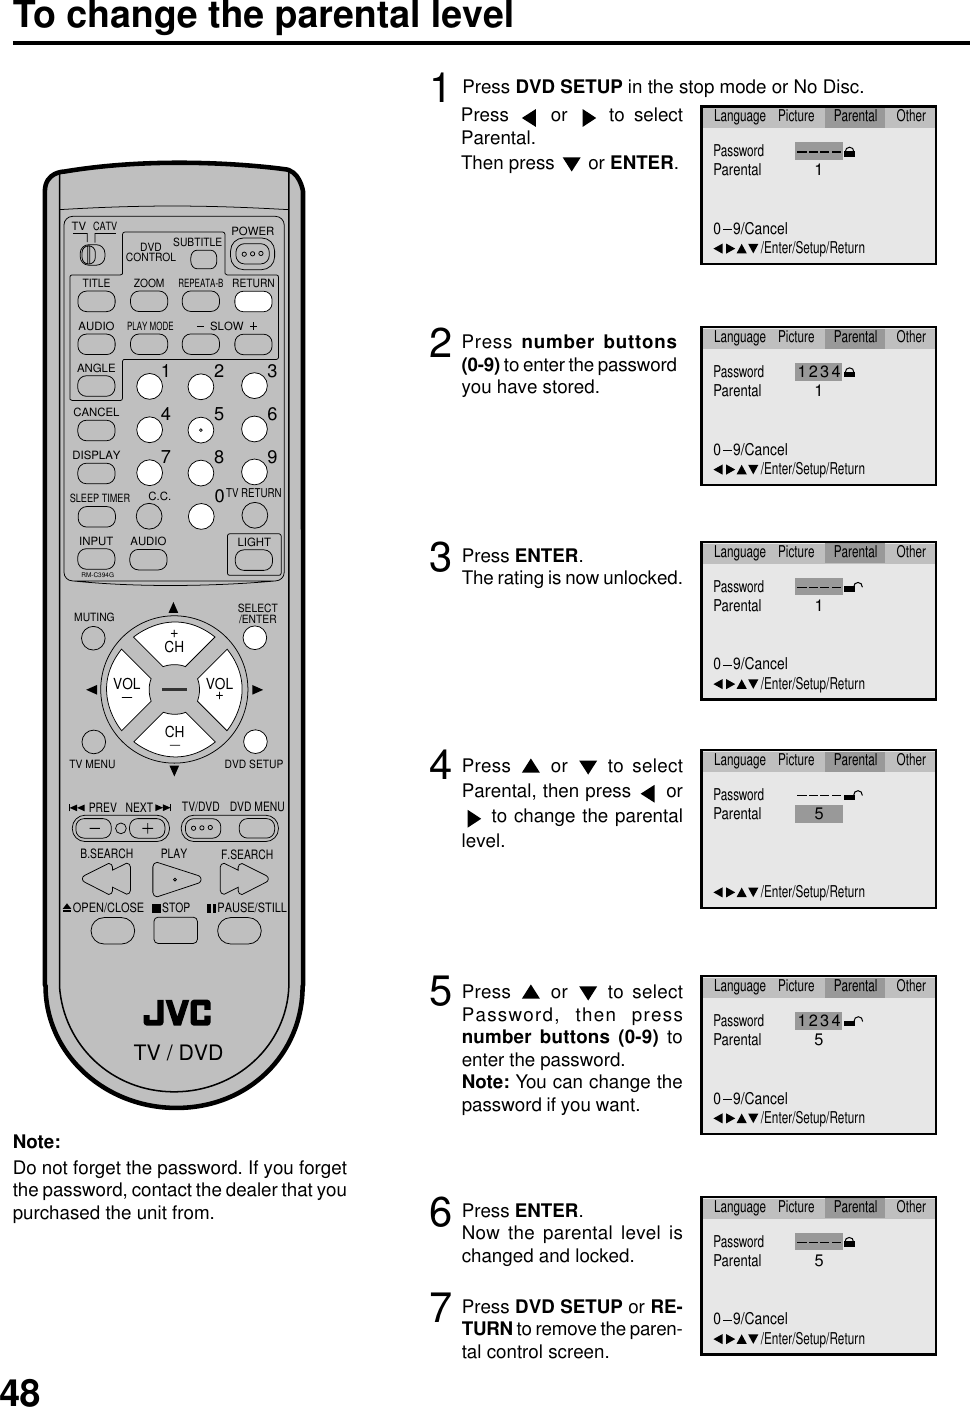
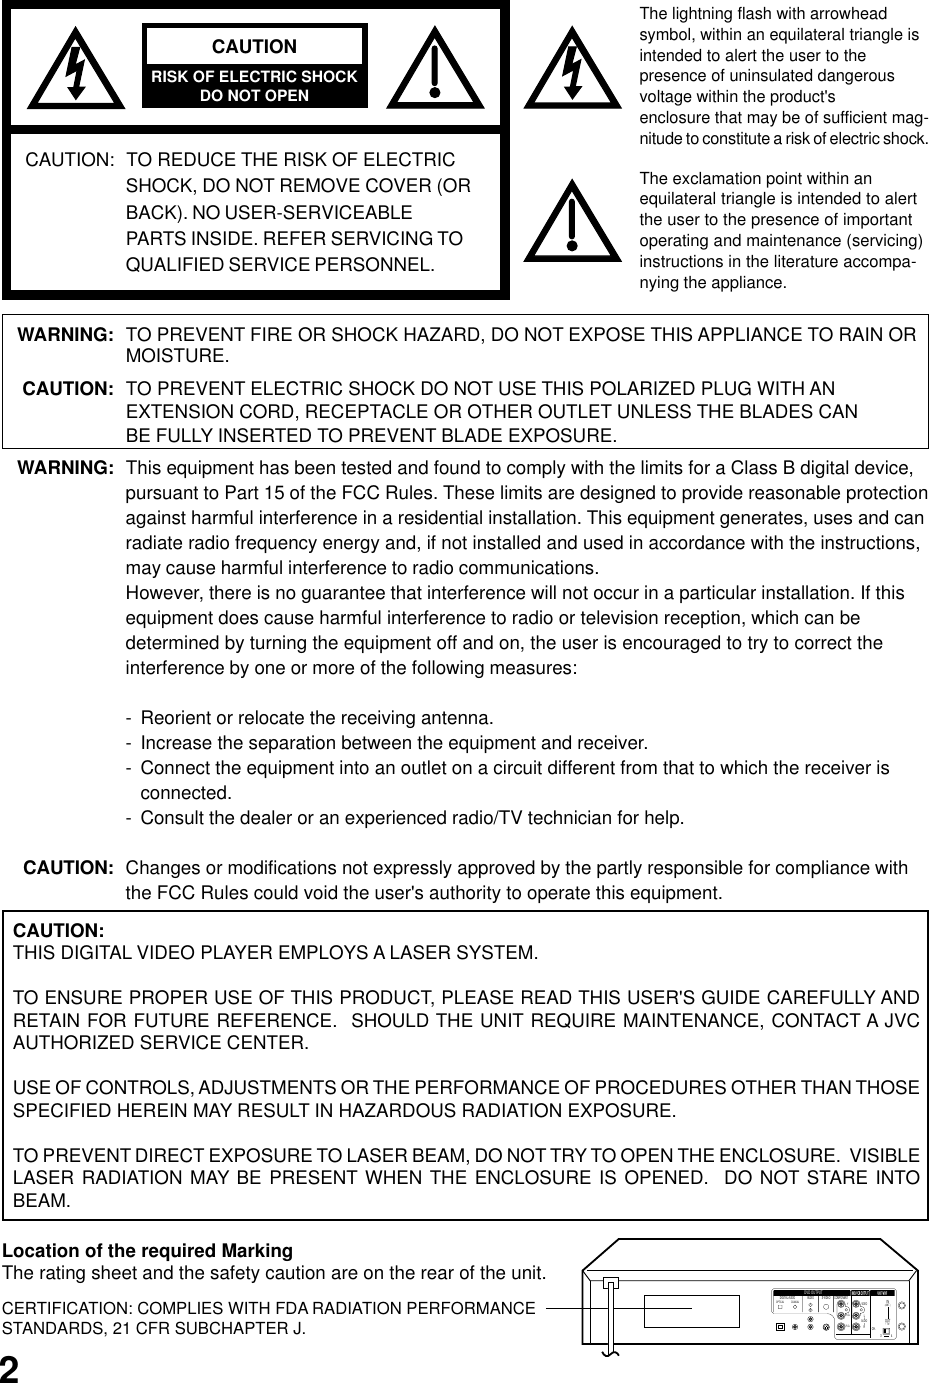
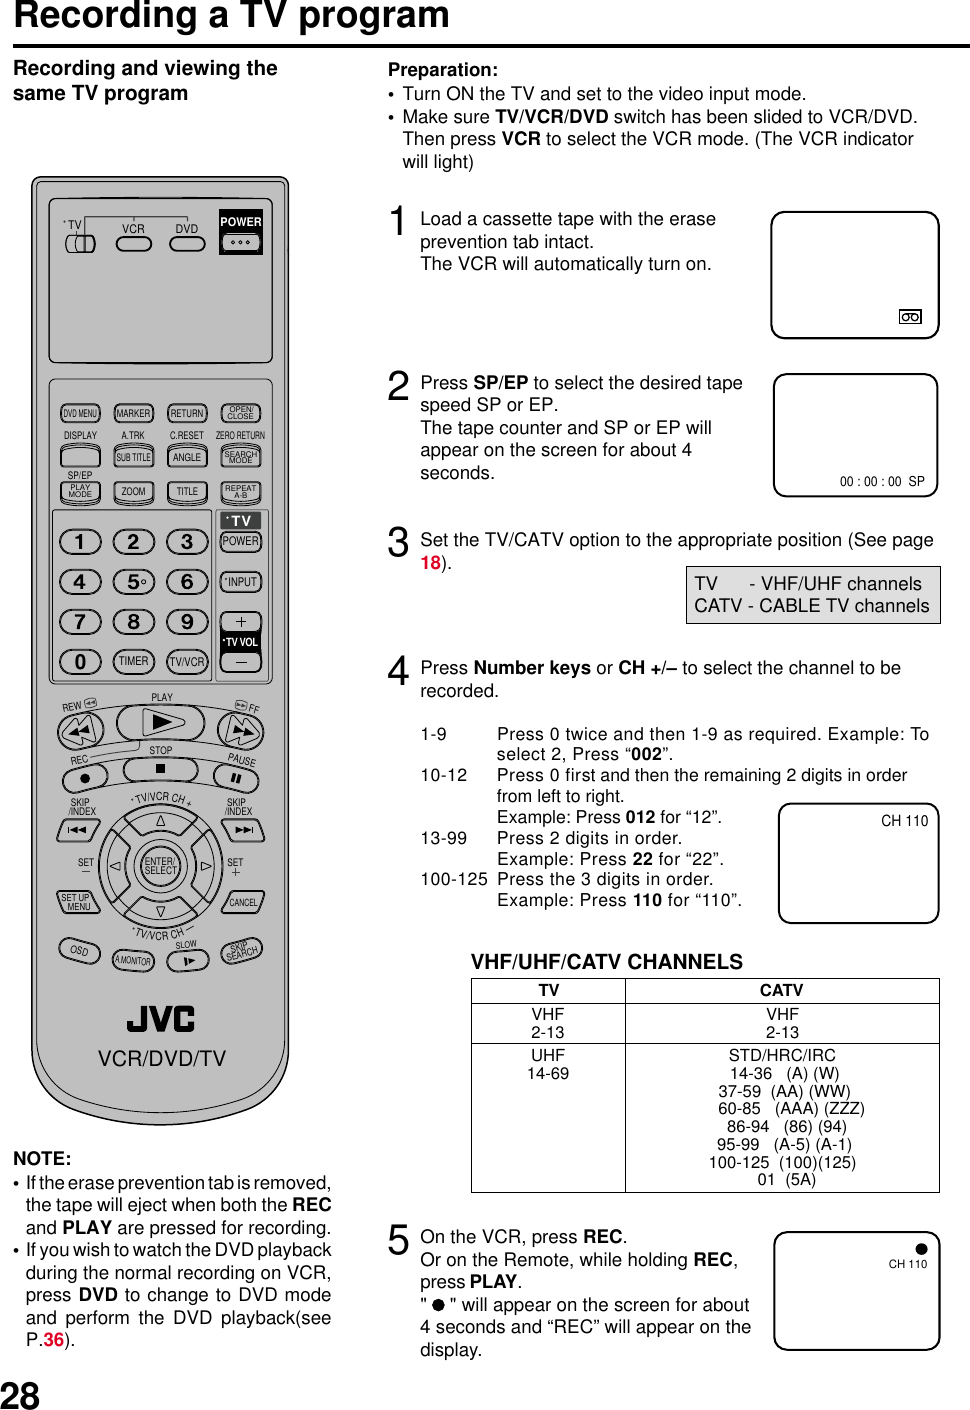
![26Adjusting tracking conditionPicture search, Still Picture, Slow Motion, Tracking and Repeat playbackReverse picture search functionPicture SearchPress x 1 or x 2 during the playback.Forward picture search functionPress x 1 or x 2 during the playback.To return to playback: Press .Still PicturePress PAUSE/STILL during playback. To resumenormal playback: Press .Slow MotionWhenever you insert a tape and start playback,automatic tracking starts working and continuouslyanalyzes the signal to enable optimum picture qualityduring playback.During playback pressSLOW.To return to playback: Press .Press PAUSE during playback.Press SLOW one by one: The picture advances frameby frameTo return to playback: Press PLAY or PAUSE.Frame by Frame pictureNote:•The audio output is muted during SPEED SEARCH,STILL, FRAME ADVANCE and SLOW MOTION.•During picture search mode there will be noise barswhich are caused by the system.•These Special Playback will automatically changeto playback after approx. 5 minutes to protect thevideo tape against excessive wear.SLOWSlow tracking and vertical lock adjustmentIf noise bars appear in the picture during slow motion,press the SET + or – to reduce the noise bars.If the still picture jitters excessively, press SET + or –to stabilize the still picture.Automatic tracking adjustmentIf automatic tracking cannot eliminate noises well duringplayback, press SET +/– to eliminate the noises.“MANUAL TR.” will appear. Press it briefly for a fineadjustment, or press and hold for a coarse adjustment.Manual tracking adjustmentRepeat playbackThe whole of the video tape will be played until its end.Then the tape will be winded until its beginning and theplayback will be repeated.1Repeat the steps 1~2 onpage 19 and selectAUTO REPEAT, .3Press SETUP MENU until the menu screen iscleared." " will appear if you press CALL.Then press ENTER toselect [ON] or [OFF].If [ON] is selected, theplayback will be repeatedendlessly.4To start the playback, press .The playback will be repeated endlessly.You can stop this playback anytime with .However the Auto Repeat is still switched on.2AUTO REPEAT [ ON]SCENE REPEATVCR EXTENSIONSELECT :ENTER : ENTERMENUEXIT :AUDIO DUBBINGAUTO REPEAT [OFF]SCENE REPEATVCR EXTENSIONSELECT :ENTER : ENTERMENUEXIT :AUDIO DUBBINGTo cancel repeat mode:Follow the above steps 1 and 2, then pressENTER to select the OFF position. Press MENUto return to the TV.Press A.TRK to reactivate automatic tracking again.“AUTO TR.” will appear.•Skip SearchEach time you press SKIP SEARCH while a tape isplaying, the unit will fast-forward ahead 30 secondson the tape. You may press the button up to six timesin a row to move 180 seconds (three minutes) ahead.1 press: 30 seconds of tape2 presses: 60 seconds of tape3 presses: 90 seconds of tapeFor example:](https://usermanual.wiki/ORION-ELECTRIC/M2A3A/User-Guide-178742-Page-26.png)
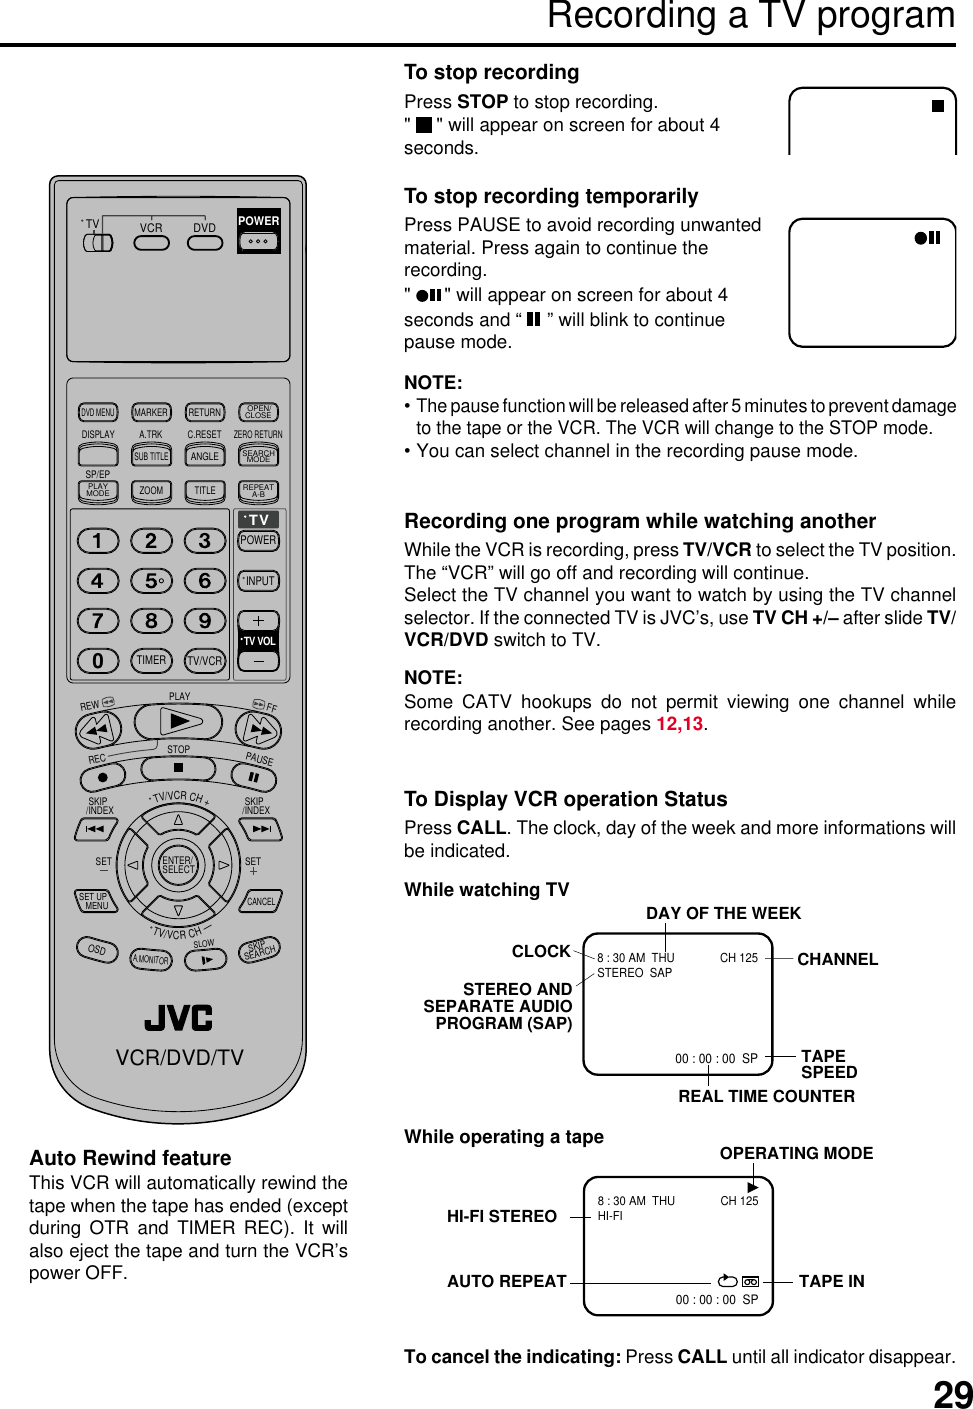
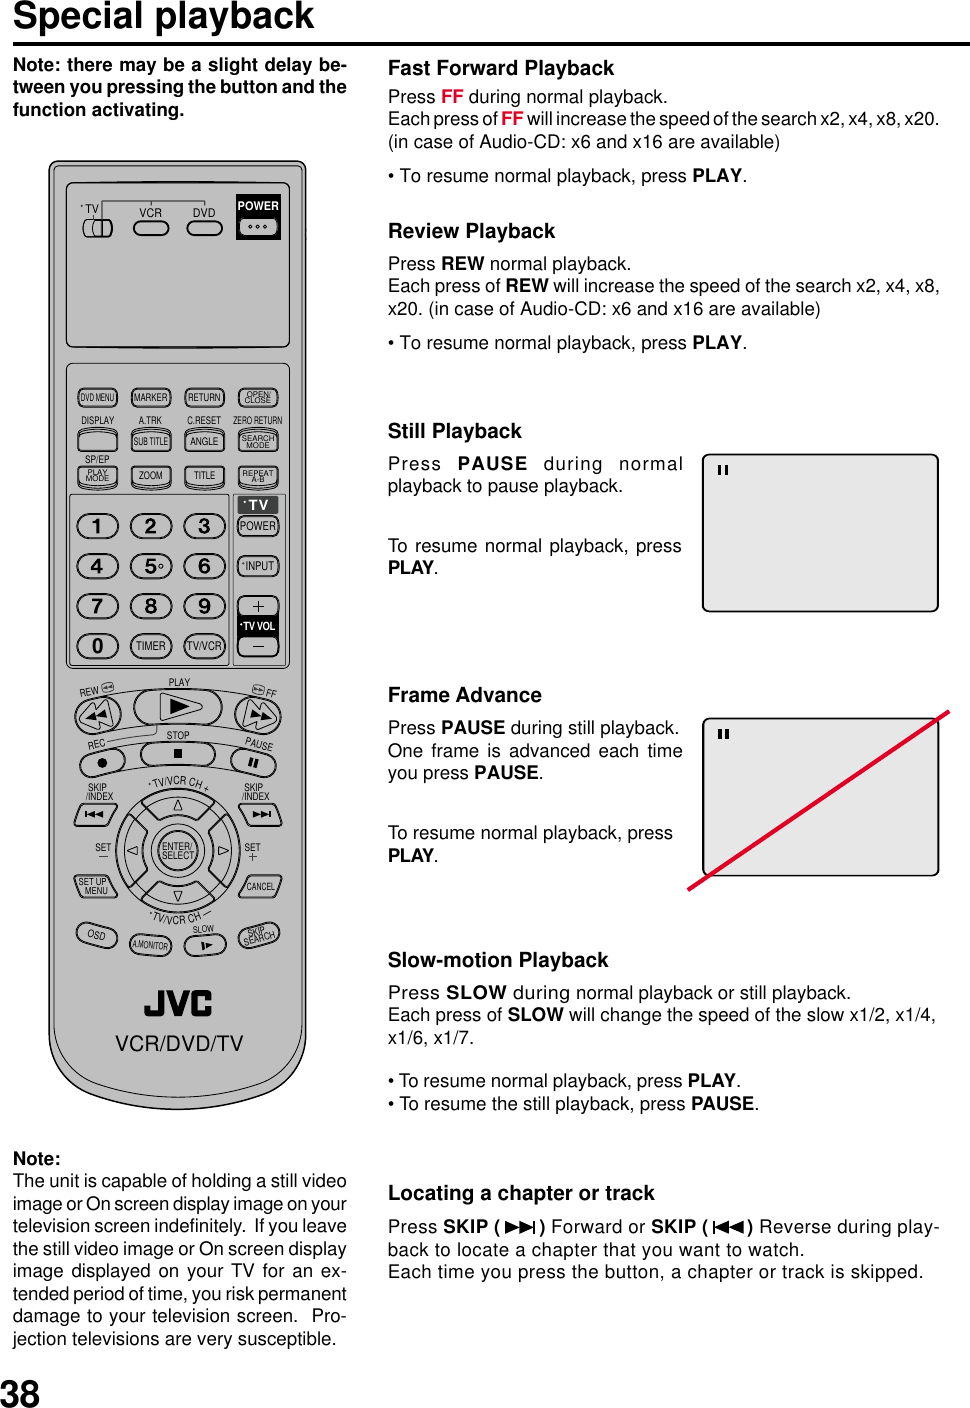
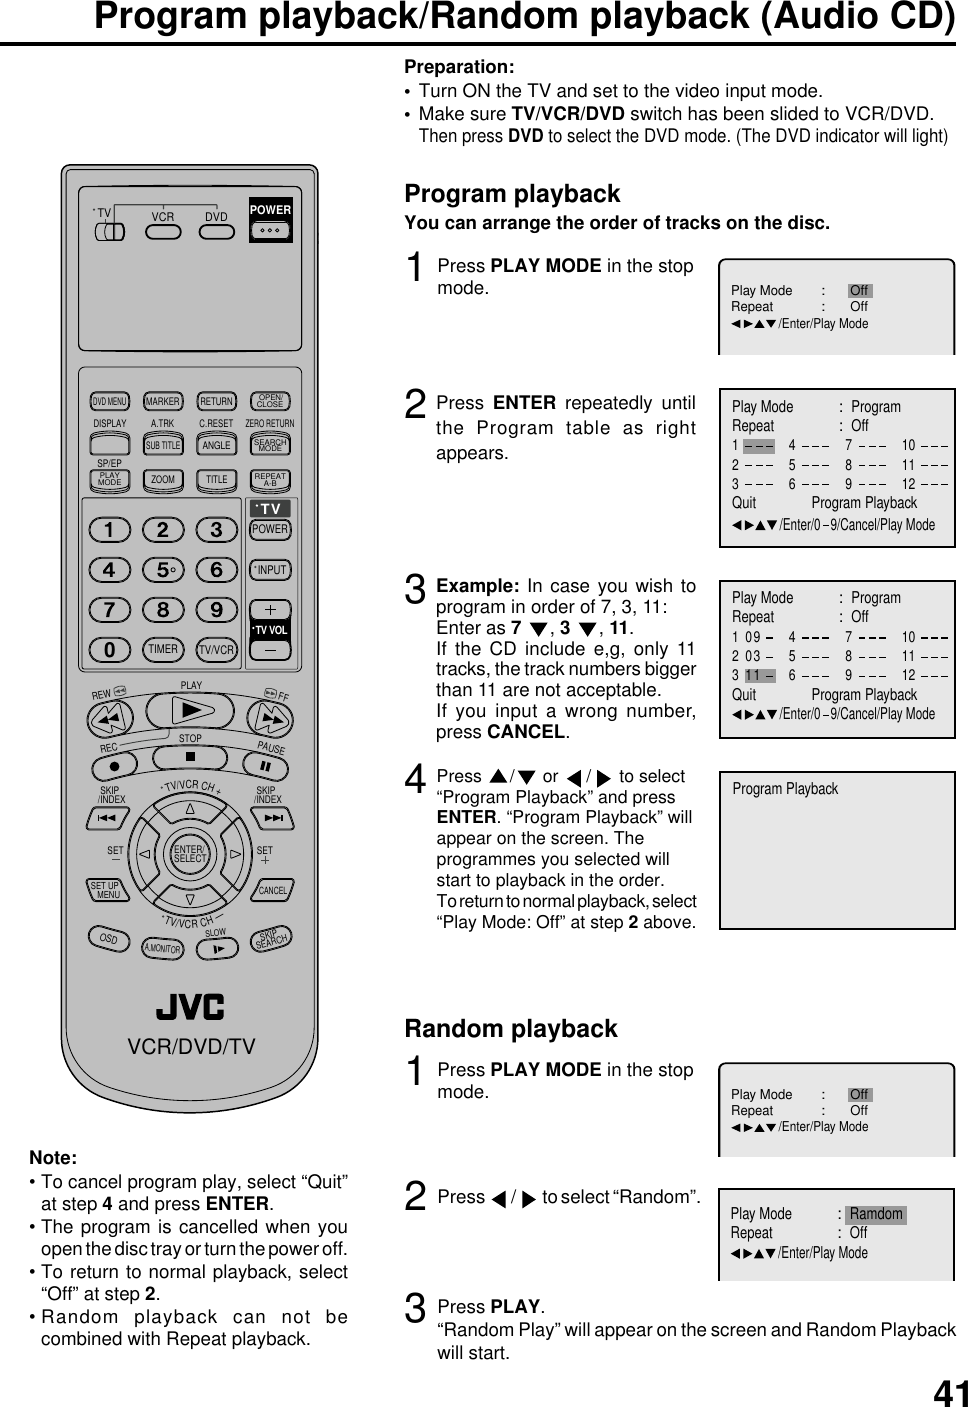
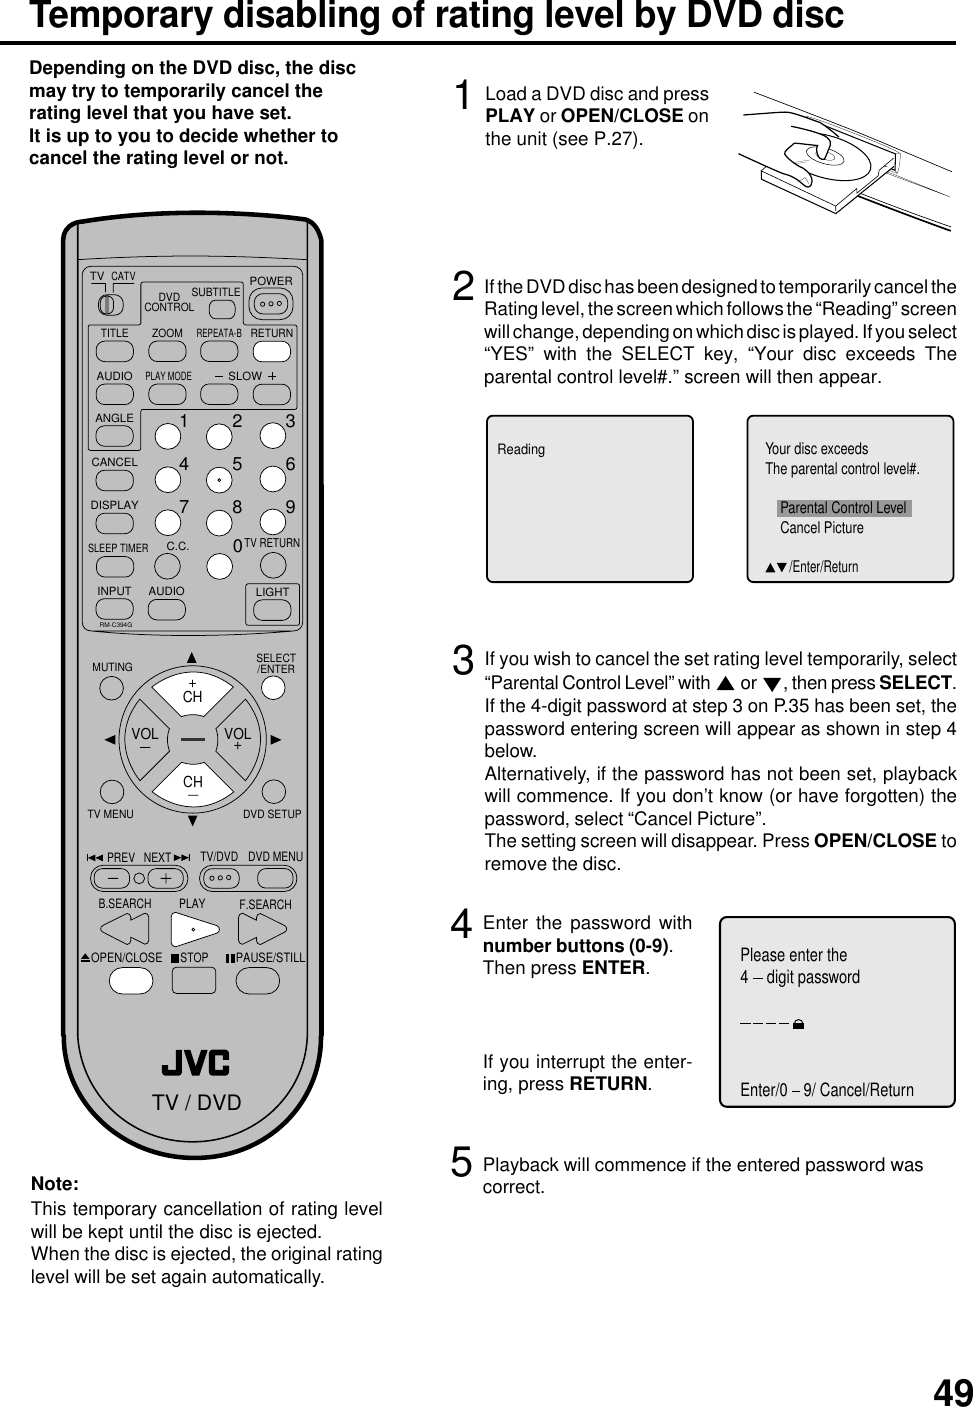
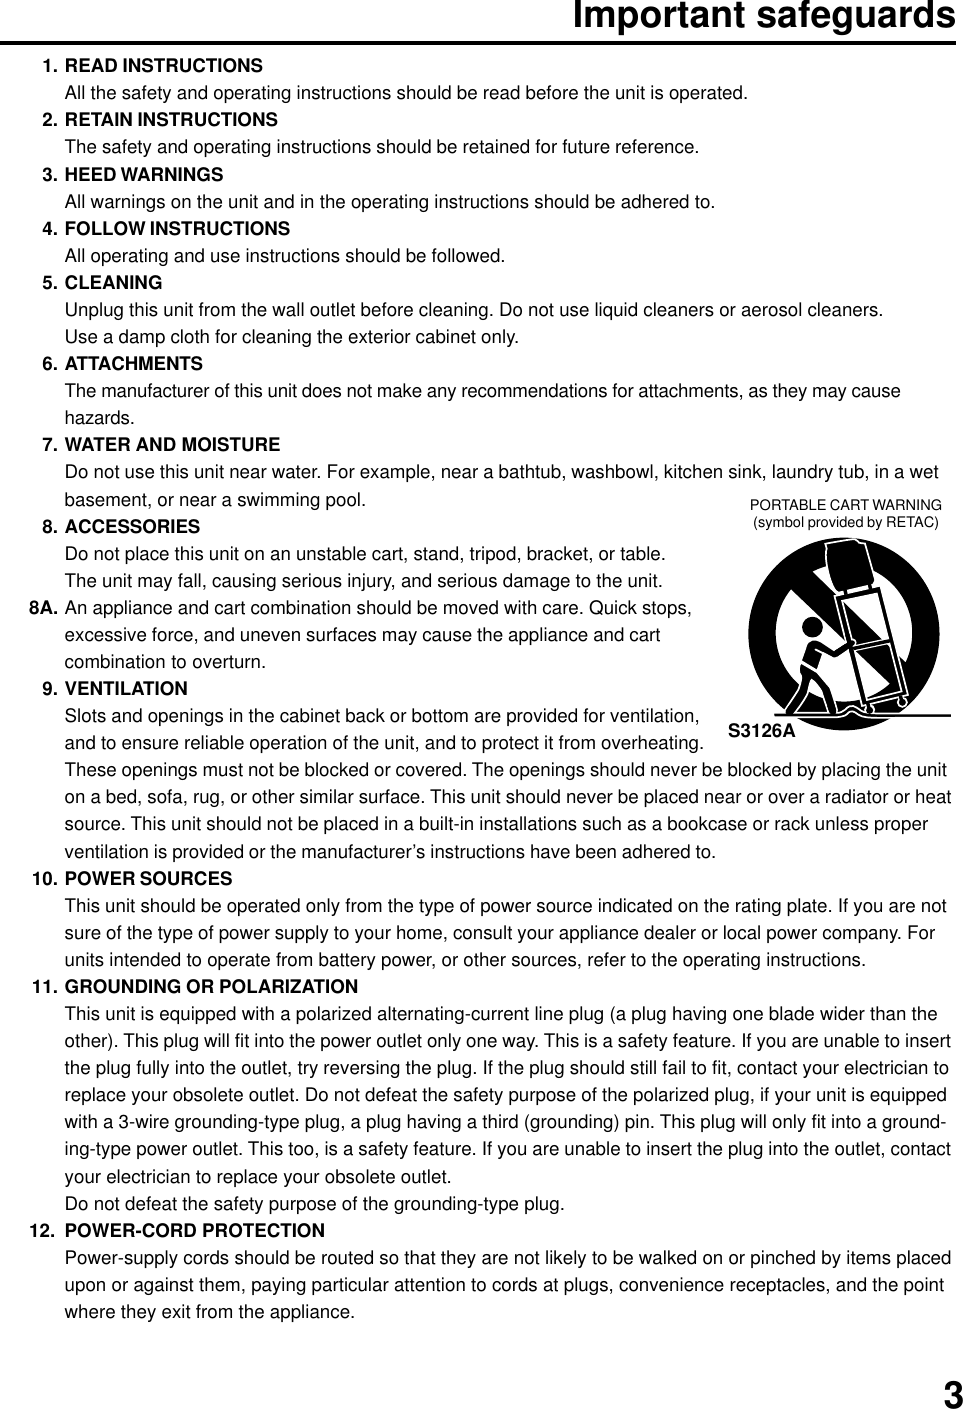
![33POWERRM-C394G123DISPLAY 789456SLEEP TIMER0TV RETURNLIGHTTVCATVPAUSE/STILLOPEN/CLOSETV / DVDRETURNAUDIOREPEATA-BCANCELSLOWZOOMTITLEAUDIOANGLESUBTITLEINPUTC.C.DVD SETUPSELECT/ENTERTV MENUMUTINGDVDCONTROLPLAY MODEPREV NEXT TV/DVD DVD MENUF.SEARCHPLAYB.SEARCHSTOP+CHVOL VOL+CHStereo Recording and Playback / Separate Audio Program (SAP)When a MTS STEREO broadcast is re-ceived, the STEREO will appear on thescreen and the program can be viewed orrecorded in stereo.The Hi-Fi STEREO recording procedure isthe same as for normal recordings.The VHS Hi-Fi audio system permits highfidelity recording of MTS STEREO TVbroadcasts.NOTE:When playing back a tape that is notrecorded in Hi-Fi stereo mode, theaudio will automatically be monaural.When listening to a VHS Hi-Fi videotape or MTS broadcast through theVHF/UHF jack (Audio/Video cord notconnected), the sound will bemonaural.Stereo Recording andPlaybackSTEREONOTE:When using a CATV system, stereo TV programs may be transmittedover a mono cable channel. In this case the word "STEREO" will notappear and the sound will be in mono.When viewing an MTS STEREO TV program, or playing a prerecordedVHS Hi-Fi STEREO videotape, press A. MONITOR to select how theaudio will be heard through the speakers. Normally set to the Hi-FiSTEREO position, this button can be set to the MONO position if thestereo broadcast or videotape audio is of poor quality. The "R" and "L"positions allow the audio from the Right or Left Hi-Fi channel to be heardover both TV speakers. This button has no effect when viewing a MONOvideotape or TV program. Each time when you press the button, OUTPUTSELECTION display appears on the screen for several seconds. Referto the chart below.Output selectionOUTPUTSELECTIONSTEREOL CHR CHMONOSOUND HEARD ON BOTHSPEAKERSSTEREOLEFT CHANNEL AUDIORIGHT CHANNEL AUDIOMONOYour VCR is fitted with an SAP broadcast system which enablesyou to switch to a separate audio program when viewing aselected channel.This function applies only when the program is broadcast inmulti-languages through the SAP broadcast system.Separate Audio Program (SAP)Repeat the steps 1~2 on page 19 and select SAP.12Then press ENTER to select [ON].Then press SETUP MENU untilthe menu screen is cleared.⟨+/–/ENTER/MENU⟩MENUCLOCK SETTIMER REC SET ON OFFON OFFAUTO REPEATCH SET UPSAPLANGUAGE/IDIOMA/LANGUE ON OFFNO NOISE BACKGROUNDWhen the VCR is turned on or a channel selection is made, makecertain "SAP" appears on the screen. This means that the "SeparateAudio Program" broadcasting is available.Listening to SAPSTEREO SAPSAPOR••](https://usermanual.wiki/ORION-ELECTRIC/M2A3A/User-Guide-178742-Page-33.png)