ORION ELECTRIC M2E5D VCR/DVD TV Interface Device User Manual VRB1362A 01 cover pm6
ORION ELECTRIC CO., LTD. VCR/DVD TV Interface Device VRB1362A 01 cover pm6
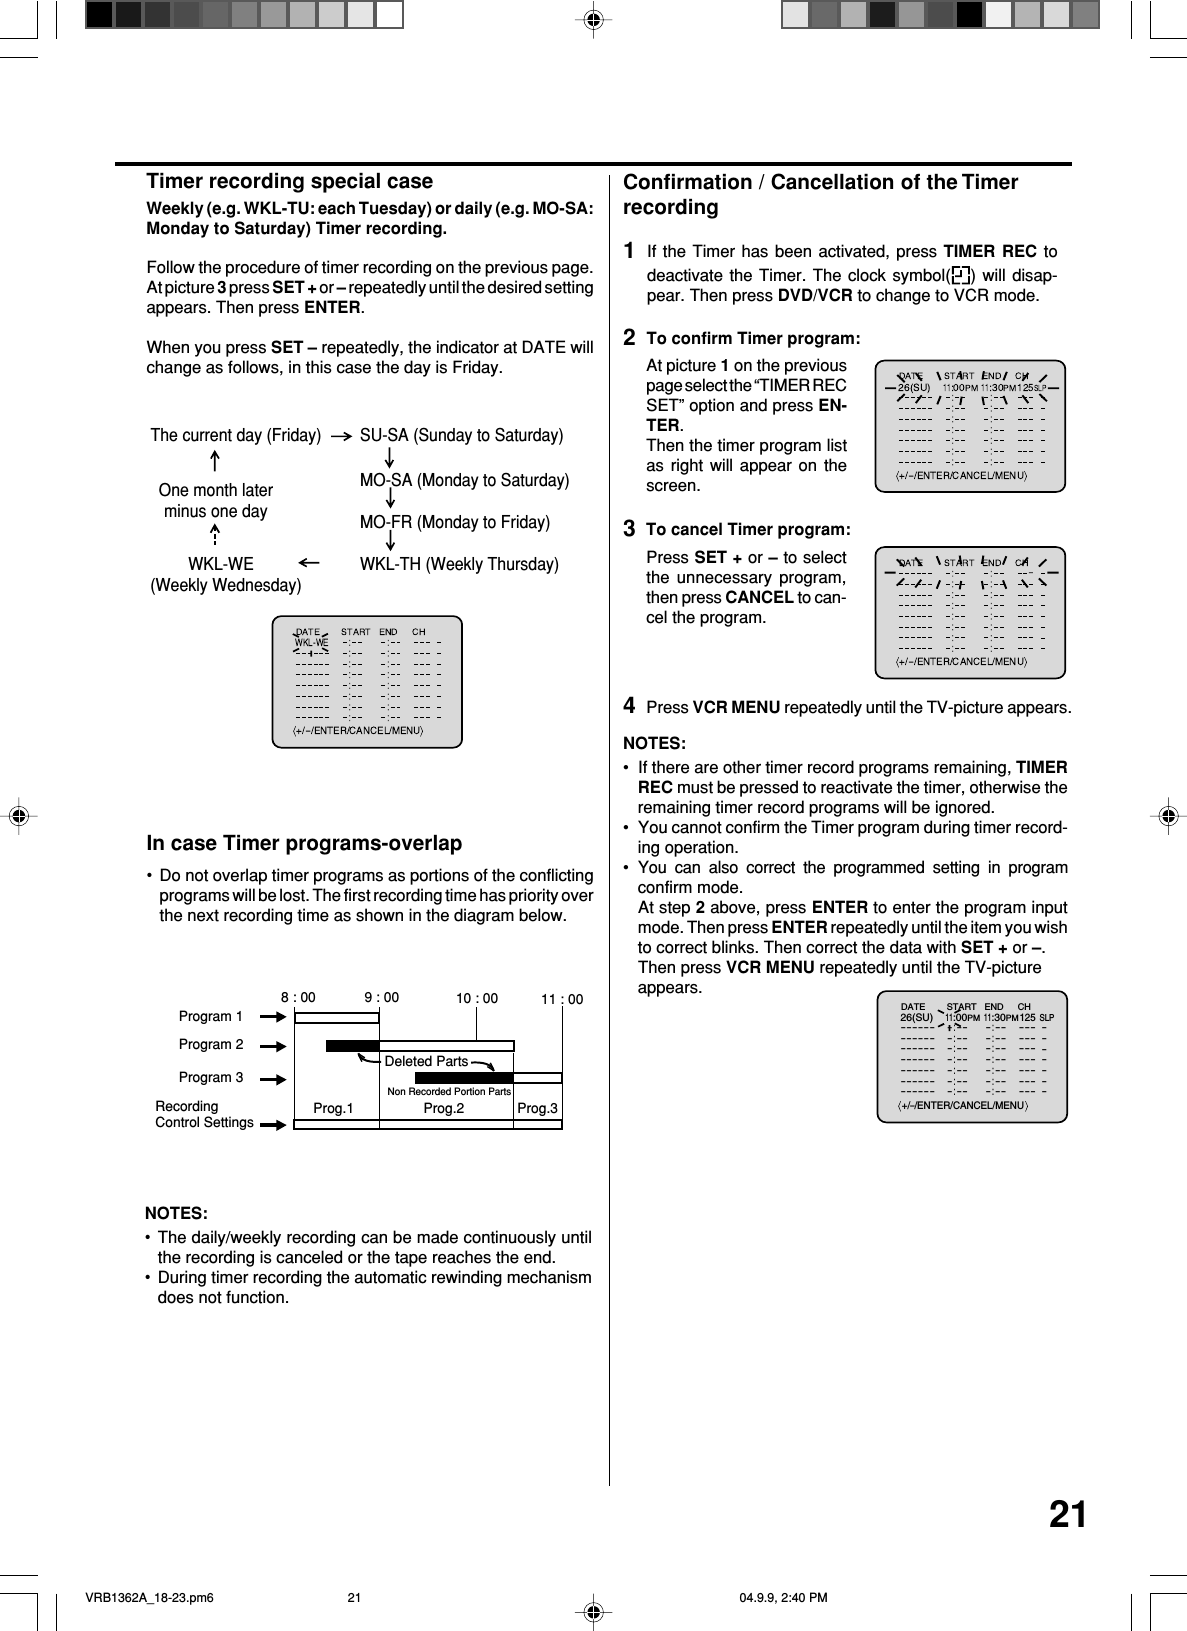
UserManual.wiki
>
ORION ELECTRIC
>
M2E5D User Manual
Users Manual
Navigation menu
Upload a User Manual
Namespaces
Wiki Guide
HTML
PDF
Info
Views
User Manual
Discussion / Help
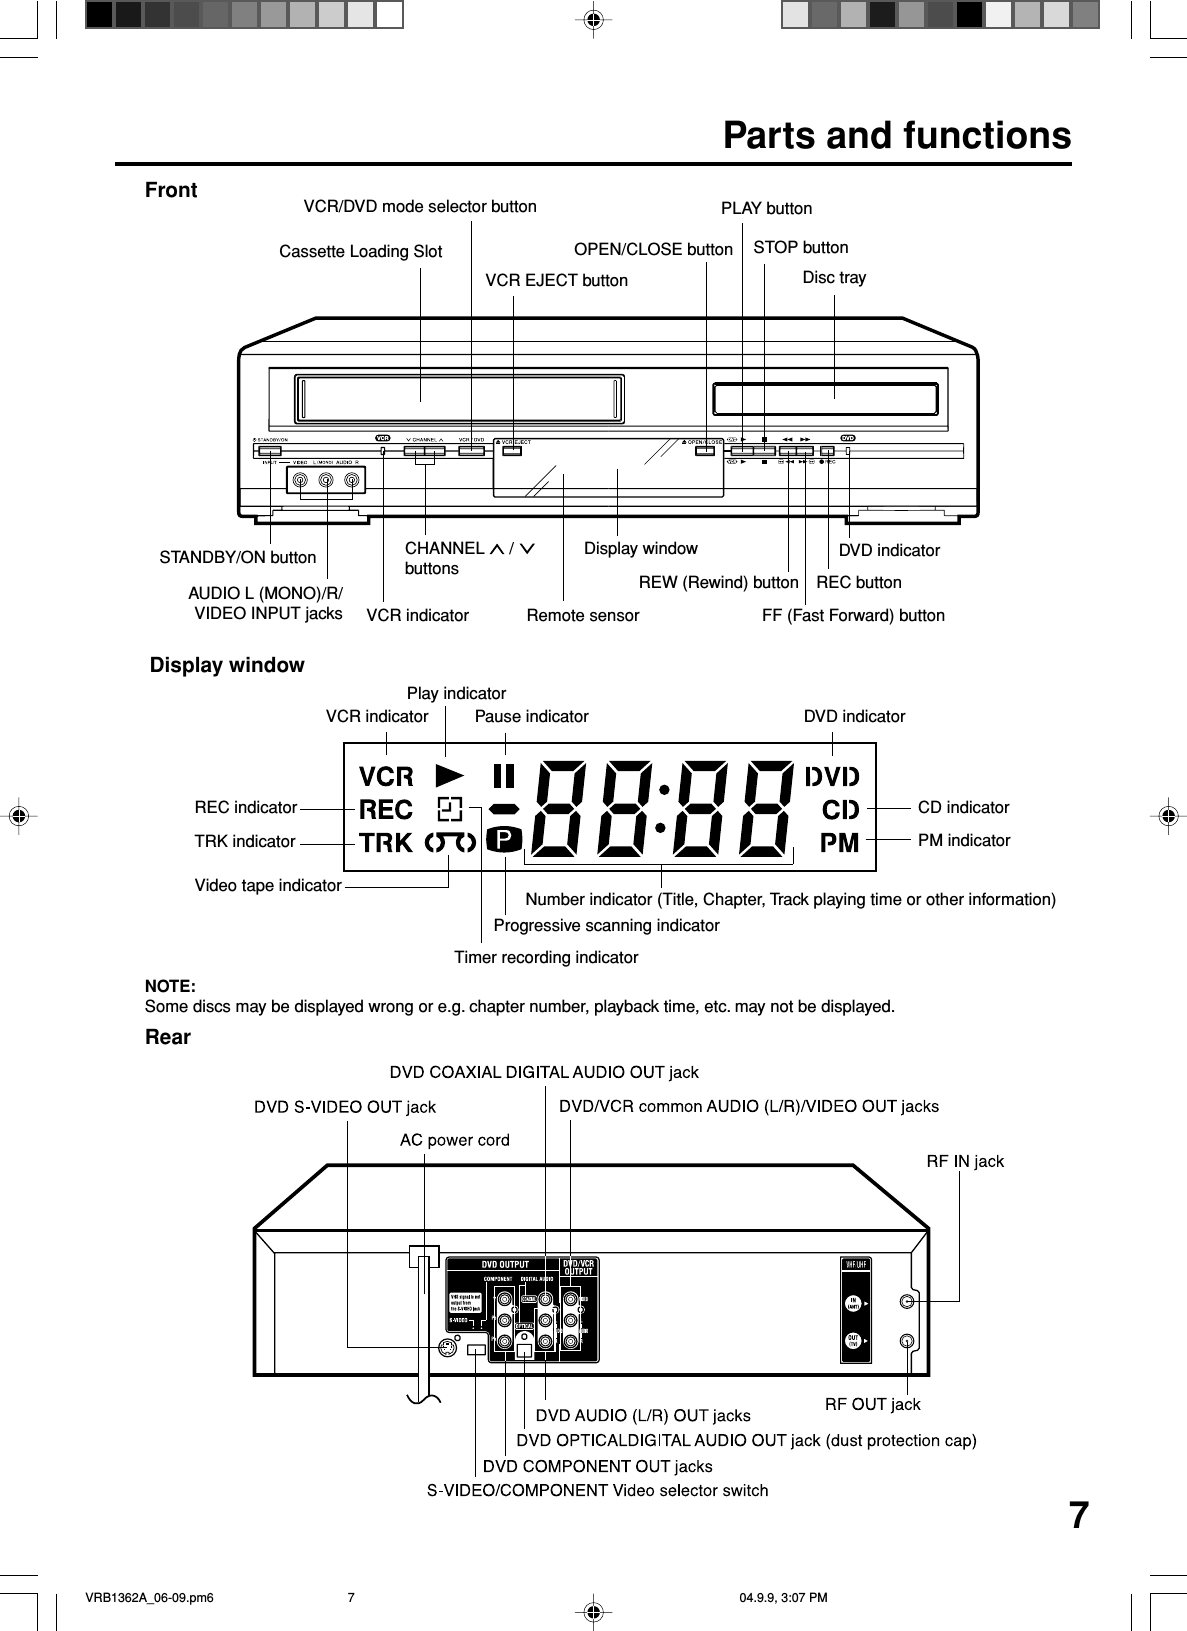
Navigation
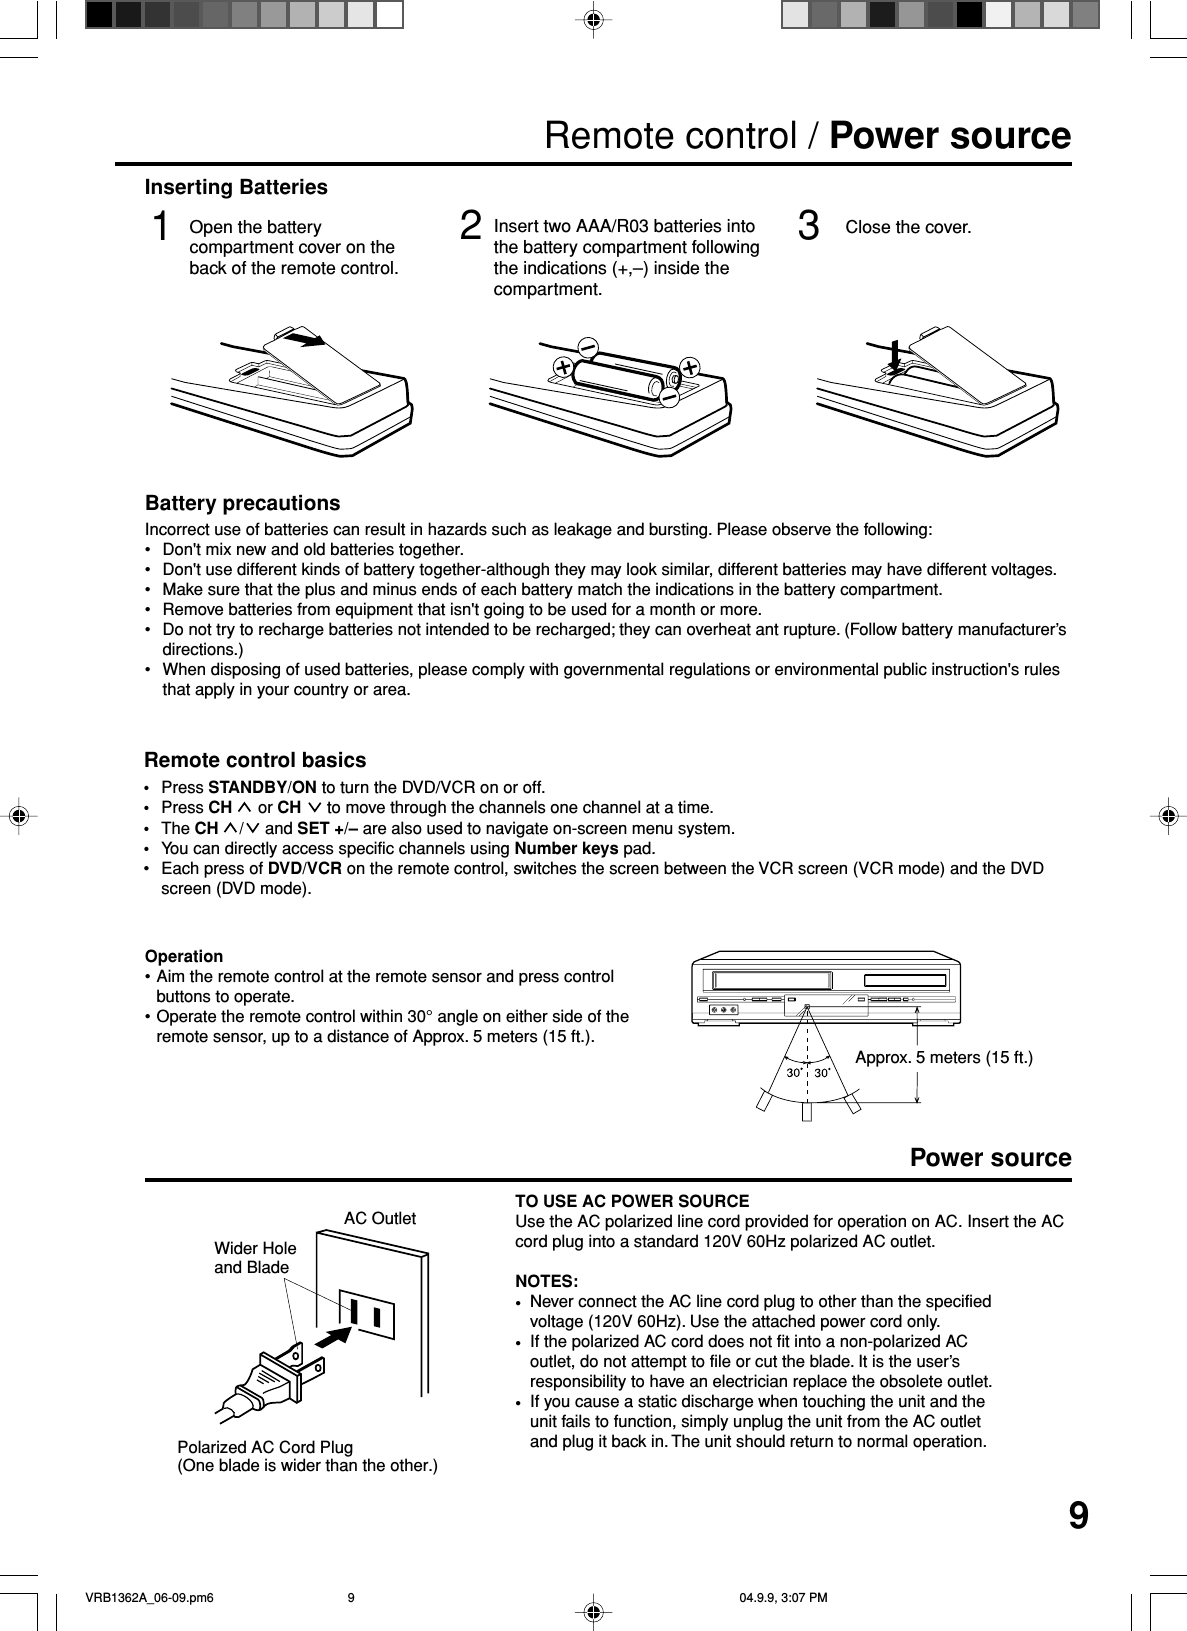
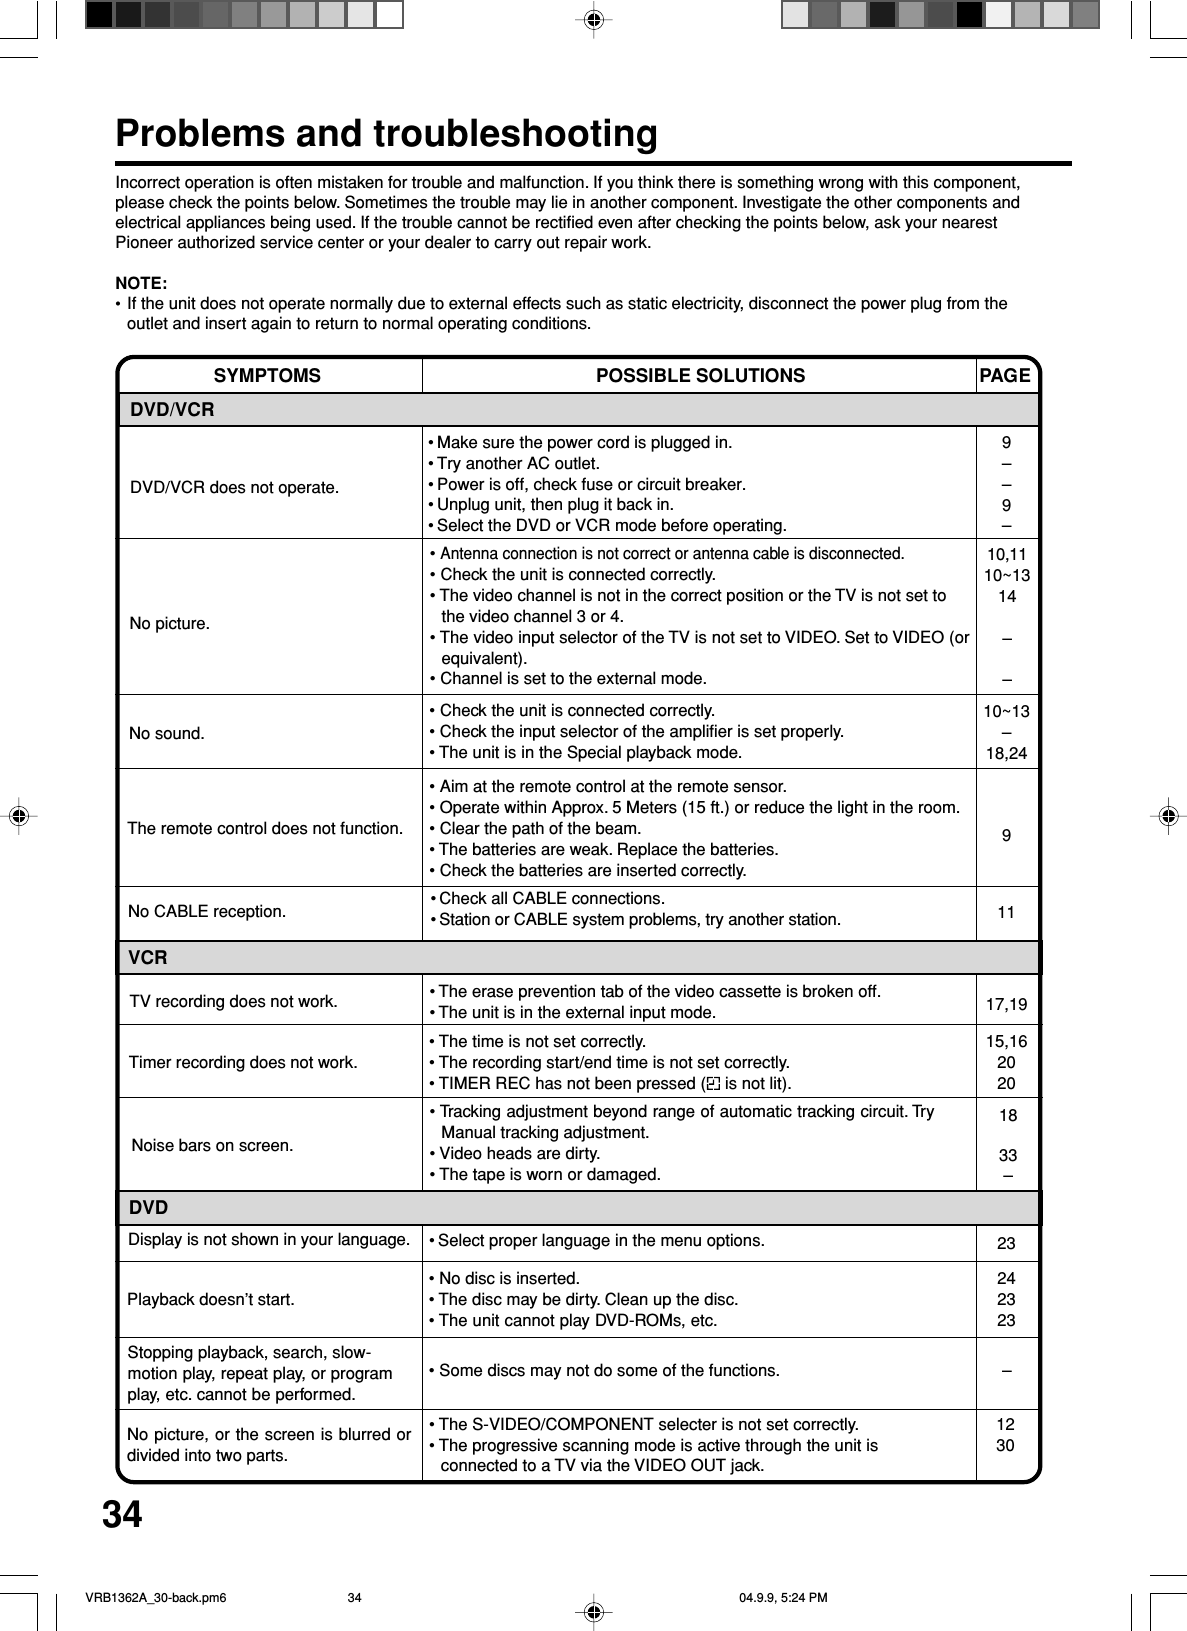
![8Remote controlSTANDBY/ON [9]VCR EJECT [17]0 – 9 [16]SETUP [23]VCR MENU [14]CH / [9]TRK/SET + / – [14]Cursor Buttons [15]DVD MENU [26]STOP [17] [24]SKIP [24]INDEX + / – [18]ZOOM [24]MARKER [25]AUDIO [25]AUDIO SELECT [22]SUBTITLE [25]ATR [18]REC [19]JUMP [25]ZERO RETURN [18]DVD OPEN/CLOSE [24]DVD/VCR [9]TIMER REC [20]INPUT SELECT [22]PROGRESSIVE [30]DISPLAY [15] [25]RETURN [23]TOP MENU [26]ENTER [14]CANCEL [21]PLAY [17] [24]PAUSE/STILL [18] [24]SEARCH + / – [17] [24]REPEAT A-B [26]SLOW [18] [24]ANGLE [26]COUNTER RESET [18]CLOCK/COUNTER [18]TV/VCR [14]PLAY MODE [26]SPEED [19]VRB1362A_06-09.pm6 04.9.9, 3:07 PM8](https://usermanual.wiki/ORION-ELECTRIC/M2E5D/User-Guide-474847-Page-8.png)