ORION ELECTRIC M2H5A DVD/VCR TV Interface Device User Manual Part 2
ORION ELECTRIC CO., LTD. DVD/VCR TV Interface Device Users Manual Part 2
Contents
- 1. Users Manual Part 1
- 2. Users Manual Part 2
Users Manual Part 2

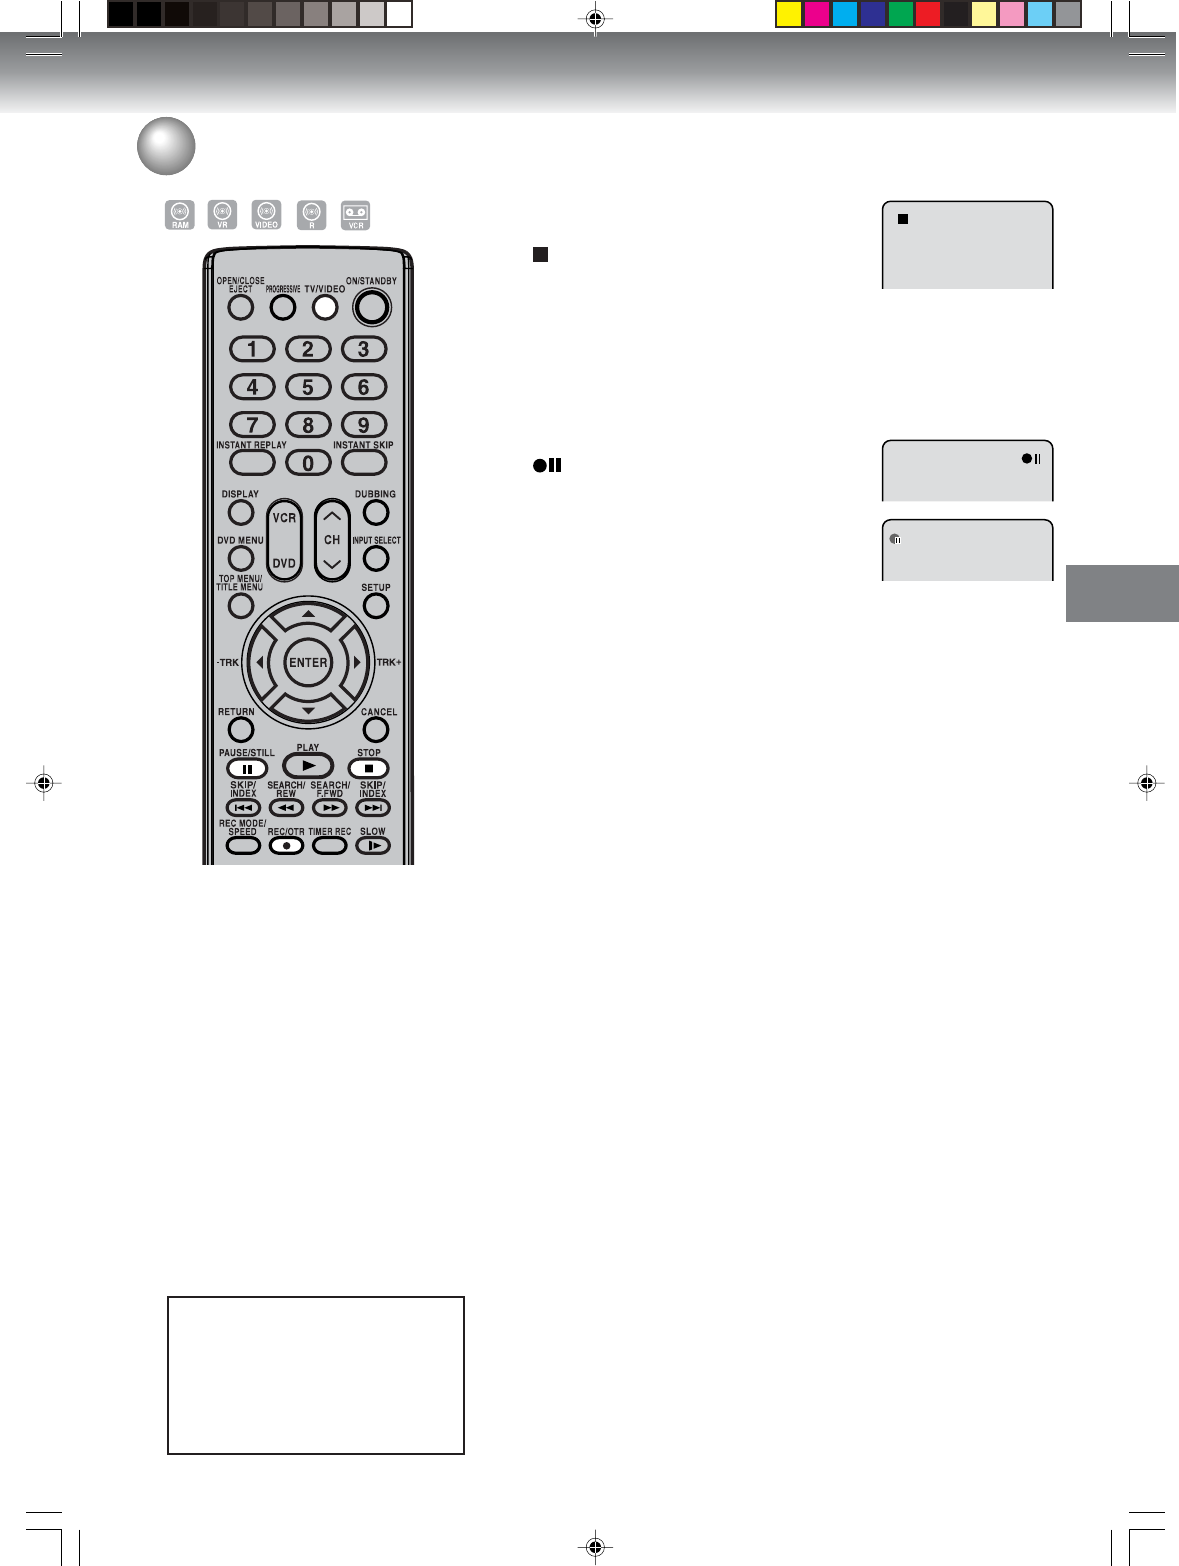
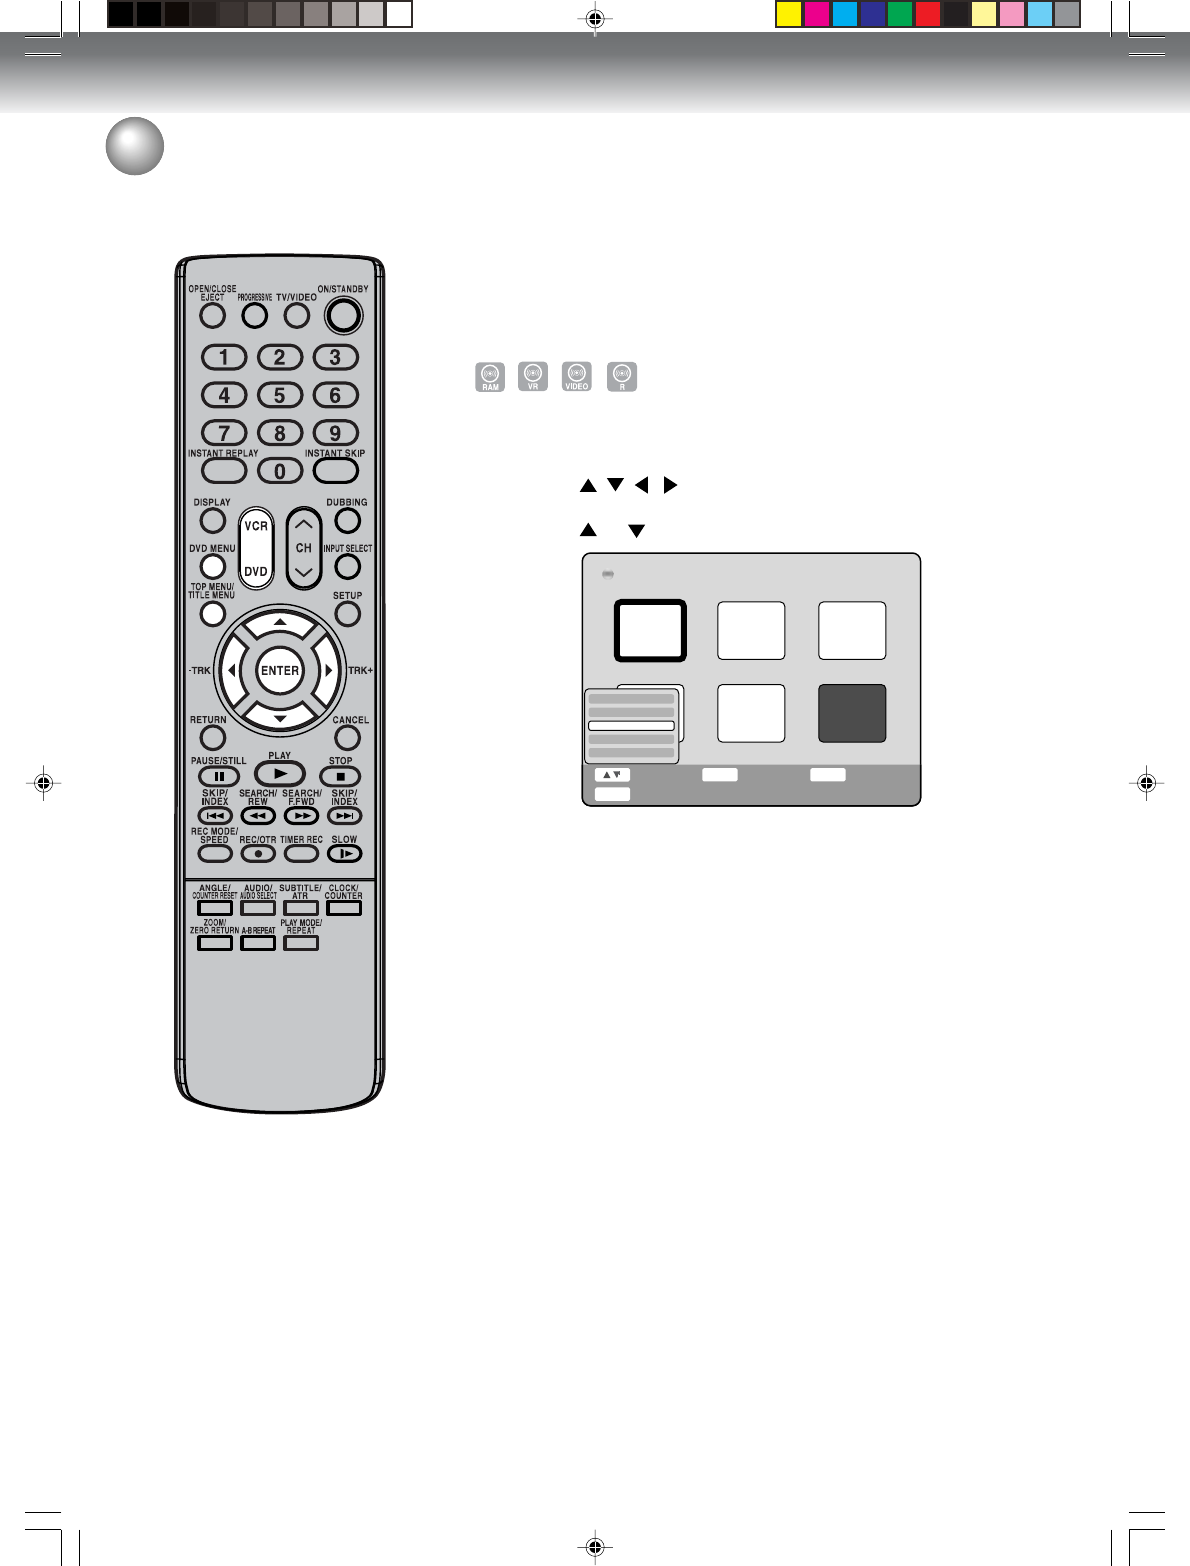
Recording
51
Read this before recording on disc
Images that cannot be recorded
Some DVD-Video and broadcasts contain copy-restriction signals to
protect copyrights. There are 3 types of copy-restriction signals: “Copy
Free”, “Copy Never” and “Copy Once”.
“Copy Free” (unrestricted recording)
Land-based TV broadcasts and images you record yourself with a video
camera allow unrestricted recording. There are no restrictions on re-
cording.
“Copy Never” (recording prohibited)
• Images that contain the recording prohibited signal cannot be re-
corded.
• If the recording prohibited signal appears halfway through an image
you are recording, recording is paused at that instant. When the re-
cording prohibited signal ends, recording resumes.
• This unit incorporates a built-in copy guard. It cannot record soft-
ware or broadcasted programs that contain copy restriction signals
designed to protect copyright, etc.
“Copy Once” (one-time recordable)
Programs (images) that contain the one-time recordable signal can be
recorded only in the VR mode using a DVD-RW disc that supports
CPRM Ver. 1.1 and Ver 1.2.
The unauthorized recording, use,
distribution, or revision of television
programs, videotapes, DVDs and
other materials, is prohibited under
the Copyright Laws of the United
States and other countries, and
may subject you to civil and/or
criminal liability.
2H5-01 P45-52 7/20/05, 20:5351

Recording
52
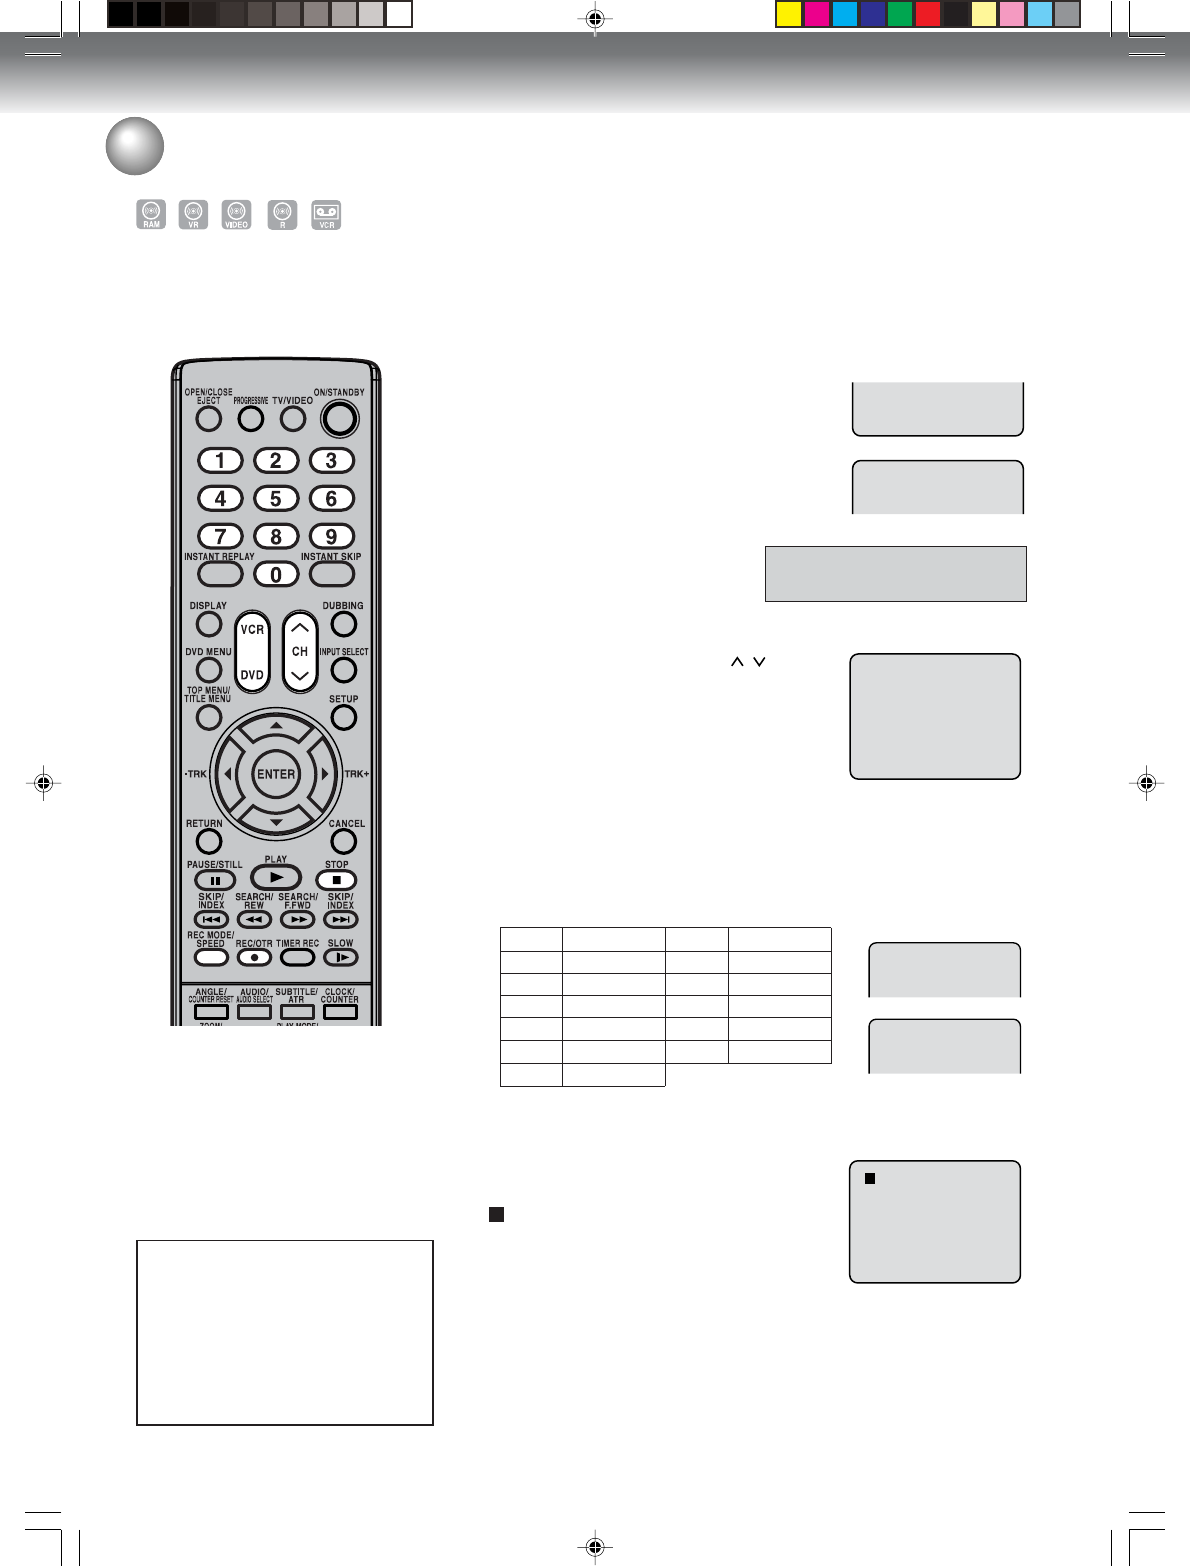
Recording a TV program
Preparation:
• Turn ON the TV and set it to the video input mode.
• Load a recordable DVD or video tape into the unit.
• Press DVD or VCR to select the appropriate mode.
1Press REC MODE/SPEED to select the re-
cording mode.
The recording mode will appear on the TV
monitor and change every time REC
MODE/SPEED is pressed.
VCR recording modes: SP/SLP
DVD recording modes: XP/SP/LP/SLP
SP is the normal recording mode for video tapes. SLP offers 3
times the recording time as SP. For more information on DVD re-
cording modes, see page 50.
2Set the TV/CABLE option to the appropriate position (page 25).
3Press the numeric keys or CH / to select the channel to be
recorded.
TO SELECT Cable TV CHANNELS:
1-9 Press 0twice and then 1-9 as required.
Example: To select 2, Press “002”.
10-12 Press 0 first and then the remaining 2 digits in order
from left to right.
Example: Press 012 for “12”.
13-99 Press 2 digits in order.
Example: Press 22 for “22”.
100-125 Press the 3 digits in order.
Example: Press 110 for “110”.
TO SELECT TV CHANNELS 1-12:
If only 1 or 2 buttons are pressed, the corresponding channel will
be selected in 2 seconds.
VHF/UHF/CABLE CHANNELS
4Press REC/OTR.
“” appears on the screen for about 4
seconds and recording will start.
NOTES:
• When recording onto a DVD, it
takes some time to start recording
when you press REC/OTR.
Recording starts when you press
REC/OTR to record onto a video-
tape.
• If the erase prevention tab of video
tapes is removed, the tape will
eject when REC/OTR is pressed
for recording.
You can record programs you
watch on TV onto video tapes or
DVDs.
00 : 00 : 00 SP
SP
DVD mode
VCR mode
CH 110
CH 110
VCR mode
DVD mode
The unauthorized recording, use,
distribution, or revision of television
programs, videotapes, DVDs and
other materials, is prohibited under
the Copyright Laws of the United
States and other countries, and
may subject you to civil and/or
criminal liability.
TV
VHF
2-13
UHF
14-69
CABLE
VHF
2-13
STD/HRC/IRC
14-36 (A) (W)
37-59 (AA) (WW)
60-85 (AAA) (ZZZ)
86-94 (86) (94)
95-99 (A-5) (A-1)
100-125 (100)(125)
01 (5A)
TV - VHF/UHF channels
CABLE - CABLE TV channels
2H5-01 P45-52 7/20/05, 20:5352
Recording
53
Recording a TV program
To stop recording
Press STOP to stop recording.
“” will appear on the screen for about 4
seconds.
NOTE:
Recording does not stop instantly even if STOP is pressed during DVD
recording. Recording may continue for as long as 1 minute maximum.
To stop recording temporarily
Press PAUSE/STILL to avoid recording
unwanted material.
“” will appear on screen for about 4 sec-
onds.
Press REC/OTR to resume recording.
NOTES:
• In DVD recording, the pause function will be released after 5 min-
utes to prevent damage. The unit will change to the STOP mode.
• When recording onto a video tape, you can select a recording chan-
nel in the recording pause mode. (You cannot change a recording
channel in the DVD recording pause mode.)
Recording one program while watching another
While the unit is recording, press TV/VIDEO to select the TV position.
The “TV” will light up on the display window and recording will continue.
Select the TV channel you want to watch by using the TV channel
selector.
NOTE:
Some CABLE hookups do not permit viewing one channel while re-
cording another. See pages 18 and 19.
Auto Rewind feature
This VCR will automatically rewind
the tape when the tape has ended
(except during OTR and TIMER
REC). It will also eject the tape.
VCR mode
DVD mode
NOTES:
• If the disc space become full, the
recording is stopped and “No
space on the disc.” will appear on
the screen.
• In case of a power failure, the pro-
gram cannot be recorded on the
disc during DVD recording.
When the power resumes, after the
VCR/DVD is turned on, the set
checks the disc to repair the error
which is caused by a power
failure. This checking process may
require about 1 minute depending
on disc condition.
The unauthorized recording, use,
distribution, or revision of television
programs, videotapes, DVDs and
other materials, is prohibited under
the Copyright Laws of the United
States and other countries, and
may subject you to civil and/or
criminal liability.
2H5-01 P53-59 7/20/05, 20:5353
Recording
54
One-touch Timer Recording (OTR)
The One-touch Timer Recording
feature provides a simple and con-
venient way to make a timed re-
cording.
00 : 00 : 00 SP
SP
DVD mode
VCR mode
CH 110
CH 110
OTR 0 : 30
OTR 0 : 30
VCR mode
DVD mode
Preparation:
• Turn ON the TV and set to the video input mode.
• Load a recordable DVD or video tape into the unit.
• Press DVD or VCR to select the appropriate mode.
Example: One-touch Timer Recording for 30 minutes.
1Press REC MODE/SPEED to select the
recording mode.
For the recording mode, see step 1on page
52.
2Set the TV/CABLE option to the
appropriate position (See page
25).
3Press numeric keys or CH / to select
the channel to be recorded.
4Press REC/OTR. Each time you press REC/OTR will increase the
recording time as shown in the chart below, up to a maximum of 6
hours. The OTR and recording time will appear on the screen for
about 4 seconds.
To cancel OTR
Press STOP.
“” will appear on screen for about 4 sec-
onds.
TV - VHF/UHF channels
CABLE - CABLE TV channels
NOTE:
If you wish to watch the DVD play-
back during the VCR OTR, press
DVD to change to DVD mode and
perform the DVD playback. You can
also playback the VCR during DVD
OTR.
Press
once
twice
3 times
4 times
5 times
6 times
NORMAL REC
OTR - : - -
OTR 0:30
OTR 1:00
OTR 1:30
OTR 2:00
OTR 3:00
OTR 4:00
OTR 5:00
OTR 6:00
OTR - : - -
Recording time Press
7 times
8 times
9 times
10 times
11 times
Recording time
The unauthorized recording, use,
distribution, or revision of television
programs, videotapes, DVDs and
other materials, is prohibited under
the Copyright Laws of the United
States and other countries, and
may subject you to civil and/or
criminal liability.
2H5-01 P53-59 7/20/05, 20:5454
Recording
55
Timer recording
The timer recording system allows
you to select the date, time, chan-
nel and record the desired pro-
grams. Up to 12 timer programs
within a month can be stored in this
unit.
Setting timer recording
Preparation:
• Turn ON the TV and set to the video input mode.
• Load a recordable DVD or video tape.
• Press DVD or VCR to select the appropriate mode.
• Confirm that the clock is indicating the correct time.
Example: Set the recording mode to LP; the TV program is on channel
12 starting at 8:00 PM and stopping at 9:30 PM on a date of 20th.
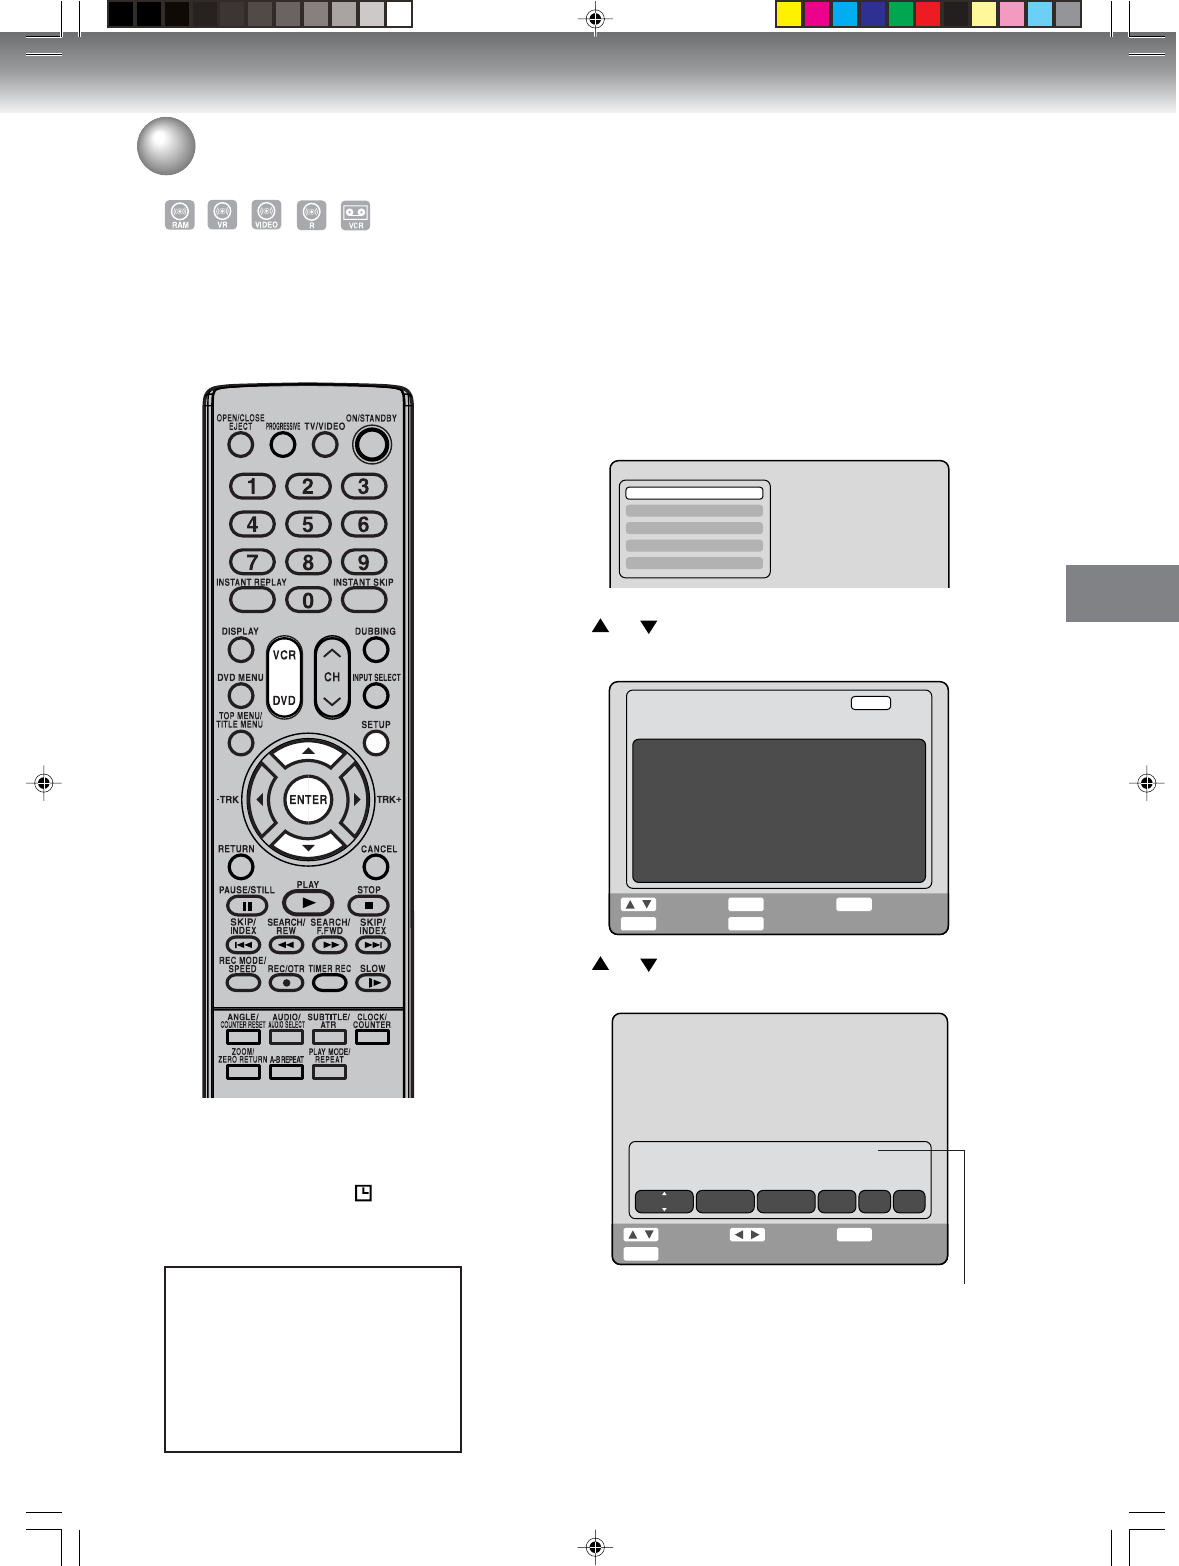
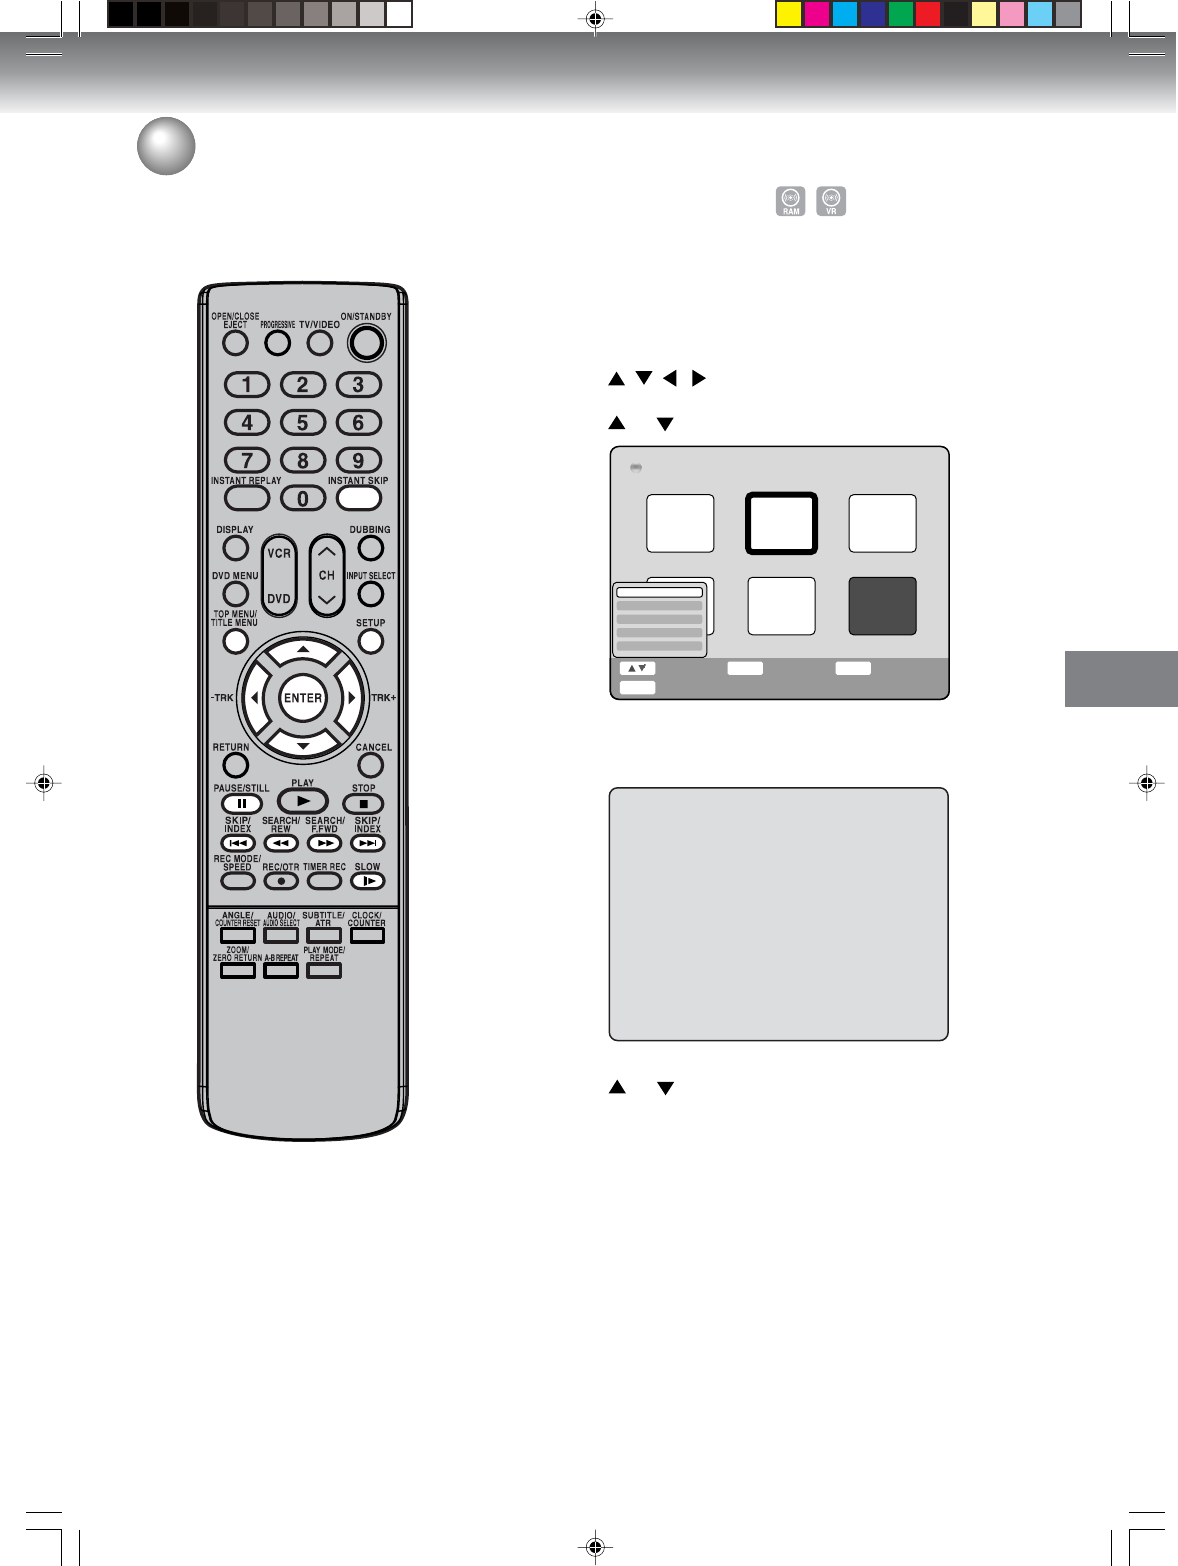
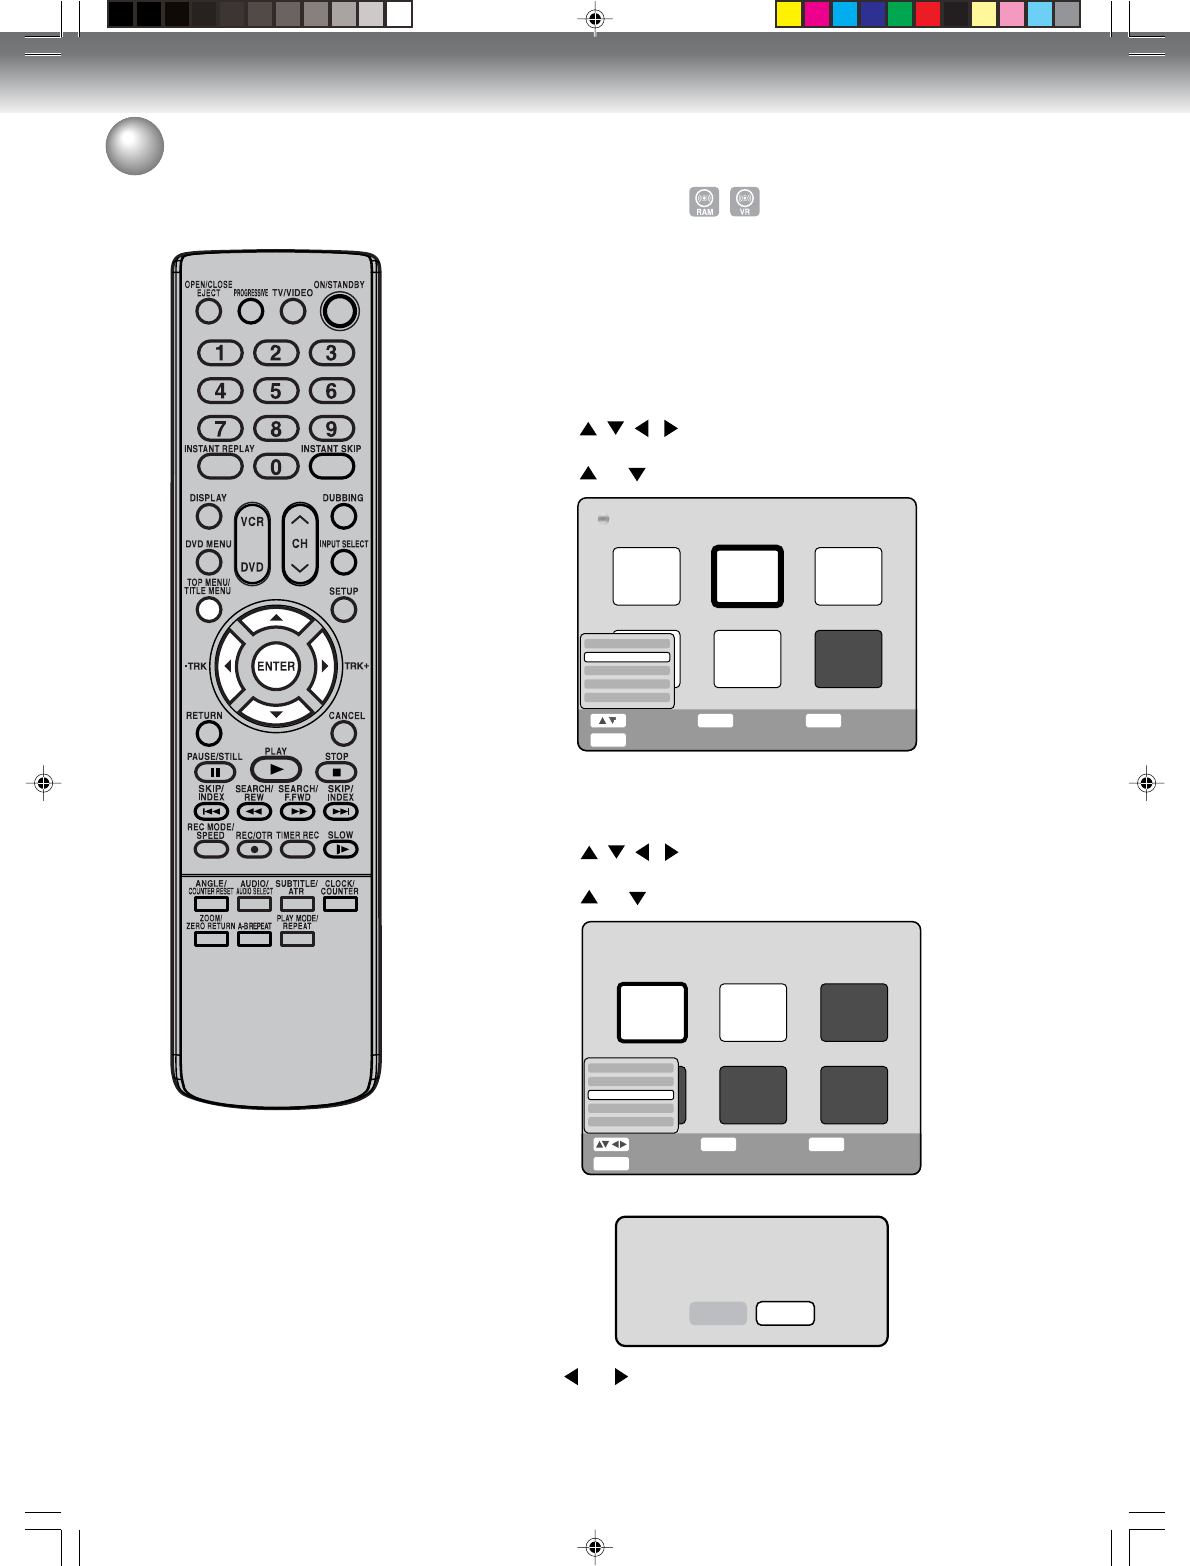
1Press SETUP.
The Easy Menu screen appears.
External Audio Input
Timer Recording
Setup Menu
Add Chapter Mark
Set Index Picture
2Press or to select “Timer Recording” and press ENTER.
The Timer Record List screen will appear.
CANCEL
Select
Delete
Timer Record List New
Enter Back
End
ENTER RETURN
SETUP
Rec Rec
TO ModeCHEndStartDate
3Press or to select “New” and press ENTER.
The program screen will appear.
NOTE:
If a recordable tape is not inserted
or no disc space is available, the
timer record indicator “ ” flashes.
Replace the tape or disc to allow re-
cording.
The unauthorized recording, use,
distribution, or revision of television
programs, videotapes, DVDs and
other materials, is prohibited under
the Copyright Laws of the United
States and other countries, and
may subject you to civil and/or
criminal liability.
RETURN
Select
Back
Timer Rec Set Free = LP 4:14:51
Rec Rec
TO ModeCHEndStartDate
DVD LP 21:21 AM12:21 AM
Set Enter
ENTER
1/ 1 [Sat]
The remaining record time displayed
changes to match the recording mode.
2H5-01 P53-59 7/20/05, 20:5455
Recording
56
Timer recording
4Press or to select “Date”.
Press or to select the date to be recorded from the list and
press ENTER.
5Press or to select “Start”.
Set the recording start time.
• To switch over the selection item (hour or minute), press
or .
• Press or to adjust the time.
6Press or to select “End”.
Set the recording stop time in the same manner in step 5.
7Press or to select “CH”.
• Press or to select the channel to be recorded.
• You can select the external input (Line1 or Line2) by pressing
or .
8Press or to select “Rec To”.
Select the media (DVD or VCR) to be recorded from the list.
9 Press or to select “Rec Mode”.
The recording modes for the media selected in “Rec To” item are
listed up.
Select the recording mode.
For the recording modes in VCR, see page 46. For the recording
modes in DVD, see page 50.
CANCEL
Select
Delete
Timer Record Set Free = LP 4:14:51
Rec Rec
TO ModeCHEndStartDate
DVD LP 209:30 PM8:00 PM
Enter Back
End
ENTER RETURN
SETUP
11/20 [Sun]
NOTES:
•
You can record same day of every
week or from Monday to Friday us-
ing the items. The items you can
select are as follows:
Every Sun: Recording every Sun.
Every Mon: Recording every Mon.
Every Tue: Recording every Tue.
Every Wed: Recording every Wed.
Every Thu: Recording every Thu.
Every Fri: Recording every Fri.
Every Sat: Recording every Sat.
Mon-Fri: Recording from Mon. to Fri.
Mon-Sat: Recording from Mon. to
Sat.
Everyday: Recording everyday.
•
The starting and stopping times for
recording are displayed on the 12-
hour (am/pm) clock. Twelve o’clock
midnight is displayed as “12:00AM
”, whereas twelve o’clock noon is
displayed as “12:00PM”.
The unauthorized recording, use,
distribution, or revision of television
programs, videotapes, DVDs and
other materials, is prohibited under
the Copyright Laws of the United
States and other countries, and
may subject you to civil and/or
criminal liability.
10 Press ENTER.
The timer program is determined and the Timer Record List screen
appears again.
CANCEL
Select
Delete
Timer Record List New
Enter Back
End
ENTER RETURN
SETUP
Rec Rec
TO ModeCHEndStartDate
DVD LP 20 9:30 PM 8:00 PM11/20 [Sun]
2H5-01 P53-59 7/20/05, 20:5456
Recording
57
8 : 00 11 : 00
9 : 00 10 : 00
Program 1
Prog.1
Deleted Parts
Non Recorded Portion Parts
Prog.2 Prog.3
Program 2
Program 3
Recording
Control Settings
Timer recording
NOTES:
•
Recording starts a few seconds be-
fore the preset starting time.
Timer recording starts before the
preset time; one second for DVD, or
five seconds for VCR.
•
You can playback the DVD during
the VCR timer recording. You can
also playback the VCR during the
DVD timer recording.
•
You cannot record the DVD during
the VCR timer recording. You can-
not also record the VCR during the
DVD timer recording.
11 When you enter the other program for the timer recording, re
peat the steps 3 to 10.
12 Press SETUP.
The Timer Record Set screen disappears and the display will
return to the normal screen.
13 Press TIMER REC. The timer indicator “ ” will appear on the
display and the unit stands by for recording.
Stopping the timer recording
After the timer recording has started, you can stop the timer record-
ing (but continue recording), or stop recording completely if you
need.
To stop the timer recording, press TIMER REC for more than 2
seconds. Recording continues so that you can manually stop
recording whenever you like. When you stop recording completely,
press STOP.
Checking or changing the timer recording
When you want to check the selected timer recording, follow the steps 1
and 2of “Setting timer recording” on page 55 and display the Timer
Record Set screen.
To change the timer recording, select the program to be changed and
press ENTER. The program screen will appears. Do step 4 to step 10
on page 56.
When you want to change the program after timer recording starts,
stop the timer recording to change the program.
Cancelling the timer recording
Display the Timer Record List screen.
Select the program you want to cancel and press CANCEL. “Delete
selected Title. Continue?” will appears. Press or to select “Yes”
and press ENTER.The selected program will be erased from the Timer
Record List.
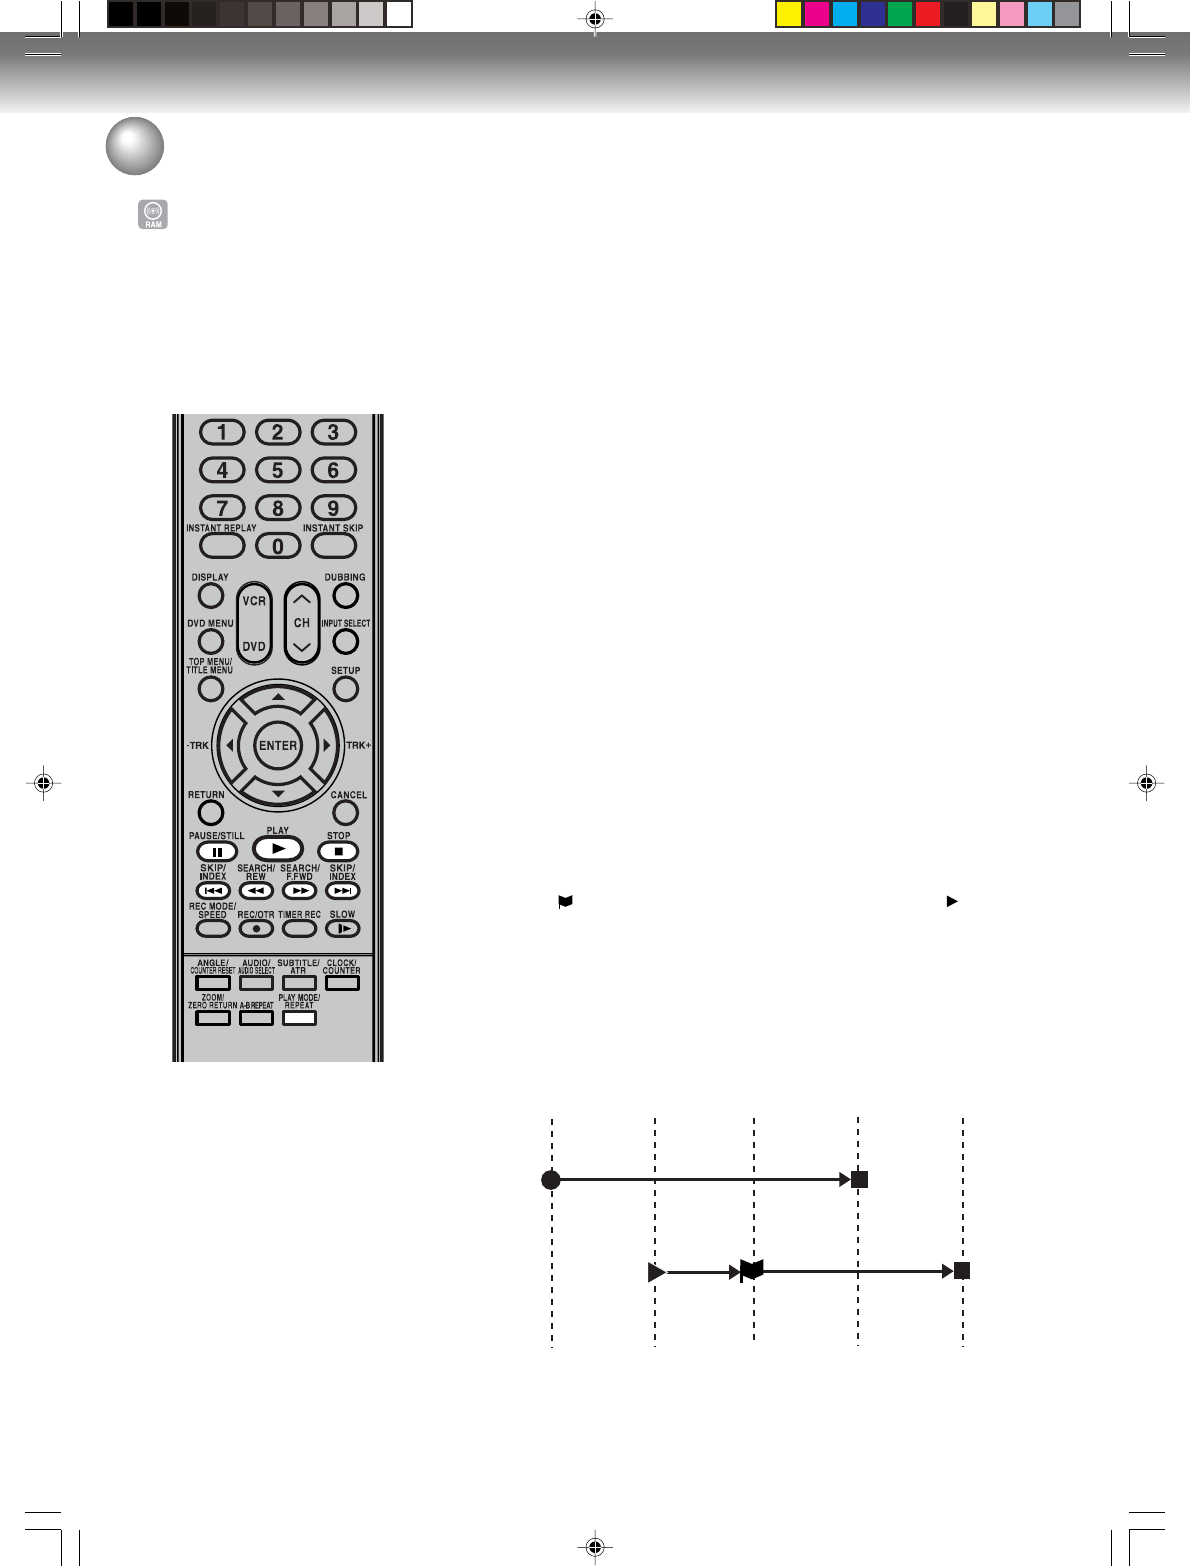
In case Timer programs overlap
Do not overlap timer programs as portions of the conflicting programs
will be lost. The first recording time has priority over the next recording
time as shown in the diagram below.
In this case, the next recording time is delayed a maximum of about
1 minute.
The unauthorized recording, use,
distribution, or revision of television
programs, videotapes, DVDs and
other materials, is prohibited under
the Copyright Laws of the United
States and other countries, and
may subject you to civil and/or
criminal liability.
2H5-01 P53-59 7/20/05, 20:5457
Recording
58
Chase playback
Still playback:
Press PAUSE.
• To resume chase playback, press PLAY.
Fast forward/Review playback:
Press SEARCH 8/9. Every press of SEARCH, it increase
the speed of the search.
• To resume chase playback, press PLAY.
• If the playback position catches up to within about 60 seconds,
chase playback resumes. It may differ depending on the
recording condition and search speed.
Locating a chapter:
Press SKIP 6/7 to locate a chapter that you want to watch.
• If you press SKIP 7 while playing back the lastest chapter,
it starts playing back from about 15 seconds before the
recording position.
Locating a specific scene:
Press PLAY MODE enables you to do a Time Search. (See
page 35.)
You can begin playback from the
beginning of a program currently
being recorded. You will find this
function of great advantage on
long programs, as you do not have
to wait for the end of recording to
begin playback.
NOTES:
• Chase playback is not available
when recording a DVD-RW/R disc
and video tape.
• Chase playback is not available
when recording in XP mode.
• A-B repeat does not work during
chase playback.
• Chase playback does not work
until 5 seconds of recording have
elapsed.
• If you press DISPLAY during
chase playback, the information
screen is displayed (see page 33).
1While recording a TV program on the DVD-RAM disc, press PLAY
to start chase playback.
The TV program as it is being recorded will played back.
2Locate a scene you want through the following operations if nec-
essary.
3Press STOP to stop the playback.
The DVD/VCR memorizes the stopped point, depending on t h e
disc. “ ” appears on the screen for approx. 4 seconds.“ ” keeps
blinking in the display until the playback is stopped completely.
Press PLAY to resume playback (from the scene point).
4Press STOP again to stop the recording.
Then press STOP again, the DVD / VCR will clear the stopped
point.
Press
REC
Press
PLAY
Press
STOP
Recording
starts
Chase playback
starts
Press
STOP
Press
STOP
Playback
stops temporarily
Recording
stops
Playback stops
completely
2H5-01 P53-59 7/20/05, 20:5458
Recording
59
Stereo recording and playback
The VHS Hi-Fi audio system per-
mits high fidelity recording of MTS
STEREO TV broadcasts.
STEREO
OUTPUT
SELECTION
STEREO
L ch
R ch
MONO
SOUND HEARD ON BOTH
SPEAKERS
STEREO
LEFT CHANNEL AUDIO
RIGHT CHANNEL AUDIO
MONO
NOTES:
• When playing back a video tape
or disc that is not recorded in Hi-Fi
stereo mode, the audio will auto-
matically be monaural.
• When listening to a Hi-Fi video
tape, disc or MTS broadcast
through the RF OUT (UHF/VHF)
jack (Audio/Video cabel not con-
nected), the sound will be monau-
ral.
When a MTS STEREO broadcast is re-
ceived, the word “STEREO” will appear on
the screen and the program can be viewed
or recorded in stereo.
The Hi-Fi STEREO recording procedure is
the same as for normal recordings.
NOTE:
When using a Cable TV system, stereo TV programs may be transmit-
ted over a mono cable channel. In this case the word “STEREO” will
not appear and the sound will be in mono.
Output selection
When viewing an MTS STEREO TV program, or playing a prerecorded
Hi-Fi STEREO on video tape, press AUDIO SELECT to select how the
audio will be heard through the speakers. Normally set to the Hi-Fi
STEREO position, this button can be set to the MONO position if the
stereo audio is of poor quality. The “R” and “L” positions allow the audio
from the Right or Left Hi-Fi channel to be heard over both TV speakers.
This button has no effect when viewing a monaural audio program.
Each time when you press the button, output selection display appears
on the screen for several seconds. Refer to the chart below.
Output selection for DVD
It is not possible to switch between channels otherwise as only the
channel selected in the setting of SAP (Second Audio Program; ON
or OFF) is recorded (see page 27).
NOTE:
When a stereo or monaural broadcast is recorded, either stereo or
monaural is played back respectively.
2H5-01 P53-59 7/20/05, 20:5459
Editing the disc
60
Editing the disc
This section explains how to edit
the recorded contents on DVD-
RWs. However, the items that you
can edit vary with the recording
formats. In VR mode, you can edit
various title menus, whereas in
Video mode, you can edit only a
few items.
Title menu
When the content is recorded, a title name that includes the date, time,
channel number and other information is created automatically.
The title menu can be used when you playback after confirming the
contents (see page 32), or when you check the contents recorded on
the disc.
Original title
The titles explained above are called original titles; these will be added
with every recording. In VR mode, you can do various editing opera-
tions i.e., you can rename the titles or add the chapter marks. In addi-
tion, you can erase the unnecessary titles to increase the disc space.
Playlist
You can create a playlist based on the original titles.
You can combine or erase undesired chapters.
If you create a playlist, it will become the primary list used by the disc.
If you create a playlist to customize your viewing preferences, and
choose to delete it, the original titles will not be affected. It is recom-
mended to create and edit the playlist to prevent important titles from
being erased accidentally.
Editable items
The items that can be edited are different between original title and
playlist.
The items can be edited in each are as follows:
NOTES:
• This unit cannot record or edit a
disc which was recorded or edited
using another DVD recorder.
• You cannot edit or record the disc
on which disc protection is set. In
such a case, make sure that the
disc protection is cancelled before
starting the operation.
• When a scene has been erased,
the selected position for erasing
may vary slightly from the actual
erased position.
Using these editing functions to modify copyrighted content for any
purpose other than your private viewing may be prohibited under
the Copyright Laws of the United States and other countries, and
may subject you to civil and criminal liability.
Editing items VR mode Video mode
Original
Changing title name
Combining chapters
Combining titles
Erasing titles
Set index picture
Original Playlist
Y
Y
Y
Y
Y
Y
N
Y
Y
Y
N
Y
Y
Y
Y
Y
Y
Y
Y
N
Y
N
N
N
N
Y
N
Playback
Creating playlist
Adding chapter mark
Erasing chapter
2H5-01 P60-73 7/20/05, 20:5560
Editing the disc
61
Preparation:
• Turn ON the TV and set to the video input mode.
• Load the recorded DVD-RAM/RW (VR).
• Press DVD to select the DVD mode. (The DVD indicator will light.)
Creating a playlist
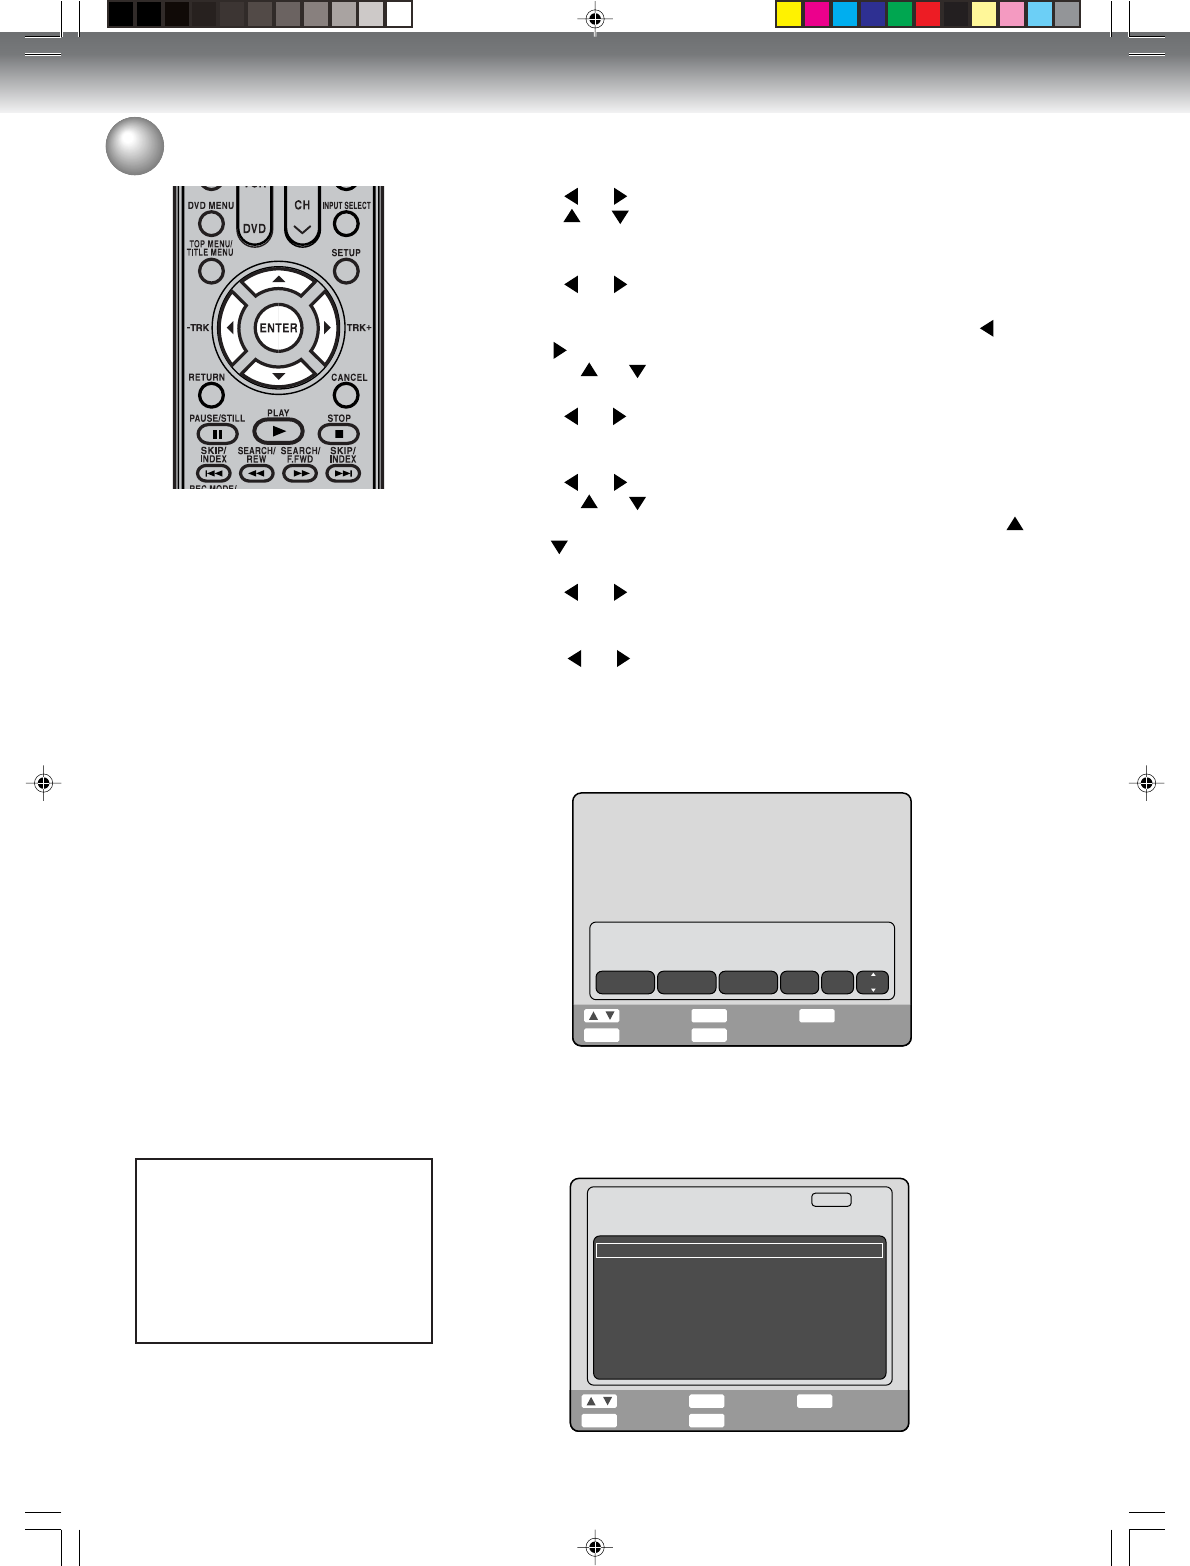
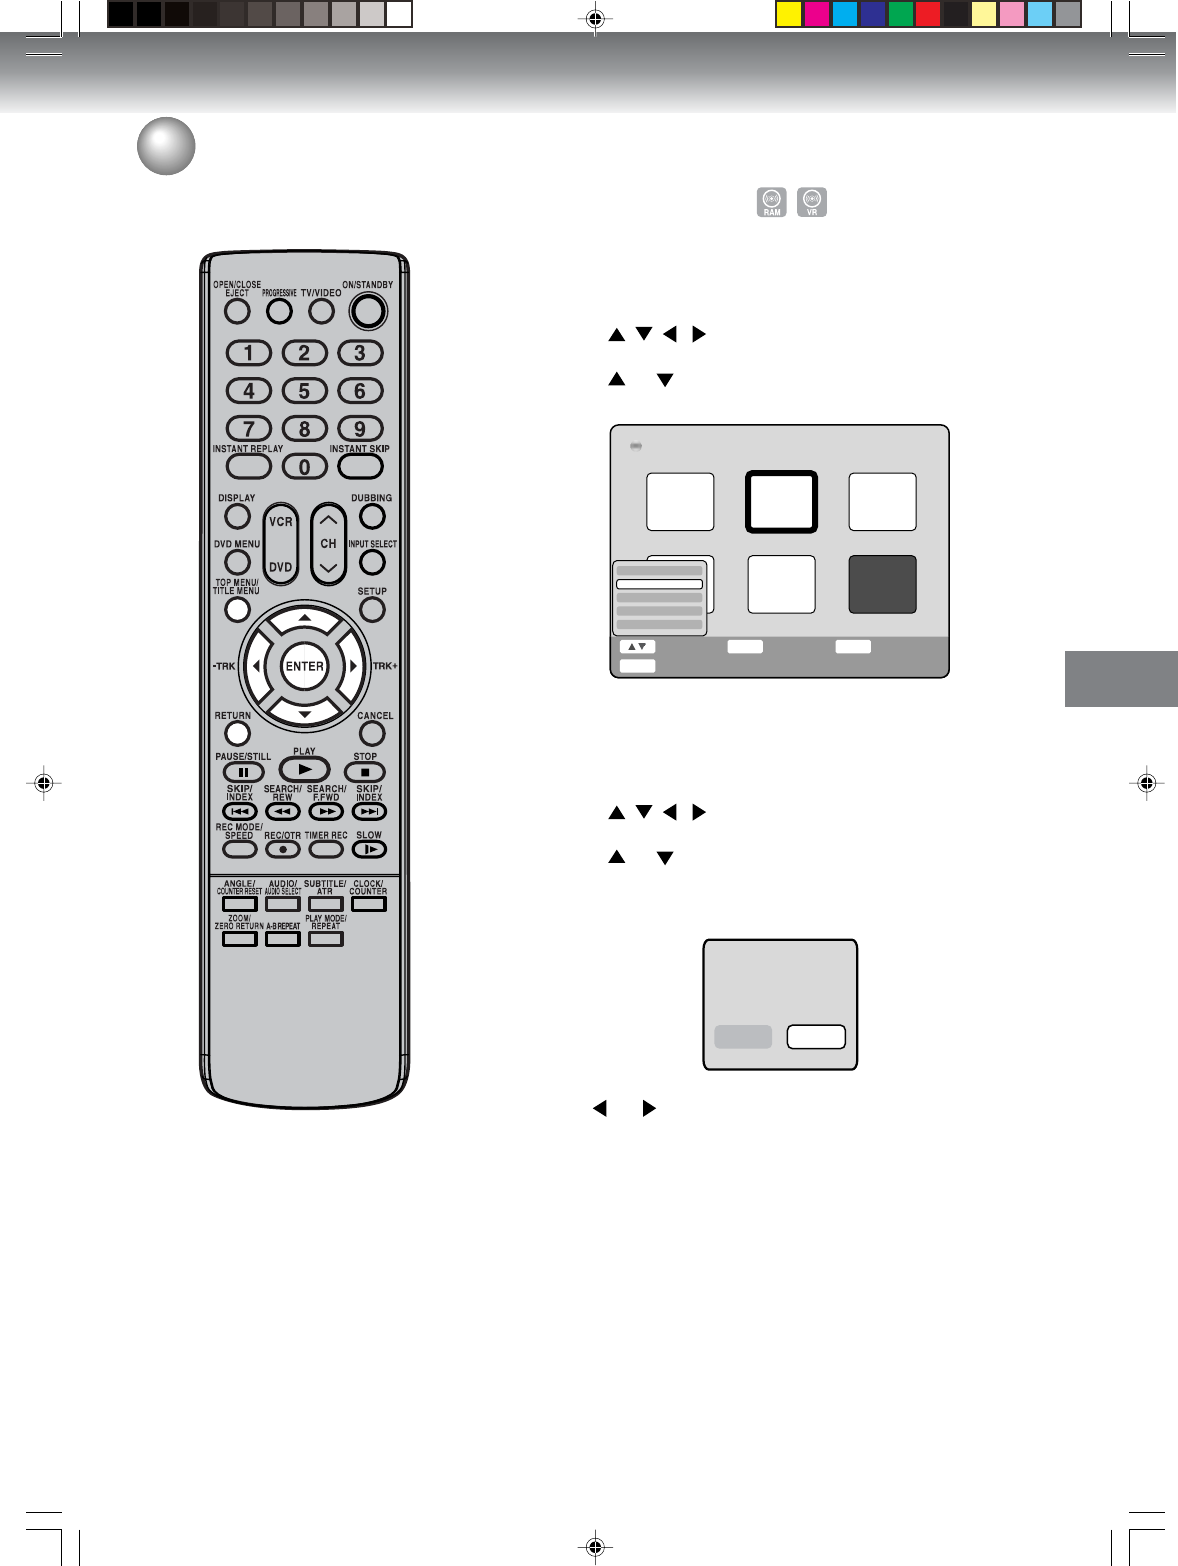
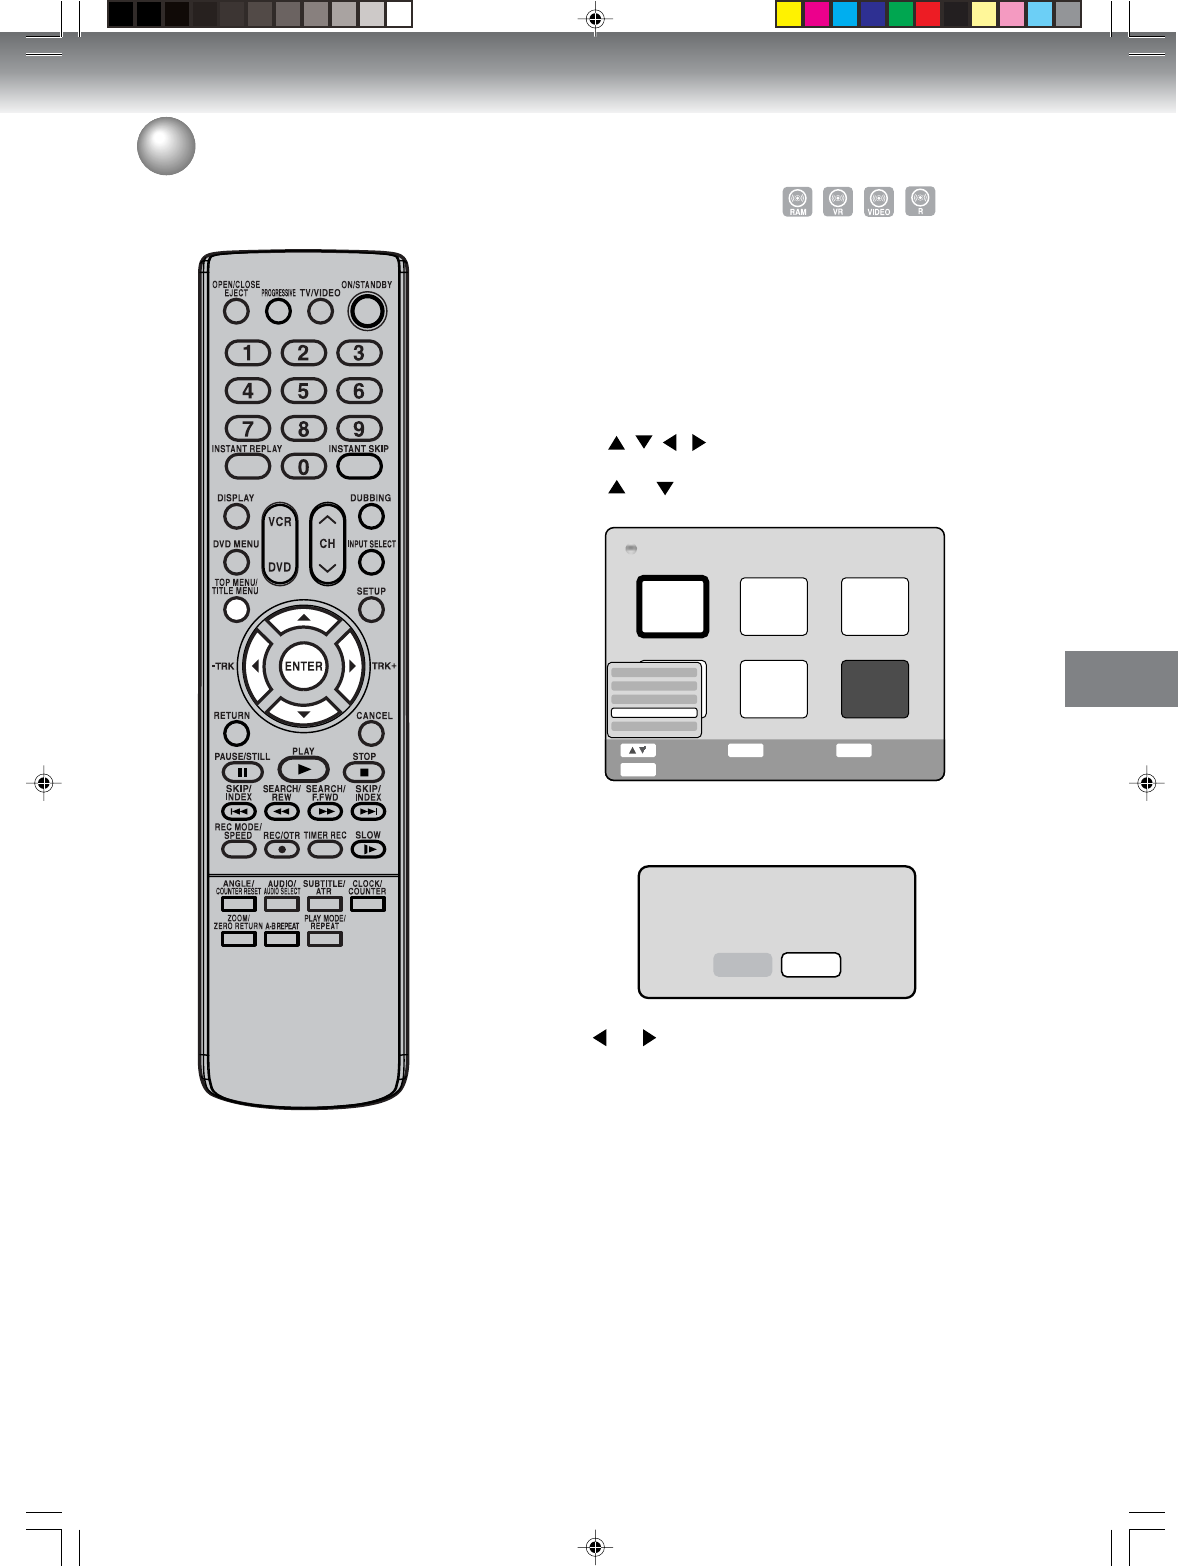
1Press TITLE MENU.
ORG(Original) Title List will appear.
Editing a playlist
You can create and edit the playlist
based on the original title.
2Press / / / to select the original title which will be used as
the base of a playlist.
3Press ENTER.
The editing menu of original title will appear.
4Press or to select “New Playlist”.
5Press ENTER.
The editing menu closes and PL(Playlist) Title List will appear.
Select Enter Info
ENTER DISPLAY
PlaylistBack
RETURN
Disc Name:050823
DVD-RW(VR)
Title 050130
01/31 0:11:09
ORG Title List 1/ 3
TITLE
MENU
End
DVD
MENU
Title 050220
02/21 0:05:09
Title 050514
05/15 0:05:09
Select Enter Info
ENTER DISPLAY
OriginalBack
RETURN
Disc Name:050823
DVD-RW(VR)
PL Title 01
01/31 0:11:09
PL Title List 1/ 1
TITLE
MENU End
DVD
MENU
Disc Name:050823
DVD-RW(VR)
Title 050130
01/31 0:11:09
ORG Title List 1/ 3
Title 050220
02/21 0:05:09
Title 050514
05/15 0:05:09
Play
Chapter List
Rename
Delete
New Playlist
Select Enter Back
ENTER RETURN
End
TITLE
MENU
NOTES:
• A playlist can only be created with
a DVD-RAM or a DVD-RW in VR
mode. You cannot create a playlist
with a DVD-RW in Video mode, nor
with a DVD-R.
• Each press of DVD MENU will
change the ORG Title List and the
PL Title List.
• You can see the title name, record-
ing time and recording length on
the screen when you press DIS-
PLAY.
2H5-01 P60-73 7/20/05, 20:5561
Editing the disc
62
Editing a playlist
Select Enter Back
ENTER RETURN
End
TITLE
MENU
Disc Name:050823
DVD-RW(VR)
PL Title 01
01/31 0:11:09
PL Title List 1/ 2
PL Title 02
02/21 0:05:09
Play
Chapter List
Rename
Delete
Combine
CAPS
Space Delete OK Cancel
PL Title 01
1Press TITLE MENU to display the PL Title List.
2Select the playlist where you want to change the title name.
• Press / / / to select the playlist.
• Press ENTER to display the editing menu of the playlist.
• Press or to select “Rename”.
3Press ENTER.
The keyboard screen will appear.
4Use the keyboard screen to enter the title name.
Changing a title name
NOTE:
For using the keyboad screen, see
“Using the keyboard screen”(page
78).
5Select “OK”and press ENTER.
It returns to the PL Title List.
2H5-01 P60-73 7/20/05, 20:5562
Editing the disc
63
Editing a playlist
NOTE:
You can automatically add a chapter
mark in recording. For more informa-
tion, see page 29.
Adding a chapter mark
You can add a chapter mark to the original title. You can add up to 999
chapter marks to one disc.
1Press TITLE MENU to display the PL Title List.
2Select the original title where a chapter mark is added.
• Press / / / to select the playlist.
• Press ENTER to display the editing menu of the playlist.
• Press or to select “Play”.
Select Enter Back
ENTER RETURN
End
TITLE
MENU
Disc Name:050823
DVD-RW(VR)
PL Title 01
01/31 0:11:09
PL Title List 1/ 2
PL Title 02
02/21 0:05:09
Play
Chapter List
Rename
Delete
Combine
3Press ENTER to search a scene where you want to add the chapter
mark.
The selected title is played back.
4Press SETUP to display Easy Menu.
Press or to select “Add Chapter Mark”.
5Search the scene by using each operation button (F.FWD,REW,
SKIP +,SKIP -,PAUSE/STILL,SLOW,INSTANT SKIP) for the
playback.
2H5-01 P60-73 7/20/05, 20:5563
Editing the disc
64
Editing a playlist
6When the scene you want to add a chapter mark, press ENTER.
The position of the added chapter mark is appeared.
The added chapter mar
k
7If you want to continue to add chapter mark, repeat step 6.
8The chapter marks are finished adding.
• To return to the normal screen, press RETURN.
2H5-01 P60-73 7/20/05, 20:5564
Editing the disc
65
Editing a playlist
Combining chapters
1Press TITLE MENU to display the PL Title List.
2Select the original titles where you want to combine the chapters.
• Press / / / to select the playlist.
• Press ENTER to display the editing menu of playlist.
• Press or to select “Chapter List”.
Disc Name:050823
DVD-RW(VR)
PL Title 01
01/31 0:11:09
PL Title List 1/ 2
PL Title 02
02/21 0:05:09
Play
Chapter List
Rename
Delete
Combine
Select Enter Back
ENTER RETURN
End
TITLE
MENU
3Press ENTER.
The Chapter List will appear.
4Select the chapter that you want to combine.
• Press / / / to select the chapter.
• Press ENTER to display the editing menu of Chapter List.
• Press or to select “Combine”.
5By pressing ENTER, the following message screen will appear.
Merge chapter?
Yes No
6Press or to select ”Yes” and press ENTER.
7The combining chapters are completed.
• To display the title menu, press RETURN.
• To return to the normal screen, press TITLE MENU.
2H5-01 P60-73 7/20/05, 20:5565
Editing the disc
66
Erasing a chapter
You can erase an unnecessary chapter from the created playlist.
When you erase the chapter from the playlist, the scene is not erased
from the original title.
1Press TITLE MENU to display the PL Title List.
2Select the playlist where a chapter you want to erase.
• Press / / / to select the playlist.
• Press ENTER to display the editing menu of the playlist.
• Press or to select “Chapter List”.
Disc Name:050823
DVD-RW(VR)
PL Title 01
01/31 0:11:09
PL Title List 1/ 2
PL Title 02
02/21 0:05:09
Play
Chapter List
Rename
Delete
Combine
Select Enter Back
ENTER RETURN
End
TITLE
MENU
3Press ENTER.
The Chapter List will appear.
4Select the chapter that you want to erase.
• Press / / / to select the chapter.
• Press ENTER to display the editing menu of the Chapter List.
• Press or to select “Delete”.
Editing a playlist
Are you sure you want to delete this Chapter?
Yes No
5By pressing ENTER, the following message screen will appear.
6Press or to select ”Yes” and press ENTER.
The selected chapter will be erased.
TITLE
MENU
Select
End
Enter Back
ENTER RETURN
PL Title 02
2005/02/21 12:43AM Length 0:05:09
Chapter List 1/ 2
12
Play
Title List
Delete
Combine
2H5-01 P60-73 7/20/05, 20:5566
Editing the disc
67
Editing a playlist
Combining the titles
You can create a playlist by combining the several original titles or playlists.
1Press TITLE MENU to display the PL Title List.
2Select the playlist where you want to combine the titles.
• Press /// to select the playlist.
• Press ENTER to display the editing menu of the playlist.
• Press or to select “Combine”.
Disc Name:050823
DVD-RW(VR)
PL Title 01
01/31 0:11:09
PL Title List 1/ 2
PL Title 02
02/21 0:05:09
Play
Chapter List
Rename
Delete
Combine
Select Enter Back
ENTER RETURN
End
TITLE
MENU
Select Enter Info
ENTER DISPLAY
OriginalBack
RETURN
Disc Name:050823
DVD-RW(VR)
PL Title 01
01/31 0:16:18
PL Title List 1/ 2
TITLE
MENU
End
DVD
MENU
PL Title 02
02/21 0:05:09
3Press ENTER.
4Select the title that you want to combine from the PL Title List, then
press ENTER.
Following the playlist, the selected playlist is combined.
The several playlist were combined so that the total recording time
is displayed.
2H5-01 P60-73 7/20/05, 20:5567
Editing the disc
68
Editing a playlist
Erasing a playlist
You can erase the created playlist. Even if you erase the playlist, the
original title will not be erased.
1Press TITLE MENU to display the PL Title List.
2Select the playlist that you want to erase.
• Press / / / to select the playlist.
• Press ENTER to display the editing menu of the playlist.
• Press or to select “Delete”.
Disc Name:050823
DVD-RW(VR)
PL Title 01
01/31 0:11:09
PL Title List 1/ 2
PL Title 02
02/21 0:05:09
Play
Chapter List
Rename
Delete
Combine
Select Enter Back
ENTER RETURN
End
TITLE
MENU
Select Enter Info
ENTER DISPLAY
OriginalBack
RETURN
Disc Name:050823
DVD-RW(VR)
PL Title 01
01/31 0:11:09
PL Title List 1/ 1
TITLE
MENU
End
DVD
MENU
3By pressing ENTER, the following message screen will appear.
Are you sure you want to delete this title?
Yes No
4Press or to select ”Yes” and press ENTER.
The selected playlist will be erased.
2H5-01 P60-73 7/20/05, 20:5568

Editing the disc
69
Editing a playlist
Set Index Picture
You can set the time that the thumbnail image is registered in the title
menu of DVD-RAM/RW (VR mode).
1Press TITLE MENU to display the PL Title List.
2Select the original title where a index picture is registered.
• Press /// to select the playlist.
• Press ENTER to display the editing menu of the playlist.
• Press or to select “Play”.
Select Enter Back
ENTER RETURN
End
TITLE
MENU
Disc Name:050823
DVD-RW(VR)
PL Title 01
01/31 0:11:09
PL Title List 1/ 2
PL Title 02
02/21 0:05:09
Play
Chapter List
Rename
Delete
Combine
3Press ENTER to search a scene where you want to set index picture.
The selected title is played back.
4Press SETUP to display Easy Menu.
Press or to select “Set Index Picture”.
5Search the scene by using each operation button (F.FWD,REW,
SKIP +,SKIP -,PAUSE/STILL,SLOW,INSTANT SKIP) for the
playback.
6When the scene you want to set index picture, press ENTER.
The position of the set index picture is appeared.
7The index picture is finished setting.
• To display the title menu, press TITLE MENU.
• To return to the normal screen, press RETURN.
2H5-01 P60-73 7/20/05, 20:5569
Editing the disc
70
Preparation:
• Turn ON the TV and set to the video input mode.
• Load the recorded disc.
• Press DVD to select the DVD mode. (The DVD indicator will light.)
Changing an original title name
1Press TITLE MENU to display the ORG Tiltle List.
2Select the original title that you want to rename.
• Press /// to select the original title.
• Press ENTER to display the editing menu of original title.
• Press or to select “Rename”.
Disc Name:050823
DVD-RW(VR) ORG Title List 1/ 5
01/31/2005 02:50
01/31 0:11:09
02/21/2005 10:00
02/21 0:05:09
05/15/2005 11:15
05/15 0:05:09
Title 050611
06/12 0:15:09
07/21/2005 07:30
07/21 0:08:09
Select Enter Back
ENTER RETURN
End
TITLE
MENU
Play
Chapter List
Rename
Delete
New Playlist
3Press ENTER.
The keyboard screen will appear.
The entering method of the title name is the same as for the playlist.
See the steps 4and 5of “Changing a title name” in “Editing a
playlist” (page 62) and enter the title name.
Editing an original title
NOTES:
• The title name can be a maximum
of 64 characters.
Long names will be shortened in
the title menu.
• Each press of DVD MENU will
change the ORG Title List and the
PL Title List.
2H5-01 P60-73 7/20/05, 20:5570
Editing the disc
71
Editing an original title
In VR mode, you can edit various
items, whereas in Video mode, you
can edit the title names only.
NOTE:
You can automatically add a chapter
mark in recording. For more informa-
tion, see page 29.
Adding a chapter mark
You can add a chapter mark to the original title. You can add up to 999
chapter marks to one disc.
1Press TITLE MENU to display the ORG Title List.
2Select the original title where a chapter mark is added.
• Press / / / to select the original title.
• Press ENTER to display the editing menu of the original title.
• Press or to select “Play”.
Disc Name:050823
DVD-RW(VR)
01/31/2005 02:50
01/31 0:11:09
ORG Title List 2/ 5
02/21/2005 10:00
02/21 0:05:09
05/15/2005 11:15
05/15 0:05:09
Title 050611
06/12 0:15:09
07/21/2005 07:30
07/21 0:08:09
Select Enter Back
ENTER RETURN
End
TITLE
MENU
Play
Chapter List
Rename
Delete
New Playlist
3Press ENTER to search a scene where you want to add the chapter
mark.
The selected title is played back.
4Press SETUP to display Easy Menu.
• Press or to select “Add Chapter Mark”.
5Search the scene by using each operation button (F.FWD,REW,
SKIP +,SKIP -,PAUSE/STILL,SLOW,INSTANT SKIP) for the
playback.
2H5-01 P60-73 7/20/05, 20:5571
Editing the disc
72
Editing an original title
6When the scene you want to add a chapter mark, press ENTER.
The position of the added chapter mark is appeared.
The added chapter mar
k
7If you want to continue to add chapter mark, repeat step 6.
8The chapter marks are finished adding.
• To return to the normal screen, press RETURN.
2H5-01 P60-73 7/20/05, 20:5572
Editing the disc
73
Editing an original title
Combining chapters
1Press TITLE MENU to display the ORG Title List.
2Select the original titles where you want to combine the chapters.
• Press /// to select the original title.
• Press ENTER to display the editing menu of original title.
• Press or to select “Chapter List”.
Disc Name:050823
DVD-RW(VR)
01/31/2005 02:50
01/31 0:11:09
ORG Title List 2/ 5
02/21/2005 10:00
02/21 0:05:09
05/15/2005 11:15
05/15 0:05:09
Title 050611
06/12 0:15:09
07/21/2005 07:30
07/21 0:08:09
Select Enter Back
ENTER RETURN
End
TITLE
MENU
Play
Chapter List
Rename
Delete
New Playlist
3Press ENTER.
The Chapter List will appear.
4Select the chapter that you want to combine.
• Press / / / to select the chapter.
• Press ENTER to display the editing menu of Chapter List.
• Press or to select “Combine”.
5By pressing ENTER,the following message screen will appear.
Merge chapter?
Yes No
6Press or to select ”Yes” and press ENTER.
7The combining chapters are completed.
• To display the title menu, press RETURN.
• To return to the normal screen, press TITLE MENU.
2H5-01 P60-73 7/20/05, 20:5573
Editing the disc
74
Editing an original title
NOTES:
• If the chapter is erased from the
original title, the created playlist is
erased.
• Disc space will only be freed up if
scenes lasting several minutes are
deleted.
• A chapter mark is automatically
added at the location of the erased
scene.
Disc Name:050823
DVD-RW(VR) ORG Title List 1/ 5
01/31/2005 02:50
01/31 0:11:09
02/21/2005 10:00
02/21 0:05:09
05/15/2005 11:15
05/15 0:05:09
Select Enter Back
ENTER RETURN
End
TITLE
MENU
07/21/2005 07:30
07/21 0:08:09
Play
Chapter List
Rename
Delete
New Playlist
Erasing a chapter
You can erase an unnecessary chapter from the original title.
Erase the chapter after checking the title. You cannot restore the erased
chapter.
When you erase the scene, you can increase the disc space.
1Press TITLE MENU to display the ORG Title List.
2Select the original title where a chapter you want to erase.
• Press / / / to select the original title.
• Press ENTER to display the editing menu of original title.
• Press or to select “Chapter List”.
3Press ENTER.
The Chapter List screen will appear.
• Press /// to select chapter.
• Press ENTER to display the editing menu of Chapter List.
• Press or to select “Delete”.
TITLE
MENU
Select
End
Enter Back
ENTER RETURN
01/31/2005 02:50PM 001 SP
2005/1/31 2:50PM Length 0:11:09
Chapter List 1/ 2
12
Play
Title List
Delete
Combine
New Playlist
4By pressing ENTER, the following message screen will appear.
Are you sure you want to delete this title?
If playlists exist. they will be deleted.
Yes No
5Press or to select “YES” and press ENTER.
The selected chapter will be erased.
2H5-01 P74-81 7/20/05, 20:5774
Editing the disc
75
Editing an original title
NOTE:
If the original title is erased, the cre-
ated playlist is also erased.
Erasing an original title
You can erase an original title. Erasing the title deletes both the title
and the recording saved under that title name. Erase the original title
after checking its title. The erased title cannot be restored.
When you erase the title, you can increase the disc space.
1Press TITLE MENU to display the ORG Title List.
2Select the original title you want to erase.
• Press / / / to select the original title.
• Press ENTER to display the editing menu of original title.
• Press or to select “Delete”.
3By pressing ENTER, the following message screen will appear.
Disc Name:050823
DVD-RW(VR) ORG Title List 1/ 5
01/31/2005 02:50
01/31 0:11:09
02/21/2005 10:00
02/21 0:05:09
05/15/2005 11:15
05/15 0:05:09
07/21/2005 07:30
07/21 0:08:09
Select Enter Back
ENTER RETURN
End
TITLE
MENU
Play
Chapter List
Rename
Delete
New Playlist
4Press or to select “YES” and press ENTER.
The original title will be erased.
Are you sure you want to delete this title?
If playlists exist. they will be deleted.
Yes No
2H5-01 P74-81 7/20/05, 20:5775

Editing the disc
76
Editing an original title
In VR mode, you can edit various
items, whereas in Video mode, you
can edit the title names only.
Preparation:
• Turn ON the TV and set to the video input mode.
• Load the recorded disc.
• Press DVD to select the DVD mode. (The DVD indicator will light.)
Set Index Picture
You can set the time that the thumbnail image is registered in the title
menu of DVD-RAM/RW (VR mode).
1Press TITLE MENU to display the ORG Title List.
2Select the original title where a index picture is registered.
• Press /// to select the original title.
• Press ENTER to display the editing menu of the original title.
• Press or to select “Play”.
Disc Name:050823
DVD-RW(VR)
01/31/2005 02:50
01/31 0:11:09
ORG Title List 2/ 5
02/21/2005 10:00
02/21 0:05:09
05/15/2005 11:15
05/15 0:05:09
Title 050611
06/12 0:15:09
07/21/2005 07:30
07/21 0:08:09
Select Enter Back
ENTER RETURN
End
TITLE
MENU
Play
Chapter List
Rename
Delete
New Playlist
3Press ENTER to search a scene where you want to set index picture.
The selected title is played back.
4Press SETUP to display Easy Menu.
Press or to select “Set Index Picture”.
5Search the scene by using each operation button (F.FWD,REW,
SKIP +,SKIP -,PAUSE/STILL,SLOW,INSTANT SKIP) for the
playback.
6When the scene you want to set index picture, press ENTER.
The position of the set index picture is appeared.
7The index picture is finished setting.
• To display the title menu, press TITLE MENU.
• To return to the normal screen, press RETURN.
2H5-01 P74-81 7/20/05, 20:5776
Editing the disc
77
Changing a disc name
You can change a disc name from
the Setup Menu.
Preparation:
• Turn ON the TV and set to the video input mode.
• Load the recorded DVD disc.
• Press DVD to select the DVD mode. (The DVD indicator will light.)
Changing a disc name
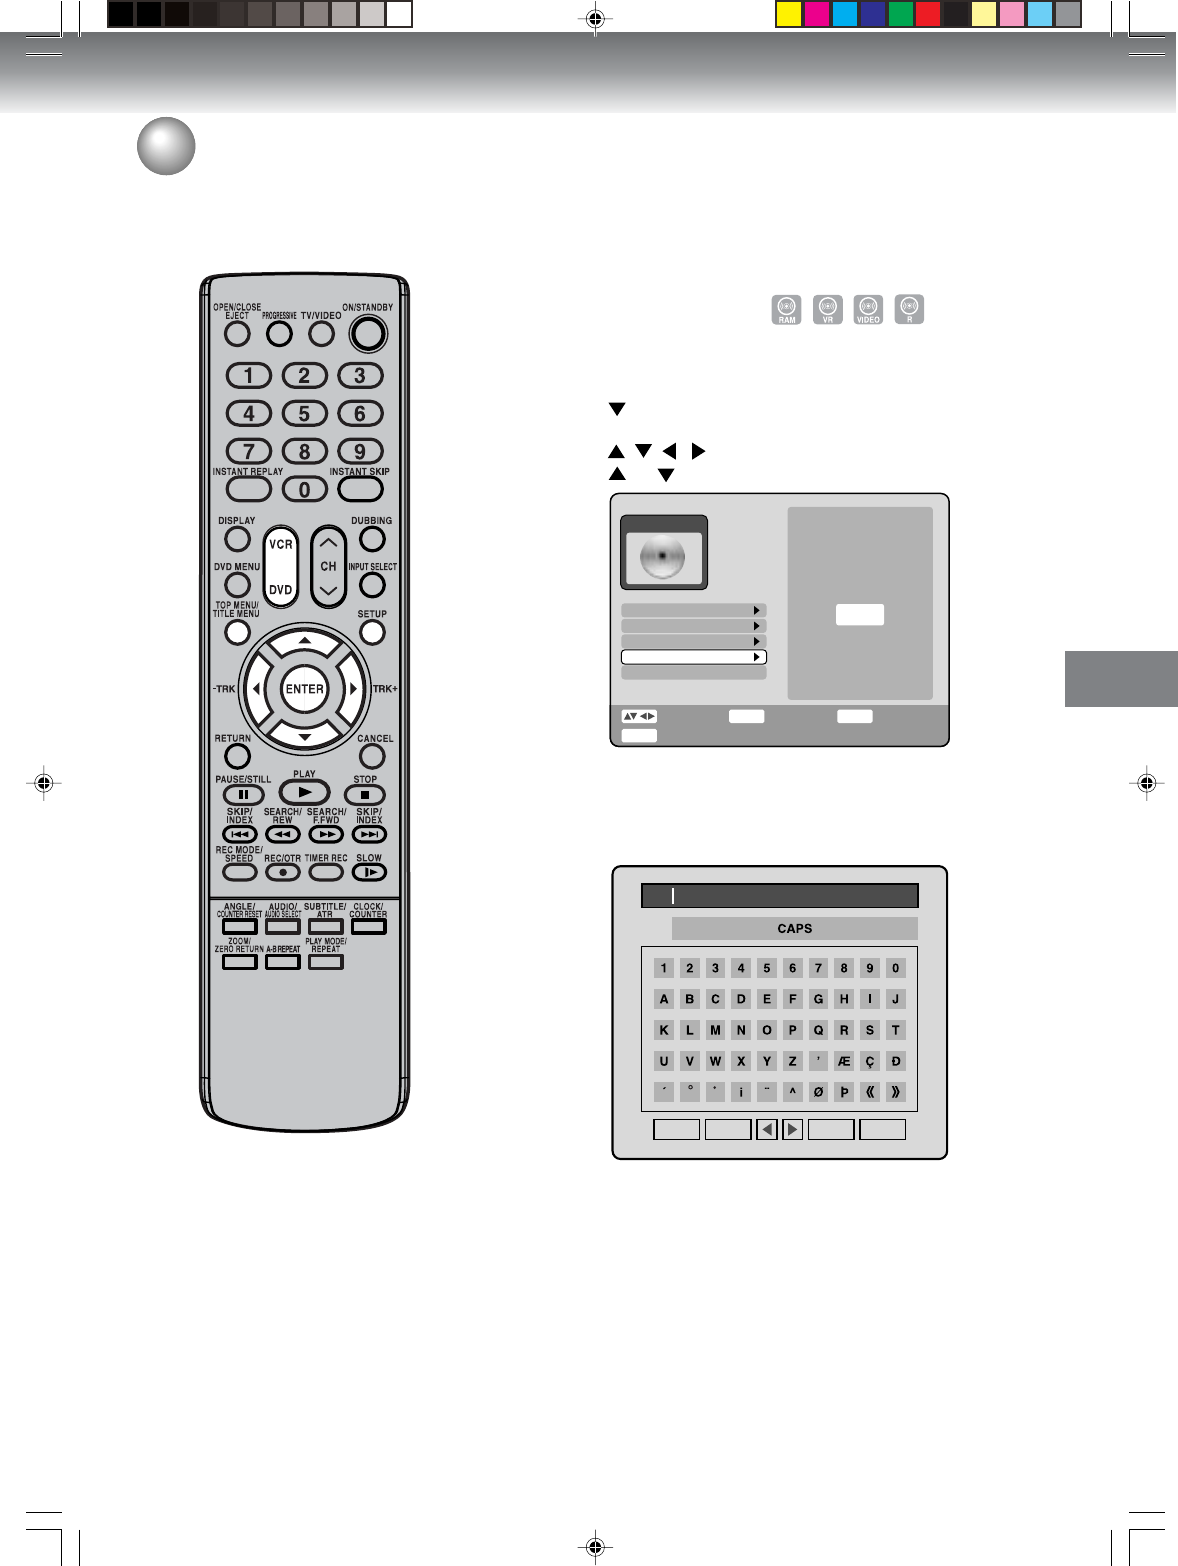
1Press SETUP to display the Easy Menu.
2• Press to select “Setup Menu”.
• Press ENTER to display the setup menu.
• Press /// to select “DISC”.
• Press or to select “Rename Disc” and press ENTER.
Initialize
Finalize
Select Enter Back
ENTER RETURN
SETUP
End
DISC
Protect Dise
Rename Disc
DVD-RAM Phyaical Format
Proceed
3Press ENTER.
The keyboard screen will appear.
4Use the keyboard screen to enter the disc name.
Space Delete OK Cancel
----
5Select “OK”, then press ENTER to return the title menu.
It returns to the DISC menu.
NOTES:
• The disc name can be a maximum
of 32 characters. Long names will
be shortened in the title menu.
• For using the keyboard screen, see
“Using the keyboard screen” (page
78).
• A DVD-R disc cannot be named af-
ter it is finalized.
2H5-01 P74-81 7/20/05, 20:5777
Editing the disc
78
Changing a disc name
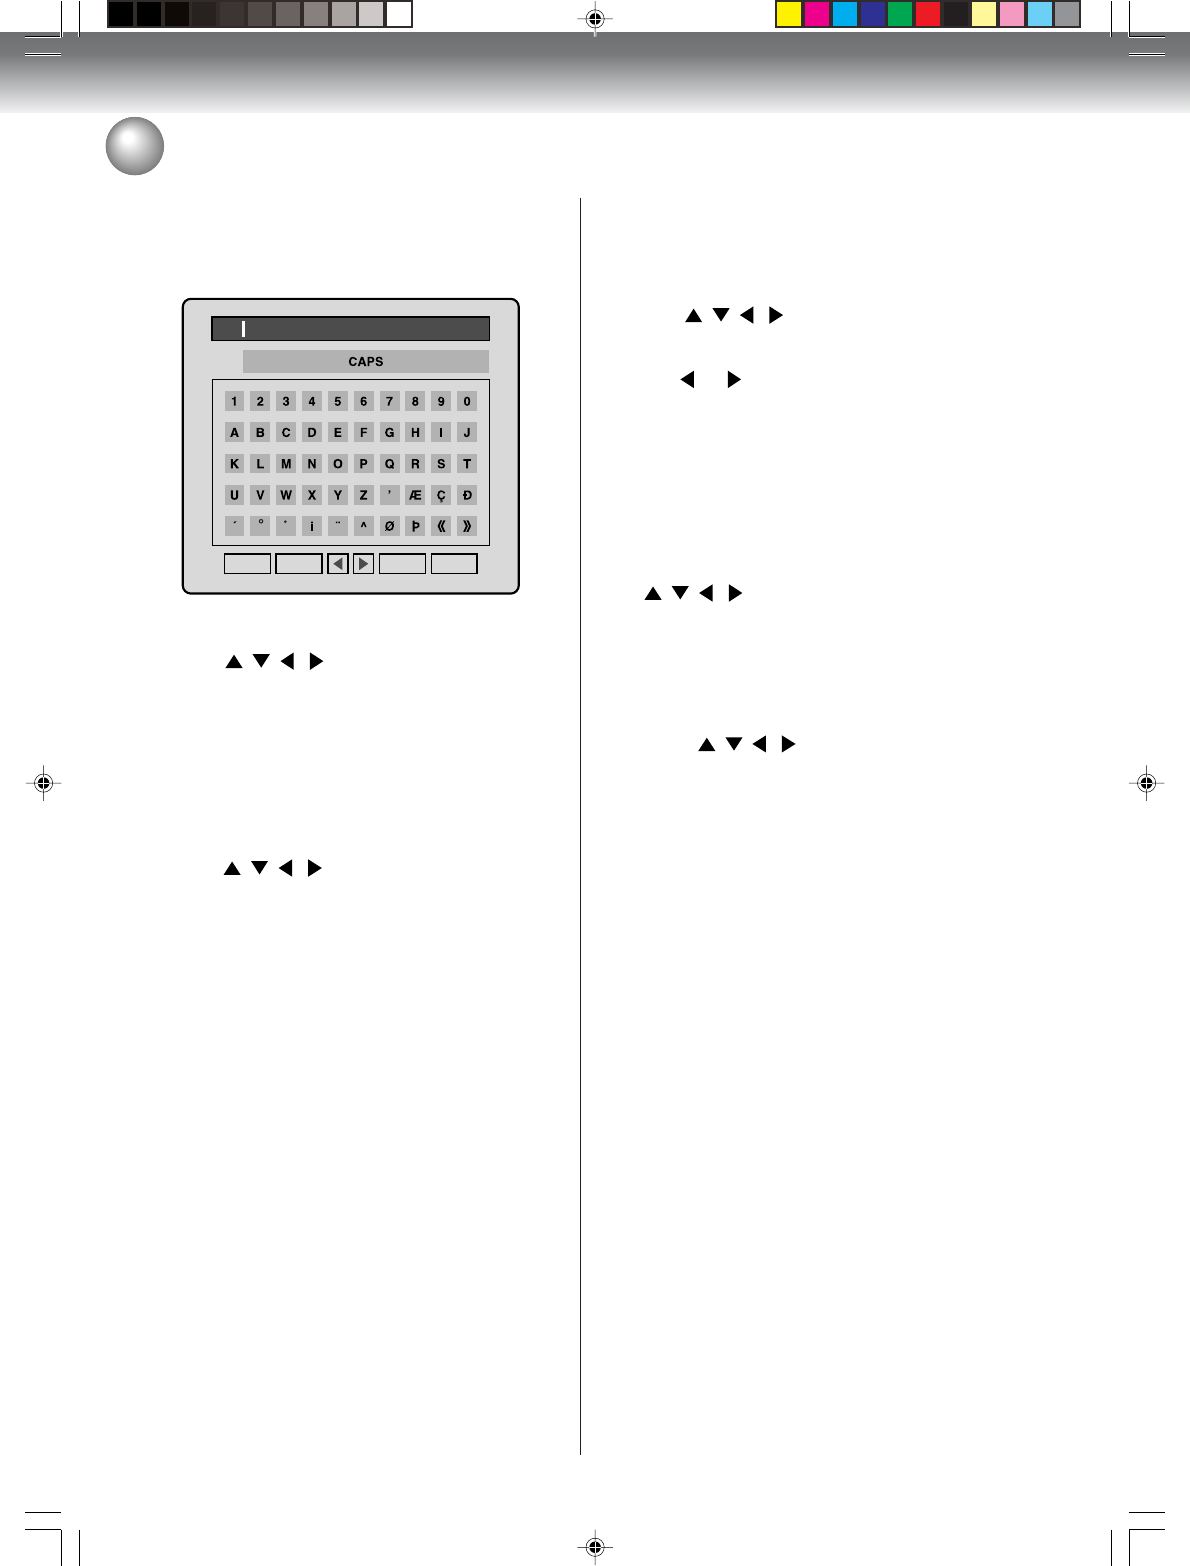
Using the keyboard screen
This section explains the function of the keyboard screen
and how to input characters. The disc name and the
title name can be changed using the keyboard screen.
Space Delete OK Cancel
----
Inputting characters
1Press / / / to select the character to be
input.
2Press ENTER.
The selected character will be input.
Erasing a character
You can erase the input character.
1Press / / / to select “Delete”.
2Press ENTER.
The last input character will be erased.
3To erase the characters continuously, press ENTER.
The input characters will be erased from the last to
the first one.
Selecting between uppercase and lowercase
letters
You can select either uppercase or lowercase letters
when modifying your titles, using the keyboard screen.
1Press / / / to select “CAPS”.
2Press or to select the type of letters in the list
below.
Numbers/Signs: This is used for inputting num-
bers/signs.
CAPS: Inputs all with uppercase letters.
small: Inputs all with lowercase letters.
Determining a name
To determine the entered disc name and title name,
press /// to select “OK”, then press ENTER.
The keyboard screen disappears and the display will
return to the Disc menu.
Cancelling character input
When you want to cancel the input and changed char-
acters, press / / / to select “Cancel”, then press
ENTER.
The input and changed characters are cancelled and
the Disc menu will appear.
2H5-01 P74-81 7/20/05, 20:5778
Dubbing
79
Preparation:
• Turn ON the TV and set to the video input mode.
• Load a source video tape and a disc for recording.
• Remove the erase protection tab of the source video tape to prevent
the data from accidentally being erased.
• Confirm the disc space before operation.
1Press DVD to set this unit to DVD mode.
The DVD indicator will light.
2Press REC MODE/SPEED and select the recording mode.
• When REC MODE/SPEED is pressed each time, “SP”, “LP”,
“SLP” or “XP” is selected in this order.
• The recording mode is indicated on both the TV screen and the
display window.
• For the details of the recording mode, see page 50.
3Press VCR and set the unit to VCR mode.
NOTE:
Confirm that the VCR indicator lights.
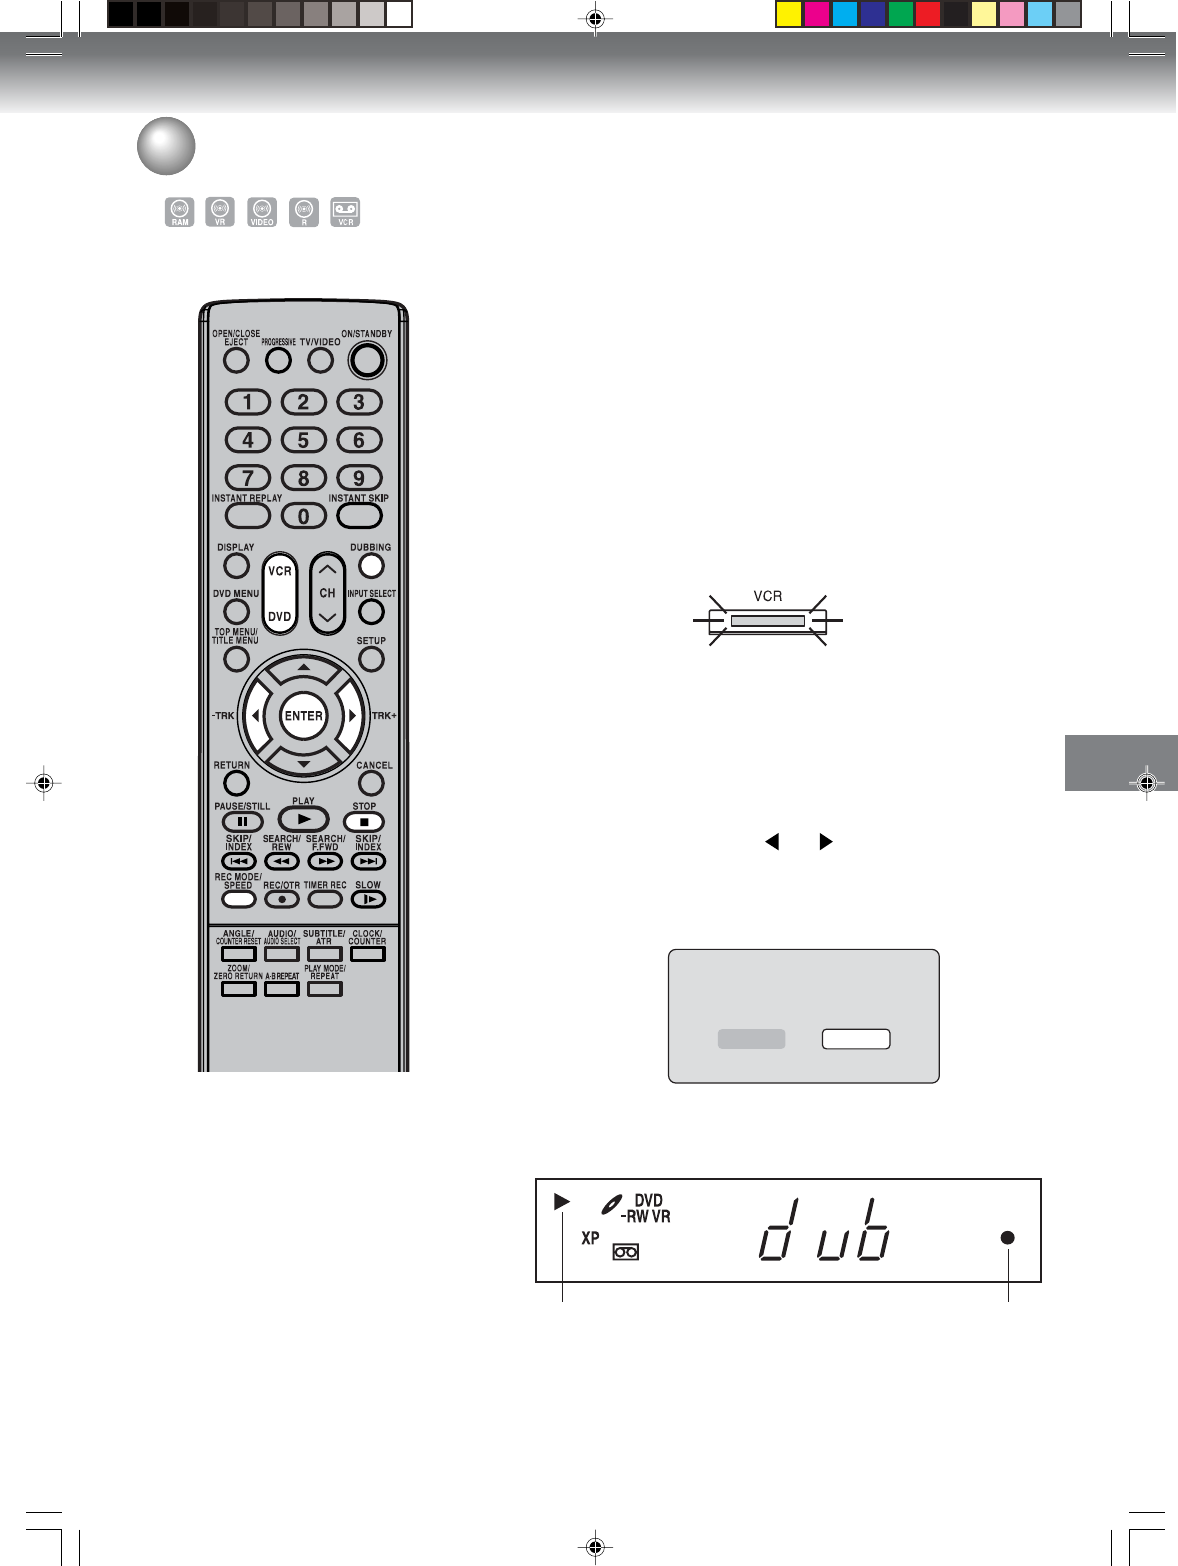
Dubbing a tape onto a disc
You can record video or audio on
a video tape onto a disc.
NOTES:
• Dubbing cannot be accomplished
when
- a copy protected tape is used.
- disc protection is set.
- disc has no recording space.
• Dubbing stops when
- the video tape is played back to
the end and stops.
- recording space becomes full.
• The videos recorded from TV pro-
grams or movies can be used only
for your personal enjoyment with-
out permission of the copyright
holder.
4Press DUBBING.
• The unit is changed to DVD mode automatically.
• The VCR is waiting for playback and the DVD is waiting for re-
cording. Then the following message will appear.
5Press DUBBING, or press or to select “Yes” and press
ENTER.
Dubbing starts.
• To cancel dubbing, press STOP, or select “No” and press EN-
TER.
In dubbing, during VCR playback, DVD recording and “dub” (dub-
bing) indicator appear on the display window.
6Press STOP to stop dubbing.
Video playback DVD recording
Dubbing
Confirm dubbing from VCR to DVD.
Yes No
2H5-01 P74-81 7/20/05, 20:5779
Dubbing
80
Preparation:
• Turn ON the TV and set to the video input mode.
• Load a source disc and a video tape for recording.
• Confirm the remaining tape for recording before operation.
1Press VCR to set this unit to VCR mode.
The VCR indicator will light.
2Press REC MODE/SPEED and select the recording mode.
• When REC MODE/SPEED is pressed each time, “SP” or “SLP”
is selected.
• The recording mode is indicated on both the TV screen and the
display window.
• For the details of the recording mode, see page 46.
3Press DVD and set the unit to DVD mode.
NOTE:
Confirm that the DVD indicator lights.
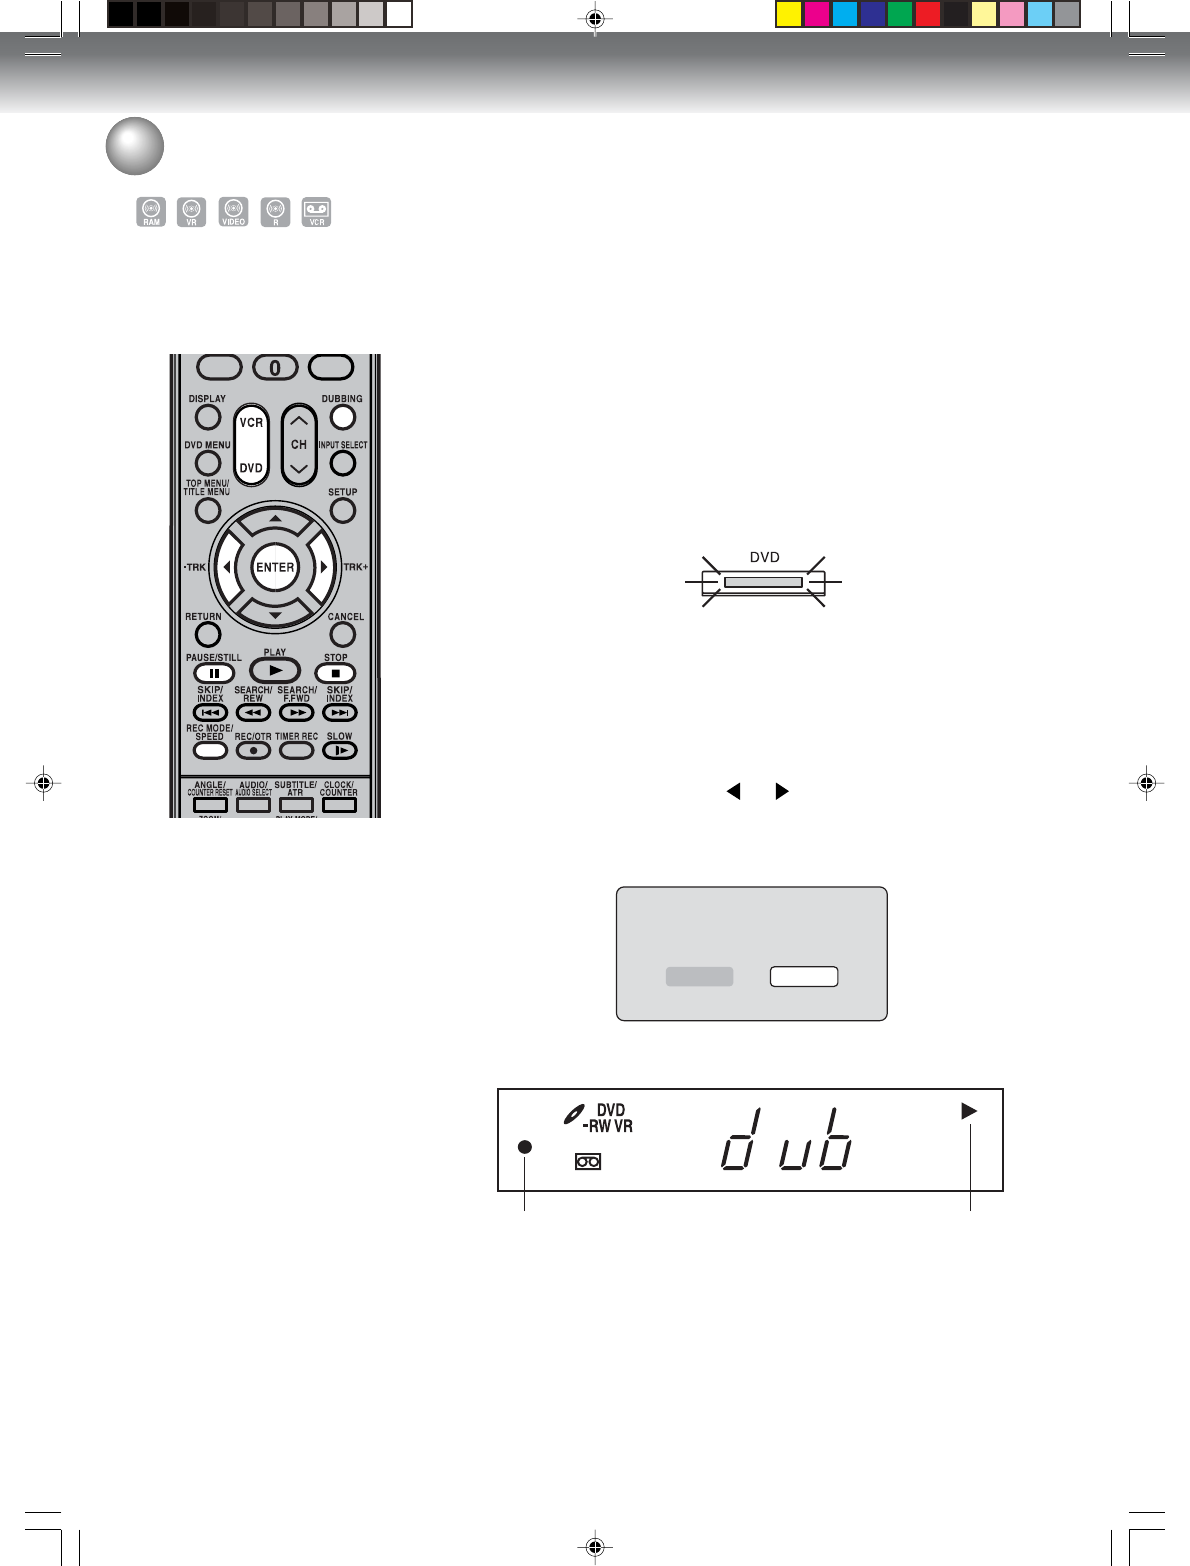
4Press DUBBING.
• The DVD is waiting for playback and the VCR is waiting for re-
cording. Then the following message appears.
5Press DUBBING, or press or to select “Yes” and press EN-
TER.
Dubbing starts.
• To cancel dubbing, press STOP, or select “No” and press EN-
TER.
Confirm dubbing from DVD to VCR.
Yes No
In dubbing, during DVD playback, VCR recording and “dub” (dub-
bing) indicator appear on the display window.
Video recording DVD playback
6Press STOP to stop dubbing.
NOTES:
• Dubbing cannot be accomplished
when
- a copy protected disc is used.
- the erase prevention tab of video
tape is removed.
• Dubbing stops when
- the disc is played back to the end
and stops.
- recording space becomes full.
• During dubbing, the unit is
changed to interlaced scan mode
automatically if it has been previ-
ously set to progressive scan
mode.
• If no special permission is obtained
from the copyright owner, videos
recorded from TV programs or
movies can only be used for your
own personal enjoyment.
You can record both video and
audio from a disc to a video tape.
When a disc with a copy guard is
used, a distorted image is re-
corded onto the video tape.
Dubbing a disc onto a tape
Dubbing only the specified titles or the playlist
When you want to dub only specific titles or playlists recorded on the disc, start the playback of the desired title or
playlist, and then immediately press DUBBING,STOP or PAUSE/STILL. If you press DUBBING, proceed from
step 5above. If you press STOP or PAUSE/STILL, proceed from step 4above. The first few seconds of the title or
playlist may not be recorded. When playback of the desired title or playlist is completed, press STOP to stop
dubbing. If you don’t press STOP, dubbing will continue.
2H5-01 P74-81 7/20/05, 20:5780
Dubbing
81
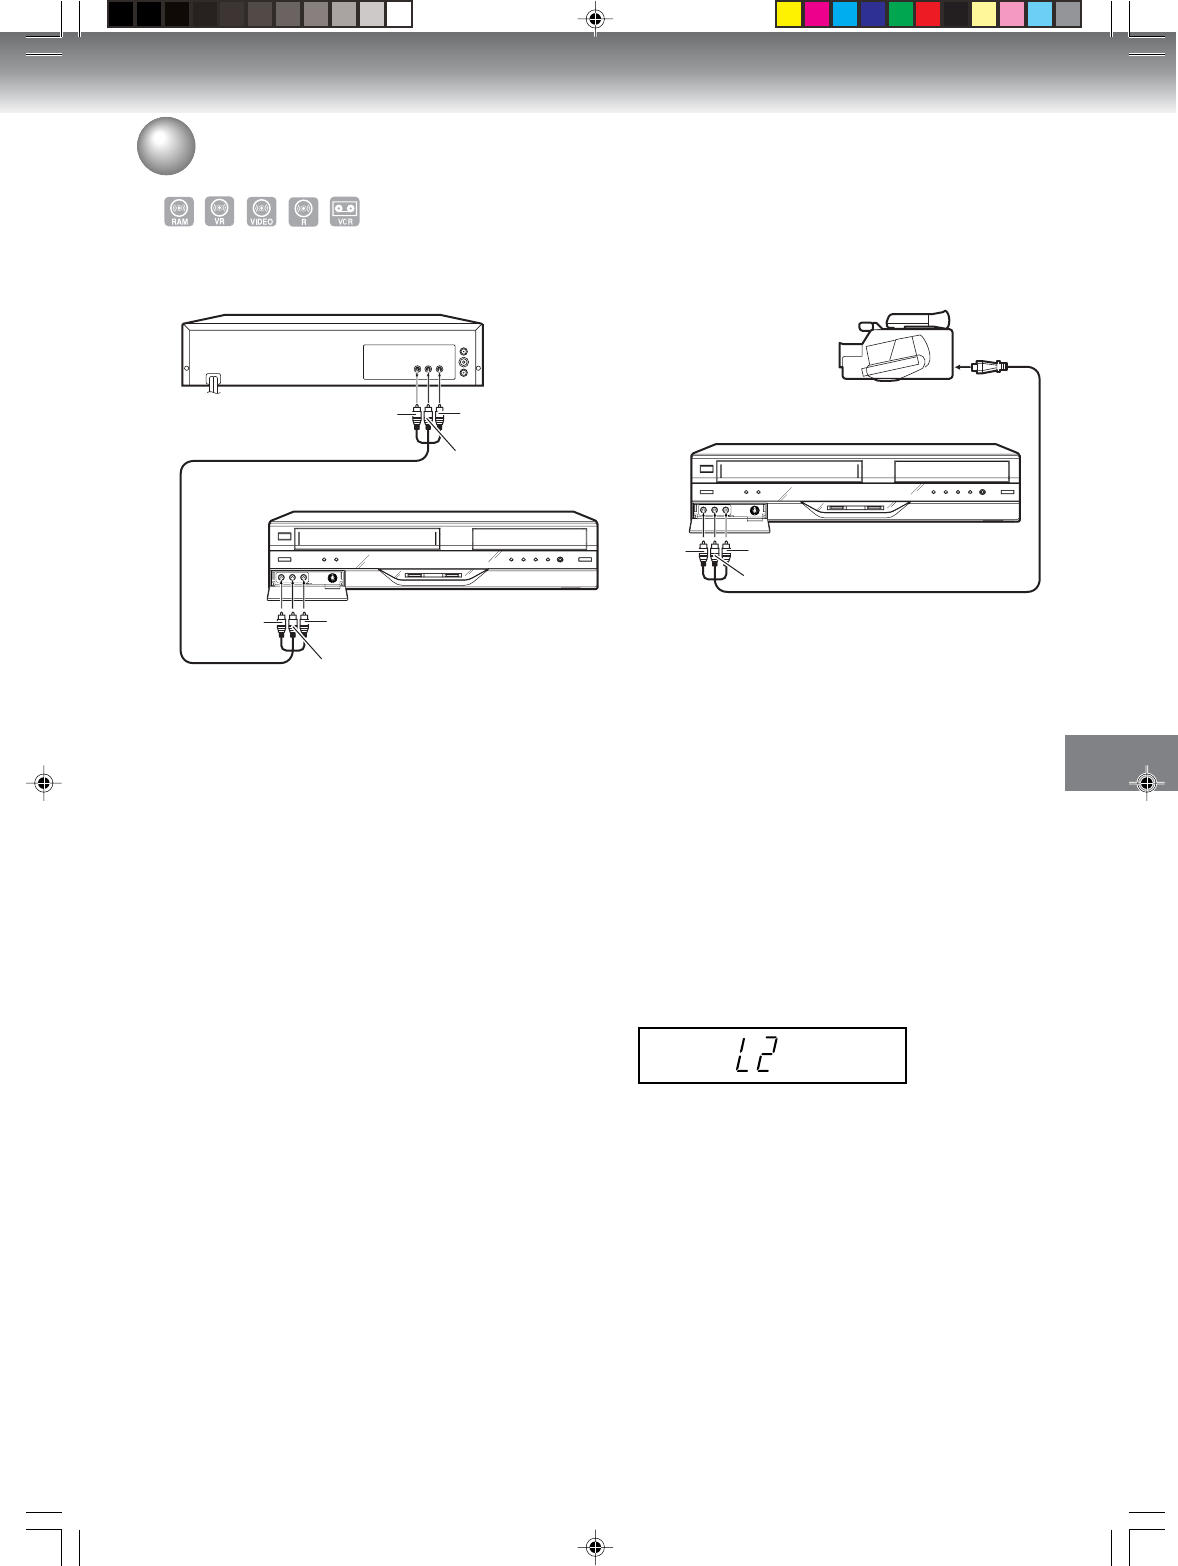
Dubbing using other equipment
You can connect another VCR or camcorder for dubbing.
Typical connection: When using this unit as a recording device
You can also connect to the audio/video input jack (L1) at the rear side
of this unit. In addition, each S-Video input jack at the front and rear
sides can also be used. When you use S-Video input jack, set the Line1
Input/Line2 Input setting to “S-Video” (see page 27).
To Audio (R) IN
Recording VCR
Playback VCR
To Audio (L) IN
To Video IN
To Audio (R) OUT
To Audio (L) OUT
To Video OUT
AUDIO/VIDEO cable (supplied)
NOTES:
• If using a monaural VCR or other
equipment, connect Audio (L) IN
jack to Audio OUT using only one
audio cable.
• When this unit is used as a play-
back device, a mark or a charac-
ter displayed on the screen is also
dubbed as an image. When the
screen display is set to OFF, see
“DISPLAY” on page 28.
• If no special permission is obtained
from the copyright owner, videos
recorded from TV programs or
movies can only be used for your
own personal enjoyment.
• You may not dub a copy protected
video or DVD disc.
• The audio mode for the audio in-
put jack can be selected, choos-
ing either stereo or monaural. Se-
lect “External Audio Input” from
Easy Menu and select from the be-
low.
Stereo: The sound is treated as
stereo sound.
L CH: The sound is treated as
the monaural sound of
the left channel.
R CH: The sound is treated as
the monaural sound of
the right channel.
When a video is recorded using this unit
Preparation:
• Turn ON the TV and set the unit to the video input mode.
• Load a video tape where the erase-protection tab is not activated or
a disc with enough recording space.
• To record onto a video tape, set the unit to VCR mode, whereas to
record onto a disc, set it to DVD mode.
1Press INPUT SELECT and set the channel to L2 (or L1).
L1 (LINE 1): on the rear panel
L2 (LINE 2): on the front panel
Confirm that L2 (or L1) appears on the display window.
2Press REC MODE/SPEED and select the recording mode.
VCR: SP or SLP (See page 46)
DVD: SP, LP, SLP or XP (See page 50)
3Press REC/OTR on this unit, then press PAUSE/STILL.
4Press the PLAY button on the playback device, then press the
PAUSE/STILL button.
5Release the recording pause and the playback still simultaneously
to begin the duplicating process.
6Press STOP to stop dubbing.
To Audio (R) IN
AUDIO/VIDEO cable (not supplied)
Recording VCR
Playback Camcorder
To Audio (L) IN
To Video IN
To AV jack
2H5-01 P74-81 7/20/05, 20:5781

Additional information
82
Glossary
A-B Repeat Playback
Playback that repeats between two set points, A and
B.
angle
Recorded onto some DVD discs are scenes which
have been simultaneously shot from a number of dif-
ferent angles (the same scene is shot from the front,
from the left side, from the right side, etc.). With such
discs, you can select the angle from which to view
the scene.
auto chapter
Feature that automatically makes chapter marks on
a DVD disc during recording.
auto clock
Feature that automatically sets the internal clock.
blue background
Feature that automatically changes unpleasant noise
images to a blue screen when a channel without a
broadcast or a channel on which the broadcast has
ended has been selected.
BROWSER screen
Screen that appears when MP3, WMA or JPEG CD
is inserted.
CABLE
Cable television.
chapter
A section within a title is called a “chapter”.
Chase playback
Feature that playback from the beginning of a pro-
gram currently being recorded.
copy guard
Copyright protection signal. Software and broadcasts
that contain this signal cannot be recorded.
Dolby Digital
Dolby® Digital Recording enables consumers to
record high-quality video with stereo sound on
recordable DVD discs. The technology, when
utilized instead of PCM recording, also saves
recordable disc space, allowing for higher video
resolution or extended recording time on each DVD.
DVDs created using Dolby Digital Recording will
play back on all DVD-Video players.
Manufactured under license from Dolby
Laboratories. "Dolby" and the double-D symbol are
trademarks of Dolby Laboratories.
DTS
This is a digital sound system developed by Digital
Theater Systems for use in cinemas. This system uses
6 audio channels and provides accurate sound field
positioning and realistic acoustics. (By connecting a
DTS Digital Surround decoder, you can also listen to
DTS Digital Surround sound.)
DVD menu
Menu recorded on a DVD-Video that enables the user
to select subtitles language, audio, etc.
finalize
Operation that enables discs recorded or edited with
this unit to be played back on other DVD players.
Instant replay
If INSTANT REPLAY is pressed during disc playback,
playback returns to a point 10 seconds earlier and
resumes.
Instant skip
When pressed during playback, playback forwards 30
seconds ahead and resumes.
interlaced scanning
Technology that alternately displays odd-numbered
scanning lines and even-numbered scanning lines.
Also called “480i”, “i” means “interlace”.
letter box
Feature that displays black bands above and below
playback images during playback of a disc recorded
in wide (16:9) format on a 4:3 TV connected to this
unit.
MP3
One type of audio compression that uses MPEG1.
This format compresses the sound to use up about 1/
10 of the original file space, with minimal loss of sound
quality.
original title
The file created by recording something is called an
“original title”.
OTR
One-touch Timer Recording. Start a timed recording
by pressing just one button (up to 6 hours).
pan scan
Feature that cuts the left and right edges of playback
images to a 4:3 size during playback of a disc recorded
in wide (16:9) format on a 4:3 TV connected to this
unit.
parental control
Some discs control viewing according to the age of
the viewer. A control level can be set for those types
of discs.
2H5-01 P82-87 7/20/05, 21:0182

Additional information
83
Glossary
parental control settings
Level 1: Adult discs and general discs (R-rated
discs included) cannot be played back.
Level 2 to 3: Adult discs and R-rated discs cannot be
played back.
Level 4 to 7: Adult discs cannot be played back.
(Level 4 to 7 discs contain content chil-
dren age 15 and younger may not see.)
Level 8: Virtually all discs can be played back
without restriction.
PBS
Acronym for Public Broadcast System. The PBS chan-
nel transmits data for auto clock setting.
playlist
User-created titles based on each original title.
Progressive scan
Technology that simultaneously displays odd-num-
bered scanning lines and even-numbered scanning
lines from top to bottom. Also called “480p”, “p” means
“progressive”.
region number
There is software that enables DVD playback in dif-
fering countries. The number of that kind of disc is
called the “region number”.
SETUP MENU
Menu that contains settings for various features of this
unit, such as recording and playback. Timer record-
ing is also set from the SETUP MENU.
slide show
Technique for flipping through and viewing many im-
ages (JPEG files).
subtitle language
Language used for subtitles of movies, etc. Viewers
can watch in a language of their choice.
title
A program recorded on a disc is called a “title”.
title menu
Menu that lists titles and tracks recorded on the disc.
It is used for playback and disc editing.
top menu
Menu on a DVD-Video for selecting chapters for play-
back, subtitle language, etc. Some DVD-Video call this
top menu “Title”.
track
A song on an Audio CD is called a “track”.
TRACK INFO screen
Screen that appears when an Audio CD is inserted.
Video mode
This recording format is compatible with commercially
available DVD players.
virtual surround
Technology that converts audio that is not recorded in
surround sound into audio that assimilates surround
sound.
VR mode
This recording format is the basic DVD-RW recording
format, and lets you enjoy the various editing func-
tions available with this unit.
2H5-01 P82-87 7/20/05, 21:0183
Additional information
84
Enter the appropriate code number for the initial settings “DVD Menu”, “Audio” and/or “Subtitle” (see page 28).
Abkhazian 1112 Fiji 1620 Lingala 2224 Singhalese 2919
Afar 1111 Finnish 1619 Lithuanian 2230 Slovak 2921
Afrikaans 1116 French 1628 Macedonian 2321 Slovenian 2922
Albanian 2927 Frisian 1635 Malagasy 2317 Somali 2925
Amharic 1123 Galician 1722 Malay 2329 Spanish 1529
Arabic 1128 Georgian 2111 Malayalam 2322 Sundanese 2931
Armenian 1835 German 1415 Maltese 2330 Swahili 2933
Assamese 1129 Greek 1522 Maori 2319 Swedish 2932
Aymara 1135 Greenlandic 2122 Marathi 2328 Tagalog 3022
Azerbaijani 1136 Guarani 1724 Moldavian 2325 Tajik 3017
Bashkir 1211 Gujarati 1731 Mongolian 2324 Tamil 3011
Basque 1531 Hausa 1811 Nauru 2411 Tatar 3030
Bengali; Bangla 1224 Hebrew 1933 Nepali 2415 Telugu 3015
Bhutani 1436 Hindi 1819 Norwegian 2425 Thai 3018
Bihari 1218 Hungarian 1831 Oriya 2528 Tibetan 1225
Breton 1228 Icelandic 1929 Panjabi 2611 Tigrinya 3019
Bulgarian 1217 Indonesian 1924 Pashto, Pushto 2629 Tonga 3025
Burmese 2335 Interlingua 1911 Persian 1611 Turkish 3028
Byelorussian 1215 Irish 1711 Polish 2622 Turkmen 3021
Cambodian 2123 Italian 1930 Portuguese 2630 Twi 3033
Catalan 1311 Japanese 2011 Quechua 2731 Ukrainian 3121
Chinese 3618 Javanese 2033 Rhaeto-Romance2823 Urdu 3128
Corsican 1325 Kannada 2124 Romanian 2825 Uzbek 3136
Croatian 1828 Kashmiri 2129 Russian 2831 Vietnamese 3219
Czech 1329 Kazakh 2121 Samoan 2923 Volapük 3225
Danish 1411 Kirghiz 2135 Sanskrit 2911 Welsh 1335
Dutch 2422 Korean 2125 Scots Gaelic 1714 Wolof 3325
English 1524 Kurdish 2131 Serbian 2928 Xhosa 3418
Esperanto 1525 Laothian 2225 Serbo-Croatian 2918 Yiddish 2019
Estonian 1530 Latin 2211 Shona 2924 Yoruba 3525
Faroese 1625 Latvian, Lettish 2232 Sindhi 2914 Zulu 3631
Language Name Code Language Name Code Language Name Code Language Name Code
Language code list
2H5-01 P82-87 7/20/05, 21:0184
Additional information
85
SYMPTOMS POSSIBLE SOLUTIONS
• Make sure the power cord is plugged in.
• Try another AC outlet.
• Power is off, check fuse or circuit breaker.
• Unplug unit, then plug it back in.
• Select the DVD or VCR mode before operating.
• Antenna connection is not correct or antenna cable is discon-
nected.
• The video channel is not in the correct position or the TV is not
set to the video channel 3 or 4.
• Check the unit is connected correctly.
• The video input selector of the TV is not set to VIDEO. Set to
VIDEO (or equivalent).
• Channel is set to the external mode.
• Check the unit is connected correctly.
• Check the input selector of the amplifier is set properly.
• The unit is in the special playback mode.
• Aim at the remote control at the remote sensor.
• Operate within approx. 7 meters or reduce the light in the room.
• Clear the path of the beam.
• The batteries are weak. Replace the batteries.
• Check the batteries are inserted correctly.
• Check all Cable TV connections.
• Station or Cable TV system problems, try another station.
DVD/VCR does not operate.
No picture.
No sound.
The remote control does not func-
tion.
No cable TV reception.
Problems and troubleshooting
Use the following checklist for troubleshooting when you have problems with your unit. Consult your local dealer or
service outlet if problems persist.
Be sure all connections are properly made when using with other units.
DVD/VCR
PAGE
15
–
–
15
31,47
16~19
22
16~21
–
–
16~21
–
34
15
18, 19
DVD
• Select proper language in the SETUP MENU.
• No disc is inserted.
• The disc may be dirty. Clean up the disc.
• The unit cannot play DVD-ROMs, etc.
• Some discs may not do some of the functions.
• Check the disc space, using the disc information.
• Check the disc for protection.
• Check if the video to be recorded is not “copy-guarded”.
• Check that the number of recorded titles is 99 or less, using the
disc information.
• Check the number of the total chapters for the recorded titles is
999, using the disc information.
• In a DVD-RW of Ver.1.0, recording in Video mode does not work.
Check the disc type.
• Check that the disc is finalized.
• Some DVD players will not play even if the disc has been final-
ized.
• If the disc was recorded in VR mode, the other player must be
RW compatible in order to play the disc.
Display is not shown in your lan-
guage.
Playback doesn’t start.
Cancel playback, search, slow-
motion play, repeat play, or program
play, etc. cannot be performed.
Recording does not work.
A recorded disc using this recorder
cannot be played back in other
players.
28
31
9
9
–
33
30
51
33, 50
33, 50
10
30
11, 30
11, 30
2H5-01 P82-87 7/20/05, 21:0185
Additional information
86
Problems and troubleshooting / Video head cleaning
SYMPTOMS POSSIBLE SOLUTIONS PAGE
TV recording does not work.
Timer recording does not work.
Noise bars on screen.
• The erase prevention tab of the video cassette is broken off.
• The unit is in the external input mode.
• The time is not set correctly.
• The recording start/end time is not set correctly.
• TIMER REC has not been pressed ( is not lit).
• Tracking adjustment beyond range of automatic tracking circuit.
Try manual tracking adjustment.
• Video heads are dirty.
• The tape is worn or damaged.
46, 52
25
56
57
48
below
–
No picture, or screen is blurred or
divided into two parts.
No 4:3 (16:9) picture.
No on-screen display.
No surround sound.
The unit or remote operation key is
not functioning.
Playback does not start when the
title is selected.
Audio soundtrack and/or subtitle
language is not changed when you
playback a DVD.
No subtitles.
Angle cannot be changed.
“” appears on the screen.
• The progressive scan mode is active though the unit is
connected to a TV via the VIDEO OUT jack.
• The setup does not match your TV.
• Select DISPLAY to “ON”.
• The setup does not match your stereo system.
• Turn off the unit and unplug the AC power cord for several min-
utes, then replug it.
• Check the Parental setup.
• Multilingual language is not recorded on the DVD disc.
• Some discs have no subtitles.
• Subtitles are cleared. Press SUBTITLE.
• Multi-angles are not recorded on the DVD disc.
• The function is prohibited with the unit or the disc.
VCR
OTHER
45
26
26
–
21
24
28
28, 39
–
–
Video head cleaning
Video head clogging
The video heads are meant by which the DVD/VCR reads the picture from the tape during playback. In the unlikely
event that the heads become dirty enough to be clogged, no picture will be played back. This can easily be
determined if, during playback of a known good tape, there is good sound, but no picture (picture is extremely
snowy). If this is the case, DVD/VCR must checked by qualified service personnel.
NOTES: • DO NOT ATTEMPT TO CLEAN THE VIDEO HEADS OR SERVICE THE UNIT BY REMOVING THE
REAR COVER.
• Video heads may eventually wear out and should be replaced when they fail to produce clear pictures.
• To help prevent video head clogging, use only good quality VHS tapes. Discard worn out tapes.
2H5-01 P82-87 7/20/05, 21:0186
Additional information
87
Load another disc for recording.
System error.
Please wait.
System error.
Disc might be failed.
Press ENTER.
Disc error.
Incorrect disc.
Cannot playback.
Region code error.
Cannot record.
General
Error/Warning message list
ERROR/WARNING MESSAGE
CAUSE POSSIBLE SOLUTIONS
NOTE: Any error/warning message other than those above might appear. Take measures against such a mes-
sage by seeing the possible solutions above.
The power was shut down without com-
pleting the termination process due to a
power failure or disconnection of the AC
cord plug. (Abnormal termination)
The data restoration was completed.
A scratch or contamination was found on
the disc.
The disc cannot be identified.
A disc specified other than “Region 1” or
“Region ALL” was loaded.
Recording was tried onto the disc hav-
ing no space.
Recording was tried onto the disc which
does not support recording.
• Adding data was tried onto the disc re
corded in the other unit.
• Adding data was tried to the disc where
PC data was recorded.
Disc erase-protection is applied.
Wait until the message disappears.
Press ENTER, then the screen re-
turns to the normal display. The
data may not be restored even
if
the restoration process is performed.
Check the disc and reload it, or use
another disc for recording.
Check the disc and load a proper
disc.
A disc specified other than “Region
1” or “Region ALL” cannot be played
back.
Check the disc space.
Load a recordable disc.
99 titles were recorded on the disc.
Recording was attempted on a copy
protected video.
A invalid key pressed during timer re-
cording standby and recording.
Timer recording is standing by.
• A copy protected tape is used
• Disc protection is set.
The video tape or disc became full during
dubbing.
Erase unnecessary titles or load
another disc.
You cannot record a copy protected
video.
Wait until the timer recording is com-
plete.
Cancel the timer recording standby
mode.
Load another video tape or disc for
recording and restart..
Load another video tape or disc for
recording and restart.
A scratch or contamination was found on
the disc.
Check the disc and reload it, or use
another disc for recording.
Playback
Recording
Cannot record.
Disc protected.
Turn off the protect. disc from Setup
Menu (DISC).
Or turn the protect switch to off on
the DVD-RAM cartridge itself.
Undo finalization or load another
disc for recording.
Cannot record.
Disc finalized. Recording was tried onto the finalized
disc.
Wait until the process is completed.
Data is being written to the
disc.
The recording termination is processing.
Erase unnecessary titles or load
another disc and restart recording.
Disc became full during recording.
No space on the disc.
Cannot record, exceeds
limited number of titles.
Cannot record.
Protected image.
The operation cannot be
executed during timer
recording standby and
recording.
Cancel T-REC standby after
executing this operation.
Unable to shift during
duplication process.
Duplication aborted.
Copying interrupted.
Dubbing
2H5-01 P82-87 7/20/05, 10:20 PM87

88
GENERAL
Power supply:
Power consumption:
Weight:
Dimensions:
Operating temperature:
Operating humidity:
Inputs/Outputs:
Video:
Audio:
Antenna:
VCR section
Video head:
Audio track:
Tuner:
RF channel output:
F.FWD/REW Time:
Hi-Fi frequency response:
Hi-Fi dynamic range:
DVD section
Signal system:
Applicable disc:
Recording format:
Recording discs:
Recording time:
(based on a 4.7GB disc)
Audio characteristics
frequency response:
S/N Ratio:
Harmonic distortion:
Wow and flutter:
Dynamic range:
Output:
Pickup:
ACCESSORIES:
AC 120V 60Hz
Operation: 29W
Standby: 2.5W (if display window is off.)
12.1 lbs (5.5 kg)
Width : 16-15/16 inches (430 mm)
Height : 3-1/2 inches (89.5 mm)
Depth : 12-9/16 inches (318.5 mm)
41°F to 95°F (5°C to 35°C)
Less than 80% RH
In: 1Vp-p/75 ohm
Out: 1Vp-p/75 ohm
In: –8dBm/50k ohm
Out: –8dBm/1k ohm
UHF/VHF IN/OUT: 75 ohm coaxial
4 Rotary Heads
Hi-Fi Sound - 2 Tracks / MONO Sound - 1 Track
181 Channel Freq. Synthesized
VHF 2-13
UHF 14-69
Cable TV 14-36 (A)-(W) 37-59 (AA)-(WW)
60-85 (AAA)-(ZZZ) 86-94 (86)-(94)
95-99 (A-5)-(A-1) 100-125 (100)-(125)
01 (5A)
Channel 3 or 4, Switchable
Approx. 1 minute and 48 seconds (with T-120 Cassette Tape)(at+25˚C)
20Hz to 20,000Hz
More than 90dB
NTSC
DVD (12cm), CD (12cm)
DVD-Video Recording (VR mode)
DVD-VIDEO (Video mode)
DVD-RAM, DVD-RW, DVD-R
XP: Approx. 60 min
SP: Approx. 120 min
LP: Approx. 240 min
SLP: Approx. 360 min
DVD: 4Hz - 22kHz
CD: 4Hz - 20kHz
90dB
Less than 1%
Less than 0.01% Wrms
More than 90dB
Video : (RCA) 1 Vp-p/75 ohm
Audio : (RCA) –12 dBm/1k ohm
Digital Audio : 0.5Vp-p/75 ohm
CD : Wavelength: 780 nm
Maximum output power: 8.5 mW
DVD : Wavelength: 660 nm
Maximum output power: 120 mW
Remote control (SE-R0180) x 1
75 ohm Coaxial Cable x 1
AUDIO/VIDEO Cable x 1
Battery AAA x 2
Specifications
• This model complies with the above specifications.
• Designs and specifications are subject to change without notice.
• This model may not be compatible with features and/or specifications that may be added in the future.
Additional information
2H5-01 P88-90 7/20/05, 21:0388

Additional information
89
Limited United States Warranty
Digital Audio Video ("DAV") Product - Depot Repair Warranty
Toshiba America Consumer Products, L.L.C. ("TACP") makes the following limited warranties to original consumers in
the United States. THESE LIMITED WARRANTIES EXTEND TO THE ORIGINAL CONSUMER PURCHASER OR
ANY PERSON RECEIVING THIS DAV PRODUCT AS A GIFT FROM THE ORIGINAL CONSUMER PURCHASER
AND TO NO OTHER PURCHASER OR TRANSFEREE.
DAV PRODUCTS PURCHASED IN THE U.S.A. AND USED ANYWHERE OUTSIDE OF THE U.S.A., INCLUDING,
WITHOUT LIMITATION, CANADA AND MEXICO, ARE NOT COVERED BY THESE WARRANTIES.
DAV PRODUCTS PURCHASED ANYWHERE OUTSIDE OF THE U.S.A., INCLUDING, WITHOUT LIMITATION,
CANADA AND MEXICO, AND USED IN THE U.S.A., ARE NOT COVERED BY THESE WARRANTIES.
Limited Ninety (90) Day Warranty on Labor
TACP warrants this DAV Product and its parts against
defects in materials or workmanship for a period of ninety
(90) days after the date of original retail purchase.
DURING THIS PERIOD, TACP WILL, AT TACP'S
OPTION, REPAIR OR REPLACE A DEFECTIVE PART
WITH A NEW OR REFURBISHED PART WITHOUT
CHARGE TO YOU FOR PARTS OR LABOR.
Limited One (1) Year Warranty on Parts
TACP further warrants the parts in this DAV Product
against defects in materials or workmanship for a period
of one (1) year after the date of original retail purchase.
DURING THIS PERIOD, TACP WILL, AT TACP'S
OPTION, REPAIR OR REPLACE A DEFECTIVE PART
WITH A NEW OR REFURBISHED PART WITHOUT
CHARGE TO YOU FOR THE PART, PROVIDED THAT IF
A DEFECTIVE PART IS REPAIRED OR REPLACED
AFTER NINETY (90) DAYS AFTER THE DATE OF
ORIGINAL RETAIL PURCHASE, THE CONSUMER
SHALL PAY ALL LABOR CHARGES INVOLVED IN THE
REPAIR OR REPLACEMENT THEREOF.
Rental Units
The warranty for DAV Product rental units begins on the
date of the first rental or thirty (30) days after the date of
shipment to the rental firm, whichever comes first.
Commercial Units
DAV Products sold and used for commercial purposes
have a limited warranty for all parts and labor, which
warranty begins on the date of original retail purchase and
ends on the date that is ninety (90) days thereafter.
Owner's Manual and Product Registration Card
Read this owner’s manual thoroughly before operating
this DAV Product.
Complete and mail the enclosed product registration card
or register your DAV Product on-line at
www.tacp.toshiba.com/service as soon as possible. By
registering your DAV Product you will enable TACP to
bring you new products specifically designed to meet your
needs and help us to contact you in the unlikely event a
safety notification is required under the U.S. Consumer
Product Safety Act. Failure to complete and return the
product registration card does not diminish your warranty
rights.
Your Responsibility
THE ABOVE WARRANTIES ARE SUBJECT TO THE
FOLLOWING CONDITIONS:
(1) You must retain your bill of sale or provide other proof
of purchase.
(2) All warranty servicing of this DAV Product must be
made by the Depot Warranty Repair Center specified
by the TACP Consumer Solutions Center.
(3) The warranties from TACP are effective only if the
DAV Product is purchased and operated in the
Continental U.S.A. or Puerto Rico.
(4) Labor service charges for set installation, setup,
adjustment of customer controls, and installation or
repair of antenna systems are not covered by this
warranty. Reception problems caused by inadequate
antenna systems are your responsibility.
(5) Warranties extend only to defects in materials or
workmanship as limited above, and do not extend to
any DAV Product or parts that have been lost or
discarded by you or to damage to the DAV Product or
parts caused by fires, misuse, accident, Acts of God
(such as lightning or fluctuations in electric power),
improper installation, improper maintenance, or use in
violation of instructions furnished by TACP; use or
malfunction through simultaneous use of this DAV
Product and connected equipment; or to units that
have been modified or had the serial number
removed, altered, defaced, or rendered illegible.
Limited warranty
2H5-01 P88-90 7/20/05, 21:0389

90
How to Obtain Warranty Services
If, after following all of the operating instructions in this
manual and checking the section "Troubleshooting," you
find that service is needed:
(1) For instructions on how to obtain warranty service for
your DAV Product, contact TACP's Consumer Solution
Center toll free at 1-800-631-3811.
(2) You must include a copy or original bill of sale or other
proof of purchase along with the entire DAV Product to
the Depot Warranty Repair Center specified by the
TACP Consumer Solutions Center. You are
responsible for all inbound transportation and
insurance charges for the DAV Product to the Depot
Warranty Repair Center specified by the TACP
Consumer Solutions Center.
For additional information, visit TACP's website:
www.tacp.toshiba.com
ALL WARRANTIES IMPLIED BY THE LAW OF ANY
STATE OF THE U.S.A., INCLUDING THE IMPLIED
WARRANTIES OF MERCHANTABILITY AND FITNESS
FOR A PARTICULAR PURPOSE, ARE EXPRESSLY
LIMITED TO THE DURATION OF THE LIMITED
WARRANTIES SET FORTH ABOVE. WITH THE
EXCEPTION OF ANY WARRANTIES IMPLIED BY THE
LAW OF ANY STATE OF THE U.S.A. AS HEREBY
LIMITED, THE FOREGOING WARRANTY IS EXCLUSIVE
AND IN LIEU OF ALL OTHER WARRANTIES,
GUARANTEES, AGREEMENTS, AND SIMILAR
OBLIGATIONS OF TACP WITH RESPECT TO THE
REPAIR OR REPLACEMENT OF ANY PARTS. IN NO
EVENT SHALL TACP BE LIABLE FOR CONSEQUENTIAL
OR INCIDENTAL DAMAGES (INCLUDING, BUT NOT
LIMITED TO, LOST PROFITS, BUSINESS
INTERRUPTION, OR MODIFICATION OR ERASURE OF
RECORDED DATA CAUSED BY USE, MISUSE OR
INABILITY TO USE THIS DAV PRODUCT).
No person, agent, distributor, dealer, or company is
authorized to change, modify, or extend the terms of these
warranties in any manner whatsoever. The time within
which an action must be commenced to enforce any
obligation of TACP arising under the warranty or under any
statute or law of the United States or any state thereof is
hereby limited to ninety (90) days from the date you
discover, or should have discovered, the defect. This
limitation does not apply to implied warranties arising
under state law.
THIS WARRANTY GIVES YOU SPECIFIC LEGAL
RIGHTS AND YOU MAY ALSO HAVE OTHER RIGHTS
WHICH MAY VARY FROM STATE TO STATE IN THE
U.S.A. SOME STATES OF THE U.S.A. DO NOT ALLOW
LIMITATIONS ON HOW LONG AN IMPLIED WARRANTY
LASTS, WHEN AN ACTION MAY BE BROUGHT,
OR THE EXCLUSION OR LIMITATION OF INCIDENTAL
OR CONSEQUENTIAL DAMAGES, SO THE ABOVE
PROVISIONS MAY NOT APPLY TO YOU UNDER
SUCH CIRCUMSTANCES.
Limited warranty
2H5-01 P88-90 7/20/05, 21:0390

91
2H5-01 P91-BACK 7/20/05, 21:0391
92 Printed in Thailand
J2H50101A SH 05/08
K
2H5-01 P91-BACK 7/20/05, 21:0392