ORION ELECTRIC M2J4A DVD / VCR TV Interface Device User Manual 2J40101A Cover
ORION ELECTRIC CO., LTD. DVD / VCR TV Interface Device 2J40101A Cover
Contents
- 1. User Manual 1
- 2. User Manual 2
- 3. User Manual 3
User Manual 2
Disc playback
46
MP3/WMA/JPEG/DivX® playback
MP3 CD
•MP3 files must have the extension
letters “.mp3”.
•Standard, sampling frequency, and
the bit rate:
MPEG-1 Audio
32kHz, 44.1kHz, 48kHz
32kbps to 320kbps (constant bit
rate or variable bit rate)
•The recommend recording setting
for a high quality sound is 44.1kHz
of sampling frequency and
128kbps of constant bit rate.
WMA CD
•When creating a WMA disc, make
sure that the copyright function is
off. DRM (Digital Rights Manage-
ment) files cannot be played back.
•WMA files must have the extension
letters “.wma”.
•Standard, sampling frequency, and
the bit rate:
WMA version 7 and 8
32kHz, 48kbps
44.1kHz, 48kbps to 192kbps
48kHz,128kbps to 192kbps
•Music files recorded as mono,
48kHz, 48kbps cannot be played
back by this unit.
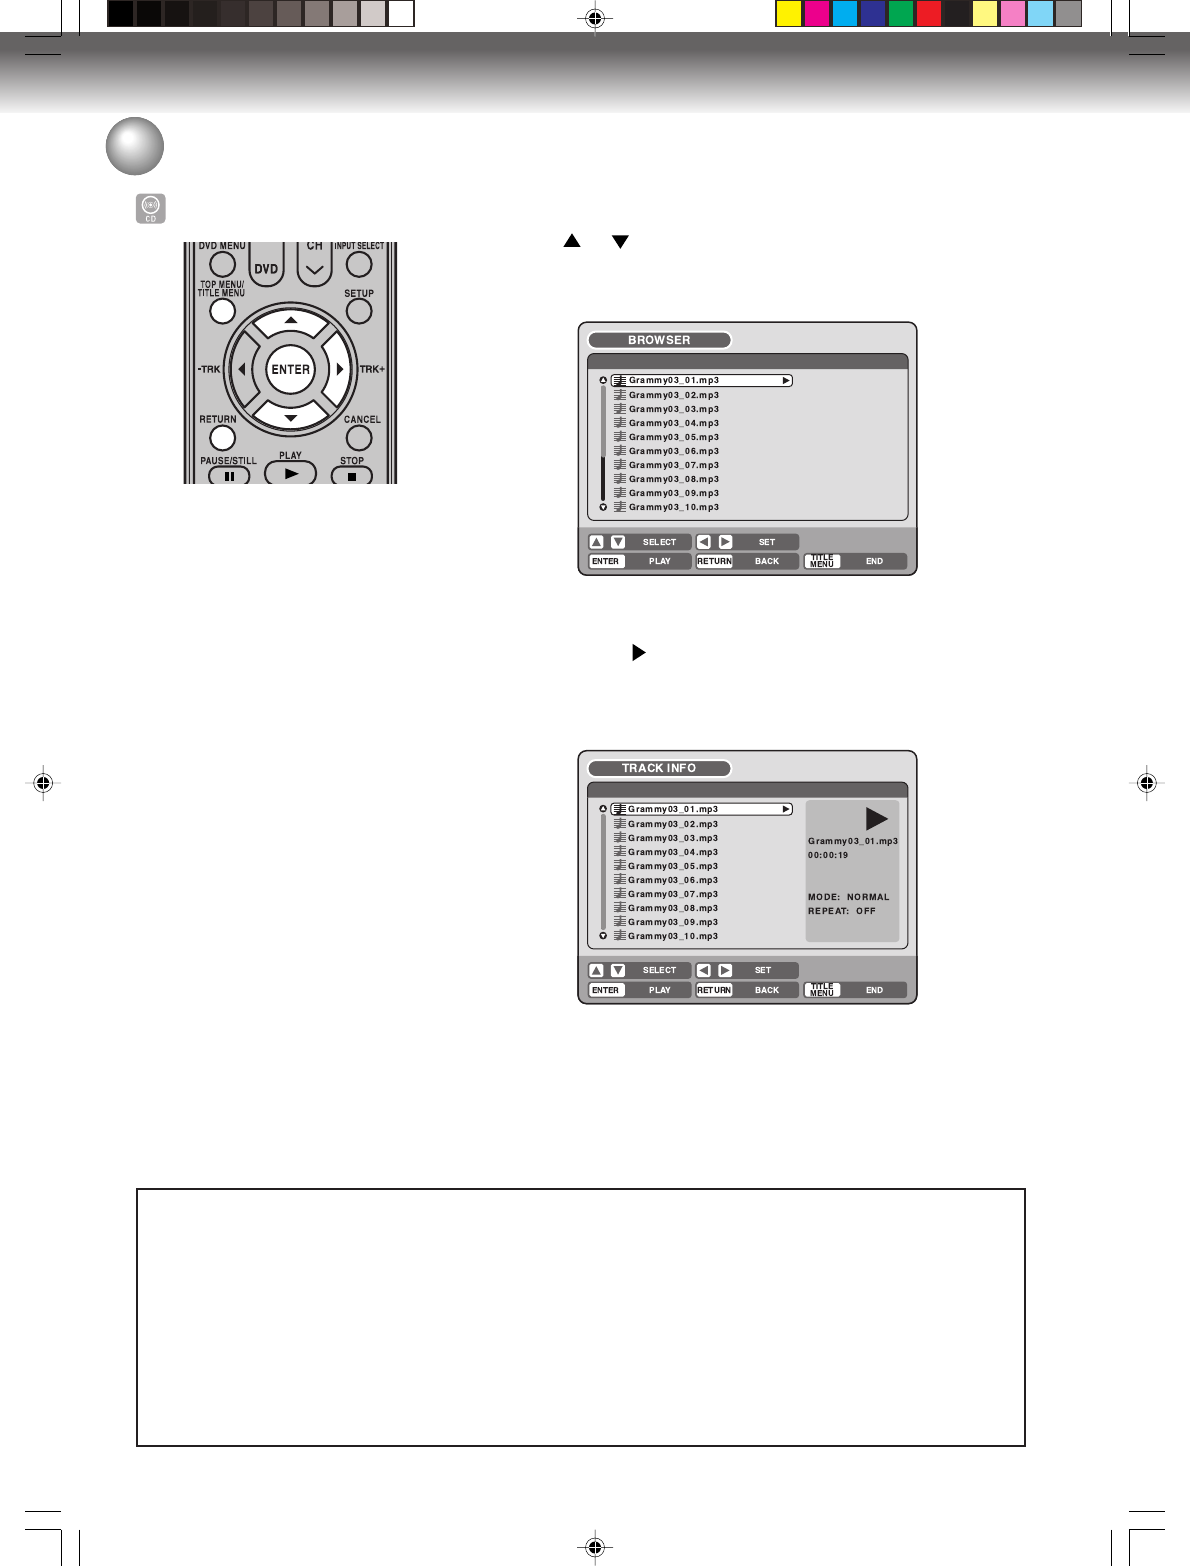
Playing back MP3/WMA files
1Press or to select MP3 or WMA file.
•In case the disc includes more than 10 files, you can turn to the
next or the previous page. (See page 43.)
2Carry out either of the item a or b below.
a: Press ENTER.
b: Press to select “PLAY” and press ENTER.
The TRACK INFO screen appears to playback the selected file.
For the details of the TRACK INFO screen, see “Various opera-
tions on CD” on page 43.
3To return to the BROWSER screen, press RETURN.
•To stop playback of the MP3 or WMA files, press TITLE MENU.
This DVD/VCR requires discs and recordings to meet certain technical standards in order to achieve optimal
playback quality. Pre-recorded DVDs are automatically set to these standards. There are many different types
of recordable disc formats (including CD-R containing MP3 or WMA files) and these require certain pre-
existing conditions (see above) to ensure compatible playback. Because this area of technology is still
evolving, Toshiba cannot guarantee that all recordable discs will produce optimal playback quality. The
technical criteria set forth in this owner’s manual are meant only as a guide.
Please be advised that you must obtain permission from the applicable copyright owners to download
copyrighted content, including music files, in any format, including the MP3 and WMA formats, prior to the
downloading thereof. Toshiba has no right to grant and does not grant permission to download any
coprighted content.
2J40101A P41-47 3/4/06, 10:44 AM46
Disc playback
47
MP3/WMA/JPEG/DivX® playback
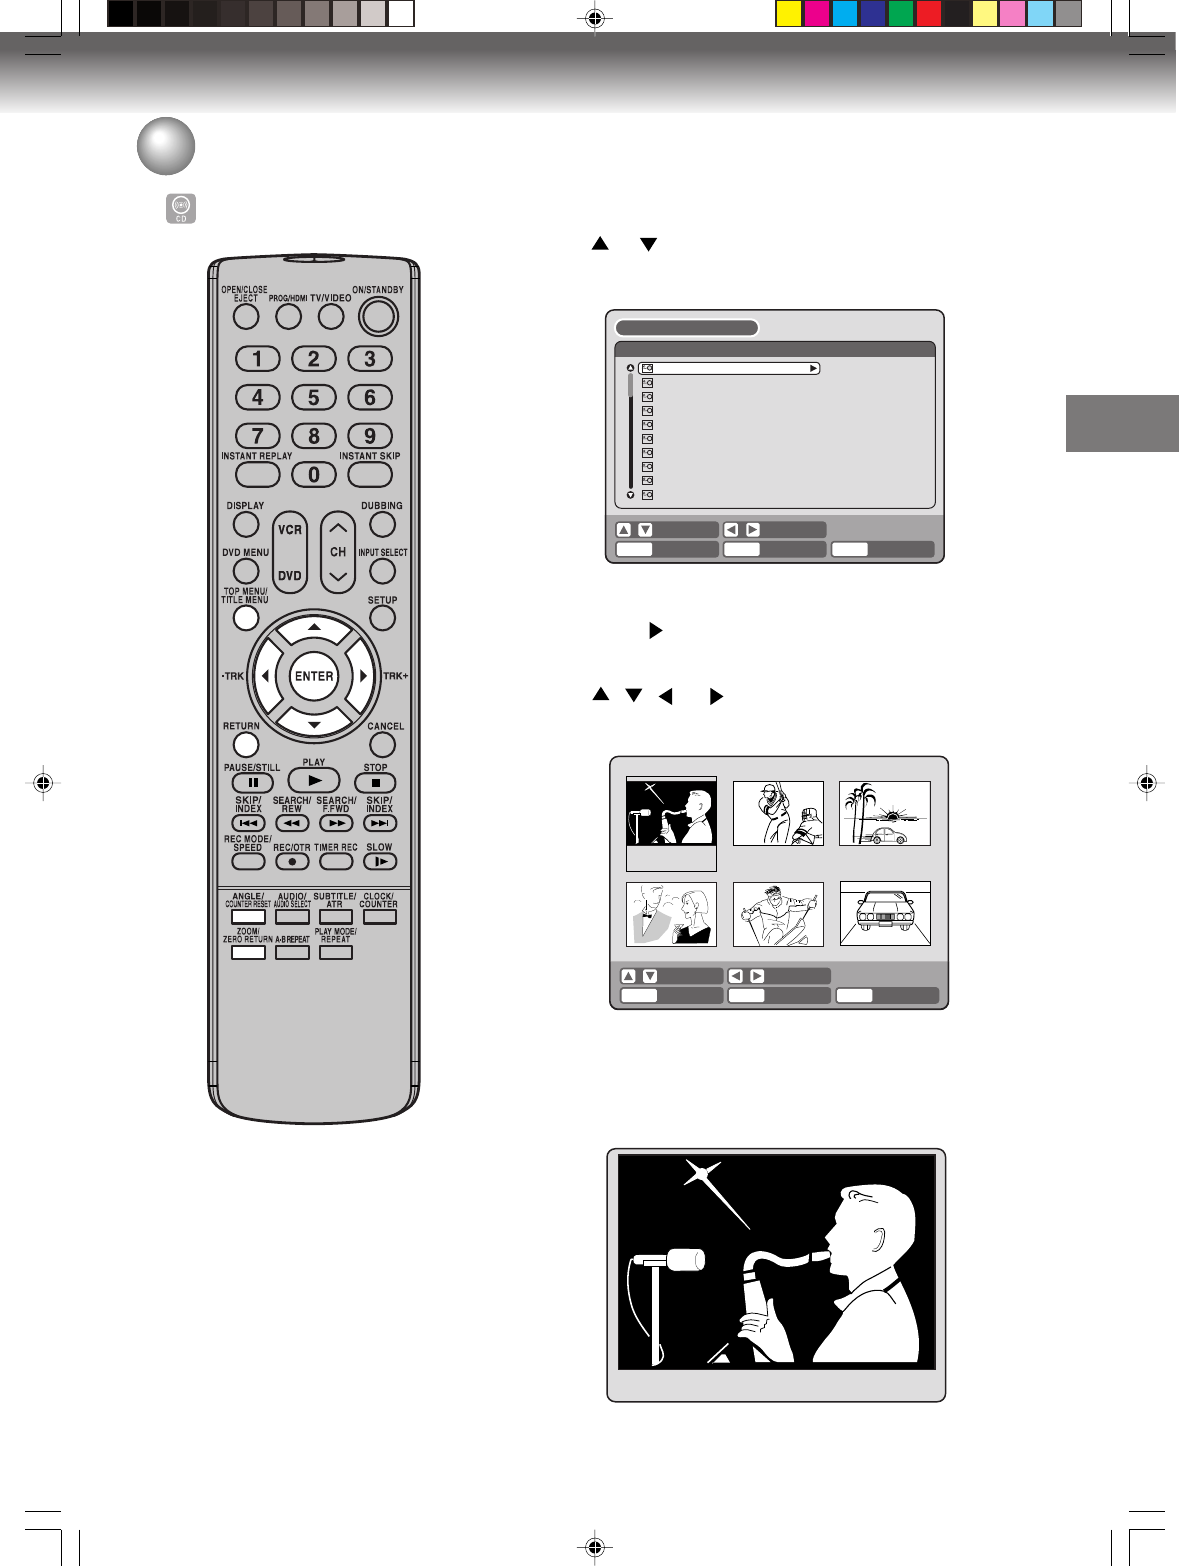
Playing back JPEG files
1Press or to select JPEG file.
•In case the disc includes more than 10 files, you can turn to the
next or the previous page. (See page 43.)
2Carry out either of the item a or b below.
a: Press ENTER.
b: Press to select “PLAY” and press ENTER.
The thumbnail images of the JPEG files stored in the route direc-
tory or the folder appear.
Press , , or to select the pages of the thumbnail im-
ages, or select the JPEG file to be displayed at first for the slide
show.
3
Press ENTER to play the selected picture.
If you have set the interval time for JPEG slide show, the pictures
will be played back one after another automatically. (See page 33.)
• Press ZOOM to enlarge the displayed image.
• Press ANGLE to rotate the image by 90 degrees each time.
Alone.jpg
Ambassadeurs-Aristide_Bruant.jp
Arlstide Bruant.jpg
At_the_Moulin_Rouge.jpg
Clown Cha-U-Kao.jpg
Dancer Seated.jpg
EI Dorado.jpg
Galerie 65 Cannes.jpg
Jane Avril-1893.jpg
Alfred Ia Guigne.jpg
/popArt
BROWSER
ENTER
RETURNPLAY BACK
SET
END
SELECT
TITLE
MENU
Saxophone.jpg Baseball.jpg Drive.jpg
party_240803.jpg practice_ski.jpg My_car.jpg
ENTER
RETURNPLAY BACK END
SELECT SELECT
TITLE
MENU
JPEG CD
JPEG files must have the extension
letters “.jpe”, “.jpeg” or “.jpg”.
4To return to the thumbnail screen, press RETURN.
•To stop the slide show, press TITLE MENU.
2J40101A P41-47 3/4/06, 10:44 AM47
Disc playback
48
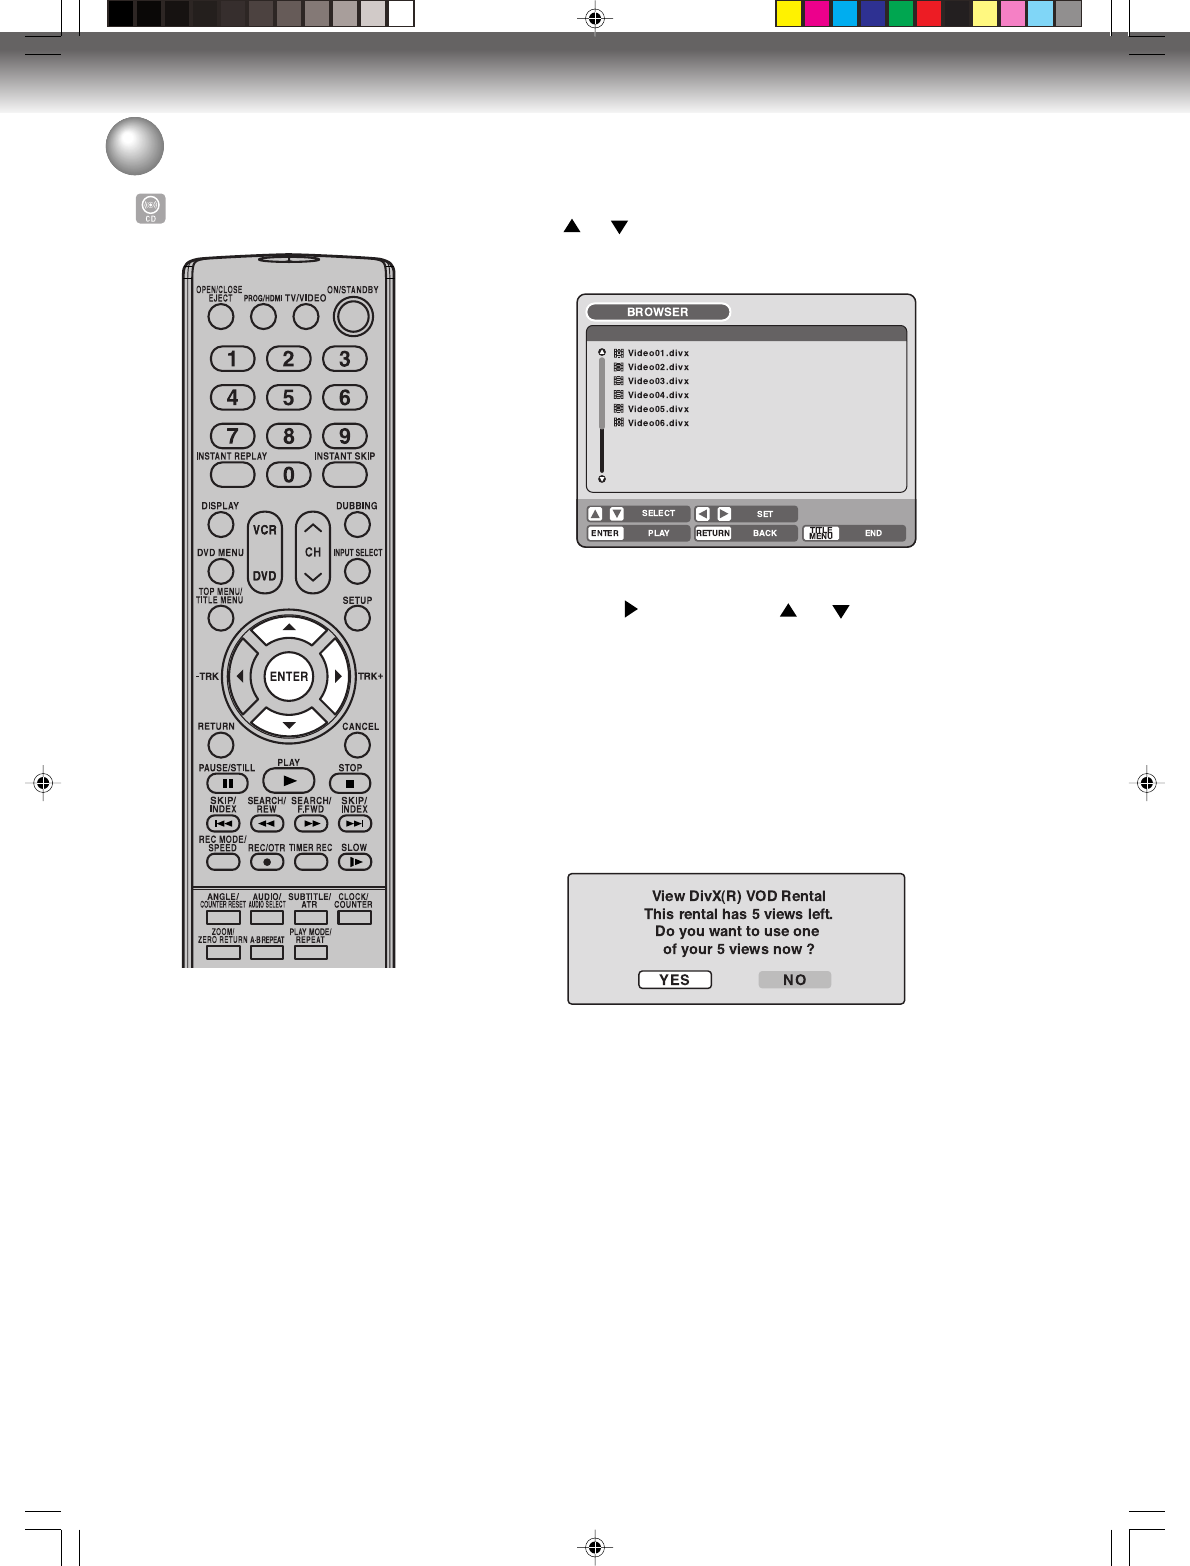
1Press or to select DivX
®
file.
•If the disc includes more than 10 files, you can move to the next
or previous page. (See page 43.)
2Carry out the item a or b listed below.
a: Press ENTER.
b:Press and then press or to select “PLAY” and
press ENTER.
The selected title is played back.
•You can use Fast forward, Review, Still, Frame advance, SKIP
6/7, and Slow motion playback (See page 37).
DivX® video specifications
• DivX® file must have the extension
letters “.avi” “.div” or “.divx”
• DivX® version: DivX® 3, 4, 5, and 6
(specifically 3.1.1, 4.1.2, 5.0.2, 5.0.5, 5.1.1,
5.2.1, 6.0 at Home Theater profile).
Audio format:
MPEG1 Layer2 (MP2), MPEG1 Layer3(MP3)
Bit rate: 8kbps - 320kbps
Sampling frequencies: 32kHz, 44.1kHz, 48kHz
Resolution: Max 720 x 576 (at 25fps)
Max 720 x 480 (at 30fps)
NOTE:
It may take a while to start to play DivX® video.
Please wait until picture appears on screen.
If the incorrect DRM file is loaded, “Authorization Error This player
is not authorized to play this video.” will appear on the screen.
When you attempt to play DivX® VOD, the number of plays is lim-
ited and the following message will appear on the screen. If you
wish to play it, select “YES”.
•If the number of plays goes over the limit, then “Rental Expired”
will be displayed, in which case the file will not be played.
MP3/WMA/JPEG/DivX
®
playback
Playing back DivX
®
video files
2J40101A P48-55 3/4/06, 10:44 AM48
Tape playback
49
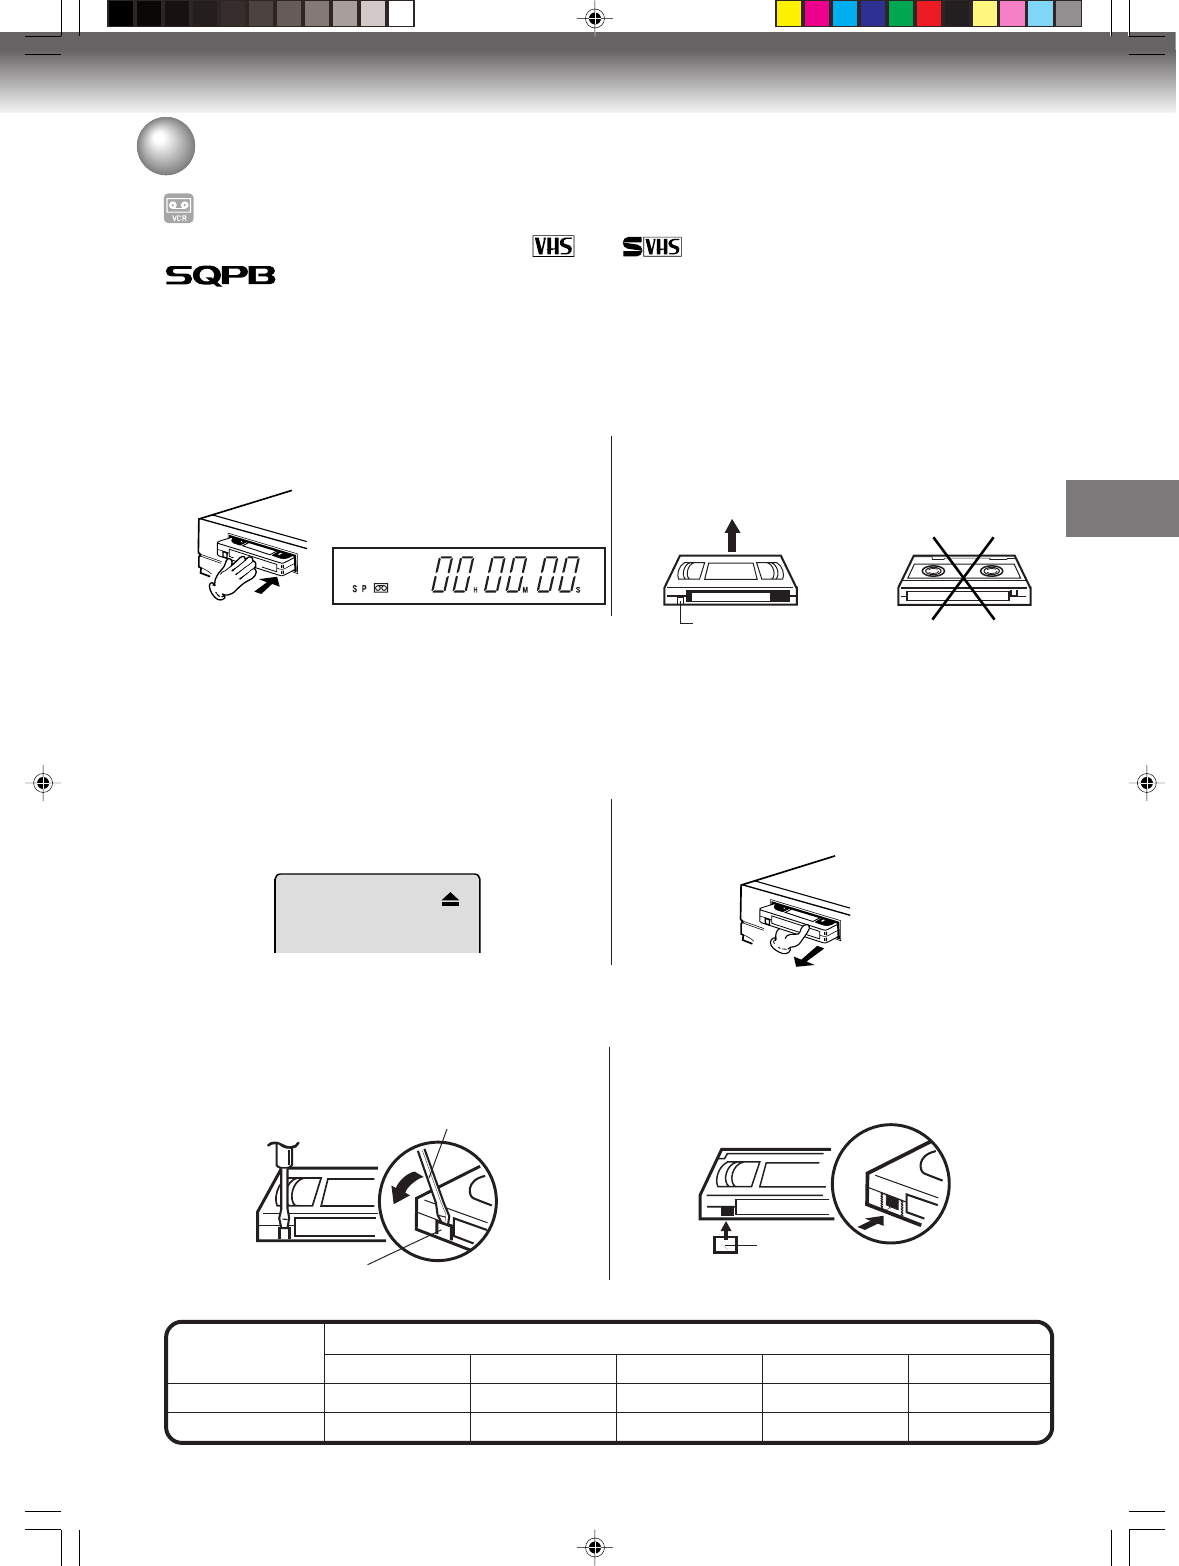
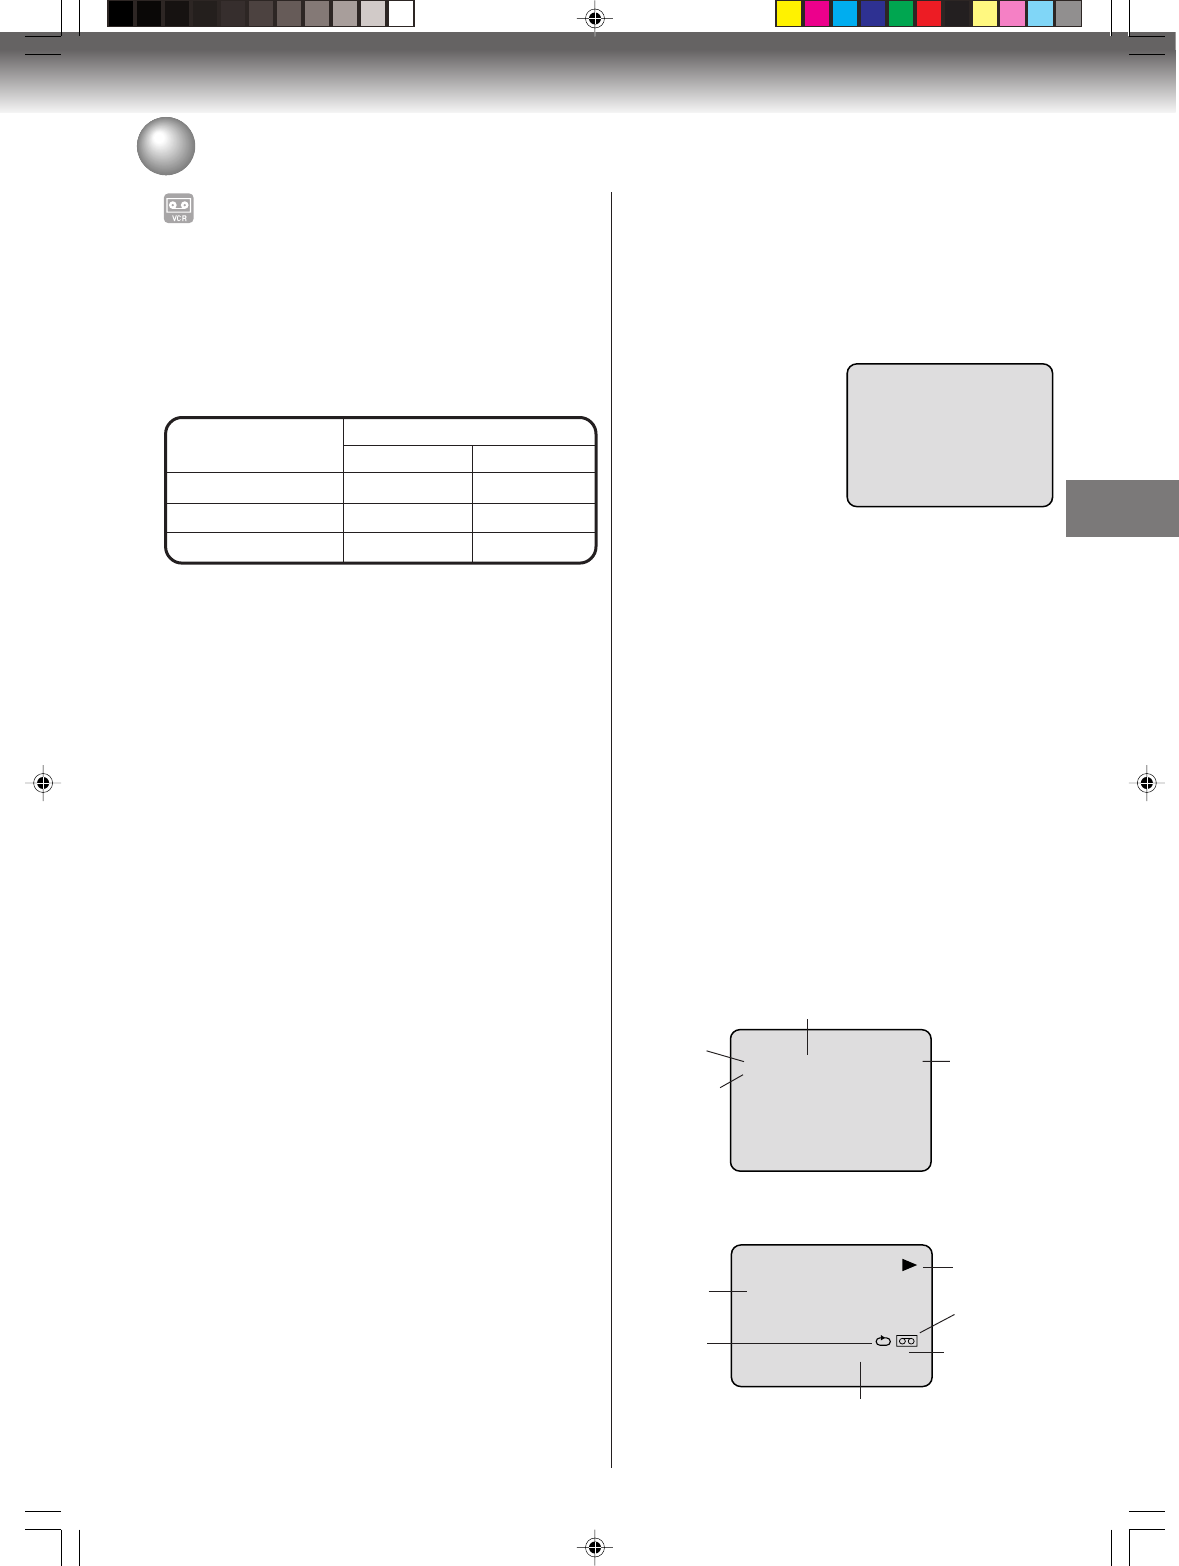
Tape speed and maximum recording time
Loading and unloading a cassette tape
Use only video cassette tapes marked and .
•Cassettes marked “VHS” (or “S-VHS”) can be used with this video cassette recorder However, S-VHS recording
is not possible with this model.
•This model is equipped with SQPB (S-VHS QUASI PLAYBACK) that makes it possible to playback S-VHS
recordings with regular VHS resolution.
•HQ VHS is compatible with existing VHS equipment.
Erase prevention tab
VCR
Erase prevention tab
Screwdriver
Video cassette tape
Tape Speed
SLP (Super Long Play)
T-160 T-120 T-90 T-60 T-30
2-2/3 hours 2 hours 1-1/2 hours 1 hour 30 minutes
8 hours 6 hours 4-1/2 hours 3 hours 1-1/2 hours
SP (Standard Play)
Loading
Push the center of the tape until it is automatically in-
serted.
Insert the cassette tape with its labeled side facing up
and the erase prevention tab positioned at your left. An
inverted cassette tape cannot be inserted.
Automatic power ON
When you insert a cassette tape the VCR power will turn ON automatically.
Automatic playback
When loading a cassette tape without an erase prevention tab, playback will start automatically.
Unloading
You can eject the video tape while the unit is turned off.
1Press EJECT on the unit or the remote control. 2Remove the cassette tape.
Automatic tape eject
This VCR will automatically rewind the tape when the tape has ended. And when the tape is rewound to its
beginning, the cassette tape will be ejected automatically.
To prevent accidental erasure
Remove the erase prevention tab with a screwdriver.
To record again
Cover the hole with a piece of adhesive tape.
P
Adhesive
Tape
Tape playback
2J40101A P48-55 3/4/06, 10:44 AM49

Tape playback
50
Cassette tape playback
NOTES:
•This VCR selects the playback
tape speed SP, LP or SLP auto-
matically.
•It is impossible to switch to the VCR
mode during DVD playback.
Preparation:
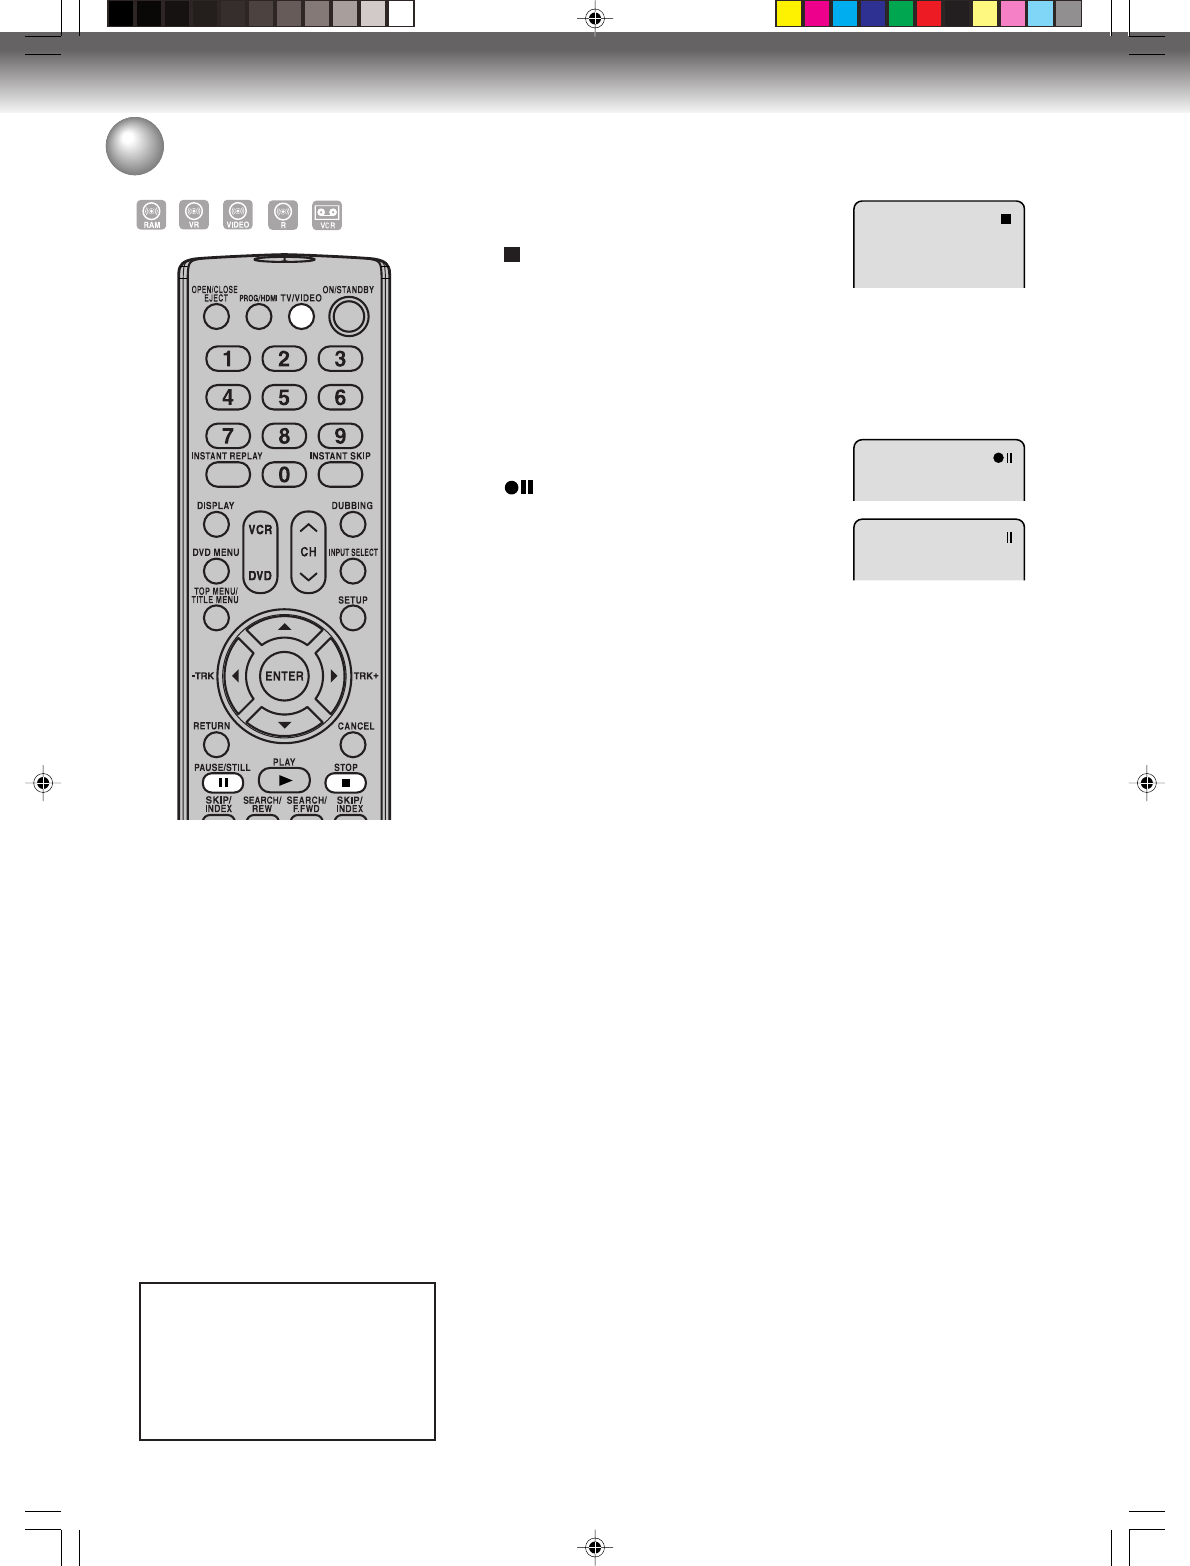
•Turn ON the TV and set to the video input mode.
• Press VCR to select the VCR mode. (The VCR indicator will light.)
1Load a prerecorded tape
(When loading a cassette tape
without the erase prevention
tab, playback will start automatically).
2To start playback
Press PLAY.
Playback will start.
“” will appear on the screen for about
4 seconds.
To stop playback
Press STOP once.
The tape will stop but remain fully
loaded and ready to play.
“ ” will appear on the screen for about
4 seconds.
To rewind the tape or forward it rapidly
Press STOP.
To rewind the tape:
Press REW.
To forward the tape:
Press F.FWD.
To stop the tape-winding, press STOP. To switch to playback directly
(without STOP), press PLAY.
Forward/Reverse picture search mode
When the tape is being winded, you can switch to picture search mode
(see next page). To do this, press REW or F.FWD and hold it down. The
unit will resume the tape winding as soon as the button is released.
2J40101A P48-55 3/4/06, 10:44 AM50
Tape playback
51
Special playback
Picture search
Reverse picture search function
Press REW x 1 or x 2 during the playback.
Forward picture search function
Press F.FWD x 1 or x 2 during the playback.
To return to playback: Press PLAY.
Still picture
Press PAUSE during playback.
To resume normal playback: Press PLAY or PAUSE.
Slow motion
During playback press SLOW.
To return to playback: Press PLAY or SLOW.
Slow tracking and vertical lock adjustment
If noise bars appear in the picture during slow motion,
press the TRK + or – to reduce the noise bars.
If the still picture jitters excessively, press TRK + or – to
stabilize the still picture.
Frame by frame picture
Press PAUSE during playback.
Each time you press SLOW, the picture advances frame
by frame.
To return to playback: Press PLAY or PAUSE.
Adjusting tracking condition
Automatic tracking adjustment
Whenever you insert a tape and start playback, automatic
tracking starts working and continuously analyzes the signal
to enable optimum picture quality during playback.
Manual tracking adjustment
If automatic tracking cannot eliminate noises well during
playback, press TRK +/– to eliminate the noises.
“MANUAL TR.” will appear. Press it briefly for a fine ad-
justment, or press and hold for a coarse adjustment.
•Press ATR to reactivate automatic tracking again.
“AUTO TR.” will appear.
NOTES:
•The audio output is muted during SPEED SEARCH,
STILL, FRAME ADVANCE and SLOW MOTION.
•During picture search mode there will be noise bars
which are caused by the system.
•The Special Playback will automatically change to
playback after approx. 5 minutes to protect the video
tape against excessive wear.
Repeat playback
The entire video tape will be played until its end. The
tape will then automatically rewind to the beginning and
the playback will be repeated.
1Press REPEAT while the VCR is playing back.
2By pressing REPEAT
each time, “REPEAT
ON” or “REPEAT OFF”
is selected in turn.
3When “REPEAT ON” is selected, the tape is played
back to the end, and then, it is automatically re-
wound to the starting point and played back again.
The display “REPEAT ON” goes out in about 3 sec-
onds.
To cancel repeat playback: Press REPEAT to se-
lect “REPEAT OFF”.
Instant skip
Press INSTANT SKIP during playback.
The video is rapidly forwarded for approx. 30 seconds
and playback resumes.
You may press the button up to six times in a row to
move 180 seconds ahead.
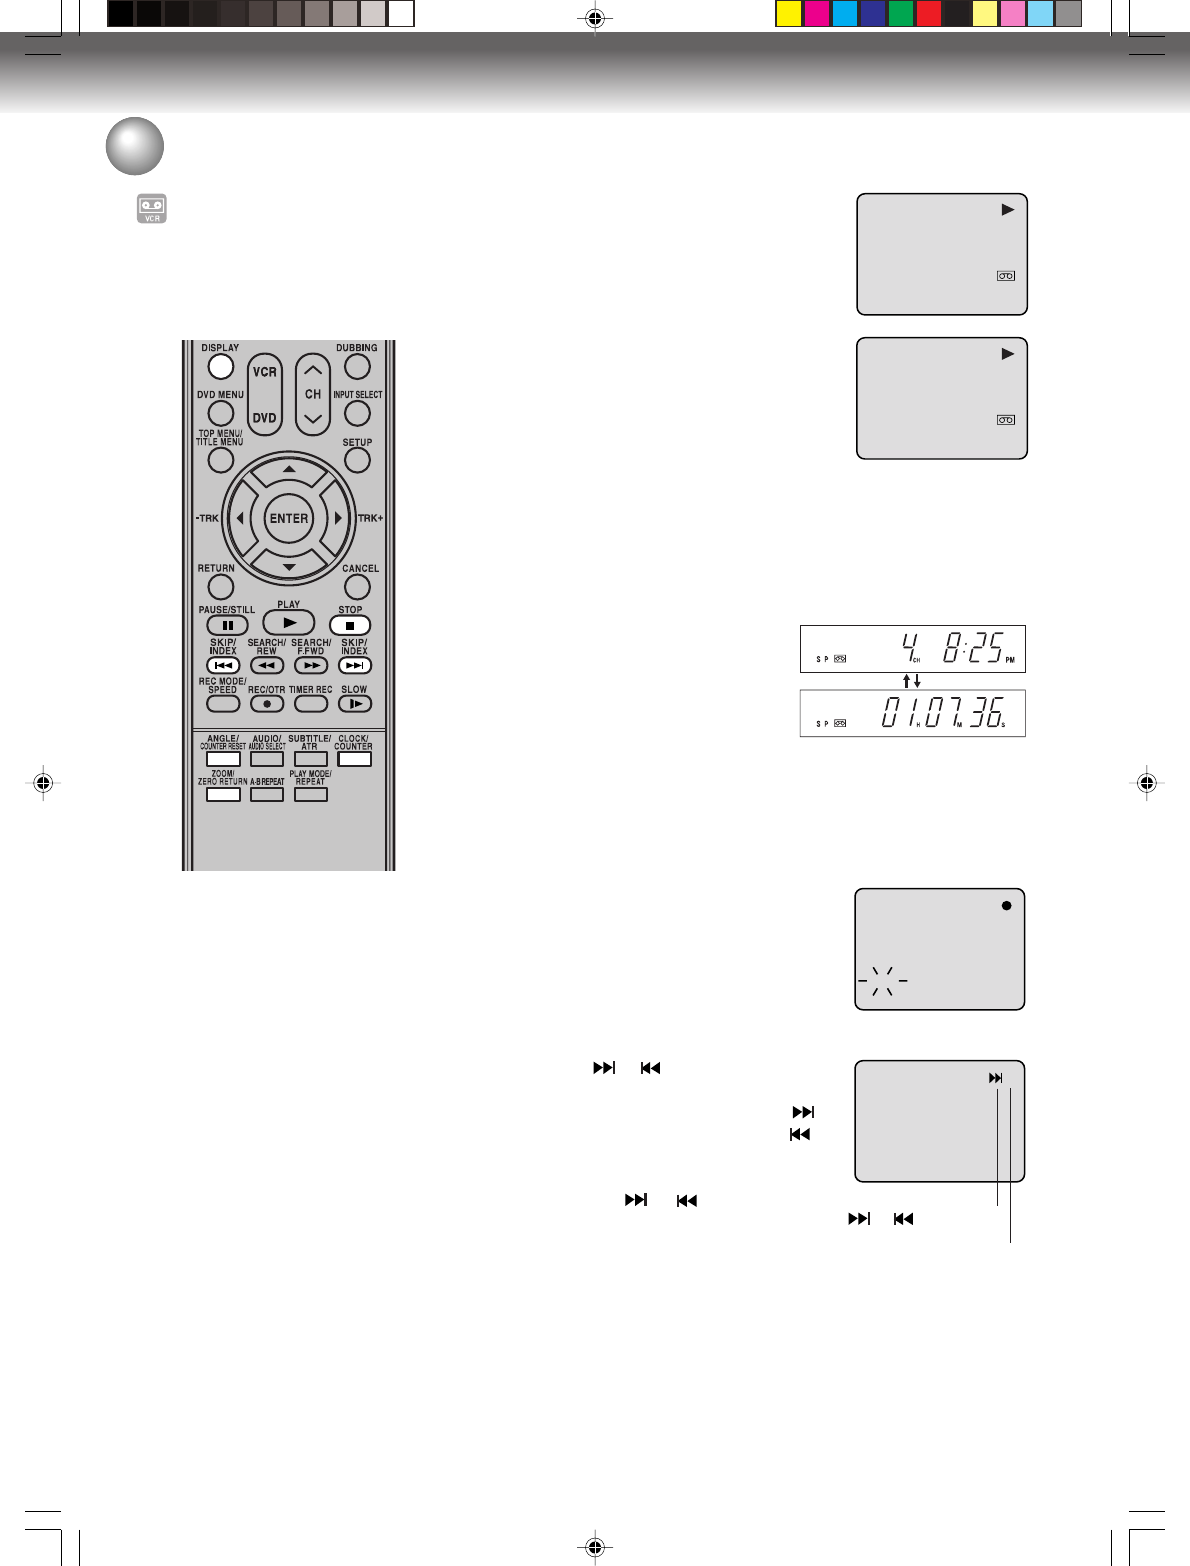
To display VCR operation status
Press DISPLAY. The clock, day of the week and more
information will be indicated.
While watching TV
While operating a tape
To cancel the display: Press DISPLAY until all indi-
cators disappear.
REPEAT ON
PICTURE SEARCH SPEED
PRESS TWICE
TAPE SPEED PRESS ONCE
SP (Standard Play)
LP (Long Play)
SLP (Super Long Play)
5 X
9 X
15 X
3 X
7 X
9 X
SPEED SEARCH TIMES
CH 125
8 : 47
AM
MON
00 : 00 : 00 SP
STEREO SAP
DAY OF THE WEEK
CHANNEL
CLOCK
STEREO AND
SECOND
AUDIO
PROGRAM
(SAP)
8 : 30
AM
MON
00 : 15 : 12 SP
HI-FI
OPERATING
MODE
TAPE IN
AUTO
REPEAT
HI-FI
STEREO
TAPE SPEED
REAL TIME COUNTER
2J40101A P48-55 3/4/06, 10:44 AM51
Tape playback
52
ZERO RETURN function / Video index search system
8 : 47
AM
MON
00 : 04 : 38 SP
HI-FI
8 : 47
AM
MON
00 : 00 : 00 SP
HI-FI
CH 001
INDEX
or is displayed
+3
INDEX NO. (up to
9)
1Press DISPLAY.
The counter display shows the tape running
time during playback or recording.
2Press COUNTER RESET at the desired
tape position. The counter display will be
reset to the “00:00:00” position (e.g. the be-
ginning of recording).
3Press STOP when playback or recording is finished.
Press ZERO RETURN.
The tape will be rewound or fast forwarded and automatically stop
at the “00:00:00” position.
Switching the display between clock and counter
Press CLOCK/COUNTER. The clock
and tape counter alternate with each
other in the display.
Video index search system
This function enables you to locate the beginning of any record-
ing made on the VCR.
Recording an INDEX MARK
The Index search function automatically records
an INDEX mark on the tape whenever a record-
ing is initiated.
Index search
Press INDEX or during stop or play
mode.
For Succeeding programs: Press INDEX .
For Preceding programs: Press INDEX .
(Additional press increases the INDEX NO.
up to 9.)
When the INDEX or is pressed, the
unit starts searching the INDEX NO. selected
and finds the portion, then playback starts
automatically.
To stop the Index Search, press STOP.
ZERO RETURN function
This function makes tape rewind-
ing stop at the counter “00:00:00”
position automatically.
NOTES for Counter Display:
•If you rewind the tape beyond
“00:00:00”, a minus sign (“–”) will
be displayed in front of the time.
•When you load a tape, the counter
will reset to “00:00:00”.
•The counter does not function on
nonrecorded (blank) sections of
the tape. When you rewind, fast
forward or play tapes through
blank sections, the counter stops.
NOTES for Video index search
system:
•When you record an INDEX mark
at the very beginning of the tape,
the mark may not be found.
•During INDEX search, the tape
may stop and begin to play at a
slightly different location.
•INDEX may not function properly
with old or worn out video tapes.
•INDEX marks may not be found if
it is extremely close to the point
where the search began.
•In recording, if you stop recording
temporarily, the INDEX mark is not
recorded on the tape.
2J40101A P48-55 3/4/06, 10:45 AM52
Recording
53
Read this before recording on disc
Types of disc
You can use DVD-RAM, DVD-RW and DVD-R discs to record video.
DVD-RAM/-RW (VR mode)
•This mode involves mutiple editing functions.
•Various editing options using a created Playlist.
DVD-RW/-R (Video mode)
• Simple editing (renaming titles).
For more information on recording format, see “Recording for-
mat” (page 10).
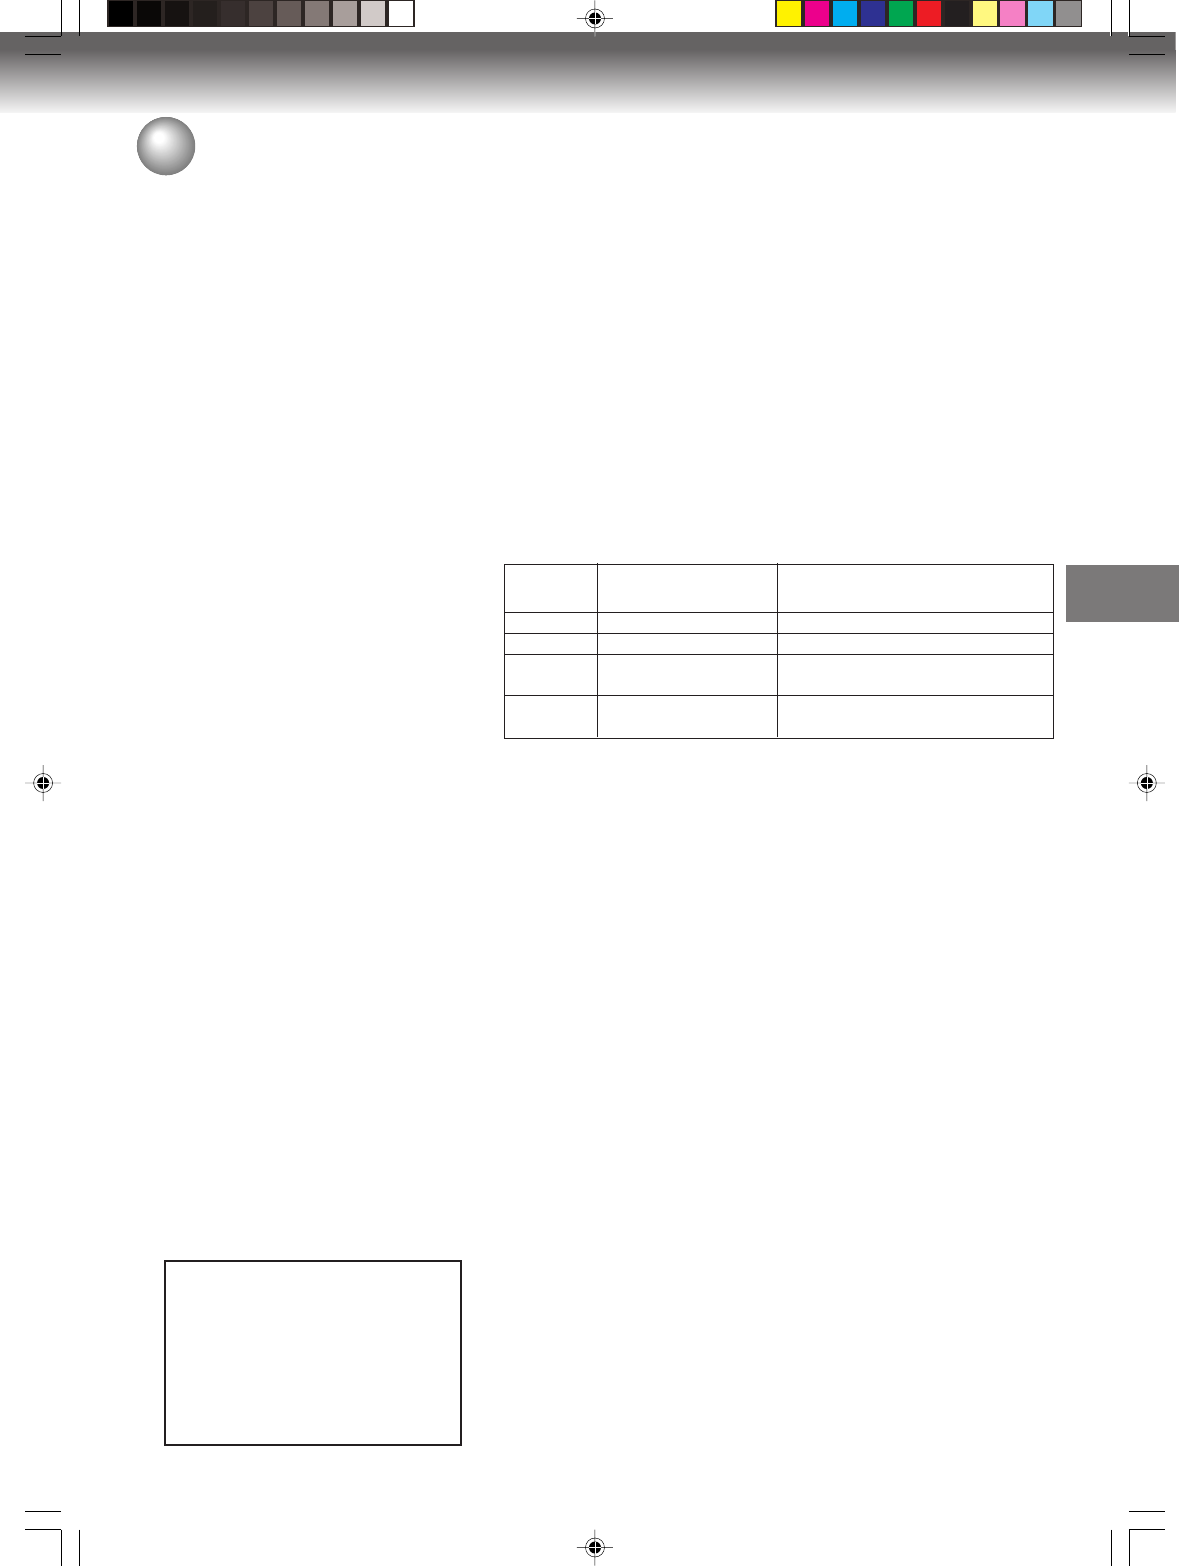
Recording modes
There are 4 modes for recording on disc. Recording time and quality
vary according to mode.
•Recording time above is based on a 4.7GB disc.
Since DVD recording is performed using VBR (Variable Bit Rate), re-
cording time varies according to the recorded content.
To know the correct recording time, stop recording and check the me-
dia information. (See page 36.)
Disc remaining time
VR mode
•Recording is possible as long as there is available space on the disc.
(Finalized discs can be recorded by cancelling the finalization, see
“UNDO FINALIZE” on page 29.)
•Erasing unnecessary title frees up available space on the disc. (Titles
can be erased from finalized discs by first undoing the finalization.
See “UNDO FINALIZE” on page 29.)
Video mode
•Up until the disc is finalized, recording is possible as long as there is
available space on the disc. (Once the disc has been finalized, addi-
tional recording and erasing are not possible.)
•The remaining time cannot be increased, nor can recorded title be
overwritten.
•Titles cannot be erased nor can recorded titles be overwritten.
This section explains what you must
know to record onto a disc. Read it
before attempting to record.
NOTES:
Recording time can change for the
following reasons.
•When image quality is poor as dur-
ing poor TV reception.
•When recording on a disc that has
been edited before.
•When the video is followed with re-
cordings of still images or just au-
dio.
NOTE:
Should a power failure occur or the
AC cord plug be disconnected while
recording, editing, initializing, finaliz-
ing or any other function, the program
being recorded will be lost or the disc
may not be playable. Manufacturer
cannot guarantee against loss of pro-
gram or disc should this occur. To
start recording again, re-format the
disc or use a new disc and follow the
instruction on recording.
Recording
mode
XP
SP
LP
SLP
Recording time
Approx. 60 min
Approx. 120 min
Approx. 240 min
Approx. 360 min
Quality
Can record high quality images.
Can record normal quality images.
Quality deteriorates slightly, but
recording time is longer.
Recording time is prioritized over
quality.
NOTE:
Because of characteristics peculiar
to digital video compression technol-
ogy, scenes with fast motion may
appear as a matrix of larger blocks.
The unauthorized recording, use,
distribution, or revision of television
programs, videotapes, DVDs and
other materials, is prohibited under
the Copyright Laws of the United
States and other countries, and
may subject you to civil and/or
criminal liability.
Recording
2J40101A P48-55 3/4/06, 10:45 AM53

Recording
54
Read this before recording on disc
Images that cannot be recorded
Some DVD-Video and broadcasts contain copy-restriction signals to
protect copyrights. There are 3 types of copy-restriction signals: “Copy
Free”, “Copy Never” and “Copy Once”.
“Copy Free” (unrestricted recording)
Land-based TV broadcasts and images you record yourself with a video
camera allow unrestricted recording. There are no restrictions on re-
cording.
“Copy Never” (recording prohibited)
•Images that contain the recording prohibited signal cannot be re-
corded.
•If the recording prohibited signal appears halfway through an image
you are recording, recording is paused at that instant. When the re-
cording prohibited signal ends, recording resumes.
•This unit incorporates a built-in copy guard. It cannot record soft-
ware or broadcasted programs that contain copy restriction signals
designed to protect copyright, etc.
“Copy Once” (one-time recordable)
Programs (images) that contain the one-time recordable signal can be
recorded only in the VR mode using a DVD-RW disc that supports
CPRM Ver. 1.1 and Ver 1.2.
The unauthorized recording, use,
distribution, or revision of television
programs, videotapes, DVDs and
other materials, is prohibited under
the Copyright Laws of the United
States and other countries, and
may subject you to civil and/or
criminal liability.
2J40101A P48-55 3/4/06, 10:45 AM54
Recording
55
Recording a TV program
Preparation:
•Turn ON the TV and set it to the video input mode.
• Load a recordable DVD or video tape into the unit.
• Press DVD or VCR to select the appropriate mode.
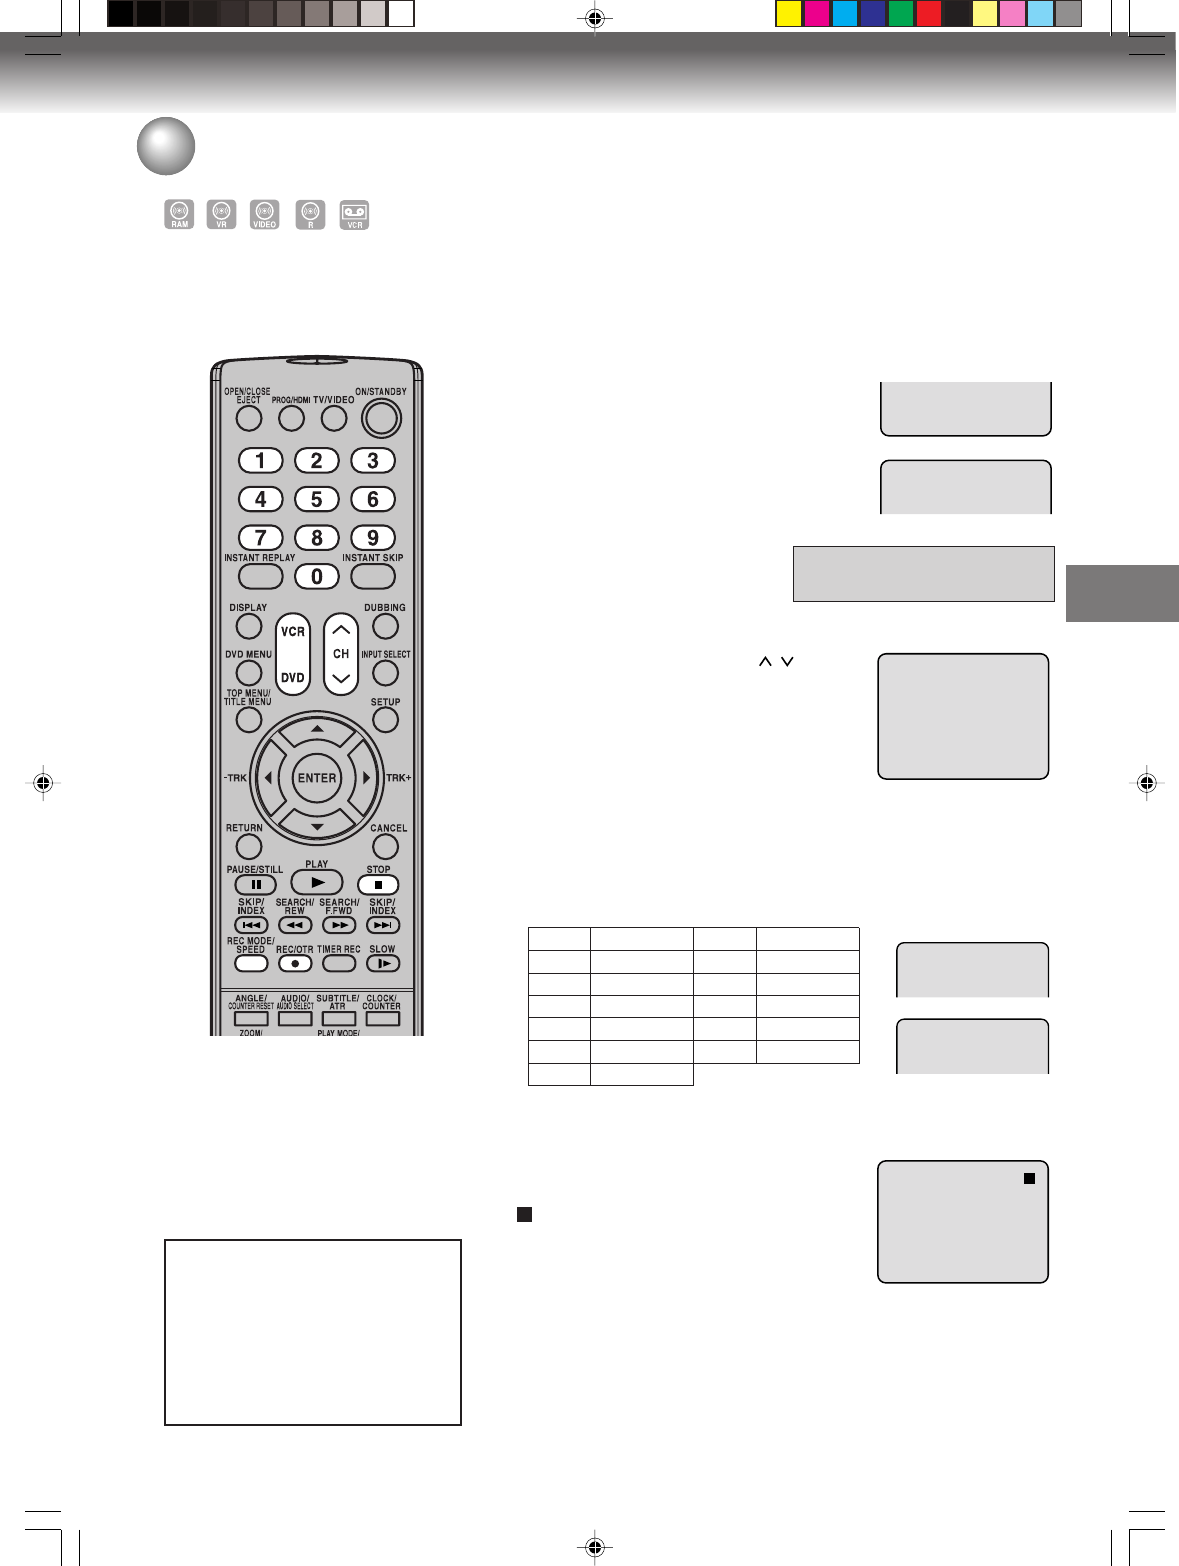
1Press REC MODE/SPEED to select the re-
cording mode.
The recording mode will appear on the TV
monitor and change every time REC
MODE/SPEED is pressed.
VCR recording modes: SP/SLP
DVD recording modes: XP/SP/LP/SLP
SP is the normal recording mode for video tapes. SLP offers 3
times the recording time as SP. For more information on DVD re-
cording modes, see page 53.
2Set the TV/CABLE option to the appropriate position (page 33).
3Press the numeric keys or CH / to select the channel to be
recorded.
TO SELECT Cable TV CHANNELS:
1-9 Press 0 twice and then 1-9 as required.
Example: To select 2, Press “002”.
10-12 Press 0 first and then the remaining 2 digits in order
from left to right.
Example: Press 012 for “12”.
13-99 Press 2 digits in order.
Example: Press 22 for “22”.
100-125 Press the 3 digits in order.
Example: Press 110 for “110”.
TO SELECT TV CHANNELS 1-12:
If only 1 or 2 buttons are pressed, the corresponding channel will
be selected in 2 seconds.
VHF/UHF/CABLE CHANNELS
4Press REC/OTR.
“ ” appears on the screen for about 4
seconds and recording will start.
NOTES:
•When recording onto a DVD, it
takes some time from when you
press REC/OTR until recording
actually starts.
Press REC/OTR slightly earlier
before the preferred starting point.
With a video tape, recording starts
almost at the same time as you
press REC/OTR.
•If the erase prevention tab of video
tapes is removed, the tape will
eject when REC/OTR is pressed
for recording.
You can record programs you
watch on TV onto video tapes or
DVDs.
TV - VHF/UHF channels
CABLE - CABLE TV channels
00 : 00 : 00 SP
SP
DVD mode
VCR mode
CH 110
CH 110
VCR mode
DVD mode
The unauthorized recording, use,
distribution, or revision of television
programs, videotapes, DVDs and
other materials, is prohibited under
the Copyright Laws of the United
States and other countries, and
may subject you to civil and/or
criminal liability.
TV
VHF
2-13
UHF
14-69
CABLE
VHF
2-13
STD/HRC/IRC
14-36 (A) (W)
37-59 (AA) (WW)
60-85 (AAA) (ZZZ)
86-94 (86) (94)
95-99 (A-5) (A-1)
100-125 (100)(125)
01 (5A)
2J40101A P48-55 3/4/06, 10:45 AM55
Recording
56
Recording a TV program
To stop recording
Press STOP to stop recording.
“ ” will appear on the screen for about 4
seconds.
NOTE:
When recording onto a DVD, even if STOP is pressed during record-
ing, recording does not stop instantly. Recording may continue for as
long as 1 minute maximum.
To stop recording temporarily
Press PAUSE/STILL to avoid recording
unwanted material.
“” will appear on screen for about 4 sec-
onds.
Press again to resume recording.
NOTES:
•In video recording, the pause function will be released after 5 min-
utes to prevent damaging the video tape. The unit will change to the
STOP mode.
•When recording onto a video tape, you can select a recording chan-
nel in the recording pause mode. (You cannot change a recording
channel in the DVD recording pause mode.)
Recording one program while watching another
While the unit is recording, press TV/VIDEO to select the TV position.
The “TV” will light up on the display window and recording will continue.
Select the TV channel you want to watch by using the TV channel
selector.
NOTE:
Some CABLE hookups do not permit viewing one channel while re-
cording another. See pages 18, 19.
Auto Rewind feature
This VCR will automatically rewind
the tape when the tape has ended
(except during OTR and TIMER
REC). It will also eject the tape.
VCR mode
DVD mode
NOTES:
•If the disc space become full, the
recording is stopped and “Disc is
full” will appear on the screen.
•
In the event of a power failure during
DVD recording including OTR and
TIMER REC, the program can not
be recorded on the disc.
When the power resumes, after the
VCR/DVD is turned on, the set
checks the disc to repair the error
which is caused by a power
failure. This checking process may
require a few minutes to about 1
hour according to disc condition.
In this process “SYSTEM ERROR
PLEASE WAIT DISC CHECKING”
will appear on the screen.
The unauthorized recording, use,
distribution, or revision of television
programs, videotapes, DVDs and
other materials, is prohibited under
the Copyright Laws of the United
States and other countries, and
may subject you to civil and/or
criminal liability.
2J40101A P56-62 3/4/06, 10:45 AM56
Recording
57
One-touch Timer Recording (OTR)
The One-touch Timer Recording
feature provides a simple and con-
venient way to make a timed re-
cording.
00 : 00 : 00 SP
SP
DVD mode
VCR mode
CH 110
CH 110
OTR 0 : 30
OTR 0 : 30
VCR mode
DVD mode
Preparation:
•Turn ON the TV and set to the video input mode.
• Load a recordable DVD or video tape into the unit.
• Press DVD or VCR to select the appropriate mode.
Example: One-touch Timer Recording for 30 minutes.
1Press REC MODE/SPEED to select the
recording mode.
For the recording mode, see step 1 on page
55.
2Set the TV/CABLE option to the
appropriate position (See page
33).
3Press numeric keys or CH / to select
the channel to be recorded.
4Press REC/OTR. Each additional press of REC/OTR will increase
recording time as shown in the chart below, up to a maximum of 6
hours. The OTR and recording time will appear on the screen for
about 4 seconds.
To cancel OTR
Press STOP or turn off the power.
“ ” will appear on screen for about 4 sec-
onds.
TV - VHF/UHF channels
CABLE - CABLE TV channels
NOTE:
If you wish to watch the DVD play-
back during the VCR OTR, press
DVD to change to DVD mode and
perform the DVD playback. You can
also playback the VCR during DVD
OTR.
Press
once
twice
3 times
4 times
5 times
6 times
NORMAL REC
OTR - : - -
OTR 0:30
OTR 1:00
OTR 1:30
OTR 2:00
OTR 3:00
OTR 4:00
OTR 5:00
OTR 6:00
NORMAL REC
Recording time Press
7 times
8 times
9 times
10 times
11 times
Recording time
The unauthorized recording, use,
distribution, or revision of television
programs, videotapes, DVDs and
other materials, is prohibited under
the Copyright Laws of the United
States and other countries, and
may subject you to civil and/or
criminal liability.
2J40101A P56-62 3/4/06, 10:45 AM57
Recording
58
Timer recording
The timer recording system allows
you to select the date, time and
channel and record the desired pro-
grams. Up to 12 timer programs
within a month can be stored in this
unit.
Setting timer recording
Preparation:
•Turn ON the TV and set to the video input mode.
• Load a recordable DVD or video tape.
• Press DVD or VCR to select the appropriate mode.
•Confirm that the clock is indicating the correct time.
Example: Set the recording mode to LP; the TV program is on channel
12 starting at 8:00 PM and stopping at 9:30 PM on a date of 20th.
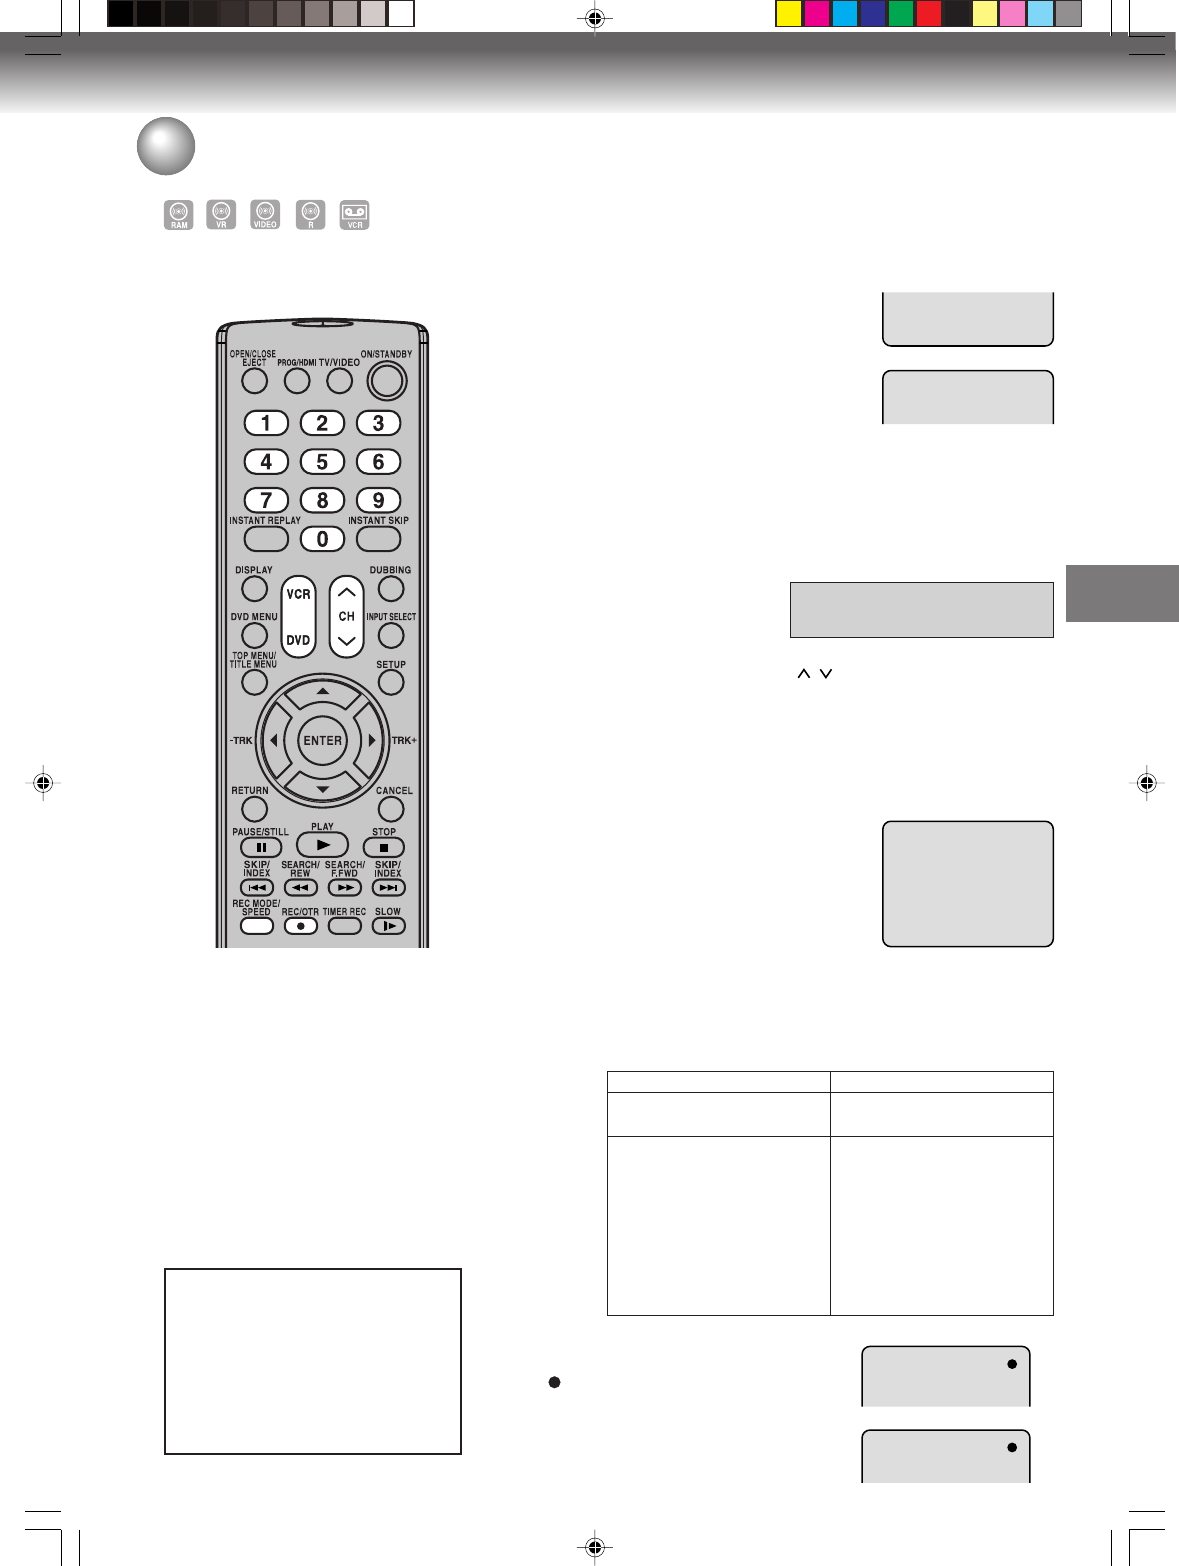
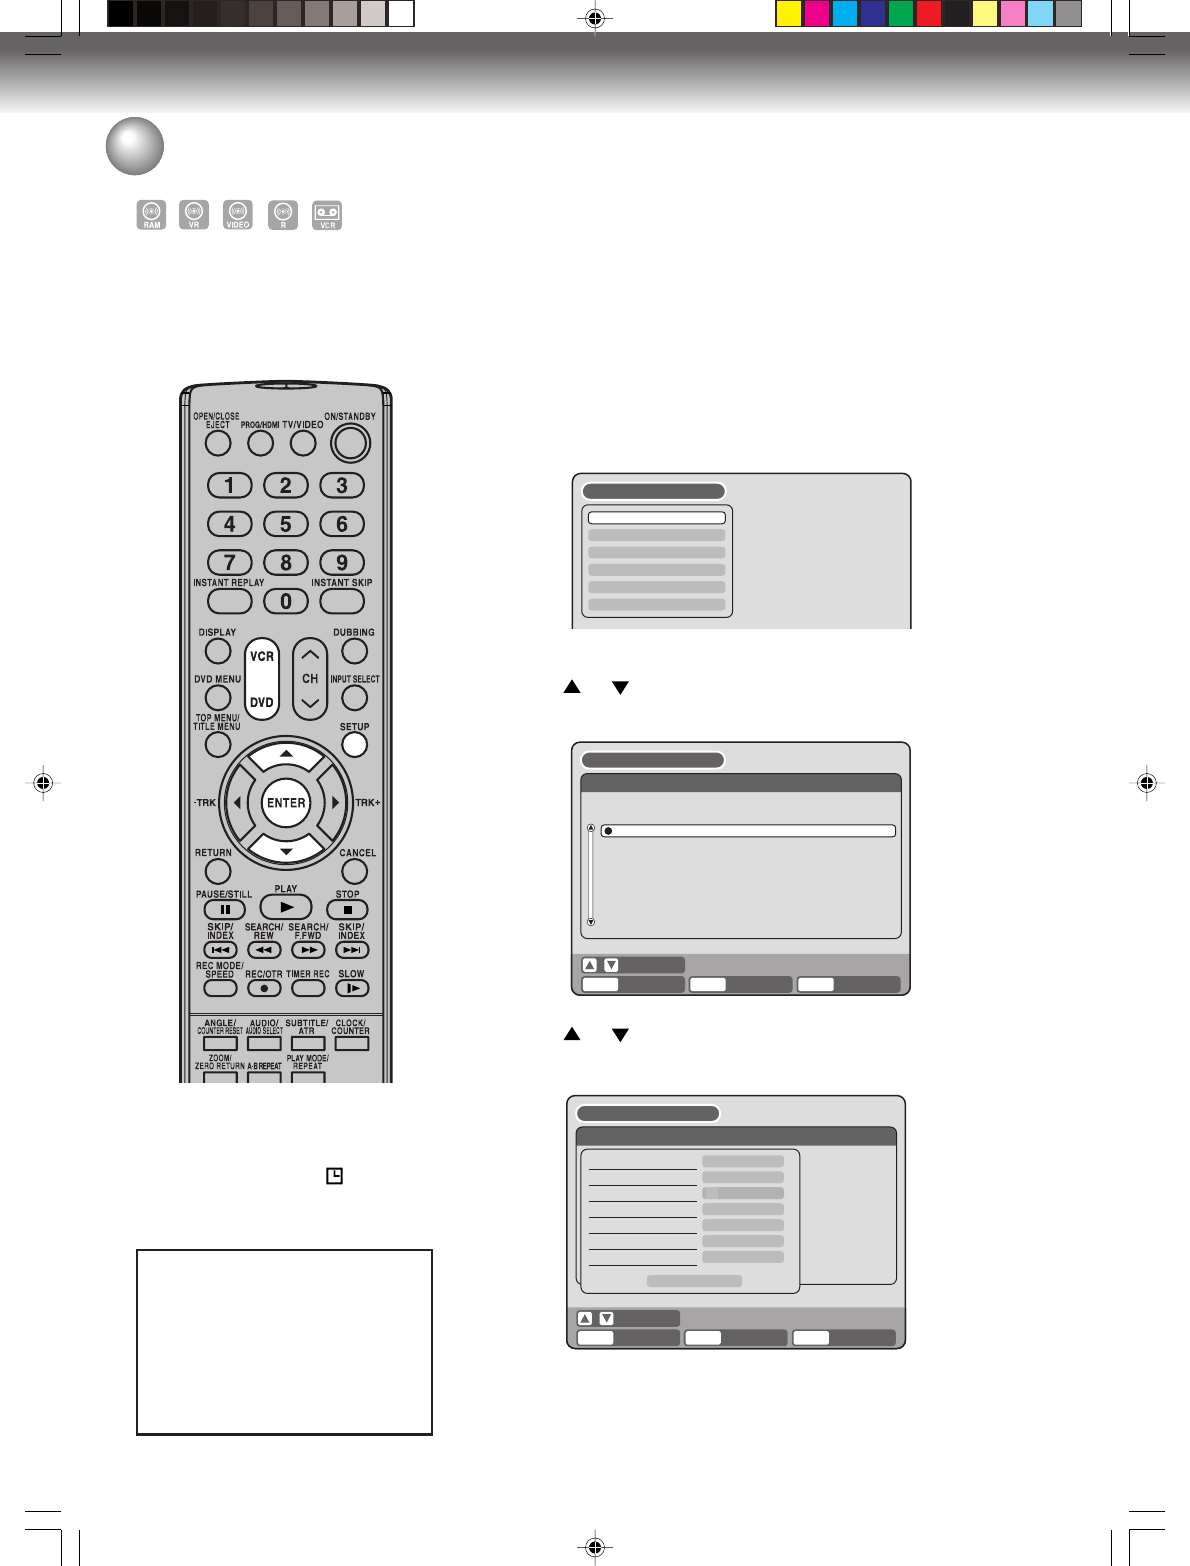
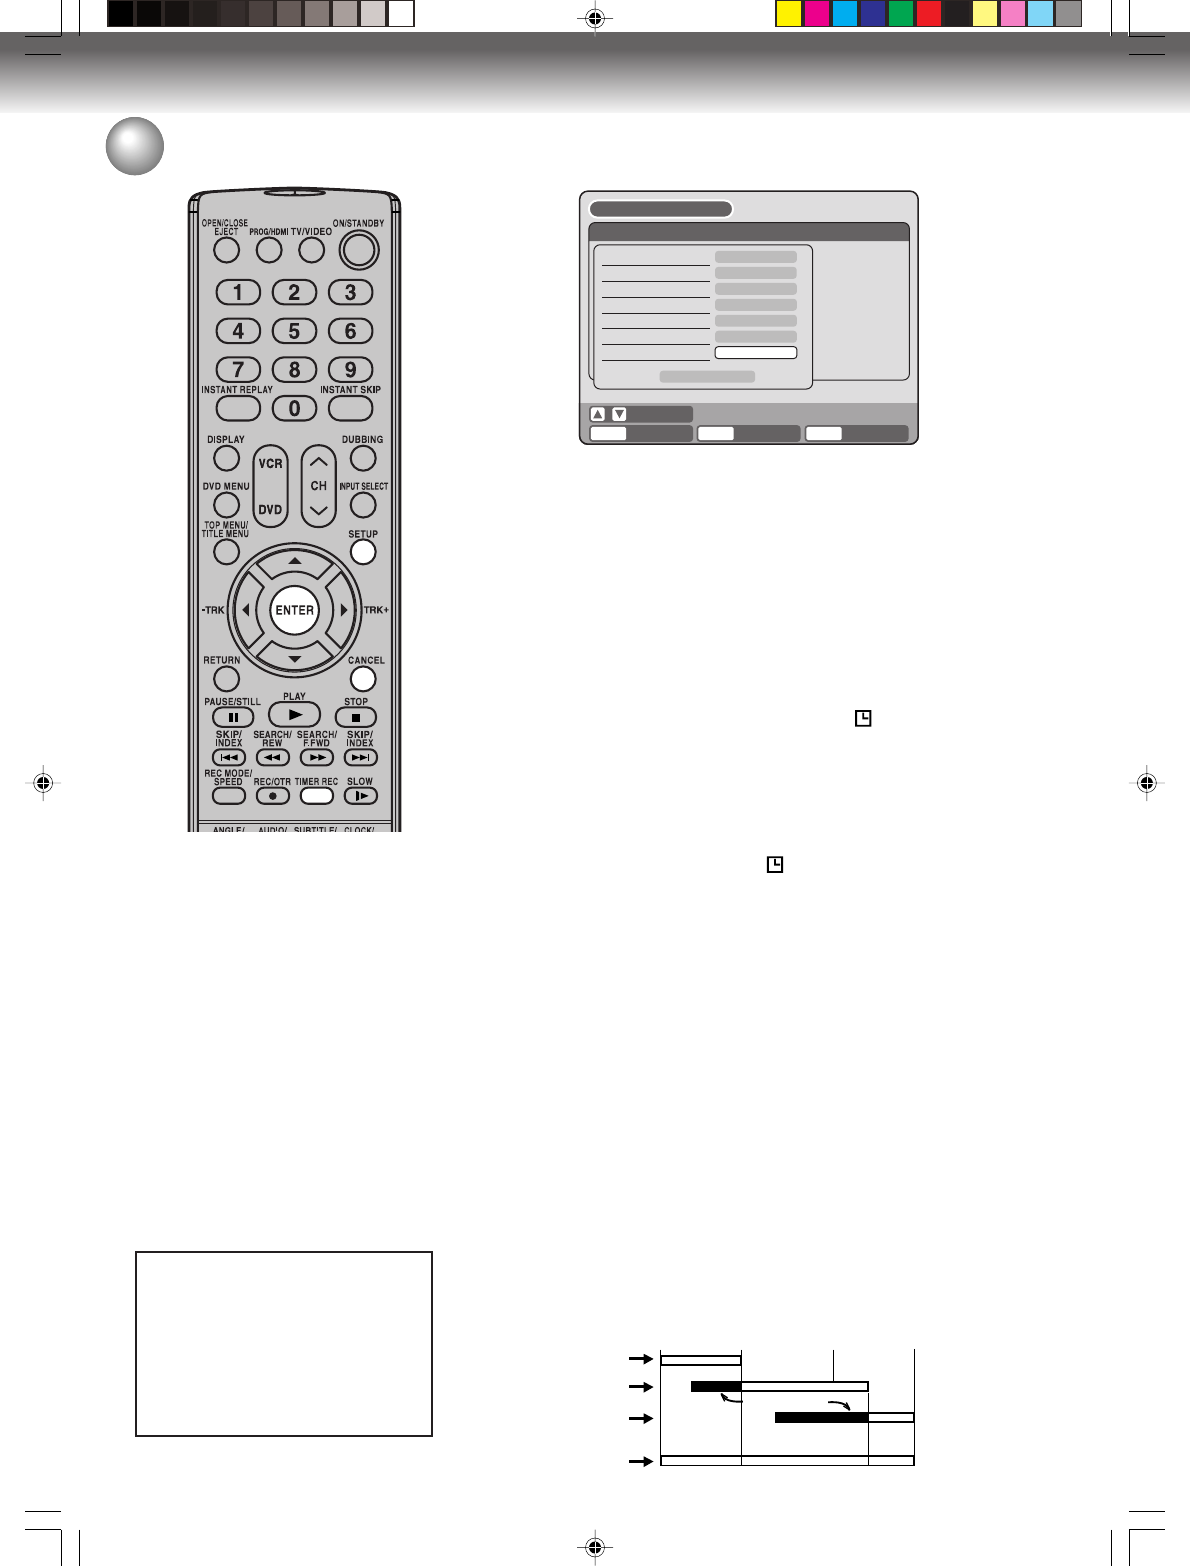
1Press SETUP.
The SETUP MENU screen appears.
NOTE:
If a recordable tape is not inserted
or no disc space is available, the
timer record indicator “ ” flashes.
Replace the tape or disc to allow re-
cording.
2Press or to select “TIMER REC SET” and press ENTER.
The TIMER REC SET screen will appear.
ENTER
RETURN BACK END
SELECT
SETUP
ENTER
TIMER REC SET
REC REC
TO MODECHENDSTARTDATE
NEW
SETUP MENU
TIMER REC SET
SYSTEM SETUP
AV SETUP
REC SETUP
CH SETUP
OTHER
SETUP MENU
ENTER
RETURN BACK END
SELECT
SETUP
ENTER
TIMER REC SET
REC REC
TO MODE
TYPE
DATE (MM/DD)
START
END
CH
REC TO
REC MODE
ONCE
01
DVD
SP
OK
11/19(WE)
03:17PM
04:17PM
SETUP MENU
3Press or to select “NEW” and press ENTER.
The program screen will appear.
The unauthorized recording, use,
distribution, or revision of television
programs, videotapes, DVDs and
other materials, is prohibited under
the Copyright Laws of the United
States and other countries, and
may subject you to civil and/or
criminal liability.
2J40101A P56-62 3/4/06, 10:45 AM58
Recording
59
Timer recording
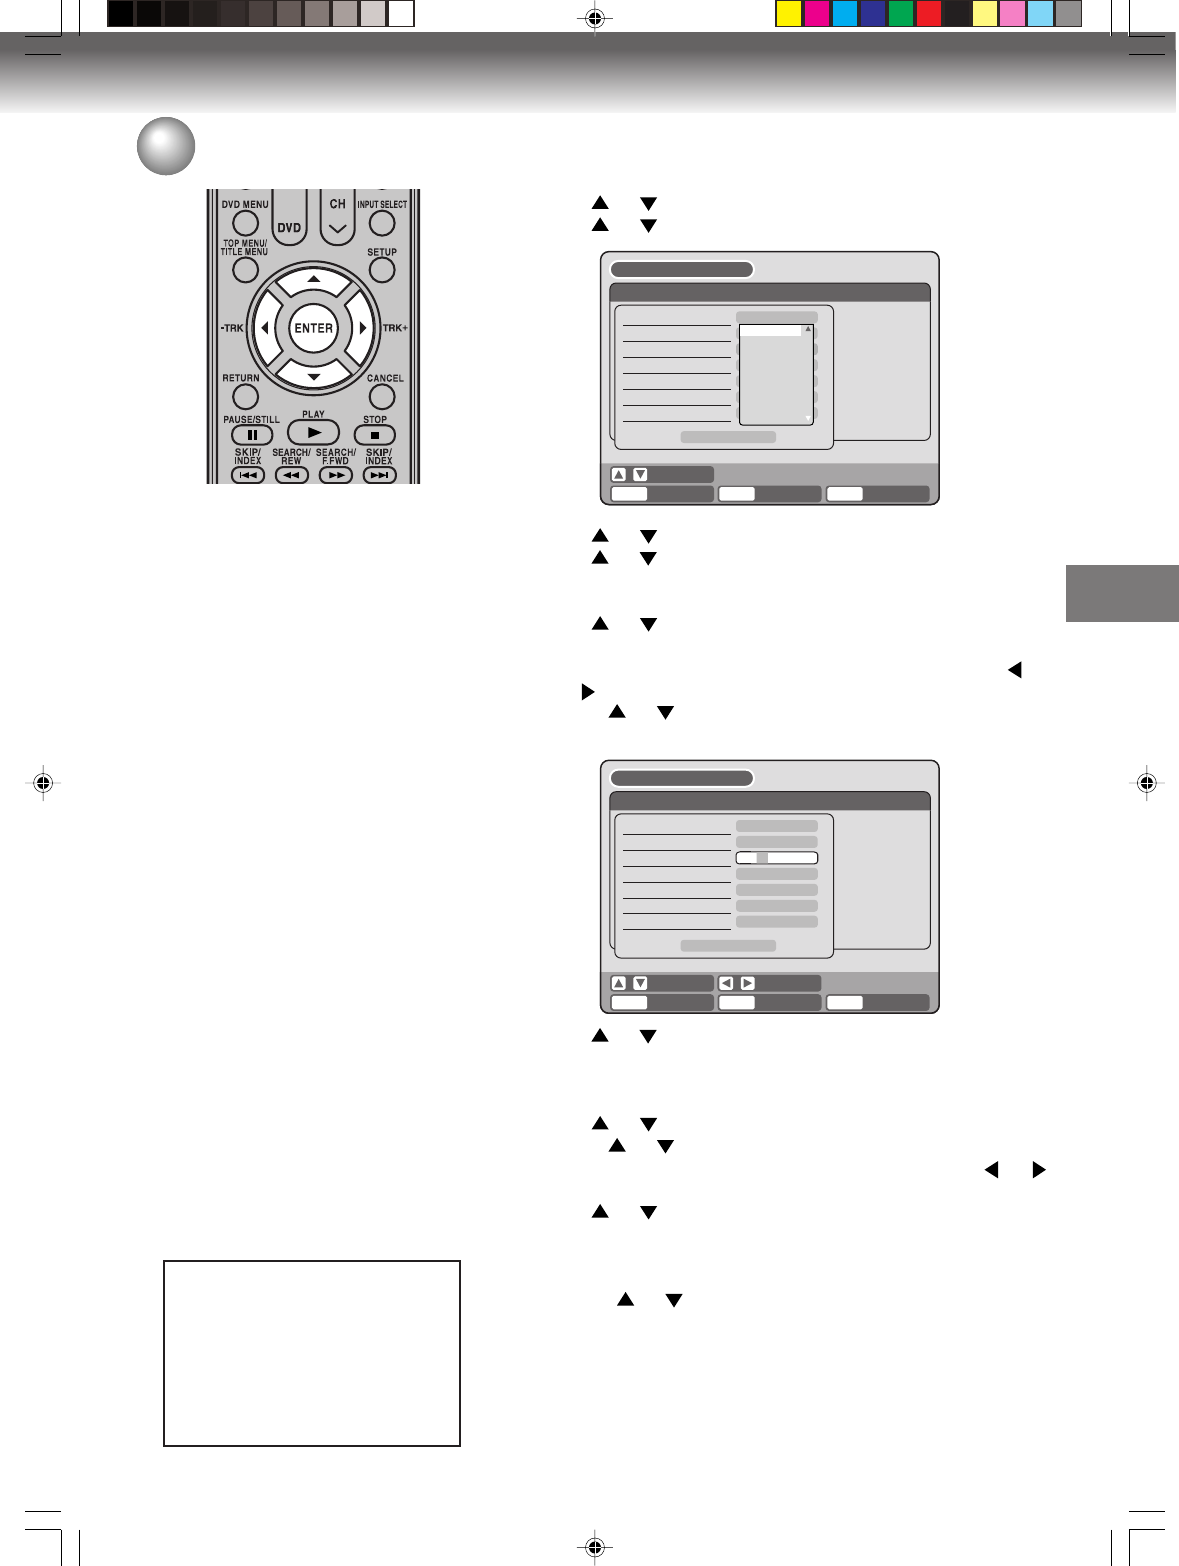
4Press or to select “TYPE” and press ENTER.
Press or to select “ONCE” from the list and press ENTER.
5Press or to select “DATE” and press ENTER.
Press or to select the date to be recorded from the list and
press ENTER.
6Press or to select “START” and press ENTER.
Set the recording start time.
•To switch over the selection item (hour or minute), press
or , then press ENTER.
• Press or to adjust the time.
•After setting the time, press ENTER.
7Press or to select “END” and press ENTER.
Set the recording end time and time in the same manner as in step
6.
8Press or to select “CH” and press ENTER.
• Press or to select the channel to be recorded.
•You can select the external input (L1 or L2) by pressing or .
9Press or to select “REC TO” and press ENTER.
Select the media (DVD or VCR) to be recorded from the list and
press ENTER.
10 Press or to select “REC MODE” and press ENTER.
The recording modes for the media selected in “REC TO” item
are listed up.
Select the recording mode and press ENTER.
For the recording modes in VCR, see page 49. For the record-
ing modes in DVD, see page 53.
ENTER
RETURN BACK END
SELECT
SETUP
ENTER
TIMER REC SET
REC REC
TO MODE
TYPE
DATE (MM/DD)
START
END
CH
REC TO
REC MODE
ONCE
01
DVD
SP
OK
11/20(TH)
08:17PM
04:17PM
SETUP MENU
SELECT
ENTER
RETURN BACK END
SELECT
SETUP
ENTER
TIMER REC SET
REC REC
TO MODE
TYPE
DATE (MM/DD)
START
END
CH
REC TO
REC MODE
ONCE
000
DVD
SP
OK
11,08,03(--)
02:17
03:17
SETUP MENU
ONCE
EVERY SUN
EVERY MON
EVERY TUE
EVERY WED
EVERY THU
EVERY FRI
EVERY SAT
MON-FRI
NOTES:
•
If you select timer recording on a
specified date only one time, select
“ONCE” in the “TYPE” for recording.
You can record same days of every
week or from Monday to Friday
using the item “TYPE”. The items
you can select are as follows:
ONCE: Recording on the selected
“DATE”
EVERY SUN: Recording every Sun.
EVERY MON: Recording every
Mon.
EVERY TUE: Recording every Tue.
EVERY WED: Recording every
Wed.
EVERY THU: Recording every Thu.
EVERY FRI: Recording every Fri.
EVERY SAT: Recording every Sat.
MON-FRI: Recording from Mon. to
Fri.
MON-SAT: Recording from Mon. to
Sat.
EVERYDAY: Recording everyday.
•
The starting and stopping times for
the recording are displayed on the
12-hour (am/pm) clock. Twelve
o’clock midnight is displayed as
“12:00AM ”, whereas twelve o’clock
noon is displayed as “12:00PM”.
•
The initial setting of “REC TO” and
“REC MODE” can be changed us-
ing “Setting the recording”. (See
page 32.)
The unauthorized recording, use,
distribution, or revision of television
programs, videotapes, DVDs and
other materials, is prohibited under
the Copyright Laws of the United
States and other countries, and
may subject you to civil and/or
criminal liability.
2J40101A P56-62 3/4/06, 10:45 AM59
Recording
60
8 : 00 11 : 00
9 : 00 10 : 00
Program 1
Prog.1
Deleted Parts
Non Recorded Portion Parts
Prog.2 Prog.3
Program 2
Program 3
Recording
Control Settings
Timer recording
NOTES:
•
Recording starts a few seconds be-
fore the preset starting time.
•
You cannot use the timer recording
for the both DVD and VCR at the
same time.
•
You can playback the DVD during
the VCR timer recording, and you
can playback the VCR during the
DVD timer recording.
•
The timer recording program is
stopped during timer recording, the
stopped program is not erased from
the timer recording list. In this case,
please cancel the program,
otherwise the stopped program will
be activated if the unit returns to
timer recording standby mode.
11 Select “OK” and press ENTER.
The timer program is determined and the TIMER REC SET
screen appears again.
12 When you enter the other program for the timer recording, re-
peat the steps 3 to 11.
13 Press SETUP.
The TIMER REC SET screen disappears and the display will
return to the normal screen.
14 Press TIMER REC. The timer indicator “
” will appear on the
display and the unit stands by for recording.
Stopping the timer recording
After the timer recording has started, you can cancel the timer record-
ing (but continue recording), or stop recording completely if you want.
To cancel the timer recording, press and hold TIMER REC for more
than 2 seconds. The timer indicator “
” disappears from the display
and recording continues. Press STOP to stop recording completely.
Checking or changing the timer recording
When you want to check the selected timer recording, follow the steps 1
and 2 of “Setting timer recording” and display the TIMER REC SET screen.
To change the timer recording, select the program to be changed and
press ENTER. The changing method is the same as that for the re-
cording a program for the first time.
Cancelling the timer recording
Display the TIMER REC SET screen.
Select the program you want to cancel and press CANCEL, then the
selected program will be erased from the timer recording list.
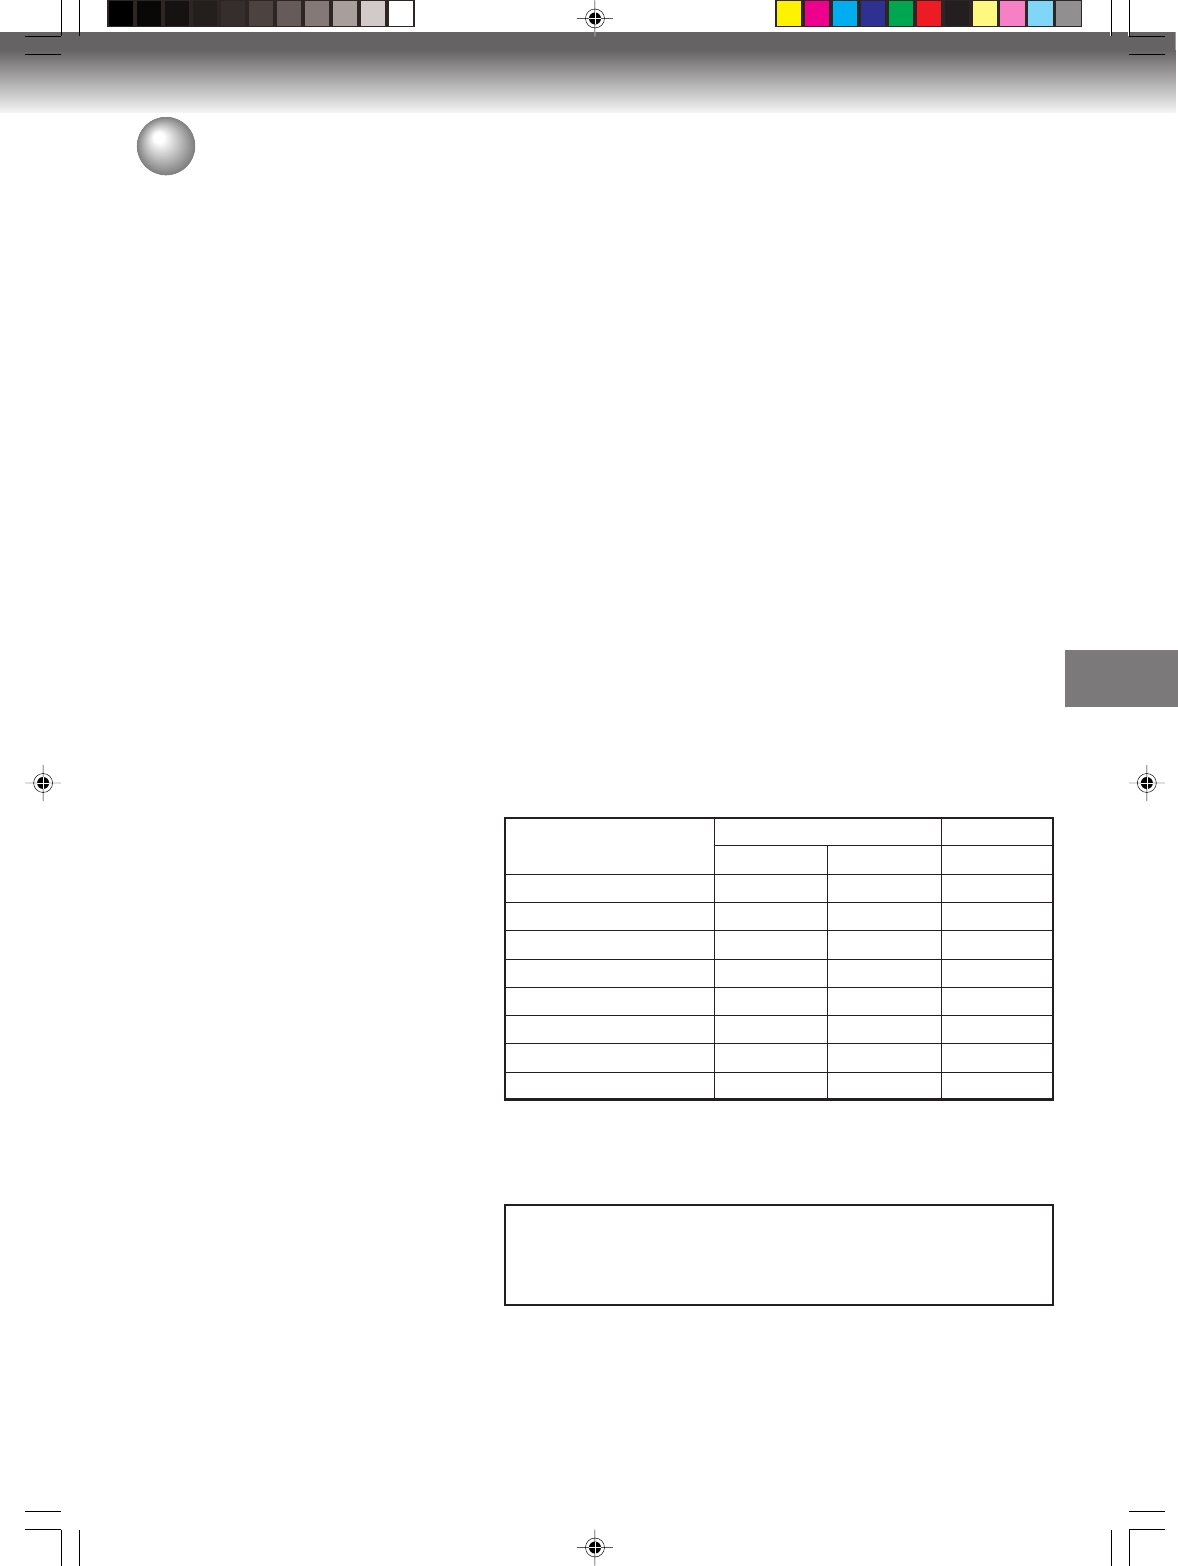
In case Timer programs-overlap
Do not overlap timer programs as portions of the conflicting programs
will be lost. The first recording time has priority over the next recording
time as shown in the diagram below.
In this case, the next recording time is delayed a maximum of about
1minute.
If you set up many timer recording programs at the same start time,
the priority will be the top program in the timer recording list.
ENTER
RETURN BACK END
SELECT
SETUP
ENTER
TIMER REC SET
REC REC
TO MODE
TYPE
DATE (MM/DD)
START
END
CH
REC TO
REC MODE
ONCE
12
DVD
LP
OK
11/20(TH)
08:00PM
09:30PM
SETUP MENU
The unauthorized recording, use,
distribution, or revision of television
programs, videotapes, DVDs and
other materials, is prohibited under
the Copyright Laws of the United
States and other countries, and
may subject you to civil and/or
criminal liability.
2J40101A P56-62 3/4/06, 10:45 AM60
Recording
61
Chase Playback
Still playback:
Press PAUSE.
•To resume chase playback, press PLAY.
Fast forward/Review playback:
Press SEARCH 8/9. Every press SEARCH, it switches the
speed of the search.
•To resume chase playback, press PLAY.
•If the playback position catches up to within about 60 seconds,
chase playback resumes. It may differ depending on the
recording condition and search speed.
Locating a chapter:
Press SKIP 6/7 to locate a chapter that you want to watch.
•If you press SKIP 7 while playing back the newest chapter,
it starts playing back from about 15 seconds before the
recording position.
Locating a specific scene:
Press PLAY MODE enables you to do a Time Search or a
Chapter Search. (See page 38.)
You can begin playback from the
beginning of a program currently
being recorded. You will find this
function of great advantage on
long programs, as you do not have
to wait for the end of recording to
begin playback.
NOTES:
•Chase playback is not available
when recording a DVD-RW/R disc
and video tape.
•Chase playback is not available
when recording in XP mode.
•Slow, Instant skip, Instant replay,
A-B repeat, and Frame advance
will not work during chase play-
back.
•Chase playback does not work
until 30 seconds of recording have
elapsed.
•If you press DISPLAY during
chase playback, the information
screen is displayed (see page 36).
1While recording a TV program onto the DVD-RAM disc, press PLAY
to start chase playback.
The TV program as it is being recorded will played back.
2Locate a scene you want through the following operations if nec-
essary.
3Press STOP to end chase playback.
If you press STOP again, the recording stops.
2J40101A P56-62 3/4/06, 10:45 AM61
Recording
62
Stereo recording and playback
The VHS Hi-Fi audio system per-
mits high fidelity recording of MTS
STEREO TV broadcasts.
STEREO
OUTPUT
SELECTION
STEREO
L ch
R ch
MONO
SOUND HEARD ON BOTH
SPEAKERS
STEREO
LEFT CHANNEL AUDIO
RIGHT CHANNEL AUDIO
MONO
NOTES:
•When playing back a video tape
or disc that is not recorded in Hi-Fi
stereo mode, the audio will auto-
matically be monaural.
•When listening to a Hi-Fi video
tape, disc or MTS broadcast
through the RF OUT (UHF/VHF)
jack (Audio/Video cord not con-
nected), the sound will be monau-
ral.
When a MTS STEREO broadcast is re-
ceived, the word “STEREO” will appear on
the screen and the program can be viewed
or recorded in stereo.
The Hi-Fi STEREO recording procedure is
the same as for normal recordings.
NOTE:
When using a Cable TV system, stereo TV programs may be transmit-
ted over a mono cable channel. In this case the word “STEREO” will
not appear and the sound will be in mono.
Output selection
When viewing an MTS STEREO TV program, or playing a prerecorded
Hi-Fi STEREO on video tape, press AUDIO SELECT to select how the
audio will be heard through the speakers. Normally set to the Hi-Fi
STEREO position, this button can be set to the MONO position if the
stereo audio is of poor quality. The “R” and “L” positions allow the au-
dio from the Right or Left Hi-Fi channel to be heard over both TV speak-
ers. This button has no effect when viewing a monaural audio pro-
gram. Each time when you press the button, output selection display
appears on the screen for several seconds. Refer to the chart below.
Output selection for DVD
You can switch between the left or right channel and stereo only
when playing a disc on which a bilingual broadcast was recorded in
the DVD-RW VR mode. It is not possible to switch between channels
otherwise as only the channel selected in the setting of SAP (Second
Audio Program; ON or OFF) is recorded in the DVD-RW Video mode
or DVD-R (see page 32).
NOTE:
When a stereo or monaural broadcast is recorded, either stereo or
monaural, respectively, is played back and it is not possible to switch
between channels.
2J40101A P56-62 3/4/06, 10:45 AM62
Editing the disc
63
Editing the disc
This section explains how to edit
the recorded contents on DVD-
RWs. However, the items that you
can edit vary with the recording
formats. In VR mode, you can edit
various title menus, whereas in
Video mode, you can edit only a
few items.
Title menu
When the content is recorded, a title name that includes the date, time,
channel number and other information is created automatically.
The title menu can be used when you playback after confirming the
contents (see page 35), or when you check the contents recorded on
the disc.
Original title
The titles explained above are called original titles; these will be added
with every recording. In VR mode you can do various editing opera-
tions i.e., you can rename the titles or add the chapter marks. In addi-
tion, you can erase the unnecessary titles to increase the disc space.
Playlist
You can create a playlist based on the original titles.
You can combine or erase undesired scenes.
If you create a playlist, it will become the primary list used by the disc.
If you create a playlist to customize your viewing preferences, and
choose to delete it, the original titles will not be affected. It is recom-
mended to create and edit the playlist to prevent important titles from
being erased accidentally.
If you create a playlist, both the original title and playlist will be dis-
played on the title menu.
Editable items
The items that can be edited are different between original title and
playlist. For the disc in Video mode, only the title name can be edited.
The items can be edited in each are as follows:
NOTES:
•This unit cannot record or edit a
disc which was recorded or edited
using another DVD recorder.
•You cannot edit or record the disc
on which disc protection is set. In
such a case, be sure to cancel the
disc protection before starting the
operation.
•When a scene has been erased,
the selected position for erasing
may vary slightly from the actual
erased position.
Editing items VR mode Video mode
Original
Playback
Adding chapter mark
Combining chapters
Erasing scenes
Erasing titles
Renaming titles
Creating playlist
Combining titles
Original Playlist
Y
Y
Y
Y
Y
Y
Y
N
Y
N
N
Y
Y
Y
N
Y
Y
N
N
N
N
Y
N
N
If you finalize the disc in Video mode, the title menu is automatically
changed. Thumbnail image and recording information will not appear
in the title menu affter finalizing.
Using these editing functions to modify copyrighted content for any
purpose other than your private viewing may be prohibited under
the Copyright Laws of the United States and other countries, and
may subject you to civil and criminal liability.
Editing the disc
2J40101A P63-71 3/4/06, 10:45 AM63
Editing the disc
64
Preparation:
• Turn ON the TV and set to the video input mode.
• Load the recorded DVD-RAM/RW (VR).
• Press DVD to select the DVD mode. (The DVD indicator will light.)
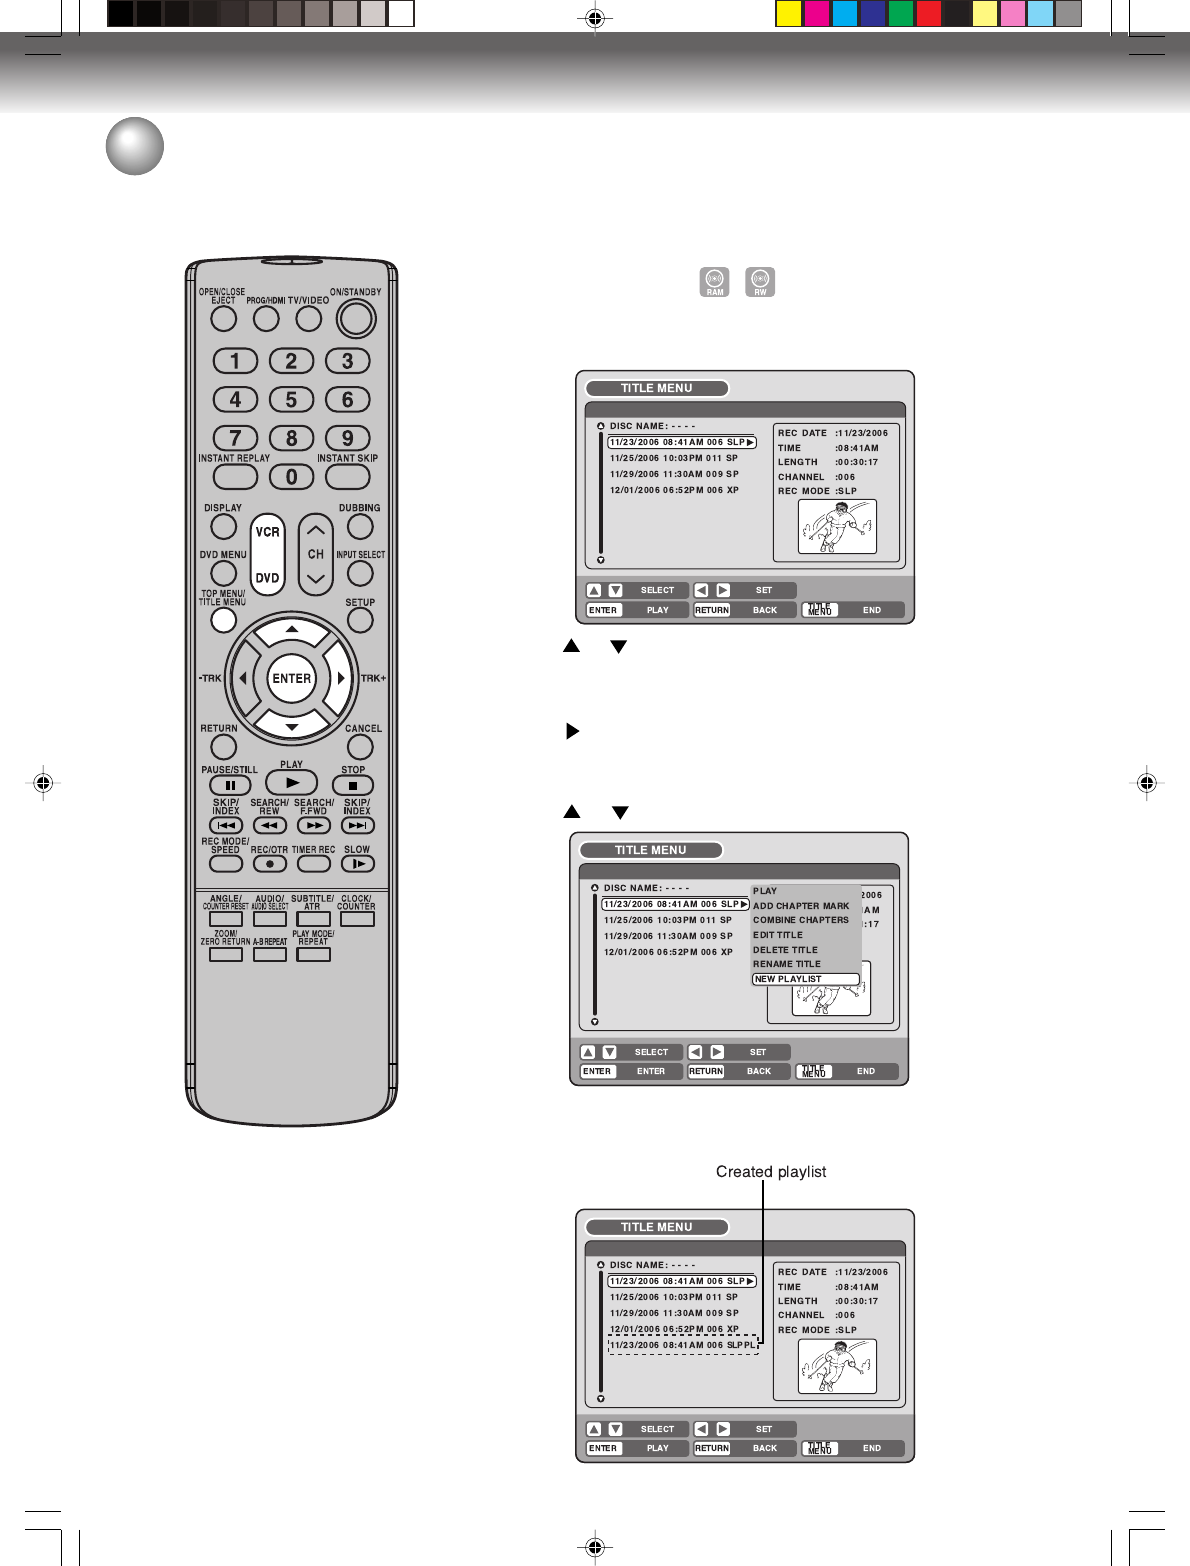
Creating a playlist
1Press TITLE MENU.
The title menu will appear.
Editing a playlist
You can create and edit the playlist
based on the original title.
2Press or to select the original title which will be used as the
base of a playlist.
3Press .
The editing menu of original title will appear.
4Press or to select “NEW PLAYLIST”.
5Press ENTER.
The editing menu closes and the created playlist appears at the
bottom of the list.
NOTES:
•A playlist can only be created with
a DVD-RAM or a DVD-RW in VR
mode. You cannot create a playlist
with a DVD-RW in Video mode, nor
with a DVD-R.
•In case the disc includes more than
9 titles, you can turn to the next or
the previous page. (See page 35.)
2J40101A P63-71 3/4/06, 10:45 AM64
Editing the disc
65
Editing a playlist
NOTES:
•The title name can be a maximum
of 64 characters. Long names will
be shortened in the title menu.
•
For using the keyboard screen, see
“Changing a disc name” (page 76).
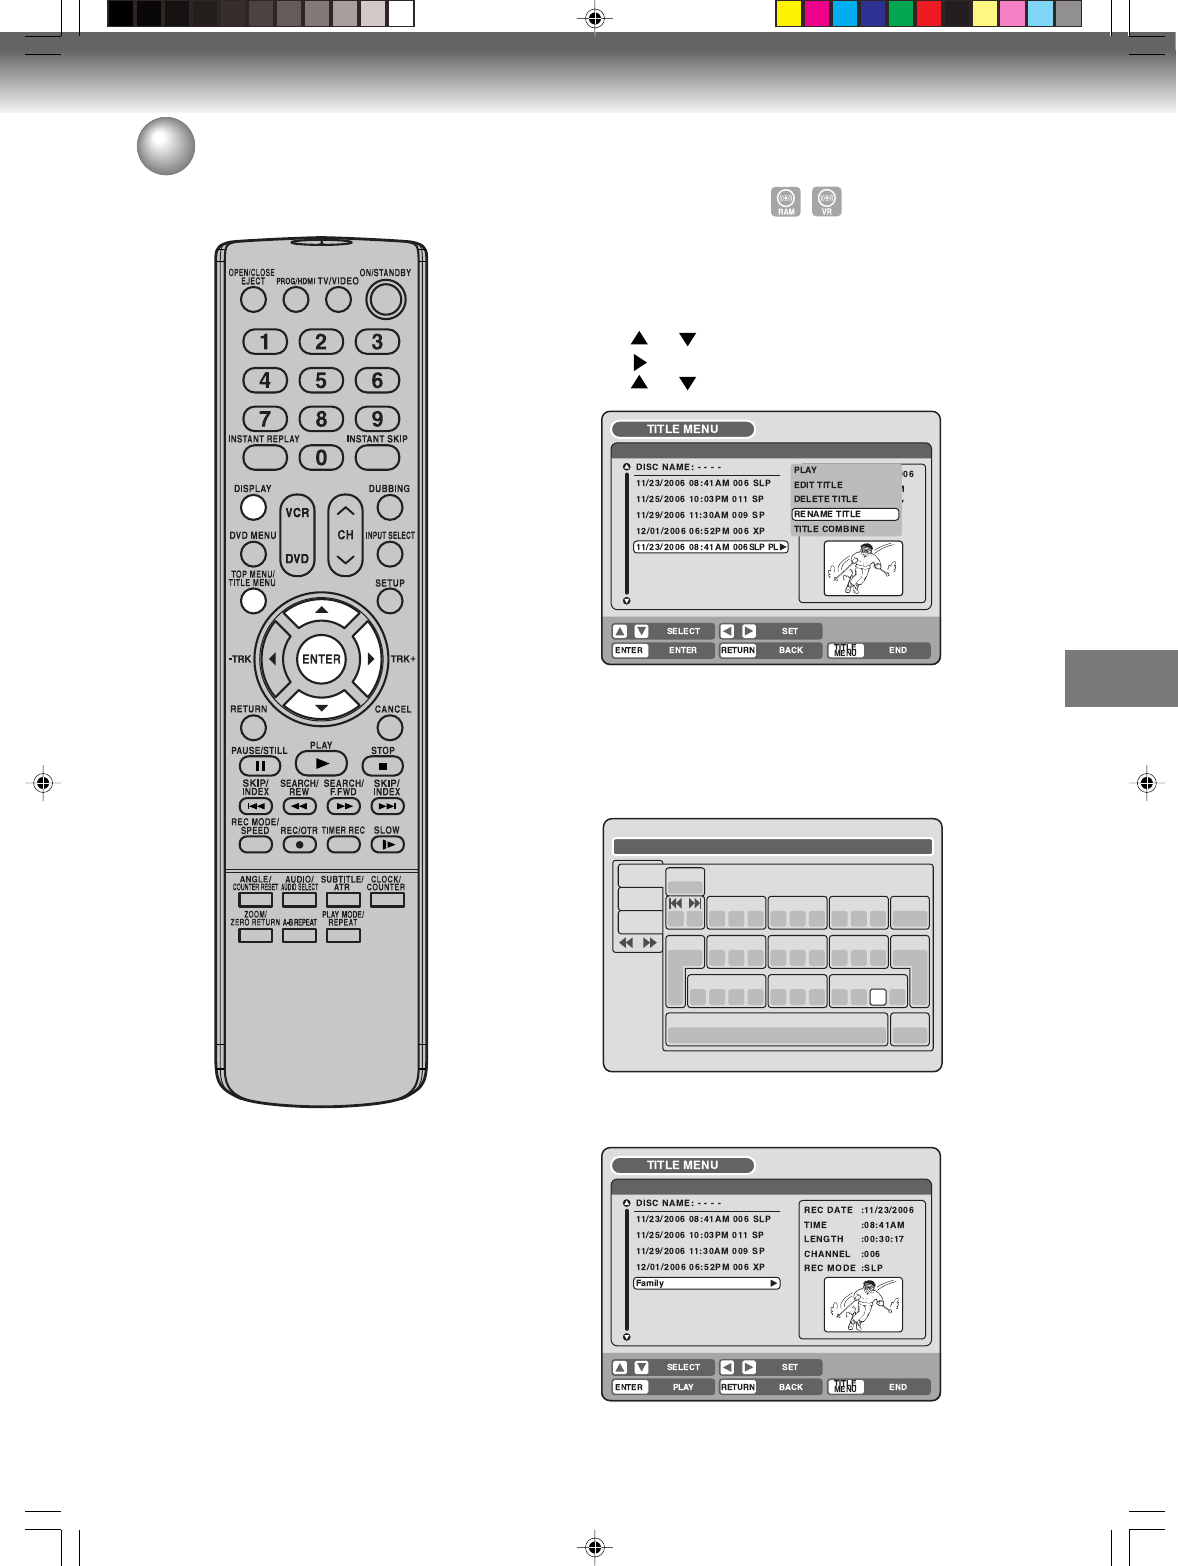
Changing a title name
1Press TITLE MENU to display the title menu.
2Select the playlist where you want to change the title name.
• Press or to select the playlist.
• Press to display the editing menu of the playlist.
• Press or to select “RENAME TITLE”.
3Press ENTER.
The keyboard screen will appear.
4Use the keyboard screen to enter the title name.
5Press DISPLAY to return to the title menu.
Family
1
( .< > #
2
abc
3
d e f
CANCEL
Back
RETURN
Exit
STOP
Caps
0
Space bar
4
g h i
5
jkl
6
m n o
7
qp r s
8
t u v
9
w x y z
DISPLAY
OK
DISPLAY
OK
Numbers
Signs
Letters
2J40101A P63-71 3/4/06, 10:45 AM65
Editing the disc
66
Editing a playlist
SELECT
ENTER
RETURNENTER BACK END
TITLE
MENU
EDIT TITLE
00:08:28
00:00:00 00:00:00
Preview
SET START
SET END
Finish
NAME Family
CHAPTER
1/3
LENGTH
00:08:28/00:30:17
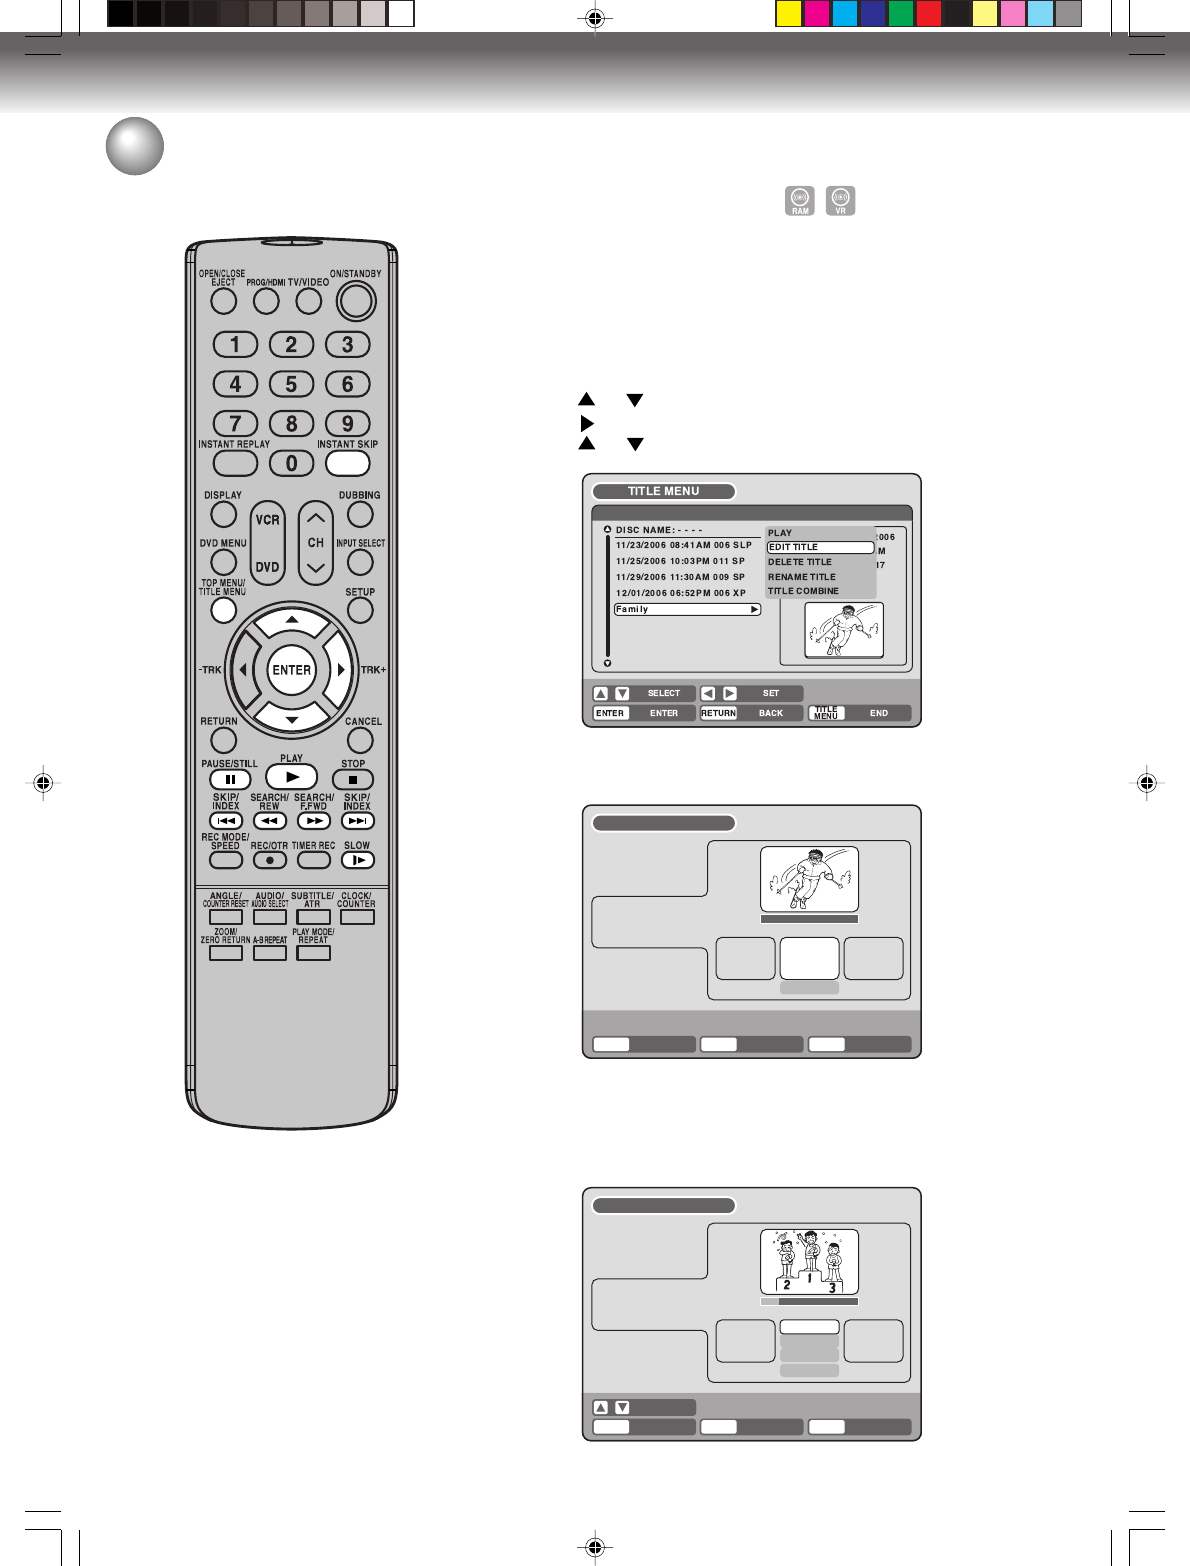
Erasing a scene (Edit title)
You can erase an unnecessary scene from the created playlist.
When you erase the scene from the playlist, the scene is not erased
from the original title.
1Press TITLE MENU to display the title menu.
2Select the playlist where a scene you want to erase is included.
• Press or to select the playlist.
• Press to display the editing menu of the playlist.
• Press or to select “EDIT TITLE”.
3Press ENTER.
The EDIT TITLE screen will appear.
4Press ENTER to playback the playlist on the EDIT TITLE screen.
• Use each operation button (F.FWD, REW, SKIP77
77
7, SKIP66
66
6,
PLAY, PAUSE/STILL, SLOW, INSTANT SKIP) for the playback
to search the starting point of the scene you want to erase.
ENTER
RETURNENTER BACK END
TITLE
MENU
EDIT TITLE
NAME Family
CHAPTER
1/3
LENGTH
00:00:00/00:30:17
00:00:00
00:00:00 00:00:00
Preview
Press
ENTER
to start
2J40101A P63-71 3/4/06, 10:45 AM66
Editing the disc
67
Editing a playlist
NOTE:
It is no problem to omit the proce-
dures for confirming the scene or
adjusting start and end points.
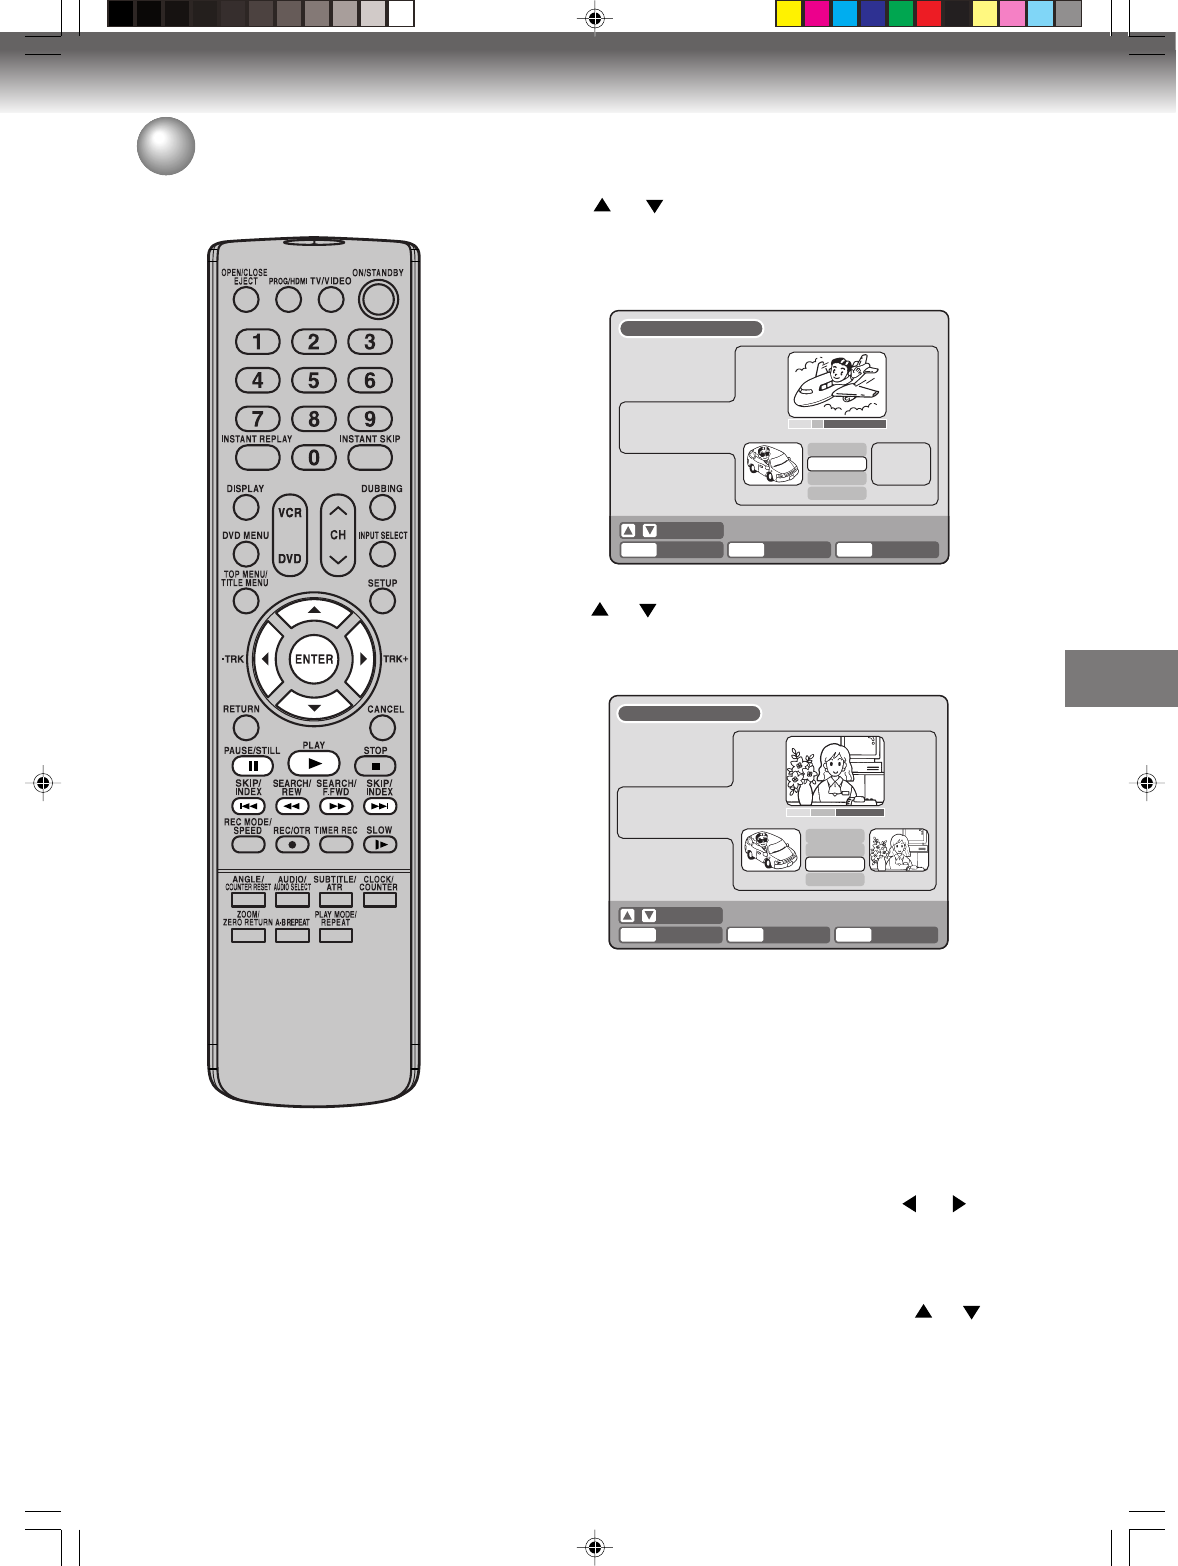
6Press or to select “SET END” at the end point of the scene
you want to erase and press ENTER.
The still image at the end point appears at the right small screen.
SELECT
ENTER
RETURNENTER BACK END
TITLE
MENU
EDIT TITLE
00:11:42
00:10:20 00:11:42
Preview
Adjust start
SET END
Finish
NAME Family
CHAPTER
2/3
LENGTH
00:11:42/00:30:17
7Check the erased scenes.
• Select “Preview” and press ENTER. Then the video where the
scenes between the start and end points are erased is played
back.
• Each operation button (F.FWD, REW, SKIP77
77
7, SKIP66
66
6, PLAY,
PAUSE/STILL) for playback also can be used.
8Adjust the start and end points.
• To adjust the start point, select “Adjust start” and press ENTER.
You can change the start point by pressing or .
• To adjust the end point, select “Adjust end” and press ENTER.
You can change the end point in the same way as the start point.
If you determine the scene to be erased, press or to select
“Finish” and press ENTER.
• A chapter mark is automatically added at the location of the
erased scene.
SELECT
ENTER
RETURNENTER BACK END
TITLE
MENU
EDIT TITLE
NAME Family
CHAPTER
2/3
LENGTH
00:15:58/00:30:17
00:15:58
00:10:20 00:15:58
Preview
Adjust start
Adjust end
Finish
5Press or to select “SET START” at the start point of the
scene that you want to erase and press ENTER. (To set the start
point easily, search the start point while “SET START” is selected)
The still image at the start point appears at the left small screen.
9
2J40101A P63-71 3/4/06, 10:45 AM67