ORION ELECTRIC M4F9B VIDEO CASSETTE RECORDER User Manual Manual
ORION ELECTRIC CO., LTD. VIDEO CASSETTE RECORDER Manual
UserManual.wiki
>
ORION ELECTRIC
>
M4F9B User Manual
Manual
Navigation menu
Upload a User Manual
Namespaces
Wiki Guide
HTML
PDF
Info
Views
User Manual
Discussion / Help
Navigation
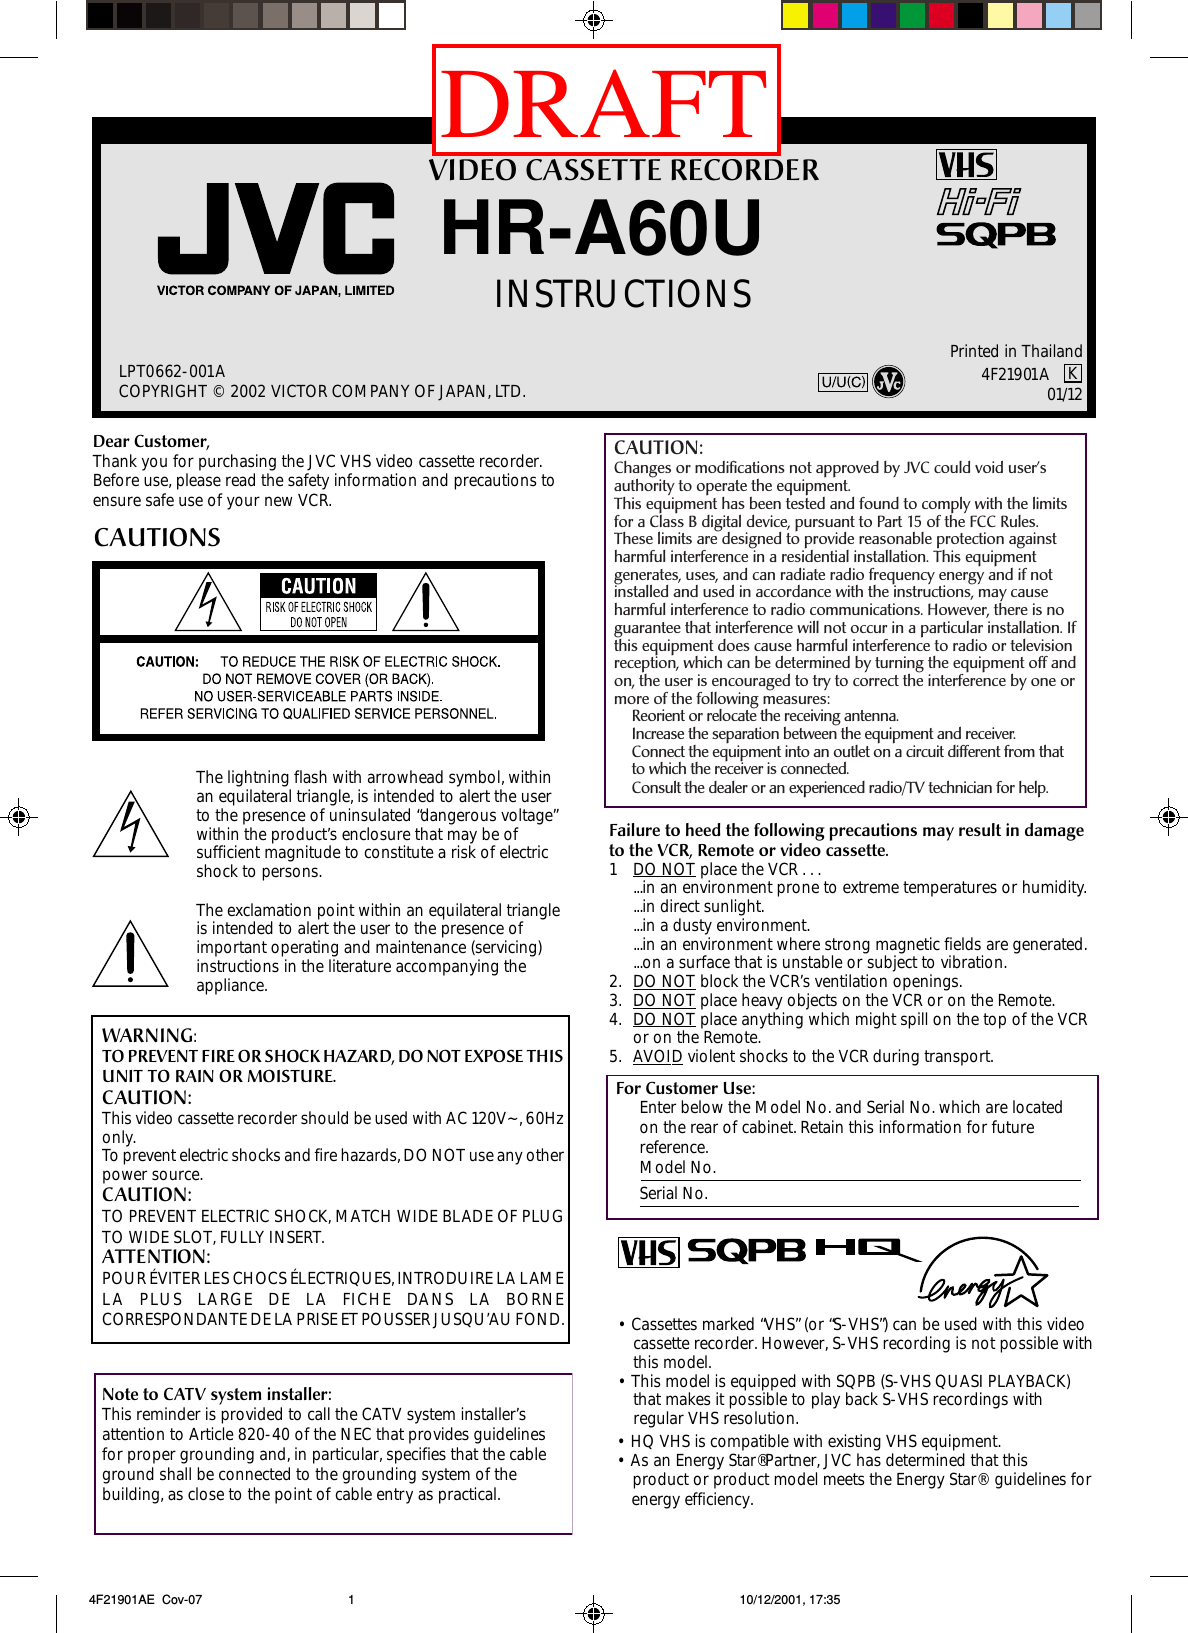
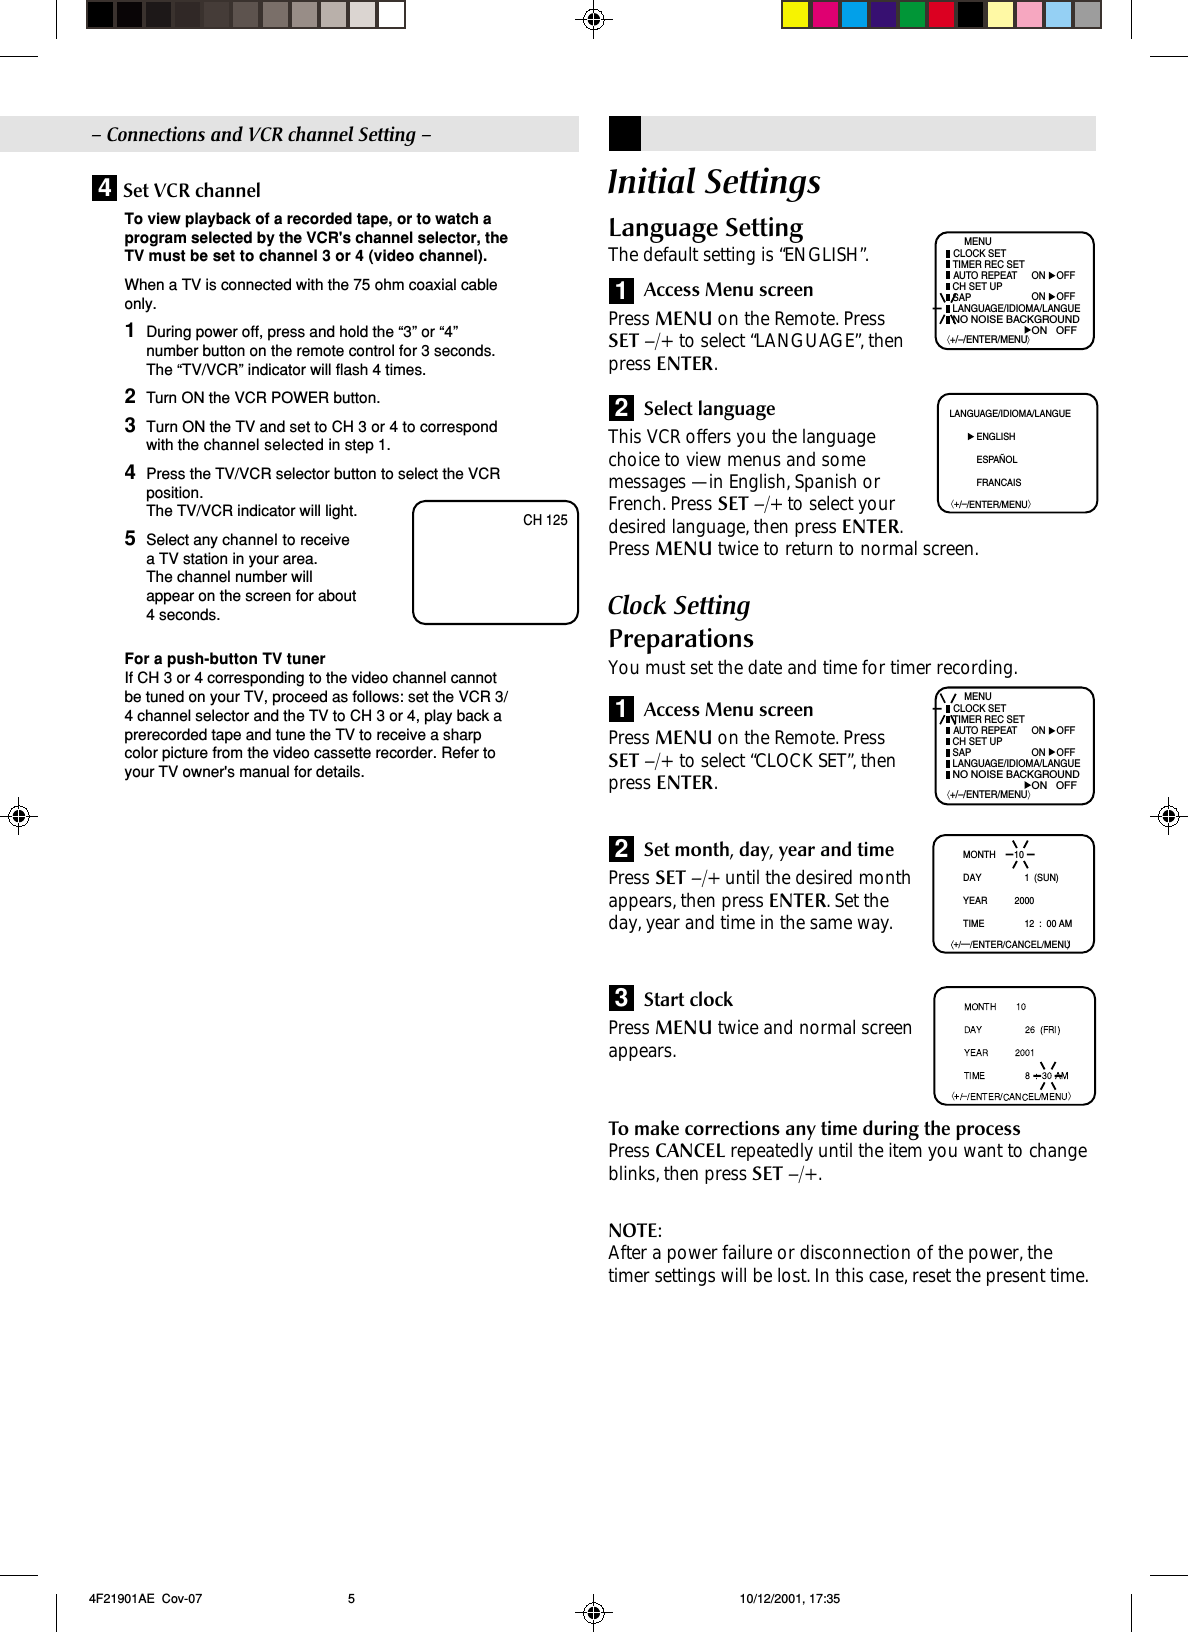
![It may be unlawful to record or play back copyrightedmaterial without the consent of the copyright owner.Load a cassetteMake sure the record safety tab isintact. If not, cover the hole withadhesive tape before inserting thecassette.•The VCR turns on, and the counteris reset, automatically.Set tape speedPress SP/EP.Select recording channelPress CH–/+ or the Number keys onthe Remote [CH–/+ on the VCR].12Start recordingOn the VCR, press REC. Or on theRemote, while holding REC, pressPLAY ( ).34OR Press STOP/EJECT(■/) on the VCR.Press STOP ( ) on theRemote.Press PAUSE.•Press PAUS E to resume recording.•You can select channel in therecording pause mode.Adjusting tracking condition– Tracking AdjustmentAutomatic tracking adjustmentWhenever you insert a tape and start playback, automatictracking starts working and continuously analyzes the signalto enable optimum picture quality during playback.Manual tracking adjustmentIf automatic tracking cannot eliminate noises well duringplayback, press SET –/+ on the Remote to eliminate thenoises. Press it briefly for a fine adjustment, or press andhold for a coarse adjustment.•Press SP/EP on the Remote again to reactivate automatictracking.Playing back tape repeatedly– Auto Repeat PlayAccess Menu screenPress MENU on the Remote.Press SET –/+ to select “AUTOREPEAT”.⟨+/–/ENTER/MENU⟩MENUCLOCK SETTIMER REC SETON OFFON OFFAUTO REPEATCH SET UPSAPLANGUAGE/IDIOMA/LANGUE ON OFFNO NOISE BACKGROUND⟨+/–/ENTER/MENU⟩MENUCLOCK SETTIMER REC SETON OFFON OFFAUTO REPEATCH SET UPSAPLANGUAGE/IDIOMA/LANGUE ON OFFNO NOISE BACKGROUND1Select ON/OFFPress ENTER to select “ON” or“OFF”.Press MENU to return to normalscreen.2Start Auto Repeat PlayPress PLAY. The tape will playover and over until the repeatmode is canceled.3Playback Features RecordingAccidental erasure preventionTo prevent accidental recording on a recorded cassette,remove its record safety tab. To record onit later, cover the hole with adhesivetape.Record safety tabBasic Recording00 : 00 : 00 SP•If you connect the TV and the VCRonly using the RF connection, pressTV/VCR on the Remote so that theTV/VCR indicator lights to view the program to berecorded.CH 001CH 110During recordingPause recordingStop recording– Playback –The REC indicator will light. 4F21901AE 08-Back 10/12/2001, 17:368](https://usermanual.wiki/ORION-ELECTRIC/M4F9B/User-Guide-282565-Page-8.png)
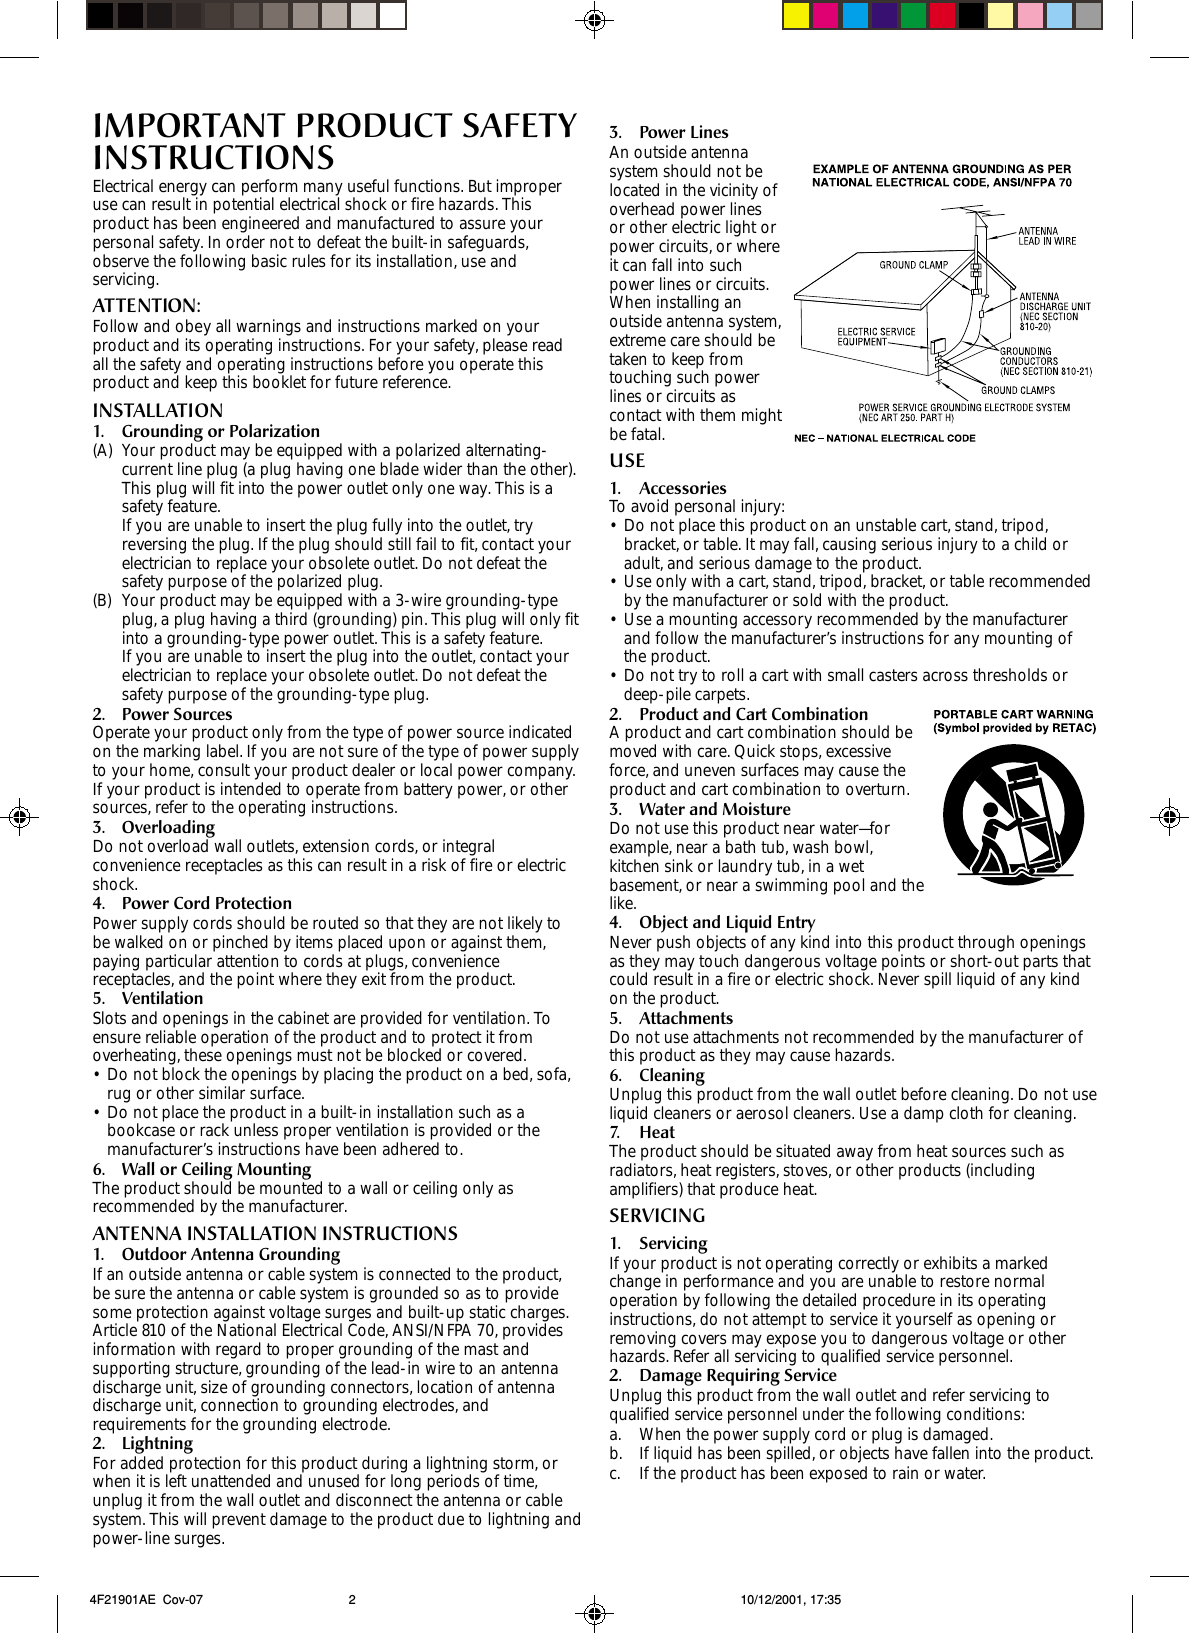
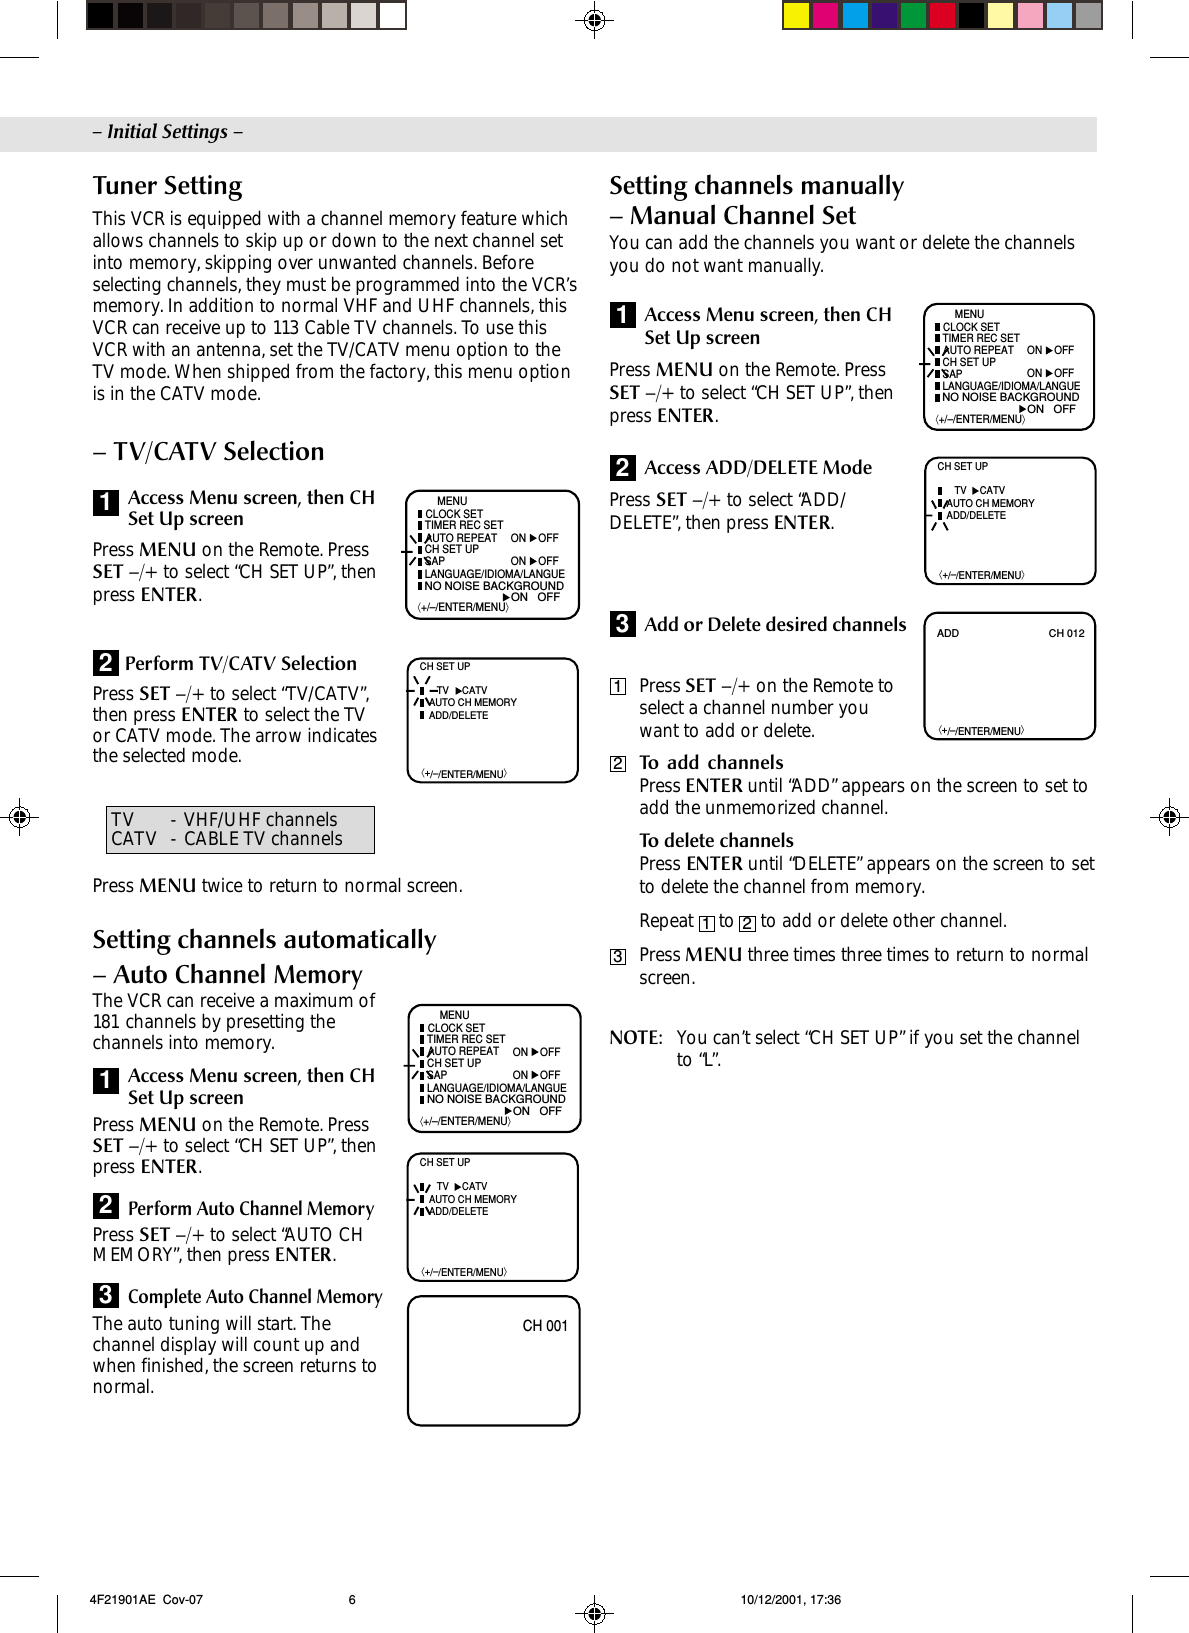
![You can use your VCR as the playback or recording VCR.You can use a camcorder as the playback VCR and your VCRas the recording VCR. Refer also to the other components’instruction manuals for connection and its operations.Make connectionsExample: When using this VCR as the playback VCR•When using this VCR as the recording VCR, connect thisVCR’s audio/video input connectors to the audio/videooutput connectors on the other VCR. If the playback VCRis monaural, connect the audio output connector on theplayback VCR to the left audio input connector on thisVCR.Load cassettesInsert the playback cassette into the playback VCR and thecassette to be recorded on into the recording VCR.Select input mode on recording VCRSelect the correct external input on the recording VCR.On this VCR (when using this VCR as the recording VCR);Select “L” — when connecting the other VCR to the audio/videoinput connectors on the front panel.Press O (AUX) or CH–/+ on the Remote [CH–/+ on the VCR].Start playbackPress PLAY ( ) on the playback VCR.Start recordingPress REC on the recording VCR.12345EditingThis VCR (for playback)Another VCR (for recording)To audio/video outTo audio/video inputAudio/video cable (notsupplied) 4F21901AE 08-Back 10/12/2001, 17:3712](https://usermanual.wiki/ORION-ELECTRIC/M4F9B/User-Guide-282565-Page-12.png)