OSEE TECHNOLOGY LMW-230LCD LCD Monitor User Manual
OSEE TECHNOLOGY CO.,LTD. LCD Monitor Users Manual
UserManual.wiki
>
OSEE TECHNOLOGY
>
LMW 230LCD User Manual
Users Manual
Navigation menu
Upload a User Manual
Namespaces
Wiki Guide
HTML
PDF
Info
Views
User Manual
Discussion / Help
Navigation

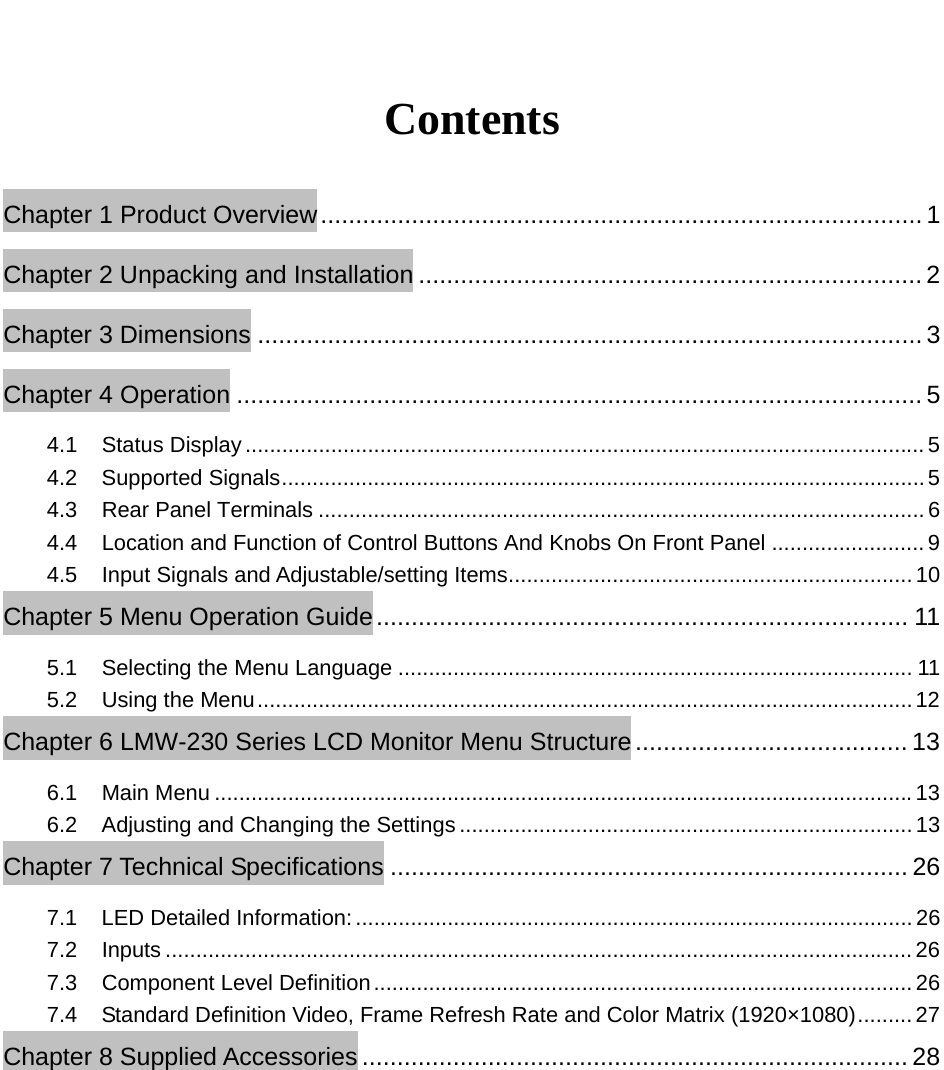


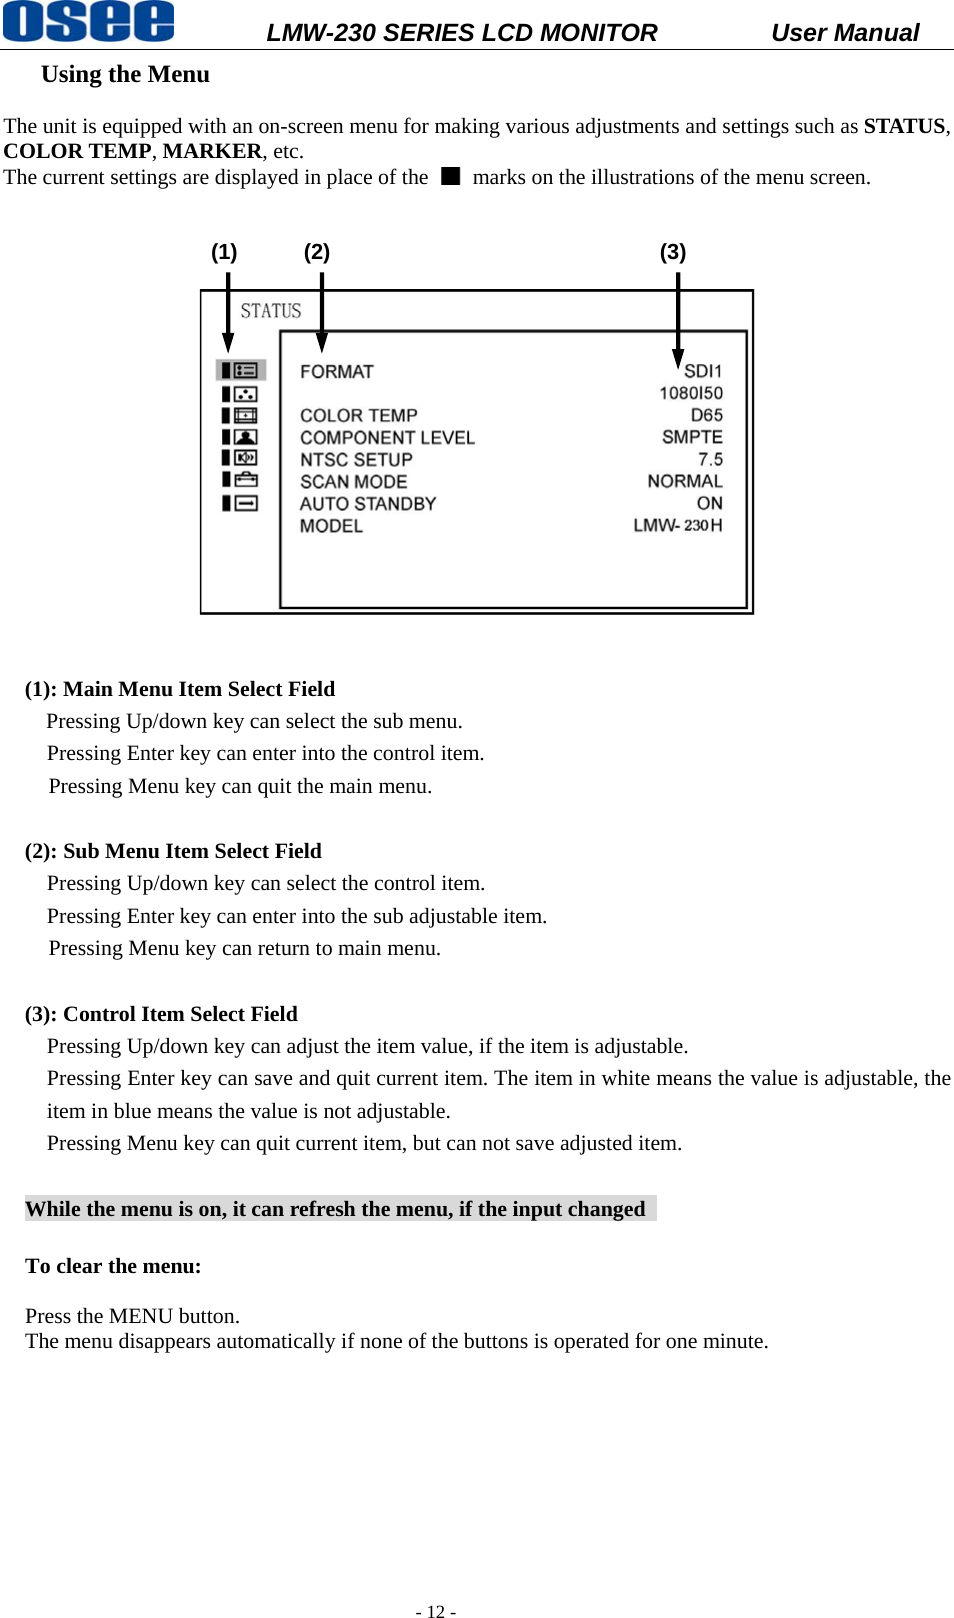
![LMW-230 SERIES LCD MONITOR User Manual - 13 - Chapter 6 LMW-230 Series LCD Monitor Menu Structure 6.1 Main Menu The screen menu of this monitor consists of the following items. [Label] [Main Menu Item] [Sub Menu] STATUS 1 COLOR TEMP 1 MARKER 1 VIDEO CONFIG 1 AUDIO CONFIG 3 USER CONFIG 5 CONTROL 1 6.2 Adjusting and Changing the Settings STATUS The STATUS menu is used to display the current status of the unit. The following items are displayed. For the video inputs include SDI1, SDI2, Line1, Line2 or DVI-I (HDMI input only), the following items are displayed. STATUS FORMAT SDI1 1080I50COLOR TEMP D65COMPONENT LEVEL SMPTENTSC SETUP 7.5SCAN MODE NORMALAUTO STANDBY ONMODEL* LMW-230H](https://usermanual.wiki/OSEE-TECHNOLOGY/LMW-230LCD/User-Guide-1828607-Page-17.png)

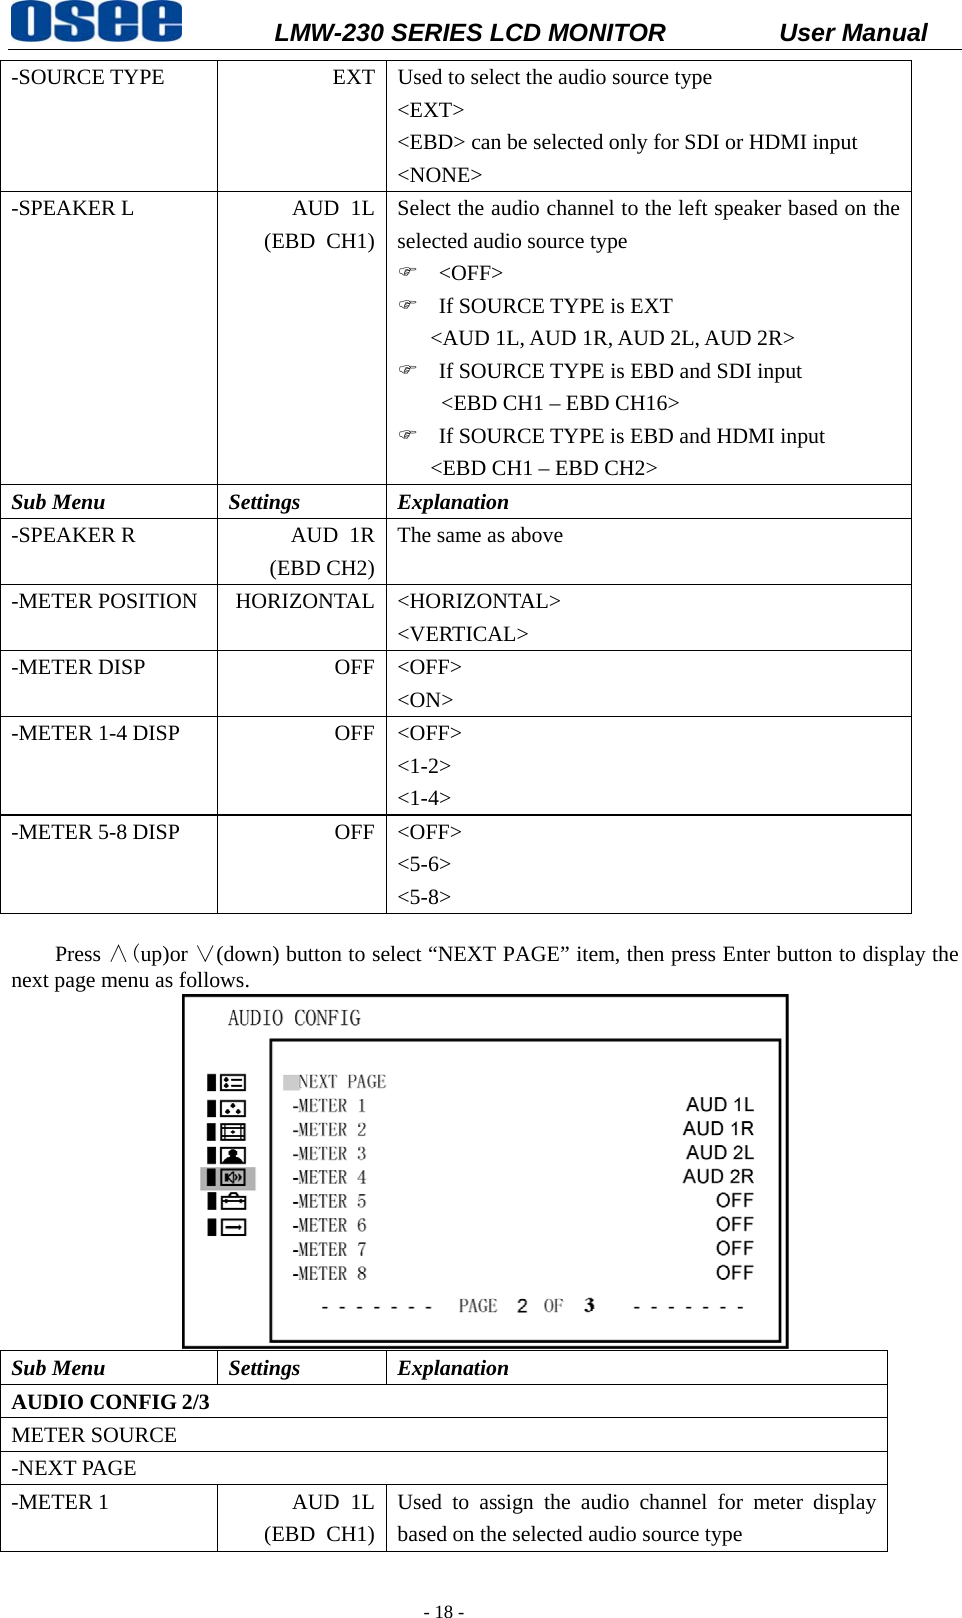

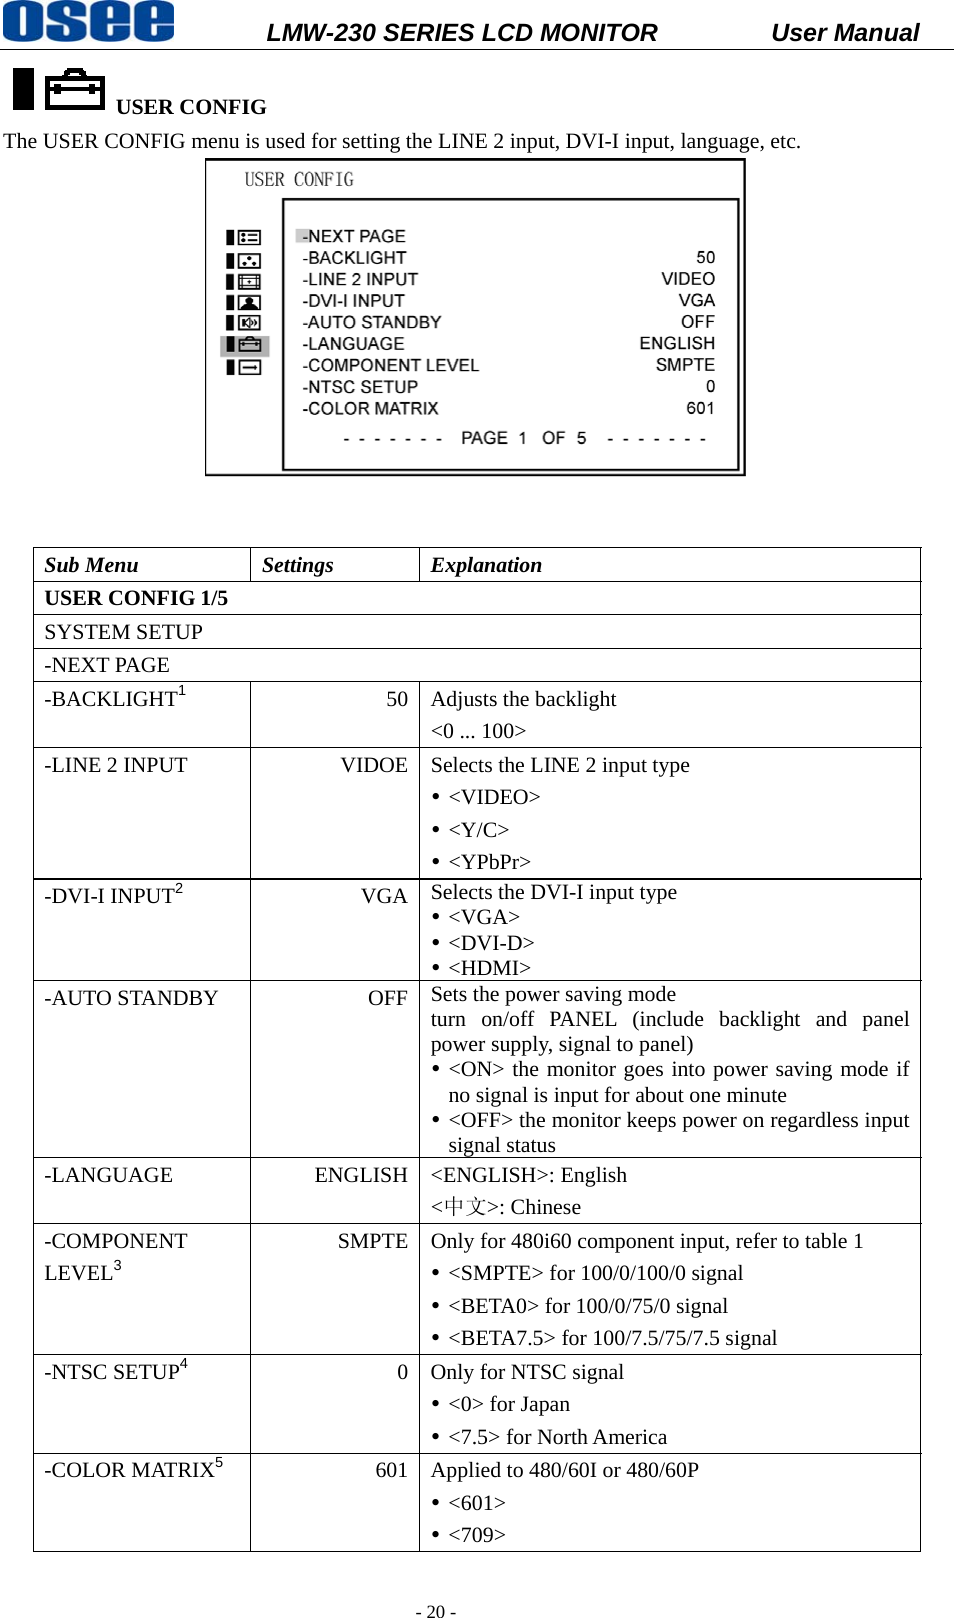
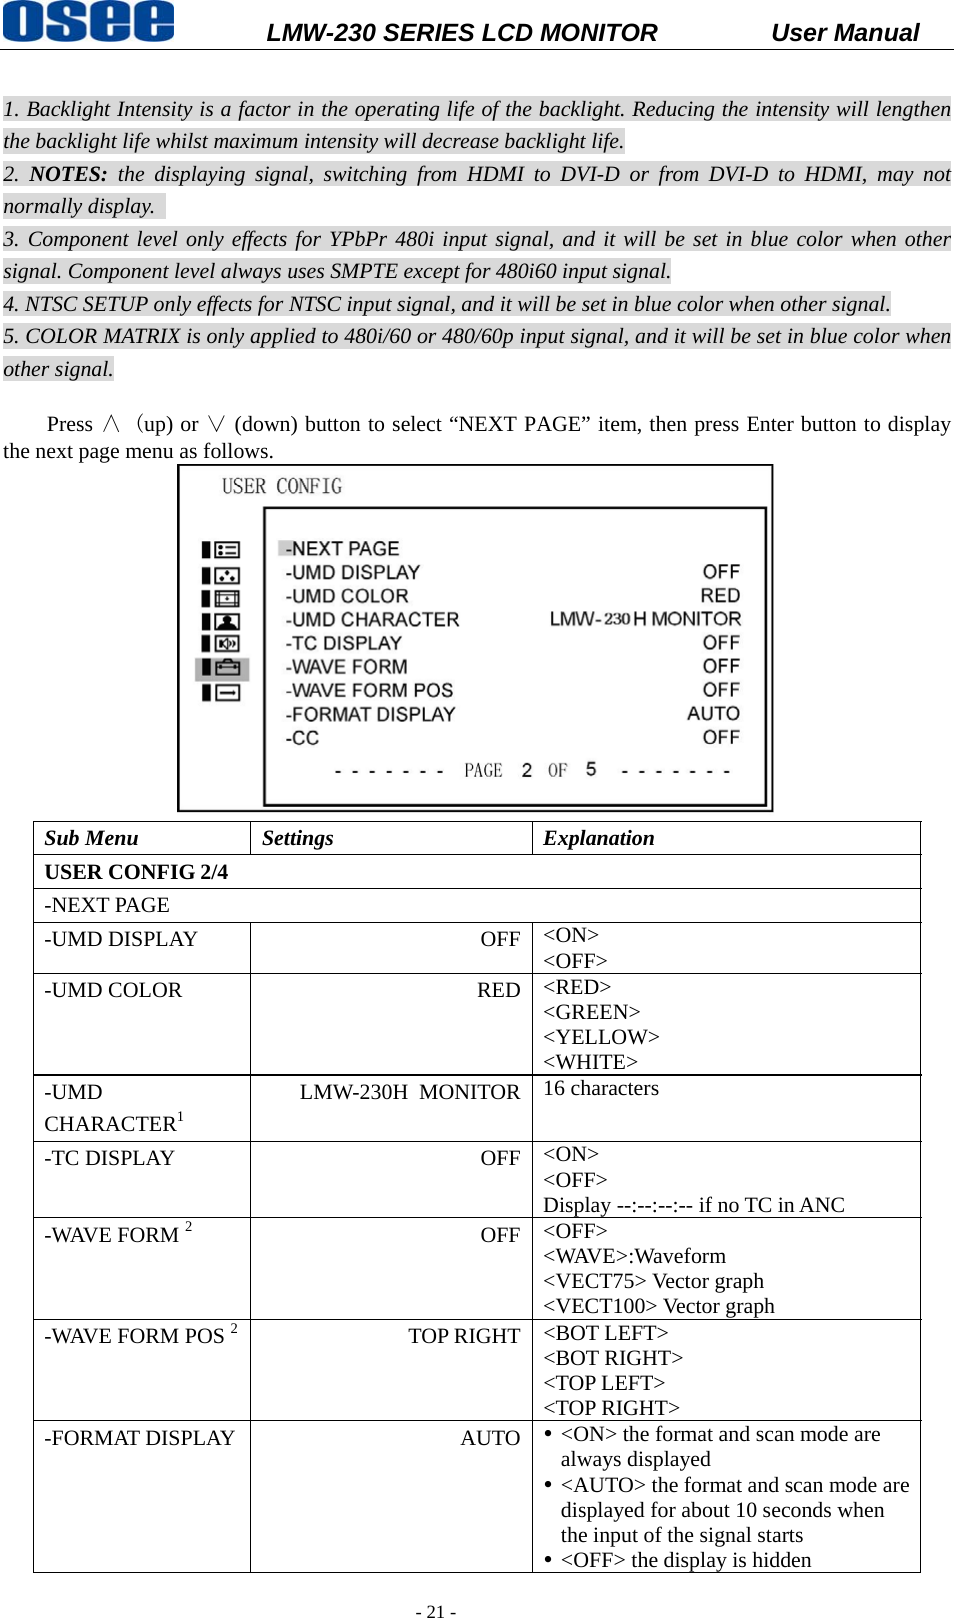
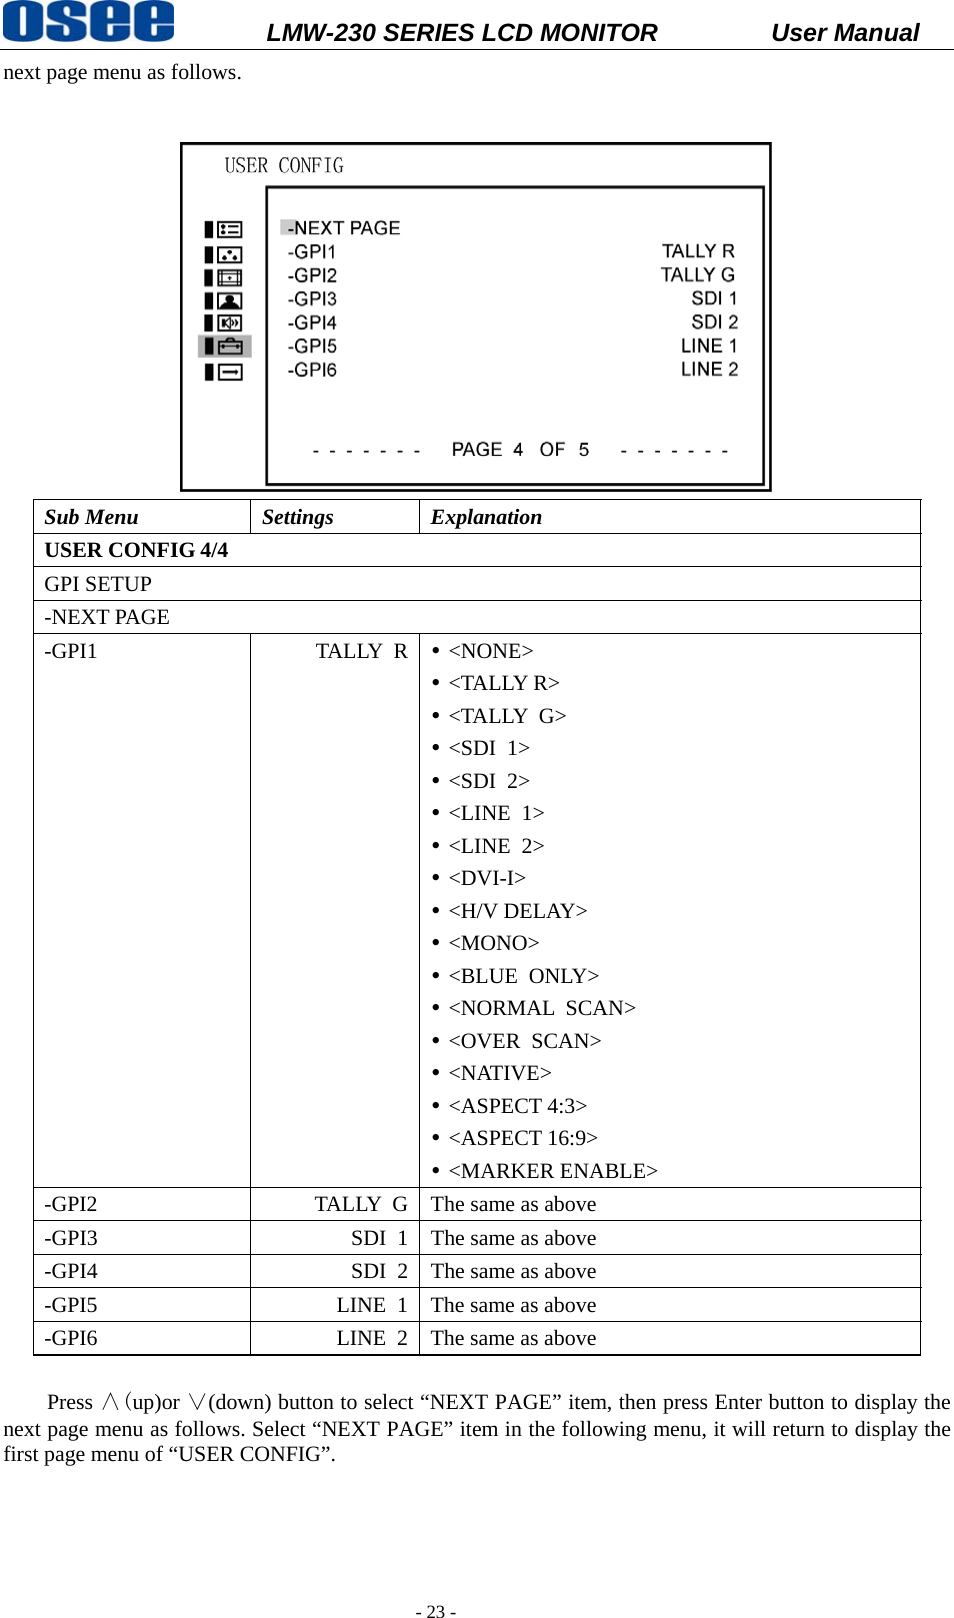
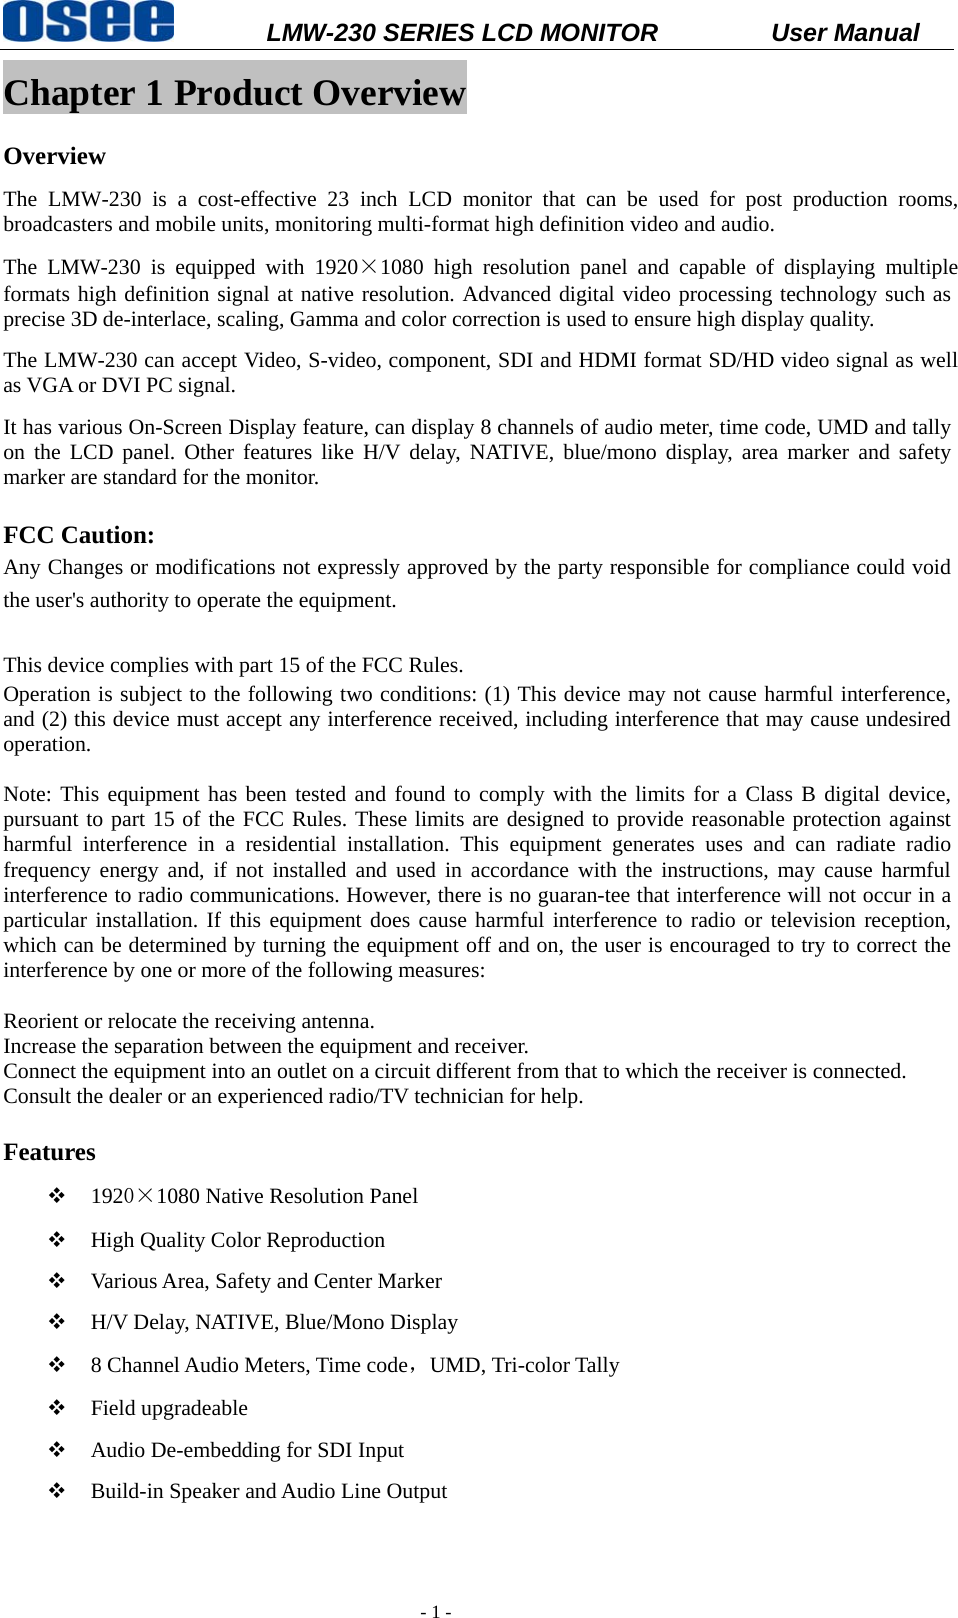
![LMW-230 SERIES LCD MONITOR User Manual - 22 - -CC 3 OFF <OFF> <CC1> <CC2> <CC3> <CC4> <TEXT1> <TEXT2> <TEXT3> <TEXT4> <XDS> 1. The default of “UMD CHARACTER” depends on the type of device. 2. Wave form is used to check the wave form and vector graph of the displaying signal picture. Only used for SDI signal. 3. CC only can be used for VIDEO: NTSC and Y/C: NTSC input signal. Press ∧(up)or ∨(down) button to select “NEXT PAGE” item, then press Enter button to display the next page menu as follows. Sub Menu Settings Explanation USER CONFIG 3/4 FUNCTION BUTTON SETUP -NEXT PAGE -F1 BUTTON MARKER F1- F3 button functions can be set as follows: y <MARKER>: Control all MARKER ON-OFF-ON y <AUD METER>: Control all audio meter display, ON-OFF-ON y <WAVEFORM>: WAVEFORM-OFF y <H/V DELAY>: OFF-H-V-H/V-OFF y <AUTO ADJ>: Press to initial auto adjustment y <NATIVE>: [ NATIVE]-OFF y <BLUE ONLY>: BLUE-NORMAL-BLUE y <MONO>: MONO-NORMAL-MONO y <ASPECT>:4:3-16:9 y <SCAN>:NORMAL-OVER y <MUTE>:OFF-MUTE y <UNDEF>: no settings -F2 BUTTON AUD METER-F3 BUTTON H/V DELAY Press ∧(up)or ∨(down) button to select “NEXT PAGE” item, then press Enter button to display the](https://usermanual.wiki/OSEE-TECHNOLOGY/LMW-230LCD/User-Guide-1828607-Page-26.png)