Ohsung Electronics URCMX3000 RF Transmitter Universal Remote Control User Manual OCE 0026A MX3000
Ohsung Electronics Co., Ltd. RF Transmitter Universal Remote Control OCE 0026A MX3000
Contents
- 1. Users Manual
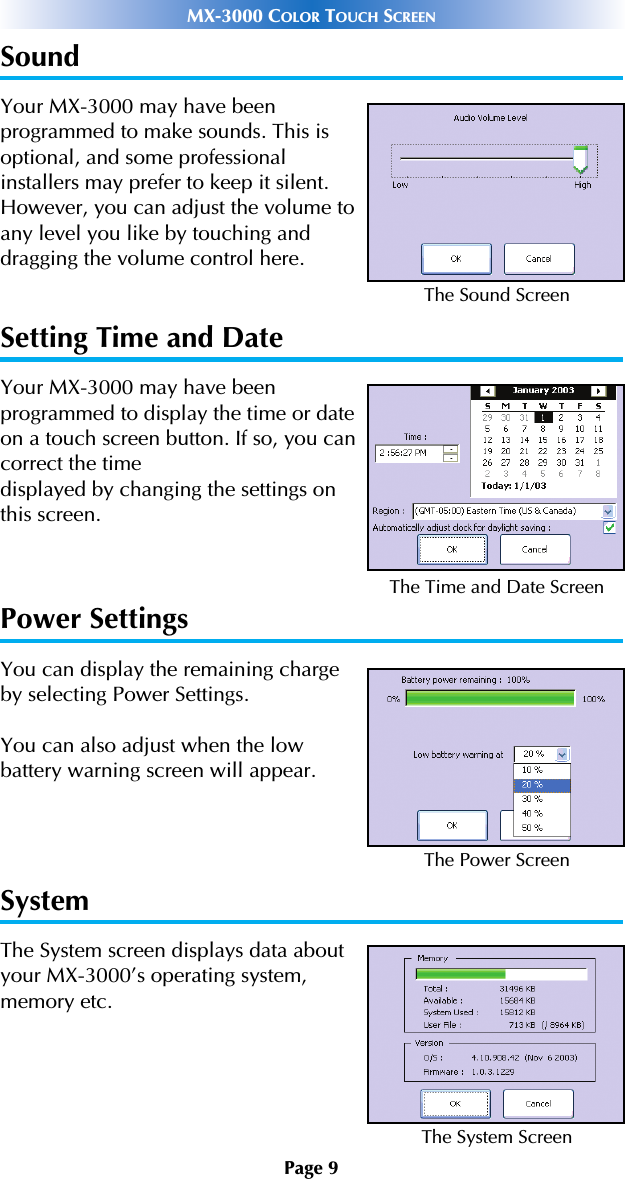
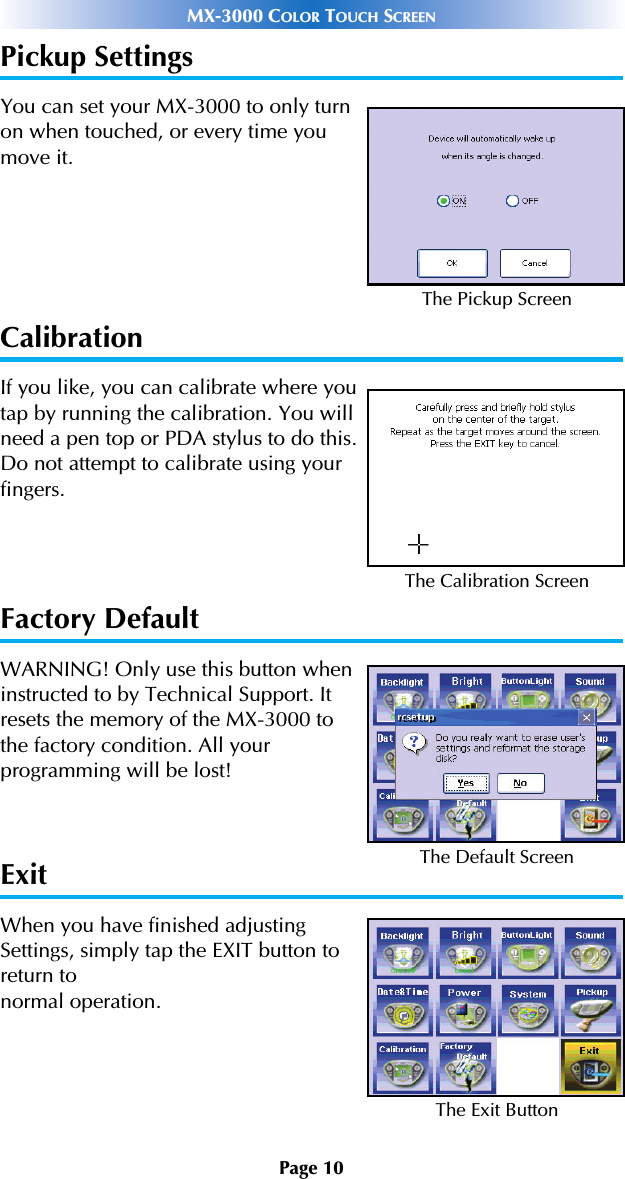
- 2. USERS MANUAL 1
- 3. USERS MANUAL 2
- 4. USER MANUAL
Users Manual