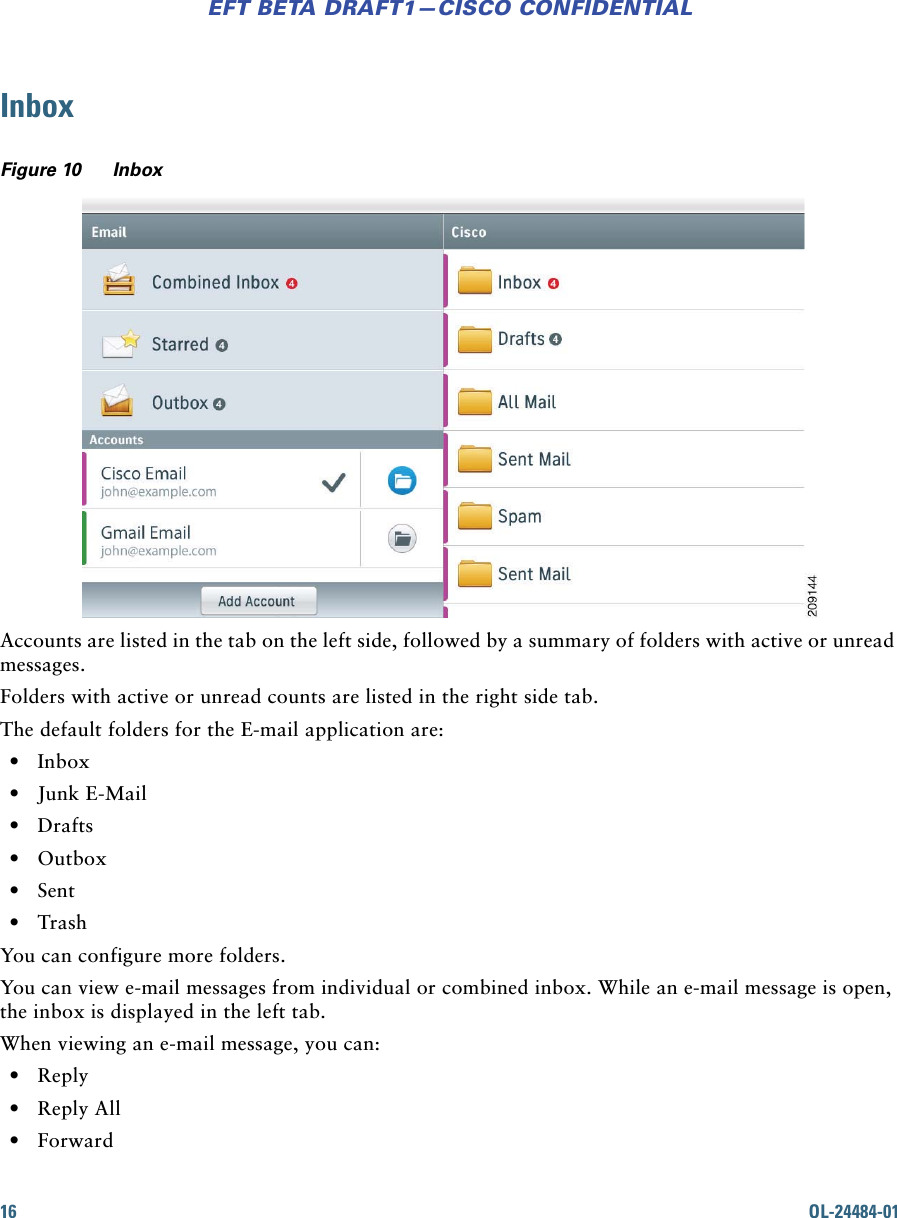
OpenPeak CSCOT0710 Cisco Cius User Manual ciusug
OpenPeak Inc. Cisco Cius ciusug
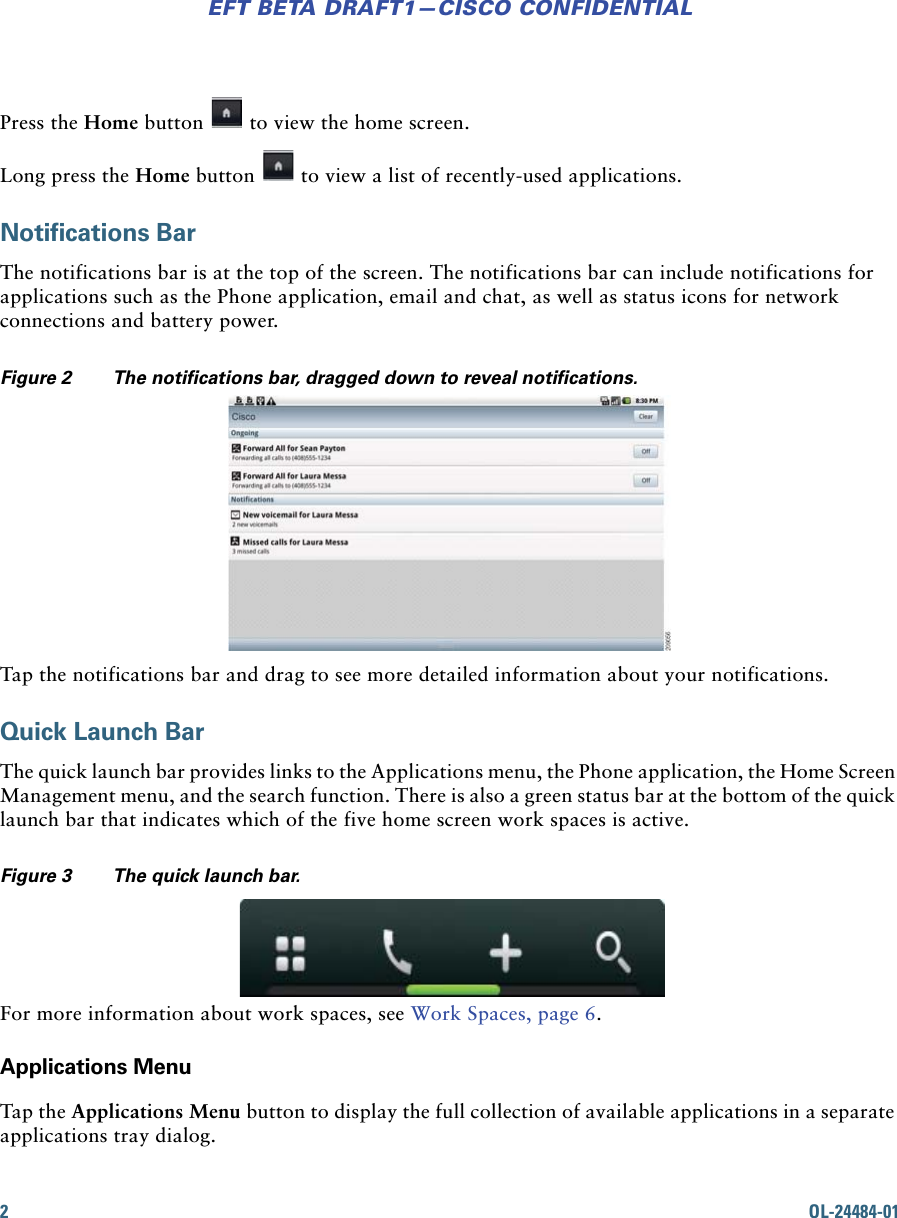
UserManual.wiki
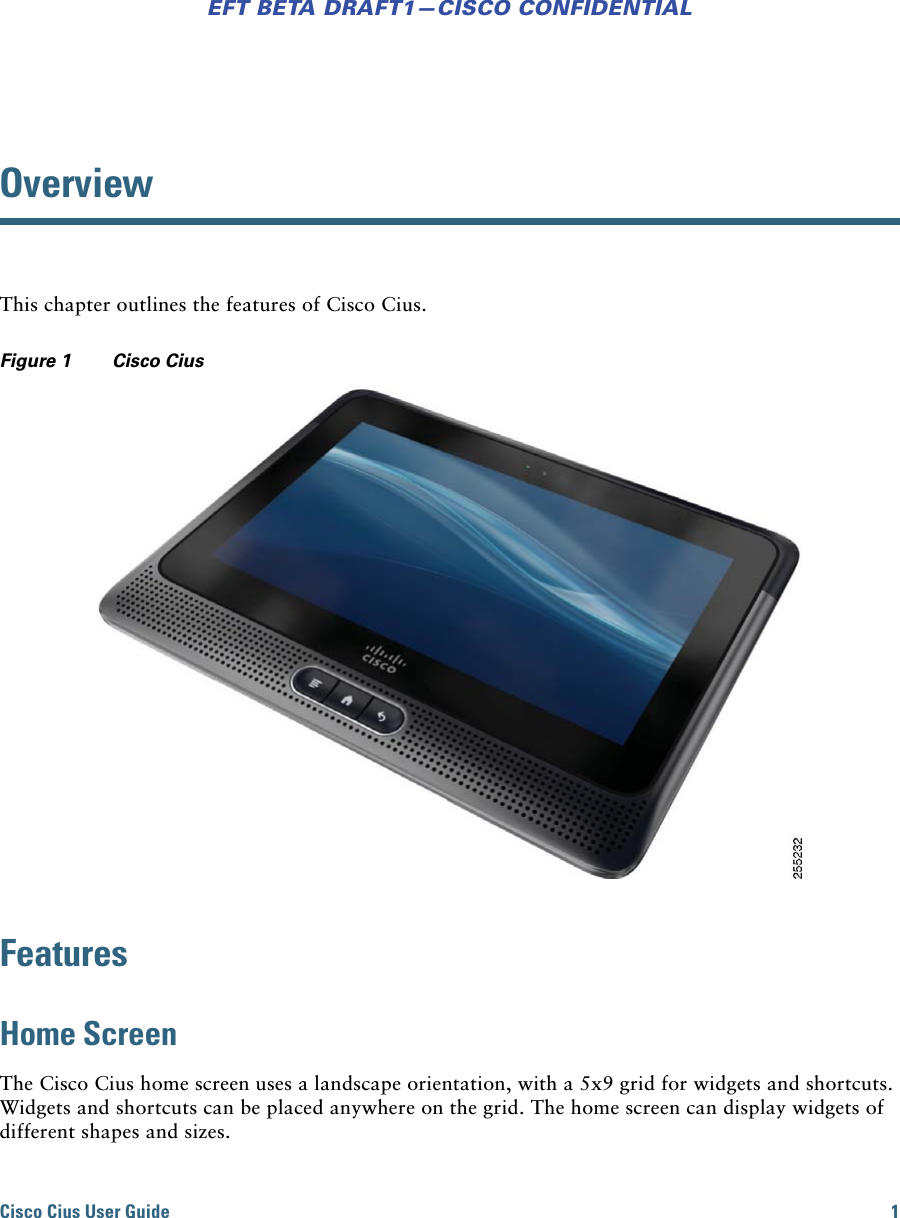
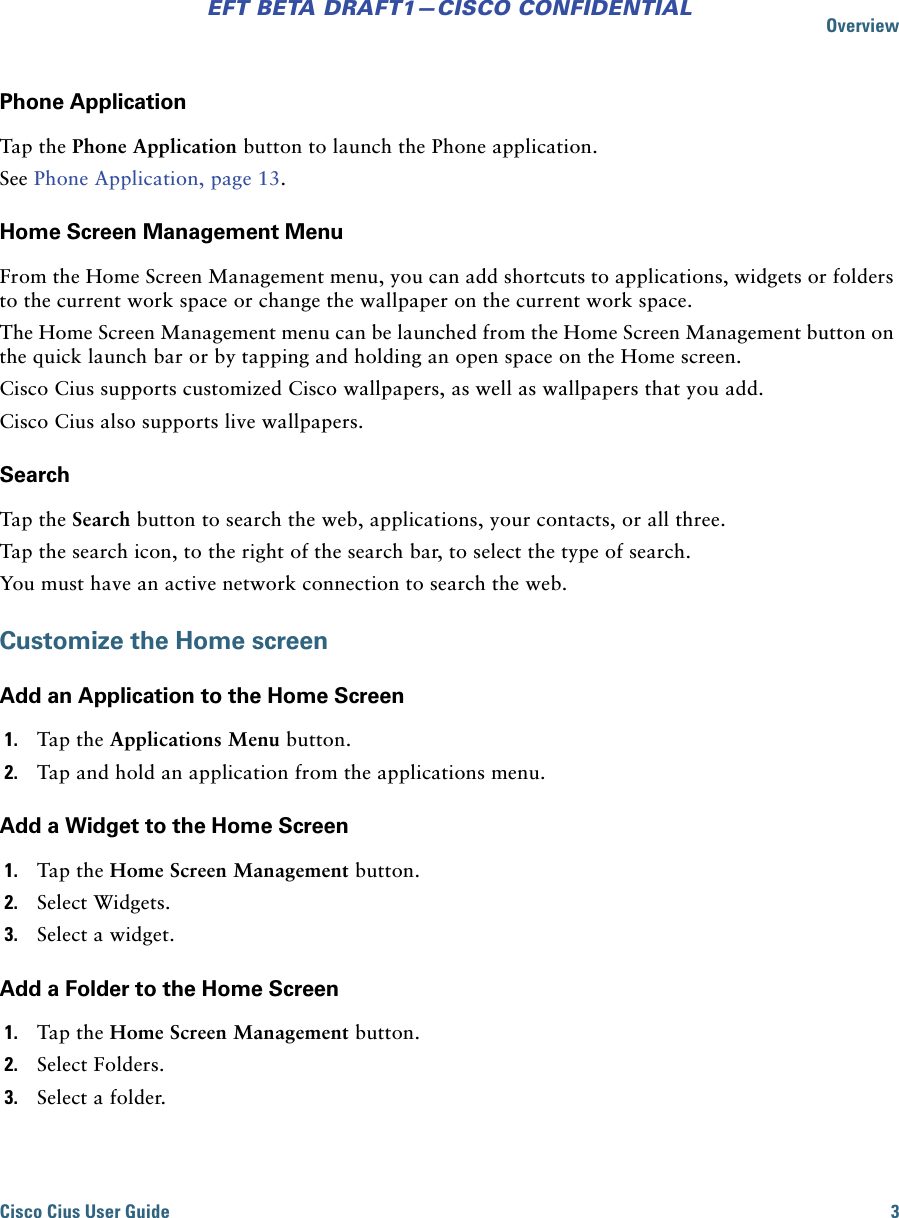
>
OpenPeak
>
CSCOT0710 User Manual
>
User manual 1 of 2
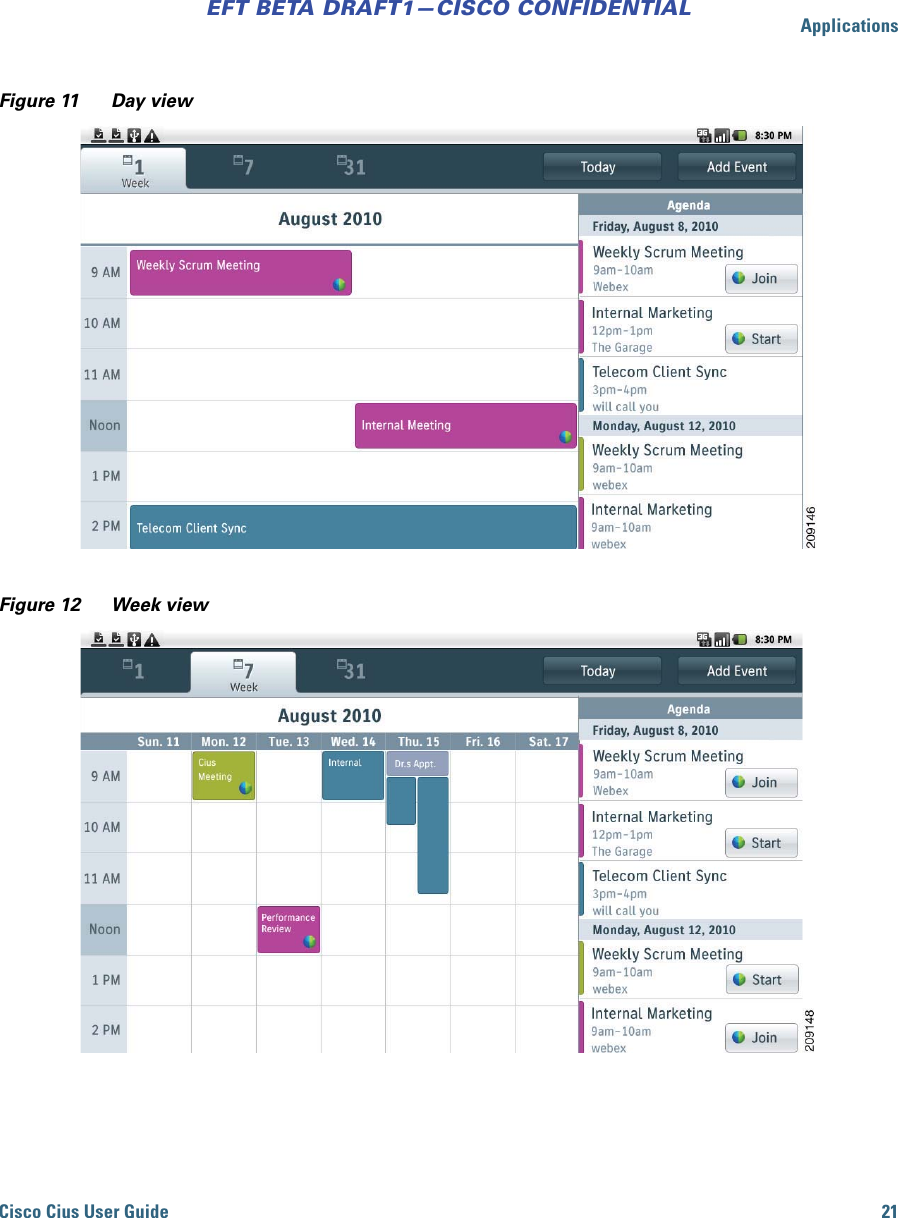
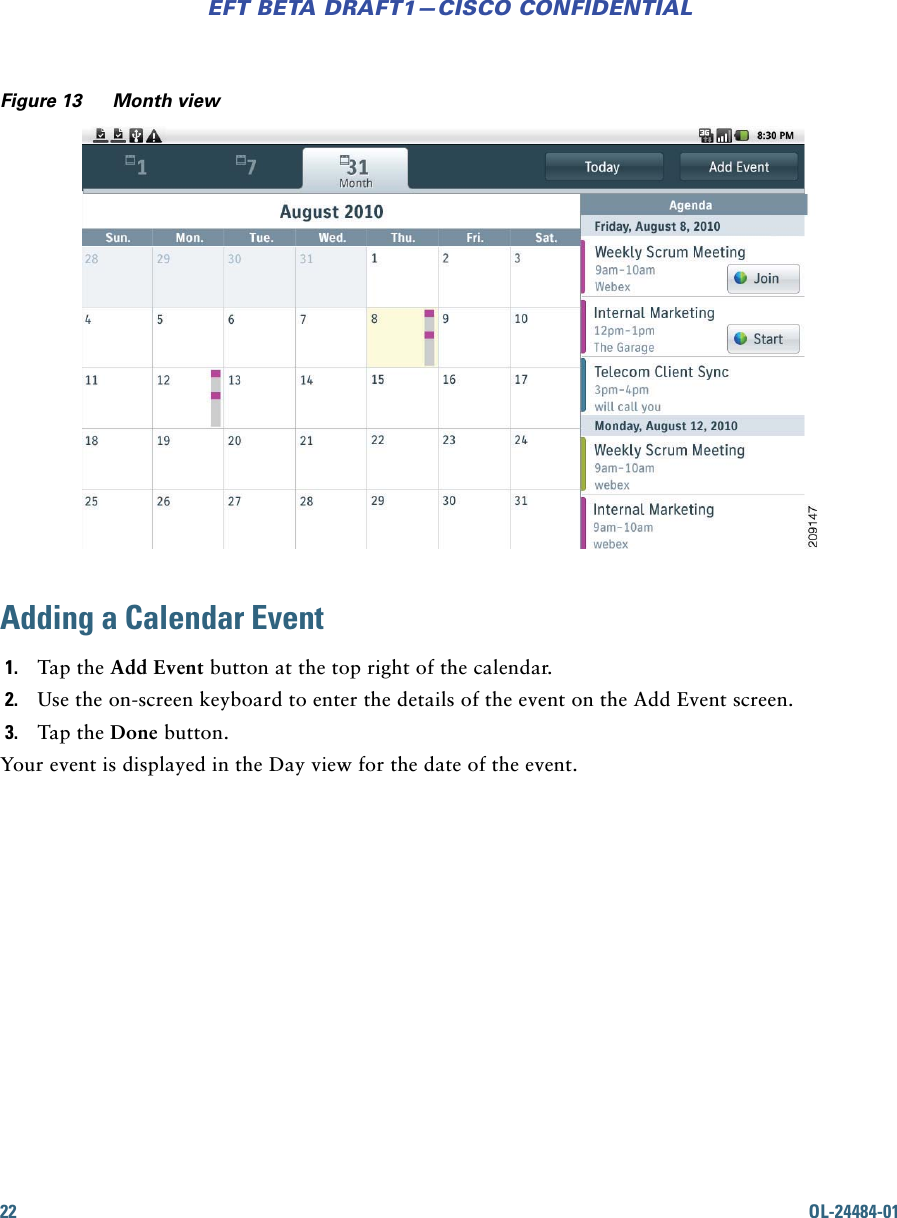
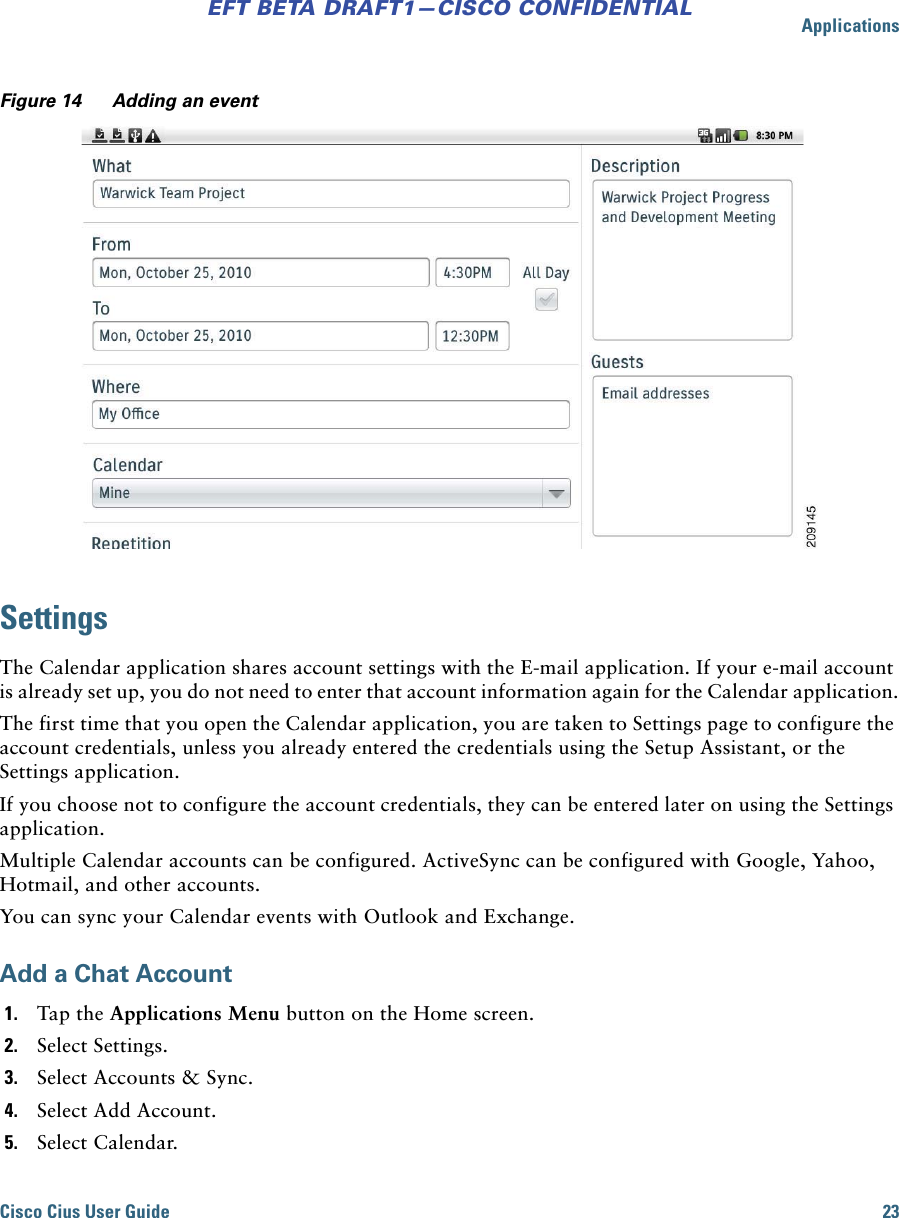
Contents
1.
User manual 1 of 2
2.
User manual 2 of 2
User manual 1 of 2
Navigation menu
Upload a User Manual
Namespaces
Wiki Guide
HTML
PDF
Info
Views
User Manual
Discussion / Help
Navigation


![viii OL-24484-01EFT BETA DRAFT1—CISCO CONFIDENTIALhttp://www.cisco.com/ • Cisco Cius Mobile Collaboration Device quick start, administration, and user guides ?:http://cisco.com/en/US/products/<URL>.html • Licensing information ?:http://cisco.com/en/US/products/<URL>.html • Cisco international websites:Allows access to international Cisco websites from www.cisco.com by clicking the Worldwide[change] link at the top of the web page.Obtaining Documentation and Submitting a Service RequestFor information on obtaining documentation, submitting a service request, and gathering additional information, see the monthly What’s New in Cisco Product Documentation, which also lists all new and revised Cisco technical documentation, at this URL:http://www.cisco.com/en/US/docs/general/whatsnew/whatsnew.htmlSubscribe to the What’s New in Cisco Product Documentation as a Really Simple Syndication (RSS) feed and set content to be delivered directly to your desktop using a reader application. The RSS feeds are a free service and Cisco currently supports RSS Version 2.0.](https://usermanual.wiki/OpenPeak/CSCOT0710.User-manual-1-of-2/User-Guide-1439731-Page-8.png)


![28 OL-24484-01EFT BETA DRAFT1—CISCO CONFIDENTIALMusic playerUse the music player to listen to audio files.Launch Music from the Applications menu.The following table lists the supported file types for the music player:The music player has different tab views to sort your audio file collection. Press the Menu button to view the options in brackets: • Artists [Party Shuffle, Shuffle All] • Albums [Party Shuffle, Shuffle All] • Songs [Play All, Party Shuffle, Shuffle All] • Playlists [Party Shuffle]Name Encoder Decoder Details Container FormatAAC LC/TP X Mono/StereoBitrate < 160kbpsSample Rate 8-48kHz3GPP (.3gp) and MPEG-4(.mp4,.m4a). No support for raw AAC (.aac).HE-AACv1 (AAC+)XHE-AACv2 (enhanced AAC+)XAMR-NB X X 4.75-12.2kbps Sample Rate 8kHz3GPP (.3gp)AMR-WB X 9 rates from 6.60 to 23.85kbpsSample Rate 16kHz3GPP (.3gp)MP3 X Mono/Stereo 8-320kbpsConstant (cbr) or Variable bit-rate (vbr).MP3 (.mp3)MIDI X MIDI Type 0 and 1DLS Version 1 and 2XMF and Mobile XMFSupport for ringtone formats RTTTL/RTX, OTA, and iMelody.Type 0 and 1 (.mid, .xmf, .mxmf).RTTTL/RTX (.rtttl, .rtx)OTA (.ota)iMelody (.imy)Ogg Vorbis X OGG (.ogg)PCM X 8 and 16 bit linear PCM(Bit rates up to limit of hardware.)WAVE (.wav)](https://usermanual.wiki/OpenPeak/CSCOT0710.User-manual-1-of-2/User-Guide-1439731-Page-36.png)
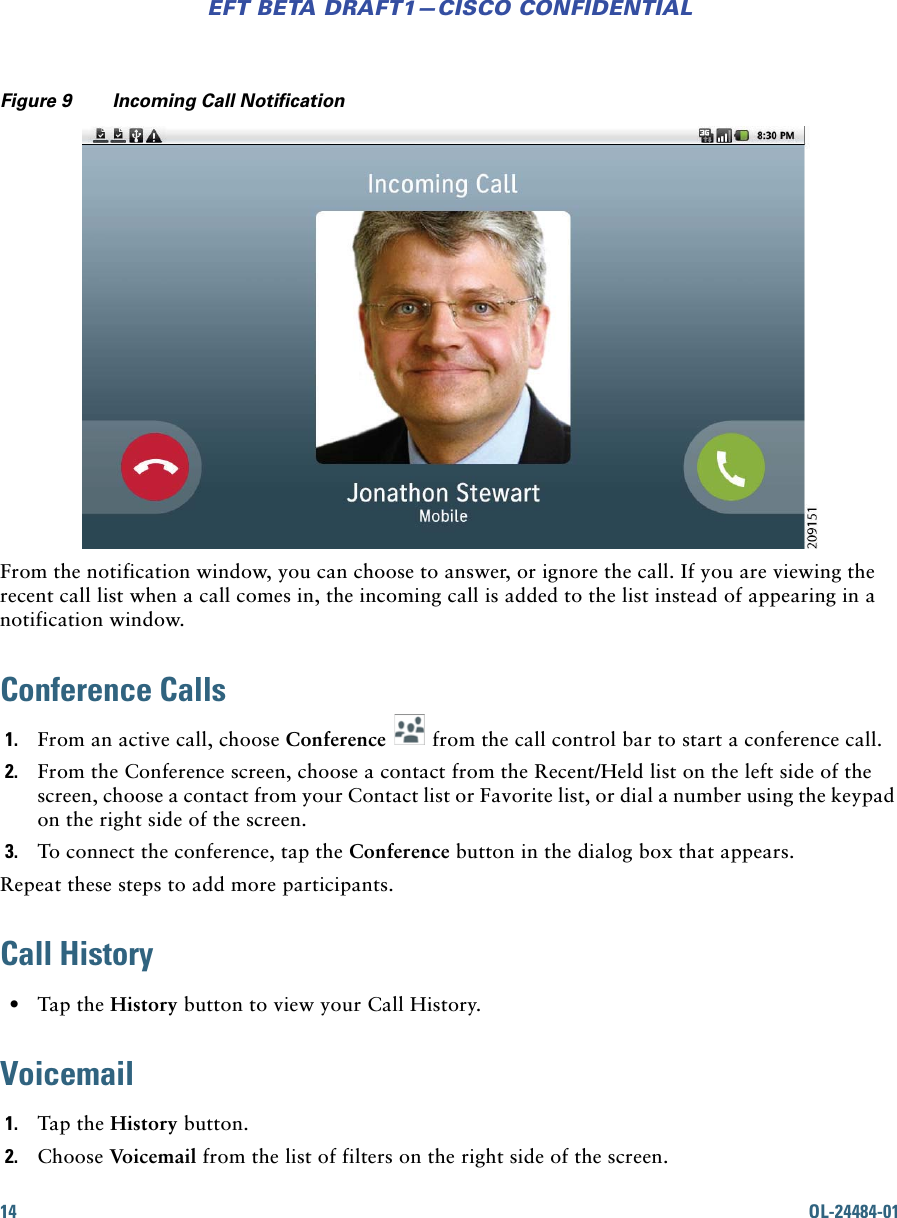
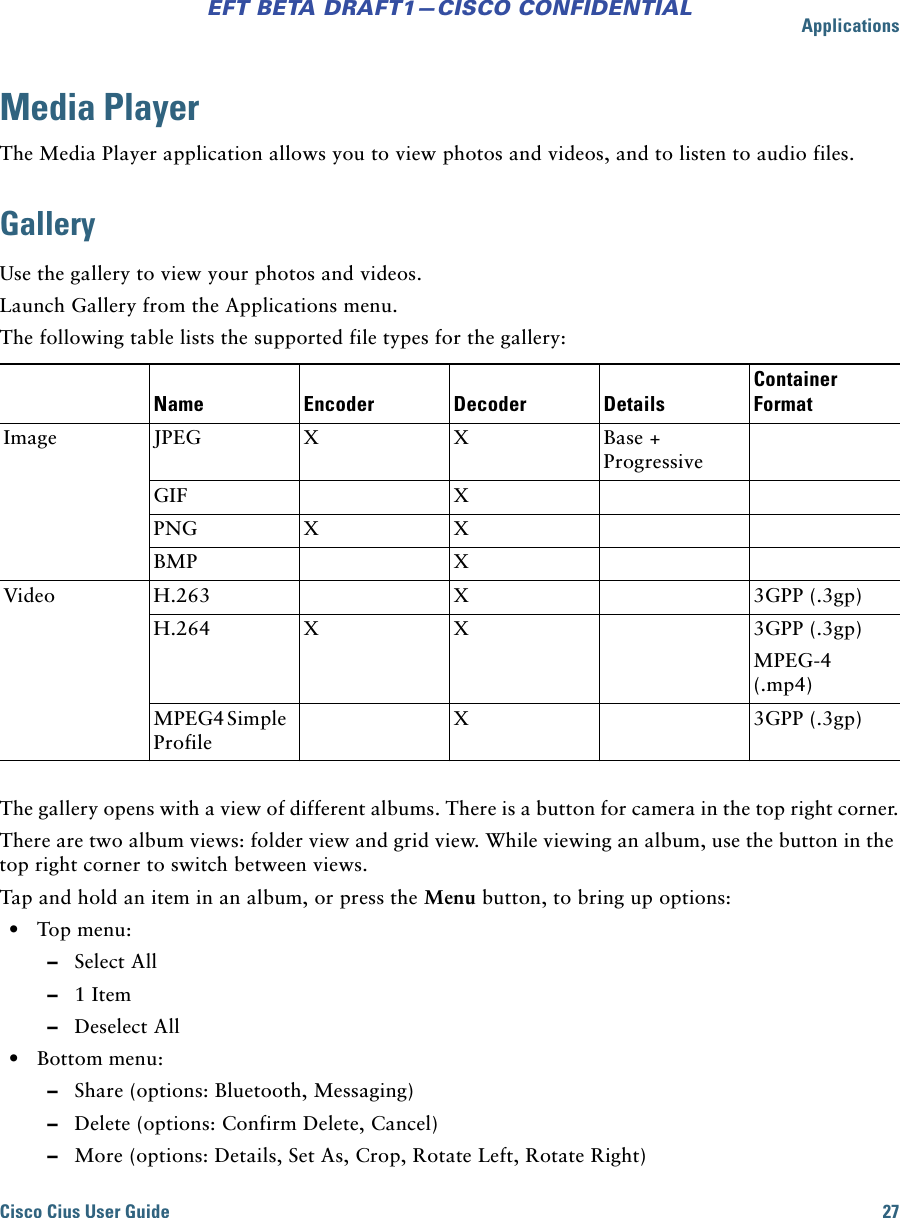
![ApplicationsCisco Cius User Guide 29EFT BETA DRAFT1—CISCO CONFIDENTIAL –Playlist View [Party Shuffle, Shuffle All, Save as Playlist, Clear Playlist] • Now Playing [Library, Party Shuffle, Add to Playlist, Use As Ringtone, Delete]PlaylistsYou can use the Music Player application to create and edit playlists. You cannot import playlists from other devices.CameraUse the Camera application to take pictures and record videos.Launch Camera from the Applications menu.Figure 15 Camera applicationThe image in the top right corner is a thumbnail of your most recent picture or video.Tap the X button to switch between photo and video mode. Tap the X button to switch between front (1 megapixel) and rear (5 megapixel) cameras. Tap the X button to take a picture, or to record a video.Within the picture frame:Tap the Settings button to adjust the picture settings: • Picture Size: –2M Pixels](https://usermanual.wiki/OpenPeak/CSCOT0710.User-manual-1-of-2/User-Guide-1439731-Page-37.png)