OvisLink AP60 Wireless-N PoE Access Point AP60 User Manual AP60 QIG A4 SA 1 ai
OvisLink Corp. Wireless-N PoE Access Point AP60 AP60 QIG A4 SA 1 ai
OvisLink >
User Manual

P1
Português
PT
Noticia Importante:
O modo wireless padrão é : modo "AP"
O endereço IP padrão é 192.168.100.252
Por defeito a subnet mask é 255.255.255.0
O nome utilizador padrão é: admin
A palavra-chave padrão é: airlive
O SSID padrão é: airlive
Certifique-se por favor de instalar a antena antes do power-on (ligar
à energia). Caso contrário, o rádio pode ser danificado.
Login Gestor Web para Configurar o AP60
1. Instale por favor a antena no AP60.
2 .Conecte o seu PC em qualquer porta LAN por cabo Ethernet.
3 .Conecte o power jack na porta power.
4 .Aguarde 1 minuto para o AP60 terminar o reboot.
5 .Por favor defina o endereço do seu PC para 192.168.100.x (ou outro
endereço dentro da mesma sub-rede)
6 .Digite o endereço IP do AP60 no explorador web para entrar no login
do Gestor Web.
Configurar o AP60 com o setup wizard
1. Login Gestor web e seleccione o idioma no topo da barra de idiomas.
(Figura A)
2. Clique em “Setup Wizard” em Wireless Settings. (Figura B)
3. Selecione Modo Wireless: O modo de operação por defeito é AP.
Quando o modo estiver seleccionado, à uma confirmação em baixo e à
esquerda da ilustração. Por favor escolha o modo e clique “Next”.
(Figura B)
4. Wireless Settings: Configure as Definições Wireless para recursos
avançados e clique “Next” depois de terminar.
5. WAN Settings: Configure as definições WAN, e seleccione o tipo WAN
de acordo com seu ISP. Se você não tiver a certeza qual o seu tipo
WAN, consulte por favor o seu ISP para obter mais informações. Note
por favor que a Porta WAN é apenas exibida nos modos WISP Router
e AP Router.
6. Quando as configurações estiverem finalizadas, clique “Finish” para
que as novas configurações tenham efeito.
Configure AP60 com IP Finder
Você pode encontrar o IP Finder através do CD fornecido e por favor
instale-o no seu computador. Depois, você pode usá-lo para encontrar o
AP-60 na sua rede. Por defeito o nome utilizador é admin, e a palavra
chave é airlive.(Figura C)
Para mais informações, leia por favor o manual de instruções no CD.
A B C
NoteBook
NoteBook
AP60
Neste modo, o AP irá actuar como um hub central
para a rede wireless.
Assistente
Configuração
Assistente
Configuração
Assistente
Configuração
Barra de Idiomas
Barra de Idiomas
Barra de Idiomas
Setup Wizard
Language Bar
AirLive AP60-SA
Wireless-N PoE Access Point
Quick Setup Guide
Declaration of Conformity
We, Manufacturer/Importer
Declare that the product
Wireless-N PoE Access Point
AirLive AP60-SA
Manufacturer/Importer
OvisLink Corp.
5F, No.6, Lane 130, Min-Chuan Rd., Hsin-Tien Dist.,
New Taipei City 231, Taiwan
Signature:
Name:Albert Yeh Position/ Title : Vice President
Date:2011/07/20
Place : Republic of China (Taiwan)
FCC Statement
This equipment has been tested and found to comply with the limits for a Class B&C
digital device pursuant to Part 15 of the FCC Rules. These limits are designed to
provide reasonable protection against harmful interferences when the equipment is
operating in a commercial area. This equipment generates, uses and may radiate radio
frequency energy, and if not installed in accordance with the user guide, may cause
interference in the transmission of radio communications. If operating in a residential
area, it is probable this equipment will cause harmful interference, in which case the
user will be required to try to correct this interference using his own means.
Tested To Comply
With FCC Standards.
FOR HOME OR OFFICE USE
Federal Communication Commission Interference Statement
This equipment has been tested and found to comply with the limits for a Class B digital device, pursuant to Part 15 of the FCC Rules. These limits are designed
to provide reasonable protection against harmful interference in a residential installation. This equipment generates, uses and can radiate radio frequency
energy and, if not installed and used in accordance with the instructions, may cause harmful interference to radio communications. However, there is no
guarantee that interference will not occur in a particular installation. If this equipment does cause harmful interference to radio or television reception, which
can be determined by turning the equipment off and on, the user is encouraged to try to correct the interference by one of the following measures:
● Reorient or relocate the receiving antenna.
● Increase the separation between the equipment and receiver.
● Connect the equipment into an outlet on a circuit different from that to which the receiver is connected.
● Consult the dealer or an experienced radio/TV technician for help.
FCC Caution: Any changes or modifications not expressly approved by the party responsible for compliance could void the user’s authority to operate this
equipment.
This device complies with Part 15 of the FCC Rules. Operation is subject to the following two conditions: (1) This device may not cause harmful interference, and
(2) this device must accept any interference received, including interference that may cause undesired operation.
For product available in the USA/Canada market, only channel 1~11 can be operated. Selection of other channels is not possible.
This device and its antenna(s) must not be co-located or operation in conjunction with any other antenna or transmitter.
IMPORTANT NOTE:
FCC Radiation Exposure Statement:
This equipment complies with FCC radiation exposure limits set forth for an uncontrolled environment. This equipment should be installed and operated with
minimum distance 20cm between the radiator & your body.

P2
Default Settings:
Operation Mode: AP
IP: 192.168.100.252
Subnet mask: 255.255.255.0
Username: admin
Password: airlive
SSID: airlive
Please make sure to install the antenna first before power-on.
Otherwise, the radio might be damaged.
Login web management to configure AP60
1. Please install antenna into AP60.
2. Connect your PC to any LAN port by Ethernet cable.
3. Connect the power jack to the power port.
4. Wait for about 1 minute for AP60 to finish reboot.
5. Please set your PC’s IP address to 192.168.100.x (or other address in
the same subnet)
6. Type the AP60’s IP address into the web browser’s to login the Web
Management.
Configure AP60 with setup wizard
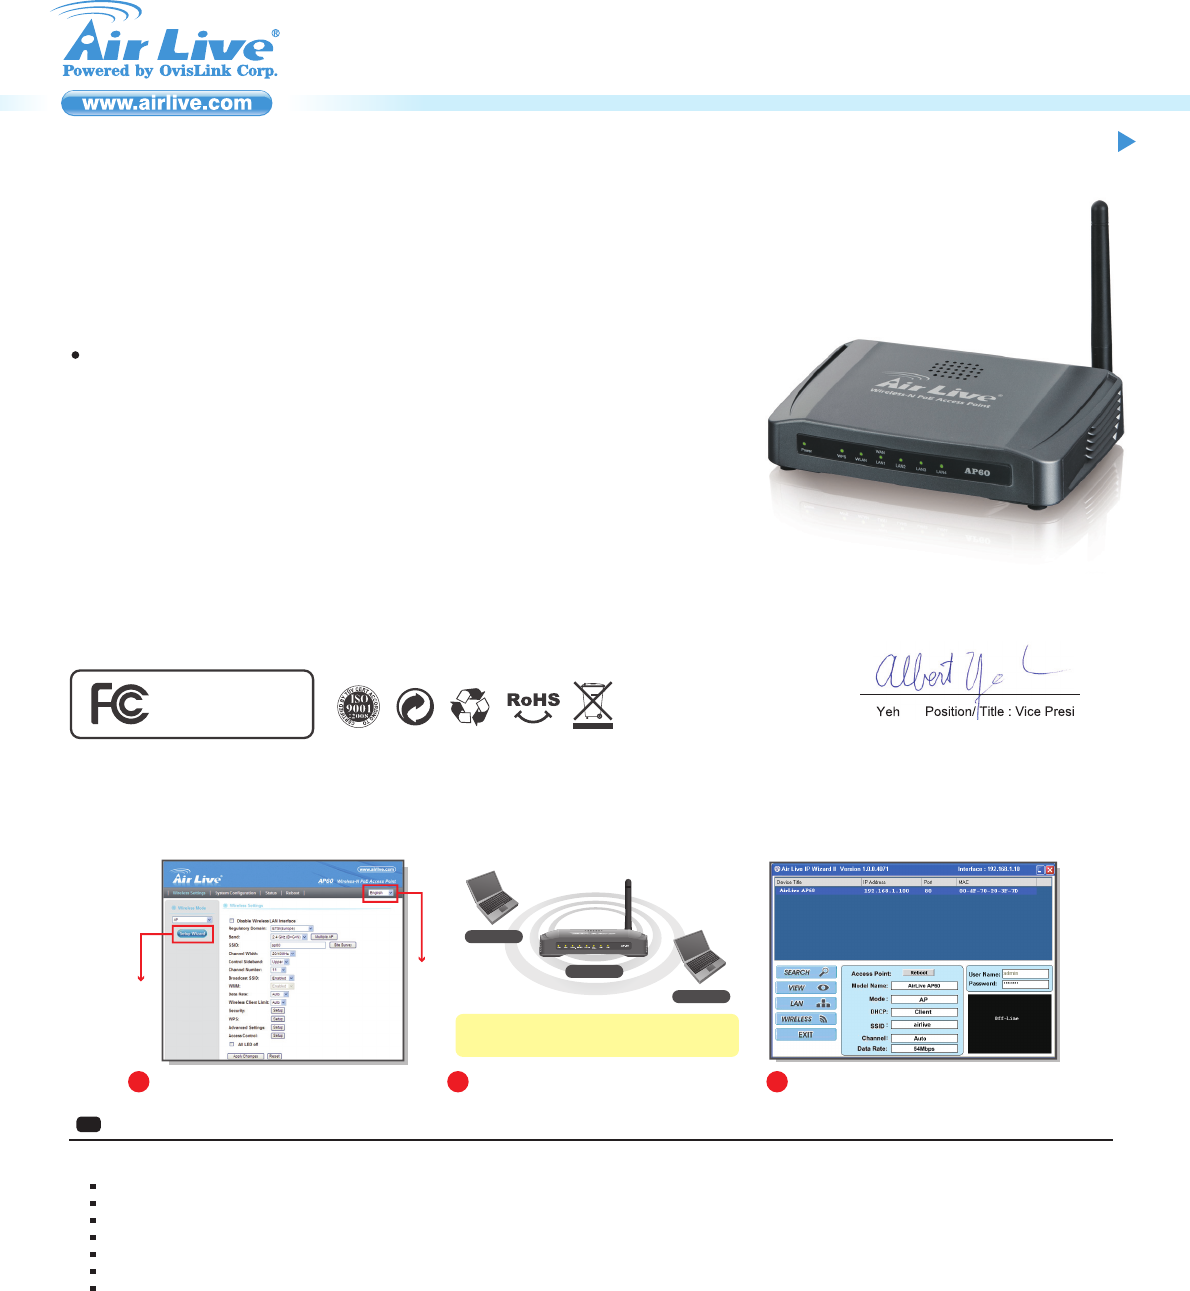
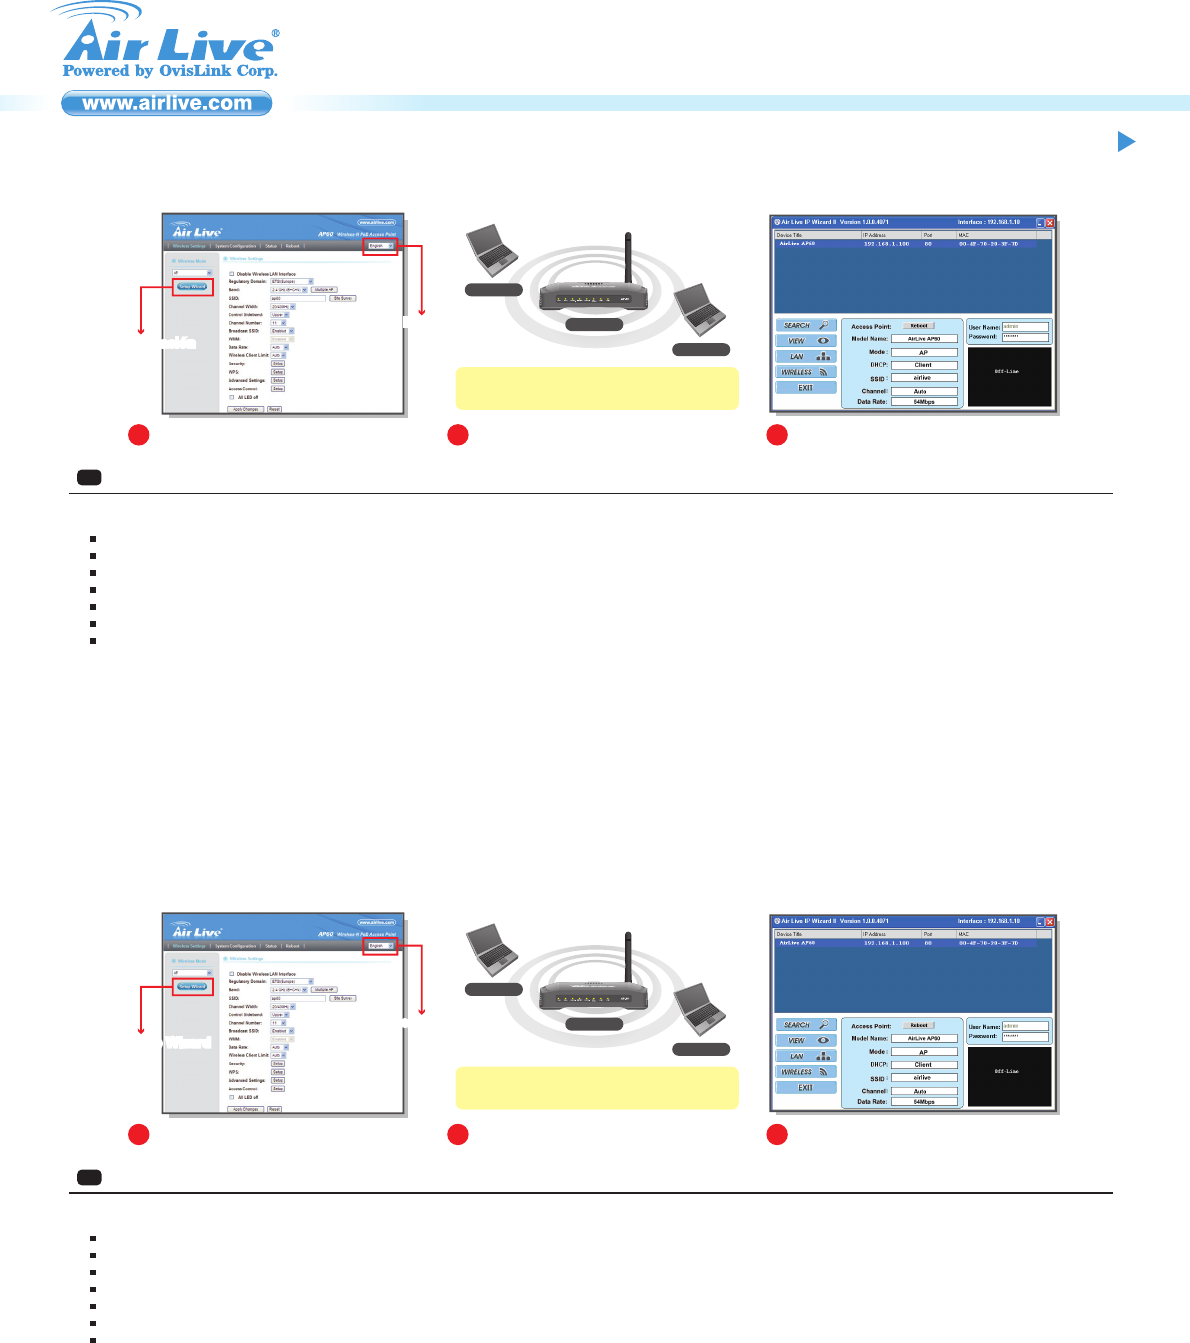
1. Login the web Management and select the language in the top of the
left pull-down language bar. (Picture A)
2. Click on “Setup Wizard” at Wireless Settings. (Picture B)
3. Select Wireless Mode: The default operation mode is AP. When mode
is selected, there is statement in the bottom of the left illustration.
Please choose mode and click “Next”. (Picture B)
4. Wireless Settings: Configure the Wireless Settings for advanced
feature and click “Next” after finish.
5. WAN Settings: Configure the WAN settings, and select the WAN type
according to your ISP. If you don’t sure what your WAN type, please
consult with your ISP for further information. Please note that WAN Port
is only displayed in WISP Router and AP Router modes.
6. When setup finished, click “Finish” for the new settings to take effect.
Configure AP60 with IP Finder
You can find the IP Finder from the supplied CD and please install it into
your computer. Then, you can use it to find the AP-60 at your network.
The default user name is admin, and the password is airlive.(Picture C)
For more information, please read the instruction manual on the CD.
English
EN
Español
ES
Noticia importante:
Modo inalámbrico por default es : modo "AP"
Dirección IP por default es 192.168.100.252
Le masque de sous réseau par défaut est 255.255.255.0
Nombre de usuario por default es: admin
Contraseña por default es: airlive
SSID por default es: airlive
Favor de instalar la antena antes de encender la máquina, de lo
contrario se dañará el radio.
Login para la administración de web para configurar el AP60
1. Instalar la antena al AP60.
2. Conectar su PC a un puerto LAN por medio del cable Ethernet.
3. Conectar el conector de corriente al puerto de corriente.
4. Esperar unos minutos para que el AP60 reinicie.
5. Configurar el IP de la PC a 192.168.100.x (u otra dirección del mismo
subnet)
6. Tipear la dirección IP del AP60 en el buscador de web para entrar a la
administración de web.
Configurar el AP60 usando la instalación wizard
1. Login la administración de web y seleccionar el idioma en la borra de
idioma del lado izquierdo-arriba. (Figura A)
2. Hacer click en “Setup Wizard” en la configuración inalámbrica. (Figura
B)
3. Seleccionar el modo inalámbrico: El modo default es AP. Cuando el
modo esté seleccionado, aparecerá una ilustración en el lado
izquierdo-debajo. Elegir el modo y hacer click en “Next”. (Figura B)
4. Configuración inalámbrica: Configurar la configuración inalámbrica en
el modo avanzado y hacer click en “Next” para terminar.
5. Configuración WAN: Configurar el WAN y seleccionar tipo WAN según
el ISP. Si no está seguro del tipo de WAN, consultar en el ISP para
mayor información. Tener en cuenta que el puerto WAN solamente
aparece en los modos WISP Router y AP Router.
6. Cuando termine la configuración hacer click en “Finish” para tomar
efecto.
Configurar el AP60 con el IP Finder
Encontrar el IP Finder en el CD e instalarlo en su computadora. Luego,
úsarlo para encontrar el AP-60 en su red. Nombre de usuario por default
es admin, contraseña es airlive.(Figura C)
Para mayor información, leer el manual de instrucciones en el CD.
AB C
NoteBook
NoteBook
AP60
In this mode, the AP will act as a center hub for the
wireless network.
Setup WizardSetup Wizard
Language Bar
Language Bar
AB C
NoteBook
NoteBook
AP60
En este modo, el AP funciona como hub central
para la conexión de red inalámbrico
InstalaciónInstalación
Barra de idiomas
Barra de idiomas
AirLive AP60-SA
Wireless-N PoE Access Point
Quick Setup Guide
M73-OVL01-310