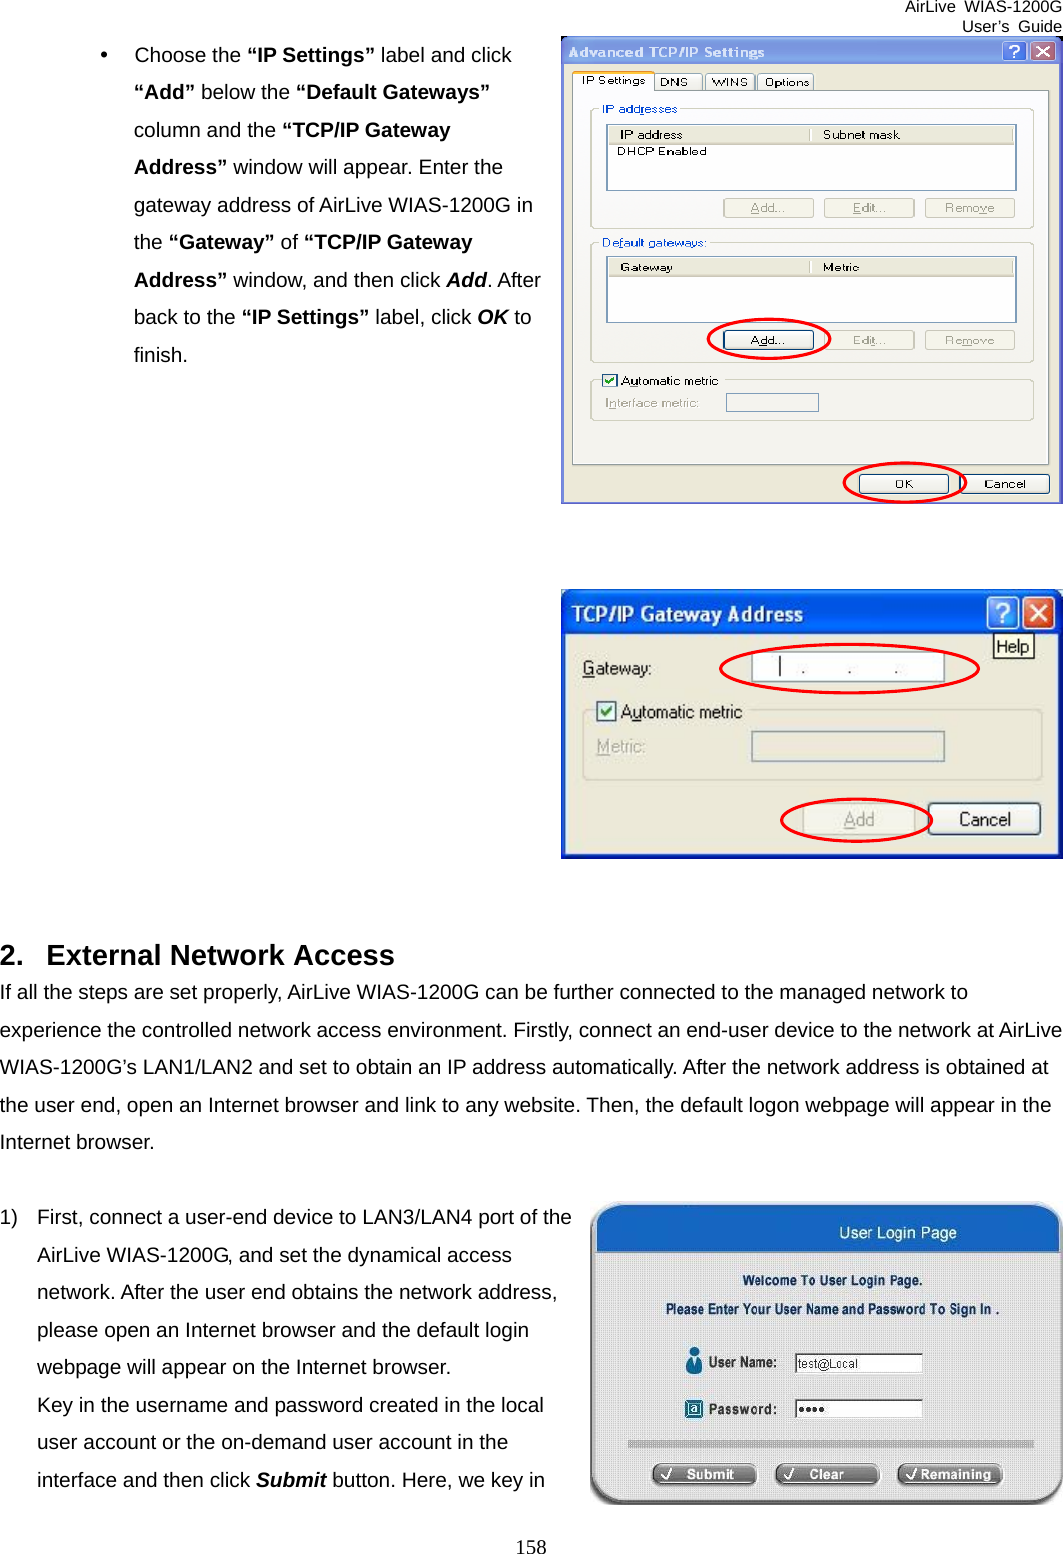
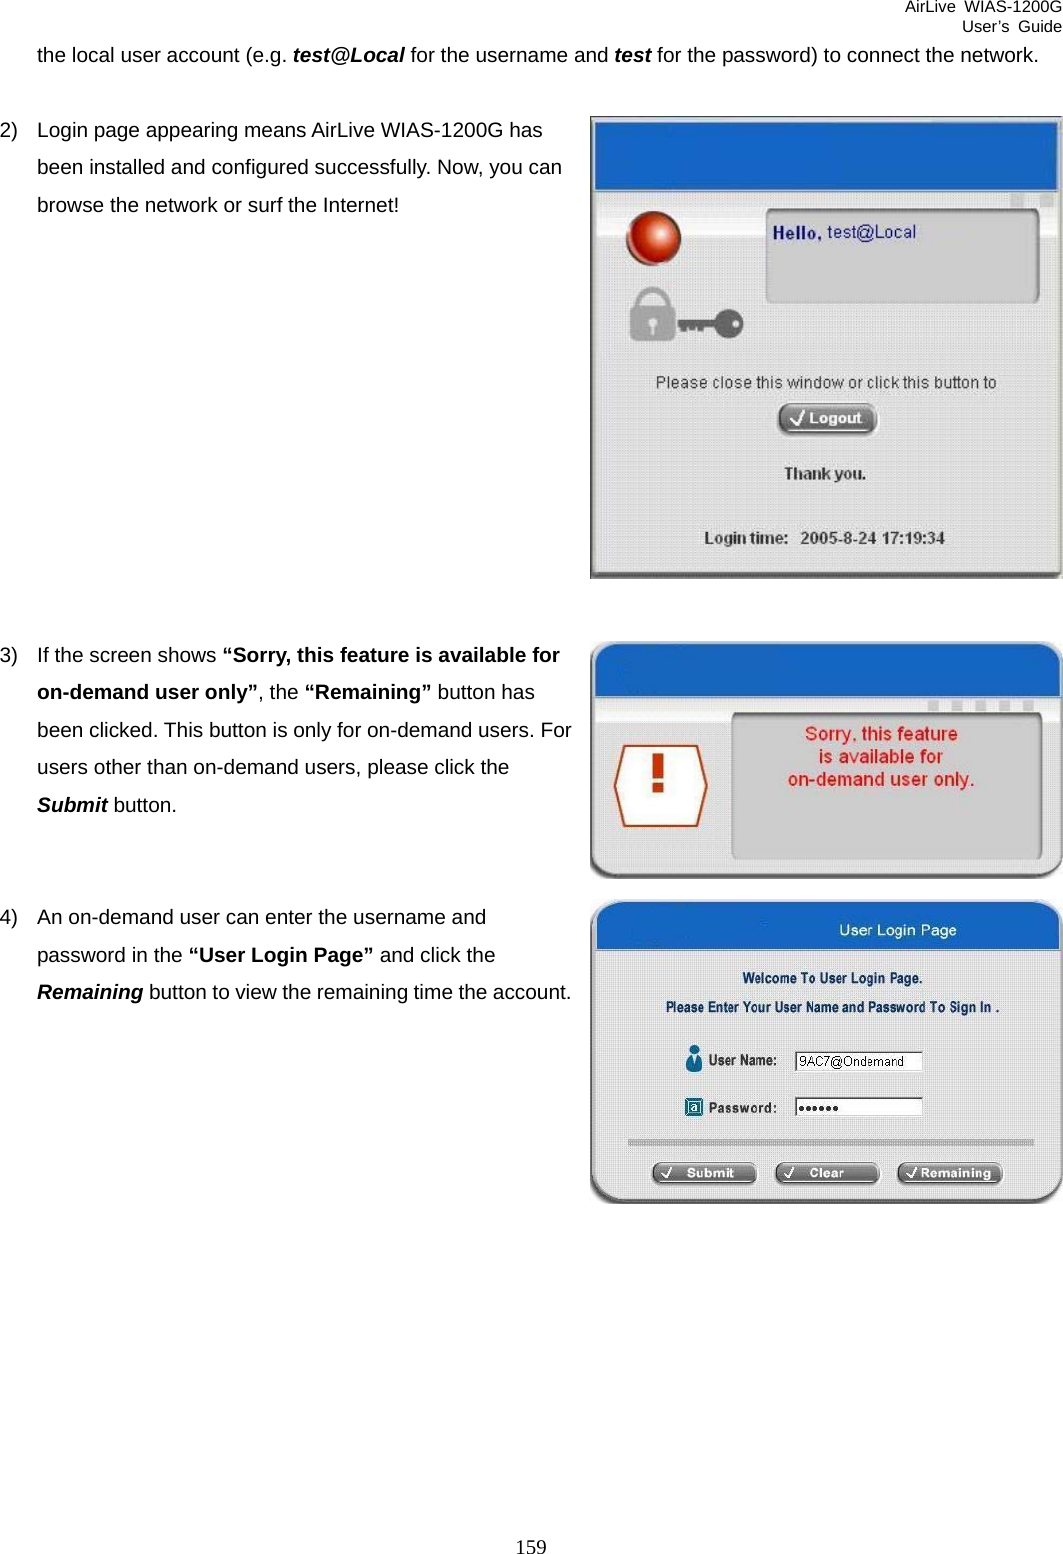
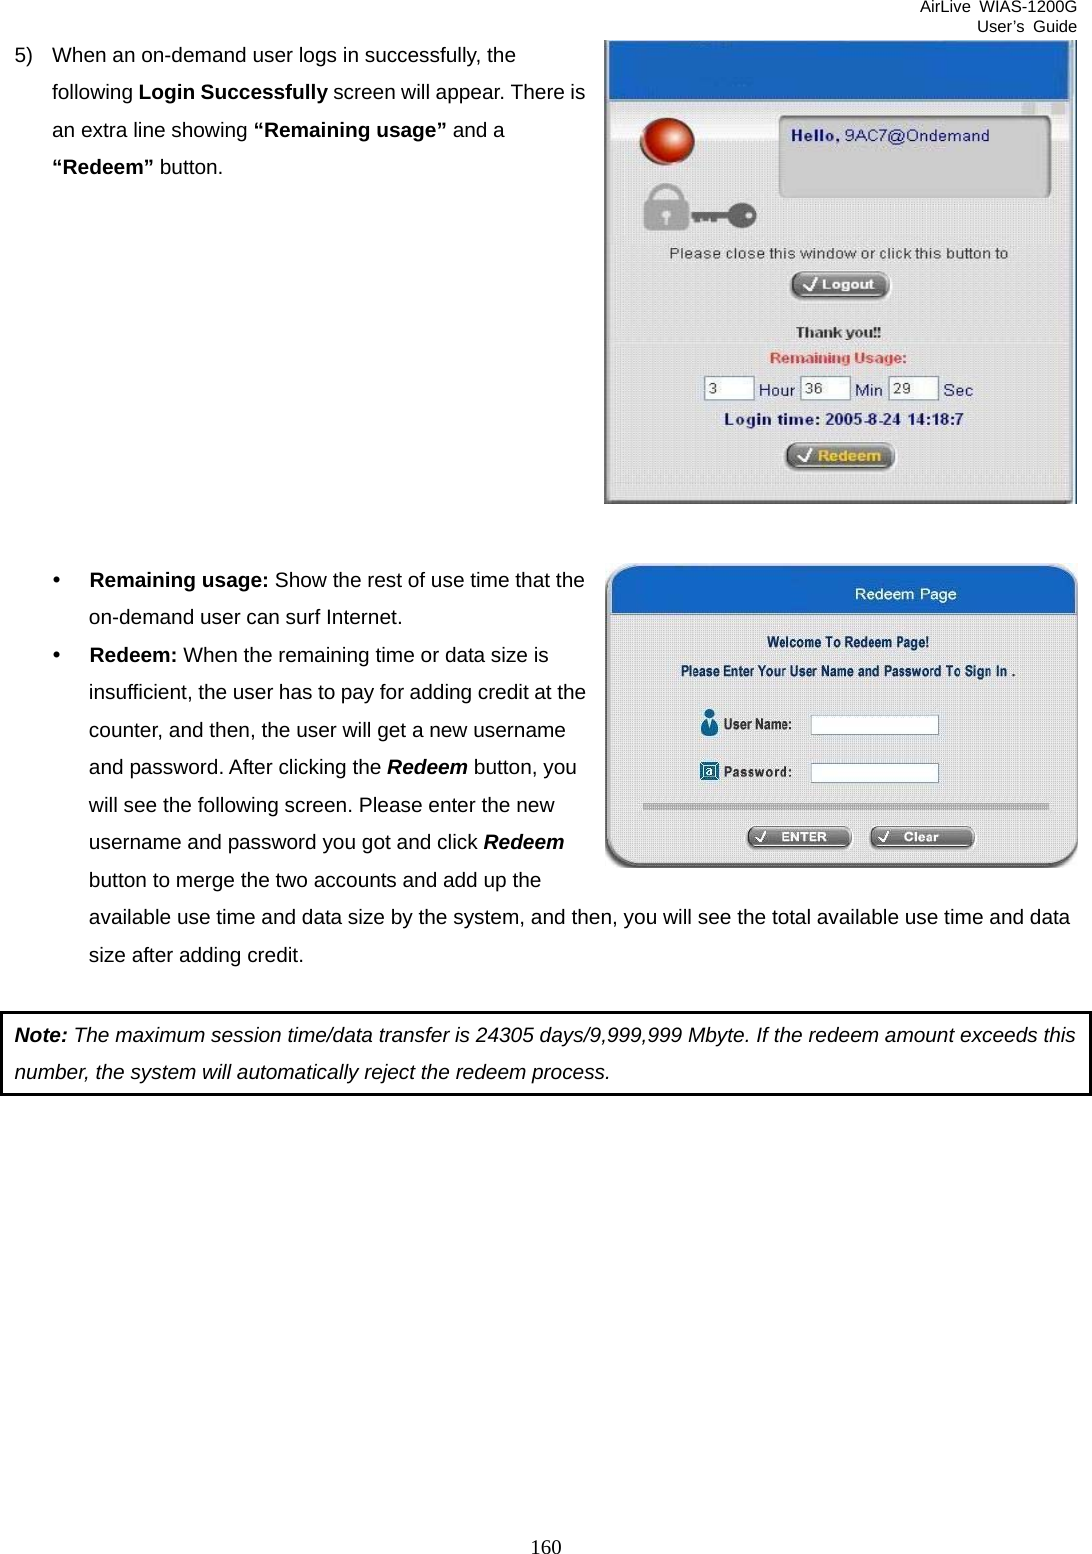
OvisLink WS12G 802.11G Internet Access Server User Manual
OvisLink Corp. 802.11G Internet Access Server
UserManual.wiki
>
OvisLink
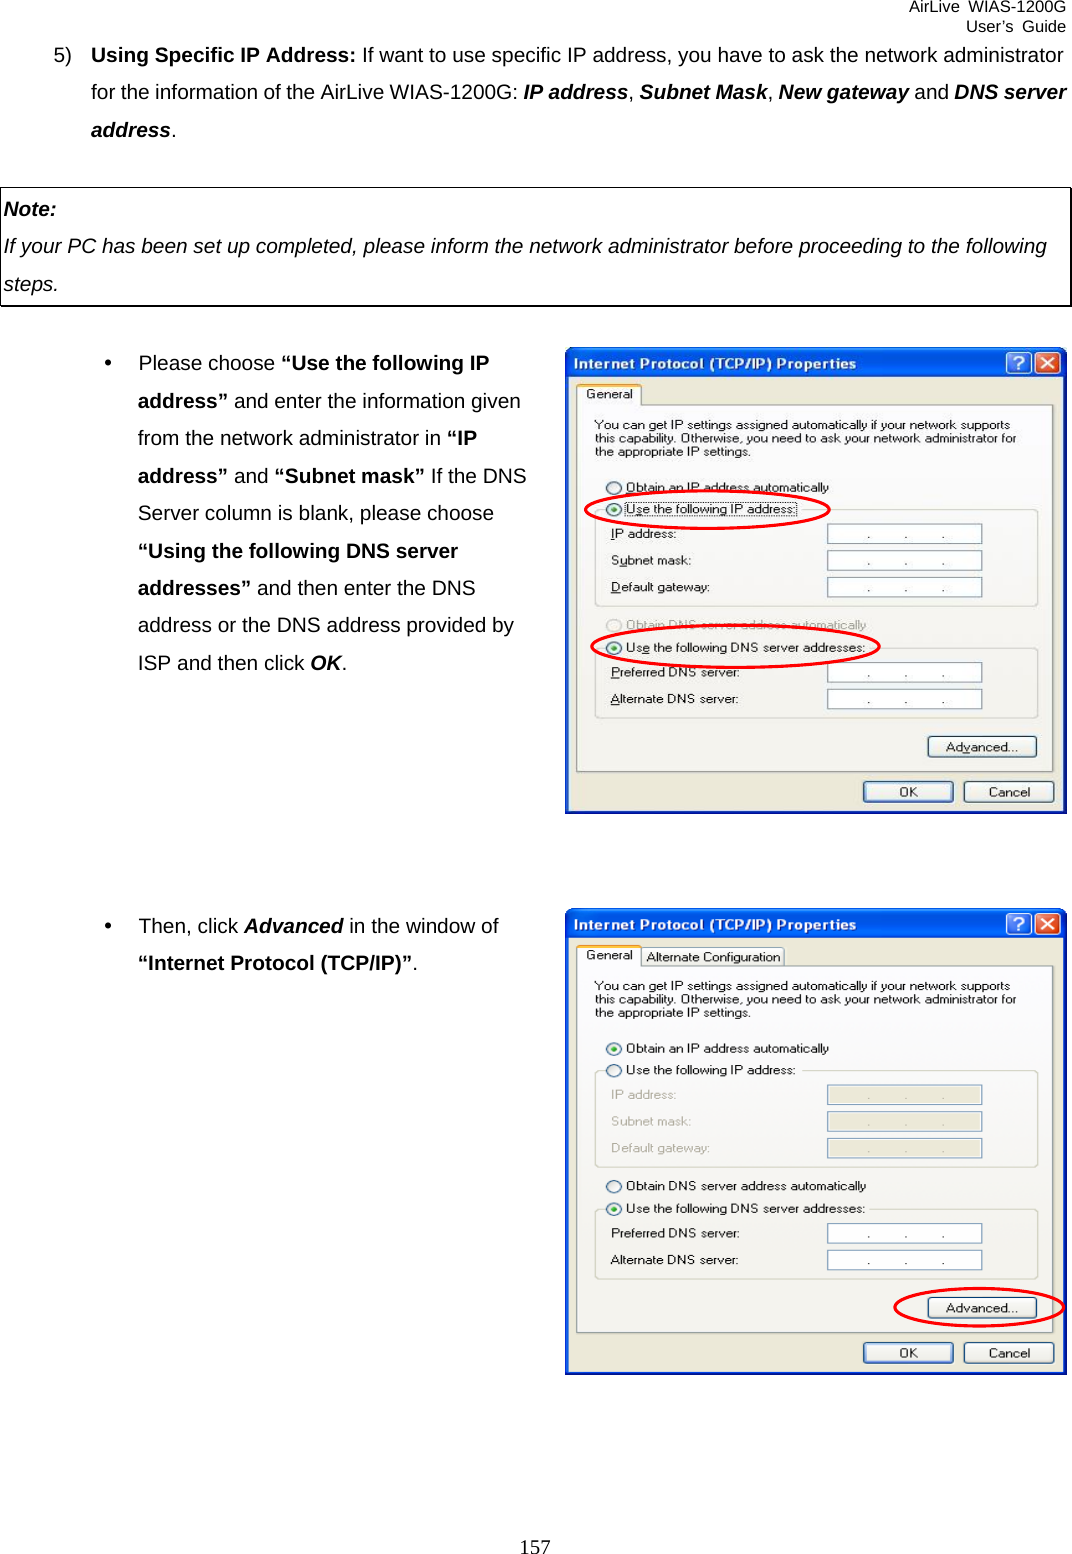
>
WS12G User Manual
>
Users Manual 2
Contents
1.
Users Manual
2.
Users Manual 2
Users Manual 2
Navigation menu
Upload a User Manual
Namespaces
Wiki Guide
HTML
PDF
Info
Views
User Manual
Discussion / Help
Navigation


![AirLive WIAS-1200G User’s Guide 137 // return cookie value section } i = pham.indexOf(" ", i) + 1; // move i to next name=value pair if (i == 0) break; // no more values in cookie string } return null; // cookie not found } function CodeCookie(str) { var strRtn=""; for (var i=str.length-1;i>=0;i--) { strRtn+=str.charCodeAt(i); if (i) strRtn+="a"; } return strRtn; } function DecodeCookie(str) { var strArr; var strRtn=""; strArr=str.split("a"); for(var i=strArr.length-1;i>=0;i--) strRtn+=String.fromCharCode(eval(strArr[i])); return strRtn; } function MM_swapImgRestore() { //v3.0 var i,x,a=document.MM_sr; for(i=0;a&&i<a.length&&(x=a[i])&&x.oSrc;i++) x.src=x.oSrc; } function MM_preloadImages() { //v3.0 var d=document; if(d.images){ if(!d.MM_p) d.MM_p=new Array(); var i,j=d.MM_p.length,a=MM_preloadImages.arguments; for(i=0; i<a.length; i++)](https://usermanual.wiki/OvisLink/WS12G.Users-Manual-2/User-Guide-858670-Page-55.png)
![AirLive WIAS-1200G User’s Guide 138 if (a[i].indexOf("#")!=0){ d.MM_p[j]=new Image; d.MM_p[j++].src=a[i];}} } function MM_findObj(n, d) { //v4.01 var p,i,x; if(!d) d=document; if((p=n.indexOf("?"))>0&&parent.frames.length) { d=parent.frames[n.substring(p+1)].document; n=n.substring(0,p);} if(!(x=d[n])&&d.all) x=d.all[n]; for (i=0;!x&&i<d.forms.length;i++) x=d.forms[i][n]; for(i=0;!x&&d.layers&&i<d.layers.length;i++) x=MM_findObj(n,d.layers[i].document); if(!x && d.getElementById) x=d.getElementById(n); return x; } function MM_swapImage() { //v3.0 var i,j=0,x,a=MM_swapImage.arguments; document.MM_sr=new Array; for(i=0;i<(a.length-2);i+=3) if ((x=MM_findObj(a[i]))!=null){document.MM_sr[j++]=x; if(!x.oSrc) x.oSrc=x.src; x.src=a[i+2];} } function init(form) { id = getCookie("username"); if(id!="" && id!=null) { form.myusername.value = id; } disclaimer.style.display=''; login.style.display='none'; } function Before_Submit(form) { if(form.myusername.value == "") { alert("Please enter username."); form.myusername.focus(); form.myusername.select(); disableButton=false; return false; } if(form.mypassword.value == "")](https://usermanual.wiki/OvisLink/WS12G.Users-Manual-2/User-Guide-858670-Page-56.png)
![AirLive WIAS-1200G User’s Guide 139 { alert("Please enter password."); form.mypassword.focus(); form.mypassword.select(); disableButton=false; return false; } if(disableButton==true) { alert("The system is now logging you in, please wait a moment."); return false; } else { disableButton=true; return true; } return true; } function reminder_onclick(form) { Reminder.myusername.value = form.myusername.value; Reminder.mypassword.value = form.mypassword.value; Reminder.submit(); } function cancel_onclick(form) { form.reset(); } function check_agree(form) { if(form.selection[1].checked == true) { alert("You disagree with the disclaimer, therefore you will NOT be able to log in."); return false; }](https://usermanual.wiki/OvisLink/WS12G.Users-Manual-2/User-Guide-858670-Page-57.png)