Oxford Instruments WL18SBMOD 802.11 b/g, Bluetooth disabled, UNII disabled User Manual
Oxford Instruments 802.11 b/g, Bluetooth disabled, UNII disabled
UserManual.wiki
>
Oxford Instruments
>
WL18SBMOD User Manual
User Manual
Navigation menu
Upload a User Manual
Namespaces
Wiki Guide
HTML
PDF
Info
Views
User Manual
Discussion / Help
Navigation


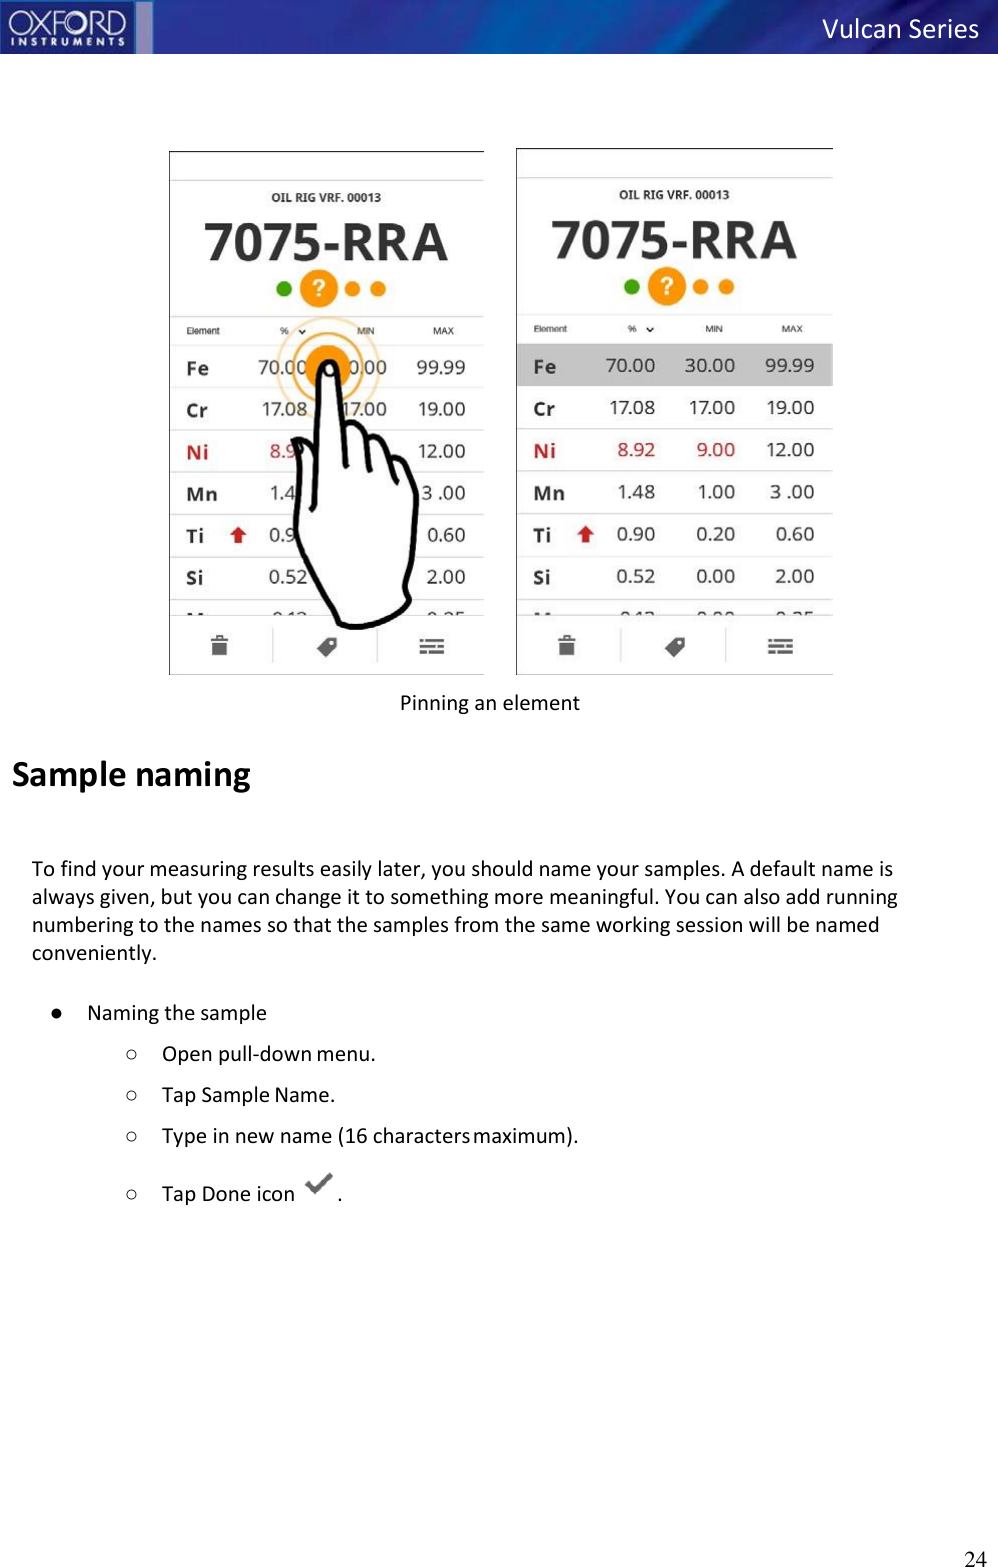
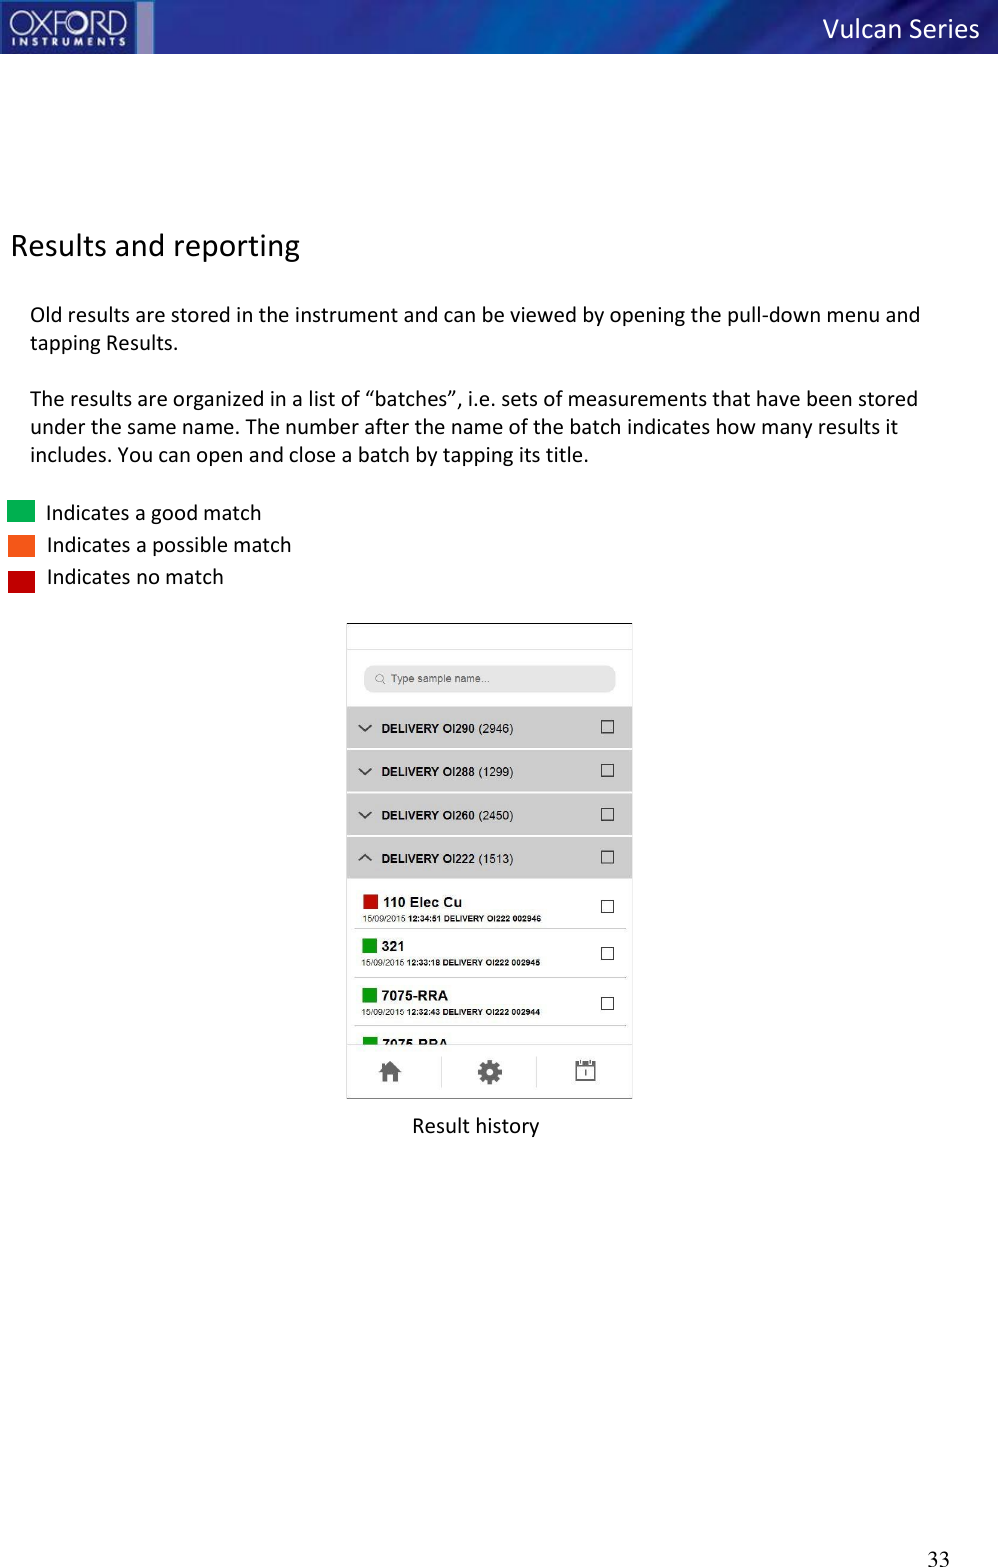
![27 Importing new library If you need to add, edit or remove grades, it is recommended to first duplicate the library and then edit the copy. ● Viewing a grade 1. In Grades view, double tap on the grade library. 2. In the library view, tap the grade’s menu and select View grade. ● Duplicating a library (supervisor only) 1. In Grades view, tap a library’s menu and select Duplicate grade library. 2. Enter a name for the duplicate. If you don’t name it, it will be called “Copy of [name]”. ● Editing a grade (supervisor only) 1. In Grades view, tap a library’s menu and select View / Edit. 2. In the library view, tap the grade’s menu and select Edit grade. 3. You’ll see a list of the elements in the grade. Choose an element and tap its menu button . 4. Select Edit element to adjust the maximum and minimum allowed concentrations. Vulcan Series](https://usermanual.wiki/Oxford-Instruments/WL18SBMOD/User-Guide-3312148-Page-30.png)
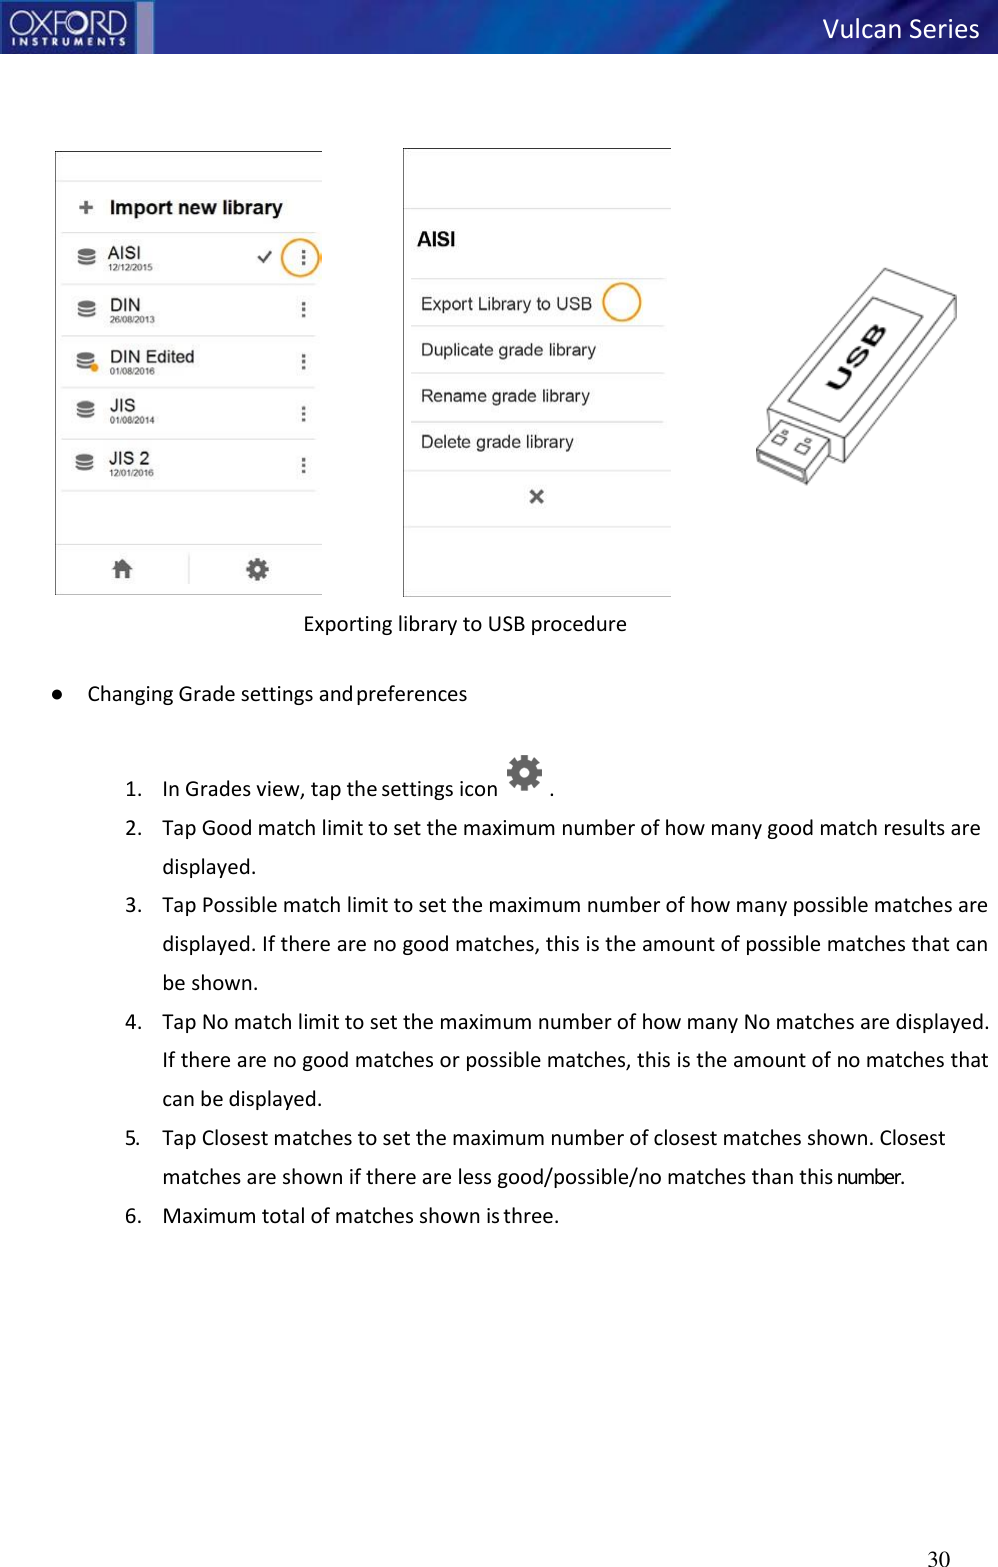
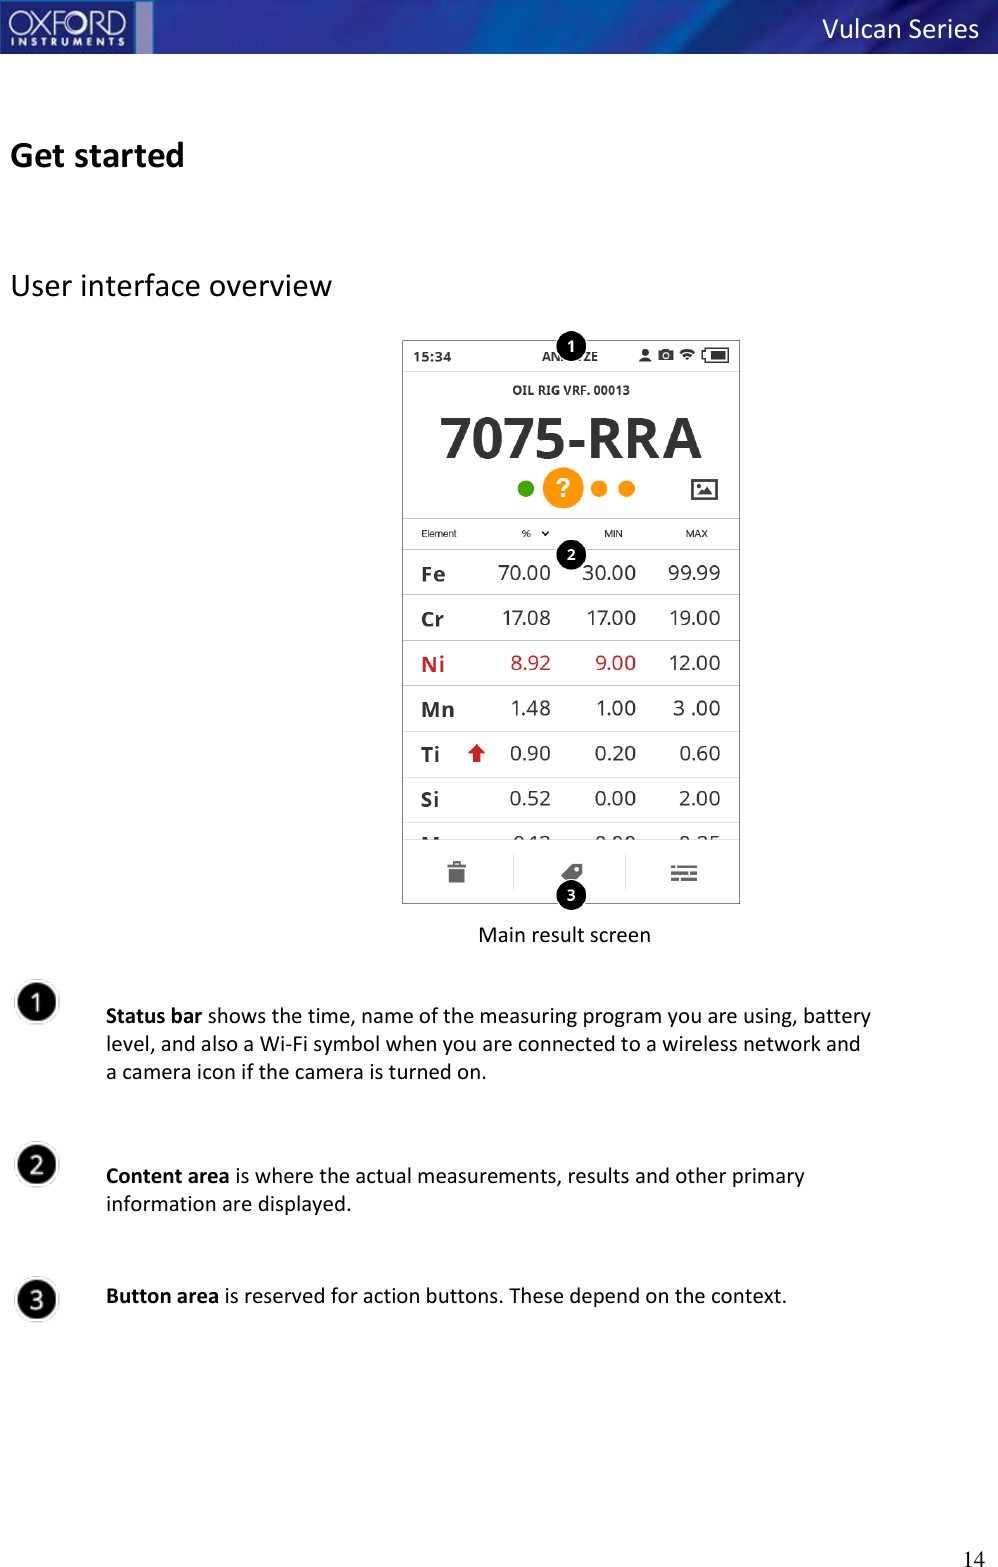
![Vulcan Series 31 Measurement results After the measurement, a results screen will be displayed. The name of the sample is shown [1], and the grade name [2] if a matching grade was found. Under the grade are icons indicating good and possible matches [3, 4]. If more than one grade match was found, you can see the others by moving between the result pages by tapping on the match icons [3, 4]. The best match is always shown first, on the left. Result screen explained (without Chemistry) Indicates a good match Indicates a possible match Indicates no match The threshold values for good, possible, no match and closest match can be set in the Grade settings.](https://usermanual.wiki/Oxford-Instruments/WL18SBMOD/User-Guide-3312148-Page-34.png)