PEGATRON CLG8202-NA Wireless Home Automation and Security User Manual 78 100422 01A0 indd
PEGATRON CORPORATION Wireless Home Automation and Security 78 100422 01A0 indd
PEGATRON >
Contents
- 1. User Manual
- 2. User Manual Statement
User Manual
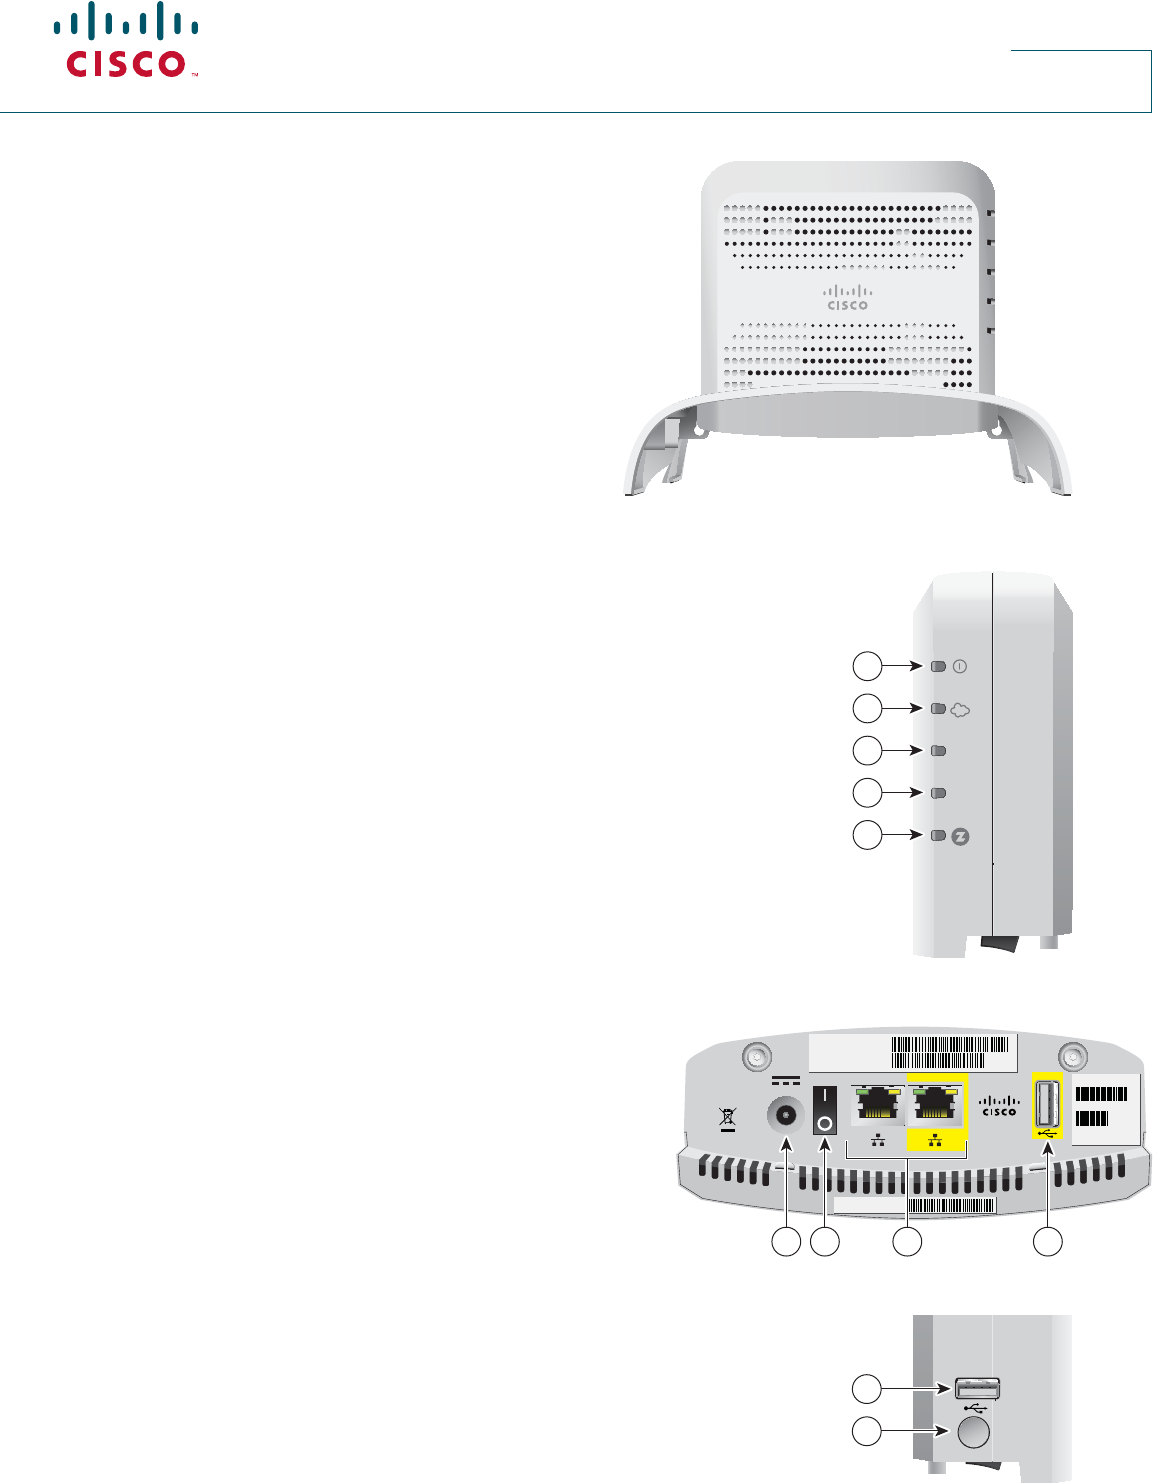
LEDs
1 Power Green indicates that 15V power is present and the gateway is powered on
O indicates that there is no power to the gateway
2 Cloud connectivity Green indicates connectivity is established with the backend
status (S/W controlled) O indicates connectivity to the backend
3 Controller status Green indicates that the gateway is active and in Normal mode
Yellow indicates that the Linux OS has booted
Red indicates that uBoot is complete
Blinking green indicates that the gateway is in Test mode
Blinking and other color combinations under S/W control. Can be used
and assigned by application developers.
O during initial power up or when rebooting
4 ZigBee Primary Green indicates that the ZigBee controller is active
RF interface active Blinking green indicates that the ZigBee controller is in Pairing mode
(S/W controlled) O indicates that the ZigBee controller is inactive
5 Z-Wave Secondary Green indicates that the Z-Wave controller is active
RF interface active Blinking green indicates that the Z-Wave controller is in Inclusion mode
(S/W controlled) O indicates that the Z-Wave controller is inactive
Cisco Connected Life Gateway
Model CLG-8202-WW
Installation Guide
Welcome
The Cisco Connected Life Gateway Model CLG-8202-WW
is a key component of the Cisco Smart and Connected
Home proposition. This service delivery platform
communicates with other network devices to provide
home security, home automation, and energy management
solutions as well as life and health monitoring and support
services. Contact your service or applications provider for
more information about Cisco Connected Life products.
POWER
MAC: 2CABA452C858
SKU: CL-72211230NA-K9
Factory ID: F2
Model No:
CLG-8202 NA
Date of mfg: 14/06
INTERNET
S/N: 254457522
15V DC
1.5A
22.5W
1 2 4
T16511
3
Bottom Panel
1 Power Connects to the included power adapter in the
Connected Life Gateway kit
2 Power switch Switches power on and o
3 Ethernet ports Connects to an RJ-45 Ethernet port on a PC or
router
4 USB 2.0 port Connects to client devices that use a USB 2.0
connector
Side Panel
1 USB 2.0 host port Connects to client devices that use a USB 2.0 connector
2 Pairing/Reset button Functions depending on user-de ned applications
ZigBee
STATUS
1
2
3
4
5
T16510
1
2
T16515
PAIRING/RESET
Cisco and the Cisco logo are trademarks or registered trademarks of Cisco and/or its a liates in the U.S. and other countries. To view a list of Cisco trademarks, go to
this URL: www.cisco.com/go/trademarks. Third-party trademarks mentioned are the property of their respective owners. The use of the word partner does not imply a
partnership relationship between Cisco and any other company. (1110R)
© 2014 Cisco and/or its a liates. All rights reserved Last Updated: July 2014 Part Number: 78-100422-01A0
Printed in China
What’s in the carton?
Verify that the following items are in the shipping carton. If any items
are missing, contact your service provider:
• The CLG-8202-WW Connected Life Gateway
• The CLG-8202-WW Connected Life Gateway cradle
• Protective cover for the USB connector
• AC power adapter
• Yellow CAT 5 Ethernet cable
• Two Phillips screws
Installation instructions
The gateway can be installed in one of two ways: desktop- or wall-
mounted.
Items needed
In addition to the items provided in the gateway shipping carton, the
following additional materials are needed:
• One Phillips screwdriver
• One Ethernet cable long enough to reach from the Cisco
Connected Life Gateway to a PC or router
When mounting to a wall, the following additional materials are
needed:
• One pencil to trace the mounting holes to the wall
• Two #6 (M3.5) pan head screws
• One screwdriver
• One drill and drill bit
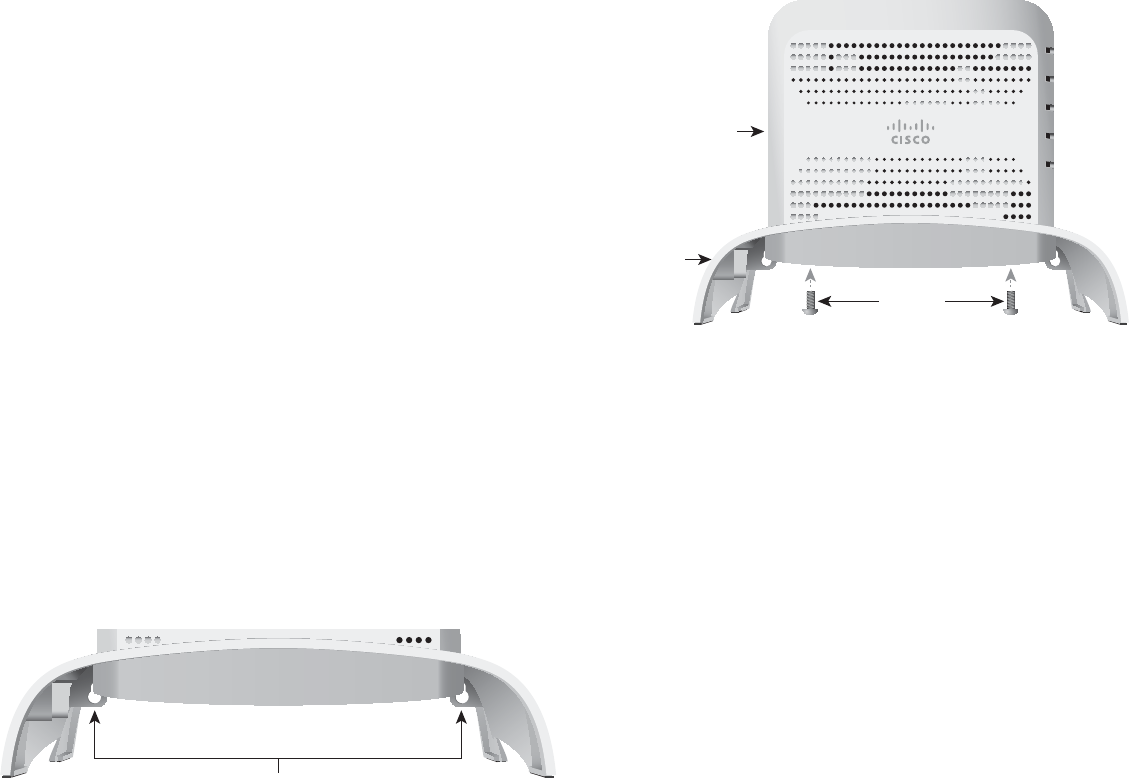
Wall mounting
T16512
Mounting holes
1. Turn the cradle so the mounting holes are opposite from you,
and place the cradle against the wall where you intend to mount
it.
2. While holding the cradle in place, use a pencil to trace the
mounting holes onto the wall.
3. Drill two holes into the wall where the pencil traces indicate.
4. Install the mounting screws into the wall, leaving a gap of about
½-inch between the screw head and the wall.
5. Place the cradle into position by slipping the large end of both
mounting slots over the screw heads and sliding the cradle
down until the narrow end of the mounting slots contacts the
screw shafts.
6. Continue installing the gateway by following the instructions for
Desktop mounting.
Desktop mounting
Allow approximately 3-5 minutes to install the gateway to stand on a
desktop.
Controller
Cradle
T16513
Phillips
Screws
1. Insert the gateway into the cradle until you feel it lock into place.
2. Using a screwdriver, secure the controller to the cradle by
inserting the two screws and tightening.
3. Insert one end of an Ethernet cable into the yellow Internet port
and the other end of the cable into an Ethernet port on a router.
Note: The gateway will be connected to a router except during
initial set up when it is connected to a PC for con guration of
network parameters.
4. Insert one end of the AC power adapter cable into the Power
port and the other end of the cable into a power outlet.
5. Turn the Power switch to the on position (|). All LEDs will ash
for one second; during this time, the STATUS LED will ash red,
yellow, and green.
Battery replacement
The gateway internal real time clock battery is designed to last up to
nine years under normal operating conditions. Should the battery fail
before that time, contact your service provider for assistance. Do not
attempt to replace the battery on your own; doing so could damage
the gateway.
Open Source License Statement
Cisco Connected Life Gateways may contain, in part, certain free
and/or open source software (“Open Source”) under separate
license terms. Examples of such licenses may include all versions
of the GNU General Public License (GPL), GNU Lesser General
Public License (LGPL), BSD license, MIT license, Mozilla Public
License, Eclipse Public License, Apache license, and others. To nd
speci c information regarding the Open Source in your product,
including copies of the applicable license documentation and related
information, go to: (i) for North America http://www.cisco.com/
web/consumer/support/open_source.html, or (ii) for outside North
America http://www.cisco.com/web/consumer/support/open_
source.htm#~international. Once at the site, search for the product
listing and click the related items identi ed. If you have any questions
or problems accessing any of the links, contact: spvtg-external-
opensource-requests@cisco.com.