PHANTOM II Production PC-MODEM-2-00 Smart interface which gets orders from PC and tran User Manual
PHANTOM II Production Ltd. Smart interface which gets orders from PC and tran
user manual
For Leonardo E-1 Interface
(C) 1999 Phantom II, LLC
™
4.1 Control Software

(C) Phantom II, LLC. 2
Software Manual
Quick Help to Technologica software
Welcome to Technologica software. This guide summarizes the primary elements
needed to know in order to work with Technologica.
The guide has two parts:
I. “General Concept” and a list of the Primitive Commands.
II. “General Structure” and how to use the software.
I. General Concept
Technologica is a Control Software designed to work with Leonardo Interface.
Technologica is used to control models built with K’NEX parts. In other words, you
build K’NEX models using motors, lights, sensors etc., attach them to the Leonardo
interface box and use Technologica to control the operation of the model.
Technologica is designed to be a highly user-friendly software and does not require
any previous knowledge in computers or programming.
Technologica is provided in four levels:
1. Direct Level is for young users.
2. Automatic Level is for new or novice users.
3. Interactive Level is for advanced users. It expands the Automatic Level to work
with K’NEX sensors.
4. Collaborative Level expands the Interactive Level to work with several
Leonardo interfaces using communication. Each Leonardo interface can send and
receive information or commands from other Leonardo interfaces.
In general, when you work with Technologica you work on a project.
A project is a set of Procedures you design. A Procedure is an organized set of
Primitive Commands and other Procedures. The Primitive Commands and the
Procedures are used to interact with the ports on the Interface Box thus, operating the
K’NEX model.
All Commands and Procedures are actually buttons on the screen. To operate
(execute) a command, simply Click it.
Note: Direct Level uses only several of the basic Primitive Commands without the
option of creating and editing procedures.

(C) Phantom II, LLC. 3
Software Manual
The principle of Technologica software is that at any given time, there is only one
Output Port (A to D) that the computer talks-to. This port is called the talk-to port.
From now on, every command is addressed to this Output Port. If you want to change
the talk-to port, click a new one on the Interface image.
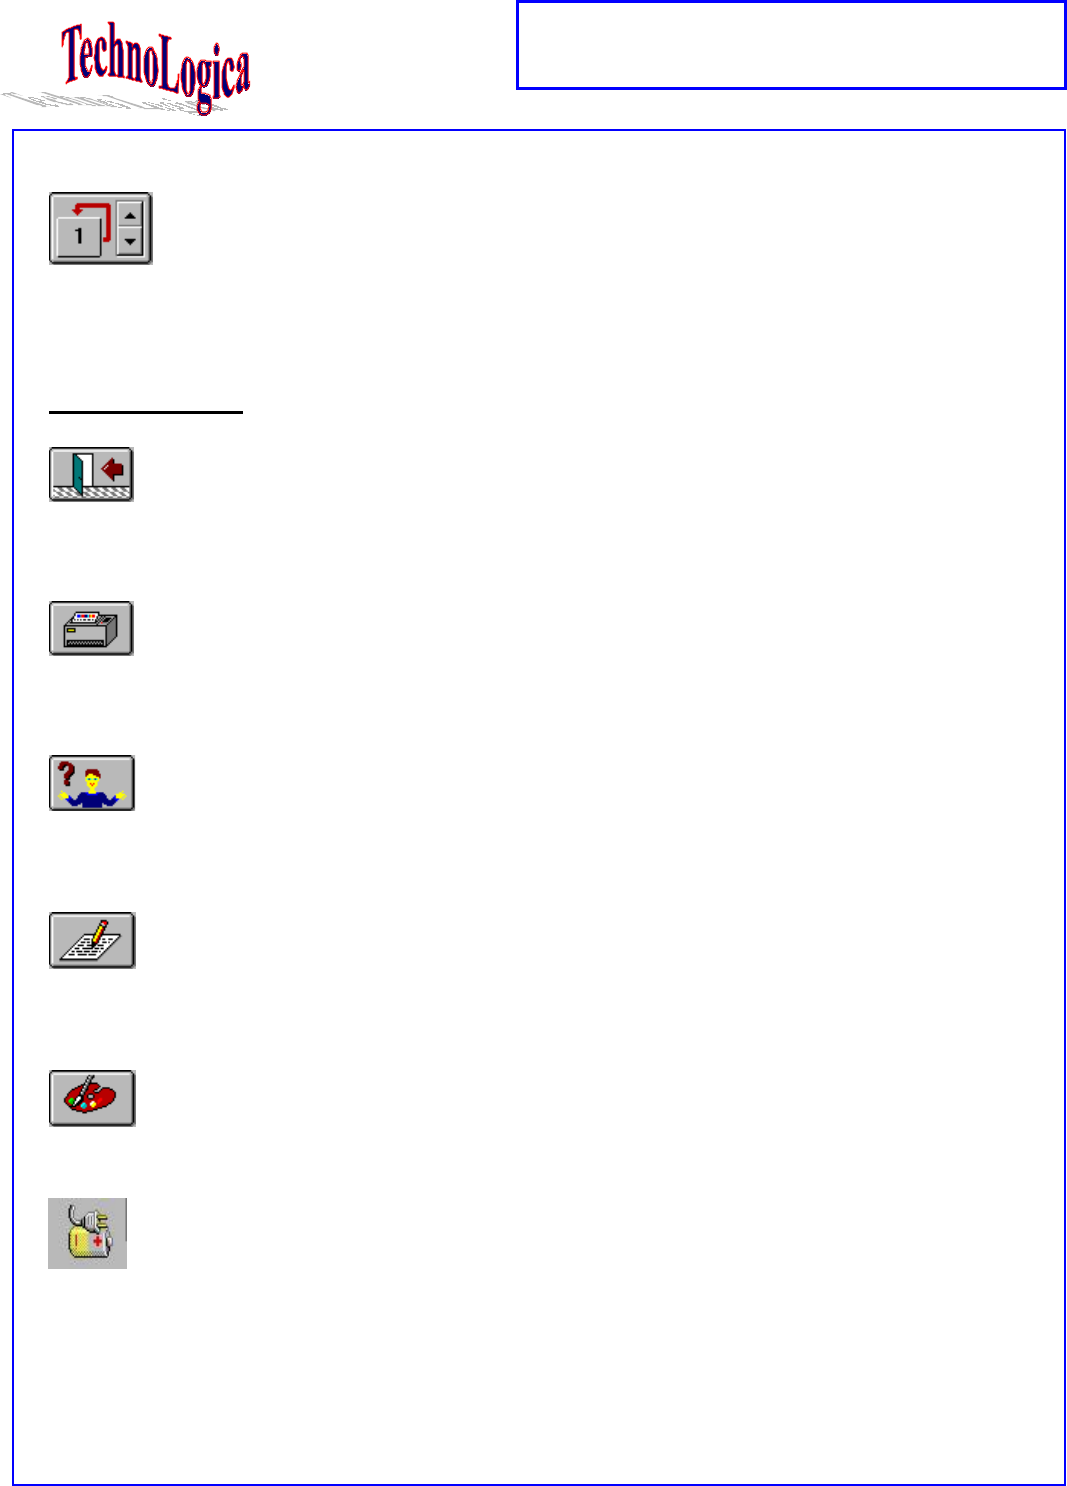
Primitives Commands
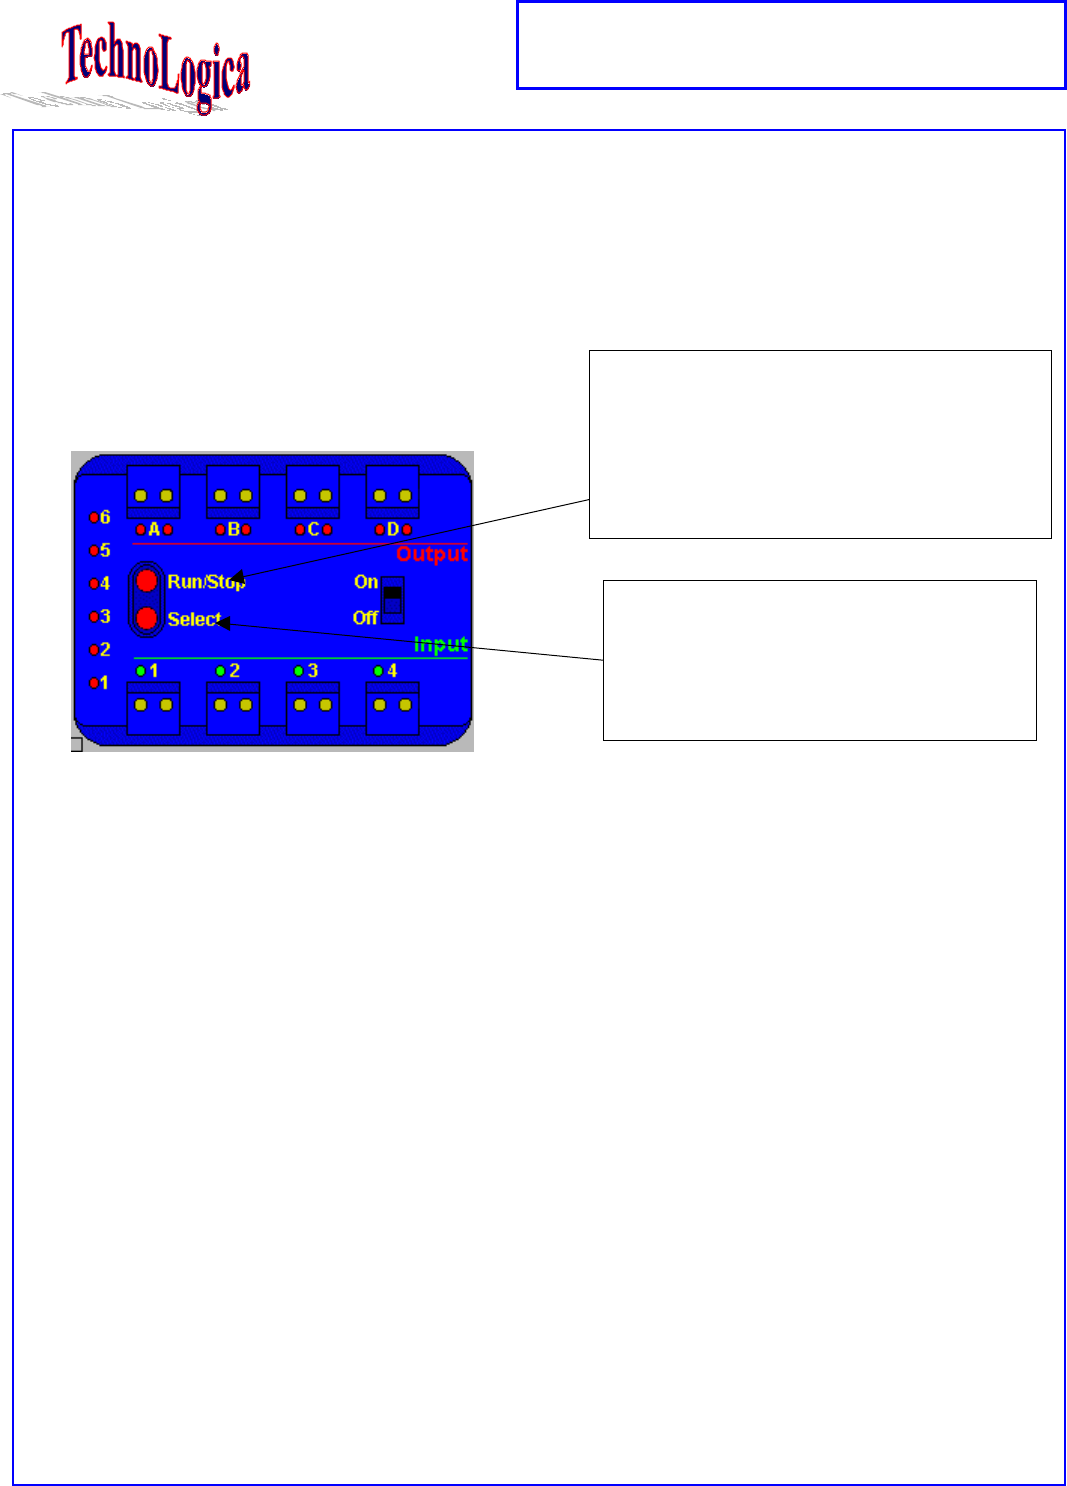
Talk-To Address an Output Port (A to D).
On Turn on the selected Output Port.
Off Turn off the selected Output Port.
Reverse-Direction, Set-Direction Change/Set the Direction of the selected Output Port.
Set-Power Set the level of electricity power of the selected Output Port.
Flash Turn the selected Output Port on and off repeatedly.
Delay Pause the flow of commands for a defined period.
Sound Produces a tone defined by its pitch and duration.
(C) Phantom II, LLC. 4
Software Manual
Repeat Repeat the following command (button), the number of times as set by
the repeat button.
Utilities Buttons
Exit Button Allows you to return back to previous screen or exit the program.
Printing Button Allows you to print the current screen.
Help button Gives information about all the software instruction and
everything else you can see on the screen.
Procedure Editor Moves you to the procedure editor to define or edit a procedure
content.
Picture Editor Moves you to the picture editor to draw or edit a procedure icon.
Power Supply Status By clicking on this icon you get information on the power
supply status of the Leonardo interface.
(C) Phantom II, LLC. 5
Software Manual
Interactive Level Concept
If you are using the Direct Level or Automatic Level of Technologica you may skip
this chapter and read it later when you are more experienced with Technologica
concepts.
Interactive Level expands the principle to work with the K’NEX sensors concerning
the input ports (1 to 4). That is, at any given time there is only one input port that the
computer listens-to. This port is called the listen-to port. All the input commands
address this port. If you want to change the listen-to port, click a new one.
After you have attached and defined a sensor to an input port, you can watch the value
it is currently reporting appear below the sensors image. These values are updated
every half second.
Some of the sensors can operate in two types of operation. Meaning, the same K’NEX
sensor can report different values according to the specific type defined to it. For
example, the angle sensor can either report the rotation angle or the number of
rotations. Therefore, you should set the sensor type according to the specific
operation you want it to perform.
Additional Primitive Commands (Interactive Level and Collaborative Level only)
Listen-to Address an input port (1 to 4).
If-Then Test the current listen-to port according to the condition set on the
button. If the result is true, the following command (button) will be
executed. Otherwise, it will be skipped.
(C) Phantom II, LLC. 6
Software Manual
If-Then-Else Test the current listen-to port according to the condition set on the
button. If the result is true, the first following command will be
executed and the second following command will be skipped.
Otherwise, the first following command will be skipped and the
second following command will be executed.
Wait-Until Test the current listen-to port according to the condition set on the
button. As long as the result is false, the computer waits, as soon as
the result is true, the execution of the following commands continue.
Reset Used to reset and adjust the values of the sensor ports (1 to 4)
according to the kind of sensor. Not all types of sensors can be reset.
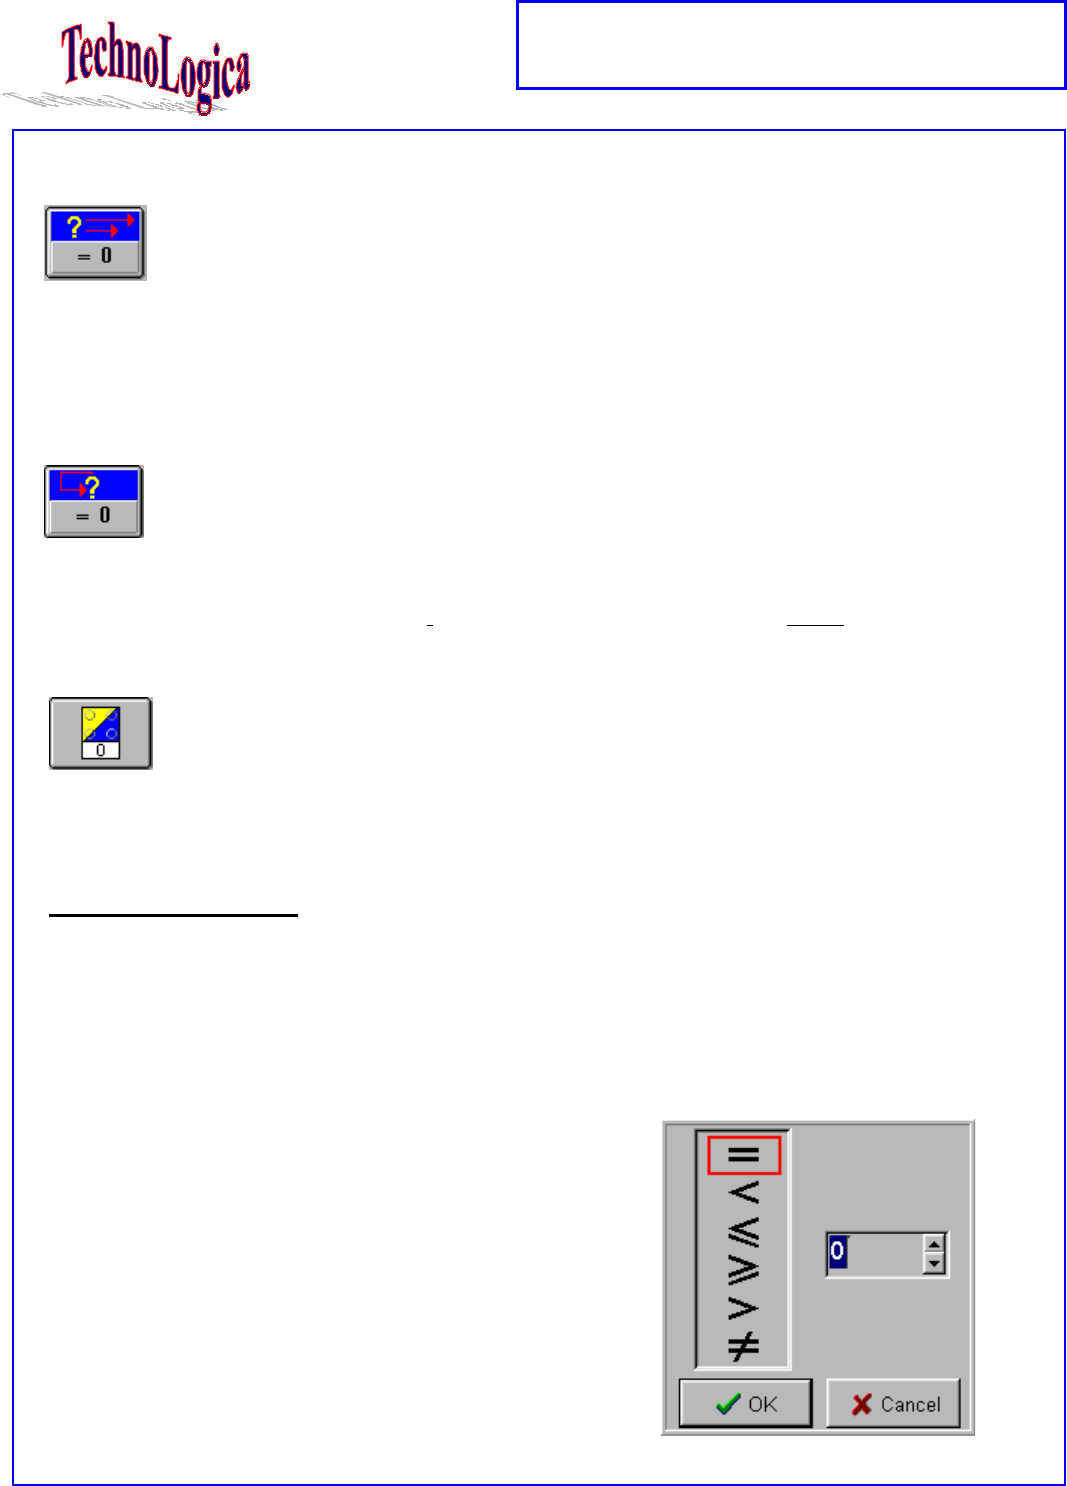
Condition Primitives (Interactive Level and Collaborative Level only)
The primitives: if, if-else and wait-until are called condition primitives.
These primitives test the current listen-to input port, according to the kind of sensor
that is defined for that port and the condition that is defined by the user for that
primitive.
Each condition command has two parameters:
operator and value.
The operator can be either: = , ≠ , < , ≤ , ≥ , >
= , ≠ , < , ≤ , ≥ , >= , ≠ , < , ≤ , ≥ , >
= , ≠ , < , ≤ , ≥ , > .
(C) Phantom II, LLC. 7
Software Manual
Collaborative Level Concept
If you are using Direct Level or Automatic Level or Interactive Level of
Technologica you may skip this chapter and read it later when you are more
experienced with Technologica concepts.
The Collaborative Level expands the principle to work with several Leonardo
interfaces using communication. Each Leonardo interface can send and receive
information or commands from other Leonardo interfaces.
Each Leonardo interface has an ID (a number between 1 and 99). The ID can be set in
Technologica Main Screen.
At any time, Technologica is communicating with one Interface ID. In order for
Technologica to interact with another Leonardo (which has a different ID) you
should click the “Choose Interface” command button on the Technologica Main
Screen.
Note: Collaborative Level operates only in wireless communication mode. In order to
communicate in Wireless Mode follow these steps:
One) disconnect the communication cable from the Leonardo interface.
Two) Reset the Leonardo interface (turn it OFF and then ON)
Three) Connect the communication cable to the RF-Modem and check that
the RF-Modem is connected to the power supply (the RF modem Red led is on).
(C) Phantom II, LLC. 8
Software Manual
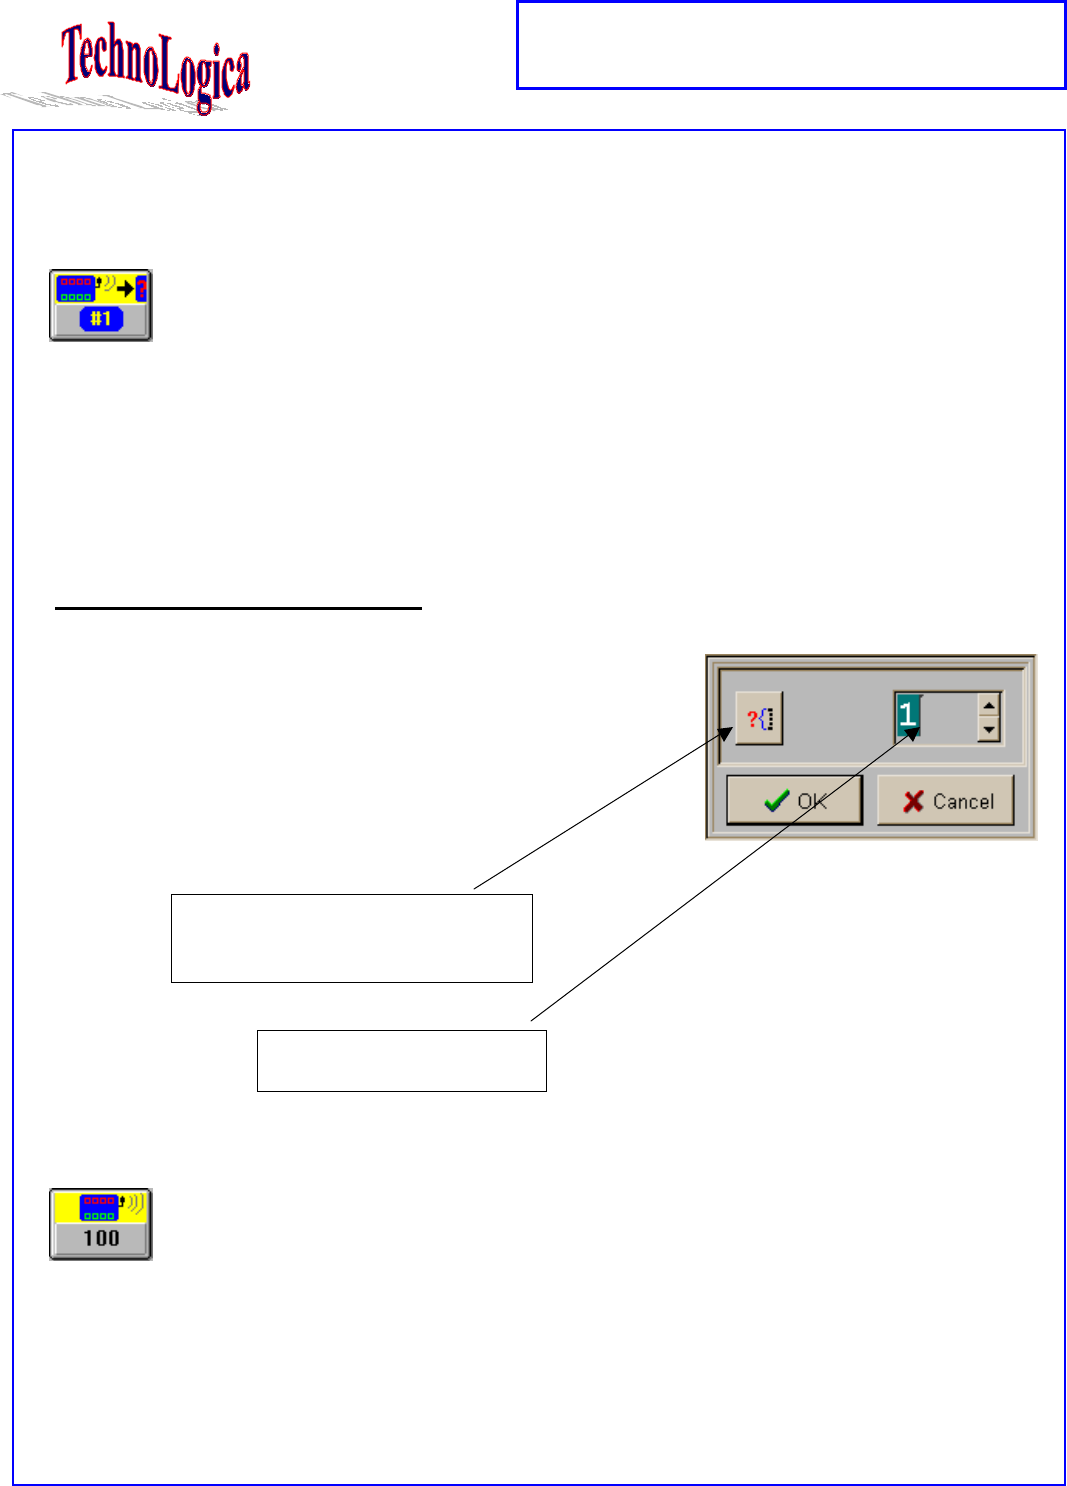
Command Interface # The “Command Interface #” command sends the following
command to the Interface ID which is set on the command
button.
Note that the sent Command will be executed by the other
Interface. It will NOT be executed by the current Interface.
Setting Interface ID commands
The Command Interface # and Listen to
Interface # commands - You need to tell the
Leonardo interface what interface ID to control or
listen to.
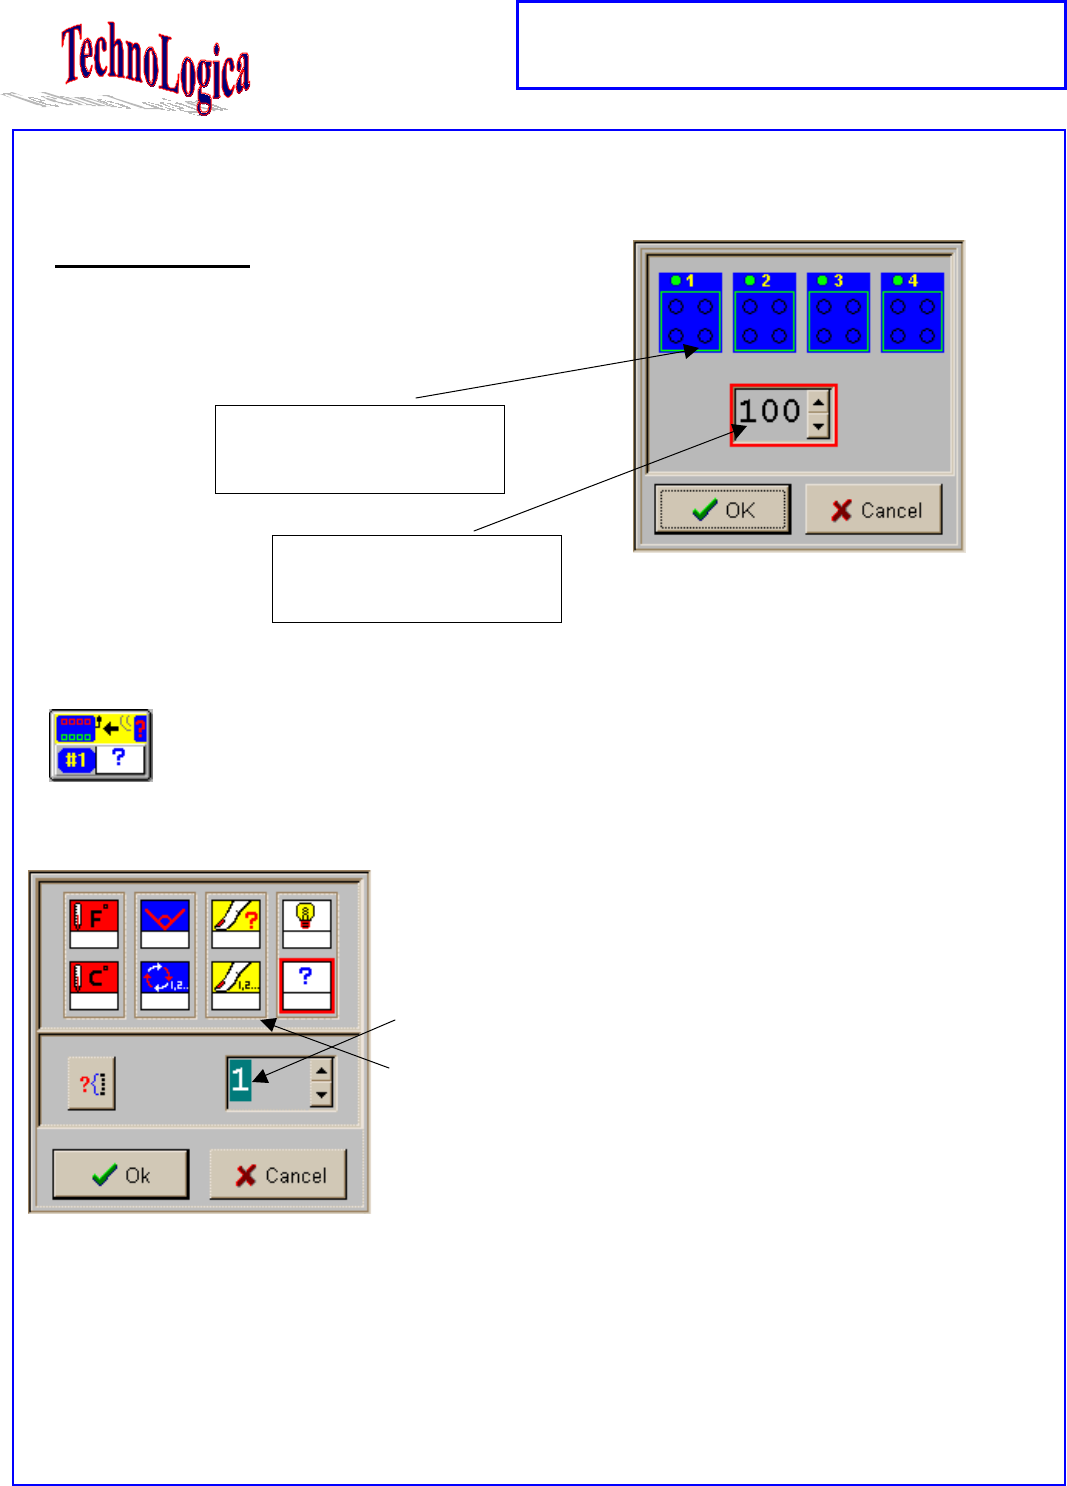
Send Value The ”Send Value” command broadcasts a number into the
air and continues the program execution.
This number can be either the current “Input Port” value or
a specific chosen number (1..200).
This command is valid only in “Downloading Mode”.
Set the interface ID here
You may use the Test button to check
whether an Interface ID you set currently
exists in the room.
(C) Phantom II, LLC. 9
Software Manual
Sending a Value
The Send Value command can send either a
constant value or the value from a specific Input
Port.
Listen-to-Interface # The “Listen-to-Interface #” command checks if a specific
“Interface ID” had just sent a value (using 'Send Value'
command).
You should set two properties for this command
button:
1) Set the specific (other) 'Interface ID' that the current
Interface will listen-to.
2) Choose the Sensor-Type you are expecting the other
Interface to send (this value should correspond to the
sensor type the other Interface is sending, in case of
mismatch, the received value will be undefined). If you
wish to receive a Raw number, you may choose the
“question-mark” (raw) sensor type.
Operation: After placing this command in a procedure, it “replaces” the current listen-
to port with listening the ‘other’ Interface.
This means that every condition command (If, If-Else, Waituntil) you will place in the
procedure after this command, will check the value that was sent from the other
interface (rather than the previous input port).
Choose a Value to send this
specific value to the other
interface.
Choose an Input Port to send the
value from that Input Port to the
other Interface.
(C) Phantom II, LLC. 10
Software Manual
The “Stop-All” command
The “Stop-All” command is the Leonardo interfaces button “Run/Stop”.
When you click this button on the Main Screen, it will either “Start Running” or
“Stop Running” the current selected program (1 to 6) on the Leonardo interface.
In the Editor Screen the Run/Stop command button can be dragged from the Interface
in order to place a “Stop-All” command button inside our procedure.
When “Stop-All” command is executed during program running, the execution of the
program stops (same as clicking the Run/Stop button on the Leonardo interface).
In this example, the Tone command will never be executed, since the program will
stop after the On command.
(C) Phantom II, LLC. 11
Software Manual
II. How to use Technologica software
Using the on-line help
Technologica provides detailed on-line help windows. Activate the Help Window by
clicking the help button, located at the upper left corner of every screen, second from
the left.
After activating the Help Window, click the item you want help about. You may click
as many item as you need.
To close the Help Window and return to regular work, click the close button on the
Help Window.
The structure of Technologica
Technologica has four main screens:
• Projects Screen
• Main Screen
• Picture Editor Screen
• Procedure Editor Screen
Defining Procedures :
A procedure is an organized set of commands you design to be automatically
executed one by one. The commands can be primitives or other commands
(procedures) you had already designed.
A procedure has two properties: its icon and its contents. To design these two
properties you use the Picture Editor and the Procedure Editor accordingly.
A new procedure button is built in two steps: first draw its icon (picture), then define
its contents (set of commands).
The Picture Editor Screen is used to draw an icon for the new procedure button you
are designing. Click the Picture Editor button (upper right) and then the empty button
in the procedures area. The Picture Editor will open and you can now draw an icon
using the drawing tools in this screen. It is recommended to draw a meaningful icon
that will tell about the action of the procedure.
When you exit the Picture Editor and return to the Main Screen, you will have an
empty new procedure which has, so far, only an icon.
(C) Phantom II, LLC. 12
Software Manual
The Procedure Editor Screen is used to design procedures.
To design a new procedure, click the Procedure Editor button (next to the Picture
Editor button) and then, click the icon you have just created.
To add a command to a procedure, either a primitive or other procedure, drag it from
its location into the procedure body area.
Command parameters (like any condition, or scale, if necessary), can be set either
before or after dragging them to the procedure body area.
To remove a command from the procedure window, drag it into the trash.
When you exit the Procedure Editor you return to the Main Screen.
Using primitives in the Procedure Editor Screen:
The following commands relate to the command that is placed after them in the
procedure. Here is a list of each command and the relation to the following command:
Repeat Place one command you want to be repeated after the repeat
command.
If-Then Place one command after the if command. It will be executed if at the
moment the condition is tested the result is true. Otherwise, it will be
skipped.
If-Then-Else Place two commands after If-Else command. If at the moment the
condition is tested the result is true, the first command will be
executed and the second will be skipped. If the result is false, the first
command is skipped and the second command is executed.
Command Interface # Place one command after that command. The command
will be sent and executed by the Leonardo interface ID set on the
command button.
Listen to Interface # The next Condition Command that will be executed will
consider the value that was sent (meanwhile) by the other Leonardo
interface.
To exit the Procedure Editor, click Exit and you will return to the Main Screen.
Choosing a project:

(C) Phantom II, LLC. 13
Software Manual
In the Projects Screen, you choose a project you want to work on. It can be an
existing project one or a new project. To choose a project, click it. After clicking the
project, the Main Screen automatically opens and you can begin your work.
Operating a model:
Operating a model is done at the Main Screen, where you activate the primitive
commands and the procedures you had designed.
The primitive commands are located at the lower left area of the Main Screen.
The procedures are located in the procedure area on the upper right area of the main
screen.
To activate a primitive command you should click it.
Notice that some primitive commands have a scale located on them. They are activated
in two steps: first, drag the scale to set its value and then, click the button to activate
the command.
The set-direction primitive command has two circles that determine the direction of
the electricity. You should first click the desired circle and then click the button itself
to activate the set-direction command.
Sensors and additional commands: (Interactive and Collaborative Levels only)
Interactive and Collaborative Levels allows the use of sensors to control the model
operation. To use sensors you have to notify the computer which sensors have been
attached to the Interface Box.
To notify a sensor (attached or removed) for an input port, double click the input port and
choose the type of sensor from the pop-up options (you may also click both mouse
buttons), according to the type of sensor you have attached to that port on the interface
box, and the kind of operation you want it to perform.
For example, to set an angle sensor to count rotations for port 4, double click port 4 and
from the pop-up options click the rotation counter sensor type.
To set parameters to a condition command, click the condition command button (on its
lower area) and choose, from the pop-up options, both, the operator and the value. The
operator can be either: = , ≠ , < , ≤ , ≥ ,
= , ≠ , < , ≤ , ≥ ,= , ≠ , < , ≤ , ≥ ,
= , ≠ , < , ≤ , ≥ , >
>>
>. The value can be a number
For example, to set the condition > 10 for the if primitive, click the condition area, click
> and set 10 on the pop-up options. Then, click the OK button.
(C) Phantom II, LLC. 14
Software Manual
You can also use procedures to operate the model. The procedures you design are
located at the upper right area of the Main Screen. A procedure is constructed of
primitive commands and other procedures. It will be explained later how to run a
procedure.
Operating advanced primitive commands in the Main Screen
(Interactive Level and Collaborative Level only):
Repeat After clicking the button it remains pressed, waiting for you to click the
command you want to repeat. Only after you chose the command, the
computer will execute it a number of times according to the number set
on the repeat button. To set the right number you can use the + and -
buttons.
If-Then After clicking the button it remains pressed, waiting for you to click the
command you want to be executed if the condition will be true.
If-Then-Else After clicking the button it remains pressed, waiting for you to click two
commands that one of them will be executed according to the result of the
condition. If the condition is true, the first command will be executed and
the second will be skipped. If the condition is false, the second command
will be executed and the first will be skipped.
Wait-Until After clicking the button, it will open the running window that will be
closed only when the result of the condition is true.
Reset Click the button to reset the current listen-to input port.
(C) Phantom II, LLC. 15
Software Manual
Running Modes:
Technologica has two operation (running) modes
1) Download running mode – the whole procedure is downloaded into one of the 6
programs of the Leonardo interface. Then use the “Run/Stop” button run the
procedure.
2) PC running mode – The PC executes the procedure commands by sending them
one by one to the Leonardo interface. This is a “debugging” (step-by-step) mode.
1) Downloading and Running procedures from LEONARDO interface:
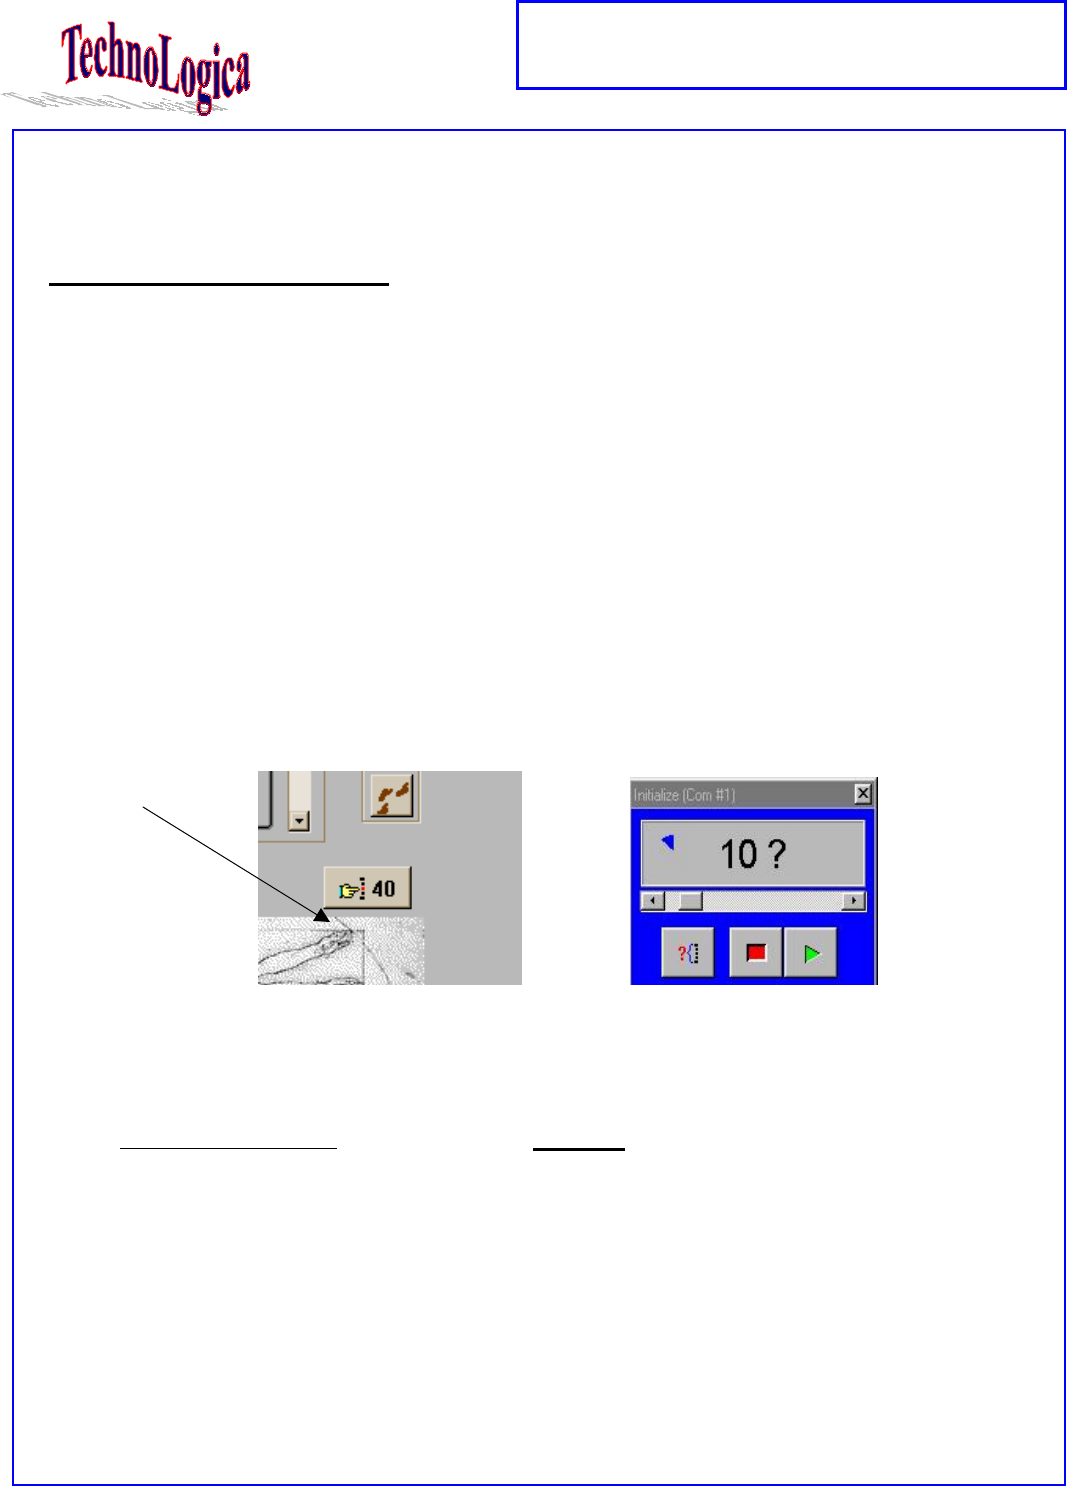
To download a procedure:
1. Choose the procedure that you want
to download.
2. Click the left mouse button.
The following window will appear
1.Select one of the Leonardo
programs that you want to save
the procedure.
2. Click Enter, or click the left
mouse button to start the
download .
(C) Phantom II, LLC. 16
Software Manual
Running a downloaded Procedure:
The program that was downloaded can now be
run both from the LEONARDO interface or the
Leonardo image on the screen.
The run another download program:
1. Push Select button until the program that you
want to run is selected.
Notice, that the light that indicates the chosen
program will flash on the interface.
1. To run a chosen program, push the Run/Stop
button on the LEONARDO interface, or click on
the Run/Stop screen button.
Notice, The LED is flashing in a constant frequency
2. To stop the program, push again the Run/Stop
button, or click this button on the screen.
(C) Phantom II, LLC. 17
Software Manual
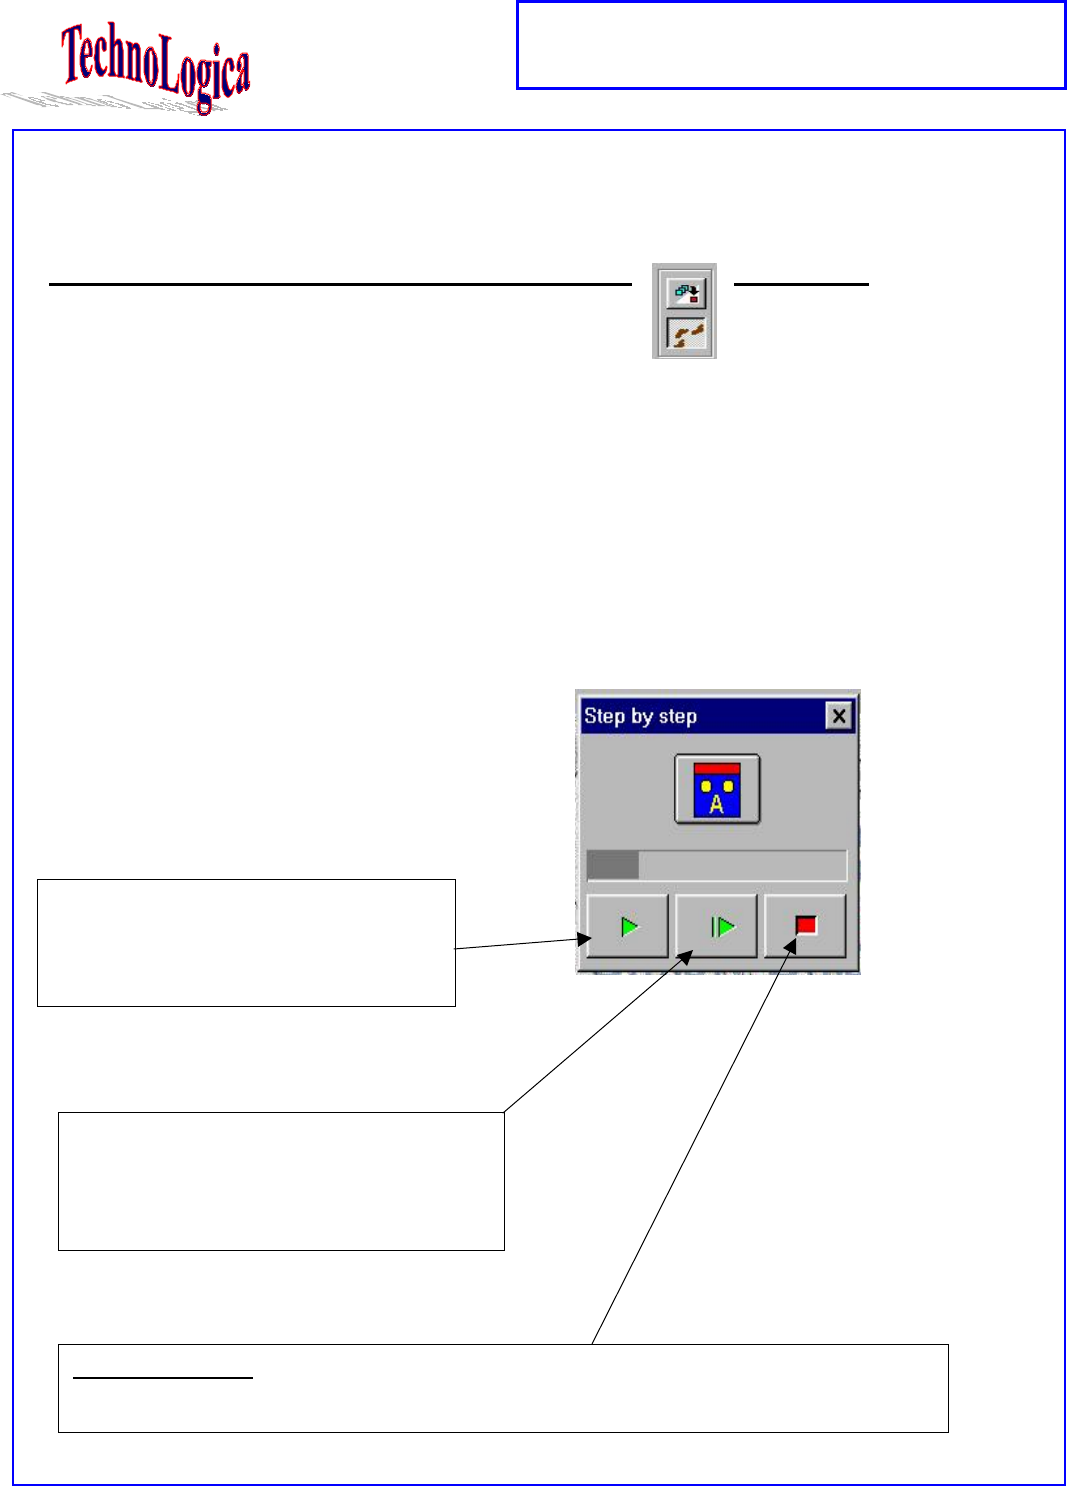
2) Running a Procedure in a 'Step by Step' mode from the PC:
1. Make sure that the 'Step by Step' button is pressed
2. Click the procedure button you want to run.
The Step by step window will appear. This window will be automatically
closed after the procedure will be finished.
Clicking this button will run the
procedure successively, showing
each command that is executed
Clicking this button, the procedure will
run the commands Step by step.
To execute the next command, click
this button again.
The Stop button:
Clicking this button will stop the procedure and will set all Output Ports to OFF.
(C) Phantom II, LLC. 18
Software Manual
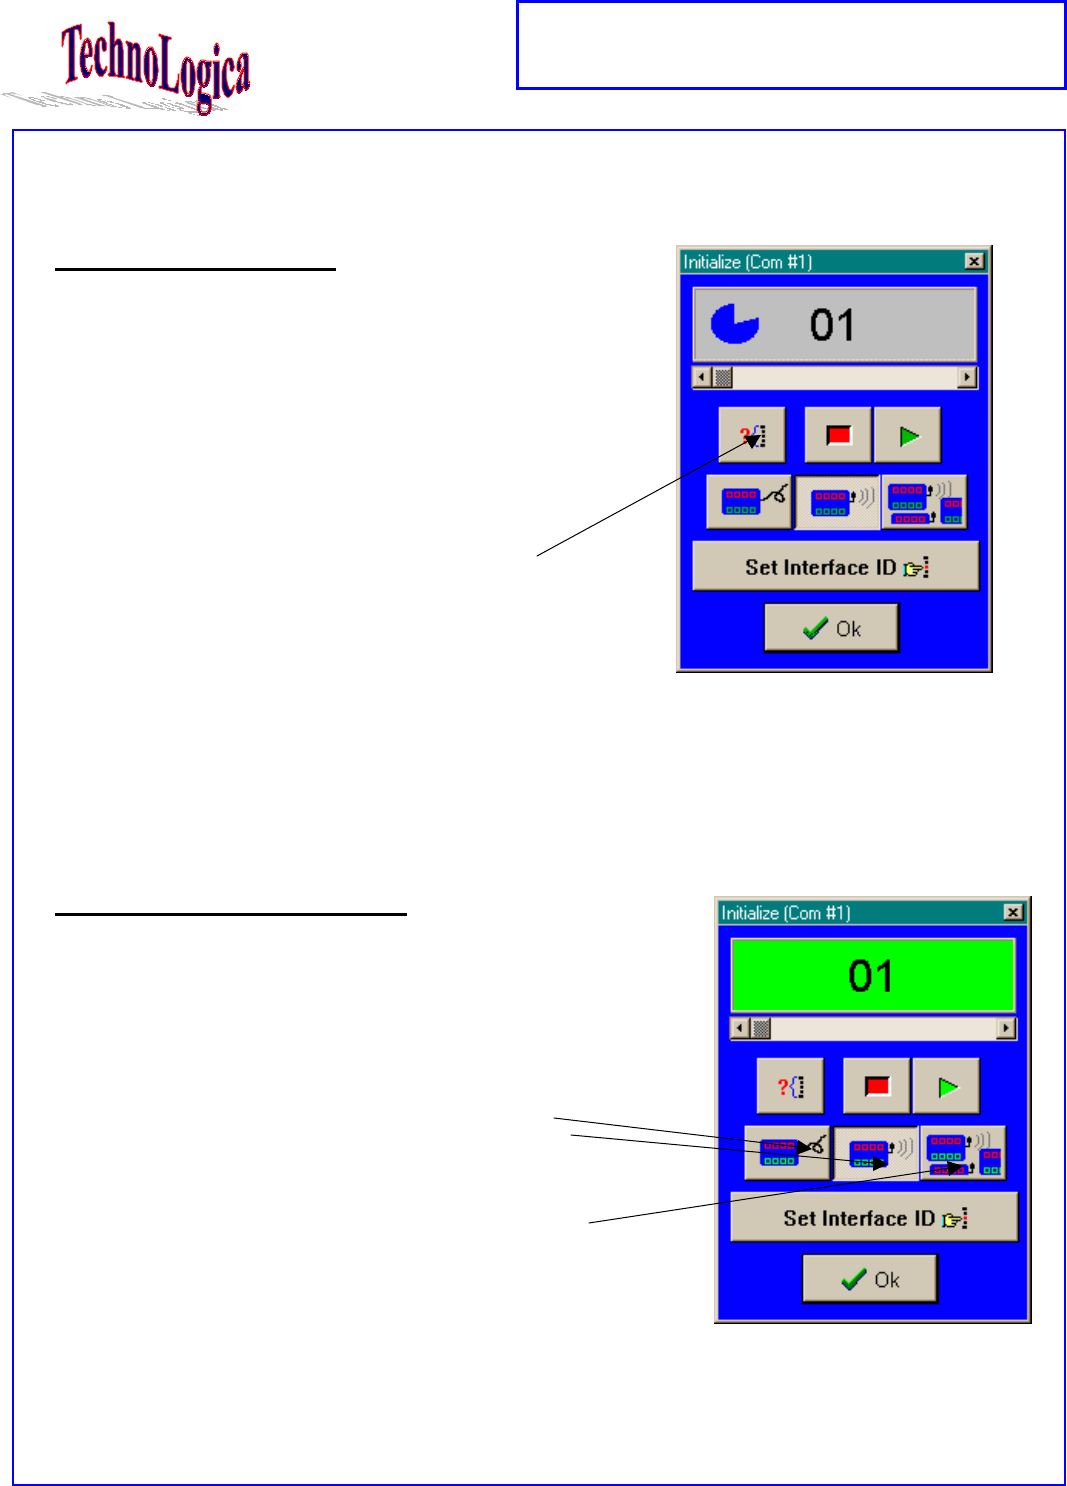
Identifying Interface ID
To find out the ID of a Leonardo interface:
1. Make sure that the Leonardo interface is
connected to the computer.
2. Turn Off the Leonardo interface.
3. Open Technologica Main Screen.
4. Click the “Choose Interface” button to open the
'Set Interface ID' window.
5. Click the 'Search' button, Technologica is
searching for an interface ID.
6. Turn On the Leonardo interface.
Within 10 seconds, Technologica should now identify the ID of the Leonardo you
are holding.
Setting Interface Update Rate
Technologica is constantly updated by the statu s of
the Leonardo interface.
The rate of the updates can be either:
1. Cable Connection – Very quick updates, suitable
only for cable connection.
2. Wireless Connection – Normal update rate,
suitable for a single-user environment.
3. Collaborative Connection – Slower updates rate,
suitable for an environment where several
Leonardo interfaces operate simultaneously.
Notice that these option buttons are enabled only after the Leonardo interface is
initialized (color of the top box is Lime).
The default connection rate is Wireless (option 2).
(C) Phantom II, LLC. 19
Software Manual
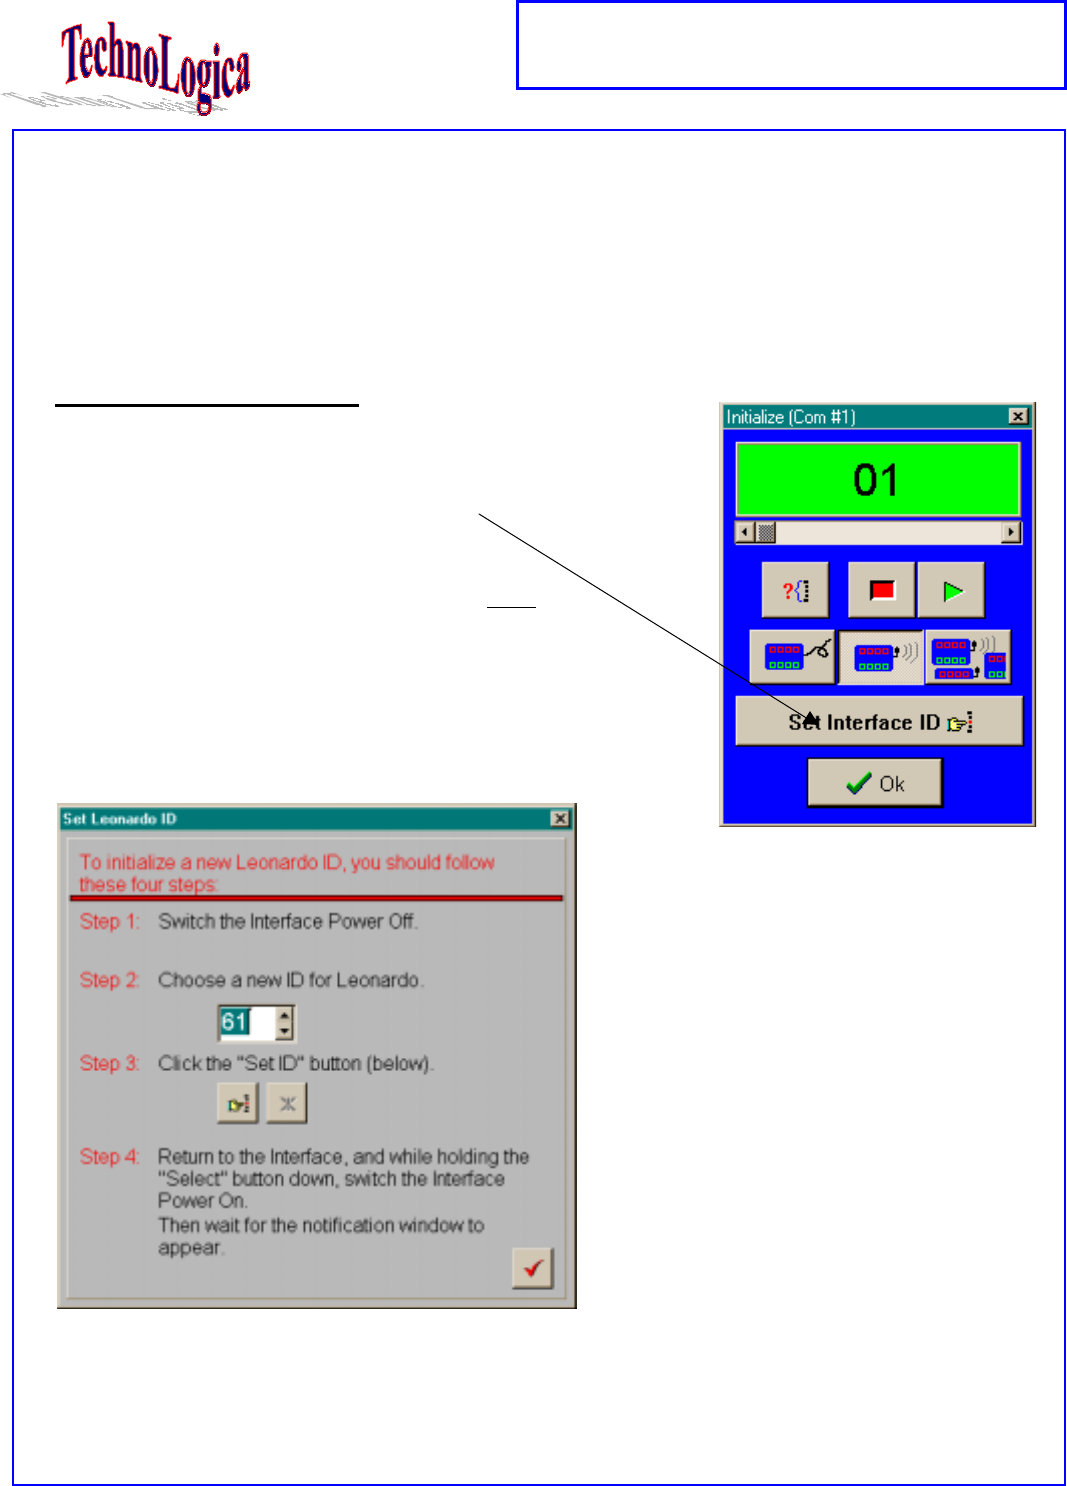
Changing an Interface ID
In order to change the ID of a Leonardo interface you
need to open the Set Interface ID window and click
the “Set Lenoardo ID” button.
Notice that this button is enabled only after the
interface was found.
After the window is opened, follow the guiding steps
that appear there.