Panasonic Connect 208006A UMTS/ GSM Cellular Mobile with Bluetooth® and RFID User Manual 000 P906i
Panasonic Mobile Communications Development of Europe Ltd UMTS/ GSM Cellular Mobile with Bluetooth® and RFID 000 P906i
Contents
- 1. User Manual Part 1
- 2. User Manual Part 2
- 3. User Manual Part 3
User Manual Part 2
200
Mail
Operate receiver
(Change rcv. type)
Change rcv. typeSelect a type of address.
To . . . . . This is the direct destination address. “To” recipients
are displayed at the receiving ends.※
Cc . . . . . Specify to let parties know the mail contents in addition
to the direct recipients. “Cc” recipients are displayed at
the receiving ends.※
Bcc . . . . Specify to hide the recipients from others. “Bcc”
recipients are not displayed at the receiving ends.
※They might not be displayed depending on the mobile phone,
device, or mail software of the receiving end.
Operate att. file
(Activate camera)
You can shoot and attach an image or i-motion movie.
Activate cameraSelect a shooting mode.
pSee page 155 and page 158 for how to shoot.
Operate att. file
(Attach file)
See page 210.
Operate att. file
(Delete att. file)
See page 212.
Template
(Load template)
You can read in a Deco-mail template and compose a Deco-mail
message.
Load template
pWhen the text has already been entered, the confirmation
display appears asking whether to delete the text.
Select a template.
The contents of the template are entered into the text.
pWhile selecting a template, press l( ) to check the
contents of the template.
pSee page 202 for composing Deco-mail.
Template
(Save template)
You can save the Deco-mail you are composing as a template.
Save templateYES
pSee page 186 when templates are stored to the maximum.
pSee page 208 for how to check the stored template.
Function menu Operation/Explanation
Add header/sig. You can paste a header/signature at the beginning or ending of
the text of the i-mode mail message.
Add header or Add signature
pYou need to store the header/signature beforehand. (See
page 235)
Function menu Operation/Explanation
Information
<Operate receiver>
pYou cannot add any addresses if the address field for “To”, “Cc”, and “Bcc” already
contains five addresses in total or contains no addresses.
pYou cannot send i-mode mail if the “To” field is blank.
<Template (Save template)>
pThe subject of i-mode mail you are composing will be the title of the template. If no
subject is entered, the title takes the name of “YYYY/MM/DD hh:mm”.
(Y: year, M: month, D: date, h: hour, m: minute)
<Add header/sig.>
pYou cannot paste a header/signature if the text, including the header/signature, would
exceed 5,000 full-pitch or 10,000 half-pitch characters.
pIf the decoration such as font color or character size is set for the top or end of text, the
header or signature will be decorated as well.
Function Menu of the Message Entry Display
Function menu Operation/Explanation
Decorate mail See page 203.
Template
(Load template)
See page 200.
Template
(Save template)
See page 200.
Full pitch/Half pitch See page 439.
Copy See page 442.
Cut See page 442.
Paste See page 442.
201
Mail
Undo After entering or deleting characters, pasting data, or operating
on a decoration, you can undo your most recent operation. You
can do it up to twice.
pYou can undo the operation also by pressing m().
Pictograph/
symbols
(Pictograph)
See page 439.
Pictograph/
symbols
(Symbols)
See page 439.
Pictograph/
symbols
(Space)
See page 440.
Phrase/code/quote
(Common phrases)
See page 440.
Phrase/code/quote
(Kuten code)
See page 440.
Phrase/code/quote
(Input time)
See page 440.
Phrase/code/quote
(Quote phonebook)
See page 440.
Phrase/code/quote
(Quote own data)
See page 440.
Phrase/code/quote
(By position loc.)
You can obtain the current location information by using the GPS
function, convert that information into the URL, and then paste it
to the i-mode mail text.
Paste locationBy position loc.Oo()YES
Phrase/code/quote
(From loc. history)
You can convert the location information retained in Location
History of the GPS function into the URL, and paste it to the
i-mode mail text.
Paste locationFrom loc. history
Select a location recordYES
Phrase/code/quote
(From phonebook)
You can convert the location information stored in the Phonebook
into the URL, and paste it to the i-mode mail text.
Paste locationFrom phonebook
Select a Phonebook entryOo()YES
Function menu Operation/Explanation
Phrase/code/quote
(Bar code reader)
See page 165.
Char. input/dict.
(Own dictionary)
See page 442.
Char. input/dict.
(Learned words)
See page 443.
Char. input/dict.
(Change input
mode)
See page 440.
Char. input/dict.
(Candid. disp. size)
See “Character input (Candid. disp. size)” on page 129.
Char. input/dict.
(Predict)
See page 439.
Char. input/dict.
(Candidate display)
See page 440.
Char. input/dict.
(Character set time)
See page 440.
Char. input/dict.
(2/NIKO-touch
guide)
See page 440.
Help See page 440.
JUMP See page 441.
Preview You can check the contents of the text before sending.
pYou can preview also by pressing p.
Function menu Operation/Explanation
202
Mail
When editing an i-mode mail message, you can change the size of the
font and the color of the background as well as inserting images, thus
composing your own original mail.
You can compose Deco-mail also using the templates (patterns). (See
page 208)
1Perform the operations in step 1 through step 3 on
page 198.
Information
<Undo>
pOnce you use “Undo” to return to the previous status, you cannot cancel this by using
“Undo” again.
pIf you close the Message Entry display, you cannot return to the previous status by
using “Undo” when you re-open it. (However, after you have exited “Preview”, you can
return to the previous status by “Undo”.)
<Phrase/code/quote>
pYou can paste up to 512 half-pitch characters by Paste Location, and the pasted URL
is counted as the number of characters in the mail text.
p“ ” is inserted before the URL pasted by Paste Location. However, you can delete
it while editing.
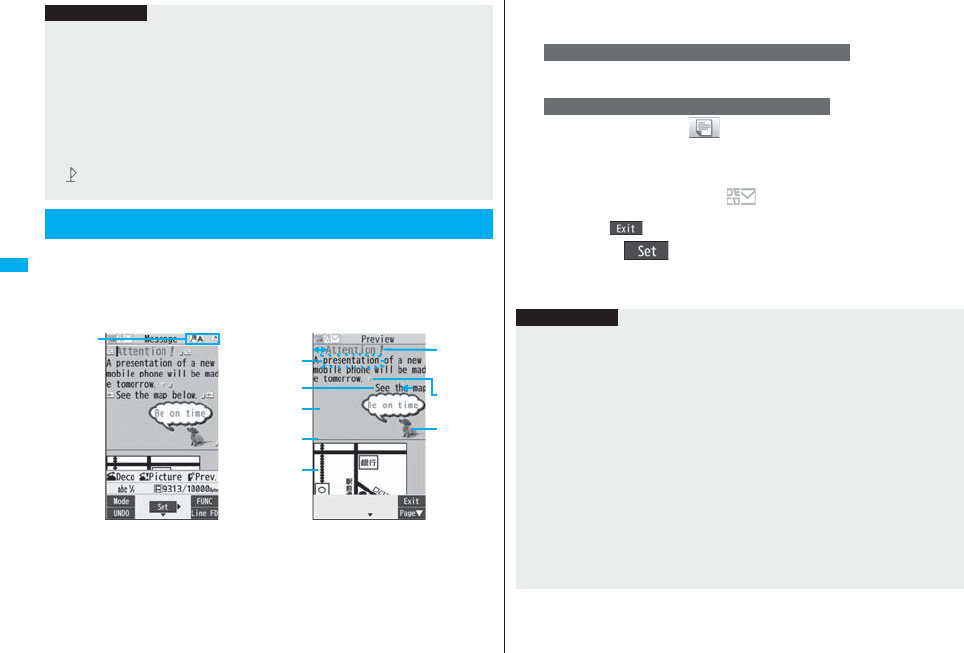
Composing Deco-mail to Send
Entering characters
Activated
decoration
Previewing
Font color
Font size
Swing
Moving
font effect
Word
alignment
Deco-mail
pictogram
Ticker
Blink
Background
color
Insert line
Insert image
2Select the text fieldDecorate the text using Palette.
pSee page 203 for how to use Palette.
dSelect one of decorationsEnter text.
Enter textd(Select area)
Go to “Select area” on page 204.
pYou can enter up to 5,000 full-pitch/10,000 half-pitch characters. (The number of
characters you can enter decreases depending on the decoration.)
pOnce you decorate the mail text, “ ” appears.
pYou can preview the contents of the text by pressing p.
Press i( ) to finish previewing and return to the former display.
3Press Oo().
The Message Composition display is displayed.
Go to step 6 on page 198.
To enter text after selecting decorations
To set decorations after entering text
Information
pEven if you delete the decorated characters, only the decoration data remain and the
number of characters you can enter might decrease. Clear the decoration and then
delete the characters. If you delete the characters by pressing and holding
-r for at least one second, the characters as well as the decoration data are
deleted.
pWhen you reply with quote to the received Deco-mail or you forward it, the
decorations or inserted images are displayed at the replying destination or forwarding
destination.
pIf you use a template containing an image unable to attach to mail for sending, the
image is deleted.
pWhen you send a Deco-mail message in excess of 10,000 bytes, it is received at the
destination as a mail message with the URL for browsing Deco-mail described
depending on the recipient’s i-mode phone. However, depending on the model, only
the mail text without the URL for browsing might be received.
pDecorations might not be correctly displayed if you send or receive Deco-mail to and
from devices such as personal computers.

203
Mail
You can decorate the text of i-mode mail using Palette.
You can set multiple decorations for one point.
pYou cannot combine Word Alignment, Ticker, and Swing for one point.
pLines are inserted by Line Insert with the color specified by Font Color.
pIf Word Alignment, Ticker, or Swing is specified, the images and moving font effects
are inserted with the specified state.
pYou can enter Deco-mail pictograms using “Insert image”, and from “Pictograph” on
the Function menu as well.
■How to use Palette
Press d from the Message Entry display to display Palette.
pWhen the cursor is over the decorated character, the Palette
appears with the icon for the set decoration depressed.
Highlight the depressed icon and press Oo( ); then
you can change, complete or cancel the decoration. You can
release the area selection also by pressing r while the
area is selected.
pPress i( ) to close Palette. You can close Palette
also by pressing r while you are operating on it.
Switch operations
You can switch between the operation of Palette and the
operation of entering text, each time you press d. You can
move the cursor and enter text with Palette displayed.
pAfter you enter text, the text entry operation returns.
When you use Palette in succession, press d and operate.
pThe movement of Ticker/Swing, blink and animation playback stop when a certain
period has passed.
About Decorations
Information
Palette operation
■How to operate Decoration
Function Operation/Explanation
Insert image
(Font effect)
You can convert characters to a mark and insert it into the
text. The mark animates in various ways and conveys your
feelings to the other party.
Select a moving font effectEnter text.
pTo delete the moving font effect, move the cursor to the
moving font effect and press r.
Insert image
(My picture)
You can insert the image stored in “My picture” into the text
of mail.
Select a folderSelect an image.
pYou can select a Deco-mail picture by pressing and holding
d for at least one second from the Message Entry
display.
pTo delete the image, move the cursor to the image and
press r.
Insert image
(Camera)
You can insert the image shot by the camera on the spot into
the text of mail.
Shoot a still image.
pThe image size of the camera is Sub-QCIF (128 x 96),
QCIF (176 x 144), QVGA (240 x 320) or CIF (352 x 288).
pTo delete the image, move the cursor to the image and
press r.
pSee step 2 and step 3 on page 155 for how to shoot.
Font color You can change the color of characters and lines to be
entered.
Select a colorEnter text.
pYou can switch between “20 Color” and “256 Color” by
pressing c().
pIn the font color changing mode, “ ” is displayed at the
upper right of the display.
pYou can set other decorations in succession.
pWhen you have selected the area, you do not need to enter
text.
204
Mail
Background color You can change the background color of the mail text.
Select a color.
pYou can switch between “20 Color” and “256 Color” by
pressing c().
Insert line You can insert a horizontal line into the mail text.
The line feed is inserted automatically, and the line is
inserted.
pTo delete the line, move the cursor to the line and press
r.
Undo You can return to the previous status of the set decoration.
You can do it up to twice.
pYou can undo the operation also by pressing m().
Decorate all reset You can release all the decorations.
YES
pIf you have inserted an image, the message “In-line image
is deleted” is displayed.
Function Operation/Explanation
Select area You can set Font Color, Blink, Font Size, Word Alignment,
Ticker and Swing over the selected text you have entered.
You can also change the set decoration, add another
decoration, or cancel Blink, Ticker or Swing.
Select a start point.
pYou can select all text by pressing i( ) and
selecting “YES”.
Select an end point.
Set, change, add or cancel each decoration.
p“ ” is displayed at the upper right of the display
during selecting decoration area.
<Set, change, or add decoration>
Select an icon and set, change, or add decorations.
pSelect another icon in succession to change the multiple
decorations or add decorations.
pWhen Blink, Ticker, or Swing has been set, reselect each
icon and complete decorations.
<Release Blink, Ticker, or Swing>
Select the icon for Blink, Ticker, or Swing
Select the same icon again.
Font size You can change the size of characters to be entered.
Select a font sizeEnter text.
pIn the font size changing mode, “ ” or “ ” is displayed at
the upper right of the display.
pYou can set other decorations in succession.
pWhen you have selected the area, you do not need to enter
text.
Function Operation/Explanation
205
Mail
Select blink You can make characters to be entered blink.
Enter text.
The set characters are blinking.
pIn the blink setting mode, “ ” is displayed at the upper
right of the display.
pYou can set other decorations in succession.
d (Reset blink)
Select ticker You can make characters to be entered and images to be
inserted flow (moving from right to left).
Enter text.
The line feed is inserted automatically and “ ” is displayed
before and after the cursor.
pIn the ticker setting mode, “ ” is displayed at the upper
right of the display.
pYou can set other decorations in succession.
d (Reset ticker)
The line feed is inserted automatically.
Select swing You can make characters to be entered and images to be
inserted swing (moving to left and right back).
Enter text.
The line feed is inserted automatically and “ ” is displayed
before and after the cursor.
pIn the swing setting mode, “ ” is displayed at the upper
right of the display.
pYou can set other decorations in succession.
d (Reset swing)
The line feed is inserted automatically.
Function Operation/Explanation
Word alignment You can change the position of characters to be entered and
images to be inserted.
Select a word alignmentEnter text.
The line feed is inserted automatically, and the alignment is
set.
pIn the word alignment setting mode, “ ” is displayed at
the upper right of the display.
pYou can set other decorations in succession.
pWhen you have selected the area, you do not need to enter
text.
Function Operation/Explanation
Information
<Insert image>
pYou can insert up to 20 types of images within 90 Kbytes in total. However, you can
insert up to 2 kinds of flash movie. Even if the inserted types of images are 20 or
fewer, the confirmation display appears for some operations asking whether to re-edit
the text because the maximum number of images has exceeded.
pIf multiple same images are inserted, they are counted as a single type of file. If you
copy/paste the image already inserted, that image is regarded as the same image
and handled as a single type of file. However, if you insert the same Flash image, it is
handled as the second type of files.
pYou can apply Blink, Ticker, Swing, and Word Alignment to the inserted images,
however, you cannot apply any decorations to Flash movies.
<Font color>
pIf you move the cursor to the character for which another color is set, the setting
changes to that color.
pThe color for pictographs is also subjected to the specified font color. To restore the
color to ordinary one, select “指定なし/Default”.
pYou cannot change the color of Deco-mail pictograms.
<Background color>
pYou cannot change the background color when editing the header or signature.
<Font size>
pIf you move the cursor to the character for which a different font size is set, the font
size is changed to that size of the character.
pYou cannot change the size of the Deco-mail pictogram.
<Select blink>
pYou cannot make Deco-mail pictograms blink.
206
Mail
Decome-Anime is a mail service which enables you to create expressive
mail using Decome-Anime templates on which Flash images with
messages and images are available.
You can create Decome-Anime with pre-installed templates or purchased
templates from IPs (Information Providers) site.
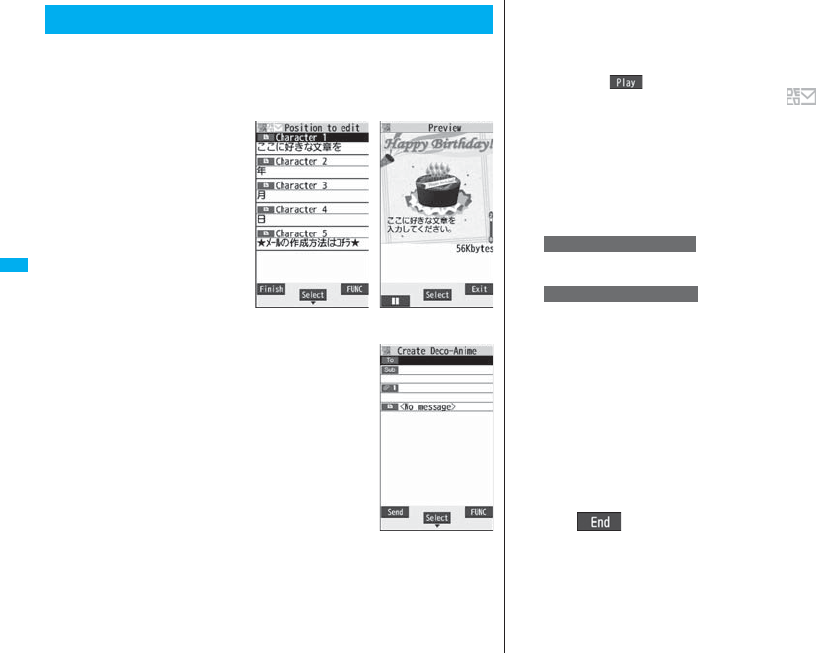
1lCreate new Decome-Anime
2Perform the operations in step 2 through step 4 on
page 198.
Creating Decome-Anime to Send
Edit Decome-Anime
display
Previewing
Decome-Anime
Creation display
3Select the text fieldPhone or microSD
Select the Decome-Anime template to be sent.
pWhen a Decome-Anime template is already selected, the Edit Decome-Anime
display appears. Go to step 4.
pPress l( ) to display the preview of the Decome-Anime template.
pOnce you select a Decome-Anime template, “ ” appears.
pDepending on the Decome-Anime template, you cannot edit contents.
pWhen you send the contents of the Decome-Anime template as they are, go to
step 5.
pYou cannot edit the text in the Decome-Anime template when it has once been
saved to the Draft, when you forward from the Inbox, or when you re-edit from the
Outbox.
4Select the contents field to be edited.
Select the character entry fieldEdit characters.
Select the insert image field
Select a folder, and select the image to be changed.
pYou cannot set decoration when you enter characters. You cannot paste header
or signature.
pWhen you break a line, the number of the characters decreases for remaining
space.
pYou can edit total of up to 90 Kbytes of templates, characters, and images. When
90 Kbytes are exceeded, you can no longer edit them.
pDepending on the Decome-Anime template, you might not be able to insert the
Flash movies even if its volume is even less than 90 Kbytes.
pAs the fonts and display position of images and characters are fixed, you cannot
edit them.
5l()
You can end the editing of the Decome-Anime.
Go to step 6 on page 198.
To edit characters
To change images
207
Mail
Information
pYou cannot create a Decome-Anime when the number of sent mail messages in
Outbox has reached the maximum.
pThe image you can insert is a GIF file (including animation GIF), JPEG file, and SWF
file.
pWhen an animation GIF file or SWF file is inserted, overflowing of the volume size for
sending might occur.
pEven when sending fails, you cannot re-edit it.
pWhen you send a Decome-Anime, it is received at the destination as a mail message
with the URL for browsing Decome-Anime described depending on the recipient’s
i-mode phone. However, depending on the model, only the text of Decome-Anime
without the URL for browsing might be received.
pYou cannot use received Decome-Anime as a template.
Function Menu of the Decome-Anime Creation Display
Function menu Operation/Explanation
Send You can send the Decome-Anime.
Go to step 7 on page 199.
Preview You can check the Decome-Anime by playback before sending.
pSee page 209 for how the playback display of Decome-Anime
works.
pPress i( ) to go back to the Decome-Anime creation
display.
Save When creating or editing the Decome-Anime, you can save it to
the Draft. After saving, you cannot re-edit the text of
Decome-Anime.
YES
Operate receiver See page 199.
Operate att. file See page 200.
Template You can read in a Decome-Anime template and create a
Decome-Anime.
Phone or microSD
Select a Decome-Anime template to be sent.
Go to step 4 on page 206.
pIf any Decome-Anime template is selected, the confirmation
display appears asking whether to discard the current contents
to read in the new one.
Function Menu of the Edit Decome-Anime Display
Function menu Operation/Explanation
Function menu Operation/Explanation
Template See page 207.
Preview See page 207.
Delete You can delete the insert image. Deleted insert image field
becomes blank.
Quit editing You can end the editing of the Decome-Anime.
Go to step 6 on page 198.
208
Mail
The Deco-mail template and Decome-Anime template are available for the
templates.
Template is form data for Deco-mail for which decorations such as font
size and image insertion are already specified.
Other than those pre-installed in the FOMA phone, you can download
templates from sites (see page 184). You can also save Deco-mail you
sent, received or composed as a Deco-mail template (see page 200 and
page 228).
You can edit the saved Deco-mail template using Palette.
The Decome-Anime template denotes the pattern data for Decome-Anime
and is created by combining characters and animations.
Other than those pre-installed in the FOMA phone, you can also
download templates from sites.
You cannot edit the Decome-Anime template.
pYou can delete the pre-installed templates. You can re-download them from the
“P-SQUARE” site (see page 186). When you use a UIM other than the one used for
downloading, the UIM restrictions (see page 40) are set to them.
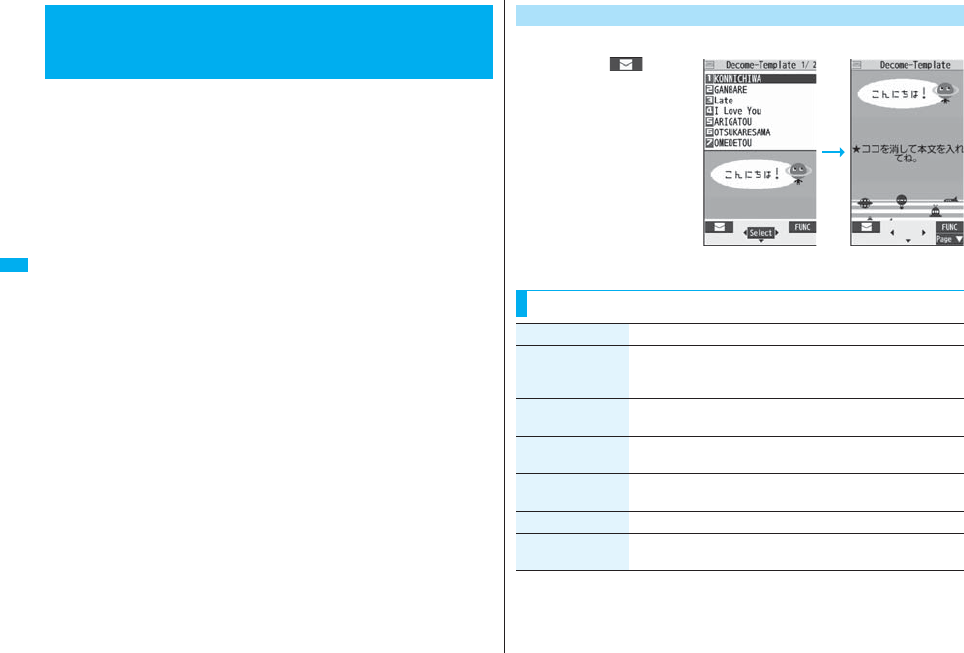
<Template>
Composing Deco-mail or Decome-Anime
by Using Template 1lTemplateDecomailSelect a template.
pPress l() to
compose Deco-mail using
the contents of the
template. Go to step 2 on
page 198.
pEven if you set “Header/
signature” to automatically
paste the header or
signature, you cannot paste
it.
pSee page 186 when you
select “Search by i-mode”.
Deco-mail Template
Deco-mail Template
list
Detailed Deco-mail
Template display
Function Menu of the Deco-mail Template List
Function menu Operation/Explanation
Compose message You can compose a Deco-mail message using the contents of
the template.
Go to step 2 on page 198.
Sort You can change the order of displayed templates.
Select an order.
Edit title Enter a title.
pYou can enter up to 15 full-pitch/30 half-pitch characters.
Info You can display the file size, saved date and time of the template,
and whether it contains images.
No. of messages You can display the number of stored templates.
Delete
(Delete this)
Delete thisYES

209
Mail
Delete
(Delete selected)
Delete selectedPut a check mark for templates to be
deletedl()YES
Delete
(Delete all)
Delete allEnter your Terminal Security CodeYES
Function Menu of the Detailed Deco-mail Template Display
Function menu Operation/Explanation
Function menu Operation/Explanation
Compose message You can compose a Deco-mail message using the contents of
the template.
Go to step 2 on page 198.
Edit You can edit the contents of the template and save it.
Edit the textOo()YES or NO
YES . . . Overwrites and saves.
NO . . . . Saves as a separate file.
pSee step 2 through step 3 on page 202 for how to edit the text.
pSee page 186 when the templates are stored to the maximum.
Save insert image You can save images inserted into the template or Deco-mail
text, and set them as the Stand-by display and Wake-up display.
Select an imageYESSelect a destination folder.
Go to step 3 on page 182.
pSee page 186 when images are stored to the maximum.
Information
<Edit>
pThe title name when saved as a separate file takes “YYYY/MM/DD hh:mm”
(Y: Year, M: Month, D: Date, h: hour, m: minute).
<Save insert image>
pDeco-mail pictograms are saved to the “お気に入り (Favorite)” folder in the
“Decomail-pictograph” folder.
1lTemplateDecome-AnimePhone or microSD
pSee page 186 when you select “Search by i-mode”.
2Select a template.
You can display the preview
of the template.
pPress l() to
create Decome-Anime
using the contents of the
template. Go to step 2 on
page 206.
The animation is played back automatically. Some Decome-Anime may sound effect
tones, or vibrate the FOMA phone. Also, depending on the Decome-Anime, you can
operate by using Bo, Oo, 0 through 9, s, or a on playback display or
preview.
pPress m( ) to pause the animation during playback. Press m() again to
resume the animation playback.
pThe effect tone sounds according to the setting of “Auto melody play”. When the
message is previewed from the Decome-Anime Template list, the effect tone sounds
regardless of the setting. However, when a melody file is attached, that melody is
played back. The effect tone for Decome-Anime does not sound.
pThe effect tone does not sound during Play Background.
pThe FOMA phone vibrates regardless of the setting of “Vibrator” or “Manner Mode”.
pSome Decome-Anime refer to the phone-information data in your FOMA phone. To
permit the use of the information in your FOMA phone, set “Use phone information” in
“i-mode settings” to “YES”. (“YES” is set at purchase.)
Decome-Anime Template
Decome-Anime
Template list
Previewing
When you display the playback display of Decome-Anime or
Preview
210
Mail
Function Menu of the Decome-Anime Template List
Function menu Operation/Explanation
Create
Decome-Anime
You can create a Decome-Anime using the contents of the
template.
Go to step 2 on page 206.
Preview You can display the preview of the Decome-Anime template.
Edit title Enter a title.
pYou can enter up to 10 full-pitch/20 half-pitch characters.
Copy to microSD See page 357.
Copy to phone See page 358.
Info You can display the title, file name, format, and whether it set with
file restriction.
Ir/ transmission
(Send Ir data)
See page 370.
Ir/ transmission
( transmission)
See page 372.
Delete
(Delete this)
See page 208.
Delete
(Delete selected)
See page 209.
Delete
(Delete all)
See page 209.
You can send an i-mode mail message with files attached.
You can attach following files:
・Still image ・Melody ・Moving image/i-motion movie
・ToruCa file ・PDF file ・Phonebook entry ・Schedule event
・ToDo item ・Bookmark (i-mode, Full Browser) ・Word
・Excel ・PowerPoint ・SD other files
You can attach up to 10 files within 2 Mbytes in total.
pYou cannot attach files that are prohibited from being attached to mail or output from
the FOMA phone to other devices.
p
Regardless of the “File restriction” setting, you can attach the still image or moving
image/i-motion movie shot with your FOMA phone or the files received via infrared rays.
pWhen you attach a file, another attachment field appears on the Message Composition
display.
pDepending on the recipient’s i-mode phone, it receives only compatible files within the
memory space of that model.
pIt might take a time to send the i-mode mail depending on the size of attached files.
1Message Composition display
Select the attachment field
Do the following operations.
<Attachments>
Attaching Files
Item
Operation/Explanation
Picture Select a folderSelect an image.
pHighlight an attached image and press Oo( ) to display
the image.
Press r to return to the former display.
Melody Select a folderSelect a melody.
pHighlight an attached melody and press Oo( ) to play
back the melody.
Press any key to stop the playback.
imotion Select a folderSelect an i-motion movie.
pHighlight the attached i-motion movie and press Oo( ) to
play back the i-motion movie.
Press r during playback or stop the playback to return to
the former display.
211
Mail
2Go to step 2 on page 198.
ToruCa When the ToruCa file is a ToruCa file (details), it is attached as a
ToruCa file (details).
Select a folderSelect a ToruCa file.
pHighlight the attached ToruCa file and press Oo( ) to
preview it. Press r to return to the former display.
PDF Select a folderSelect a PDF file.
pHighlight an attached PDF file and press Oo( ) to display
the PDF file.
Press r to return to the former display.
Phonebook Select a search methodSelect a Phonebook entry
Oo()
pWhen you specified a search method last time, the Phonebook
entry is searched by that method.
Schedule Select a dateSelect a schedule eventOo()
ToDo Select a ToDo itemOo()
Bookmark i-mode or Full BrowserSelect a bookmark.
Document file You can attach a file of Word, Excel, and PowerPoint.
Select a folderSelect a file.
Other You can attach a file stored in “SD other files”.
Select a folderSelect a file.
Item
Operation/Explanation
Information
<Picture>
pThe images are not sent as the attachments to i-mode phones of the mova service;
they are in the form of URLs for browsing images and automatically attached with
expiry dates and can be obtained by selecting URLs. The mail text that can be sent to
an i-mode phone of the mova service is up to 184 full-pitch characters (369 bytes).
(When the acceptable number of characters of the mova phone is “250 full-pitch
characters”)
When multiple files are attached, the files are deleted and just the mail text is sent.
pThe i-mode phone of the mova service cannot receive GIF images.
pYou can attach a Flash movie as well.
pThe still image might not be received correctly or not be displayed or coarsely
displayed depending on the model at the receiving end.
<Melody>
pMelodies stored on the microSD card cannot be attached. Copy the melodies to the
FOMA phone. (See page 360)
pIf the receiving end is other than FOMA P906i, the sent melody might not be played
back correctly or the attachment might be deleted.
pYou cannot receive the attached melody on the i-mode phone of the mova service.
<imotion>
pSome i-motion movies cannot be attached to mail or their file sizes may become
larger or smaller.
pMoving images stored on the microSD card cannot be attached. Copy the moving
images to the FOMA phone. (See page 360)
pDepending on the mobile phone of the receiving end, i-motion movies cannot be
correctly received/displayed, might become coarse, or might be converted into
consecutive still images.
When sending moving images to other than the 2 Mbytes compatible model, it is
advisable to shoot them with the following settings:
File size setting: Mail restrict’n (S)
Image quality: Normal
<ToruCa>
pToruCa files stored on the microSD card cannot be attached. Copy the ToruCa files to
the FOMA phone. (See page 271)
212
Mail
You can delete an attached file you are selecting or all attached files.
1Message Composition display i()
Operate att. fileDelete att. file
Delete this or Delete allYES
pTo delete a single file, highlight the file to be deleted.
You can send photos (still images) to the other party during a voice call.
The photo is sent as the attachments of i-mode mail, and the receiving
end can view it during a call.
To send photos during a voice call, you need to store the phone number
and mail address of the other party in the same Phonebook entry
beforehand.
Depending on the model of other party’s phone, the other party might not
be able to view the photo during a call.
During a voice call, you can send photos (still images) you shoot on the
spot.
1During a voice calli()Shoot/send photo
Photo mode
The camera starts up.
2Press Oo().
The photo is shot.
pPress h from the Finder display to return to the “Talking” display.
pSee page 160 for how to operate on the Finder display.
Delete Attached File
<Photo-sending>
Using Photo-sending
Shoot and Send Photos
3Oo()Select a mail address.
The photo is saved and sent.
pYou can send it also by pressing i( ) and selecting “Save & send”.
pYou can set “Set display” and “File restriction” by pressing i( ). (See
page 157 and page 164)
pWhen multiple mail addresses are stored, select the mail address you send the
mail message to.
pWhen you select “Quit”, the photo is saved to the Draft as the image-attached
mail.
You can send the saved photos (still images).
1During a voice calli()Shoot/send photo
My picture
2Select a folderSelect a photoSelect a mail address.
The photo is sent.
pYou can select a photo (still image) of QCIF (176 x 144) and Sub-QCIF (128 x
96).
pWhen multiple mail addresses are stored, select the mail address you send the
mail message to.
When “Photo auto display” is set to “ON”, the photo is automatically displayed.
If you have received multiple photos during a voice call, you can press No to switch
them.
pYou can display the received photo during a voice call by pressing i( ) and
selecting “Display photo”.
pYou can also execute “Check new msg.” during a voice call by pressing i().
(See page 215)
Information
pThe image sizes of the camera are QCIF (176 x 144) and Sub-QCIF (128 x 96).
Select and Send Photos
When you received a photo (still image)
213
Mail
Information
pPhoto-sending is not available in the following cases:
・When the phone number and mail address of the other party on the phone are not
stored in the same Phonebook entry
・When the phone number and mail address of the other party on the phone are
stored as secret data in the Phonebook
・When a caller ID is not notified to the receiving end (User unset, PublicPhone,
Unavailable etc.)
(However, you can send from the calling end.)
・When “Restrict dialing” is not set for the phone number of the other party on the
phone during “Restrict dialing”
・When the number of sent mail messages in the Outbox has reached the maximum
and those messages are all protected, or when 20 mail messages are saved to the
Draft or the Draft is full (You cannot send.)
・When the Inbox is full of unread or protected mail (You cannot receive.)
・During Call Waiting
・In B Mode of 2in1
pYou cannot send Flash movies by Photo-sending.
pYou cannot send images by Photo-sending.
pA photo sent/received during a voice call is saved to the Outbox or Inbox as a file
attachment of the image mail (the subject is the phone number).
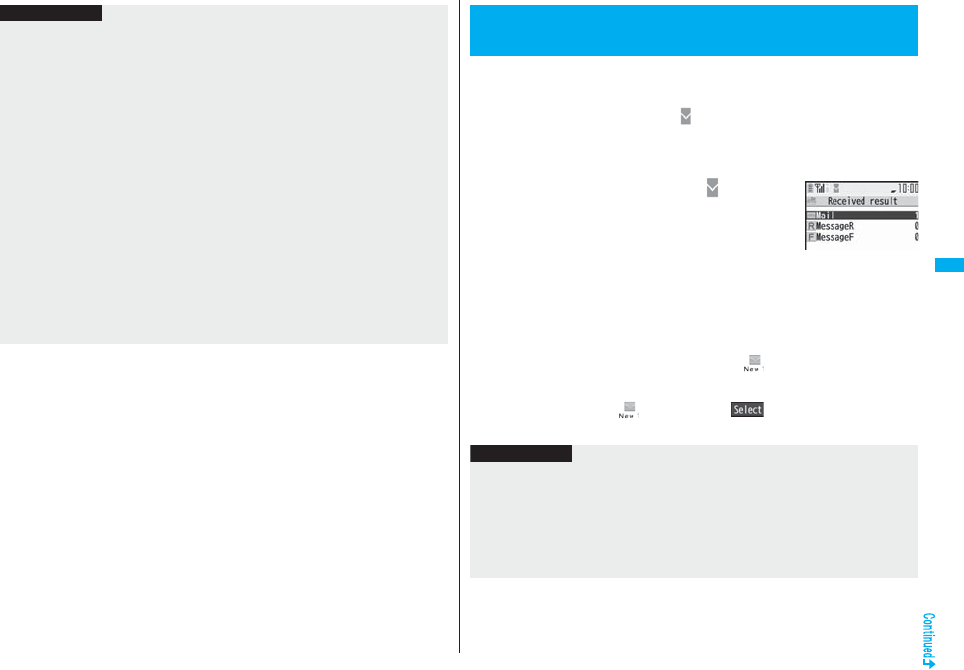
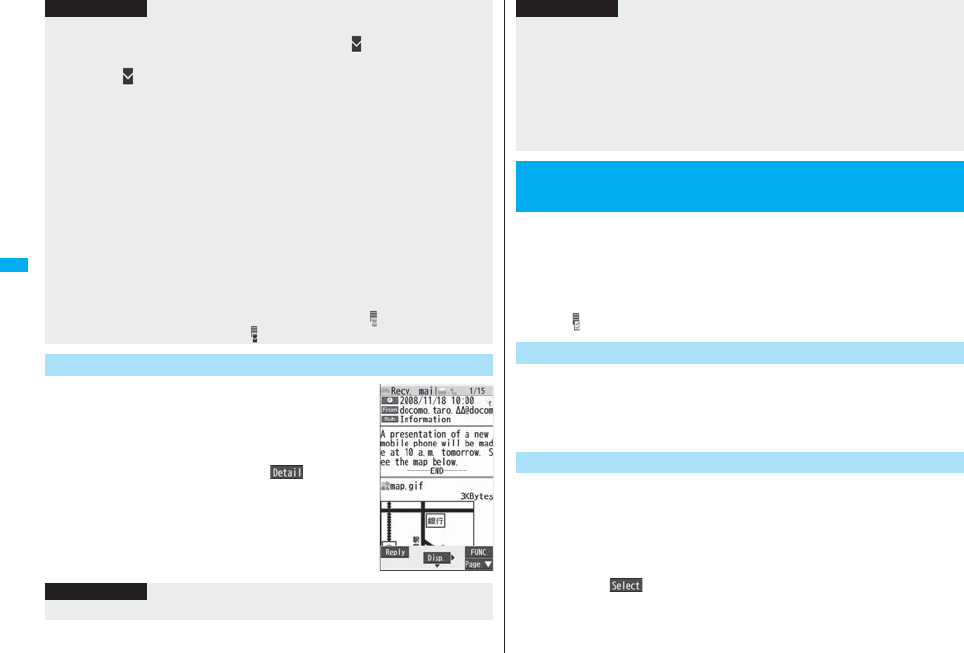
When the FOMA phone is in the service area, you can receive i-mode
mail, SMS messages and SMS reports automatically. (See page 214 for
receiving i-mode mail after selecting it.)
When a mail message comes in, “ (pink)” appears at the top of the
display.
You can save up to 2,500 received i-mode mail messages including SMS
messages.
1When i-mode mail arrives, “ (pink)”
blinks and the receiving message is
displayed.
When receiving is completed, the display shows the
number of received i-mode mail messages and
Messages R/F.
pYou can display the Inbox list by selecting “Mail”.
pTo cancel receiving midway, select “Cancel” or press and hold r for at least
one second while “Mail Receiving...” is displayed. However, the mail message
might be received depending on the timing.
pIf no keys are pressed for about 15 seconds, “ ” (see page 125) appears on
the desktop and the former display returns. (The transit time varies depending on
the setting for “Mail/Msg. ring time”.)
Press Oo, highlight “ ”, and press Oo( ) to display the Inbox list.
pSee page 32 for when the FOMA phone is closed.
<Mail Auto-receive>
Receiving i-mode Mail Automatically
Reception Result
display
Information
pYou can automatically receive up to 100 Kbytes of an i-mode mail message including
attached files. You can manually obtain the attached files in excess of 100 Kbytes
from the i-mode Center. (See page 217)
pWhen the total number or size of received messages stored in the FOMA phone has
reached the maximum, the mail messages will be overwritten in the priority order of
mail in the “Trash box” folder and older received mail. However, unread or protected
mail is not overwritten.
214
Mail
1Reception Result displayMail
Select an i-mode mail message to be
displayed.
pFor Decome-Anime, the playback display of
Decome-Anime appears. Press i( ) to display
the detailed display.
pPress and hold No for at least one second from the
detailed i-mode mail display to change the size of
characters. (See “Mail” on page 129.)
pWhen the total number of unread or protected mail messages in the Inbox has
reached the maximum, no new mail can be received and “ (dark blue)” is displayed.
To receive i-mode mail, delete received mail or read unread mail or release protection
of mail until “ (dark blue)” clears, and then perform “Check new message”.
pYou can receive i-mode mail with melodies, still images, or other files attached. You
can receive incompatible attached files but you cannot display them.
pWhen you receive mail from a device that can set To, Cc and Bcc, you can check
whether the message was sent to you as To, Cc or Bcc.
pMail Messages for you are held at the i-mode Center in the following cases:
・When the power is off ・During a videophone call
・During Self Mode ・During infrared data exchange
・During Omakase Lock ・During iC communication
・When you are out of the service area
・While connecting to the FirstPass center
・During PushTalk communication
・While copying to the microSD card
・While connecting to the Data Storage Center
・When the space of the Inbox is full with protected or unread messages
pWhen i-mode mail messages are held at the i-mode Center, “ (pink)” appears, and
when they are held to the maximum, “ (dark blue)”, appears.
Display Newly Received i-mode Mail
Information
Information
pUndisplayable characters are replaced by spaces, etc.
You can check the titles of i-mode mail messages held at the i-mode
Center and select them to receive, or delete them at the Center before
receiving.
To use this function, set “Receive option setting” to “ON” beforehand.
When “Receive option setting” is set to “ON”, you cannot receive i-mode
mail messages automatically. When a mail message comes in the i-mode
Center, “ ” is displayed.
You can set whether to select and receive necessary i-mode mail only.
1lMail settingsReceive option settingON or OFF
1lReceive optionOperate following the procedure
described in “Mobile Phone User’s Guide [i-mode]
FOMA version”.
pWhen “Receive option setting” is set to “OFF”, the display to the effect that it will
be set to “ON” appears.
Press Oo( ) to set “Receive option setting”.
pYou can bring up the Receive Option display also by iiMenu
メニュー/検索 (Menu/Search)メール選択受信 (Receive Option).
pWhen the number of characters in the text of received i-mode mail exceeds the
maximum, “/” or “//” is inserted at the end of the text and the excess part is deleted
automatically.
pThe still image automatically displayed at opening might not be correctly displayed.
When the image is larger than the screen size, it is displayed shrunk with a
proportional ratio retained.
pSome decorations inserted into the decorated mail (HTML mail) sent from a personal
computer might not be displayed correctly.
<Receive Option>
Receiving Selected i-mode Mail
Receive Option Setting
Information
Select and Receive Mail Messages
215
Mail
i-mode mail messages and Messages R/F arriving at the i-mode Center
are automatically sent to your FOMA phone. However, the messages will
be held at the i-mode Center if your FOMA phone cannot receive mail
because it is turned off or out of the service area, or when Receive Option
Setting is set to “ON”.
When “ (pink)” is displayed, receive mail by checking the i-mode Center.
See “Receive option” when “ ” is displayed.
1Press and hold l for at least one second.
“ (pink)” and “ (yellow)/ (yellow)” will blink, the message “Checking...” will be
displayed, and the i-mode mail and Messages R/F will be delivered.
On the results of checking, the numbers of the received i-mode mail and Messages
R/F are shown.
pTo cancel receiving midway, press and hold r for at least one second.
However, the mail message might be received depending on the timing.
pYou cannot receive i-mode mail message and Message R/F even when you
press and hold l for at least one second when the Stand-by display appears
on the horizontal display.
Information
pEven when Receive Option Setting is set to “ON”, you will still receive all mail
messages if you execute “Check new message”. If you do not want to receive all mail
messages, remove a check mark from “Mail”. (See page 234)
pWhen you bring up the Receive Option display, the “ ” icon goes off. Also, the “ ”
icon goes off if you turn the power off or bring up the mail display.
pYou cannot select SMS messages for receiving.
<Check New Message>
Checking whether Center Holds i-mode
Mail
Information
pWhen icons such as “ (dark blue)”, “ (dark blue)/ (dark blue)” or “ (dark blue)”
are displayed, the FOMA phone cannot receive any more i-mode mail or Messages
R/F. Delete unnecessary mail and messages, or read unread mail and messages, or
release protection. (Read and unprotected mail and messages are overwritten
automatically from the oldest one.)
You can reply to the sender. With “Rep.w/ i-mode mail”, you can
compose the normal i-mode mail message, with “Rep. w/ Deco-Anime”,
you can compose the Decome-Anime, or with “Reply with quote”, you
can quote the original text in your received i-mode mail and reply to it.
You cannot use “Reply with quote” for Decome-Anime and SMS
messages.
1Inbox list/Detailed Received Mail displayi()
Reply/forwardRep.w/ i-mode mail, Rep. w/
Deco-Anime or Reply with quote
pYou can reply for i-mode mail message also by pressing l().
pIf other recipients of the simultaneous mail are found, you can choose whether to
reply to the sender only or to all addresses.
Select “To sender” or “To all”.
pJust one quotation mark (see page 235) is added to the beginning of the text in
the i-mode mail to be replied with quote.
2Enter a subject and text, and then send.
When you have selected i-mode mail, go to step 3 on page 198.
When you have selected an SMS message, go to step 3 on page 244.
After you send mail, “ ” changes to “ ”.
pEven when i-mode mail messages are held at the i-mode Center, the “ (pink)” icon to
that effect, or the “ (dark blue)” icon telling that messages are held to the maximum
at the i-mode Center might not appear.
(This happens if mail arrives at the Center when, for instance, your FOMA phone is
off.)
pYou can select items to be checked by “Set check new message”.
pYou cannot use this function to receive SMS messages. Use “Check new SMS” to
receive them.
<Reply> <Reply with Quote>
Replying to Received i-mode Mail
Information
Information
pFor the sender’s address that cannot be replied to (such as when the mail address
exceeds 50 half-pitch characters), “ ” is displayed.
216
Mail
You can forward the i-mode mail or SMS messages to others.
1Inbox list/Detailed Received Mail displayi()
Reply/forwardForward
pYou can forward also by pressing m( ) from the Inbox list.
2Enter an address and send the mail.
When you have selected an i-mode mail message, go to step 2 on page 198.
When you have selected a Decome-Anime, go to step 2 on page 206.
When you have selected an SMS message, go to step 2 on page 244.
After you send mail, “ ” changes to “ ”.
p“Re:” is prefixed to the subject of the mail message to be replied or replied with a
quotation. When the subject exceeds 100 full-pitch characters, the excess part is
deleted. (When “Re:” has already been prefixed, it changes to “Re2:” and will be
counted up to“Re99:”.)
pEven if the i-mode mail text contains pasted data, you cannot quote it in your reply.
Also, you cannot quote it when using the DoCoMo keitai datalink or infrared data
exchange function. See page 221 for pasted data.
pIf the text of Deco-mail contains images that are prohibited from being attached to mail
or being output from the FOMA phone to other devices, such images will be deleted
when you reply to it.
pFor Decome-Anime, you cannot reply with quote.
<Forward>
Forwarding Received i-mode Mail
Information
Information
p“Fw:” is prefixed to the subject of the mail message to be forwarded. When the subject
exceeds 100 full-pitch characters, the excess part is deleted. (When “Fw:” has already
been prefixed, it changes to “Fw2:” and will be counted up to“Fw99:”.)
pWhen you forward an i-mode mail message with a file you have not obtained yet, the
file information is deleted.
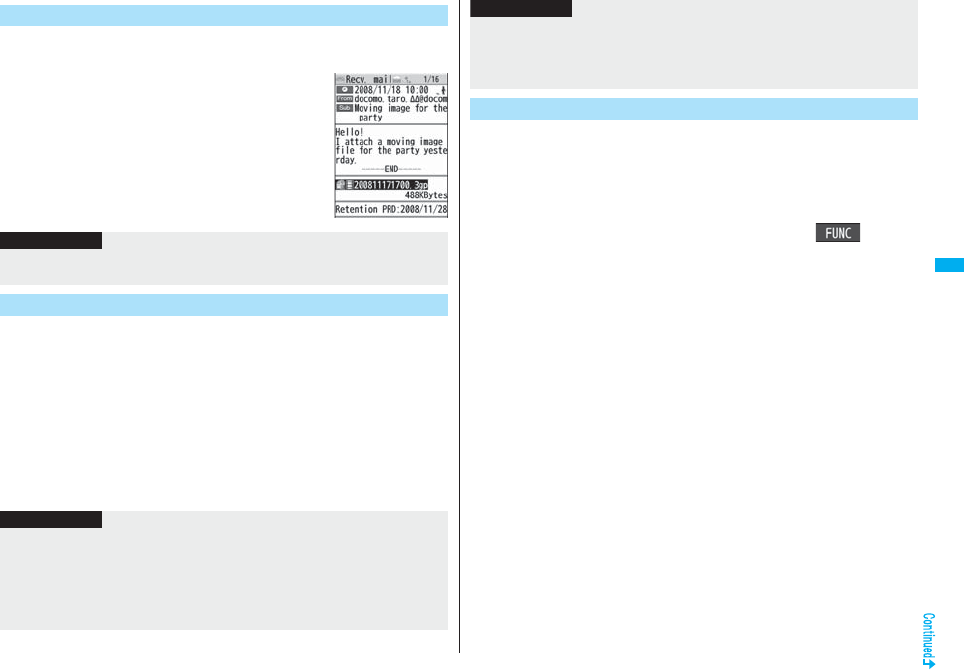
You can receive up to 2 Mbytes of the attached files on your FOMA
phone. However, you receive only the attached file information for the
files in excess of 100 Kbytes, so you need to manually obtain those
attached files from the i-mode Center.
The FOMA phone supports following files:
・Still image ・Melody ・Moving image/i-motion movie
・PC movie ・ToruCa file ・PDF file ・Phonebook entry
・Schedule event ・ToDo item ・Bookmark (i-mode, Full Browser)
・Word ・Excel ・PowerPoint
You cannot play back or display the files other than above. You can save
them to any folder in “SD other files”, or use the i-mode mail to forward
them.
You can use “Attachment preference” to select the files to be received.
pWhen multiple data items are pasted, they might not be displayed.
pEven if the i-mode mail text contains pasted data, you cannot quote it in your
forwarding mail. Also, you cannot quote it when using the DoCoMo keitai datalink or
infrared data exchange function. See page 221 for pasted data.
pWhen a mail message is forwarded and a ToruCa file (details) that contains data
whose output from the FOMA phone is prohibited is attached to the mail message, the
attached file returns to a ToruCa file before obtaining details.
pWhen a mail message on the microSD card is forwarded, the attached file is deleted.
pWhen you “Forward” a mail/SMS message received to Number B/Address B in Dual
Mode of 2in1, the sent mail message is retained in the Outbox or Draft, even if you
switch to A Mode.
When i-mode Mail with Files Attached/
Pasted is Received
Information
217
Mail
You can obtain the receive option attached files held at the i-mode
Center.
1Detailed Received Mail display
Select an attached file which has not
been obtained.
After obtaining is completed, files are played back/
displayed.
You can play back or display the attached/pasted files already obtained.
1Detailed Sent Mail display/Detailed Received Mail
displaySelect an attached file.
The file is played back or displayed.
pFor a PC movie or document file, the confirmation display appears telling that you
cannot play it back/display it. Play it back/display it after saving it to the microSD
card.
pFor the Phonebook entries, schedule events, ToDo items, bookmarks, and files
which are not supported by the FOMA phone, the confirmation display appears
asking whether to save them.
Obtain Receive Option Attached Files
Information
pYou cannot obtain the attached files when the unused memory space in the Inbox is
smaller than the files.
Play Back/Display Attached or Pasted Files
Information
pWhen the sender’s device is other than FOMA P906i, the received melodies might not
be played back correctly.
pWhen the first attached file is an obtained still image, that still image only is
automatically displayed when the mail message is opened. The size of a still image
displayed automatically is up to 5M (2592 x 1944) size.
pWhen the image size is larger than the screen, it is displayed shrunk.
You can save the attached or pasted files that you have obtained. You
can set some files for a ring tone, or an image on the Stand-by display,
Wake-up display, or other displays.
1Detailed Sent Mail display/Detailed Received Mail
display/Detailed Message R/F display
Highlight an attached file and press i()
Operate fileSave attached fileYES
pPC movies are saved to the destination folder in “microSD” folder of “PC Movie”.
pDocument files are saved to the destination folder in “Document viewer”.
pThe files not supported by the FOMA phone are saved to the destination folder in
“SD other files”.
pEven if the files are supported by the FOMA phone, some of them cannot be
saved to the FOMA phone depending on the file such as an invalid data file or
whose size is too large. In that case, the confirmation display appears asking
whether to save it to the microSD card. When you save it, it is saved to a
destination folder in “SD other files”.
pThe confirmation display might appear telling that a part of the file cannot be
saved depending on the attached file.
pYou cannot play back a melody in excess of 100 Kbytes.
pYou cannot play back a Flash movie in excess of 100 Kbytes.
pYou cannot display a ToruCa file in excess of 1 Kbyte and ToruCa file (details) in
excess of 100 Kbytes.
Save Attached or Pasted Files
Information
218
Mail
2Select a destination or folder to save to.
For melodies, go to step 2 on page 183.
For still images, go to step 3 on page 182.
For i-motion movies, go to step 2 on page 194.
pBookmarks are saved according to each information of i-mode or Full Browser.
pIf the maximum number of files has already been saved to the microSD card or
there is no usable memory space when you save SD other files, PC movies, or
document files, the confirmation display appears asking whether to delete
unnecessary files and to save new files. Select “YES” to list the files in Data Box,
then select unnecessary files and delete them. See page 186 for when files other
than SD other files, PC movies, or document files are stored to the maximum.
You can save up to 2,500 received i-mode mail messages including SMS
messages. You can save up to 30 Area Mail messages separately from
i-mode mail messages and SMS messages.
You can check the received i-mode mail messages, SMS messages, and
Area Mail messages.
pThe mail message “未定” has been saved by default.
1lInboxSelect a folder.
pSee page 236 for displaying Messages R/F.
Information
pYou cannot save a melody in excess of 100 Kbytes to the FOMA phone.
pYou cannot save a Flash movie in excess of 100 Kbytes to the FOMA phone.
pYou cannot save a ToruCa file in excess of 1 Kbyte and ToruCa file (details) in excess
of 100 Kbytes to the FOMA phone.
<Inbox> <Outbox> <Draft>
Displaying Mail from Inbox/Outbox/Draft
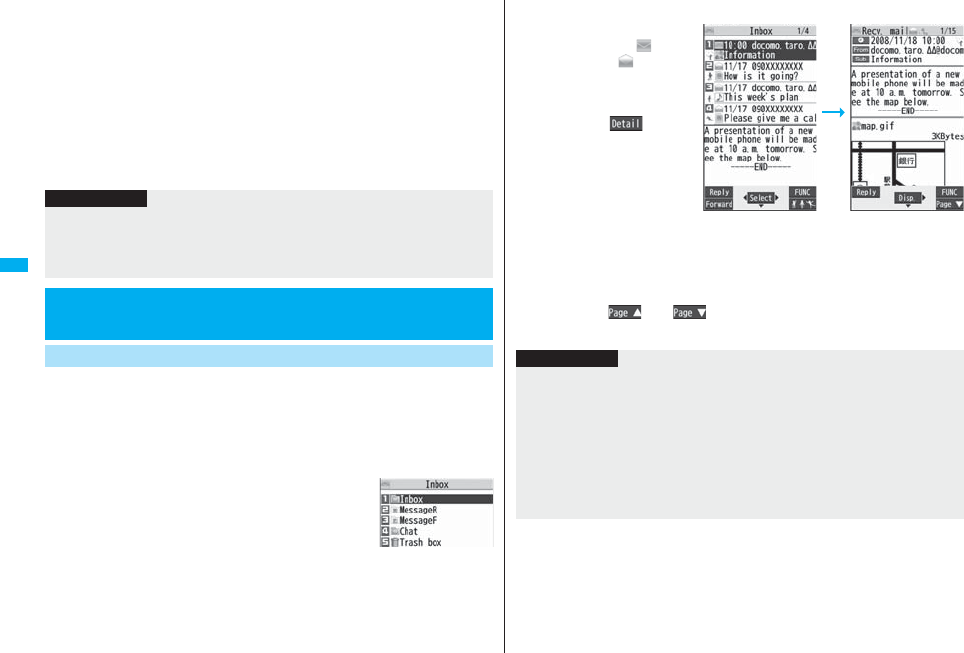
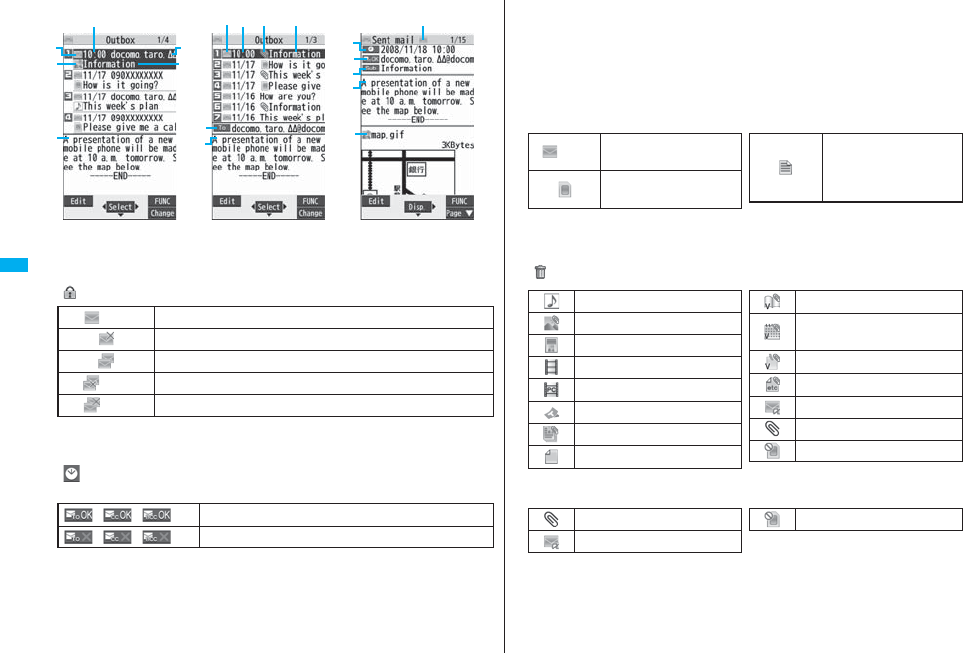
Display Mail from Inbox
Inbox Folder list
2Select a mail message.
pWhen you select an unread
mail message, “(pink)”
changes to “”.
pFor Decome-Anime, the
playback display of
Decome-Anime appears.
Press i() to
display the detailed
Received Mail display. See
page 209 for how the
playback display of
Decome-Anime works.
pUse No to check other
mail messages. When you
press No to show the
Decome-Anime message from the detailed Received Mail display, the
Decome-Anime playback display does not appear.
pWhen the mail text is long, use Bo to scroll the display to check it. Also, you can
press m()/c() or >/< to scroll page by page. You cannot
scroll for Decome-Anime.
Inbox list Detailed Received
Mail display
Information
pThe mail message “未定” is not charged a communication fee.
pYou cannot reply to the mail message “未定”.
pThe effect tone sounds according to the setting of “Auto melody play” when a melody
file is attached, when a Flash movie with effect tone is inserted in mail text, or when
the Decome-Anime text has the effect tone. However, when a melody file is attached
to a mail message and a Flash movie with effect tone is inserted in the mail text or the
Decome-Anime text has the effect tone, the melody is preferentially played back. The
effect tone for the Flash movie or Decome-Anime does not sound.
pThe melody and effect tone do not sound during Play Background.
219
Mail
You can save up to 1,000 sent i-mode mail messages including SMS
messages.
You can check the sent i-mode mail messages and SMS messages.
1lOutboxSelect a folder.
2Select a mail message.
pFor Decome-Anime, the
playback display of
Decome-Anime appears.
Press i( ) to
display the detailed Sent
Mail display. See page 209
for how the playback
display of Decome-Anime
works.
pUse No to check other
mail messages. When you
press No to show the
Decome-Anime message
from the detailed Sent
Mail display, the
Decome-Anime playback display does not appear.
pWhen the mail text is long, use Bo to scroll the display to check it. Also, you can
press m()/c() or >/< to scroll page by page. You cannot
scroll for Decome-Anime.
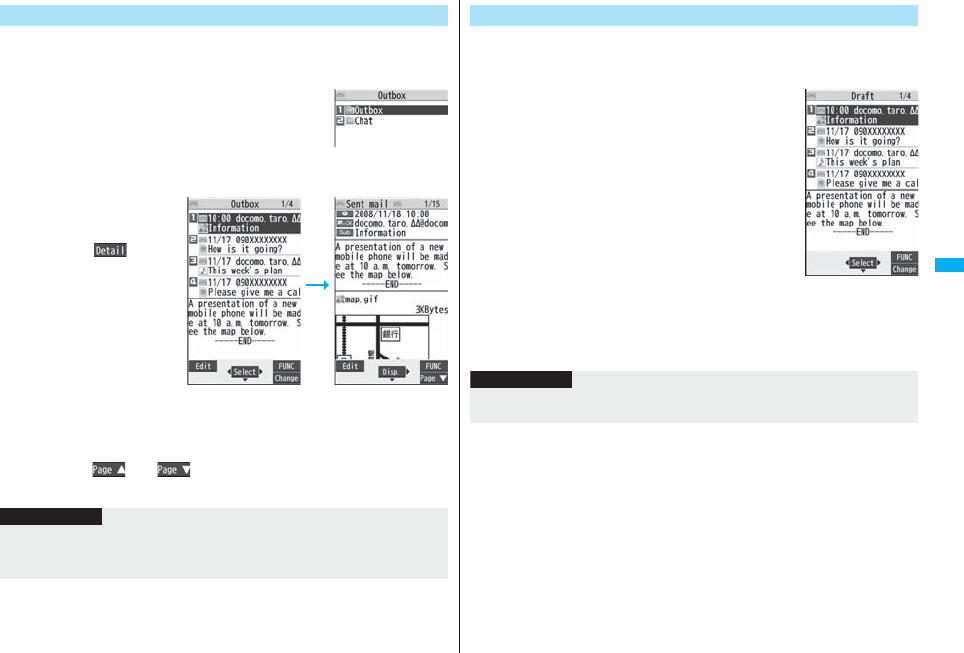
Display Mail from Outbox
Outbox Folder list
Outbox list Detailed Sent Mail
display
Information
pWhen the Decome-Anime text has the effect tone, it sounds according to the setting of
“Auto melody play”.
pThe effect tone does not sound during Play Background.
You can edit and send i-mode mail messages and SMS messages in the
Draft. You can save up to 20 i-mode mail messages including SMS
messages.
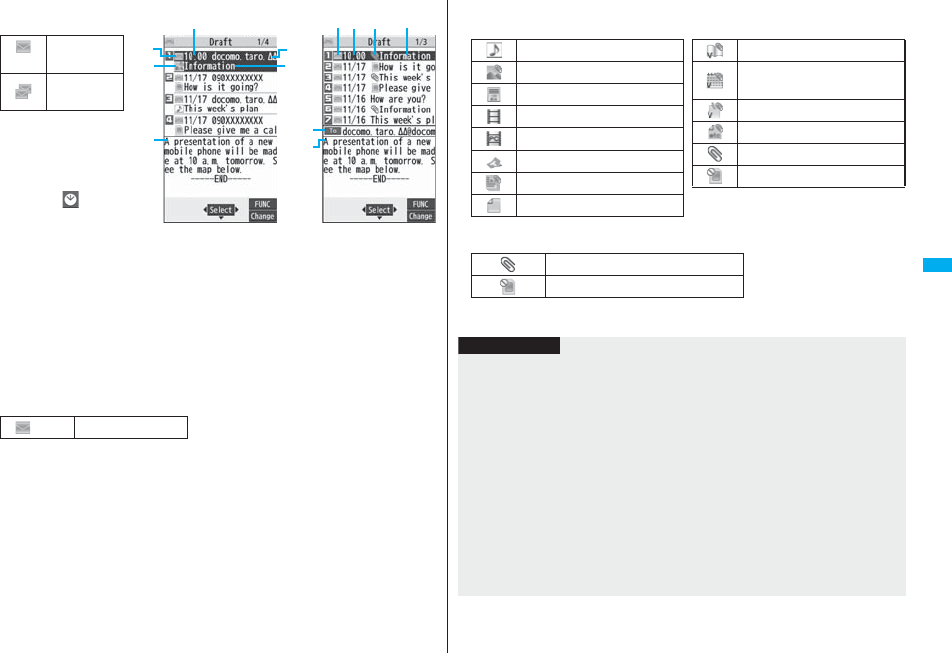
1lDraft
2Select a mail message.
When you have selected i-mode mail, go to step 2 on page 198. When you have
selected an SMS message, go to step 2 on page 244.
Display Mail from Draft
Draft list
Information
pWhen you select the i-αppli mail folder, the mail-linked i-αppli that supports the folder
starts.
220
Mail
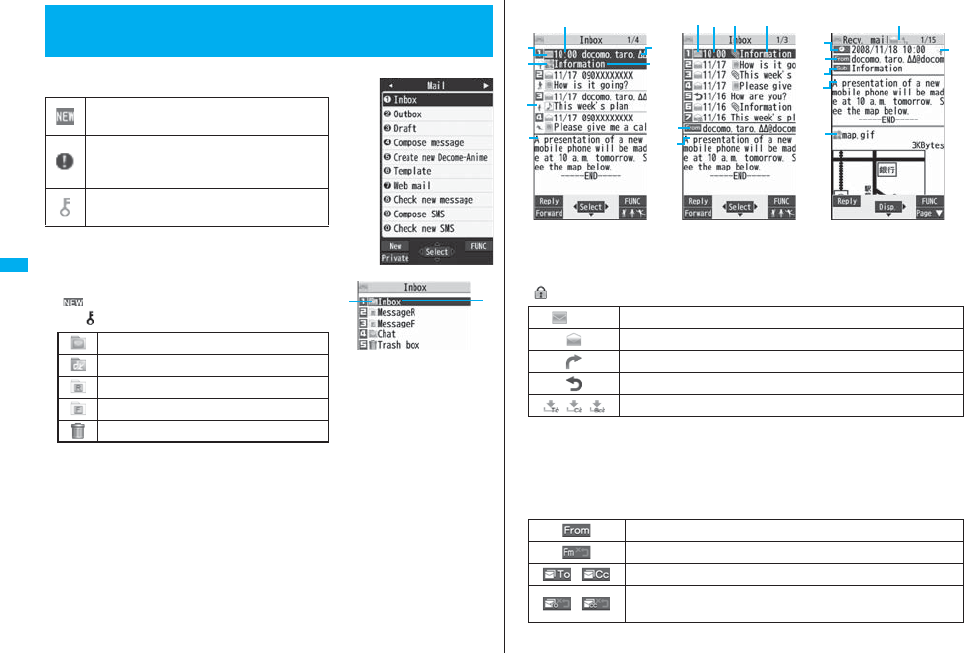
■Mail menu
Icons might have the following marks:
■Inbox Folder list
Folder status
“ ” appears when unread messages are found,
and “ ” appears when Mail Security is activated.
Folder name
How to See Inbox/Outbox/Draft List and
Detailed Display
Unread mail messages or messages are
saved in the Inbox.
Failed-to-send mail messages are saved in the
Outbox.
Draft mail messages are saved in the Draft.
“Mail security” is activated. (displayed also for
chat mail)
Ordinary folder
i-αppli mail folder
Message R folder
Message F folder
Trash box folder
■Inbox list and detailed Received Mail display
Mail status and type
“ ” appears when protection is set.
Received date and time
The Inbox list shows the time for the mail received today, and shows the date for the
mail received until yesterday.
The detailed display shows the date and time the mail was received. The Japanese
date and time the mail was received from the Center is displayed.
Phone number or mail address of the sender or of another recipient of simultaneous mail
(pink) Unread mail
Read mail
Forwarded mail
Replied mail
Type of the received mail (Detailed display only)
Sender’s mail address (Detailed display only)
Sender’s mail address that cannot be replied to (Detailed display only)
Recipient’s mail addresses of simultaneous mail (Detailed display only)
Recipient’s mail addresses of simultaneous mail that cannot be
replied to (Detailed display only)
Inbox list
For “Date+sender/
receiver subject”
Inbox list
For “Date+subject”
Detailed Received
Mail display
221
Mail
Subject
When “Mail list display” is set to “Date+sender/receiver subject”, the subject is
displayed up to 11 full-pitch/22 half-pitch characters. When set to “Date+subject”, it is
displayed up to 7 full-pitch/14 half-pitch characters, however, for a mail message with
files attached, it is decreased by 1 full-pitch/2 half-pitch character/s as the icon is
added at the top.
For SMS messages or Area Mail messages, the beginning of the text is displayed.
(“SMS” or “Area Mail” is displayed on the detailed display.)
In Dual Mode of 2in1, “ ” is displayed at the end of the subject or sender’s address
of SMS/i-mode mail messages received to Number B/Address B.
Attached or pasted data
The detailed display shows the data volume as well.
<For Inbox list (Date+sender/receiver subject) and detailed Received Mail display>
“ ” is added to each icon when you execute “Delete att. file” (Detailed display only).
(blue) SMS messages in the
FOMA phone
SMS messages on the UIM
Area Mail
Melody file
Image file
Inserted image file (List only)
i-motion movie file
PC movie file
ToruCa file
PDF file
Document file
Phonebook entry file
Schedule event or ToDo item
file
Bookmark file
Other files
Attached file before obtaining
(Detailed display only)
Attached file suspended to be
obtained (Detailed display only)
Attached file failed to be
obtained (Detailed display only)
i-αppli start information
(List only)
i-αppli mail (List only)
Multiple files (List only)
Multiple pasted files
File set with the UIM restrictions
<For Inbox list (Date+subject) (Date+sender/receiver)>
Feel*Mail icon
When you press c( ) from Inbox list, the Feel*Mail image is played back.
See page 122 for Feel*Mail.
Text of mail
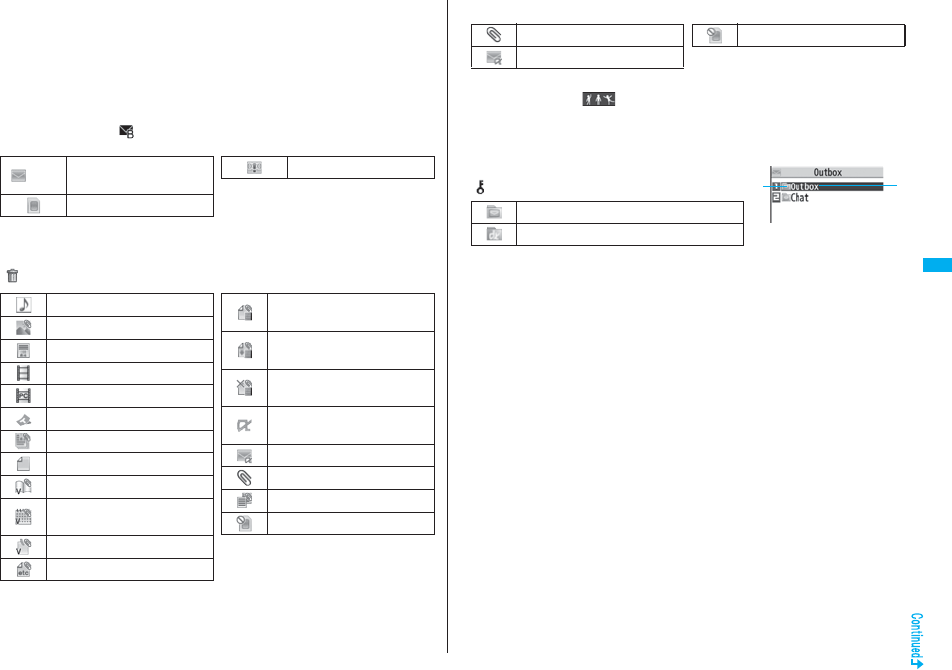
■Outbox Folder list
Folder status
“ ” appears when Mail Security is activated.
Folder name
Ordinary folder
i-αppli mail folder
Attached file
i-αppli mail
File set with the UIM restrictions
222
Mail
■Outbox list and detailed Sent Mail display
Mail status
“ ” appears when protection is set.
Sent date and time
The Outbox list shows the time for the mail sent today, and shows the date for the mail
sent until yesterday. The detailed display shows the date and time the mail was sent.
“ ” appears when the date/time is corrected.
Recipient’s phone number or mail address
(pink) Mail successfully sent
Mail failed to be sent
Simultaneous mail successfully sent to all addresses
(gray) Simultaneous mail sent to some addresses
(pink) Simultaneous mail failed to be sent to all addresses
Mail address successfully sent (Detailed display only)
Mail address failed to be sent (Detailed display only)
Outbox list
For “Date+sender/
receiver subject”
Outbox list
For “Date+subject”
Detailed Sent Mail
display
Subject
When “Mail list display” is set to “Date+sender/receiver subject”, the subject is
displayed up to 11 full-pitch/22 half-pitch characters. When set to “Date+subject”, it is
displayed up to 7 full-pitch/14 half-pitch characters, however, for a mail message with
files attached, it is decreased by 1 full-pitch/2 half-pitch character/s as the icon is
added at the top.
For SMS messages, the beginning of the text is displayed. (“SMS” is displayed on the
detailed display.)
Attached data
The detailed display shows the data volume as well.
<For Outbox list (Date+sender/receiver subject) and detailed Sent Mail display>
“ ” is added to each icon when you execute “Delete att. file” (Detailed display only).
<For Outbox list (Date+subject) (Date+sender/receiver)>
Text of mail
(blue) SMS messages in the
FOMA phone
SMS messages on the
UIM
SMS report received [List
(Date+sender/receiver
subject) and detailed
display only]
Melody file
Image file
Inserted image file (List only)
i-motion movie file
PC movie file
ToruCa file
PDF file
Document file
Phonebook entry file
Schedule event or ToDo item
file
Bookmark file
Other files
i-αppli mail (List only)
Multiple files (List only)
File set with the UIM restrictions
Attached file
i-αppli mail
File set with the UIM restrictions
223
Mail
■Draft list
Mail status
Saved date and time
The Draft list shows the
time for the mail saved
today, and shows the date
for the mail saved until
yesterday. “ ” appears
when the date/time is
corrected.
Recipient’s phone
number or mail address
When the phone number or mail address is stored in the Phonebook, the name stored
in the Phonebook is displayed.
Subject
When “Mail list display” is set to “Date+sender/receiver subject”, the subject is
displayed up to 11 full-pitch/22 half-pitch characters. When set to “Date+subject”, it is
displayed up to 7 full-pitch/14 half-pitch characters, however, for a mail message with
files attached, it is decreased by 1 full-pitch/2 half-pitch character/s as the icon is
added at the top.
For SMS messages, the beginning of the text is displayed.
(pink)
Ordinary mail
Simultaneous
mail
(blue) SMS messages
For “Date+sender/
receiver subject”
For “Date+subject”
Attached data
<For Date+sender/receiver subject>
<For (Date+subject) (Date+sender/receiver)>
Text of mail
Attached file
File set with the UIM restrictions
Melody file
Image file
Inserted image file
i-motion movie file
PC movie file
ToruCa file
PDF file
Document file
Phonebook entry file
Schedule event or ToDo item
file
Bookmark file
Other files
Multiple files (List only)
File set with the UIM restrictions
Information
pSee “Mail list display” on page 233 to change a method to display the Inbox/Outbox/
Draft list.
pWhen “Name in phonebook” of “Mail list display” is checked, the name stored in the
Phonebook is displayed as sender or recipient. However, when the sender’s mail
address is “phone number@docomo.ne.jp”, the name is not displayed even when
“phone number@docomo.ne.jp” is stored in the mail address field in a Phonebook
entry. Store the phone number part only to display the name. When a sender’s/
recipient’s phone number or mail address matches a Phonebook entry stored as
secret data, the name is not displayed. It is displayed in Secret Mode or Secret Data
Only.
Even when a sender’s/recipient’s phone number or mail address matches a
Phonebook entry not stored as secret data, the name is not displayed in Secret Data
Only. Switch to Secret Mode or release Secret Data Only to display the name.
pWhen “Message” of “Mail list display” is not checked, the text does not appear on the
Inbox/Outbox/Draft list.
224
Mail
Managing Mail Messages
Function Menu of the Inbox Folder List/Outbox Folder List
Function menu Operation/Explanation
Operate folder
(Add folder)
You can add a new folder. You can add up to 22 folders to each
of “Inbox” and “Outbox”.
Add folderEnter a folder name.
pYou can enter up to 10 full-pitch/20 half-pitch characters.
Operate folder
(Edit folder name)
You can edit the names of the added folders only.
Edit folder nameEdit the folder name.
pYou can enter up to 10 full-pitch/20 half-pitch characters.
Operate folder
(Sort folder)
You can sort folders. You can sort the added folders, Message R/
F folder, and the i-αppli mail folders.
Sort folderUse Bo to sort the orderOo()
Operate folder
(Delete folder)
All the mail messages including secret mail in the folder will be
deleted as well.
Delete folderEnter your Terminal Security CodeYES
Open folder You can display the mail messages in the i-αppli mail folder
without running mail-linked i-αppli.
Read all
[Inbox Folder only]
You can change unread mail in the folder to read mail.
YES
Sort
(Auto-sort)
See page 231.
Sort
(Re-sort)
You can resort mail messages following the sorting conditions
specified by “Auto-sort”.
Re-sortYES
pWhen the folder applied with Mail security (see page 224) is
found, you need to enter your Terminal Security Code.
Mail security You can set the folder to open only when you enter your Terminal
Security Code.
Enter your Terminal Security CodeYES
pTo release it, perform the same operation.
Ir/ transmission
(Send all Ir data)
See page 371.
Ir/ transmission
(All
transmission)
See page 372.
No. of messages You can display the number of stored received mail messages,
Messages R/F, and sent mail messages.
Delete
(DEL all read mails)
[Inbox Folder only]
You can delete all the read mail messages including secret mail
in all Inbox folders. All the read SMS messages on the UIM are
deleted as well.
DEL all read mailsYES
Delete
(DEL all recv. mails)
[Inbox Folder only]
You can delete all the mail messages including secret mail in all
Inbox folders. All the received SMS messages on the UIM are
deleted as well.
DEL all recv. mailsEnter your Terminal Security Code
YES
DEL all sent mails
[Outbox Folder only]
You can delete all the mail messages including secret mail in all
Outbox folders. All sent SMS messages on the UIM are deleted
as well.
Enter your Terminal Security CodeYES
Function menu Operation/Explanation
Information
<Operate folder (Delete folder)>
pYou cannot delete an i-αppli mail folder if corresponding mail-linked i-αppli exists.
If the software program does not exist, you can delete the i-αppli mail folder, but this
will delete both folders created in the Outbox Folder list and Inbox Folder list.
<Sort (Re-sort)>
pYou cannot re-sort the mail messages in the “Chat” folder and “Trash box” folder.
pMail messages which are not applied with “Auto-sort” are sorted into the “Inbox”
folder.
225
Mail
<Mail security>
pYou can neither delete the Mail-Security-activated folder nor edit its name.
Function Menu of the Inbox List/Outbox List/Draft List
Information
Function menu Operation/Explanation
Reply/forward
(Reply)
[Inbox only]
See page 215.
Reply/forward
(Reply with quote)
[Inbox only]
See page 215.
Reply/forward
(Forward)
[Inbox only]
See page 216.
Edit
[Outbox only]
You can re-edit the sent mail message and send it again.
When you have selected an i-mode mail message, go to step 2
on page 198.
When you have selected a Decome-Anime, go to step 2 on
page 206.
When you have selected an SMS message, go to step 2 on
page 244.
Protect
(Protect ON/OFF)
[Inbox/Outbox]
You can protect the mail message so that it is not overwritten and
deleted. You can protect all the received and sent messages.
(2,500 received messages, 1,000 sent messages)
The protected one is indicated by “ ”.
Protect ON/OFF
pTo release protection, perform the same operation.
pYou can switch between protected and unprotected also by
pressing 1 from the detailed Received Mail display or
detailed Sent Mail display.
Protect
(ProtectSLCT. ON/
OFF)
[Inbox/Outbox]
ProtectSLCT. ON/OFFPut/Remove a check mark for mail
messages to be protected/unprotectedl()
pA check mark is placed to the mail already protected.
Move/copy
(Move)
[Inbox/Outbox]
MoveSelect a destination folder
Put a check mark for mail messages to be moved
l()YES
Move/copy
(Move to trash)
[Inbox only]
You can move mail messages to the “Trash box” folder. The mail
messages moved to the “Trash box” folder are preferentially
overwritten (deleted).
Move to trashPut a check mark for mail messages to be
moved to the trash boxl()YES
Move/copy
(UIM operation)
[Inbox/Outbox]
You can copy or move the mail message to the UIM or FOMA
phone. (See page 422)
Move/copy
(Copy to microSD)
See page 357.
Move/copy
(Store in Center)
You can save mail messages stored in FOMA phone to the Data
Storage Center. Data Security Service is a pay service that is
available on a subscription basis.
Store in CenterEnter your Terminal Security Code
Put a check mark for mail messages to be saved
l()YES
pYou can select up to 10 mail messages.
pYou do not need to put a check mark for the mail messages on
the detailed Received Mail display and detailed Sent Mail
display.
Function menu Operation/Explanation
226
Mail
Search/sort
(Search sender/
Search receiver)
[Inbox/Outbox]
You can retrieve mail messages with a mail address or phone
number of a sender or recipient.
“Search sender” for received mail and “Search receiver” for sent
mail are displayed respectively.
Search mailSearch sender or Search receiver
Select an item.
Phonebook . . . . . . . . Call up a Phonebook entry and select a
phone number or mail address.
Received address. . . Select a phone number or mail address
and press Oo().
Sent address . . . . . . . Select a phone number or mail address
and press Oo().
Enter address . . . . . . Enter the mail address or phone number.
pYou can enter up to 50 half-pitch characters.
Search/sort
(Search subject)
[Inbox/Outbox]
You can retrieve mail messages with a subject.
Search mailSearch subjectEnter a subject.
pYou can enter up to 100 full-pitch/200 half-pitch characters.
Search/sort
(Search
subject+msg)
[Inbox/Outbox]
You can retrieve mail messages with a subject or text.
Search mailSearch subject+msg
Enter a part of a subject or text.
pYou can enter up to 100 full-pitch/200 half-pitch characters.
Search/sort
(Sort)
[Inbox/Outbox]
You can change the order of displayed mail messages.
SortSelect an order.
Search/sort
(Filter)
[Inbox/Outbox]
You can display the mail messages only that satisfy the condition.
FilterSelect a type.
Search/sort
(Display all)
[Inbox/Outbox]
You can re-display all mail messages in “By date↑” order after
using Search Mail, or the Sort or Filter function.
Display all
Function menu Operation/Explanation
Mail history
[Inbox/Outbox]
You can display the history of sent/received mail from the sender
or to the recipient being selected or displayed. Up to 1,000
histories are displayed in the chronological order from the most
recent one.
Select a sender’s or destination address.
The target sent/received mail histories are displayed.
. . . . Sent mail
. . . . Received mail
pSelect a history; then you can bring up the detailed Received
Mail display or detailed Sent Mail display. Press r to return
to the former display.
pYou can display also by pressing 7 on the detailed
Received Mail display or detailed Sent Mail display.
Color label
[Inbox/Outbox]
You can color the characters on the Inbox list and Outbox list for
classifying mail. Select “Default” to set ordinary character color.
Select a color.
List setting You can select the item to be displayed on the list. You can also
switch between the name stored in the Phonebook and the mail
address/phone number for the display in the sender’s/destination
address field.
You can set to list the mail messages by subject depending on
the setting of “Mail list display”.
Select an item to be displayed.
pYou can switch each time you press c( ) from the
Outbox list and Draft list.
Ir/ transmission
(Send Ir data)
See page 370.
Ir/ transmission
(Send all Ir data)
[Draft only]
See page 371.
Ir/ transmission
( transmission)
See page 372.
Ir/ transmission
(All
transmission)
[Draft only]
See page 372.
Function menu Operation/Explanation
227
Mail
No. of messages You can display the number of stored received mail messages,
sent mail messages and draft mail messages.
Delete
(Delete this)
Delete thisYES
Delete
(Delete selected)
Delete selectedPut a check mark for mail messages to
be deletedl()YES
Delete
(Delete read mails)
[Inbox only]
You can delete all the read mail messages in the folder.
Delete read mailsYES
Delete
(Delete all SMS-R)
[Inbox only]
You can delete all the SMS reports. While displaying SMS reports
using the Search Mail function or Filter function, only the
displayed SMS reports are deleted.
Delete all SMS-REnter your Terminal Security Code
YES
Delete
(DEL all frm folder)
[Inbox/Outbox]
You can delete all mail messages in the folder.
DEL all frm folderEnter your Terminal Security Code
YES
Delete
(Delete all)
[Draft only]
You can delete all the mail messages in Draft.
Delete allEnter your Terminal Security CodeYES
Function menu Operation/Explanation
Information
<Edit>
pTo use “Mail group” for destination addresses, delete all the entered addresses, press
+l( ) to complete the deletion, and then re-select the address field.
<Protect>
pYou cannot protect mail messages in the “Trash box” folder.
pIf you protect all the sent messages which are stored to the maximum, you can no
longer compose i-mode mail messages.
<Move/copy (Move to trash)>
pIf you move unread mail to the Trash box, it changes to read mail.
<Move/copy (Store in Center)>
pYou cannot save the SMS messages stored on the UIM.
pYou cannot save the files attached to mail.
pYou cannot use Data Security Service when you are out of the service area.
pWhen you have not signed up for Data Security Service, the message to that effect
appears.
pYou can download the mail messages saved to the Data Security Center from its site
to your FOMA phone. For details, refer to “Mobile Phone User’s Guide [i-mode]
FOMA version”.
<Search/sort>
pEven if you set “No title” for “Search subject” of “Search mail”, you cannot search for
the i-mode mail whose subject is not entered and displayed as “No title”.
<Color label>
pColor Label applied to the mail messages is released when they are copied to the
microSD card, copied/moved to the UIM, copied/moved from the UIM or sent via
infrared rays or iC transmission.
pColor Label applied to the SMS messages on the UIM is released when the UIM is
dismounted and then mounted.
Function Menu of the Detailed Received Mail Display/
Detailed Sent Mail Display
Information
Function menu Operation/Explanation
Reply/forward
(Reply)
[Received Mail only]
See page 215.
Reply/forward
(Reply with quote)
[Received Mail only]
See page 215.
Reply/forward
(Forward)
[Received Mail only]
See page 216.
Edit
[Sent Mail only]
See page 225.
228
Mail
Resend
[Sent Mail only]
You can re-send the sent mail message.
YES
Protect ON/OFF See page 225.
Move/copy
(Copy)
CopySelect an item to be copied.
pSee page 442 for how to copy.
pWhen the addresses of the sender and another recipient of
simultaneous mail are found or the multiple destination
addresses are found, select a mail address or phone number to
be copied.
Move/copy
(Move)
MoveSelect a destination folder.
Move/copy
(Move to trash)
[Received Mail only]
You can move the mail to the “Trash box” folder. The mail
messages moved to the “Trash box” folder are preferentially
overwritten (deleted).
Move to trashYES
Move/copy
(UIM operation)
You can copy or move the mail to the UIM or FOMA phone. (See
page 422)
Move/copy
(Copy to microSD)
See page 357.
Move/copy
(Store in Center)
See page 225.
Operate file
(Save attached file)
See page 217.
Operate file
(Save insert image)
See page 209.
Operate file
(Save D-pictograph)
[Received Mail only]
You can save Deco-mail pictograms in the mail text at once. You
can save up to 20 of them.
Save D-pictographYES
pSee page 186 for when the Deco-mail pictograms are stored to
the maximum.
pSee page 330 for how to check the stored Deco-mail
pictograms.
Function menu Operation/Explanation
Operate file
(Save as template)
You can save the sent/received Deco-mail as a template.
Save as templateYES
pSee page 186 for when the templates are stored to the
maximum.
pSee page 208 for how to check the stored template.
Operate file
(Property)
You can display the file name and file size of the image inserted
into the text.
PropertySelect an image.
Operate file
(Delete att. file)
Delete att. fileYES
Store
(Store address)
See page 96.
Store
(Add to phonebook)
See page 96.
Store
(Auto-sort)
You can store a sender or subject as a sort condition. (See
page 231)
Store
(Add desktop icon)
See page 127.
Mail history See page 226.
Color label See page 226.
Display
(Name/address)
You can display the sender’s/destination address by the name
stored in the Phonebook or by the mail address/phone number.
Name/address
pYou can switch also by pressing 5.
Display
(Scroll)
See page 233.
Display
(Character size)
See “Mail” on page 129.
Display SMS report
[Sent Mail only]
You can check the result of the SMS message you sent, or the
date and time it arrived at the destination. To receive the SMS
report, set “SMS report request” to “ON”.
Function menu Operation/Explanation
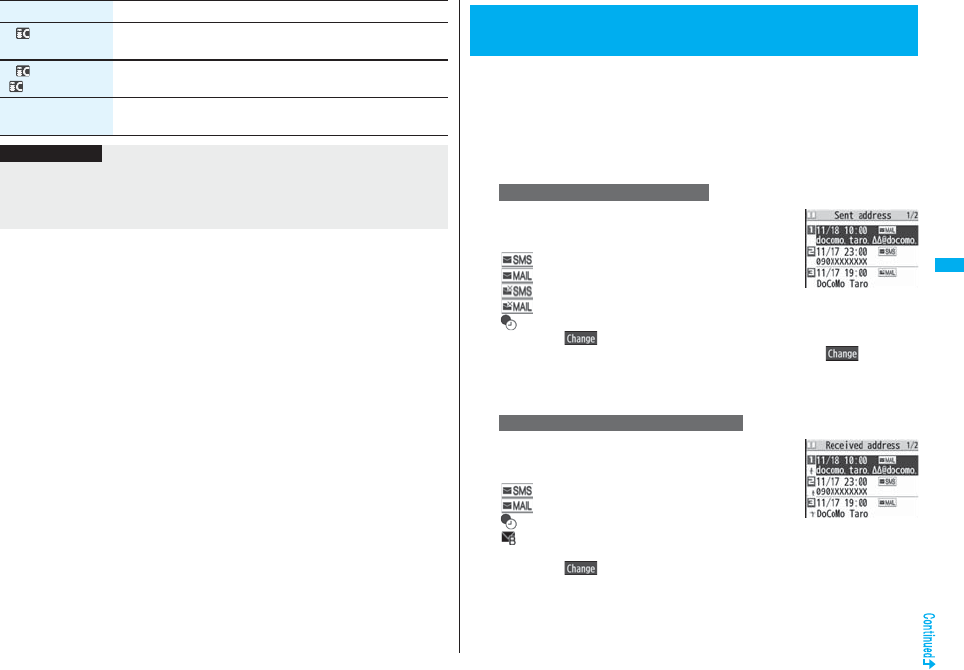
229
Mail
Ir/ transmission
(Send Ir data)
See page 370.
Ir/ transmission
( transmission)
See page 372.
Delete YES
pYou can delete the mail message also by pressing 0.
Function menu Operation/Explanation
Information
<Resend>
pIf you re-send a failed-to-send mail message, it is saved as the sent mail message. If
you re-send the failed-to-send simultaneous message to all addresses, it is saved as
the sent mail message.
Sent and received i-mode mail messages and SMS messages are stored
in Sent Address and Received Address, up to 30 messages each. You
can check the list for the mail addresses and phone numbers. When you
exchange mail messages with the same mail address or phone number,
the older one is deleted.
pIn Dual Mode of 2in1, up to 60 records for Number A/Address A and Number B/
Address B are stored in Received Address in total.
1Press and hold Vo for at least one
second.
: SMS message successfully sent
: i-mode mail successfully sent
: SMS message failed to be sent
: i-mode mail failed to be sent
: Time-difference corrected time
pPress m( ) from the Sent Address list to display Redial. When the Sent
Address list is displayed from Dialed Calls, you can press m( ) to display
Dialed Calls.
pYou cannot display the Sent Address list even when you press and hold Vo for
at least one second when the Stand-by display appears on the horizontal diplay.
Press and hold Co for at least one
second.
: SMS message
: i-mode mail
: Time-difference corrected time
: SMS/i-mode mail message received to Number B/
Address B (only in Dual Mode of 2in1)
pPress m( ) from the Received Address list to display Received Calls.
pYou cannot display the Received Address list even when you press and hold Co
for at least one second when the Stand-by display appears on the horizontal
diplay.
<Sent Address> <Received Address>
Displaying Sent/Received Mail Record
When Using Sent Address
When Using Received Address
Sent Address list
Received Address
list

230
Mail
2Select a record to be displayed.
The detailed display of the Address list is displayed.
pWith an SMS message for which the other party’s phone number is not notified,
the reason for no caller ID is displayed.
pTo send i-mode mail to the displayed address, press Oo( ) and go to
step 3 on page 198. To send an SMS message to the displayed phone number,
press Oo( ) and go to step 3 on page 244.
pTo store in the Phonebook, press m( ). Go to step 2 of “Storing Displayed
Phone Number/Mail Address in Phonebook” on page 96.
Function Menu while Sent/Received Address is Displayed
Function menu Operation/Explanation
Character size You can switch the character size for the list. (See “Dialed/recv.
calls” on page 129)
Feel*Mail
[Received Address
only]
The Feel*Mail image is played back. See page 122 for Feel*
Mail.
pYou can play back the Feel*mail image also by pressing
c().
Add to phonebook See page 96.
Add desktop icon See page 127.
Compose message You can compose an i-mode mail message. The mail address is
entered in the address field.
Go to step 3 on page 198.
Compose SMS You can compose an SMS message. The phone number is
entered into the address field.
Go to step 3 on page 244.
Dialing If the mail address has been stored in a Phonebook entry, you
can make a voice call, videophone call or PushTalk call to the
phone number stored in the Phonebook.
Select a dialing type.
pWhen you select “Select image”, select an image to be sent to
the other party during a videophone call. To cancel the setting,
select “Release”.
pWhen multiple phone numbers are stored in a Phonebook
entry, you can dial the first phone number.
Dial
pTo make an international call, select “Int’l dial assist”, select an
international call access code, and follow the procedure above
after selecting “Dialing” from the Function menu. (See page 61)
pTo set Caller ID Notification, select “Notify caller ID”. (See step 2
on page 48)
Redial/Dialed calls
[Sent Address only]
You can display the Redial list or the Dialed Call list.
Received calls
[Received Address
only]
You can display the Received Call list. All received calls (all calls)
are displayed.
Delete this YES
Delete selected Put a check mark for records to be deletedl()
YES
Delete all Enter your Terminal Security CodeYES
Function menu Operation/Explanation
231
Mail
You can automatically save the mail messages that satisfy the set
conditions to the specified folder. This function applies to only the added
folders and i-αppli mail folders.
1Inbox Folder list/Outbox Folder listi()Sort
Auto-sort
Follow the operation of the Function menu list on page 231 to set “Auto-sort”.
If you select a folder for which Auto-sort conditions have been set, the Auto-sort
Setting display appears.
You can specify a sort condition and folder from the detailed Sent/
Received Mail display.
1Detailed Sent Mail display/Detailed Received Mail
displayi()StoreAuto-sort
Do the following operations.
The confirmation display appears asking whether to change the condition or to overwrite
it. Select “YES” to release the set condition and set the new one.
<Auto-sort>
Sorting Mail Automatically to Each Folder
Auto-sort Storing
Item Operation/Explanation
Address sort You can set the displayed sender’s/recipient’s address for a
sorting condition.
Select a folder.
pWhen multiple addresses are found, select an address.
Subject sort You can edit the displayed subject and set it for a sorting
condition.
Edit the subjectSelect a folder.
To change the condition
The confirmation display appears asking whether to change the condition.
Select “YES” to release the condition set for another folder and to set it for the selected
folder.
pYou cannot change the setting for a Mail-Security-activated folder.
The confirmation display appears asking whether to add the address.
When the same condition is set for another folder
When storing another address for the folder set for “Address
sort”
Information
pYou can store a total of 700 addresses in all folders.
pWhen multiple conditions match, sorting is done in the priority below.
Sort all
Subject sort
Reply impossible/Send impossible
Address sort (Look-up address/Enter address)
Address sort (Look-up mail group)
Address sort (Look-up group)
pMail messages sent simultaneously to multiple members cannot be sorted by
“Address sort” or “Send impossible”.
pArea Mail messages are not sorted by “Address sort”.
Function Menu of the Auto-sort Setting Display
Function menu Operation/Explanation
Address sort
(Look-up address)
You can look up a mail address or phone number in the
Phonebook or Sent/Received Address and set it to the folder for
sorting.
Look-up addressSelect an item.
Phonebook . . . . . . . . .Call up a Phonebook entry and select a
phone number or mail address.
Sent address . . . . . . .Select a phone number or mail address
and press Oo().
Received address . . . Select a phone number or mail address
and press Oo().
232
Mail
Address sort
(Look-up group)
You can set a group to be sorted into the folder.
Look-up groupSelect a group.
Address sort
(Look-up mail
group)
You can set a mail group to be sorted into the folder.
Look-up mail groupSelect a mail group.
Address sort
(Enter address)
You can directly enter a mail address or phone number to be
sorted into the folder.
Enter addressEnter a mail address or phone number.
pYou can enter up to 50 half-pitch characters.
pWhen the mail address is “phone number@docomo.ne.jp”,
enter the phone number only. You can sort SMS messages as
well if you enter the phone number only.
Subject sort You can enter the subject of i-mode mail messages to be sorted
into the folder. One subject can be set per folder.
Enter a subject.
pYou can enter up to 100 full-pitch/200 half-pitch characters.
Reply impossible You can set reply-disabled mail messages to be sorted. You can
set for only one folder.
Send impossible You can set failed-to-send mail messages to be sorted. You can
set for only one folder.
Sort all You can sort all mail messages into the i-αppli mail folder. You
can set for only one i-αppli mail folder each in the Inbox and
Outbox. When “Sort all” is set, other sort settings are disabled.
YES
Edit addr/subj You can edit and store the mail address, phone number, and
subject set for the folder.
Edit the mail address, phone number or subject.
List setting You can switch whether to display the destinations by the name
stored in the Phonebook or by the mail address or phone number.
Name or Address
pYou can switch also by pressing c().
Function menu Operation/Explanation
Release
(Release this)
You can release the sort condition. (The item is deleted from the
Auto-sort Setting display.)
Release thisYES
Release
(Release selected)
You can select mail addresses or phone numbers, and release
the sort condition for them. (The items are deleted from the
Auto-sort Setting display.)
Release selectedPut a check mark for mail addresses or
phone numbers to be releasedl()YES
Release
(Release all)
You can release all sort conditions. (The items are deleted from
the Auto-sort Setting display.)
Release allYES
Function menu Operation/Explanation
Information
<Address sort (Look-up group)>
pOn the Auto-sort Setting display, “ ” is added to the top of the name.
pYou cannot set groups on the UIM.
pThe secret mail messages received in ordinary mode (not in “Secret mode” or “Secret
data only”) are not sorted into the folder.
<Address sort (Look-up mail group)>
pOn the Auto-sort Setting display, “ ” is added to the top of the mail group name.
<Subject sort>
pWhen the subject matches sort conditions for multiple folders, it is sorted to the folder
nearest to the “Inbox” folder or “Outbox” folder.
pEven if you set “No title”, the i-mode mail titled with “No title” because of no entry
cannot be sorted.
pSMS messages cannot be sorted by subject.
<Sort all>
pYou cannot sort SMS reports or SMS messages that have been directly received on
the UIM.
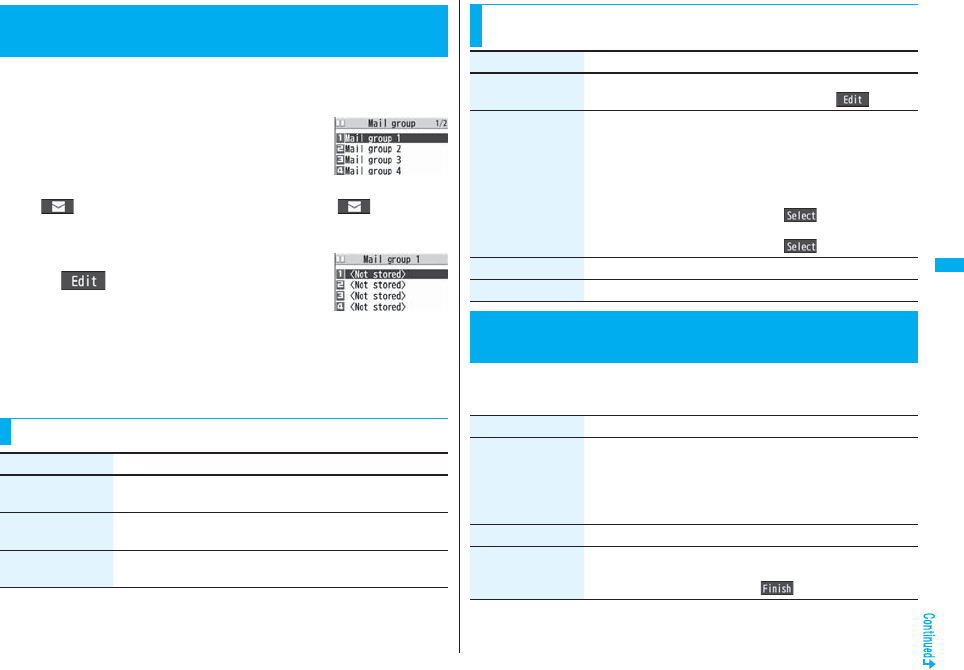
233
Mail
You can store mail addresses by group. You can send mail to regular
destinations.
You can store up to five addresses per group, and up to 20 groups.
1mPhonebookPhonebook
settingsMail group
Select a Mail group to be stored.
pWhen mail addresses are stored in a Mail group,
“ ” appears at the lower left of the display. Press l( ) to compose
i-mode mail to a selected Mail group set as the destination address.
Go to step 3 on page 198.
2Highlight <Not stored> and press
l().
pIf you select a stored mail address, the Mail Group
Address Confirmation display appears.
3Enter a mail address.
pYou can enter up to 50 half-pitch characters.
When you store multiple mail addresses, repeat step 2 and step 3.
+m-2-6
<Mail Group>
Creating Mail Group
Mail Group list
Detailed Mail Group
display
Function Menu of the Mail Group List
Function menu Operation/Explanation
Compose message You can compose an i-mode mail message to the Mail group.
Go to step 3 on page 198.
Edit group name Enter a name of the Mail group.
pYou can enter up to 10 full-pitch/20 half-pitch characters.
Reset group name You can reset the name of Mail group to the default.
YES
1lMail settingsDo the following operations.
Function Menu of the Detailed Mail Group Display/Mail
Group Address Confirmation Display
Function menu Operation/Explanation
Edit address Go to step 3 on page 233.
pYou can edit the address also by pressing l().
Look-up address You can call up a phone number or mail address in the
Phonebook, Sent Address, or Received Address to enter it.
Select an item.
Phonebook . . . . . . . . .Call up a Phonebook entry and select a
phone number or mail address.
Sent address . . . . . . .Select a phone number or mail address
and press Oo().
Received address . . . Select a phone number or mail address
and press Oo().
Delete this YES
Delete all Enter your Terminal Security CodeYES
<Mail Settings>
Setting Mail and Messages R/F
Item Operation/Explanation
Scroll You can set the number of lines that are scrolled at a time for
when you press Bo on the detailed mail display, detailed
Message R/F display, Message Composition display and preview
display.
Select the number of lines.
Character size See “Mail” on page 129.
Mail list display You can set items to be displayed on the Inbox/Outbox/Draft list
by using radio buttons or check boxes.
Select a display formatl()
234
Mail
Message display You can set whether to display received mail in standard display
(from the top) or from the text.
Standard or From message
Mail security See page 142.
Secret mail display See page 142.
Auto color label You can specify the text color of the sender, received date/time
and others on the Inbox list by mail address. You can store up to
10 items.
<Not stored>Select an item.
Phonebook . . . . . . . . Call up a Phonebook entry and select a
phone number or mail address.
Sent address . . . . . . . Select a phone number or mail address
and press Oo().
Received address. . . Select a phone number or mail address
and press Oo().
Enter address . . . . . . Enter a mail address or phone number.
pTo change the set color, press i( ) and select “Select
color”.
pTo delete the set item, press i( ) and select “Delete”→
“Delete this” or “Delete all” and select “YES”. If you select
“Delete all”, you need to enter your Terminal Security Code.
Select a color.
Pred. conv. at reply You can set whether to preferentially display the words contained
in the subject and text of the received mail message as
conversion candidates when you reply to, reply with quote to, or
forward it.
ON or OFF
Header/signature See page 235.
Set check new
message
You can select items to be checked from among i-mode mail,
Message R and Message F, for when you perform “Check new
message”.
Put a check mark for the items to be checkedl()
Item Operation/Explanation
Auto-display See page 236.
Receiving display You can set whether to display the Message Receiving and
Reception Result displays, even during operation of another
function.
Alarm preferred or Operation preferred
Alarm preferred
. . . .Prioritizes the Message Receiving and Reception Result
displays when you have new mail.
Operation preferred
. . . .Prioritizes the display of the current operation when you have
new mail.
Receive option
setting
See page 214.
Attachment
preference
You can set whether to receive the attached file with an i-mode
mail message. The attached files for which you remove a check
mark are held at the i-mode Center.
(The file in excess of 100 Kbytes is held at the i-mode Center,
even if you put a check mark for it.)
Put a check mark for items to be receivedl()
pPut a check mark for “Tool data” to receive Phonebook entries,
schedule events, ToDo items, and bookmarks.
pPut a check mark for “Other” to receive PC movies, document
files, and files unsupported by the FOMA phone.
Auto melody play You can set whether to play back the attached or pasted
melodies automatically for when you display the text of received
mail, or message R/F.
ON or OFF
Photo auto display You can set whether to automatically display the photo (still
image) received during a call.
ON or OFF
Chat setting See page 242.
Check settings You can check each of “Mail settings”.
Item Operation/Explanation
Information
<Message display>
pEven if “From message” is set, the message might not be displayed from the text
depending on the number of characters in the text.

235
Mail
You can store a header, signature and quotation mark. Also, you can set
whether to automatically paste the header or signature.
1lMail settingsHeader/signature
Do the following operations.
<Auto color label>
pEven when you set this function, the text color of the mail message already received
does not change.
<Set check new message>
p If you do not want to receive Messages R and Messages F by “Check new
message”, change these settings to “ ”.
<Auto melody play>
pYou cannot play back attached or pasted melodies during Play Background
regardless of the setting of “Auto melody play”.
Header/Signature
Information
Item Operation/Explanation
Header The header is the sentence such as greeting at the beginning of
the text.
Select the header fieldEnter a headerl()
pYou can enter up to 5,000 full-pitch/10,000 half-pitch
characters.
pIf you do not want the header to be pasted automatically, select
“Insert” to change “ ” to “ ”. See page 200 for adding a
header by mail message.
Signature The signature is your name and other information, placed at the
end of the text.
Select the signature fieldEnter a signaturel()
pYou can enter up to 5,000 full-pitch/10,000 half-pitch
characters.
pIf you do not want the signature to be pasted automatically,
select “Insert” to change “ ” to “ ”. See page 200 for
adding a signature by mail message.
Quotation marks The quotation mark is the symbol indicating a quotation from
received mail for when you reply to mail.
Enter a quotation mark.
pYou can enter up to 10 full-pitch/20 half-pitch characters.
Message services automatically deliver information you want to your
FOMA phone.
When your FOMA phone is in the service area, it receives Messages R/F
automatically from the i-mode Center.
“ (yellow)” or “ (yellow)” appears at the top of the display when a
Message R/F is delivered.
You can save up to 100 each of received Messages R/F.
1When you receive a Message R/F, the
“ (yellow)” or “ (yellow)” blinks and
the message for receiving the Message
R/F appears.
After the message is received, the number of received mail messages and
Messages R/F is displayed.
pYou can display the Message R/F list by selecting “MessageR” or “MessageF”.
pIf “Auto-display” is set to other than “OFF”, the contents of received Message R/F
are displayed automatically. They are displayed for 15 seconds when “Mail/Msg.
ring time” is set to 0 through 10 seconds, or for the specified duration plus 5
seconds when it is set to 11 seconds or longer.
pIf no keys are pressed for the specified duration, “ ” or “ ” (see page 125)
appears on the desktop and the former display returns. (The transit time varies
depending on the setting for “Mail/Msg. ring time”.)
Press Oo, highlight “ ” or “ ”, and press Oo( ) to display the
Message R/F list.
pSee page 32 for when the FOMA phone is closed.
Information
pYou can set decorations in a header and signature.
pEven if you have put a check mark for “Insert”, the header and signature cannot be
pasted when you compose i-mode mail for Photo-sending during a call or from a
template or i-αppli.
pYou cannot paste the header, signature, and quotation marks to Decome-Anime and
SMS messages.
<Receive Message R/F>
Receiving Messages R/F Automatically
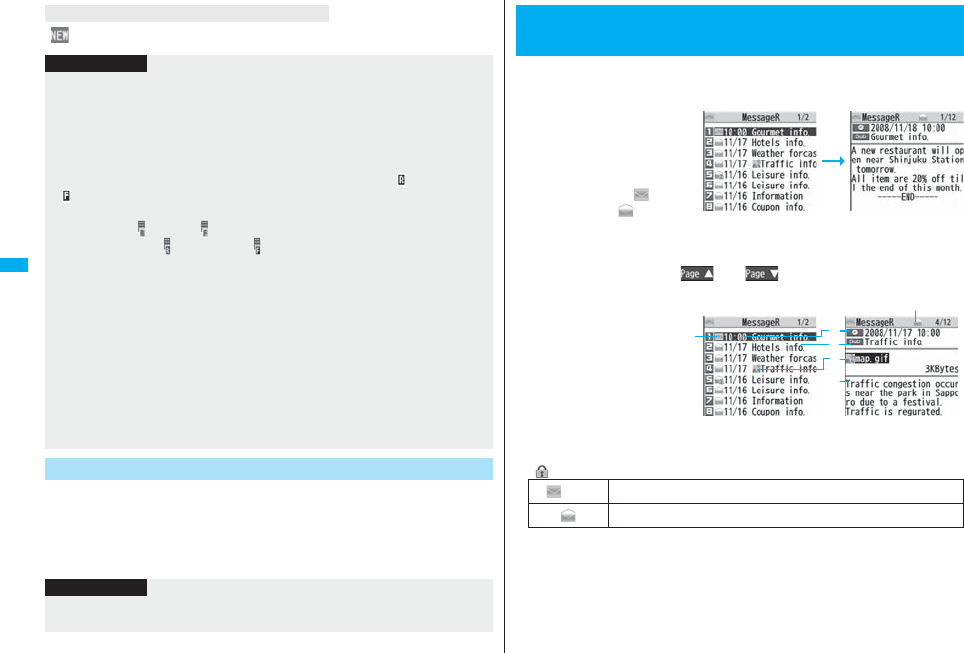
236
Mail
“ ” is added to “Message R/F” of i-mode menu.
You can set how to automatically display Messages R/F received during
standby.
1lMail settingsAuto-display
Select an option for automatic display.
When unread Messages R/F are found
Information
pReceived Messages R/F are not automatically displayed while a display other than
the Stand-by display is shown, while an i-αppli program is running, during Public
Mode (Drive Mode), during Lock All, or during Personal Data Lock.
pWhen the Messages R/F exceeds the maximum number of messages that can be
saved, they are overwritten starting from the oldest one. Unread or protected
Messages R/F are not overwritten.
pWhen the FOMA phone cannot receive any more Messages R/F, “ (dark blue)” or
“ (dark blue)” is displayed. Delete unnecessary Messages R/F, read unread
Messages R/F or release protection.
pWhen the icon “ (pink)” or “ (pink)” is displayed, the i-mode Center holds Messages
R/F. When the icon “ (dark blue)” or “ (dark blue)” is displayed, the i-mode Center
can hold no more Messages R/F. Perform “Check new message” to receive them.
pAfter being displayed automatically, Messages R/F are still displayed as unread ones
in the Message R/F list. However, if you scroll through the messages while they are
being displayed automatically, they will be indicated as read.
pMessages R/F for you are held at the i-mode Center in the following cases:
・When the power is off ・During a videophone call
・During Self Mode ・When you are out of the service area
・During infrared data exchange ・While connecting to the FirstPass Center
・During PushTalk communication ・During Omakase Lock
・During iC communication ・During copy to microSD
・While connecting to the Data Storage Center
・When the space for Messages R/F is full with protected or unread messages
Auto-display
Information
pThe Messages R/F are not displayed automatically when “Mail security” is set for
“Inbox”, or when “Mail security” is set for “MessageR” folder or “MessageF” folder.
1lInboxMessageR or MessageF
Select a Message R/F to be displayed.
pYou can display Messages
R/F also by iMessage
R/FMessageR or
MessageF.
pWhen you select an unread
Message R/F, “ (pink)”
changes to “ ”.
pUse No to check other
Messages R/F.
pWhen the text of Message R/F is long, use Bo to scroll the display to check it.
Also, you can press m()/c() or </> to scroll page by page.
■Message R/F list and Detailed Message R/F Display
Status of Message R/F
“ ” appears when protection is set.
<Display Message R/F>
Reading Received Messages R/F
Detailed Message R/F
display
Message R/F list
(pink) Unread Message R/F
Read Message R/F
Detailed Message
R/F display
Message R/F list
237
Mail
Received date and time
The list shows the time for the Message R/F received today, and shows the date for
the Message R/F received until yesterday. The detailed display shows the date and
time the Message R/F was received.
Subject
The data attached or pasted
The detailed display shows the data volume.
Text of message
The phone number stored in the Phonebook is displayed by the name stored in the
Phonebook.
Valid melody file
Valid image file
Valid ToruCa file
Multiple attached files
Multiple pasted files
File set with the UIM restrictions
Function Menu of the Message R/F List
Function menu Operation/Explanation
Protect
(Protect ON/OFF)
You can protect a Message R/F not to be overwritten or deleted.
You can protect up to 50 messages (Message R and Message F
each).
Protected messages are indicated by “ ”.
Protect ON/OFF
pTo release protection, perform the same operation.
Protect
(Unprotect all)
Unprotect allYES
Search/sort
(Sort)
You can rearrange the displaying order.
SortSelect a displaying order.
Search/sort
(Filter)
You can display only Messages R/F that satisfy the condition.
FilterSelect a displaying type.
Search/sort
(Display all)
After you execute “Sort” or “Filter”, you can reset it and list all
Messages R/F by “By date ↑”.
Display all
No. of messages You can display the total number of Messages R/F stored in the
FOMA phone, as well as the number of unread messages and
protected messages.
Delete
(Delete this)
Delete thisYES
Delete
(Delete selected)
Delete selectedPut a check mark for Messages R/F to be
deletedl()YES
Delete
(Delete read mails)
You can delete all read Messages R/F.
Delete read mailsYES
Delete
(DEL all frm folder)
You can delete all Messages R/F.
DEL all frm folderEnter your Terminal Security Code
YES
Function menu Operation/Explanation
Information
<Search/sort>
pTo return to the former status, execute “Display all”.
pIf you close the list and re-open it, you can return to the list of all items.
Function Menu of the Detailed Message R/F Display
Function menu Operation/Explanation
Protect ON/OFF See page 237.
Operate file
(Save attached file)
You can save attached or pasted files. (See page 217)
Operate file
(Save insert image)
You can save the attached image and set it as the Stand-by
display, Wake-up display, or another display. (See page 209)
Operate file
(Save BG image)
Save BG imageYESSelect a destination folder.
Go to step 3 on page 182.
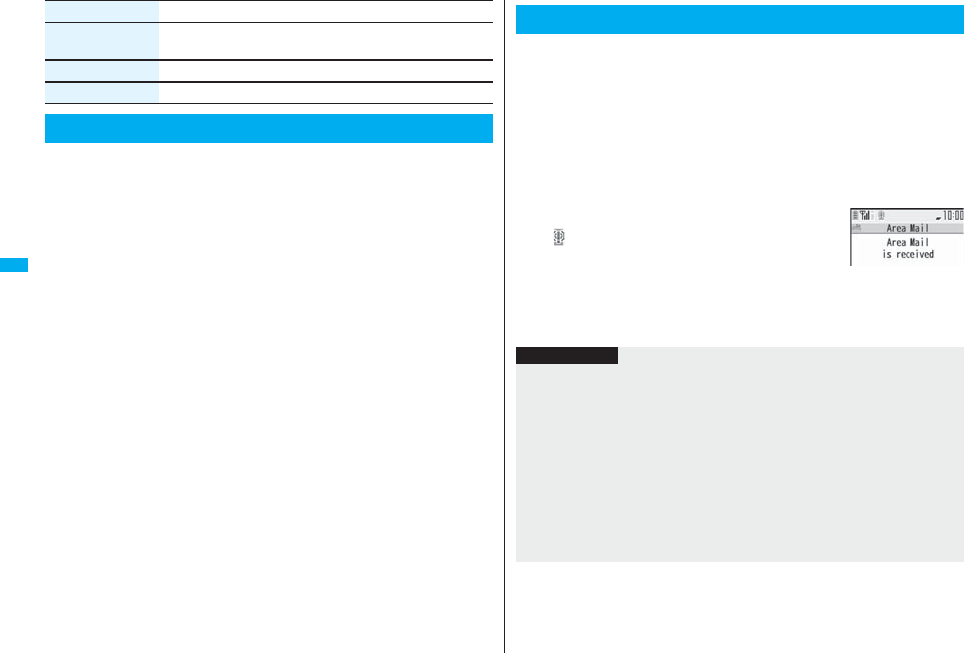
238
Mail
This service enables you to receive reports such as emergency
earthquake alerts distributed from the Japan Meteorological Agency.
pYou can receive Area Mail messages without i-mode contract.
pYou need to set “Receive setting” to receive Area Mail messages.
※See page 239 for “Receive setting” of Area Mail.
pYou might not be able to receive Area Mail messages in the following cases:
・During a call (voice call/videophone call)
・During packet communication (i-mode communication, data communication,
PushTalk communication)
・During updating software program
pYou cannot receive Area Mail messages in the following cases:
・During Omakase Lock
・During international roaming
・During Self Mode
※When you could not receive the messages by the reasons above, you cannot
receive them again.
Operate file
(Save D-pictograph)
You can save the all Deco-mail pictograms inserted into the text.
(See page 228)
Add to phonebook See page 96.
Delete YES
What is Emergency Alert “Area Mail”?
Function menu Operation/Explanation
When you receive an Area Mail message, the ring tone for Area Mail
sounds. The “Ring volume”, “Ring time”, and “Vibrator” settings follow
those of “Mail”.
When you receive an emergency earthquake alert, a dedicated buzzer
(alarm) sounds, and the vibrator works to notify you. Further, the
contents are automatically displayed. “Ring volume” is fixed to “Level 4”,
and “Vibrator” is fixed to “Melody linkage”, so you cannot change their
settings. You can use “Area mail settings” to set “Beep time”.
Up to 30 Area Mail messages are saved separately from i-mode mail
messages and SMS messages in the Inbox.
1When an Area Mail message arrives,
“ ” blinks and the message telling its
arrival appears.
pIf you press any key, the former display returns.
pThe details of some Area Mail messages might be
displayed when you receive them. To clear it, press Oo, r, or h.
pSee page 218 for displaying Area Mail messages.
Receiving Emergency Alert “Area Mail”
Reception Result
display
Information
pThe buzzer sounds when you receive an emergency earthquake alert with “Original”
set to sound any of the following tones. When every setting is set to mute, the buzzer
does not sound:
・Mail volume ・Phone volume ・Alarm volume
・VM tone ・Keypad sound
pEven when “Vibrator” of “Original” is set to “OFF”, the vibrator works if you receive an
emergency earthquake alert.
pWhen you receive a new Area Mail message with 30 Area Mail messages saved, the
read messages are overwritten from the oldest. When all 30 messages are not read,
they are overwritten from the oldest one in order.
pWhether the details of a received Area Mail message are displayed or not depends on
the setting by the Area Mail message provider.

239
Mail
1lArea mail settingsDo the following operations.
<Area Mail Settings>
Setting Emergency Alert “Area Mail”
Item Operation/Explanation
Receive setting You can set whether to use Area Mail.
Read exemption clause thoroughlyYes or No
Receive entry You can register Message IDs for the reports to be received other
than emergency information. You can register up to 20 IDs.
<New>Enter your Terminal Security Code
Enter a registration nameEnter a Message ID.
pTo edit a registered Message ID, highlight it, press l(),
and then enter your Terminal Security Code.
pYou can enter up to 15 full-pitch/30 half-pitch characters for a
registration name, and enter 4 half-pitch characters for a
Message ID.
pYou can edit also by selecting “Edit” from the Function menu.
Select “Delete this” to delete the Message ID, and select
“Delete all” and enter your Terminal Security Code to delete all
Message IDs.
pYou cannot edit/delete “Emergency information”.
Beep setting You can set whether to make the beep sound for when you
receive an Area Mail message that beeps.
ON or OFF
pWhen you set “OFF”, the dedicated ring tone for Area Mail
sounds.
Beep time You can set the duration the beep sounds.
Enter a beep time (seconds).
pEnter it in two digit, from “01” through “30”.
You can send or receive chat mail messages to and from multiple
persons on a single display. To use Chat Mail, you need to store chat
members. You can easily store them by creating chat groups.
You can store up to six chat members including the user (yourself).
1lChat maili()
Chat member<Not recorded>
Enter a mail address.
pTo edit a stored member, select the member.
pWhen the mail address is “phone
number@docomo.ne.jp”, store the phone number only.
pYou can enter up to 50 half-pitch characters.
<Chat Mail>
Using Chat Mail
Store Chat Members
Chat Member list
Information
pIf you edit the mail address of the stored member, the member’s name and image are
changed.
Function Menu of the Chat Member List
Function menu Operation/Explanation
Edit You can edit the mail address.
Go to step 1 on page 239.
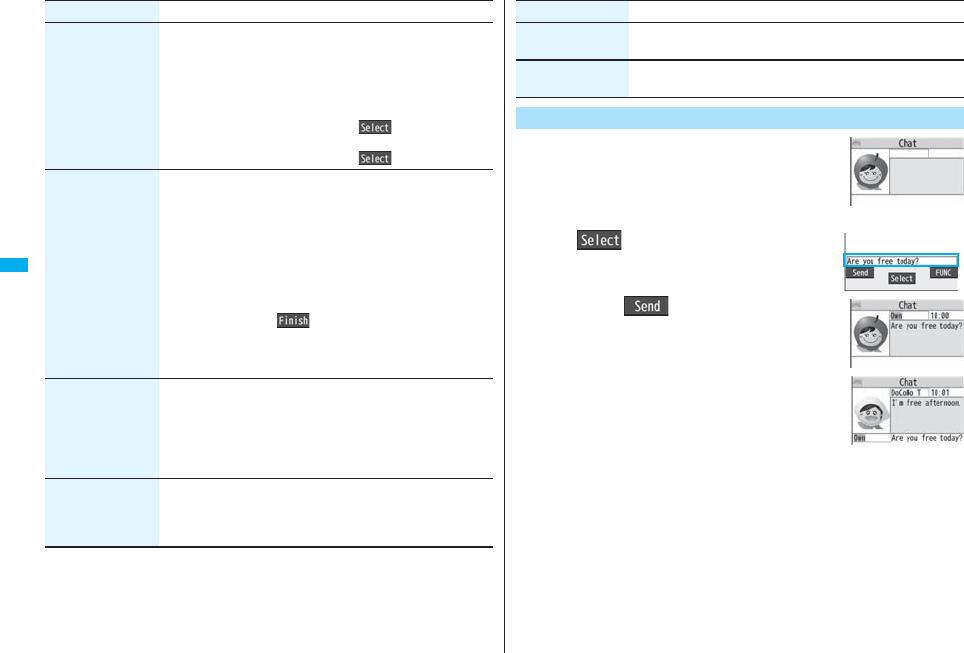
240
Mail
Refer address You can look up a phone number or mail address in the
Phonebook, Received Address, or Sent Address to enter it.
Select an item.
Phonebook . . . . . . . . Call up a Phonebook entry and select a
phone number or mail address.
Sent address . . . . . . . Select a phone number or mail address
and press Oo().
Received address. . . Select a phone number or mail address
and press Oo().
Change member
(Chat group)
You can store the members stored in a chat group as chat
members.
Chat groupGroup list or Member list
Group list. . . . . .You can select members by chat group.
Member list . . . .You can select members from all the members
stored in chat groups.
pIf you select “Group list”, select a chat group.
The members from the selected group are stored.
pIf you select “Member list”, check the members you want to
store and press l().
pIf you have already stored chat members, the confirmation
display appears asking whether to replace all the chat
members.
Change member
(Mail group)
You can store the mail addresses stored in Mail group as chat
members.
Mail groupSelect a Mail group.
pIf you have already stored chat members, the confirmation
display appears asking whether to replace all the chat
members.
Display setting You can check the chat member’s name, image, background
color, and mail address.
pYou can press No to switch members.
pThe mail address of the user (yourself) is not displayed.
Function menu Operation/Explanation
1lChat mail
2Oo()Enter characters.
pYou can enter up to 250 full-pitch/500 half-pitch
characters.
3Press l().
The chat mail message is sent.
The sent chat mail message is displayed at the top of the
Chat Mail display.
4The display for receiving chat mail
appears and a chat mail message is
received.
The received chat mail message is displayed at the top of
the Chat Mail display.
Repeat step 2 through step 4 to send and receive chat mail messages.
5rYES or NO
YES . . . . You can delete read and sent chat mail message from the “Chat” folder.
NO . . . . . You do not delete read and sent chat mail message from the “Chat”
folder.
Chat Mail ends.
pYou can end Chat Mail also by pressing h.
pWhen no sent and received chat mail messages are found, the confirmation
display does not appear.
Delete
(Delete this)
Delete thisYES
Delete
(Delete all)
Delete allYES
Exchange Chat Mail Messages
Function menu Operation/Explanation
Chat Mail display
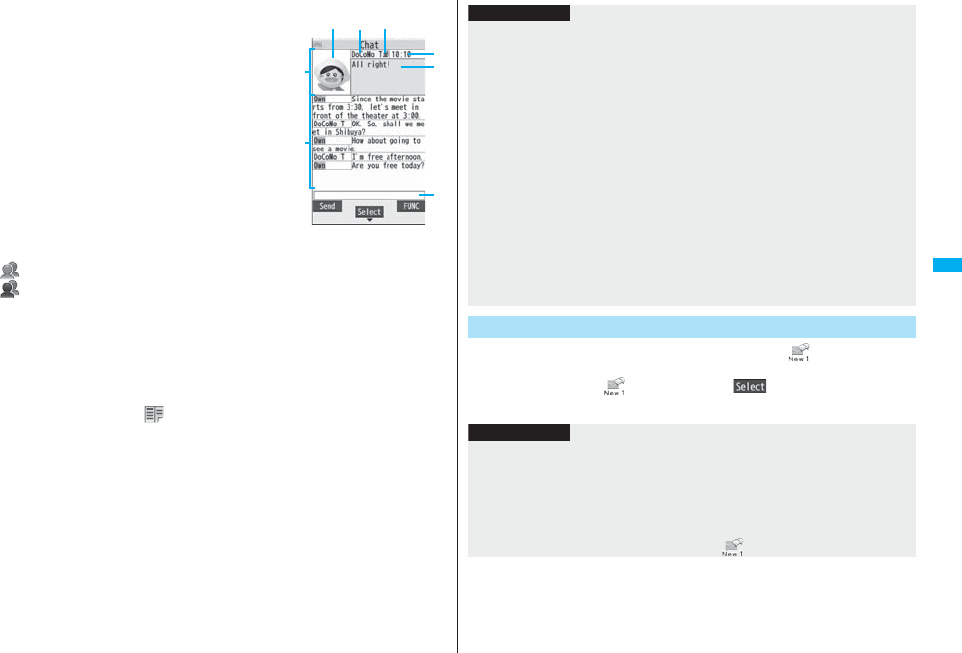
241
Mail
■Chat Mail display
Image
The image you have stored in Chat Group is
displayed.
Member name
The chat member’s name store in the chat
group is displayed. Also, the name is displayed
with a specified background color.
pWhen the name is not stored in the chat
group, up to eight half-pitch characters from
the beginning of the mail address are
displayed. When the mail address is stored in
the Phonebook, up to four full-pitch/eight
half-pitch characters from the beginning of
the name are displayed.
Broadcast mark
Displayed when the chat mail message set with multiple addresses is received.
(blue): All addresses are stored in Chat Member.
(dark blue): Addresses that are not stored in Chat Member are found.
Sent/Received date and time
The date and time the chat mail message was sent/received are displayed. The time is
displayed for the chat mail messages sent/received today and the date for the chat mail
messages sent/received until yesterday.
Text
The text of chat mail message is displayed. The number of characters of the text to be
displayed is up to 250 full-pitch/500 half-pitch characters.
If the text exceeds four lines, is displayed and you can switch the pages by pressing
No.
pYou cannot switch the page of the text on the Chat Mail history.
pThe text of the chat mail message successfully sent is displayed in black. The text of
the chat mail message failed to be sent is displayed in gray.
Input box
Entered characters (characters to send) are displayed from the beginning by a factor of
one line.
Current
Chat mail
Chat Mail
history
If you receive a chat mail message during standby, “ ” appears on the
desktop.
Press Oo, highlight “ ”, and press Oo( ); then Chat Mail starts
up.
Information
pThe communication fee for when you send chat mail messages to multiple chat
members is the same as for sending a chat mail message to one member. (However,
the data for the added address fields will involve a higher charge.)
pWhen “Receive option setting” is set to “ON”, you cannot execute Chat Mail.
pWhen the Inbox is full of unread or protected mail messages, you cannot execute
Chat Mail. Delete unnecessary mail messages or read unread mail messages, or
release the protection and then operate.
pAttached files or pasted data are not displayed.
pSent/Received chat mail messages are saved to the “Chat” folder.
pThe subject of a sent chat mail message is “チャットメール (chat mail)” (half-pitch
characters).
pEven when the chat mail text on the Chat Mail display contains the phone number,
mail address, or URL, the Phone To/AV Phone To, Mail To, and Web To functions are
not available. However, those functions will be available when Chat Mail is finished
and chat mail message is brought up from the “Inbox” or “Outbox”.
pDuring playing back a music file by MUSIC Player, a tone for the chat mail message
does not sound.
If You Receive Chat Mail during Standby
Information
pMessages are recognized as chat mail messages in the following cases:
・When the sender’s address or destination address is stored in Chat Member or in a
chat group
・When the subject contains “チャットメール (chat mail)” (all full-pitch or all half-pitch
characters)
pEven when you receive a chat mail message from a member of a chat group other
than Chat Member while Chat Mail is running, “ ” appears.

242
Mail
If you start Chat Mail from a mail address or from a chat group that is not stored in Chat
Member, the confirmation display appears asking whether to delete stored member and
start Chat Mail.
Select “YES”; then the current chat members are deleted and the sender’s mail address
or chat group members are stored in Chat Member.
If you start Chat Mail from the desktop
The sender’s mail address is stored in Chat Member. When the sender’s mail address
has been stored in a chat group, the members in that chat group are stored in Chat
Member. However, the mail address selected as the destination is only the mail address
of the sender.
If you start Chat Mail from Chat Group
The chat group members are stored in Chat Member. All members of the group are
selected as the destination.
If you start Chat Mail from the desktop or Chat Group
Function Menu of the Chat Mail Display
Function menu Operation/Explanation
Send You can send the chat mail message.
Select receiver From among chat members, you can select destination
addresses to send the chat mail messages to.
Put a check mark for destination addresses to send the
messages tol()
Chat member You can store chat members. (See page 239)
Broadcast address You can check the destination addresses you have
simultaneously sent a chat mail message to.
pWhen there are destination addresses that are not stored in
Chat Member, the confirmation display appears asking whether
to store them in Chat Member. If you store them in Chat
Member, select “YES” and put a check mark for the destination
addresses to be stored and press l().
Reload You can receive chat mail messages that you could not
automatically receive. If you receive a new chat mail message,
the Chat Mail display is updated.
View first line You can display the latest chat mail message.
View last line You can display the oldest chat mail message.
1lMail settingsChat setting
Do the following operations.
Delete read mails You can delete all the received read chat mail messages and
sent chat mail messages including secret mail and chat mail
messages failed to send.
YES
Function menu Operation/Explanation
Information
<Broadcast address>
pYou can store up to six members (including yourself) in Chat Member.
Chat Setting
Item Operation/Explanation
Sound setting You can set a tone for when you send/receive a chat mail
message on the Chat Mail display.
Select a folderSelect a tone.
pThe tone does not sound when a chat mail message comes in
from a member not stored in Chat Member.
Chat image You can set whether to display images on the Chat Mail display.
ON or OFF
User setting You can set the name and image of the user (yourself).
Select the name fieldEnter a user name.
pYou can enter up to four full-pitch/eight half-pitch characters.
pIf you do not change the user name, go to the next step.
Select the image fieldSelect a folderSelect an image.
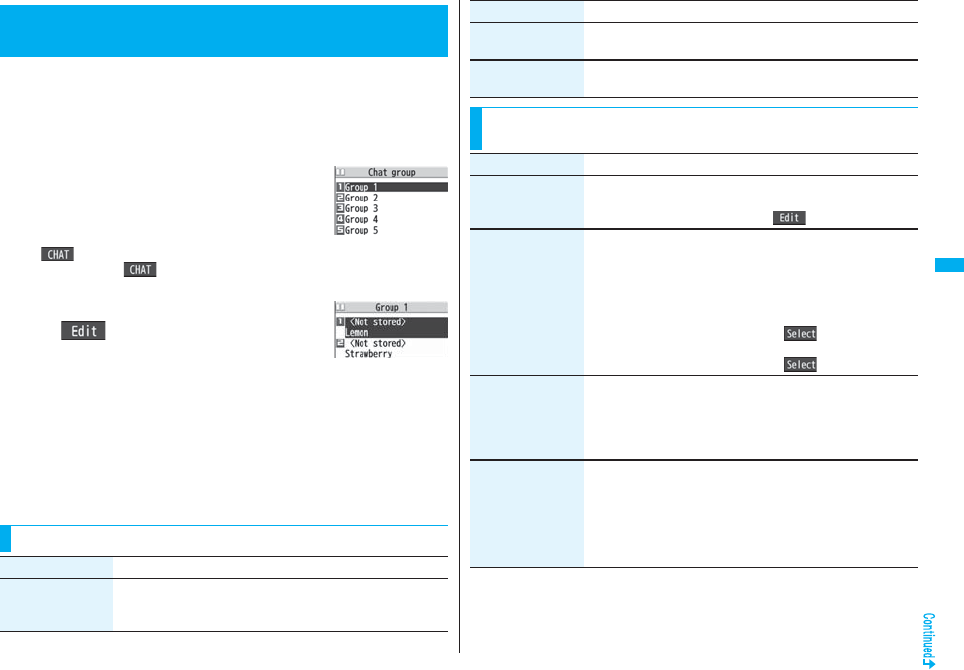
243
Mail
You can store the mail addresses you want to exchange chat mail per
group.
By storing multiple members in a group, you can set them as chat
members at a time.
You can store up to five mail addresses per group. You can create up to
five groups.
1mPhonebookPhonebook
settingsChat groupSelect a chat
group to be stored.
pWhen the selected chat group has any member,
“ ” appears at the lower left of the display.
If you press l( ), Chat group members are stored in Chat Member and
Chat Mail starts. Go to step 2 on page 240.
2Highlight <Not stored> and press
l().
pIf you select a stored mail address, the Chat Group
Address Confirmation display appears.
3Enter a mail address.
pYou can enter up to 50 half-pitch characters.
pWhen the entered mail address is stored in the Phonebook, and the image is
stored in the Phonebook, the image is also set.
pWhen the mail address is “phone number@docomo.ne.jp”, store the phone
number only.
When you store multiple mail addresses, repeat step 2 and step 3.
+m-2-6
<Chat Group>
Creating Chat Group
Chat Group list
Detailed Chat Group
display
Function Menu of the Chat Group List
Function menu Operation/Explanation
Activate chat The members in the chat group are stored as chat members and
Chat Mail starts.
Go to step 2 on page 240.
Edit group name Enter a chat group name.
pYou can enter up to 10 full-pitch/20 half-pitch characters.
Reset group name You can reset the name of the chat group to the default.
YES
Function Menu of the Detailed Chat Group Display/Chat
Group Address Confirmation Display
Function menu Operation/Explanation
Function menu Operation/Explanation
Edit You can edit the mail address.
Go to step 3 on page 243.
pYou can edit also by pressing l().
Refer address You can look up a phone number or mail address in the
Phonebook, Sent Address, or Received Address to enter it.
Select an item.
Phonebook . . . . . . . . .Call up a Phonebook entry and select a
phone number or mail address.
Sent address . . . . . . .Select a phone number or mail address
and press Oo().
Received address . . . Select a phone number or mail address
and press Oo().
Change member You can store members from a Mail group in the chat group.
Mail groupSelect a Mail group.
pIf you have already stored members in the chat group, the
confirmation display appears asking whether to replace all the
members.
Member setting You can set the member’s name and image. You can switch
members by pressing No.
Select the member name fieldEnter a member’s name.
pYou can enter up to four full-pitch/eight half-pitch characters.
pNot to change the member’s name, go to the next step.
Select the picture fieldSelect a folderSelect an image.
244
Mail
You can compose and send SMS messages. You can save up to 1,000
sent SMS messages including i-mode mail messages to the Outbox.
pYou can send and receive SMS messages to and from subscribers of overseas
carriers other than DoCoMo. For the countries and overseas carriers available for the
service, refer to the DoCoMo Global Service web page.
pYou can move/copy the sent SMS messages to the UIM. (See page 422)
1lCompose SMS
2Select the address fieldSelect an item.
Phonebook . . . . . . . . . Call up a Phonebook entry and select a phone number.
Sent address . . . . . . . . Select a phone number and press Oo().
Received address. . . . Select a phone number and press Oo().
Enter address . . . . . . . Enter a phone number.
Only one address can be specified.
pYou can enter up to 21 digits (including “+”).
pWhen the address is that of overseas carriers other than DoCoMo, enter “+”
(press and hold 0 for at least one second), “country code”, and “destination
mobile phone number” in that order. When the mobile phone number begins with
“0”, enter the phone number except for the “0”. Also, you can enter “010”, “country
code”, and “destination mobile phone number” in that order to send SMS
messages. (When you reply to SMS messages received from overseas, enter
“010”.)
3Select the text fieldEnter text.
pThe number of characters you can enter differs depending on the “SMS input
character”.
Delete YES
Delete all Enter your Terminal Security CodeYES
<Compose SMS>
Composing SMS Messages to Send
Function menu Operation/Explanation
SMS Composition
display
Address field
Text field
4Press l().
The animation display during transmission appears and mail is sent.
5OK
Information
pDepending on the radio wave conditions, the characters might not be sent
successfully to the destination.
pWhen the number of sent mail messages exceeds the maximum number of storage,
they will be overwritten starting from the oldest sent mail. However, protected sent
mail cannot be overwritten.
pYou cannot compose an SMS message when the number of sent mail messages in
the Outbox has reached the maximum and those messages are all protected, or
when 20 mail messages are saved to the Draft or the Draft is full.
Release the protection for sent mail messages, or send/delete draft mail messages,
and then operate again.
pEven if “Activate” of “Caller ID notification” is set to “OFF”, the caller ID is notified to the
other party you send an SMS message to. If you attempt to send an SMS message to
the phone number headed by “184”/“186”, the confirmation display appears asking
whether to delete prefix numbers and send the mail.
pIf you set “SMS report request” to “ON”, you cannot send SMS messages to the
i-mode phone of the mova service.
p“+” is valid only at the beginning of the address.
pYou cannot send the message to addresses that include any characters other than
numbers, “_”, “#” and “+”.
pYou cannot start a new line while editing the text.
pThe special symbols (see page 506) are replaced by half-pitch spaces.
pEach space is counted as a character.
pYou cannot reply to the SMS message whose sender is User unset/PublicPhone/
Unavailable.
pIn B Mode of 2in1, you cannot compose SMS messages.
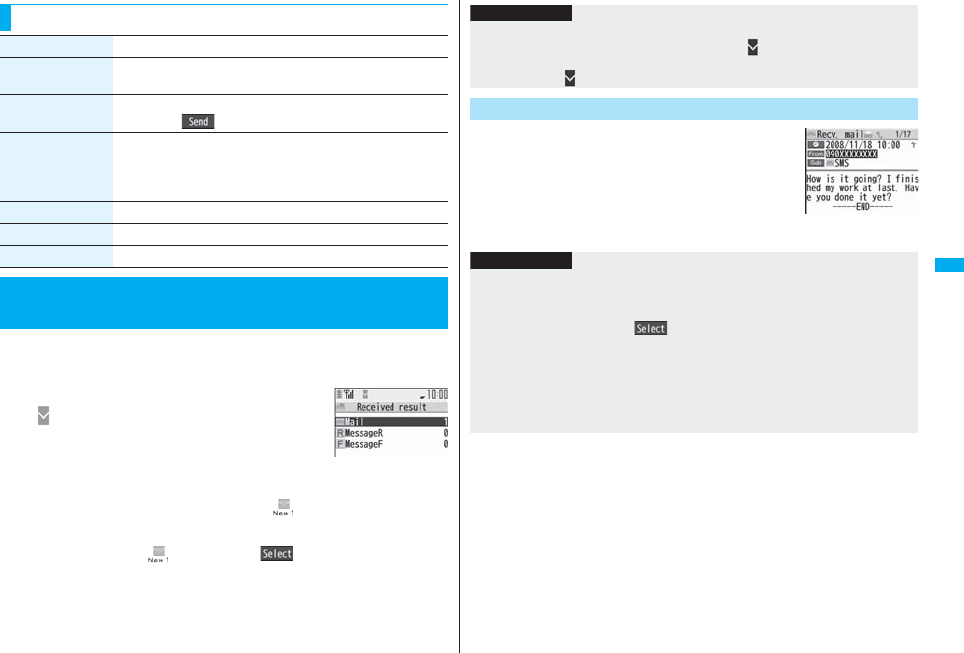
245
Mail
You can save up to 2,500 received SMS messages including i-mode mail
messages.
pYou can move/copy the received SMS messages to the UIM. (See page 422)
1When an SMS message arrives,
“ (pink)” lights and the receiving
message is displayed.
When receiving ends, the display shows the number of
received SMS messages.
pYou can display the Inbox list by selecting “Mail”.
pIf no keys are pressed for about 15 seconds, “ ” (see page 125) appears on
the desktop and the former display returns. (The transit time varies depending on
the setting for “Mail/Msg. ring time”.)
Press Oo, highlight “ ”, and press Oo( ) to display the Inbox list.
pSee page 32 for when the FOMA phone is closed.
Function Menu of the SMS Composition Display
Function menu Operation/Explanation
Send You can send the SMS message.
Go to step 5 on page 244.
Preview Before sending, you can check the address and the text contents.
pPress l( ) to send the SMS message.
Save You can save the SMS message you are composing or editing to
the Draft.
pYou cannot save the message when the address field and text
field are blank.
SMS report req. See page 246.
SMS valid. per. See page 246.
SMS input char. See page 247.
<Receive SMS>
Receiving SMS Messages Automatically
Reception Result
display
1Reception Result displayMail
Select an SMS message to be
displayed.
pPress and hold No for at least one second from the
detailed SMS display to change the size of characters.
(See “Mail” on page 129)
Information
pWhen the number of unread or protected messages in the Inbox has reached the
maximum, no new messages can be received and “ (dark blue)” is displayed. To
receive SMS messages, delete mail in the Inbox or read unread mail or release
protection until “ (dark blue)” clears, and then perform “Check new SMS”.
Display Newly Received SMS Messages
Information
pDepending on the characters entered in the received SMS message, spaces might be
displayed.
pWhile the sender’s address (phone number) is highlighted in the displayed SMS
message, you can press +Oo( ) to make a voice call, videophone call, or
PushTalk call to the displayed number (the Phone To/AV Phone To function).
Further, if the sender’s phone number is stored in the Phonebook, the stored “name”
is highlighted. In this case, you can dial the phone number in the same way.
pA Short Mail message is received as an SMS message on the FOMA phone. When
the sender does not notify you of the phone number, the reason is displayed in the
sender’s field.
246
Mail
When SMS messages arrive at the SMS Center, they are automatically
sent to your FOMA phone, but will be held at the SMS Center if your
FOMA phone cannot receive messages such as when it is off or out of
the service area.
You can receive the messages by “Check new SMS”.
1lCheck new SMS
2Return
If the Center holds SMS messages, the FOMA phone automatically receives them.
<Check New SMS>
Checking whether Center Holds SMS
Messages
Information
pSome SMS messages are not delivered immediately after checking.
pWhen “ (dark blue)” or “ (dark blue)”, etc. are displayed, you cannot receive any
more SMS messages. Delete unnecessary mail, read unread mail, or release
protection. (Read and unprotected messages are overwritten automatically from the
oldest one.)
pYou cannot use this function to receive i-mode mail or Messages R/F. Use “Check
new message” to receive i-mode mail or Messages R/F.
You can set whether to request an SMS report for when sending an SMS
message.
The SMS report lets you know that your SMS message was delivered to
the destination.
You can check received SMS reports in the “Inbox” folder.
1lSMS settingsSMS report requestON or OFF
pWhen you operate from the Function menu of the SMS Composition display, the
setting is effective only for the SMS message you are composing.
You can set the period that the SMS Center holds an SMS message sent
but unsuccessfully delivered due to the out-of-service area, etc.
1lSMS settingsSMSvalidity period
Select a holding period.
pIf you select “None”, the stored SMS message is re-sent after a certain period of
time and deleted from the SMS Center.
pWhen you operate from the Function menu of the SMS Composition display, the
setting is effective only for the SMS message you are composing.
<SMS Settings>
Setting SMS
SMS Report Request
SMS Validity Period
247
Mail
You can set the characters you can enter into the text of SMS messages.
You can set to enter only half-pitch alphanumeric characters and
half-pitch symbols.
1l
SMS settings
SMS input character
Select an item.
Japanese (70char.) . . .You can enter full-pitch and half-pitch characters. You
cannot enter pictographs except “ ” and “ ” (see
page 502). You can enter up to 70 characters for the text.
English (160char.) . . . .You can enter only half-pitch alphanumeric characters
and half-pitch symbols. You can enter up to 160
characters for the text.
pWhen you operate from the Function menu of the SMS Composition display, the
setting is effective only for the SMS message you are composing.
You can set the address and “Type of number” for the SMS Center. This
setting is for getting any service other than SMS Service you currently use.
1lSMS settingsSMS center selection
User settingEnter an address
International or Unknown
pYou can enter up to 20 half-pitch characters for the address. However, if “:” or
“#” is included, you cannot set it for “International”.
pYou can reset User Setting to “DoCoMo” by ResetEnter your Terminal Security
CodeYES.
You can send mail messages or browse received mail messages on the
i-mode site.
pYou can use only in B Mode or Dual Mode of 2in1.
pFor details on Web mail, refer to “Mobile Phone User’s Guide [2in1]”.
1lWeb mail
Operate following the instructions on the display.
SMS Input Character
SMS Center Selection
※Normally, you do not need to change this setting.
<Web Mail>
Using Web Mail

248

249
i-αppli
What is i-αppli? . . . . . . . . . . . . . . . . . . . . . . . . . . . . . . . . . . . . . . 250
Downloading i-αppli from Sites . . . . . . . . .<i-αppli Download> 250
Starting i-αppli . . . . . . . . . . . . . . . . . . . . . . . . . . . .<i-αppli Run> 251
Setting i-αppli . . . . . . . . . . . . . . . . . . . . . . . . <iαppli Settings> 261
Starting i-αppli Automatically . . . . . . . . . . . . . . . . . . . . . . . . . . . 262
Operating i-αppli Stand-by Display
. . . . . . . . . . . . . . . . . . . . . . . . . . . . . .<i-αppli Stand-by Display> 263
Displaying i-αppli Data Files on the microSD Card
. . . . . . . . . . . . . . . . . . . . . . . . . . . . . . . . . . . <iαppli(microSD)> 264
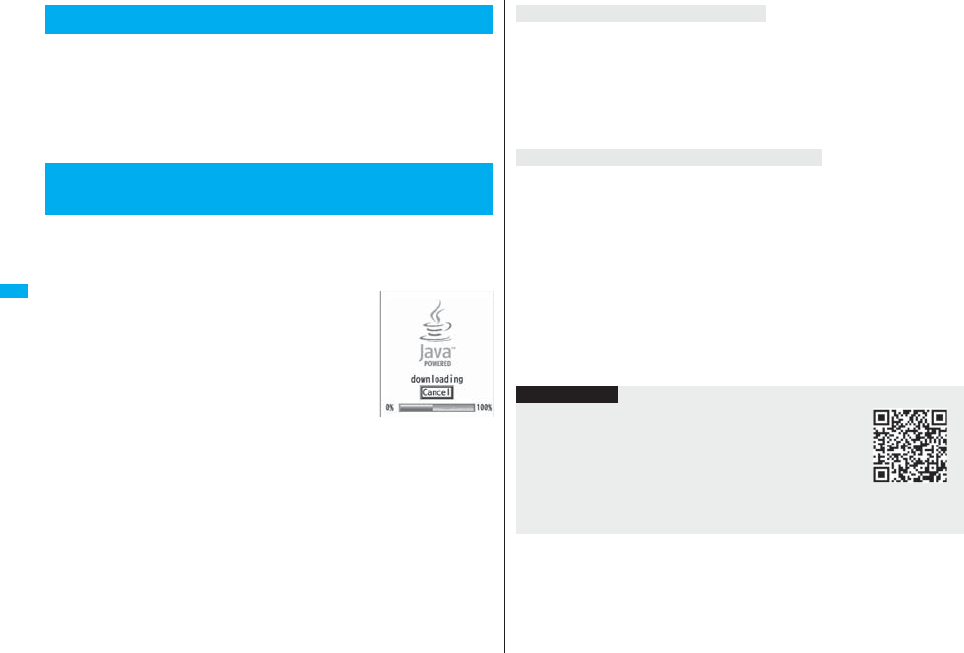
250
i-αppli
By downloading i-αppli from i-mode sites, you can use the FOMA phone
more convenient. You can use the i-αppli which enables you to directly
store the data into the Phonebook or Schedule, or the i-αppli which links
to Data Box, enabling you to save or obtain images.
Also, as the large capacity mega i-αppli is supported, you can enjoy
playing high-resolution 3D games and full-length role playing game.
pFor details on i-αppli, refer to the “Mobile Phone User’s Guide [i-mode] FOMA version”.
You can download software programs from sites to the FOMA phone.
You can save up to 100 files, however, the number of files you can save
decreases depending on the data volume because the memory space is
shared with other data files. (See page 537)
1Bring up an i-αppli downloadable site
Select a software program.
2Select “OK” when downloading ends.
pSee page 186 when i-αppli programs are stored to the maximum.
pWhen downloading ends, the display for Software Setting (Network Set, Stand-by
Set, Location Usage, or Program Guide Key) might appear. These settings can
be done also from the Software list.
3YES or NO
YES . . . . Starts i-αppli.
NO . . . . . Returns to the site display.
What is i-αppli?
<i-αppli Download>
Downloading i-αppli from Sites
When you press r or h to suspend downloading an i-αppli program of 100
Kbytes or more, or when downloading is suspended by the radio wave conditions, the
confirmation display appears asking whether to resume downloading. Select “YES” to
resume downloading the remaining part. Select “NO” to show the confirmation display
asking whether to save the file downloaded halfway. Select “YES” to partially save the
file.
You can re-download the rest of the partially saved i-αppli program from the Software list.
An i-αppli mail folder is created automatically each in the Inbox/Outbox Folder list, and
the title of the downloaded mail-linked i-αppli becomes the name of the folder.
pYou can save up to five mail-linked i-αppli programs.
pYou cannot download the software program if the mail-linked i-αppli using the same
folder is already in the Software list.
pYou cannot download mail-linked i-αppli while Mail Security is set.
pYou cannot download mail-linked i-αppli if the Inbox/Outbox Folder list contains five
i-αppli mail folders.
pWhen re-downloading mail-linked i-αppli whose folder only remains, the confirmation
display appears asking whether to use the existing i-αppli mail folder. If you select
“YES”, the existing folder is used. If you select “NO” because you do not use it, the
confirmation display appears asking whether to delete an existing folder and create a
new one. You cannot download mail-linked i-αppli without creating a new folder.
When downloading is suspended
When you downloaded mail-linked i-αppli
Information
pYou can download pre-installed i-αppli programs from the
“P-SQUARE” site (Japanese only).
iMenu→メニュー/検索 (Menu/Search)
→ケータイ電話メーカー (Mobile Phone Maker)→P-SQUARE
pDownloading is not available from some accessed sites.
QR code for
accessing the site
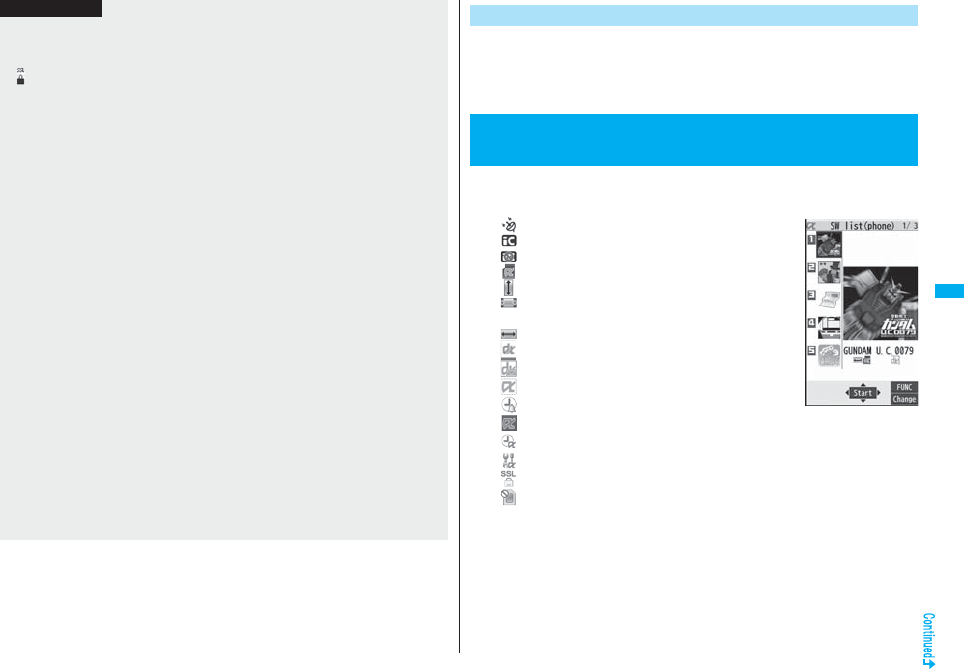
251
i-αppli
pSome i-αppli programs can automatically connect to the i-mode Center after they are
downloaded. However, to use this service, you need to set it in advance in “Software
setting (Network set)”.
p“ ” appears at the top of the display while software information or a software program
is being downloaded from SSL pages.
pAt downloading, the confirmation display might appear asking whether to send the
“serial number of your mobile phone/UIM”. Select “YES” to start downloading. In this
case, the “serial number of your mobile phone/UIM” is sent to the IP (Information
Provider) over the Internet, so could be deciphered by third parties. However, your
phone number, address, age, and gender are not notified to the IP (Information
Provider) or others by this operation.
pIf you attempt to re-download the software program that was downloaded using a
different UIM, the confirmation display appears asking whether to overwrite the
software program. With the Osaifu-Keitai compatible i-αppli, the confirmation display
appears telling that the data on the IC card is to be deleted. Select “YES” to start
downloading. When downloading ends, the software program that was downloaded
using a different UIM and the data on the IC card are deleted.
pYou cannot download some software programs while the IC card function is working
or IC Card Lock is activated.
pSome software programs that start immediately after downloading cannot be saved.
pDepending on the data volume on the IC card, you might not be able to download
Osaifu-Keitai compatible i-αppli even if there is still available space for software
storage. Delete the displayed software programs following the confirmation display,
and then download it again. (Some software programs might not be targeted for
deletion, depending on the software type to be downloaded.)
Depending on the software program, you need to start it and delete the files on the IC
card before deleting the software program itself.
pYou can save up to 1 Mbyte per i-αppli program.
p“i-αppli mail” is the mail sent and saved by mail-linked i-αppli and mail received as
mail-linked i-αppli. i-αppli mail is automatically saved to the i-αppli mail folder.
pThe 3D polygonal※ engine enables cubic images to be displayed in i-αppli.
※By combining polygons, a deep, cubic image is displayed.
Information
You can display software information when downloading i-αppli.
1mi-αppliiαppli settingsDisp. software info
Display or Not display
1i(for at least one second)
Select a software program to be started.
: GPS compatible i-αppli
: Osaifu-Keitai compatible i-αppli
: Management information i-αppli
: microSD card compatible i-αppli
: Vertical full display compatible i-αppli
: Horizontal display compatible i-αppli (incompatible
with full display)
: Horizontal full display compatible i-αppli
: i-αppli DX
: Mail-linked i-αppli
: Partially saved i-αppli
: Set for Auto Start
: Set for the i-αppli Stand-by display
: Set for both Auto Start and the i-αppli Stand-by display
: Can set for the i-αppli Stand-by display
: Downloaded from an SSL page
: Downloaded or upgraded by using a different UIM
Display Software Info
<i-αppli Run>
Starting i-αppli
Software list
252
i-αppli
pYou can display the Software list on the microSD card by
mi-αppliiαppli(microSD)SW list(microSD).
pEach time you press c( ) from the Software list in the FOMA phone, the
display format changes.
pWhen you start an i-αppli DX program or while it is running, the confirmation
display might appear asking whether to permit the i-αppli DX program to use the
FOMA phone’s information and functions.
pWhen you start the Osaifu-Keitai compatible i-αppli program for the first time, the
confirmation display appears asking whether to make the UIM and IC card
compatible. The UIM information that has been made compatible is saved on the
IC card as IC owner information.
pWhen you select a partially saved i-αppli program, you can download the
remaining part of it.
p“” or “” is displayed while an i-αppli program is running.
pTo end i-αppli, press and hold r for at least one second or press h; then
select “YES”.
pThe software program you started last time comes at the top of the list. You
cannot manually change the order of software programs.
pSee page 186 when you select “Search by i-mode”.
pSee page 186 when you select “Search by i-mode”.
pYou cannot display the Software list even when you press and hold i for at
least one second when the Stand-by display appears on the horizontal display.
Information
pWhen a software program to be started is not specified, select a software program.
pTo start up i-αppli DX, set the data and time by “Set time” beforehand.
pWhen a software program is running, melodies are played back at the volume set for
“Phone” of “Ring volume”. However, melodies are not played back during a call.
pYou may need to set the communication setting while a software program is running.
pWhen communicating frequency is extremely high in a certain period of time while an
i-αppli program is running, the confirmation display appears asking whether to
continue communicating.
pWith some software programs, you can use the Web To function and the Phone To/
AV Phone To function from i-αppli. However, you cannot use them while the software
program is running as the i-αppli Stand-by display.
pIf you start the camera from i-αppli, the shot images are not saved with ordinary
images, but are saved as part of i-αppli for its usage.
pIf you start the camera from i-αppli, you can specify the image size or image quality for
some i-αppli programs.
pYou can scan QR codes and JAN codes from i-αppli using the camera. The scanned
data is saved and used by the software program.
pImages※ that are used by i-αppli and data you have entered might be sent over the
Internet to the server automatically.
※i-αppli uses the following types of images:
・Images shot by the camera after it is started from a camera-linked application
program
・Images obtained by the infrared data exchange function of i-αppli
・Images downloaded from sites or Internet web pages
・Images obtained from Data Box by i-αppli
pi-αppli mail running under mail-linked i-αppli might not be displayed correctly.
pSome i-αppli programs save the various information used on the i-αppli programs
when you end them. However, the information might not be saved if the low battery
alarm sounds or the battery pack is removed while the i-αppli program is running. If
the battery level indicates “”, either press -h or end the i-αppli program in
accordance with the operation of each software program.
pYou can save the data files of some software programs to the microSD card, but you
might not be able to use them for another model. You can check “iαppli(microSD)”
for the software programs that use the microSD card.
pSome IPs (Information Providers) may access the software program stored in your
mobile phone and have it directly halted, depending on the software program. In that
case, you will not be able to start or upgrade the software program, or use it for the
Stand-by display. You can delete it or display the software information. To resume
running the software program, you need to receive the communication to cancel the
software halting state. Contact the IP (Information Provider) to inquire about that.
pSome IPs (Information Providers) might send data to the software program stored in
your mobile phone depending on the software program.
pWhen the IP (Information Provider) requests to halt or re-open the software program
or sends data to it, the mobile phone communicates and “” is displayed. In this
case, you are not charged a communication fee.
pTo creators of i-αppli
If you encounter an error while creating a software program, the Trace Information
display might help identify the problem.
For how to check the trace information, see “Trace Information” on page 253.
Information
253
i-αppli
The FOMA phone supports “motion tracking” which operates i-αppli programs (by
inclining or swinging the FOMA phone) through the recognition technology of the inside
camera.
pIt might not work in the following cases:
・When the lens of the inside camera is dirty
・When the clothes you are wearing are similar to the background
・When the background is not stable such as when you are moving
・When you are in a dark or too bright place
You can check the details when a software program malfunctions.
1mi-αppliiαppli infoTrace info
pWhen the memory space for Trace Info becomes full, the information is
overwritten from the oldest one.
pYou can operate “Copy info” and “Delete info” from the Function menu.
You can check the details when an i-αppli program ends because of a
security error.
1mi-αppliiαppli infoSecurity error history
pYou can operate “Copy info” and “Delete info” from the Function menu.
pYou can display the security error history also by selecting “” on the desktop.
Motion tracking
Information
pThis application program is the game played by inclining or swinging the FOMA
phone. If you excessively swing your FOMA phone, it might happen that it hits against
persons or objects, resulting in accidents or damage. When playing the game,
securely take hold of your FOMA phone, do not swing to an extent more than
necessitated, and check around you for safety.
Trace Information
Security Error History
Function Menu of the Software List
Function menu Operation/Explanation
Set iαppli To You can set whether to permit the i-αppli program to start from a
link on site or mail message. You can set also for when you place
the FOMA phone over an IC card compatible scanning device.
You can set this for each software program.
Put a check mark for items to be setl()
pSome items might not be set depending on the software
program.
Auto start time See page 262.
Software setting
(Stand-by set)
See page 263.
Software setting
(Network set)
You can set whether to communicate while an i-αppli program is
running.
Network setON, OFF or Check every startl()
pIf you select “Check every start”, the confirmation display
appears each time you start the i-αppli program.
Software setting
(Stand-by net)
See page 263.
Software setting
(Icon info)
You can set whether to permit the i-αppli program to use
information of icons indicating i-mode mail, SMS messages,
Messages R/F, battery level, Manner Mode, and within/out-of
service area.
Icon infoON or OFFl()
Software setting
(Hor. open menu
set)
You can set the i-αppli program for when it starts by selecting
“i-αppli” on the Horizontal Open Menu.
Hor. open menu setON or OFFl()
Software setting
(Change mld./img.)
You can set whether to permit the i-αppli program to change the
setting for the ring tones, Stand-by display, etc. This function is
available only for i-αppli DX programs.
Change mld./img.ON, OFF or Check every change
l()
pIf you select “Check every change”, the confirmation display
appears each time the i-αppli program tries to change the
setting for the ring tones, Stand-by display, etc.
254
i-αppli
Software setting
(See P. book/hist.)
You can set whether to permit the i-αppli program to refer to the
Phonebook, Redial, and Received Calls. This function is available
only for i-αppli DX programs.
See P. book/hist.ON or OFFl()
Software setting
(View ToruCa)
You can set whether to permit the i-αppli program to refer to
ToruCa files. This function is available only for i-αppli DX
programs.
View ToruCaON or OFFl()
Software setting
(Location usage)
You can set whether to permit the i-αppli program to use location
information. This function is available only for i-αppli DX
programs.
Location usageON or OFFl()
Software setting
(Program guide
key)
You can set the software program for the Program Guide i-αppli
that starts up from 1Seg. You can set this only for the i-αppli DX
program that links to 1Seg.
Program guide keyON or OFFl()
Software info You can display the software name, version, and others of the
i-αppli program.
Upgrade YES
Add desktop icon See page 127.
Delete
(Delete this)
Delete thisYES
Delete
(Delete selected)
Delete selectedPut a check mark for software programs
to be deletedl()YES
Delete
(Delete all)
Delete allEnter your Terminal Security CodeYES
Move to microSD See page 361.
Move to phone See page 361.
Power saver You can set whether to validate Power Saver Mode for each
i-αppli program for when “αPower saver” is set to “ON”.
ON or OFF
Function menu Operation/Explanation
The confirmation display appears asking whether to delete the i-αppli mail folder as well.
If you do not delete it, you can check the text of mail from the Outbox/Inbox list.
YES. . . . . . Deletes both the software program and the i-αppli mail folder.
NO. . . . . . . Deletes the software program only and the i-αppli mail folder is left.
Cancel. . . . Does not delete both the software program and i-αppli mail folder; the former
display returns.
pYou can delete neither the i-αppli program nor the i-αppli mail folder even if you select
“YES”, in the following cases:
・While Mail Security is set ・While the folder is set with security
・While displaying details of the folder ・When the folder contains protected mail
Information
<Software setting (Icon info)>
pWhen you set “Software setting (Icon info)” to “ON” for the i-αppli Stand-by display, the
icon information for unread mail/message, battery level, Manner Mode, radio wave
strength and out-of-service area can be sent to the IP (Information Provider) over the
Internet in the same way as the serial number of your mobile phone/UIM, and can be
deciphered by third parties.
pWhen the software program needs “Software setting (Icon info)”, the software
program might not run if “OFF” is selected.
<Upgrade>
pDepending on the software program, you can upgrade it at start.
pAt upgrading, the confirmation display might appear asking whether to send the “serial
number of your mobile phone/UIM”. Select “YES” to start upgrading. In this case, the
“serial number of your mobile phone/UIM” is sent to the IP (Information Provider) over
the Internet, so could be deciphered by third parties. However, your phone number,
address, age, and gender are not notified to the IP (Information Provider) or others by
this operation.
pYou cannot upgrade the mail-linked i-αppli in the following cases:
・While details of the corresponding i-αppli mail folder are displayed
・While Mail Security is set
・When Mail Security is set for the corresponding i-αppli mail folder
When you delete mail-linked i-αppli
255
i-αppli
The confirmation display appears asking whether to delete files on the microSD card as
well.
YES . . . . . . Deletes both the software program and files on the microSD card. Press
“YES” again on the confirmation display. You need to enter your Terminal
Security Code to execute “Delete” or “Delete selected”.
NO. . . . . . . Deletes the software program only and the files are left.
Cancel. . . . Does not delete both the software program and files on the microSD card,
and the former display returns.
The confirmation display appears telling that the files on the IC card will be deleted.
pYou cannot delete the “iD設定アプリ (iD Setting Application)”.
pYou might not be able to delete the Osaifu-Keitai compatible i-αppli while the IC card
function is working or IC Card Lock is set.
The following i-αppli programs are pre-installed:
pYou can delete the pre-installed i-αppli programs except for “Gガイド番組表リモコン
(G Guide Program List Remote-controller)”. You can re-download them from the
“P-SQUARE” site (see page 186). When you use a UIM other than the one used for
downloading, the UIM restrictions (see page 40) are set to them.
pDeadlines for re-download services
・“ガンダム U.C.0079 (Gundam U.C.0079)”: the end of April, 2012
・“レイトン教授と不思議な町 (Professor Layton and the Curious Village)”:
the end of April, 2012
・“カウントダウントレインGPS (Countdown Train GPS)”: the end of April, 2011
・“日英版/日中版 しゃべって翻訳 for P (J-E/J-C Speech Translation for P)”:
the end of April, 2012
pThe re-download service might be halted or closed without notice even in the service
period.
pDeadlines for downloading i-αppli additional data
・“ガンダム U.C.0079 (Gundam U.C.0079)”: the end of April, 2012
・“レイトン教授と不思議な町 (Professor Layton and the Curious Village)”:
the end of April, 2012
・“カウントダウントレインGPS (Countdown Train GPS)”: the end of May, 2011
・“日英版/日中版 しゃべって翻訳 for P (J-E/J-C Speech Translation for P)”:
the end of May, 2012
When you delete an i-αppli program whose files are on the
microSD card
When you delete Osaifu-Keitai compatible i-αppli
Pre-installed i-αppli Programs
The Gundam is now appearing in your mobile
phone. Operate the Gundam and then break
through heated battles.
1Software listガンダム U.C.0079 (Gundam U.C.0079)
OoOoOo
When you activate this i-αppli program in Normal Style, the confirmation display
appears telling that you are advised to play the game in Horizontal Open Style.
2Confirm to upgrade to the complete version
YES or NOOo
YES . . .Connects to the site and upgrade to the complete version
NO . . . .Not upgrade to the complete version
pYou are charged a packet communication fee for when you connect to the site or
upgrade to the complete version.
pThe complete version data is saved to the microSD card.
pYou can upgrade to the complete version also from the menu.
pYou cannot carry over the previous data when you upgrade to the complete
version.
pIf you put a check mark for “次回起動時から表示しない (Does not show this
display from the next start-up.)”, the confirmation whether to upgrade to the
complete version is not made when you start the program next time.
3Select a menu.
TIME ATTACK . . . Challenges how fast you can shoot down a certain number of
enemy airplanes
SURVIVAL. . . . . . . Challenges how many enemies that appear one after another
you can shoot down
HELP . . . . . . . . . . . For displaying how to operate the game
OPTION . . . . . . . . . For selecting a key operation type and setting the volume level
or vibrator
UP GRADE . . . . . . Connects to the site and upgrade to the complete version
QUIT. . . . . . . . . . . . For ending the application program
ガンダム U.C.0079 (Gundam U.C.0079)
256
i-αppli
This is the transplanted version of an
adventure puzzle game, which was a huge hit
for game consoles.
© LEVEL-5 INC.
1Software listレイトン教授と不思議な町 (Professor
Layton and the Curious Village)0
When you activate this i-αppli program in Normal Style, the confirmation display
appears telling that you are advised to play the game in Horizontal Open Style.
2Select a menu.
はじめから (From the beginning) . . .Start the game from the beginning
オプション (Option) . . . . . . . . . . . . . .For setting the volume level or vibrator
アップグレード (Upgrade) . . . . . . . . .Upgrade to the complete version
pYou are charged a packet communication fee for when you upgrade to the
complete version.
pThe complete version data is saved to the microSD card.
“Mobile Google Map” is the convenient i-αppli program that
enables you to get town information visually. You can easily
search for information about areas or shops using the map.
You can switch to the aerial photos as well.
pYou need to agree with “利用規約 (Usage rules)” for the first
time.
pYou are separately charged a packet communication free.
レイトン教授と不思議な町
(Professor Layton and the Curious Village)
Mobile Google Map
You can download the time schedule of trains, and can count
down the departure time of the train you want to catch on a
minute/second basis. The alarm function is also provided to
notify you of 5 to 30 minutes before the departure. You can
update the time schedule from the menu so the latest one is
always available. Further, you can search for the nearest
station using the GPS function.
pYou are separately charged a packet communication fee for
using.
pFor details, refer to “ヘルプ (Help)” in the menu.
Powered by JR Travel Navigator
1Software list
カウントダウントレイン-P (Countdown Train-P)
2Read “免責事項 (Exemption clause)” thoroughly
i()はい (YES)
3l()最寄駅検索(GPS) [Search the nearest
station (GPS)] or 駅名入力検索 (Search by entering
station name)
最寄駅検索(GPS) [Search the nearest station (GPS)]
. . . . Measures your current location and searches the surroundings for a station.
駅名入力検索 (Search by entering station name)
. . . . Enter a station name, and press i(). You do not need to enter the
whole station name.
4Select a station nameSelect a line and direction
i()はい (YES)
カウントダウントレインGPS (Countdown Train GPS)
257
i-αppli
Just by speaking a phrase to be translated into your FOMA
phone, this application program translates it from Japanese to
English or Chinese and vice versa.
pYou can use all the functions charge free for 60 days from
when you start using this application program. The phrases
available for translation are restricted from the 61st day after.
To use all the services, you need to register My Menu
(charged) from the “しゃべって翻訳 (Speech Translation)”
site by ATR-Trek Co., Ltd.
[(How to access: iMenu→メニュー/検索 (Menu/Search)
→辞書/便利ツール (Dictionary/Convenient Tool)→便利
ツール (Convenient Tool)→しゃべって翻訳 (Speech
Translation)]
pYou are separately charged a packet communication fee for using.
© ATR-Trek
1Software list
日英 しゃべって翻訳_P (J-E Speech Translation_P)
or 日中 しゃべって翻訳_P (J-C Speech Translation_P)
SKIP
pSelect “日英 しゃべって翻訳_P (J-E Speech Translation_P)” for using English
version, or select “日中 しゃべって翻訳_P (J-C Speech Translation_P)” for
using Chinese version.
2Read “しゃべって翻訳とは (What is Speech
Translation?)” and “ご利用規約 (Usage rules)”
thoroughly同意する (Agree)
pYou need to agree with “ご利用規約 (Usage rules)” for the first time.
3Read “ご利用注意事項 (Cautions in use)” thoroughly
OKはい (YES)
pIf you select “いいえ (NO)”, “しゃべって翻訳とは (What is Speech
Translation?)”, “ご利用規約 (Usage rules)”, and “ご利用注意事項 (Cautions in
use)” do not appear when you start the program next time.
4はい (YES)OK
p“iアプリの使い方 (How to use i-αppli)” appears at the first startup.
日英版/日中版 しゃべって翻訳 for P
(J-E/J-C Speech Translation for P)
The display is for
English version.
5Select a menu item.
日→英 翻訳 (Translate Japanese to English)
. . .Start to translate Japanese to English.
英→日 翻訳 (Translate English to Japanese)
. . .Start to translate English to Japanese.
日→中 翻訳 (Translate Japanese to Chinese)
. . .Start to translate Japanese to Chinese.
中→日 翻訳 (Translate Chinese to Japanese)
. . .Start to translate Chinese to Japanese.
シーンを変更 (Change scene)
. . .You can select the scene to translate.
pPress i to switch between Japanese and English or Chinese.
By using the GPS function and map, you can check the map for where you are currently
in or for the place you specify, or check your nearby area for details. You can then
navigate yourself to the destination by vehicle, on foot, or by car.
Further, you can easily get train information by voice input.
pYou are separately charged a packet communication fee. You are advised to use
Pake-Houdai/Pake-Houdai Full for using this software program.
pIf you delete this software program and then when you want to resume it, download it
from “iエリアー周辺情報ー (i-area -Local Information-)”.
pThis software program is the i-αppli program that uses the mail function, so it is not
available when the mode of 2in1 is set to B Mode.
pNote that we are not held responsible for the accuracy and promptness of the map and
route information.
pWhile driving, ensure that a person other than the driver operates this application
program.
pSee page 279 for details on operations.
地図アプリ (Map Application)
258
i-αppli
“楽オク出品アプリ2 (Rakuoku Exhibition Application 2)”
enables you to easily exhibit your goods on Rakuoku whenever
you want wherever you are. Even if you are a beginner, an
instruction guides you through exhibition procedures, so you
can use it easily. The convenient functions such as shooting/
editing photos and saving records are available so that you can
exhibit your goods in a shorter time than you do on sites.
pYou need to agree with “利用規約 (Usage rules)” for the first
time.
pYou are separately charged a packet communication fee.
pFor details on Rakuoku, refer to “Mobile Phone User’s Guide
[i-mode] FOMA version”.
pTo exhibit on Rakuoku, you need to register with the Rakuten
membership and exhibitor membership.
pFor the information about Rakuoku, refer to i-mode site.
i-mode site: iMenu→楽オク -オークション-
(Rakuoku -Auction-)
楽オク出品アプリ2 (Rakuoku Exhibition Application 2)
※
The display is for reference.
The actual one may differ.
QR code for
accessing the site
This is an i-αppli program that enables you to conveniently use
mobile banking. Mobile banking enables you to use your
FOMA phone to check the account balance, check the
deposits/withdrawals, and transfer/shift money whenever you
want and wherever you are. By entering your specified
password at the start of this application program, you can use
the mobile banking services for up to two banks.
pTo use mobile banking, you need to have the bank account
and subscribe to the mobile banking service of each bank.
pYou are separately charged a packet communication fee.
pFor details on i-αppli Banking, refer to “Mobile Phone User’s
Guide [i-mode] FOMA version”.
pFor the information about i-αppli Banking, refer to i-mode site.
i-mode site: iMenu→メニュー/検索 (Menu/Search)
→モバイルバンキング (Mobile Banking)
→iアプリバンキング (i-αppli Banking)
iアプリバンキング (i-αppli Banking)
※
The display is for reference.
The actual one may differ.
QR code for
accessing the site
259
i-αppli
This is an i-αppli program that bundles the TV program list and
AV remote-controller function and the monthly charge is free.
Anytime and anywhere you are, you can easily obtain the
terrestrial digital, terrestrial analog or BS digital TV program
information for the desired time zone. You can know about
titles, contents, and start/end times of TV programs. Further,
you can start a 1Seg program from the program list and vice
versa.
If there is any program you want to watch, you can set timer
recordings of the program on a DVD recorder, etc. over the
Internet. (You need to have a DVD recorder, etc. that supports
the remote timer recording function. And you need to perform
initial settings of this application program.) Further, you can
search for the program information by keywords such as
program genres or celebrities you like, or pickup keywords on
the top of the display. You can also remote-control a TV, video
recorder, and DVD player. (Some models are not supported.)
pSee “Using Infrared Remote-controller Function” on page 371 for details on the infrared
remote-controller.
pYou need to make the initial settings and to agree with the usage rules for the first time.
pYou are separately charged a packet communication fee.
pTo use this application program overseas, set the time for the FOMA phone to Japan
time.
pFor details, refer to “Mobile Phone User’s Guide [i-mode] FOMA version”.
pYou cannot delete “Gガイド番組表リモコン (G Guide Program List
Remote-controller)”.
pThis software program is the i-αppli program that uses the mail function, so it is not
available when the mode of 2in1 is set to B Mode.
You can select and book a program you want to watch from the program list of this
application program.
How to book a program
1. Software listGガイド番組表リモコン (G Guide Program List Remote-controller)
Highlight a program to be booked and press i()
視聴予約 (Book program)予約実行 (Execute booking)
Operate following the instructions on the display.
Gガイド番組表リモコン
(G Guide Program List Remote-controller)
About program booking function
※
The display is for reference.
The actual one differs.
Local programs according
to your region appear on
your display.
You can select a program you want to record and set a timer recording from the program
list of this application program.
How to set a timer recording
1. Software listGガイド番組表リモコン (G Guide Program List Remote-controller)
Highlight a program to be set for a timer recording and press i()
♯ワンセグ録画予約 (1Seg timer recording)予約実行 (Execute booking)
Operate following the instructions on the display.
(You can set a timer recording also by highlighting a program and pressing s.)
If you have a DVD recorder, etc. that supports the remote timer recording function, you
can set timer recordings from the program list of this application program over the
Internet even if you are away.
For remote timer recording, you need to make initial settings of this application program.
How to make initial settings
1. Set the Internet connection for the DVD recorder, etc.
(Refer to the instruction manual of the DVD recorder, etc. you use.)
2. Software listGガイド番組表リモコン (G Guide Program List Remote-controller)
i()リモート録画予約 (Remote timer recording)
Operate following the guidance.
How to set timer recordings
After the initial settings, specify your desired program and select “リモート録画予約
(Remote timer recording)”. Then, the DVD recorder, etc. specified on this application
program is connected via the Internet, and you can set timer recordings.
pYou are separately charged a packet communication fee.
About timer recording function
About remote timer recording function
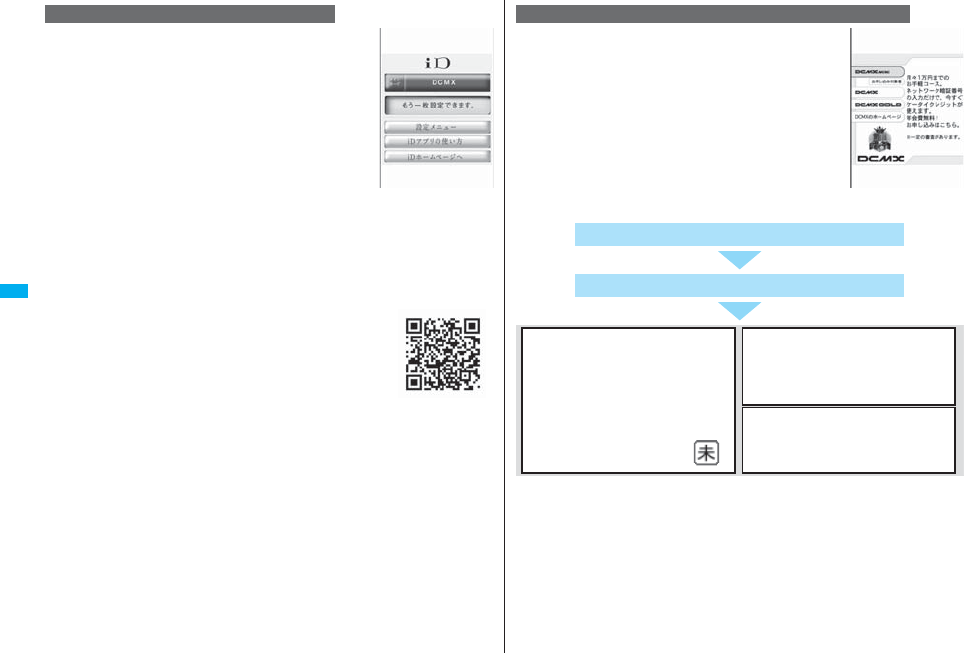
260
i-αppli
Chargeless electronic money “iD” is a service that enables you
to do shopping by placing your Osaifu-Keitai or a credit card
with “iD” mounted over a scanning device. You can do
shopping easily and conveniently without signing. Depending
on the card publishing company, cashing is also supported.
pFor using “iD”, you need to subscribe to a card publishing
company that supports “iD” as well as to have Osaifu-Keitai
on which specified settings have been completed by the iD
application program and card application program provided
by the card publishing company, or a credit card on which
“iD” is mounted.
pWhen you use “iD” on Osaifu-Keitai, you need to complete iD
application settings and then make settings at the card
application end by downloading or starting the card application provided by your card
publishing company. Depending on the card you use, you might be able to use iD only
with the settings at the card application end without any iD application settings.
pThe expense (annual fees, etc.) charged for the iD service differs depending on the
card publishing company.
pFor the information about “iD”, refer to the i-mode site of “iD”.
i-mode site: iMenu→メニューリスト (Menu List)→「iD」
iD設定アプリ (iD Setting Application)
※
The display is for reference.
The actual one may differ.
QR code for
accessing the site
“DCMX” is a credit service that supports “iD” and offered by
NTT DoCoMo Group. DCMX provides DCMX mini that
enables you to use up to ¥10,000 per month and respective
DCMX/DCMX GOLD services that enable you to use more
amount and save up DoCoMo points.
With “DCMX mini”, you can easily make a subscription from
this application program and immediately use Mobile Phone
Credit.
※1 The online screening is conducted at your subscription for DCMX mini. For
subscribing to a service other than “DCMX mini”, you are connected to the
subscription page for i-mode.
※2 You might be required to enter your pin number under certain conditions.
※3 Only for DCMX mini, you can check usage status from the application program. For
the other than “DCMX mini”, you can check it at the i-mode site.
DCMXクレジットアプリ (DCMX Credit Application)
※
The display is for reference.
The actual one may differ.
Subscribing for membership/Screening ※1
Use
No troublesome deposit is required!
Just by placing the mobile phone with
completing card information setting at a
shop where the following iD mark is put
up, you can enjoy shopping without
signing※2.
Check ※3
You can check, on the application
program, the service contents of DCMX,
the balance for the current month, and
detailed account!
Change
You can perform setting when changing
models, or updating your validity period
from the application program.
Setting card information
261
i-αppli
pFor service contents and details of subscriptions, refer to the
i-mode site of DCMX.
・i-mode site: iMenu→DCMX iD
“FOMA 通信環境確認アプリ (FOMA Communication
Environment Check Application)” enables you to check
whether the FOMA phone is available at the FOMA
High-Speed Area.
pUse “FOMA 通信環境確認アプリ (FOMA Communication
Environment Check Application)” with your consent to “ご利
用の注意 (Cautions in use)”.
pDepending on the communication environment (such as
weather, radio wave conditions, network congestion state) at
communication environment check, the different result or “out
of service” might appear even in the same area or at the
same period of time.
pYou might not be able to check correctly if you use another function while using this
application program.
QR code for
accessing the site
Information
pTo start this application program for the first time, you need to agree with “ご利用上の
注意 (Cautions in use)”.
pYou are charged a packet communication fee for settings and operations.
■Cautions on Osaifu-Keitai compatible i-αppli
Note that we take no responsibility for any information set on your IC card.
FOMA 通信環境確認アプリ
(FOMA Communication Environment Check Application)
※
The display is for reference.
The actual one may differ.
1mi-αppliiαppli settings
Do the following operations.
<iαppli Settings>
Setting i-αppli
Item Operation/Explanation
Auto start setting See page 262.
Disp. software info See page 251.
Preferred tone You can set which sound to be output preferentially, from MUSIC/
1Seg or i-αppli program, for when you start an i-αppli program
during music playback or use of 1Seg.
MUSIC/1Seg or iαppli
αBacklight You can set the backlight operation for when an i-αppli program is
running.
Select an item.
Depend on system . . . .Follows the setting of “Backlight”.
Depend on software . . .Follows the setting of each software
program.
Constant light. . . . . . . . .Lights constantly.
αPower saver You can set to Power Saver Mode to decrease battery
consumption by suspending the i-αppli program temporarily for
when you close the FOMA phone during i-αppli running.
ON or OFF
pThis setting is valid from when an i-αppli program starts until it
closes.
pEven when this function is set to “ON”, Power Saver Mode
becomes invalid if “Power saver” that can be set for each i-αppli
program is set to “OFF”.
αVibrator You can set the vibrator operation for when an i-αppli program is
running.
Depend on system or Depend on software
Depend on system . . . .Does not work regardless of the setting
of “Vibrator”. With some software
programs, the vibrator works.
Depend on software . . .Follows the setting of each software
program.
Check settings You can check each of “iαppli settings”.
262
i-αppli
You can make an i-αppli program start automatically at the set date and
time. Set the date and time for automatic start using Auto Start Time.
You can set whether to enable automatic start of i-αppli programs.
1mi-αppliiαppli settingsAuto start setting
ON or OFF
You can set the date and time for automatic start. You can set for up to
three software programs.
1Software listi()Auto start time
2Put a check mark for an item to be setl()
Time interval set . . . . Starts at an interval specified by the software program. The
setting is completed.
Start time set . . . . . . . Starts at the set start time automatically.
3Select start timeEnter the date and time to be set.
41 timeSelect a type of repeat.
pIf you select “1 time”, the automatic start is not repeated.
pIf you select “Weekly”, put a check mark for days of the week to be set and press
l().
Information
<αBacklight> <αVibrator>
pWith some software programs, the backlight and vibrator settings are “OFF”.
Consequently, if you set “Depend on software”, the backlight and vibrator will not
work; if you want them to work, set “Depend on system”.
Starting i-αppli Automatically
Auto Start Setting
Auto Start Time
5Press l().
You can check whether a software program has started automatically
and properly. Also, you can check the information of start failure from IC
card. Up to three records of automatic start, a record of automatic start
set by i-αppli, and a record of start failure from IC card are stored.
1mi-αppliiαppli infoAuto start info
StartO . . . . .Started automatically and properly.
StartX . . . . . Did not start automatically. When “ ” is displayed, you can press
Oo( ) to start the software program.
Start–. . . . . .Has not started yet.
Auto Start Info
Information
pSoftware programs do not start automatically in the following cases:
・When the FOMA phone is turned off
・When the date and time are not set
・When another function is working
・During Lock All
・During Personal Data Lock
・During playback of animations/Flash movies
・When the time set for automatic start is identical to the reserved time set for
“Software update”, or the time set for an alarm of “Alarm”, “Schedule” or “ToDo”,
“Book program” or “Timer recording”
・When a start time has been specified to the same software program within 10
minutes from the previous auto-start
pIf automatic start fails, “ ” appears on the desktop. Select the icon to bring up the
Auto Start Info.
263
i-αppli
You can set an i-αppli program for the Stand-by display. Once set, the
i-αppli Stand-by display automatically appears each time you bring up
the Stand-by display.
1Software listi()Software setting
Stand-by setON or OFFl()
“ ” is displayed for the software program set as the Stand-by display.
“ ” or “ ” is displayed while an i-αppli Stand-by display is running.
From the i-αppli Stand-by display, press r.
“ ” or “ ” changes to a blinking “ ” or “ ” and then you can operate the i-αppli
program as a normal one.
pTo return to the i-αppli Stand-by display, press and hold r for at least one second
or press h; then select “Ended”. To release the i-αppli Stand-by display, select
“Terminated”, and select “YES”.
<i-αppli Stand-by Display>
Operating i-αppli Stand-by Display
Software Setting (Stand-by Set)
To operate an i-αppli program as a normal i-αppli program
when an i-αppli Stand-by display is running
Information
pIf you turn off the FOMA phone while the i-αppli Stand-by display is running, the
confirmation display appears asking whether to start the i-αppli program when you
turn on the power again.
pYou can set only one software program for the i-αppli Stand-by display.
pSome i-αppli programs cannot be set for the Stand-by display.
pWith some software programs set as the i-αppli Stand-by display, you can press a key
to go from the normal i-αppli status to the i-αppli Stand-by display status. However,
you cannot return to the i-αppli Stand-by display if another menu function is running.
pNote that you might not be able to receive timely information if you have set “Software
setting (Stand-by net)” to “OFF”.
pYou cannot use the Web To function and the Phone To/AV Phone To function from
the i-αppli Stand-by display.
pIf the software program which connects to the network is set for the i-αppli Stand-by
display, it might not operate successfully because of radio wave conditions or other
factors.
You can set whether to permit communication for when the i-αppli
Stand-by display is running.
1Software listi()Software setting
Stand-by netON or OFFl()
You can temporarily end the running i-αppli Stand-by display. Also, you
can release the i-αppli Stand-by display.
1mSettingsDisplayDisplay setting
Stand-by displayEnd iαppli display
End or Terminate
pWhen you select “Terminate”, select “YES”.
pWhen you bring up the Stand-by display while a menu function is operating, the image
set for “Stand-by display” of “Display setting” will be displayed, even when the i-αppli
Stand-by display is set.
pWhen communicating frequency is extremely high in a certain period of time while an
i-αppli program is running as the i-αppli Stand-by display, the confirmation display
appears. When you press -r, the confirmation display appears asking whether to
continue communication.
pIf you set Lock All or Personal Data Lock when the i-αppli Stand-by display is shown,
the i-αppli Stand-by display will end. If you set Lock All, the image set for “Stand-by
display” of “Display setting” will be displayed and if you set Personal Data Lock, the
default Stand-by display will be displayed. The i-αppli Stand-by display will return
when you release each lock.
Software Setting (Stand-by Net)
Information
End Stand-by Display
264
i-αppli
When the i-αppli Stand-by display does not end successfully, you can
check the date/time and its reason.
1mi-αppliiαppli infoEnd stand-by info
pWhen “ ” is displayed on the End Stand-by Info display, press i(),
and select “Copy info” to copy the information. Select “Delete info”, and select
“YES” to delete the information.
Depending on the i-αppli program, you can save its data files on the
microSD card.
You can display the i-αppli data files saved on the microSD card.
1mi-αppliiαppli(microSD)iαppli(microSD)
End Stand-by Info
<iαppli(microSD)>
Displaying i-αppli Data Files on the
microSD Card
Function Menu while i-αppli Data File is Displayed
Function menu Operation/Explanation
Folder info You can display the information of the software program that uses
the selected folder, available/unavailable for folder usage, and the
reason if unavailable.
Delete folder You can delete the selected folder and files in the folder.
Enter your Terminal Security CodeYES

265
Osaifu-Keitai/ToruCa
What is Osaifu-Keitai?. . . . . . . . . . . . . . . . . . . . . . . . . . . . . . . . . 266
What is iC Transfer Service? . . . . . . . . . . . . . . . . . . . . . . . . . . . 266
Starting Osaifu-Keitai Compatible i-αppli
. . . . . . . . . . . . . . . . . . . . . . . . . . . . . . . . . . . . <IC Card Content> 267
Checking IC Owner Data in IC Card . . . . . . <Check IC Owner> 268
What is ToruCa? . . . . . . . . . . . . . . . . . . . . . . . . . . . . .<ToruCa> 268
Obtaining ToruCa Files . . . . . . . . . . . . . <Obtain ToruCa Files> 269
Displaying ToruCa Files . . . . . . . . . . . . . . . . <ToruCa Viewer> 269
How to See ToruCa File List/Detailed ToruCa File Display . . . 272
Setting about ToruCa . . . . . . . . . . . . . . . . . <ToruCa Settings> 274
Locking IC Card Function . . . . . . . . . . . . . . . . . <IC Card Lock> 275

266
Osaifu-Keitai/ToruCa
The convenient i-mode function which uses the IC card function of the
i-mode phone (i-mode FeliCa), or the i-mode phone with the IC card
mounted is called “Osaifu-Keitai”.
FeliCa is one of the non-contact IC technologies that enables you to read
and write data just by placing it over a scanning device.
Just by placing Osaifu-Keitai over the scanning device in a shop, you can
pay by electronic cash or use it as an air ticket or reward card. Mobile
phones have become one of easy-to-use tools.
Further, different from the existing FeliCa compatible non-contact IC
card, the new one enables you to deposit electronic money by using the
communication into the IC card inside the Osaifu-Keitai or to check your
account for balance or usage details.
※To use Osaifu-Keitai compatible service, you need to make the settings from i-αppli
(IC application) program which supports the IC card function [for details, inquire of IP
(Information Provider)].
※For cautions on using each Osaifu-Keitai compatible service, refer to “Mobile Phone
User’s Guide [i-mode] FOMA version”.
pData on the IC card might be lost or deformed owing to the malfunction of
Osaifu-Keitai. (When we keep your Osaifu-Keitai for repair, we cannot keep it with data
files left, so the data files shall be deleted beforehand by yourself as a rule.) Use the
backup service of the IP (Information Provider) for supports such as reissue,
restoration, temporary storage or transfer of data files, except for the data transfer by iC
transfer service. The availability of backup services and their usage conditions
(necessary applications, charges, etc.) and the support availability of iC transfer service
differ depending on the service. Contact the IP (Information Provider) beforehand. For
your important data files, be sure to use the service with backup support.
pIn any case including malfunction or model change, we cannot be held responsible for
the loss or deformation of data on the IC card or other losses caused regarding
Osaifu-Keitai compatible services.
pIf your Osaifu-Keitai has been stolen or lost, inquire of the provider for Osaifu-Keitai
compatible service you use about ways of dealing with the trouble, immediately. With
this FOMA phone, you can use Omakase Lock or IC Card Lock. (See page 135, and
page 275)
What is Osaifu-Keitai?
iC transfer service※1 is the service for transferring the data files on the IC
card at a time※2 to your new Osaifu-Keitai mobile phone※3 when you
replace your Osaifu-Keitai mobile phone such as at the time of model
change or malfunction. After completing the transfer of data files on the
IC card, just download an Osaifu-Keitai compatible i-αppli program, and
then you can easily use the Osaifu-Keitai services.
iC transfer service is available at the service counters such as a DoCoMo
shop nearby.
For details, refer to “Mobile Phone User’s Guide [i-mode] FOMA version”.
※1 You are charged a handling fee for using iC transfer service. (You might not be
charged at times.)
In addition, you are charged a packet communication fee for downloading iC
application programs and respective settings.
※2 Some Osaifu-Keitai services are not supported. The services that are not supported
are deleted when you use iC transfer service, so ensure that you use a back-up
service for the Osaifu-Keitai services or delete them in advance.
※3 iC transfer service is available when new Osaifu-Keitai mobile phone is iC transfer
service compatible model.
What is iC Transfer Service?
267
Osaifu-Keitai/ToruCa
You can start the Osaifu-Keitai compatible i-αppli from the Software list.
By using Osaifu-Keitai compatible i-αppli, you can read/write the data
inside the IC card and use convenient functions such as depositing
electronic money or traffic tickets, or checking your account for the
balance and usage details on the mobile phone.
pTake care of your Terminal Security Code and password used for each service not to
reveal to anyone.
pWhen you start or download the Osaifu-Keitai compatible i-αppli program for the first
time, the message “Use IC card for current UIM?” appears. When you select “YES”,
you cannot use the IC card function afterward unless you insert the same UIM.
To use the IC card function with another UIM, delete all the information on the IC card
from “Change IC owner”, and then delete all the Osaifu-Keitai compatible i-αppli
programs other than “iD設定アプリ (iD Setting Application)”. Otherwise, you cannot
use it.
pReading and writing data from the software program and to the IC card is suspended in
the following cases:
In that case, the read or written data is discarded. The operation after the
communication ends differs depending on the service you use.
・When a call comes in while an i-αppli program is running
・When the battery goes flat
1mOsaifu-KeitaiIC card content
The list of the Osaifu-Keitai compatible i-αppli program is displayed. When you
select the i-αppli program, it starts up.
<IC Card Content>
Starting Osaifu-Keitai Compatible i-αppli
Read and Write Data inside the IC Card
Place the FeliCa mark “ ” of the FOMA phone over the scanning
device, and you can use the FOMA phone as electronic money to pay for
shopping or to use it as a traffic ticket. This function is available without
starting the software program.
pDuring a call or i-mode connection, you can use Osaifu-Keitai by placing the FeliCa
mark over the scanning device, however, you cannot start the Osaifu-Keitai compatible
i-αppli.
1Place the FeliCa mark “ ” of the FOMA phone over the
scanning device to use the target service.
pThe Call/Charging indicator lights when you bring your FOMA phone close to a
scanning device and communication becomes ready.
Use Osaifu-Keitai
Place the FeliCa mark “ ” of the FOMA
phone over the scanning device.
Information
pMount the battery pack to use Osaifu-Keitai. Even when the power is turned off or
when the battery has gone flat, you can use Osaifu-Keitai by placing the FeliCa mark
over the scanning device, however, you cannot start the Osaifu-Keitai compatible
i-αppli. You might not be able to use Osaifu-Keitai if you have left the battery unused
for a long period or not charged it after the low battery alarm sounds. Charge the
battery.
pWhen the FeliCa mark “ ” of the FOMA phone placed over the scanning device is
not identified, slightly move the mark forwards, backwards, to left, or to right.
pOsaifu-Keitai compatible i-αppli might start when you place the FOMA phone over the
scanning device.

268
Osaifu-Keitai/ToruCa
You can check whether IC owner information for using the IC card is
consistent with the information of the currently inserted UIM.
1mOsaifu-KeitaiCheck IC owner
pWhen the UIM differs from the one for stored information, select “変更” and reset
the data inside the IC card, and then you can store the UIM information.
You can delete the data in IC card, and reset the IC owner data. After
resetting, you can re-register by currently inserted UIM.
pDelete all the Osaifu-Keitai compatible i-αppli programs other than “iD設定アプリ (iD
Setting Application)” to delete the IC owner information. However, the i-αppli program
with its data file on the IC card is not initialized, so you need to delete it separately.
1mOsaifu-KeitaiChange IC ownerResetYES
Enter your Terminal Security CodeYES
ToruCa is an electronic card that you can obtain with Osaifu-Keitai for
use as fliers, restaurant cards, and coupon tickets.
You can obtain ToruCa files from scanning devices or sites and can
easily exchange them using mail, infrared ray, or a microSD card.
The obtained ToruCa files are saved to “ToruCa” of “Osaifu-Keitai”.
pAvailable on the ToruCa compatible model. For details, refer to “Mobile Phone User’s
Guide [i-mode] FOMA version”.
<Check IC Owner>
Checking IC Owner Data in IC Card
Change IC Owner
<ToruCa>
What is ToruCa?
■Flow for using ToruCa
■Sources of ToruCa files
Place your Osaifu-Keitai over a scanning
device to obtain a ToruCa file.
You can view more detailed information by using “詳細 (Details)” key.
Scanning device
Site
i-αppli
Exchanges ToruCa
files between i-mode
phones.
Mail,
infrared data exchange,
iC communication
QR code
microSD card
269
Osaifu-Keitai/ToruCa
You can obtain the ToruCa file from a scanning device using the IC card
function. By obtaining detailed information, a ToruCa file becomes a
ToruCa file (details) which has more pieces of information.
pFor a ToruCa file (details), you can download up to 100 Kbytes per file, and for a
ToruCa file before obtaining the details, you can download up to 1 Kbyte per file.
1Place the FeliCa mark “ ” of the FOMA phone over the
scanning device.
A ToruCa obtained tone sounds, the Call/Charging indicator
flickers.
pWhen “Receiving display” is set to “ON”, detailed display of
obtained ToruCa file appears.
pFor a ToruCa file before obtaining detailed information, the
confirmation display appears asking whether to connect to a
site to download detailed information. Select “YES” to display
a ToruCa file (details) with detailed information obtained.
Select “NO” to display a ToruCa file without detailed
information.
pIf no keys are pressed for about 15 seconds or “Receiving display” is set to “OFF”,
“” appears on the desktop.
Press Oo, highlight , and press Oo(); then the ToruCa File list appears.
<Obtain ToruCa Files>
Obtaining ToruCa Files
Obtain from Scanning Device
When the ToruCa file is obtained
If you set “Auto reading” to “Accept” to use the ToruCa files by placing the FOMA phone
over the scanning device, the available ToruCa files are automatically recognized. The
used ToruCa files are converted into “Used” and then moved to the “Used ToruCa”
folder. Up to 20 used ToruCa files are saved, and when the number of the files exceeds
20, the files are deleted from the one downloaded at the oldest date.
pEven if “Auto reading” is set to “Reject”, the confirmation display might appear asking
whether to use “Auto reading” when you place the FOMA phone over the scanning
device. To use ToruCa files, select “YES”, and then set “Auto reading” to “Accept”.
You can display the ToruCa file obtained using the IC card function, or
from sites or mail.
1mOsaifu-KeitaiToruCa
Select a folder.
pEach time you press m from the ToruCa Folder list,
you can switch folders between the FOMA phone and
the microSD card.
pWhen the folder contains unread ToruCa files, “” appears.
About Auto-reading Function of ToruCa
Information
pWhen you fail to obtain a ToruCa file, the ToruCa failed-to-obtain tone sounds, and
the Call/Charging indicator lights.
pA ToruCa obtained tone and a ToruCa failed-to-obtain tone sound at the volume set
for “Phone” of “Ring volume”.
pDepending on the settings by IPs (Information Providers), you might not be able to
update ToruCa files or send them by mail or infrared rays.
<ToruCa Viewer>
Displaying ToruCa Files
ToruCa Folder list
270
Osaifu-Keitai/ToruCa
2Select a ToruCa file.
A ToruCa file before obtaining detailed information itself does not show the detailed
information. Select “詳細 (Details)” on the ToruCa file display and select “YES” to
connect to the site to obtain more detailed information.
After obtaining the detailed information, the ToruCa file is overwritten and saved.
Detailed ToruCa File
display
ToruCa File list
When obtaining detailed information from a ToruCa file
Information
pYou are charged the ordinary packet fee for obtaining.
Function Menu of the ToruCa Folder List
Function menu Operation/Explanation
Operate folder
(Add folder)
You can create a user folder. You can create up to 20 folders.
Add folderEnter a folder name.
pYou can enter up to 10 full-pitch/20 half-pitch characters for the
FOMA phone.
pYou can enter up to 31 full-pitch/63 half-pitch characters for the
microSD card.
Operate folder
(Edit folder name)
You can edit the folder name for the user folder.
Edit folder nameEnter a folder name.
pYou can enter up to 10 full-pitch/20 half-pitch characters for the
FOMA phone.
pYou can enter up to 31 full-pitch/63 half-pitch characters for the
microSD card.
Operate folder
(Delete folder)
All ToruCa files in the folder are deleted.
Delete folderEnter your Terminal Security CodeYES
Search all folders You can search through all ToruCa files in the FOMA phone
(except ToruCa files stored in the “Used ToruCa” folder) by
specifying a search condition.
Select a search condition.
Genre . . . Select a genre.
Press l( ) to display a list of category icons
belonging to the genre.
Title . . . . . Enter characters to be searched for, from those in the
title.
Index. . . . Enter characters to be searched for, from those in
location data.
pYou can enter up to 20 full-pitch/40 half-pitch characters for the
Title search, and up to 10 full-pitch/20 half-pitch characters for
the Index search.
Function menu Operation/Explanation
271
Osaifu-Keitai/ToruCa
Auto-sort You can set to automatically sort and save the ToruCa files that
satisfy the conditions set to the folder for when you obtain them
from a scanning device or automatically obtain them from data
broadcasting while watching a 1Seg program.
Select a sorting condition.
Genre . . . . Put a check mark for the genre to sort into and press
l( ). You can put it for multiple genres.
Title . . . . . . Enter characters from those in the title, to be a sorting
condition.
Index . . . . . Enter characters from those in the location data, to
be a sorting condition.
Release. . . Select “YES” to release the sorting condition you
specified.
pYou can enter up to 20 full-pitch/40 half-pitch characters for the
Title sort, and up to 10 full-pitch/20 half-pitch characters for the
Index sort.
pWhen a sorting condition is already specified for the folder, it is
displayed. Press i( ) to set a sorting condition again.
Copy
(Copy to microSD)
You can copy the ToruCa files together with the folder from the
FOMA phone to the microSD card.
Copy to microSD
Copy
(CPY all to microSD)
You can copy all the ToruCa files together with the folder from the
FOMA phone to the microSD card.
CPY all to microSDEnter your Terminal Security Code
YES
Copy
(Copy to phone)
You can copy the ToruCa files together with the folder from the
microSD card to the FOMA phone.
Copy to phone
Copy
(Copy all to phone)
You can copy all the ToruCa files together with the folder from the
microSD card to the FOMA phone.
Copy all to phoneAdd or Overwrite
Enter your Terminal Security CodeYES
Function menu Operation/Explanation
Ir/ transmission
(Send all Ir data)
See page 371.
Ir/ transmission
(All
transmission)
See page 372.
Memory info You can display the used memory space (estimate)/the number
of saved files.
Delete all You can delete all the ToruCa files stored in the FOMA phone.
Enter your Terminal Security CodeYES
Select storage You can set a destination folder for when copying from the FOMA
phone to the microSD card.
YES
Function menu Operation/Explanation
Information
<Auto-sort>
p“ ” is displayed when the Genre sort is set, “ ” is displayed when the Title sort is
set, and “ ” is displayed when the Index sort is set.
pWhen a file satisfies multiple conditions, it is sorted into the top of the folder in the
ToruCa Folder list.
<Copy (Copy to microSD)>
pThe ToruCa file (details) is copied as a ToruCa file before obtaining details if it
contains data which is prohibited to output from the FOMA phone or set with UIM
restrictions.
<Copy (CPY all to microSD)>
pThe ToruCa files in the “ToruCa” folder within the FOMA phone are saved to “SD
ToruCa” on the microSD card.
<Copy (Copy all to phone)>
pThe ToruCa files in “SD ToruCa” on the microSD card are added or overwritten and
then saved to the “ToruCa” folder in the FOMA phone.
<Select storage>
p“ ” is displayed for the folder set as a destination.
pWhen you execute Check microSD, or create or edit a folder by using a personal
computer, the destination folder on the microSD card might be changed. When the
setting is changed, set the destination folder again.
272
Osaifu-Keitai/ToruCa
Indicates the state of ToruCa file
※1 Does not apply to the ToruCa file downloaded from a site.
※2 Appears for only the ToruCa file on the microSD card.
p“ ” is add to the expired ToruCa file.
p“ ” is add to the ToruCa file whose output from the FOMA phone is prohibited.
Indicates the category
Displays a category icon that matches the contents of the ToruCa file.
Indicates the Index file
Displays the location data of the publisher that publishes the information about the
ToruCa file.
Indicates the title
Indicates the date and time the ToruCa file was obtained
Indicates the ToruCa information
Simple explanation and the “詳細 (Details)” key are displayed for a ToruCa file.
Information about the publisher is displayed for a ToruCa file (details).
How to See ToruCa File List/Detailed
ToruCa File Display
ToruCa File list
Detailed ToruCa File display
(for ToruCa file)
Detailed ToruCa File display
[for ToruCa file (details)]
※1Unread ToruCa file
Read ToruCa file
※2FOMA phone incompatible ToruCa file
Function Menu of the ToruCa File List/Detailed ToruCa File
Display
Function menu Operation/Explanation
Attach to mail You can compose an i-mode mail message with the ToruCa file
attached.
Go to step 2 on page 198.
pYou can compose it also by pressing l().
Move Select a destination folder.
pYou cannot select the “Used ToruCa” folder.
Search/sort
(Search)
[List only]
You can search through ToruCa file in the folder by specifying a
search condition.
SearchSelect a search condition.
Genre . . . Select a genre.
Press l( ) to display a list of category icons
belonging to the genre.
Title . . . . . Enter characters to be searched for, from those in the
title.
Index. . . . Enter characters to be searched for, from those in
location data.
pYou can enter up to 20 full-pitch/40 half-pitch characters for the
Title search, and up to 10 full-pitch/20 half-pitch characters for
the Index search.
Search/sort
(Sort)
[List only]
You can change the order of displayed files.
SortSelect an order.
Copy
(Copy)
You can copy the displayed or highlighted ToruCa file to another
folder.
CopySelect a destination folder.
pYou cannot select the “Used ToruCa” folder.
Copy
(Copy to microSD)
The files are copied to the folder as specified by “Select storage”
on page 271.
Copy to microSD
Copy
(Copy to phone)
You can copy the ToruCa file from the microSD card to the
ToruCa folder in the FOMA phone.
Copy to phone

273
Osaifu-Keitai/ToruCa
Multiple-choice
[List only]
You can select multiple ToruCa files and operate.
Put a check mark for ToruCa files to be selected
i()Select an item.
Move . . . . . . . . . . . . . . See page 272.
Copy . . . . . . . . . . . . . . See page 272.
Copy to microSD. . . . See page 272.
Copy to phone . . . . . . See page 272.
Send Ir data . . . . . . . . See page 370.
Select all . . . . . . . . . . . Selects all files.
Release all . . . . . . . . . Releases all selections.
Update ToruCa
[Detailed display only]
You can re-obtain the information about the ToruCa file. The
re-obtained ToruCa file (details) is automatically overwritten and
then saved.
YES
pYou cannot update some ToruCa files.
pSee page 186 for when ToruCa files are stored to the
maximum.
Operate image
(Save image)
[Detailed display only]
You can save the image displayed on the ToruCa file and set it for
the Stand-by display or Wake-up display.
Save imageSelect an imageYES
Select a destination folder.
Go to step 3 on page 182.
pSee page 186 for when images are stored to the maximum.
Operate image
(Save BG image)
[Detailed display only]
You can save the background image of the ToruCa file and set it
for the Stand-by display or Wake-up display.
Save BG imageYESSelect a destination folder.
Go to step 3 on page 182.
pSee page 186 for when images are stored to the maximum.
Operate image
(Retry)
[Detailed display only]
You can play back an animation image or Flash movie in the
ToruCa file from the beginning.
Retry
pWhen a part of the Flash movie is outside the display area, the
Flash movie might not be played back.
Add to phonebook
[Detailed display only]
See page 96.
Add desktop icon See page 127.
Function menu Operation/Explanation
Ir/ transmission
(Send Ir data)
See page 370.
Ir/ transmission
( transmission)
See page 372.
Memory info
[List only]
You can display the used memory space (estimate)/the number
of saved files.
Delete
(Delete this)
Delete thisYES
Delete
(Delete selected)
[List only]
Delete selectedPut a check mark for ToruCa files to be
deletedl()YES
Delete
(Delete all)
[List only]
You can delete all ToruCa files in the folder.
Delete allEnter your Terminal Security CodeYES
Function menu Operation/Explanation
Information
<Attach to mail>
pThe ToruCa file (details) that contains data whose output from the FOMA phone is
prohibited is attached as a ToruCa file before obtaining details.
pYou might not be able to attach the ToruCa file to i-mode mail depending on its file
size.
<Copy (Copy)>
pYou cannot copy ToruCa files whose output from the FOMA phone is prohibited.
274
Osaifu-Keitai/ToruCa
<Copy (Copy to microSD)>
pThe ToruCa file (details) that contains data whose output from the FOMA phone is
prohibited or the data set with the UIM restrictions is copied as a ToruCa file before
obtaining details.
pWhen the number of files in the destination folder on the microSD card is full, a new
folder is automatically created and ToruCa files are saved to that folder.
When copying is completed, the message “This folder is set for storage XXXXXX”
(XXXXXX denotes a folder name) appears.
pThe name of copied ToruCa file is TORUCXXX (XXX denotes a numeral).
pWhen no folder is set as a destination folder on the microSD card, a new folder is
created automatically and the file is saved to the folder. After saving, the newly
created folder is set as the destination folder.
pYou might not be able to execute “Copy to microSD” for the ToruCa file depending on
its file size.
<Copy (Copy to phone)>
pYou might not be able to execute “Copy to phone” for the ToruCa file depending on its
file size.
<Operate image>
pThe images that satisfy the following conditions are saved as frames or stamps:
・The transparent GIF file that is not an animation GIF file
・The file extension is “ifm”.
・The image size is Stand-by (480 x 854), VGA (640 x 480), CIF (352 x 288), QVGA
(240 x 320), QCIF (176 x 144), or Sub-QCIF (128 x 96) for frames; and Stand-by
(480 x 854) or smaller except frames for stamps.
Information
1mOsaifu-KeitaiSettings
Do the following operations.
<ToruCa Settings>
Setting about ToruCa
Item Operation/Explanation
Receive ToruCa You can set whether to obtain ToruCa file from a scanning device
using the IC card function.
Accept or Reject
ToruCa from
dataBC
You can set whether to obtain ToruCa files automatically from
data broadcasting while watching a 1Seg program.
Auto receive ON or Auto receive OFF
Receiving display You can set whether to display the detailed ToruCa File display
when you obtain a ToruCa file while the Stand-by display is
shown.
ON or OFF
Check same data You can set whether to check the same ToruCa file is already
obtained before obtaining a ToruCa file from a scanning device or
obtaining a ToruCa file automatically from data broadcasting
while watching a 1Seg program.
ON or OFF
ON . . . . Checks and does not obtain a new ToruCa file if the
same ToruCa file is already obtained.
OFF . . . Does not check. Obtains even the same ToruCa file.
Auto reading You can set whether to have the available ToruCa files
automatically recognized for when you place the FOMA phone
over the scanning device.
Accept or Reject
Information
<Check same data>
pThe ToruCa files stored in the “Used ToruCa” folder or expired ToruCa files are not
included as target files.
<Auto reading>
pIf “Auto reading” is set to “Reject”, you might not be able to use ToruCa files.
275
Osaifu-Keitai/ToruCa
To prevent the IC card function from being used by others, you can set
the Osaifu-Keitai, obtained ToruCa, or iC communication disabled.
pIf the battery runs out when the IC card is locked, the IC card stays locked.
1Press and hold m for at least one second.
“ ” appears and IC Card Lock is set.
pTo release IC Card Lock, perform the same operation and enter your Terminal
Security Code. When Timer Lock ON At Close is set, the display for releasing IC
Card Lock appears also by opening the FOMA phone.
When you set “PIM/IC security mode” to “Face reader”, follow the operation of
“Use Face Reader to Release Lock” on page 140.
When you set it to “Double security”, enter your Terminal Security Code after the
operation on page 140.
pYou cannot set/release IC Card Lock even when you press and hold m for at
least one second when the Stand-by display appears on the horizontal display.
You can set whether to lock the IC card function while the power is
turned off.
1mSettingsLock/SecurityLock setting
or
mOsaifu-KeitaiIC card lock set.
2IC lock (power-off)
Enter your Terminal Security CodeSelect an item.
Setting before OFF . . . .Follows the setting at just before the power-off.
Lock. . . . . . . . . . . . . . . . .Sets IC Card Lock.
<IC Card Lock>
Locking IC Card Function
IC Lock (Power-off)

276

277
GPS Function
About Using GPS Function . . . . . . . . . . . . . . . . . . . . . . . . . . . . . 278
Checking Your Location . . . . . . . . . . . . . . <Position Location> 278
Using GPS Compatible i-αppli . . . . <GPS Compatible i-αppli> 279
Providing Location Information upon Request
. . . . . . . . . . . . . . . . . . . . . . . . . . . . . . . . . . . <Provide Location> 284
Notifying Location Information. . . . . . . . .<Notify of Location> 285
Displaying Location Information History
. . . . . . . . . . . . . . . . . . . . . . . . . . . . . . . . . . . . <Location History> 286
Configuring GPS Service Settings . . . . . . . <Service Settings> 286
Setting GPS . . . . . . . . . . . . . . . . . . . . . . . . . . . .<GPS Settings> 287
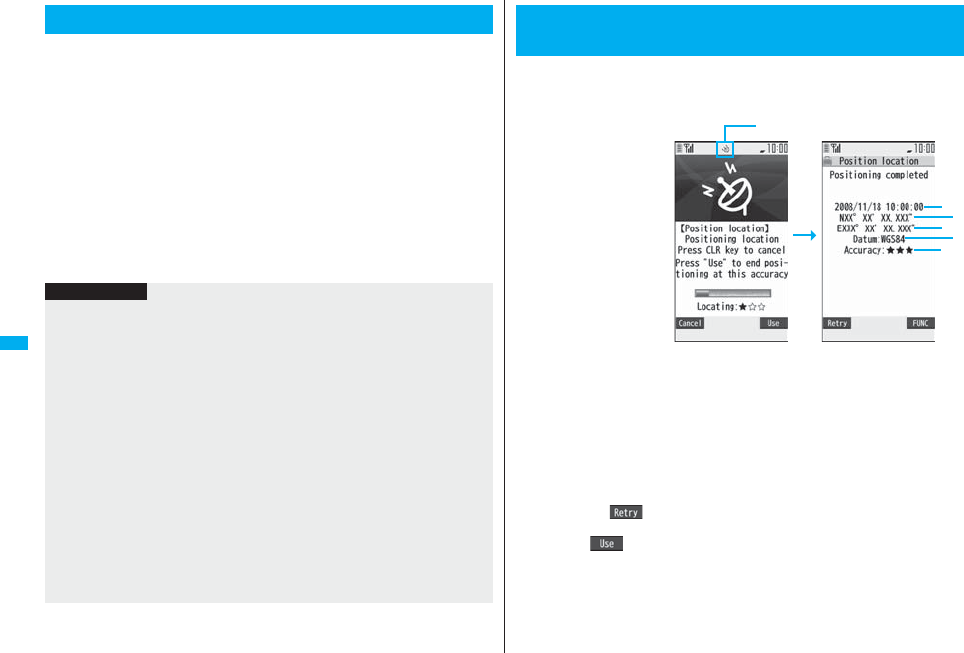
278
GPS Function
pGPS is operated by the United States Department of Defense, so the GPS radio wave
conditions might be controlled (accuracy deterioration, radio wave supply suspension,
etc.) depending on the defense strategy of the United States Department of Defense.
pNote that we do not take any responsibility for a loss such as pure economic loss
resulting from the facts that you have missed the chance to check the measurement
(communication) results, which have been caused by external factors such as
malfunctions, erroneous operations, troubles, or power failure (including battery
shortage) on the FOMA phone.
pYou cannot use the FOMA phone as a navigating system for aircraft, vehicles, and
people. Therefore, note that we are not held responsible for any damage resulting from
the use of the location information for navigation.
pYou cannot use GPS as a high-accuracy measuring device. Note that we do not take
any responsibility for the damage caused by an error in the location information.
pYou cannot use the GPS function when the FOMA phone is out of the service area (or
overseas).
About Using GPS Function
Information
pYou cannot use the GPS function in the following cases:
・During Lock All※・During Self Mode ・During Omakase Lock※
・While the UIM is not inserted
※Provide Location is available.
pAs GPS uses radio waves transmitted from the satellites, note that you cannot or
might have difficulty to receive radio waves in the following conditions:
・In a building or right under it
・In the basement, tunnel, ground, water
・In a bag or case
・In densely crowded areas with buildings and houses
・In densely crowded trees and right under them
・Close to high-tension wires
・In a car or train
・In bad weather such as heavy rain and snow
・When there are obstacles (persons and articles) around the FOMA phone.
・When you cover the displays, keys, microphone, or speakers of the FOMA phone
with your hand.
In these cases, an error in the obtained location information might become 300
meters or more.
You can measure your current location and display it. You can display a
map of the location, and send the location information by mail as well.
1mLifeKitGPSPosition location
The current location is displayed by the latitude and longitude.
…Measurement date …Latitude …Longitude …Geographic datum
…Accuracy
★★★: Almost accurate location information (Error is about less than 50
meters)
★★☆: Relatively accurate location information (Error is less than about 300
meters)
★☆☆: Approximate location information (Error is about 300 meters or more)
The accuracy is an estimate. It might differ from actual one depending on the radio
wave conditions in the surrounding area.
pPress l( ) to measure again in “Quality mode” (see “Positioning Mode”
on page 287).
pWhen “ ” is displayed at bottom right of the display during measuring, press
i and select “OK” to display the location using the information during
measuring.
pYou can measure the location also by pressing and holding 1 for at least one
second from the Stand-by display on the vertical display. After measuring, the
FOMA phone works “Function Menu while Current Location is Displayed” on
page 279 according to the setting of “GPS Button Setting”.
<Position Location>
Checking Your Location
Blinks during measuring
279
GPS Function
Function Menu while Current Location is Displayed
Function menu Operation/Explanation
Read a map You can display a map by connecting a map site.
YES
pAfter displaying the map, you can use “i-area” to search for the
surrounding information. For details about “i-area”, refer to the
DoCoMo web page.
Run iαppli You can use the location information on a GPS compatible i-αppli
program.
Select an i-αppli program.
Paste to mail You can compose an i-mode mail message with the URL
converted from the location information pasted to the text.
YES
Go to step 2 on page 198.
pThe URL of the location information to be sent is displayed on i-
mode compatible phones only.
Add to phonebook You can store the location information in the Phonebook.
YES
Go to step 2 of “Storing Displayed Phone Number/Mail Address
in Phonebook” on page 96.
Attach to image You can store the location information in the image.
Select a folderSelect an imageYES or NO
YES . . . . Overwrites and saves.
NO . . . . . Saves as a separate file.
1mLifeKitGPSiαppli
The list of i-αppli programs that support GPS is displayed. Select an i-αppli
program to start it.
pSee page 251 for the Software list.
The pre-installed “地図アプリ (Map Application)” enables you to check
the map of the place you are currently in or the place you specify, or
check your nearby area for details by using the GPS function and map.
You can then navigate yourself to the destination by vehicle, on foot, or
by car.
Further, you can easily get transfer information by voice input.
pYou are separately charged a packet communication fee. You are advised to subscribe
to Pake-Houdai/Pake-Houdai Full for using this software program.
pIf you delete this software program and then when you want to resume it, download it
from “iエリア−周辺情報− (i-area -Local Information-)”.
pThis software program is the i-αppli program that uses the mail function, so it is not
available when the mode of 2in1 is set to B Mode.
pNote that we are not held responsible for the accuracy and promptness of the map and
route information.
pWhile driving, ensure that a person other than the driver operates this software
program.
<GPS Compatible i-αppli>
Using GPS Compatible i-αppli
Information
pWhen you use a GPS compatible i-αppli program, the location information is sent to
the information provider of the i-αppli program you use.
pYou need to set “Location usage” of “Software setting” to “ON” when you use the GPS
function on a GPS compatible i-αppli program.
Using “地図アプリ (Map Application)”
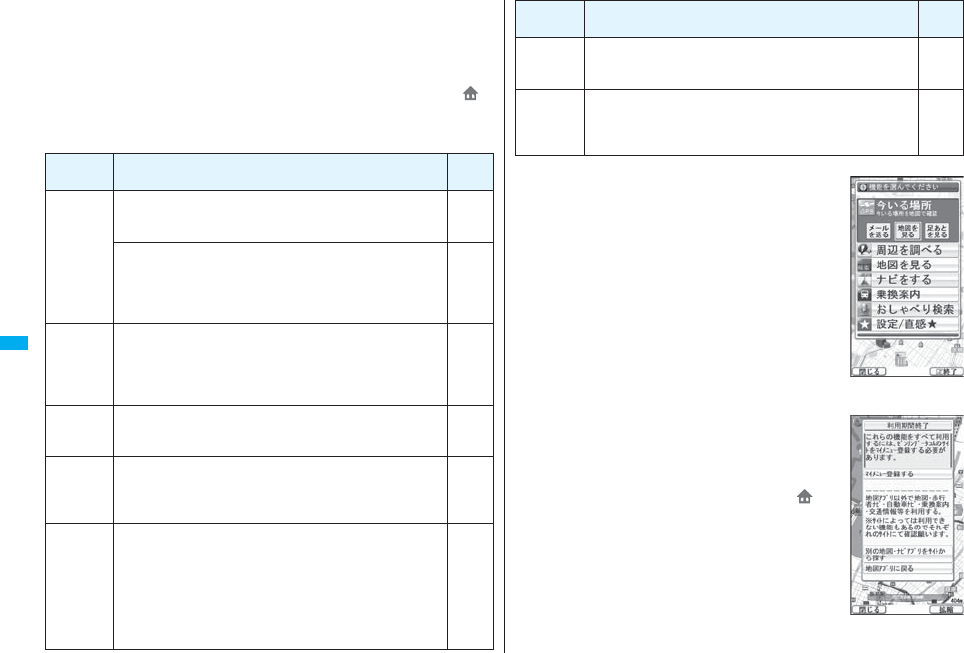
280
GPS Function
■Standard and optional services
The standard and optional services are available with this software program.
Standard service: Provided by DoCoMo (charge free).
Optional service: Provided by ZENRIN DataCom (charged).
You can use the optional services charge free except traffic information for up to 90 days
from when you have started this software program for the first time. To use the optional
services from 91 days on, you need to register yourself as a member of “ゼンリン 地
図+ナビ (ZENRIN/map+navi)” (charged) provided by ZENRIN DataCom.
Even when you register yourself as a member while you are using this software
program, you do not need to re-download it. You can use this software program as it is.
Menu Descriptions
From 91
days on
地図
(Map)
p
You can see the map by using GPS you are currently in, or can
enter a keyword, genre, address, or phone number to see the map.
pBy voice input, you can easily see the map.
Free
pYou can check the points stored in this software program or on
the server, or in the Phonebook, or check the map for the
points retrieved by the previous search.
pAfter the storage on the server, the stored points can be shared
with your personal computer as well.
Charged
お店や施設
(Shops and
facilities)
pYou can check the details of shops, facilities, or iD member
stores in the area where you are currently in or you specify, and
can obtain coupons from gourmet information.
pYou can check nearby weather or empty spaces in parking lots.
p
By voice input, you can easily check the details of your nearby area.
Free
ナビ
(Navigate)
pYou can navigate yourself to the destination by vehicle, on foot,
or by car.
pYou can navigate yourself easily to your home you have stored.
Charged
乗換案内
(Transfer
guide)
pYou can check the train transfer guides and timetables.
pYou can check the map for a train route and set an alarm
before your departure.
pBy voice input, you can easily get transfer information.
Charged
お楽しみ
(Fun)
pIn addition to the ordinary map, you can change the mode to
show the various types of maps such as the map you can move
by inclining the FOMA phone, the 3D map, and the map that
accentuates train routes.
pUsing GPS, you can leave your footprints on your current
position, and view the tracks you moved.
p
You can paint colors on the cities, wards, towns, villages, or
prefectures of the places where you measured in the past using GPS.
Free
■Top menu display and its operation
The respective menus are displayed on the TOP display.
When you close the menu, the map retrieved by the last search
appears.
pThe displays are for reference, so the actual ones might
differ.
pAt the first start-up, the usage rules and caution items on use
are displayed.
◆When 91 days have passed without registering yourself as a member
At the first start-up on or after 91 days, the message telling that
the functions you can use are limited, and the message that
refers to the member registration site appear.
The same messages appear when you select an optional
service menu.
※To register yourself as a member, access “ゼンリン 地
図+ナビ (ZENRIN/map+navi)” via this software program.
災害時地図
(Disaster
time map)
pThis i-αppli program links with the map application, does not
require communication, and is for when disasters occur.
Charged
設定/
ヘルプ
(Settings/
Help)
pYou can set how to show the map or navigation, and check
how to use it.
Free
Menu Descriptions
From 91
days on
TOP display
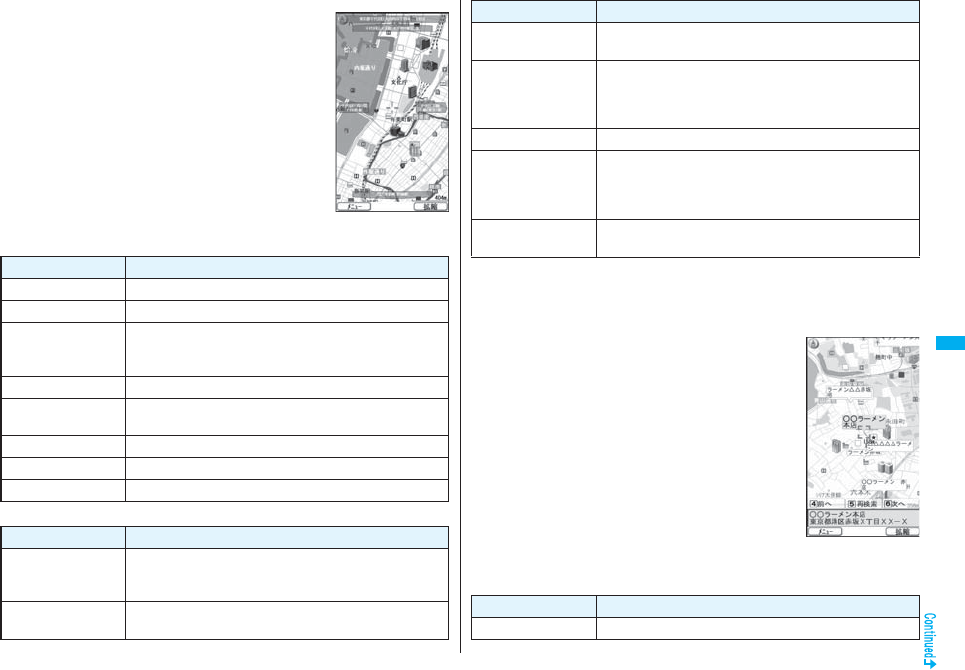
281
GPS Function
■Map display and its operation
◆Key operation when the map is shown
◆Key operation when the quick access menu is shown
© 2008 ZENRIN DataCom
Map View display
Key operation Action
l[メニュー (Menu)] Can show the menu.
OoCan show the quick access menu.
i[拡縮
(Enlarge/Reduce)]
Can show the scale bar. To display a large area, press Zo,
and to display the details, press Xo. Press i[閉じる
(close)] to fix the reduced scale, and then to clear the bar.
MoCan move the map up, down, left, and right.
rCan close the menu, or returns to the point retrieved by the first
search.
aCan turn the map counterclockwise.
0Can turn the map northward.
sCan turn the map clockwise.
Key operation Action
Zo[周辺を調べる
(Check local
information)]
Can check the local information centering around the area on
the map.
Xo[ココへナビ
(Navi to)]
Can set the start point and search for a route to the center of
the map.
■The Search Result display for the local information and its operation
pThe display is for reference, so the actual one might differ.
pThe display and operation are for when you show the search result on the map, not for
when you select it from the list.
◆The Search Result display for the local information
◆
Key operation when the Search Result display for the local information is shown
※When the cursor is not placed over the shop, etc. retrieved by the search, the quick
menu appears.
Co[ココを送信
(Send here)]
Can send the URL for the displayed map by i-mode mail.
Vo[ココを登録
(Store here)]
Can store the location information of the center of the map in
this software program, on the server, or in the Phonebook.
When you store it on the server, the stored point can be shared
with your personal computer as well.
Oo[地図へ (To map)] Can close the quick access menu.
1[3D/パノラマ
(3D/Panorama)]
Can show the point from where a three-dimensional
intersection or panoramic image can be viewed. Select the
point to display the three-dimensional intersection or
panoramic image.
2[ビル/テナント
(Building/Tenant)]
Can show the buildings around and can click to check the
tenants in the buildings if any.
Key operation Action
© 2008 ZENRIN DataCom
Key operation Action
OoCan confirm detailed information about search results.
282
GPS Function
You can set a start point and destination, and search for a route. The
route you can go through on foot, by public transportation, or by car are
displayed. After you search for the route, the voice and display navigate
you to your destination.
1TOP displayナビ (Navigate)
出発地/目的地を選ぶ (Select a start point/destination)
2出発地 (Start point)Select a setting method.
現在地(GPS) [Current location (GPS)]
. . . .Measures and sets the current location.
フリーワード検索 (Keyword search)
. . . .Set a start point searching by keywords.
地図上で指定 (Specify on map)
. . . .Set a start point on the map.
TEL/〒検索 (TEL/ZIP code search)
. . . .Set a start point searching by the phone number or zip code.
住所一覧から (From address list)
. . . .Set a start point selecting an address.
ジャンルから (From genre)
. . . .Set a start point selecting a genre.
履歴から (From record)
. . . .Set a start point on the map previously displayed.
登録地点から (From stored point)
. . . .Set a start point from the location information stored in this software program,
on the server, or in the Phonebook.
自宅 (Home)
. . . .Set a start point from the location information of your home.
出発地の確認 (Confirm start point)
. . . .Confirm information about the start point.
MoCan move the map up, down, left, and right.
5Can re-search the center area of the displayed map.
4Can show the previous search results.
6Can show the next search results.
l[メニュー (Menu)] Can show the menu.
i[拡縮
(Enlarge/Reduce)]
Can show the scale bar. To display a large area, press Zo,
and to display the details, press Xo. Press i[閉じる
(close)] to fix the reduced scale, and then to clear the bar.
Searching for a Route and Navigating Yourself to
Destination by Voice and on Display
Key operation Action 3目的地 (Destination)Select a setting method.
フリーワード検索 (Keyword search)
. . . Set a destination searching by keywords.
地図上で指定 (Specify on map)
. . . Set a destination on the map.
TEL/〒検索 (TEL/ZIP code search)
. . . Set a destination searching by the phone number or zip code.
住所一覧から (From address list)
. . . Set a destination selecting an address.
ジャンルから (From genre)
. . . Set a destination selecting a genre.
履歴から (From record)
. . . Set a destination on the map previously displayed.
登録地点から (From stored point)
. . . Set a destination from the location information stored in this software program,
on the server, or in the Phonebook.
自宅 (Home)
. . . Set a destination from the location information of your home.
目的地の確認 (Confirm destination)
. . . Confirm information about the destination.
4時間指定 (Specify time)Select an item.
現時刻で指定 (Specify by current time)
. . . Search for a route by the current time.
出発時刻指定 (Specify start time)
. . . Search for a route specifying the start time.
到着時刻指定 (Specify arrival time)
. . . Search for a route specifying the arrival time.
終電を利用 (Use last train)
. . . Search for a route by the last train of the day.
5条件設定 (Set conditions)Select a condition.
乗換条件 (Transfer conditions)
. . . Select a transfer condition from “早い (Fast)”, “安い (Cheap)”, and “楽々
(Easy)”.
徒歩ルート (Foot route)
. . . Select a route condition from “おまかせ (Free)”, “屋根多い (Many roofs)”, and
“階段少ない (Less stairs)”.
特急利用 (Use special express)
. . . Select whether to use special expresses for even when the total distance is
less than 100 km.
通常利用車種 (Ordinary type of vehicles)
. . . Select a type of vehicle.
6上記で設定 (Fix as specified above)
283
GPS Function
7ルートを検索 (Search for a route)
You can search for a route by “ で検索 (Search by )” that
searches all types of routes, or “ のみで検索 (Search by only )” that
searches for routes only by car. Up to six routes are displayed as search results.
When the routes using different transportation are found, the characteristics of the
routes are displayed by the icons shown below:
早 (Fast): Arrival time is early.
安 (Cheap): Fare is cheap.
楽 (Easy): Transfer is less.
オススメ (Recommendable): Route provided with three conditions, “早 (Fast)”,
“安 (Cheap)”, and “楽 (Easy)”.
有料 (Charged): Route by car using toll roads
一般 (Ordinary): Route by car using ordinary roads
pTo store the route, select “ルートを登録 (Store route)”.
8ルートを選択 (Select a route)
ナビ・ルート確認 (Navi/Confirm route)
ナビ (Navi) or ナビ(省電力) [Navi (power saver)]
Navigation to the destination starts.
pTo confirm the route, select “ルート確認 (Confirm route)”.
pTo check the timetable, select “時刻表 (Timetable)”.
■Route (Car)/Navigation (Car) View display and its operation
pThe displays are for reference, so the
actual ones might differ.
© 2008 ZENRIN DataCom
The route to
the destination
is displayed.
Navigation (Car)
View display
The current location
and proceeding
direction is
displayed.
◆Key operation when using Navigation
◆Key operation when the quick access menu appears
Key operation Action
l[メニュー (Menu)] Can end the Navigation program and shows the TOP menu.
OoCan show the quick access menu.
i[拡縮
(Enlarge/Reduce)]
Can show the scale bar. To display a large area, press Zo,
and to display the details, press Xo. Press i[閉じる
(Close)] to fix the reduced scale, and then to clear the bar.
MoCan move the map up, down, left, and right.
rCan return to the current location.
2Can switch to the intersection mode.
5Can pause or start the Navigation program.
aCan turn the map counterclockwise.
0Can turn the map northward.
sCan turn the map clockwise.
Key operation Action
Xo[結果&設定
(Result&Settings)]
Can show search results of routes (time, fare, and others), or
sets the navigation.
Co[経由地を設定
(Point setting)]
Can search for a route by adding up to three points you go
through to the destination.
Vo[リルート
(Re-route)]
Can re-search for a route from the current point to the
destination.
1[ルート消去
(Clear route)]
Can clear the displayed route.
2[モード切替
(Switch mode)]
Can switch to the intersection mode.
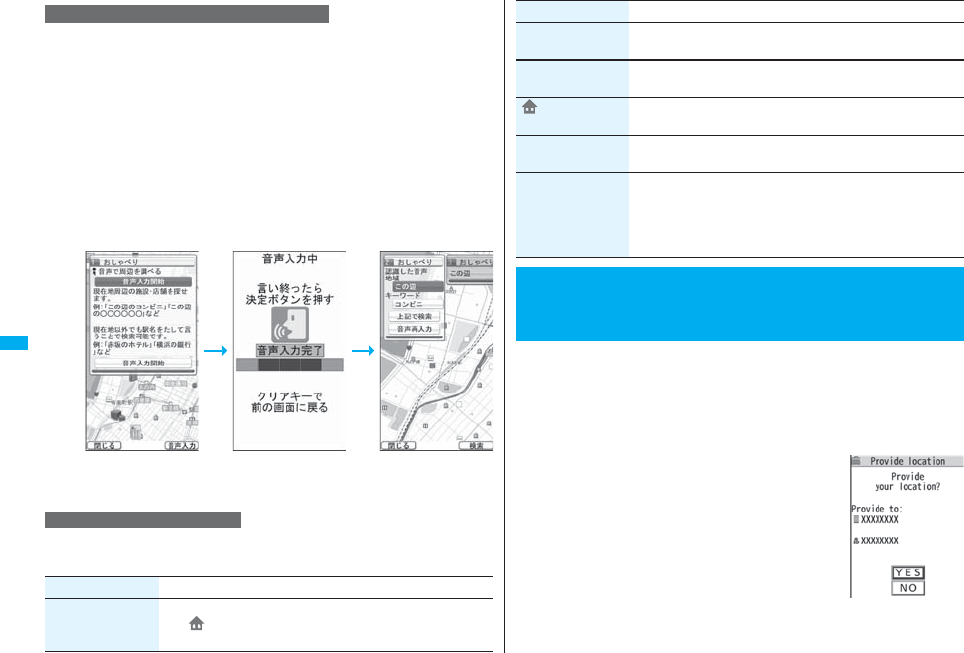
284
GPS Function
By voice input, you can easily check the local information, get transfer
information, or see the map from the Voice search menu.
<Example> When using おしゃべり検索 (Voice search) to check the local
information
1TOP displayお店や施設 (Shops and facilities)
おしゃべり検索 (Voice search)
How to input your voice is displayed.
2Explanatory display for voice input
音声入力開始 (Start voice input)
The display for voice input appears. After the Voice Input display appears, speak in
Japanese about the local information to search for.
Example: “Konohen-no Konbini” (nearby convenience store)
1
TOP display
設 定・ヘ ル プ
(Settings/Help)
Select an item.
Using おしゃべり検索 (Voice search)
Using Settings and Help
The confirmation display appears after your voice
is recognized.
When the recognition result is wrong, select “音声
再入力(Re-input voice)”.
Item Action
会員情報確認
(Confirm member
information)
You can check whether you are registered as a member of “ゼン
リン 地図+ナビ (ZENRIN/map+navi)”.
You can provide your location information upon the request from others.
Depending on the service you use, you need to set GPS service settings
beforehand. (See page 286) Also, you need to set “Location request
menu” to “ON” or set the permitted period by “Permission schedule”
beforehand.
<When the setting by service is “毎回確認 (Check every time)”>
1When a location provision request
arrivesYES or NO
YES . . . . Measures the current location and sends the
location information.
NO . . . . . Rejects to provide the location information.
pIf no keys are pressed for about 20 seconds, the former
display returns without providing your current location.
α基本設定
(
α
Standard settings)
You can perform the overall settings of the software program
such as specifying map display color or font size.
ナビ設定
(Navi settings)
You can perform the overall settings of the navigation program
such as re-routing or the sound level of voice guide.
自宅設定
(Home setting)
You can register the location of your home.
履歴系クリア
(Clear records)
You can clear the records of the map or Navigation used.
使い方の説明/よく
ある質問/利用規約
(Explanation about
how to use/FAQ/
Usage rules)
You can get explanation about how to use, FAQ, and usage
rules.
<Provide Location>
Providing Location Information upon
Request
Item Action
285
GPS Function
<When the setting by service is “許可 (Accept)”>
1When a location provision request
arrivesOK
pWhen you select “OK” or about three seconds elapse,
the current location provision starts.
pThe information of the service provider might not be
displayed.
pPress r to stop providing information. However,
your location information might be sent depending on
the timing.
Information
pIf no keys are pressed for about 15 seconds from the Position Location Result display
or the Failure display, the former display returns.
pTo use “imadoco-search”, you need to set “位置情報利用設定(イマドコサーチ設
定) [Location Information Usage Setting (imadoco-search Setting)] of “オプション設
定 (Options)” of “料金&お申込・設定 (Bill & Subscription/Setting)” on iMenu.
pTo use Provide Location, you might need to subscribe to a service provider which
supports the Provider Location function or to pay the service fee.
pEven when you send your location information, it might not be delivered to the service
provider depending on the radio wave conditions.
pWhen “Location request menu” is set to “OFF”, the location information is not
displayed, and the request is rejected.
pWhen you set, by GPS service settings, the location request to be checked every
time, the location information is not provided on the location provision request during
Public Mode (Drive Mode).
pWhen you set, by GPS service settings, the location request to be accepted, the
location information is provided with a display during Public Mode (Drive Mode) but
the positioning tone, vibrator, and illumination do not work.
pWhen you are requested to provide your location information from the other party
using “imadocokantan search”, the confirmation display appears asking whether to
send the current location information each time you receive a request. Select “YES” to
immediately send the rough position location result. After selecting “YES”, the GPS
Measuring display appears and the precise position location result is notified after
GPS measuring. The rough position location result is notified even if you suspend the
location providing during GPS measuring. In this case, it is stored in Location History
but the location information is not displayed.
You can notify a service provider of your current location.
1mLifeKitGPSNotify of locationDirect input
Enter a party to be notifiedYES
pYou can enter up to 12
digits by using numerals, #
and :.
pIf you have stored LCS
clients by “Reg. LCS client”
beforehand, you can select
an LCS client from “View
service clients”.
pYou can press l()
to stop measuring, but your
current location might be
notified depending on the
timing.
2OK
pRegardless of the mode of 2in1, the location information can be searched for Number
A only.
When the other party searches you by your Number B, your current location is not
provided and the searcher is notified that the search has failed.
pA fee is not charged for using the Provide Location function.
pFor using the service, refer to the information on your service provider or the DoCoMo
web page.
<Notify of Location>
Notifying Location Information
Information
Information
pEven when you send your location information, it might not be delivered to the service
provider depending on the radio wave conditions.
pYou are charged a fee for using the function to notify your current location.
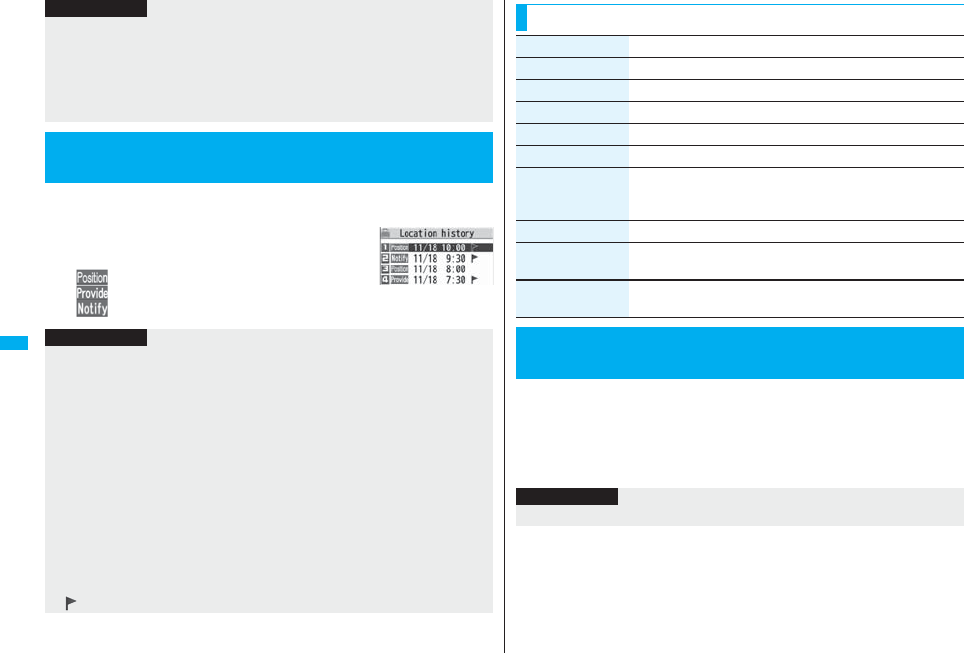
286
GPS Function
Up to 50 histories of Position Location, Notify Of Location, and Provide
Location are stored.
1mLifeKitGPSLocation history
Select a location history.
: Position location
: Provide location
: Notify of location
pTo use Notify Of Location, you might need to subscribe to a service provider that
supports Notify Of Location. Further, you might be charged a fee for using the service.
pYou cannot enter any digits during Keypad Dial Lock.
pRegardless of the mode of 2in1, your location information is notified by Number A.
pFor using the service, refer to the information on your service provider or the DoCoMo
web page.
<Location History>
Displaying Location Information History
Information
Information
pWhen the location histories exceed 50, they are automatically overwritten from the
oldest one.
pThe location information and accuracy stored in Location History may differ from the
ones sent to the location provision requester or LCS client depending on the radio
wave conditions, and others.
pWhen you cancel Position Location midway, you fail to measure your current location,
or you set “Location request menu” to “OFF”, its history is not stored in Location
History.
pEven when the histories of Provide Location or Notify Of Location are stored, they
might not have been delivered to your service providers.
pYou cannot operate a failed-to-measure history of Provide Location or Notify of
Location for other than “Compose message”, “Dialing”, “Delete this”, and “Delete all”.
pWhen Provide Location was used, the name of the location provision requester is
checked against the Phonebook entries which appear in each mode of 2in1 and then
shown.
p“ ” is displayed for the records of successful positioning.
By connecting to GPS service settings (a host set by “Host selection”),
you can configure the settings for the Provide Location service such as
the permission for location information search and password.
1mLifeKitGPSService settings
pSee page 173 for operations while a site is displayed.
Function Menu while Location History is Displayed
Function menu Operation/Explanation
Read a map See page 279.
Run iαppli See page 279.
Paste to mail See page 279.
Add to phonebook See page 279.
Attach to image See page 279.
Compose message You can compose an i-mode mail message to your location
provision requester.
Go to step 3 on page 198.
Dialing See page 166.
Delete
(Delete this)
Delete thisYES
Delete
(Delete all)
Delete allEnter your Terminal Security CodeYES
<Service Settings>
Configuring GPS Service Settings
Information
pYou cannot use the Bookmark or Screen Memo function.
287
GPS Function
You can set an operation for after measuring your location by pressing
and holding 1 for at least one second from the Stand-by display on
the vertical display. You can select an operation from “Function Menu
while Current Location is Displayed” on page 279.
1mLifeKitGPSGPS settingsGPS button setting
Select an operation.
pIf you set to “Confirm every session”, you can select an operation each time you
measure the location.
You can select a tone to sound for when you check your current location
or when you are requested to provide location information. You can set a
color of the Call/Charging indicator and the vibration pattern as well.
1mLifeKitGPSGPS settingsPosit. tone/illum.
Select an operation to be set
Do the following operations.
<GPS Settings>
Setting GPS
GPS Button Setting
Positioning Tone/Illumination
Item Operation/Explanation
Select posit. ring
tone
Select a folderSelect a ring tone.
pWhile selecting, the selected tone sounds for confirmation.
Ring time setting You can set a ring time for positioning ring tone.
Enter a ring time (seconds).
pEnter two digits from “00” through “30”. For “Location req./
Confirm”, however, enter two digits from “00” through “20”. If
you set to 0 seconds, the tone does not sound.
Select a mode for measuring the current location from either “Standard
mode” or “Quality mode”.
When you select “Quality mode”, it takes a longer time for measuring,
but the measuring accuracy might be improved as a result.
You can set a measuring mode for Position Location, Notify Of Location,
and Provide Location respectively.
1mLifeKitGPSGPS settingsPositioning mode
Select an operation to be set
Standard mode or Quality mode
If you have stored LCS clients, you can select an LCS client when you
notify of your current location. Further, you can automatically notify of
your current location when you make a call to the stored phone number.
You can store up to five LCS clients.
1mLifeKitGPSGPS settingsReg. LCS client
Highlight <Not stored> and press l() or
Oo()Do the following operations.
pIf you select a stored LCS client, you can confirm the stored contents.
Select vibrator Select a vibration pattern.
pIf you select “Melody linkage”, the FOMA phone vibrates in time
with ring tone.
pWhile selecting, the FOMA phone vibrates by the selected
pattern for confirmation.
Select illumination Select a color.
pWhile selecting, the Call/Charging indicator lights in the selected
color for confirmation.
Positioning Mode
Item Operation/Explanation
Register LCS Client
Item Operation/Explanation
Service client name Enter a service client name.
pYou can enter up to 16 full-pitch/32 half-pitch characters.
288
GPS Function
2Press l().
Service client ID Enter a service client ID.
pYou can enter up to 12 digits by using numerals, # and :.
pEnter the service client ID specified by your service provider.
Phone number Enter a phone number.
pYou can enter up to 26 digits.
pHighlight the phone number field, press i( ), and select
“Enter from PB” to call up a phone number from the Phonebook
and enter it.
pIf you enter a phone number by “Enter from PB” with “Service
client name” not entered, the name for the Phonebook entry is
entered.
Notify when dialing You can set whether to notify of your current location for when
you make a voice call or videophone call to the stored phone
number.
ON, OFF or Confirm every dial
pTo check each time you make a call, select “Confirm every dial”.
Item Operation/Explanation
Information
pEven if “Notify when dialing” is set to “ON” or to “Confirm every dial”, you cannot notify
of your current location when you make a call without notifying of your caller ID.
Function Menu while LCS Client is Displayed
Function menu Operation/Explanation
Delete
(Delete this)
Delete thisYES
Delete
(Delete all)
Delete allEnter your Terminal Security CodeYES
Add to phonebook You can store the service client name and phone number stored
in “Reg. LCS client” into the Phonebook. (See page 279)
You can set whether to accept a location provision request (provide
location information). You can set validity period as well.
1mLifeKitGPSGPS settings
Location request menu
Enter your Terminal Security Code
ON, OFF or Permission schedule
2Do the following operations.
3Press l().
Edit Go to step 1 of “Register LCS Client” on page 287.
pYou can edit also by pressing l().
Send Ir data See page 370.
Send all Ir data See page 371.
transmission See page 372.
All transmission
See page 372.
Location Request Menu
Function menu Operation/Explanation
Item Operation/Explanation
Permit from Enter the time for starting permission.
Permit to Enter the time for ending permission.
Repeat Select a repeat type.
pWhen you select “1 time”, the permission period does not
repeat.
pWhen you select “Select day”, put a check mark for days of the
week to be repeated, then press l().
Validity period When you set to “Repeat”, you can set the period to be valid.
ON or OFFEnter a validity date (from)
ON or OFFEnter a validity date (to).
289
GPS Function
■Operations when the validity period for location provision is specified
Example: When the current date and time are 12:00/18/Nov and you set 14:00 as the
start time and 21:00 as the end time
Information
pYou can set “Location request menu” also by “Initial setting” (see page 46).
pWhen “ON” is set, the location information might be sent without any operation on the
FOMA phone, and might be notified to the searcher.
pWhen “OFF” is set, the location provision is rejected even if its location provision
request is received. The history is not stored.
pYou can specify from January 1, 2008 through December 31, 2037 for “Permission
schedule”.
Repeat Validity period Period of location provision
1 time — 14:00/18/Nov through 21:00/18/Nov
Daily Start date: 20/Nov
End date: 30/Nov
Every day 14:00 through 21:00 from 20/Nov through
30/Nov
Start date: 10/Nov
End date: 30/Nov
Every day 14:00 through 21:00 from 18/Nov through
30/Nov
OFF Every day 14:00 through 21:00 on and after 18/Nov
Select day Start date: 20/Nov
End date: 30/Nov
14:00 through 21:00 of the specified days of the
week from 20/Nov through 30/Nov
Start date: 10/Nov
End date: 30/Nov
14:00 through 21:00 of the specified days of the
week from 18/Nov through 30/Nov
OFF 14:00 through 21:00 of the specified days of the
week on and after 18/Nov
Example: When the current date and time are 12:00/18/Nov and you set 10:00 as the
start time and 21:00 as the end time
Example: When the current date and time are 12:00/18/Nov and you set 14:00 as the
start time and 10:00 as the end time
Repeat Validity period Period of location provision
1 time — 12:00/18/Nov through 21:00/18/Nov
Daily Start date: 20/Nov
End date: 30/Nov
Every day 10:00 through 21:00 from 20/Nov through
30/Nov
Start date: 10/Nov
End date: 30/Nov
12:00/18/Nov through 21:00/18/Nov, every day
10:00 through 21:00 from 19/Nov through 30/Nov
OFF 12:00/18/Nov through 21:00/18/Nov, every day
10:00 through 21:00 on and after 19/Nov
Select day Start date: 20/Nov
End date: 30/Nov
10:00 through 21:00 of the specified days of the
week from 20/Nov through 30/Nov
Start date: 10/Nov
End date: 30/Nov
If 18/Nov is the specified day;
12:00/18/Nov through 21:00/18/Nov, 10:00 through
21:00 of the specified days of the week from 19/Nov
through 30/Nov
OFF If 18/Nov is the specified day;
12:00/18/Nov through 21:00/18/Nov, 10:00 through
21:00 of the specified days of the week on and after
19/Nov
Repeat Validity period Period of location provision
1 time — 14:00/18/Nov through 10:00/19/Nov
Daily Start date: 20/Nov
End date: 30/Nov
14:00 through 10:00 of the next day from 20/Nov
through 30/Nov
Start date: 10/Nov
End date: 30/Nov
14:00 through 10:00 of the next day from 18/Nov
through 30/Nov
OFF 14:00 through 10:00 of the next day on and after
18/Nov
Select day Start date: 20/Nov
End date: 30/Nov
14:00 through 10:00 of the next days of the specified
days of the week from 20/Nov through 30/Nov
Start date: 10/Nov
End date: 30/Nov
14:00 through 10:00 of the next days of the specified
days of the week from 18/Nov through 30/Nov
OFF 14:00 through 10:00 of the next days of the specified
days of the week on and after 18/Nov
290
GPS Function
Example: When the current date and time are 12:00/18/Nov and you set 10:00 as the
start time and 10:00 as the end time
Repeat Validity period Period of location provision
1 time — 12:00/18/Nov through 10:00/19/Nov
Daily Start date: 20/Nov
End date: 30/Nov
10:00/20/Nov through 10:00/1/Dec
Start date: 10/Nov
End date: 30/Nov
12:00/18/Nov through 10:00/1/Dec
OFF 12:00/18/Nov through 10:00/19/Nov, every day
10:00 through 10:00 of the next day on and after
19/Nov
Select day Start date: 20/Nov
End date: 30/Nov
10:00 through 10:00 of the next days of the specified
days of the week from 20/Nov through 30/Nov
Start date: 10/Nov
End date: 30/Nov
If 18/Nov is the specified day;
12:00/18/Nov through 10:00/19/Nov, 10:00 through
10:00 of the next days of the specified days of the
week from 19/Nov through 30/Nov
OFF If 18/Nov is the specified day;
12:00/18/Nov through 10:00/19/Nov, 10:00 through
10:00 of the next day of the specified days of the
week on and after 19/Nov
You can use this setting for changing the host for Service Settings.
1mLifeKitGPSGPS settingsHost selection
Highlight <Not stored> and press l().
pIf you select a stored host, the setting is changed to that host.
pTo delete a stored host, press i( ), select “Delete” and select “YES”.
2Do the following operations.
3Press l().
Host Selection
※Normally, you do not need to change this setting.
Item Operation/Explanation
Host name Enter a host name.
pYou can enter up to 9 full-pitch/18 half-pitch characters.
Host number Enter a host number.
pYou can enter up to 99 half-pitch alphanumeric characters.
Host address Enter a URL.
pYou can enter up to 100 half-pitch alphanumeric characters.

291
1Seg
What is 1Seg? . . . . . . . . . . . . . . . . . . . . . . . . . . . . . . . . . . . . . . . 292
Before Using 1Seg . . . . . . . . . . . . . . . . . . . . . . . . . . . . . . . . . . . . 293
Setting Channels . . . . . . . . . . . . . . . . . . . . . <Channel Setting> 294
Watching 1Seg Programs . . . . . . . . . . . . . . . . <Activate 1Seg> 295
Using Program Guide i-αppli. . . . . . . <Program Guide i-αppli> 300
Using Data Broadcasting . . . . . . . . . . . . <Data Broadcasting> 301
Using TV Links . . . . . . . . . . . . . . . . . . . . . . . . . . . . . . . .<TVlink> 302
Recording a 1Seg Program while Watching . . . . . . . . . . . . . . . 303
Booking Programs or Setting Timer Recording of 1Seg
. . . . . . . . . . . . . . . . . . . . .<Book Program> <Timer Recording> 304
Settings for 1Seg . . . . . . . . . . . . . . . . . . . . . . . <User Settings> 309
292
1Seg
1Seg is the terrestrial digital TV broadcasting service for mobile objects, and it
broadcasts data as well as video and audio. Further, by using i-mode, you can obtain the
detailed information, can participate in quiz programs or can have fun with TV shopping.
For details on the 1Seg service, browse to the web page as follows:
社団法人 デジタル放送推進協会 (The association for Promotion of Digital
Broadcasting)
From personal computers: http://www.dpa.or.jp/
From i-mode: http://www.dpa.or.jp/1seg/k/ (Japanese only)
■Using 1Seg
pThe 1Seg broadcasting is a service provided by television entrepreneurs (broadcasting
stations).
pThe subscription is not required to receive video, audio and data broadcasting
transmitted on the airwaves for the 1Seg service, and its charge is free.
pThe information displayed in the data broadcasting area contains “Data broadcasting”
and “Data broadcasting site”.
“Data broadcasting” is displayed on airwaves together with video and audio, and “Data
broadcasting site” is displayed by connecting from the information of data broadcasting
to the sites provided by television entrepreneurs (broadcasting stations). Also, it might
be connected to “i-mode site”, etc. When connecting to sites, you need to subscribe to
i-mode separately.
pYou are charged a packet communication fee for browsing “Data broadcasting site”
and “i-mode site”.
You might be charged an information fee for using some sites (i-mode pay sites).
■Radio waves
1Seg is one of the broadcasting services receiving radio waves (broadcasting waves)
different from that used for the FOMA services. Accordingly, you cannot watch the
broadcasting when you are out of reach of the broadcasting waves, or when the
broadcasting is suspended regardless of whether you are in or out of the FOMA service
area.
Even when you are in the terrestrial digital TV broadcasting service area, reception
condition might be deteriorated or you might not be able to receive programs in the
following places:
・Where the radio tower that transmits broadcasting waves is far away
・Where the radio waves are blocked by geographical features such as mountains or
valleys of high-rise buildings
・Where the radio waves are weak or do not reach, such as in tunnels, underground, or
recesses of buildings
The reception conditions might be improved by moving your FOMA phone away from or
close to you, or moving yourself to another place.
What is 1Seg? ■Messages on the display when you use 1Seg for the first time
When you use 1Seg for the first time after purchase, the Exemption Clause Confirmation
display appears.
Press Xo or Vo and then press Oo().
If you select “NO” from the succeeding confirmation display, the same confirmation
display does not appear afterward.
pThe Exemption Clause Confirmation display also appears when you replace the UIM
with another one.
■What is broadcasting storage area?
The broadcasting storage area is a storage area inside the terminal that is exclusive for
1Seg. The information you input according to the instruction on the data broadcasting
program is saved to that broadcasting storage area following the settings of television
entrepreneurs (broadcasting stations). The information to be saved might contain
answers for quiz, and personal information such as membership number, gender, age,
or occupation.
The saved information might be displayed, or be sent to television entrepreneurs
(broadcasting stations) without your re-input when you browse to the data broadcasting
site.
pSee page 311 to erase information in the broadcasting storage area.
When you replace the UIM with another one, the confirmation display appears asking
whether to reset the broadcasting storage area. Select “YES”, and reset it. If you select
“NO”, the services using the broadcasting storage area are not available.
■Messages on the display when the information in the broadcasting storage area
is read out
When the information in the broadcasting storage area is used while you are watching a
program, the message “Use saved information? It may include information used by the
same broadcasting group” is displayed.
If you select “YES”, the confirmation display asking whether to read out the stored
information while watching the same program does not appear after that. Further if you
select “YES (confirm once)”, the same confirmation display does not appear afterward.
293
1Seg
<Example> When you watch a 1Seg program for the first time
Store the channel list for the area you use. (See page 294)
Activate 1Seg. (See page 295)
■Battery level
If you try to start 1Seg or 1Seg starts automatically by Book Program when the battery is
low, the battery alert tone sounds, and the confirmation display appears asking whether
to start it. Also, when the battery becomes low while you are watching or recording a
1Seg program, the battery alert tone sounds, and the confirmation display appears
asking whether to end 1Seg. The battery alert tone sounds regardless of the setting of
“Keypad sound”.
pWhen you do nothing from the confirmation display for about one minute, 1Seg
automatically terminates.
pWhile “Rec. when low battery” is set to “ON”, the confirmation display does not appear
during recording. (See page 309)
pIf the battery level becomes low during recording and recording ends, the video
recorded up to that point is automatically saved.
pDuring Multitask, the battery alert tone sounds but the confirmation display does not
appear. Switch to the viewer display and then operate.
Before Using 1Seg
How to Watch a 1Seg Program
Channel Setting
Activating 1Seg
1
2
■When a call etc. comes in while you are watching or recording a 1Seg program
When the events shown below occur while watching or recording a 1Seg program, the
video and audio are suspended, and each function works. Recording is not suspended.
After you finish each function, you can resume watching a 1Seg program. See page 300
for receiving i-mode mail, SMS messages or Messages R/F.
pIncoming voice call
pIncoming videophone call
pIncoming PushTalk call
pNotification of Alarm, Schedule, ToDo, Book Program
(when “Alarm setting” is set to “Alarm preferred”)
pNotification of Timer Recording
(When the start date/time comes, the FOMA phone works according to the setting of
“Priority”.)
Information
pWhen you have not inserted the UIM, when you have canceled the contract with
DoCoMo, or when you have temporarily suspended using the FOMA service, you
cannot watch 1Seg programs.
pEven when you have inserted the UIM contracted with DoCoMo, you might be
disabled to start 1Seg if you repeatedly watch 1Seg programs in the condition the
FOMA phone cannot communicate such as when you are out of the service area. In
that case, try to start 1Seg in the condition the FOMA phone can communicate such
as by moving into the FOMA service area.
pWhen you watch a 1Seg program for the first time, start 1Seg in the FOMA service
area.
p1Seg is not available while “USB mode setting” is set to “microSD mode” or “MTP
mode” and the FOMA phone is connected to a personal computer.
p1Seg might automatically start when you end a call by closing the FOMA phone
during a call. In such a case, be careful not to use the FOMA phone close to your ear
because audio is played back at the sound volume for 1Seg.
pThe life of battery pack may shorten if you watch 1Seg programs for a long time
during charging.
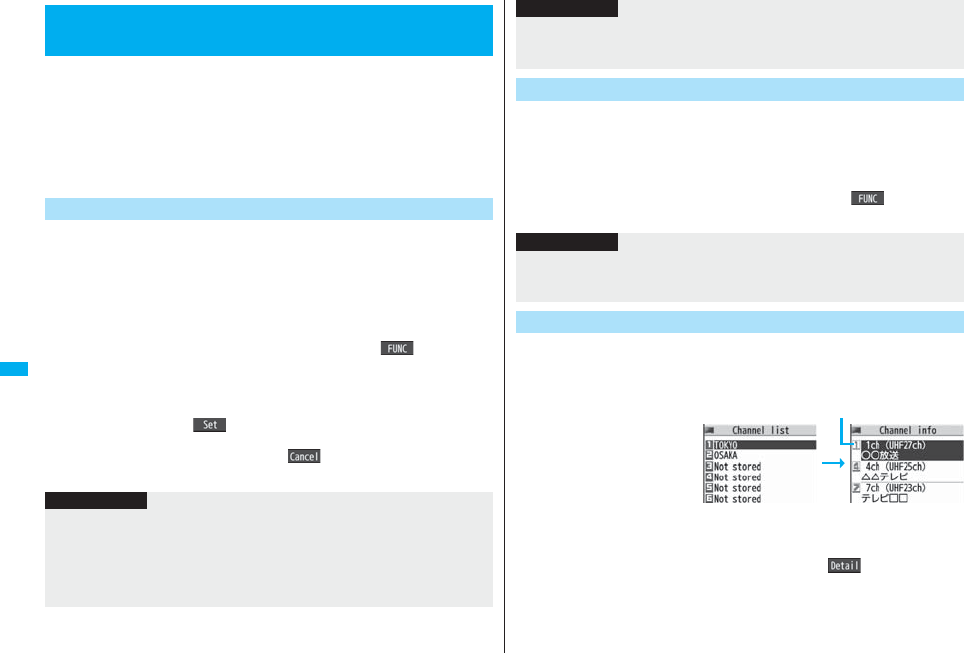
294
1Seg
To watch 1Seg programs, you need to execute Channel Setting and to
select a channel list in advance. You can store up to 10 channel lists.
pThe broadcasting stations you can receive differ depending on the local area. If you
store a channel list of the area for traveling or business trip, you can watch programs in
the area just by selecting the channel list.
pThe remote-control numbers you use with channel selections are previously set for
respective broadcasting stations.
pYou cannot execute Channel Setting during recording a 1Seg program.
The broadcasting stations you can currently watch are automatically
searched and stored in a channel list.
pYou need to set this function in the terrestrial digital TV broadcasting service area.
1m1SegChannel settingAuto channel setting
YES
Searching takes place.
pFrom the Channel list display or viewer display, press i( ), select
“Channel setting”, and select “Auto channel setting”.
2YESEnter a title.
pYou can enter up to 11 full-pitch/22 half-pitch characters.
pWhen you press Oo( ) without entering a title, the title name takes the
name of “YYYY/MM/DD hh:mm”. (Y: year, M: month, D: date, h: hour, m: minute)
pTo cancel searching midway, press l() or r; then select “YES”. You
can store the searched broadcasting stations in a channel list.
<Channel Setting>
Setting Channels
Auto Channel Setting
Information
pWhen the multiple broadcasting stations which have the same remote-control number
are retrieved, the message to the effect that the remote-control number is doubled
appears. Select “OK” and select your area from the Local Area Selection display. The
channels in the area you select are preferentially assigned to remote-control numbers
1 to 12, and channels in the area you do not select are assigned to remote-control
numbers 13 onward.
You can store the broadcasting stations set by prefecture to a channel
list.
1m1SegChannel settingSelect area
Select an areaSelect a prefectureYES
pFrom the Channel list display or viewer display, press i(), select
“Channel setting”, and select “Select area”.
You can select a channel list to set the broadcasting stations you receive.
Also, you can edit the channel list already stored.
1m1SegChannel listSelect a channel list.
The channel list you receive
is set, and the detailed
display appears.
pSelect a broadcasting
station to watch a 1Seg
program.
pWhen you select “Channel
list” from the Function
menu of viewer display, the
viewer display returns by selecting a channel list.
pYou can watch a 1Seg program also by pressing l( ) from the Channel
list display and selecting a broadcasting station.
pThe time to search channels requires for about 30 to 60 seconds. However, it differs
depending on the number of broadcasting stations or airwave conditions, and might
exceed 60 seconds.
Select Area
Information
Information
pDepending on the area, you may not be able to correctly store the broadcasting
stations by “Select area”. In that case, search for the broadcasting stations by “Auto
channel setting”.
Select Channel List
Channel list display Detailed Channel list
display
Remote-control number
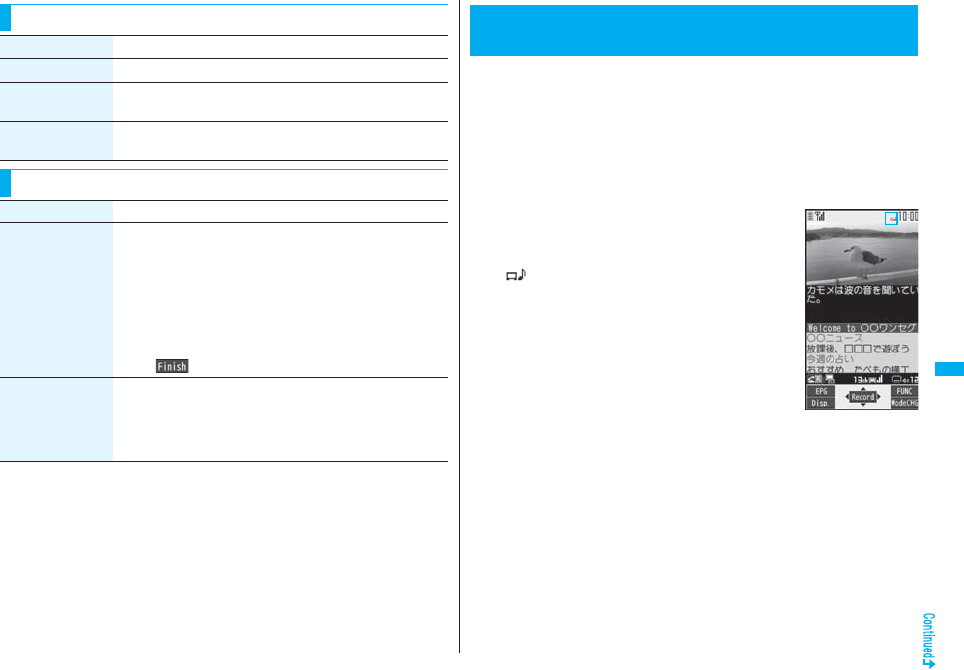
295
1Seg
Function Menu of the Channel List Display
Function menu Operation/Explanation
Channel setting See page 294.
Edit title Enter a title.
You can enter up to 11 full-pitch/22 half-pitch characters.
Delete YES
pYou cannot delete the channel list currently set.
Function Menu of the Detailed Channel List Display
Function menu Operation/Explanation
Remote control No. You can change the broadcasting station set for the
remote-control number.
Select a broadcasting station you want to change
Select the remote-control number to be set.
pIf any broadcasting station has already been set for the
specified remote-control number, the broadcasting stations
switch positions. Repeat the operation to set a broadcasting
station for a remote-control number.
l()YES
Delete YES
pWhen you delete all the broadcasting stations in the channel
list, the channel list itself is deleted.
pYou cannot delete the broadcasting station in the channel list
currently set.
Just change the style to automatically switch between the vertical display
and horizontal display when you are watching. You can switch displays
manually also by pressing d in Normal Style.
pWhen you use 1Seg for the first time, the Exemption Clause Confirmation display
appears. (See page 292)
pYou can start 1Seg also by using the channel information displayed in the Program
Guide i-αppli, sites, or mail.
pYou can play back the audio from 1Seg programs via a commercial Bluetooth device.
(See page 430)
1Press and hold c for at least one
second.
1Seg starts from the channel you watched last time.
“ ” is displayed while watching a 1Seg program.
pWhen you have not stored any channel list, the
confirmation display appears. Select “OK” and execute
Channel Setting. (See page 294)
pYou can start 1Seg also by switching to Horizontal
Open Style while the display for selecting a 1Seg
function is shown in Normal Style.
pWhile “Work with style” is set to “1Seg”, you can start
1Seg also by switching to Horizontal Open Style from
the Stand-by display.
pTo end watching, press h and select “YES”.
<Activate 1Seg>
Watching 1Seg Programs
Viewer display
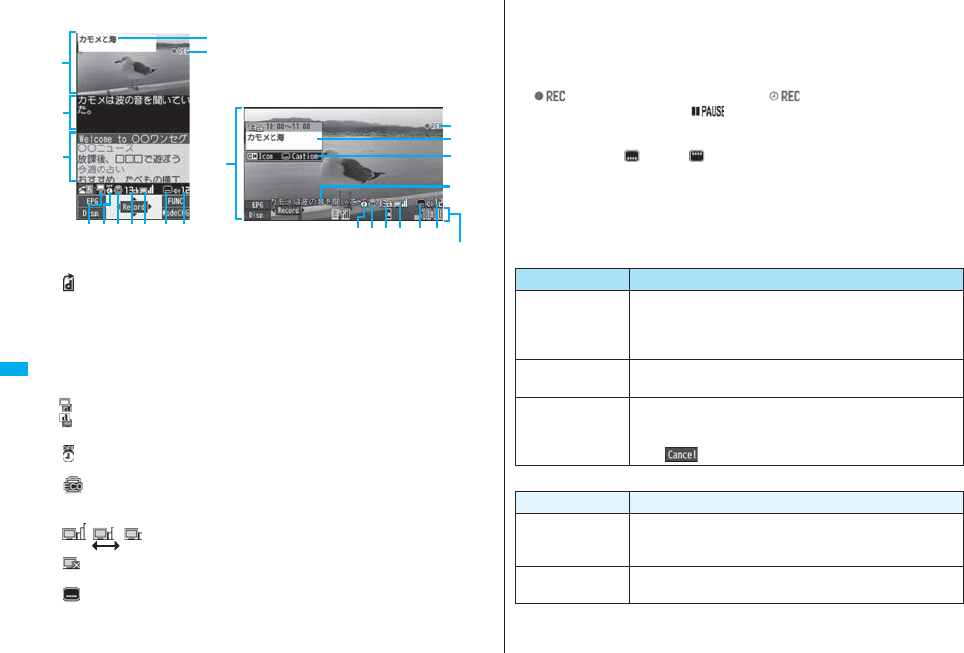
296
1Seg
■About Viewer display
(When “Switch display” is “V. img+Caption+DBC”.)
Video
“ ” appears on the upper right of the display when the data broadcasting linked with
a 1Seg program is found while you are watching on the horizontal display or in the
multiwindow.
Caption
You can set display position of the caption on the horizontal display by “Caption posit.
in w-scr”.
Data Broadcasting
Operation Mode
Video Mode: Operates the video or audio. (See page 295)
Data Broadcasting Mode: Operates the data broadcasting. (See page 301)
Off Timer
“ ” appears while Off Timer is set.
ECO Mode
“ ” appears during ECO Mode.
Channel (remote-control number)
Airwave Reception Level (estimate)
(Strong) (Weak)
“ ” appears out of the broadcasting area.
Reception of Caption
“ ” is displayed while caption information is being received.
Sound Volume
Guide display
Horizontal display
Vertical display
Program Information (outline)
The program name is displayed on the vertical display.
The channel, start/end time, and program name are displayed on the horizontal
display.
This is displayed when you operate keys or switch styles.
Record Video
“ ” appears during video recording, and “ ” appears during video
recording by Timer Recording. “ ” appears during pause of recording.
Icon/Caption
Icon: “ON/OFF” of “Icon”
Caption: Position ( : Lower, : Upper) and OFF
This is displayed when you operate keys or switch styles.
pAfter you select a channel using Channel Search, the channel (remote-control number)
might not be displayed.
pWhile “Icon” is set to “OFF” in the horizontal display, the guide display appears when
you operate keys or switch styles.
■Channel switching operation (in Video Mode only)
■Operations while watching a 1Seg program
Operation Key operation
Direct channel
selection
Remote control No.1~9 . . . . . 1~9
Remote control No.10. . . . . . . a
Remote control No.11. . . . . . . 0
Remote control No.12. . . . . . . s
Sequential channel
selection
No
Channel search No(for at least one second)
pEach time of pressing switches channels by searching
receivable broadcasting stations in order of frequency.
pl() or r to suspend
Operation Key operation
Sound volume
adjustment
Bo※1 or <>
pPress and hold to adjust the sound volume sequentially.
pSetting from Level 0 (Silent) through 25 is available.
Mute r※1
pr※1 or adjust volume to play back sound
297
1Seg
※1 In Data Broadcasting Mode, you cannot operate.
※2 You cannot operate in Horizontal Open Style.
※
3 When you close the FOMA phone, the vertical display returns. In Horizontal Open Style,
the horizontal display automatically appears; the vertical display does not appear.
Start program
guide i-αppli
l()
※2
Program info l(for at least one second)※2
Program info
(outline)
m()
Switch display m( ) while displaying program information (outline)
pEach time of pressing from the horizontal display switches the
setting of “Icon” and “Caption posit. in w-scr”.
Full display d※2※3
p
In Video Mode, each time of pressing switches the display directions.
pIn Data Broadcasting Mode, each time of pressing switches
between the normal display and the full display.
Record video Oo()
※1 or p(for at least one second)
pOo()
※1 or p to end
Record still image p
Switch TV/data BC c()
※2
pEach time of pressing switches between Video Mode and Data
Broadcasting Mode.
Operation Key operation
Information
pEven when you switch the display by using Multitask while you are watching a 1Seg
program, the audio from the 1Seg program is played back. (Play Background) The
audio might not be played back, however, depending on the function or program.
(See page 511)
pWhen “TV sound while closed” is set to “ON”, the audio is played back even if you
close the FOMA phone while you are watching a 1Seg program. You cannot do
anything other than adjusting the volume when your FOMA phone is closed.
pThe following might occur depending on the airwave conditions:
・The audio is interrupted.
・The data broadcasting is not operable.
・Block-shaped noise appears on the display or playing stops.
・The video or the data broadcasting is not displayed. (A dark screen appears.)
pThe caption might not be displayed depending on the program.
pThe data broadcasting cannot be displayed on the horizontal display.
pIf you move, the receivable airwaves or broadcasting stations might change being
affected by mountains or buildings. If reception on 1Seg goes bad after moving,
perform “Auto channel setting”; then reception might be improved via different
airwaves or you might be able to watch programs of other broadcasting stations.
pIf you use Channel Search to select channels after you move, etc., you might find the
channels you could not store by “Auto channel setting”. Execute “Add to ch. list” to
store the channels you found, and then you can watch the channel from the next time.
pWhen starting 1Seg or switching channels, it takes a while before you can watch a
1Seg program.
Function Menu of Viewer Display
Information
Function menu Operation/Explanation
Channel info You can display the detailed display of the selected channel list.
Select a broadcasting station to switch to it.
Program info You can display information of the program you are watching.
pWhen you have not obtained program information, it is not
displayed.
Channel list Go to step 1 of “Select Channel List” on page 294.
Channel setting See page 294.
Add to ch. list You can add the broadcasting station you are currently watching
to the channel list.
YES
pThe broadcasting station is stored in the lowest number of an
unoccupied remote-control number from 13 onward.
Program guide See page 300.
298
1Seg
Switch display You can switch the contents of the viewer display.
Select an item.
pIf you set to “Enlarged V. img+DBC”, the video on the vertical
display is enlarged. However, the sides of the video might be
cut depending on the program.
pEven if you set to “Data broadcasting”, the audio from 1Seg
programs is played back.
Switch TV/data BC You can switch between Video Mode and Data Broadcasting
Mode while watching a 1Seg program on the vertical display.
Icon See page 310.
Mail ticker disp. See page 310.
Compose message See page 299.
Settings
(Off timer)
When the specified time elapses, the confirmation display
appears asking whether to end watching or recording a program
(except for Timer Recording).
Select a time.
Settings
(Brightness)
You can set the brightness of the display light to Level 1 (dark)
through 5 (bright).
Select a brightness level.
pIf you set to “Auto setting”, it is adjusted automatically in
accordance with the ambient brightness sensed by the light
sensor.
pThe setting here is valid until you finish watching the 1Seg
program. The setting at 1Seg start-up follows the setting
specified by “Brightness” of “Backlight” on page 118.
Settings
(Mobile W-Speed)
See page 309.
Function menu Operation/Explanation
At 1Seg start-up
When “Caption” is
set to “ON”:
V. img+Caption+D
BC
When “Caption” is
set to “OFF”:
Visual image+DBC
At 1Seg start-up
Video Mode
At 1Seg start-up
OFF
Settings
(Image quality)
See page 309.
Settings
(LCD AI)
See page 119.
Settings
(Auto volume)
See page 309.
Settings
(Remaster)
See page 309.
Settings
(Listening)
See page 310.
Settings (Equalizer) See page 310.
Settings
(Main/sub sound)
SoundMain/sub sound
Main sound, Sub sound, or Main+sub sound
Settings
(Switch audio data)
SoundSwitch audio dataSound 1 or Sound 2
pYou can switch only when audio that can be switched is found.
Settings
(TV sound w/
closed)
See page 310.
Settings
(ECO mode)
See page 310.
Data broadcasting
(Reload contents)
You can reload the data broadcasting site being displayed.
Reload contents
pThe confirmation display appears asking whether to re-send the
data you entered, depending on the site.
Data broadcasting
(Certificate)
See page 176.
Data broadcasting
(Set image display)
See page 188.
Function menu Operation/Explanation
At 1Seg start-up
Main sound
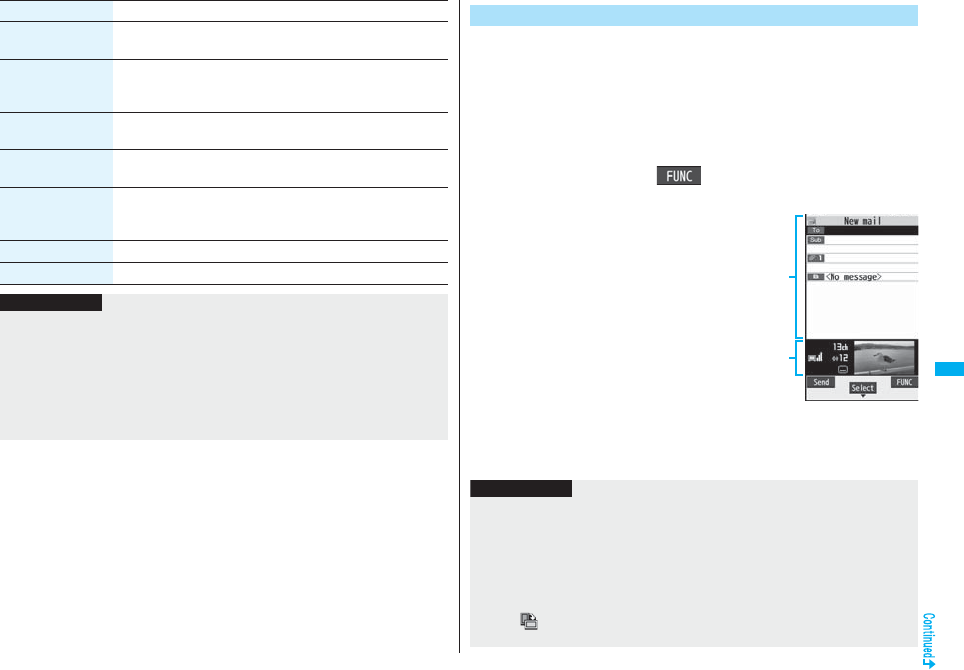
299
1Seg
Data broadcasting
(Sound effect)
See page 310.
Data broadcasting
(ToruCa from
dataBC)
See page 274.
Data broadcasting
(Reset settings)
See page 310.
Back to data BC You can stop browsing the data broadcasting site and return to
the data broadcasting.
Tune service You can select a program to watch when the same broadcasting
station is broadcasting multiple services (programs).
Select a channel.
TVlink list You can display the TVlink list. (See page 302)
AV output See page 382.
Function menu Operation/Explanation
Information
<Settings (Off timer)>
pIn the following cases, the Off Timer confirmation display appears after each
operation finishes.
・When the timer recording is on standby
・When a booked program is being recorded
・When a still image is being saved
・When an unsaved image is left
・When channels are being searched by Auto Channel Setting
You can compose and send i-mode mail messages while you are
watching a 1Seg program. (Multiwindow)
When you send an i-mode mail message to the FOMA phone supporting
the “Media To” function by “Recom. channel mail”, the receiving end can
start 1Seg by using the “Media To” function.
pYou cannot operate 1Seg while the Message Composition display is shown. You
cannot display the caption and data broadcasting, either.
pYou can compose SMS messages while watching a 1Seg program.
1Viewer displayi()Compose message
Compose message or Recom. channel mail
Compose message
. . . You can compose a new i-mode
mail message.
Go to step 2 on page 198.
Recom. channel mail
. . . You can compose an i-mode
mail message whose text
contains the information of the
channel you are watching.
Go to step 2 on page 198.
pWhen the Message Composition
display is shown, you can switch
between the Message Composition
display and the viewer display (horizontal display) each time you press and hold
c for at least one second. When the viewer display is shown, you can change
the display directions each time you press d.
Send i-mode Mail while Watching
Message
Composition
display
Viewer display
Information
p
Even when you show the Message Composition display/detailed Sent Mail display by
Multitask while you are watching a 1Seg program, the display appears in the multiwindow.
pOnly the audio is played back from a 1Seg program without showing the viewer
display if you select “Mail history” from the Function menu of the Inbox/Outbox/Draft
list or a detailed mail display by Multitask while watching a 1Seg program and show
the detailed Sent Mail display of a mail message sent to a person whose mail address
is not stored in the Phonebook.
pWhen “ ” appears at the lower left of the display, switch to Horizontal Open Style or
do something to switch to the viewer display and then operate.
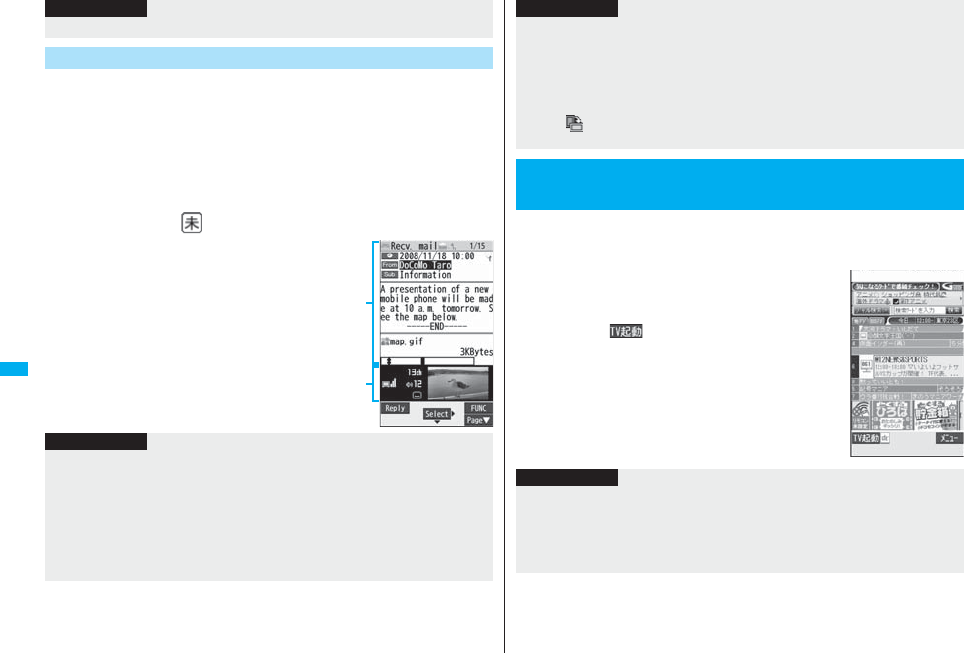
300
1Seg
The ticker notifies you of the receiving of the i-mode mail message, SMS
message, and Messages R/F. You can open the detailed Received Mail
display while you are watching a 1Seg program. (Multiwindow)
pYou cannot use this function when “Mail ticker display” is set to “OFF”.
pYou cannot operate 1Seg while the detailed Received Mail display is shown. You
cannot display the caption and data broadcasting, either.
pYou can display SMS messages while watching a 1Seg program.
1Receive i-mode mail while viewer display is shown
Press l( ) while the ticker is displayed.
pWhen the Detailed Received Mail display
is shown, you can switch between the
Detailed Mail display and the viewer
display (horizontal display) each time you
press and hold c for at least one
second. When the viewer display is
shown, you can change the display
directions each time you press d.
pIn B Mode of 2in1, you cannot compose/send i-mode mail message. (See page 456)
Receive i-mode Mail while Watching
Information
Detailed
Received
Mail display
Viewer
display
Information
pEven if “Mail ticker display” is set to “Sender+subject”, the titles are not displayed for
Messages R/F, i-mode mail messages, and SMS messages received from the parties
not stored in the Phonebook.
pEven when you show the detailed Received Mail display by Multitask while you are
watching a 1Seg program, the display appears in the multiwindow. However, you
cannot show the viewer display and only the audio from a 1Seg program is played
back when you display a mail message from a person whose mail address is not
stored in the Phonebook.
By using the Program Guide i-αppli, you can start 1Seg by selecting a
program from the program guide, book programs, and set timer
recordings. (See page 259)
1m1SegProgram guide
“Gガイド番組表リモコン (G Guide Program List
Remote-controller)” starts.
pPress l( ) from the display of “Gガイド番組表
リモコン (G Guide Program List Remote-controller)” to
watch the program currently broadcast on the selected
channel.
pFor details, refer to “Mobile Phone User’s Guide
[i-mode] FOMA version”.
pWhen the display is shown in the multiwindow, or when only audio from a 1Seg
program is played back with the detailed Received Mail display shown, you cannot
press +No to show other messages. However, you can press +No to show other
messages when you select “Mail history” from the Function menu of the Inbox/
Outbox/Draft list or the detailed mail display by Multitask while watching a 1Seg
program.
pWhen “ ” appears at the lower left of the display, switch to Horizontal Open Style or
do something to switch to viewer display and then operate.
<Program Guide i-αppli>
Using Program Guide i-αppli
Information
Information
pYou can set the Program Guide i-αppli by “Program guide key” of “Software setting”.
pWhen you use “Gガイド番組表リモコン (G Guide Program List Remote-controller)”
for the first time, you need to do initial settings.
pThis software program is the i-αppli program that uses the mail function, so it is not
available when the mode of 2in1 is set to B Mode.
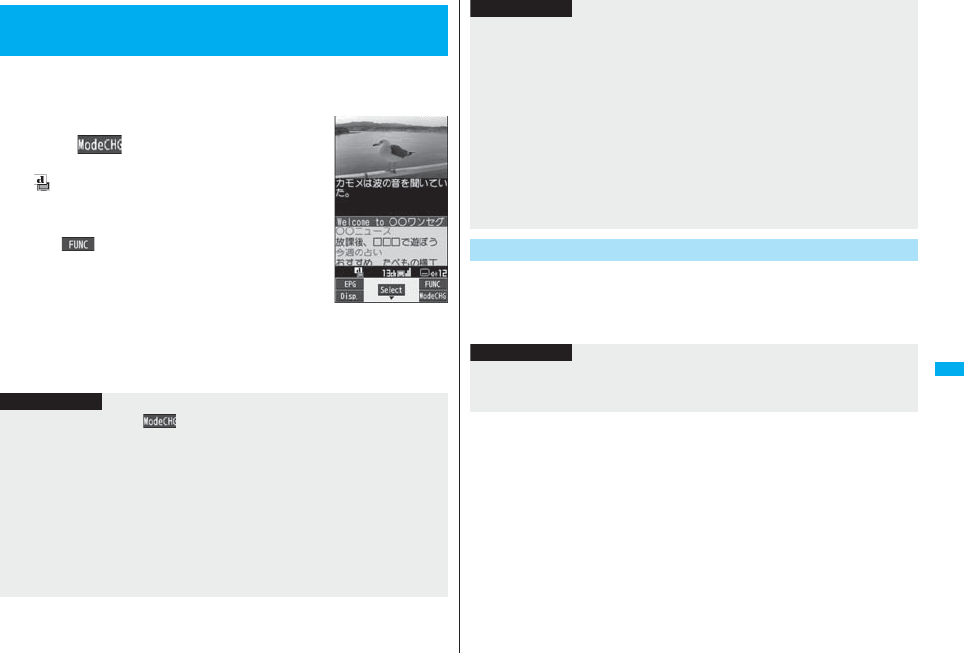
301
1Seg
1Seg enables you to use the data broadcasting in addition to the video
and audio. Various information including still/moving images is available
from the site linked with TV programs.
1Viewer display (Video Mode)
c()
Video Mode switches to Data Broadcasting Mode and
“ ” appears.
pAudio from a 1Seg program is played back even during
Data Broadcasting Mode.
pYou can display only data broadcasting when you press
i( ) from the viewer display and select “Data
broadcasting” of “Switch display”.
2Select an item (link).
pThe confirmation display appears asking whether to connect to i-mode
depending on the data broadcasting and data broadcasting site.
pSee page 173 for the operation while a site is displayed.
<Data Broadcasting>
Using Data Broadcasting
Information
pEach time you press +c( ), Video Mode and Data Broadcasting Mode are
switched.
pIf you change a channel during Data Broadcasting Mode, Video Mode returns.
pYou cannot display the data broadcasting on the horizontal display.
pYou cannot enter pictographs when you enter characters on data broadcasting or
data broadcasting site.
pThe audio might be played back depending on the program while the i-mode site is
displayed. The 1Seg video does not appear, however.
pWhen you display the data broadcasting or data broadcasting site, a tone might be
output depending on the program. In that case, the playback of the 1Seg audio
temporarily stops, and the tone of the data broadcasting is preferentially output.
You can use the highlighted information in the data broadcasting site to
easily use the functions such as making calls, or sending mail.
Select an item (link) and use the Phone To/AV Phone To or Mail To
function. (See page 187)
pWhile the data broadcasting or data broadcasting site is displayed, the confirmation
display might appear asking whether to send the contents you entered on the site or
whether to permit obtaining mobile phone information.
pWhen you select “YES (confirm once)” from the confirmation display for data
broadcasting, the information on data broadcasting might be automatically updated,
and you might be charged a packet communication fee while watching a 1Seg
program or playing back a video. (See page 311)
pIf you move in a place where the airwave is unstable while watching a 1Seg program,
the video, data broadcasting, and data broadcasting site may be automatically
updated. In that case, the top page of the data broadcasting appears, and the
information you have entered into the connected data broadcasting or data
broadcasting site is cleared. Ensure that you watch the data broadcasting and data
broadcasting site in a place where the airwave is stable.
Use Highlighted Information for Various Operations
Information
Information
pDepending on the data broadcasting or data broadcasting site, the function of
composing i-mode mail or storing the Phonebook entries might be automatically used.
The confirmation display asking whether to use each function appears.
302
1Seg
Some data broadcasting programs might contain TV links which lead to
the details of the programs or related information site.
From the TV links, you can store the site address information in the
TVlink list and can easily call them up for browsing later.
When you select the item (link) that can be stored in the TVlink list, the
confirmation display appears asking whether to store it in the TVlink list.
You can store up to 50 TV links.
1In Data Broadcasting Mode, select an item (link) that can
be stored in the TVlink listYES
pWhen you try to store the same URL or memo information, the confirmation
display appears asking whether to overwrite it.
pWhen the maximum number of TV links has already been stored in the TVlink list,
the confirmation display appears asking whether to store after deleting.
<TVlink>
Using TV Links
Store in TV Links
Information
pValidity period is set for some links. If the validity period is expired, you cannot store it.
pThe number of characters that can be stored for a URL is up to 60 half-pitch
characters. When the number of characters used for a URL exceeds that, you cannot
store it.
pYou can store a title of up to 20 full-pitch/40 half-pitch characters. When the number of
characters exceeds that, the excess is deleted. When a TV link has no title, the URL is
displayed on the list display.
pThe contents you entered in the site is not stored in the TVlink.
1m1SegTVlink
Select a TV link to be displayed.
pWhen the confirmation display appears asking whether
to connect to i-mode, select “YES”.
pFor a link whose validity period is expired, the
confirmation display appears asking whether to delete it.
pAfter you brought up a site using a TV link, the TV link is displayed at the top of
the TVlink list next time.
■Icons in the TVlink list
Bring Up a Stored TV Link
TVlink list
Icon Format Description
Memo information Displays memo information.
Link communication
contents
Connects to the data broadcasting site.
(Video and caption are not displayed.)
i-mode contents Connects to the i-mode site.
Full Browser contents Connects via Full Browser.
Function Menu of the TVlink List
Function menu Operation/Explanation
Display detail Displays the title, URL, outline, content type, and validity period of
the TV link.
No. of TVlink Displays the number of the registered TV links.
Delete
(Delete this)
Delete thisYES
Delete
(Delete selected)
Delete selectedPut a check mark for TV links to be
deletedl()YES
Delete
(Delete all)
Delete allEnter your Terminal Security CodeYES
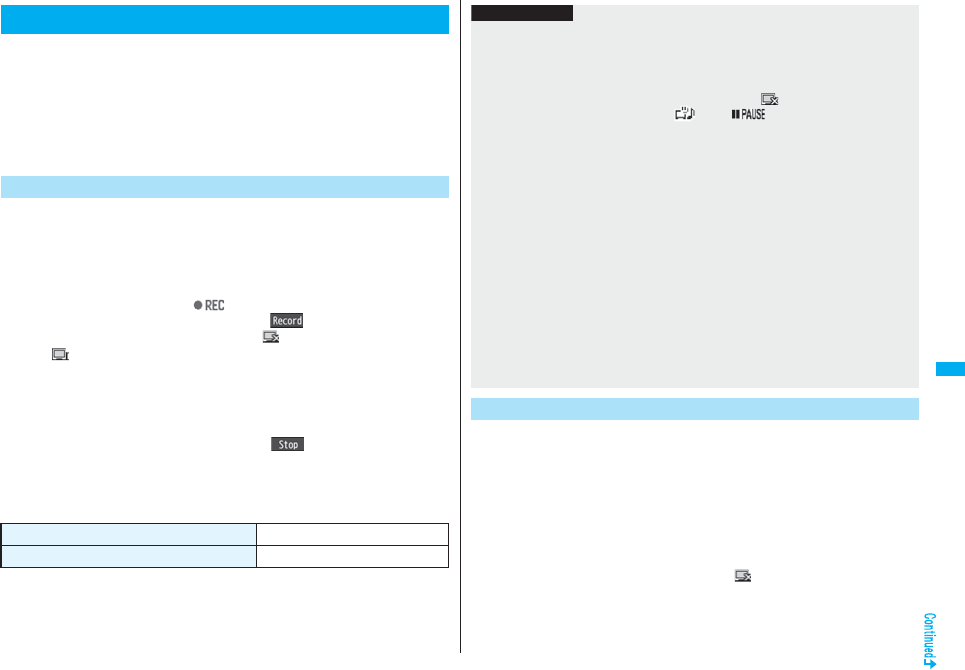
303
1Seg
You can save the program as video or still images while you are
watching.
pThe copy control signals such as “Copy never”, “Copy once”, and “Copy free” are
incorporated into 1Seg. The copy control signals are determined by each broadcasting
station.
pYou cannot record the programs of “Copy never”. Further, when the copy control signal
is changed to “Copy never” during recording, the recording session is closed, and the
video recorded up to that point is saved.
The recorded video is saved to the microSD card (“Data box”→“1Seg”→
“Video”).
pSee page 345 for playing back the recorded video.
pYou cannot save the recorded video to the FOMA phone.
1Viewer displayp(for at least one second)
The confirmation tone sounds, “ ” appears, and recording starts.
pYou can start recording also by pressing Oo( ) in Video Mode.
pWhen the airwave reception level indicates “ ”, you cannot record video. Even
if “ ” is indicated, you might not be able to record it depending on the airwave
conditions.
pYou cannot change the channel during recording.
2Press p.
The confirmation tone sounds and video is saved.
pYou can save the video also by pressing Oo( ) in Video Mode.
pWhen the file size is larger than 2 Gbytes, or the storage location becomes full,
the recording automatically ends, and then the video recorded up to that point is
saved.
■Estimate of the number of saved files and recordable time
pThe savable number of video files decreases depending on the data volume.
pThe maximum recordable time is an estimate for microSD card of 2 Gbytes, and it is an
estimate for 224 kbps of video, 48 kbps of audio, and 52 kbps of data (including
captions). The recordable time varies depending on the broadcasting station or
program.
Recording a 1Seg Program while Watching
Record Video
The maximum savable number 99
The maximum recordable time (total) Approx. 000 minutes
The recorded still images are saved to your FOMA phone (“Data box”→
“1Seg”→“Image” folder). You can save up to 3,500 files in total sharing
the memory space with other data files, however, the number of files you
can save decreases depending on the data volume. (See page 537)
pSee page 330 for displaying the recorded still image files.
pYou cannot save still images to the microSD card.
1Viewer displayp
The confirmation tone sounds, and the still image is saved.
pWhen the airwave reception level indicates “ ”, you cannot record still images.
Information
pThe playing time of the saved data might become shorter than the recording time
depending on the airwave conditions.
pThe recording is not suspended even when you switch displays by Multitask or when
a call comes in during recording.
pWhen the airwave conditions are changed to indicate “ ” during recording,
recording shifts to pause state, then “ ” and “ ” are displayed. Video and
audio during that period are not saved.
pIf you remove the battery pack or pull out the microSD card during recording, the
recorded data is saved as the file that cannot be played back.
pDepending on the broadcasting station or program, video and audio might be saved a
few seconds after your recording operation.
pYou cannot record when the video storage area is full. Also, you might not be able to
record when the unused space in the storage area is not enough. Delete unnecessary
video files and try again.
pSome programs cannot use the storage area fully.
pThe file name and title name of the saved video are as follows:
File name: “PRGXXX”
Title name: “YYYY/MM/DD hh:mm”
(X: numerals, Y: year, M: month, D: date, h: hour, m: minute)
pYou cannot set the recorded video for the Stand-by display, ring tone or Call
Receiving display.
pYou cannot save video during AV output.
Record Still Images
304
1Seg
You can book programs or set timer recordings of 1Seg. At the specified
date/time, an alarm sounds to notify you of the start of the program.
pYou can book programs or set timer recordings also by using the channel information
displayed in the Program Guide i-αppli, sites, or mail.
You can book programs by setting the date/time, channel, and program
name. By using “Act. TV w/ alarm”, 1Seg automatically starts at the set
time. You can book up to 100 programs.
1m1SegBook program listl()
Do the following operations.
pSelect a booked program to check the contents, and you can edit it by pressing
l().
Information
pThe file name and title name of the saved still image are as follows:
File name: “YYYYMMDDhhmmXXX”
Title name: “YYYY/MM/DD hh:mm”
(Y: year, M: month, D: date, h: hour, m: minute, X: numeral)
pYou cannot set the recorded still image for the Stand-by display or the Call Receiving
display.
pSee page 186 for when images are stored to the maximum.
pData broadcasting and caption cannot be saved as still images.
pYou cannot record still images during AV output.
<Book Program> <Timer Recording>
Booking Programs or Setting Timer
Recording of 1Seg
Book Program List
Item Operation/Explanation
Channel Select a channel.
Edit title Enter a program name.
pYou can enter up to 48 full-pitch/96 half-pitch characters.
Start date
setting
Enter a date/time for starting watching.
Select an item.
Enter date. . . . . . Enter a date/time directly.
Choose date . . . Select a date from the Calendar and enter a
time.
Repeat Select a type of repeat.
pIf you select “1time”, the booking is not repeated.
pIf you select “Select day”, put a check mark for days of the week
to be set and press l().
pThe program booking set with repetition is counted as one
booking.
Alarm Select an alarm method.
ON . . . . . . . . . . . .Alerts you at the time set for the start date/time
comes. The setting for alarm notification is
completed.
ON/Set time . . . .Alerts you at the time set as the prenotification.
OFF . . . . . . . . . . .Does not alert. The setting for alarm notification
is completed.
Select how many seconds (minutes) before the specified
time to be alerted.
pWhen you set “Auto power ON” to “ON”, you cannot set “15
seconds before”, “30 seconds before”, and “45 seconds before”
as the prenotification time.
Alarm tone Select a type of alarm toneSelect a folder
Select an alarm tone.
Volume Use Bo to adjust the volume.
pIf you set to “Step”, the alarm tone is silent for about three
seconds, and then the volume steps up every about three
seconds, from Level 1 through Level 6.
Item Operation/Explanation
305
1Seg
2Press l().
Act. TV w/ alarm Select an item.
Auto ON . . . . . . After the Booking Alarm Notification display
appears, 1Seg automatically starts.
Manual ON . . . . You can manually activate 1Seg from the
Booking Alarm Notification display.
OFF . . . . . . . . . . Only the booking alarm notification is notified.
You cannot activate 1Seg from the Booking
Alarm Notification display.
Auto power ON You can set whether to turn on the power automatically to notify
booking alarm when the booking alarm notification time arrives
during power off.
ON or OFF
1Seg volume You can set the sound volume of a 1Seg program when it is
activated by “Act. TV w/ alarm”.
Use Bo to adjust the volume.
Off timer You can set to end watching a 1Seg program for when the
specified time elapses after the 1Seg program automatically
starts by “Act. TV w/ alarm”.
Select a time.
Prefer manner
mode
You can set the booking alarm tone which sounds at the specified
time during Manner Mode.
ON or OFF
ON . . . . Sounds at the same volume as set for “Alarm for Book
program” on page 114.
OFF . . . Sounds at the volume set for this function.
Item Operation/Explanation
You can set timer recordings by setting the date/time, channel, and
program name. You can set up to 100 timer recordings.
1m1SegTimer recording listl()
Do the following operations.
pSelect a set timer recording to check the contents, and you can edit it by pressing
l().
pYou can display the used memory space (estimate) by pressing i().
Timer Recording List
Item Operation/Explanation
Channel Select a channel.
Edit title Enter a program name.
pYou can enter up to 48 full-pitch/96 half-pitch characters.
Start date
setting
Enter a date/time for starting or ending recording. The booking
alarm notification is made about one minute before the starting
time.
Select an item.
Enter date . . . . . . .Enter a date/time directly.
Choose date . . . . .Select a date from the Calendar and enter a
time.
End date setting
Repeat Select a type of repeat.
pIf you select “1 time”, the recording is not repeated.
pIf you select “Select day”, put a check mark for days of the week
to be set and press l().
pThe timer recording set with repetition is counted as one event.
Alarm You can set whether to make the alarm tone for the booking
alarm notification.
ON or OFF
Volume Use Bo to adjust the volume.
pYou cannot set the volume to “Step”.
306
1Seg
2Press l().
pWhen the confirmation display appears asking whether to set the timer recording,
select “YES”. If you select “YES (confirm once)”, the same confirmation display
does not appear afterward.
Priority You can set a recording operation for when the start date/time
arrives while operating a function which cannot be started up
simultaneously.
Recording or Operation
Recording . . . . Suspends and terminates the function being
operated, and starts recording.
Operation. . . . . The confirmation display appears asking
whether to start recording. Select “YES” to
suspend and terminate the function being
operated and start recording.
pFor while operating a function which can be started up
simultaneously, recording starts by the Multitask function.
pWhen the start time arrives during a call (including dialing and
ringing), recording starts after you end the call. When you are
using another function during a call, recording starts after you
end the call and the function.
Overwrite setting
When you set a recording to be repeated and set “Overwrite
setting” to “ON”, the program recorded last time is automatically
deleted and overwritten.
ON or OFF
Item Operation/Explanation
Information
pYou can book programs or set timer recordings also by using the program information
displayed in the Program Guide i-αppli, sites, or mail. In that case, the registration
display might appear with the start date/time, end date/time, channel, and program
name entered.
pWhen you booked multiple programs whose booking alarm notification is made at the
same date/time, the notification for the program set for the earliest start date/time is
preferentially made. When the start date/time of the programs is the same, the
notification set for the program booked in the last is preferentially made.
pYou cannot set multiple timer recordings whose recording time overlaps. If you set two
timer recordings and the recording end time of one program is the same as the
recording start time of the other, recording of the first program ends about one minute
earlier.
pYou cannot book programs or set timer recordings of which starting date/time or alarm
notification date/time (for Timer Recording, about one minute before) is over except
for the booking set to be repeated.
pThe program bookings and timer recordings of which alarm notification date/time is
over are automatically deleted. However, the bookings set to be repeated, program
bookings for which “Alarm” is set to “OFF” are not deleted. Also the bookings are not
deleted if you were operating the program booking/timer recording function on the
notification date/time.
pWhen no channel lists are set, you cannot book programs and set timer recordings.
pTurn off the FOMA phone after setting “Auto power ON” to “OFF” when you are near
electronic devices using high-precision control or weak signals, or where the use is
prohibited such as in airplanes and hospitals.
pWhen you have set “Priority” to “Operation” and the confirmation display is shown, the
recording does not start even at the recording start time and starts at the time you
select “YES”. However, the recording is not executed if the recording end time is over.
pWhen “Overwrite setting” is set to “ON”, the timer recording starts after erasing the
program previously recorded. Regardless of whether you have watched the recorded
program or not, or whether you have succeeded or failed timer recording, the
previously recorded program is erased. If it is not erased before the timer recording
starts, recording might not start on time.
pWhen you set “Overwrite setting” to “ON” for a recording, the file size of the recorded
video might become larger than that of the video recorded last time because the file
size varies depending on the recording (or watching) environment or programs. Note
that you might not be able to record correctly when the unused memory space in the
storage location is not enough.
pThe title of the recorded video file takes the program name booked for the timer
recording.
p“ ” appears on the viewer display during recording by Timer Recording.
pThe audio from a 1Seg program is not played back during recording that has been
started by Timer Recording. You can play back the audio by pressing -r or
adjusting the sound volume, however.
Function Menu while Book Program List or Timer
Recording List is Displayed
Information
Function menu Operation/Explanation
New Go to step 1 on page 304 for Book Program.
Go to step 1 on page 305 for Timer Recording.
307
1Seg
The icon appears on the desktop.
“ ” . . . . Displayed when an alarm is set for today (except the setting for past time).
“ ” . . . . Displayed when an alarm is set for tomorrow or onward only.
pIf you set “Display setting”→“Clock”→“Clock display” to “OFF”, or set “Alarm” to “OFF”
for a program booking, the icons are not displayed.
Edit Go to step 1 on page 304 for Book Program.
Go to step 1 on page 305 for Timer Recording.
Sort You can change the display order.
Select an order.
Delete this YES
Delete past You can delete the program bookings and timer recordings
whose start date/time or end date/time is set for the past date/
time.
YES
Delete selected Put a check mark for program bookings or timer
recordings to be deletedl()YES
Delete all Enter your Terminal Security CodeYES
Memory info
[Timer Recording list
only]
You can display the used memory space (estimate).
When you set an alarm for “Book program” or “Timer
recording”
Function menu Operation/Explanation
<Book Program>
If you set “Act. TV w/ alarm” to other than “Auto ON”, the alarm sounds for about five
minutes, and illumination lights. The vibrator works as the same setting for “Phone” of
“Vibrator”. The set start date/time, channel, program name and an animation appear on
the display.
If you set “Alarm” to “ON” and “Act. TV w/ alarm” to “Auto ON”, 1Seg automatically starts
when the specified time comes. The alarm does not sound.
To end watching, press h and select “YES”.
If you set “Off timer”, the confirmation display appears asking whether to continue
watching when the specified time elapses. If you select “NO” or do nothing for about 15
seconds, 1Seg automatically terminates.
<Timer Recording>
About one minute before starting time, the alarm sounds for about two seconds, and
illumination lights. The vibrator works as the same setting for “Phone” of “Vibrator”. The
set start date/time, end date/time, channel, program name and an animation appear on
the display, then the viewer display appears. If you do nothing for about one minute after
the recording starts, the Stand-by display appears. If the timer recording has started with
the FOMA phone closed, you can show the viewer display by opening the FOMA phone.
If the FOMA phone is opened, you can show the viewer display by re-opening the FOMA
phone or by pressing x and selecting “Activate 1Seg”.
To end video recording by Timer Recording and save video, press p on the viewer
display. In Video Mode, you can end the video recording and save video also by
pressing Oo ( ) and selecting “YES”.
pDuring a call
The alarm sounds from the earpiece.
pDuring operations
<Book Program>
When “Alarm setting” is set to “Operation preferred”, the booking alarm notification is
made only when the Stand-by display is shown. When it is set to “Alarm preferred”, the
booking alarm notification is made even while you are operating another function or
during a call. (See page 416)
<Timer Recording>
Timer Recording works according to the setting of “Priority” (see page 306). However,
Timer Recording might not work when you are reading to/writing from the microSD
card, or accessing the Data Storage Center.
When the time specified for “Book program” or “Timer
recording” comes
308
1Seg
pWhen the booking alarm notification for a program booking or timer recording is set to
the same time of “Alarm”, “ToDo”, or “Schedule”
The notification is made in the priority order of “Alarm” → “Timer recording” → “ToDo”
→ “Schedule” → “Book program”. However, if you set alarm for “Auto power ON” and a
program booking to the same time, and the specified time comes while the power is
turned off, the icon does not appear on the desktop.
A missed program booking or timer recording is notified by the icon on the desktop.
pWhen the power is turned off
The booking alarm notification is not made except for the program booking set with
“Auto power ON”. For Timer Recording, you cannot record a 1Seg program unless the
power has been set to “ON” one minute before the start date/time.
The icon does not appear on the desktop even after turning on the power.
pIn Manner Mode
The vibrator, message display, and illumination light notify you. The alarm sounds at
the volume set for Manner Mode. (See page 113)
pDuring Lock All, Personal Data Lock or Omakase Lock
The booking alarm notification is not made. You cannot record a 1Seg program unless
each lock is released one minute before the start date/time.
After releasing each lock, the icon appears on the desktop to inform you.
pDuring infrared data exchange, during iC communication, or while SD-PIM is operated
The booking alarm notification is not made. You cannot record a 1Seg program unless
each function is finished one minute before the start date/time.
After each function is finished, the icon appears on the desktop to inform you.
pWhile updating software program
The booking alarm notification is not made. You cannot record a 1Seg program unless
software update is finished one minute before the start date/time.
When the specified time comes during updating software program, the icon does not
appear on the desktop even after updating is completed.
Information
pWhen you book programs or timer recordings with “Alarm setting” set to “Alarm
preferred”, and the booking alarm time arrives while you are dialing, the alarm sounds
after you have called up the other party. When booking alarm time arrives during
ringing, the alarm sounds after communication has started.
The alarm tone stops by pressing any of the keys, but the animation/i-motion becomes a
still image, and the booking alarm message stays displayed. When “Act. TV w/ alarm” is
set to “OFF”, press any key again to clear. However, you cannot clear the booking alarm
message by pressing a side key, with the FOMA phone closed. When a call comes in,
the alarm stops.
Press Oo( ) and select “YES” from the Booking Alarm Notification display; then
1Seg starts, and you can watch the booked program. If you start watching the booked
program during recording, the video recorded up to that point is automatically saved;
then the booked program appears.
pWhen you have set “PIN1 code entry set” to “ON” and set “Auto power ON” to
automatically turn on the power to make a booking alarm notification for a program
booking, the display for entering your PIN1 code appears after the power is
automatically turned on. The booking alarm notification is not made unless you enter
your PIN1 code.
pWhen you set “Auto power ON” to automatically turn on the power to make a booking
alarm notification for a program booking, the alarm notification is made after the
wake-up image stops.
pYou might not be able to set some i-motion movies/Chaku-uta Full® music files for an
alarm for a program booking.
pDepending on the i-motion movie you set for the alarm for a program booking, only
the audio might be played back at the specified time.
pWhen a Chaku-uta Full® music file is set for an alarm for a program booking, only the
audio is played back at the specified time. The illumination for when you play back a
demo to select an alarm tone differs from for when you are notified by an alarm.
To clear alarm tone/booking alarm message, animation, and
i-motion for Book Program
When “Act. TV w/ alarm” of Book Program is set to “Manual
ON”
Information
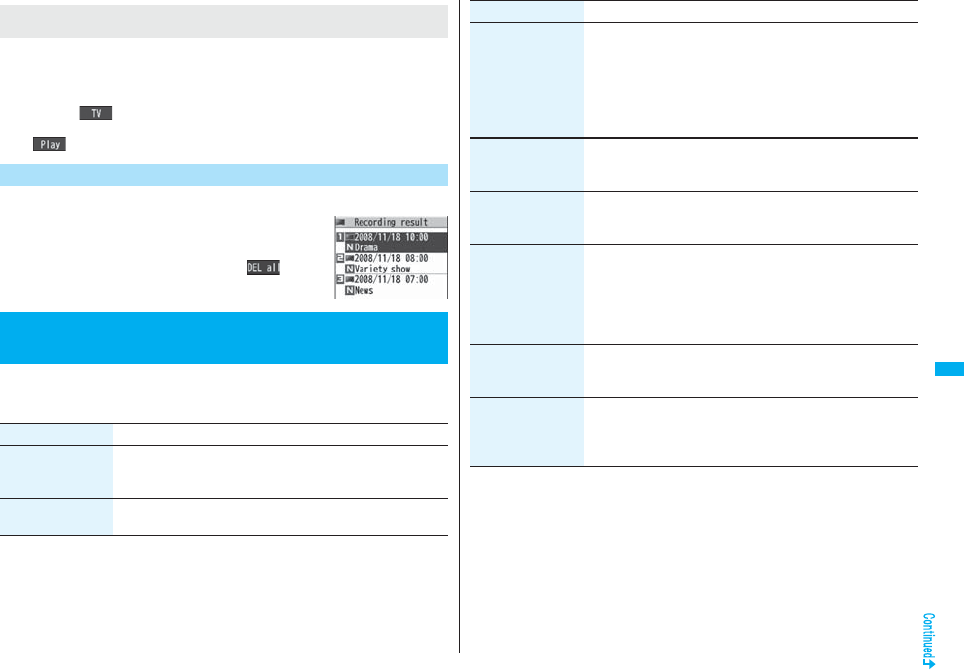
309
1Seg
The icon appears on the desktop. You can check that icon for the contents of the missed
booking alarm (booking information) or recording result.
The booking information or recording result is the latest missed one.
pWhen “Act. TV w/ alarm” is set to other than “OFF”, you can start 1Seg also by
pressing Oo( ) and select “YES” from the display of booking Information.
pWhen recorded video is stored, you can play back the video also by pressing
Oo( ) from the display of recording result.
You can display up to 20 recording results from the latest one.
1m1SegRecording result
Select a recording result.
pTo delete all recording results, press i( ), enter
your Terminal Security Code, and select “YES”.
1m1SegUser settings
Do the following operations.
When “Booking Alarm Notification” is not executed or
recording is completed
Recording Result
<User Settings>
Settings for 1Seg
Item Operation/Explanation
Caption You can set whether to display the caption for when watching
starts.
ON or OFF
Caption posit. in
w-scr
You can set the caption position on the horizontal display.
Upper or Lower
Rec. when
low battery
You can set whether to continue recording when the battery runs
short during recording.
ON or OFF
ON . . . . The confirmation display does not appear and recording
continues.
OFF . . . The confirmation display appears asking whether to end
recording.
Rec. program when
call
You can set whether to start recording automatically when a call
or PushTalk call comes in during watching a 1Seg program.
ON or OFF
Mobile W-Speed The outlines of images are automatically corrected so that you
can watch more smooth videos of 1Seg programs.
ON or OFF
Image quality You can change the image quality.
Select an item.
Standard . . . The average image quality
Sports . . . . . The image quality suitable for sports programs
Cinema . . . . The image quality suitable for movies
Dynamic . . . The dynamic image quality by accentuation
Sound
(Auto volume)
You can set whether to turn up the sound volume so that it will be
more audible.
Sound effectAuto volumeON or OFF
Sound
(Remaster)
You can bring the sound from an earphone or Bluetooth device to
the original sound by complementing high-pitch range lost at data
compression.
Sound effectRemasterON or OFF
Item Operation/Explanation
310
1Seg
Sound
(Listening)
You can set sound effect for listening.
Sound effectListeningSelect an item.
Surround . . . Makes the sound natural and stereophonic.
Natur 1/2. . . . Complements the cooped-up feeling specific to
earphones and plays back natural sound. Select 1
or 2 according to your taste.
OFF. . . . . . . . Sets Listening to “OFF”.
p“Natur 1/2” is effective for the sound from an earphone or
Bluetooth device.
Sound
(Equalizer)
You can change the sound quality of an earphone or Bluetooth
device.
Sound effectEqualizerSelect an item.
Normal . . . . Reproduces normal sound quality.
Dynamic. . . Makes the sound dynamic by accentuation.
Voice. . . . . . Makes conversation audible.
Train . . . . . . Minimizes abnormal sound that causes sound
leakage.
Sound
(TV sound while
closed)
You can set whether to continue outputting audio for when you
close the FOMA phone while watching a 1Seg program.
TV sound while closedON or OFF
pWhen the setting is “OFF”, audio is silenced when you close the
FOMA phone. Audio is played back again when you open the
FOMA phone and select “OK”.
ECO mode You can set ECO Mode which fixes some settings and reduces
the battery consumption.
YES
pTo release ECO Mode, perform the same operation.
pOnce ECO Mode is set, the following settings are fixed and
cannot be changed. However, if you release ECO Mode,
settings return.
Mobile W-Speed: OFF
Image quality: Standard
Remaster: OFF
Listening: OFF
Equalizer: Normal
Item Operation/Explanation
Display light You can set the period of time of the display lights while you are
watching a 1Seg program.
Constant light or Lighting duration
Enter a lighting duration (minutes).
pEnter from “01” through “30” in two digits.
Data broadcasting
(Set image display)
You can set whether to display images of the data broadcasting
site. (See page 188)
Data broadcasting
(Sound effect
setting)
You can set whether to sound an effect tone of the data
broadcasting and the data broadcasting site.
Sound effect settingON or OFF
Data broadcasting
(Reset settings)
If you select “YES (confirm once)” from the confirmation display
for data broadcasting during watching a 1Seg program or playing
back video, the same confirmation display does not appear
afterward for both of them. The confirmation display resumes
after you execute Reset Settings.
Reset settingsYES
Icon You can set whether to always display guide (see page 296) in
the horizontal display.
ON or OFF
pEven if you set “Icon” to “OFF”, the icon such as “ ”, “ ”, “ ”
or “ ” appears during communication or when an i-mode mail
message or Message R/F comes in.
Mail ticker display For when you receive an i-mode mail message, SMS message,
or Message R/F while watching a 1Seg program, you can set
whether to notify you of the receiving by the ticker on the viewer
display.
Select an item.
Sender+subject. . . .Displays ticker of the sender and title.
Rcpt notification . . .Displays ticker of reception notification only.
OFF . . . . . . . . . . . . . .Does not display ticker on the viewer
display.
pSee page 300 for details on ticker display.
Check TV settings You can check each of “User settings”.
Reset channel
setting
You can delete all channel lists.
Enter your Terminal Security CodeYES
Item Operation/Explanation
311
1Seg
Reset storage area i()DeleteDelete this or Delete all
Delete this . . . Deletes only the information of the affiliated
broadcasting stations you selected, from the
broadcasting storage area.
Delete all. . . . . Deletes the information of all affiliated
broadcasting stations created in the
broadcasting storage area.
YES
pIf you select “Delete all”, you need to enter your Terminal
Security Code.
Reset TV settings You can reset each of “User settings” to the default.
See “Function List” for the items to be reset. (See page 482)
Enter your Terminal Security CodeYES
Item Operation/Explanation
Information
<Rec. program when call>
pThe recording cannot be started when the call comes in the following cases:
・During playing background ・During displaying in the multiwindow
・During recording video ・During recording by Timer Recording
・During preparing recording of Timer Recording
<Mobile W-Speed>
pWhen you set to “ON”, you might not be able to have enough effects of “Image
quality”.
pMobile W-Speed becomes invalid during ECO mode, displaying in the multiwindow,
or AV output.
pDepending on the broadcast state, you might not be able to have the effects of Mobile
W-Speed.
pEven when “Mobile W-Speed” is set to “ON” during recording or during timer
recording, it is invalid when you play back the recorded video.
<Sound (TV sound while closed)>
pWhen “TV sound while closed” is set to “ON”, the information about the data
broadcasting might be automatically updated, and you might be charged a packet
communication fee.
pRegardless of the setting of this function, the audio is played back even if your FOMA
phone is closed when you switch displays by Multitask, or when the display appears in
multiple windows.
<Data broadcasting (Set image display)>
pIf you change this setting, “Set image display” of “i-mode settings” is also changed.
<Data broadcasting (Reset settings)>
pYou cannot reset the confirmation display at the start of 1Seg (see page 292) and at
the time of Timer Recording (see page 306).
<Icon>
pThe guide display might appear even if “Icon” is set to “OFF” when the airwave
conditions have got worse.
Information

312

313
Full Browser/PC Movie
Displaying Web Pages Designed for PC . . . . . <Full Browser> 314
Setting Full Browser . . . . . . . . . . . . . <Full Browser Settings> 317
What is PC Movie? . . . . . . . . . . . . . . . . . . . . . . . . . . . . . . . . . . . . 320
Downloading PC Movies . . . . . . . . . . . . . . . . . . . . . . . . . . . . . . . 320
Playing Back PC Movies from Data Box . . <PC Movie Player> 322
314
Full Browser/PC Movie
You can browse Internet web pages designed for PCs using the Full
Browser function. You can display even the Internet web pages that
cannot be correctly displayed by i-mode. However, you cannot display or
correctly display some Internet web pages.
If you change the style while running Full Browser, the display
automatically switches between the vertical display and the horizontal
display. However, the display might not switch automatically during data
communication or while a message is shown. When you switch it
manually, select “CHG wide scr. mode” from the Function menu.
pThe data such as Home URL or Bookmarks registered via Full Browser cannot be
used via i-mode. The contents set by Full Browser are invalid for i-mode, either.
pNote that you are charged a high communication fee for the massive data
communication such as browsing Internet web pages having many images or
downloading data files. For details on the packet communication fee, refer to “Mobile
Phone User’s Guide [i-mode] FOMA version”.
pYou can browse Internet web pages composed of frames. You can select a frame to
display it as well. (See page 316)
pYou can display SSL/TLS※-compatible pages via Full Browser.
※SSL and TLS are the methods of safer data communication using authentication/
encryption technology to protect your privacy. SSL/TLS pages prevent
eavesdropping and information alteration during communication by exchanging
encrypted data files. Further, server authentication prevents web spoofing, thus
making your personal information such as credit card number or postal address
exchanged safer.
<Full Browser>
Displaying Web Pages Designed for PC
1iFull BrowserSelect an item.
Home. . . . . . . . . . . . Displays an Internet web page set as Home URL.
Bookmark. . . . . . . . Displays an Internet web page stored in Bookmark.
(See page 178)
Last URL. . . . . . . . . Displays an Internet web page you viewed last time.
Go to location . . . . Displays an Internet web page by entering a URL.
(See “Displaying Internet Web Pages” on page 178)
Full Browser settings
. . . . . . . . . . . . . . . . . Configures Full Browser settings. (See page 317)
pWhen “Access setting” is set to “No”, the confirmation display appears asking
whether to start Full Browser. Highlight “Yes” and select “OK” to switch setting of
“Access setting”, then Full Browser starts up.
pTo end Full Browser, press h with an Internet web page displayed and select
“YES”.
…: Displaying in the multiwindow
…Window number/Number of windows
…: During communication in another window
: During communication in another frame
…: Phone Mode
: PC Mode
…: Displaying an enlarged frame
Information
pIt may take long to display some Internet web pages.
pYou cannot use the following functions on Full Browser:
・Phone To function ・Screen memos
・Flash movies ・PDF files
Full Browser Display
Full Browser Display
315
Full Browser/PC Movie
■Operations for the Full Browser display
Two modes, “Phone mode” and “PC mode”, are available for the Full
Browser display.
1iFull BrowserFull Browser settings
Display Mode settingPhone mode or PC mode
Phone mode
. . . Displays an Internet web page to fit in the display width of the FOMA phone.
You do not need to scroll sideways; you can browse Internet web pages by
scrolling upward and downward.
PC mode
. . . Displays an Internet web page in the same format as when it is displayed on
your personal computer in 800 (width) x 600 (height) dots. You can browse
Internet web pages by scrolling upward, downward, and sideways.
pWhen you show an Internet web page, you can switch the display modes each
time you select “Change disp. mode” from the Function menu.
pWhen you show the horizontal display, “PC mode” is automatically set and you
cannot change the setting.
Operation Key operation
Phone Mode PC Mode
Return to previous page Co or 11
Forward to next page Vo or 33
Scroll display BoMo
Scroll display page by page </> or m()/c()
pTo scroll to the top/end of the page, </>(for at
least one second), m()/c( ) (for at
least one second) or a/s
Reload 2
Enlarge/Reduce display size 7 to reduce the display size, 8 to display in
standard size, 9 to enlarge the display size
Display Bookmark Folder list 0
Switch Display Mode
Press l( ) from the Full Browser display to switch to “Operation
mode”. The operation palette is displayed by switching to Operation
Mode, then you can move to the previous/next page or enlarge/reduce
the display size.
No: Moves to the previous/next page.
Bo: Enlarges/reduces the display size.
You can simultaneously open up to five Internet web pages via Full
Browser.
pYou can switch the simultaneously opened Internet web pages to show one by one.
1Full Browser displayi()Open new window
Select an item.
Bookmark . . . Opens a new window to show an Internet web page stored in
Bookmark. (See page 178)
Enter URL . . . Opens a new window to show an Internet web page by entering a
URL. (See “Displaying Internet Web Pages” on page 178)
Home . . . . . . . Opens a new window to show an Internet web page set as Home
URL.
Link . . . . . . . . Opens a new window to show a page of the link highlighted on the
Full Browser display.
pSee page 316 for how to switch or close the window.
Use Operation Mode
Open in the Multiwindow
Information
pSome Internet web pages have links configured to open in new windows. When you
open such a link, the new window opens even if you do not perform above operations.
316
Full Browser/PC Movie
You can display Internet web pages composed of frames. You can select
a frame, and enlarge each selected frame for displaying.
1From an Internet web page composed of frames
Use
Bo
to highlight a frame, and press
Oo
().
pTo return to the display for
all frames, press r or
select “All frames” from the
Function menu.
You can switch to Full Browser to show the Internet web pages
incorrectly displayed by i-mode.
1While a page to be shown is displayed in Full Browser
i()InternetSwitch to FBOK
Display a Page Composed of Frames
All frames Enlarged by frame
Information
pWhen an Internet web page has many divided frames, you might not be able to open
all frames. “ ” is added to the frames that you could not open.
Switch from i-mode to Full Browser
Information
pYou cannot correctly display some Internet web pages.
Function Menu of Full Browser Display
Function menu Operation/Explanation
Add bookmark See page 178.
Bookmark See page 179.
Enter URL You can enter a URL to display an Internet web page.
Select a text box.
Go to step 2 on page 178.
pThe URL of displaying site is entered beforehand.
Reload The contents on the Internet web page is updated to the latest
ones.
Change disp. mode See page 315.
CHG wide scr.
mode
The image is displayed horizontally by rotating the display 90
degrees to the right.
pWhen it is already displayed horizontally, the vertical display
returns.
Open new window See page 315.
Change window You can switch the windows while displaying the Internet web
pages in the multiwindow.
Select a window.
Close window You can close the window while displaying the Internet web
pages in the multiwindow.
YES
Save image See page 182.
Add desktop icon See page 127.
Compose message You can compose an i-mode mail message with the URL of the
displayed Internet web page pasted to the text.
Go to step 2 on page 198.
Home
(Set as home URL)
You can set the displayed Internet web page as Home URL.
Set as home URLYES
317
Full Browser/PC Movie
Home
(Display home)
You can display the Internet web page set as Home URL.
Display home
Scroll (Speed) See page 317.
Scroll
(Focus while scroll)
See page 317.
Zoom See page 318.
All frames You can return to the display for all frames from the display for the
enlarged frame.
Retry You can play back the displayed animation from the beginning.
Page info You can display information of the displayed Internet web page.
URL or Title
Others
(Set image display)
You can set whether to display images.
Set image display
See page 318.
Others
(Change CHR code)
See page 176.
Others
(Cookie setting)
You can set whether to validate cookies.
Cookie setting
Go to step 1 of “Cookie Setting” on page 319.
Others
(Delete Cookies)
You can delete cookies.
Delete Cookies
Go to step 1 of “Delete Cookies” on page 319.
Others
(Referer setting)
You can set whether to send a referer.
Referer setting
Go to step 1 of “Referer Setting” on page 319.
Others
(Certificate)
See page 176.
Function menu Operation/Explanation
You can upload JPEG or GIF images stored in the FOMA phone to an
Internet web page.
pProcedure for uploading images differs depending on the Internet web page. Follow
the instructions on the display.
1iFull BrowserFull Browser settings
Do the following operations.
Information
<Compose message>
pThe number of characters of the URL you can paste to the text is up to 512 half-pitch
characters. If the URL contains 512 half-pitch characters or more, you cannot paste it.
Upload Images
Information
pWhen the total size of the selected images exceeds 80 Kbytes, or when the total size
of the selected image and other files exceeds 100 Kbytes, you cannot upload the
images.
pYou may not be able to upload images depending on the Internet web page.
pYou cannot upload the images whose output from FOMA phone is prohibited.
<Full Browser Settings>
Setting Full Browser
Item Operation/Explanation
Display Mode
setting
See page 315.
Scroll (Speed) You can set scroll speed.
SpeedHigh speed or Low speed
Scroll
(Focus while scroll)
You can set whether to highlight links while scrolling.
Focus while scrollON or OFF
318
Full Browser/PC Movie
Zoom You can set the display size of the Internet web page.
From the Function menu of the Full Browser display, you can
enlarge/reduce the display size by each page.
Select a display size.
pIn PC Mode, you can select a display area by “Select disp. area”
from the Function menu of the Full Browser display.
Access setting You can set whether to use Full Browser.
Yes . . Uses Full Browser.
No . . . Displays the cautions at the start of Full Browser. Check
the cautions, highlight “Yes” and then select “OK”, then
the setting switches to “Yes”, and Full Browser becomes
available.
Home URL You can set Home URL.
Select the URL fieldEnter a URLOK
Set image display You can set whether to display images.
ON or OFF
PC Movie auto-play You can set whether to automatically play back the downloaded
type of PC movies while obtaining.
ON or OFF
Cookie setting See page 319.
Delete Cookies See page 319.
Referer setting See page 319.
Script setting You can set whether to validate JavaScript. JavaScript is a simple
program language that runs on Internet web pages. It is widely
used to create Internet web pages with movements.
When “Valid” is set, you can use the JavaScript function to
browse Internet web pages on Full Browser.
Valid or Invalid
Item Operation/Explanation
Window Open
Guard
You can set whether to prevent a new window from opening
automatically by JavaScript.
Valid or Invalid
Check settings You can check respective Full Browser settings.
Reset last URL You can erase the URL of the Internet web page you viewed last.
YES
Item Operation/Explanation
Information
<Access setting>
pIf you replace the UIM with a new one when “Yes” is set, the setting switches to “No”.
<Set image display>
pEven when “ON” is set, images might not be displayed correctly. In this case, “ ” is
displayed.
pWhen “OFF” is set, “ ” is displayed and the data file is not received.
<Script setting>
pSome Internet web pages may not be displayed correctly unless “Valid” is set.
pEven when “Valid” is set, it might not work depending on JavaScript.
319
Full Browser/PC Movie
By using cookies, you can effectively access the Internet web pages you
have accessed once.
A cookie is the system to temporarily save personal information such as
the date/time or number of times you accessed an Internet web page. The
information from the server is written into the FOMA phone, temporarily
saved, and used for content services.
pIf a cookie is sent, the information such as the date/time or number of times you
accessed an Internet web page is also sent to the web page. Note that even if your
information is detected by a third party by sending a cookie, we cannot be held
responsible for that. However, you may not be able to correctly display or use some
Internet web pages or content services unless the cookie setting is valid.
You can set whether to validate cookies.
1iFull BrowserFull Browser settings
Cookie settingSelect an item.
Valid. . . . . . . Always validates cookies. The confirmation display does not appear
before a cookie is sent or received.
Invalid . . . . . Always invalidates cookies.
Sending. . . . Validates cookie’s sending/receiving. The confirmation display
appears each time before a cookie is sent.
Receiving . . Validates cookie’s sending/receiving. The confirmation display
appears each time before a cookie is received.
Sending/receiving
. . . . . . . . . . . The confirmation display appears asking whether to permit a cookie
to be sent or received each time before a cookie is sent or received.
pWhen you replace a UIM with another one, “Invalid” is set. If you change the
setting with the another one, the display for entering your Terminal Security Code
might appear.
Cookie
Cookie Setting
Information
pWhen “Sending”, “Receiving”, or “Sending/receiving” is set, the confirmation display
might consecutively appear asking whether to send/receive (update) cookies
depending on the Internet web page.
1iFull BrowserFull Browser settings
Delete CookiesEnter your Terminal Security Code
YES
The referer denotes the link source information. When a referer is sent,
the information about from which page you have accessed it is sent to
the site.
Note that even if your information is detected by a third party by sending
a referer, we cannot be held responsible for that.
You can set whether to send a referer while an Internet web page is open.
1iFull BrowserFull Browser settings
Referer settingSelect an item.
Send. . . . . . Sends a referer.
Unsend . . . Does not send a referer.
Notify . . . . . When a referer is sent, the confirmation display appears asking
whether to send it.
Delete Cookies
Referer
Referer Setting
Information
pWhen “Notify” is set, the confirmation display might consecutively appear asking
whether to send a referer depending on the Internet web page.
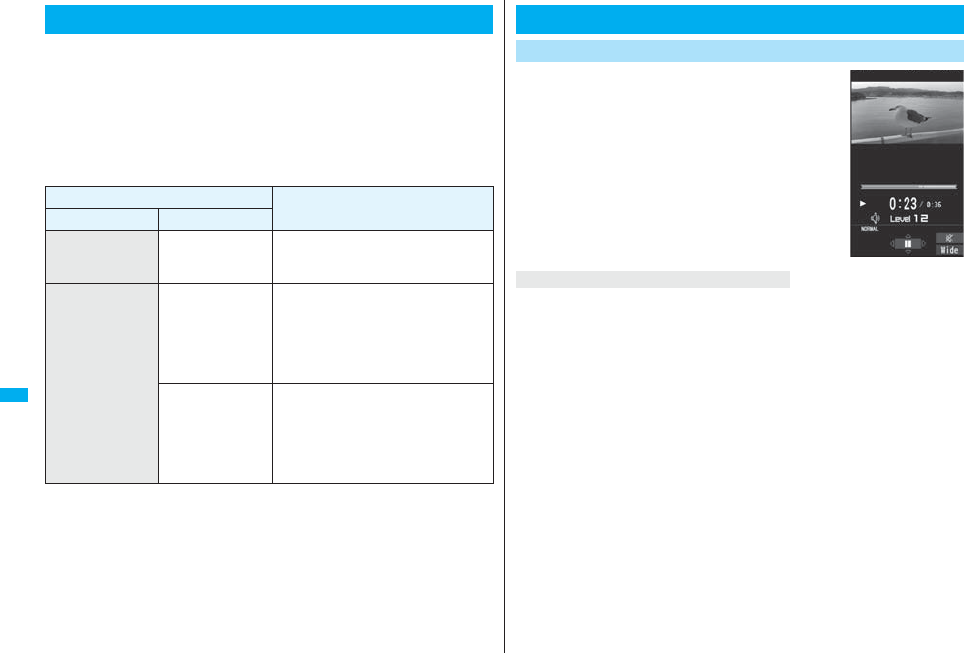
320
Full Browser/PC Movie
By using high speed communication, you can play back smooth and
high-quality PC movies provided by portal sites, movie specialty sites
and other sites on the Internet.
pPC Movie Player supports playback of Windows Media® Video.
pWhen downloading or streaming a PC movie, you might receive a bulky size of file.
Note that you are charged a high packet communication fee for a bulky sent/received
file such as a streaming type file whose size is not limited. For the details of the packet
communication fee and billing plan, refer to “Mobile Phone User’s Guide [i-mode]
FOMA version”.
pThe distribution server for streaming type supports Windows Media Services 4.1 and
Windows Media Services 9. You cannot play back a streaming type of PC movie
distributed from other than Windows Media Services 4.1 and Windows Media Services
9.
pSome sites check the operating environment (browser type, OS type, etc.) are checked
and you might not be able to play back PC movies.
pSee page 323 for the supported file format of PC movies.
What is PC Movie?
Categories Description
Type Playback type
Streaming type
(cannot be saved)
Plays back while
obtaining
You can play back a PC movie while
obtaining it. A long time playback is
available.
Download type
(can be saved)
Plays back while
obtaining
When “PC Movie auto-play” is set to “ON”,
you can play back a PC movie while
obtaining it. You can save it to the
microSD card after download and play it
back without re-connection. Up to 10
Mbytes of a file can be downloaded.
Plays back a file
saved to the
microSD card
To the microSD card, you can save not
only data files obtained by the FOMA
phone but also PC movies obtained or
created on a personal computer, and then
play them back. You can save a bulky file
of up to the space size of microSD card.
1Select a PC movie from a PC movie
obtainable siteYES
See page 322 for the operation during playback.
pAmong the PC movies protected by the license, you can play back the streaming type
of PC movies only. You cannot play back the download type of PC movies protected by
the license.
pYou might not be able to play back PC movies depending on the license setting of the
PC movies.
pIf files are stored to the maximum when you try to obtain a license to save it to the
FOMA phone, the confirmation display appears asking whether to delete currently
stored licenses to save a new one. Select “YES” to delete all the stored licenses to
save it. You need to obtain a license again to play back a PC movie whose license is
deleted.
Downloading PC Movies
Playing Back a Streaming Type of PC Movie
About license (Windows Media DRM)
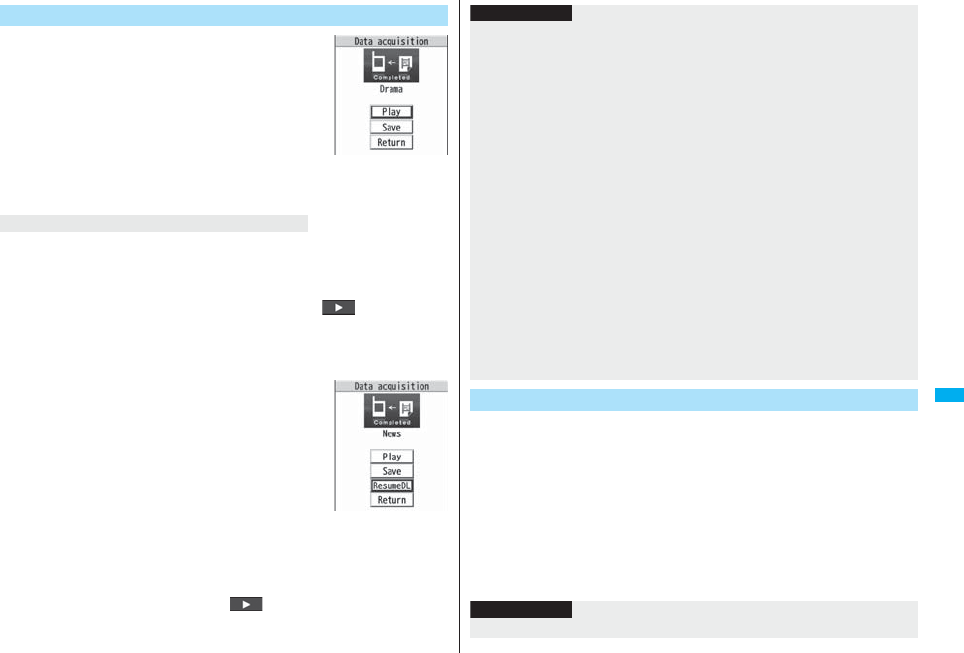
321
Full Browser/PC Movie
1Select a PC movie from a PC movie
obtainable siteYES
See page 322 for the operation during playback.
pIf “PC Movie auto-play” is set to “ON”, a PC movie is
played back during obtaining. If “OFF” is set, you can
play it back by selecting “Play” from the Obtaining
Completion display.
pWhen you obtain a download type of PC movie from a
site, the file is obtained while it is played back, and
obtaining itself continues even when you suspend the playback midway.
Depending on the type of a PC movie being obtained or the reason why the obtaining is
suspended, the operation differs.
Streaming type
After the suspension by an incoming call, alarm notification, or disconnection of
communication, the obtaining will be in pause state. Press Oo( ) to resume
playback from the suspended point.
The display before playback returns when you suspend obtaining by pressing r or
h.
Download type
After the suspension by an incoming call, alarm notification, or
disconnection of communication, the Obtaining Completion
display appears. However, when it is played back while
obtaining, the display in pause state appears. Select “Play” to
play back the obtained segments of the file. Select “Save” to
save the obtained segments of the file. (See “Saving PC
Movies”.) Select “ResumeDL” to resume obtaining from the
suspended point.
The confirmation display appears asking whether to discard
the data when you suspend obtaining by pressing r or h.
pFor download type of PC movies, the downloading is continued during suspension if it
is suspended by an incoming voice call, receiving a mail message or Message R/F, or
alarm notification.
pDepending on the PC movie or the site you are connecting to, you cannot resume from
the suspended point even by pressing Oo( ) or selecting “ResumeDL”. In that
case, the obtaining resumes from the top of the file.
Playing Back a Download Type of PC Movie
Obtaining
Completion display
When obtaining a PC movie is suspended
You can save the obtained PC movies to the microSD card. However, you
cannot save the streaming type of PC movies.
1Obtaining Completion displaySaveYES
The PC movie is saved to the folder selected by “Select storage”.
pWhen the maximum number of files has already been saved to the microSD card
or memory space is full, the confirmation display appears asking whether to
delete unnecessary files to save new one. Select “YES” to list the files in Data
Box, and select the unnecessary files to delete them. Before deleting, you can
play back PC movies on the microSD card for confirmation, but cannot display
the previous or next files.
Information
pNote that there is no upper size limit for a streaming type of PC movie, you might
exchange the files of no size limit. When obtaining it, the confirmation display appears
asking whether to play it back.
pDepending on the site or PC movie you are connecting to, you might not be able to
obtain a file, play it back during obtaining, or play it back after obtaining.
pDepending on the line speed, line state, or radio wave conditions, the playback during
obtaining might be suspended or the images might blur. You can repeatedly play back
the download type of PC movies after obtaining but cannot play back the streaming
type of PC movies.
pIf the PC movie has the restrictions on the playable period, you cannot play it back
before and after that period. If you leave your FOMA phone with the battery pack
removed for a long time, the date/time information retained in the FOMA phone might
be reset. In that case, you cannot play back the PC movie that has the restrictions on
the playable period or playable deadline. See “Contents info” for checking the
playback restrictions.
pIf you try to play back a PC movie with a low battery, the battery alert tone sounds
regardless of the setting of “Keypad sound”, and the confirmation display appears
asking whether to play it back. When the battery becomes low during playback, the
playback pauses, and the confirmation display appears asking whether to end the
playback.
p“Contents info” of a PC movie and deadline information on the display that notifies you
of a playable deadline are shown by the date/time with “Summer time” set to “OFF”.
Saving PC Movies
Information
pYou cannot attach the saved PC movie to an i-mode mail message for sending.
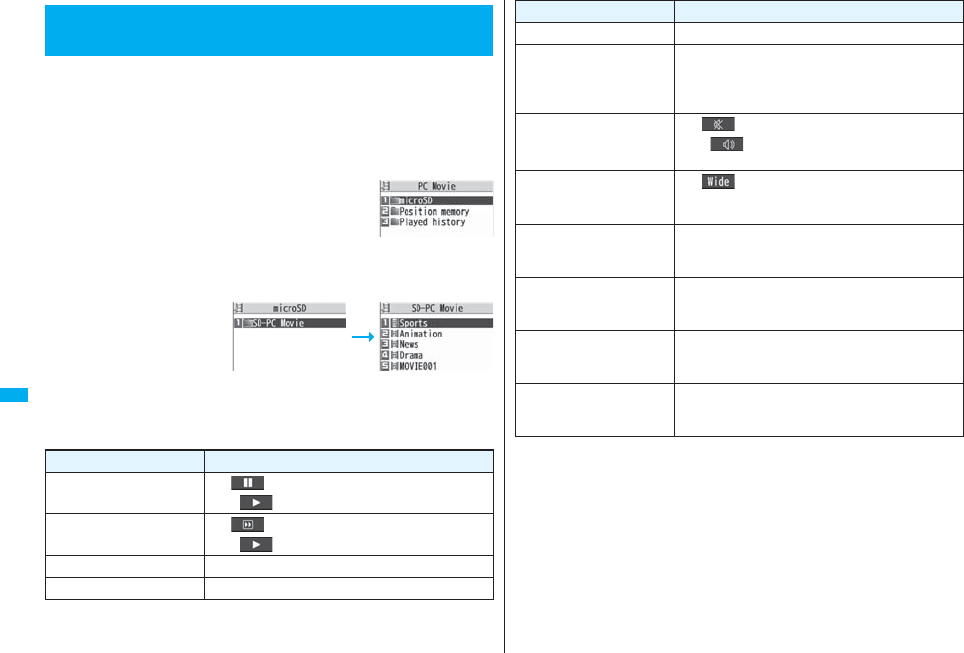
322
Full Browser/PC Movie
You can play back moving images published on the Internet for personal
computers or PC movies saved to the microSD card via a personal
computer, etc.
PC movie is played back in the horizontal display in Horizontal Open
Style. You can switch the style during playback.
pYou can play back the sound of moving images from a commercial Bluetooth device.
(See page 431)
1mData boxPC Movie
2microSDSelect a folderSelect a file.
pWhen you press and hold
p for at least one second
during playback, pause, or
halt, or press h, PC
Movie Player ends. It ends
even when you play back
during obtaining.
■Operations while playing back a PC movie
pSee page 325 for when you operate from the Function menu.
<PC Movie Player>
Playing Back PC Movies from Data Box
PC Movie Type
Selection display
PC Movie Folder list PC Movie list
Operation Key operation
Pause※1Oo() or p
pOo() or p to play back
Fast forward※1l()
pl( ) to play back
Display next file※2※3Vo
Display previous file※2※3Co※4
※1 You might not be able to operate this for some PC movies.
※2 You cannot operate this for a streaming type of PC movie, or when you are playing
back a PC movie while obtaining it. You cannot operate this when you play back an
obtained but unsaved PC movie from the Obtaining Completion display, either.
※3 The files are displayed in the order on the PC Movie list. You can operate this when
you play back from the PC Movie list. However, PC movies in WVX, ASX, and WAX
formats are skipped.
※4 When three seconds have elapsed after starting playback, this operation returns the
position to the beginning of the file. However, you might not be able to operate this
for a streaming type of PC movie or when you are playing back a PC movie while
obtaining it.
※5 You cannot operate this during fast-rewinding.
※6 The horizontal display is valid only for the current display of playback display. When
you close the playback display, the vertical display returns.
Select position to play
※1※5Press and hold No.
Sound volume adjustment Bo or </>
pPress and hold to adjust the sound volume
sequentially.
pSetting from Level 0 (Silent) through 25 is available.
Mute i()
pi( ) or adjust the sound volume to play back
sound
Switch vertical display/
horizontal display※6※7
[Normal Style only]
c()
pEach time of pressing switches display direction.
Icon
[Horizontal Open Style only]
m※8
pEach time of pressing switches whether to display
icons and navigations.
Remaster 9
pEach time of pressing switches between “ON” and
“OFF”.
Listening 8
Each time of pressing switches in order of “OFF” →
“Surround” → “Natur1” → “Natur2”.
Equalizer 7
pEach time of pressing switches in order of “Normal” →
“S-XBS1” → “S-XBS2” → “Train”.
Operation Key operation
323
Full Browser/PC Movie
※7 You cannot operate this for PC movies with incompatible video data or voice-only
PC movies.
※8 Even if you set the icons not to be displayed, the icon such as “ ”, “ ”, “ ” or “ ”
appears during communication or when an i-mode mail message or Message R/F
comes in.
pIf you play back on the horizontal display from the pause state, the display might
become dark, however, the video appears soon after you resume the playback.
You can perform the following operations when you play back or pause a
PC movie using the switch of Flat-plug Stereo Earphone Set (option) or
Flat-plug Earphone/Microphone with Switch (option).
■Specification for PC movie playback
You might be able to play back the files that exceed the bit rates described above.
pEven when the file format is supported, you might not be able to obtain files, play back
during obtaining, or play back after obtaining depending on the file.
pIf the file format of either video or audio is not supported, the file might be played back
with the supported format only.
Operation Switch operation
Pause Press once.
pTo play back, press again.
Play back next file Press twice in succession.
Play back previous file Press three times in succession.
pWhen playback time is over three seconds, you go
back to the beginning of the file.
File format WMV, WMA, WVX, WAX, ASF, ASX
Extension wmv, wma, wvx, wax, asf, asx
Codec Video Windows® Media Video 8 through 9
Audio Windows® Media Audio 2 through 9
Bit rate Video only 512 kbps
Voice only 192 kbps
Video + Voice 512 kbps + 64 kbps
Video size QVGA (sidewise 320 dots x lengthwise 240 dots)
Frame rate 30 fps
Information
pFiles with the extension of wvx, wax, asx are the files for which the URL of a PC movie
on the Internet is specified. When you select those files saved on the microSD card,
streaming or downloading playback starts from the specified URL.
■Icons on the PC Movie list
pAbove icons are displayed only for “Position memory” or “Played history”.
The Position Memory Selection display appears. When you select “Marker to resume” or
“Position memory1 through 9”, the PC movie is played back from the stored position.
pYou can display information about the position memory by pressing i( ) and
selecting “Posit. memory info”.
pTo delete “Position memory”, press i( ) and select “Multiple-choice”, “Delete
this”, or “Delete all”. You cannot delete “Marker to resume”.
pWhen a PC movie with a position memory has been deleted or moved to another
folder, or when its file name has been edited, you cannot play it back.
pEven when you play back a PC movie from a position memory, it may be played back
from the beginning, depending on the PC movie.
Icon File format
WMV, ASF
WVX, ASX
WMA
WAX
Icon Description
PC movie on the Internet.
PC movie saved to the microSD card.
When you select “Position memory” from the PC Movie Type
Selection display
Marker to resume This is stored automatically when a call comes in, an alarm
operates, or the battery level goes flat during playback of a PC
movie, or when you terminate the PC Movie player during
playback.
Position memory You can store in any optional position in a PC movie, and create
up to nine position memories. (See page 324 and page 325)
324
Full Browser/PC Movie
When you play back a PC movie, the URL or storage location
of that file is stored as a history. Up to 30 histories are stored,
and when those are exceeded, the oldest history is overwritten.
Select a played history to play back the PC movie according to
the history information.
pWhen a PC movie stored in a played history has been
deleted or moved to another folder, you cannot play it back.
pWhen you play back an obtained but unsaved PC movie from the Obtaining
Completion display, it is not stored in Played History.
When you select “Played history” from the PC Movie Type
Selection display
Function Menu of the PC Movie Folder List
Played History list
Function menu Operation/Explanation
Add folder Enter a folder name.
pYou can enter up to 31 full-pitch/63 half-pitch characters.
Edit folder name Enter a folder name.
pYou can enter up to 31 full-pitch/63 half-pitch characters.
Delete folder Enter your Terminal Security CodeYES
Select storage You can set a destination folder for saving downloaded PC
movies to the microSD card.
YES
Information
<Select storage>
p“ ” is displayed for the folder set as a destination folder.
Function Menu of the PC Movie List/Played History List
Function menu Operation/Explanation
Contents info You can display the file title, file name, and others of the PC
movie.
Move You can move the PC movie to another folder.
Select a destination folder.
Edit title
(Edit title)
Edit titleEnter a title.
pYou can enter up to 18 full-pitch/36 half-pitch characters.
Edit title
(Reset title)
You can reset the title to the default.
Reset titleYES
Copy You can copy the PC movie to another folder.
Select a destination folder.
History info You can display information of the played history.
Position memory You can store the URL information of the PC movie stored in
Played History to a position memory. When you play back the file
from the position memory, it is played back from the beginning.
Select a position memory number to be registered.
pYou cannot select “Marker to resume”.
Multiple-choice You can select multiple files and operate them.
Put a check mark for files to be operatedi()
Select an item.
Delete . . . . . . . . .See “Delete this” on page 324.
Copy . . . . . . . . . .See page 324.
Move . . . . . . . . . .See page 324.
Description You can display the lyric or description of the PC movie.
The words view or Description view
pUp to 1,024 full-pitch/2,048 half-pitch characters can be
displayed in each.
Memory info You can display the used memory space (estimate).
Delete this YES
Delete all You can delete all the files in the folder.
Enter your Terminal Security CodeYES
Listing You can change the display format of PC Movie list.
Title or File name
Function menu Operation/Explanation
325
Full Browser/PC Movie
Function Menu during Pause/at the End of Playback
Function menu Operation/Explanation
Fast The PC movie is played back fast.
pTo cancel it, press l().
Rewind The PC movie is played back fast in the opposite direction.
pTo cancel it, press l().
Stop You can end playback.
Position to play You can set the start position for playing back the PC movie.
Use No to move the cursor position of the time bar and
press Oo().
pTo cancel, press r.
Sound effect
(Remaster)
You can bring the sound from an earphone or Bluetooth device to
the original sound by complementing high-pitch range lost at data
compression.
RemasterON or OFF
Sound effect
(Listening)
You can set sound effect for listening.
ListeningSelect an item.
Surround . . .Makes the sound natural and stereophonic.
Natur 1/2 . . . .Complements the cooped-up feeling specific to
earphones and plays back natural sound. Select 1
or 2 according to your taste.
OFF . . . . . . . .Sets Listening to “OFF”.
p“Natur 1/2” is effective for the sound from an earphone or
Bluetooth device.
Sound effect
(Equalizer)
You can change the sound quality of an earphone or Bluetooth
device.
EqualizerSelect an item.
Normal . . . Reproduces normal sound quality.
S-XBS1 . . . Enhances bass sound.
S-XBS2 . . . Enhances bass sound more deeply than S-XBS1.
Train . . . . .Minimizes abnormal sound that causes sound
leakage.
Contents info See page 324.
Position memory You can store a position memory in the PC movie. Operate it at
the desired position in pause state.
Select a position memory number to be stored.
pYou cannot select “Marker to resume”.
Description See page 324.
Copy URL While playing back a PC movie published on the Internet, you can
copy the URL of that PC movie.
pYou can copy up to 512 half-pitch characters for the URL.
Display size You can set the display whether to display a PC movie in the
original size (Actual size) or to fit to the display size.
Actual size or Fit in display
pEven if you set to “Actual size”, the PC movie in excess of the
display size is reduced to the display size.
Function menu Operation/Explanation
Information
<Position to play>
pYou might not be able to select the position to play depending on the PC movies.
<Sound effect>
pEven if an earphone or Bluetooth device is not connected, the respective setting
contents are displayed on the display.
<Position memory>
pRegardless of the point of pause, the position memory might be stored at the
beginning of the file depending on the PC movies.
<Display size>
pDepending on the image size, the image might be displayed with the right or bottom
side cut off.

326

327
Data Display/Edit/Management
About Data Box. . . . . . . . . . . . . . . . . . . . . . . . . . . . . . . . . . . . . . . 328
Making Full Use of Still Images
Displaying Images . . . . . . . . . . . . . . . . . . . . . <Picture Viewer> 330
Editing Still Images. . . . . . . . . . . . . . . . . . . . . . . .<Edit Picture> 335
Creating Animations. . . . . . . . . . . . . . . . <Original Animation> 338
Making Full Use of Moving Images
Playing Back Moving Images/i-motion Movies
. . . . . . . . . . . . . . . . . . . . . . . . . . . . . . . . . . . . .<i-motion Player> 338
Using Playlist . . . . . . . . . . . . . . . . . . . . . . . . . . . . . . . . . . . . . . . . 343
Editing Moving Images/i-motion Movies . . . .<Edit imotion> 343
Making Full Use of Video
Playing Back Video. . . . . . . . . . . . . . . . . . . . . . . <Video Player> 345
Making Full Use of Chara-den
What is Chara-den? . . . . . . . . . . . . . . . . . . . . . . . .<Chara-den> 349
Displaying/Operating Chara-den Images
. . . . . . . . . . . . . . . . . . . . . . . . . . . . . . . . . . . <Chara-den Player> 349
Recording Chara-den Images . . . . . . . . . <Record Chara-den> 350
Making Full Use of Melodies
Playing Back Melodies . . . . . . . . . . . . . . . . . . <Melody Player> 351
Making Full Use of Kisekae Tool
Checking Kisekae Tool . . . . . . . . . . . . . . . . . . <Kisekae Tool> 354
Making Full Use of microSD Card
About microSD Card . . . . . . . . . . . . . . . . . . . . . . . . . . . . . . . . . . 355
Inserting/Removing microSD Card . . . . . . . . . . . . . . . . . . . . . . . 355
Displaying Data Items on microSD Card . . . . . . . . . <SD-PIM> 356
Copying Still Images, Moving Images, etc. . . . . . . . . . . . . . . . . 359
Moving Copyrighted Files . . . . . . . . . . . . <Movable Contents> 361
Managing Unsupported Files . . . . . . . . . . . . <SD Other Files> 362
Formatting microSD Card . . . . . . . . . . . . . . <microSD Format> 362
Checking microSD Card . . . . . . . . . . . . . . . .<Check microSD> 362
Displaying Capacity of microSD Card . . . . . . . <microSD Info> 363
Using a microSD Card with a Personal Computer . . . . . . . . . . 363
Folder Configuration on microSD Card . . . . . . . . . . . . . . . . . . . 364
Making Full Use of Data
Managing Folders . . . . . . . . . . . . . . . . . . . . . . . . . . . . . . . . . . . . 366
Making Full Use of Infrared Data Exchange
About Infrared Data Exchange . . . . . . . . . . . . . . . . . . . . . . . . . . 367
Sending/Receiving One or Multiple Data Files . . . . . . . . . . . . . 370
Sending/Receiving All Data Files . . . . . . . . . . . . . . . . . . . . . . . . 370
Using Infrared Remote-controller Function. . . . . . . . . . . . . . . . 371
Communication Setting. . . . . . . . . . . . . . <Forwarding Image> 371
Making Full Use of iC Communication
About iC Communication . . . . . . . . . . . . . . <iC Transmission> 372
Sending/Receiving One Data File . . . . . . . . . . . . . . . . . . . . . . . . 372
Sending/Receiving All Data Files . . . . . . . . . . . . . . . . . . . . . . . . 372
Making Full Use of Voice Recorder
Using Voice Recorder . . . . . . . . . . . . . . . . . . <Voice Recorder> 373
Making Full Use of PDF Viewer
Displaying PDF Files . . . . . . . . . . . . . . . . . . . . . . <PDF Viewer> 374
Making Full Use of Document Viewer
Displaying Word, Excel, and PowerPoint Files
. . . . . . . . . . . . . . . . . . . . . . . . . . . . . . . . . . . <Document Viewer> 378
Printing Still Images
Printing Saved Images . . . . . . . . . . . . . . . . . . . . . . . . . . . . . . . . 379
Displaying Images on TV
Displaying Still Images, Moving Images/i-motion Movies on TV
. . . . . . . . . . . . . . . . . . . . . . . . . . . . . . . . . . . . . . . . . <AV Output> 380
328
Data Display/Edit/Management
Data Box contains the items and folders as listed below. Data is saved to
respective folders according to the contents.
About Data Box
My picture
i-mode Downloaded still images, etc.
Search by i-mode Connects to the data site.
Camera Still images shot by the camera, shot Chara-den
images, etc.
Decomail-picture Still images to be used for composing Deco-mail
Search by i-mode Connects to the data site.
Decomail-
pictograph
お気に入り
(Favorite)
※1Pictographs to be used for composing Deco-mail
p
You can delete the pre-installed Deco-mail pictograms.
You can re-download them from the “P-SQUARE” site
(see page 186). When you use a UIM other than the
one used for downloading, the UIM restrictions (see
page 40) are set to them.
i
絵文字
(
i
pictograph)
※1
装飾 (Decoration)※1
ハート・キラキラ
(Heart/Sparkling)※1
天気・季節
(Weather/Season)※1
移動・生活
(Transfer/Life)
※1
電話・メール
(Phone/Mail)
※1
食べ物 (Food)※1
キャラクター
(Cartoon character)
※1
文字 (Character)※1
Search by i-mode Connects to the data site.
Pre-installed Pre-installed still images
User folder※2Still images in the user folder
Original animation The function of displaying still images continuously
Frame Still images to be used for frames
Stamp
Still images to be used for marker stamps and cushy marks
Search by i-mode Connects to the data site.
microSD Picture Still images shot by the camera, and images in JPEG
format and GIF format that conform to the DCF
standard and were copied from the FOMA phone
Image Box Animation images in GIF format copied from the
FOMA phone, and images in JPEG format that do not
conform to the DCF standard
Movable contents Copyrighted still images moved from the FOMA phone
Decomail-pictograph Deco-mail pictograms copied from the FOMA phone
MUSIC
i-mode Initial folder Chaku-uta Full® music files obtained from sites
Search by i-mode Connects to the data site.
User folder※2Chaku-uta Full® music files in the user folder
Search by i-mode Connects to the data site.
microSD Copyrighted Chaku-uta Full® music files downloaded
or moved from the FOMA phone
WMA WMA files obtained from personal computer
Music&Video Channel
Downloaded program Programs downloaded via Music&Video Channel
Saved program Programs saved to the FOMA phone
imotion
i-mode i-motion movies obtained from sites, etc.
Search by i-mode Connects to the data site.
Camera i-motion movies recorded by the camera, shot
Chara-den movies, etc.
Pre-installed Pre-installed i-motion movies
Voice recorder Voices recorded by the voice recorder
User folder※2i-motion movies in the user folder
Playlist Playback of playlist
Position memory Playback of marker position
Search by i-mode Connects to the data site.
microSD Movie Moving images shot by the camera or copied from the
FOMA phone
Movable contents Copyrighted moving images moved from the FOMA
phone
Other contents Voice-only i-motion movies※3 recorded by using the
camera function, voice-only i-motion movies※3 copied
from the FOMA phone, or video-unplayable i-motion
movies※3 copied from the FOMA phone
Melody
i-mode Downloaded melodies, etc.
Search by i-mode Connects to the data site.
Pre-installed Pre-installed melodies
User folder※2Melodies in the user folder
Voice announce Data files recorded by using “Voice announce”
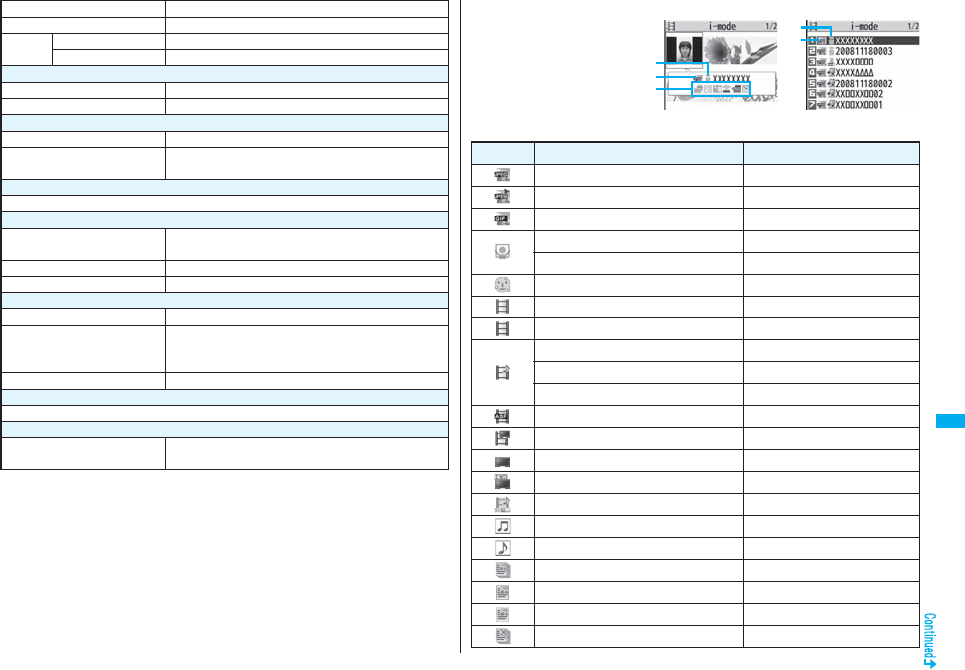
329
Data Display/Edit/Management
※1 The folder names can be changed by “Edit folder name”. Deco-mail pictograms are
directly saved to these folders, and files other than Deco-mail pictograms cannot be
saved to them.
※2 The folder names you have entered for “Add folder” are displayed.
※3 Includes the music files in AAC format.
Playlist Playback of playlist
Search by i-mode Connects to the data site.
microSD Melody Melodies copied from the FOMA phone
Movable contents Copyrighted melodies moved from the FOMA phone
My documents
i-mode Downloaded PDF files, etc.
microSD PDF files downloaded or copied from the FOMA phone
Kisekae Tool
Search by i-mode Connects to the data site.
microSD Kisekae Tool files downloaded, or moved from the
FOMA phone
Chara-den
Pre-installed or downloaded Chara-den images
PC Movie
microSD PC movies downloaded, or saved by personal
computer
Position memory Playback of marker position
Played history Playback histories of PC movies
1Seg
Image Still images recorded by 1Seg
Video Video recorded by 1Seg, and copyright-protected and
1Seg compatible moving images made with other AV
devices
Position memory Playback of marker position
Document viewer
Document files saved from mail (attached files)
SD other files
SD others Incompatible files saved from mail (attached files), or
files in BMP or PNG format obtained by Full Browser
■Icons in the File list
File Type
Title namePicture
Icon Type File format
Still image JPEG
Still image with location information JPEG
Still image/Animation image GIF
Frame GIF
Marker stamp GIF
Cushy mark GIF
Flash movie SWF
i-motion movie MP4(AMR)
i-motion movie MP4(AAC)
i-motion movie MP4(AAC+[HE-AAC])
i-motion movie MP4(Enhanced aacPlus)
i-motion movie ASF
Video MPEG2-TS
Video already viewed MPEG2-TS
※Video not viewed yet MPEG2-TS
Partially saved i-motion movie —
Melody SMF
Melody MFi
Complete PDF file PDF
Partial PDF file PDF
Incomplete PDF file PDF
Damaged PDF file PDF
330
Data Display/Edit/Management
※For the video recorded by the device other than this FOMA phone, the icon for already
viewed video is displayed.
pFor the file with the file restrictions, “ ” is added to each icon.
pSome files have restrictions on the number of playbacks, playable period, or playable
deadline. “ ” is added to the icon of the file with playback restrictions and “ ” is
added to the icon of the file with playback restrictions expired.
Acquired source
※For the copyrighted file movable to the microSD card, “ “ is displayed.
Available operation
Kisekae Tool file —
Partially saved Kisekae Tool file —
Chara-den image —
Word file WORD
Excel file EXCEL
PowerPoint file POWERPOINT
Incompatible file —
Icon Type File format
Icon Description
※Obtained from sites or i-mode mail attachment
Files shot by the FOMA phone, or recorded by the voice recorder
Obtained from infrared data exchange or iC communication or microSD
card
Files of recorded Chara-den images
Files of recorded 1Seg programs
Icon Description
Attach to i-mode mail
Insert image into Deco-mail, or create Decome-Anime
Set display
Send Ir data, iC transmission
Copy to microSD card
Upload
You can display the still images saved to the FOMA phone or the
microSD card.
Picture is displayed in the horizontal display in Horizontal Open Style.
You can switch the style during display.
1mData boxMy pictureSelect a folder
Select a file.
pEach time you press m
from the Folder list, you can
switch between the folders
in the FOMA phone and the
microSD card.
pSee page 366 for the
Function menu on the
Folder list.
pThe image on the right is displayed when you cannot display a
preview image:
pWhen selecting folders or still images by another function, some
folders or still images may not be displayed depending on the function. You may
at times be able to confirm the still image by pressing l( ) while you are
selecting it.
pSee page 186 when you select “Search by i-mode”.
1mData box1SegImageSelect a file.
+m-4-6
<Picture Viewer>
Displaying Images
Folder list Still Image list
Display Images Recorded by 1Seg
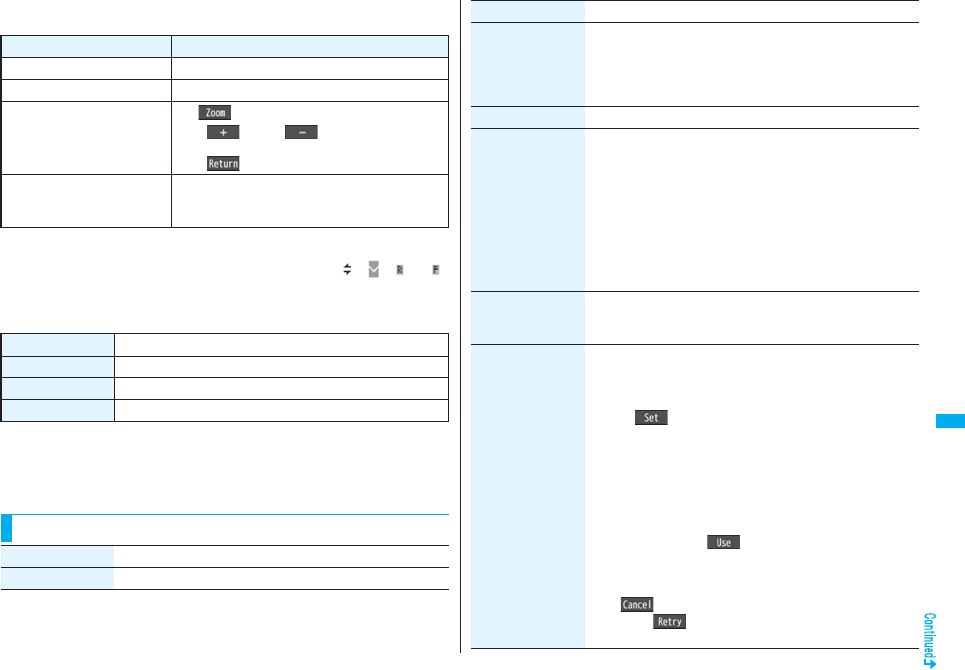
331
Data Display/Edit/Management
■Operations when playing back still images
pSee page 334 for when you operate from the Function menu.
※1 Files are displayed in the order on the Still Image list.
※2 You cannot operate depending on the image size or file format.
※3 Even if you set the icons not to be displayed, the icon such as “ ”, “ ”, “ ” or “ ”
appears during communication or when an i-mode mail message or Message R/F
comes in.
■Specifications for playing back still image files
※1 The types of JPEG file you can play back are Baseline and Progressive of the Exif/
CIFF/JFIF format.
※2 For the file in the progressive format, you can display the file of VGA (640 x 480)
size or smaller.
pYou cannot display some files even if their file formats are supported.
Operation Key operation
Display the next file※1Vo
Display the previous file※1Co
Zoom (Enlarge/Reduce)※2Oo()
pi() or l( ) to display enlarge/
reduce during zooming
pOo( ) to return to the former file
Icon
[Horizontal Open Style only]
m※3
pEach time of pressing switches whether to display
icons and navigations.
File format JPEG※1, GIF, Flash
Extension jpg, gif, swf, ifm
Pixels Files of 5M (2592 x 1944) size or smaller※2
File size Still images of 2 Mbytes or less
Function Menu of the Still Image List
Function menu Operation/Explanation
Edit picture See page 335.
Edit title Enter a title.
pFor a file in the FOMA phone, you can enter up to 9 full-pitch/18
half-pitch characters.
pFor a file on the microSD card, you can enter up to 18 full-pitch/
36 half-pitch characters.
Display picture You can display the image.
Set display
You can paste the image to the Stand-by display and other
displays for displaying.
See “Positioning” for the position to which you paste the still image.
Select the display you paste it to.
p“★” is displayed for the pasted items but not for the videophone
related items other than “Videophone dial” or “V.phone
incoming” even if already pasted.
pIf you select the videophone related items other than
“Videophone dial” or “V.phone incoming”, an appropriate
message is displayed at the center of the still image.
Picture info You can display the still image title, file name and others.
pThe item of “Set display” only is displayed for “Picture info” of
original animations.
Location info
(Attach location)
Attach locationSelect an item.
By position loc.
. . . Measures the current location and store the location
information. After checking the location information, press
Oo().
From loc. history
. . . Select a piece of location information from Location History
and store it.
From phonebook
. . . Select a Phonebook entry which contains the location
information for storing.
p
To delete the stored location information, select “Delete loc. info”.
pWhen you press i( ) during measuring the current
location, the confirmation display appears asking whether to
display the result obtained so far from the location information.
pTo cancel measuring the current location, press r or
l().
pPress l( ) from the confirmation display for the location
information to restart measuring in “Quality mode”.
Function menu Operation/Explanation
332
Data Display/Edit/Management
Location info
(Delete loc. info)
You can delete the location information stored in the image.
Delete loc. infoYES
Location info
(Details)
You can check the location information detail.
Details
pIf you press i( ) while displaying the detail, the
Function menu for the location detail is displayed.
(See page 279)
Attach to mail Go to step 2 on page 198.
pYou can compose an i-mode mail message also by pressing
l().
Decorate mail You can compose Deco-mail using data in the “Decomail-picture”
folder or “Decomail-pictograph” folder.
Go to step 2 on page 198.
pSee page 202 for Deco-mail.
Send Ir data See page 370.
transmission See page 372.
Add desktop icon See page 127.
Copy to microSD See page 359.
Store in Center You can save the still image stored in the FOMA phone to the
Data Storage Center. Data Security Service is a pay service that
is available on a subscription basis.
Enter your Terminal Security Code
Put a check mark for still images to be savedl()
YES
pYou can select up to 10 still images.
pYou can switch between “Picture” and “Title name” by pressing
i().
pWhile a still image is displayed, you do not need to put a check
mark for the still image.
Copy to phone See page 360.
Move to microSD See page 361.
Move to phone See page 361.
Function menu Operation/Explanation
Positioning You can set the position for when you paste the still image to the
Stand-by display, etc.
See page 331 for “Set display”.
Select a position for displaying.
Edit file name Enter a file name.
pYou can enter up to 36 half-pitch alphanumeric characters.
File restriction If you set “File restricted” for the file, the operation of attaching to
i-mode mail is disabled at the receiving end who receives the
image as the first distribution.
File unrestricted or File restricted
pSee page 164 for the file restrictions.
DPOF setting See page 379.
Slideshow All still images are consecutively displayed starting from the still
image selected in the folder. You can select the speed the still
image switches at.
Normal or Slow
Press Oo( ) to stop Slideshow. Press Oo( ) again to
resume Slideshow.
Copy You can copy the still image, moving image, PDF file, document
file, or SD other file on the microSD card to another folder on the
microSD card.
Select a destination folder.
Move You can move the still image, moving image, PDF file, document
file, Kisekae Tool file, or SD other file to another folder.
Select a destination folder.
pPress l( ) to display folders at the second-tier level or
lower, if they exist. Press r to return to the upper level.
Delete this YES
Delete all You can delete all files in the folder.
Enter your Terminal Security CodeYES
Function menu Operation/Explanation
333
Data Display/Edit/Management
Multiple-choice You can select multiple files and operate them.
Put a check mark for the files to be operatedi()
Select an item.
Picture/Title name/Listing
. . . . . . . . . . . . . . . . . . . See page 333, page 354 and page 375.
Delete . . . . . . . . . . . . . See “Delete this” on page 332.
DPOF setting . . . . . . . See page 379.
Copy . . . . . . . . . . . . . . See page 332.
Move . . . . . . . . . . . . . . See page 332.
Copy to microSD. . . . See page 359.
Copy to phone . . . . . . See page 360.
Send Ir data . . . . . . . . See page 370.
Select all . . . . . . . . . . . Selects all files.
Release all . . . . . . . . . Releases all selected files.
Memory info You can display the used memory space (estimate).
Sort You can change displayed order.
Select an order.
pYou cannot sort the files on the microSD card.
Picture/Title name You can switch the lists of still images.
pYou can switch the lists also by pressing c( ) from the
Still Image list.
Function menu Operation/Explanation
Information
<Edit title>
pYou may not be able to edit the title depending on the file.
<Display picture>
pYou may not be able to execute Display Picture depending on the file.
pFlash movies are played back at the volume set for “Phone” of “Ring volume”. When
“Phone” of “Ring volume” is set to “Step”, they are played back at “Level 2”.
<Set display>
pFlash movies can be pasted only to “Stand-by display”, “Wake-up display”, “Dialing”,
“Calling”, “Videophone dial”, “V.phone incoming”, “Mail sending”, “Mail receiving”,
“Checking”, and “Mail/msg. rcpt result”.
pAnimation GIF images cannot paste to the videophone related items other than
“Videophone dial” or “V.phone incoming”.
pThe displayed size might differ from the actual size depending on the image size or
the display pasted to.
pYou cannot execute “Set display” for some image files.
<Attach to mail>
pYou may not be able to compose i-mode mail depending on the image.
pSee page 164 for attaching a file set with the file restriction to mail.
<Decorate mail>
pWhen an image size is larger than Sub-QCIF (128 x 96) size, the display for selecting
how to convert the image size appears. The converted still image is saved as a
separate new file.
Select “Attach directly”; then the image size does not change.
Select “Sub-QCIF scale down”; then the image size is scaled down to Sub-QCIF (128
x 96) size or smaller with its proportional ratio retained.
Select “Sub-QCIF trim away”; then the image size is scaled down or cut out to
Sub-QCIF (128 x 96) size or smaller with its proportional ratio retained.
If the file size exceeds the maximum size to create Deco-mail, its size is converted to
the maximum size to create Deco-mail or less.
pEven if you scale down or cut out the still image to Sub-QCIF (128 x 96) size, you can
again scale down or cut it out by pressing +l( ) or pressing +i( ) and
selecting “Cancel”. When you press +i( ) and select “Set”, the Message
Composition display appears.
pYou may not be able to create Deco-mail depending on the image.
Information
334
Data Display/Edit/Management
<Store in Center>
pYou cannot save the following still images:
・Images whose sizes exceed 100 Kbytes
・Images whose output from the FOMA phone is prohibited
・Images other than in JPEG or GIF format
pYou cannot use Data Security Service when you are out of the service area.
pWhen you have not signed up for Data Security Service, the message to that effect
appears.
pYou can download the saved still images from the Data Storage Center site to your
FOMA phone. For details, refer to “Mobile Phone User’s Guide [i-mode] FOMA
version”.
<Edit file name>
pYou may not be able to edit the file name depending on the file.
pYou cannot use half-pitch space for the file name.
<File restriction>
pYou may not be able to set the file restrictions depending on the file.
<Slideshow>
pFlash movies are not displayed.
pThe time interval to show the images might differ depending on the image.
<Copy> <Move>
pIf a call comes in while copying/moving multiple files, copying/moving is canceled
even midway.
<Delete this> <Delete all>
pIf a call comes in while deleting multiple files, deleting is canceled.
<Multiple-choice>
pYou can select up to 3,500 still images, moving images, melodies, PDF files and
Kisekae Tool files, and up to 100 videos, document files and SD other files.
<Picture/Title name>
pWhen you use “Picture” to display still images, some images may appear different.
Information
Function Menu while Playing Back Still Image
Function menu Operation/Explanation
Edit picture See page 335.
Set display See page 331.
Picture info See page 331.
Location info
(Attach location)
See page 331.
Location info
(Delete loc. info)
See page 332.
Location info
(Details)
See page 332.
Attach to mail See page 332
Decorate mail See page 332.
Send Ir data See page 370.
transmission See page 372.
Display size You can set whether to display the still image in original size
(normal size) or to fit to the display size.
Normal or Fit in display
pEven if you set to “Normal”, the still image in excess of the
display size is reduced to the display size. Also, when the still
image is QCIF (176 x 144) size or smaller, it is doubled at both
lengthwise and sidewise to be displayed.
Add desktop icon See page 127.
Copy to microSD See page 359.
Store in Center See page 332.
Copy to phone See page 360.
Positioning See page 332.
DPOF setting See page 379.
Delete See “Delete this” on page 332.
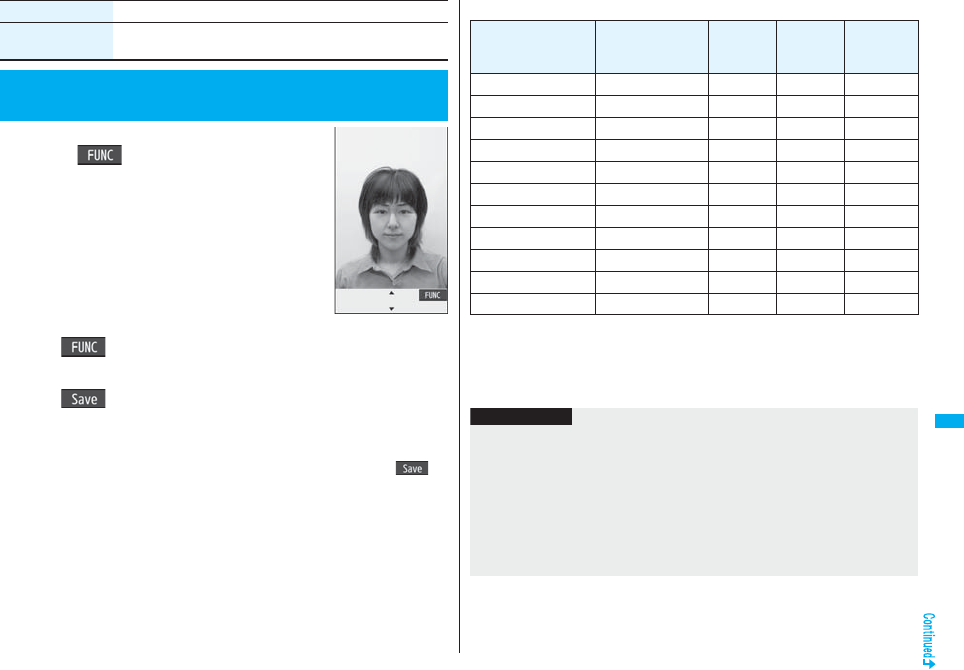
335
Data Display/Edit/Management
1Still Image list/Still image in play
i()Edit picture
pWhen the still image, which is not the Stand-by (480 x
854) size, is larger than VGA (640 x 480) size, it is
reduced to VGA (640 x 480) size.
pWhen the still image to be edited is larger than the
display size, use Mo to scroll it.
2i()Edit the still image.
See page 336 to page 337 for how to operate.
3Oo()YES or NO
YES . . . Overwrites the image to save.
NO . . . . Saves the image as a new still image.
The edited still image is saved.
pTo edit and save an edited still image on the microSD card, press Oo() in
step 3; then it is saved to the “i-mode” folder anew.
pNot to save the edited still image, press r or h; then select “YES”.
pSee page 186 when images are stored to the maximum.
Retry You can play back the animation or Flash movie from the
beginning.
<Edit Picture>
Editing Still Images
Function menu Operation/Explanation
Edit Picture display
■The size of still image you can edit
○: Editing picture is enabled. ×: Editing picture is disabled.
※1 You cannot edit the still image smaller than 24 x 24 dots.
※2 You cannot edit the still image of Chat Picture (80 x 80) size or smaller.
pYou can edit the still images of 1920 x 1440 dots, 1632 x 1224 dots, 1616 x 1212 dots,
1600 x 900 dots, and 1280 x 960 dots as well.
Edit menu
5M, 3M, 2M, VGA,
CIF, QVGA, QCIF,
Sub-QCIF
3.7M Wide,
2M Wide Stand-by
Other sizes
smaller than
VGA
Marker stamp ○○○○
Frame ○×○×
Character stamp ○○○
○※1
Cushy mark ○○×○
Fit in screen ○○○○
Change size ○○○○
Trim away ○○○
○※2
Retouch ○○×○
Rotate ○○○○
Brightness ○○○○
Attach to mail ○○○○
Information
pYou can execute “Edit picture” only for the “File unrestricted” files of still images shot
by the cameras, obtained by data communication, downloaded from sites, or retrieved
from i-mode mail.
pYou cannot edit some still images, or you might have difficulty to produce editing
effect.
pIf you repeat editing image such as pasting frames or marker stamps to the shot still
image, the image quality may deteriorate or the file size may become larger.
pIf you change the size of a still image, some still images cannot be allowed to edit
picture.
336
Data Display/Edit/Management
pIf the battery runs out during editing, the edited contents are discarded.
pThe file name, title, storage location, and acquired source of the newly saved still
image are as follows:
・File name: “YYYYMMDDhhmmnnnn”
Title: “YYYY/MM/DD hh:mm”
(Y: year, M: month, D: date, h: hour, m: minute, n: number)
・Storage location: Folder the source file is saved to (Still images on the microSD card
are saved to the “i-mode” folder.)
・Acquired source: The same as the source file
Function Menu of the Edit Picture Display
Information
Function menu Operation/Explanation
Marker stamp You can add the marker stamp in the “Stamp” folder.
Select a marker stamp.
pYou can rotate the marker stamp by pressing i( ) and
selecting “90° to right/90° to left/180°”. Select “Scale up/Scale
down” to enlarge or shrink the marker stamp.
pYou can reselect a marker stamp by pressing l().
Use Mo to position the marker stamp and press
Oo().
pYou can add a marker stamp by pressing l().
Oo()
Frame Select a frameOo()
pYou can add the frame whose size is the same as the size of
the image you are editing.
pYou can display the previous or next frame by pressing No.
Press and hold No for at least one second to display
sequentially.
pYou can rotate the frame by pressing i( ) and selecting
“180° rotation”.
pYou can reselect a frame by pressing l().
Character stamp You can add text.
Enter characters.
You can enter up to 15 full-pitch/30 half-pitch characters.
However, the number of characters you can enter decreases
depending on the size of the still image.
pPress i( ) and select “Character color” to select a color;
then, you can change the color of characters. You can switch
between “16 Color” and “256 Color” by pressing c().
Select “Font” to change the character fonts.
Select “Character size” to enlarge or shrink characters.
Select “Character input” to edit entered characters.
Use Mo to position the charactersand press Oo()
Oo()
pYou can reselect a position by pressing l().
Cushy mark You can compound a cushy mark in the “Stamp” folder. The
person’s facial region is automatically recognized and the cushy
mark is pasted to an appropriate position.
Select a cushy mark.
pPress i( ) and select “Scale up/Scale down” to enlarge
or shrink the cushy mark.
pTo cancel, press l().
Use Mo to position the cushy markand press Oo().
pThe cushy mark that comes out of the still image is cut off.
pYou can add a cushy mark by pressing l().
Oo()
Fit in screen You can convert an image size into Stand-by (480 x 854) size.
pDepending on the source still image size, the confirmation
display might appear asking whether to cut out an image size
and convert into Stand-by (480 x 854) size.
Function menu Operation/Explanation
337
Data Display/Edit/Management
Change size Select an image size to change to.
pIf you select the size different in proportional ratio from the
source still image, the still image is enlarged or shrunk so that it
does not exceed the selected size with its proportional ratio
retained.
Oo()
pYou can reselect a size by pressing l().
Trim away You can trim the still image to a certain size.
Select an image size to trim to.
pYou cannot select a trimming frame larger than the still image
you are editing.
pWhen you select “Dial/recv. PIC (480 x 288)” or “VGA (480 x
640)”, the still image you are editing or the trimming frame are
halved at both lengthwise and sidewise to be displayed.
Use Mo to select a part to be trimmed and press
Oo().
pYou can reselect a size to trim by pressing l().
Oo()
pYou can reselect a part to be trimmed by pressing l().
Retouch You can set texture and color tone of the still image.
Select an item.
Sharp. . . . . . . . . . . . . . . . .Stresses the outline.
Blur . . . . . . . . . . . . . . . . . .Softens the outline.
Sepia . . . . . . . . . . . . . . . . .Makes the color tone sepia.
Emboss. . . . . . . . . . . . . . .Makes the still image rugged.
Negative . . . . . . . . . . . . . .Reverses the color tone.
Horizontal flip . . . . . . . . .Flips the image horizontally.
Super clear shadow . . . .Makes the dark still image clear.
Memory color. . . . . . . . . .Corrects the color and contrast.
Oo()
pYou can reselect an effect by pressing l().
Function menu Operation/Explanation
Rotate 90° to right, 90° to left or 180°Oo()
pYou can reselect the rotation angle by pressing l().
Brightness You can adjust the brightness to -3 (dark) through +3 (bright).
Select a brightness level.
Attach to mail See page 332
Save See page 335.
Function menu Operation/Explanation
Information
<Marker stamp>
pYou cannot select the marker stamp with following sizes:
・When the size is larger than the still image to be edited
・CIF (352 x 288) ・VGA (640 x 480) ・QVGA (240 x 320)
・QCIF (176 x 144) ・Sub-QCIF (128 x 96)
pYou cannot enlarge a marker stamp to the size larger than the still image you are
editing.
<Character stamp>
pYou cannot set some character colors depending on the image to be edited. In that
case, select another color.
<Cushy mark>
pYou cannot select a cushy mark larger than VGA (640 x 480) size.
pYou can enlarge or shrink a cushy mark up to three times, but cannot enlarge it to the
size larger than VGA (640 x480) size.
pPerson’s face or outline might not be recognized correctly. When multiple persons’
faces are found, a single person’s face only is recognized.
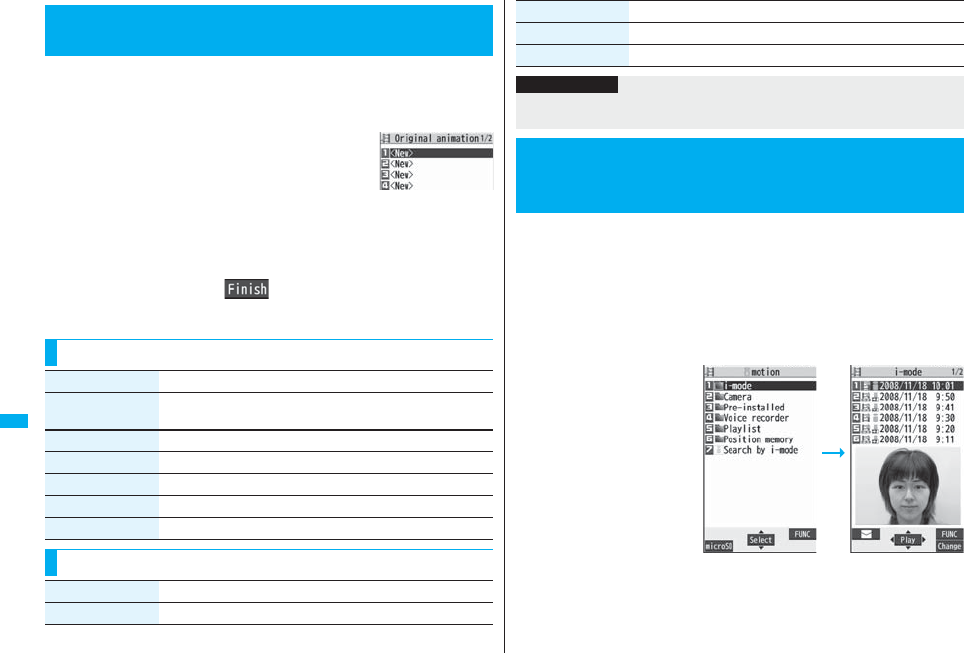
338
Data Display/Edit/Management
You can select up to 20 JPEG files (20 frames) of Stand-by (480 x 854)
size or smaller from the “i-mode” folder, “Camera” folder and user
folders, and play them back as an animation. You can store 20 original
animations.
1mData boxMy picture
Original animation<New>
pTo change, select an original animation you have set.
2Select a frame position from <1st> to <20th>
Select a folderSelect a still image.
pTo release the stored still image, select “Release this”.
3Repeat step 2l()
<Original Animation>
Creating Animations
Original Animation list
Function Menu of the Original Animation List
Function menu Operation/Explanation
Edit title Enter a title.
pYou can enter up to 9 full-pitch/18 half-pitch characters.
Org. animation Go to step 2 on page 338.
Display picture You can play back the original animation.
Set display See page 331.
Picture info See page 331.
Release animation YES
Function Menu while Playing Back Original Animation
Function menu Operation/Explanation
Set display See page 331.
You can play back moving images saved to the FOMA phone or the
microSD card.
Moving image is played back in the horizontal display in Horizontal Open
Style. You can switch the style during playback.
pYou can play back the sound of moving images from a commercial Bluetooth device.
(See page 431)
1mData boximotionSelect a folder
Select a file.
pEach time you press m
from the Folder list, you can
switch between the folders
in the FOMA phone and the
microSD card.
pSee page 366 for the
Function menu on the
Folder list.
pSee page 186 when you
select “Search by i-mode”.
Display size See page 334.
Retry You can play back the original animation again.
Function menu Operation/Explanation
Information
pIf you delete a still image stored in an original animation, the original animation which
contains the still image is released.
<i-motion Player>
Playing Back Moving Images/i-motion
Movies
Folder list Moving Image list
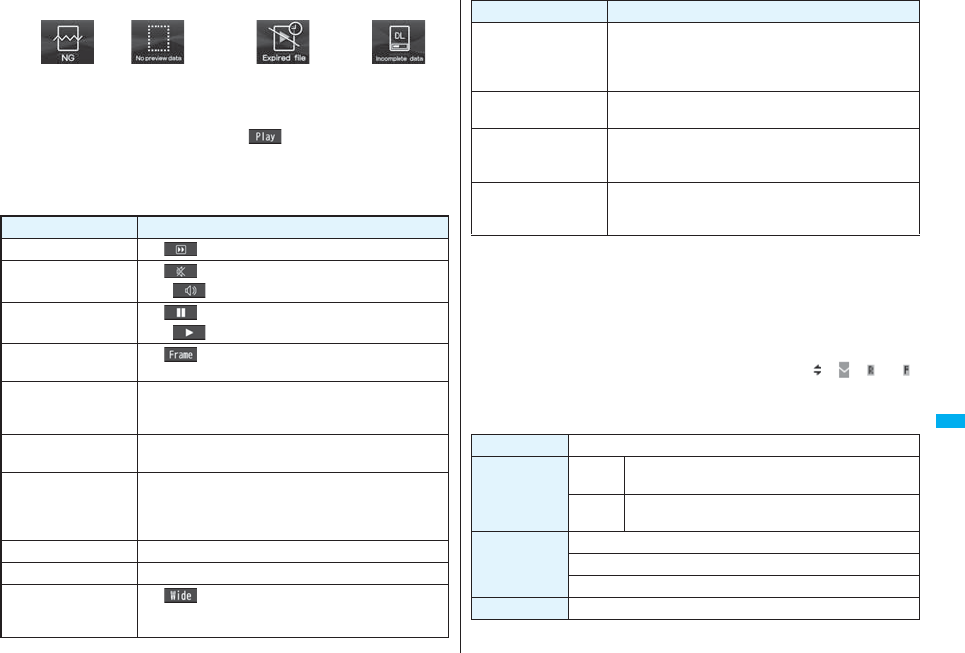
339
Data Display/Edit/Management
pThe following images are displayed when you cannot display the preview images:
p
When you select a folder or i-motion movie from another function, some folders or
i-motion movies may not be displayed depending on the function. You may be able to
confirm the i-motion movie by pressing
l
( ) while selecting an i-motion movie.
pDepending on the i-motion movie, you can play back by selecting a chapter set
for the i-motion movie. (See page 341)
■Operations when playing back moving image
pSee page 341 for when you operate from the Function menu.
Cannot be
played back
Playback restrictions have
expired, and the like.
No preview
images
Incomplete
download
Operation Key operation
Quick View l( ) (See page 341)
Mute i()
pi
( ) or adjust the sound volume to play back sound
Pause※1Oo()
pOo( ) to resume
Play back frame by
frame※2l( ) during pause
pEach time of pressing proceeds frame by frame.
Sound volume
adjustment
Bo or </>
pPress and hold to adjust the sound volume sequentially.
pSetting from Level 0 (Silent) through 6 is available.
Display next file or
chapter※3Vo
Display previous file or
chapter※3Co
pWhen playback time is over three seconds, you go back to
the beginning of the file. (You go back to the top of the
chapter for the file with chapters.)
Search (fast forward)※2Press and hold Vo.
Search (fast rewind)※2Press and hold Co.
Change vertical disp./
horizontal disp./full disp.
[Normal Style only]
c()
pEach time of pressing switches display format.
※1 You cannot operate this for a streaming type of i-motion movie.
※2 You cannot operate this for a streaming type of i-motion movie, or when you are
playing back an i-motion movie while obtaining it. Further, you might not be able to
operate this depending on the i-motion movie.
※3 Moving images having no chapters are switched in the order on the Moving Image
list. This operation is available when you play back from the Moving Image list.
Moving images having chapters are switched in the order that the chapters are
stored.
※4 Even if you set the icons not to be displayed, the icon such as “ ”, “ ”, “ ” or “ ”
appears during communication or when an i-mode mail message or Message R/F
comes in.
■Specifications for moving image playback
pEven when the file format is supported, you might not be able to play back some files.
Icon
[Horizontal Open Style
only]
m※4
pEach time of pressing switches in order of “Display icons
and navigations” → “Nondisplay icons and navigations” →
“Full display”.
Remaster 9
pEach time of pressing switches between “ON” and “OFF”.
Listening 8
pEach time of pressing switches in order of “OFF”
→ “Surround” → “Natur1” → “Natur2”.
Equalizer 7
pEach time of pressing switches in order of “Normal”
→ “S-XBS1” → “S-XBS2” → “Train”.
Operation Key operation
File format MP4, ASF
Coding system MP4 file Image: MPEG4, H.263, H.264
Audio: AMR, AAC, AAC+ (HE-AAC), Enhanced aacPlus
ASF file Image: MPEG4
Audio: G.726
Pixels MPEG4: Files of VGA (640 x 480) size or smaller
H.263: Files of Sub-QCIF (128 x 96) or QCIF (176 x 144) size only
H.264: Files of QVGA (240 x 320) size or smaller
Extension sdv, 3gp, mp4, asf
340
Data Display/Edit/Management
The display for selecting Position Memory appears. When you select “Marker to resume”
or “Position memory 1/2”, the moving image is played back from the stored position.
pTo delete “Position memory”, press i( ) and select “Delete”. You cannot delete
the “Marker to resume”.
pWhen the moving image with a position memory has been deleted or moved to another
folder, you cannot play it back.
When you select “Position memory” from the Folder list for
moving images
Marker to resume This is stored automatically when a call comes in, an alarm
operates, or the battery level goes flat during playback of a
moving image.
Position memory You can store in any optional position in a moving image, and
create up to two position memories. (See page 342)
Information
pWhile searching (fast forward or fast rewind) a moving image or playing it back frame
by frame, it does not sound. You can search (fast forward or fast rewind) while
pausing or playing back the moving image (including slow and quick view).
pIf you receive mail or a Message R/F when playing back an i-motion movie, the video
or sound might be interrupted.
Function Menu of the Moving Image List
Function menu Operation/Explanation
Edit imotion See page 343.
Edit title See page 331.
Set imotion
(Ring tone)
You can set a moving image for a ring tone.
Ring toneSelect an incoming typel()
pThe set item is indicated by “★”.
Set imotion
(Stand-by display)
You can set a moving image for the Stand-by display.
Stand-by displayYESl()
Set
i
motion
(Standby disp. Wide)
You can set a moving image for the (horizontally) Stand-by
display.
Standby disp. WideYESl()
Set imotion
(Wake-up display)
You can set a moving image for the Wake-up display.
Wake-up displayYESl()
imotion info You can display the i-motion movie title, file name and others.
Attach to mail You can compose an i-motion mail message with the file
attached.
Go to step 2 on page 198.
pYou can compose it also by pressing l().
Send Ir data See page 370.
transmission See page 372.
Copy to microSD See page 359.
Copy to phone See page 360.
Move to microSD See page 361.
Move to phone See page 361.
Copy See page 332.
Move See page 332.
Add desktop icon See page 127.
Edit file name See page 332.
File restriction See page 332.
Reset title You can reset the title to the default.
YES
Delete this See page 332.
Delete all See page 332.
Multiple-choice See page 333.
Memory info You can display the used memory space (estimate).
Sort See page 333.
Function menu Operation/Explanation
341
Data Display/Edit/Management
Listing You can change the displayed contents for Moving Image list.
You can select whether the title or file name is displayed in the
microSD Card list.
Select a display format.
Title . . . . . . . . . . . . . The titles or file names are listed.
Title + Image. . . . . . The title or file name, and image are
displayed at a time. The displayed image is
the first frame of moving image.
Title/File name . . . . You can select whether to display the title or
file name.
pIn the case of the microSD Card list, “Title” is displayed as
“Name”, and “Title + Image” is displayed as “Name + Image”.
pYou can switch the lists also by pressing c( ) from the
Moving Image list.
Function menu Operation/Explanation
Information
<Set imotion>
pYou cannot set the i-motion movie whose acquired source is “ ” as a ring tone.
pSee “imotion info” to check whether the i-motion movie can be set for a ring tone or
receiving display.
<Attach to mail>
pWhen the file size is larger than 2 Mbytes, the confirmation display appears asking
whether to cut it out to the mail size. Select “YES” to cut out the i-motion movie from
the beginning to the about 2-Mbyte point.
pYou may not be able to compose i-mode mail depending on the i-motion movie.
pDepending on the i-motion movie, its file size may become larger or smaller.
pYou cannot attach an i-motion movie in excess of 2 Mbytes to mail from the Edit
imotion display. See “Trim for mail” for how to cut out the i-motion movie for
attaching to i-motion mail.
Function Menu during Pause/at the End of Playback
Function menu Operation/Explanation
Normal play The moving image is played back at the normal speed.
Chapter list You can display the list of chapters stored in the moving image
and select a chapter to be played back.
Select a chapter to be played back.
Slow The moving image is played back mute at half the normal speed.
pTo cancel Slow playback, press l( ), or perform
“Normal play”.
Quick View (1.25x) The moving image is played back at the speed 1.25 times the
normal speed.
pPress l( ) to play back the moving image at twice the
normal speed. Press l( ) to play back at the normal
speed.
Quick View (2x) The moving image is played back at twice the normal speed.
pTo cancel Quick View, press l( ), or perform “Normal
play”.
Stop You can end playback.
Position to play You can set the start point for playing back the moving image.
Use No to move the cursor position of the time bar and
press Oo().
pTo cancel, press r.
Sound effect
(Remaster)
You can bring the sound from an earphone or Bluetooth device to
the original sound by complementing high-pitch range lost at data
compression.
RemasterON or OFF
Sound effect
(Listening)
You can set sound effect for listening.
ListeningSelect an item.
Surround. . . . Makes the sound natural and stereophonic.
Natur 1/2 . . . . Complements the cooped-up feeling specific to
earphones and plays back natural sound. Select
1 or 2 according to your taste.
OFF . . . . . . . . Sets Listening to “OFF”.
p“Natur 1/2” is effective for the sound from an earphone or
Bluetooth device.
Function menu Operation/Explanation
342
Data Display/Edit/Management
Sound effect
(Equalizer)
You can change the sound quality of an earphone or Bluetooth
device.
EqualizerSelect an item.
Normal . . . . . . Reproduces normal sound quality.
S-XBS1. . . . . . Enhances bass sound.
S-XBS2. . . . . . Enhances bass sound more deeply than S-XBS1.
Train . . . . . . . . Minimizes abnormal sound that causes sound
leakage.
Position memory You can store a position memory in the moving image. Store it at
the desired position in pause state.
Position memory1 or Position memory2
Edit imotion See page 343.
Attach to mail See page 340.
pYou can compose an i-mode mail message also by pressing
l( ) from the playback end display.
Set imotion See page 340.
imotion info See page 340.
Send Ir data See page 370.
transmission See page 372.
Copy to phone See page 360.
Add desktop icon See page 127.
Display size You can set the display whether to display a moving image in the
original size (Actual size) or to fit to the display size.
Actual size or Fit in display
pEven if you set to “Actual size”, the moving image in excess of
the display size is reduced to the display size. Also, when the
moving image is QCIF (176 x 144) size or smaller, it is doubled
at both lengthwise and sidewise to be displayed.
Change to full You can change the display format of moving images. Each time
of selecting the item switches in order of playback on the vertical
display → playback on the horizontal display fitted to the display
size → playback on the enlarged full size display.
Function menu Operation/Explanation
Information
<Chapter list>
pWhen restrictions on chapter forward/rewind are applied, you cannot select chapters
after/before the one you are currently playing back.
<Slow>
pYou cannot slow-play the following i-motion movies:
・A streaming type of i-motion movie
・An i-motion movie being played back while obtaining data
・An i-motion movie played back from the Stand-by display
<Quick View>
pYou cannot execute Quick View for some i-motion movies.
pi-motion movies are not played back in stereo sound during Quick View.
pIt may be hard to hear sound during Quick View.
<Position to play>
pYou might not be able to select the position to play depending on the moving image/
i-motion movie.
<Sound effect>
pEven if an earphone or Bluetooth device is not connected, the respective setting
contents are shown on the display.
pWhen audio format of the i-motion movie is AMR or G.726, sound effect might be
unavailable.
<Position memory>
pYou might not be able to store the position memory depending on the moving image/
i-motion movie.
<Display size>
pDepending on the image size, the image might be displayed with the right or bottom
side cut off.
<Change to full>
pThe moving image of QCIF (176 x 144) size or smaller is not played back in full
display.
pDepending on the image size, the image might be displayed with the right or bottom
side cut off.
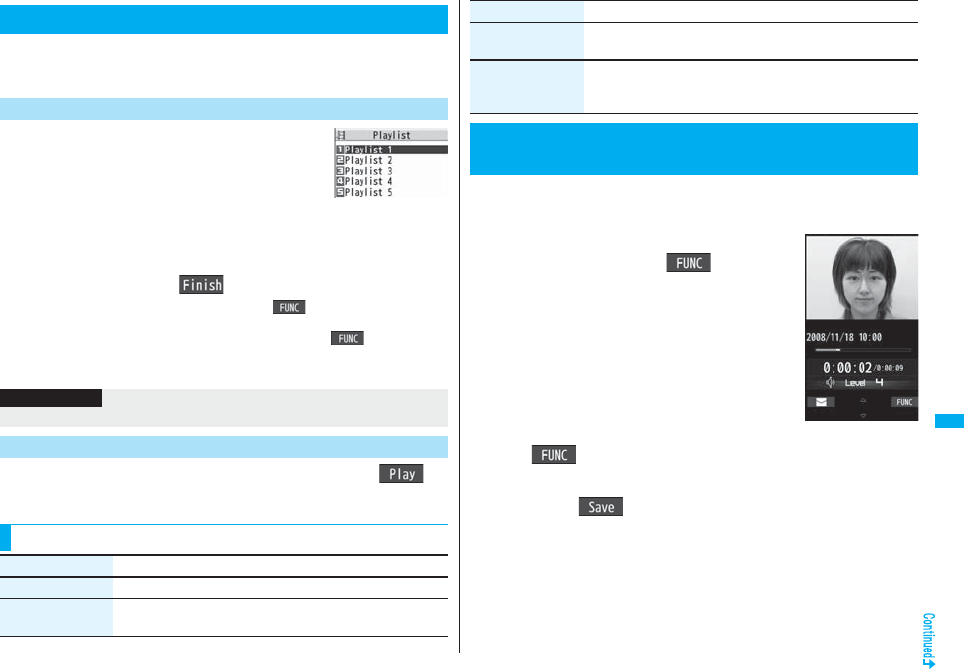
343
Data Display/Edit/Management
You can store moving images in a playlist, and continuously play them
back in the order you like. You can create up to 5 playlists, and can store
up to 30 moving images per playlist.
1mData boximotionPlaylist
Select Playlist 1 through 5.
2Select <1st> through <30th>Select a folder
Select a moving image.
3Repeat step 2l()
pTo release a stored moving image, press i( ) and select “DEL one from
list”. Select “DEL all from list”, then you can release all the stored moving images.
pTo change the order of stored moving images, press i( ) and select
“Order to play”, and select a moving image whose position to be changed. Then,
select the destination position to change the order.
1Playlist listHighlight a playlist and press l().
Using Playlist
Store Playlist
Playlist list
Information
pYou cannot store partially saved i-motion movies in the playlist.
Play Back Playlist
Function Menu of the Playlist List
Function menu Operation/Explanation
Play See page 343.
Edit playlist You can edit the playlist.
Go to step 2 of “Store Playlist” on page 343.
You can edit the moving image/i-motion movie. The moving image/
i-motion movie you edited is saved to the folder containing the source
moving image/i-motion movie.
1Moving Image list/During pause/At the
end of playbacki()
Edit imotion
pUse Bo or </ > to adjust the sound volume.
2i()Edit the moving image/i-motion movie.
See page 344 for how to operate.
3Press Oo().
pNot to save the edited moving image/i-motion movie, press r or h; then
select “YES”.
4YES
The edited moving image/i-motion movie is saved.
pSee page 186 for when i-motion movies are stored to the maximum.
Release playlist You can release all moving images stored in the playlist.
YES
Edit playlist name You can edit the name of the playlist.
Edit a playlist name.
pYou can enter up to 10 full-pitch/20 half-pitch characters.
<Edit imotion>
Editing Moving Images/i-motion Movies
Function menu Operation/Explanation
Edit imotion display
344
Data Display/Edit/Management
■Operations during editing an i-motion movie or demo playback
pYou cannot do some operations depending on the state.
Operation Key operation
Pause Oo()
pPress Oo( ) to resume play back.
Fast forward Press and hold Vo.
Fast rewind Press and hold Co.
Forward frame by frame During pause, press Vo.
Rewind frame by frame During pause, press Co.
Sound volume adjustment Bo or </>
Information
pYou cannot edit the following moving images/i-motion movies:
・The files with “File restriction” and “Replay restriction” obtained from sites or i-mode
mail
・The files other than VGA (640 x 480), HVGA Wide (640 x 352), QVGA (320 x 240),
QCIF (176 x 144) and Sub-QCIF (128 x 96) size
・The files saved to the microSD card
pYou might not be able to edit some i-motion movies.
pThe image quality may deteriorate or the file size may become larger or smaller by
executing “Edit imotion”.
pWhen a call comes in, the battery level goes flat, or you close the FOMA phone while
editing, the confirmation display appears asking whether to save the fixed edited
contents.
Function Menu of the Edit imotion Display
Function menu Operation/Explanation
Trim imotion You can cut out a certain range from an i-motion movie.
Use Vo to display a start frame and press l().
The start frame is set and the moving image/i-motion movie is
played back.
Press Oo( ) at the position you want to cut out.
Playing back the moving image/i-motion movie pauses.
Use Vo to display an end frame and press l().
The cut out range is played back.
pWhen the file size reaches about 10 Mbytes, the end frame is
automatically set.
Press Oo().
pPress l( ) to play back a demo to check the edited
moving image/i-motion movie.
Trim for picture You can cut out the still image and save it.
Use Vo to display a frame and press l()YES
Select a folder.
pSee page 186 for when images are stored to the maximum.
Trim for mail You can cut out the moving image/i-motion movie to the size
attachable to i-mode mail.
Mail size (S) or Mail size
Mail size (S) . . . .Cut out to the size of about 500 Kbytes or less.
Mail size . . . . . . .Cut out to the size of about 2,048 Kbytes or
less.
Use Vo to display a start frame and press l().
The moving image/i-motion movie is played back. When the file
size reaches about 500 Kbytes, about 2,048 Kbytes, or at the end
of playback, the playback stops automatically.
Oo()
pPress l( ) to play back a demo and you can check the
edited moving image/i-motion movie.
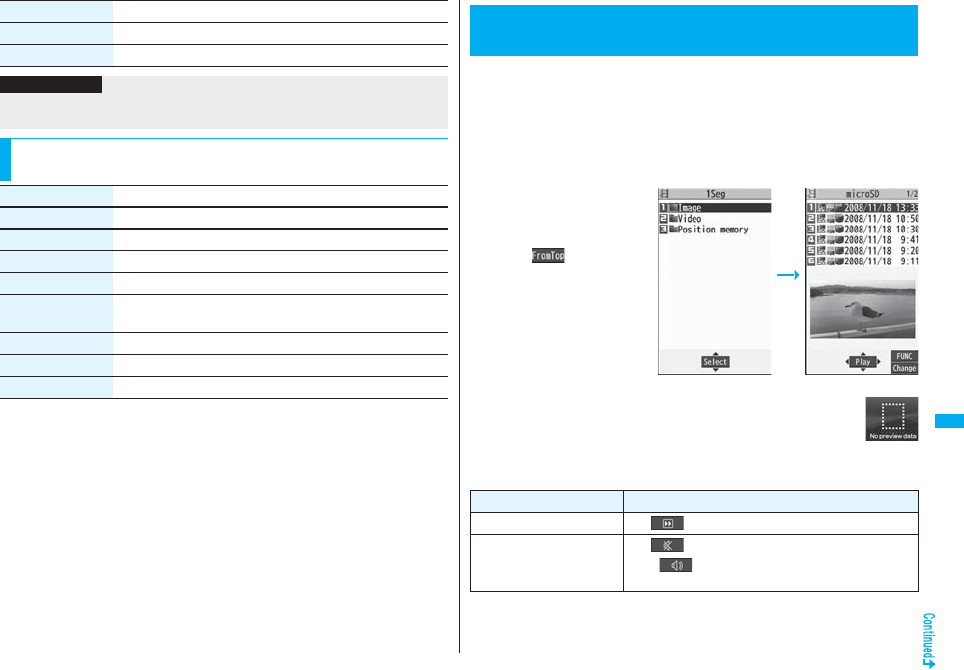
345
Data Display/Edit/Management
Attach to mail See page 340.
File restriction See page 332.
Function menu Operation/Explanation
Information
<Trim imotion>
pIf you execute “Trim imotion”, the file size may become larger.
Function Menu while i-motion Movie is Edited or Demo
Playback is in Pause
Function menu Operation/Explanation
Normal play You can play back at the normal speed.
Slow You can play back mute at half the normal speed.
Quick View (1.25x) You can play back at the speed 1.25 times the normal speed.
Quick View (2x) You can play back at twice the normal speed.
Starting point You can set the start frame for “Trim imotion” and “Trim for
mail”.
Ending point You can set the end frame for “Trim imotion”.
Determine You can set the frame for “Trim for picture”.
Stop You can stop playing back.
You can play back the video saved to the microSD card.
Just change the style to automatically switch between the vertical display
and horizontal display when you are playing back a video. You can
switch displays manually by pressing d.
pYou can play back the sound of video from a commercial Bluetooth device.
(See page 431)
1mData box1SegVideoSelect a file.
pWhen the position to play is
recorded to the video, the
playback starts from the
recorded position. Press
l( ) to play back
from the beginning.
pThe image on the right is displayed when you cannot display a
preview image:
■Operations when playing video
pSee page 347 for when you operate from the Function menu.
<Video Player>
Playing Back Video
Folder list Video list
Operation Key operation
Quick View l( ) (See page 341)
Mute i()
pi( ) or adjust the sound volume to play back
sound
346
Data Display/Edit/Management
※1 In Data Broadcasting Mode, you cannot operate.
※2 You cannot operate for a file whose playback time is shorter than 30 seconds.
※3 You cannot operate for a file whose playback time is shorter than 10 seconds.
Pause Oo() or p
pOo() or p to resume
Play back frame by frame l( ) during pause
pEach time of pressing proceeds frame by frame.
Sound volume adjustment Bo※1 or </>
pPress and hold to adjust the sound volume
sequentially.
pSetting from Level 0 (Silent) through 25 is available.
Fast forward※1Vo
pOo() or p to resume
Rewind※1Co
pOo() or p to resume
Skip (fast forward)※1※2Vo(for at least one second) or s during playback or
pause
Skip (rewind)※1※3Co(for at least one second) or a during playback or
pause
Program title※4m()
pIcons and the time bar appear on the horizontal display.
Switch display m( ) while displaying program title
pEach time of pressing from the horizontal display
switches ON/OFF of “Icon” and Caption.
pEach time of pressing from the horizontal display
switches the position of the time bar as well regardless
of whether Caption is displayed or not.
Full display d※5※6
pIn Video Mode, each time of pressing switches the
display direction.
pIn Data Broadcasting Mode, each time of pressing
switches between standard display and full display.
Switch TV/data BC c()
※6
pEach time of pressing switches between Video Mode
and Data Broadcasting Mode.
Operation Key operation ※4 When you operate immediately after “Skip”, “Fast forward”, “Rewind”, or “Position to
play”, the program title stored in “File property” might appear.
※5 You cannot operate this in Horizontal Open Style.
※6 Close the FOMA phone to return to the vertical display. In Horizontal Open Style, the
display automatically appears in the horizontal display in Video Mode and the
vertical display does not appear.
The display for selecting Position Memory appears. When you select “Marker to resume”
or “Position memory 1/2”, the video is played back from the stored position.
pTo delete “Position memory”, press i( ) and select “Delete”. You cannot delete
the “Marker to resume”.
pWhen the video with a position memory has been deleted or moved to another folder,
you cannot play it back.
When you select “Position memory” from the Folder list for
videos
Marker to resume This is stored automatically when a call comes in, an alarm
operates, or the battery level goes flat during playback of a video.
Position memory You can store in any optional position in a video, and create up to
two position memories. (See page 348)
Information
pNo sound is output during frame-by-frame playback or during skipping. Further,
captions are not displayed.
pThe displayed time bar is for reference.
pEven if you set “Sound effect setting” (or “Sound effect”) to “ON”, effect tones do not
sound during pause, frame-by-frame playback, slow playback, or quick view
playback.
pWhen you select “YES (confirm once)” from the confirmation display for data
broadcasting while watching a 1Seg program or playing back video, the information
on data broadcasting might be automatically updated, and you might be charged a
packet communication fee. (See page 310)
pThe information about the data broadcasting is discarded when you operate skip, fast
forward, rewind, or “Position to play”. You are charged a packet communication fee
when you re-obtain communication contents.
pYou might not be able to operate links by selecting them on data broadcasting during
pause or at the end of playback.
347
Data Display/Edit/Management
pThe part of video that was not correctly recorded owing to the bad radio wave
conditions is not displayed and skipped to the position where it can be displayed
correctly. In that case, the video might not be played back for a few seconds, or might
be distorted. Further, the time bar might not be displayed correctly.
pIf you try to play back a video with a low battery, the battery alert tone sounds, and the
confirmation display appears asking whether to play it back. When the battery
becomes low during playback, the playback pauses, the battery alert tone sounds,
and the confirmation display appears asking whether to end the playback. The battery
alert tone sounds regardless of the setting of “Keypad sound”.
pIf you edit (divide) the video using a mobile phone or personal computer that supports
the edit function, you might not be able to correctly play it back on the FOMA phone.
Function Menu of the Video List
Information
Function menu Operation/Explanation
Edit title Enter a title.
pYou can enter up to 18 full-pitch/36 half-pitch characters.
File property You can display the channel name, the program name, etc. of the
video.
pYou can display the channel name, the program name, etc. also
by pressing c().
Add desktop icon See page 127.
Reset title You can reset the title to the default.
YES
Delete
(Delete this)
Delete thisYES
Delete
(Delete selected)
You can select multiple videos and delete them.
Delete selected
Put a check mark for videos to be deleted
l
()
YES
Delete
(Delete all)
Delete allEnter your Terminal Security CodeYES
Memory info You can display the used memory space (estimate).
Listing You can change the displayed contents for Video list.
Select a display format.
Title . . . . . . . . . . . . The title names are displayed.
Title + image. . . . . The title name and image are displayed at a
time. The displayed image is the first frame of
video.
Function menu Operation/Explanation
Information
<Delete>
pIf a call comes in while deleting multiple videos, deleting is canceled.
pThe video whose recording time is long might take a long time to be deleted. Make
sure that the remaining battery is full enough.
pYou might not be able to delete the video containing data that does not support the
FOMA phone.
<Listing>
pThe video that was not recorded correctly owing to the bad radio wave conditions
might not be played back.
Function Menu during Pause/at the End of Playback
Function menu Operation/Explanation
Normal play The video is played at the normal speed.
Slow The video is played back mute at half the normal speed.
pTo cancel Slow play, perform “Normal play”.
Quick View The video is played back quickly.
Select an item.
1.25x . . . The video is played back at the speed 1.25 times the
normal speed. (See page 341)
2x . . . . . . The video is played back at twice the normal speed.
(See page 341)
Fast forward The video is played back fast.
10x or 30x
pTo cancel fast forward playback, press Oo().
348
Data Display/Edit/Management
Rewind The video is played back fast in the opposite direction.
10x or 30x
pTo cancel rewind playback, press Oo().
Stop You can end playback.
Position to play You can set the start point for playing the video.
Use No to move the cursor position of the time bar and
press Oo().
pTo cancel, press r.
Position memory You can store a position memory in the video. Store it at the
desired position in pause state.
Position memory1 or Position memory2
File property See page 347.
Add desktop icon See page 127.
Switch display You can switch the contents on the viewer display.
Select an item.
pIf you set to “Enlarged V. img+DBC”, the video on the vertical
display is enlarged. However, the sides of the video might be
cut depending on the program.
pIf you operate “Fast forward” or “Rewind” from the Function
menu while “Data broadcasting” is set, the setting at Video
Player start-up returns.
pEven if you set to “Data broadcasting”, the audio from the video
is played back.
pYou can set “Caption” from 1Seg.
Switch TV/data BC You can switch between Video Mode and Data Broadcasting
Mode while watching a video on the vertical display.
Icon See page 310.
Image quality See page 309.
Sound
(Auto volume)
See page 309.
Function menu Operation/Explanation
At player start-up
When “Caption” is
set to “ON”:
V. img+Caption+D
BC
When “Caption” is
set to “OFF”:
Visual image+DBC
At player start-up
Video Mode
Sound
(Remaster)
See page 309.
Sound
(Listening)
See page 310.
Sound
(Equalizer)
See page 310.
Sound
(Main/sub sound)
Main/sub sound
Main sound, Sub sound, or Main+sub sound
Data broadcasting
(Reload contents)
You can reload the displayed data broadcasting site.
Reload contents
pThe confirmation display appears asking whether to re-send the
data you entered, depending on the site.
Data broadcasting
(Certificate)
See page 176.
Data broadcasting
(Set image display)
See page 188.
Data broadcasting
(Sound effect)
See page 310.
Data broadcasting
(Reset settings)
See page 310.
Back to data BC You can stop browsing the data broadcasting site and return to
the data broadcasting.
Function menu Operation/Explanation
At player start-up
Main sound
Information
<Position to play>
pYou might not be able to select the position to play depending on the videos.
pWhen you have selected the part that was not recorded correctly owing to bad radio
wave conditions, the start point moves to the part where you can play back the video
correctly.
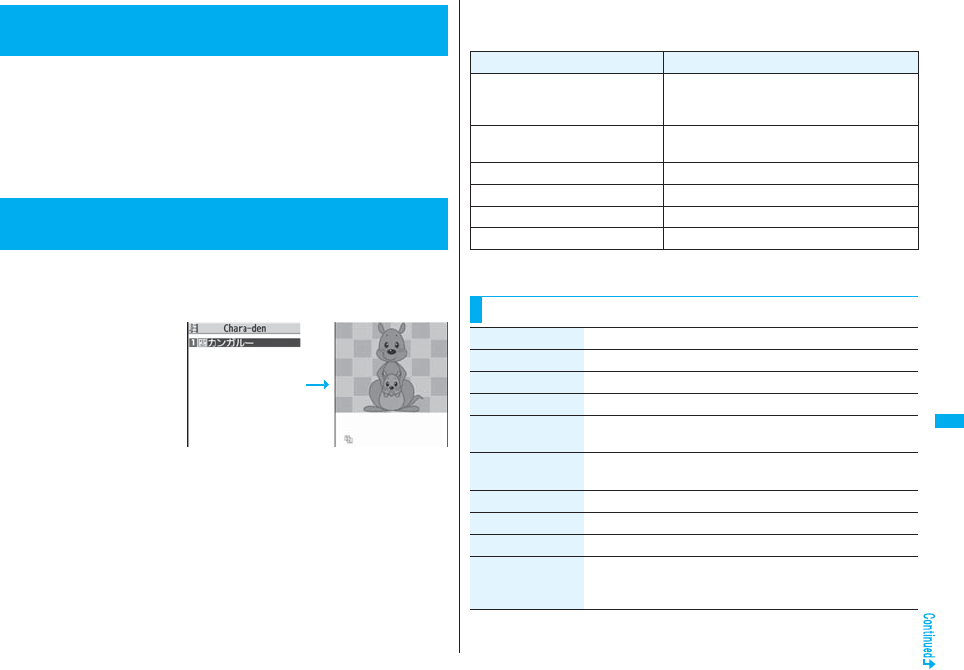
349
Data Display/Edit/Management
Chara-den is an animation character representing yourself. You can send
it as your image during videophone calls.
You can use the Chara-den player to play it back and shoot it.
pYou can delete the pre-installed Chara-den image. You can re-download it from the
“P-SQUARE” site (see page 186). When you use a UIM other than the one used for
downloading, the UIM restrictions (see page 40) are set to it.
pSome Chara-den images synchronize their movement with your voice spoken into the
microphone.
You can display stored Chara-den images.
You can make the Chara-den image move by key operation.
1mData boxChara-denSelect a Chara-den image.
<Chara-den>
What is Chara-den?
<Chara-den Player>
Displaying/Operating Chara-den Images
Chara-den list Chara-den display
■Key assignment of operating Chara-den
You can use the Action list to check the actions that you can operate.
pThe number of actions you can operate varies depending on the Chara-den image.
※1 You cannot operate for the pre-installed Chara-den image.
※2 Press s again to cancel the first s.
Key operation Details
1∼9
s1∼s9※1※2
(Whole Action Mode)
Whole action: expresses an action with whole of
the body.
11∼99※1
(Parts Action Mode)
Parts action: expresses an action with a part of
the body.
0Suspends the running action.
mDisplays the Action list.
lMakes a videophone call.
cRecords Chara-den images.
Function Menu of the Chara-den List
Function menu Operation/Explanation
Chara-den call See page 74.
Substitute image See page 74.
Rec. Chara-den See page 350.
Edit title Enter a title.
pYou can enter up to 18 full-pitch/36 half-pitch characters.
File property You can display the title, file name, and others of the Chara-den
image.
Memory info You can display the used memory space (estimate).
Add desktop icon See page 127.
Delete YES
Delete all Enter your Terminal Security CodeYES
pThis operation deletes the pre-installed Chara-den image as
well.
350
Data Display/Edit/Management
Multiple-choice You can select and delete multiple Chara-den images.
Put a check mark for Chara-den images to be deleted
i()DeleteYES
Display size You can set whether to display the Chara-den image in “Actual
size” or “Fit in display”.
Actual size or Fit in display
Reset title You can reset the title to the default one.
YES
Function menu Operation/Explanation
Information
<File property>
p“Rec. file restriction” denotes whether to restrict the operation such as attaching still
images/moving images created by “Rec. Chara-den” to mail, saving them to microSD
card, or editing them.
<Delete> <Delete all> <Multiple-choice>
pIf you delete a Chara-den image set for the substitute image except “カンガルー
(kangaroo)”, “カンガルー (kangaroo)” is set for the substitute image. If you delete “カ
ンガルー (kangaroo)”, a pre-installed substitute image will be sent.
Function Menu of the Chara-den Display
Function menu Operation/Explanation
Chara-den call See page 74.
Substitute image See page 74.
Rec. Chara-den See page 350.
Add desktop icon See page 127.
Action list You can display the list for actions that you can operate.
pHighlight an action, and press Oo( ) to run the action;
and press l( ) to check the details of the action.
pYou can display the Action list also by pressing m.
You can shoot the displayed Chara-den image as a still image or moving
image.
1mData boxChara-den
Select a Chara-den image to be shot
c()
pYou can select “Rec. Chara-den” also from the Function
menu of the Chara-den list or Chara-den display for
recording.
1Display “ ” on the Chara-den Recording display and
press Oo().
A still image of the displayed Chara-den image is shot.
pWhile “ ” is displayed, press c( ) to display “ ”.
2Press Oo().
The still image you have shot is saved to the “Camera” folder.
Change action You can switch the action modes between Whole Action Mode
( ) and Parts Action Mode ( ).
File property See page 349.
Display size See page 350.
<Record Chara-den>
Recording Chara-den Images
Function menu Operation/Explanation
At Chara-den display
Whole Action Mode
Chara-den
Recording display
Shoot Still Images
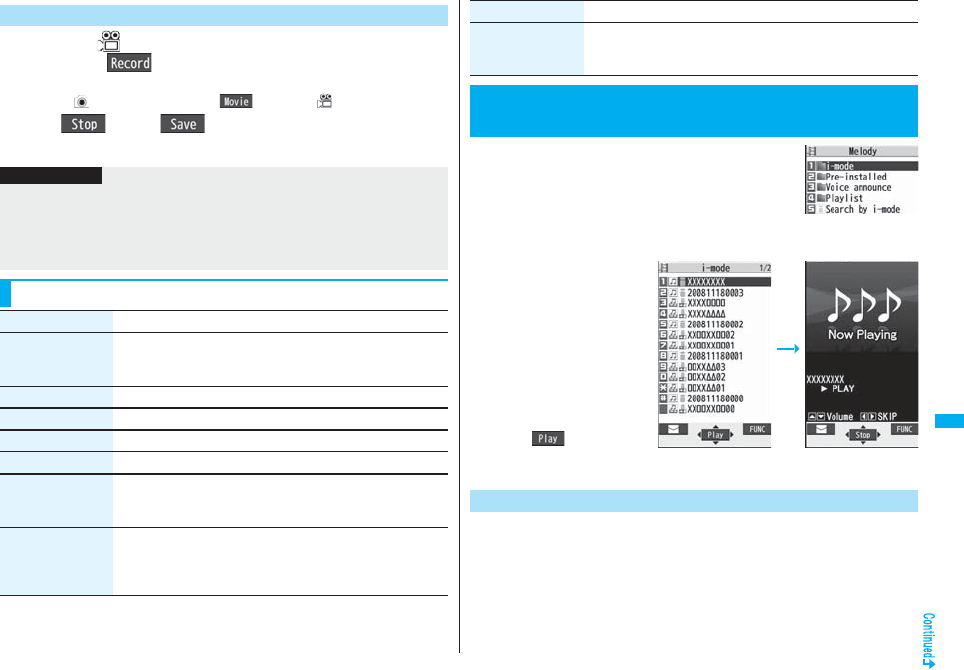
351
Data Display/Edit/Management
1Display “ ” on the Chara-den Recording display and
pressOo().
Recording of the displayed Chara-den image starts.
pWhile “ ” is displayed, press c( ) to display “ ”.
2Oo()Oo()
The recorded moving image is saved to the “Camera” folder.
Record Moving Images
Information
pThe image size is fixed to QCIF (176 x 144).
pIn Manner Mode or when “Phone” or “Mail” of “Ring volume” is set to “Silent”, the
recording confirmation tone, the recording start tone, and the recording end tone do
not sound.
pWhen “Recording type” is set to “Video + voice”, the voice is recorded as well.
Function Menu of the Chara-den Recording Display
Function menu Operation/Explanation
Switch Chara-den Select a Chara-den image to be displayed.
pIf you switch Chara-den images, the action mode switches to
Whole Action Mode.
Substitute image See page 74.
Action list See page 350.
Change action See page 350.
Display size See page 350.
Recording size You can set the image size for recording and saving a still
Chara-den image. You can set only in Photo Mode.
QCIF (176 x 144) or Small (117 x 96)
Recording type You can set whether to record video or voice for recording and
saving a moving Chara-den image. You can set only in Movie
Mode.
Video + voice or Video
1mData boxMelody
pEach time you press m from the Folder list, you can
switch between the folders in the FOMA phone and the
microSD card.
pSee page 366 for the Function menu on the Folder list.
2Select a folderSelect a melody.
pWhen selecting folders and
melodies by another
function, some folders or
melodies may not be
displayed depending on the
function. Some melodies
may be played back for
confirmation while being
selected, or you may at
times be able to play back
the melody by pressing
l().
pSee page 186 when you
select “Search by i-mode”.
You can repeatedly play back the melodies selected by “Edit playlist”.
1mData boxMelodyPlaylist
Recording quality You can set the image quality for saving a moving Chara-den
image. You can set only in Movie Mode.
Normal, Prefer image quality, or Prefer motion speed
+m-1-6
<Melody Player>
Playing Back Melodies
Function menu Operation/Explanation
Folder list
Melody list Melody Playback
Play Back Playlist
352
Data Display/Edit/Management
■Operation while playing back a melody
※1 If the FOMA phone is closed, playback is halted.
※2 Valid when played back from the Melody list.
Operation Key operation
Halt Oo(), d, 0 through 9, a, s,
m, c, p
Sound volume
adjustment
Bo or </ >※1
pPress and hold to adjust the sound volume sequentially.
pSetting from Level 0 (Silent) through 6 is available.
Replay next file※2Vo
Replay previous file※2Co
Information
pThe melodies are played back at the volume set for “Phone” of “Ring volume”. When
“Phone” of “Ring volume” is set to “Silent” or “Step”, they are played back at “Level 2”.
However, the melody played back when it is selected does not sound.
pEven if you change the volume while playing back, the volume set for “Phone” of
“Ring volume” returns when you exit the Melody player.
Function Menu of the Melody List
Function menu Operation/Explanation
Edit title Edit the title.
pFor a file in the FOMA phone, you can enter up to 31 full-pitch/
63 half-pitch characters.
pFor a file on the microSD card, you can enter up to 18 full-pitch/
36 half-pitch characters.
Edit file name Edit the file name.
pYou can enter up to 36 half-pitch alphanumeric characters
(except extension).
Play melody See page 351.
Set as ring tone Select an incoming type.
p“★” indicates the set item.
File restriction You can set the file restrictions on the selected melody.
File unrestricted or File restricted
pSee page 164 for the file restrictions.
Add desktop icon See page 127.
Attach to mail You can compose an i-mode mail message with the selected
melody attached.
Go to step 2 on page 198.
pYou can compose it also by pressing l().
Send Ir data See page 370.
transmission See page 372.
Copy to microSD See page 359.
Melody info You can display the melody title, file name and others.
Copy to phone See page 360.
Move to phone See page 361.
Copy You can copy the melody from a folder on the microSD card to
another folder on the microSD card.
Select a destination folder.
Memory info You can display the used memory space (estimate).
Reset title You can reset the title to the default.
YES
Delete
(Delete this)
You can delete the melody stored in the FOMA phone.
Delete thisYES
Delete
(Delete selected)
You can select and delete multiple melodies stored in the FOMA
phone.
Delete selected
Put a check mark for melodies to be deletedl()
YES
Delete
(Delete all)
You can delete all melodies stored in the selected folder in the
FOMA phone.
Delete all Enter your Terminal Security CodeYES
Delete this You can delete the melody stored on the microSD card.
YES
Function menu Operation/Explanation
353
Data Display/Edit/Management
Delete all You can delete all melodies stored in the selected folder on the
microSD card.
Enter your Terminal Security CodeYES
Multiple-choice You can select multiple melodies stored on the microSD card and
operate them.
Put a check mark for the melodies to be operated
i()Select an item.
Delete . . . . . . . See “Delete this” on page 352.
Copy . . . . . . . . See page 352.
Move . . . . . . . . See page 353.
Select all . . . . . You can select all melodies.
Release all . . . You can release all selected melodies.
Sort You can change displayed order.
Select an order.
pYou cannot sort the files on the microSD card.
Move You can move the melody to another folder.
Select a destination folder
Put a check mark for melodies to be movedl()
YES
pPress l( ) to display folders at the second-tier level or
lower, if they exist. Press r to return to the upper level.
pFor the microSD card, you do not need to put a check mark for
the melodies.
Move to microSD See page 361.
Function menu Operation/Explanation
Information
<Edit file name>
pWhen the icon of the acquired source is “ ” or “ ” and the icon such as “ ” or
“ ” is displayed for that melody, you cannot change the file name.
pYou cannot use some characters such as symbols for a file name.
<File restriction>
pYou can set the file restrictions only to the melody with the acquired source icon “ ”.
pWhen the melody file exceeds 100 Kbytes by applying the restriction, you cannot set
the file restrictions.
<Attach to mail>
pYou cannot attach the melody with “ ” or “ ”, or the melody in excess of 100
Kbytes, whose acquired source icon is “ ” or “ ”.
<Melody info>
pYou may not be able to attach to i-mode mail even when the file restriction in the
melody information is “File unrestricted”.
<Delete>
pWhen a melody set for another function is deleted, the setting returns to the default.
(When the melody is set for an alarm tone of “Schedule”, “ToDo”, or “Book program”,
or for “Alarm”, it switches to “Clock Alarm Tone”.)
pYou cannot delete the pre-installed melody.
Function Menu of the Melody Playback Display
Information
Function menu Operation/Explanation
Set as ring tone See page 352.
Add desktop icon See page 127.
Attach to mail See page 352.
Melody info See page 352.
Copy to microSD See page 359.
Copy to phone See page 360.
Play all/
Play portion
You can temporarily switch the play start positions of the melody.

354
Data Display/Edit/Management
You can check the details on Kisekae Tool files.
pYou can delete the pre-installed Kisekae Tool file. You can re-download it from the
“P-SQUARE” site (see page 186). When you use a UIM other than the one used for
downloading, the UIM restrictions (see page 40) are set to it.
1mData boxKisekae Tool
Select a Kisekae Tool fileSelect an item.
Selected image, ring tone or
illumination are played back
as a demo. If you select a
color theme, the display is
displayed in selected color
theme.
pEach time you press m
from the Kisekae Tool list,
you can switch between the
list in the FOMA phone and the microSD card. In the Folder list on the microSD
card, you can display the Kisekae Tool list by selecting a folder.
pSee page 366 for the Function menu on the Folder list.
pThe image on the right is displayed when
you cannot display a preview image.
pWhen you select a Chara-den image in a Kisekae Tool file, you can press
i( ) to use the Function menu of the Chara-den display (see page 350).
pSee page 186 when you select “Search by i-mode”.
<Kisekae Tool>
Checking Kisekae Tool
Kisekae Tool list Detailed Kisekae
Tool display
Cannot be
played back
No preview image
Information
pYou cannot set Kisekae Tool files on the microSD card at a time.
pClock display cannot be played back as a demo.
Function Menu while Kisekae Tool File is Displayed
Function menu Operation/Explanation
Edit title See page 331.
Preview You can preview the Kisekae Tool file.
Set at one time You can set the Kisekae Tool file at one time. (See page 121)
pYou can set the Kisekae Tool file at one time also by pressing
l.
File info You can display the title, file name, and others of the Kisekae
Tool file.
Move to microSD See page 361.
Move to phone See page 361.
Reset title You can reset the title to the default.
YES
Move See page 332.
Delete this See page 332.
Delete all You can delete all files in the folder.
Enter your Terminal Security CodeYES
Multiple-choice See page 333.
Memory info You can check the used memory space (estimate)/number of
stored items.
Sort See page 333.
Listing You can change the displayed contents for the Kisekae Tool list.
Title or Image
pYou can switch the lists also by pressing c( ) from the
Kisekae Tool list.
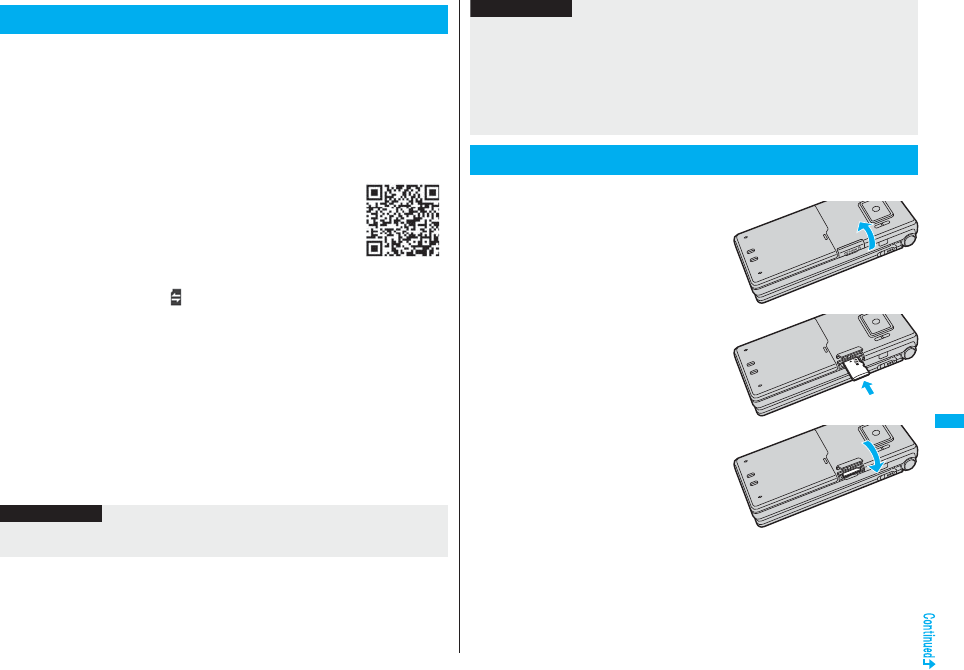
355
Data Display/Edit/Management
You need to obtain a microSD card separately to use the functions
related to the microSD card.
The microSD card is available at mass retailers for home electric
appliances etc.
pFOMA P906i supports a commercial microSD card of up to 2 Gbytes and microSDHC
card of up to 4 Gbytes (As of March 2008).
For the latest operation check information such as the memory capacity and
manufacturers of microSD cards, access the following sites (Japanese only). Note that
the microSD cards other than published in the sites might not correctly work.
・From i-mode to P-SQUARE (As of March 2008)
iMenu → メニュー/検索 (Menu/Search) → ケータイ電話
メーカー (Mobile Phone Maker) → P-SQUARE
・From personal computershttp://panasonic.jp/mobile/
Note that the published information is the result obtained from the
operation check, which does not necessarily guarantee all
performances of those microSD cards.
pDuring processing of the card, “ ” is displayed. During processing
of the card, never remove the microSD card, or turn off the FOMA phone. Check that
processing of the card does not go on before turning off the FOMA phone, and then
remove the microSD card.
pWhen the FOMA phone or microSD card has many data files, it may take longer to
access the files.
pFolders and files on the microSD card are recognized up to about 65,500 items.
pThe microSD card has an operating life. If you use the microSD card for a long time,
you may not be able to write new data on it, or the card may be disabled.
pWith the FOMA phone, you can save the downloaded still images, i-motion movies,
melodies, Kisekae Tool files, Chaku-uta Full® music files, and i-αppli programs with the
file restrictions to the microSD card. You cannot save the files IPs (Information
Providers) do not permit.
About microSD Card
QR code for
accessing the site
Information
pYou may not be able to use the microSD card formatted using a personal computer
and other devices. Be sure to use the microSD card formatted with FOMA P906i.
■Inserting
1Open the cover of the microSD
card slot.
2Face the front surface of the
microSD card upwards and
insert the card.
pPush it until it clicks.
3Close the cover of the
microSD card slot.
pNote that formatting deletes all the contents on the microSD card.
pIf you read/write data from/on a microSD card using a device other than this FOMA
phone, the microSD card might become unusable depending on the device or
operations.
pWhen you insert a microSD card which has been used with another device such as a
personal computer into FOMA P906i, new files and folders to be used in FOMA P906i
are created.
Inserting/Removing microSD Card
Information
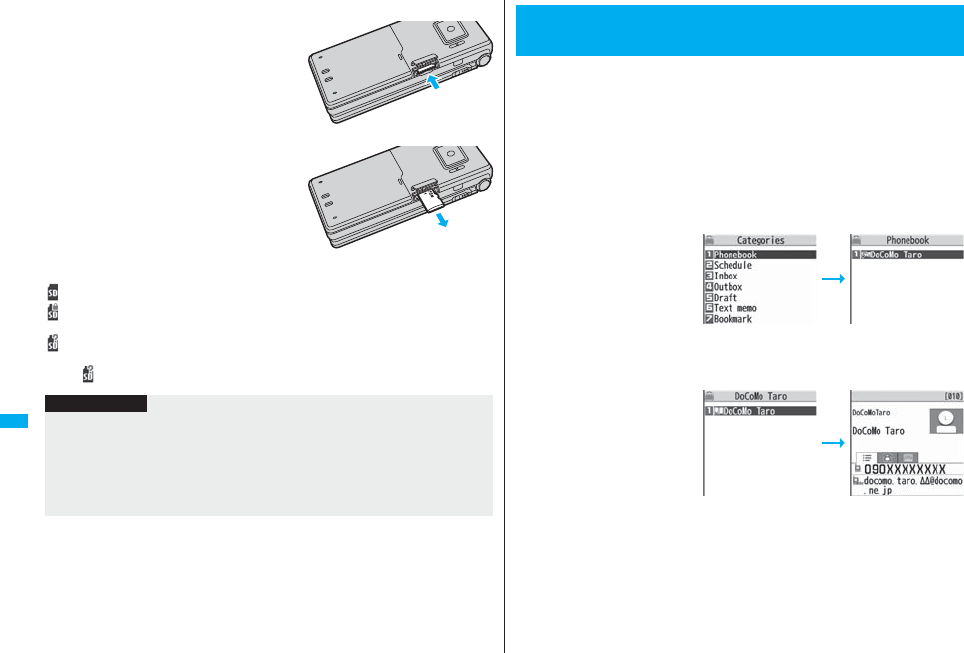
356
Data Display/Edit/Management
■Removing
1Open the cover following
step 1 of “■Inserting” and
push the microSD card until it
stops.
pPushing the microSD card inside pops up
the card.
2Remove the microSD card.
■Icons on the display
The following icons appear when you insert the microSD card:
: You can save and read data.
: The microSD card is write-protected. You cannot save data, and execute “Check
microSD” and “microSD format”.
: You cannot use the microSD card. Remove the microSD card and then insert it
again.
If “ ” is still displayed, execute “Check microSD” or “microSD format”.
Information
pDo not insert or remove the microSD card with the FOMA phone turned on. It may
damage the microSD card or its data.
pNote that microSD card may pop out when you insert or remove it.
pCheck the direction of the microSD card, and then insert or remove it straight. If you
obliquely insert the microSD card into the slot, the microSD card may be damaged.
pIt may take long to initially read or write data after inserting the microSD card.
You can display the Phonebook entries, schedule events, ToDo items,
mail messages, text memos, and bookmarks (i-mode/Full Browser)
stored on the microSD card.
pYou can operate in the same way on the detailed Phonebook display, detailed Mail
display, and detailed Bookmark display as when you display data stored in your FOMA
phone.
See page 101 for detailed operations of the Phonebook.
See page 227 for detailed operations of mail.
See page 179 for detailed operations of bookmarks.
1mLifeKitSD-PIMSelect a category.
pIf you select “Schedule”,
ToDo items are also
displayed.
2Select a fileSelect a data item.
<SD-PIM>
Displaying Data Items on microSD Card
Category list microSD File display
(For Phonebook)
Data list
(For Phonebook)
Detailed data display
(For Phonebook)
357
Data Display/Edit/Management
Function Menu of the Category List/microSD File Display/
Data List/Detailed Data Display
Function menu Operation/Explanation
Edit title Enter a title.
pYou can enter up to 15 full-pitch/31 half-pitch characters.
Add to phone See page 358.
Overwrite to phone See page 359.
Add one to phone See page 358.
Add all to phone See page 358.
Overwr. all to ph. See page 358.
Copy to microSD See page 357.
Delete this YES
Delete all You can delete all files in the currently displayed category.
Enter your Terminal Security CodeYES
microSD info See page 363.
Property You can display the detailed data display.
microSD format See page 362.
Check microSD See page 362.
Information
<Delete this> <Delete all>
pWhen the access right is set for read only by devices such as a personal computer,
the confirmation display appears asking whether to delete the data.
You can copy the Phonebook entries, schedule events, ToDo items, mail
messages, text memos, and bookmarks stored in the FOMA phone to the
microSD card.
You can copy a single file from the FOMA phone onto the microSD card.
A copied data item is saved as a single file.
You cannot copy the secret code stored in a Phonebook entry.
1Display for a data item to be copiedi()
Copy to microSDYES
You can copy the data items of the category selected on the Category list
or of the category displayed on the microSD File display from the FOMA
phone to the microSD card. The copied data items are all saved as a
single file.
You cannot copy secret codes or voice dial entries stored in the
Phonebook entries.
1Category list/microSD File displayi()
Copy to microSD
Enter your Terminal Security CodeYES
pTo copy scheduled events, select “Schedule”, “ToDo”, or “All” (Schedule and
ToDo).
pTo copy bookmarks, select “i-mode”, “Full Browser”, or “All” (i-mode and Full
Browser).
Copy Data Items in the FOMA Phone to the microSD Card
Copy one to microSD
Copy all to microSD
Information
pWhen you copy a file stored as secret data, the file is copied as an ordinary file.
pWhen you copy all files, the files stored as secret data are also copied.
pWhen you copy all the Phonebook entries, the information from the PushTalk
Phonebook entry and the contents of “Own number” are also copied.
358
Data Display/Edit/Management
You can copy the Phonebook entries, schedule events, ToDo items, mail
messages, text memos, and bookmarks (i-mode/Full Browser) stored on
the microSD card to the FOMA phone.
pSee page 365 for the number of data items that can be saved to the microSD card.
You can copy the data item selected on the data list or displayed on the
detailed data display to the FOMA phone.
1Data list/Detailed data displayi()
Add one to phone or Copy to phoneYES
You can copy all data items in all files of the category selected on the
Category list or all data items in all files displayed on the microSD File
display to the FOMA phone.
The copied data items are added to the FOMA phone.
1Category listi()Add all to phone
Enter your Terminal Security CodeYES
or
microSD File displayi()Add all to phone
Enter your Terminal Security CodeYES
pFor copying mail, some files attached to mail may be deleted depending on file format.
pWhen you copy mail containing links to start an i-αppli program, the information about
starting the i-αppli program in that mail is deleted.
pDuring copying, the FOMA phone is placed in the same status as it is out of the
service area.
Copy Data Items on the microSD Card to the FOMA
Phone
Add one to phone
Information
Add all to phone
You can copy all data items in a file selected on the microSD File display
or all data items displayed on the data list to the FOMA phone.
The copied data items are added to the FOMA phone.
1microSD File displayi()Add to phone
Enter your Terminal Security CodeYES
or
Data listi()Add all to phone
Enter your Terminal Security CodeYES
You can copy all data items in all files of the category selected on the
Category list or all data items in all files displayed on the microSD File
display to the FOMA phone.
Note that the data items already stored in the FOMA phone are
overwritten and deleted.
1Category listi()Overwr. all to ph.
Enter your Terminal Security CodeYESYES
or
microSD File displayi()Overwr. all to ph.
Enter your Terminal Security CodeYESYES
Add to phone
Overwrite all to phone
359
Data Display/Edit/Management
You can copy all data items in a file selected on the microSD File display
or all data items displayed on the data list to the FOMA phone.
Note that the data items already stored in the FOMA phone are
overwritten and deleted.
1microSD File displayi()
Overwrite to phone
Enter your Terminal Security CodeYESYES
or
Data listi()Overwr. all to ph.
Enter your Terminal Security CodeYESYES
Overwrite to phone
Information
pIf the memory capacity of the FOMA phone runs short during copying, copying is
suspended midway; however, the data already copied is stored.
pWhen you perform “Add one to phone” for a Phonebook entry, any group is not set if
the group number or group name stored in the microSD file differs from that stored on
the FOMA phone.
pThe copied Phonebook entries are also stored in the PushTalk Phonebook. When
you overwrite the Phonebook entries, the contents of the PushTalk group are also
overwritten.
When you execute “Add one to phone”, the confirmation display appears asking
whether to store it. Select “YES” (select a phone number when multiple phone
numbers are stored) to store the entry also to the PushTalk Phonebook.
pWhen you overwrite the Phonebook entries, the voice dial entries are deleted.
pWhen you copy a mail message with the Outbox or Inbox full, the oldest unprotected
mail message is overwritten (the read one for the Inbox).
pWhen you execute “Add all to phone”, you cannot copy the following data:
・Schedule events set for the same date and time
・Bookmarks of the same URL
pIf the number of files stored on the microSD card increases, it may take long to read or
write data.
pDuring copying, the FOMA phone is placed in the same status as it is out of the
service area.
File name and the destination folder are as follows:
pWhen you copy or move a file between the FOMA phone and the microSD card, its file
format might change.
1Still Image list/Still image in play/Moving Image list/
Melody list/Melody during playback/PDF File list/
Decome-Anime Template listi()
Copy to microSD
pIf you have used “Multiple-choice” to select files to be copied, you can copy the
multiple files at a time.
Copying Still Images, Moving Images, etc.
Copy Files from the FOMA Phone to the microSD Card
Still image
(DCF standard)
The destination folder in the “Picture” folder
PXXXXXXX (X denotes a numeral.)
Still image
(Non DCF standard)
The destination folder in the “Image Box” folder
STILXXXX (X denotes a numeral.)
Still image
(Deco-mail pictogram)
The destination folder in the “Decomail-pictograph” folder
DIMGXXXX (X denotes a numeral.)
Moving image
(With video)
The destination folder in the “Movie” folder
MOLXXX (X denotes an alpha-numeral.)
Moving image
(Without video)
The destination folder in the “Other contents” folder
MMFXXXX (X denotes a numeral.)
Melody The destination folder
RINGXXXX (X denotes a numeral.)
PDF file The destination folder
PDFDCXXX (X denotes a numeral.)
Decome-Anime template The destination folder
DEATXXXX (X denotes a numeral.)
Information
pYou can copy JPEG, GIF, SWF, MP4, MFi, SMF, PDF and Decome-Anime template
files in the “i-mode” folder, “Camera” folder, “Decomail-picture” folder,
“Decomail-pictograph” folder and a user folder.
360
Data Display/Edit/Management
You can copy files from the microSD card to the i-mode folder in the
FOMA phone.
(Deco-mail pictograms are copied to the “お気に入り (Favorite)” folder in
the “Decomail-pictograph” folder and Decome-Anime templates are
copied to the “Phone” folder.)
1Still Image list/Still image in play/Moving Image list/
Moving image in pause/Moving image at the end of
playback/Melody list/Melody during playback/PDF File
list/Decome-Anime Template list, which is on the
microSD cardi()Copy to phone
pIf you have used “Multiple-choice” to select files to be copied, you can copy the
multiple files at a time.
pSee page 186 when images/i-motion movies/melodies/PDF files are stored to the
maximum.
pYou can copy multiple JPEG, GIF, SWF and MP4 files at a time but not others.
pWhen the files in the destination folder are stored to the maximum, a new folder is
automatically created and files are saved to that folder. For the files other than still
images or Decome-Anime template, the message “Storage is changed to XXXXXXX”
(XXXXXXX denotes a folder name) appears when copying is completed.
pYou cannot copy the following files:
・
Files that you shot Chara-den models whose “Rec. file restriction” is “File restricted”
・Files whose output from the FOMA phone is prohibited
・Pre-installed Deco-mail pictures
・Files set with playback restrictions
・Partially saved i-motion movies or Chaku-uta Full® music files
・PDF files partially downloaded page by page
pIf you copy the file to the microSD card, the image quality may deteriorate or the file
size becomes larger.
Copy Files from the microSD Card to the FOMA Phone
Information
Information
pDo not pull out the microSD card during copying.
pYou can copy JPEG, GIF, SWF, MP4, MFi, SMF, PDF and Decome-Anime template
files. However, you cannot copy a melody and a SWF file in excess of 100 Kbytes.
pYou can copy multiple JPEG, GIF, SWF and MP4 files only at a time. However, you
cannot copy multiple moving images of ASF format, VGA (640 x 480) and HVGA
Wide (640 x 352) size, or in excess of 10 Mbytes.
pWhen you copy moving images, the images are cut out, converted or shrunk;
therefore the image quality may deteriorate or the file size may become larger or
smaller. However, a moving image whose video codec is H.264 is copied without
being converted or shrunk.
pWhen you copy VGA (640 x 480) size or HVGA Wide (640 x 352) size of a moving
image, the image is converted into QVGA (320 x 240) size. When you copy VGA (640
x 480) size or HVGA Wide (640 x 352) size of a moving image, ASF file, or the file in
excess of 10 Mbytes, it might take a longer time.
pYou cannot copy the moving image in excess of 10 Mbytes in the following cases:
・When the video codec is H.264
・When the audio codec is AAC, AAC+ (HE-AAC), or Enhanced aacPlus
・When the bit rate of the moving image is in excess of the restriction
・When searching (fast forward or fast rewind) is disabled
・When the moving image size is other than VGA (640 x 480), HVGA Wide
(640 x 352), QVGA (320 x 240), QCIF (176 x 144) or Sub-QCIF (128 x 96)
Some moving images cannot be copied in the conditions other than the above.
pPlaying back a copied ASF file may take a longer time.
pThe file after copying takes the title of the one set on the microSD card. When no title
is set on the microSD card or the default title is unknown, the file name will be the title.
Information
361
Data Display/Edit/Management
You can move the copyrighted file obtained from a site to the microSD
card after encoding. The moved file is then saved to the destination
folder in the “Movable contents” folder (the specified destination folder
for Chaku-uta Full® music files).
Some files you moved to the microSD card can be operated only with the
UIM you used when moving, and some files can be operated with the UIM
and the phone you used when moving.
1Still image list/Moving image list/Melody list/Kisekae
Tool list/Chaku-uta Full® Music listi()
Move to microSDOK
You can move a copyrighted file from the microSD card to the “i-mode”
folder in the FOMA phone.
1Still Image list/Moving Image list/Melody list/Kisekae
Tool list/Chaku-uta Full® Music list, which is on the
microSD cardi()Move to phone
pSee page 186 for when files are stored to the maximum.
<Movable Contents>
Moving Copyrighted Files
Move Files in the FOMA Phone to the microSD Card
Information
pYou can move a file to the microSD card only when the acquired source icon is “ ”.
pPartially saved i-motion movies, Chaku-uta Full® music files and Kisekae Tool files
cannot be moved to the microSD card.
pThe setting is released if you move a file set for another function.
Move Files from the microSD Card to the FOMA Phone
Some i-αppli programs can be moved to and saved to the microSD card.
You cannot start the i-αppli program moved to the microSD card. Move it
back to your FOMA phone to start. However, some i-αppli programs can
be operated only with the UIM you used when moving, and some other
programs can be operated only with the UIM and the phone you used
when moving.
1Software listi()Move to microSDYES
You can move an i-αppli program from the microSD card to the FOMA
phone.
1Software listi()Move to phoneYES
Information
pYou can move a copyrighted file (with file restriction) to the FOMA phone only if its
property for “Moved to phone” is “Available” or “Available (Same model)”. In addition,
you cannot move a file of “Available (Same model)” to the FOMA phone other than
P906i. See “Picture info”, “imotion info”, “Melody info”, “File info”, or “Music info” to
check whether the file is “Available”, “Unavailable” or “Available (Same model)”.
pThe setting is released if you move a file set for another function.
pThe moved files are saved to the “i-mode” folder. However, the Kisekae Tool files are
saved to the “Kisekae Tool” folder and Chaku-uta Full® music files are saved to the
“Initial folder” in Data Box.
Move i-αppli in the FOMA Phone to the microSD Card
Move i-αppli from the microSD Card to the FOMA Phone
362
Data Display/Edit/Management
You can save a variety of files which are not supported by the FOMA
phone, or files in BMP and PNG format obtained by Full Browser, to the
microSD card. (See page 217 and page 316)
You can attach the saved files to an i-mode mail message to send, or
check them on a personal computer.
1mData boxSD other filesSelect a folder.
pSee page 366 for the
Function menu on the
Folder list.
pYou cannot display the
contents of the file using
the FOMA phone.
<SD Other Files>
Managing Unsupported Files
Folder list SD Other File list
Function Menu of the SD Other File List
Function menu Operation/Explanation
Edit title See page 331.
File info You can display the name and type of files.
Attach to mail You can compose an i-mode mail message with the file attached.
Go to step 2 on page 198.
pYou can compose it also by pressing l().
Copy See page 332.
Move See page 332.
Delete this See page 332.
Delete all See page 332.
Multiple-choice See page 333.
Memory info You can display the used memory space (estimate).
When you use the microSD card for the first time, you need to format
(initialize) it. Be sure to use FOMA P906i for formatting. The microSD card
formatted using other devices such as personal computers may not be
used properly.
Note that formatting deletes all the contents on the microSD card.
1mLifeKitSD-PIMi()microSD format
Enter your Terminal Security CodeYES
You can check and recover the microSD card.
1mLifeKitSD-PIMi()Check microSD
YES
<microSD Format>
Formatting microSD Card
Information
pDo not remove the microSD card during formatting. Malfunction of the FOMA phone
or microSD card could result.
pIf you press +l() or -h, or receive a voice call or videophone call while
formatting the microSD card, formatting is canceled. Format it again.
pFiles that have been saved to the microSD card whose formatting is suspended
becomes unfixed.
pYou cannot format the incompatible memory card.
pRequired folders are automatically created when you save data to the microSD card
after formatting.
<Check microSD>
Checking microSD Card
363
Data Display/Edit/Management
You can display the used and unused memory space (estimate) on the
microSD card.
pSee page 333 for checking the used memory space for the still images or moving
images.
1mLifeKitSD-PIMi()microSD info
Information
pDo not remove the microSD card during Check microSD. Malfunction of the FOMA
phone or microSD card could result.
pYou cannot execute Check microSD for the unformatted microSD card or
incompatible memory card.
pWhen you execute Check microSD, the microSD card may not be recovered
correctly, the data existed before executing Check microSD may be deleted, or the
microSD card itself may be initialized depending on the condition of the microSD card.
pIf you press +l() or -h, or receive a voice call or videophone call during
Check microSD, Check microSD is canceled.
pIf you cancel Check microSD midway, data not recovered may remain. In this case,
try Check microSD again.
pIt may take long to complete Check microSD depending on the data volume stored on
the microSD card.
<microSD Info>
Displaying Capacity of microSD Card
Information
pAs the microSD card contains the system files for the card, the memory space is
smaller than that described on the microSD card even if it contains no data.
By connecting the microSD card to the microSD card adapter, you can
use the microSD card on a personal computer which supports SD card.
The microSD card adapter is available at mass retailers for home electric
appliances etc.
For installing the microSD card adapter, refer to the instruction manual
for the microSD card adapter.
With a microSD card inserted, connect the FOMA phone to a personal
computer; then you can read the data from or write the data onto the
microSD card.
The following equipment is required:
pConnector Cable: FOMA USB Cable with Charge Function 01/02 (option)
pPersonal Computer: Personal computer having the USB port (Universal Serial Bus
Specification Rev 1.1 compliant) that can be connected with the
FOMA USB Cable with Charge Function 01/02 (option)
pCompatible Operating Systems: Windows 2000, Windows XP, Windows Vista
(Japanese version in each)
1mSettingsOther settingsUSB mode setting
microSD mode
pWhen you set to “microSD mode”, “ ” appears on the Stand-by display.
pTo save WMA files from your personal computer to the microSD card, set to
“MTP mode”. When you set to “MTP mode”, “ ” appears on the Stand-by
display.
pTo use the FOMA phone for packet communication, 64K data communication,
data sending/receiving (OBEX™ communication), and for calls with USB
Hands-free compatible device, set mode to “Communication mode”.
2Connect the FOMA phone to a personal computer using
the FOMA USB Cable with Charge Function 01/02
(option).
The personal computer recognizes the microSD card.
p“ ” appears on the desktop, and “ ” appears on the Stand-by display.
Also, “ ” is displayed while the microSD card is in the FOMA phone.
Using a microSD Card with a Personal
Computer
Use FOMA Phone as microSD Reader/Writer
364
Data Display/Edit/Management
The FOMA phone creates the following folders on the microSD card to
save data files. To write files to the microSD card from a personal
computer, you need to write the following configuration and file names.
DCIM (Folder for DCF standard still images)
△△△_PANA
P△△△zzzz.### (Extension is JPG, or GIF.)
MISC [DPOF folder (This folder is created automatically when “DPOF setting” on
page 379 is set.)]
SD_VIDEO (Folder for moving images)
PRL◇◇◇ (Folder for movies)
MOL◇◇◇.### (Extension is 3GP, SDV, ASF, or MP4.)
MGR_INFO (Folder for video management information)
PRG◇◇◇ (Folder for videos)
Information
pIf the FOMA phone and personal computer are not correctly connected, or the
remaining battery level of the FOMA phone shows very low or goes flat, you cannot
send or receive data. In addition, you may lose data.
pWhile data is being read or written, do not pull the FOMA USB Cable with Charge
Function 01/02 off. Not only you cannot send or receive data, but also you may lose
the data.
pWhile data is being read or written, you cannot set this function. Further, make sure
that you do not “Reset settings” or “Initialize” during reading/writing. Malfunction of the
microSD card could result.
pYou cannot read from/write to a personal computer while reading from/writing to the
FOMA phone, and vice versa.
pTo use the DoCoMo keitai datalink, set it to “Communication mode”.
Folder Configuration on microSD Card
PRIVATE
DOCOMO
STILL (Folder for non-DCF standard still images)
SUD□□□
STILzzzz.### (Extension is JPG, GIF, or SWF.)
DOCUMENT (Folder for PDF files)
PUD□□□
PDFDC□□□.PDF
RINGER (Folder for melodies)
RUD□□□
RINGzzzz.### (Extension is MLD, or SMF.)
TORUCA (Folder for ToruCa files)
TRC□□□
TORUC□□□.TRC
MMFILE [Folder for non-SD-VIDEO standard moving images (include music
data of AAC format)]
MUD□□□
MMFzzzz.### (Extension is 3GP, SDV, ASF, or MP4.)
WM_SYSTEM
WM
DECOIMG (Folder for Deco-mail pictograms)
DUD□□□
DIMGzzzz.### (Extension is JPG, or GIF.)
OTHER (Folder for SD other files)
OUD□□□
OTHER□□□.### (Extension is up to three-digit half-pitch alphabets that
the FOMA phone cannot recognize.)
MOVIE (Folder for PC movie files)
MVUD□□□
MOVIE□□□.### (Extension is WMV, WMA, WVX, WAX, ASF, or ASX.)
DECO_A_T (Folder for Decome-Anime template)
DTUD□□□
DEATZZZZ.VGT
TABLE (Folder for additional information)
MEIGROUP
PMC
DOCUMENT (Folder for Word, Excel, or PowerPoint files)
DOC□□□
DOCDC□□□.### (Extension is XLS, DOC, or PPT.)
TABLE
DOCUMENT
365
Data Display/Edit/Management
SD_PIM (Folder for Phonebook entries, schedule events, ToDo items, mail
messages, text memos, and bookmarks)
PIM▲▲▲▲▲.### (Extension is VCF for Phonebook entries, VCS for schedule
events and ToDo items, VMG for mail messages, VNT for text
memos, and VBM for bookmarks.)
SD_AUDIO (Folder for SD-Audio)
SD_BIND (Folder for i-αppli or movable contents)
SVC▲▲▲▲▲
■■■■◆◆◆◆
△△△: A three-digit half-pitch numeral of 100 through 999 (Use the same numerals for
the folder name, and for the file name saved to that folder.)
□□□: A three-digit half-pitch numeral of 001 through 999
◇◇◇: A hexadecimal numeral※ of 001 through FFF using half-pitch numerals of 0
through 9 and half-pitch alphabets of A through F
▲▲▲▲▲: A five-digit half-pitch numeral of 00001 through 65535
■■■■ and ◆◆◆◆: Hexadecimal numerals※ of 0001 through FFFF using half-pitch
numerals of 0 through 9 and half-pitch alphabets of A through F
zzzz: A four-digit half-pitch numeral of 0001 through 9999
###: Extension
※The hexadecimal numerals are carried up every 16, unlike the way the decimal
numerals are carried up every 10.
pUsing a personal computer, you can write a file name of up to 64 bytes (including
extension) of free characters for a PDF file, SD other file, PC movie file, Word file, Excel
file and PowerPoint file. However, the file name might change when the file is copied or
moved in the FOMA phone.
■The number of files and time that can be saved to the microSD card
File Folder Number of
savable files/time
Still image (DCF standard) DCIM See page 152.
Still image (Non-DCF standard) STILL Approx. 58,390
Moving image (Movie) SD_VIDEO See page 154.
Moving image (Video) SD_VIDEO 99
Moving image (Non-SD-VIDEO standard) MMFILE Approx. 58,390
PC movie file MOVIE Approx. 58,390
Melody RINGER Approx. 58,390
PDF file DOCUMENT Approx. 58,390
Word, Excel, PowerPoint file PMC Approx. 58,390
pThe number of savable files and time for saving vary depending on the memory
capacity of the microSD card. You can save more files by adding folders to save files
to.
pYou might not be able to save the maximum number of files depending on the file size.
pYou can check used and unused space of the microSD card by “microSD info”.
SD-Audio SD_AUDIO 999
ToruCa file TORUCA Approx. 58,390
Deco-mail pictogram DECOIMG Approx. 58,390
Decome-Anime template DECO_A_T Approx. 58,390
SD other file OTHER Approx. 58,390
Phonebook entry, schedule event, ToDo item,
mail message, text memo, bookmark SD_PIM Approx. 58,390
i-αppli SD_BIND Approx. 58,390
Movable contents SD_BIND
File Folder Number of
savable files/time
Information
pFolder and file names may be displayed in lowercase characters depending on the
personal computer you use.
pWhen the personal computer is set not to display extensions and hidden folders,
change the setting and then operate. For how to change the setting, refer to the
instruction manual for your personal computer or Help.
pDo not use the personal computer to delete or move the folders on the microSD card.
The microSD card might not be read by FOMA P906i.
pYou cannot see the files in the “SD_AUDIO”, “SD_BIND” and “PRG◇◇◇” folders on
a personal computer, as they are encrypted.
pWhen you save data in the “PRG◇◇◇” folder by using a personal computer, you
might not be able to delete the video using the FOMA phone.
pWhen you delete, overwrite, or write a file on a personal computer, ensure that you do
not use the same file name you have once used. Even when you have deleted that
file, use a different file name.
pOn the FOMA phone, you might not be able to display or play back a data item which
was saved to the microSD card from other devices. On other devices, you might not
be able to display or play back a data item which was saved to the microSD card from
the FOMA phone.
366
Data Display/Edit/Management
My picture, MUSIC, imotion, Melody, My documents, Kisekae Tool (SD),
PC Movie, Document viewer, and SD other files in Data Box manage files
in the respective folders.
pSee page 397 for folder operations of MUSIC.
pEven when the files in the “Movable contents” folder are listed, the Function menu in
the Folder list is displayed.
pTo procure a microSD reader/writer or PC card read adapter, inquire respective
manufacturers for the operation of microSD card beforehand.
Managing Folders
Function Menu of the Folder List
Information
Function menu Operation/Explanation
Add folder You can create a user folder.
Enter a folder name.
pYou can enter up to 10 full-pitch/20 half-pitch characters in the
FOMA phone.
pYou can enter up to 31 full-pitch/63 half-pitch characters on the
microSD card. You can enter up to 10 full-pitch/20 half-pitch
characters for a folder in the “Movable contents” folder.
Edit folder name You can edit the name of a user folder, or a folder in the
“Decomail-pictograph” folder in the FOMA phone.
Enter a folder name.
pYou can enter up to 10 full-pitch/20 half-pitch characters in the
FOMA phone.
pYou can enter up to 31 full-pitch/63 half-pitch characters on the
microSD card. You can enter up to 10 full-pitch/20 half-pitch
characters for a folder in the “Movable contents” folder.
Delete folder You can delete a user folder and all files in the folder.
Enter your Terminal Security CodeYES
Folder security
[My picture/
imotion]
You can set the folder to open only when you enter your Terminal
Security Code.
Enter your Terminal Security CodeYES
The folder changes to “ ”.
pTo release it, perform the same operation.
DEL all frm folder
[My picture only]
You can delete all the files in the folder selected in “i-mode”,
“Camera”, “Decomail-picture”, “Decomail-pictograph”, and user
folder in “My picture”.
Enter your Terminal Security CodeYES
Edit playlist
[Melody only]
You can select up to 10 melodies and program them in order as
you like. This is displayed while you are selecting “Playlist”.
Select a playing order from <1st> through <10th>
Select a folderSelect a melody.
pTo release a programmed melody, select “Release this”.
Repeat the operations and complete the playlist editing
l()
Release playlist
[Melody only]
You can release all the programmed melodies from the playlist.
This is displayed while you are selecting “Playlist”.
YES
Select storage You can set the destination folder for when you save the shot still/
moving images or the melodies and PDF files obtained by
downloading or data communication to the microSD card.
YES
Function menu Operation/Explanation
Information
<Add folder>
pYou can add up to 20 folders in the FOMA phone.
pYou cannot add folders on the microSD card in the following cases:
・When the “Picture” folder contains 900 folders
・When the “Movie” folder contains 4,095 folders
・When 999 folders are contained in the “Image Box”, “Decomail-pictograph”,
“Melody”, “Other contents”, “My documents”, “Document viewer”, or “SD other files”.
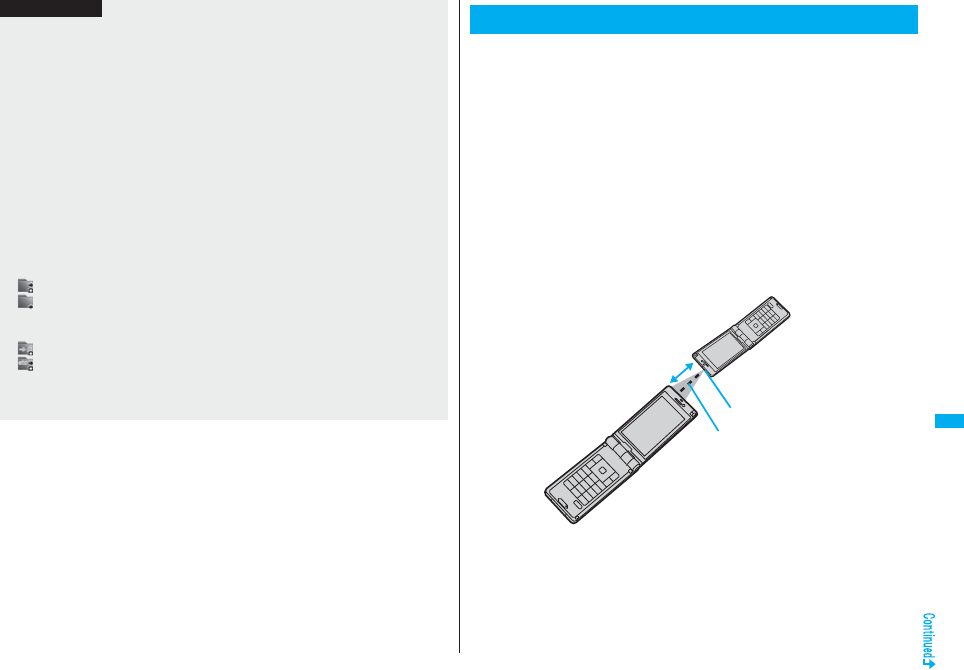
367
Data Display/Edit/Management
<Edit folder name>
pYou cannot edit the Folder-Security-activated folder name.
<Delete folder>
pWhen a melody set for another function is deleted, the setting returns to the default.
(When the melody is set for an alarm tone of “Schedule”, “ToDo” or “Book program”,
or for “Alarm”, it switches to “Clock Alarm Tone”.)
<Folder security>
pYou can set it only for “i-mode”, “Camera”, “User folder”, and “Voice recorder”.
pWhen you select a folder with folder security, the display for entering your Terminal
Security Code appears. Enter your Terminal Security Code to temporarily release
folder security.
<Edit playlist>
pIf you change or delete the file name, title, or contents of the melody stored in the
playlist, all the melodies are released from the playlist.
<Select storage>
pThe following icons are displayed for the folder set as a destination folder:
“ ” . . .The folders in the “Picture” folder and “Movie” folder
“ ” . . .The folders in “My documents”, “Document viewer”, and “SD other files”
The folders in the “Decomail-pictograph” folder, “Image Box” folder, and
“Melody” folder
“ ” . . .The folders in the “Movable contents” and “Kisekae Tool” folder
“ ” . . .The folders in the “Other contents” folder
pWhen you execute Check microSD, or create or edit a folder by using a personal
computer, the destination folder on the microSD card might be changed. When the
setting is changed, set the destination folder again.
Information
The FOMA phone conforms to IrMC™ version 1.1 standard.
You can exchange data files with the devices supporting the infrared data
exchange function. However, you cannot exchange some files depending
on the other party’s device.
pThe distance for infrared data exchange should be within about 20 cm. Do not move
the FOMA phone with the infrared data port pointed to the receiving end until data
transfer ends.
pHold the FOMA phone with your hands securely so that it does not move.
pIf you expose the FOMA phone to direct sunlight or put it under fluorescent lights or
near an infrared equipment, you may not be able to transmit infrared ray normally due
to their influence.
pFirst set at the receiving end and begin sending data from the sending end within 30
seconds.
pDuring exchange, the FOMA phone is placed in the same state as it is out of the
service area, so you cannot make/receive voice calls, videophone calls or PushTalk
calls, use packet communication such as i-mode or mail, or do data communication.
About Infrared Data Exchange
Infrared data port
Within ±15° from
the center
Within about 20 cm
368
Data Display/Edit/Management
■List of data files you can transfer
○: Can be transferred ×: Cannot be transferred
※1 You cannot send/receive holidays and anniversaries.
※2 You can send/receive up to 30 Area Mail messages separately. (2,530 messages in
total)
※3 You cannot send/receive some files.
※4 The file is sent/received after being converted to the vnt file.
※5 Includes Flash movies.
※6 You cannot send/receive original animations and still images recorded by 1Seg.
※7 You cannot send/receive ASF files and videos recorded by 1Seg.
※8 The i-mode bookmarks may be deleted.
※9 When sending/receiving bookmarks, the folder-sort setting may not be reflected.
Transfer terms
Transferable data One item Multiple
items All items
Phonebook (Own number) ○×Up to 1,000 items
Schedule※1○×Up to 1,000 items
ToDo ○× Up to 100 items
Received mail※2○×Up to 2,500 items
Sent mail ○×Up to 1,000 items
Draft mail ○× Up to 20 items
Decome-Anime template ○× ×
Text memo ○× Up to 20 items
Melody※3, ※4○× ×
Still image file※4, ※5, ※6○○ ×
Moving image file※4, ※7○○ ×
PDF file※3, ※4, ※8○× ×
ToruCa file※4○○ Up to 495 items
Bookmark (i-mode/Full Browser)※9○×
Up to 100 items each for
i-mode and Full Browser
LCS client information ○× Up to 5 items
■Storage location and order of received files
Data Storage location/Order
Phonebook
(Own
number)
receive one data
The phone number is stored to the lowest empty memory
number in “010” through “999” in the Phonebook. If all
memory numbers “010” through “999” are occupied, the
phone number is stored to the lowest empty memory
numbers in “000” through “009” (two-touch dial).
receive all data Stored in the same memory number as that of the sender.
Schedule
receive one data
Stored with the starting date/time of the schedule event.
receive all data Stored with the same date and time as those of the
sender.
ToDo
receive one data
Stored on the top in the ToDo list.
receive all data Stored in the same order as that of the sender.
Received
mail
receive one data
Stored in the “Inbox” folder on the Inbox Folder list with
the same date and time as that of the sender.
receive all data Stored in the same folder as that of the sender with the
same date and time.
Sent mail
receive one data
Stored in the “Outbox” folder on the Outbox Folder list
with the same date and time as that of the sender.
receive all data Stored in the same folder as that of the sender with the
same date and time.
Draft mail
receive one data
Stored with the same date and time as that of the sender.
receive all data Stored with the same date and time as that of the sender.
Decome-
Anime
template
receive one data
Stored on the top in the “Phone” folder in
“Decome-Anime” in “Template” inside “Mail”.
Text Memo
receive one data
Stored in the first <Not recorded>.
receive all data Stored in the same order as that of the sender from the
top of the list.
Melody
receive one data
Stored on the top in the “i-mode” folder in “Melody” inside
“Data box”.
369
Data Display/Edit/Management
Still Image
file
receive one data/
receive multiple
data
Stored on the top in the “i-mode” folder in “My picture”
inside “Data box”.
Moving
Image file
receive one data/
receive multiple
data
Stored on the top in the “i-mode” folder in “imotion”
inside “Data box”.
PDF file
receive one data
Stored on the top in the “i-mode” folder in “My documents”
inside “Data box”.
ToruCa file
receive one data/
receive multiple
data
Stored on the top in the “ToruCa” folder.
receive all data Stored in the same folder as that of the sender in the
same order.
Bookmark
receive one data
Stored on the top in the “Bookmark” folder each for i-
mode and Full Browser.
receive all data Stored in the same folder as that of the sender in the
same order.
LCS client
information
receive one data
Stored in the first <Not stored>.
receive all data Stored in the same order as that of the sender from the
top of the list.
Data Storage location/Order
Information
pYou cannot send the following files:
・Files whose output from the FOMA phone is prohibited
・Partially saved files
・Pre-installed Deco-mail pictures
・Phonebook entries and SMS messages on the UIM
pYou cannot send the files on the microSD card. Copy or move to the FOMA phone
and then send.
pYou can send and receive up to 9 full-pitch/18 half-pitch characters for a title of a still
image, moving image, or PDF file, or up to 31 full-pitch/63 half-pitch characters for a
title of a melody.
pWhen you send a mail message, the file attached to the mail message is also sent.
However some files cannot be sent depending on the file type.
pDepending on the mobile phone at the receiving end, subjects of i-mode mail
messages cannot be received completely.
pThe mail message with an attached file which has not been obtained, or the mail
message containing the link information for starting an i-αppli program is sent after the
file or information is deleted.
pWhen the maximum number of storable received mail messages (see page 537) is
exceeded, the messages are overwritten in the following order; messages in the
“Trash box” folder → the oldest received message.
pWhen the maximum number of storable sent mail messages (see page 537) is
exceeded, the oldest unprotected mail message in the Outbox folder is overwritten.
pWhen the Decome-Anime template contains a file whose output from the FOMA
phone is prohibited, the mail message is sent after the file or text data is deleted.
pWhen you send a ToruCa file (details) using infrared rays, the confirmation display
appears asking whether to forward the file including the detailed information. In this
case, select “YES” to send it with the detailed information, or select “NO” to send the
ToruCa file as a file before obtaining the detailed information.
pThe ToruCa file (details) that contains data whose output from the FOMA phone is
prohibited is sent as a ToruCa file before obtaining the detailed information.
pYou cannot receive Phonebook entries while Restrict Dialing is activated. At sending,
you can send only the Phonebook entries set with Restrict Dialing and data of Own
Number.
pIt may take long to forward data or you might not be able to receive data depending on
the data size.
pYou cannot store a still image in excess of 2 Mbytes, moving image in excess of 10
Mbytes, melody in excess of 100 Kbytes, PDF file in excess of 2 Mbytes,
Decome-Anime template in excess of 100 Kbytes, ToruCa file in excess of 1 Kbyte, or
ToruCa file (details) in excess of 100 Kbytes.
pIf the FOMA USB Cable with Charge Function 01/02 (option) is connected to the
FOMA phone, you may not be able to perform infrared data exchange.
pYou cannot send files that are not supported by the device at the receiving end.
Information
370
Data Display/Edit/Management
You can send/receive the data files one by one using infrared rays.
You can send/receive multiple still images, moving images, and ToruCa
files at a time.
■Notes on sending/receiving
pIn Secret Mode, you can send secret data as well. However, in Secret Data Only, you
can send only the secret data.
pIf you receive a Phonebook entry stored as secret data in “Secret mode” or “Secret
data only”, the Phonebook entry is stored as an ordinary one.
pWhen sending a Phonebook entry, you cannot send the stored secret code and voice
dial entry.
1Display for a data item to be senti()
Send Ir data
pTo send a Phonebook entry, select “Send Ir data” from the Function menu and
select “Send phonebook”.
pTo send a mail message, ToruCa file or bookmark, select “Ir/ transmission”
from the Function menu and select “Send Ir data”.
pTo send multiple files, select the files you want to send by “Multiple-choice”. Press
i( ) to select “Send Ir data”.
2YES
pTo send multiple files, select “YES” by a factor of selected number of files, and
send them.
1mLifeKitReceive Ir data
pYou can paste the Ir data receiving function to the desktop. (See page 127)
Sending/Receiving One or Multiple Data
Files
Send One or Multiple Data Files
+m-7-9
Receive One or Multiple Data Files
2ReceiveYES
pWhen you receive Phonebook entries, the confirmation display appears asking
whether to store them also in the PushTalk Phonebook.
pThe confirmation display appears asking whether to continue receiving after
receiving one data file.
When you received multiple files, select “YES”.
You can send/receive the following data files all at once using infrared
rays: the Phonebook entries, schedule events, ToDo items, text memos,
bookmarks, mail messages, ToruCa files, and LCS client information.
To send all data files, enter a session number (any four-digit number).
The receiving end needs to enter the same session number.
■Notes on sending/receiving all data files
pReceiving all data files deletes all data you have stored including the secret data and
protected data, and the received data overwrites the existing data. The data you have
stored in “Secret mode” is deleted as well. Check that no important data is stored
before receiving all data files.
pIf you send all Phonebook entries, the “Own number” data is also sent. All the data of
“Own number” at the receiving end is overwritten except the own number. Mail address
is also overwritten by sender’s address, so change it at the receiving end.
pIf you send all Phonebook entries, PushTalk Phonebook entries are also sent.
Information of voice dial entries are not sent.
pThe Phonebook entries stored as secret data are sent not only during Secret Mode but
also any other time. The sent secret data is stored as secret data at the receiving end,
too.
pThe group names in the Phonebook you have received are stored, so the data set in
“Group setting” is also overwritten.
pNote that the schedule events at the receiving end are all deleted if you send all ToDo
items to the phone that does not support ToDo.
pYou can send/receive the protected sent/received mail messages.
Information
pWhen you receive an instruction for starting a software program, and you have
already downloaded a compatible software program, that software program starts. If
you have not put a check mark for “Ir iαppli To” of “Set iαppli To”, the software
program does not start up automatically.
Sending/Receiving All Data Files
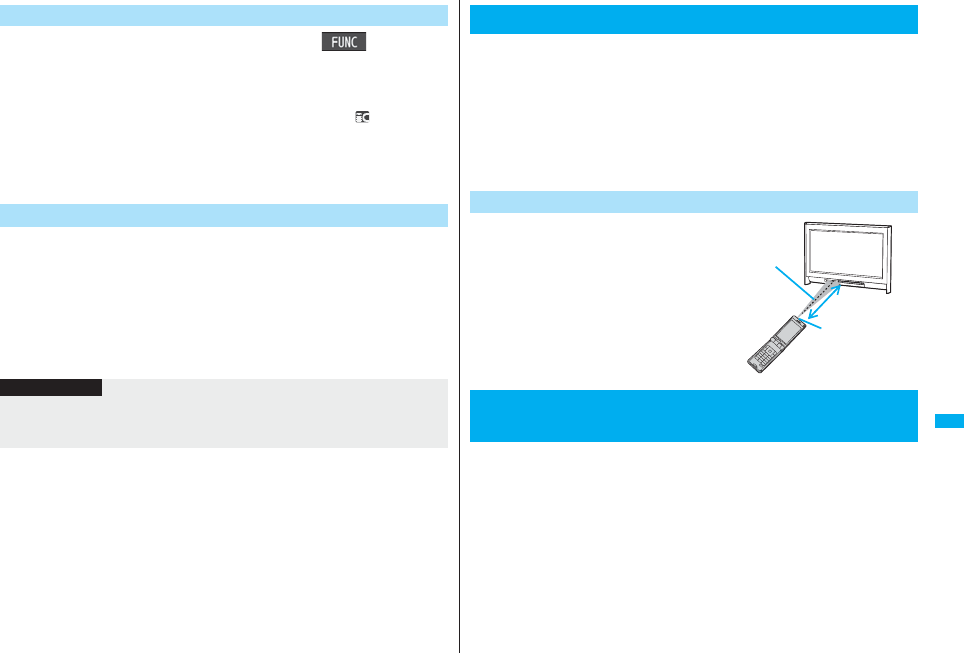
371
Data Display/Edit/Management
1Display for a data item to be senti()
Send all Ir dataEnter your Terminal Security Code.
pTo send the Phonebook entries, select “Send Ir data” from the Function menu
and select “Send all phonebook”.
pTo send mail messages, ToruCa files or bookmarks, select “Ir/ transmission”
from the Function menu and select “Send all Ir data”.
2Enter the session numberYES
pEnter any four-digit number as the session number.
1mLifeKitReceive Ir data
pYou can paste the Ir data receiving function to the desktop. (See page 127)
2Receive allEnter your Terminal Security Code
Enter the same session number as that entered at the
sending endYESYES
The stored data is deleted, then receiving starts.
Send All Data Files
+m-7-9
Receive All Data Files
Information
pWhen you receive Phonebook entries in which still images are stored or mail to which
files are attached, and the multiple same still images or files are found, only one image
or file is stored.
You can use the FOMA phone as a TV remote-controller by starting the
i-αppli program.
pTo use remote-control devices, you may need to download the software program for
those devices. [The pre-installed “Gガイド番組表リモコン (G Guide Program List
Remote-controller)” supports the infrared remote-controller function.] The key
operation for the remote-controller differs depending on the software program.
pThis function does not work with some devices.
pCommunication might be affected by compatible devices and the ambient light.
pYou cannot use the infrared remote-controller during Self Mode.
pTurn the FOMA phone’s Infrared data port
to the front of a device to be operated. You
can operate within about 4 meters away
from the device.
pThe radiation angle of the infrared rays is
within ±15° from the center.
For when you forward Phonebook entries using infrared rays, iC
communication, SD-PIM, or DoCoMo keitai datalink, you can specify
whether to forward the stored still images together.
1mPhonebookPhonebook settings
Forwarding imageON or OFF
Using Infrared Remote-controller Function
Infrared Remote-controller
+m-2-6
<Forwarding Image>
Communication Setting
Within about
4 meters
Infrared data port
Within ±15° from
the center
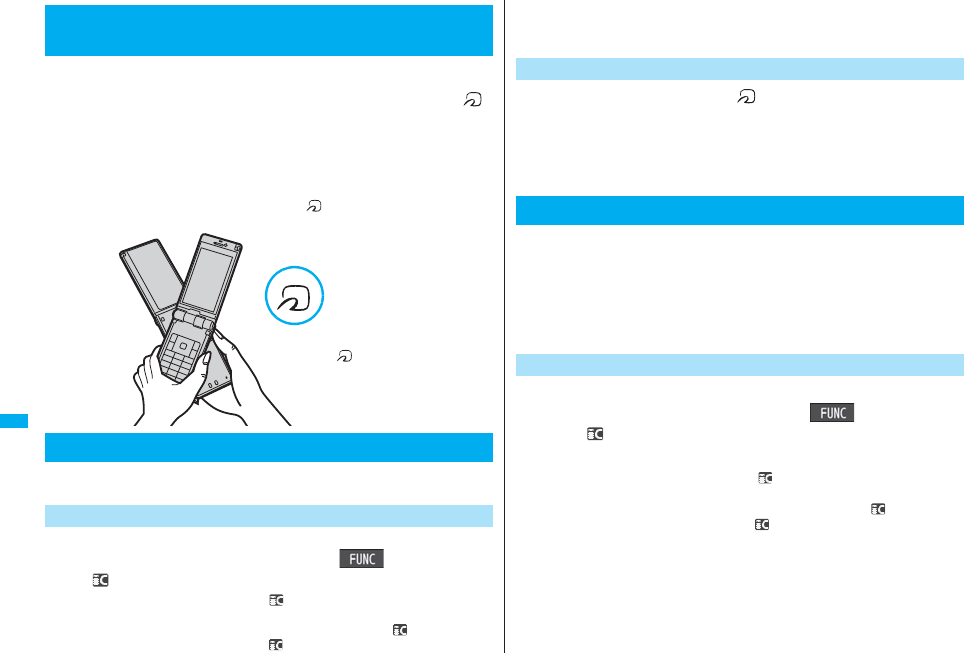
372
Data Display/Edit/Management
iC communication is the function that enables you to send/receive data
files to/from another FOMA phone using the FeliCa reader/writer
function. You can send/receive data files by overlapping the FeliCa “ ”
mark of your FOMA phone with that of another FOMA phone supporting
the iC communication function.
pThe type of files and conditions of forwarding are the same as those of infrared data
exchange. (See page 368) However, you cannot send multiple files at a time.
pYou cannot execute iC communication while “IC card lock” is activated.
pYou might have difficulty in sending or receiving files depending on the destination
FOMA phone. In that case, move a FeliCa mark “ ” close to or away from the other
FeliCa mark or move each side up, down, left, or right.
You can send/receive the data files one by one using iC communication.
pSee “■Notes on sending/receiving” on page 370 as well.
pYou cannot use this function during charging.
1Display of the data to be senti()
transmission
pTo send a Phonebook entry, select “ transmission” from the Function menu
and select “Send phonebook”.
pTo send a mail message, ToruCa file or bookmark, select “Ir/ transmission”
from the Function menu and select “ transmission”.
<iC Transmission>
About iC Communication
Sending/Receiving One Data File
Send One Data File
Overlap one another’s
FeliCa mark “ ”.
2YES
1Overlap the FeliCa mark “ ” at the sending end with
that of your FOMA phone while the Stand-by display is
shownYES
pWhen you receive a Phonebook entry, the confirmation display appears asking
whether to store it also in the PushTalk Phonebook.
You can send/receive the following data files all at once using iC
communication: Phonebook entries, schedule events, ToDo items, text
memos, bookmarks, mail messages, ToruCa files, and LCS client
information.
To send all data files, enter a session number (any four-digits number).
The receiving end needs to enter the same session number.
pSee “■Notes on sending/receiving all data files” on page 370 as well.
pYou cannot use this function during charging.
1Display of the data to be senti()
All transmission
Enter your Terminal Security Code.
pTo send the Phonebook entries, select “ transmission” from the Function
menu and select “Send all phonebook”.
pTo send mail messages, ToruCa files or bookmarks, select “Ir/ transmission”
from the Function menu and select “All transmission”.
2Enter the session numberYES
pEnter any four-digits number as the session number.
Receive One Data File
Sending/Receiving All Data Files
Send All Data Files
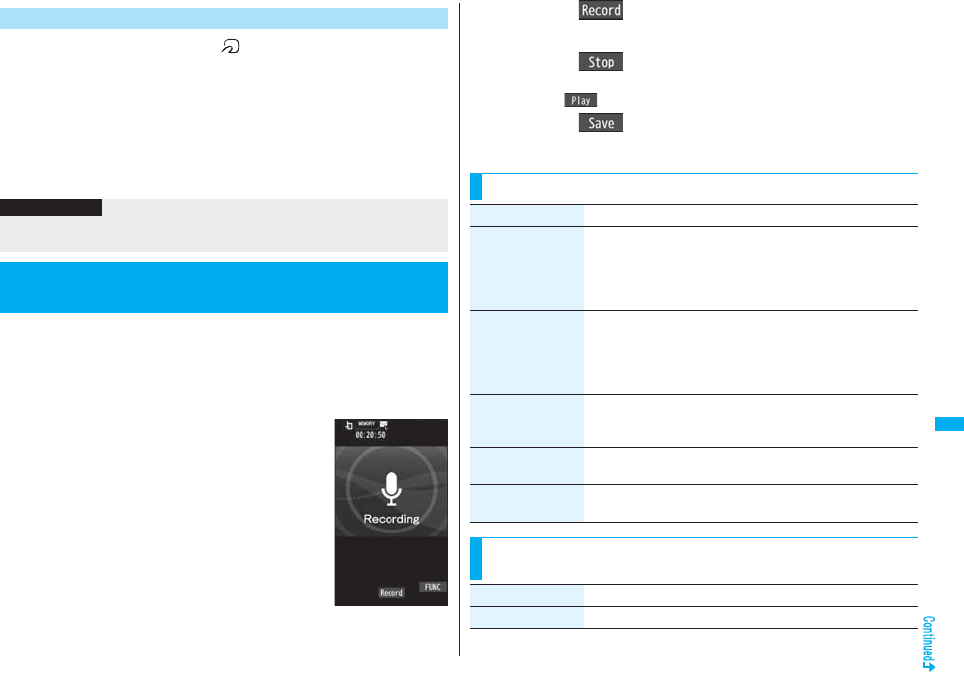
373
Data Display/Edit/Management
1Overlap the FeliCa mark “ ” at the sending end with
that of your FOMA phone while the Stand-by display is
shown.
2YESEnter your Terminal Security Code
Enter the same session number as that entered at the
sending end.
The stored data is deleted, and then receiving starts.
This function is for recording voices. You can record voices in a meeting
instead of taking notes.
pThis function is the same as the one for when “Movie type set” is set to “Voice” in Movie
Mode. See page 153 for an estimate of recording time.
pYou can play back the saved voice from “imotion” of “Data box”.
pSee page 153 for the estimate of recordable time.
1mLifeKitVoice recorder
Receive All Data Files
Information
pWhen you receive Phonebook entries in which still images are stored, and the
multiple same still images are found, only one image is stored.
<Voice Recorder>
Using Voice Recorder
Voice Recorder
Recording display
2Press Oo().
Start recording.
3Press Oo().
pRecording ends. Voice recorder saving pre-check display appears.
pPress m( ) to play back the recorded voice.
4Press Oo().
Function Menu of the Voice Recorder Recording display
Function menu Operation/Explanation
File size setting Select an item.
Mail restrict’n(S). . . . . .You can record up to 500 Kbytes.
Mail restrict’n(L). . . . . .You can record up to 2 Mbytes.
Long time . . . . . . . . . . .You can record for a long time. The
voice is saved to the microSD card.
Storage setting
(Store in)
You can set the storage location for the recorded voice.
When you set to “Phone”, the voice is saved to “Voice recorder” in
the “imotion” folder. When you set to “microSD”, it is saved to
the folder in “Other contents” which you set for “Select storage”.
Phone or microSD
Storage setting
(Auto save set)
You can set whether to automatically save the recorded voice
after you finish recording.
ON・OFF
Storage setting
(File restriction)
See page 164.
Memory info You can display the used memory space (estimate)/number of
stored items.
Function Menu of the Voice Recorder Saving Pre-check
display
Function menu Operation/Explanation
Play See page 373.
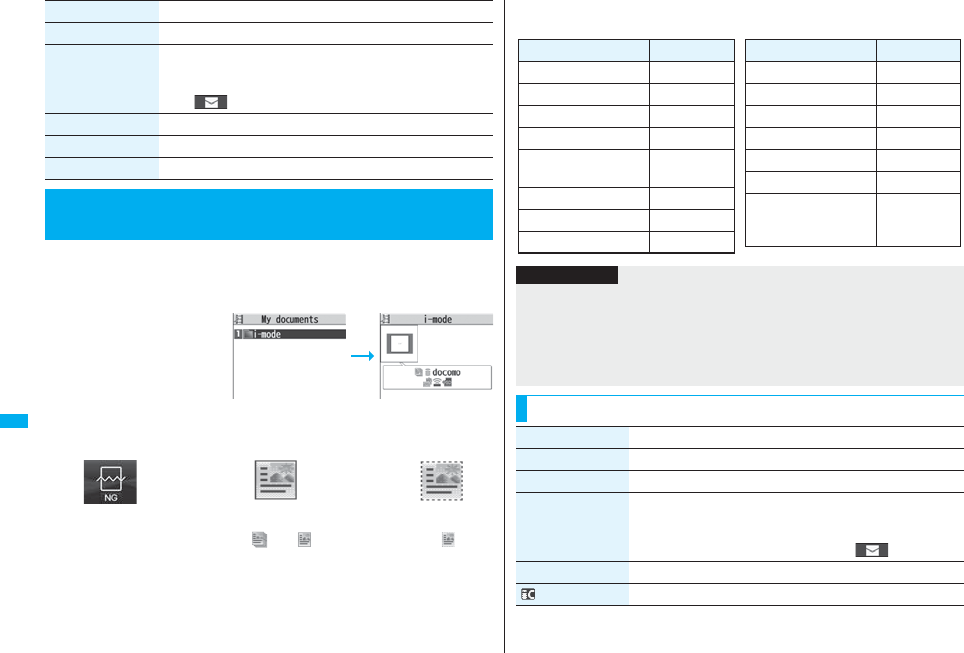
374
Data Display/Edit/Management
You can display the PDF files saved by downloading from sites.
1mData boxMy documentsSelect a folder
Select a PDF file.
pEach time you press m
from the Folder list, you can
switch between the folders
in the FOMA phone and the
microSD card.
pSee page 366 for the
Function menu on the
Folder list.
pIf you cannot display a preview image, any of the following images are displayed:
pSee page 183 when the PDF file is set with a password.
Save See page 373.
Attach to mail You can save the recorded voice and attach it to i-mode mail.
Go to step 2 on page 198.
pYou can compose an i-mode mail message also by pressing
l
().
Store in See page 373.
File restriction See page 164.
Cancel You do not save the recorded voice.
<PDF Viewer>
Displaying PDF Files
Function menu Operation/Explanation
Folder list PDF File list
Does not support
(PDF file displayed
as “ ” or “ ”)
Cannot be
displayed
Does not support
(PDF file displayed
as “ ”)
■Operations when displaying a PDF file
pSee page 375 for when you operate from the Function menu.
Operation Key operation
Upper scroll Zo
Lower scroll Xo
Left scroll Co
Right scroll Vo
Bring up key operation
guide l
Zoom in 3
Zoom out 1
Fit page 2
Operation Key operation
Next page c9>
Previous page m7<
Search 5
Search next 6
Search previous 4
Bring up bookmark list 8
Add bookmark
8
(for at least one
second)
Information
pWhen many files are stored in the FOMA phone or the microSD card, it may take long
to access them. It may take long to display the PDF file depending on the PDF file.
pA PDF file that contains the complicated design or in the format not compatible with
the PDF viewer might not be correctly displayed.
pWhen you try to display undownloaded pages while the PDF file partially downloaded
is displayed, downloading of the page starts.
Function Menu of the PDF File List
Function menu Operation/Explanation
Edit title See page 331.
Document info You can display the PDF file name, saved date/time, etc.
Attach to mail You can compose an i-mode mail message with the PDF files
attached.
Go to step 2 on page 198.
pYou can compose it also by pressing l().
Send Ir data See page 370.
transmission See page 372.
375
Data Display/Edit/Management
Copy to microSD See page 359.
Copy to phone See page 360.
Copy See page 332.
Move See page 332.
Add desktop icon See page 127.
Delete this See page 332.
Delete all See page 332.
Multiple-choice See page 333.
Memory info You can display the used memory space (estimate)/number of
stored items.
Sort See page 333.
Listing You can change the displayed contents of the PDF File list.
Title or Image
pYou can switch the lists also by pressing c( ) from the
PDF File list.
Function menu Operation/Explanation
Information
<Listing>
pWhen you use “Image” to display PDF files, they might appear different from the
actual images depending on the PDF files.
Function Menu while PDF File is Displayed
Function menu Operation/Explanation
Zoom in You can zoom in the PDF file.
You can zoom in the PDF file up to 1,000%.
Zoom out You can zoom out the PDF file.
You can zoom out the PDF file up to 8%.
Go to You can move to another page of the PDF file.
Select the page you want to move to.
pIf you select “Specified page”, enter the page number you want
to move to in the page number field, and select “OK”; then you
can access to the specified page.
Search You can display the screen in which the specified character string
is contained. The point that matches the specified character is
marked in yellow green.
SearchSelect the search string field
Enter a character string to be searched for.
pYou can enter up to 8 full-pitch/16 half-pitch characters.
Put a check mark for search conditions to be specified
l()
pIf you select “Search next” or “Search prev.”, you can continue
to search under the same condition.
Bookmark/mark
(Disp. bookmark)
See page 376.
Bookmark/mark
(Add bookmark)
You can set a bookmark (i-mode bookmark) for the page
currently displayed and can display the desired page easily by
selecting the bookmark. You can set up to 10 bookmarks.
Add bookmarkYESSelect the title fieldEnter a title
OK
pYou can enter up to 64 full-pitch/128 half-pitch characters.
pSee page 377 when bookmarks are stored to the maximum.
Bookmark/mark
(Display mark)
See page 377.
Bookmark/mark
(Add mark)
You can store the currently displayed page number and the
position within the page as the mark. You can use the stored
mark as the sign of the reference point. You can set up to 10
marks.
Add markYES
pSee page 377 when marks are stored to the maximum.
View types
(View mode)
You can change display format of the PDF file.
View modeSelect a display format.
pIf you select “User defined”, enter the magnification value in the
magnification specification field, and select “OK”; then you can
display the page at the specified magnification.
pThe magnification you can specify is 8 through 1,000%.
pIf you save a file after changing the display format, it is
displayed at the saved magnification next time.
View types
(Rotate view)
Rotate view90° to right or 90° to left
Function menu Operation/Explanation
376
Data Display/Edit/Management
View types
(Page layout)
You can change the display layout of the PDF file.
Page layout
Single page, Continuous or Continuous-facing
View types
(Display link)
You can display links set in the PDF file. Internal links (links set in
the PDF file displayed), Web To, Mail To, and Phone To/AV
Phone To are available for the links.
Display linkSelect a link.
pWhen multiple links are found in the display, you can select a
link by pressing Bo.
pWhen you select an internal link, you can move to the linked
page in the PDF file. See page 187 for another link.
View types
(Page info ON/OFF)
You can set whether to display the zoom magnification, page
number, and scroll bar for displaying the PDF file.
Page info ON/OFFSelect an item
Display or Not display
View types
(Document info)
See page 374.
Save See page 377.
Download remain You can download all pages of the PDF file which you have not
completely downloaded yet such as partially downloaded page by
page or failed to be downloaded owing to disconnection of
communication midway.
YES
Capture screen You can cut out a part of the display and save it as JPEG image.
Oo()YESSelect a folder.
pSee page 186 when images are stored to the maximum.
Attach to mail You can compose an i-mode mail message with the PDF files
attached.
Go to step 2 on page 198.
Function menu Operation/Explanation
At Viewer start-up
Single page
At Viewer start-up
Display You can list the bookmarks set for the PDF file and the i-mode
bookmarks additionally set.
By selecting a bookmark, you can display the page for which the
bookmark is set.
1While a PDF file is displayedi()
Bookmark/markDisp. bookmark
Bookmark or i-mode bookmarkSelect a bookmark.
pSome bookmarks that have been set beforehand are categorized into tier-levels.
Press i( ) to display the bookmarks at the lower level. However, all the
bookmarks at the third-tier level or lower are displayed at the third-tier level.
Information
<Search>
pThe search conditions work as shown below:
Match case: Identifies between uppercase and lowercase for search.
Whole words only: Searches for character strings that completely match by unit of a
word.
Search upward: When you do “Search next”, you can search backwards to the first
page from the start page.
Search ‘?’ as wildcard: “?” mark (half-pitch) entered in the search string field is set for
a search condition as a random character.
Search in this page: Searches in the currently displayed page only.
<View types (Page layout)>
pYou cannot change the layout of the partial PDF file.
<Capture screen>
pYou might not be able to cut out the display depending on the security setting of the
PDF file.
Display Bookmark
Function Menu while i-mode Bookmark is Displayed
Function menu Operation/Explanation
Edit title Enter a title.
pYou can enter up to 64 full-pitch/128 half-pitch characters.
Delete
(Delete)
DeleteYES
377
Data Display/Edit/Management
You can list the marked pages and positions stored in the PDF file.
When you select a mark, you can display the page in which the mark is
stored.
1While a PDF file is displayedi()
Bookmark/markDisplay markSelect a mark.
Delete
(Delete selected)
Delete selected
Put a check mark for bookmarks to be deleted
l()YES
Delete
(Delete all)
Delete allEnter your Terminal Security CodeYES
Display Mark
Function menu Operation/Explanation
Function Menu while the Mark List is Displayed
Function menu Operation/Explanation
Delete YES
Delete selected Put a check mark for marks to be deletedl()
YES
Delete all Enter your Terminal Security CodeYES
You can save the PDF files. You can save the newly downloaded pages
and added bookmarks/marks.
You can save up to 3,500 files in total sharing the memory space with
other data files, however, the number of files you can save decreases
depending on the data volume. (See page 537)
1While a PDF file is displayedi()SaveYES
The PDF file once saved to the FOMA phone or microSD card is overwritten each
time you save it. (The operation in step 2 is not required.)
The PDF file that is not saved to the FOMA phone or microSD card is newly saved.
pWith the PDF file that was re-downloaded from the first page owing to updating at
the server’s end, the confirmation display appears asking whether to overwrite
the current data. Select “YES” to overwrite it. Select “NO” to newly save.
2Select a destination folder.
pSee page 186 when PDF files in the FOMA phone are stored to the maximum.
If you try to add a bookmark or mark to the PDF file for which 10 bookmarks or marks
have been set, or if you try to save the PDF file for which 11 or more bookmarks or marks
have been set, the confirmation display appears asking whether to add/save the
bookmark or mark after unnecessary ones are deleted.
1. YES
2. Select bookmarks/marks to be deletedYES
or
Put a check mark for bookmarks/marks to be deletedl()YES
pContinue putting a check mark until “ ” appears.
You can set a display format for when the PDF files are displayed from
sites.
1ii-mode settingsDoc. display settings
Select a display format.
Save
When bookmarks or marks are set to the maximum
Document Display Settings
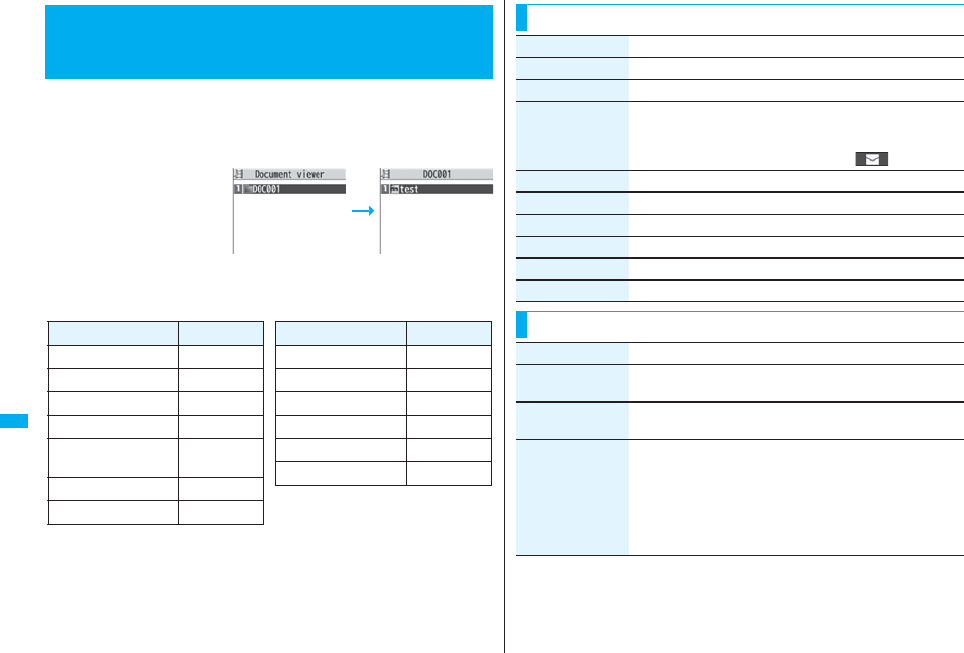
378
Data Display/Edit/Management
You can display the Microsoft Word, Microsoft Excel and Microsoft
PowerPoint files saved to the microSD card.
1mData boxDocument viewerSelect a folder
Select a file.
pSee page 366 for the
Function menu on the
Folder list.
■Operations when displaying a document file
pSee page 378 for when you operate from the Function menu.
<Document Viewer>
Displaying Word, Excel, and PowerPoint
Files
Folder list Document list
Operation Key operation
Upper scroll Zo
Lower scroll Xo
Left scroll Co
Right scroll Vo
Bring up key operation
guide l
Zoom in 3
Zoom out 1
Operation Key operation
Fit page 2
Next page c9>
Previous page m7<
Search 5
Search next 6
Search previous 4
Function Menu of the Document List
Function menu Operation/Explanation
Edit title See page 331.
File info You can display the name and type of files.
Attach to mail You can compose an i-mode mail message with the document
file attached.
Go to step 2 on page 198.
pYou can compose it also by pressing l().
Copy See page 332.
Move See page 332.
Delete this See page 332.
Delete all See page 332.
Multiple-choice See page 333.
Memory info You can display the used memory space (estimate).
Function Menu while Document File is Displayed
Function menu Operation/Explanation
Zoom in You can zoom in the file.
You can zoom in the file up to 1,000%.
Zoom out You can zoom out the file.
You can zoom out the file up to 8%.
View types You can change display format of the file.
Select a display format.
pIf you select “User defined”, enter the magnification value in the
magnification specification field, and select “OK”; then you can
display the page at the specified magnification.
pThe magnification you can specify by “User defined” is 8
through 1,000%.
379
Data Display/Edit/Management
Go to You can move to another page or sheet of the file.
Select the page or the sheet you want to move to.
pIf you select “Specified page” for the Microsoft Word file or
Microsoft PowerPoint file, enter the page number you want to
move to in the page number field, and select “OK”; then you can
more to the specified page.
Search You can display the screen in which the specified character string
is contained. The point that matches the specified character string
is highlighted.
SearchSelect the search string field
Enter a character string to be searched for.
pYou can enter up to 8 full-pitch/16 half-pitch characters.
Put a check mark for search conditions to be specified
l()
pIf you select “Search prev.” or “Search next”, you can continue
to search under the same condition.
Zoom & page You can set whether to display the zoom magnification and page
number for displaying the file.
Display or Not display
Scroll bar You can set whether to display the scroll bar for displaying the file.
Display or Not display
Rotate view 90° to right or 90° to left
Document info You can display the name and type of files.
Function menu Operation/Explanation
Information
<Search>
pThe search conditions work as shown below:
Whole words only: Searches for character strings that completely match by unit of a
word.
Match case: Identifies between uppercase and lowercase for search.
Search in this page (Excel file only): Searches in the currently displayed page only.
Search in this file (Excel file only): Searches in the whole file.
DPOF is the format for recording the print information about the still
image you shot with a digital camera. You can input the information into
the still image on the microSD card about whether to print it out and how
many copies you print out. You can take the card to DPE service shops
or use a DPOF compatible printer to print photos as you specify.
1Still image in play/Still image listi()
DPOF settingPrint
Enter the number of copies to be printed out.
pEnter “01” through “99” in two digits.
pTo cancel printing the selected still image, select “Print OFF”. To cancel printing
all still images, select “All print OFF”.
Printing Saved Images
Select a Method to Print the Images Saved in the
microSD Card
Information
pThe classification icon of the images set DPOF Setting is “ ”.
pYou can set DPOF Setting for up to 999 image files.
pYou cannot set DPOF Setting for the image in excess of 2 Mbytes or 5M (2592 x
1944) size.
pIf unused space on the microSD card is not enough, DPOF Setting might not be set.
(The icon and Picture Information, however, indicate DPOF is set.)
pStill images shot by P906i also support PRINT Image MatchingⅢ.
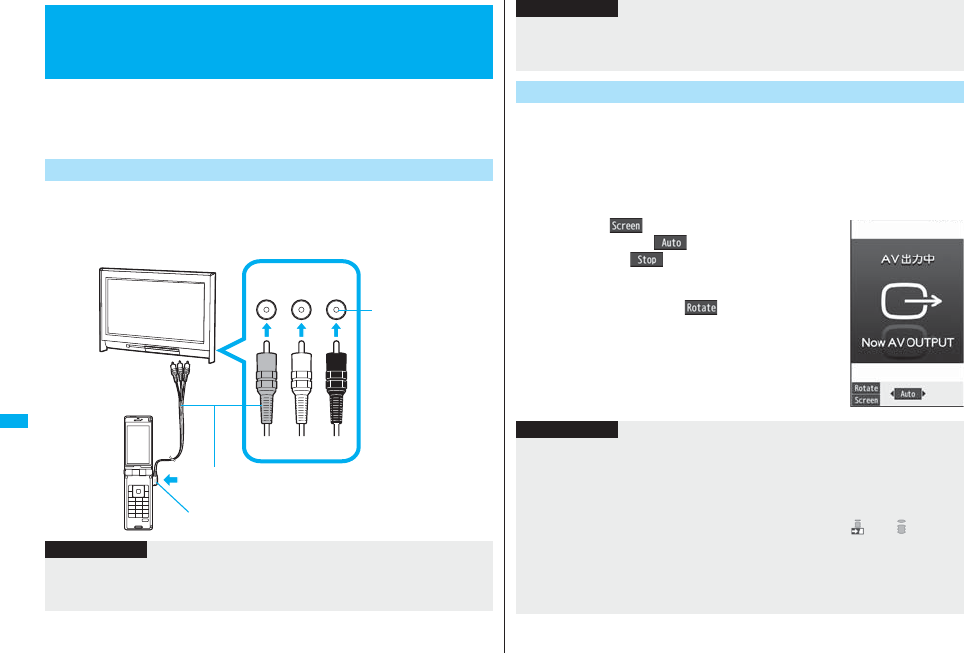
380
Data Display/Edit/Management
When you connect the FOMA phone to a TV using the Flat-plug AV
Output Cable P01 (option), you can display still images, moving images/
i-motion movies, and images during a videophone call, video from 1Seg
and from i-αppli on the TV. You cannot display any other images.
Open the cover of the Earphone/Microphone/AV output terminal on the
FOMA phone and connect the Flat-plug AV Output Cable to it. Then
connect the Flat-plug AV Output Cable to the video/audio input terminal
on the TV.
<AV Output>
Displaying Still Images, Moving Images/
i-motion Movies on TV
Connect FOMA Phone to TV
Video
(yellow)
Audio L
(white)
Audio R
(red)
(yellow) (white) (red)
Video/Audio input
terminal
Earphone/Microphone/AV output terminal
Flat-plug AV Output Cable
Information
pYou can connect to the devices other than TV sets for output.
pWhen connecting the Flat-plug AV Output Cable, make sure that you firmly insert it.
Do not pull the cable forcibly, twist it by the plug, or apply an excessive force.
1Play back a still image while the Flat-plug AV Output
Cable is connected
or
connect the Flat-plug AV Output Cable while a still
image is being played back.
pPress m( ) to switch the display size.
pYou can press Oo( ) to start a slide show. You
can press Oo( ) again to stop it.
pYou can press No to display a previous or next still
image.
pEach time you press l( ), you can rotate the
still image clockwise by 90 degrees.
pSee page 330 for how to display still images.
pTo cancel AV output, pull the Flat-plug AV Output Cable
off of the FOMA phone. When the playback ends, or
when another function starts up, AV output is canceled
as well.
pBefore connecting or disconnecting the Flat-plug AV Output Cable to and from the
device such as a TV, turn off the sound volume of the connected device.
pTo pull the plug out, take hold of the plug and then pull it out softly.
Display Still Images on TV
Information
Information
pAV output is not available in the following cases:
・When playing back a still image from any other than the Still Image list or icon
pasted to the desktop
・When playing back a still image from any other than the “i-mode” folder, “Camera”
folder, user folders, “Picture” folder (microSD), and “Image Box” folder (microSD)
・When displaying a still image whose acquired source icon is “ ” or “ ”, and
whose “File restriction” is “File restricted”
・When playing back a Chara-den picture you shot a Chara-den model whose “Rec.
file restriction” is “File restricted”
・When playing back a still image in the actual size or by slide show
・When playing back a Flash movie
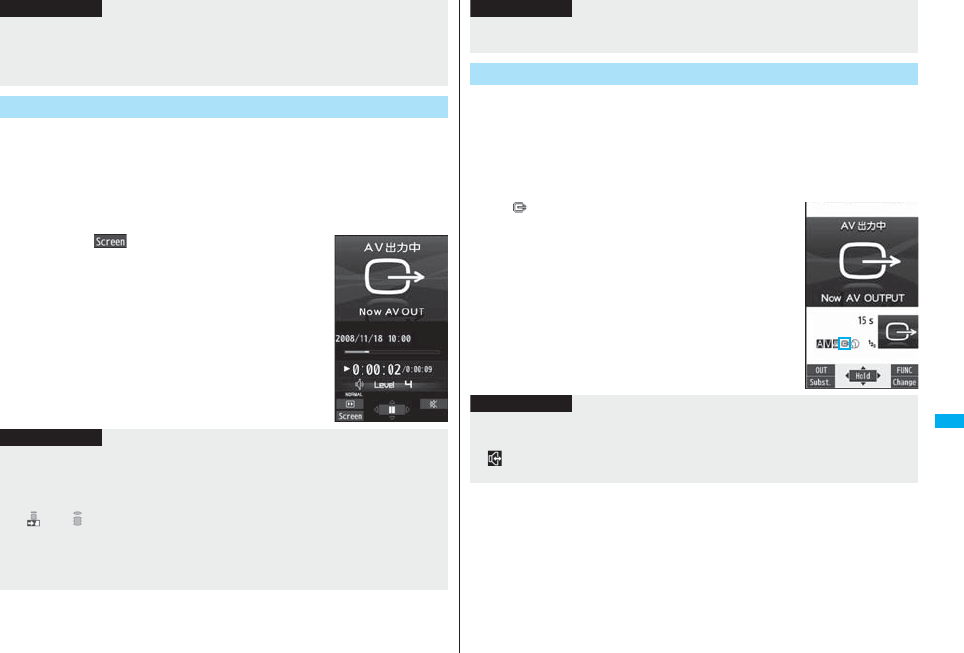
381
Data Display/Edit/Management
1Play back a moving image/i-motion movie while the
Flat-plug AV Output Cable is connected
or
connect the Flat-plug AV Output Cable while a moving
image/i-motion movie is being played back.
pPress m( ) to switch the display size.
pSee page 338 for how to play back moving images/
i-motion movies and how to operate during playback.
pTo cancel AV output, pull the Flat-plug AV Output Cable
off of the FOMA phone. When another function starts
up, AV output is canceled as well.
pWhen a still image is larger than the VGA (640 x 480) size, it is reduced to VGA (640
x 480) or smaller with its proportional ratio retained for displaying on the TV.
pOn some TVs, still images may not be displayed correctly when the display size is
switched.
Display Moving Images/i-motion Movies on TV
Information
Information
pAV output is not available in the following cases:
・When the image is played back from any other than the Moving Image list or icon
pasted to the desktop
・When playing back a moving image/i-motion movie whose acquired source icon is
“ ” or “ ”, and whose “File restriction” is “File restricted”
・When playing back a Chara-den movie you shot a Chara-den model whose “Rec.
file restriction” is “File restricted”
・When a moving image/i-motion movie in the “Pre-installed” folder, or “Movable
contents” folder (microSD) is played back
1Make a videophone call while the Flat-plug AV Output
Cable is connected
or
connect the Flat-plug AV Output Cable during a
videophone call.
p“ ” appears during AV output.
pTo cancel AV output, pull the Flat-plug AV Output Cable
off of the FOMA phone. When the videophone call
ends, or another function starts up, AV output is
canceled as well.
pOn some TVs, moving images/i-motion movies may not be displayed correctly when
the display size is switched.
Display Images during a Videophone Call on TV
Information
Information
pYou cannot execute AV output for the images of Remote Monitoring.
pThe sensitivity of the microphone is improved during AV output.
p“ ” (Hands-free icon) does not appear during AV output. However, the voice is
output from the connected device. You cannot switch to Hands-free.
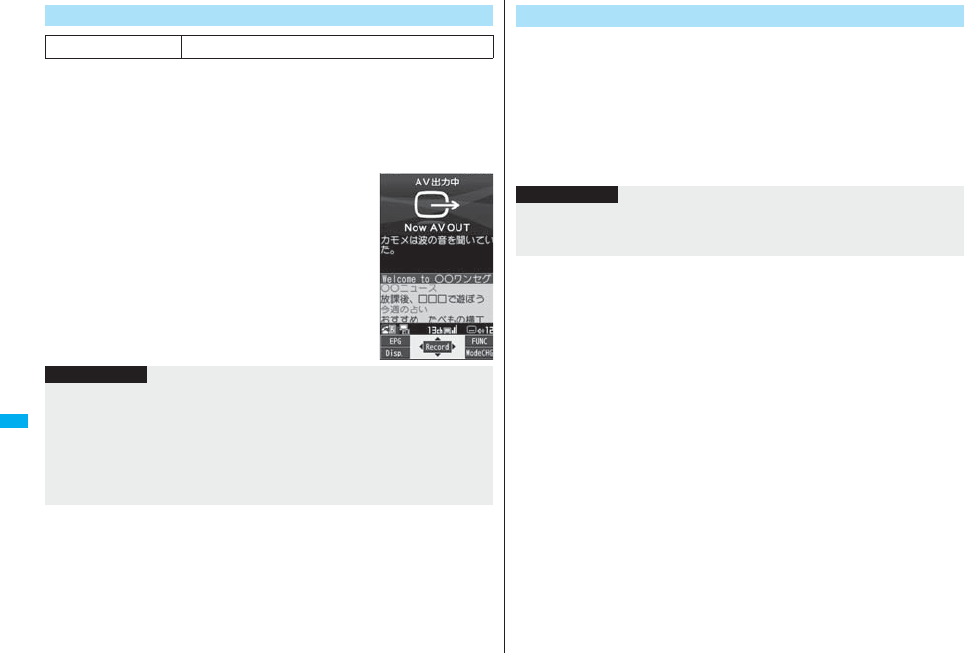
382
Data Display/Edit/Management
1Watch a 1Seg program while the Flat-plug AV Output
Cable is connected
or
connect the Flat-plug AV Output Cable during watching
a 1Seg program.
pTo switch to AV output while the Flat-plug AV Output
Cable is connected, select “AV output” from the
Function menu.
pTo cancel AV output, pull the Flat-plug AV Output Cable
off of the FOMA phone or select “AV output” again from
the Function menu. When watching 1Seg programs
ends, or when another function starts up, AV output is
canceled.
Display Video from 1Seg
At 1Seg start-up Released
Information
pWhen “TV sound while closed” is set to “ON”, AV output still continues even if you
close the FOMA phone.
pThe caption and data broadcasting are not displayed on TV.
pAV output is unavailable during recording.
pAV output is unavailable for video or still images recorded by 1Seg.
pThe sound during AV output is output from a connected device, so adjusting the
sound volume of the FOMA phone cannot change the output sound volume.
1Start an i-αppli program while the Flat-plug AV Output
Cable is connected
or
connect the Flat-plug AV Output Cable while an i-αppli
program is running.
pTo cancel AV output, pull the Flat-plug AV Output Cable off of the FOMA phone.
When an i-αppli ends, or when another function starts up, AV output is canceled.
Display Video from i-αppli
Information
pAV output still continues even if you close the FOMA phone. However, AV output is
not available during pause in Power Saver Mode.
pAV output of i-αppli programs is unavailable during Play Background.

383
Music&Video Channel/Music Playback
Music&Video Channel
What is Music&Video Channel? . . . . . . . . . . . . . . . . . . . . . . . . . 384
Setting Programs . . . . . . . . . . . . . . . . . . . . . . . . . . . . . . . . . . . . . 384
Playing Back/Operating Programs . . . . . . . . . . . . . . . . . . . . . . . 386
MUSIC Player
Playing Back Music . . . . . . . . . . . . . . . . . . . . . . . . . . . . . . . . . . . 390
Saving Music Files . . . . . . . . . . . . . . . . . . . . . . . . . . . . . . . . . . . . 390
Using MUSIC Player. . . . . . . . . . . . . . . . . . . . . <MUSIC Player> 392
Using Playlist . . . . . . . . . . . . . . . . . . . . . . . . . . . . . . . . . . . . . . . . 400
■Handling Music Files
You can use music files saved on the microSD card for personal use only. Before using, give enough consideration not to infringe on the third
party’s intellectual property rights or other rights such as copyright.

384
Music&Video Channel/Music Playback
Music&Video Channel is a service which automatically delivers up to
about one-hour programs at night by just setting your favorite music
programs in advance. Further, you can enjoy high-quality moving image
program of up to about 30 minutes. Programs are updated periodically
and you can enjoy the delivered programs at your convenient time such
as on commuting.
■Before using Music&Video Channel
pMusic&Video Channel is a pay service which is available on a subscription basis. (You
need to subscribe to i-mode and Pake-Houdai/Pake-Houdai Full to apply for it.)
pOther than the service fee for using Music&Video Channel, you might be separately
charged an information fee depending on the program.
pFor the details on Music&Video Channel, refer to “Mobile Phone User's Guide
[i-mode]”.
pIf you insert the UIM to the Music&Video Channel incompatible FOMA phone after you
subscribe to Music&Video Channel, you cannot use Music&Video Channel Service.
Note that the service fee applies unless you cancel the Music&Video Channel
subscription.
pYou cannot obtain or set programs during international roaming. When you try to obtain
or set programs, note that you are charged a packet communication fee for the i-mode
communication. Take procedures to halt the distribution of programs before departure
to overseas. Then, after homecoming, resume receiving distribution.
What is Music&Video Channel?
If you previously set a program that you want to watch, the FOMA phone
automatically downloads the program data at night.
1mMUSICMusic&Video Channel
2Set programFollow the instructions on the display to
set a program.
For details, refer to “Mobile Phone User’s Guide [i-mode] FOMA version”.
pSee page 186 when data files are stored to the maximum.
“ ” appears on the Stand-by display 12 hours before the time
the program obtaining starts. However, it does not appear if
you have inserted a UIM which is different from the one you
used to set the program.
Programs are automatically obtained at night. The display for
obtaining programs does not appear but “ ” appears on the
desktop when they are successfully obtained. Press Oo,
highlight “ ”, and press Oo( ) to display the
Music&Video Channel display.
When obtaining fails, “ ” appears.
Setting Programs
Music&Video
Channel display
When a program is set
385
Music&Video Channel/Music Playback
Information
pWhen the communication is disconnected during obtaining a program, re-obtaining is
automatically tried up to five times by an interval of about three minutes. When a
display for obtaining a program is shown, however, the confirmation display appears
asking whether to re-obtain the program.
pThe ring tone does not sound and the vibrator does not work to notify that obtaining
programs starts or is completed. When you set “Music&Video ch illum.” of
“Illumination” to “ON”, the Call/Charging indicator flickers when obtaining programs is
completed. (See page 122)
pYou can set up to two programs at once.
pNote that a newly obtained program overwrites a saved program and you can no
longer play back that saved program afterward. To avoid overwriting, perform “Move
program” to move the program to the “Saved program” folder.
pYou cannot save the obtained program to the microSD card.
pTo set programs, you need to register the site which offers Music&Video Channel
programs to your My Menu. (See page 177)
pIf you have not subscribed to Music&Video Channel, select “About this service” to see
the Music&Video Channel introduction page.
pWhen the programs could not be obtained due to “power off” or “low battery” at the
start time of program obtaining, re-obtaining is performed at night of the following day.
pIt may take a time to obtain programs, so fully charge the battery and operate in the
good radio wave conditions.
pYou cannot perform the setting operation and automatic obtaining of the program
selected on the Music&Video Channel display or the program in use.
pWhen you cancel Music&Video Channel, the programs other than those moved by
“Move program” are deleted.
pIf you insert a UIM which is different from the one you used to set programs, programs
cannot be automatically obtained. Set the programs again from the Music&Video
Channel display.
pWhen you select a service menu for Music&Video Channel and the message
“Confirm set up information?” appears, select “YES” to delete the programs that have
already been distributed. However, they may not be deleted while the distribution of
programs is halted.
pIf you insert the UIM of the FOMA phone that you have already set programs into
another Music&Video Channel compatible FOMA phone, the programs cannot be
obtained automatically. Select “Set program” again from the Music&Video Channel
display to automatically update the program setting on the FOMA phone, then the
programs can be obtained automatically.
1Music&Video Channel displaySet program
Follow the instructions on the display.
You can check or cancel the set program. For details, refer to “Mobile Phone
User’s Guide [i-mode] FOMA version”.
“ ” appears on the Stand-by display when the automatic program
obtaining fails or the program is not updated even after the program
distribution date. When the automatic obtaining fails, you can manually
obtain the program.
1Music&Video Channel displaySelect a programYES
pFor a partially obtained program, select “Play” to play it back.
pFor a program which has not been updated, select “Play” to play it back.
Check/Cancel the Set Program
Information
pEven if the setting of a program is canceled, My Menu is not deleted.
Obtain a Program Manually
Information
pWhen obtaining of a program is suspended, the part of the program obtained up to
that point is saved. To obtain remaining part, you can manually obtain it except in
some time zones. When a program has been updated or switched to another
program, obtaining starts not from the suspended point but from the beginning.
pYou cannot re-obtain the program whose playable deadline has expired. Such a
program cannot be updated until the next distribution date.
pYou may not be able to manually obtain programs depending on the time zone.

386
Music&Video Channel/Music Playback
pYou can enjoy playing back programs in stereo sound by connecting the Flat-plug
Stereo Earphone Set (option). Also, you can enjoy playing back programs wirelessly by
using a commercial Bluetooth device. (See page 431)
1mMUSICMusic&Video Channel
Select a program.
“ ” is displayed while Music&Video Channel is
activated, and “ ” is displayed when the program
shifts to pause state during Play Background.
pWhile highlighting a program, the next distribution date
is displayed under the program name.
pWhen information of the previously played program
exists, playback starts from the position and/or in the
mode accordingly.
pHighlight a program and press l( ); then the
Chapter list is displayed.
pHighlight a program and press m( ) to connect
to the URL of the program URL information.
pAny of the following images are displayed when you cannot display the preview
images:
pWhen you press and hold p for at least one second or press h during
playback or pause, playing back program ends.
pYou can use mail functions, display sites, and so on, while listening to music
using Music&Video Channel (Play Background). (See page 511)
Playing Back/Operating Programs
Music&Video
Channel display
Cannot be
played back
Playback restrictions have
expired, and the like.
No preview
images
Updating
program
You can play back programs also from Data Box. From Data Box, you can
play back currently distributed programs as well as the programs that
have been distributed in the past and moved to the “Saved program”.
1mData boxMusic&Video Channel
Downloaded program or Saved program
Select a program.
pYou can switch display
format each time you press
c( ) from the
Program list.
■About Music&Video Channel Playback display
…Program image or program video
(When no images are stored, an animation
appears.)
…Chapter number/The number of chapters
(Chapter number only on the Private window)
…Chapter name/Artist name
…Program name
…Playback state
…Playback time/Total playback time
…Play mode (No indication for “Normal”)
: Repeat
…Equalizer
: Normal : S-XBS1
: S-XBS2 : Train
Operate Music&Video Channel from Data Box
Program Folder list Program list
When the FOMA phone is closed
387
Music&Video Channel/Music Playback
…Stereo/Monaural
: Stereo : Monaural
…Listening (No indication for “OFF”)
: Surround : Natur1
: Natur2
…Remaster (No indication for “OFF”)
: ON
…Icon of Bluetooth connection (No indication for not connected)
: Being connected
…Sound volume
■Operation while playing back a Music&Video Channel program
Operation Key operation
Halt l()
Pause Oo() or p
pOo() or p to play back
Sound volume
adjustment
Bo or </>
pPress and hold Bo to adjust the sound volume sequentially.
pSetting from Level 0 (Silent) through 25 is available.
Replay next
chapter
Vo or >(for at least one second)
Replay previous
chapter
Co or <(for at least one second)
pWhen playback time is over three seconds or no previous
chapter is found, you go back to the beginning of the file.
Search
(fast forward)※
Press and hold Vo.
Search
(fast rewind)※
Press and hold Co.
Connect to site m()
Play background c()
Display next image 3
Display previous
image
1
Remaster 9
pEach time of pressing switches between “ON” and “OFF”.
※You cannot operate during pause.
From the Music&Video Channel Playback display, you can do the following
operations by using the switch of the Flat-plug Stereo Earphone Set (option) or
the Flat-plug Earphone/Microphone with Switch (option):
pYou can operate them when the FOMA phone is closed as well.
■Icons on the Music&Video Channel display/the Program list
The icons on the Music&Video Channel display indicate the download status.
p“ ” is added to the newly obtained program.
pSome programs have restrictions on the number of playbacks, playable deadline, or
playback period. “ ” is added to the icon of the program with playback restrictions and
“ ” is added to the icon of the program with restrictions expired. You can check the
playback restrictions for the program by “Program info”.
pSome programs have restrictions on operation. “ ” is added to the icon of the
program with operation restrictions.
pDepending on the program, its playable time zone is fixed. “ ” is added to the icon of
the program with time zone restrictions. The time follows the time information obtained
from the network.
Listening 8
pEach time of pressing switches in order of “OFF” → “Surround”
→ “Natur1” → “Natur2”.
Equalizer 7
pEach time of pressing switches in order of “Normal” →
“S-XBS1” → “S-XBS2” → “Train”.
Operation Key operation
Operation Switch operation
Pause Press once.
pTo play back, press again.
Replay next
chapter
Press twice in succession.
Replay previous
chapter
Press three times in succession.
pWhen playback time is over three seconds or no previous
chapter is found, you go back to the beginning of the file.
Icon Description
Successfully obtained program
Broken program
Partially obtained program or unsuccessfully obtained program
388
Music&Video Channel/Music Playback
pWhen obtaining a periodically-updated program fails, “ ” appears to tell the program
has not been updated. “ ” disappears when obtaining the program starts.
pThe file restriction is set to all the Music&Video Channel programs. See page 164 for
the file restrictions.
Information
pThe information of the previously played program is erased if you do the following
operations:
・When you turn on/off the FOMA phone
・When you update the program
・When you delete or move the previously played program
pIf you try to play back a program with a low battery, the confirmation display appears
asking whether to play it back. The battery alert tone sounds regardless of the setting
of “Keypad sound”. When the battery becomes low during playback, the playback
pauses, and the confirmation display appears asking whether to end the playback.
pIn the following cases, playback pauses and resumes after you finish each operation:
・When you make/receive a voice call, videophone call, or PushTalk call
・When you receive a mail message or Message R/F while “Receiving display” is set
to “Alarm preferred” or the Stand-by display is shown
・When an alarm tone of “Alarm”, “Schedule”, “ToDo”, “Book program” or “Timer
recording” sounds
Depending on the function which occurred, the confirmation display might appear
asking whether to end the Music&Video Channel program.
pIf a black display appears after you play back a program having time zone restrictions,
playback starts at the next playable time zone.
p“Program info” of a Music&Video Channel program and deadline information on the
display that notifies you of a playable deadline are shown by date/time with “Summer
time” set to “OFF”.
Function Menu of Music&Video Channel Display/Program
Folder List/Program List
Function menu Operation/Explanation
Chapter list You can display the list of chapters set for the program. Select a
chapter to play back the selected chapter and afterward.
pPress i() and select “Chapter info” to display the
information about the chapter title, playback time, etc.
Play mode setting Normal or Repeat
Normal . . . Plays back the program once in the order of the
chapters.
Repeat . . . Plays back the program repeatedly in the order of the
chapters.
Program info You can display the program title, distribution source, playback
restrictions, etc.
Move program Programs currently distributed are updated to new programs on
the next distribution date. You can save the current programs by
moving them to the “Saved program” folder before the distributed
program is updated. You can check “Memory info” for unused
memory space you can save to. You can save up to 10 programs
sharing the memory space with other data files, however, the
number of programs you can save decreases depending on the
data volume. (See page 537)
YES
pSee page 186 when programs are stored to the maximum.
Add desktop icon See page 127.
Edit title Enter a title.
pYou can enter up to 31 full-pitch/63 half-pitch characters.
Reset title You can reset the title to the default.
YES
Multiple-choice You can select and delete multiple programs stored in “Saved
program” folder.
Put a check mark for programs to be deletedi()
Delete
Connect to URL You can access the URL when the program has the URL
information.
YES
Display image You can display the program images stored in the program.
pPress r to return to the list.
Memory info You can display the used memory space (estimate).
Delete/Delete this You can delete the program.
YES
Delete all You can delete all the programs stored in the “Saved program”
folder.
Enter your Terminal Security CodeYES
Function menu Operation/Explanation
389
Music&Video Channel/Music Playback
Information
<Play mode setting>
pThe playable mode setting is invalid for the programs having the time zone
restrictions.
pEven if you set to “Repeat”, the program is not played back repeatedly if it has no time
zone restrictions but has restrictions on the number of playbacks.
<Move program>
pYou cannot move the program when its obtaining is not completed, or the move
restriction or time zone restriction is set for the program.
<Edit title>
pWhen the next program is delivered, the edited title is overwritten by the new title.
<Multiple-choice> <Delete/Delete this> <Delete all>
pEven when you delete the program, the program setting is not released.
Function Menu during Playback/Pause
Function menu Operation/Explanation
Chapter list See page 388.
Play mode setting See page 388.
Sound effect
(Remaster)
You can bring the sound from an earphone or Bluetooth device to
the original sound by complementing high-pitch range lost at data
compression.
RemasterON or OFF
Sound effect
(Listening)
You can set sound effect for listening.
ListeningSelect an item.
Surround . . . Makes the sound natural and stereophonic.
Natur 1/2 . . . . Complements the cooped-up feeling specific to
earphones and plays back natural sound. Select 1
or 2 according to your taste.
OFF . . . . . . . . Sets Listening to “OFF”.
p“Natur 1/2” is effective for the sound from an earphone or
Bluetooth device.
Sound effect
(Equalizer)
You can change the sound quality of an earphone or Bluetooth
device.
EqualizerSelect an item.
Normal. . . . .Reproduces normal sound quality.
S-XBS1 . . . .Enhances bass sound.
S-XBS2 . . . .Enhances bass sound more deeply than S-XBS1.
Train . . . . . .Minimizes abnormal sound that causes sound
leakage.
Program info See page 388.
Chapter info You can display the title, play time, etc. of the chapter currently
played back.
Connect to URL See page 388.
Previous image You can display a previous image.
Next image You can display a next image.
Change to full You can change the display format of images. Each time of
selecting the item switches in order of playback on the vertical
display → playback on the horizontal display fitted to the display
size → playback on the enlarged full size display.
Function menu Operation/Explanation
Information
<Sound effect>
pEven if an earphone or Bluetooth device is not connected, the respective setting
contents are displayed on the display.
<Previous image> <Next image>
pYou can display up to three images, however, you may not be able to display them
depending on the program.
<Change to full>
pWhen the music program of voice only or moving image program of QCIF (176 x 144)
size or smaller, you cannot play back on the full size display.
pDepending on the image size, the image might be displayed with the right or bottom
side cut.
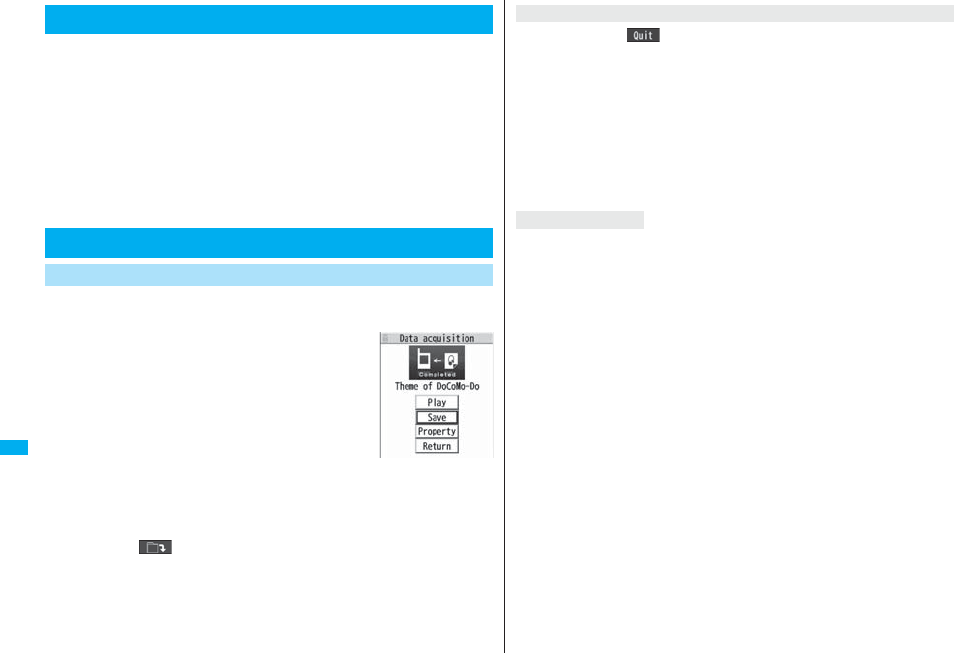
390
Music&Video Channel/Music Playback
You can play back music files on your FOMA phone by using MUSIC
Player or i-motion player.
■MUSIC Player (See page 392)
By “MUSIC Player” of “MUSIC”, you can play back Chaku-uta Full® music files or music
files saved from music CDs to the microSD card via a personal computer.
■i-motion Player (See page 338)
From the “imotion” folder in “Data box”, you can play back the voice-only i-motion
movie (including music data of AAC format) or AAC format files stored on the microSD
card.
pYou can display mail, sites, and so on, while listening to music by MUSIC Player (Play
Background). (See page 511)
You can download Chaku-uta Full® music files from sites. You can save
up to 101.6 Mbytes of files including other data files. (See page 536)
1Bring up a Chaku-uta Full® music file
downloadable siteSelect a Chaku-uta
Full® music fileSaveYES
pSelect “Play” to play back the Chaku-uta Full® music
file. See page 395 for operations while a Chaku-uta
Full® music file is being played back.
pSelect “Property” to display the Chaku-uta Full® music
file information. (See page 398)
pSee page 186 when Chaku-uta Full® music files are
stored to the maximum.
2Select a destination folder.
pPress l( ) to display folders at the second-tier level or lower, if they exist.
Press r to return to the upper level.
Playing Back Music
Saving Music Files
Download Chaku-uta Full® Music Files
Obtaining
Completion display
When you press l( ) to suspend downloading or when the downloading is
suspended by an incoming call, the confirmation display appears asking whether to
resume downloading. Select “YES” to resume downloading the remaining part. Select
“NO” to show the Obtaining Completion display. Select “Save pt.” to save it to a folder in
“i-mode” folder in “MUSIC” in “Data box”.
You can re-download the rest of the partially saved file from “Data box”.
pThe title name of the partially saved Chaku-uta Full® music file takes the date and time
when it is downloaded.
pWhen the playable period or playable deadline of the partially saved Chaku-uta Full®
music file has expired, you cannot download the remaining segments of the file.
Further, the partially saved file is deleted when you save re-obtaining data.
Uta-hodai files are the Chaku-uta Full® music files you can play back just for a period of
the contract with a content provider. The playable deadline is specified in the license
information that is downloaded together with the music file.
Even when the playable deadline has expired, you can play back the music file by
updating the license.
pWhen a music file (Chaku-uta Full® music file downloaded on the membership service
basis) whose playable deadline has expired is found at the start of MUSIC Player, the
confirmation display appears asking whether to update the playable deadline. Select
“YES” to update the file (Packet communication fee is charged). Select “NO” not to use
the music file. See page 392 for starting MUSIC Player.
pSome Uta-hodai music files are applied with surplus playable days even after the
playable deadline has passed. During this period, you can play back files without
updating the playable deadline information. When the surplus playable days are over,
you cannot play back the files. Also if you download a music file with playable period
not updated, you cannot play it back before it is saved.
pWhen the upper limit of the (membership) music services you can register is exceeded,
the confirmation display appears asking whether to overwrite them. Select “YES” to
overwrite a music service whose playable deadline is the oldest. You can no longer
play back the music files downloaded from the overwritten service.
pPacket communication fee charged for updating a playable deadline during
international roaming is not supported by Pake-Houdai and Pake-Houdai Full.
pIf you insert the UIM with a phone number different from the one you used to download
Uta-hodai music files, you cannot download/play back the files. When you use
Uta-hodai with a new UIM, execute “Initialize” (see page 433).
When downloading Chaku-uta Full® music file is suspended
About Uta-hodai
391
Music&Video Channel/Music Playback
You can use Windows Media Player 10/11 to save Windows Media®
Audio (WMA) files from a personal computer to the microSD card.
You can save up to 600 WMA files.
pAs well as music files, you can save playlists, jacket images, and license keys.
First, prepare the devices required for saving WMA files.
pFOMA P906i
pmicroSD card
pFOMA USB Cable with Charge Function 01/02 (option)
pPersonal computer with Windows Media Player 10 (10.00.00.3802 or later)/11 installed
・
When you use Windows Media Player 10/11 in Windows XP, use Windows XP
Service Pack 2 or later. When you use Windows Vista, use Windows Media Player 11.
pBefore connecting the FOMA phone to a personal computer, you need to check the
version of Windows Media Player.
Information
pYou can save up to 5 Mbytes per Chaku-uta Full® music file.
pWhen the Uta-hodai music file set for the ring tone or alarm tone needs to be updated
because the playable deadline has expired, the default tone sounds when a call
comes in, or an alarm sounds/vibrates.
pFor a Chaku-uta Full® music file that has restrictions on the number of playbacks,
playable period, or playable deadline, “ ” is displayed at the head of the title. If you
remove the battery and keep it aside for a long time, the date/time information in the
FOMA phone might be reset. In that case, you cannot play back the Chaku-uta Full®
music file that has restrictions on the playable period or playable deadline. See “Music
info” for checking the playback restrictions.
p“Music info” of a Chaku-uta Full® music file and deadline information on the display
that notifies you of a playable deadline are shown by the date/time with “Summer
time” set to “OFF”.
pPartially saved Chaku-uta Full® music files cannot be played back from Data Box.
Save WMA Files
Prepare devices required for saving WMA files
1
Set “USB mode setting” to “MTP mode”. (See page 363)
Start Windows Media Player 10/11 and save WMA files to the microSD
card.
pYou cannot save WMA files to the FOMA phone.
pFor how to operate Windows Media Player 10/11, refer to Help for Windows Media
Player 10/11.
pWhen you finish saving, remove the FOMA USB Cable with Charge Function 01/02
from the FOMA phone.
When you remove the FOMA USB Cable with Charge Function 01/02, remove it after
finishing the software in use.
You have the ability to save music files using the Napster® application.
pPlease download the Napster® application from the following web page:
http://www.napster.jp/ (Japanese only)
pIf you have any questions about the Napster® application, refer to the following web
page:
http://www.napster.jp/support/ (Japanese only)
Use the FOMA phone as reader/writer
Save music files to the microSD card
About the Napster® Application
2
3
Information
pDo not remove the microSD card during saving a file. You may lose the file.
pMusic files and jacket images are saved to PRIVATE/DOCOMO/MMFILE/WM/ on the
microSD card.
pThe WMA files saved to the microSD card using another FOMA phone might not be
recognized by the FOMA P906i. Further, the files might not be recognized by the
FOMA P906i even when it is connected to the personal computer with “USB mode
setting” set to “MTP mode”.
In that case, delete “WM” folder and “WM-SYSTEM” folder on the microSD card by
using your personal computer, or format the microSD card (see page 362). Note that
not only music files but also all the other files are deleted when the microSD card is
formatted.
392
Music&Video Channel/Music Playback
By using SD-Jukebox (commercial item), you can save the music files on
the music CDs to the microSD card as AAC format data.
pBy using the microSD card adapter (option), you can save music files to the microSD
card directly from a personal computer as well.
※The following steps are an example for when the FOMA phone is used as a microSD
reader/writer for saving music files.
You can purchase SD-Jukebox from the web page below:
http://www.sense.panasonic.co.jp/PanaSense/special/soft/sd_jukebox/ (Japanese only)
pFor details about operating environments, refer to the web page below:
http://panasonic.jp/support/software/sdjb/ (Japanese only)
First, prepare the devices required for saving music files.
pFOMA P906i
pmicroSD card
pFOMA USB Cable with Charge Function 01/02 (option)
pPersonal computer (Windows XP, Windows 2000, or Windows Vista)
pSD-Jukebox (commercial item)
pMusic CD you want to save
pWhen you add or delete the WMA files on the microSD card repeatedly, the size of
license files might become large, and memory space on the microSD card might
become low. In this case, you can delete the license files. You cannot play back the
necessary WMA files of license if you delete the license files. To play back, delete the
WMA files of the pertinence as well, connect the FOMA phone to a personal
computer, and save WMA files again.
pWhen unused memory space on the microSD card becomes 300 Kbytes or less, the
card might not be recognized by a personal computer. Check the unused memory
space on the microSD card, and delete unnecessary data files if the unused memory
space is 300 Kbytes or less, then connect to the personal computer after setting “USB
mode setting” to “MTP mode”.
Save Music Files by Using SD-Audio
About SD-Jukebox
Prepare devices required for saving music files
Information
1
Install SD-Jukebox on the personal computer.
Set “USB mode setting” to “microSD mode”. (See page 363)
Start SD-Jukebox and set a music CD on the personal computer. Then
use SD-Jukebox to save music files to the microSD card.
pFor how to operate SD-Jukebox, refer to Help for SD-Jukebox.
pWhen you finish saving, remove the FOMA USB Cable with Charge Function 01/02
from the FOMA phone.
You can play back Chaku-uta Full® music files obtained from sites or
music files saved to the microSD card.
To play back music files, select “MUSIC Player” from “MUSIC” on Main
Menu. Play Background is available so that you can use mail functions,
display sites, and so on, while listening to music.
To manage folders or data files, select “MUSIC” from “Data box” on Main
Menu.
pNote that battery consumption will be faster when you use MUSIC Player.
pYou can enjoy playing back music in stereo sound by connecting the Flat-plug Stereo
Earphone Set (option). Also, you can enjoy listening to music wirelessly by using a
commercial Bluetooth device. (See page 431)
pIf the number of stored files increases, it may take long to start MUSIC Player.
Install SD-Jukebox
Use the FOMA phone as reader/writer
Save music files to the microSD card
<MUSIC Player>
Using MUSIC Player
2
3
4
393
Music&Video Channel/Music Playback
1Press and hold p for at least one
second.
The Player Menu display appears.
pThe playback display (in pause state) of the previously
played music file appears when the information about it
remains. You can display the playback display also by pressing and holding p
for at least one second with the FOMA phone closed.
2Select an item.
All tracks. . . Displays all the music files saved on the FOMA phone and microSD
card.
Artist . . . . . . Displays all the artist names.
Highlight the name of the artist you want to listen to and press
Oo( ), then all the album names of the selected artist are
displayed. (Go to Album)
Album . . . . . Displays all the albums.
Highlight the name of the album you want to listen to and press
Oo().
Genre. . . . . . Displays all the genres.
Highlight the genre you want to listen to and press Oo().
Playlist/SD-Audio
. . . . . . . . . . . Displays all the playlists created by the FOMA phone and personal
computer.
See page 401 for the playback of playlists.
Play Back Music Files
Player Menu display
pThe “★” mark is added to the
playlist which is being played
back or was previously played
back.
pWhen you select “Artist”,
“Album”, or “Genre”, and press
l( ) from the Type list,
all the music files stored in the
selected item are played back.
pYou can switch display format
each time you press
c( ) from the Music list.
pWhen “ ” is displayed on
the Type list or the Music list,
you can display the playback
display of previously played back music file or music file in-play by pressing
m().
pYou might not be able to display all the stored music files depending on their file
size.
pThe image on the right is displayed
when you cannot display a preview
image:
3Select a music file.
Playback starts from the selected music file in the order listed on the Type list or
playlist. “ ” is displayed while MUSIC Player is activated, and “ ” is
displayed when the music shifts to pause state during Play Background.
pThe “★” mark is added to the music file which is currently played back or was
previously played back.
pPlayback continues even if you close the FOMA phone during playback.
pWhen you press and hold p for at least one second during playback, pause, or
halt, or press h, MUSIC Player ends.
pWhen you press m( ) during playback, the former Music list is displayed.
Type list
(For Artist)
Music list
Cannot be
displayed
Incomplete
download
No image,
etc.
394
Music&Video Channel/Music Playback
1mData boxMUSIC
2Select an item.
MUSIC Player. . . MUSIC Player starts. (See page 393)
i-mode. . . . . . . . . Displays the i-mode (Chaku-uta Full®) Folder list. Select a
folder.
WMA . . . . . . . . . . Displays the WMA list.
pEach time you press m
from the i-mode (Chaku-uta
Full®) Folder list, you can
switch between the folders
in the FOMA phone and the
microSD card.
pYou can switch display
format each time you press
c( ) from the
Chaku-uta Full® Music list
and WMA list.
pSee page 393 when you
cannot display a preview
image.
pSee page 186 when you
select “Search by i-mode”.
pSome WMA files have playable license (number/period/
deadline).
Manage Folders or Music Files
Music Folder list
i-mode (Chaku-uta
Full®) Folder list
Chaku-uta Full®
Music list
WMA list
3Select a Chaku-uta Full® music file or WMA file.
Only the selected music file is played back as a demo.
pWhen you close the FOMA phone during playback, the playback stops.
pTo terminate playback, press and hold p for at least one second or press h
during playback or pause.
pYou might be able to play back a Chaku-uta Full® music file by pressing
l( ) or selecting “Play” from the Function menu while selecting it on
another function.
pChaku-uta Full® music files are shown by titles for control (“Music title - Artist
name” in default title) when you display them from the “i-mode” folder. When you
operate them from “MUSIC Player”, they are shown by titles.
■About playback display during using MUSIC Player
…The jacket image which is stored in the music file
(When no images are stored, an animation
appears.)
…Track number
…Title
…Artist name
…Playback state
…Playback time/Total playback time
…Play mode (No indication for “Normal”)
: Play only one : Repeat one
: Repeat all : Random
: Random play & repeat
: Demo (Displayed only in demo playbacks.)
…Equalizer
: Normal : S-XBS1
: S-XBS2 : Train
…Stereo/Monaural
: Stereo : Monaural
…Listening (No indication for “OFF”)
: Surround : Natur1
: Natur2
…Remaster (No indication for “OFF”)
: ON
…Icon of Bluetooth connection (No indication for not connected)
: Being connected
…Sound volume
When the FOMA
phone is closed
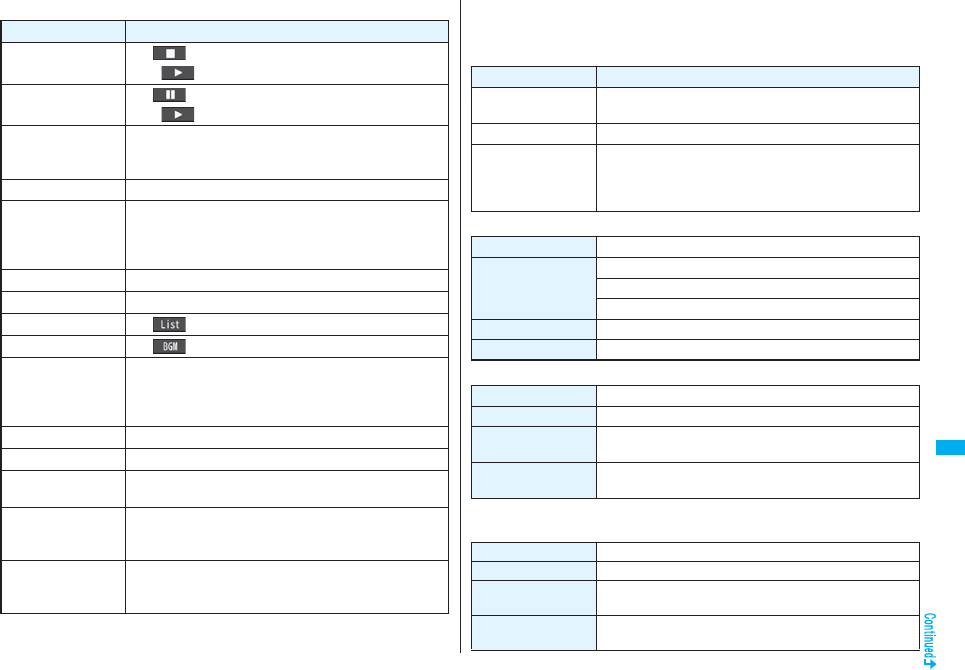
395
Music&Video Channel/Music Playback
■Operations of MUSIC Player in use
※You cannot operate during halt or pause.
pYou cannot use some operations during playback of a demo.
Operation Key operation
Halt l()
pOo() or p to play back
Pause Oo() or p
pOo() or p to play back
Sound volume
adjustment
Bo or </>
pPress and hold Bo to adjust the sound volume sequentially.
pSetting from Level 0 (Silent) through 25 is available.
Replay next file Vo or > (for at least one second)
Replay previous file Co or < (for at least one second)
pWhen playback time is over three seconds, no previous
music file is found, and “Random” or “Random play&repeat”
is set, you go back to the beginning of the file.
Search (fast forward)
※Press and hold Vo.
Search (fast rewind)※Press and hold Co.
Display list m()
Play background c()
Display image/
Display lyric/Player
2
pEach time of pressing switches in order of “Playback display
(Jacket image)” → “Full display lyric image” → “Full display
jacket image”.
Display next image 3
Display previous image
1
Remaster 9
pEach time of pressing switches between “ON” and “OFF”.
Listening 8
pEach time of pressing switches in order of “OFF” →
“Surround” → “Natur1” → “Natur2”.
Equalizer 7
pEach time of pressing switches in order of “Normal” →
“S-XBS1” → “S-XBS2” → “Train”.
From the playback display during using MUSIC Player, you can operate
the following by using the switch of the Flat-plug Stereo Earphone Set
(option) or the Flat-plug Earphone/Microphone with Switch (option):
pYou can operate them when the FOMA phone is closed as well.
■Playback specifications of Chaku-uta Full® music files
■Playback specifications of SD-Audio files and number of storable files
※Except “All tracks”.
■Playback specifications of WMA files and number of storable files
Operation Switch operation
Pause Press once.
pTo play back, press again.
Replay next file Press twice in succession.
Replay previous file Press three times in succession.
pWhen playback time is over three seconds, no previous
music file is found, and “Random” or “Random play&repeat”
is set, you go back to the beginning of the file.
File format MP4
Codec MPEG-4 AAC
MPEG-4 AAC+ (HE-AAC)
Enhanced aacPlus
Bit rate 8 to 128 kbps
Extension 3gp
File format MPEG-2 AAC, MPEG-2 AAC+SBR
Bit rate 32 to 256 kbps
Maximum number of
storable files
999 files
Maximum number of
playlist
99 files (Up to 99 files can be stored in a single playlist.※)
File format WMA (Windows Media Audio 9 Standard)
Bit rate 32 to 192 kbps
Maximum number of
storable files
Maximum 600 files
Maximum number of
playlist
100 files (Up to 250 files can be stored in a single playlist.)
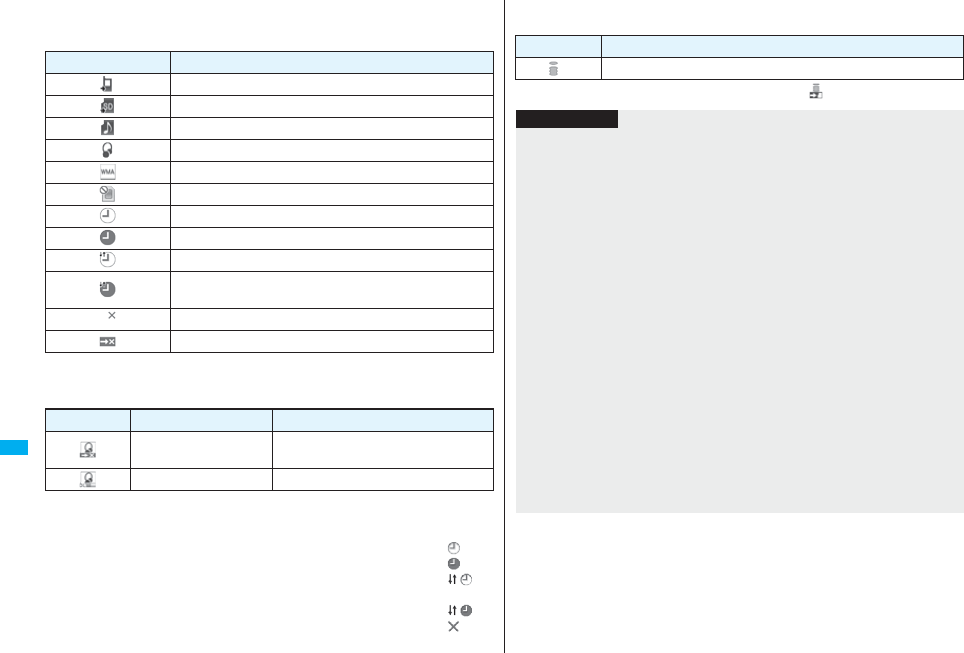
396
Music&Video Channel/Music Playback
■Icons on the Music list
When you select a music file from “MUSIC→MUSIC Player”, the following icons are
displayed:
■Icons on the Chaku-uta Full® Music list
When you select a Chaku-uta Full® music file from “Data box→MUSIC”,
the following icons are displayed:
pSome Chaku-uta Full® music files and Uta-hodai music files have restrictions on the
number of playbacks, playable deadline, or playable period. The following icons are
added.
・File with playback restrictions. . . . . . . . . . . . . . . . . . . . . . . . . . . . . . . . . . . . . “ ”
・File with playback restrictions expired . . . . . . . . . . . . . . . . . . . . . . . . . . . . . . “ ”
・Playable Uta-hodai music file . . . . . . . . . . . . . . . . . . . . . . . . . . . . . . . . . . . . . “ ”
・Uta-hodai music file which needs to be updated because the playable
deadline has expired. . . . . . . . . . . . . . . . . . . . . . . . . . . . . . . . . . . . . . . . . . . . “ ”
・Unplayable Chaku-uta Full® music file or Uta-hodai music file. . . . . . . . . . . “ ”
You can check the playback restrictions for the file by “Music info”.
Icon Description
Stored in the FOMA phone
Stored on the microSD card
SD-Audio file type
Chaku-uta Full® file type
WMA file type
UIM restrictions function
Chaku-uta Full® music file with playback restrictions
Chaku-uta Full® music file with playback restrictions expired
Playable Uta-hodai music file
Uta-hodai music file which needs to be updated because the
playable deadline has expired
Unplayable Uta-hodai music file
File with file restrictions
Icon Audio format Type
AAC, AAC+(HE-AAC),
Enhanced aacPlus MP4 file
−Partially saved Chaku-uta Full® music files
pAll Chaku-uta Full® music files are set with file restrictions. See page 164 for file
restrictions.
※For the copyrighted file movable to the microSD card, “ ” is displayed.
Icon Acquired source
※Sites
Information
pEven when the file format is supported, you might not be able to play back some files.
pThe information of the previously played music file is erased if you do the following
operations:
・When you remove/insert the microSD card
・When you turn on/off the FOMA phone
・When you execute “Reset settings” or “Initialize”
・When you delete the previously played music file
・When you delete the previously played playlist
・When you do not insert the microSD card on which the previously played music file
is stored
・When you set “USB mode setting” to “microSD mode” or “MTP mode” and connect
to a personal computer
・When you played back a music file from other than a playlist last time, and then
when you perform “Edit music info” or “Reset music info”, or when you newly
download, save or delete a Chaku-uta Full® music file
・When the music file previously played is an Uta-hodai music file which needs to be
updated because the playable deadline has expired
・When the previously played music file is a WMA file and when you delete all the
WMA licenses
・When the WMA license becomes invalid
pPartially saved Chaku-uta Full® music files are not displayed when you operate from
MUSIC Player.
pNote that the battery is consumed sooner if you perform the fast-forward and other
similar operations frequently.
397
Music&Video Channel/Music Playback
pIn the following cases, the playback pauses and resumes after you finish each
operation:
・When you make/receive a voice call, videophone call, or PushTalk call
・When you receive a mail message or Message R/F while “Receiving display” is set
to “Alarm preferred” or the Stand-by display is shown
・When an alarm tone of “Alarm”, “Schedule”, “ToDo”, “Book program” or “Timer
recording” sounds
Depending on the event which occurred, the confirmation display might appear
asking whether to end MUSIC Player.
pWhen a music file is switched to the previous or next one, the music file whose
playable deadline or playable period has expired, or WMA file whose WMA license is
deleted is skipped. When the Chaku-uta Full® music file has restrictions on the
number of playbacks, the confirmation display appears asking whether to play it back
regardless of the remaining number of playbacks. However, the music file whose
number of playbacks has finished is skipped.
Function Menu of the Music Folder List/i-mode (Chaku-uta
Full®) Folder List/Player Menu Display
Information
Function menu Operation/Explanation
Play mode setting Select a play mode.
Normal . . . . . . . . Plays back the music files sorted by type or in
the playlist in order as listed.
Finishes after the last music file is played
back.
Play only one . . . Plays back the selected music file once.
Repeat one. . . . . Plays back the selected music file repeatedly.
Repeat all . . . . . . Plays back the music files sorted by type or in
the playlist in order as listed repeatedly.
Random . . . . . . . Plays back the music files sorted by type or in
the playlist at random. Finishes after all the
music files are played back.
Random play&repeat
. . . . . . . . . . . . . . . Plays back the music files sorted by type or in
the playlist at random repeatedly.
Add folder Enter a folder name.
pYou can enter up to 10 full-pitch/20 half-pitch characters.
pYou can create a total of 25 folders at each level up to the
second-tier level in the FOMA phone. You can create folders at
each level up to the seventh-tier level on the microSD card.
Edit folder name Enter a folder name.
pYou can enter up to 10 full-pitch/20 half-pitch characters.
Delete folder You can delete a user folder and all Chaku-uta Full® music files in
the folder.
Enter your Terminal Security CodeYES
Select storage You can set the destination folder for when you move the Chaku-
uta Full® music file to the microSD card. You can set it for up to
seventh-tier-level folders.
YES
Memory info You can display the used memory space (estimate)/number of
stored items.
Function menu Operation/Explanation
Information
<Add folder>
pYou cannot create a user folder in the WMA folder.
<Delete folder>
pIf you delete the Chaku-uta Full® music file set for another function, the setting returns
to the default.
<Select storage>
p“ ” is displayed for the folder set as a destination.
pWhen you execute Check microSD, or create or edit a folder by using a personal
computer, the destination folder on the microSD card might be changed. When the
setting is changed, set the destination folder again.
398
Music&Video Channel/Music Playback
Function Menu of the Chaku-uta Full® Music List/Type List/
Music List/WMA List
Function menu Operation/Explanation
Player menu You can show the Player Menu display from the Type list or
Music list.
Play mode setting See page 397.
Set as ring tone
(Fullsong ring tone)
You can set a full piece of Chaku-uta Full® music file as a ring
tone.
Fullsong ring toneSelect an item.
pFor the Chaku-uta Full® music files on the microSD card, the
confirmation display appears asking whether to move it to the
FOMA phone. See “Move Files from the microSD Card to the
FOMA Phone” on page 361.
Set as ring tone
(Point ring tone)
You can set a part of Chaku-uta Full® music file as a ring tone.
Point ring toneSelect a range to be setSelect an item.
pYou can check the range to be set by pressing l().
pFor the Chaku-uta Full® music files on the microSD card, the
confirmation display appears asking whether to move it to the
FOMA phone. See “Move Files from the microSD Card to the
FOMA Phone” on page 361.
Music info You can display the title, artist name, playback time, etc.
pPress i( ) with the music information of Chaku-uta
Full® music file displayed and select “Edit music info”; then you
can edit the information contents. Select a desired item and
then edit it. To return the edited information to the unedited one,
select “Reset music info”. Select a desired item and select
“YES”.
Add to playlist Select a storing method.
Add one to P-list . . . . . . . You can store the music file.
Add some to P-list . . . . . Select the music files to be stored, and
press l().
pThe music files are stored in the displayed order.
Select a playlist you store music files to.
pIf you create a new playlist and store music files to, select “New
playlist”, then enter a playlist name. If the playlist is stored to 30
lists, the confirmation display appears asking whether to delete
it.
Move You can move the Chaku-uta Full® music file in the FOMA phone
to another folder inside it, or can move the Chaku-uta Full® music
file on the microSD card to another folder inside it.
Select a destination folder.
pPress l( ) to display folders at the second-tier level or
lower, if they exist. Press r to return to the upper level.
Move to microSD You can move the Chaku-uta Full® music file to the microSD
card. (See page 361)
Move to phone You can move the Chaku-uta Full® music file on the microSD
card to the FOMA phone. (See page 361)
Edit title You can edit the title of Chaku-uta Full® music file.
Enter a title.
pFor a Chaku-uta Full® music file in the FOMA phone, you can
enter up to 9 full-pitch/18 half-pitch characters.
pFor a Chaku-uta Full® music file on the microSD card, you can
enter up to 18 full-pitch/36 half-pitch characters.
Reset title You can reset the title of a Chaku-uta Full® music file to “Music
title - Artist name”.
YES
Add folder See page 397.
Edit folder name See page 397.
Function menu Operation/Explanation
399
Music&Video Channel/Music Playback
Delete folder See page 397.
Multiple-choice You can select multiple Chaku-uta Full® music files and operate
them.
Put a check mark for Chaku-uta Full® music files to be
operatedi()Select an item.
Delete . . . See “Delete this” on page 399.
Move . . . . See page 398.
Connect to URL You can access the URL when the Chaku-uta Full® music file has
the URL information.
YES
Display image You can display jacket images stored in the music file.
pWhen multiple jacket images are stored, press No to display a
previous or next jacket image.
pWhen the image is storable, press Oo( ) and select
“YES”, then select any destination folder to save it.
Display lyric You can display lyric images stored in the Chaku-uta Full® music
file.
pWhen multiple lyric images are stored, press No to display a
previous or next lyric image. You can display up to seven lyric
images.
pWhen the image is storable, press Oo( ) and select
“YES”, then select any destination folder to save it.
Select storage See page 397.
Memory info You can display the used memory space (estimate)/number of
stored items.
DEL all licenses You can delete the WMA license files.
Enter your Terminal Security CodeYES
Delete this YES
Delete all You can delete all Chaku-uta Full® music files or WMA files in the
folder.
Enter your Terminal Security CodeYES
pIf there is a user folder in a folder, you cannot delete the user
folder or Chaku-uta Full® music files in the user folder.
Function menu Operation/Explanation
Information
<Set as ring tone>
pWhen an Uta-hodai music file set for a ring tone cannot be played back, needs to be
updated because of expired playback deadline, or is set with UIM restrictions, the
default ring tone returns.
pSee “Music info” for checking whether to be set as ring tone.
<Add to playlist>
pYou cannot add music files to the playlist created using a personal computer.
<Reset title>
pIf there is no music title or artist name, it is displayed as “Unknown” for each.
<Display image>
pSome images may not be displayed correctly.
<Delete this> <Delete all>
pIf you delete the Chaku-uta Full® music file set for another function, the setting returns
to the default.
pIf you delete the WMA file stored in the WMA playlist, it is released from WMA playlist.
Function Menu during Playback/Halt/Pause
Function menu Operation/Explanation
Player menu You can show the Player Menu display from the playback display
during using MUSIC Player.
pPlayback state continues even when you show the Player Menu
display.
Play mode setting See page 397.
Sound effect
(Remaster)
You can bring the sound from an earphone or Bluetooth device to
the original sound by complementing high-pitch range lost at data
compression.
RemasterON or OFF