Panasonic Healthcare 9TB097DSS S-AIT Tape Drive Unit User Manual S AIT 1
Panasonic Healthcare Co., Ltd. S-AIT Tape Drive Unit S AIT 1
UserManual.wiki
>
Panasonic Healthcare
>
9TB097DSS User Manual
users manual
Navigation menu
Upload a User Manual
Namespaces
Wiki Guide
HTML
PDF
Info
Views
User Manual
Discussion / Help
Navigation
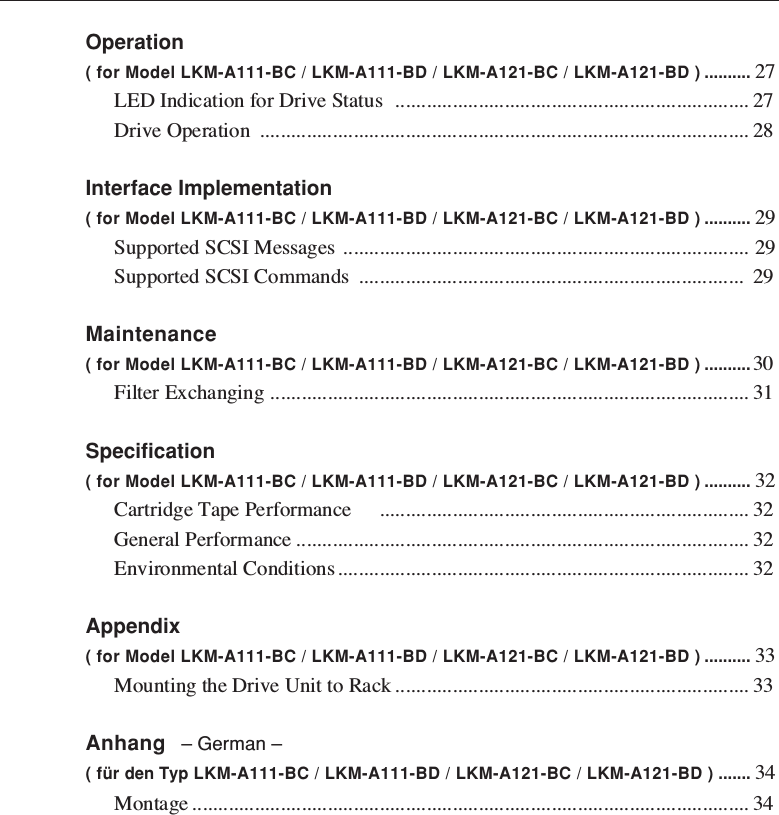


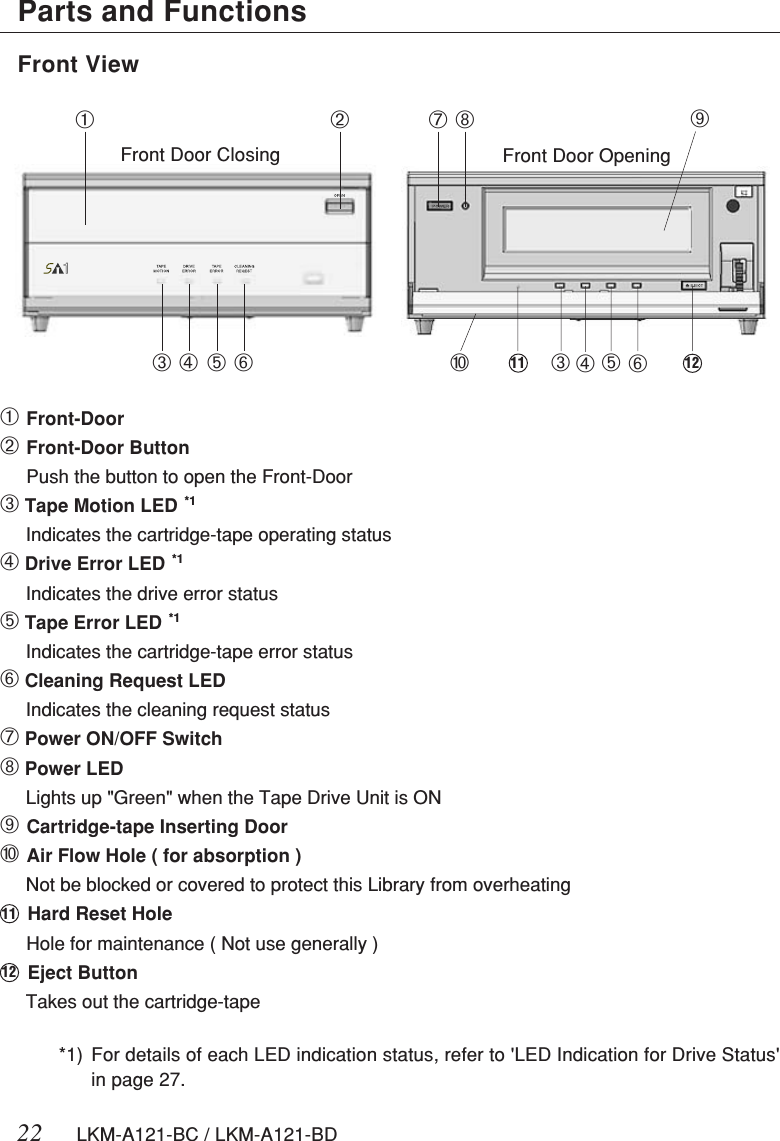

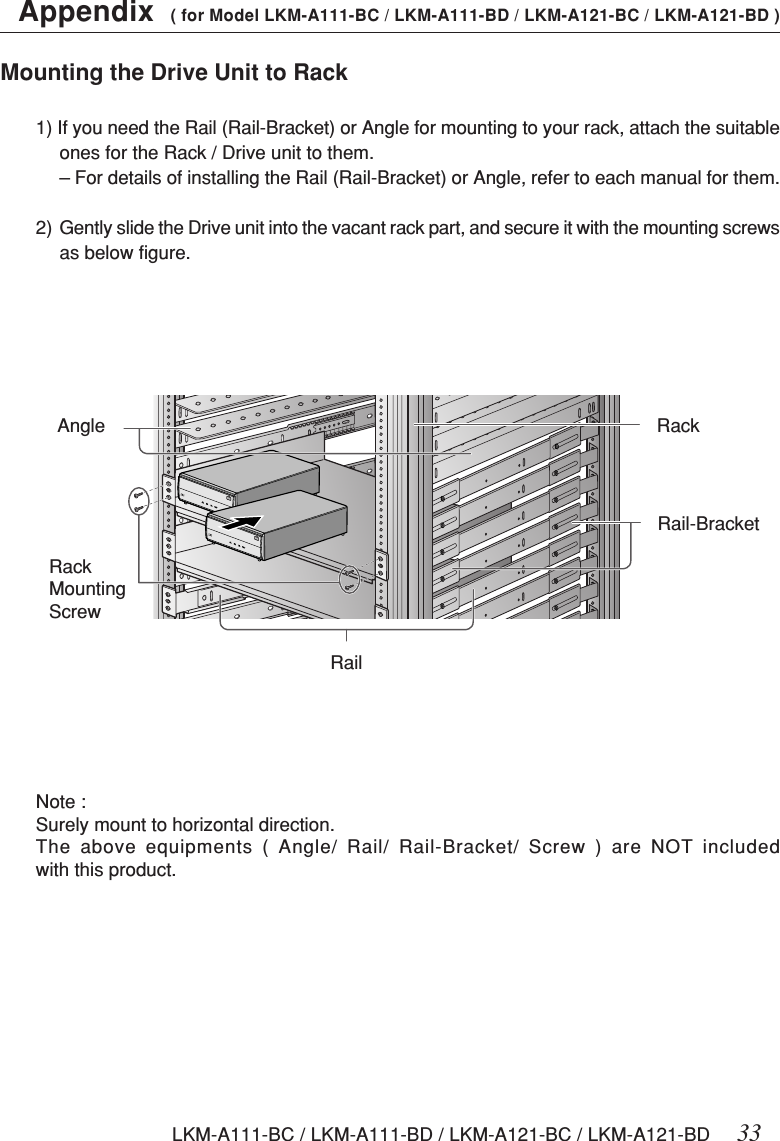
![LKM-A111-BC / LKM-A111-BD / LKM-A121-BC / LKM-A121-BD 27LED Indication for Drive Status The LED indicators are defined as followsGREEN, ALL lit(0.5 sec.)thenYELLOW blinks from left LED to right LEDrepeatedly.(during Diag for 2to 3 sec.)ALL GREEN,blinkingGREEN, ALL lit only whileEject Buttonis pressingUMBER, blinkingUMBERYELLOW, blinkingYELLOWGREEN, blinkingGREENOFFTape Accessin Progress(Write)Tape Accessin Progress(Search)Tape Loaded(Write Protected)Tape Accessin Progress(Read)Tape Loaded(Writable)No TapeDrive ErrorOccuredDrive ErrorOccuredNo Drive ErrorOccuredError on CleaningCleaning RequestCleaning is Not CompletedNo Cleaning RequestOccuredLED TAPE MOTION DRIVE ERROR TAPE ERROR CLEANING REQUESTA Moment of Power ON and ResetFirmware UpdateEject InhibitMedia ErrorOccuredMedia ErrorOccuredMedia WarningNo Media ErrorOccuredOperation ( for Model LKM-A111-BC / LKM-A111-BD / LKM-A121-BC / LKM-A121-BD )Power LED [GREEN] : lit = Power ON, blinking = FAN is malfunction](https://usermanual.wiki/Panasonic-Healthcare/9TB097DSS/User-Guide-346844-Page-31.png)
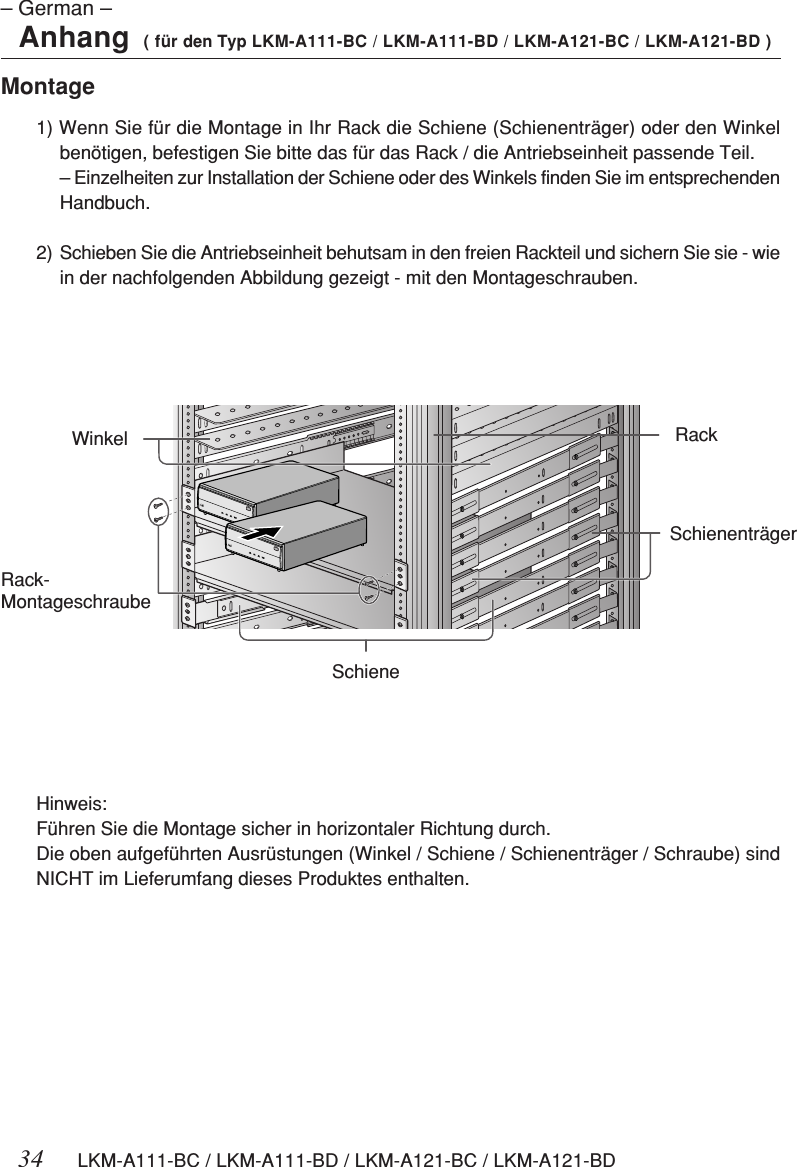
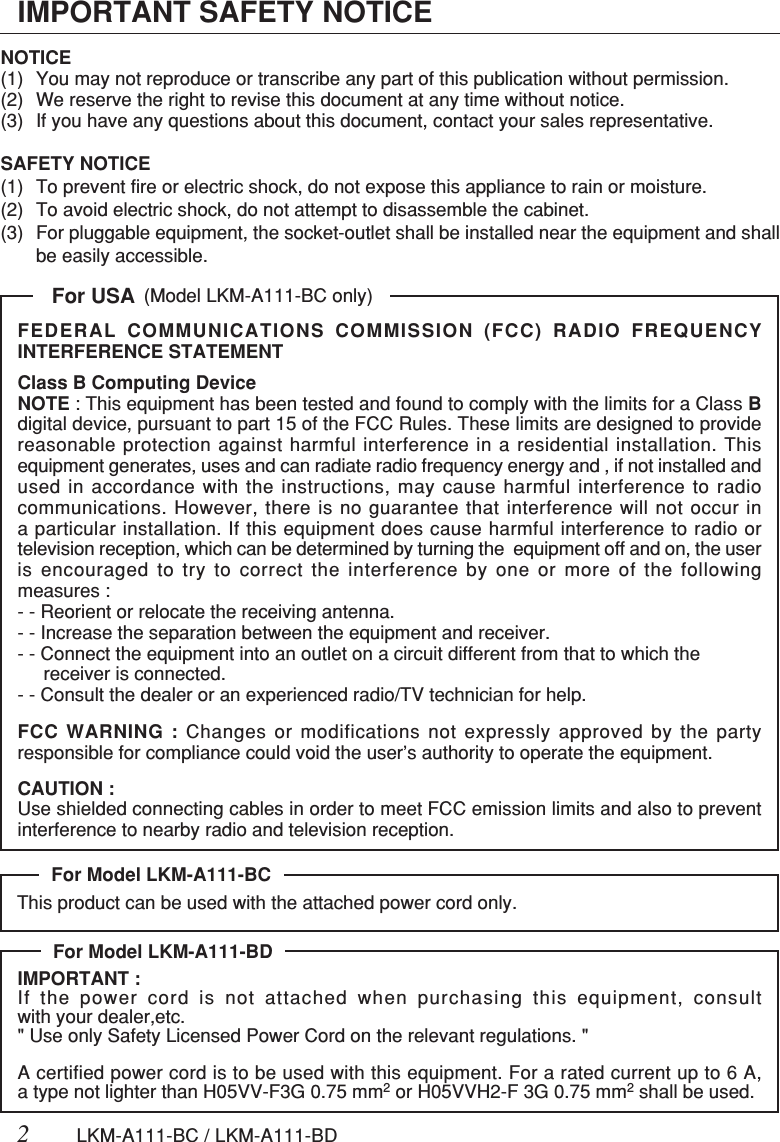
![32 LKM-A111-BC / LKM-A111-BD / LKM-A121-BC / LKM-A121-BDSpecification( for Model LKM-A111-BC / LKM-A111-BD / LKM-A121-BC / LKM-A121-BD )Cartridge Tape PerformanceEnvironmental ConditionsGeneral PerformanceData Capacity (S-AIT1 / 600 m) *1 500 GByte ( compression mode : 1300 GByte )Transfer Rate (S-AIT1) *2 30 MByte/s ( compression mode : 78 GByte/s )Note : *1 ) Compression Rate = 2.6 x ( Compression Rate is changed with data type.) *2 ) Transfer Rate may be different with system(host PC) performance.Search Time (average) 70 sInterface Ultra 160 Wide LVD/SE SCSI (LKM-A111-B)2 GByte/s Fiber-Channel (LKM-A121-B)Buffer Memory 72 MByteError Rates Less than 10 –17Power Rating 100 – 240 V ~ AUTO0.7 – 0.4 A 50 / 60 HzDimensions (W x H x D) 210 x 86 x 370 mmWeight 6.7 kg [ typical ]Operating Non-operating• Temperature 5 ~ 35 °C – 40 ~ 70 °C(No cartridge-tape)• Humidity 20 ~ 80 %Rh 5 ~ 95 %Rh(Non-condensation) (Non-condensation)Installation : Horizontal](https://usermanual.wiki/Panasonic-Healthcare/9TB097DSS/User-Guide-346844-Page-36.png)