Panasonic Mobile Communications Development of USA 26C001A GSM Cellular Mobile Radio User Manual VS3 VF AAA
Panasonic Mobile Communications Development Corporation of USA GSM Cellular Mobile Radio VS3 VF AAA
Contents
- 1. User Manual Part 1
- 2. User Manual Part 2
User Manual Part 2
![73MessagingVodafone MailVodafone Mail is an innovative service that lets you stay up-to-date with all of your messages. You need to subscribe to this service. For further information, contact Vodafone.Connecting to internet maild Main menu > Messaging > Vodafone MailYour phone is connected to the Internet via a WAP connection to retrieve e-mail messages.1. Follow the screen contentsVodafone MessengerVodafone Messenger lets you enjoy the fun of instant messaging wherever you are. It’s the fun way to chat on-line. For further information, contact Vodafone.Viewing Vodafone Messengerd Main menu > Messaging > Vodafone Messenger1. Follow the screen contentsVoicemailVoicemail is a network service which allows callers, who could not reach you, to leave voice messages. You may need to subscribe to this service. For further information, contact Vodafone.Retrieving stored voice messagesWhen a new voice message is stored, an alert sounds and ( ) appears on the display, and you receive an SMS notification.When an SMS notification is displayed on standby screen:1. [0]9[5] (Call)2. Follow the recorded instructionsORd Main menu > Messaging > Voicemail > Call Voicemail1. Follow the recorded instructionsShortcut: You can also press and hold [A] in standby mode to call your voice mailbox.VS3_VF_AAA.book Page 73 Monday, May 23, 2005 11:25 AM](https://usermanual.wiki/Panasonic-Mobile-Communications-Development-of-USA/26C001A.User-Manual-Part-2/User-Guide-551461-Page-1.png)
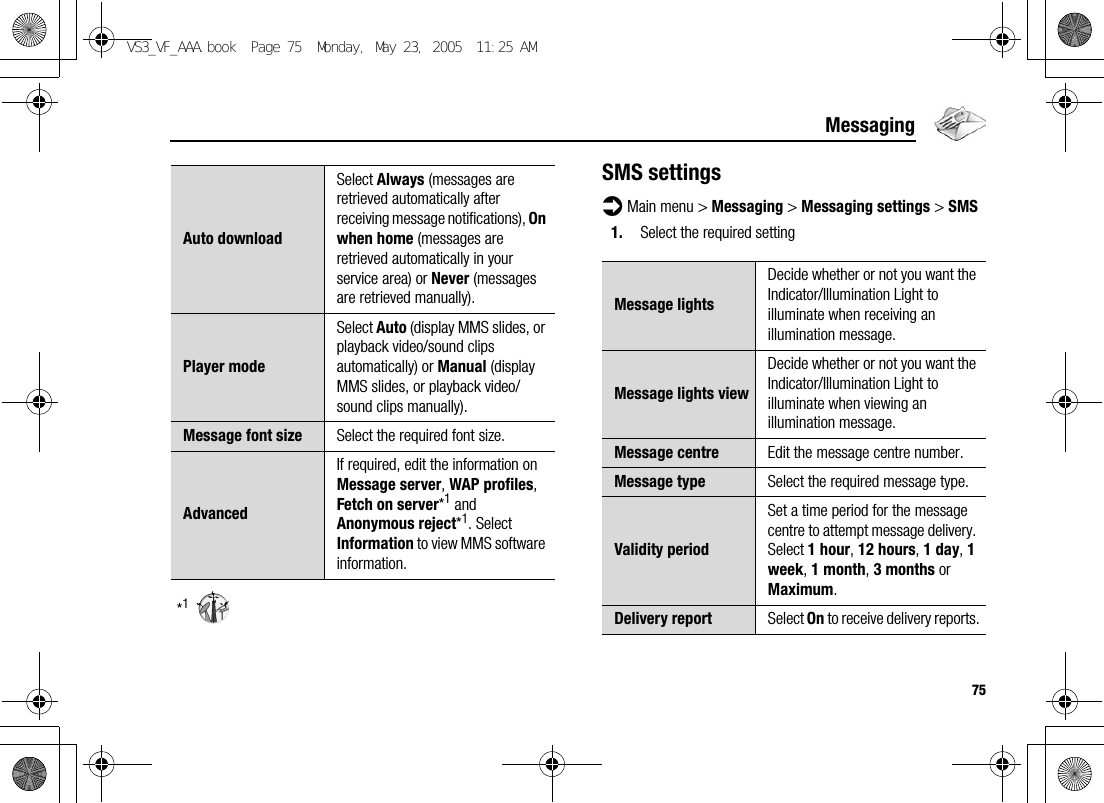
![74MessagingChanging the voice mailbox numberd Main menu > Messaging > Voicemail > Set mailbox number1. Enter new voice mailbox number 7 [0]9[5] (Ok)Media AlbumYou can store your personal pictures, sound/video clips and MMS messages on your online album and share them with family and friends. You need to subscribe to this service. For further information, contact Vodafone.Uploading picturesd Main menu > Messaging > Media Album1. Follow the screen contentsMessaging settingsMMS settingsd Main menu > Messaging > Messaging settings > MMS1. Select the required settingReportsSelect Request read (check if the other party has read the message), Send read (inform the other party that you have read the message when asked), Request delivery (check if the other party has received the message) or Send delivery (inform the other party that you have received the message when asked).Priority Select Low, Normal or High for the message priority level.Validity periodSet a time period for the message centre to attempt message delivery. Select 1 day, 7 days or Maximum.VS3_VF_AAA.book Page 74 Monday, May 23, 2005 11:25 AM](https://usermanual.wiki/Panasonic-Mobile-Communications-Development-of-USA/26C001A.User-Manual-Part-2/User-Guide-551461-Page-2.png)
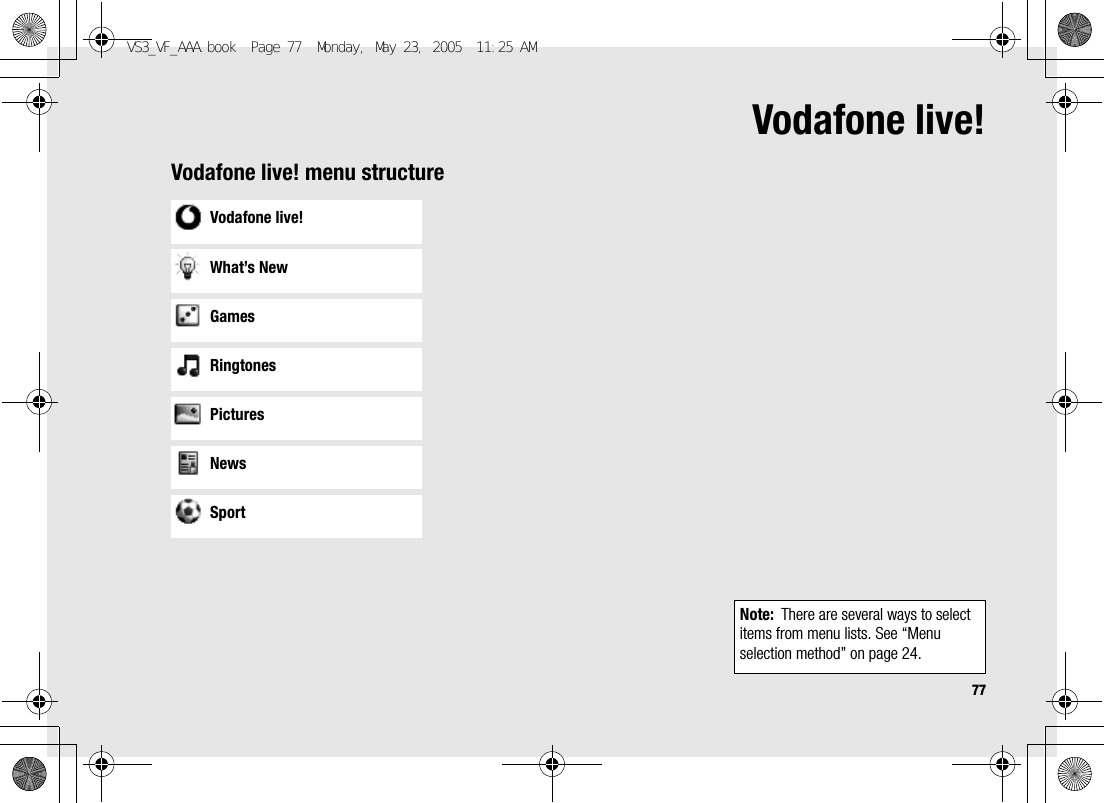
![78Vodafone live!Viewing Vodafone live!Vodafone live! allows you to access useful services and download latest ringtones, great pictures and much more. For further information on the services, contact Vodafone.Connecting to Vodafone live!d Main menu > Vodafone live!1. [192] to scroll to the required menu 7 [0]The phone is connected to the web site.Online status iconsDisconnecting from Vodafone live!1. [5] (Options) 7 Select Exit browserShortcut: You can directly access the Vodafone live! web site by pressing [6] (} live!) in standby mode.Non-secure CSD connectionSecure CSD connectionNon-secure GPRS connectionSecure GPRS connectionVS3_VF_AAA.book Page 78 Monday, May 23, 2005 11:25 AM](https://usermanual.wiki/Panasonic-Mobile-Communications-Development-of-USA/26C001A.User-Manual-Part-2/User-Guide-551461-Page-6.png)
![79Vodafone live!Browser optionsWhile Browser is on-line or off-line, the following options are available.d Main menu > Vodafone live! [Off-line]ORd Main menu > Vodafone live! > Required menu [On-line]1. [5] (Options) 7 Select the required option*1Available only when the web page is displayed.*2Available only when the web page has the image, melody or video contents.BookmarksOnce you bookmark your favourite page or a frequently accessed page, you can jump to the page quickly. You can also categorise the bookmarked pages into 10 folders and rename each folder.While off-line or on-line:1. [5] (Options) 7 Select Bookmarks2. [192] to scroll to the required bookmark folder 7 [0]3. [192] to scroll to the required bookmark4. To load the URL: [0]To select the required option: [5] (Options)Select Select the required item.Bookmarks Go to the bookmark list.Enter address Go to URL entry.Save media*1 *2The image in contents is saved to My Files.Set as bookmark*1The displayed URL is saved to the bookmark list.Service Inbox Open Service Inbox.Reload page*1Reload this page.AdvancedGo to homepage, clear the cache, view or send the current URL, or view the current WAP information.SettingsEdit WAP profiles/Push access settings or view the security information.Exit browser*1Terminate the browser.VS3_VF_AAA.book Page 79 Monday, May 23, 2005 11:25 AM](https://usermanual.wiki/Panasonic-Mobile-Communications-Development-of-USA/26C001A.User-Manual-Part-2/User-Guide-551461-Page-7.png)
![80Vodafone live!Renaming a bookmark folder[192] to scroll to the required bookmark folder 7 [5] (Options) 7 Select Rename 7 Enter a new folder name 7 [0]Deleting all bookmarksIn the bookmark list:[5] (Options) 7 Select Delete all 7 [5] (Yes)All the saved bookmarks are deleted, and the folder names return to the default.Enter addressYou can directly go to the required web page by entering the URL.While off-line or on-line:1. [5] (Options) 7 Select Enter address2. Enter URL 7 [0]Save mediaImages, melodies or videos on the web page can be saved to My Files.When the web page is displayed:1. [5] (Options) 7 Select Save media2. [0]9[5] (Select) to saveGo to page Jump to the web page.Add bookmark Add to the bookmark list.Edit Edit the selected bookmark name and URL.Delete Delete the selected bookmark.Move to Move the selected bookmark to another folder.Send bookmark Send the bookmarked URL via MMS or SMS.Delete all in folder Delete all the bookmarks in the folder.Note: Panasonic is not responsible for the performance of downloaded contents or possible corruption of phone software.VS3_VF_AAA.book Page 80 Monday, May 23, 2005 11:25 AM](https://usermanual.wiki/Panasonic-Mobile-Communications-Development-of-USA/26C001A.User-Manual-Part-2/User-Guide-551461-Page-8.png)
![81Vodafone live!Set as bookmarkYou can save the URLs of your favourite pages in Bookmarks.When the web page is displayed:1. [5] (Options) 7 Select Set as bookmark2. Enter title 7 [0]3. [192] to scroll to the required folder 7 [0]9[5] (Save)Service InboxView WAP Push message and go to URL.While off-line or on-line:1. [5] (Options) 7 Select Service Inbox2. To load the URL: [0]To select the required option: [5] (Options)*1Available only when text and URL are delivered from Vodafone.Reload pageCurrent page can be reloaded.When the web page is displayed:1. [5] (Options) 7 Select Reload pageAdvancedWhile off-line or on-line:1. [5] (Options) 7 Select Advanced2. Select the required option*1Available only when the web page is displayed.Go to page Jump to the web page.View message*1View the message.Delete Delete the message.Home Jump to the set-up homepage.Clear cache Delete the contents stored in the cache.View current URL*1View the URL of the current page.Send current URL*1Send the URL of the current page via MMS or SMS.WAP information View WAP browser information.VS3_VF_AAA.book Page 81 Monday, May 23, 2005 11:25 AM](https://usermanual.wiki/Panasonic-Mobile-Communications-Development-of-USA/26C001A.User-Manual-Part-2/User-Guide-551461-Page-9.png)
![82Vodafone live!Browser settingsWAP profilesYou can check or edit the current WAP profile settings, or add new WAP profile settings.d Main menu > Vodafone live! [Off-line]1. [5] (Options) 7 Select Settings2. Select WAP profiles3. [192] to scroll to the required profile4. [5] (Options) 7 Select Activate, Edit or Delete5. If Edit is selected, you can edit the following information: Profile name, Homepage, Proxy IP, Proxy port, Use proxy and Data connectionsPush accessSet up Push access to receive WAP messages.While off-line or on-line:1. [5] (Options) 7 Select Settings2. Select Push access3. Select Service Indication, Service Loading or Other messages4. Select On or OffSecurityView security information.While off-line or on-line:1. [5] (Options) 7 Select Settings2. Select Security3. Select the required item*1Available only while secure connection.Note: You need to configure GPRS or CSD before configuring the WAP profile settings. See “Data connections” on page 107. Certificates Select Certificate 1-20.Current certificate*1View the current certificate.Session info*1View session information.VS3_VF_AAA.book Page 82 Monday, May 23, 2005 11:25 AM](https://usermanual.wiki/Panasonic-Mobile-Communications-Development-of-USA/26C001A.User-Manual-Part-2/User-Guide-551461-Page-10.png)
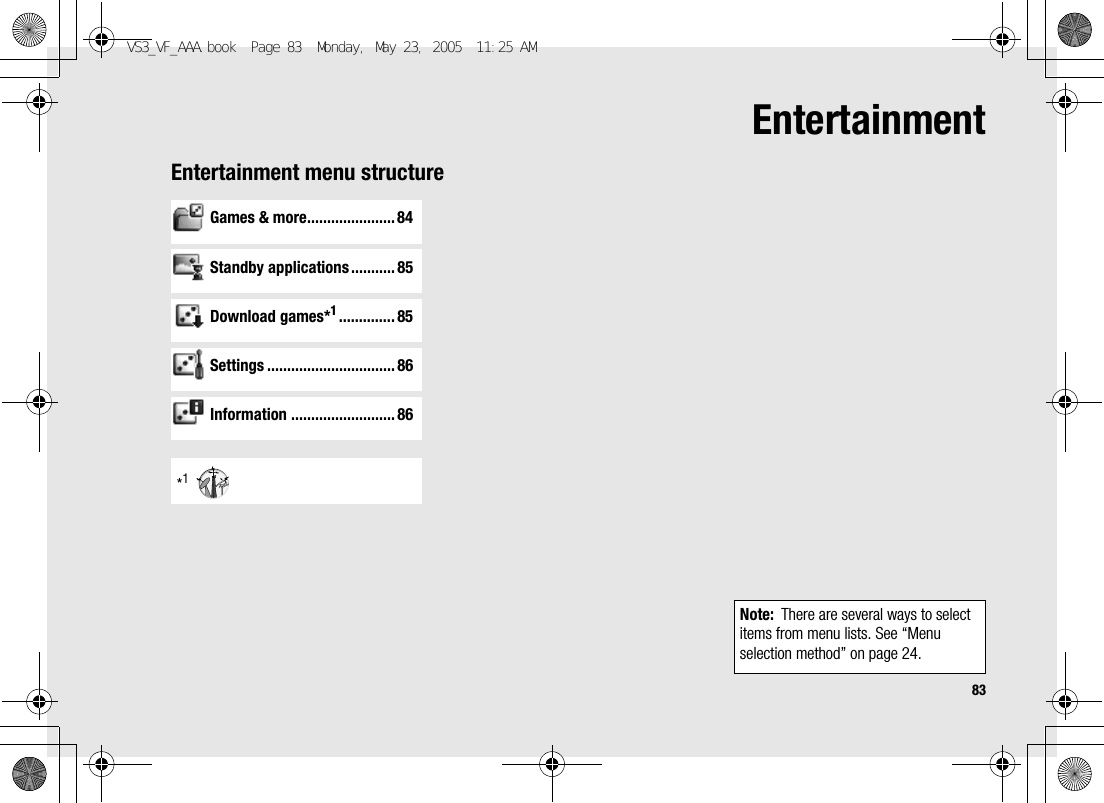
![84EntertainmentGames & moreSelecting gamesYour phone has preloaded games. The downloaded JavaTM applications are also listed here.d Main menu > Entertainment > Games & more1. [192] to scroll to the required application2. [5] (Options) 7 Select the required optionSuspending/Terminating the game1. [Y]2. Select Suspend or TerminateWhen you select Suspend, JavaTM icon () appears on the standby screen.To resume the game:d Main menu > Entertainment > Games & more1. Select ResumeThe JavaTM applications start running.Run Run the selected JavaTM application.PermissionSelect Network access, Messaging or Auto invocation, then select Always allowed, Ask first time, Ask every time or Not allowed.Details Show the application name, version, vendor, storage size, etc.Delete Delete the selected JavaTM application.Activate Renew your Activation key to run the selected JavaTM application.Note: Your phone supports J2METM JavaTM applications. Other types of JavaTM applications cannot be installed.For game details, contact Vodafone.Note: You can also suspend the JavaTM application by opening/closing the flip.VS3_VF_AAA.book Page 84 Monday, May 23, 2005 11:25 AM](https://usermanual.wiki/Panasonic-Mobile-Communications-Development-of-USA/26C001A.User-Manual-Part-2/User-Guide-551461-Page-12.png)
![85EntertainmentStandby applicationsSelecting a standby applicationd Main menu > Entertainment > Standby applications > Application list1. Select the required applicationThe selected JavaTM application starts running.To switch off the running standby application:d Main menu > Entertainment > Standby applications > Application settings1. Select Switch offChanging the waiting timeYou can change the duration of the interval between when the screen returns to standby mode and the standby application starts running.d Main menu > Entertainment > Standby applications > Application settings > Waiting time(1-10s)1. Enter the required time (1-10 seconds) 7 [0]9[5] (Ok)Download gamesYou can download games to your phone from WAP site. For customer support of downloaded contents, visit the respective supplier’s web sites.d Main menu > Entertainment > Download games1. Select the required JavaTM applicationWhen the downloading is over, “Would you like to run application?” appears.2. To run the JavaTM application: [0]9[5] (Ok)To exit: [Y]9[6] (Cancel)The downloaded files are stored to My Files.Note: Panasonic is not responsible for the performance of downloaded contents or possible corruption of phone software.VS3_VF_AAA.book Page 85 Monday, May 23, 2005 11:25 AM](https://usermanual.wiki/Panasonic-Mobile-Communications-Development-of-USA/26C001A.User-Manual-Part-2/User-Guide-551461-Page-13.png)

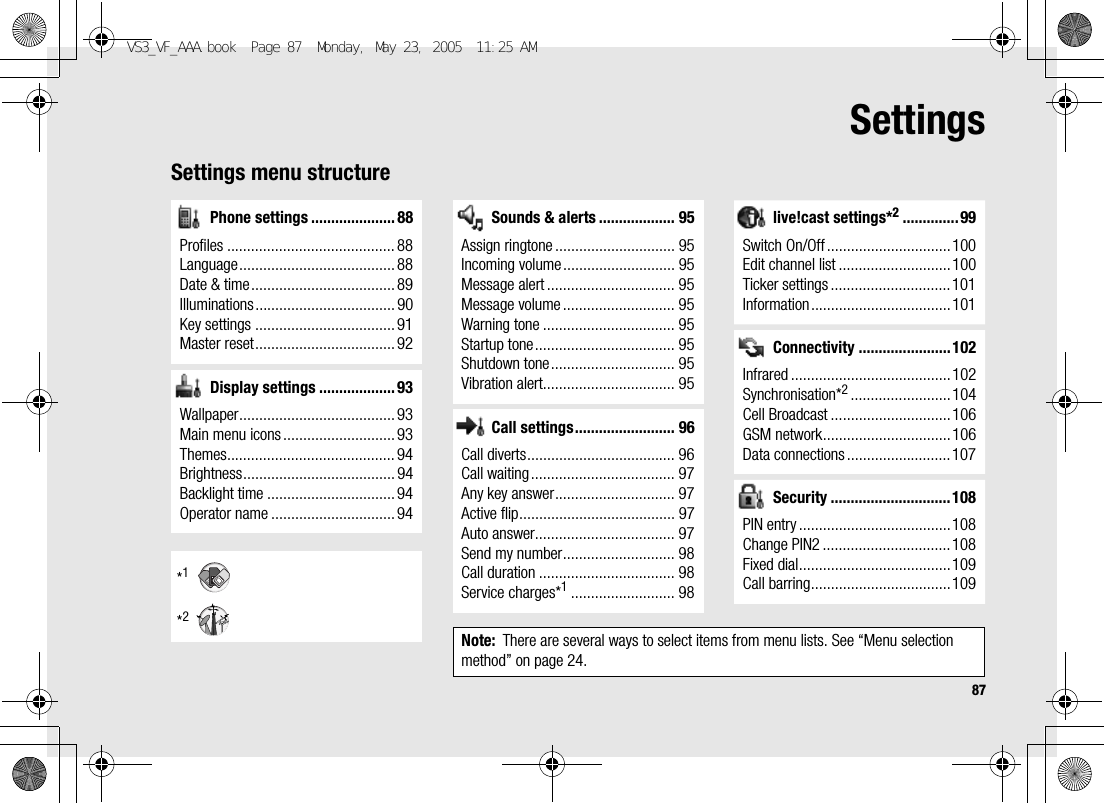
![88SettingsPhone settingsProfilesYou can switch among different profiles in your phone, each with a distinct combination of alert method, ringtone, etc. Profiles are set up for use in the following environments:Activating a profilesd Main menu > Settings > Phone settings > Profiles1. [192] to scroll to the required profile2. [0]OR[5] (Options) 7 Select ActivateSetting a profileYou can personalise the individual settings within a profile. For further details about the individual settings, see “Sounds & alerts” on page 95.d Main menu > Settings > Phone settings > Profiles1. [192] to scroll to the required profile2. [5] (Options) 7 Select Edit3. Select the required setting4. Select the required itemLanguageYou can change the language used for display messages and/or text entry. Automatic uses the language dictated by the country/region code of the SIM card.d Main menu > Settings > Phone settings > Language > Display language or Input language1. Select Automatic or the required languageNormal For everyday settings.Silent For formal occasions.Meeting For meetings.Outdoor For noisy environments.Car For driving occasions.VS3_VF_AAA.book Page 88 Monday, May 23, 2005 11:25 AM](https://usermanual.wiki/Panasonic-Mobile-Communications-Development-of-USA/26C001A.User-Manual-Part-2/User-Guide-551461-Page-16.png)
![89SettingsDate & timeYou can set your Home clock and Away clock.Home clockYou can set the current time and date on your phone.d Main menu > Settings > Phone settings > Date & time > Home clock1. Select the required settingAway clockYou can set Away clock to display the time in the area you choose.d Main menu > Settings > Phone settings > Date & time > Away clock1. Select the required settingChoosing clockYou can choose either Home clock or Away clock to be displayed on your phone.d Main menu > Settings > Phone settings > Date & time > Select clock > Home clock or Away clockSet date & time Enter the time 7 [2] 7 Enter the dateHome area Select your home area.Summer time Select On to activate the summer time mode.Set time zone Select the required area.Summer time Select On to activate the summer time mode.VS3_VF_AAA.book Page 89 Monday, May 23, 2005 11:25 AM](https://usermanual.wiki/Panasonic-Mobile-Communications-Development-of-USA/26C001A.User-Manual-Part-2/User-Guide-551461-Page-17.png)
![90SettingsDisplay formatYou can select the required display format for the date and time.d Main menu > Settings > Phone settings > Date & time > Display format > Time or Date1. To set Time format: Select 24 hour or 12 hourTo set Date format: Select the required format (DD=date, MM=month, YY=year)IlluminationsThe Indicator/Illumination Light flashes or beams when you receive calls/messages, have a conversation, the flip is closed, the battery is charging or data is transferred.d Main menu > Settings > Phone settings > Illuminations1. Select the required eventIncomingSelect the required colour or Off.MessageIn conversationFlip closeCharging Select On or Off.Data transferNote: You can check the Flip close illumination by pressing [O9P] while the phone is in standby mode with the flip closed.VS3_VF_AAA.book Page 90 Monday, May 23, 2005 11:25 AM](https://usermanual.wiki/Panasonic-Mobile-Communications-Development-of-USA/26C001A.User-Manual-Part-2/User-Guide-551461-Page-18.png)
![91SettingsKey settingsKey toneYou can change the key tone.d Main menu > Settings > Phone settings > Key settings > Key tone1. Select the required toneKey volumeYou can change the key tone volume.d Main menu > Settings > Phone settings > Key settings > Key volume1. [1929394] to scroll to Silent or the required volume 7 [0]9[5] (Select)Key backlightIf you set the key backlight to off, you can maintain longer battery life.d Main menu > Settings > Phone settings > Key settings > Key backlight1. Select On or OffKeyguardKeyguard prevents any keys from being accidentally pressed e.g. when the phone is being carried. When Keyguard is enabled, the Keyguard icon ( ) appears on the display. When a call is received, Keyguard is temporarily disabled and you can answer the call.To enable Keyguard:d Main menu > Settings > Phone settings > Key settings > Keyguard1. “Would you like to lock keypad?” 7 [0]9[5] (Yes)ORIn standby mode:1. Press and hold [0]2. “Would you like to lock keypad?” 7 [0]9[5] (Yes)Note: Emergency calls can still be made with the Keyguard enabled but there is no indication that you are dialling the number.VS3_VF_AAA.book Page 91 Monday, May 23, 2005 11:25 AM](https://usermanual.wiki/Panasonic-Mobile-Communications-Development-of-USA/26C001A.User-Manual-Part-2/User-Guide-551461-Page-19.png)
![92SettingsTo disable Keyguard:When () appears on the display:1. [0] 7 “Would you like to unlock?” 7 [0]9[5] (Yes)Shortcut keysNavigation key [1929394] can be used as a Shortcut key. It is possible to assign a specific menu to Navigation key so that you can access the menu directly from standby mode.d Main menu > Settings > Phone settings > Key settings > Shortcut keys1. Select Navigation up, Navigation right, Navigation down, or Navigation left2. Select the required menuMaster resetYou can reset your phone to the factory settings, except for the data of the following: Data in My Files, Contacts, Call log and Messaging.Password is required for master reset. The factory set password is 0000.Resettingd Main menu > Settings > Phone settings > Master reset > Reset settings1. “Would you like to reset all phone settings?” 7 [0]9[5] (Yes)2. Enter the password 7 [0]9[5] (Ok)Changing the passwordd Main menu > Settings > Phone settings > Master reset > Password setting1. Enter the current password 7 [0]9[5] (Ok)2. Enter a new password 7 [0]9[5] (Ok)3. Enter the new password again 7 [0]9[5] (Ok)VS3_VF_AAA.book Page 92 Monday, May 23, 2005 11:25 AM](https://usermanual.wiki/Panasonic-Mobile-Communications-Development-of-USA/26C001A.User-Manual-Part-2/User-Guide-551461-Page-20.png)
![93SettingsDisplay settingsWallpaperYou can change the wallpaper on the standby screen.d Main menu > Settings > Display settings > Wallpaper1. Select My Files or Download pictures*12. [1929394] to scroll to the required wallpaper3. To set: [5] (Select)To view and set: [0] 7 [0]9[5] (Select)Main menu iconsYou can change menu icons or the background on Main menu screen.Changing iconsTo change menu icons:d Main menu > Settings > Display settings > Main menu icons1. [1929394] to scroll to the required menu icon 7 [0]2. Select My Files or Download pictures*13. [1929394] to scroll to the required image4. To set: [5] (Select)To view and set: [0] 7 [0]9[5] (Select)To change the background:d Main menu > Settings > Display settings > Main menu icons1. [5] (Options) 7 Select Attach full image2. Repeat steps 2-4 in “To change menu icons:” on page 93*1VS3_VF_AAA.book Page 93 Monday, May 23, 2005 11:25 AM](https://usermanual.wiki/Panasonic-Mobile-Communications-Development-of-USA/26C001A.User-Manual-Part-2/User-Guide-551461-Page-21.png)
![94SettingsSetting back to defaultd Main menu > Settings > Display settings > Main menu icons1. [5] (Options) 7 Select Set to default2. “Would you like to set default?” 7 [0]9[5] (Yes)ThemesYou can change the colour theme of the display.d Main menu > Settings > Display settings > Themes1. Select the required colour themeBrightnessYou can adjust the brightness of the display.d Main menu > Settings > Display settings > Brightness1. [192] to adjust the brightness level 7 [0]9[5] (Select)Backlight timeYou can set the length of time the display is illuminated by the backlight.d Main menu > Settings > Display settings > Backlight time1. Select 10 seconds, 30 seconds or 60 secondsOperator nameYou can change the position of your operator name on the standby screen.d Main menu > Settings > Display settings > Operator name1. Select Default, Upper left or Lower leftVS3_VF_AAA.book Page 94 Monday, May 23, 2005 11:25 AM](https://usermanual.wiki/Panasonic-Mobile-Communications-Development-of-USA/26C001A.User-Manual-Part-2/User-Guide-551461-Page-22.png)
![95SettingsSounds & alertsRingtone/Message alertYou can change the tone and/or the volume of the ringtone for incoming calls and the Message alert for incoming messages.Changing the ringtone/Message alertd Main menu > Settings > Sounds & alerts > Assign ringtone or Message alert1. Select My Files or Download sounds*12. [192] to scroll to the required tone3. [0] to listen to the tone 7 [6] (Cancel) to stop the tone and return to the previous screen4. [5] (Select)*1Changing the ringtone/Message alert volumed Main menu > Settings > Sounds & alerts > Incoming volume or Message volume1. [1929394] to adjust the volume (Silent, Volume1-4, Escalating) 7 [0]9[5] (Select)Warning toneThe Warning tone informs you of low battery.d Main menu > Settings > Sounds & alerts > Warning tone1. Select On or OffStartup tone/Shutdown toneThe Startup tone sounds after switching on the phone, while the Shutdown tone sounds after switching off the phone.d Main menu > Settings > Sounds & alerts > Startup tone or Shutdown tone1. Select On or OffVibration alertThe phone does not ring but vibrates to inform you of incoming calls and messages if you switch on Vibration alert.d Main menu > Settings > Sounds & alerts > Vibration alert1. Select On or OffVS3_VF_AAA.book Page 95 Monday, May 23, 2005 11:25 AM](https://usermanual.wiki/Panasonic-Mobile-Communications-Development-of-USA/26C001A.User-Manual-Part-2/User-Guide-551461-Page-23.png)
![96SettingsCall settingsCall divertsVoice, fax and data calls can be diverted to different numbers in different situations. For example, you can divert calls to your voice mailbox when you are out of reach.Voice calls can be diverted in the following situations:d Main menu > Settings > Call settings > Call diverts1. Select Divert voice, Divert all fax or Divert all data2. Select the divert situation3. Select Direct input or From contacts4. If Direct input is selected: Enter the phone number to divert to 7 [0]If From contacts is selected: Highlight the required contact 7 [5] (Select) 7 If the card has several phone numbers stored, [192] to scroll to the required number 7 [0]9[5] (Select)When the setting is enabled, the divert icon () is displayed on the standby screen.To cancel each setting/check each status:After step 1, highlight the required divert situation 7 [5] (Options) 7 Select Off or StatusTo cancel all the settings/check all the statuses:In step 1, Select Cancel all or Status allAll calls Divert all incoming voice calls.When busy Divert incoming voice calls when a call is in progress.When no reply Divert incoming voice calls if call is not answered.When unreachable Divert incoming voice calls when phone is not in a coverage area.VS3_VF_AAA.book Page 96 Monday, May 23, 2005 11:25 AM](https://usermanual.wiki/Panasonic-Mobile-Communications-Development-of-USA/26C001A.User-Manual-Part-2/User-Guide-551461-Page-24.png)
![97SettingsCall waitingIf Call waiting is switched on, another call can be received while on a call and multiple calls can be made.d Main menu > Settings > Call settings > Call waitingThe current status is displayed.To accept the current status:1. [0]To change the setting:1. [5] (Options) 7 Select Activate or DeactivateThe current status is displayed.2. [0] to accept the current statusAny key answerCalls can be answered by pressing any key except [Y], [0], [6] (Cancel), [U], [O] and [P].When Any key answer is off, calls can only be answered by pressing [q] or [5] (Accept).d Main menu > Settings > Call settings > Any key answer1. Select On or OffActive flipYou can answer the call by opening the phone and end the call by closing the phone.When Active flip is off, you need to press the appropriate key to answer or end the call. Closing the phone during a conversation switches the caller’s voice to the Speaker so you can speak handsfree.d Main menu > Settings > Call settings > Active flip1. Select On or OffAuto answerWhen you use the optional Personal Handsfree earpiece, you can answer a call automatically.d Main menu > Settings > Call settings > Auto answer1. Select On or OffVS3_VF_AAA.book Page 97 Monday, May 23, 2005 11:25 AM](https://usermanual.wiki/Panasonic-Mobile-Communications-Development-of-USA/26C001A.User-Manual-Part-2/User-Guide-551461-Page-25.png)
![98SettingsSend my numberYou can choose whether or not to show your name and/or number to another phone. You can comply with your network’s own setting if you select Network set.d Main menu > Settings > Call settings > Send my number1. Select Network set, On or OffCall durationYou can check the duration of incoming or outgoing calls.d Main menu > Settings > Call settings > Call duration1. Select Incoming or Outgoing2. To reset the counter, [0]9[5] (Reset)3. “Would you like to reset?” 7 [0]9[5] (Yes)Service chargesCost leftYou can check the remaining call units available if Max cost is set.d Main menu > Settings > Call settings > Service charges > Cost leftCall meterYou can check the total costs of calls made.d Main menu > Settings > Call settings > Service charges > Call meterTo reset the counter:1. [0]9[5] (Reset) 7 “Reset total cost?” 7 [0]9[5] (Yes)2. Enter the PIN2 code 7 [0]9[5] (Ok)VS3_VF_AAA.book Page 98 Monday, May 23, 2005 11:25 AM](https://usermanual.wiki/Panasonic-Mobile-Communications-Development-of-USA/26C001A.User-Manual-Part-2/User-Guide-551461-Page-26.png)
![99SettingsPrice/unitYou can set your personal rate of the cost that the service provider charges for one unit of call time.d Main menu > Settings > Call settings > Service charges > Price/unit1. [0]9[5] (Edit) 7 Enter the PIN2 code 7 [0]9[5] (Ok)2. Enter the currency 7 [0]9[5] (Ok)3. Enter the value 7 [0]9[5] (Ok)Max costYou can set the maximum cost of calls allowed. If this is set, the remaining units are displayed when the call is ended.d Main menu > Settings > Call settings > Service charges > Max cost1. [0] 7 Enter the PIN2 code 7 [0]9[5] (Ok)2. Enter the credit limit 7 [0]9[5] (Ok)To disable the Max cost:In step 1, [5] (Options) 7 Select Disable 7 [0]9[5] (Yes) 7 Enter the PIN 2 code 7 [0]9[5] (Ok)live!cast settingslive!cast lets you receive messages on specified topics, such as weather information and traffic news provided by Vodafone and cyclically displays with ticker in standby screen. You need to specify the channel of information you wish to receive.live!cast displays its messages in three modes.This service may not yet be available in your country/region. For information on this service, contact Vodafone.Ticker modeDisplay the prearranged number of newly received messages. Messages are cyclically displayed. Only a part of each message can be viewed.Latest news modeDisplay 10 newly received messages. Full messages can be viewed.Channel view modeDisplay 10 messages of the selected channel. Full messages can be viewed.VS3_VF_AAA.book Page 99 Monday, May 23, 2005 11:25 AM](https://usermanual.wiki/Panasonic-Mobile-Communications-Development-of-USA/26C001A.User-Manual-Part-2/User-Guide-551461-Page-27.png)
![100SettingsActivating live!castd Main menu > Settings > live!cast settings > Switch On/Off1. Select On or OffEditing channel listYou can edit the channel via online channel selection service.d Main menu > Settings > live!cast settings > Edit channel list1. “Would you like to connect?” 7 [0]9[5] (Yes)2. Edit the channel as requiredViewing messagesViewing messages in Latest news mode1. While in standby mode with no ticker: [5] (live!cast)While in Ticker mode: [5] (More)Viewing messages in Channel view mode1. In Latest news mode, [5] (Options) 7 Select the required channelWhen the number of subscribed channel is more than seven, select All channel, then select the required channel.Operations while viewing messages in Latest news mode or Channel view modeTo scroll the displayed message: [192]To scroll to the other message: [394]To update information: [0]VS3_VF_AAA.book Page 100 Monday, May 23, 2005 11:25 AM](https://usermanual.wiki/Panasonic-Mobile-Communications-Development-of-USA/26C001A.User-Manual-Part-2/User-Guide-551461-Page-28.png)
![101SettingsOptionsIn Latest news mode and Channel view mode, the following options are available by pressing [5] (Options).*1Available only in Channel view mode.*2Available only when the number of subscribed channel is more than seven.Ticker settingsTicker speedYou can change the ticker speed.d Main menu > Settings > live!cast settings > Ticker settings > Ticker speed1. Select Slow, Medium or FastNumber of messagesYou can select the number of messages to be displayed in Ticker mode.d Main menu > Settings > live!cast settings > Ticker settings > Number of Msg.1. Select 1 message, 3 messages, 5 messages or 10 messagesInformationYou can view live!cast software information.d Main menu > Settings > live!cast settings > InformationChannel name View the selected channel in Channel view mode.Latest news*1View the messages in Latest news mode.All channel*2Show all the channel names. Select the required channel to view in Channel view mode.Settings Access the live!cast settings menu.VS3_VF_AAA.book Page 101 Monday, May 23, 2005 11:25 AM](https://usermanual.wiki/Panasonic-Mobile-Communications-Development-of-USA/26C001A.User-Manual-Part-2/User-Guide-551461-Page-29.png)
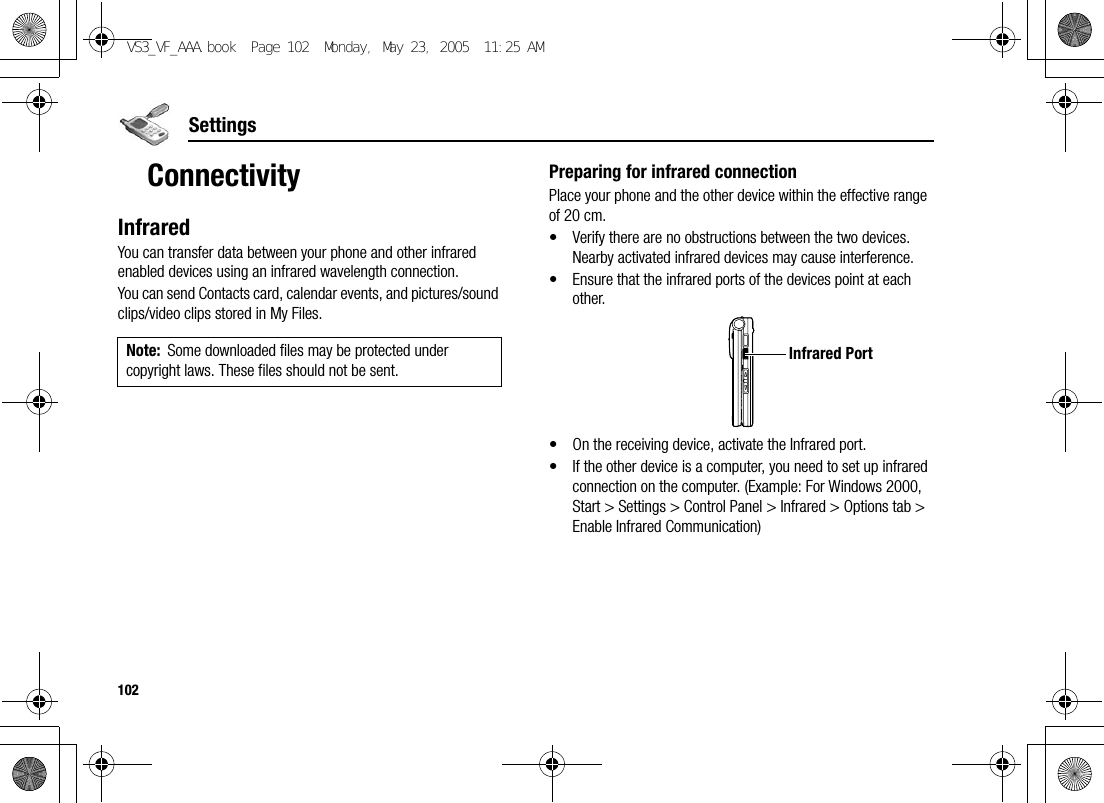
![103SettingsSending data via infraredPrepare for infrared connection as described in “Preparing for infrared connection”.1. Select the item you wish to send2. [5] (Options) 7 Select Send via infraredThe phone automatically begins infrared connection.A confirmation message is displayed when complete.If transfer does not begin within 10 minutes, the infrared connection automatically stops.Receiving data via infraredPrepare for infrared connection as described in “Preparing for infrared connection” on page 102.To activate infrared:You need to activate the infrared function before receiving data.When infrared is set to on, the infrared icon ( ) appears on the display. If infrared is unused for 10 minutes or the phone is once switched off, it is automatically set to off and ( ) disappears.d Main menu > Settings > Connectivity > Infrared1. Select OnTo receive data via infrared:When ( ) is displayed, sender can begin transfer of data.1. When transfer is started, “Would you like to receive data?” 7 [0]9[5] (Yes) to receive the data2. When transfer is complete, “Data received” is displayed on standby screen 7 [0]9[5] (Save) to save the dataThe received data is stored in respective menus or files.VS3_VF_AAA.book Page 103 Monday, May 23, 2005 11:25 AM](https://usermanual.wiki/Panasonic-Mobile-Communications-Development-of-USA/26C001A.User-Manual-Part-2/User-Guide-551461-Page-31.png)
![104SettingsSynchronisationYou can synchronise your Contacts list with your network server. You may need to do this if you store your Contacts list on the network server, and you want them all to be the same. You can just send changes or send all your records to the network server. This function uses SyncML/OMA Standard technology.Before you can synchronise your Contacts list, you need to set up a server profile and select a WAP profile.Creating/editing a server profileYou can create up to 2 server profiles.d Main menu > Settings > Connectivity > Synchronisation1. [5] (Options) 7 Select Sync. settings2. [192] to scroll to the required profile3. [5] (Options) 7 Select Edit4. Select the required setting 7 [0]5. Enter information 7 [0]6. [5] (Save)Selecting a server profiled Main menu > Settings > Connectivity > Synchronisation1. Repeat steps 1 and 2 in “Creating/editing a server profile” on page 1042. [5] (Options) 7 Select SetSelecting a WAP profiled Main menu > Settings > Connectivity > Synchronisation1. [5] (Options) 7 Select WAP profiles2. Select the required profileProfile name Enter the profile name.Server name Enter the web address of the server.Server database Enter the database name of the server.Server user ID Enter your user name for the server.Server password Enter the password.VS3_VF_AAA.book Page 104 Monday, May 23, 2005 11:25 AM](https://usermanual.wiki/Panasonic-Mobile-Communications-Development-of-USA/26C001A.User-Manual-Part-2/User-Guide-551461-Page-32.png)
![105SettingsSynchronisingTo send only changes to the network server:d Main menu > Settings > Connectivity > Synchronisation > Sync. contactsThe phone confirms completion.To send all your records to the network server:d Main menu > Settings > Connectivity > Synchronisation > Restore contactsThe phone confirms completion.Server or database authenticationWhile synchronising, you may be asked for server or database authentication. Enter the correct information and retry the synchronisation connection.In authentication screen:1. [192] to scroll to the required setting 7 [0]2. Enter the correct information 7 [0]3. To retry the synchronisation connection, [5] (Options) 7 Select OkNote: If you are synchronising your Contacts list for the first time, or you need to make a large number of changes, then the synchronisation may take several minutes or more.You cannot synchronise the following fields: Birthday, Postal address, Ringtone, Message alert, Illumination, Picture and Group.VS3_VF_AAA.book Page 105 Monday, May 23, 2005 11:25 AM](https://usermanual.wiki/Panasonic-Mobile-Communications-Development-of-USA/26C001A.User-Manual-Part-2/User-Guide-551461-Page-33.png)
![106SettingsCell BroadcastYou can receive messages on specified topics, such as weather information and traffic news, regularly from your service provider. You can specify the “topic(s)” of information and the language in which you wish to receive the information.Activating Cell Broadcastd Main menu > Settings > Connectivity > Cell Broadcast > On/Off1. Select On or OffReading a received messaged Main menu > Settings > Connectivity > Cell Broadcast > Read messages1. [192] to scroll to the required message 7 [0]Topics and languagesYou can add, edit and delete topics and languages.d Main menu > Settings > Connectivity > Cell Broadcast > Options > Topic or Language1. [192] to scroll to the required topic or language2. [5] (Options) 7 Select Add, Edit or DeleteGSM networkSelecting a network manuallyYou can manually select a network that is available in your current location.d Main menu > Settings > Connectivity > GSM network > New search1. Select the required networkNetwork listThe network list is used when the Search mode is set to Automatic. The order in the list indicates the search priority. You can edit the list as required.d Main menu > Settings > Connectivity > GSM network > Select network1. [192] to scroll to the required network2. [5] (Options) 7 Select Add, Insert, Edit or DeleteAdd stores a new network at the end of the list, while Insert stores a new network above the selected network.VS3_VF_AAA.book Page 106 Monday, May 23, 2005 11:25 AM](https://usermanual.wiki/Panasonic-Mobile-Communications-Development-of-USA/26C001A.User-Manual-Part-2/User-Guide-551461-Page-34.png)
![107SettingsSearch modeYou can set your phone to automatically or manually search for the other networks when roaming. When Automatic is selected, the phone automatically selects a new network in order to maintain optimum network availability. When Manual is selected, available networks are shown on the standby screen.d Main menu > Settings > Connectivity > GSM network > Search mode1. Select Automatic or ManualData connectionsGPRS settings and CSD settings are stored in the Data connections menu.Data can be sent/received using GPRS or CSD technology.Editing GPRS/CSD settingsd Main menu > Settings > Connectivity > Data connections1. [192] to scroll to the required setting you want to edit or <Empty> to add new setting2. [5] (Options) 7 Select Edit3. If <Empty> is selected in step 1, select GPRS or CSD4. Edit the required field 7 [5] (Save)To delete the setting:In step 2, [5] (Options) 7 Select Delete 7 [0]9[5] (Yes)USBYou can backup data stored on your phone to a PC using the optional USB Cable. To use the USB Cable, you need to download Handset Manager software and install it to your PC. For further information, visit http://panasonic.co.jp/pmc/enNote: National regulations may not permit roaming in your home region.Note: If Vodafone has protected some of your settings, you may not be able to modify them.VS3_VF_AAA.book Page 107 Monday, May 23, 2005 11:25 AM](https://usermanual.wiki/Panasonic-Mobile-Communications-Development-of-USA/26C001A.User-Manual-Part-2/User-Guide-551461-Page-35.png)
![108SettingsSecurityPIN codeThe PIN protects your SIM card against unauthorised use. If you enable the PIN, you will be prompted to enter the PIN code every time the phone is switched on.The PIN2 controls security for certain service provider services such as Fixed dial and Service charges.Enabling/Disabling PIN entryd Main menu > Settings > Security > PIN entry > Enable/disable1. Select Enable or Disable2. Enter the PIN code (4-8 digits) 7 [0]9[5] (Ok)Changing PINYou can change the PIN when PIN entry is set to Enable.d Main menu > Settings > Security > PIN entry > Change PIN1. Enter the current code 7 [0]9[5] (Ok)2. Enter the new code 7 [0]9[5] (Ok)3. Enter the new code again 7 [0]9[5] (Ok)Changing PIN2d Main menu > Settings > Security > Change PIN21. Enter the current code 7 [0]9[5] (Ok)2. Enter the new code 7 [0]9[5] (Ok)3. Enter the new code again 7 [0]9[5] (Ok)Note: If PIN is entered incorrectly 3 times the phone will be locked, and you will need to enter the PUK code. If PIN2 is entered incorrectly 3 times SIM card will be locked, and you will need to enter PUK2 code. If the PUK code is entered incorrectly 10 times, the phone will cease to operate permanently. All information stored in the SIM card will be lost and the SIM card will need to be replaced. Contact Vodafone for further information.VS3_VF_AAA.book Page 108 Monday, May 23, 2005 11:25 AM](https://usermanual.wiki/Panasonic-Mobile-Communications-Development-of-USA/26C001A.User-Manual-Part-2/User-Guide-551461-Page-36.png)
![109SettingsFixed dialWhen Fixed dial is enabled, only the phone numbers stored in SIM Contacts can be dialled. Any manually dialled phone numbers must match the phone numbers in SIM Contacts.To store, edit or delete phone numbers in SIM Contacts, you need to enter your PIN2 code.d Main menu > Settings > Security > Fixed dial1. Select Enable or Disable2. Enter the PIN2 code (4-8 digits) 7 [0]9[5] (Ok)Call barringCall barring restricts certain calls, using a password supplied by Vodafone.The following Call bar settings are available:Bar outgoing calls All outgoing calls are barred.Bar foreign calls International outgoing calls are barred.Bar foreign calls except HomeInternational outgoing calls except to your home country are barred.Bar incoming calls All incoming calls are barred.Bar incoming if abroad Roaming is barred if abroad.VS3_VF_AAA.book Page 109 Monday, May 23, 2005 11:25 AM](https://usermanual.wiki/Panasonic-Mobile-Communications-Development-of-USA/26C001A.User-Manual-Part-2/User-Guide-551461-Page-37.png)
![110SettingsCall barring settingd Main menu > Settings > Security > Call barring1. Select the required setting2. Enter the password 7 [0]9[5] (Ok)To cancel setting/check status:d Main menu > Settings > Security > Call barring1. [192] to scroll to the required setting2. [5] (Options) 7 Select Off or Status3. Enter the password 7 [0]9[5] (Ok)To cancel all the settings/check all the statuses:d Main menu > Settings > Security > Call barring1. Select Cancel all or Status all2. If Cancel all is selected, enter the password 7 [0]9[5] (Ok)Changing the passwordd Main menu > Settings > Security > Call barring > Password1. Enter the current password 7 [0]9[5] (Ok)2. Enter a new password 7 [0]9[5] (Ok)3. Enter the new password again 7 [0]9[5] (Ok)VS3_VF_AAA.book Page 110 Monday, May 23, 2005 11:25 AM](https://usermanual.wiki/Panasonic-Mobile-Communications-Development-of-USA/26C001A.User-Manual-Part-2/User-Guide-551461-Page-38.png)
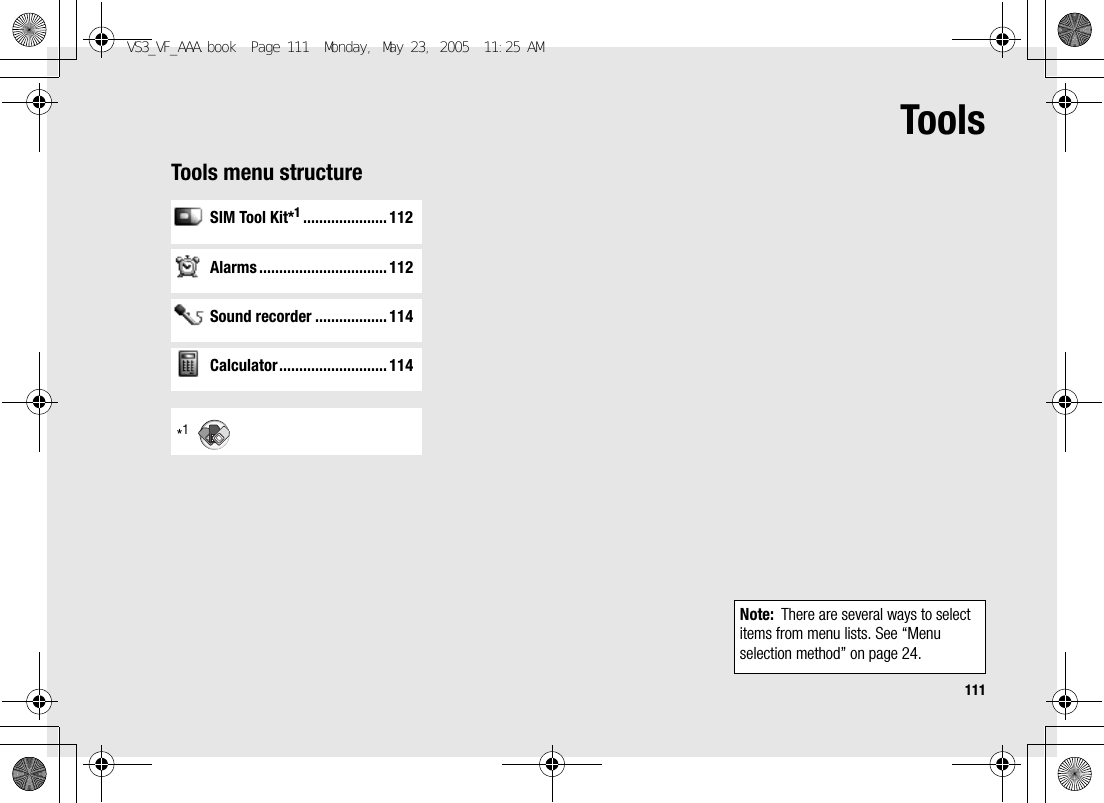
![112ToolsSIM Tool KitThe SIM Tool Kit allows the applications existing on the SIM card to interact and operate with your phone. These applications, stored in the SIM memory, are Value Added Services. Vodafone can configure your SIM card with the applications that can be seen on your phone as additional menu items.For further information, contact Vodafone.AlarmsYou can set up to 5 different alarms.Setting the alarmd Main menu > Tools > Alarms1. [192] to scroll to the required setting 7 [0]2. [192] to scroll to the required field 7 [0]3. Enter information 7 [0]4. [5] (Save) to store the entryThe alarm icon () appears on the standby screen.Turn on/off Select On or Off.Time Enter the time.Repeat type Select Once, Everyday or Weekly for alarm repeat type.VS3_VF_AAA.book Page 112 Monday, May 23, 2005 11:25 AM](https://usermanual.wiki/Panasonic-Mobile-Communications-Development-of-USA/26C001A.User-Manual-Part-2/User-Guide-551461-Page-40.png)
![113Tools*1Turning the alarm on/offd Main menu > Tools > Alarms1. [192] to scroll to the required setting2. [5] (Options) 7 Select Turn on or Turn offStopping the alarmWhen the alarm sounds, you can activate the snooze function to repeat the alarm 5 times at 5 minute intervals.1. Press any key except [Y] 7 “Alarm snooze for 5 minutes”2. To stop the snooze function: [0]9[5] (Turn off)To activate the snooze function: [6] (Snooze)Alarm toneSelect alarm tone from <Default> or My Files. To download an alarm tone, select Download sounds*1.Alarm volume Adjust alarm volume (Silent, Volume1-4 or Escalating).PictureSelect the required picture. The picture appears on the screen when the alarm sounds.Illumination Select the required illumination pattern.Note: The alarm sounds at the time you set even if the phone is off.Shortcut: Stopping the alarm by pressing [Y] activates the snooze function and returns to standby mode.VS3_VF_AAA.book Page 113 Monday, May 23, 2005 11:25 AM](https://usermanual.wiki/Panasonic-Mobile-Communications-Development-of-USA/26C001A.User-Manual-Part-2/User-Guide-551461-Page-41.png)
![114ToolsSound recorderYou can record sounds, your voice or phone conversation. The recorded sound clips (except for the phone conversation) can be attached to MMS messages.Recording new sound clipsd Main menu > Tools > Sound recorder1. [0]9[5] (Start) to start recordingThe max. recording time is 3 minutes.2. [0]9[5] (Stop) to stop recording3. [0] to play back if required[192] to adjust the volume4. [5] (Options) 7 Select SaveThe sound clip is saved to My Files.If you select Send as MMS, you can access MMS menu.CalculatorYou can use the 4-function calculator (addition, subtraction, multiplication and division) to make simple arithmetic operations.d Main menu > Tools > Calculator1. Enter a numberTo enter a decimal point: [5]To erase digits: [6] (Clear)2. [1929394] to select the arithmetic operation ([1] to multiply, [4] to add, [2] to divide, [3] to subtract)3. Enter a number4. [0] (=) to calculateNote: When you save the recorded sound clip and receive storage full message, press [0]9[5] (Yes) to save the recorded sound clip by deleting unwanted files in My Files.VS3_VF_AAA.book Page 114 Monday, May 23, 2005 11:25 AM](https://usermanual.wiki/Panasonic-Mobile-Communications-Development-of-USA/26C001A.User-Manual-Part-2/User-Guide-551461-Page-42.png)

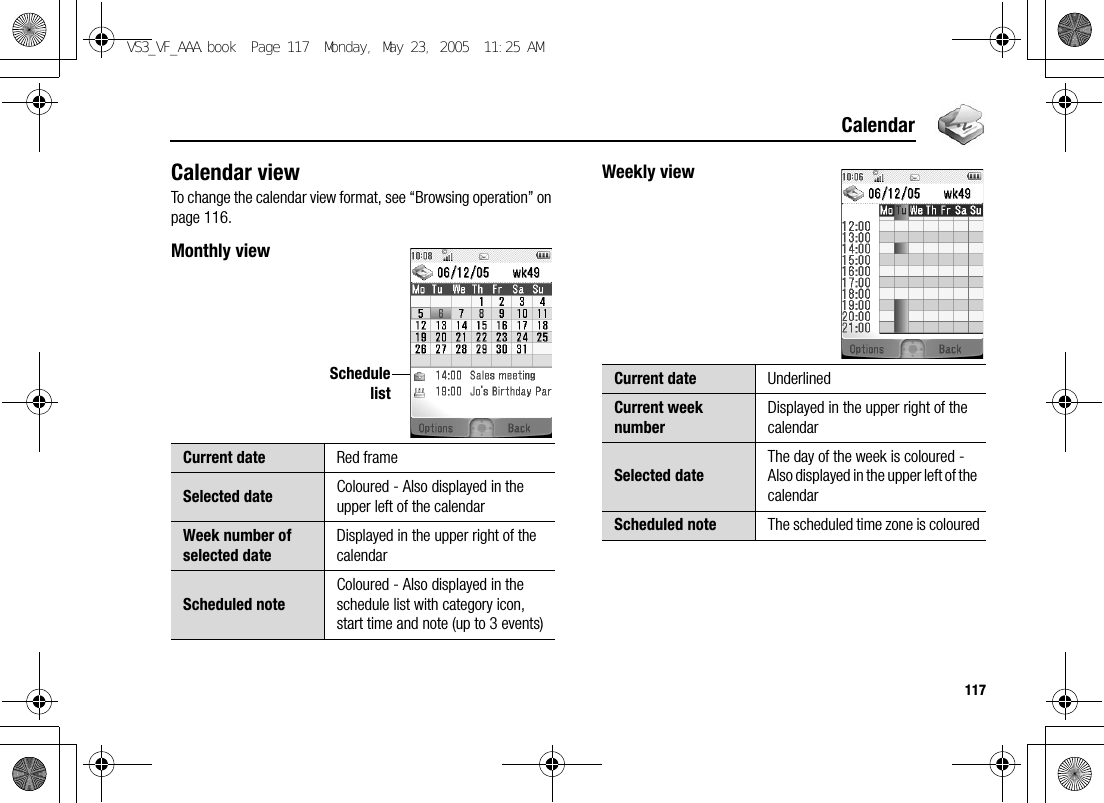
![116CalendarBrowsing CalendarYou can view the calendar by month, by week or by day.Browsing operationd Main menu > CalendarTo move around the calendar: [1929394]To change the view format (Monthly view/Weekly view): see View format in “Options”To view the details of the selected day (Daily view): [0]OptionsFrom Monthly view or Weekly view, the following options are available by pressing [5] (Options).New entry See “Creating Calendar events” on page 118.View format Change calendar view format, Monthly or Weekly.Go to date Go to specified date.Send via infrared Send calendar events via infrared. See “Infrared” on page 102.Delete See “Deleting multiple events” on page 120.Memory status Show used memory for calendar.Settings See “Calendar settings” on page 120.VS3_VF_AAA.book Page 116 Monday, May 23, 2005 11:25 AM](https://usermanual.wiki/Panasonic-Mobile-Communications-Development-of-USA/26C001A.User-Manual-Part-2/User-Guide-551461-Page-44.png)
![118CalendarDaily view Creating Calendar eventsd Main menu > Calendar1. Select the day of the event you wish to store2. [5] (Options) 7 Select New entry3. [192] to scroll to the required field 7 [0]4. Enter information 7 [0]To enter characters, see “Text entry” on page 34.5. [5] (Save) to store the eventCurrent date Displayed in the upper leftCurrent week number Displayed in the upper rightScheduled note Displayed with category icon, start time and note Note Enter note (subject).Start date/timeEnter the start time 7 [2] 7 Enter the start date (Present time/date is already entered.)End date/timeEnter the end time 7 [2] 7 Enter the end date (Present time/date is already entered.)Repeat type Select an event repeat cycle.VS3_VF_AAA.book Page 118 Monday, May 23, 2005 11:25 AM](https://usermanual.wiki/Panasonic-Mobile-Communications-Development-of-USA/26C001A.User-Manual-Part-2/User-Guide-551461-Page-46.png)
![119Calendar*1Managing Calendar eventsEditing eventsd Main menu > Calendar1. From Daily view, [192] to scroll to the required event 2. [5] (Options) 7 Select Edit3. Edit the required field 7 [5] (Save) to overwriteDeleting eventsDeleting an eventd Main menu > Calendar1. From Daily view, [192] to scroll to the required event2. [5] (Options) 7 Select Delete3. [0]9[5] (Yes)ReminderSet the reminder to sound at the start time (0 min.) or certain minutes ahead of the start time.Select Off, 0 min., or 5, 10, 15, 30, 60, 90 min. ahead.When the reminder tone sounds, press [5] (View) to check the schedule or press [6] (Stop) to return to standby mode.Location Enter location.Category Select category.Calendar toneSelect a reminder tone from <Default> or My Files. To download a tone, select Download sounds*1.Calendar volumeAdjust the reminder volume (Silent, Volume1-4 or Escalating).Illumination Select a reminder illumination pattern.Note: The reminder sounds at the scheduled time even if the phone is off.VS3_VF_AAA.book Page 119 Monday, May 23, 2005 11:25 AM](https://usermanual.wiki/Panasonic-Mobile-Communications-Development-of-USA/26C001A.User-Manual-Part-2/User-Guide-551461-Page-47.png)
![120CalendarDeleting multiple eventsTo delete the events of the selected day or the past events:d Main menu > Calendar1. From Monthly view or Weekly view, [1929394] to scroll to the required date2. [5] (Options) 7 Select Delete3. Select Day or Past4. [0]9[5] (Yes)To delete all events:d Main menu > Calendar1. From Monthly view or Weekly view, [5] (Options) 7 Select Delete2. Select All3. [5] (Yes)Calendar settingsSelecting the starting day of the weekd Main menu > Calendar1. [5] (Options) 7 Select Settings2. Select Week starts on3. Select the required day of the weekSetting holidaysYou can set holidays to be indicated in red.d Main menu > Calendar1. [5] (Options) 7 Select Settings2. Select Holiday set3. [192] to scroll to the required day of the week 7 [0]Repeat this step to select other days of the week.4. [5] (Ok)VS3_VF_AAA.book Page 120 Monday, May 23, 2005 11:25 AM](https://usermanual.wiki/Panasonic-Mobile-Communications-Development-of-USA/26C001A.User-Manual-Part-2/User-Guide-551461-Page-48.png)
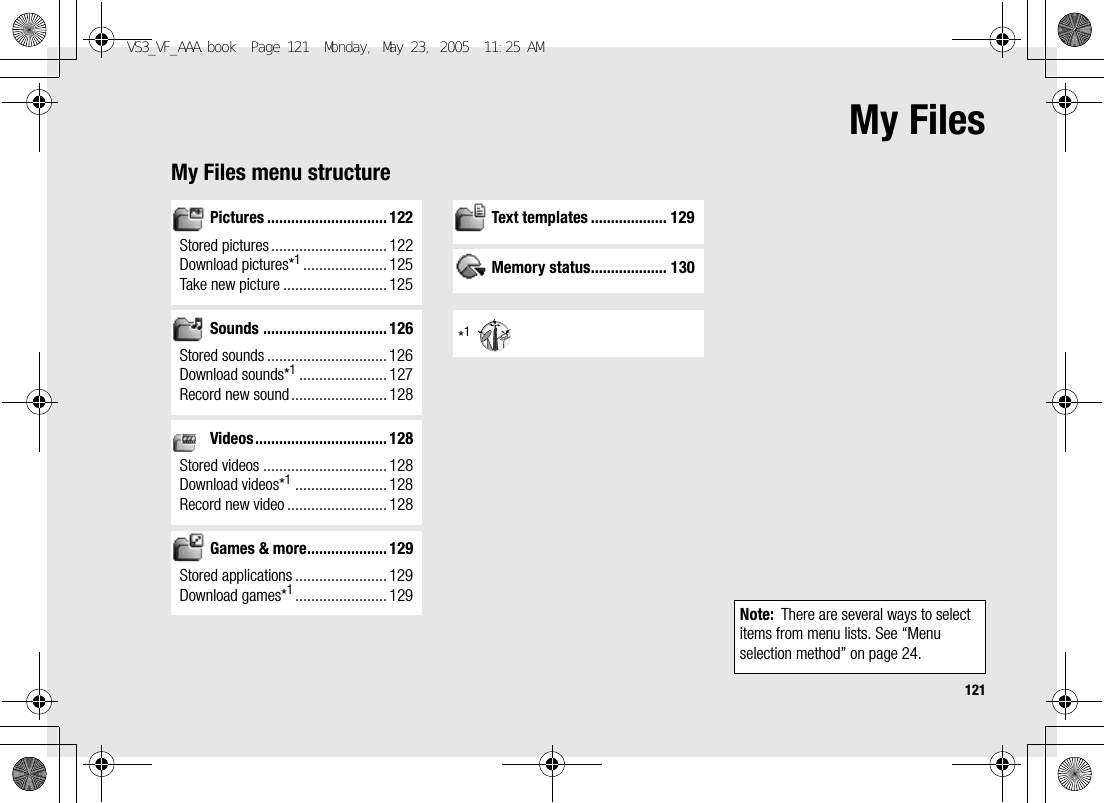
![122My FilesPicturesPictures taken by Camera, images downloaded from a WAP site and received via infrared are stored in the Pictures folder.Viewing picturesd Main menu > My Files > Pictures > Stored pictures1. [1929394] to scroll to the required thumbnail 7 [0]You can view the actual size of the selected picture by pressing [0] if the picture is larger than the display. To continue onto step 2, press [6] (Back).2. [4]9[2] to view the next picture or [3]9[1] to view the previous pictureManaging filesTo make a new folder:1. In the Stored pictures folder, [5] (Options) 7 Select Manage files2. Select New folder3. Enter folder name 7 [0]To move the selected picture to another folder:1. When the required thumbnail is highlighted, [5] (Options) 7 Select Manage files2. Select Move to folder3. Select the required folderNote: The file size of highlighted picture is displayed under the picture title, together with the date and time the image was stored. The picture of less than 1 kB is displayed as 1 kB.VS3_VF_AAA.book Page 122 Monday, May 23, 2005 11:25 AM](https://usermanual.wiki/Panasonic-Mobile-Communications-Development-of-USA/26C001A.User-Manual-Part-2/User-Guide-551461-Page-50.png)
![123My FilesOptionsWhen viewing the picture list, the following options are available by pressing [5] (Options).*1Create messageAttach the selected picture to an MMS message or postcard*1. See “Creating an MMS message” on page 61 or “Creating a postcard” on page 65.Copy to album*1Copy the selected picture to Media Album. See “Media Album” on page 74.Use asUse the selected picture as Wallpaper or Contacts picture. See “Using pictures” on page 124.Delete Delete the selected picture or folder.Delete all Delete all the pictures in the folder or all the folders.Activate Renew your Activation key to view the selected picture.Rename Rename the selected picture or folder.Send via infraredSend the selected picture via infrared. See “Infrared” on page 102.Resize Resize the selected picture.Edit Edit the selected picture. See “Editing pictures” on page 124.Change view Change the picture list to List view or Grid view.Manage filesMake a new folder or move the selected picture to another folder. See “Managing files” on page 122.Details Show details of the selected picture.Note: Sending, copying or editing of forward locked picture indicated by the icon ( ) is restricted.VS3_VF_AAA.book Page 123 Monday, May 23, 2005 11:25 AM](https://usermanual.wiki/Panasonic-Mobile-Communications-Development-of-USA/26C001A.User-Manual-Part-2/User-Guide-551461-Page-51.png)
![124My FilesUsing picturesYou can use the stored pictures as wallpapers or Contacts pictures.d Main menu > My Files > Pictures > Stored pictures1. [192] to scroll to the required picture2. [5] (Options) 7 Select Use as3. Select Wallpaper or Contacts picture(If Contacts picture is selected, go to the next step.)4. Highlight the required contact 7 [5] (Select)5. [5] (Save)Editing picturesAdding frameYou can add a frame to your picture.d Main menu > My Files > Pictures > Stored pictures1. When the required thumbnail is highlighted or the required picture is displayed on the screen, [5] (Options) 7 Select Edit2. Select Add frame3. Select the required frameThe picture with the selected frame is displayed.You can change the frame by pressing [394].4. [0]9[5] (Save)5. Enter the file name 7 [0]VS3_VF_AAA.book Page 124 Monday, May 23, 2005 11:25 AM](https://usermanual.wiki/Panasonic-Mobile-Communications-Development-of-USA/26C001A.User-Manual-Part-2/User-Guide-551461-Page-52.png)
![125My FilesTrimmingYou can trim your pictures.d Main menu > My Files > Pictures > Stored pictures1. When the required thumbnail is highlighted or the required picture is displayed on the screen, [5] (Options) 7 Select Edit2. Select Trimming3. Select the required trimming size4. If Free size is selected: [1929394] to determine the starting point 7 [0]9[5] (Start) 7 [1929394] to determine the ending point 7 [0]9[5] (Ok)If a size other than Free size is selected: [1929394] to move the trimming box 7 [0]9[5] (Start)5. [0]9[5] (Save)6. Enter the file name 7 [0]Clearing shadowYou can make dark pictures clearer.d Main menu > My Files > Pictures > Stored pictures1. When the required thumbnail is highlighted or the required picture is displayed on the screen, [5] (Options) 7 Select Edit2. Select Clear shadow3. [0]9[5] (Save)4. Enter the file name 7 [0]Downloading picture filesd Main menu > My Files > Pictures > Download picturesThe download site is displayed.Taking a new pictured Main menu > My Files > Pictures > Take new pictureThe phone switches to Picture mode. See “Taking a picture” on page 49.Note: Panasonic is not responsible for the performance of downloaded contents or possible corruption of phone software.VS3_VF_AAA.book Page 125 Monday, May 23, 2005 11:25 AM](https://usermanual.wiki/Panasonic-Mobile-Communications-Development-of-USA/26C001A.User-Manual-Part-2/User-Guide-551461-Page-53.png)
![126My FilesSoundsSound clips recorded by Sound recorder, downloaded from a WAP site and received via infrared are stored in the Sounds folder.Playing sound clipsd Main menu > My Files > Sounds > Stored sounds1. [192] to scroll to the required sound file 7 [0][192] to adjust the volume.2. To stop: [0]To restart: [5] (Restart)Managing filesYou can make new folders or move the selected sound files to another folder. See “Managing files” on page 122.OptionsIn the sound list, the following options are available by pressing [5] (Options).Note: The file size of highlighted sound is displayed at the top of the list, together with the date and time the sound file was stored. The sound file of less than 1 kB is displayed as 1 kB.Send as MMSAttach the selected sound clip to an MMS message. See “Creating an MMS message” on page 61.Copy to album*1Copy the selected sound clip to Media Album. See “Media Album” on page 74.Use asUse the selected sound clip as Ringtone, Message alert or Contacts ringtone. See “Using sound clips” on page 127.Play in sequenceSelect Looped or Random to play all the sound clips in the selected folder in a loop or at random.Delete Delete the selected sound file or folder.Delete all Delete all the sound files in the folder or all the folders.VS3_VF_AAA.book Page 126 Monday, May 23, 2005 11:25 AM](https://usermanual.wiki/Panasonic-Mobile-Communications-Development-of-USA/26C001A.User-Manual-Part-2/User-Guide-551461-Page-54.png)
![127My Files*1sUsing sound clipsYou can use the stored sound clips as ringtones, Message alerts or Contacts ringtones.d Main menu > My Files > Sounds > Stored sounds1. [192] to scroll to the required sound clip2. [5] (Options) 7 Select Use as3. Select Ringtone, Message alert or Contacts ringtone(If Contacts ringtone is selected, go to the next step.)4. Highlight the required contact 7 [5] (Select)5. Select Ringtone ( ) or Message alert ( )6. [5] (Save)Downloading sound clipsd Main menu > My Files > Sounds > Download soundsThe download site is displayed.Activate Renew your Activation key to play the selected sound file.Rename Rename the selected sound file or folder.Send via infraredSend the selected sound file via infrared. See “Infrared” on page 102.Manage filesMake a new folder or move the selected sound file to another folder. See “Managing files” on page 122.Details Show details of the selected sound file.Note: Sending, copying or editing of forward locked sound indicated by the icon ( ) is restricted.Note: Panasonic is not responsible for the performance of downloaded contents or possible corruption of phone software.VS3_VF_AAA.book Page 127 Monday, May 23, 2005 11:25 AM](https://usermanual.wiki/Panasonic-Mobile-Communications-Development-of-USA/26C001A.User-Manual-Part-2/User-Guide-551461-Page-55.png)
![128My FilesRecording new sound clipsd Main menu > My Files > Sounds > Record new soundThe phone switches to the Sound recorder mode. See “Sound recorder” on page 114.VideosVideo clips recorded by Video recorder, downloaded from a WAP site and received via infrared are stored in the Videos folder.Playing video clipsd Main menu > My Files > Videos > Stored videos1. [192] to scroll to the required video file 7 [0][192] to adjust the volume.2. To stop: [0]To restart: [5] (Restart)Managing filesYou can make new folders or move the selected video files to another folder. See “Managing files” on page 122.OptionsIn the video list, the same options in the Sounds folder are available. See “Options” on page 126. Note that Use as option is not available for video files.Downloading video clipsd Main menu > My Files > Videos > Download videosThe download site is displayed.Recording a new videod Main menu > My Files > Videos > Record new videoThe phone switches to Video mode. See “Video” on page 54.Note: The file size of highlighted video is displayed at the top of the list, together with the date and time the video file was stored. The video file of less than 1 kB is displayed as 1 kB.Note: Panasonic is not responsible for the performance of downloaded contents or possible corruption of phone software.VS3_VF_AAA.book Page 128 Monday, May 23, 2005 11:25 AM](https://usermanual.wiki/Panasonic-Mobile-Communications-Development-of-USA/26C001A.User-Manual-Part-2/User-Guide-551461-Page-56.png)
![129My FilesGames & moreDownloaded games are stored in the Games & more folder.Playing gamesd Main menu > My Files > Games & more > Stored applications1. [192] to scroll to the required game 7 [0]For further details, see “Games & more” on page 84.Downloading gamesd Main menu > My Files > Games & more > Download gamesFor further details, see “Download games” on page 85.Text templatesYou can use templates stored in the phone when creating a text message. You can also save frequently used text as templates.Editing Text templatesd Main menu > My Files > Text templates1. [192] to scroll to the required template 7 [0]2. Edit the template 7 [0]Note: Panasonic is not responsible for the performance of downloaded contents or possible corruption of phone software.VS3_VF_AAA.book Page 129 Monday, May 23, 2005 11:25 AM](https://usermanual.wiki/Panasonic-Mobile-Communications-Development-of-USA/26C001A.User-Manual-Part-2/User-Guide-551461-Page-57.png)
![130My FilesOptionsIn the text templates list, the following options are available by pressing [5] (Options).Memory statusYou can see how much data is stored in the individual folders in My Files.d Main menu > My Files > Memory statusNew Create a new template.Create message Create an MMS or SMS message using the selected template.Edit Edit the selected template.Delete Delete the selected template.Delete all Delete all the templates.Details Show size, time and date of the selected template.Note: To decrease the amount of phone memory used, delete unwanted data or store data on your PC (see “USB” on page 107).VS3_VF_AAA.book Page 130 Monday, May 23, 2005 11:25 AM](https://usermanual.wiki/Panasonic-Mobile-Communications-Development-of-USA/26C001A.User-Manual-Part-2/User-Guide-551461-Page-58.png)