Panasonic Mobile Communications 209023A UMTS/ GSM Cellular Mobile with Bluetooth®, WLAN and RFID User Manual BEGIN E OI 091214
Panasonic Mobile Communications Development of Europe Ltd UMTS/ GSM Cellular Mobile with Bluetooth®, WLAN and RFID BEGIN E OI 091214
Contents
User Manual 4 of 7
Messaging
13-7
13
Sending SMS Messages
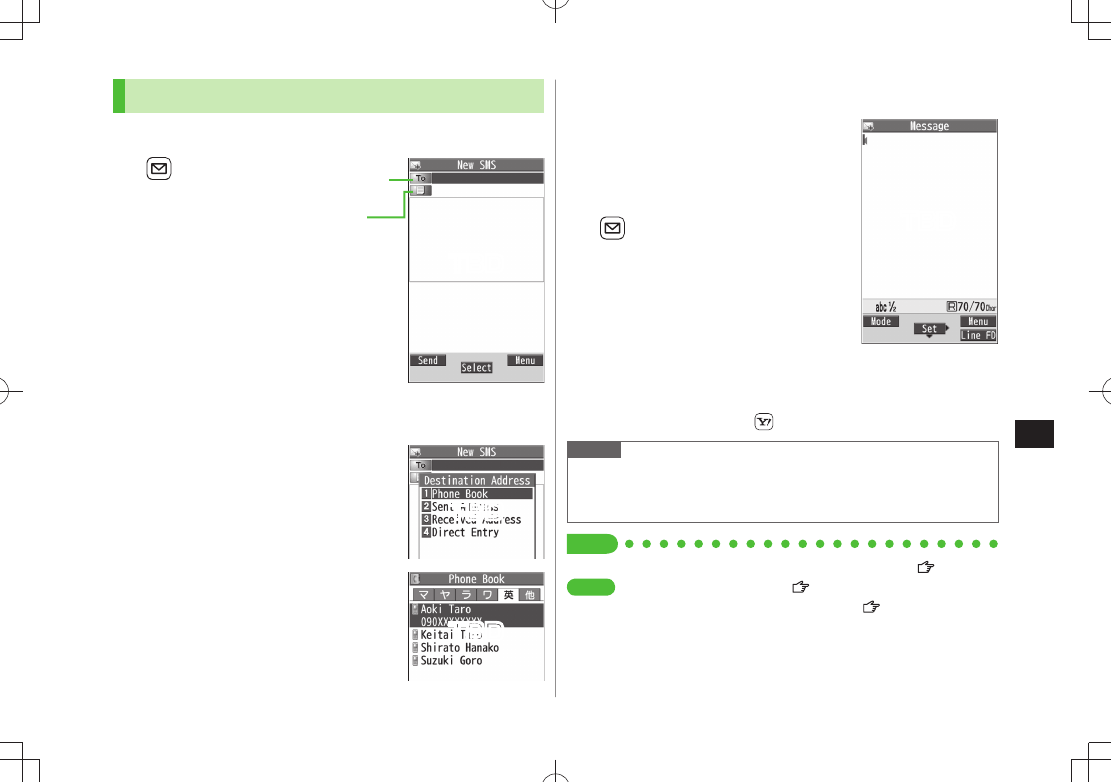
Example: Select a Phone Book entry to send SMS.
1
Create New SMS
2 Select Address field
Phone Book
3 Select a Phone Book entry
Select a SoftBank handset number
Address field
Text field
Composition Window
4 Select Text field
5 Enter text
When number of entered character
exceeds limit, S! Mail conversion option
message appears.
6 [Send]
Manual Mail Conversion
In SMS Composition window,
>[Menu]
Change mail type
Note
When a single-byte text message including | { } [ ]
^ is sent or a draft
including such text is edited, some characters may be cut out of text
field.
Tip
Addresses Functions Available while Creating Messages ( P.13-8)
Settings
Confirm Message Delivery ( P.18-18) Change SMS Center
Number Set Input Character to English ( P.18-19)
Text Entry Window
TBD
TBD
TBD
TBD
BEGIN_E_OI.indb 7 2009/12/14 16:34:05
Messaging
13-8
13
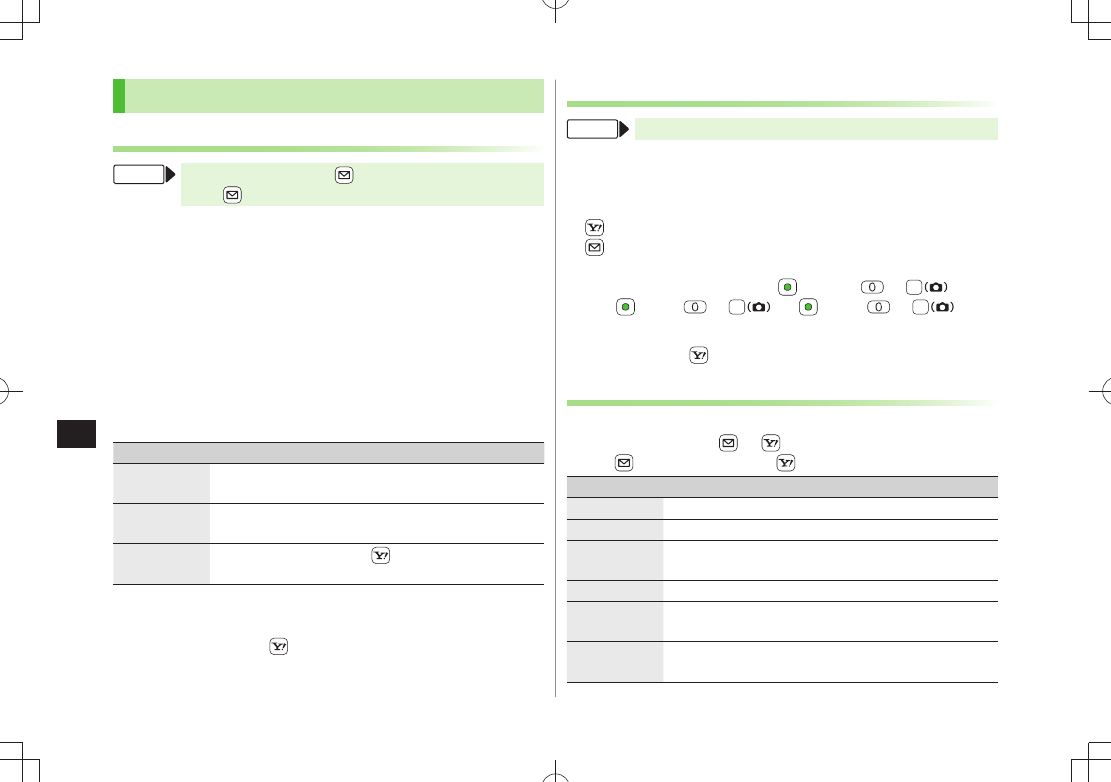
Creating Messages
Addresses
From S! Mail: Press and hold Select Address field
SMS: Create New SMS Select Address field
Enter Address Directly
S! Mail:
>
Address Input
or
Phone Number Input
Enter a mail
address/SoftBank handset number
SMS:
>
Direct Entry
Enter a SoftBank handset number
Select Address from Sent Address/Received Address Logs
Sent Address
> or
Received Address
Select a log
Select S! Mail Address from Mail Group
Mail Group
> Select a Mail Group
Add/Edit/Delete Address
Follow the steps (See below)
>
Item Operation/Description
Add
recipients*
<Not entered>
> Select an address selection
method
Select an address or enter directly
Edit Select an address
>
Edit
(For SMS:
Direct Entry
)
Edit address
Delete*Highlight an address
> [Menu]
Delete receiver
YES
* S! Mail only
Change To/Cc/Bcc (S! Mail only)
Highlight an address
> [Menu]
Destination types
Select a
type
Attachments
From After attaching a file, select Attachment field
Open/Play Attached Files
Select a file
>
Add Attachments
>
[Menu]
Add Attached Files
( Select a folder Select a file)*
[Finish]
* To capture still images or videos:
Activate Camera
Photo mode
or
Video mode
Frame subject [Record], or ( For
video, [Stop], or ) [Save], or
Delete Attachments
Highlight a file
> [Menu]
Del Attached Files
YES
Other Functions
Functions Available while Creating Messages
S! Mail: Press and hold
> [Menu] Select an item (See below)
>
SMS:
Create New SMS
[Menu] Select an item (See below)
Item Operation/Description
Send Send message
Preview Preview message while creating
Save as
Drafts
Save message to Drafts box without sending
Attached files
1
View attached file list
Load
Template 1
Select a template
>
Save
Template 1
Save edited template
YES
>
BEGIN_E_OI.indb 8 2009/12/14 16:34:06
Messaging
13-9
13
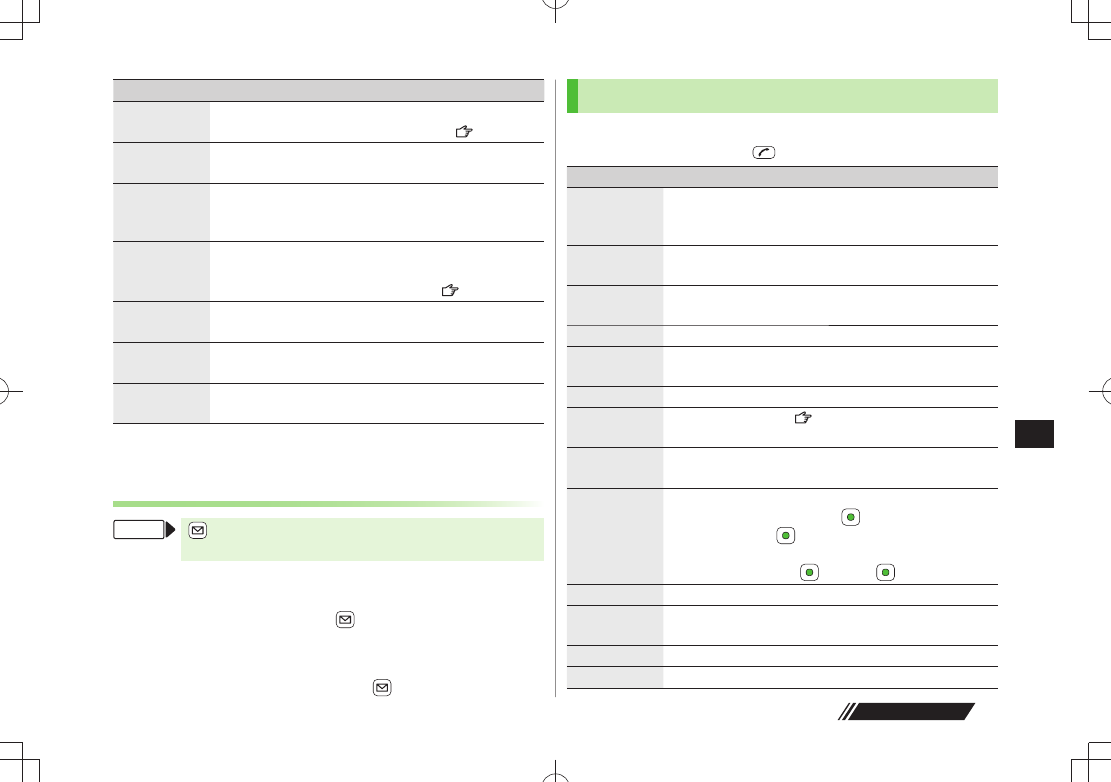
Item Operation/Description
Add
Signature 1
Add signature
Create and save signature beforehand (
Below).
Send Settings:
Priority 1
Notify recipient of message priority level
Select a level
>
Send Settings:
Confirm
Delivery 1
Check whether S! Mail is sent to recipient
ON
>
Send Settings:
Set Reply
Address 1
Set reply-to address
ON
>
Specify reply-to address beforehand (
Below).
Confirm
Delivery 2
Check whether SMS is sent to recipient
ON
>
Input
character 2
Select character input mode
Japanese
> or
English
Change mail
type 2
Switch SMS to S! Mail while creating
1 S! Mail only
2 SMS only
Sending Options
From Settings S! Mail Settings
Sending Options
Set Reply-to Address
Set Reply-To
>
ON
Select reply-to address entry field Select a
reply-to address or enter directly [Finish]
Set Signature
Set Signature
> Select an item (
ON
or
ON When New
Select
signature entry field Enter signature [Finish])
Graphic Mail Functions
Use Other Graphic Mail Settings
In S! Mail text entry window,
> Select an arrange item (See below)
Item Operation/Description
Insert files:
File Select
Insert still images, Flash® or music files
Send inserted music files as BGM
Select a folder
> Select a file
Insert files:
Camera
Activate camera to insert pictures
Capture a sill image
>
Insert files:
Delete BGM
Delete inserted music file
YES
>
Font Color Change font color
>
Background
color
Change background color
>
Insert Lines Insert separator line
My
Pictograms
Insert My Pictograms ( P.13-6)
Graphic all
reset
Cancel all Graphic Mail Settings
YES
>
YES
Select area Specify text to be arranged
Place cursor before text
> [Start]
Specify area [End] Select other items
Follow the steps for selected items
To cancel selection:
[End]
Font Size Change font size
>
Select
Blinking
Flash text
Set Scrolling Scroll text
Set Swinging Swing text
Next Page
BEGIN_E_OI.indb 9 2009/12/14 16:34:07
Messaging
13-10
13
Item Operation/Description
Alignment Select a type
>
One file of BGM or Flash
®, and up to 40 types of My Pictograms or
images can be inserted per Graphic Mail.
To delete inserted images, lines, My Pictograms, etc.: Close Graphic
Palette Move cursor before images, etc.
Ring Songs&Tones or Music files cannot be inserted directly from
microSD Card. Move files to handset beforehand.
Download Templates via Internet
>
Templates
Download Templates
YES
941P connects to Internet, and a website appears. Follow onscreen
instructions.
Sending Messages
From S! Mail: Press and hold [Menu]
SMS: Create New SMS [Menu]
Confirm Delivery
(For S! Mail,
>
Send Settings
)
Confirm Delivery
ON
Confirm Message Delivery (
P.18-18)
Save to Drafts
Save as Drafts
>
Messages are saved to
Drafts
( P.13-15).
Receiving & Viewing Messages
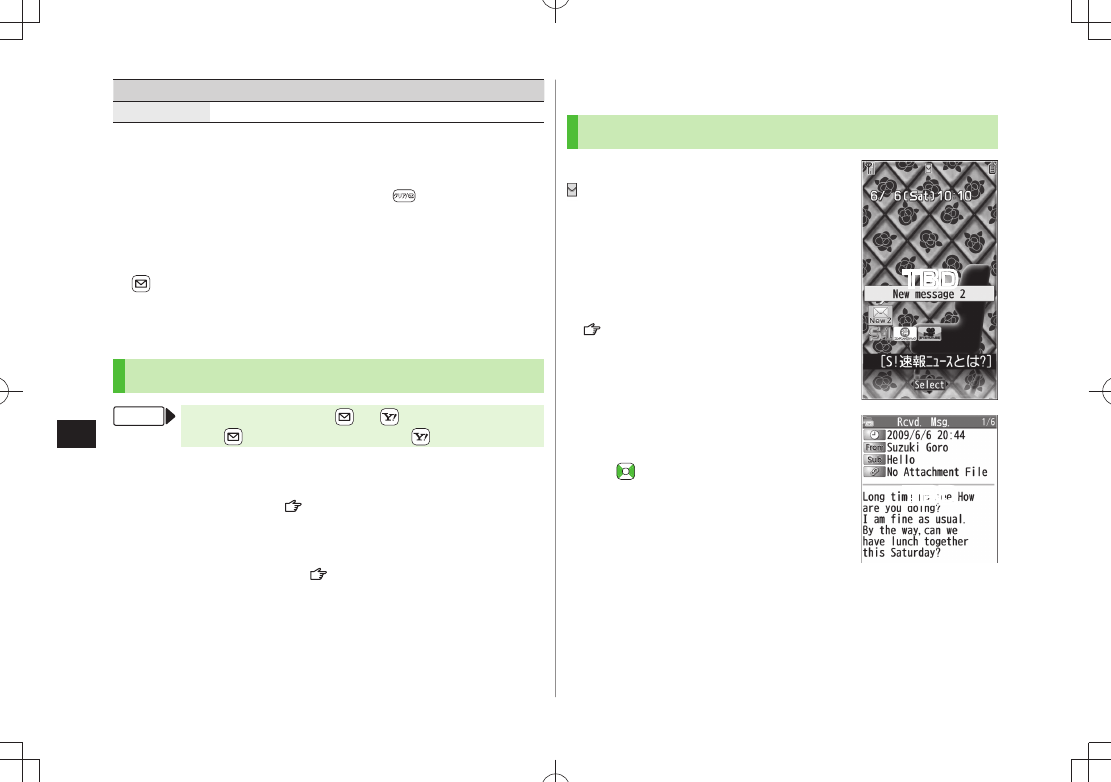
Opening New Messages
When a new message is received,
and Event Indicator appear in
Standby.
By default, the complete message and any
attachments are automatically downloaded.
This setting also applies while abroad.
Transmission fees are incurred; adjust to use
(To change auto download settings:
P.18-19).
1 Select indicator
Latest message appears.
to show previous/next message.
Message Window
TBD
TBD
BEGIN_E_OI.indb 10 2009/12/14 16:34:08
Messaging
13-11
13
Note
941P may connect to the Network via URL link in message text.
Data-intensive web pages may incur high charges.
Depending on situations, Message tone may not sound and Notification
Light may not flash.
flashes for new messages instead.
Event Indicator disappears even when an unread message other than
latest message is selected.
View latest message with handset closed (
P.1-23).
Tip
Retrieving/Viewing Messages ( P.13-15)
Setting Secret Mail ( P.11-9)
Settings
Change Ringtone Change Ringer Volume Set Message
Ringtone Duration Set Vibration Alert ( P.18-2) Adjust
Notification Light Color Tone for Incoming Call/Message
(P.18-10)
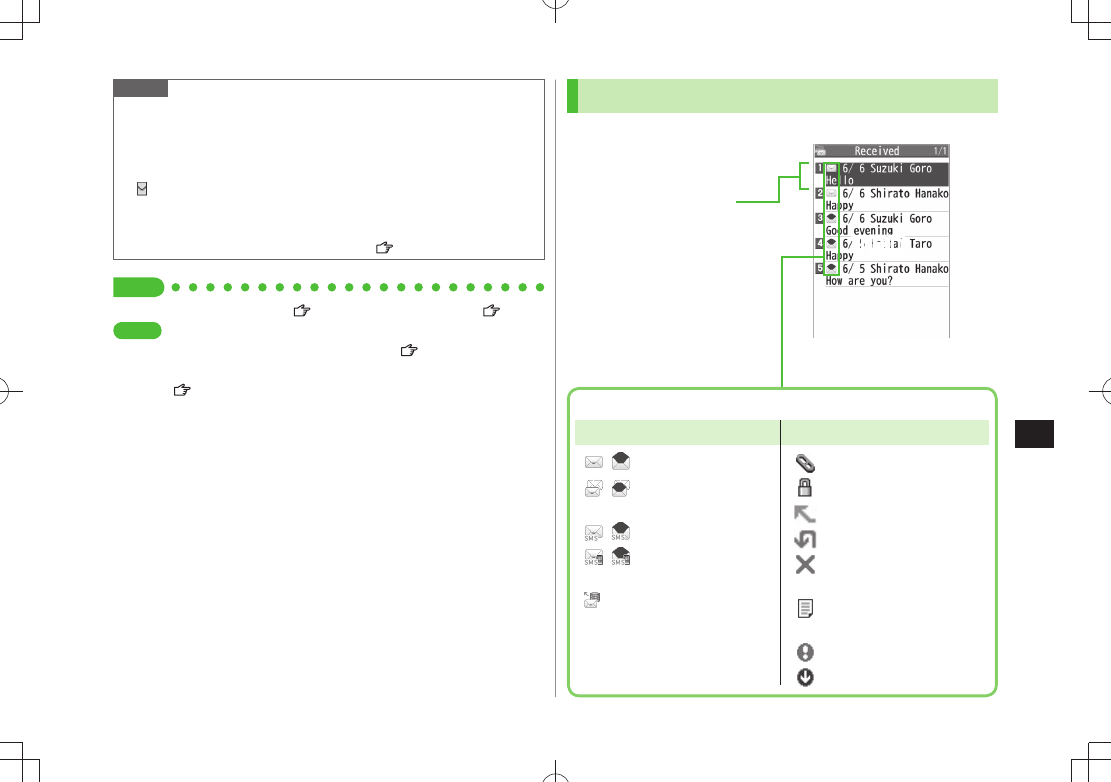
Window Description
Messaging Folder Contents
Received Date & Time 1,
Sender 2 and S! Mail Subject
(For SMS, Message Text)
For Sent/Unsent box, following
appear:
1 Sent date/time
2 Recipient
Example: Received Folder
in Incoming Mail
Message Type/Status
Unread/Read S! Mail
Unread/Read S! Mail
Notice
Unread/Read SMS
Unread/Read USIM
Card SMS
Server Mail
Attachments
(Silver) Protected
Forwarded Message
Replied Message
Sending failed
(Sent/Unsent Message)
Delivery Report received
(Sent/Unsent Message)
High Priority
Low Priority
Message Type Message Status
/
/
/
/
TBD
BEGIN_E_OI.indb 11 2009/12/14 16:34:12
Messaging
13-12
13
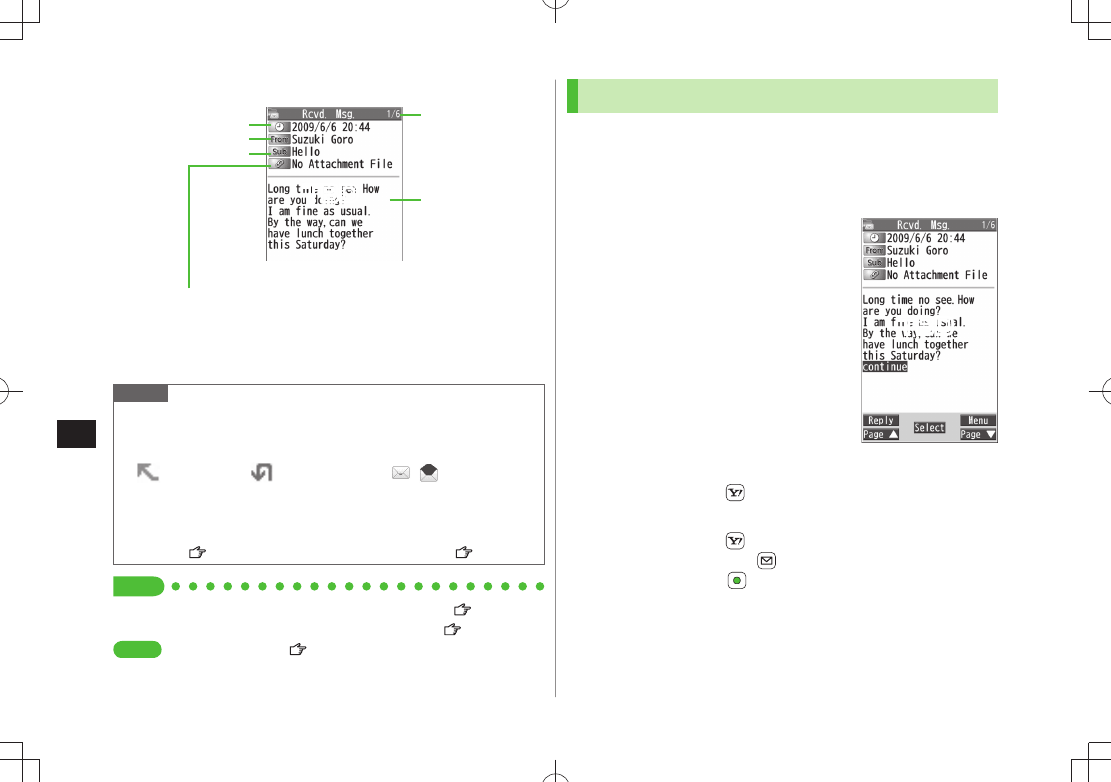
Message Contents
For a sent message, the following appear:
1 Sent date/time2 Recipient3 Number/all sent messages
Note
Status indicators for forwarded/replied SMS messages (saved in USIM
Card) do not appear.
After retrieving complete messages, S! Mail Notice icons with
(Forwarded) or (Replied) change to / (S! Mail).
Messages remain protected after complete messages are retrieved via
protected S! Mail Notices.
If messages on microSD Card do not appear correctly, copy messages to
handset ( P.9-19) and execute
Charset Conversion
( P.13-22).
Tip
Functions Available for Received/Sent/Draft Message List ( P.13-20)
Functions Available in Received/Sent Message Window ( P.13-22)
Settings
Change Font Size ( P.18-18)
Sender 2
Subject
Number of Attachments
Message Text
The number of files (images, sounds, videos, text, etc.) appears.
Example: Received Message
Received Date/Time 1Number/All Received
Messages 3
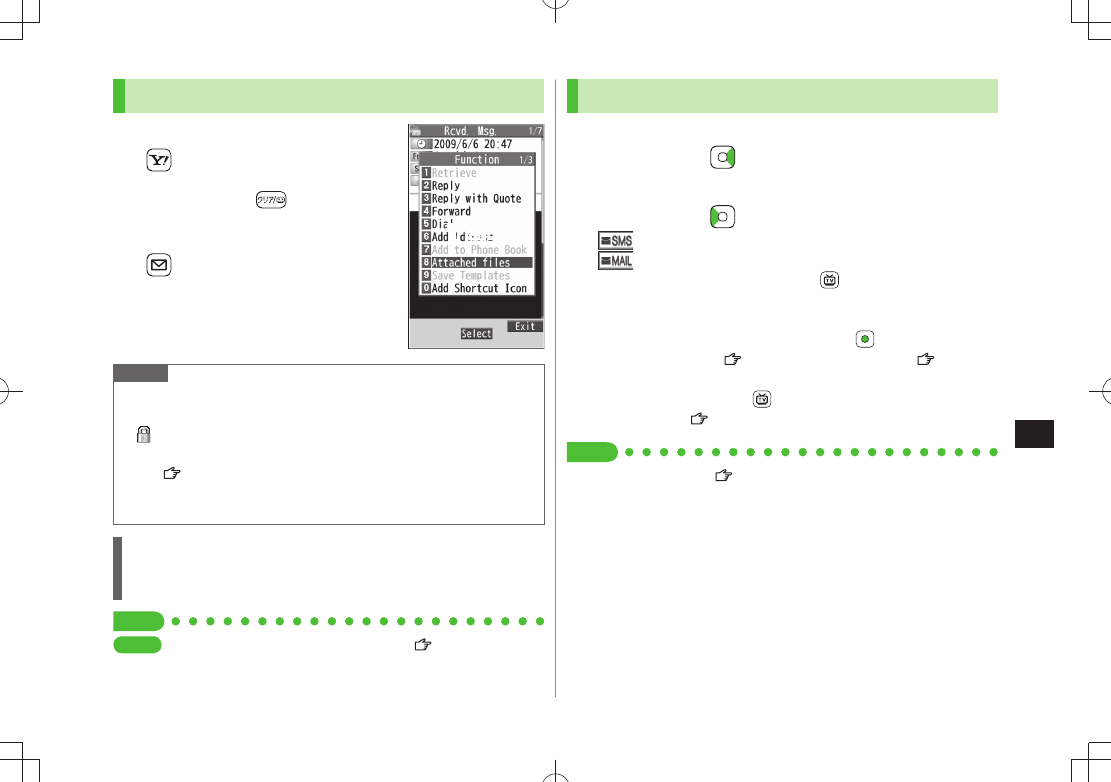
Retrieving Complete S! Mail
During Video Calls or outgoing mail, complete S! Mail is not
downloaded. When notification arrives, retrieve complete
message. Note: Depending on download setting, complete
message is not downloaded.
1 At the end of message text,
highlight
Continue
Retrieve from Message List
In received message list,
>[Menu]
Retrieve
This one
Retrieve Multiple Messages
In received message list,
>[Menu]
Retrieve
Selected
Repeat: Select a message* [Finish]
YES
* To cancel selection, press again.
TBD
TBD
BEGIN_E_OI.indb 12 2009/12/14 16:34:14
Messaging
13-13
13
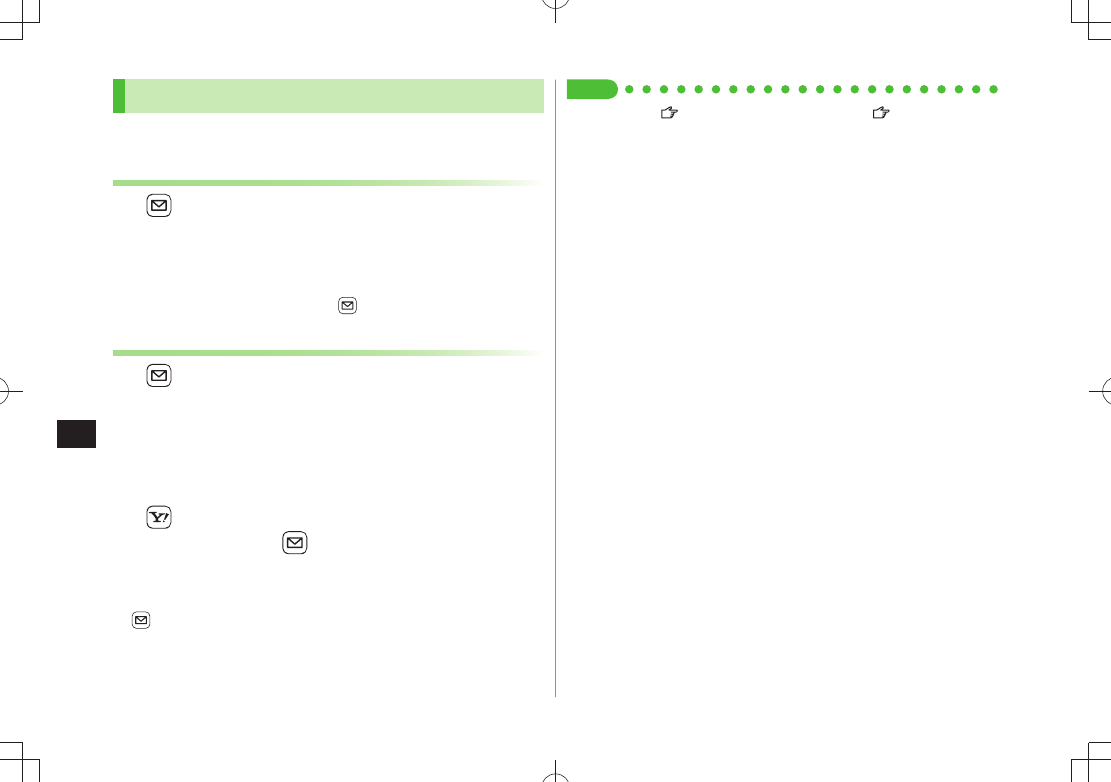
Opening & Saving Attachments
1 In Message window,
[Menu]
Attached files
2 Select a file
3 To save the file, highlight the file
[Save]
YES
4 Select a folder
Note
When messages are opened, attached image files appear/play
automatically.
(Silver) appears with file requiring a Content Key. If Content Key has
expired, warning appears when opening a file. Acquire new Content
Key ( P.9-5).
Incompatible files are saved to Other Documents in Data Folder. Some
files may not be saved to 941P.
File Formats Supported by Auto Playback
Image files (JPEG, GIF, PNG)
Music files (SMAF, AMR, SMF, SP-MIDI)
Tip
Settings
Play Attached Music Files Automatically ( P.18-19)
Showing Sent/Received Mail Address
1 Sent Address
Press and hold
Received Address
Press and hold
: SMS (successfully sent)
: S! Mail (successfully sent)
To show Redial/Incoming Call Logs:
[Change]
2 Select a log to show
To send S! Mail/SMS to addresses shown:
Mail composition
operation (S! Mail: From Step 4 on P.13-4 or SMS: From Step
4 on P.13-7)
To save to Phone Book:
[Store] Operation for saving to
Phone Book ( From Step 2 on P.4-5)
Tip
Sent/Received Address ( P.13-19)
TBD
BEGIN_E_OI.indb 13 2009/12/14 16:34:16
Messaging
13-14
13
Using Server Mail
Retrieve mail list stored at the Center to view Server Mail.
Viewing Server Mail
1
Server Mail
2
Retrieve Mail List
YES
Update Server Mail List
After Step1,
>
Retrieve Mail List
[Update]
YES
Retrieving Server Mail
1
Server Mail
Retrieve Mail List
If no Server Mail is in the list,
YES
Back
2 Retrieve a New Message
Select S! Mail
Retrieve Multiple Messages
[Menu]
Retrieve
Retrieve
Selected
Select S! Mail* [Finish]
YES
* To clear, repeat same operation.
Retrieve All Messages
>
Server Mail
Retrieve All
Tip
Mail Security ( P.11-10)Server Mail Functions ( P.13-15)
BEGIN_E_OI.indb 14 2009/12/14 16:34:16
Messaging
13-15
13
Retrieving/Viewing Messages
Manually Retrieving New Messages
Retrieve S! Mail messages saved on Server while handset is off/out-of-range.
>
Retrieve New
Server Mail functions
From Server Mail
Delete One/Selected Server Mail
>
Retrieve Mail List
Highlight a message [Menu]
Del Server Mail
Delete This
or
Delete Selected
( For
Delete This
, select messages* [Finish])
YES
* To clear, repeat same operation.
Delete All Server Mail
Delete All
> Enter Phone Password
YES
Forward Server Mail
Retrieve Mail List
> Highlight a message [Menu]
Fwd Server Mail
Compose S! Mail [Send]
Sort Server Mail
Retrieve Mail List
> [Menu]
Sort
Select a condition
View Server Mail Information
Retrieve Mail List
> Highlight a message [Menu]
Mail Information
View Server Mail Memory
Server Mail Memory
>
Organizing/Using Messages
Checking Messages in Messaging Folders
1
Incoming Mail
,
Drafts
,
Sent/Unsent
In Incoming Mail folder, select a folder then message.
Messaging Folders:
P.13-3
2 Select a message
In Received/Sent Message window, toggle
to view previous/
next messages.
Tip
Functions Available in Incoming Mail Box Functions Available for
Received/Sent/Draft Message List ( P.13-20)
BEGIN_E_OI.indb 15 2009/12/14 16:34:17
Messaging
13-16
13
Auto-sort
Previously received messages are not sorted.
Incoming messages are sorted by subject if both address and subject
match sort condition applied to specific folder. Messages with no subject
are sorted by address.
Either address or mail subject can be specified per folder.
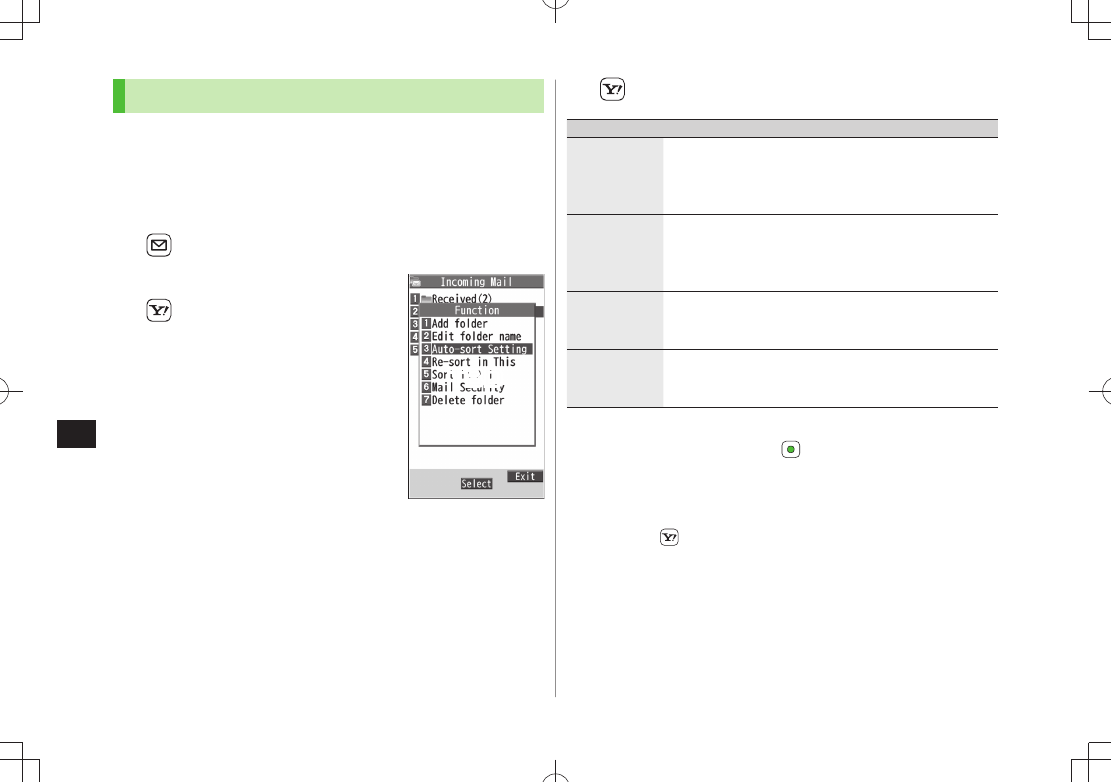
1
Incoming Mail
2 Highlight
ユーザーフォルダ
1-3
[Menu]
Auto-sort Setting
3 [Menu] Select an item (See below)
Item Operation/Description
Add Address Sort received messages by sender’s address
Select an address selection method
>
Select/enter an address
Save up to 10 addresses per folder.
Add Subject Sort received messages by mail subject
Enter a subject
>
Save one subject per folder.
SMS cannot be sorted by mail subject.
Add Group Sort received messages by Group in Phone Book
Select a group
>
Save up to 10 groups per folder.
Add Mail
group
Sort received messages by Mail Group
Select a Mail Group
>
Save up to 10 Mail Groups per folder.
Edit Sort Conditions
After Step 2, highlight an item
> [Edit] Edit address, subject or
mail group
Change Auto-sort List View
Switch Name view or Address view for Auto-sort.
After Step 2,
>[Menu]
Display the List
Name
or
Address
TBD
BEGIN_E_OI.indb 16 2009/12/14 16:34:18
Messaging
13-17
13
Delete Auto-sort Settings
After Step 2, (highlight an item
>) [Menu]
Delete
or
Delete All
( For
Delete All
, enter Phone Password)
YES
Filter Spam
Sort messages from unidentifiable handsets into Spam
Folder without incoming notification.
Note
Some messages from addresses saved in Phone Book as secret data
may be sorted into Spam Folder. Be careful when deleting messages
from Spam Folder.
Setting Spam Folder
<Default> OFF
1
Settings
Universal Settings
Anti-Spam Measures
2
Spam Filter
Enter Phone Password
3
ON
YES
Safe List
Specify up to 20 addresses and domains (for example, @softbank.ne.jp)
to receive messages from without sorting into Spam Folder.
1
Settings
Universal Settings
Anti-Spam Measures
Safe List
2 Add Addresses
[Menu]
Add Address
Received Address
or
Direct Entry
Select or enter an address
Add Domains
[Menu]
Add Domain
Enter a domain
(character string after @)
3 [Finish]
Edit Saved Addresses
After Step 1, highlight an address
> [Edit] Edit address
Delete Addresses
After Step 1, (highlight an address
>) [Menu]
Delete
or
Delete All
( For
Delete All
, enter Phone Password)
YES
Tip
Report Spam ( P.13-23)
BEGIN_E_OI.indb 17 2009/12/14 16:34:18
Messaging
13-18
13
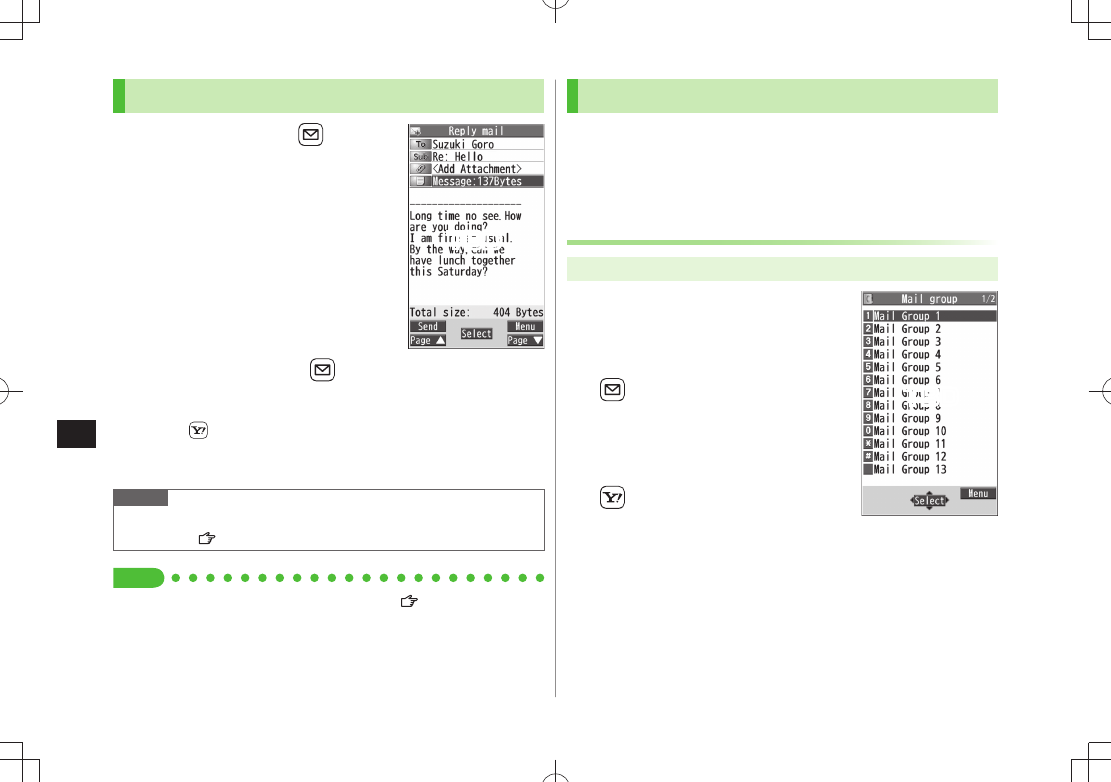
Replying to Messages
1 In Message window, [Reply]
Re
: appears before Subject when replying
to S! Mail. Received message text is
quoted.
2 Complete message
[Send]
Reply without Quoting/Replying to All
In Step 1,
>[Menu]
Reply
Reply to Sender
or
Reply to All
Compose S! Mail
or
Compose SMS
Selectable items differ by mail type.
Note
Alternatively, reply from Message List window without opening
messages ( P.13-20)
Tip
Change Message Quote Setting when Replying ( P.18-18)
Using Mail Groups
Save mail addresses by group. Messages can be sent to
specified group of recipients.
Save up to 20 recipients per group.
Create up to 20 groups.
Creating Mail Groups
Main Menu Phone Book Settings Mail Group
1 Select a group to save
2 Enter Mail Address Directly
Highlight
<Not stored>
[Edit] Enter mail address
Select Mail Address from Phone
Book or Sent/Received Address Logs
Highlight
<Not stored>
[Menu]
Look-up address
Select an item Select an entry
Repeat Step 2 to save mail addresses.
Mail Group List
TBD
TBD
BEGIN_E_OI.indb 18 2009/12/14 16:34:19
Messaging
13-19
13
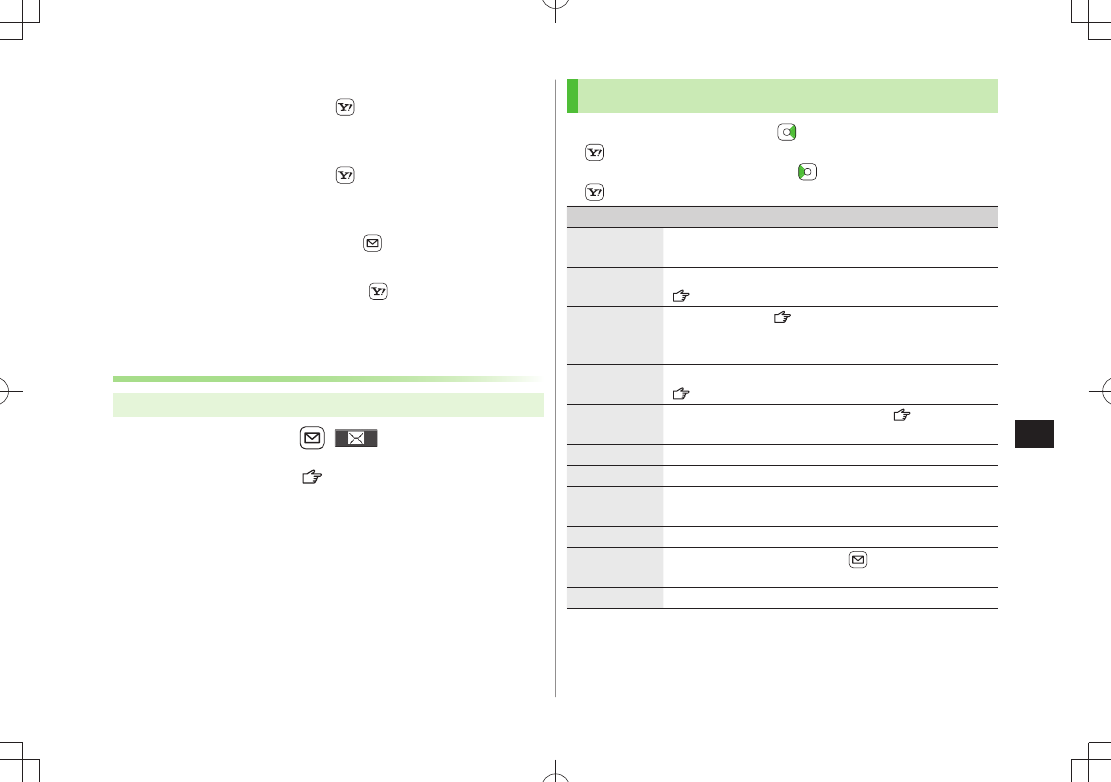
Change Group Names
In Step 1, highlight a mail group
> [Menu]
Edit group name
Edit name
Reset Group Names
In Step 1, highlight a mail group
> [Menu]
Reset group name
YES
Edit Mail Addresses
After Step 1, highlight a mail address
> [Edit] Edit
Delete Saved Mail Addresses
>
After Step 1, (highlight a mail address ) [Menu]
Delete this
or
Delete all
( For
Delete all
, enter Phone Password)
YES
Sending a Message to All Group Members
Main Menu Phone Book Settings Mail Group
1 Highlight a group [ ]
2 Compose a message ( From Step 4 on P.13-4)
Sent/Received Address
Sent address logs: Press and hold
> Highlight an address
[Menu] Select an item (See below)
Received address logs: Press and hold
> Highlight an address
[Menu] Select an item (See below)
Item Operation/Description
Character
size
Toggle character size
Add to Phone
Book
Save selected mail address/number to Phone Book
(From Step 2 on P.4-5)
Add shortcut
icon
Create a shortcut ( P.1-22) Select a shortcut in Standby
to open composition window with selected mail address/
number in Address field
Compose
S! Mail
Create S! Mail to selected address/phone number
(From Step 4 on P.13-4)
Compose
SMS
Create SMS to selected phone number ( From Step 4 on
P.13-7)
Dialing Select a dialing method
>
Dial
Dialed calls 1Show Redial logs
Received
calls 2
Show Incoming Call Logs
Delete this
YES
>
Delete
selected
Check logs to be deleted
> [Finish]
YES
Delete all Enter Phone Password
>
YES
1 Sent address logs only
2 Received address logs only
BEGIN_E_OI.indb 19 2009/12/14 16:34:20
Messaging
13-20
13
Organizing Messages
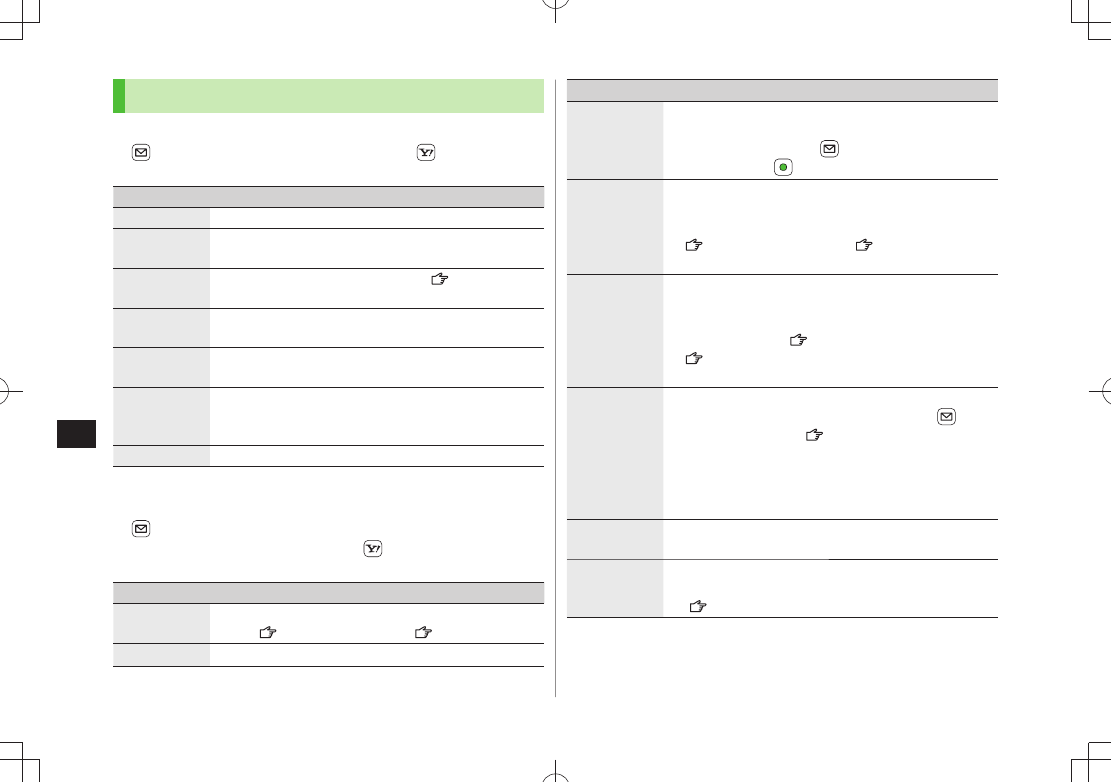
Functions Available in Incoming Mail Box
>
Incoming Mail
(Highlight a folder) [Menu] Select
an item (See below)
Item Operation/Description
Add folder Enter folder name
>
Edit folder
name*
Edit folder name
>
Auto-sort
Setting*
Sort received messages (Auto-sort:
>From Step 3 on
P.13-16)
Re-sort in
This
Re-sort messages in selected folder
YES
>
Sort in All
Re-sort messages in all folders
YES
>
Mail Security
Set to require Phone Password for opening a folder
Enter Phone Password
>
To cancel: repeat the step
Delete folder
* Enter Phone Password
>
YES
* only
Functions Available for Received/Sent/Draft Message List
>
Incoming Mail
,
Drafts
or
Sent/Unsent
( For
Incoming Mail
,
select a folder) Highlight a message
[Menu] Select an item
(See below)
Item Operation/Description
Edit 1 2Edit message to send
(S! Mail: From Step 2 on P.13-4/SMS: From Step 2 on P.13-7)
Send 2Send Drafts
Item Operation/Description
Retrieve 3Retrieve complete S! Mail
This one
> or
Selected
( For
Selected
, select
multiple messages* [Finish]
YES
)
* To cancel: press again
Reply 3
Reply without quoting message
Reply to Sender
> or
Reply to All
Compose S! Mail
or
Compose SMS
Compose a message
(S! Mail:
From Step 4 on P.13-4/SMS: From Step 4 on P.13-7)
Selectable items differ by mail type.
Reply with
Quote 3
Quote received message to reply
Reply to Sender
> or
Reply to All
Compose S! Mail
or
Compose SMS
Compose a
message (S! Mail: From Step 4 on P.13-4/SMS:
From Step 4 on P.13-7)
Selectable items differ by mail type.
Forward 3
Forward
>/
Fwd Server Mail
Select Address field
Select an item Select/enter an address [Send]
Forward Server Mail (
P.13-15)
When forwarding S! Mail,
Fw: appears before Subject.
Dotted line appears in the first line of Text field.
Attachments are also forwarded (Messages with copy
protected attachments may not be forwardable.).
Dial Select an item
> Make a call/compose a message/add
to Phone Book
Add
Address 1 3
Save addresses to Phone Book
Select phone number or mail address
>
YES
(From Step 2 on P.4-5)
BEGIN_E_OI.indb 20 2009/12/14 16:34:21
Messaging
13-21
13
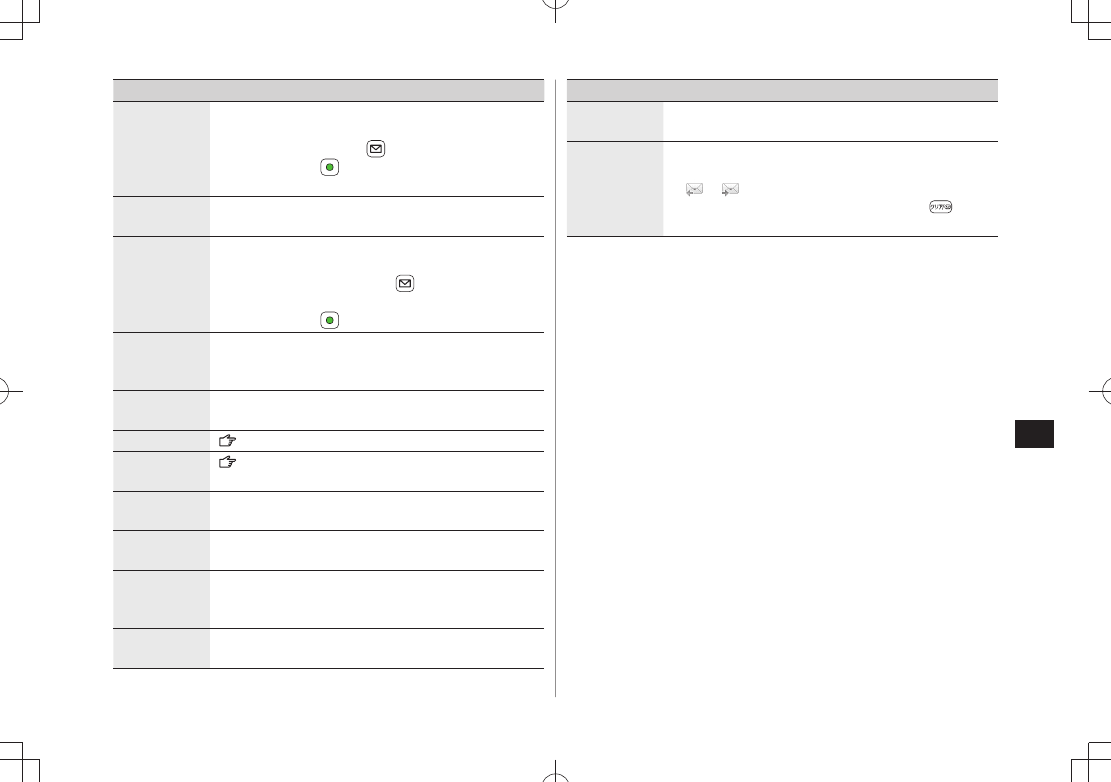
Item Operation/Description
Protect/
Unprotect 1 3
Protect received/sent messages
This one
> or
Selected
( For
Selected
, select
multiple messages* [Finish])
* To cancel: press again
To unprotect, repeat the step.
Unread/
Read 3
Switch status to Unread/Read
Move 3Move messages to specific folders
Move This
> or
Move Selected
( For
Move Selected
,
select multiple messages* [Finish]
YES
)
Select a folder
* To cancel: press again
Delete Select an item
> Operate selected item
If messages are received while selecting multiple
messages, message deletion may fail.
Confirm
Delivery 1
View Delivery report
Send Ir data (P.10-3)
IC
Transmission
(P.10-5)
Copy to
microSD
Copy messages to microSD Card
YES
>
Copy to USIM/
Copy to Phone
3
Copy SMS to USIM Card/handset
YES
>
Move to
USIM/Move
to Phone 3
Move SMS to USIM Card/handset
YES
>
Sort Change display order
Select a display order
>
Item Operation/Description
Mail
Information
View detailed information (Subject, From, To, etc.)
Mail history
1 3
Show up to 1000 sent/received mail records
Select a sender/recipient address
>
or appears.
Select a record to show Message Window.
to
return to previous window.
1 Sent messages only
2 Drafts only
3 Received messages only
BEGIN_E_OI.indb 21 2009/12/14 16:34:22
Messaging
13-22
13
Using Messages
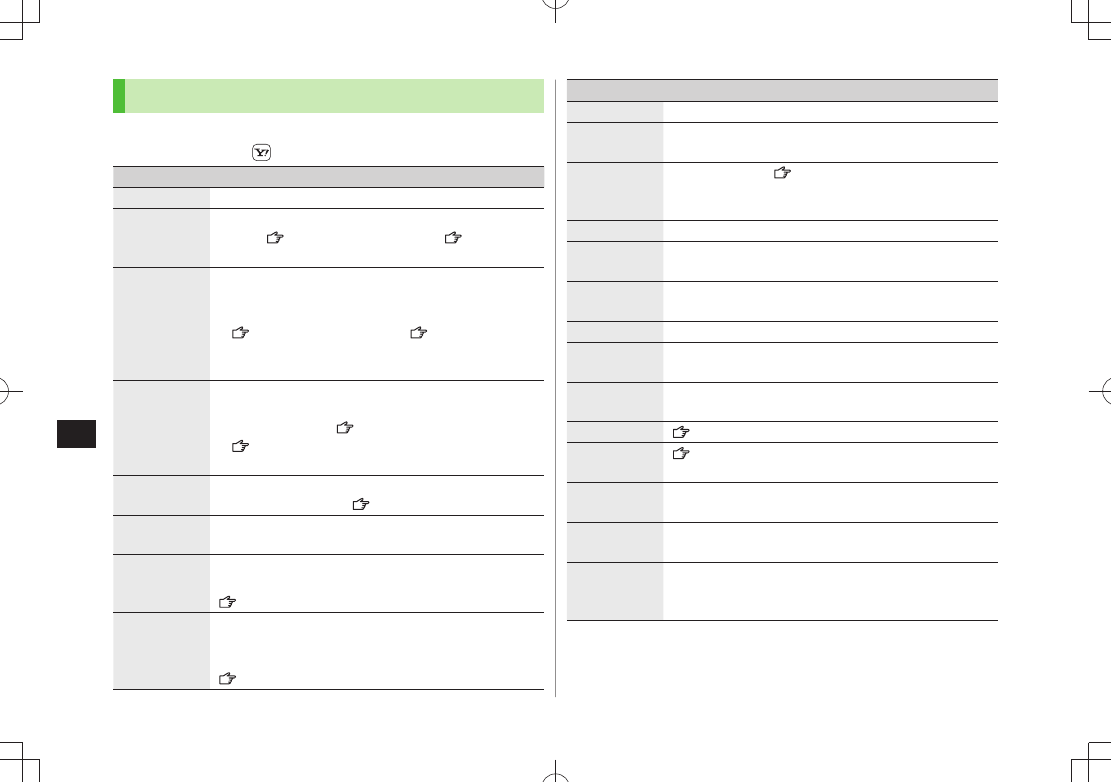
Functions Available in Received/Sent Message Window
In Message Window,
>[Menu] Select an item (See below)
Item Operation/Description
Retrieve 1Retrieve complete S! Mail
Edit 2Edit message to send
(S! Mail: From Step 2 on P.13-4/SMS: From Step 2
on P.13-7)
Reply 1Reply without quoting message
Reply to Sender
> or
Reply to All
Compose S! Mail
or
Compose SMS
Compose a message
(S! Mail:
From Step 4 on P.13-4/SMS: From Step 4 on
P.13-7)
Selectable items differ by mail type.
Reply with
Quote 1
Quote received message to reply
Reply to Sender
> or
Reply to All
Compose a
message (S! Mail: From Step 4 on P.13-4/SMS:
From Step 4 on P.13-7)
Selectable items differ by mail type.
Forward 1
Forward
> or
Fwd Server Mail
Forward Server Mail (
P.13-15)
Dial Select an item
> Make a call/compose a message/add
to Phone Book
Add Address Save addresses to Phone Book
Select phone number or mail address
>
YES
( From Step 2 on P.4-5)
Add to Phone
Book
Save highlighted phone number/mail address to Phone
Book
YES
>
(From Step 2 on P.4-5)
Item Operation/Description
Attached files Show attached files
Save
Templates
Save templates
YES
>
Add Shortcut
Icon
Create a shortcut ( P.1-22) Select a shortcut in Standby
to open composition window with selected mail address/
number in Address field
Font Size Select a size
>
Scroll Unit Change scroll unit
Half Screen
> or
Whole Screen
Charset
Conversion 1
Convert characters when not properly shown
Select an item
>
Delete Select an item
> Operate selected item
Confirm
Delivery 2
View Delivery report
Mail
Information
View detailed information (Subject, From, To, etc.)
Send Ir data (P.10-3)
IC
Transmission
(P.10-5)
Copy to
microSD
Copy messages to microSD Card
YES
>
Copy to USIM or
Copy to Phone
1
Copy SMS to USIM Card/handset
YES
>
Move to USIM
or Move to
Phone
1
Move SMS to USIM Card/handset
YES
>
BEGIN_E_OI.indb 22 2009/12/14 16:34:22
Messaging
13-23
13
Item Operation/Description
Report Spam
1
Report received mail as Spam Mail
>[Send]
Change destination to report to (
P.18-18).
Mail history Show up to 1000 sent/received mail records
Select a sender/recipient address
>
or appears.
Select a record to show Message Window.
to
return to previous window.
1 Received Message Window only
2 Sent Message Window only
BEGIN_E_OI.indb 23 2009/12/14 16:34:23

13-24
Messaging
13
BEGIN_E_OI.indb 24 2009/12/14 16:34:23
14
14-1
Internet
Getting Started .................................................. 14-2
Using Yahoo! Keitai ............................................ 14-3
Opening Yahoo! Keitai Main Menu ...........................................14-3
Entering URL ............................................................................14-4
Using Access Histories ..............................................................14-4
Exiting Mobile Internet .............................................................14-4
Using PC Site Browser ........................................ 14-5
Opening Menu .........................................................................14-5
Entering URL ............................................................................14-5
Using Access Histories ..............................................................14-5
Exiting Internet .........................................................................14-5
Basic Operations ................................................. 14-6
Using Cursor ............................................................................14-6
Text Entry & Item Selection .......................................................14-7
Using Information .............................................. 14-8
Bookmarks & Saved Pages ........................................................14-8
Managing Bookmarks & Saved Pages .......................................14-9
Bookmarks/Saved Pages Functions ..........................................14-10
Downloading Image/Sound Files .............................................14-11
Using Number, Address or URL ................................................14-11
Streaming ..............................................................................14-12
Option Menu Items ........................................... 14-13
BEGIN_E_OI.indb 1 2009/12/14 16:34:23
Internet
14-2
14
Getting Started
Access Yahoo! Keitai Mobile Internet and PC sites.
"Yahoo! Keitai" is both a SoftBank Mobile Internet service
and the SoftBank Mobile Internet portal.
View PC Internet websites via PC Site Browser.
Internet
Yahoo! Keitai
View Mobile Internet Websites (
P.14-3)
Download image/sound files, etc. (
P.14-11)
Movies/Music Streaming (
P.14-12)
Register S! Quick News (
P.7-4)
PC Sites
View PC Sites (
P.14-5)
Download still images (
P.14-11)
Note
Separate subscription is required for Network access.
For more information, visit SOFTBANK MOBILE Corp. Website
(http://www.softbank.jp).
Video Calls cannot be received while connecting to the Network.
Cache Memory
Retrieved information is temporarily saved in Cache
Memory.
When full, oldest is deleted first.
Previously viewed pages may load from Cache Memory. To view the
latest, update information ( P.14-13).
Cached items with expiry dates are deleted upon expiry.
Information remains even after handset is disconnected from the
Network or handset power is turned off.
Tip
Settings
Clear Cache Delete Cookies ( P.18-20)
Initialize Browser ( P.18-21)
BEGIN_E_OI.indb 2 2009/12/14 16:34:25
Internet
14-3
14
SSL/TLS
SSL (Secure Sockets Layer) and TLS (Transport Layer Security)
are encryption protocols for secure Internet transmissions
of important/sensitive information such as credit card
numbers.
Server certificates are saved on 941P ( P.18-21).
Notes
When a security notice appears, subscribers must decide for themselves
whether or not to open the page. SOFTBANK MOBILE Corp., VeriSign
Japan K.K., Cybertrust Japan Co., Ltd., Entrust Japan Co.,Ltd., GlobalSign
K.K., RSA Security Inc. and SECOM Trust Systems Co., Ltd. cannot be held
liable for any damages associated with the use of SSL and TLS.
Tip
Settings
Security Settings ( P.18-20)
Using Yahoo! Keitai
Opening Yahoo! Keitai Main Menu
Select Yahoo! Keitai Main Menu items to access websites.
Main Menu Yahoo! Keitai
1
Yahoo! Keitai
941P connects to the Network.
2 Select a menu item
Repeat Step 2 as required.
Basic Operations:
P.14-6
Note
Shortcut: In Standby, press
BEGIN_E_OI.indb 3 2009/12/14 16:34:27
Internet
14-4
14
Entering URL
Enter URLs (addresses beginning with "http://" or "https://")
directly to access websites, or open previously viewed pages
using URL histories.
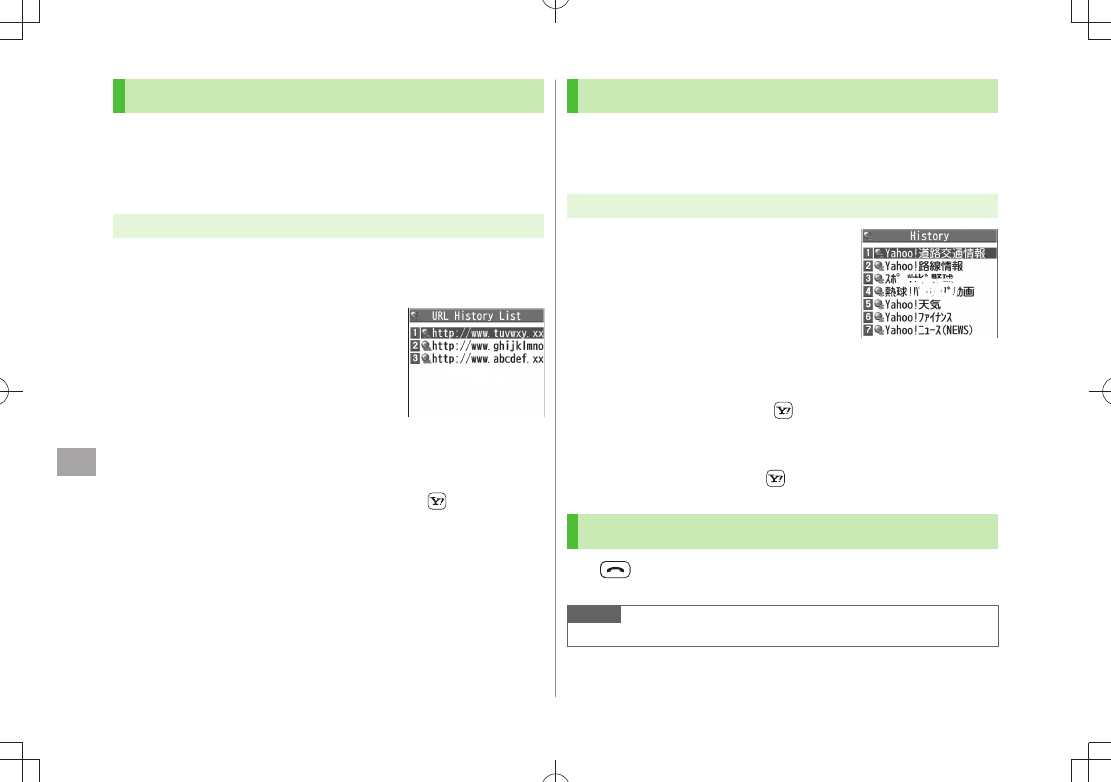
Up to 20 URL histories are stored.
Main Menu Yahoo! Keitai Enter URL
1 Enter URL Directly
Direct Entry
Enter URL
Use URL History
URL History List
Select a URL
Delete URL Histories
In Step1,
>
URL History List
(Highlight a URL ) [Menu]
Delete
or
Delete All
YES
URL History List
Window
Using Access Histories
Open previously viewed pages using access histories.
Up to 100 access histories are stored (The number of savable histories
varies depending on data amount.).
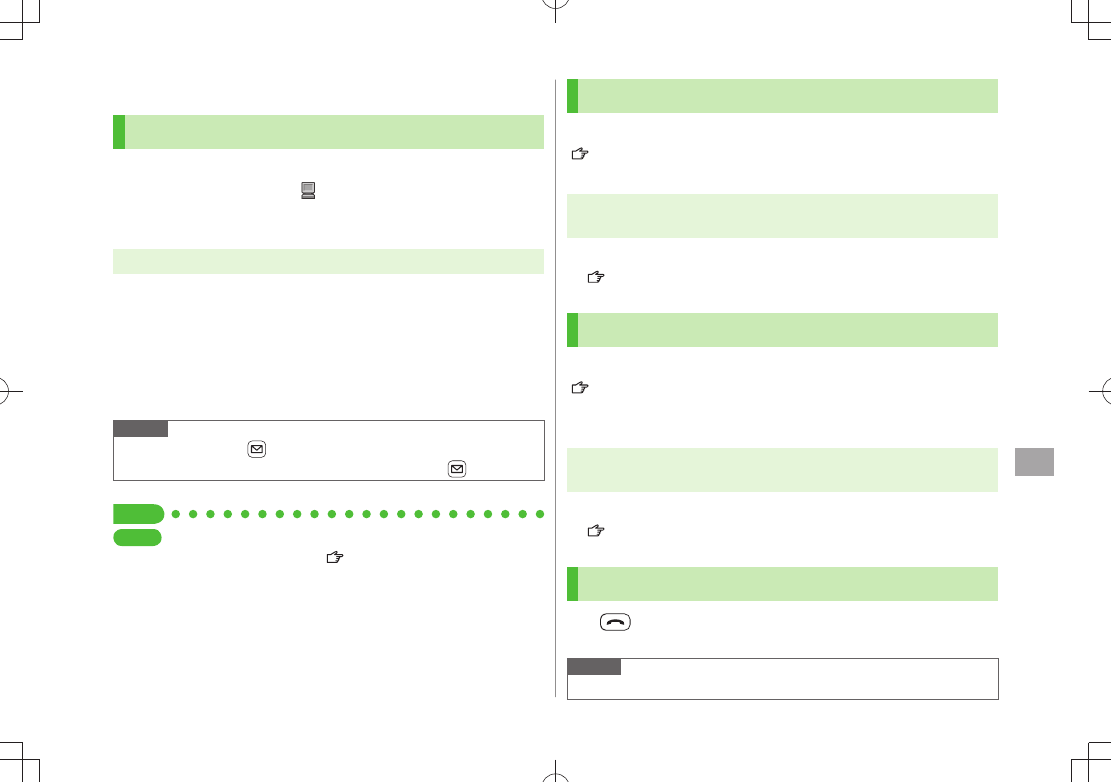
Main Menu Yahoo! Keitai History
1 Select a history
Delete Access Histories
In Step 1, (highlight a history
>) [Menu]
Delete
or
Delete All
YES
( For
Delete All
, enter Phone Password)
Show Access History URLs
In Step 1, highlight a history
> [Menu]
Display URL
Exiting Mobile Internet
1
YES
Note
Closing handset does not affect active browser.
History Window
TBD
TBD
BEGIN_E_OI.indb 4 2009/12/14 16:34:28
Internet
14-5
14
Using PC Site Browser
Opening Menu
View PC websites using PC Site Browser.
When PC Site Browser opens,
appears.
Some pages may not be viewable.
Viewing PC websites may incur high charges.
Main Menu Yahoo! Keitai PC Site Browser
1
Homepage
Confirmation appears. Select
NO
.
To show confirmation each time:
YES
2 Select a menu item
Repeat Step 2 as required.
Note
Alternatively, press
in Yahoo! Keitai Menu to switch to PC Site
Browser Menu. To return to Yahoo! Keitai Menu, press again.
Tip
Settings
Hide Warning Messages when Activating PC Site Browser or
Switching to Yahoo! Keitai ( P.18-19)
Entering URL
Follow same operation accessed from Yahoo! Keitai
(P.14-4).
Up to 20
URL histories are stored.
Main Menu Yahoo! Keitai PC Site Browser
Enter URL
Follow Step 1 of same operation accessed from Yahoo! Keitai
( P.14-4).
Using Access Histories
Follow same operation accessed from Yahoo! Keitai
(P.14-4).
Up to 100 access histories are stored (The number of savable histories
varies depending on data amount.).
Main Menu Yahoo! Keitai PC Site Browser
History
Follow Step 1 of same operation accessed from Yahoo! Keitai
( P.14-4).
Exiting Internet
1
YES
Note
Closing handset does not affect active browser.
BEGIN_E_OI.indb 5 2009/12/14 16:34:29
Internet
14-6
14
Basic Operations
Using Cursor
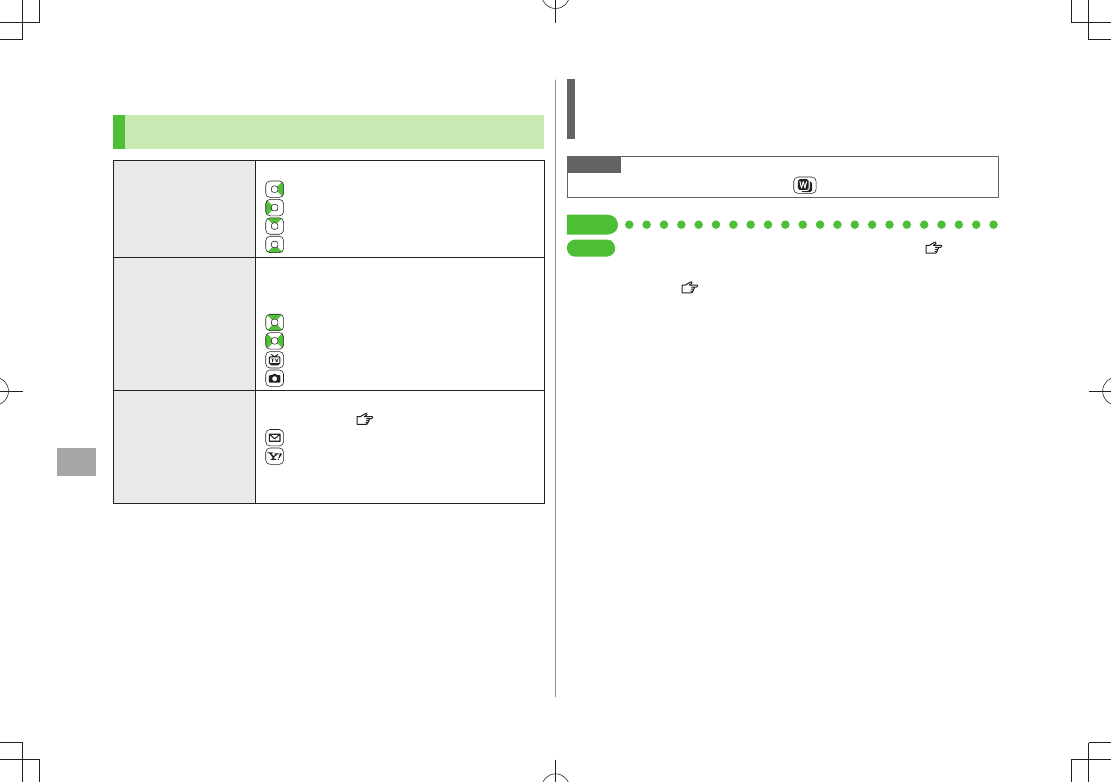
Move Cursor
Use cursor to select underlined menu items.
to move right
to move left
to move to previous line
to move to next line
Scroll Pages
Scroll bar appears on right side or at bottom of
Display when page content continues beyond
view.
scroll up/down
scroll left/right
scroll page up by a screenful
scroll page down by a screenful
Move to
previous page/
next page
Previously viewed pages are temporarily saved in
Cache Memory ( P.14-2).
[Back]: Return to previous page
[Menu]
Forward
: View next page
Some web pages may not appear after
performing the steps above.
When Authentication is Required
Some pages require user authentication for access.
If required, enter user ID or password.
Note
While page is open, press and hold
to switch to TV.
Tip
Settings
Font Size Scroll Unit Images Off Sound Off ( P.18-19)
Delete User ID or Password Entered when Authentication is
Required ( P.18-20)
BEGIN_E_OI.indb 6 2009/12/14 16:34:38
Internet
14-7
14
Text Entry & Item Selection
Enter text or select items to send information.
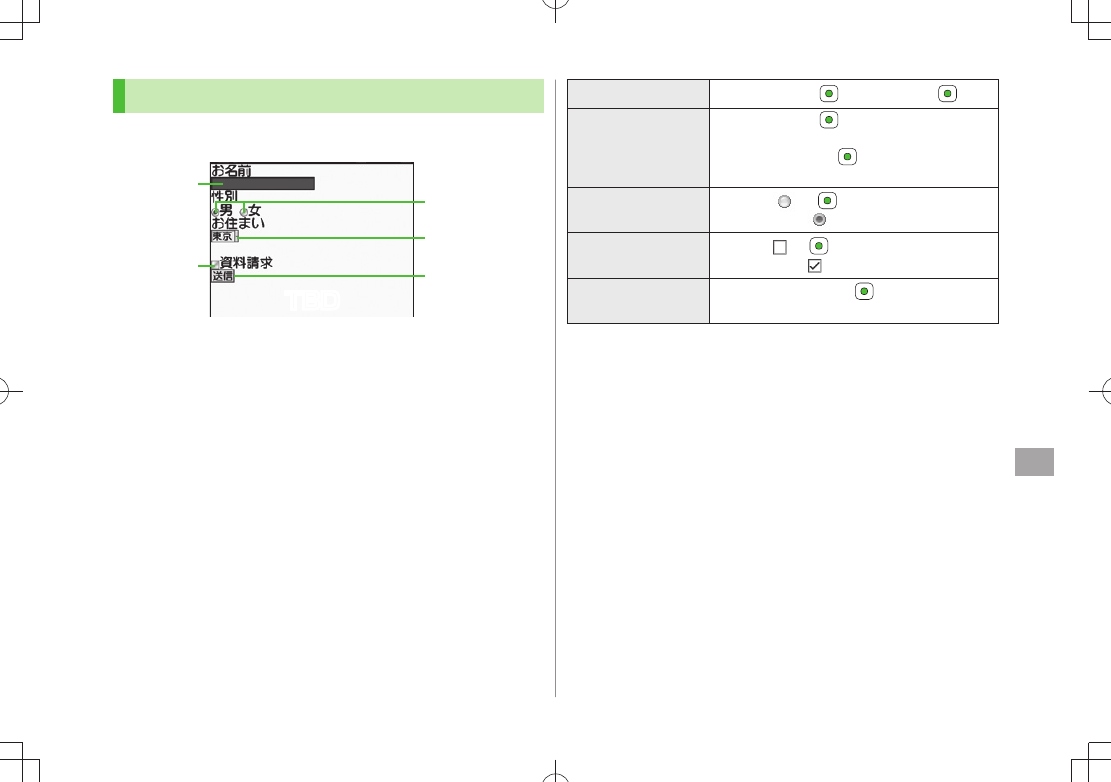
Actual web pages may differ in appearance.
Text Entry
Field
Check Box
Radio Button
Menu List
Command Button
Text Entry Field Highlight field Enter text
Menu List
Highlight field
Menu list appears.
Highlight an item
Selected items are highlighted.
Radio Button Highlight
When selected, appears.
Check Box Highlight
When selected, appears.
Command Button Highlight the button
Corresponding command is executed.
TBD
BEGIN_E_OI.indb 7 2009/12/14 16:34:41
Internet
14-8
14
Using Information
Bookmarks & Saved Pages
Bookmark websites or save page content to Saved Pages.
Some copy protected materials cannot be saved.
Bookmarks Save links to websites. 941P connects to the
Network to open the link.
Saved Pages Save page content. 941P opens saved pages
without connecting to the Network.
Saving Web Pages
1 Open a web page [Menu]
Bookmarks
or
Saved Pages
Add
2 Select title
Edit title
3
OK
OK
Saved Bookmarks/Saved Pages are saved to Bookmarks List/Saved
Pages List ( Right)
Open Bookmarks/Saved Pages in Web Page
Open a web page
> [Menu]
Bookmarks
or
Saved Pages
View List
Viewing Bookmarks & Saved Pages
Main Menu Yahoo! Keitai ( PC Site Browser)
1
Bookmarks
or
Saved Pages
Select an item
Example: Yahoo! Keitai Browser
Note
Create folders in Bookmarks/Saved Pages List to organize Bookmarks/
Saved Pages ( P.14-9).
Tip
Send Bookmarks via Infrared ( P.10-3) Send Bookmarks via
IC Transmission ( P.10-5)
Add Bookmark Shortcuts to Standby Save URLs to Bookmarks
Send Bookmark URLs ( P.14-10)
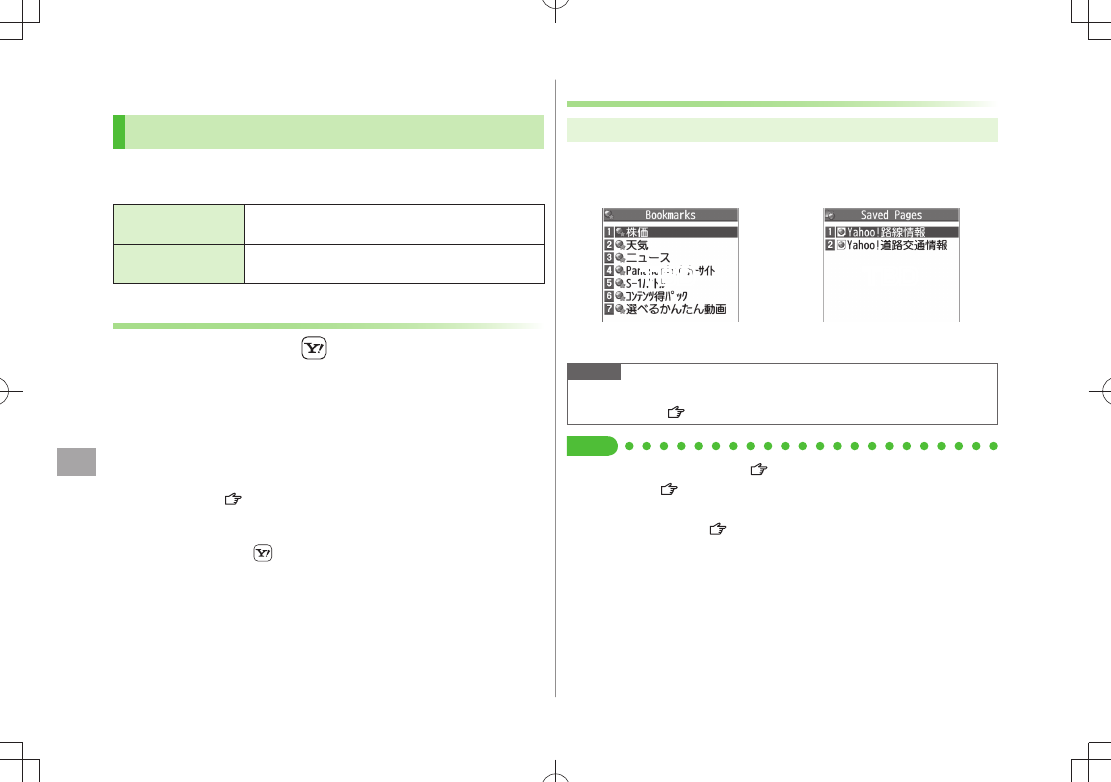
Saved Pages List WindowBookmarks List Window
TBD TBD
BEGIN_E_OI.indb 8 2009/12/14 16:34:42
Internet
14-9
14
Managing Bookmarks & Saved Pages
Follow the steps below to open Bookmarks or Saved Pages
list:
Yahoo! Keitai
Main Menu Yahoo! Keitai Bookmarks or Saved Pages
PC Site Browser
Main Menu Yahoo! Keitai PC Site Browser
Bookmarks or Saved Pages
Note
When a different USIM Card is inserted, Saved Pages do not appear or
title name cannot be changed.
Creating New Bookmarks/Saved Pages Folders
Folders cannot be created within existing folders.
1 Bookmarks
In Bookmarks list window, [Menu]
Create New
Folders
Enter title
Saved Pages
In Saved Pages list window, [Menu]
New Folder
Enter title
Move Bookmarks/Saved Pages to Folder
Before moving to folders, set
Sort
to
Saved/Moved Order
(P.14-10)
In Bookmarks/Saved Pages list window ( P.14-8), highlight a
bookmark/saved page [Menu]
Move to
Select a folder
Select a destination
Edit Folder Title
In Bookmarks/Saved Pages list window (
>P.14-8), highlight a folder
[Menu]
Edit
Edit folder title
Editing Bookmark Titles/URLs
1 In Bookmarks list window, highlight a bookmark
[Menu]
Edit
2 Edit title/URL
Renaming Saved Pages
1 In Saved Pages list window, highlight a saved page
[Menu]
Edit
2 Edit title
Tip
Delete Bookmarks/Saved Pages/Folders Display Bookmark/Saved Page
URLs Change Bookmarks/Saved Pages/Folders Display Order Sort
Bookmarks/Saved Pages/Folders ( P.14-10)
BEGIN_E_OI.indb 9 2009/12/14 16:34:42
Internet
14-10
14
Bookmarks/Saved Pages Functions
From Main Menu Yahoo! Keitai ( PC Site Browser)
Bookmarks or Saved Pages
Add Bookmark Shortcuts to Standby
Highlight a bookmark
> [Menu]
Add shortcut icon
YES
Save URLs to Bookmarks
>[Menu]
Create New
Bookmarks
Enter a title/URL
OK
Delete Bookmarks/Saved Pages/Folders
Follow the steps below
>
Item Operation/Description
Delete Highlight a bookmark, saved page or folder
>
[Menu]
Delete
YES
Delete
Selected Items Select items to delete
>[Menu]
Delete selected
Check items to
delete [Delete]
YES
Delete All
>[Menu]
Delete All
YES
Enter Phone
Password
Display Bookmark/Saved Page URLs
Highlight a bookmark/saved page
>
[Menu]
Display URL
Change Bookmarks/Saved Pages/Folders Display Order
Highlight a bookmark/saved page/folder
>
[Menu]
Move to
to select a position
Before changing order, set
Sort
( Right) to
Saved/Moved Order
.
Sort Bookmarks/Saved Pages/Folders
>[Menu]
Sort
Select a condition
Send Bookmark URLs
Highlight a bookmark
> [Menu]
Send URL
S! Mail
or
SMS
Create a message (S! Mail: From Step 2 on P.13-4/SMS:
From Step 2 on P.13-7)
BEGIN_E_OI.indb 10 2009/12/14 16:34:43
Internet
14-11
14
Downloading Image/Sound Files
Save images, sounds, etc. to Data Folder or microSD Card.
For PC Site Browser, only still images can be saved.
1 Open a web page [Menu]
Select File
2 Select a file
3
Save
YES
Available menu items vary by saved content.
Save location is determined by
Save Settings
( P.18-20).
However, save location may change depending on situations. Check
confirmation when download is complete.
Confirmation appears when downloading images or sound files.
Select
YES
for image/sound setting.
Note
Do not remove/install microSD Card while saving files to it.
Do not turn 941P power off while downloading or saving files.
Files may be damaged.
Some copy protected files may not be saved.
Videos selected from web pages play while being downloaded.
Using Number, Address or URL
Use linked numbers, addresses or URLs to make calls, send
messages, access websites, or save directly to Phone Book.
1 Open a web page containing phone numbers, mail
addresses or URLs
2 Phone Number
Select a phone number Select an item (See below)
Item Operation/Description
Voice call Make a Voice Call
Video call Make a Video Call
Select image Select outgoing image
Add to Phone
Book
Save a number to Phone Book ( From Step 2 on P.4-5)
E-mail Address
Select an address Select an item (See below)
Item Operation/Description
Compose
S! Mail
Create S! Mail ( From Step 4 on P.13-4)
Compose SMS Create SMS ( From Step 4 on P.13-7)
Add to
Phone Book
Save mail address to Phone Book ( From Step 2 on
P.4-5)
URL
Select URL
941P connects to the Network.
BEGIN_E_OI.indb 11 2009/12/14 16:34:44
Internet
14-12
14
Streaming
Enjoy video/sound clips while they download.
Supported by compatible files on Yahoo! Keitai sites only.
Streaming files cannot be saved.
Main Menu Yahoo! Keitai Yahoo! Keitai
1 Open a web page Select a file
Streaming starts.
2 or to exit
Engaged Streaming Operations
Mute/Release Mute [ /]
Pause/Resume*[/]
Volume /
Set Playback
Position*
to start playback from specified point
Toggle Display
Position Toggle Portrait/Landscape view.
* Not available during playback for live events such as live sports programs.
Note
Streaming requires a continuous Network connection. Network remains
connected even during a pause (Transmission fees apply).
Paused streams may stop after three minutes of inactivity.
When roaming abroad, streaming may be unavailable or not be
performed properly.
Incoming Voice Calls while Streaming
Incoming call pauses an active stream.
Video Calls cannot be received while streaming.
BEGIN_E_OI.indb 12 2009/12/14 16:34:48
Internet
14-13
14
Option Menu Items
In Yahoo! Keitai, press [Menu] for following operations.
Some functions may not be available depending on web pages.
Item Operation/Description
Forward Go to next page ( P.14-6)
Bookmarks View Bookmarks list, add bookmarks, or add bookmark
shortcuts to Standby
Saved Pages View Saved Pages list or save page content to Saved
Pages
Text Copy Copy page text
Reload Page Refresh page information
Enter URL Enter URL directly or use URL History to access pages
Select File View, play or save file to Data Folder (Downloading
Image/Sound Files: From Step 2 on P.14-11)
Item Operation/Description
Handy
Functions
Switch PC Browser
1
/Switch Browser
2: Toggle
Yahoo! Keitai/PC site
Internet Search
: Search text in Internet
Search In Page
: Search text within page
Jump in this page
: Jump to top/end of page
Send URL
: Send URL via S! Mail/SMS
History
: Open previously viewed pages
Expand/Shrink
2: Zoom page in/out
Set Display Range
2: Specify displayed area of page
Flash(R) Menu
: Playback/pause Flash® files
Properties
: View page details or server certificates for
secure pages
Yahoo! Keitai 1/
Home Page 2
View top menu
Settings
Font Size
: Change character size
Encoding
: Change encoding type
Pointer
: Set Pointer 2
Switch screen 2Toggle between Small Screen and PC Screen
Exit Browser Exit Browser
1 Yahoo! Keitai only
2 PC Site Browser only
BEGIN_E_OI.indb 13 2009/12/14 16:34:48

14-14
Internet
14
BEGIN_E_OI.indb 14 2009/12/14 16:34:49
15
15-1
S! Appli
Before Using S! Appli ......................................... 15-2
Downloading S! Appli ...............................................................15-2
Using S! Appli ..................................................... 15-3
Activating S! Appli ....................................................................15-3
Terminate/Suspend & Resume ...................................................15-3
Using S! Appli Startup History ...................................................15-3
Managing Applications .............................................................15-4
BEGIN_E_OI.indb 1 2009/12/14 16:34:49
S! Appli
15-2
15
Before Using S! Appli
S! Appli are Java™-based applications designed to run on
SoftBank handsets. Download games and other real-time
applications for use on 941P.
Separate subscription required to use downloaded applications (not
required for pre-installed S! Appli).
For usage on pre-installed applications, see Help menu for each S! Appli.
Note
For more information, visit SOFTBANK MOBILE Corp. Website
(http://www.softbank.jp).
Network S! Appli
Network S! Appli requires Network connection.
Connection fees apply.
License Information
Main Menu
> S! Appli Information
Downloading S! Appli
Download up to 100 S! Appli files to 941P/microSD Card.
End suspended S! Appli if any. However, S! Appli may not be ended
during calls.
Main Menu S! Appli S! Appli List
1
Download S! Appli
YES
941P connects to the Network, and download site appears.
2 Select an S! Appli
Properties appear.
3 Follow onscreen instructions
4 Select a save location
Downloaded S! Appli is saved to Data Folder automatically.
Download may take some time.
5
YES
to activate
Downloaded S! Appli starts.
To exit:
NO
Download Lifestyle-Appli
Main Menu
> (S! Appli ) Osaifu-Keitai Lifestyle-Appli
Download YES Select a Lifestyle-Appli
Lifestyle-Appli:
P.16-2
BEGIN_E_OI.indb 2 2009/12/14 16:34:50
S! Appli
15-3
15
Using S! Appli
Activating S! Appli
Main Menu S! Appli S! Appli List
1 Select an S! Appli
Application starts and appears.
See application Help menu for usage information.
Confirmation appears when selecting Network S! Appli.
For a microSD Card S! Appli, press
[microSD] before Step 1.
Note
Activate an S! Appli;
Main Menu Data Folder S! Appli
Select an S! Appli
Applications with
in S! Appli List are intended for Landscape View.
Incoming transmissions pause S! Appli.
If handset is closed while S! Appli is active, S! Appli pauses.
AV output compatible applications may be viewed on a TV set
( P.10-13).
Tip
Settings
Volume Backlight On/Off Deactivate Vibration
Sync microSD Card with S! Appli List ( P. 1 8 - 2 1)
Terminate/Suspend & Resume
Terminating/Pausing S! Appli
1 While running an S! Appli,
2
Suspended
or
Stopped
appears for a suspended application.
Resuming/Terminating Paused S! Appli
Main Menu S! Appli S! Appli List
1
Replayed
or
Stopped
Resumed application starts from paused point.
Using S! Appli Startup History
Main Menu S! Appli S! Appli History
1 Highlight a record [Menu]
Start, S! Appli info
or
Delete
BEGIN_E_OI.indb 3 2009/12/14 16:34:53
S! Appli
15-4
15
Managing Applications
Moving S! Appli between 941P and microSD Card
Main Menu S! Appli S! Appli List
1 Highlight an S! Appli [Menu]
Move to microSD
or
Move to phone
Some S! Appli may not be moved to microSD Card.
Deleting S! Appli
Main Menu S! Appli S! Appli List
1 Highlight an S! Appli [Menu]
Delete
YES
Some pre-installed S! Appli may not be deleted.
Viewing S! Appli Properties
Main Menu S! Appli S! Appli List
1 Highlight an S! Appli [Menu]
S! Appli info
Setting Security Level while Running S! Appli
Security Level cannot be set for some applications.
Main Menu S! Appli S! Appli List
1
Highlight an S! Appli [Menu]
Security level
2 Select an item (See below)
Item Operation/Description
Network Access Connect to the Network
Auto Invocation Activate S! Appli
Multimedia Recording Record multimedia data
Data Reading Access Read Phone Book, Calendar events, etc.
Data Rewrtng Accss Write/delete Phone Book, Calendar
events, etc.
Location Access Retrieve Location information
3
Always Allowed
,
Ask First Time
*,
Ask Every Time
or
Not Allowed
* Confirmation appears the first time application is activated.
Reset Security Level Settings
Reset security level settings to default or condition when downloading.
In Step 2,
>
Reset Sec. Setting
YES
BEGIN_E_OI.indb 4 2009/12/14 16:34:53
16
16-1
Osaifu-Keitai®
Basics .................................................................. 16-2
Downloading Lifestyle-Appli .....................................................16-3
Activating Lifestyle-Appli ..........................................................16-3
Using Osaifu-Keitai® ........................................... 16-4
Reader/Writer Transactions .......................................................16-4
IC Card Lock Functions ....................................... 16-5
Activating IC Card Lock ............................................................16-5
Remote Lock ............................................................................16-5
BEGIN_E_OI.indb 1 2009/12/14 16:34:53

Osaifu-Keitai®
16-2
16
Basics
"Osaifu-Keitai®" is a range of IC Card-based services used
by Osaifu-Keitai® compatible handsets. Make purchases
using e-money or e-ticketing. Hold handset up to a reader/
writer to pay for your purchase.
Osaifu-Keitai
® Terms
Osaifu-
Keitai®
A contactless IC Card technology to read/write data by
holding an IC card up to a reader/writer
IC Card An IC chip embedded in Osaifu-Keitai®-compatible handsets
Lifestyle-
Appli
Applications to use Osaifu-Keitai®. Some applications are
preinstalled.
Precautions
Data saved in IC Card vary by service content and usage history.
Procedures to delete IC Card data vary by Lifestyle-Appli. Contact
Osaifu-Keitai® service providers for details.
SoftBank is not liable for damages from accidental loss or alteration of IC
Card data or settings.
IC Card data can be misused if your Osaifu-Keitai
® compatible handset is
lost or stolen. SoftBank is not liable for any resulting damages.
Downloading Lifestyle-Appli and using applications may incur high
packet transmission charges.
Do not remove sticker from back of battery cover. Do not remove battery
cover. Doing so may disable Osaifu-Keitai®.
BEGIN_E_OI.indb 2 2009/12/14 16:34:53
Osaifu-Keitai®
16-3
16
Getting Started
Download Lifestyle-Appli via Internet website.
Activate Lifestyle-Appli to complete registration or customize
settings.
Make deposit into account, check payment records or balance, etc.
Note
Keep a copy of service passwords/customer service contact, etc. in a
separate place.
Downloading Lifestyle-Appli
Registration/Settings
Downloading Lifestyle-Appli
Main Menu Osaifu-Keitai Lifestyle-Appli
1
Download
YES
2 Select a Lifestyle-Appli
Lifestyle-Appli is saved to Data Folder.
Activating Lifestyle-Appli
Lifestyle-Appli cannot be activated during a call or while another
S! Appli is active.
Main Menu Osaifu-Keitai Lifestyle-Appli
1 Select a Lifestyle-Appli
2 To exit,
Stopped
Note
Alternatively,
Main Menu S! Appli Osaifu-Keitai
Lifestyle-Appli
or
Main Menu Data Folder Lifestyle-Appli
BEGIN_E_OI.indb 3 2009/12/14 16:34:55
Osaifu-Keitai®
16-4
16
Using Osaifu-Keitai®
Reader/Writer Transactions
Complete registration/settings and charge your account beforehand.
There is no need to activate a Lifestyle-Appli during transaction.
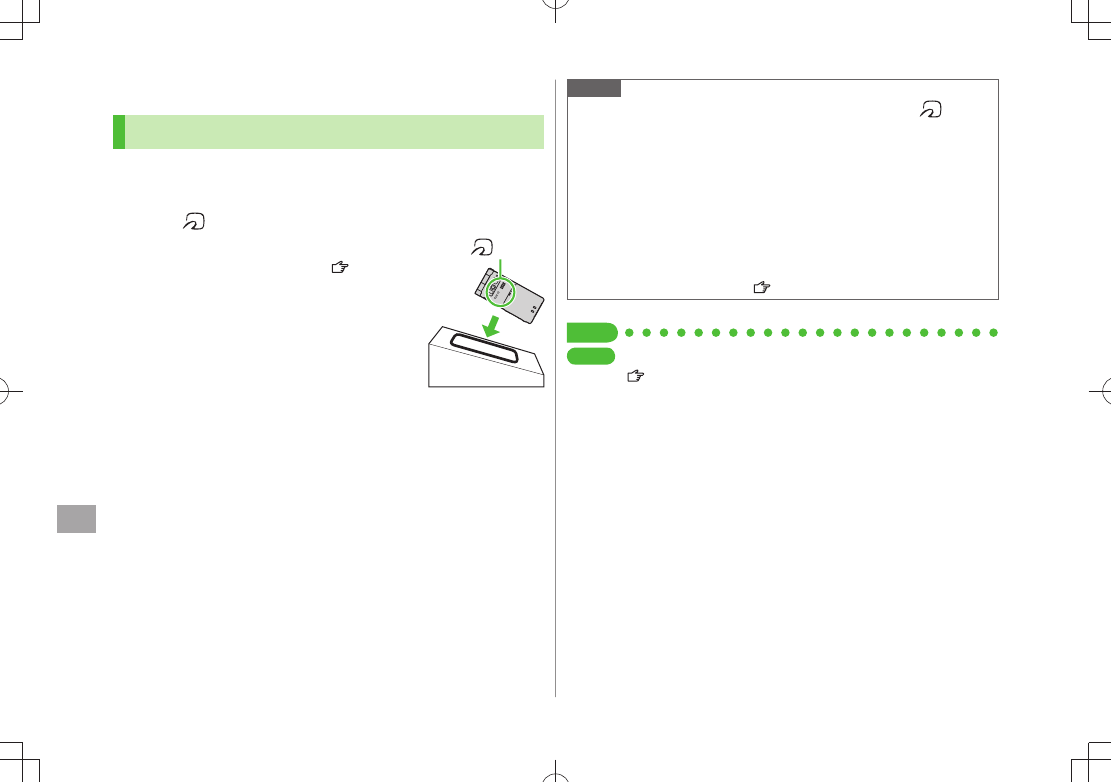
1 Hold logo up to reader/writer
When IC Card Notification Light is
ON
,
Notification Light illuminates ( P.18-10).
Hold handset parallel to reader/writer.
Try moving handset around if recognition is
slow.
Check scan result on reader/writer display.
Osaifu-Keitai
® can be used during a call or
Internet transmission (May require extra
time.).
logo
Note
Data may be unreadable if a metal object, etc. is between
logo and
reader/writer.
Even though Osaifu-Keitai
® is available while handset is off, Lifestyle-
Appli does not activate. However, if battery is left uncharged after
warning tone sounds, Osaifu-Keitai® may become disabled. Charge
battery beforehand.
When handset is held up to reader/writer, handset may show a message
or vibrate depending on service. S! Appli, Messaging or Internet may
also activate automatically. To avoid such cases, set the functions not to
activate during transactions ( P.18-21).
Tip
Settings
Disable Handset Response to Commands from Reader/Writer
(P.18-21)
BEGIN_E_OI.indb 4 2009/12/14 16:35:02
Osaifu-Keitai®
16-5
16
IC Card Lock Functions
Activating IC Card Lock
<Default> OFF
1 Press and hold Enter Phone Password
appears in Standby.
Repeat the step as required to unlock.
Note
Alternatively,
Main Menu Osaifu-Keitai IC Card Settings
IC Card Lock or Main Menu Settings Security
IC Card Lock
Remote Lock
<Default> OFF
Saving Numbers to Activate Remote Lock
Save up to three phone numbers to enable Remote Lock.
Main Menu Osaifu-Keitai IC Card Settings
Remote Lock
1 Enter Phone Password
ON
Numbers to Permit
2
<Not Recorded>
Enter phone numbers
To save numbers from Phone Book/Incoming Call Logs or to use a
payphone number: [Menu]
Refer to
or
Payphone
3 [Return] [Set]
BEGIN_E_OI.indb 5 2009/12/14 16:35:07

Osaifu-Keitai®
16-6
16
Number of Calls to Activate Remote Lock
<Default> Three times
Specify the number of incoming calls for activating IC Card Lock.
Main Menu Osaifu-Keitai IC Card Settings
Remote Lock
1 Enter Phone Password
ON
2
# of Incoming Call
Enter a number (03-10)
[Set]
Activating Remote Lock
1 Call 941P from one of the specified numbers
(Send Caller ID)
2 Hang up after 941P receives the call
3 Repeat Steps 1-2 until specified number of incoming
calls is reached (within three minutes)
After specified number of incoming calls, IC Card Lock is set and a
message informs you IC Card Lock is activated.
Note
When setting IC Card Lock, call 941P from the same specified phone
number. Incoming calls from different phone numbers cannot be
counted.
Specified incoming calls may not be counted when Call Forwarding is
active.
Remote Lock is not available when ring time for Answer Phone is set to
0 or Driving Mode is active.
BEGIN_E_OI.indb 6 2009/12/14 16:35:07
17-1
17
S! GPS Navi
About S! GPS Navi .............................................. 17-2
Using S! GPS Navi............................................... 17-2
Checking Your Current Position .................................................17-2
Activating Navi Appli ................................................................17-3
Using Location Navi (Japanese) .................................................17-3
Using Location Log ...................................................................17-3
BEGIN_E_OI.indb 1 2009/12/14 16:35:07
17-2
S! GPS Navi
17
About S! GPS Navi
S! GPS Navi provides location information by
communicating with base stations and by GPS satellite.
Check your position on map, area information or route to
your destination using a Navi Appli.
Note
Location information may be inaccurate due to location or signal
conditions.
SoftBank is not liable for any resulting damages.
Position cannot be determined while Positioning Lock is active
( P.18-22).
For more information, visit SOFTBANK MOBILE Corp. Website
(http://www.softbank.jp).
Using S! GPS Navi
Checking Your Current Position
Activate Navi Appli to check your position.
Main Menu Tools S! GPS Navi
1
Current Location
YES
Positioning starts.
To check your current position during positioning: When
[Use]
appears at lower right,
OK
2 When positioning is complete, [Map]
YES
941P connects to the Network and web page opens.
To reposition:
[Retry]
Save to Phone Book
Save obtained location information to Phone Book.
Positioning is complete
> [Menu]
Add to Phone Book
YES
Follow the steps for saving to Phone Book ( From Step 2 on P.4-5)
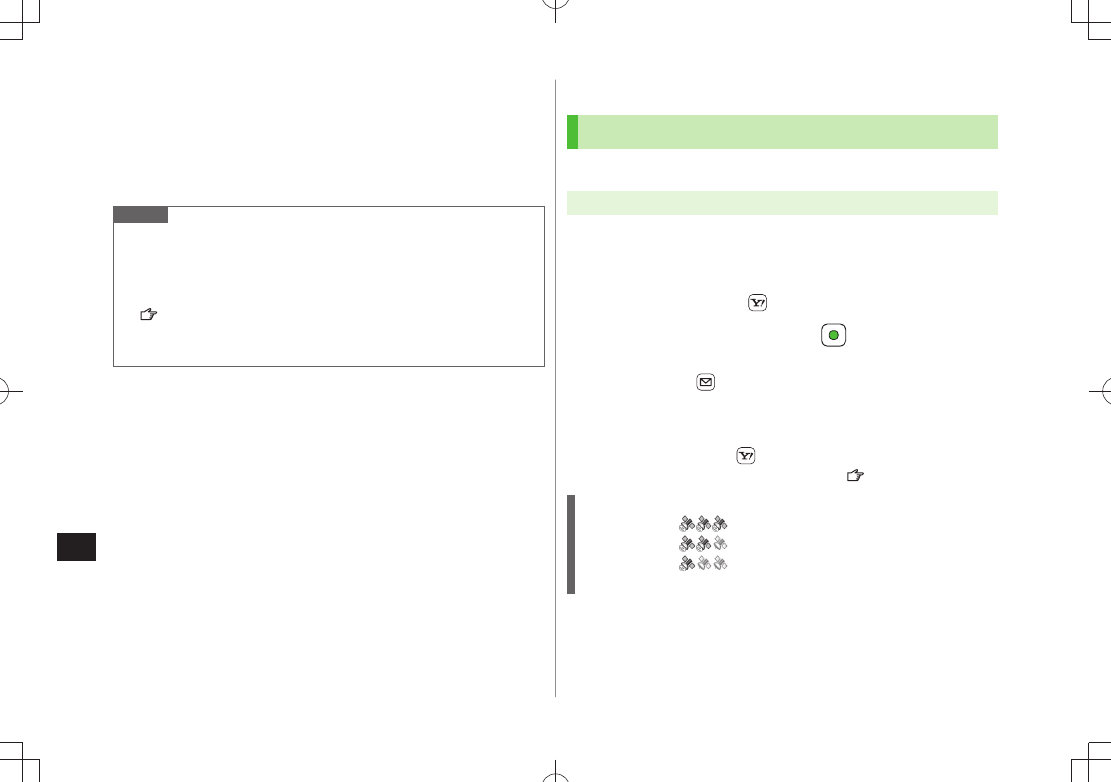
Indicating Positioning Accuracy Level
Accuracy Level ... Fairly accurate
Accuracy Level ... Relatively accurate
Accuracy Level ... No accurate location information retrieved
Retrieve location information again.
BEGIN_E_OI.indb 2 2009/12/14 16:35:12
17-3
S! GPS Navi
17
Activating Navi Appli
Search for current area information or route to your
destination.
End all applications including suspended applications.
Main Menu Tools S! GPS Navi Navi Appli
Using Location Navi (Japanese)
Use Location Navi to locate a person via a SoftBank 3G
handset or PC.
For more information, visit SOFTBANK MOBILE Corp. Website
(http://www.softbank.jp).
Main Menu Tools S! GPS Navi Location Navi
Note
Event Indicator appears when location information is automatically
provided or location information request is rejected. Select indicator to
show location log.
Using Location Log
Up to 50 latest location info are saved. Delete as required.
Main Menu Tools S! GPS Navi Location Logs
1 Show Details
Select a record to view details
appears if positioning fails.
Delete a Record
Highlight a record [Menu]
Delete
Delete this
YES
Delete All
[Menu]
Delete
Delete all
Enter Phone Password
YES
Note
When 50 records are saved, oldest is deleted first.
When positioning is requested while viewing a record, a message
appears and log window returns.
Tip
Settings
S! GPS Navi Settings ( P.18-22)
BEGIN_E_OI.indb 3 2009/12/14 16:35:13

17-4
S! GPS Navi
17
BEGIN_E_OI.indb 4 2009/12/14 16:35:13
18-1
18
Settings
Sound & Vibration .............................................. 18-2
Ringtones .................................................................................18-2
Charge Sound/Key Tone ............................................................18-2
Display ................................................................ 18-3
Display Settings ........................................................................18-3
Main Menu ..............................................................................18-4
Clock .......................................................................................18-4
Back Light ................................................................................18-5
External Display ........................................................................18-5
Font .........................................................................................18-6
Manner Mode ..................................................... 18-7
Incoming Settings............................................... 18-7
Date & Time ........................................................ 18-8
Call Settings ....................................................... 18-9
Call Time & Call Cost ................................................................18-9
Making & Receiving Calls .........................................................18-9
Notification Light ............................................. 18-10
Text Entry .......................................................... 18-10
Phone Book ...................................................... 18-11
Voice Dial .......................................................... 18-11
Video Call ......................................................... 18-12
Function Menus ......................................................................18-12
Engaged Video Call Settings ...................................................18-12
Horizontal Open Position ................................. 18-13
Horizontal Open Menu/Wallpaper ...........................................18-13
Standby Clock ........................................................................18-13
Digital TV .......................................................... 18-14
Mobile Widget (Japanese) ................................ 18-15
S! Quick News (Japanese) ................................ 18-16
Display Settings ......................................................................18-16
Auto Update/Deleting Information ..........................................18-16
Bluetooth® ........................................................ 18-17
Messaging ........................................................ 18-18
Universal Settings ...................................................................18-18
S! Mail Settings ......................................................................18-19
SMS Settings ..........................................................................18-19
Internet ............................................................. 18-19
Browser Display Settings .........................................................18-19
Memory Manager & Reset ......................................................18-20
Security Settings .....................................................................18-20
Reset......................................................................................18-21
S! Appli ............................................................. 18-21
Osaifu-Keitai® ................................................... 18-21
S! GPS Navi Settings ........................................ 18-22
Default Settings ............................................... 18-23
Confirming Settings ......................................... 18-24
BEGIN_E_OI.indb 1 2009/12/14 16:35:14
18-2
Settings
18
Settings
Sound & Vibration
Ringtones
From Main Menu Settings
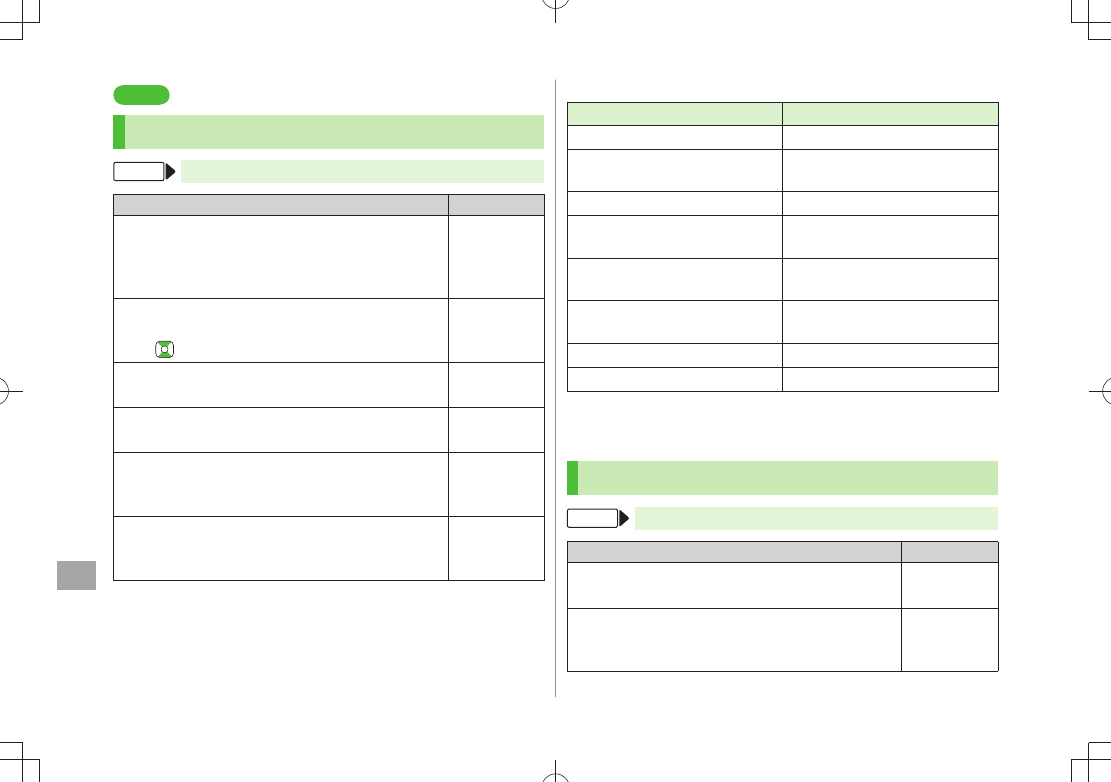
Setting/Operation Default
Change
■Ringtone
Sound Settings
>
Ring Tones
Select an item
Select Ring Tone
Select a type Select a folder
Select a tone
Phone/Video
Call: Pattern 1
Message:
Tone3
Change
■Ringer Volume
Sound Settings
>
Ringer Volume
Select a type
to adjust volume
Level 4
Disable 3D Sound Effect (Ringtone/Melody)
■
Sound Settings
>
Stereo/3D Sound
OFF
ON
Set Ringtone Sound Output for Earphone
■*
Sound Settings
>
Earphone
Earphone
Earphone +
Speaker
Set Message
■Ringtone Duration
Sound Settings
>
Message Ring Tones
ON
or
OFF
( For
ON
, enter ring time)
ON (Ring time:
05 sec)
Set
■Vibration Alert
Incoming Settings
>
Vibrator
Select an item
Select a vibration pattern
OFF
*
When earphone is connected and Sound Settings is set to
Earphone
, ringtone
sounds through earphone and speaker for incoming calls/messages or alarms
after about 20 seconds. Other sounds (e.g. Demo playback) are heard only from
earphone.
Pre-installed Ringtones
Title Composer
Pinwheel Original
SINFONIA NR 101 THE CLOCK HOB
I 101
HAYDN FRANZ JOSEPH
JE TE VEUX SATIE ERIK ALFREDI LE
DANSE DES MIRLITONS // CASSE
NOISETTE OP 71A /ORI
CHAJKOVSKIJ PETR ILICH
HEIGH HO // SNOW WHITE AND THE
SEVEN DWARFS /INST
CHURCHILL FRANK E
DANCE OF THE KNIGHTS
OP 64 NO 13
PROKOFEV SERGEJ S
WALTZ/COPPELIA BALLET SUITE DELIBES LEO CLEMENT PHILIBERT
PETER AND THE WOLF OP 67 PROKOFEV SERGEJ S
Names of composers given above conform to JASRAC Website. Parts of titles
may not appear due to Display size.
Charge Sound/Key Tone
From Main Menu Settings
Setting/Operation Default
Set Key Tone
■
Sound Settings
>
Key Tone
ON
or
OFF
OFF
Charging Start/End Tone Off
■
Phone Settings
>
Battery
Charge Sound
OFF
ON
BEGIN_E_OI.indb 2 2009/12/14 16:35:15
18-3
Settings
18
Settings
Display
Display Settings
Horizontal Open Menu/Wallpaper (Horizontal Open Position) (
P.18-13)
From Main Menu Settings Display Settings
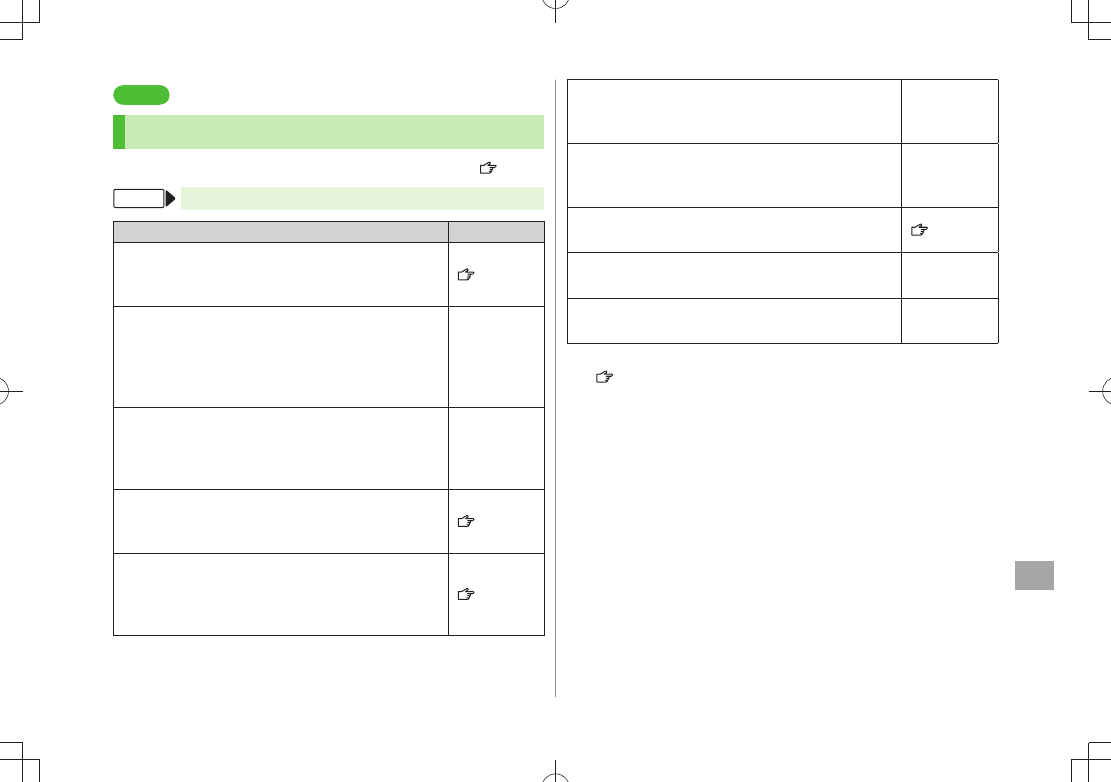
Setting/Operation Default
Change
■Wallpaper
>
Internal Display
Stand-by Display
Select an item Select a folder Select an image
(P.18-23)
Add Calendar to Wallpaper
■
Internal Display
>
Stand-by Display
Calendar
Select a view format
BG Image ON
or
BG Image OFF
(
For
BG Image ON
, select a
folder select an image)
–
Change Wallpaper Randomly
■
Internal Display
>
Stand-by Display
Random Display
Select a folder
Every Hour
or
Every Day
–
Change Outgoing Call/Message Image
■
Internal Display
> Select an outgoing type
Select a folder Select an image
(P.18-23)
Change Incoming Call/Message Image
■
Internal Display
> Select an incoming type
Select Calling Disp.
1 Select an image type
Select a folder Select an image
(P.18-23)
Change Battery/Antenna Indicator
■
Internal Display
>
Battery Icon
or
Antenna Icon
Select a pattern
Pattern 1
Change Start-up Window
■
Internal Display
>
Start-up
OFF
,
Message
,
Pictures
or
Videos
2
–
Change Display
■Color Scheme
Color
> Select a color (P.18-23)
Set Interface
■Language
言語設定
>
English
Show New Call/Message when Handset Opens
■
>
Open for New
ON
OFF
1
Setting applies to messages retrieved manually (
Incoming Options
( P.18-19) set to
Manual Retrieval
) or when Server Mail is retrieved
(Retrieve New window cannot be changed).
2
For
Pictures
or
Videos
: Select a folder Select an image
For
Message
: Enter text
BEGIN_E_OI.indb 3 2009/12/14 16:35:18
18-4
Settings
18
Main Menu
From Main Menu Settings Display Settings
Menu Icons
Setting/Operation Default
Change Main Menu Theme
■
Select a pattern
>(P.18-23)
Change Main Menu Icons
■
Customize
> Select a menu Select a folder
Select an image
–
Change Main Menu Background
■
Customize
>
Background Image
Select a
folder Select an image
–
Clock
Standby Clock (Horizontal Open Position) (
P.18-13)
External Display Clock (
P.18-5)
From Main Menu Settings Display Settings
Internal Display Clock
Setting/Operation Default
Change Standby Clock Pattern
■ 1
Stand-by Clock
> [Pattern] Select a pattern
[Set]
(P.18-23)
Change Standby Clock Position
■ 1 2
Stand-by Clock
> [Position] Select a
position [Set]
Pattern 1
Change Standby Clock Size
■ 1
Stand-by Clock
> [Size]
Large
[Set] Small
Change Standby Clock at Upper Right (lower
■
right in Landscape View)
Icon Clock
> Select a pattern
(P.18-23)
1 Highlight
Stand-by Clock
[Play] to view Standby Clock.
2 Even if clock position is set to
Pattern 2
-
Pattern 12
, clock appears in
Pattern 1
when:
Calendar, World Clock or Operator Name is set to appear in Standby
Time zone is set to other than GMT+9
Privacy Key Lock is active
BEGIN_E_OI.indb 4 2009/12/14 16:35:22
18-5
Settings
18
Back Light
From Main Menu Settings Display Settings
Setting/Operation Default
Turn Back Light On/Off; Set Power Saver Mode
■
1
Back Light Time
>
Lighting
ON
or
OFF
Select
ON (Power Saver Mode)
or
OFF (Constant Light)
( For
ON
, Enter Light time)
ON+Saver
Illuminate Back Light while Charging
■
Back Light Time
>
Charging
Constant Light
Standard 2
Limit Back Light to Display Only
■
Back Light Time
>
Area
LCD
LCD + Keys
Adjust Brightness
■
>
Back Light Time
Brightness
Select a brightness level
Auto 3
Set Back Light to Turn On Softly
■
Back Light Time
>
Soft Light
ON
OFF
Disable Auto Image Compensation
■
LCD AI
>
OFF
ON
1 During operation (except when in Standby or S! Appli is active), press and
hold to toggle
ON
/
OFF
.
2 When set to
Standard
, Back Light illuminates with the same setting as
Lighting
setting.
3 When set to
Auto
, Back Light is automatically adjusted according to
ambient light.
External Display
From Main Menu Settings Display Settings
External Display
Setting/Operation Default
Turn Off External Display
■
OFF
>ON
Adjust
■Brightness
ON
>
Brightness
Select a brightness level Level 3
Change
■Wallpaper
ON
>
Stand-by Display
Select an item Select
a folder Select an image
(P.18-23)
Add Calendar to Wallpaper
■
ON
>
Stand-by Display
Calendar
BG Image ON
or
BG Image OFF
( For
BG Image ON
, select a folder Select an image)
–
Change Stand-by
■Clock Display 1
ON
>
Clock
Stand-by Clock
[Pattern]
Select a clock pattern [Set]
(P.18-23)
Change Stand-by Clock Position
■1 2
ON
>
Clock
Stand-by Clock
[Position]
Select a pattern [Set]
Pattern 10
Change Stand-by Clock Size
■1
ON
>
Clock
Stand-by Clock
[Size]
Small
[Set]
Large
BEGIN_E_OI.indb 5 2009/12/14 16:35:23
18-6
Settings
18
Change Icon Clock Pattern
■
ON
>
Clock
Icon Clock
Select a pattern (P.18-23)
Set Caller ID Off
■
ON
>
Incoming Calls
OFF
ON
Forbid Opening New Message by Pressing
■
ON
>
Message
OFF
ON (Open)
Turn Back Light Off after All S! Quick News
■
Viewed
ON
>
S! Quick News All
ON
OFF (Turn off in
15 seconds)
Turn Back Light Off while Playing Videos
■
ON
>
Movie Display Time
Display Always
15 seconds
1 Highlight
Stand-by Clock
[Play] to view Standby Clock.
2 Even if clock position is set to
Pattern 2
-
Pattern 12
, clock appears in
Pattern 1
when:
Calendar, World Clock or Operator Name is set to appear in Standby
Time zone is set to other than GMT+9
Privacy Key Lock is active
Font
From Main Menu Settings Display Settings
Setting/Operation Default
Change Font Size by Function
■
Font Size
> Select an item Select a size Standard
■Set Menu Font Sizes Collectively
Font Size
>
Collective Setting
Large
or
Small
*
Standard
Change Font Style (Incoming/Outgoing Call Window)
■
Disp. Call/Recv #
>
Pattern 2
Pattern 1
* When set to
Small
, font size for Phone Book and Incoming/Outgoing Call
Logs is set to
Standard
.
BEGIN_E_OI.indb 6 2009/12/14 16:35:24
18-7
Settings
18
Settings
Manner Mode
From Main Menu Settings Incoming Settings
Manner Mode Type
Setting/Operation Default
Set Manner Mode Type
■
Manner Mode, Super Silent
>or
Us
er Mode
( For
User Mode
, set individual items [Finish])
Manner Mode
Default Settings by Mode
■
Manner Mode Super Silent Driving Mode User Mode
Answer Phone
Value set for
Answer Phone
Value set for
Answer Phone ON OFF
Vibrator
ON ON OFF ON
In. Calls
Silent Silent Silent Silent
Msg Ring T.
Silent Silent Silent Silent
Alarm
Silent Silent Silent Silent
Rec. Check Tone
ON OFF ON ON
Key Tone
OFF OFF * OFF
Mic Sensitiv.
Up Up Up Up
LVA Tone (Low battery alarm)
OFF OFF OFF OFF
* Based on Key Tone setting ( P.18-2)
Settings
Incoming Settings
From Main Menu Settings Incoming Settings
Setting/Operation Default
Change Answer Setting
■ ( P.18-8)
Answer Setting
>
Quick Silent
or
OFF
Any Key Answer
Answer Calls by Opening Handset
■
>
Open-to-Ans. Call
Phone
or
Video Call
Answer
Keep Ringing
Hide Caller Image Saved in Phone Book
■
Phone Book Image
>
OFF
ON
Set
■ Response ( P.18-8) for Missed Call/New
Message Notification
Info Notice Setting
>
ON
or
OFF
ON
Activate Auto Answer with Earphone
■
>
Auto Answer
ON
Enter ring time OFF
Set Call Waiting Response
■
In-call Management
>
Call Forwarding
or
Call Rejection
Answer
BEGIN_E_OI.indb 7 2009/12/14 16:35:25
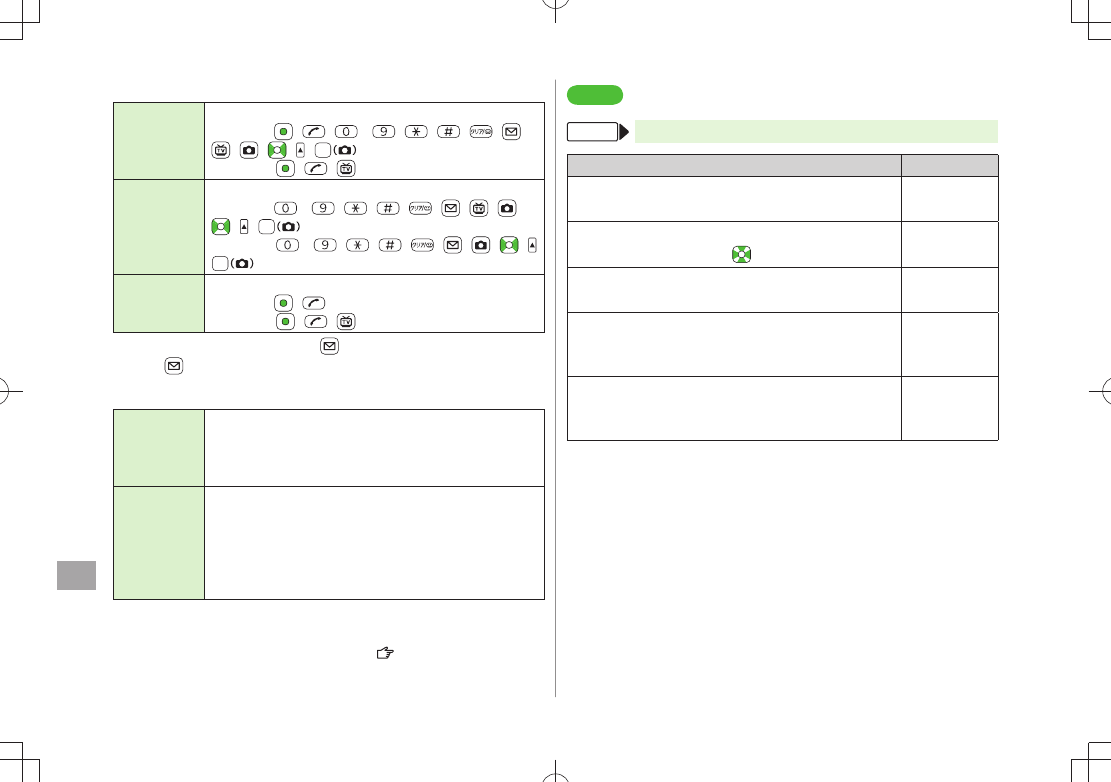
18-8
Settings
18
Answer Setting Key Operations
Any Key
Answer
To answer a call, press any of the following keys:
Voice Call: , ,
- , , , , ,
, , , ,
Video Call: , ,
Quick Silent
To cancel ringtone/vibration, press any of the following keys:
Voice Call:
- , , , , , , ,
, ,
Video Call:
- , , , , , , , ,
OFF To answer a call, press any of the following keys:
Voice Call: ,
Video Call: , ,
When [Voice Mail] is assigned to
indicated at the bottom of Display,
press to start voice or video recording.
Info Notice Setting Response
ON No Missed Calls/No Received Messages: Triple-beep
sounds
Missed Calls/Received Messages: Double-beep sounds
twice
ボイス
(Voice)*
No Missed Calls/No Received Messages: Triple-beep
sounds
Missed Calls: Double-beep sounds; voice message
announces that you have a missed call
Received Messages: Double-beep sounds; voice message
announces that you have a new message
When Vibrator is set for Incoming Settings, vibration activates with beeps.
In Manner Mode, only vibration activates.
Set
Side-keys Guard
to
OFF
beforehand ( P.11-8).
* Japanese only
Settings
Date & Time
From Main Menu Settings Date & Time
Setting/Operation Default
Change Date and Time
■
Date & Time
> Enter year, date, time and time zone –
Display World Clock
■
>
World Clock
ON
to select an area OFF
Activate Daylight Savings Time
■
Daylight Savings
>
ON
OFF
Deactivate Alarm while Operating Other
■
Functions
Alarm Tone
>
Operation Preferred
Alarm
Preferred
Deactivate Automatic Time Correction via
■
Yahoo! Keitai
>
Time Correction
OFF
ON
BEGIN_E_OI.indb 8 2009/12/14 16:35:32
18-9
Settings
18
Settings
Call Settings
Call Time & Call Cost
From Main Menu Settings Call Settings
Setting/Operation Default
Display
■Call Time/Cost 1
Call Time/Cost
>–
Reset
■Total Call Charge/Time
Reset
> Enter Phone Password
Reset Total Duration
or
Reset Total Cost
YES
( For
Reset Total Cost
, enter PIN2)
–
Set
■Charge Limit 2
Set Max Cost Limit
>
ON
Enter charge limit
Enter PIN2
OFF
1 May not be available depending on subscription status. In that case, Set
Max Cost Limit is not available.
2 When set to
ON
, incoming/outgoing calls including emergency number
calls are not dialable if charge limit is reached.
Making & Receiving Calls
From Main Menu Settings
Setting/Operation Default
Change Earpiece Volume
■
Call Settings
>
Volume
to adjust volume Level 4
Set Handset Response when Closed during Call
■
Call Settings
>
Closing Clamshell
No Tone
or
Hold Call
*
End the Call
Set Hold Tone
■
Call Settings
>
Hold Tones
On-hold Tone
or
Holding Tone
Select a tone
On-hold Tone:
On-hold Tone 1
Holding Tone:
JESU JOY OF
MAN's
Turn Off Noise Reduction
■
Call Settings
>
Noise Reduction
OFF
ON
Sound Alarm before Connection is
■
Disconnected
Call Settings
>
Quality Alarm
OFF
or
Low Tone
High Tone
Sound Alarm until Line is Reconnected
■
Call Settings
>
Reconnect Signal
OFF
or
Low Tone
High Tone
Call Service Numbers
■
(Service not available at present)
Call Settings
>
Service Numbers
Select a service number
–
Specify Phone Book Entry to Call with Earphone
■
Phone Settings
>
Headset Switch to Call
Voice Call
Search Phone Book Select an entry
OFF
* When
Hold Call
is selected:
Speaker ON
(Hold tone sounds from
speaker)/
Speaker OFF
(Hold tone does not sound from speaker)
BEGIN_E_OI.indb 9 2009/12/14 16:35:32
18-10
Settings
18
Settings
Notification Light
From Main Menu Settings Notification Light
Setting/Operation Default
Set Notification Light by Incoming Type
■
(Voice/Video Calls or Messages)
Incoming
>
Select Color
Select a type
to select a color
(P.18-23)
Change Notification Light Color Name for
■
Incoming Call/Message
Incoming
>
Color
Edit Color Name
Select a color Edit color name
–
Adjust Notification Light Color Tone for
■
Incoming Call/Message
Incoming
>
Color
Adjust Color Tone
Select a color Adjust color tone
–
Set Notification Light for Missed Calls/New
■
Messages
Missed Call/Unread
>
OFF When Checked
or
OFF
OFF after
24hours
Set Notification Light for Other Functions
■
Select a function
>
ON
or
OFF,
or to select a
color
–
View Notification Light Status
■*
Confirm Status
>–
* View Notification Light settings for incoming calls/messages, engaged
calls or upper Side Key commands.
Settings
Text Entry
From Main Menu Settings Phone Settings
Text Entry Method
Setting/Operation Default
Set Input Mode
■
Input Mode
> Check input mode(s) to use
[Finish] Select a input mode to prioritize
Input mode:
All
Prioritized
mode:
Mode 1
(5-touch)
Hide Predictive Candidates/Context Forecast
■
List
Predict
>
OFF
ON
Set Learning Feature Off for Secret Mode/
■
Secret Data Only
Learn in Secret Mode
> Enter Phone Password
OFF
ON
Delete All Learned Words
■
Reset Learned Words
> Enter Phone Password
YES
–
BEGIN_E_OI.indb 10 2009/12/14 16:35:33
18-11
Settings
18
Settings
Phone Book
From Main Menu Phone Book Settings
Setting/Operation Default
Change
■Save Location for New Entry
Save Settings
>
USIM
or
Ask Every Time
Phone
Change Phone Book Search Method
■
Search Method
> Select a method
A-KA-SA-TA-NA
Change Font Size
■
Font Size
>
Phone Book
or
Call Log
Large
Standard
Forbid Forwarding Phone Book Entry Images
■
Forwarding Image
>
OFF
ON*
* If
ON
is selected, images can be forwarded via Infrared, IC transmission or
Bluetooth®.
Settings
Voice Dial
From Main Menu Settings Phone Settings
Voice Settings
Setting/Operation Default
Activate Voice Dial Automatically
■
Auto Voice Dial
>
ON
OFF
Activate Voice Dial via Earphone or Bluetooth
■®
Device
Voice Earphone Dial
>
ON
OFF
BEGIN_E_OI.indb 11 2009/12/14 16:35:33
18-12
Settings
18
Settings
Video Call
Function Menus
From Main Menu Settings Video Call
Setting/Operation Default
Change Incoming Image Quality
■
Incoming Video Qlty
>
Quality Prioritized
or
Motion Prioritized
Standard
Change Outgoing Image
■
Select Images
> Select a category Highlight
Original
[Menu]
Change setting
Select a folder Select a file [Play] to view
image
Pre-installed
Switch Earpiece On
■
Loud Speaker
>
OFF
ON
Switch to Voice Call when Video Call Fails
■
Voice Call Auto Redial
>
ON
OFF
Monitor Room Remotely
■
Remote Monitoring
> ( P.2-8) –
Engaged Video Call Settings
From During a Video Call, [Menu] V. Call settings
Setting/Operation Default
Change Incoming Image Quality
■
IncomingVideo Qlty
>
Qlty Prioritized
or
Motion Prioritized
Standard
Change Brightness
■
Brightness
> Select a brightness level 0
Adjust Color Tone to Lighting Conditions
■
White balance
> Select an environment Automatic
Change Color Tone
■
Color mode set
> Select a color tone Normal
■Enhance Image Quality in Low Light Conditions
Night mode
>
ON
OFF
Set Focus
■*
Focus
> Select a focus type Landscape
* Outside Camera only
BEGIN_E_OI.indb 12 2009/12/14 16:35:34
18-13
Settings
18
Settings
Horizontal Open Position
Horizontal Open Menu/Wallpaper
From Main Menu Settings
Setting/Operation Default
Set Which Operation to Start when Opening
■
Handset to Horizontal Open Position
Phone Settings
>
Horizontal View
TV
,
Camera
or
Horizontal Open Menu
OFF
Change Menu Theme in Horizontal Open
■
Position
Display Settings
>
Hor. Open Menu
Select a
pattern
(P.18-23)
Change Wallpaper in Standby
■
Display Settings
>
Internal Display
Stand-by Display Wide
Select a folder Select
an image
(P.18-23)
Add Calendar to
■Wallpaper in Standby
Display Settings
>
Internal Display
Stand-by Display Wide
Calendar
BG Image ON
or
BG Image OFF
( For
BG Image ON
, select a folder Select an image)
–
Change Wallpaper Randomly
■
Display Settings
>
Internal Display
Stand-by Display Wide
Random Display
Select a folder
Every Hour
or
Every Day
–
Standby Clock
From
Main Menu Settings Display Settings
Internal Display Clock Stand-by Clock Wide
Setting/Operation Default
Change Standby
■Clock Display 1
>[Pattern] Select a pattern [Set] (P.18-23)
Change Standby Clock Position
■ 1 2
>[Position] Select a pattern [Set] Pattern 3
Change Standby Clock Size
■ 1
>[Size]
Small
[Set] Large
1 Highlight
Stand-by Clock Wide
[Play] to view clock.
2 Even if clock position is set to
Pattern 2
-
Pattern 7
, clock appears in
Pattern 1
when:
Calendar, World Clock or Operator Name is set to appear in Standby
Time zone is set to other than GMT+9
Privacy Key Lock is active
BEGIN_E_OI.indb 13 2009/12/14 16:35:35
18-14
Settings
18
Settings
Digital TV
From Main Menu TV User Settings
Setting/Operation Default
Hide Caption
■
Display
>
Caption
OFF
ON
Change Caption Position in Landscape View
■
Display
>
Caption Posit. In W-scr
Upper
Lower
Hide Guide in Landscape View
■
Display
>
Icons
OFF
ON
Forbid Enhancing Frame Rate Automatically
■
Video
>
Mobile W-Speed
OFF
ON
Change Image Quality
■
Video
>
Image Quality
Select an item Dynamic
Set Back Light Duration while Watching TV
■
Display Light
>
Lighting Duration
Enter duration (min.)
Constant Light
Deactivate Auto Volume
■
Sound
>
Sound Effect
Auto Volume
OFF
ON
Remaster Sounds from Earphone or Bluetooth
■®
Device
Sound
>
Sound Effect
Remaster
1
ON
OFF
Add Listening Effect to Sound from Earphone
■
or Bluetooth® Device
Sound
>
Sound Effect
Listening
1
Select an item
OFF
Change Quality of Sound from Earphone or
■
Bluetooth® Device
Sound
>
Sound Effect
Equalizer
1
Select an item
Normal
Turn Off Speaker by Closing 941P while
■
Watching TV
Sound
>
TV Sound While Closed
OFF
ON
End Recording when Battery Runs Low
■
Recording
>
Rec. When Low Battery
Stop Recording
Continue
Recording
Start Recording TV Automatically when a Call
■
Comes in while Watching TV
Recording
>
Rec. Program When Call
ON
OFF
Hide Images on Data Broadcast Sites
■
Data Broadcasting
>
Images
OFF
ON
Turn Off Sounds from Data Broadcast/Sites
■
Data Broadcasting
>
Sound Effect
OFF
ON
Show Confirmation on Data Broadcast
■
Data Broadcasting
>
Reset Settings
YES
–
Set Power Saving Mode
■ 2
ECO Mode
>
YES
OFF
Reset Channel List
■
Reset Channel Setting
> Enter Phone Password
YES
–
Delete Information in Broadcasting Storage
■
Area
Reset Storage Area
> (Highlight an affiliated
channel ) [Menu]
Delete this
or
Delete all
( For
Delete all
, enter Phone Password)
YES
–
BEGIN_E_OI.indb 14 2009/12/14 16:35:35
18-15
Settings
18
Reset
■TV Settings
Reset TV Settings
> Enter Phone Password
YES
–
Check TV Settings
■
Check TV Settings
>–
1 Remaster/Listening/Equalizer Settings: P.5-8
2 To cancel ECO Mode, perform same operation. When ECO Mode is set,
following settings automatically activate and cannot be changed.
When canceled, original settings return.
Mobile W-Speed
: OFF
Image Quality
: Normal
Remaster
: OFF
Listening
: OFF
Equalizer
: Normal
Settings
Mobile Widget (Japanese)
From Main Menu Entertainment Mobile Widget
Settings
Setting/Operation Default
Deactivate Auto Update
■
Auto Refresh
>
OFF
ON (Activate)
Activate Auto Roaming Abroad
■
Auto Roaming
>
ON
OFF
(Deactivate)
Hide Confirmation when Roaming Abroad
■
Roaming Notification
>
OFF
ON (Show)
Forbid Sending/Receiving Cookies
■
Cookies
>
OFF
ON
(Send/Receive)
■Delete Cookies
Delete Cookies
>
YES
–
BEGIN_E_OI.indb 15 2009/12/14 16:35:36
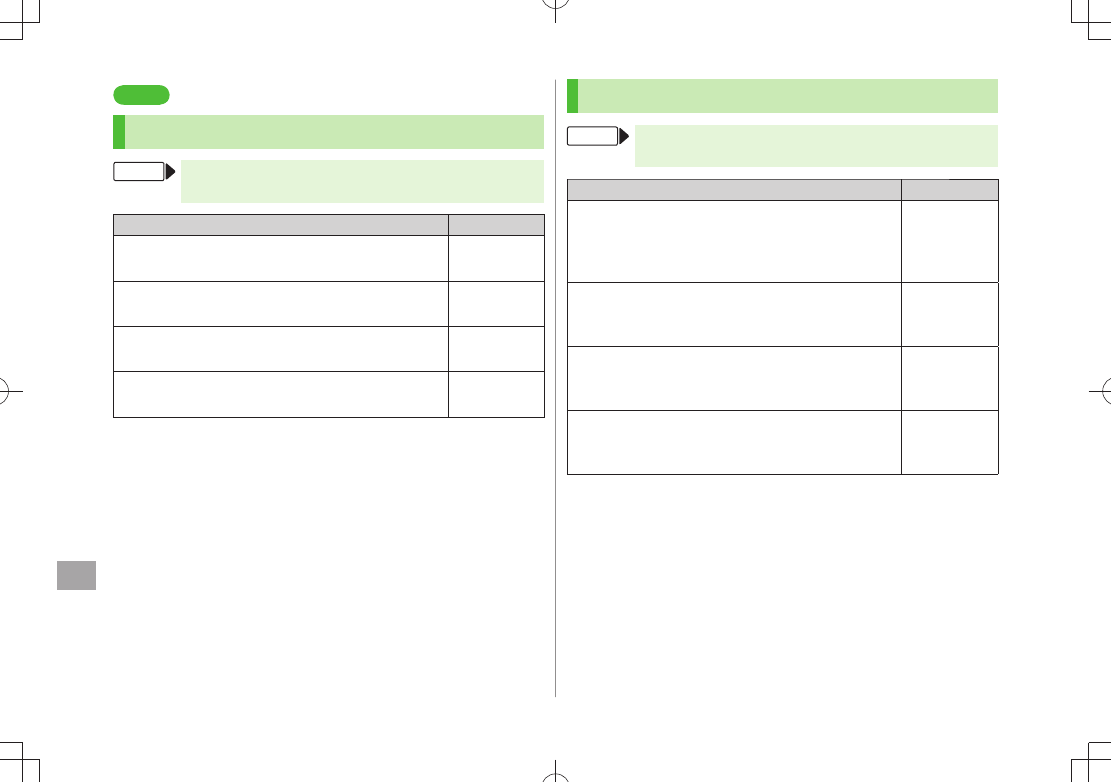
18-16
Settings
18
Settings
S! Quick News (Japanese)
Display Settings
From Main Menu Settings Display Settings
Internal Display S! Quick News Settings
Setting/Operation Default
Show Only Unread Items in Standby
■
Unread/Read Setting
>
Unread
Unread + Read
Change Marquee Speed
■
Marquee Speed
>
Fast
or
Slow
Normal
Hide S! Quick News
■
Display Always
>
OFF
ON (Show)
Show Image Data
■
Image Display
>
ON
OFF (Hide)
Auto Update/Deleting Information
From Main Menu Entertainment S! Quick News
Settings
Setting/Operation Default
Automatically Update Quick News in S! Quick
■
News List 1 2
Auto Refresh
>
S! Quick News
Set update
frequency
OFF
(Not update
automatically)
Automatically Update General News (Once a
■
day) 1 2
Auto Refresh
>
General
ON
OFF
(Not update
automatically)
Automatically Update Special News (Every four
■
hours) 1 2
Auto Refresh
>
Special
ON
OFF
(Not update
automatically)
Delete S! Quick News Information
■
Del S! Quick News List
>
YES
Enter Phone
Password
–
1 If calls are in progress at update time, auto update does not occur until
next update.
2 Video Calls are rejected during auto update.
BEGIN_E_OI.indb 16 2009/12/14 16:35:36
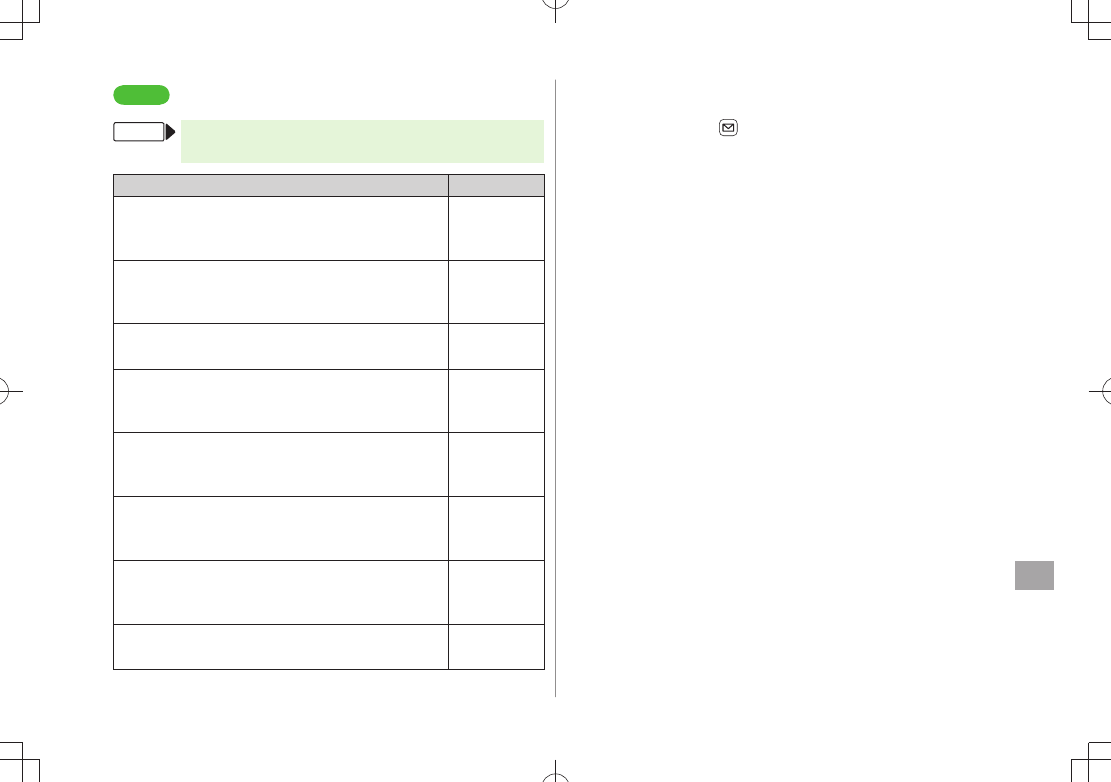
18-17
Settings
18
Settings
Bluetooth®
From Main Menu Tools Bluetooth
My Devices Settings
Setting/Operation Default
Set Authentication/Encryption to Send Phone
■
Book Entries
Set Authentications
>
ON
ON
OFF/OFF
Enter Password when Sending All Phone Book
■
Entries
Session Number Setting
>
ON
OFF
Set Duration to Search for Bluetooth
■® Devices
Time-out to Search
>
Enter duration (sec.) 05 sec
Stop Ringtone Output to Headset/Handsfree
■
Device
Forward Ring Tone
>
OFF
ON
Continue Calls on Handset when Bluetooth
■® is
Disconnected from Headset/Handsfree Device
Disconnection Settings
>
Continue on the Phone
End the Call
Always Make Calls from 941P even when
■
Headset Device is Connected
Dial from Headset
>
Deactivate
Activate
Always Use Handsfree Device to Make/Receive
■
Calls
Handsfree Setting
>
Handsfree Mode
Private Mode 1
View Bluetooth
■® Properties
Device Properties
> 2–
1 In
Private Mode
, device that makes/answers call takes priority.
2 Device name, address, class and supported services appear.
To change device name: [Edit]
BEGIN_E_OI.indb 17 2009/12/14 16:35:37
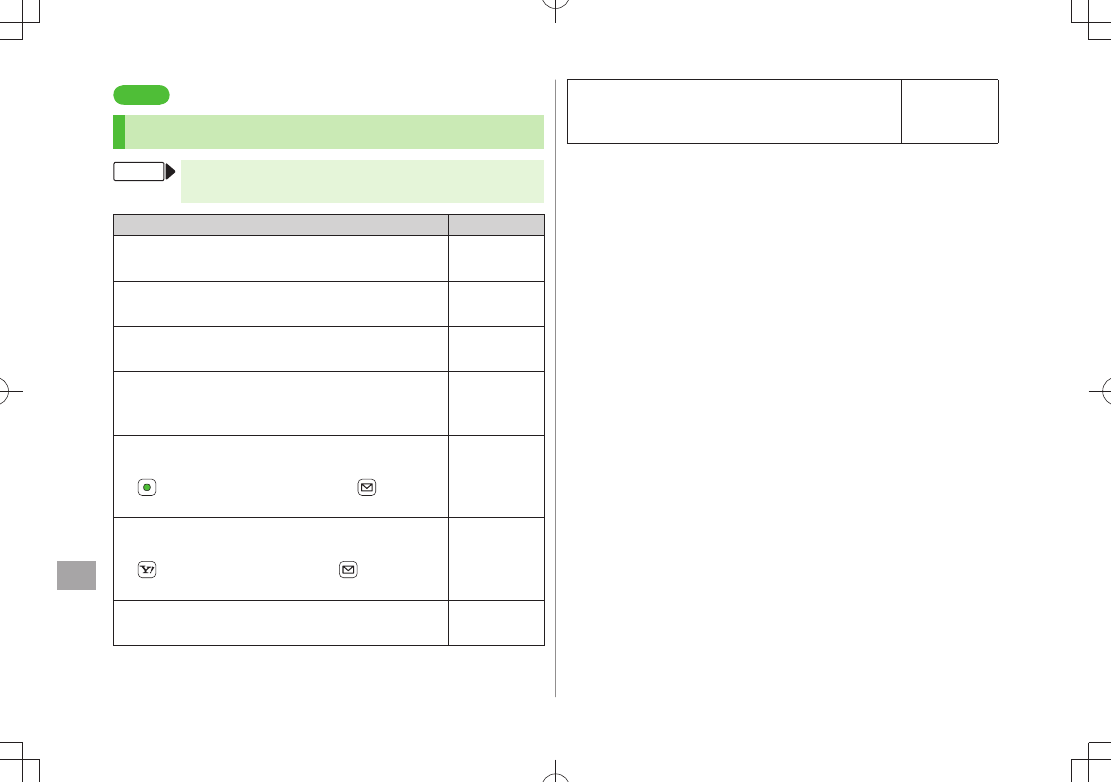
18-18
Settings
18
Settings
Messaging
Universal Settings
From Main Menu Messaging Settings
Universal Settings
Setting/Operation Default
Change Font Size
■*
Font Size
>
Small
or
Large
Normal
Set Scroll Unit in Text Entry/Preview Window
■
Scroll Unit
>
Half Screen
or
Whole Screen
Single Line
Change Message Quote Setting when Replying
■
Quote Message
>
ON (S! Mail/SMS)
or
OFF
ON (S! Mail)
Confirm Message Delivery (Available when
■
messaging to SoftBank handset numbers)
Delivery Report
>
ON
OFF
(Not confirm)
Change Anti-Spam Measures Setting
■
Anti-Spam Measures
>
Report Spam
[Edit] Edit recipient address [Finish]
YES
stop@meiwaku.
softbankmobile.
co.jp
Reset Anti-Spam Measures Setting
■
Anti-Spam Measures
>
Report Spam
[Menu]
Reset Address
[Finish]
YES
–
Set Auto Delete Off (For Sent/Unsent)
■
Auto Sent Msg Del
>
OFF
ON
Set Auto Delete Off (For Incoming Mail)
■
Auto Received Msg Del
>
ON (Read Msg Only)
or
OFF
ON (All Msg)
* Character size in SMS or S! Mail subject field does not change. Check
preview to see actual size.
BEGIN_E_OI.indb 18 2009/12/14 16:35:37
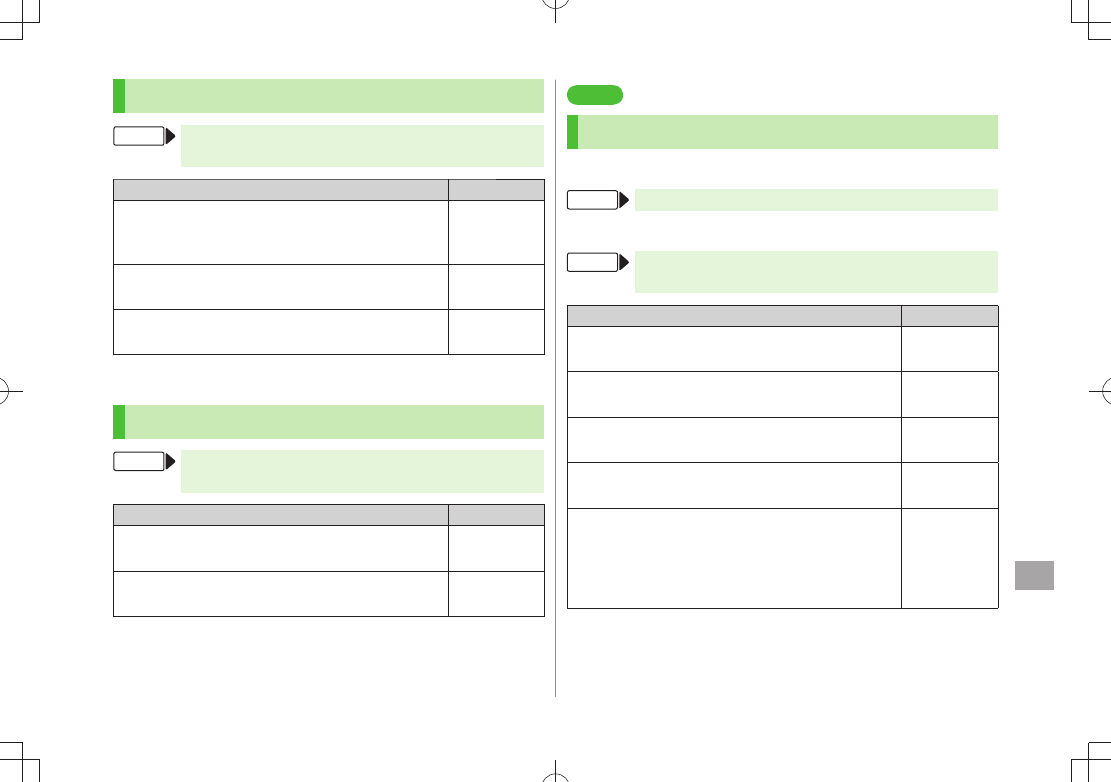
18-19
Settings
18
S! Mail Settings
From Main Menu Messaging Settings
S! Mail Settings Incoming Options
Setting/Operation Default
Set S! Mail Download Condition (within Japan)
■
Home Auto Setting
>
Download by Numbers
or
Manual Retrieval
Auto Download
All
Retrieve S! Mail Manually while Abroad
■
Roaming Auto Setting
>
Manual Retrieval
Auto Download
Play Attached Music Files Automatically
■*
Auto Sound Play
>
ON
OFF
(Not play back)
* When multiple sound files are attached, the first file plays.
SMS Settings
From Main Menu Messaging Settings
SMS Settings
Setting/Operation Default
Change SMS Center Number
■*
Message Center
> Enter SMS Center number –
■Set Input Character to English
Set Input Character
>
English (160char.)
Japanese
(70char.)
* Changing Message Center number may disable SMS.
Settings
Internet
Browser Display Settings
Yahoo! Keitai
From Main Menu Yahoo! Keitai Set Yahoo! Keitai
PC Site Browser
From Main Menu Yahoo! Keitai PC Site Browser
Set PC Site Browser
Setting/Operation Default
Font Size
■
Font Size
>
Large
or
Small
Normal
Scroll Unit
■
>
Scroll Unit
Whole Screen
or
Half Screen
Single Line
Images Off
■
Downloads
>
Display Image
OFF
ON
Sound Off
■
Downloads
>
Play Sounds
OFF
ON
Hide
■Warning Messages when Activating PC
Site Browser or Switching to Yahoo! Keitai*
Warning Messages
>
PC Site Browser
(when
activating) or
Yahoo! Keitai
(when switching)
OFF
ON
* PC Site Browser only
BEGIN_E_OI.indb 19 2009/12/14 16:35:38
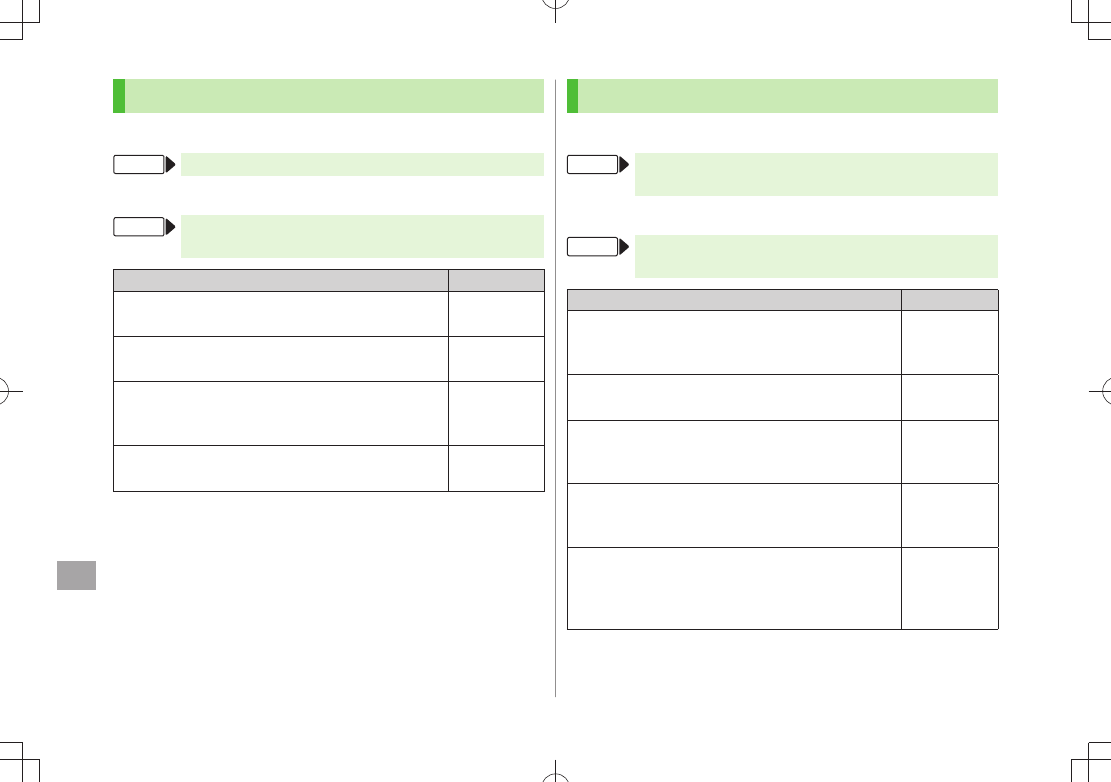
18-20
Settings
18
Memory Manager & Reset
Yahoo! Keitai
From Main Menu Yahoo! Keitai Set Yahoo! Keitai
PC Site Browser
From Main Menu Yahoo! Keitai PC Site Browser
Set PC Site Browser
Setting/Operation Default
Clear Cache
■
>
Memory Manager
Clear Cache
YES
–
■Delete Cookies
Memory Manager
>
Delete Cookies
YES
–
Delete User ID or Password Entered when
■
Authentication is Required
Memory Manager
>
Delete Certificates
YES
–
Set Data Storage Location to microSD Card
■*
Save Settings
>
microSD
Phone
* Yahoo! Keitai Browser only
Security Settings
Yahoo! Keitai
From Main Menu Yahoo! Keitai Set Yahoo! Keitai
Security
PC Site Browser
From Main Menu Yahoo! Keitai PC Site Browser
Set PC Site Browser Security
Setting/Operation Default
Set Auto Send Off for Manufacturer's Number
■
(for Authentication)
>
Manufacture Number
OFF
(Not send)
ON (Send)
Forbid Sending
■Referer Information
Send Referer
>
OFF
ON (Send)
Select whether or Not to Allow Cookies to Be
■
Stored on 941P
Cookies
>
OFF
or
Ask Every Time
ON (Save)
Select whether or Not to Run Scripts in Yahoo!
■
Keitai 1
>
Script
ON, OFF
or
Ask Every Time
Ask before
Connect
Select whether or Not to Run Scripts in PC Site
■
Browser 2
Script
>
Ask before Connect, OFF
or
Ask Every Time
ON (Run)
BEGIN_E_OI.indb 20 2009/12/14 16:35:38
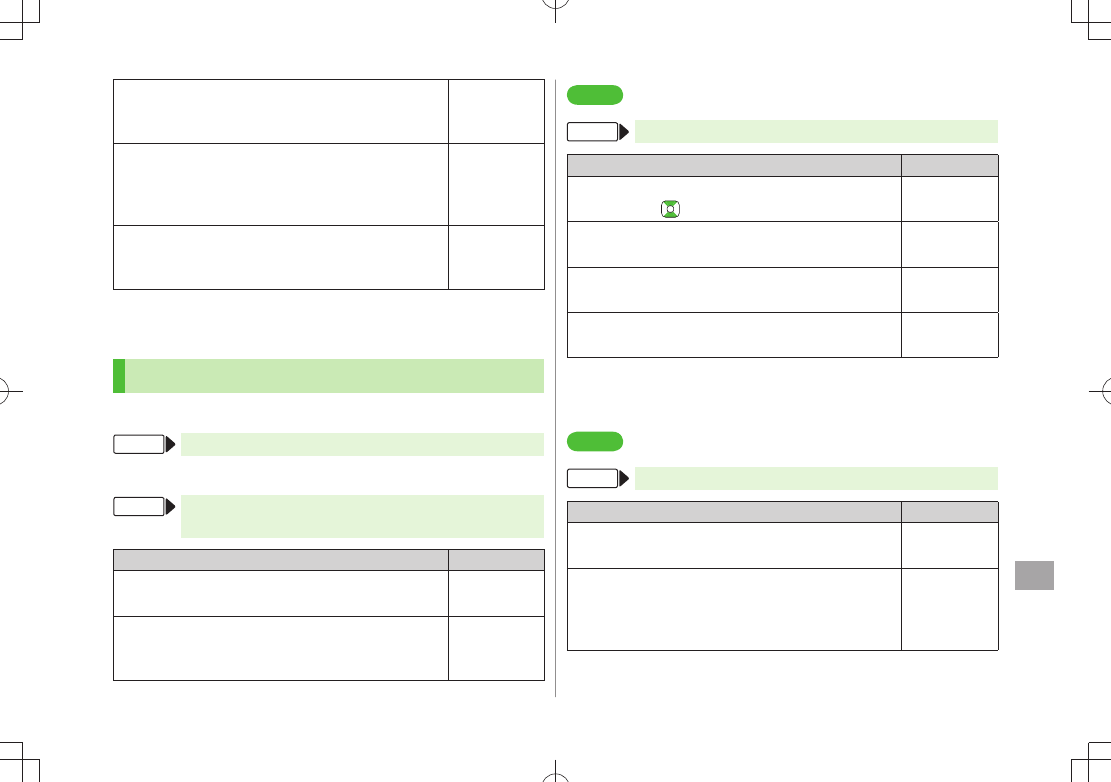
18-21
Settings
18
View Server Certificates Issued by Certificate
■
Authorities
Root Certificates
> Select an item
–
■Select whether or Not to Retain Authentication
Information
Certificate Retention
>
Always Keep
or
Not Keep
Keep While
Browsing
Hide Confirmation when Connecting to Secure
■
Site
Secure Prompt
>
OFF
ON
1 Yahoo! Keitai Browser only
2 PC Site Browser only
Reset
Yahoo! Keitai
From Main Menu Yahoo! Keitai Reset
PC Site Browser
From Main Menu Yahoo! Keitai PC Site Browser
Reset
Setting/Operation Default
Reset
■Browser Settings
Restore Defaults
>
YES
Enter Phone Password –
■Initialize Browser
Initialized Browser
>
YES
Enter Phone
Password
–
Settings
S! Appli
From Main Menu S! Appli S! Appli Settings
Setting/Operation Default
■Volume
Volume
> to adjust volume Level 4
■Backlight On/Off
Display Backlight
>
Always ON
or
Always OFF
Follow General
Setting
Deactivate
■Vibration
Vibration
>
OFF
ON
Sync
■microSD Card with S! Appli List*
Synchronize microSD
>–
* Update S! Appli List on microSD Card after using microSD Card in another
handset or PC.
Settings
Osaifu-Keitai®
From Main Menu Osaifu-Keitai IC Card Settings
Setting/Operation Default
View IC Card Status
■
IC Card Status
>–
Disable Handset Response to Commands from
■
Reader/Writer
Interface Settings
> Enter Phone Password
Select an item
OFF
All ON
BEGIN_E_OI.indb 21 2009/12/14 16:35:39
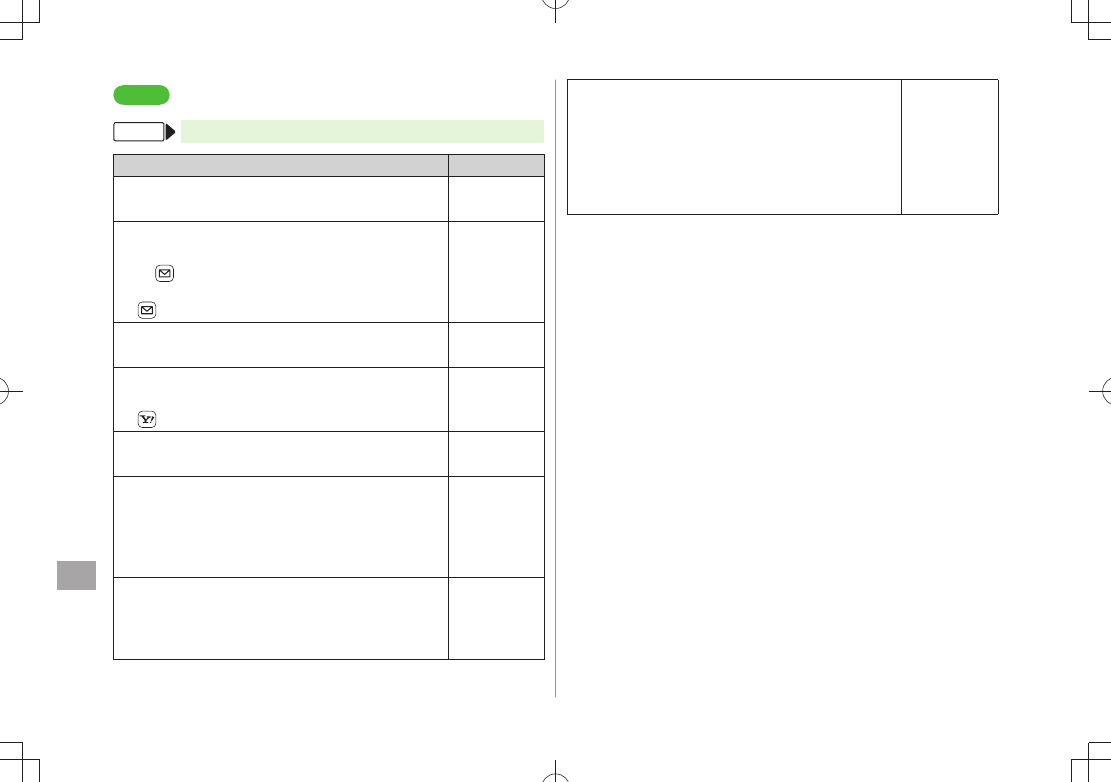
18-22
Settings
18
Settings
S! GPS Navi Settings
From
Main Menu Tools S! GPS Navi NAVI Settings
Setting/Operation Default
Select Navi Appli to Activate
■
Select Navi Appli
> Select a Navi Appli –
Save Current Map URL
■
Map URL Settings
> Highlight
<Not Recorded>
[Edit]
URL Name
Enter a name
Map URL
Enter a URL ("http://" or "https://")
[Finish]
–
Select Map URL
■
Map URL Settings
> Select a name NAVITIME
Edit/Delete Map URL
■*
Map URL Settings
> Highlight a name
[Menu]
Edit
or
Delete
–
Activate to Lock Positioning Function
■
Positioning Lock
> Enter Phone Password
ON
OFF
Hide Confirmation when Sending Location
■
Information
Send Location Info
> Enter Phone Password
Send without Check
(Send location information
without showing confirmation)
Send with
Check (Show
confirmation
every time)
Hide Notification of Incoming Location
■
Provision Request
Notification Setting
> Enter Phone Password
OFF
ON
Set Positioning Ringtone/Vibrator/Ringtone
■
Duration
Recv Location Request
>
Ringtone
,
Vibration Alert
or
Ringtone Duration
Set individual item
Ringtone:
Pattern 2
Vibrator Alert:
Pattern 1
Ringtone
Duration:
05 seconds
* Pre-installed NAVITIME cannot be edited or deleted.
BEGIN_E_OI.indb 22 2009/12/14 16:35:39
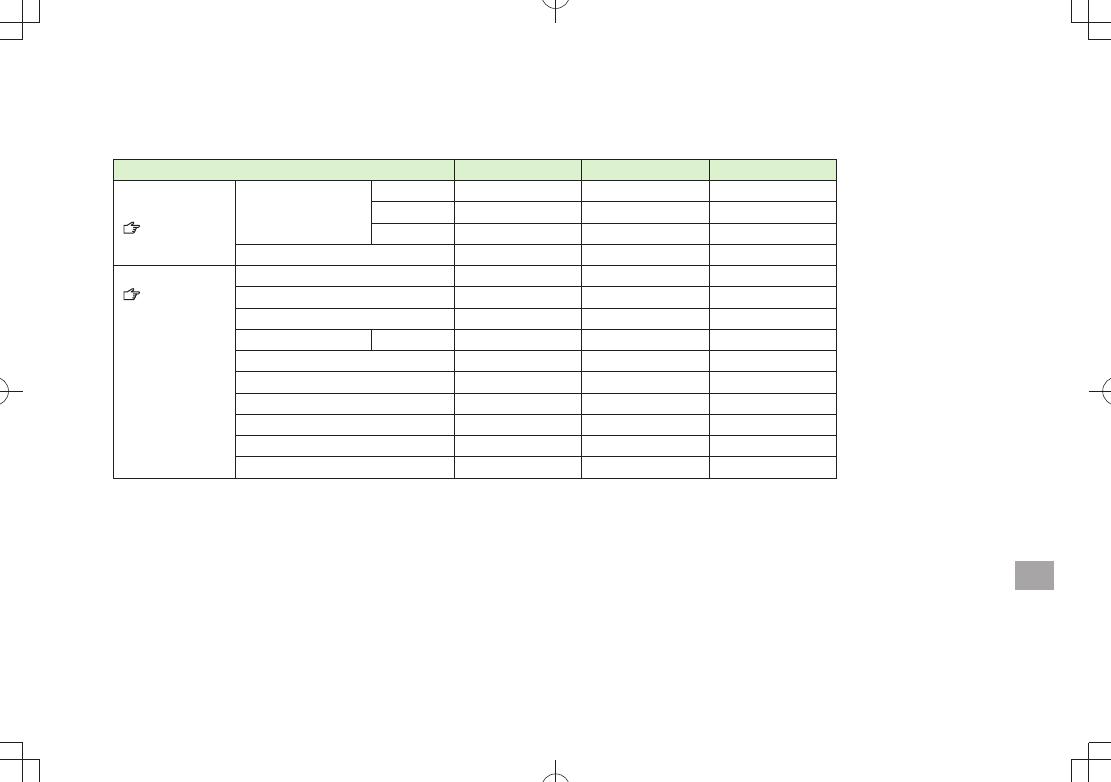
18-23
Settings
18
Default Settings
Default settings vary by handset color as below.
For operations, refer to respective setting sections.
Setting Black White Pink
Notification
Light
(P.18-10) Incoming
Voice Call A-Signal B-Signal C-Signal
Video Call A-Signal B-Signal C-Signal
Message A-Rhythm B-Rhythm C-Rhythm
Side Key (Upper Side Key) A-HOTARU B-HOTARU C-HOTARU
Display Settings
(P.18-3 to 6,
P.18-13)
Stand-by Display Night View 1* White Room 1* Window in Dream 1*
Stand-by Display Wide Night View 2* White Room 2* Window in Dream 2*
External Stand-by Display Night View 3* White Room 3* Window in Dream 3*
Stand-by Clock Pattern Pattern 4 Pattern 1 Pattern 4
Icon Clock (Internal/External Display) Pattern 4 Pattern 1 Pattern 4
Outgoing Image (Call/Message) Pattern 1 Pattern 2 Pattern 3
Incoming Image (Call/Message) Pattern 1 Pattern 2 Pattern 3
Menu Icons Midnight road White cube Pinky dream
Horizontal Open Menu Pattern 1 Pattern 1 Pattern 2
Color Scheme Black White Pink
* Background color and design change. Unavailable when Calendar appears in Standby
BEGIN_E_OI.indb 23 2009/12/14 16:35:40

18-24
Settings
18
Confirming Settings
Main Menu Setting Phone Settings
Confirm Settings
Confirmable Settings
Back Light Time
View Blind
Volume
Shikkari Talk
Noise Reduction
Select Network
Horizontal View
appears for items changed from default settings.
BEGIN_E_OI.indb 24 2009/12/14 16:35:40
19-1
19
Appendix
Function List ....................................................... 19-2
Troubleshooting ................................................ 19-10
Warning Signs ........................................................................19-12
Software Update .............................................. 19-12
Updating Software Manually ...................................................19-12
Updating Software Automatically ............................................19-13
Quick Open Menu ............................................. 19-14
Key Assignments (5-touch Mode) ..................... 19-15
Key Assignments (2-touch Mode) ..................... 19-16
Key Assignments (NIKO-touch Mode) ............... 19-17
Symbol List ....................................................... 19-18
Character Code List .......................................... 19-19
Weather Indicator List ...................................... 19-24
Memory List ...................................................... 19-25
Specifications ................................................... 19-26
Index ................................................................. 19-27
Warranty & Service ........................................... 19-33
Warranty ................................................................................19-33
After-Sales Service ..................................................................19-33
Customer Service.............................................. 19-34
BEGIN_E_OI.indb 1 2009/12/14 16:35:40
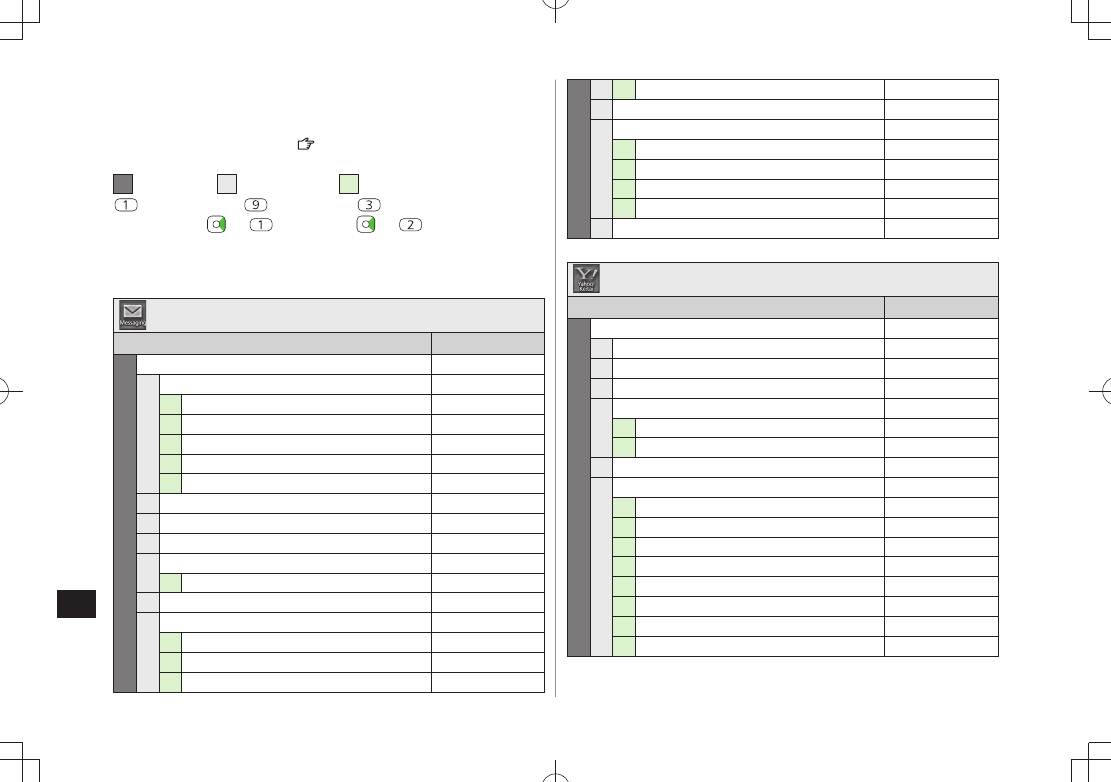
Appendix
19-2
19
Function List
From Main Menu, press key corresponding to a menu
number for direct access ( P.1-19, P.1-20).
Example: To select
S! Mail Settings
in Messaging menu:
1first column 9second column 3third column
(Messaging) (Settings) (S! Mail Settings)
To select
: ; To select :
When Menu Icons are set to Standard or Customize, first column of
function number is not available. Select a menu from Main Menu; then
select a function number (second column in table).
Messaging
Menu Number/Function Name Page
1Messaging –
1Incoming Mail –
1Received P.13-3
2 1 P.13-3
3 2 P.13-3
4 3 P.13-3
5Spam Folder P.13-17
2Create New P.13-4
3Retrieve New P.13-15
4Drafts P.13-15
5Templates –
1Download Templates P.13-10
6Sent/Unsent P.13-15
7Server Mail –
1Retrieve Mail List P.13-14
2Retrieve All P.13-14
3Delete All P.13-15
174Server Mail Memory P.13-15
8Create New SMS P.13-7
9Settings –
1Custom Mail Address P.13-3
2Universal Settings P.18-18
3S! Mail Settings P.18-19
4SMS Settings P.18-19
0Memory Status P.13-3
Yahoo! Keitai
Menu Number/Function Name Page
2Yahoo! Keitai –
1Yahoo! Keitai –
2Bookmarks P.14-8
3Saved Pages P.14-8
4Enter URL –
1Direct Entry P.14-4
2URL History List P.14-4
5History P.14-4
6PC Site Browser –
1Homepage P.14-5
2Bookmarks P.14-8
3Saved Pages P.14-8
4Enter URL P.14-5
5History P.14-5
6Yahoo! Keitai P.14-5
7Set PC Site Browser P.18-19
8Reset P.18-21
BEGIN_E_OI.indb 2 2009/12/14 16:35:46
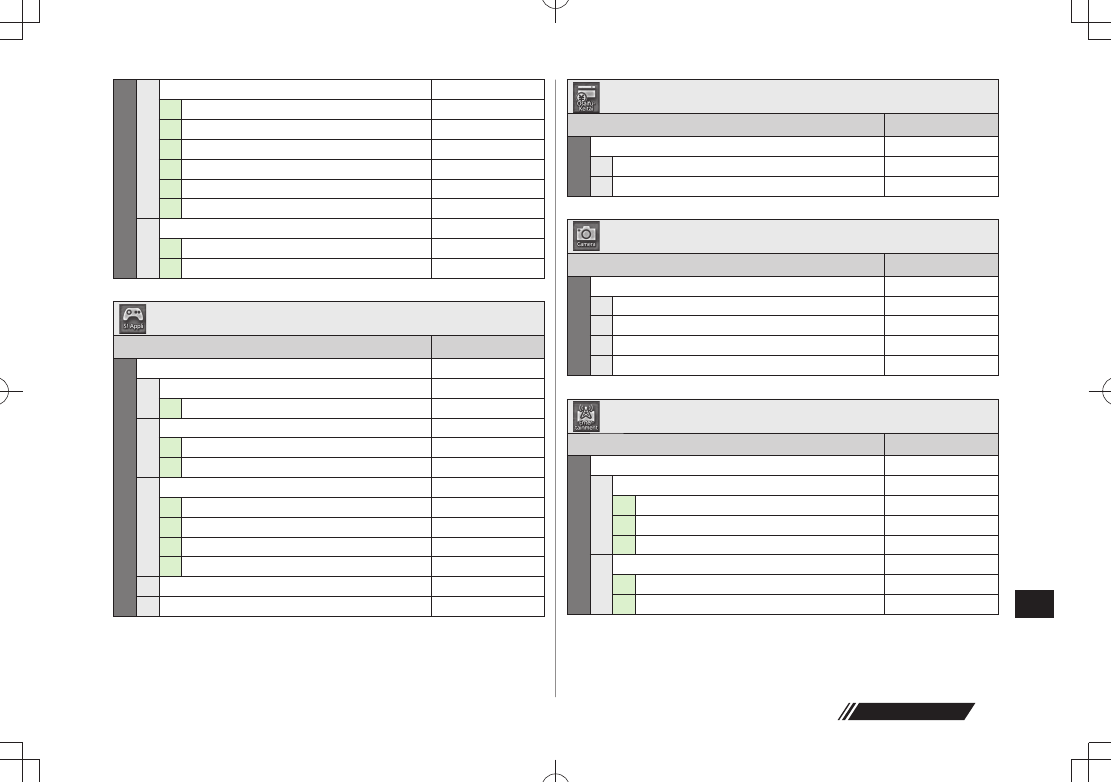
Appendix
19-3
19
27Set Yahoo! Keitai –
1Font Size P.18-19
2Scroll Unit P.18-19
3Downloads P.18-19
4Memory Manager P.18-20
5Security P.18-20
6Save Settings P.18-20
8Reset –
1Restore Defaults P.18-21
2Initialized Browser P.18-21
S! Appli
Menu Number/Function Name Page
3S! Appli –
1S! Appli List –
1Download S! Appli P.15-2
2Osaifu-Keitai –
1Lifestyle-Appli P.16-3
2IC Card Settings P.16-5
3S! Appli Settings –
1Volume P.18-21
2Display Backlight P.18-21
3Vibration P.18-21
4Synchronize microSD P.18-21
4S! Appli History P.15-3
5Information P.15-2
Osaifu-Keitai
Menu Number/Function Name Page
4Osaifu-Keitai –
1Lifestyle-Appli P.16-3
2IC Card Settings P.16-5
Camera
Menu Number/Function Name Page
5Camera –
1Camera P.6-6
2Video Camera P.6-8
3Pictures P.6-14
4Videos P.6-14
Entertainment
Menu Number/Function Name Page
6Entertainment –
1Mobile Widget –
1Widget Contents P.7-3
2Settings P.18-15
3Information P.7-2
2S! Quick News –
1S! Quick News List P.7-4
2Settings P.18-16
Next Page
BEGIN_E_OI.indb 3 2009/12/14 16:35:49
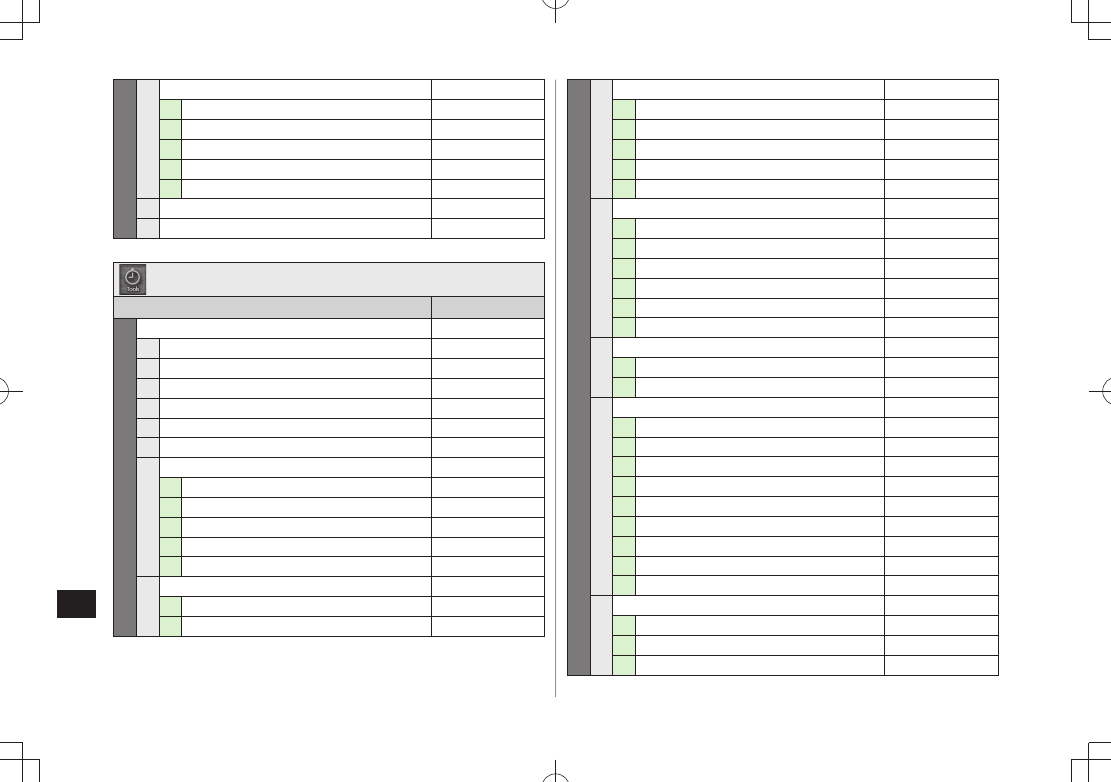
Appendix
19-4
19
63S! Info Ch./Weather –
1What's New? P.7-6
2History P.7-6
3Register/Cancel P.7-6
4Get Latest Contents P.7-6
5Weather Indicator P.7-7
4BookSurfing P.7-8
5e-Book Viewer P.7-8
Tools
Menu Number/Function Name Page
7Tools –
1Alarms P.12-6
2Calendar P.12-2
3Calculator P.12-8
4Notepad P.12-8
5Tasks P.12-5
6Dictionary P.12-9
7Sound Recorders –
1Voice Call Data P.2-16
2Video Call Data P.2-16
3Answer Phone Setting P.2-15
4Voice Recorder P.12-10
5Voice Announce P.12-10
8Bar Code Reader –
1Scan Barcodes P.12-11
2Saved Data List P.12-12
79S! GPS Navi –
1Navi Appli P.17-3
2Current Location P.17-2
3Location Navi P.17-3
4Location Logs P.17-3
5NAVI Settings P.18-22
0Bluetooth –
1Search&Paired Device P.10-7
2Bluetooth OFF/Bluetooth ON P.10-8
3Accept Registered P.10-9
4Dialup Rgstry Standby P.10-10
5Receive via Bluetooth P.10-9
6My Devices Settings P.18-17
①Receive via Infrared –
1Receive P.10-3
2Receive All P.10-4
②microSD Backup –
1Phone Book P.9-18
2Calendar P.9-18
3Tasks P.9-18
4Incoming Mail P.9-18
5Sent Messages P.9-18
6Unsent Messages P.9-18
7Drafts P.9-18
8Memo Pad P.9-18
9Bookmarks P.9-18
③Templates/Users Dic. –
1Templates P.3-5
2User's Dictionary P.3-10
3Download Dictionary P.3-10
BEGIN_E_OI.indb 4 2009/12/14 16:35:50
Appendix
19-5
19
Data Folder
Menu Number/Function Name Page
8Data Folder –
1Pictures –
1Download Pictures P.9-2
2Main Folder P.9-2
3Camera P.9-2
4My Pictograms P.9-2
5Mail Art P.9-2
6Pre-installed P.9-2
7Original Animation P.9-13
2Ring Songs&Tones –
1DL Ring Songs&Tones P.9-2
2Main Folder P.9-2
3Pre-installed P.9-2
4Voice Announce P.9-2
5Play List P.9-2
3S! Appli –
1Download S! Appli P.15-2
4Widget –
1Download Widget P.7-3
5Music –
1Main Folder P.9-2
2WMA P.9-2
86Videos –
1Download Videos P.9-3
2Main Folder P.9-3
3Camera P.9-3
4Pre-installed P.9-3
5Play List P.9-3
6Position Memory P.9-6
7PC Movies –
1microSD P.9-3
2Position Memory P.9-6
3Play History P.9-3
8TV –
1Image P.5-14
2Video P.5-13
3Position Memory P.9-3
9Lifestyle-Appli –
1Download P.16-3
0Books –
1Download Books P.9-3
①Customized Screen –
1Customized Screen P.1-24
2Familiar Usability P.1-24
②Templates –
1Download Templates P.13-10
③Font –
1Download Font P.9-3
2Main Folder P.9-3
3Pre-installed P.9-3
④Other Documents –
1Main Folder P.9-3
BEGIN_E_OI.indb 5 2009/12/14 16:35:51
Appendix
19-6
19
Music Player
Menu Number/Function Name Page
9Music Player –
1Player –
1All Tracks P.8-6
2Artist P.8-6
3Album P.8-6
4Genre P.8-6
5Play List P.8-6
2Data Manager –
1Main Folder P.8-7
2WMA P.8-7
TV
Menu Number/Function Name Page
TV –
1Watch TV P.5-5
2Program List P.5-7
3Timer Watching P.5-14
4Timer Recording P.5-14
5Recording Result P.5-15
6TV Link P.5-11
7Channel List P.5-4
8Channel Setting –
1Select Area P.5-4
2Automatic P.5-4
9User Settings –
1Display P.18-14
2Video P.18-14
3Display Light P.18-14
4Sound P.18-14
5Recording P.18-14
6Data Broadcasting P.18-14
7ECO Mode P.18-14
8Reset Channel Setting P.18-14
9Reset Storage Area P.18-14
0Reset TV Settings P.18-15
Check TV Settings P.18-15
BEGIN_E_OI.indb 6 2009/12/14 16:35:54
Appendix
19-7
19
Next Page
Phone Book
Menu Number/Function Name Page
Phone Book –
1Phone Book P.4-2
2Create New Entry P.4-3
3Call Log –
1Outgoing Call Logs P.2-14
2Incoming Call Logs P.2-14
4Group P.4-6
5Account Details P.1-30, P.4-13
6S! Addressbook BkUp –
1Start Sync P.4-11
2Auto Sync Settings P.4-12
3Sync Log P.4-12
7Memory Manager P.4-9
8Restrictions P.11-10
9Settings –
1Save Settings P.18-11
2Search Method P.18-11
3Font Size P.18-11
4Voice Dial P.4-14
5Mail Group P.13-18
6Forwarding Image P.18-11
0Memory Status P.4-10
Number in first column is not available for Phone Book.
Settings
Menu Number/Function Name Page
#Settings –
1Sound Settings –
1Ring Tones P.18-2
2Ringer Volume P.18-2
3Key Tone P.18-2
4Stereo/3D Sound P.18-2
5Earphone P.18-2
6Message Ring Tones P.18-2
2Display Settings –
1Internal Display P.18-3
2External Display P.18-5
3Font Size P.18-6
4Font P.1-25
5Menu Icons P.18-4
6Hor. Open Menu P.18-13
7Back Light Time P.18-5
8View Blind P.1-30
9Color P.18-3
0Private Menu P.1-26
P.18-3
#Open For New P.18-3
①LCD AI P.18-5
②Disp. Call/Recv # P.18-6
③Describe Icons P.1-11
3Customized Screen –
1Customized Screen P.1-24
2Familiar Usability P.1-24
3Release Settings P.1-24
BEGIN_E_OI.indb 7 2009/12/14 16:35:55
Appendix
19-8
19
#4Incoming Settings –
1Vibrator P.18-2
2Manner Mode Type P.18-7
3Answer Setting P.18-7
4Open-to-Ans. Call P.18-7
5Call Logs P.11-8
6Phone Book Image P.18-7
7Ring Time Settings P.11-11
8Info Notice Setting P.18-7
9Auto Answer P.18-7
0In-call Management P.18-7
5Phone Settings –
1Horizontal View P.18-13
2Side-keys Guard P.11-8
3Text Entry Method P.18-10
4Battery P.18-2
5Pause Dial P.2-3
6Headset Switch to Call P.18-9
7Voice Settings P.18-11
8Confirm Settings P.18-24
9Software Update P.19-12
6Date & Time –
1Date & Time P.18-8
2World Clock P.18-8
3Daylight Savings P.18-8
4Alarm Tone P.18-8
5Time Correction P.18-8
#7Security –
1Privacy Key Lock P.11-4
2Personal Data Lock P.11-4
3IC Card Lock P.16-5
4Secret Mode P.11-9
5Secret Data Only P.11-9
6Key Pad Dial Lock P.11-7
7Reject Unknown P.11-11
8Call Setting w/o ID P.11-11
9All Reset P.11-12
0Reset Settings P.11-12
PIN Authentication P.11-2
#Change Phone Password P.11-2
①Timer Lock at Close P.11-6
②Lock OFF at Open P.11-6
③Content Key P.9-22
④Lock Message P.11-7
8Call Settings –
1Call Time/Cost P.18-9
2Reset P.18-9
3Set Max Cost Limit P.18-9
4Voice Mail/Call Fwding P.2-17, P.2-18
5Call Waiting P.2-20
6Call Barring P.2-20
7Missed Call Notifi. P.2-19
8Prefix P.2-3
9Volume P.18-9
0Shikkari Talk P.2-5
Closing Clamshell P.18-9
#Hold Tones P.18-9
BEGIN_E_OI.indb 8 2009/12/14 16:35:55
Appendix
19-9
19
#8①Noise Reduction P.18-9
②Quality Alarm P.18-9
③Reconnect Signal P.18-9
④Emission OFF Mode P.1-18
⑤Show My Number P.2-21
⑥Service Numbers P.18-9
9Video Call –
1Incoming Video Qlty P.18-12
2Select Images P.18-12
3Loud Speaker P.18-12
4Voice Call Auto Redial P.18-12
5Remote Monitoring P.2-8
0International Call –
1Int'l Dial Assist P.2-10
2Select Operator P.2-11
3PLMN Setting P.2-11
4Operator Name P.2-11
5Select Network P.2-11
①Connectivity –
1USB Mode P.10-11
2Retrieve NW Info P.1-16
②Notification Light –
1Incoming P.4-4, P.18-10
2Online P.18-10
3Missed Call/Unread P.18-10
4Clamshell Close P.18-10
5Music P.18-10
6Bluetooth P.18-10
7IC Card P.18-10
8Side Key P.18-10
9Confirm Status P.18-10
BEGIN_E_OI.indb 9 2009/12/14 16:35:56
Appendix
19-10
19
Troubleshooting
Handset does not turn on
Was
pressed for more than one second?
Is battery level sufficient?
Is battery inserted properly? (
P.1-14)
Handset functions do not work after turning power on
Does PIN Entry window appear?
PIN Authentication is
ON
. Enter PIN ( P.11-2).
USIM not inserted After power-off Insert USIM or Inserted USIM is
unavailable to this mobile phone Please insert valid one
appears
when handset is turned on or operations attempted
Is USIM Card inserted correctly? (
P.1-3)
Is SoftBank specified USIM Card inserted? (
P.1-2).
USIM Card IC chip may be dirty.
Wipe with a clean cloth, then insert USIM Card correctly.
Keypad does not respond
Does
or appear in Standby?
Keyguard ( P.11-3) or Privacy Key Lock is active ( P.11-4). Cancel it.
Side Keys do not work while handset is closed
Does
appear?
Side-keys Guard ( P.11-8) is
ON
.
Set to
OFF
.
Outgoing calls or Video Calls will not connect or message and
Internet connections are unavailable
Does
appear?
Is handset out-of-range or in a location where signal is weak?
Move to a location where signal is strong.
Are you using handset overseas?
Set international settings (e.g. Select Operator) to use abroad
(P.2-10).
Does
appear?
Personal Data Lock is set ( P.11-4). Deactivate Personal Data Lock.
Outgoing calls or Video Calls will not connect
Is area code entered?
Is restricting outgoing calls in Call Barring? (
P.2-20)
Does
appear in Standby? Total cost has reached upper limit. Set Max
Cost Limit to
OFF
or execute
Reset
( P.18-9).
Outgoing calls will not connect or busy signal sounds
Did you enter area code?
Is restricting outgoing calls in Call Barring? (
P.2-20)
Call is interrupted or disconnected
Does
appear? Is handset out-of-range or in a location where signal
is weak?
Move to a location where signal is strong.
"Cannot start any more functions" appears when a menu is
opened.
Maximum number of functions are active at the same time. Cancel
current function and try again ( P.1-29).
BEGIN_E_OI.indb 10 2009/12/14 16:35:58
Appendix
19-11
19
Calls cannot be made via a Phone Book entry
Entry may be saved as Secret.
Set Secret Mode or Secret Data Only
ON
( P.11-9).
Does
appear?
Personal Data Lock is set ( P.11-4). Deactivate Personal Data Lock.
Digital TV does not work
Is handset out of terrestrial Digital TV broadcasting service area or in a
location where airwaves are weak?
Move to a location where airwaves are strong ( P.5-3).
Customized Screen setting cannot be canceled
Enter "6368##" in Standby
Release Settings
Customized Screen cannot be canceled in Standby while Simple menu
is active. Deactivate Simple menu in Standby.
Osaifu-Keitai® does not work
Does
appear?
Deactivate IC Card Lock ( P.16-5).
Display clock is reset
Replacing battery does not reset Display clock; however, if battery is
removed for long periods, the clock may be reset. Set Date & Time
(P.18-8) or Retrieve NW Info ( P.1-16) again.
Battery Operating Time is greatly reduced
Battery Operating Time may be reduced by environmental factors such
as temperature, charging conditions or signal strength, as well as by
operations or settings. See "Charging Time & Operating Time
Estimates" ( P.1-12) and "Battery Time" ( P.1-13).
Cannot charge battery
Is AC Charger (sold separately) firmly connected to handset or Desktop
Holder (not included)? ( P.1-15)
Is AC Charger securely plugged into an outlet?
Is battery installed in handset correctly? (
P.1-14)
Is handset correctly mounted in Desktop Holder?
Make sure handset, battery, Desktop Holder and AC Charging terminals
are clean.
Battery may not charge beyond +5°C and +35°C.
Battery may need to be replaced.
Handset/accessories feel warm
AC Charger/Desktop Holder may warm during charging.
Handset may warm during long use. This is normal if you can hold it
comfortably. Low temperature burns may occur if handset is held
against skin for long periods.
Note
If you did not find the remedy to your problem here, please contact
SoftBank Mobile Customer Center ( P.19-34).
BEGIN_E_OI.indb 11 2009/12/14 16:35:59
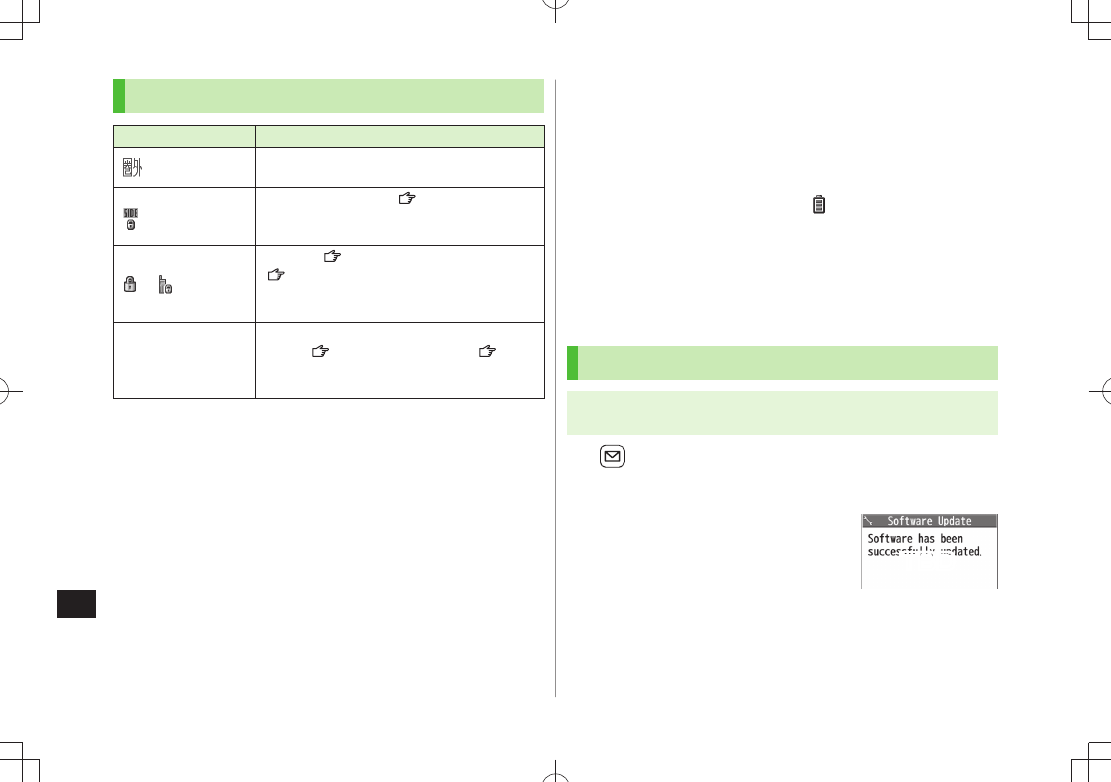
Appendix
19-12
19
Warning Signs
Problem Causes and Remedies
appears Handset is out-of-range.
Move to a location where signal is strong.
appears
Side-keys Guard is
ON
( P.11-8).
To activate Side Keys while handset is closed, set
Side-keys Guard
OFF
.
or appears
Keyguard ( P.11-3) or Privacy Key Lock
(P.11-4) is active. Cancel it to use handset.
Answer calls even if Keyguard or Privacy Key
Lock is active.
Low battery
message appears
and battery alarm
tone sounds
Battery is low.
Charge ( P.1-15) or replace battery ( P.1-14).
Software Update
Check for handset software updates and download as required.
Choose to begin update or schedule update.
Connection fees do not apply to updates (including checking for updates,
downloading and rewriting).
Fully charge battery beforehand. Even if
appears, low battery message
may appear. In this case, charge battery until Charging Indicator goes
out.
Select a place where signal is strong and stable.
Do not remove battery during the update. Update will fail.
Other functions are not available during Software Update.
The update may take some time.
Updating Software Manually
Main Menu Settings Phone Settings
Software Update Software Update
1 [YES] Follow onscreen instructions
After download is complete, handset automatically turns off and
restarts before Software Update begins.
After Software Update is complete, handset
automatically turns off and restarts before
information appears for successful update
(This process takes approximately
60 seconds.).
TBD
BEGIN_E_OI.indb 12 2009/12/14 16:36:01
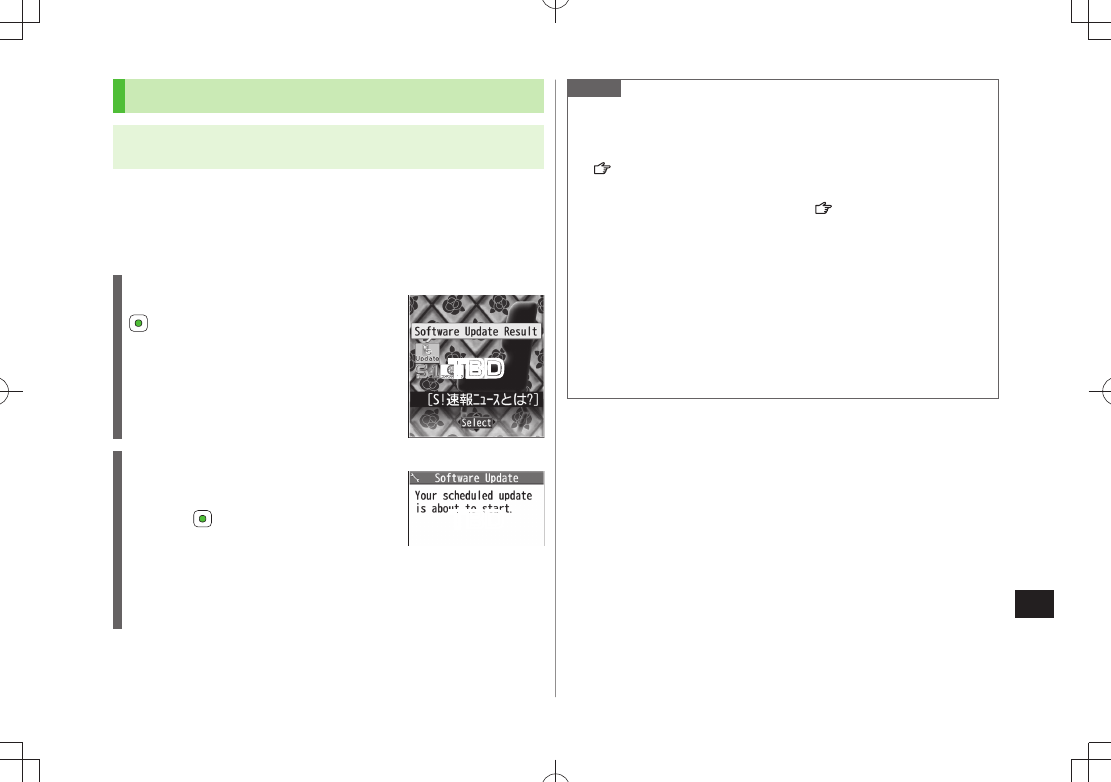
Appendix
19-13
19
Updating Software Automatically
Main Menu Settings Phone Settings
Software Update Regular Updates
1
YES
Follow onscreen instructions
Select
YES
to activate Internet. Follow onscreen instructions to
perform Regular Updates. For more information, visit SOFTBANK
MOBILE Corp. Website (http://www.softbank.jp).
Update Results
When Event Indicator appears,
Update
When
Update
indicator does not appear,
Main Menu Settings
Phone Settings
Software Update
Update Results
Scheduled Update
Follow onscreen instructions for setup.
Confirmation appears at scheduled update
time. Press or wait ten seconds for
update to start.
Software Update will not start while
handset is in use. Continuing handset
usage for ten minutes or more cancels
Scheduled Update.
Note
If handset does not power on after Software Update, remove then
re-insert battery and try again. If handset still does not power on,
contact SoftBank Mobile Customer Center, Customer Assistance
(P.19-34).
Software Update failure may disable handset. Contact SoftBank Mobile
Customer Center, Customer Assistance ( P.19-34).
Software Update does not affect Phone Book entries, files saved in Data
Folder or other content, but it is recommended that you create a backup
of any important information and data (note that some files cannot be
copied).
SoftBank is not liable for damages resulting from loss of data,
information, etc.
Alarm tone does not sound during update.
For more information, visit SOFTBANK MOBILE Corp. Website
(http://www.softbank.jp).
TBD
TBD
BEGIN_E_OI.indb 13 2009/12/14 16:36:04
19-14
Appendix
19
Menu #
External Display 93
Font Settings 66
Menu Icons 57
Back Light Time 70
Color Theme 86
Private Menu Settings 52
Language 15
Describe Icons 36
Vibrator 54
Manner Mode Type 20
Answer Setting 58
Ring Time Settings 90
Info Notice Setting 65
Auto Answer 94
Text Entry Method 35
Date & Time 31
Secret Mode 40
Secret Data Only 41
Call Setting w/o ID 10
Reset Settings 23
Change Phone Password 29
Call Time/Cost 61
Reset Total Duration/Cost 60
Closing Clamshell 18
Menu #
Noise Reduction 76
Quality Alarm 75
Reconnect Signal 77
Show My Number 17
Notification Light 89
Quick Open Menu
When
Menu Icons
is set to
Standard
or
Customize
( P.18-4), press menu numbers in
Main Menu to open the following functions.
Example: To open Notepad:
In Standby,
Menu #
Alarm 44
Calendar 45
Calculator 85
Notepad 42
Tasks 95
Sound Recorders 55
Receive via Infrared 79
Templates/Users Dictionary 38
Pictures folder 46
Ring Songs&Tones folder 16
Phone Book Settings 26
Ring Tones 13
Ringer Volume 50
Key Tone 30
Stereo/3D Sound 64
Earphone/Speaker Settings 51
Message Ring Tones 68
Internal Display 56
BEGIN_E_OI.indb 14 2009/12/14 16:36:05
19-15
Appendix
19
Key Assignments (5-touch Mode)
Display
Key 漢カナ
abc 123
1 2_
2
3
3Pictograms
[Press and hold] Templates
Space
Space
Space
[Press and hold] Symbols 4
1 Appears when entering single-byte character.
2 Appears when entering double-byte character.
3 Added to highlighted character. Press to display pictographs after determining character.
4 In number mode, symbol list may not be displayed.
While entering character, press
to toggle characters at cursor in reverse order.
After entering hiragana, katakana or alphanumerics, press
to toggle upper/lower case.
In number mode, press and hold
to enter "+" (not available in S! Mail text field).
In alphanumerics mode, characters entered after an upper-case character appear in order of: upper case
lower case.
BEGIN_E_OI.indb 15 2009/12/14 16:36:14
19-16
Appendix
19
Key Assignments (2-touch Mode)
Kanji (Hiragana) Mode
<Upper Case Mode>
Second digit
First digit
Second digit
First digit
Second digit
First digit
Second digit
First digit
1
Second digit
First digit
1
2
1
2
<Lower Case Mode>
Katakana Mode
<Upper Case Mode>
<Lower Case Mode>
Alphanumerics Mode
Toggle upper/lower case
1 Appears when entering double-byte character.
2 Appears when entering single-byte character.
Note
A space is entered by pressing key corresponding
to a blank where no character is assigned.
In kanji (hiragana) or katakana mode, "
" or "
"
is entered by pressing after entering
characters. Press once for "
", twice for "
".
In number mode, press and hold
to enter
"+" (not available in S! Mail text field).
BEGIN_E_OI.indb 16 2009/12/14 16:36:17
19-17
Appendix
19
Key Assignments (NIKO-touch Mode)
Kanji (Hiragana) Mode
Second digit
First digit
Second digit
First digit
Katakana Mode
Note
Press
[Mode] to toggle kanji (hiragana) and
single-byte number modes.
To switch to katakana mode: In kanji (hiragana)
mode, [Menu]
1 byte character
To toggle lower/upper case: Enter a character
A space is entered by pressing key corresponding
to a blank where no character is assigned.
Press
once for "
", twice for "
". In kanji
(hiragana) mode, enter characters before pressing
.
In number mode, press and hold
to enter
"+" (not available in S! Mail text field).
BEGIN_E_OI.indb 17 2009/12/14 16:36:20
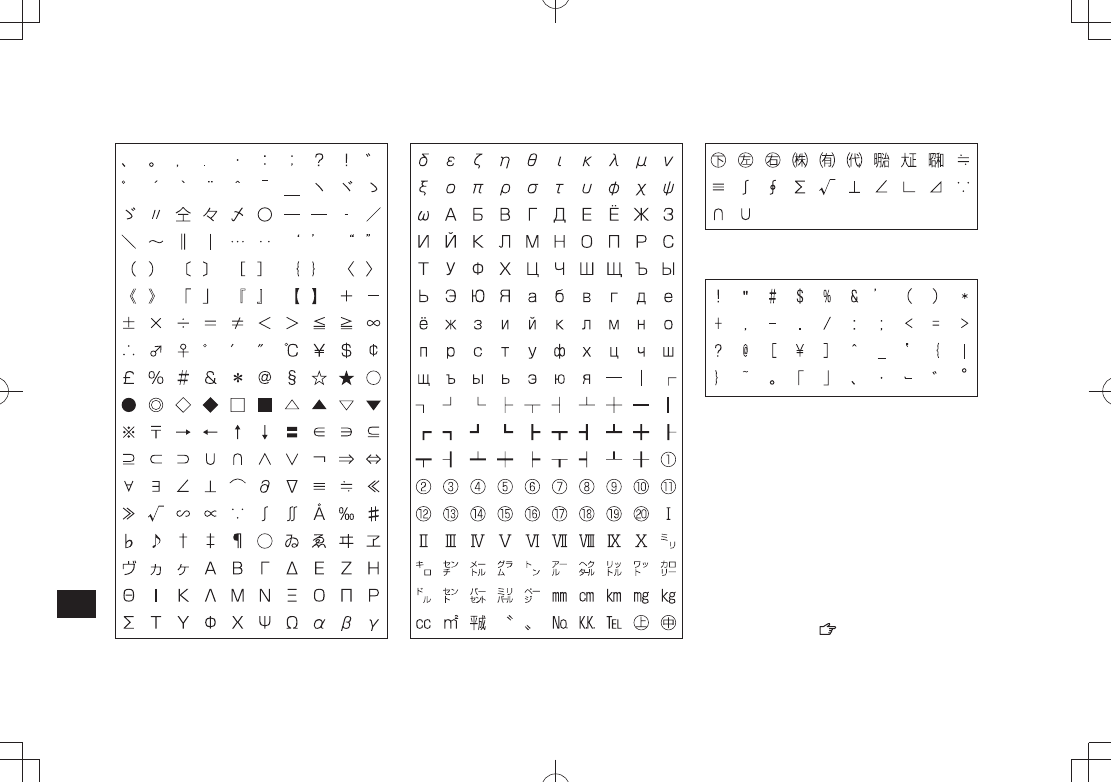
19-18
Appendix
19
Symbol List
&
Double-byte Symbol List
Single-byte Symbol List
To enter a space:
P. 3-3
BEGIN_E_OI.indb 18 2009/12/14 16:36:21
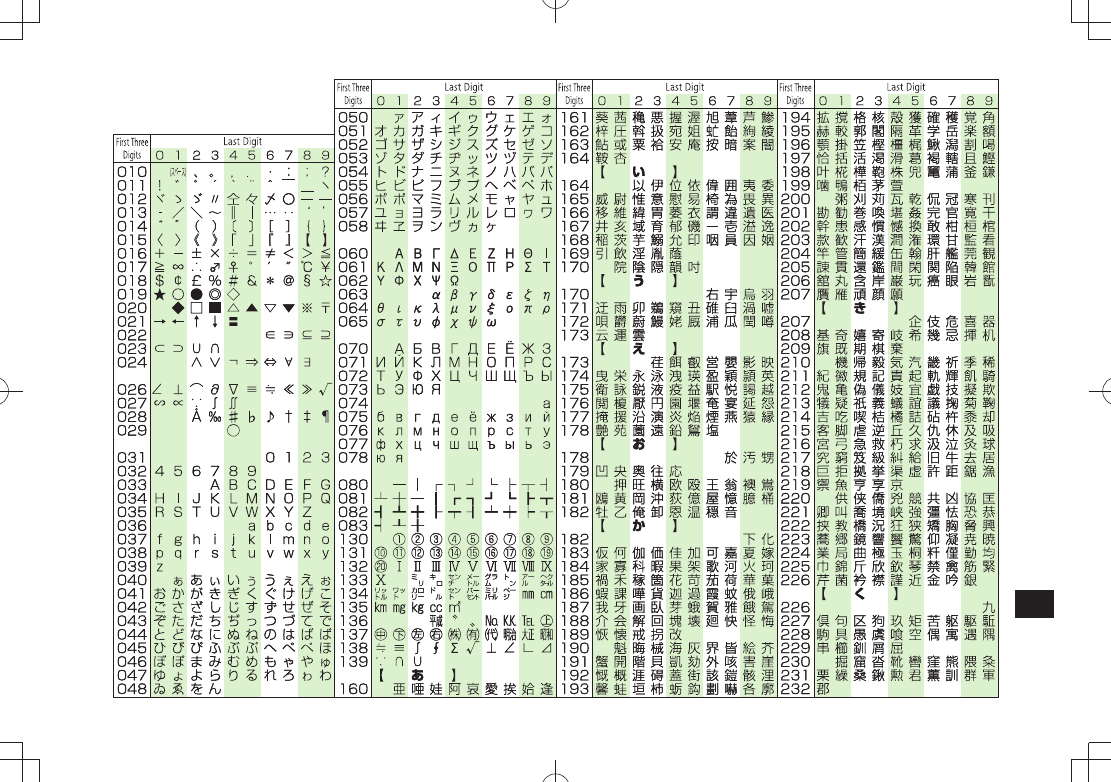
19-19
Appendix
19
Character Code List
BEGIN_E_OI.indb 19 2009/12/14 16:36:26