Panasonic Mobile Communications 209023A UMTS/ GSM Cellular Mobile with Bluetooth®, WLAN and RFID User Manual BEGIN E OI 091214
Panasonic Mobile Communications Development of Europe Ltd UMTS/ GSM Cellular Mobile with Bluetooth®, WLAN and RFID BEGIN E OI 091214
Contents
User Manual 2 of 7
Call
2
2-14
Viewing Call Logs
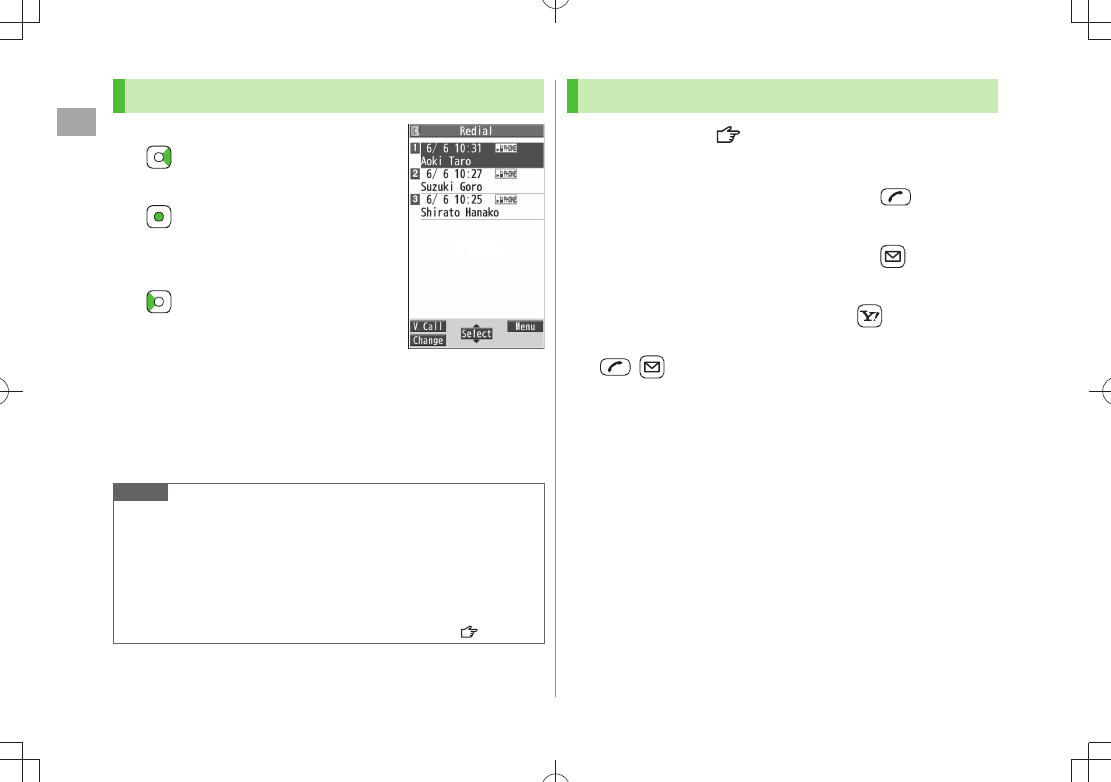
1 Redial
Outgoing Call Logs
Phone Book
Call Log
Outgoing Call Logs
Incoming Call Logs
Records appear.
View Missed Calls
■
Main Menu
> Phone Book Call Log Incoming Call Logs
Missed Calls
Unknown Calls
appears in Call Log for unchecked calls.
Note
Newest record appears at top of list. Names appear if saved in Phone
Book.
Call Log records remain even if 941P is turned off.
When the maximum number of records are saved, oldest is deleted first.
Incoming Call Logs can also be opened from
Main Menu
Phone Book Call Log Incoming Call Logs All Calls
Missed Calls records can be viewed with handset closed (
P.1-23).
Redial
Making Calls from Call Log
1 Open Call Logs ( Left)
2 Voice Calls
Highlight a phone number or name
Video Calls
Highlight a phone number or name [V. Call]
International Calls
Select a phone number or name [Menu]
Int'l dial assist
Select a country/region
/[V. Call]
TBD
BEGIN_E_OI.indb 14 2009/12/14 16:27:24
Call
2
2-15
Functions Available from Call Log
Highlight a call record and press [Menu].
Available functions vary by selected log/record.
Item Operation/Description
Notify caller ID
Notify or withhold your Caller ID ( P.2-3)
Prefix
numbers
Add a prefix to phone number before dialing
Select an entry
>
Int’l dial
assist
Add international dialing prefix
Select a country/region
>
Character size Toggle font size
Add to
Phone Book
Save number to Phone Book ( P.4-5)
Ring time 1Show ring time (missed calls)
Add shortcut
icon
Create a shortcut ( P.1-22)
Compose
S! Mail
Create S! Mail
(From Step 4 on P.13-4)
Compose
SMS 2
Create SMS
(From Step 4 on P.13-7)
Received
address/
Sent address
Show Received/Sent address log
Delete this/
Delete
selected/
Delete all
Delete record(s) in selected list
>
1 Available only for Incoming Call Logs
2 Message can be sent to SoftBank handsets only
Answer Phone
Record up to five voice messages for Voice Calls or up to
two for Video Calls (up to 20 seconds per message) on 941P.
When Answer Phone is active,
– (Voice Call) or –
(Video
Call) appears in Standby.
Unavailable when: handset is off or in Emission OFF Mode;
appears.
Use Voice Mail ( P.2-18).
Activating/Canceling Answer Phone
<Default> OFF
1 Press and hold
To cancel: Press and hold
again
Redirect a Call to Answer Phone
■
>[Ans. Ph] or
Note
Alternatively, activate/cancel from
Main Menu Tools
Sound Recorders Answer Phone Setting ON or OFF
When full, new messages cannot be recorded even if Answer Phone is
activated. Delete old messages.
While Manner Mode (set for User Mode) is active, Answer Phone
setting for User Mode ( P.18-7) is prioritized.
TBD
BEGIN_E_OI.indb 15 2009/12/14 16:27:26
Call
2
2-16
Playing Messages
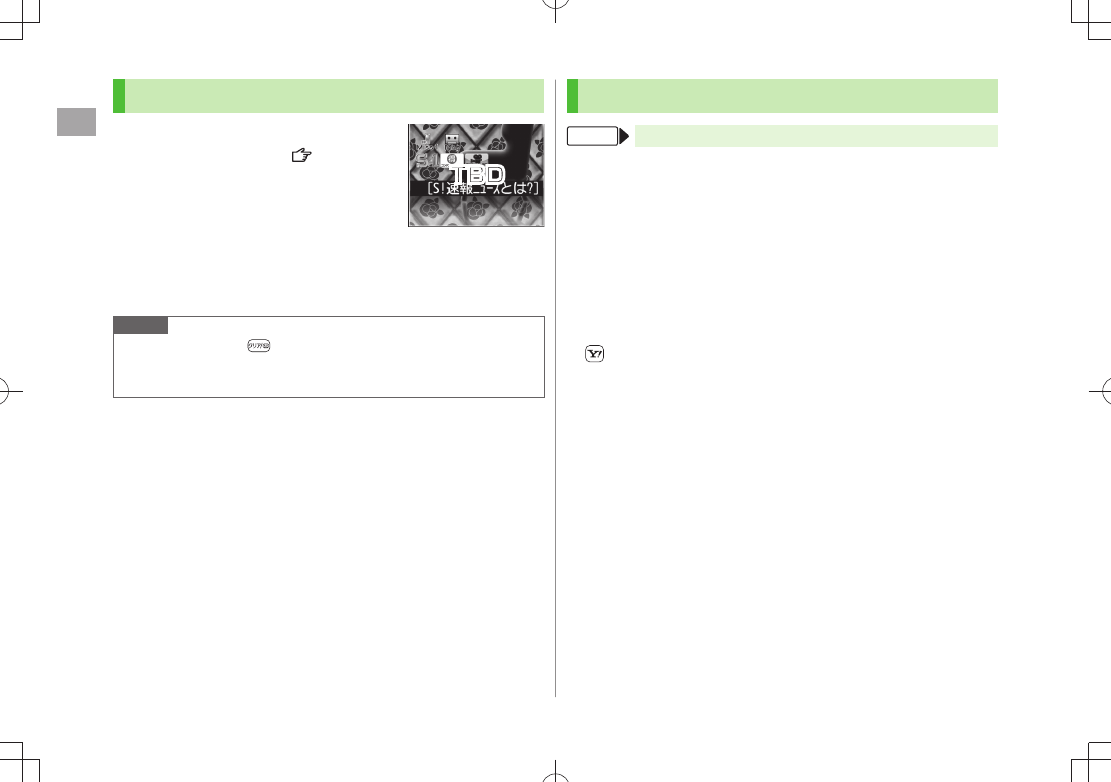
When a new message is recorded,
Event Indicator appears ( P.1-21)
in Standby.
1 Select indicator
2 Select a message
Playback starts.
After playback ends, indicator disappears.
Note
Alternatively, press
in Standby (for Voice Call messages) or
Main Menu Tools Sound Recorders Voice Call Data or
Video Call Data Select a recording
Play Recorded Caller's Voice/Video
■
Main Menu
> Tools Sound Recorders Voice Call Data or
Video Call Data Call Data
Answer Phone Functions
From Main Menu Tools Sound Recorders
Select Outgoing Message/
■Set Ring Time
Answer Phone Setting
>
ON
Select a message Enter ring time
When Answer Phone and Optional Service (Voice Mail or Call Forwarding)
are both active, function with shorter ring time takes priority.
For example, if Answer Phone ring time is 18 seconds and Optional
Service is 20 seconds, Answer Phone responds first (Priority may change
due to signal conditions.).
Delete Recorded Call Data
■
Voice Call Data
> or
Video Call Data
(Highlight an item)
[Menu]
Erase this
,
Erase rec. msg.
,
Erase Call Data
* or
Erase all
YES
*
Video Call Data
only
TBD
BEGIN_E_OI.indb 16 2009/12/14 16:27:27
Call
2
2-17
Optional Services
Overview
For details, visit SOFTBANK MOBILE Corp. Website
(http://www.softbank.jp).
Call Forwarding
(Right)
Forward unanswerable calls to a preset
number when handset is off, out-of-range, etc.
Voice Mail
(P.2-18)
Unanswered calls are forwarded to Voice Mail
Center as set or when handset is off, out-of-
range, engaged, etc.
Missed Call Notification (
P.2-19)
Call Waiting*
(P.2-20)
Place the current call on hold and answer a
second, or alternate between calls.
Call Barring
(P.2-20)
Restrict calls by condition.
While Call Forwarding or Voice Mail Service
is active,
Bar All Outgoing
and
Bar All Incoming
are not available
(Call Forwarding or Voice Mail Service is
prioritized.).
Caller ID
(P.2-21) Show or hide your number when calling.
* Separate subscription required.
Call Forwarding
Call Forwarding and Voice Mail cannot be set simultaneously.
When forwarding Video Calls, set a destination phone that supports
3G-324M standard video calls. If not, Video Calls are not forwarded.
Activating Call Forwarding
Main Menu Settings Call Settings
Voice Mail/Call Fwding Call Forwarding ON
1 Select a type
2 Enter a destination phone number
to select number from Phone Book.
3 Select an item (See below)
Item Operation/Description
Ringer ON Forward missed calls
Select a ring time
>
YES
Ringer OFF Forward all calls without ringing/vibrating
YES
>
Check Call Forwarding Status
■
>
Main Menu Settings Call Settings Voice Mail/Call Fwding
Get Status
BEGIN_E_OI.indb 17 2009/12/14 16:27:27

Call
2
2-18
Cancel Call Forwarding
■
>
Main Menu Settings Call Settings Voice Mail/Call Fwding
Deactivate All YES
Note
Toll free numbers and international call numbers cannot be saved as a
destination number.
When using Call Forwarding together with Answer Phone, the function
with shorter ring time takes priority (Priority may change due to signal
conditions.).
When
Ringer ON
is set, following operations are available while 941P
is ringing (within ring time):
To answer call:
・
To forward call:
・ [Menu]
Call Forwarding
Voice Mail
Calls are forwarded to Voice Mail Center via Call Forwarding function;
Call Forwarding and Voice Mail cannot be set simultaneously.
Voice Mail is not available for Video Calls.
Activating Voice Mail
Main Menu Settings Call Settings
Voice Mail/Call Fwding Voice Mail ON
1 Select an item (See below)
Item Operation/Description
Ringer ON Forward missed calls
Select a ring time
>
YES
Ringer OFF Forward all calls without ringing/vibrating
YES
>
Check Voice Mail Status
■
Main Menu
> Settings Call Settings Voice Mail/Call Fwding
Get Status
Cancel Voice Mail
■
Main Menu
> Settings Call Settings Voice Mail/Call Fwding
Deactivate All YES
BEGIN_E_OI.indb 18 2009/12/14 16:27:28
Call
2
2-19
Note
When using Voice Mail together with Answer Phone, the function with
shorter ring time takes priority (Priority may change due to signal
conditions.).
When
Ringer ON
is set, following operations are available while 941P
is ringing (within ring time):
To answer call:
・
To forward call:
・ [Menu]
Call Forwarding
Checking Voice Mail Messages
Event Indicator ( P.1-21) and appear in Standby when
new messages are recorded.
1 Select indicator
YES
Follow voice guidance.
Indicator and disappear after messages
are checked.
View Details
■
View callers' phone numbers and date/time Voice Mail messages were left
before playing messages.
Activate
Missed Call Notification
beforehand.
>
Voice Mail Notif.
[ ]
Delete
■ Indicator
>
Main Menu Settings Call Settings Voice Mail/Call Fwding
Delete Voice Mail Icon YES
Note
Alternatively, follow these steps to check Voice Mail:
Main Menu Settings Call Settings
Voice Mail/Call Fwding Listen to Voice Mail YES
Missed Call Notification
When Missed Call Notification function is active, Event
Indicator appears for calls missed while 941P was off, out-of
range, engaged etc.
Available only when Voice Mail is active.
Main Menu Settings Call Settings Missed Call Notifi.
1
YES
941P connects to the Network.
Follow voice guidance.
When Calls are Received while Missed Call Notification is
Active…
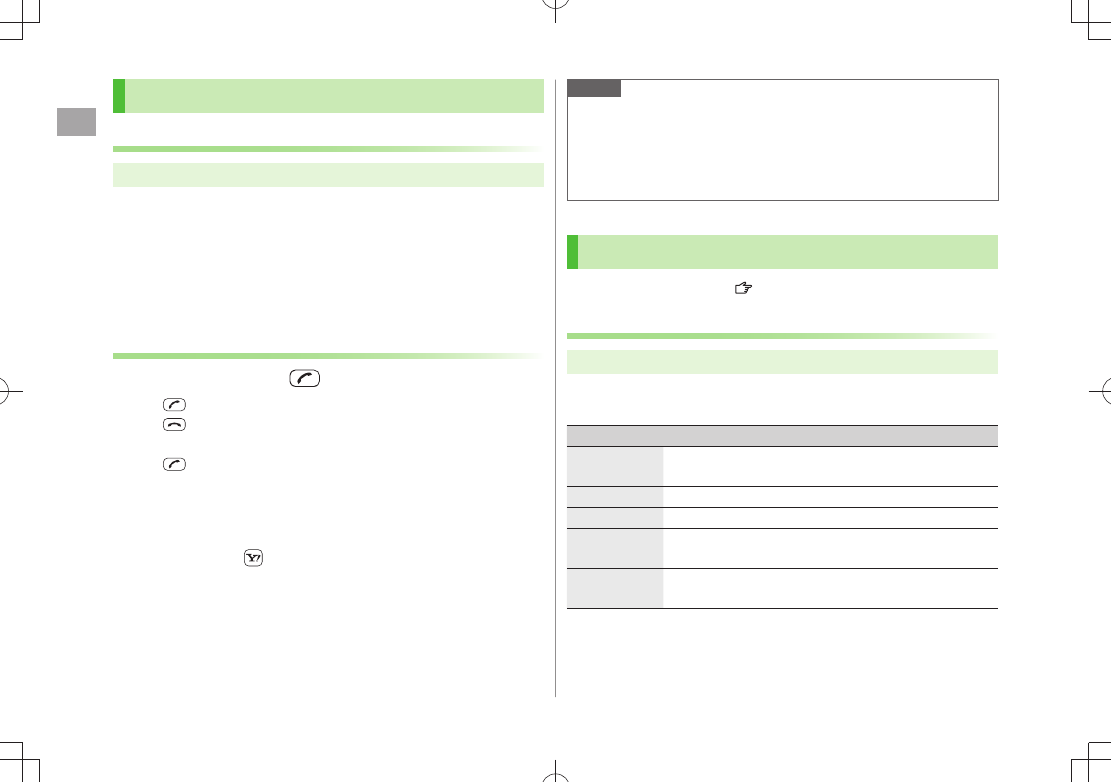
Event Indicator appears for missed calls when
941P is turned on or comes into range. Select
indicator to view Missed Calls.
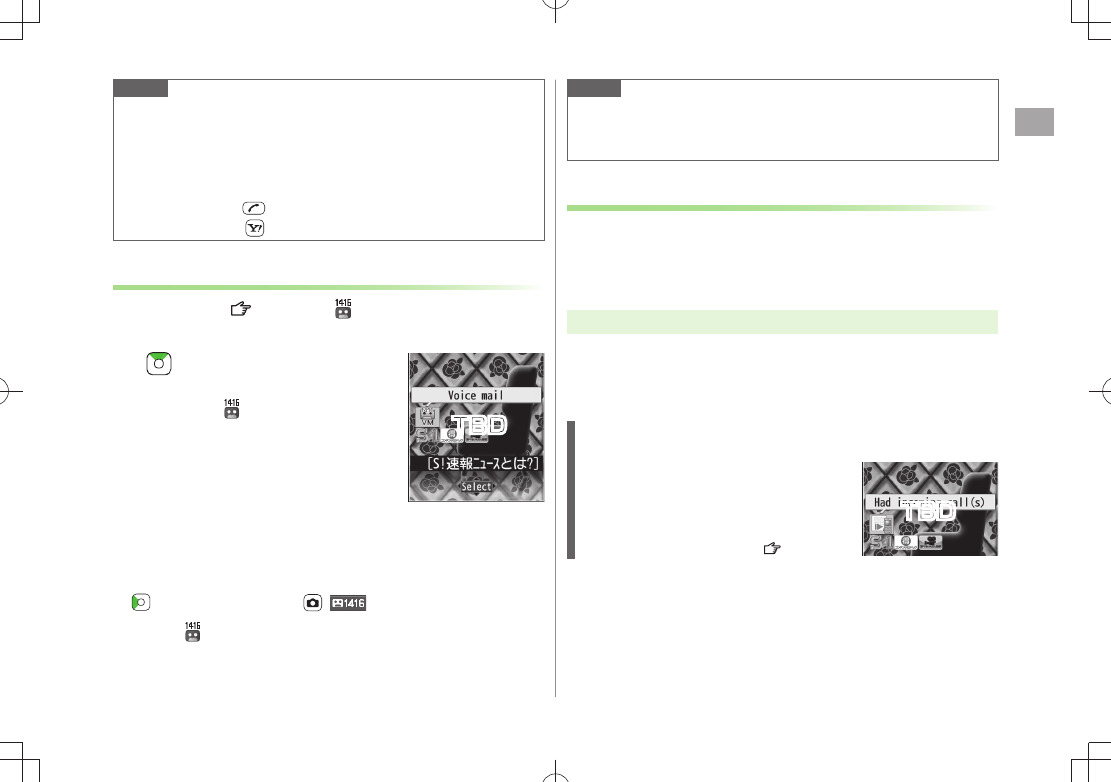
Voice mail
indicator appears when Voice
Mail messages are recorded ( Left).
TBD
TBD
BEGIN_E_OI.indb 19 2009/12/14 16:27:31
Call
2
2-20
Call Waiting
Activating/Canceling Call Waiting
Main Menu Settings Call Settings Call Waiting
1
Activate
or
Deactivate
YES
Current status appears.
Check Call Waiting Status
■
Main Menu
> Settings Call Settings Call Waiting
Get Status
Answering Second Call
1 When tone sounds,
to alternate between calls.
to disconnect active call.
When the party hangs up, active call ends.
to re-engage the party on hold.
When a second call comes in while first call is on hold, hold status
is canceled and first call resumes.
Reject Second Call
■
When tone sounds,
>[Menu]
Call Rejection
Note
When Voice Mail or Call Forwarding is set to
Ringer ON
while Call
Waiting is active, unanswered calls are transferred to Voice Mail Center
or the forwarding number.
When Voice Mail or Call Forwarding is set to
Ringer OFF
, Call Waiting
is disabled.
Call Barring
Security Code is required (
P.1-28).
Activating/Deactivating Call Barring
Main Menu Settings Call Settings Call Barring
1 Select an item (See below)
Item Operation/Description
Bar All
Outgoing
Restrict all non-emergency calls
Bar All Int'l Allow only domestic calls
Bar Int'l Restrict all international calls except to Japan
Bar All
Incoming
Reject all calls
Bar All
Roaming
Reject calls when outside Japan
2
Activate or Deactivate
YES
3 Enter Security Code
BEGIN_E_OI.indb 20 2009/12/14 16:27:31
Call
2
2-21
Check Call Barring Status
■
After Step 1,
>
Get Status
Cancel All Call Barring
■
In Step 1,
>
Cancel All Barring
Enter Security Code
Change
■Security Code
In Step 1,
>
Set Security Code
Enter current Security Code Enter
new Security Code Reenter Security Code
Note
Emergency numbers (110, 119, 118) are dialable even while Call
Barring for outgoing calls is active.
If call is attempted when Call Barring is active, warning message
appears. It may take longer to appear in some areas. Check Call Barring
settings if the message does not appear.
Caller ID
<Default> Network Set
Main Menu Settings Call Settings
Show My Number Activate
1
ON
,
OFF
or
Network Set
Network Set
Caller ID setting varies by subscription.
Check Caller ID Status
■
Main Menu
> Settings Call Settings Show My Number
Check Setting
Note
Alternatively, enter these numbers/symbols before the phone number to
show or hide Caller ID:
Show: or
Hide: or
BEGIN_E_OI.indb 21 2009/12/14 16:27:36

Call
2
2-22
BEGIN_E_OI.indb 22 2009/12/14 16:27:36
3
3-1
Text Entry
Text Entry .............................................................. 3-2
Entering Text ......................................................... 3-3
Entering Characters ....................................................................3-3
Pictographs & Symbols ...............................................................3-4
Templates ...................................................................................3-5
Additional Features.....................................................................3-5
Conversion Methods (Japanese) ........................... 3-6
Predictive Conversion .................................................................3-6
Converting Hiragana to Katakana/Alphanumerics ........................3-7
Conversion ................................................................................. 3-8
Editing Text ........................................................... 3-9
Deleting & Replacing ..................................................................3-9
Copy/Cut/Paste ...........................................................................3-9
User's Dictionary ................................................ 3-10
Saving User's Dictionary Entries ................................................3-10
Download Dictionary .......................................... 3-10
Activating Downloaded Dictionaries ..........................................3-10
BEGIN_E_OI.indb 1 2009/12/14 16:27:36
Text Entry
3
3-2
Text Entry
Enter alphanumerics, hiragana, kanji, katakana, symbols and
pictographs.
Three types of character input methods are available: Mode 1 (5-touch),
Mode 2 (2-touch), Mode 3 (NIKO-touch)
In this guide, examples are described in Mode 1 (5-touch).
Mode 2 (2-touch)/Mode 3 (NIKO-touch)
Press two numeric keys to enter a character.
List of Key Assignments (
P.19-15 to 17)
■Help
Help describes text entry operations.
In text entry window,
>[Menu]
Help
Select an item
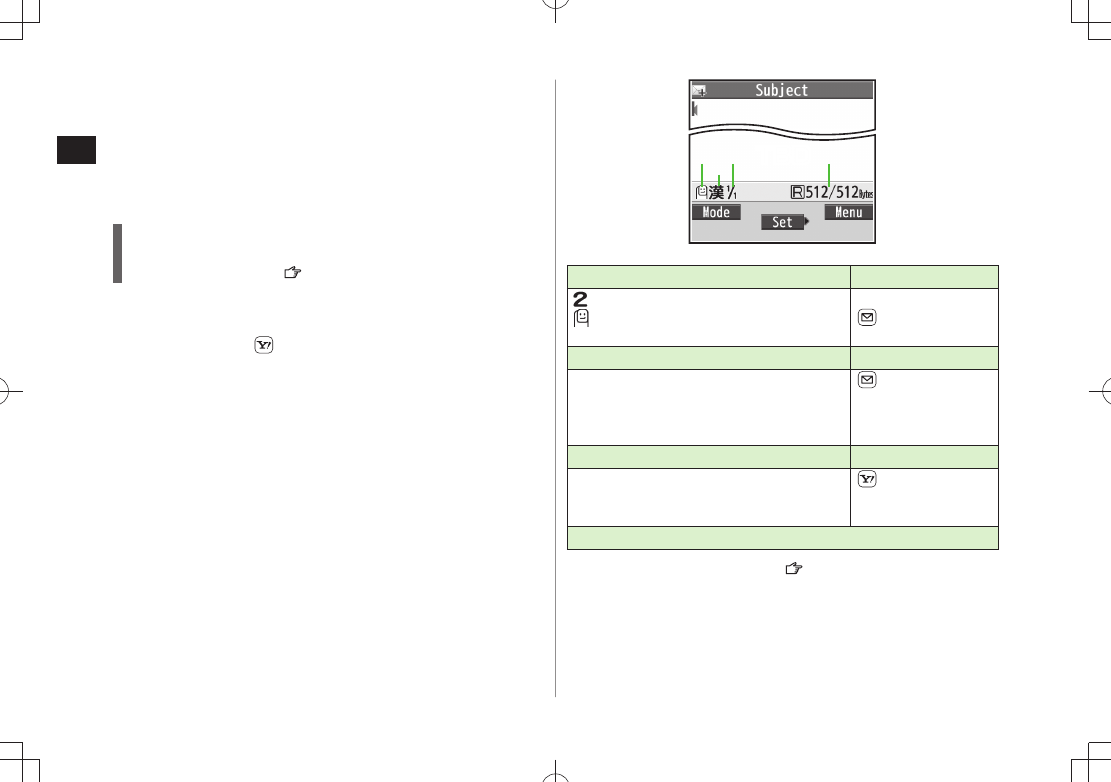
❶ Character Input Methods Operations
: Mode 2 (2-touch)
: Mode 3 (NIKO-touch)
No icon appears for Mode 1 (5-touch).
Press and hold
[Mode]
❷ Input Modes* Operations
abc: Alphanumerics
123: Numbers
漢: Kanji (hiragana)
カナ: Katakana
[Mode]
❸ Double-byte/Single-byte* Operations
1/1: Double-byte
1/2: Single-byte
[Menu]
2bytes character
(
1byte character
)
❹ Remaining/Maximum Bytes in Message
* Operations in Mode 3 (NIKO-touch): P.19-17
❶❷❸❹
TBD
BEGIN_E_OI.indb 2 2009/12/14 16:27:41
Text Entry
3
3-3
Entering Text
Entering Characters
Example: Enter 鈴木
1 In alphanumerics mode,
twice to switch to kanji (hiragana)
mode
す: three times
ず: * three times
き: twice
* When the next character is on the same key, press first to move
cursor.
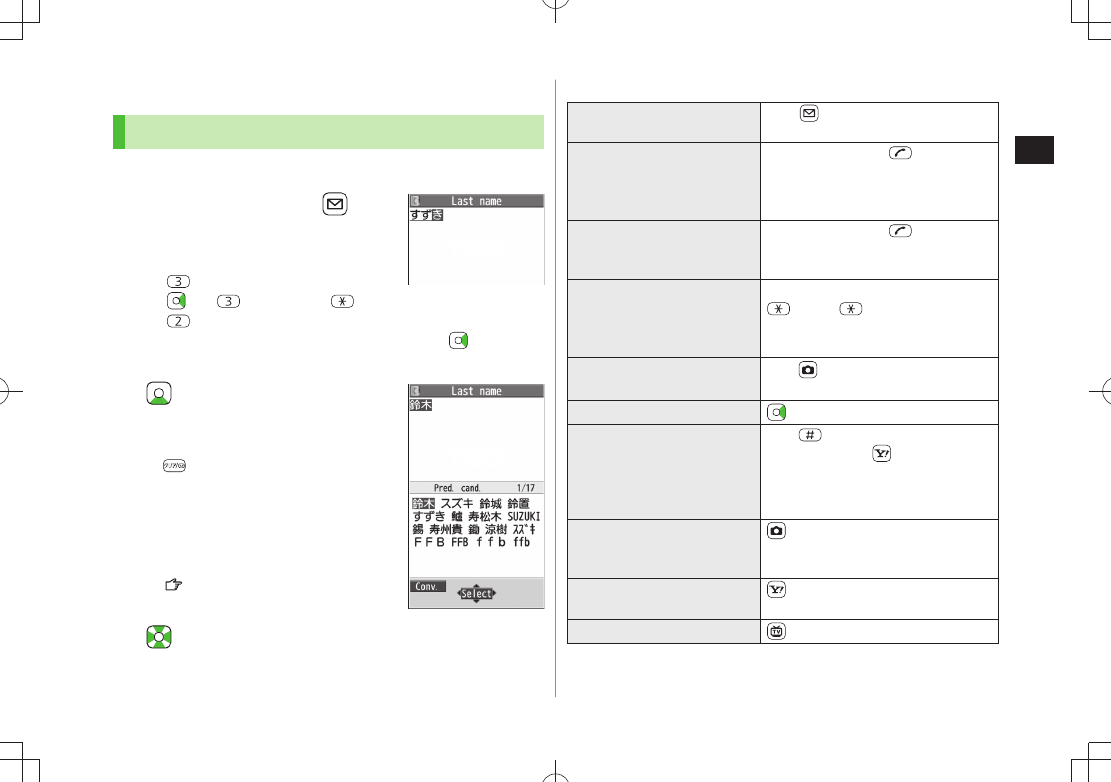
2 to enter Predictive
Candidates List
To change word before converting, press
.
There are four types of word suggestion
lists:
Predictive Candidates
,
Conversion Candidates
,
Context Forecast
and
abc/123/Kana Candidates
( P.3-6)
3 to select 鈴木
Other Input Functions
■
Enter katakana/
alphanumerics
Press [Mode] several times to select
an input mode Enter characters
Enter small kana
(っ, ッ, etc.)
Enter a character
to convert to
small character
Alternatively, press a key repeatedly
to enter an assigned small kana.
Enter upper case
characters
Enter a character
Alternatively, press a key repeatedly to
enter an assigned upper case character.
Add ゛
or ゜
Enter a character to add ゛
or ゜
for ゛
or twice for ゜
In single-byte katakana mode, ゛
and ゜
are entered as a single-byte character.
Insert line break
Press
[Line FD] to insert line
breaks in text
Insert space at end of text
Insert space within text
Press repeatedly until single-byte
space appears*, or [Menu]
Pictograms/symbols
Space
to enter
a space (Double-byte (single-byte) space
is entered in 2 bytes (1 byte) input mode.)
Toggle characters in
reverse order
[Rev]
Example: From c, press to toggle as
follows: c
b
a
2…
Move cursor to beginning/
end of sentence
[Menu]
Jump
To beginning
or
To end
Undo [Undo]
* Space cannot be entered within text in number mode by following the
steps above. Use symbol list.
TBD
TBD
BEGIN_E_OI.indb 3 2009/12/14 16:27:54
Text Entry
3
3-4
Pictographs & Symbols
Pictographs do not appear in messages sent to incompatible SoftBank
handsets or e-mail.
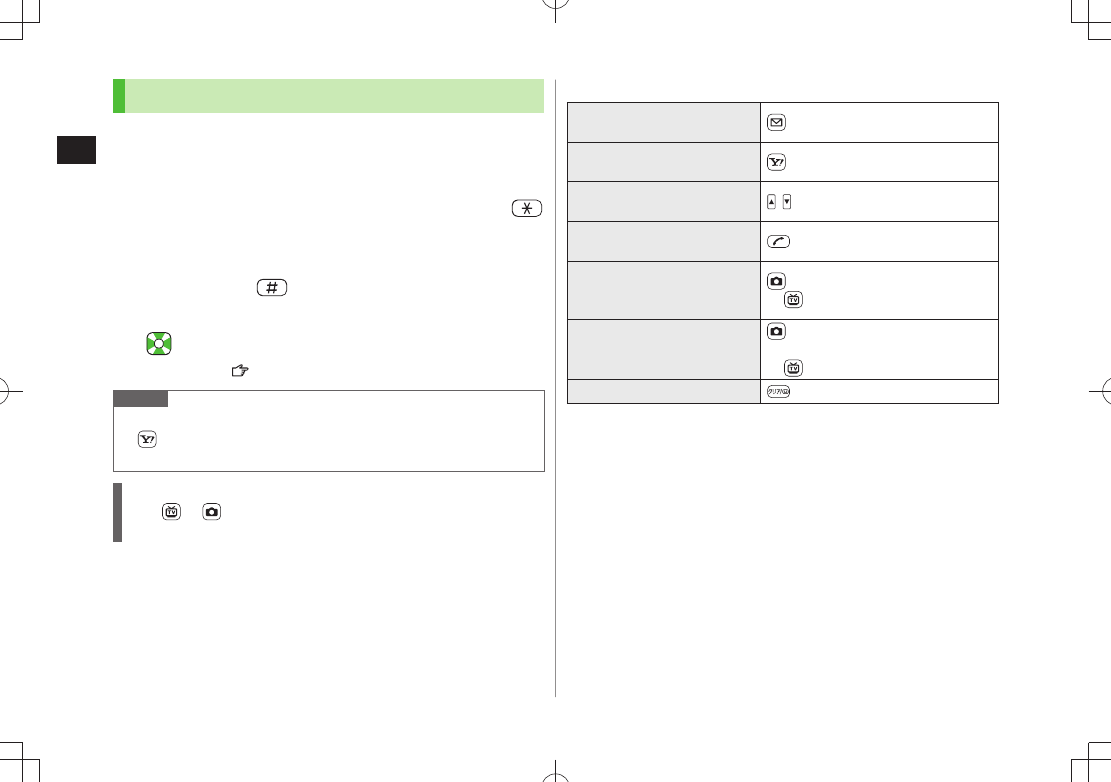
1 Pictographs
In kanji (hiragana)/katakana/alphanumerics mode,
SoftBank pictograph list appears.
Symbols
Press and hold
Single-byte symbol list appears.
2 to select a pictograph or symbol
Symbol List:
P.19-18
Note
Alternatively, follow the steps to access pictograph or symbol:
[Menu]
Pictograms/symbols
List Log may appear first.
Entering Cross-carrier Pictographs
Press or to toggle lists (Universal pictograph list, Log, Full
pictograph list and My Pictograms).
Functions Available in Pictograph/Symbol List
■
Enter same pictograph or
symbol again [Cont.]
Toggle pictograph/symbol
list [Pict./Symbol]
Jump to previous/next
page /
Toggle full screen/standard
screen
Toggle double/single-byte
symbol and log
[symbol list only]
[1byte/2bytes/Log]
to toggle in reverse
Toggle pictograph lists
[pictograph list only]
[Univrsl. 1/Full/My Pict. 2/
NxtMyPic 2/Log]
to toggle in reverse
Close list
1 In S! Mail Subject/Text/Signature field or Subject field for Auto-sort Setting
only
2 In S! Mail Text field only
BEGIN_E_OI.indb 4 2009/12/14 16:27:58
Text Entry
3
3-5
Templates
Insert templates (greetings, URLs, emoticons) or edit
preinstalled templates.
Inserting Templates
1 In text entry window, press and hold
Not available in number mode.
2 Select a category Select a template
Note
Alternatively, in a text entry window,
[Menu]
Input assistance
Templates
to enter a template
Editing Templates
Main Menu Tools Templates/Users Dic. Templates
1 Select a category
2 Highlight a template [Edit] Edit template
Reset Edited Templates
■
After Step 1, (highlight a template
> ) [Menu]
Reset this
or
Reset all
( For
Reset all
, enter Phone Password)
YES
Manage Template Folders
■
In Step 1, highlight a category
> [Menu]
Edit folder name
Edit folder name
To reset folder name,
[Menu]
Reset name
YES
Additional Features
1
In text entry window, [Menu]
Input assistance
2 Select an item (See below)
Item Operation/Description
Kuten Code Enter a character code ( P.19-19)
Enter a character code (4 digits)
>
Input date/
time
Select a style to enter date/time
Select a display style
> Enter date/time
Quote phone
book
Quote Phone Book entry detail
Select an entry
> Check item(s) to quote
[Finish]
Quote accnt
detls
Quote Account Details
Enter Phone Password
> Check item(s) to quote
[Finish]
Bar code
reader
Activate Bar Code Reader to insert scanned result
(P.12-11)
BEGIN_E_OI.indb 5 2009/12/14 16:27:58
Text Entry
3
3-6
Conversion Methods (Japanese)
Predictive Conversion
The following suggestion lists appear while entering text or
after a word is fixed.
While
Entering
Text
Predictive
Candidates
Lists likely conversions (Predictive
Candidates) and matching conversions
(Conversion Candidates)
Predictive Candidates わ 私, わたし, etc.
Conversion Candidates わ 和, 輪, etc.
Conversion
Candidates
Suggests matching conversions
Example: わ 和, 輪, etc.
abc/123/
Kana
Candidates
Lists alphanumerics/katakana assigned to
key ( P.3-7)
After a
Word is
Fixed
Context
Forecast
Suggests words likely to follow
Example: 私 is fixed です, の, は, etc.
Predictions change with each letter entered.
Press
[Pred.]/[Conv.] to toggle Predictive Candidates List and
Conversion Candidates List.
Note
941P learns entered characters and suggests them for future
conversions ( P.3-8).
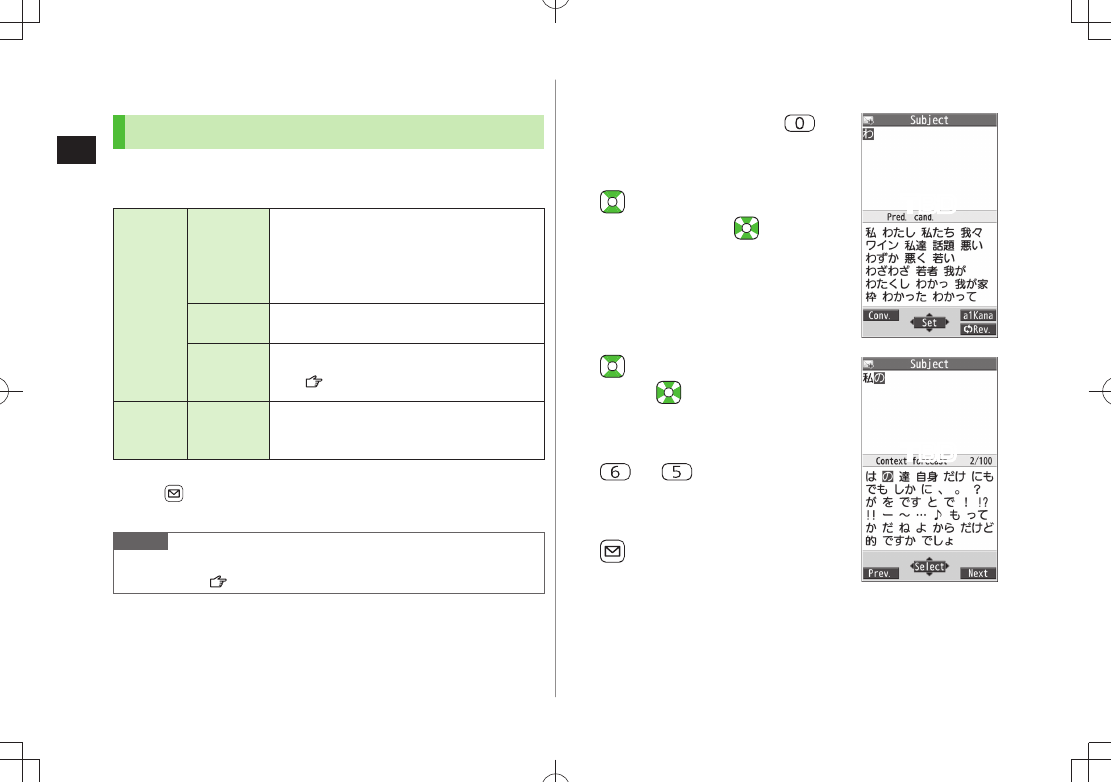
Example: Enter 私の鼻
1 In kanji (hiragana) mode,
わ is entered and Predictive Candidates List
appears.
2 to move to Predictive
Candidates List to select 私
私 is entered and Context Forecast List
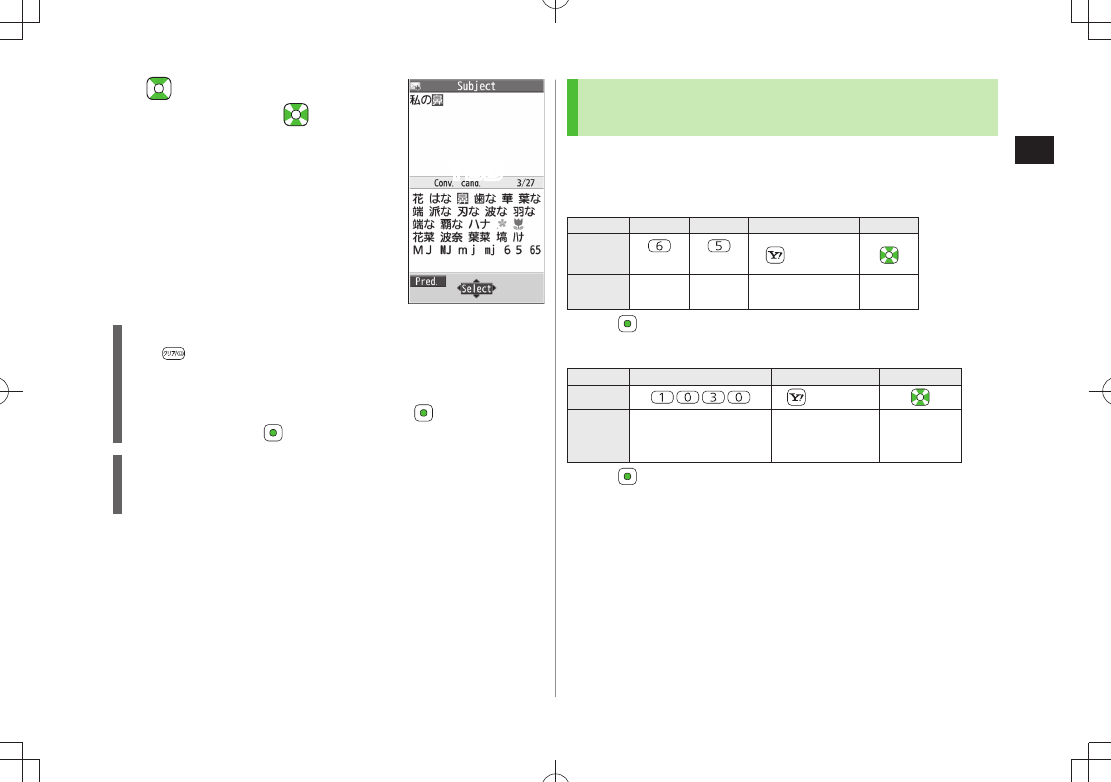
appears.
3 to move to Context Forecast
List to select の
の is entered and Context Forecast List
appears.
4
はな is entered and Predictive Candidates
List appears.
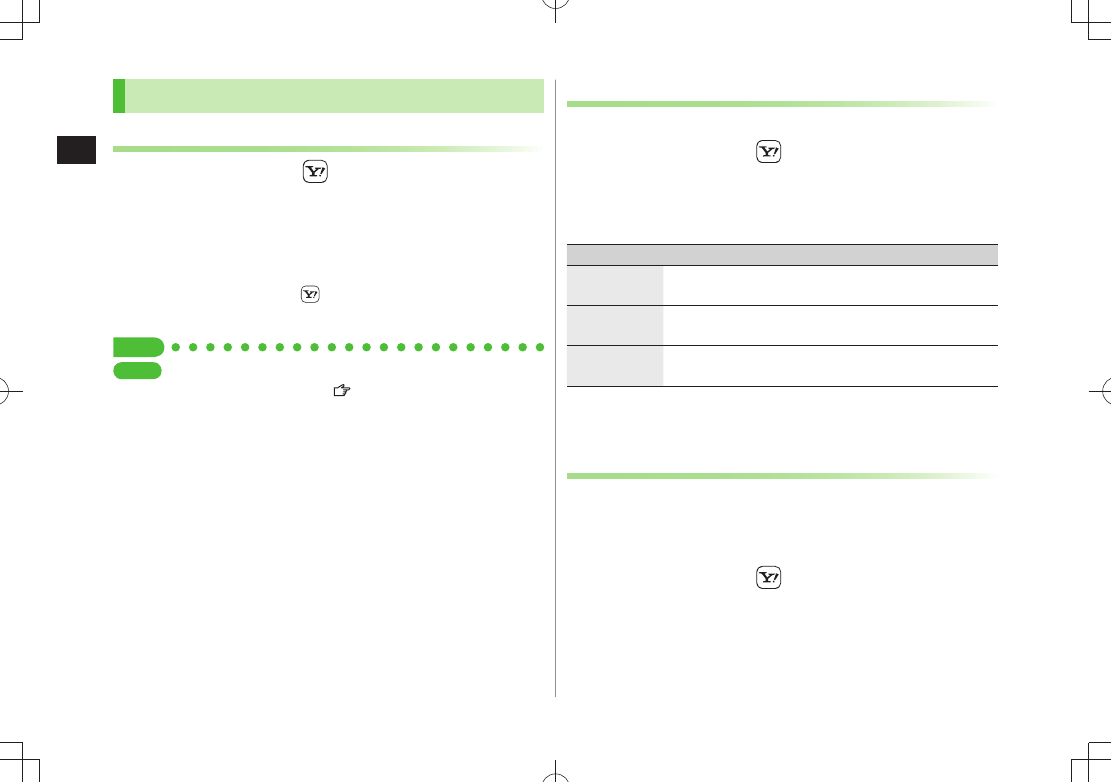
5 [Conv.]
Conversion Candidates List appears.
TBD
TBD
BEGIN_E_OI.indb 6 2009/12/14 16:28:07
Text Entry
3
3-7
6 to move to Conversion
Candidates List to select
鼻
If the Word is Not Listed
Press to return to hiragana, and segment hiragana to convert
separately.
Example: Segment はるか into はる and か, then convert to 春香
① Move cursor to る, then convert はる to 春
② Convert か to 香
Using Previously Entered Words
Enter the first one or two hiragana to access previously entered
words in the list.
Converting Hiragana to Katakana/
Alphanumerics
Enter katakana and alphanumerics in kanji (hiragana) mode.
Date and time can be entered quickly.
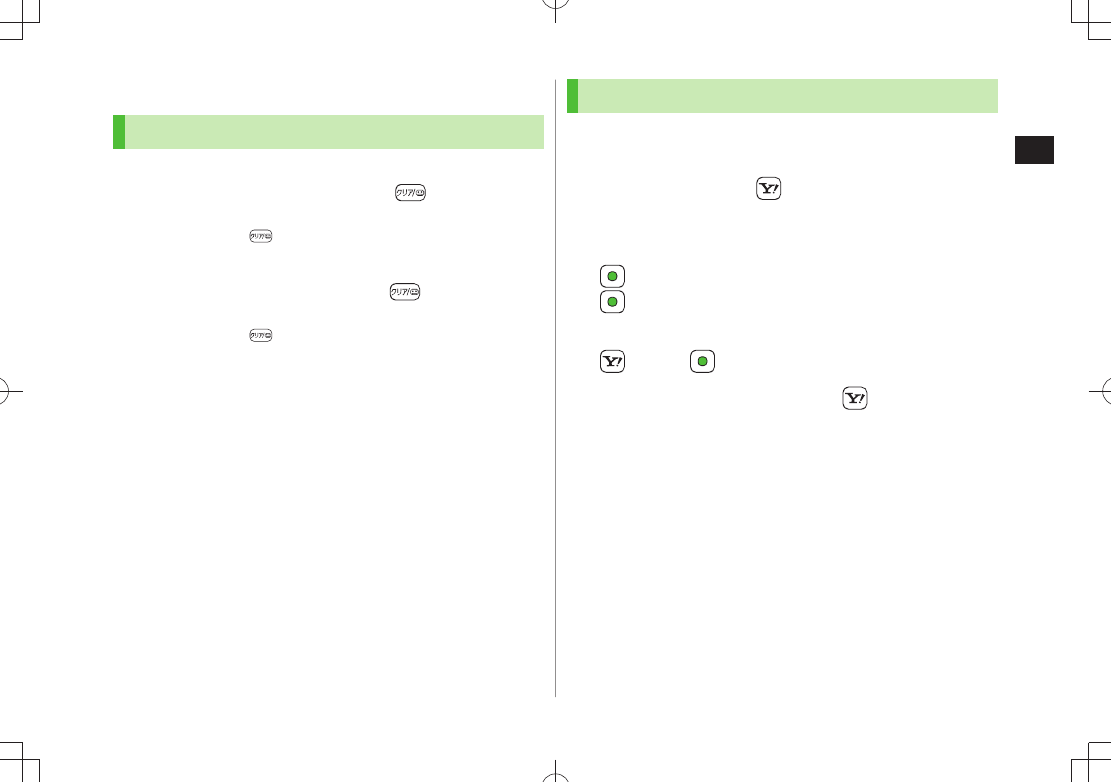
Example 1: Enter OK
Step 1 2 3 4
Key (3 times) (twice) [a1Kana]
Display ふふに
abc/123/Kana
Candidates OK
Press
after highlighting OK.
Example 2: Enter 10:30 or 10/30
Step 1 2 3
Key [a1Kana]
Display あわさわ abc/123/Kana
Candidates
10:30
or
10/30
Press
after highlighting 10:30 or 10/30.
TBD
BEGIN_E_OI.indb 7 2009/12/14 16:28:10
Text Entry
3
3-8
Conversion
Viewing Learned Words
1 In text entry window, [Menu]
Text entry setting
Learned words
2 Select a row Select a log
Delete Learned Words
■
In Step 2, (highlight a log
> ) [Menu]
Delete this
or
Delete all
( For
Delete all
, enter Phone Password)
YES
Tip
Settings
●Set Learning Feature Off for Secret Mode/Secret Data Only
●Delete All Learned Words ( P.18-10)
Activating/Canceling Prediction List
<Default> ON
1 In text entry window, [Menu]
Text entry setting
2 Select an item (See below)
Item Operation/Description
Predict Activate/cancel Predictive Candidates and Context
Forecast lists.
Candidate
display
Activate/cancel Context Forecast list.
2/NIKO-touch
guide
Activate/cancel Conversion Candidates guidance for
2/NIKO-touch input method.
3
ON
or
OFF
Fixing Entered Characters Automatically
<Default> OFF
Fix character in Mode 1 (5-touch) automatically after
specified time elapses.
1 In text entry window, [Menu]
Text entry setting
2
Character set time
Select a speed
BEGIN_E_OI.indb 8 2009/12/14 16:28:10
Text Entry
3
3-9
Editing Text
Deleting & Replacing
1 Delete Characters within Lines
Place cursor before a character
A character after cursor is deleted.
Press and hold
to delete all characters after cursor.
Delete Characters from the End of Text
Place cursor at the end of text
A character before cursor is deleted.
Press and hold
to delete all characters before cursor.
2 Enter another character
Copy/Cut/Paste
Copy/cut text (up to 5000 double-byte/10000 single-byte)
and paste to another place.
1 In text entry window, [Menu]
Copy
or
Cut
2 Select Text to Copy/Cut
Place cursor before (or after) text to select
[Start] Place cursor after (or before) text
[End]
Select All
[All] [End]
3 Place cursor at target location [Menu]
Paste
BEGIN_E_OI.indb 9 2009/12/14 16:28:11
Text Entry
3
3-10
User's Dictionary
Save frequently used words/phrases (up to 100 entries).
Saved words/phrases appear among word suggestions.
Saving User's Dictionary Entries
1
In text entry window,
[Menu]
Text entry setting
User
'
s Dictionary
2
<New>
3 Enter a word Enter reading
Edit User's Dictionary Entries
■
After Step 1, highlight a word
> [Edit] Edit word Edit reading
Delete User's Dictionary Entries
■
After Step 1,
>[Menu]
Delete
Delete this
or
Delete all
( For
Delete all
, enter Phone Password)
YES
Note
Alternatively,
Main Menu Tools Templates/Users Dic.
User's Dictionary
Download Dictionary
Download dictionaries from P-egg, a download site for 941P
users (see below). Activate downloaded dictionaries to add
character conversions to conversion suggestions (Japanese).
P-egg (as of May 2009)
Yahoo! Keitai top page メニューリスト 辞書・ツール
ケータイメーカー P-egg
Activating Downloaded Dictionaries
Main Menu Tools Templates/Users Dic.
Download Dictionary
1 Select a dictionary
★ appears next to active dictionary.
To cancel: follow the same step
Change Title
■
In Step 1, highlight a dictionary
> [Menu]
Edit title
Edit
View Details
■
In Step 1, highlight a dictionary
> [Menu]
Dictionary info
Delete Dictionaries
■
In Step 1, (highlight a dictionary)
> [Menu]
Delete this
or
Delete all
( For
Delete all
, enter Phone Password)
YES
BEGIN_E_OI.indb 10 2009/12/14 16:28:11
4
4-1
Phone Book
Overview .............................................................. 4-2
Saving to Phone Book .......................................... 4-3
Phone Book Entry Items ..............................................................4-3
Create New Entry .......................................................................4-3
Other Ways to Add New Entries ..................................................4-5
Setting Groups ...........................................................................4-6
Searching/Using Phone Book ................................ 4-6
Making Calls from Phone Book ...................................................4-6
Using Phone Book ......................................................................4-7
Managing Phone Book ......................................... 4-9
Editing Phone Book Entries .........................................................4-9
Deleting Phone Book Entries .......................................................4-9
Copying/Deleting Phone Book Data ............................................4-9
Phone Book Memory Status ......................................................4-10
S! Addressbook Back-up..................................... 4-10
Manual Synchronization ...........................................................4-11
Auto Synchronization ................................................................4-12
Viewing Sync Log .....................................................................4-12
Account Details .................................................. 4-13
Editing Account Details .............................................................4-13
Account Details Functions .........................................................4-13
Voice Dial ............................................................ 4-14
Adding Entries to Voice Dial ......................................................4-14
Searching Entries by Voice Dial ..................................................4-14
BEGIN_E_OI.indb 1 2009/12/14 16:28:12
4-2
Phone Book
4
Overview
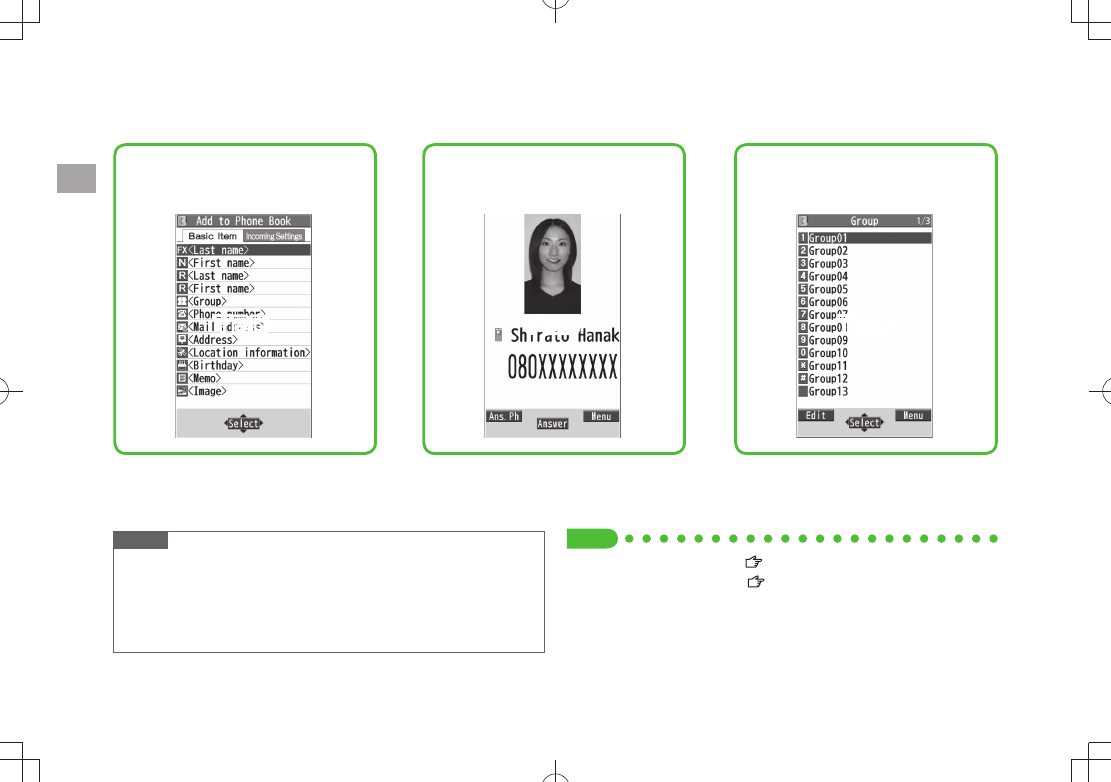
Save frequently used phone numbers and mail addresses to Phone Book.
Note
Back-up Important Information
Keep a separate copy of Phone Book entry information. When battery is
exhausted or removed for extended periods, entries may be lost.
Handset damage may also affect data recovery. SoftBank is not liable
for damages from lost/altered entries.
Supplement phone numbers and mail
addresses with birthday, street
address, an image or notes.
Set tones/image for each entry. Sort entries into Groups.
Tip
●Phone Book Memory Status ( P.4-10)
●Backing up to microSD Card ( P.9-19)
TBD TBD TBD
BEGIN_E_OI.indb 2 2009/12/14 16:28:17
Phone Book
4
4-3
Next Page
Saving to Phone Book
Phone Book Entry Items
Save up to 1000 entries in Phone Book. Save phone numbers
or mail addresses etc. in USIM Card Phone Book.
Up to 50 entries can be saved to USIM Card Phone Book.
Phone Book Entry Items 941P USIM Card
Basic item
Name (Reading) ○○
Group 19 10
Phone number 4 2
Mail address 3 1
Address ○̶
Location information ○̶
Birthday ○̶
Memo ○̶
Image 100 ̶
Memory number 000 - 999 ̶
Incoming Settings
Ringtone
○̶
Vibrator
Notification Light
Screen
Msg Ringtone
Msg Vibrator
Msg Notif. Light
Answer message
○: Can be saved ̶: Cannot be saved
Phone Book entries in USIM Card can also be used in another SoftBank
handset.
Create New Entry
Save new entries to 941P or USIM Card Phone Book.
When saving to USIM Card Phone Book, set
Save Settings
to
USIM
or
Ask Every Time
beforehand ( P. 1 8 - 1 1 ) .
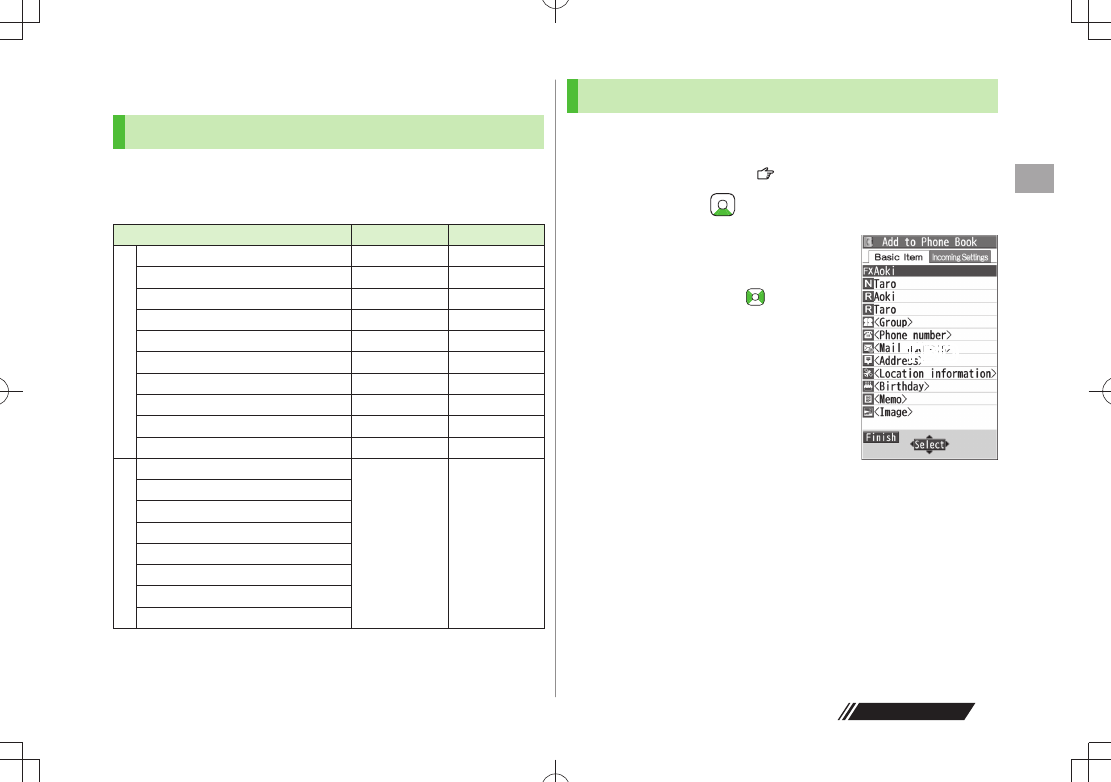
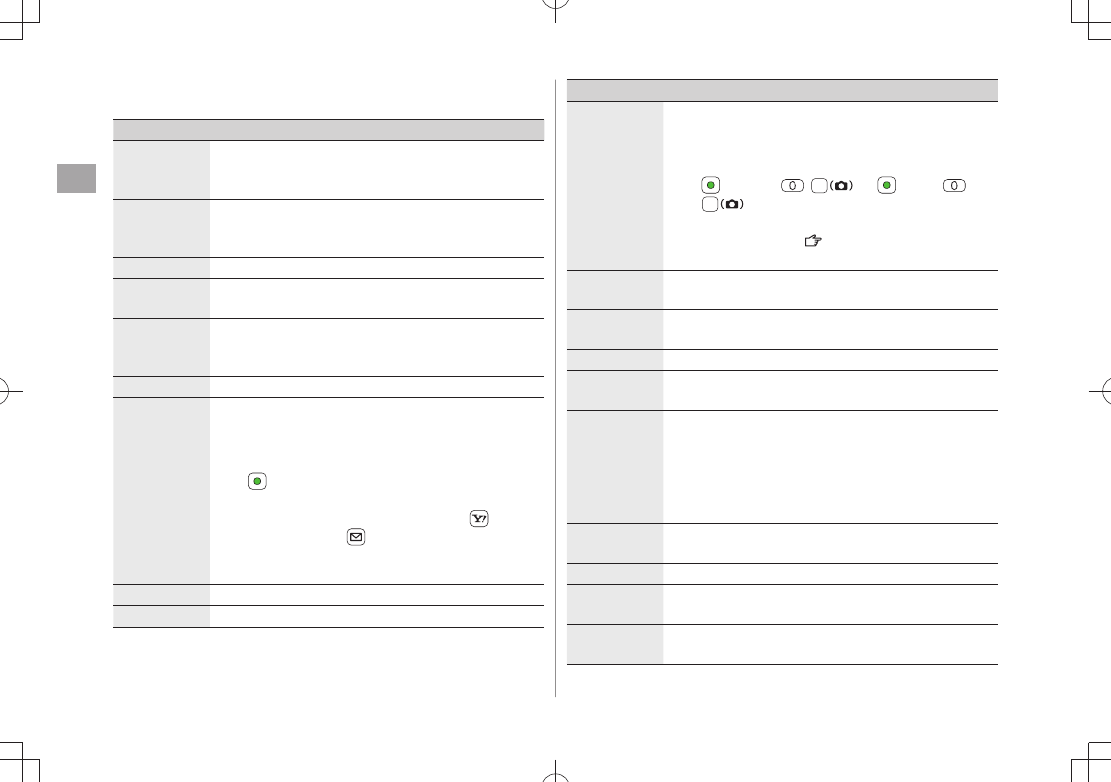
1 Press and hold
2 Enter Last name
Enter First name
For 941P Phone Book,
to switch
Basic item and Incoming Settings tabs.
941P Phone Book
TBD
BEGIN_E_OI.indb 3 2009/12/14 16:28:20
Phone Book
4
4-4
3 Select an item (See below)
Item Operation/Description
Name
(First/Last)
Save first and last names separately. For USIM Card, enter
both names together
Enter name
>
Reading
(First/Last)
Save first and last name readings separately. For USIM
Card, enter both readings together
Enter reading
>
Group Select a group
>
Phone
number
Enter phone number (
> For 941P, select an icon)
Mail address Enter mail address (
> For 941P, select an icon)
Save only phone number if mail address is "phone
number@softbank.ne.jp".
Address Enter zip code
> Enter address
Location
information
Identify handset location and save information. Also, save
location record selected from location logs
Select an item
>
・
By position loc.
YES
Check information
[Set]
(To show information while positioning: When [Use]
appears at lower right of display, press [OK]. To
retry positioning: [Retry])
・
From loc. history
Select a location record to
save
Birthday Enter birthday
>
Memo Enter memo
>
Item Operation/Description
Image Save a still image to appear for incoming calls
Select an item
>
Select image
・ Select a folder Select a file
・
Shoot image
Frame subject
[Record]/ / [Save]/ /
Saved still image appears for an incoming call only when
Phone Book Image
( P.18 - 7 ) i s
ON
. If there is an
image saved for
Screen
, the image preferentially appears.
Memory
number
Enter memory number
>
Ring tone
Ring Tones
> Select a type Select a folder
Select a ringtone
Vibrator
Select vibrator
> Select a pattern
Notification
Light
Select illumination
> Select a pattern
Screen*
SEL picture
> Select a screen type Select a folder
Select an image
Still image saved for
Screen
appears for an incoming
call whether
Phone Book Image
is
ON
or
OFF
.
Phone Book Image
setting applies only when still
image is saved for
Image
.
Msg Ringtone
Ring Tones
> Select a type Select a folder
Select a ringtone
Msg Vibrator
Select vibrator
> Select a pattern
Msg Notif.
Light
Select illumination
> Select a pattern
Answer
message
Select answer message
> Select a message
* To cancel: Select
RLS picture
BEGIN_E_OI.indb 4 2009/12/14 16:28:28

Phone Book
4
4-5
4 [Finish]
Other Ways to Add New Entries
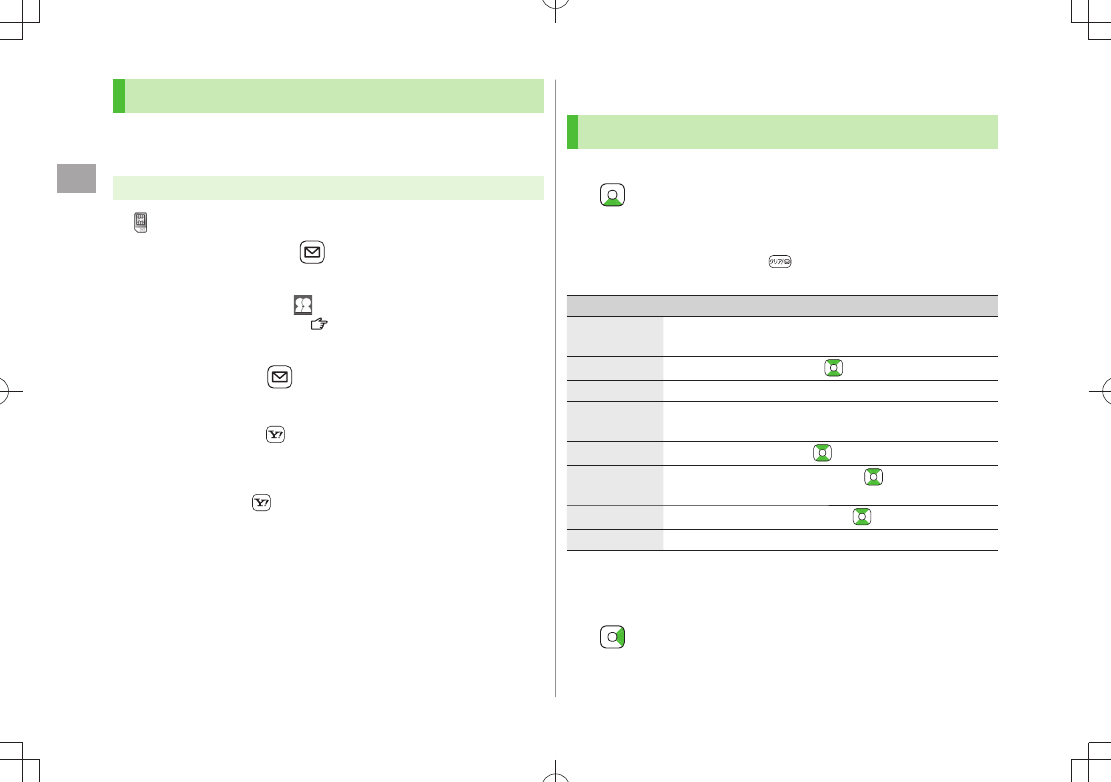
Save currently displayed phone numbers, mail addresses,
still images or location information to Phone Book.
Example: Saving Numbers from Incoming Call Logs
1 Highlight a record [Menu]
Add to Phone Book
2 New Entry
New
Enter details ( From Step 3 on P.4-4)
Add to Existing Entry
Add
Select entry Enter other details
(Step 3 on P.4-4)
When saving to USIM Card,
Overwrite
appears instead of
Add
.
3 When complete, [Finish]
YES
Note
Press
[Menu] from a function. If
Add to Phone Book
appears,
the information is savable to Phone Book. From a text message
window, select
Add Address
to save entries; from still image list/still
image, select
Set display
Phone Book
to save entries.
When adding still images or location information, entries are saved to
handset regardless of Save Settings.
When saving new entries in Secret Mode or Secret Data Only, entries
are saved to handset regardless of Save Settings.
BEGIN_E_OI.indb 5 2009/12/14 16:28:31
Phone Book
4
4-6
Setting Groups
Sort entries by Group. Custom set ringtones/vibrators/
notifications per group.
Main Menu Phone Book Group
appears for USIM Card Group.
1 Highlight a group [Edit] Select an item
Set item
Enter group name for "
Group name."
For other item operations:
P.4-4
Custom settings unavailable for USIM Card Groups.
2 When complete, [Finish]
Check Settings
■
Select a group entry, or
>[Menu]
Check setting
Settings cannot be checked in USIM Card Group Phone Book.
Reset Group Setting
■
Highlight a group
> [Menu]
Reset group
YES
Searching/Using Phone Book
Making Calls from Phone Book
<Default> A-KA-SA-TA-NA
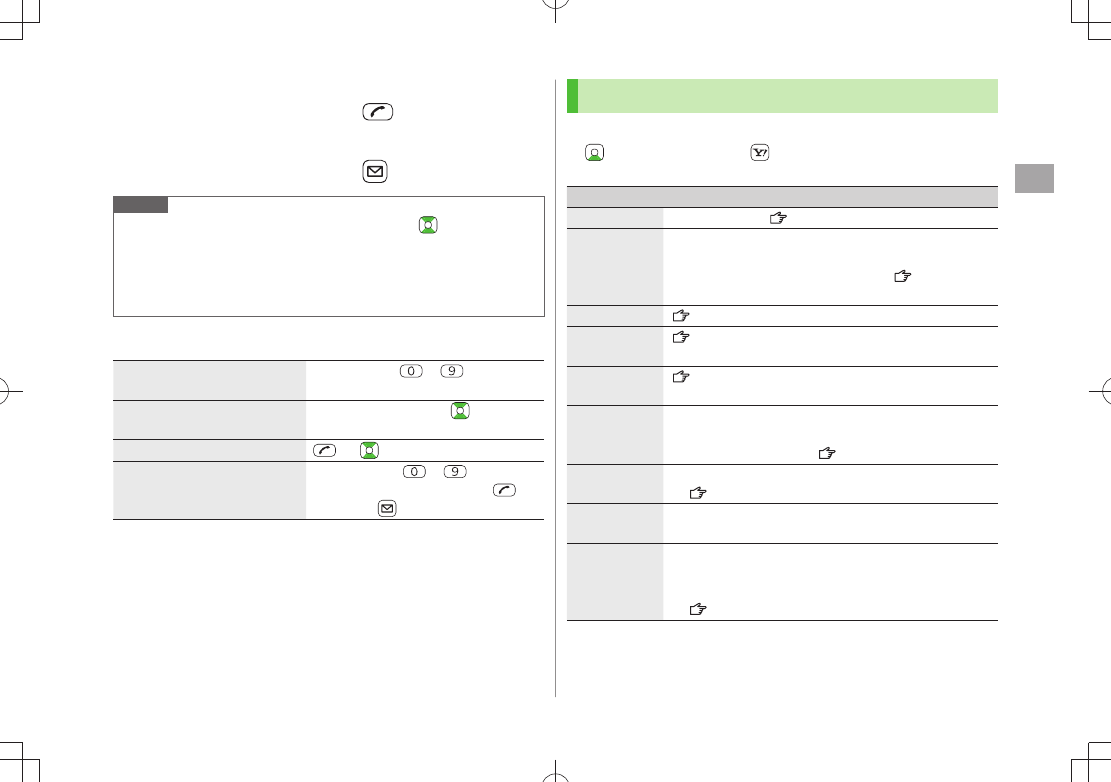
1
2 Search Phone Book (See below)
To change search method:
Select a search method
(See below)
Search Method Operation/Description
A-KA-SA-TA-
NA
Search entries by katakana syllabary. Names saved in
Roman characters are saved under the 英 tab.
Reading Enter partial reading
>
Group Select a group
>
Memory
Number*
Enter memory (entry) number to search for an entry
Enter a memory number
>
Name Enter partial name
>
Phone
Number
Enter partial phone number
>
Mail Address Enter partial mail address
>
2-touch Dial* Show entries with memory (entry) numbers 000 - 009
* 941P Phone Book only
3 Select an entry
4
BEGIN_E_OI.indb 6 2009/12/14 16:28:34
Phone Book
4
4-7
5 Voice Calls
Highlight a phone number
Video Calls
Highlight a phone number [V. Call]
Note
To scroll through entries, enter nothing and press
(not available in
Group
or
2-touch Dial
).
If no matches are found in
Reading
or
Memory Number
method,
entries closest to condition appear.
Once a method is selected, same method retains.
Additional Search/Dialing Methods
■
Open Tab Assigned to Key
from Standby
Press and hold –
Open search window assigned to key.
Enter Partial Number from
Standby or during Call
Enter partial number
By Memory Number Enter a memory number
By Single-digit Memory
Number (2-touch Dial)
Enter last digit ( – ) of memory
number 000-009 Voice Call: /
Video Call: [V. Call]
Using Phone Book
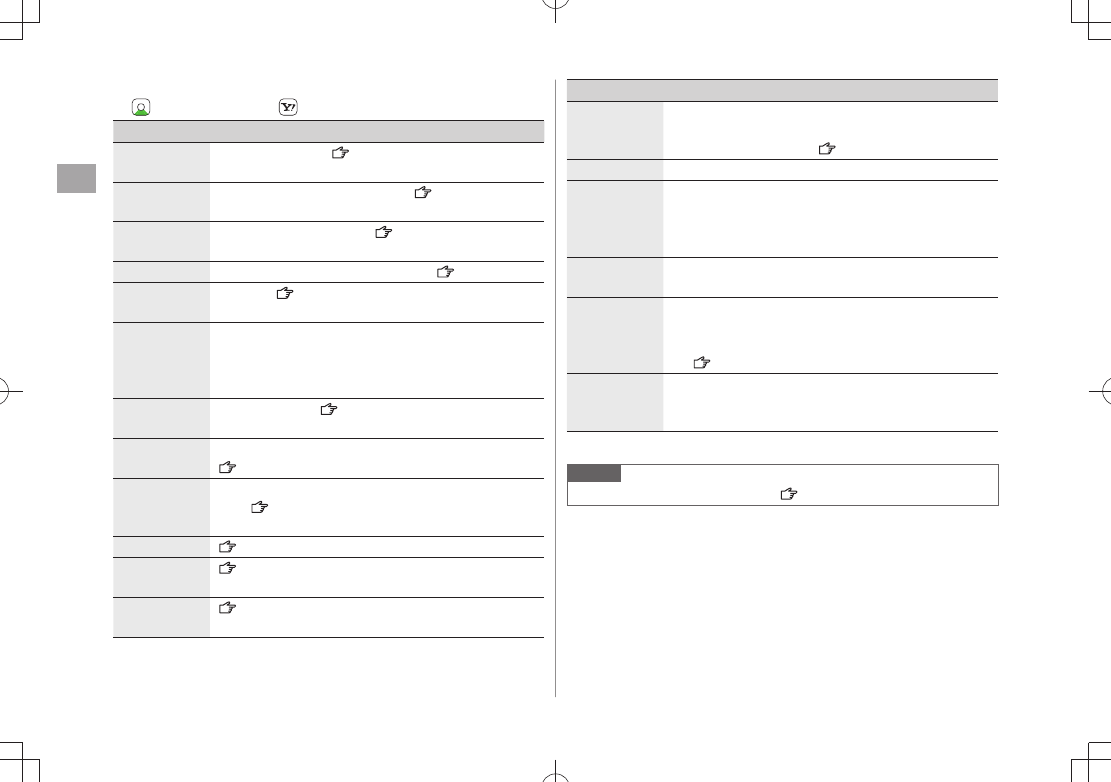
Use Phone Book Entries
■
> Highlight an entry [Menu] Select an item
(See below)
Item Operation/Description
New Add a new entry ( From Step 2 on P.4-3)
Sort Change display order
Select an order
>
Available only when search method (
P.4-6) is
Name
,
Phone Number
or
Mail
Address
.
Send Ir data*( P.10-3)
IC
transmission*
(P.10-5)
Send to
Bluetooth*
(P.10-9)
Copy to
microSD*
Copy an entry to microSD Card
YES
>
To display copied data:
P.9-18
Delete phone
book
Select an item
> Follow steps for selected option
(P.4-9)
Character
size
Switch character size to large/standard
Set secret
mode/
Release
secret*
Set/cancel Secret Mode for selected entry
Entries saved as secret data appear only when
Secret Mode
or
Secret Data Only
is active
(P.11-9).
* Not available in USIM Card Phone Book
BEGIN_E_OI.indb 7 2009/12/14 16:28:36
Phone Book
4
4-8
Use Entry Details
■
> Select an entry [Menu] Select an item (See below)
Item Operation/Description
Notify caller
ID
Show/hide caller ID ( P.2-3)
Prefix
numbers
Make a call using a prefix number ( P.2-3)
Int'l dial
assist
Set International dial assist ( P.2-10)
Restrictions* Activate restrictions on specified entry ( P.11-10)
Edit Phone
Book
Edit entry ( From Step 3 on P.4-4)
Delete phone
book
Phone number
> or
Delete this
YES
Item names vary by selected item:
Mail address
/
Address
/
Location info
/
Birthday
/
Memo
/
Image
Add shortcut
icon
Create a shortcut ( P.1-22)
Compose
S! Mail
Create a message to mail address of selected entry
(From Step 4 on P.13-4)
Compose
SMS
Create an SMS message to phone number of selected
entry ( From Step 4 on P.13-7)
Message can be sent to SoftBank handsets only.
Send Ir data*( P.10-3)
IC
transmission*
( P.10-5)
Send to
Bluetooth*
(P.10-9)
Item Operation/Description
Copy to
microSD*
Copy an entry to microSD Card
YES
>
To display copied data:
P.9-18
Copy names Copy a name
Copy phone
numbers
Copy an item
Item names vary by selected item.
Copy mail add.
/
Copy address
/
Copy location info
/
Copy birthday
/
Copy memo
Character
size
Switch character size to large/standard
Set secret
mode/
Release
secret*
Set/cancel Secret Mode for selected entry
Entries saved as secret data appear only when
Secret Mode
or
Secret Data Only
is active
( P.11-9).
Copy to USIM/
Copy from
USIM
Copy an entry to USIM Card
YES
>
* Not available in USIM Card Phone Book
Note
Insert entry details to a message (
P.3-5).
BEGIN_E_OI.indb 8 2009/12/14 16:28:36
Phone Book
4
4-9
Managing Phone Book
Editing Phone Book Entries
1 Select an entry [Edit]
2 Edit ( From Step 3 on P.4-4)
YES
Deleting Phone Book Entries
1 Highlight an entry [Menu]
Delete phone book
2 Select an item (See below)
Item Operation/Description
Delete this
YES
>
Delete select Check entries to delete
> [Finish]
YES
[Menu]
Select all in tab
*,
Select all
,
Release all in tab
* or
Release all
to check/uncheck
all entries at a time
Delete all in
tab*
YES
>
Delete all Delete all entries (941P/USIM Card Phone Book) including
Secret Mode entries
Enter Phone Password
>
YES
YES
* Available in
A-KA-SA-TA-NA
,
Reading
,
Group
and
Memory Number
search methods ( P.4-6)
Copying/Deleting Phone Book Data
Main Menu Phone Book Memory Manager
1 Enter Phone Password
2 Select an item (See below)
Item Operation/Description
Copy Copy data between 941P/USIM Card Phone Book
Copy to USIM
> or
Copy from USIM
Delete Delete data in 941P/USIM Card Phone Book
Phone
> or
USIM
3
Phone Book
Select an entry*
* To clear, repeat operation.
4 [Finish]
YES
BEGIN_E_OI.indb 9 2009/12/14 16:28:37

Phone Book
4
4-10
Phone Book Memory Status
Main Menu Phone Book Memory Status
View 941P/USIM Card Phone Book memory status.
S! Addressbook Back-up
Back up Phone Book entries to S! Addressbook (network
server); synchronize 941P Phone Book with S! Addressbook;
restore Phone Book after accidental loss/alteration.
Separate subscription is required for this service.
Notes
Fully charge battery beforehand (
appears).
Transmission fees apply to synchronization, backup and restoration.
Restoration cancels these Phone Book settings: Ringtone, Vibrator,
Notification Light, Picture, Answer message.
Subscription to the service activates Auto Sync Settings during network
information retrieval to back up edited Phone Book entries. Note that
initiating network information retrieval activates Auto Sync Settings even
when Auto Sync Settings are
OFF
. When contract is terminated, check if
Auto Sync Settings are
OFF
( P.4-12).
S! Addressbook is deleted upon contract termination.
Addresses saved in Address field on 941P Phone Book are
saved to building name field in S! Addressbook.
When number of characters saved in S! Addressbook exceeds
maximum number of characters savable on 941P Phone Book,
excess characters do not appear on 941P Phone Book.
BEGIN_E_OI.indb 10 2009/12/14 16:28:38
Phone Book
4
4-11
Synchronization/Back-up/Restoration
Be careful of back-up/restoration timing or selecting a synchronization
direction.
When no 941P Phone Book entries exist, selecting
Synchronize
,
Sync from Phone
or
Backup to Server
deletes S! Addressbook.
When no S! Addressbook entries exist, selecting
Synchronize
,
Sync from Server
or
Restore from Server
deletes all 941P Phone
Book entries.
Capacity Disparities
When the number of savable items varies between 941P Phone Book
and S! Addressbook, synchronization reflects lower limit.
Transfer to New Handsets
S! Addressbook Back-up-compatible 3G Handsets: Data remains.
Other 3G Handsets: Service subscription and data remains, but data is
not accessible via handset (accessible via PCs).
V3/V4/V5/V6/V8 Series: Service subscription is terminated and data is
deleted.
Manual Synchronization
Main Menu Phone Book S! Addressbook BkUp
Start Sync
1
YES
Enter Phone Password
2 Select an item (See below)
Item Operation/Description
Synchronize Synchronize 941P Phone Book with S! Addressbook
Sync from
Phone
Send edited data to S! Addressbook
Sync from
Server
Receive edited data from S! Addressbook
Backup to
Server
Back up 941P Phone Book to S! Addressbook
Restore from
Server
Restore S! Addressbook to 941P Phone Book
3
YES
OK
BEGIN_E_OI.indb 11 2009/12/14 16:28:38
Phone Book
4
4-12
Auto Synchronization
Main Menu Phone Book S! Addressbook BkUp
Auto Sync Settings ON/OFF
1 Enter Phone Password
ON
To cancel, select
OFF
2 Select an item (See below)
Item Operation/Description
Every week Synchronize weekly at specified time of the day
Select a day
> Set start time Select a sync type
Every month Synchronize monthly at specified time of the date
Enter a date
> Set start time Select a sync type
After Editing
PB
Synchronize ten minutes after entries are edited
Select a sync type
>
3
YES
View Auto Sync Settings
■
Main Menu
> Phone Book S! Addressbook BkUp
Auto Sync Settings Confirm Settings
Viewing Sync Log
View synchronization/back-up/restoration logs.
Main Menu Phone Book S! Addressbook BkUp
Sync Log
1 Select a log
Delete Sync Log
■
In Step 1, (highlight a log
>) [Menu]
Delete this
or
Delete all
( For
Delete all
, enter Phone Password)
YES
BEGIN_E_OI.indb 12 2009/12/14 16:28:38
Phone Book
4
4-13
Account Details
Save phone number, mail address, street address, etc. in
Account Details.
Editing Account Details
1
2 [Edit]
3 Enter Phone Password Edit [Finish]
Your subscribing phone number cannot be edited or deleted.
Account Details Functions
In Account Details, press [Menu] for following operations.
Item Operation/Description
Edit* Edit Account Details ( From Step 3 above)
Character
size
Switch character size to large/standard
Display all
data*
View all saved items such as phone numbers and mail
addresses
Copy names Copy a name
Copy phone
numbers
Copy an item
Item names vary by selected item.
Copy mail add.
/
Copy address
/
Copy birthday
/
Copy notepad
Item Operation/Description
Send Ir data Send details via Infrared ( P.10-3)
Alternatively, while Account Details is open, press
[Ir].
IC
transmission
Send details via IC transmission ( P.10-5)
Alternatively, while Account Details is open, press
[ICtrans].
Copy to
microSD
Copy details to microSD Card
YES
>
To display copied data:
P.9-18
Account Details is saved as a Phone Book entry.
Erase phone
number*
Select an item
>
YES
Delete items saved in Account Details
Item names vary by selected item.
Erase mail add.
/
Erase address
/
Erase birthday
/
Erase memorandums
/
Delete image
Reset* Reset all Account Details except your subscribing phone
number
YES
>
* Enter Phone Password if required.
Note
Quote a content from Account Details to a message (
P.3-5).
BEGIN_E_OI.indb 13 2009/12/14 16:28:39
Phone Book
4
4-14
Voice Dial
Make a call by saying a voice dial name.
Note
Keep microphone about 10 cm away from your mouth, and pronounce
a Voice Dial name clearly. If microphone is too distant, your voice may
not be recognized.
Avoid making sounds unrelated to Voice Dial names (clearing your
throat, clicking your tongue, heavy breathing, etc.).
Say Voice Dial names in quiet places.
Avoid pressing or brushing keys, or covering microphone with fingers
when pronouncing a Voice Dial name.
Adding Entries to Voice Dial
Main Menu Phone Book Settings Voice Dial
1
<New>
Select a Phone Book entry
Entries with ★ are already saved in Voice Dial list.
2 Enter a Voice Dial name
Only katakana entry is available for Voice Dial names.
Edit Voice Dial Names
■
In Step 1, highlight a Voice Dial name
> [Edit] Edit name
YES
Delete Voice Dial Entries
■
In Step 1, (highlight a Voice Dial name
>) [Menu]
Delete this
or
Delete all
YES
Searching Entries by Voice Dial
1 Press and hold Say a Voice Dial name
Say the name within four seconds after voice recognition tone sounds.
Once Voice Dial is recognized, result appears.
2 [Detail] to show phone number
3 Voice Calls
Highlight phone number
Video Calls
Highlight phone number [V. Call]
Tip
Settings
●Activate Voice Dial Automatically ●Activate Voice Dial via
Earphone or Bluetooth® Device ( P.18-11)
BEGIN_E_OI.indb 14 2009/12/14 16:28:40
5
5-1
Digital TV
Basics .................................................................... 5-2
Initial Setup .......................................................... 5-4
Channel Settings ........................................................................5-4
Watching TV .......................................................... 5-5
Indicators ................................................................................... 5-6
Operations while Viewing TV.......................................................5-7
Program List (Japanese) ..............................................................5-7
Data Broadcast (Japanese) ..........................................................5-7
Functions while Viewing TV.........................................................5-8
TV Links (Japanese) ............................................ 5-11
Saving TV Links ........................................................................5-11
Opening TV Links ......................................................................5-11
Functions Available in TV Link List .............................................5-11
Recording/Playing Programs .............................. 5-12
Recording Current Program.......................................................5-12
Capturing Screenshots ..............................................................5-12
Playing Recorded Programs.......................................................5-13
Viewing Captured Screenshots ..................................................5-14
Timer........................................................................................5-14
BEGIN_E_OI.indb 1 2009/12/14 16:28:41
Digital TV
5-2
5
Basics
941P supports One Seg terrestrial digital TV broadcasting.
One Seg
One Seg is a digital TV broadcasting service for mobile phones.
For more information, visit The Association for Promotion of Digital
Broadcasting Website:
[PC] http://www.dpa.or.jp/
[Handset] http://www.dpa.or.jp/1seg/k/
(Japanese only)
Features
Watch TV Programs
(P.5-5)
Watch One Seg Digital TV on handset.
View Data Broadcast
(P.5-7)
Access a variety of program-related
information.
Record TV Programs
(P.5-12)
Record program/capture still image while
watching the program.
Set Timer
(P.5-14)
Use Timer to view/record programs. You can easily
set Timer by using Program List ( P.5-7).
Mobile W-Speed
Frame rate of Digital TV images are automatically enhanced. Enjoy
smooth image flow ( P.18-14).
Mobile W-Speed is set to
ON
by default.
When this function is set to
ON
, full effect of
Image Quality
may not
be achieved.
Depending on broadcasting condition, full effect of this function may
not be achieved.
Disabled during ECO Mode (
P.18-14) or AV output ( P.10-13).
Disabled for playing back videos recorded with Mobile W-Speed set to
ON
.
Precautions
Digital TV is available only in Japan.
Incoming calls/messages may affect TV image or audio quality while TV is
activated.
Digital TV may be disabled if USIM Card is not installed or SoftBank
subscription is terminated.
SoftBank is not liable for damages from accidental loss/alteration of
handset/microSD Card information.
Data saved to handset (TV Links, Channel List, etc.) cannot be restored
after repairs or handset replacement. Back up important information.
BEGIN_E_OI.indb 2 2009/12/14 16:28:42

Digital TV
5-3
5
Signal Reception Areas
TV signal reception may be poor in the following conditions:
Too far from or close to broadcasting stations.
Mountain areas or near tall buildings.
In moving vehicles, underground, in tunnels, etc.
Near high-voltage wires, neon lights, wireless base stations, railroad
tracks or highways.
Areas with numerous signal obstructions or areas where signal
reception is blocked.
When Battery is Running Out
Warning tone sounds and warning message appears if Digital TV is
activated with low battery.
When battery runs low while programs are on or being recorded,
handset operates as follows:
While Viewing
・
Warning tone sounds, and confirmation appears.
While Recording
・
Response differs depending on
Rec. When Low Battery
(P.18-14) setting.
Continue Recording
... Warning tone does not sound and
confirmation does not appear.
Stop Recording
...
Warning tone sounds and confirmation appears.
Watching TV while charging may shorten battery life.
If recording ends due to low battery, recorded portion is automatically
saved.
Incoming Transmissions
TV pauses for incoming calls. Resume TV after call ends.
Incoming calls do not interfere with recording.
Tip
●Use Other Functions while Viewing TV ( P.5-8)
BEGIN_E_OI.indb 3 2009/12/14 16:28:42
Digital TV
5-4
5
Initial Setup
Set channels for your area.
Up to ten Channel Lists can be saved.
Main Menu TV Channel Setting Select Area
1 Select a region Select a prefecture
2
YES
Note
If manual setup fails, try automatic channel setup (
Below).
941P detects a change in reception area after moving to a different
area. Set Channel List for that area.
Channel Settings
Automatic Channel Setup
Main Menu TV Channel Setting Automatic
1
YES
2 After channel search,
YES
Enter title
If title is not entered, date (year/month/day/hour/minute) is
automatically saved as title.
Using Channel List
From Main Menu TV Channel List
Set Channels
■
Select a Channel List
>
Channel List is set, and available channels appear.
Select a channel to access the station.
Delete Channel List
■
Highlight a Channel List
> [Menu]
Delete
YES
Selected Channel List cannot be deleted.
Delete Channels from Channel List
■
Highlight a Channel List
> [Detail] Highlight a channel
[Menu]
Delete
YES
Channels in selected Channel List cannot be deleted.
Edit Title
■
Highlight a Channel List
> [Menu]
Edit title
Edit
Reassign a Remote Control Number (Keypad) to a
■
Channel
Highlight a Channel List
> [Detail] [Menu]
Remote control
#
Select a channel Select a new remote control
number [Finish]
YES
BEGIN_E_OI.indb 4 2009/12/14 16:28:45
Digital TV
5-5
5
Watching TV
Set channels beforehand (
P.5-4).
Horizontal Open Position (
P.1-7, P.1-8)
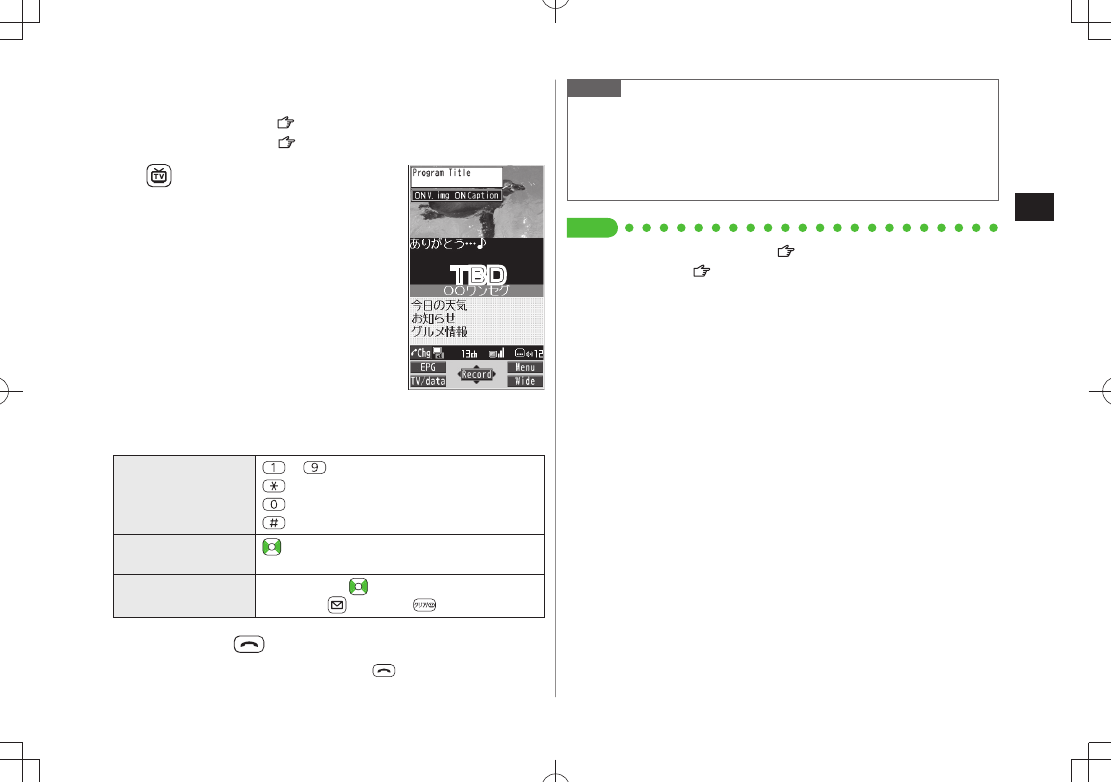
1
2 Select a channel
Direct Channel
Access
–
(Channel 10)
(Channel 11)
(Channel 12)
Previous/
Next Channel
Channel Search Press and hold
To stop:
[Cancel] /
3 To end TV,
End TV
To play TV sound in the background:
Change to BGM
Viewer
Note
Alternatively,
Main Menu TV Watch TV
Closing handset while viewing TV shows still image in External Display
(not video image and data broadcasting). When TV Sound While Closed
is
ON
, sound is heard but operations except volume adjustment are
unavailable.
Tip
●Display Digital TV Images on a TV ( P.10-13) ●Use Bluetooth® Device
for Wireless Playback ( P.10-10)
TBD
BEGIN_E_OI.indb 5 2009/12/14 16:28:53
5-6
Digital TV
5
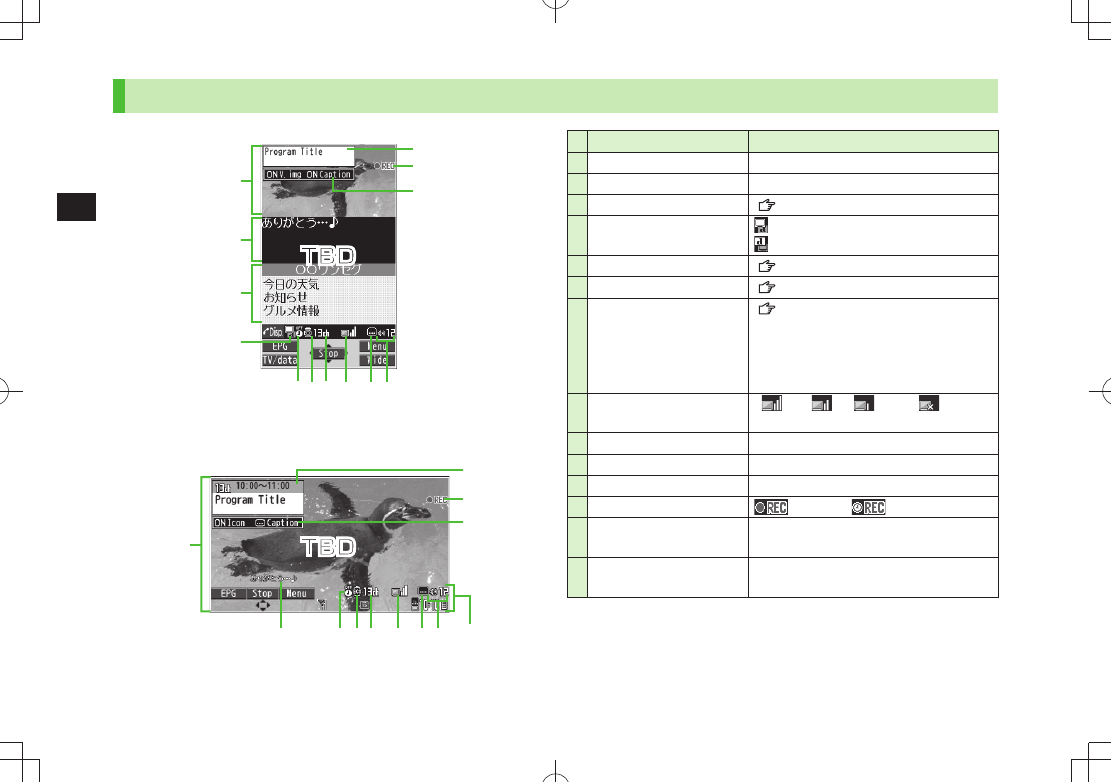
Indicators
❶
❷
❸
❺❻❼ ❽ ❾
❹
❶
❾ Guide Display
❷❼❽❺ ❻
Item Description
●❶Image –
●❷Captions –
●❸Data Broadcast ( P.5-7)
●❹Data Broadcast Mode Data Broadcast Mode off
Data Broadcast Mode on
●❺Off timer ( P.5-10)
●❻ECO Mode ( P.18-14)
●❼Channel ( P.5-4)
When multiple programs are available
in the same broadcasting station,
"service number/total numbers"
appears.
●❽Signal Strength Level
Strong←――→Weak Out of range
●❾Receiving Captions –
●Volume –
●Program Title –
●Recorder Status
Recording Timer Set
●Display/Caption Display: ON/OFF/Large
Caption: ON/OFF
●Indicator/Caption Indicators: ON/OFF
Caption: Upper position/Lower position/OFF
TBD
TBD
BEGIN_E_OI.indb 6 2009/12/14 16:28:56
Digital TV
5-7
5
Operations while Viewing TV
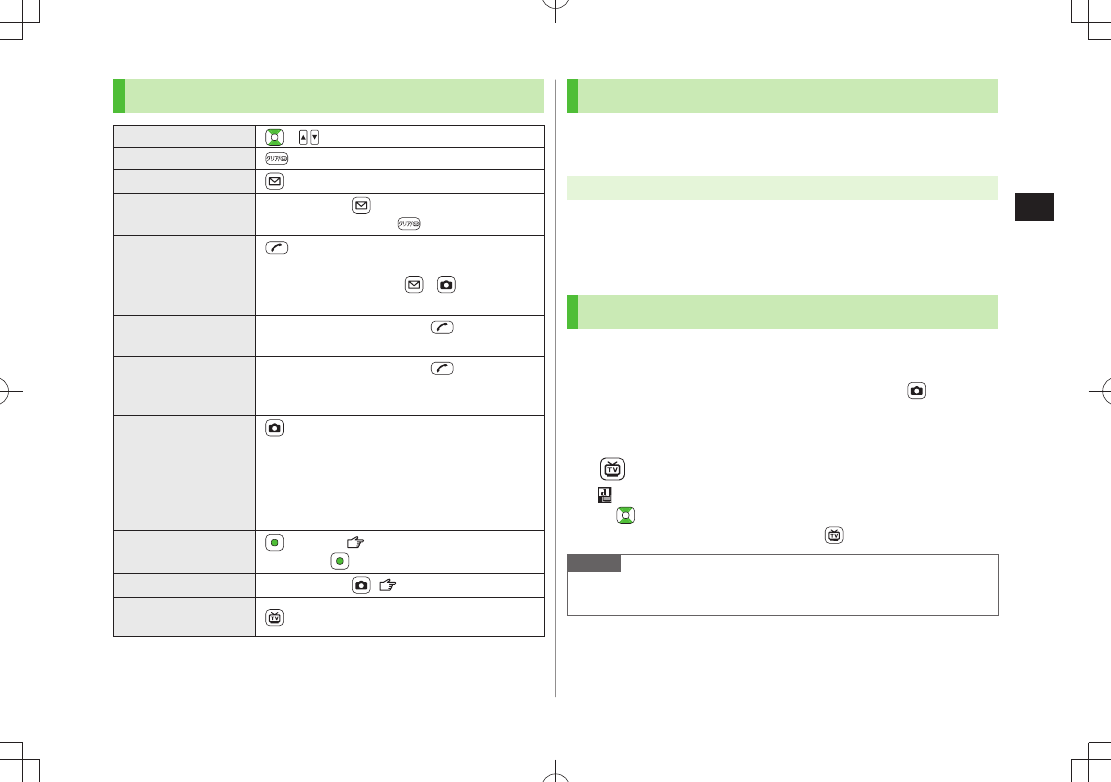
Volume 1/
Mute/Cancel Mute 1
Program List [EPG]
Program Info Press and hold
To return to Viewer:
Program Title Alternatively, in Landscape View (Normal
Open Position), press , ( in Horizontal
Open Position)
Display/Caption
View 2
While Program Title appears:
Each key press toggles display and caption views.
Indicator/
Caption View 3
While Program Title appears:
Each key press toggles indicators (icons) on/
off and caption view (in Landscape View).
Display View
Each key press toggles display direction
(Broadcast Mode off).
Each key press toggles full/normal display
(Broadcast Mode on).
Not available in Horizontal Open Position
Record Programs 1[Record] ( P.5-12)
To stop:
[Stop]
Capture Still Images
1
Press and hold ( P.5-12)
Data Broadcast
Mode On/Off 2[TV/data]
1 Available when Data Broadcast Mode is off
2 Available only in Portrait View
3 Available only in Landscape View
Program List (Japanese)
Check program schedules and set timer to view/record TV
programs.
Main Menu TV Program List
Confirmation appears when using Program List for first time. Follow
onscreen instructions.
See Program List Help menu for usage information.
Data Broadcast (Japanese)
Access a variety of program-related information such as still
images and videos.
Data Broadcast is not available in Landscape View. Press
to switch to
Portrait View.
1 Activate TV (Data Broadcast Mode off)
[TV/data]
appears.
to select information
To deactivate Data Broadcast Mode:
[TV/data]
Note
Viewing Data Broadcast information requires no fees: however,
accessing websites will incur connection fees.
BEGIN_E_OI.indb 7 2009/12/14 16:29:01
Digital TV
5-8
5
Functions while Viewing TV
Sound Settings
■
While TV is active,
>[Menu]
Settings
Sound
Sound Effect
Select an item (See below)
Item Operation/Description
Auto Volume Automatically increase to optimum volume
ON
> or
OFF
Remaster Adjust sound quality to reproduce original sound
ON
> or
OFF
Listening Adjust to natural sound when using earphone or
Bluetooth® device
Select an item
>
Surround
・ : Reproduce natural and stereophonic
sound
Natur 1
・ or
Natur 2
: Complement sound specific to
earphone to reproduce natural sound
OFF
・ : Turn off Listening setting
Equalizer Change sound quality when using earphone or Bluetooth®
device
Select an item
>
Normal
・ : Reproduce normal sound
H. BASS1
・ : Enhance low-pitched sound
H. BASS2
・ : Enhance low-pitched sound even more
Voice
・ : Make voice clear
Train
・ : Minimize sound leakage
Other Functions
■
While TV is active, follow the steps below.
>
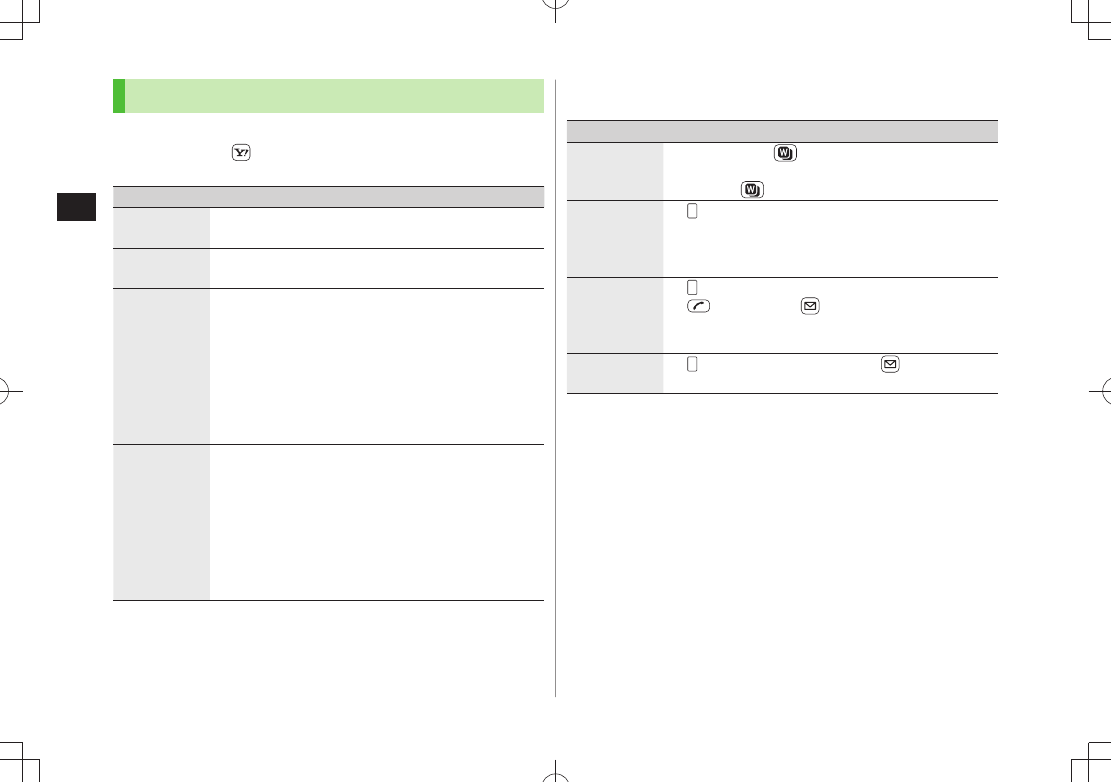
Item Operation/Description
Access
Internet via
Yahoo! Keitai
Press and hold
>
To return to viewer: While Yahoo! Keitai is active, press
and hold
Access
Internet via
PC Site
Browser
>(MULTI)
Open Menu
Yahoo! Keitai
PC Site Browser
Follow onscreen instructions
Make a Voice
Call/Video
Call
>(MULTI)
Stand-by display
Enter a number
(For Video Call, [V. Call])
Interrupt TV during call. After call, TV resumes.
Recording will not be interrupted.
Use
Messaging
>(MULTI)
Stand-by display
BEGIN_E_OI.indb 8 2009/12/14 16:29:02

Digital TV
5-9
5
Functions Available while Viewing TV
■
While TV is active,
>[Menu] Select an item (See below)
Item Operation/Description
Program info View current program information
Program list
View Program List
Disp.Ch./
operation 1
Select an item
>
Channel info
・ : View channel details. Select a
channel to watch that Station
Channel List
・ : View Channel List ( P.5-4)
Channel Setting
・ : Set channels for your area
(P.5-4)
Add to ch. list
・ : Add current station to Channel
List. Assign current station to lowest available
number key.
Tune service
・ : Select a program when multiple
programs are available from the same broadcasting
company
Item Operation/Description
Data
Broadcasting
1
Select an item
>
Back to data BC
・
: End Data Broadcast site and return
to Data Broadcast window
Reload contents
・
: Reload page (Data Broadcast link)
Certificate
・
: View owner, author, validity period and
serial number of certificate used in SSL communication
Images
・ 2: Show/hide images on Data Broadcast
sites
Sound Effect
・ 2: Turn on/off sounds from Data
Broadcast/sites
Reset Settings
・ 2: Show confirmation on Data
Broadcast
TV link list 1Show TV Link details
Compose
S! Mail
Create S! Mail while listening to sound ( From Step 2
on P.13-4)
Next Page
BEGIN_E_OI.indb 9 2009/12/14 16:29:05
Digital TV
5-10
5
Item Operation/Description
Settings Select an item
>
Display/operation
・
Switch display
1: Switch
view (switch image size/image off)
Display/operation
・
Switch TV/data BC
1:
In Portrait View, toggle Data Broadcast Mode on/off
(P.5-7)
Display/operation
・
Icons
2: Set Guide Display
in Landscape View
Display/operation
・
AV output
: View a Digital
TV image on a TV set or other devices ( P.10-13)
Video
・
Brightness
: Set Back Light brightness
Video
・
Mobile W-Speed
2: Enhance frame rate
of TV images automatically
Video
・
Image Quality
2: Select an image quality
Video
・
LCD AI
: Activate image compensation
according to Back Light
Sound
・
Sound Effect
2 ( P.5-8)
Sound
・
Main/sub sound
: Set main/sub sound
Sound
・
Switch audio data
: Available only
when multiple audio data are supported
Sound
・
TV Sound W/ Closed
2: Set whether to
keep speaker on when closing 941P while viewing
TV
ECO Mode
・ 2: Set power saving mode ( P.18-14)
Off timer
・ : When set time passes, confirmation
appears asking whether to end viewing/recording
TV
Item Operation/Description
Key guide View key operation guide while watching TV
1 Available only in Portrait View
2 Available from User Settings even while TV is not active ( P.18-14).
BEGIN_E_OI.indb 10 2009/12/14 16:29:05
Digital TV
5-11
5
TV Links (Japanese)
Saving TV Links
Following function is not available in Landscape View.
1 Switch Data Broadcast Mode on Select a link
2
YES
Follow onscreen instructions to save link.
Opening TV Links
Main Menu TV TV Link
1 Select a TV Link
Confirmation appears when Internet access is required. Select
YES
to proceed.
If TV Link is expired, confirmation appears asking whether to delete
link.
Functions Available in TV Link List
Main Menu TV TV Link
1 [Menu] Select an item (See below)
Item Operation/Description
Display detail Show TV Link title, URL, summary, content type, expiration
date
No. of TVlink Show number of saved TV Links
Delete Select an item
>
Delete this
・
YES
Delete selected
・ Check TV link(s) to delete
[Finish]
YES
Delete all
・ Enter Phone Password
YES
BEGIN_E_OI.indb 11 2009/12/14 16:29:05
Digital TV
5-12
5
Recording/Playing Programs
Recording Current Program
Save programs as videos or still images.
Recordings are saved to microSD Card.
microSD Card:
P.9-16
Save up to 2GB of data at a time.
Recording Time (total)*
Approx. 640 minutes
Savable Files 99 files
* Average recordable time per 2GB of data
Recording is unavailable when signal strength drops to
.
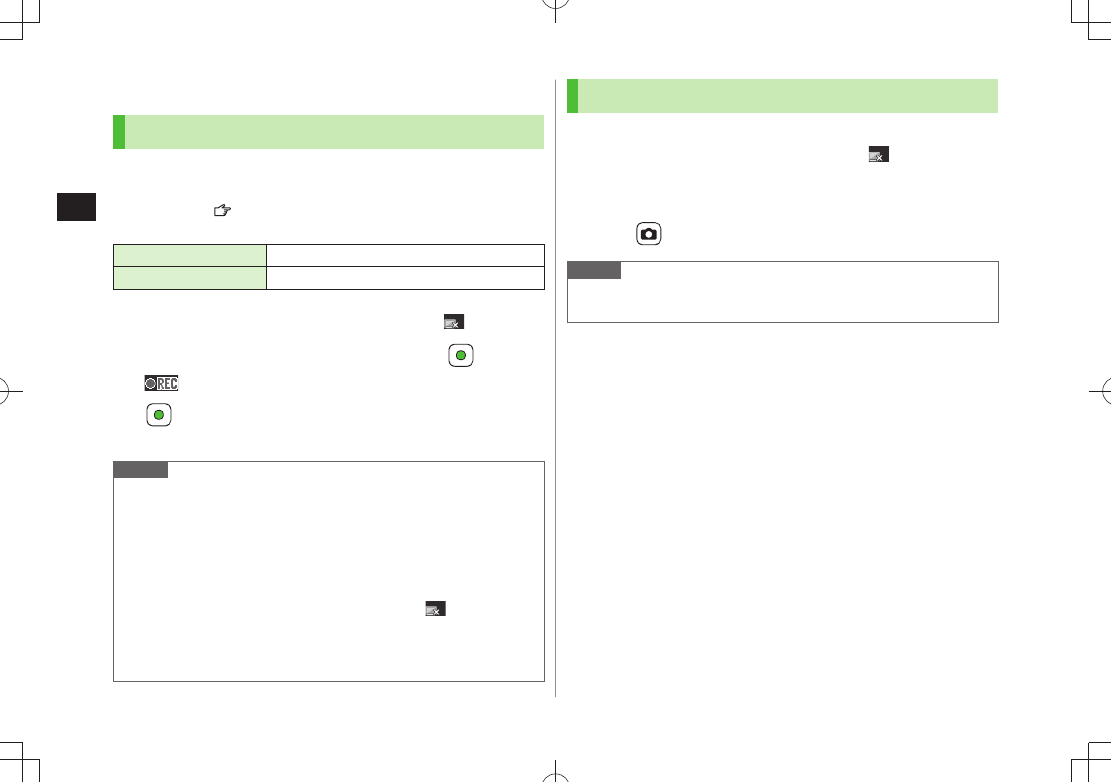
1 Activate TV (Data Broadcast Mode off) [Record]
appears, and recording starts.
2 [Stop] to stop recording
Program is saved to microSD Card.
Note
In the following cases, recording ends and recorded portion is
automatically saved:
File size is over 2GB
・
microSD Card memory is full
・
Recorded files are not saved to handset.
Do not remove microSD Card while recording.
Recording continues even if signal strength level is
; however,
images and audio are not saved.
Data Broadcast information cannot be recorded.
Recording is disabled during AV output.
Capturing Screenshots
Captured screenshots are saved to handset.
This feature is unavailable when signal strength is
or Data Broadcast
Mode is on.
1 Activate TV (Data Broadcast Mode off) press and
hold
Note
Captions cannot be captured.
Capturing is disabled during AV output.
BEGIN_E_OI.indb 12 2009/12/14 16:29:06
Digital TV
5-13
5
Playing Recorded Programs
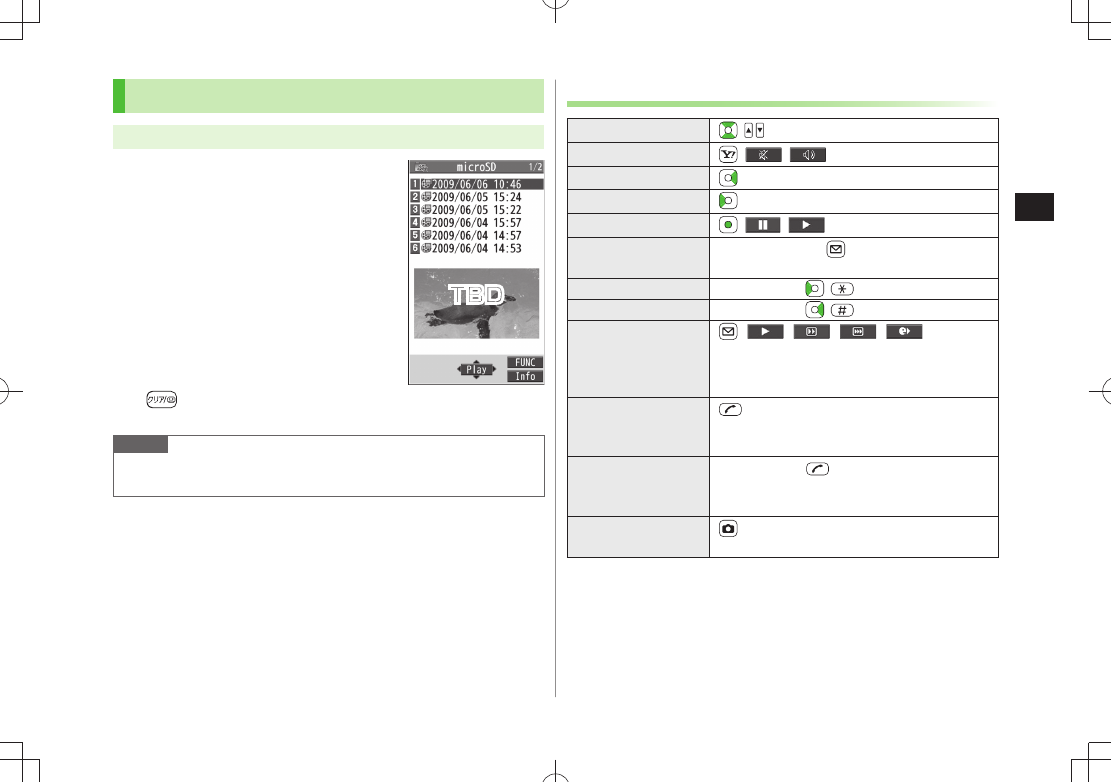
Main Menu Data Folder TV Video
1 Select a file
Playback starts.
2 to stop playback
Note
Closing handset while watching TV shows landscape view in External
Display.
Example: Video
Folder
Playback Operations
Volume /
Mute/Cancel Mute [ / ]
Fast Forward (Press once: 10x; Press twice: 30x)
Fast Rewind (Press once: 10x; Press twice: 30x)
Pause/Resume [ / ]
Play Frame by
Frame
Pause playback [Frame]
Play back frame by frame.
Skip Rewind 1Press and hold /
Skip Forward 2Press and hold /
Toggle Playback
Speed
[ / / / (Summary
View)]
Summary View adjusts playback speed
according to audio.
View Title In Landscape View, indicator/caption setting
display appears.
Toggle Caption
Display title
In Landscape View, each key press toggles
indicators (icons) and captions on/off.
Portrait/Landscape
View 3 4Each key press switches view.
1 Unavailable if file is under 10 seconds long
2 Unavailable if file is under 30 seconds long
3 Close handset to return to Portrait View.
4 Disabled in Horizontal Open Position
TBD
BEGIN_E_OI.indb 13 2009/12/14 16:29:10
Digital TV
5-14
5
Viewing Captured Screenshots
Main Menu Data Folder TV Image
1 Select an image
Timer
Set up to 100 timer entries to watch or record programs.
Main Menu TV
1
Timer Watching
or
Timer Recording
2 [New] Select an item (See below)
Item Operation/Description
Start date
setting
Set date and time to start and end viewing/recording a
program
Select an item
>
Enter date
・ Enter a date and time
Choose date
・ Select a date Enter date and
time
End date
setting 1
Channel Select a channel
>
Edit title Enter a program name
>
Repeat Select a repetition
> For
Select day
, select a day (days)
[Finish]
Alarm (Alarm
notice) 2
ON
> or
ON/Set time
For
ON/Set time
, select an
alarm time
Item Operation/Description
Alarm tone 2Select an alarm type
> Select a folder Select an
alarm
Alarms (Alarm
on/off)
1
ON
> or
OFF
Alarms (Alarm
volume)
> to adjust volume
For
Timer Recording
, Escalating Tone cannot be set.
Activate TV
w/ alarm 2
ON
> or
OFF
When
ON
is set, Digital TV activates from alarm
notification window.
Priority 1Set handset response when Timer Recording starts
Recording
> or
Operation
When
Recording
is set, active function suspends/
ends, and recording starts.
When
Operation
is set, confirmation appears.
To suspend/end active function, select
YES
and to
start recording.
1 Timer Recording only
2 Timer Watching only
3 [Finish] For
Timer Recording
, select
YES
or
YES
(confirm once)
BEGIN_E_OI.indb 14 2009/12/14 16:29:10
Digital TV
5-15
5
Note
Select timer entries to check details;
[Edit] to edit details.
Timer Recording does not start if Internet and two other functions are
active simultaneously.
Alarm does not sound for Timer Watching/Timer Recording in following
functions. For Timer Recording, complete followings (in parentheses)
one minute before timer starts; otherwise, recording does not start.
While handset is off (Turn on handset)
・
While Privacy Key Lock is active (Cancel lock)
・
While Personal Data Lock is active (Cancel/change lock)
・
During data transfer (Complete transfer)
・
During Infrared transmission, IC transmission or Bluetooth
・ ®
transmission (Complete transmission)
During software update (Complete update)
・
Other Timer Operations
Main Menu TV
1
Timer Watching
or
Timer Recording
2 [Menu] Select an item (See below)
Item Operation/Description
New Set a timer entry to watch/record a program ( P.5-14)
Edit Edit entry details ( P.5-14)
Sort Sort timer entries
Select an order
>
Delete this
YES
>
Delete past Timer entries with start/end time set prior to current date/
time are deleted
YES
>
Delete
selected
Check timer entries to delete
> [Finish]
YES
Delete all Enter Phone Password
>
YES
Memory
Status*
Show memory status
* Timer Recording only
Checking Timer Recording Results
Main Menu TV
1
Recording Result
Select a result
Details appear.
BEGIN_E_OI.indb 15 2009/12/14 16:29:11

5-16
Digital TV
5
BEGIN_E_OI.indb 16 2009/12/14 16:29:11
6
6-1
Camera
Before Using Camera ............................................ 6-2
Image File Formats .....................................................................6-2
Notes ......................................................................................... 6-2
Inside & Outside Camera ............................................................6-3
Camera Display Indicators ...........................................................6-4
Pictures/Videos ..................................................... 6-6
Capturing Still Images (Camera Mode) ........................................6-6
Recording Videos (Video Camera Mode) ......................................6-7
Functions Available while Shooting .............................................6-7
Focus Functions (Outside Camera) ..................... 6-12
Changing Focus Settings ...........................................................6-12
Auto Focus Lock .......................................................................6-12
Viewing Saved Images ....................................... 6-13
BEGIN_E_OI.indb 1 2009/12/14 16:29:11
Camera
6-2
6
Before Using Camera
941P features approximately 8.1 Mega Pixel CMOS
Auto-focus Camera capable of capturing still images and
videos.
Image File Formats
Still images/videos are saved to Data Folder.
Image Type File Format Save Location
Still images JPEG (.jpg) Camera folder in Pictures folder
Videos MPEG-4 (.3gp),
ASF (.asf) Camera folder in Videos folder
To save to microSD Card (Storage setting:
P.6-11)
Notes
Remove dust/debris from lens cover with a soft cloth.
Handset movement may blur images especially in dark places; hold
handset firmly.
Capturing/saving images immediately after handset has been left in a
hot place may affect image quality.
Exposing lens to direct sunlight may affect image quality.
While Camera is active, Photo light illuminates/flashes. When Inside
Camera is used, Notification Light/Charging Indicator flashes.
Illuminating/flashing cannot be turned off.
Shutter Click
Shutter click sounds at fixed volume even in Manner Mode.
To change shutter click sound:
P.6-11
BEGIN_E_OI.indb 2 2009/12/14 16:29:13
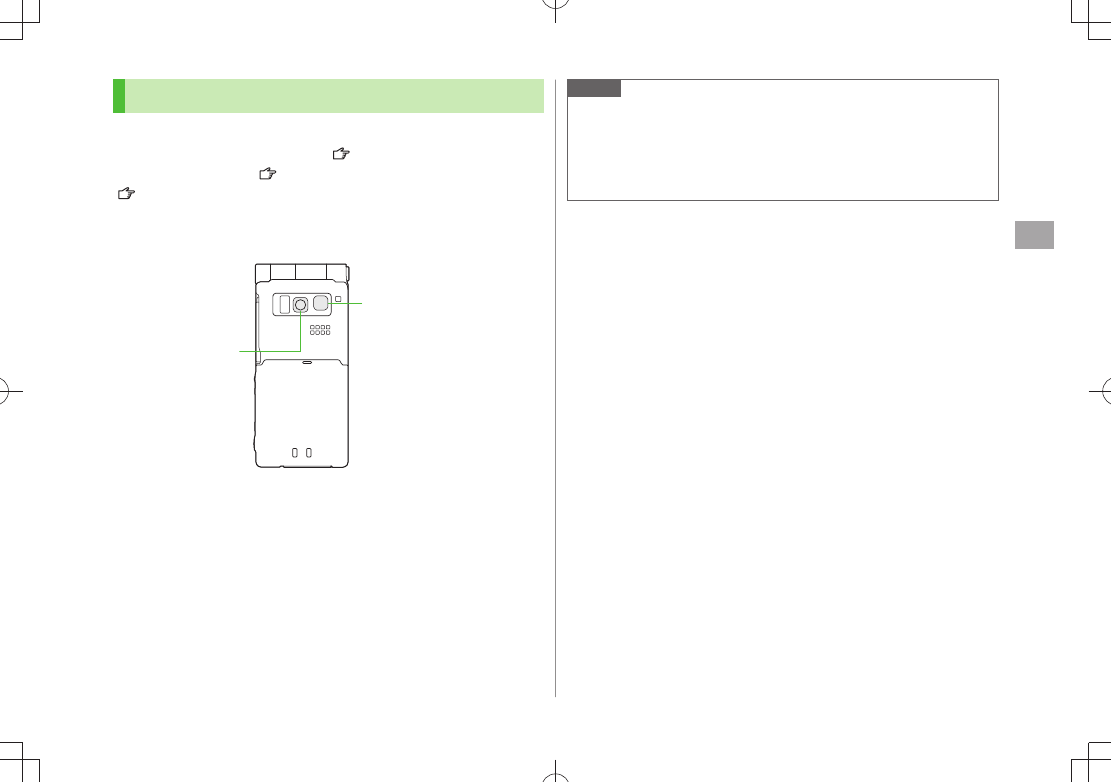
Camera
6-3
6
Inside & Outside Camera
Use Inside or Outside Camera. Still images can also be
captured with handset closed ( P.6-7). With Outside
Camera, auto focus ( P.6-13) and image stabilizer
(P.6-11) are available.
Change settings by using either function menus or key
operations.
Camera
Flash/Photo light
Note
Camera is not available when battery is low.
Incoming calls, Alarm and low battery cancel Camera. Captured images/
recorded videos are retained. Save data when Camera restarts.
When left in Viewfinder for three minutes, Camera is canceled and
previous window returns.
BEGIN_E_OI.indb 3 2009/12/14 16:29:14
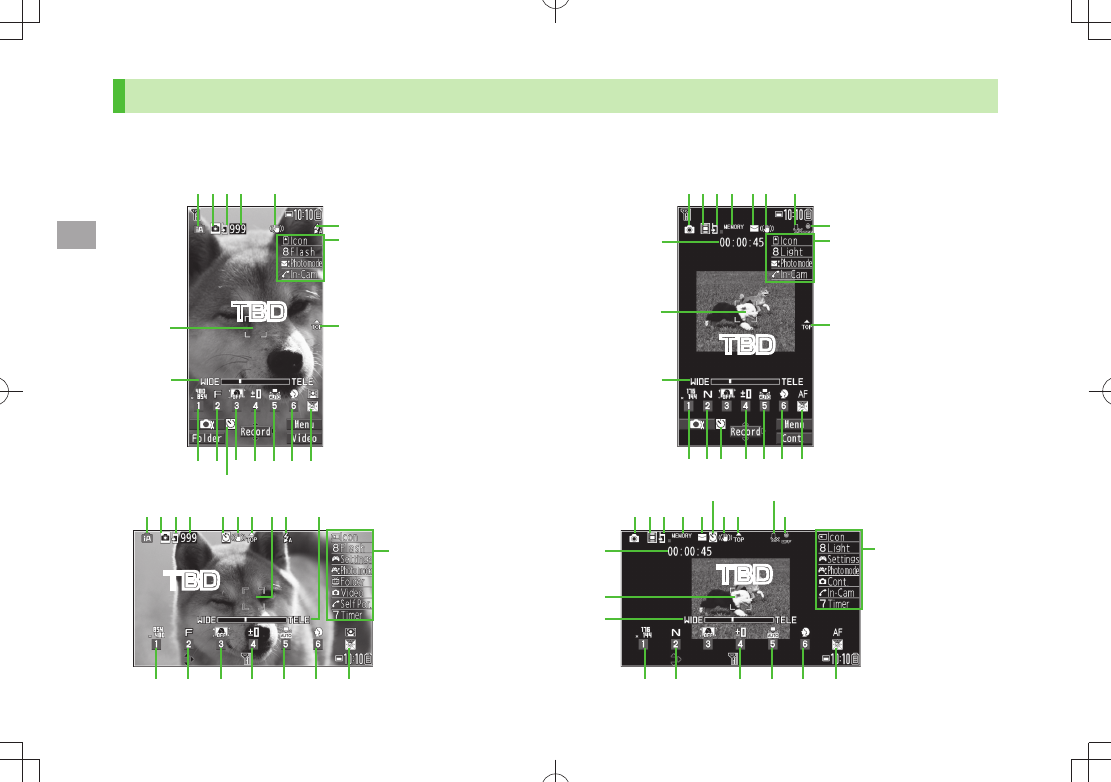
6-4
Camera
6
Camera Display Indicators
Images shown below are for reference only.
■Picture Viewfinder
■Video Viewfinder
❶❺
❻
❾
❸❹
❼
❽
❷
❾
❻
❼
❽❺
❸❹❷❶
❽
❾
❷❸ ❺
❻
❶
❼
❸❺
❾
❷❶
❼
❽
❻
TBD
TBD
TBD
TBD
BEGIN_E_OI.indb 4 2009/12/14 16:29:19
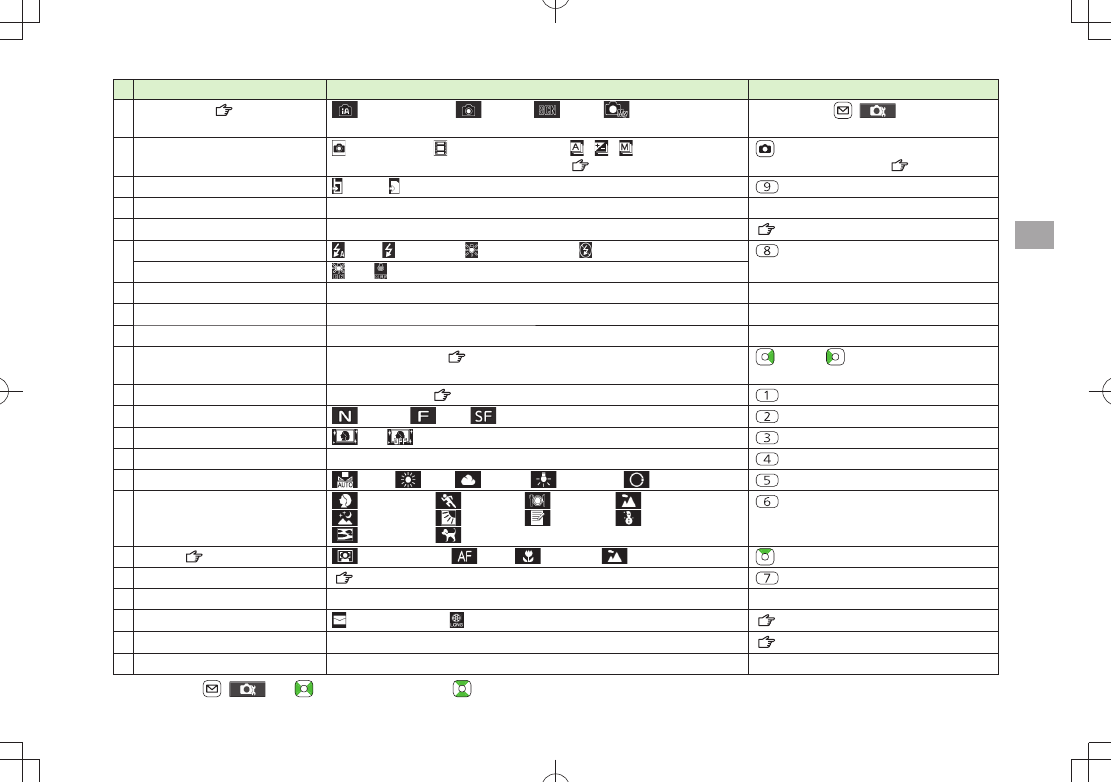
6-5
Camera
6
Item Description Operation
❶Photo mode ( P.6-10) Intelligent Auto Normal Scene My original set.
For Scene/My original set., indicators may vary depending on setting.
Press and hold [ ]
Select a mode
( For Scene/My original set., select an item)
❷CHG Camera-mode
Camera mode Video Camera mode / / Action mode (Auto/
Auto bracket/Manual) (Cont. shooting set.: P.6-8)
[Video/Cont./Camera]
Toggle Action mode (
P.6-11)
❸Storage setting Phone microSD Card
❹No. of frames Show number of remaining frames —
❺Img. stabilizer Correct camera shake ( P.6-11)
❻Flash setting (Still image) Auto Forced ON Always light ON Forced OFF
Photo light setting (Action/Video)
ON OFF
❼Key Guidance Show key operation guidance —
❽Top indicator Indicate vertical direction —
❾Focus Guide Adjust focus automatically —
Zoom bar Indicate zoom level ( P.6-9) zoom in/ zoom out
Long press: continuous zoom
Image size* Show image size ( P.6-9)
Select a size
Image quality* Normal Fine Super fine
Select a mode
High sensitiv.* ON OFF
Select ON/OFF
Brightness* Adjust brightness (Level -3 to +3)
Select a level
White balance* Auto Fine Cloudy Light bulb Fluorescent light
Select a mode
Scene*
Portrait
Sports
Food
Scenery
Night mode
Backlight
Character
Snow
Sunset
Pet
Select a scene
Focus* ( P.6-13) Face Detection Auto Close-up Landscape
Select a mode
Auto timer ( P.6-8)
Toggle ON/OFF
Memory capacity bar Indicate memory status (appears in red when memory is full) —
File size setting Mail restrict'n(S) Long time ( P.6-11)
Movie type set Record video with/without audio ( P.6-11)
Recordable time Indicate recordable time —
* Alternatively, [ ]
to highlight an item
to select a setting
BEGIN_E_OI.indb 5 2009/12/14 16:29:40
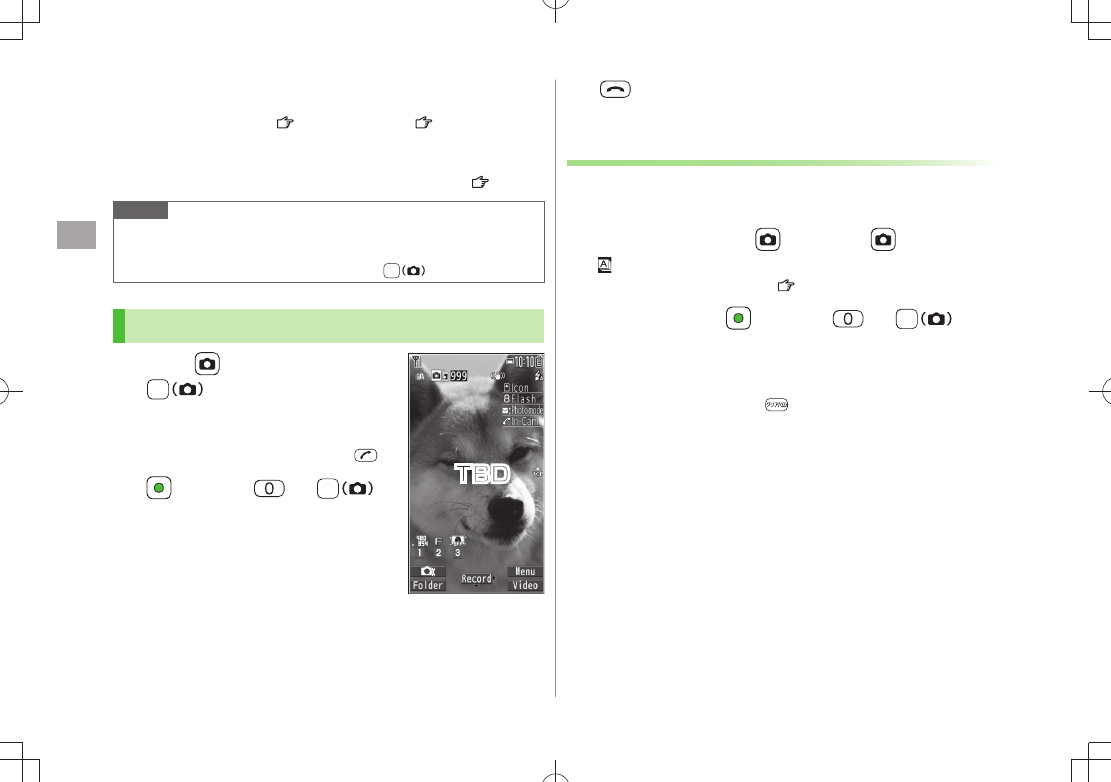
Camera
6-6
6
Pictures/Videos
Confirm battery strength (
P.1-11) and memory ( P.6-11) before
recording. When battery is low, video cannot be recorded.
Captured images and videos are automatically saved to Data Folder. To
select save location each time, turn
Auto save set
to
OFF
( P.6-11).
Note
When using Inside Camera, mirror image appears on Viewfinder.
Captured images appear correctly.
For activating Camera/capturing images by
, press firmly.
Capturing Still Images (Camera Mode)
1 Press or press and hold
to activate Camera
2 Frame subject
To toggle Inside/Outside Camera:
3 [Record], or to
capture the image
Shutter click sounds at fixed volume.
Image is automatically saved.
When
Focus
is set to
Auto
or
Face
Detection
, Outside Camera
automatically focuses on subject before
capturing image.
Picture Viewfinder
4 to exit
Return to Standby.
Continuous Shooting
Capture a succession of up to 20 still images automatically
with a single press.
1 In Picture Viewfinder, [Video] [Cont.]
appears (Indicators vary by Action mode).
To set Continuous Shooting:
P.6-11
2 Frame subject
[Record], or
Images are automatically saved.
When
Focus
is set to
Auto
, Outside Camera automatically focuses
on subject before capturing image.
To stop shooting halfway:
TBD
BEGIN_E_OI.indb 6 2009/12/14 16:29:51
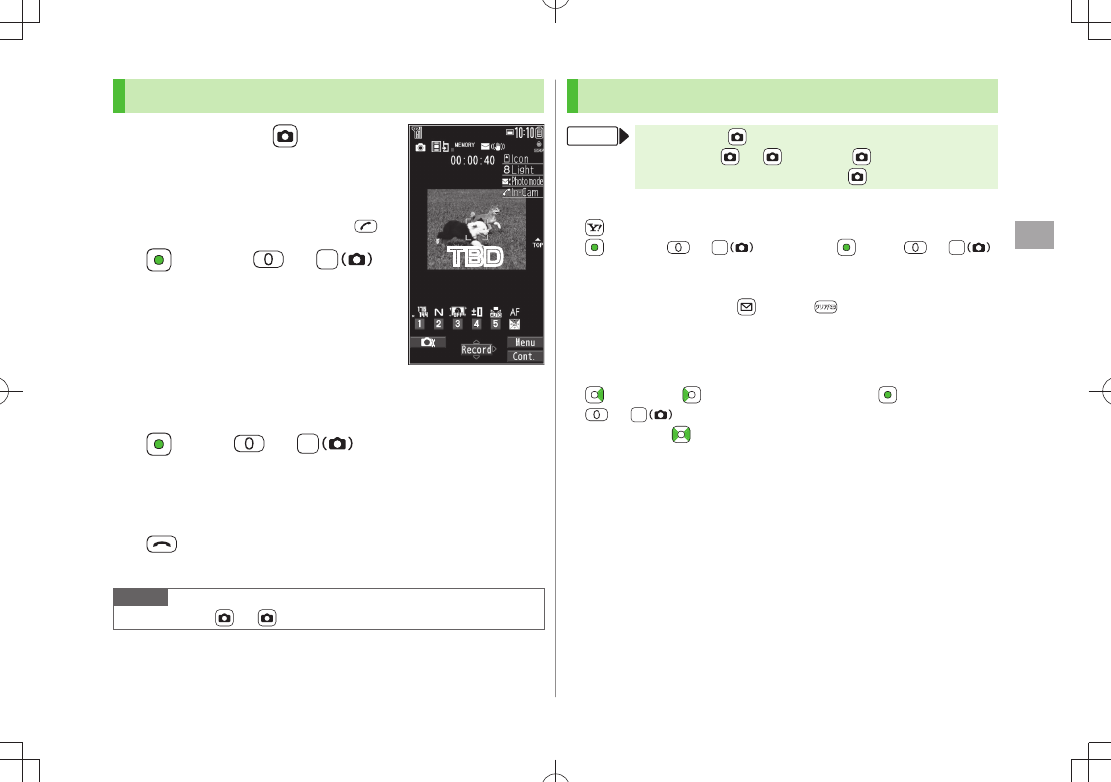
Camera
6-7
6
Recording Videos (Video Camera Mode)
1 Press and hold to
activate Video Camera
2 Frame subject
To toggle Inside/Outside Camera:
3 [Record], or
to start recording
Tone sounds.
When
Focus
is set to
Auto
, Outside
Camera automatically focuses on subject
before recording begins. During
recording, auto focus functions
regardless of Focus setting.
4 [Stop], or to end recording
Tone sounds.
Video is automatically saved.
Recording stops automatically at maximum recording time.
5 to exit
Return to Standby.
Note
Alternatively,
[Video] to activate Video Camera
Video Viewfinder
Functions Available while Shooting
From Camera mode:
Action mode: [Video] [Cont.]
Video camera mode: Press and hold
■Auto Timer
>[Menu]
Auto timer
ON
Enter time (seconds)
[Record], or ( For video, [Stop], or )
Auto timer tone sounds. After set period of time, shutter is released and
recording starts.
When Auto timer is active,
[Quit] or to return to Viewfinder
without canceling Auto timer.
Auto timer is not available when
Cont. shooting set.
is set to
Manual
.
■Zoom
>
(zoom in) or
(zoom out) to adjust zoom [Record],
or
Press and hold
for continuous zoom.
Zoom is available during video recording.
Zoom is disabled when
Image size
is set as follows:
Inside Camera:
・
VGA
,
HVGA Wide
or
QVGA
(individual mode)
Zoom may change image quality.
TBD
BEGIN_E_OI.indb 7 2009/12/14 16:29:53
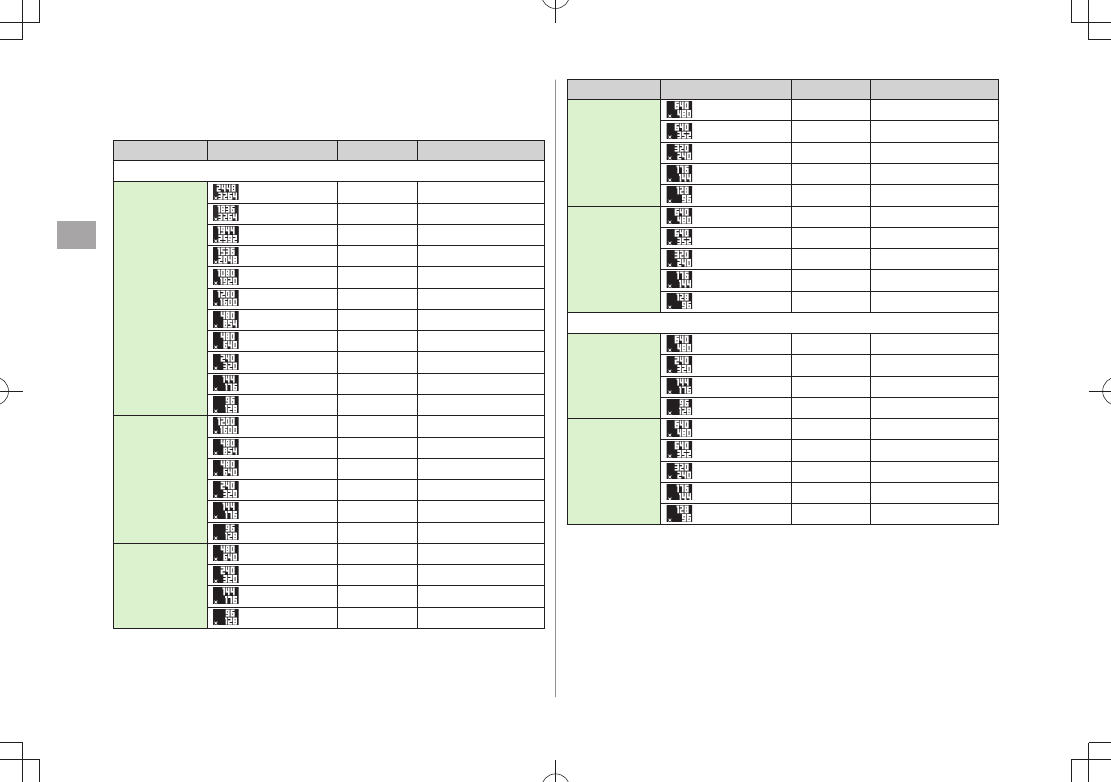
Camera
6-8
6
Maximum zoom levels for individual image size are as follows.
Maximum zoom levels in Horizontal Open Position are indicated in ( ) if
different from those in Normal Position.
Camera mode
Size
Zoom level Max. level (approx.)
Outside Camera
Camera
(High
sensitiv.:
OFF)
8M 21 levels 2.6 times
6M Wide 21 levels 2.6 times
5M 21 levels 2.6 times
3M 21 levels 2.6 times
2M Wide 21 levels 2.6 times
2M 21 levels 2.6 times
Stand-by 21 levels 2.6 times
VGA 21 levels 2.6 times
QVGA 31 levels 5.1 times
QCIF 31 levels 8.5 times
Sub-QCIF 31 levels 12.8 times
Camera
(High
sensitiv.: ON)
2M 21 levels 2.6 times
Stand-by 21 levels 2.6 times
VGA 21 levels 2.6 times
QVGA 31 levels 5.1 times
QCIF 31 levels 8.5 times
Sub-QCIF 31 levels 12.8 times
Continuous
shooting
VGA 21 levels 2.6 times
QVGA 31 levels 5.1 times
QCIF 31 levels 8.5 times
Sub-QCIF 31 levels 12.8 times
Camera mode
Size
Zoom level Max. level (approx.)
Video camera
(Img.
stabilizer:
Auto)
VGA 21 levels 1.9 times
HVGA Wide 21 levels 1.9 times
QVGA 31 levels 2.9 (3.8) times
QCIF 31 levels 5.2 (6.4) times
Sub-QCIF 31 levels 7.2 (9.6) times
Video camera
(Img.
stabilizer
:
OFF
)
VGA 21 levels 2.6 times
HVGA Wide 21 levels 2.6 times
QVGA 31 levels 3.8 (5.1) times
QCIF 31 levels 7.0 (8.5) times
Sub-QCIF 31 levels 9.6 (12.8) times
Inside Camera
Camera/
Continuous
shooting
VGA 1 level 1.0 time
QVGA 1 level 1.0 time
QCIF 6 levels 1.6 times
Sub-QCIF 21 levels 2.1 times
Video camera
VGA 1 level 1.0 time
HVGA Wide 1 level 1.0 time
QVGA 1 level 1.0 time
QCIF 6 levels 1.9 (1.6) times
Sub-QCIF 21 levels 2.8 (2.1) times
BEGIN_E_OI.indb 8 2009/12/14 16:30:01
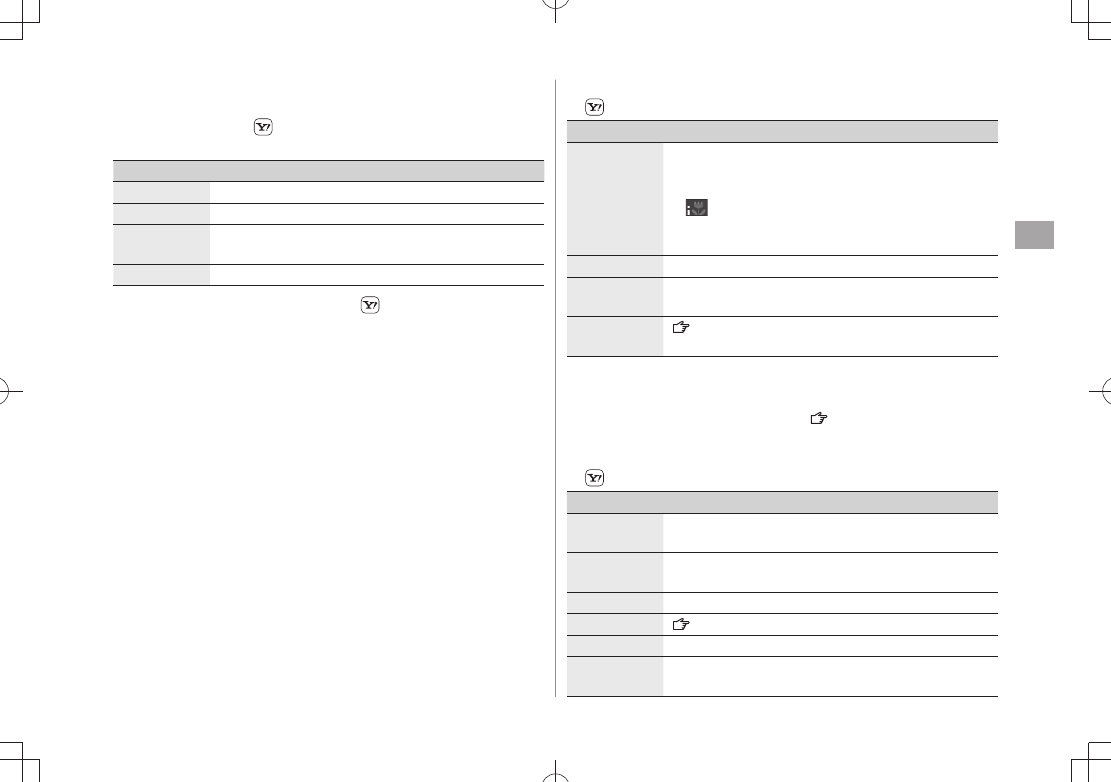
Camera
6-9
6
Use
■Flash/Photo Light
Select a Flash/Photo Light setting for Outside Camera.
In Picture Viewfinder,
>[Menu]
Flash setting
Select an item
(See below)
Item Operation/Description
Auto Flash goes off automatically in low-light situations.
Forced ON Flash always goes off when capturing images.
Always light
ON
Photo Light illuminates.
Forced OFF Flash/Photo Light is disabled.
>
In Continuous Shooting/Video Viewfinder, [Menu]
Photo light set.
ON
or
OFF
Flash/Photo light is not available when battery is low.
When Camera is ended or changed to Inside Camera while a setting
other than
Forced OFF
is set, Flash setting is changed to
Auto
next
time Camera activates or Outside Camera is used. When
Forced OFF
is
set, setting remains.
Even if
Forced OFF
(Flash setting) or
OFF
(Photo light set.) is set, Photo
light illuminates or flashes when Camera is active or during shooting.
When Photo mode is set to
Intelligent Auto
,
Forced ON
cannot be
set.
When using flash, maintain an appropriate distance from subject of 40
to 100 cm.
When image is captured at close range, image may turn white as a result
of poor exposure.
Set Photo Mode According to Scene
■
>[Menu]
Photo mode
Select an item (See below)
Item Operation/Description
Intelligent
Auto
Automatically switch Photo mode according to occasion
(in Camera mode)
Indicator is animated when mode changes (Example:
Close-up).
Mode does not change after Auto Focus Lock. Cancel
Auto Focus Lock.
Normal Capture an image in normal mode
Scene Adjust brightness and color tone according to scene
Select an item
>
My original
set.
(P.6-12)
Functions Available in Viewfinder
■
Change settings before initiating image capture. Some functions are
changeable with simple key operations ( P.6-5).
Some operations are not available depending on Photo mode, image size
or Photo mode.
>[Menu] Select an item (See below)
Item Operation/Description
Inside camera/
Outside camera
Switch Inside/Outside Camera
CHG camera-
mode
Camera mode
>,
Video camera mode
,
Action mode
or
Bar code reader
Folder jump Open storage folder
Photo mode (Above)
Image size Select a size
>
File size
setting
Select
Mail restrict'n(S)
for S! Mail attachments or
Long time
for long-time recording
BEGIN_E_OI.indb 9 2009/12/14 16:30:02
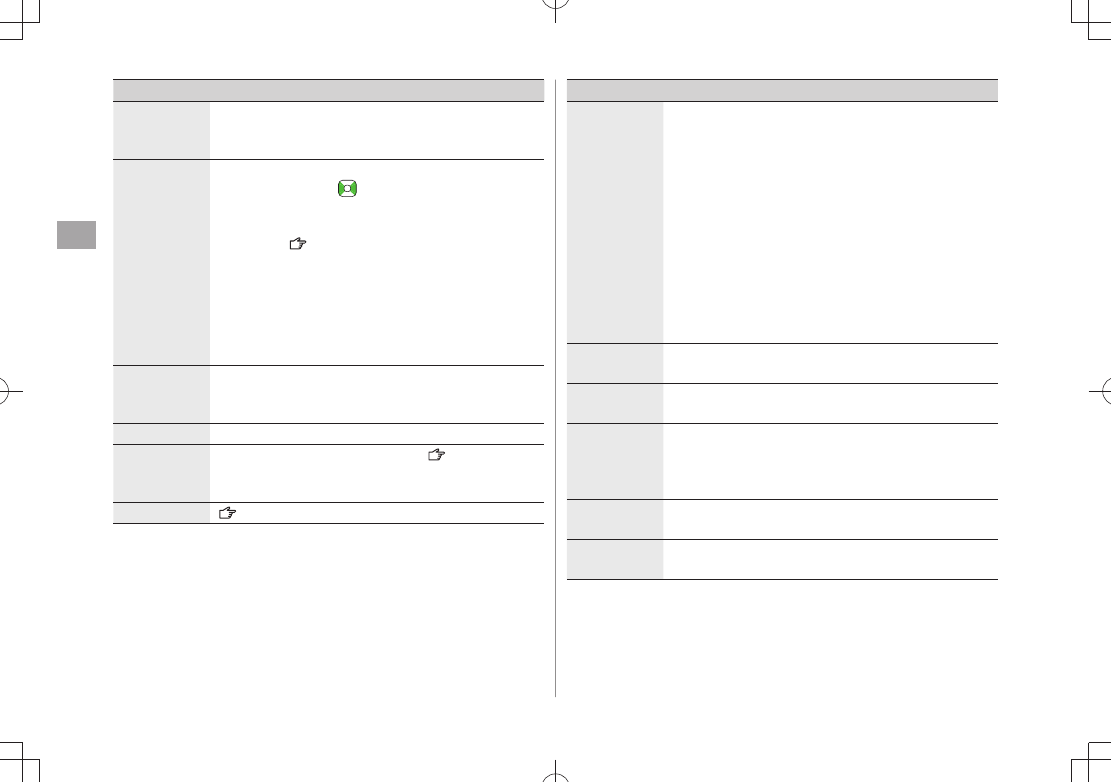
Camera
6-10
6
Item Operation/Description
Image quality Select an item
>
In Video camera mode, this function is available only
when
File size setting
is set to
Long time
.
Camera
settings
Select an item
>
Brightness
・
・
White balance
: Adjust color tone
Color mode set
・ : Select a color mode
Focus
・ : P.6-13
Img. stabilizer
・ : Minimize camera shake
automatically
Shoot with frame
・ : Add frame to image
・
Shutter sound
: Select a shutter click sound
Flicker correction
・ : Minimize flicker while shooting
near fluorescent light
Storage
setting
Select an item
>
Store in
・
Phone
or
microSD
・
Auto save set
ON
or
OFF
High sensitiv.
ON
> or
OFF
Flash setting/
Photo light
set.
Set whether to use Flash/Photo light ( P.6-10)
Auto timer (P.6-8)
Item Operation/Description
Cont.
shooting set.
Select an item
>
Action mode
・ :
Manual
captures one picture at a
time.
Auto bracket
captures nine different still
images automatically.
Shot interval
・ : Select an interval when
Action mode
is set to
Auto
.
Shot number
・ : Set number of images to be
captured when
Action mode
is set to
Auto
or
Manual
. Details are as follows:
VGA (480×640): 4
QVGA (240×320): 5 to 10
QCIF (144×176): 5 to 20
Sub-QCIF (96×128): 5 to 20
Movie type
set
Normal
> or
Video
Display size Select Viewfinder size
Actual size
> or
Fit in display
Attach S!Mail
mode
YES
> or
NO
Image size, File size setting and Image quality are set
as follows (respectively):
QCIF
,
Mail restrict'n(S)
,
Normal
Icon Show/hide display indicators
ON
> or
OFF
Memory
Status
View memory information
BEGIN_E_OI.indb 10 2009/12/14 16:30:02
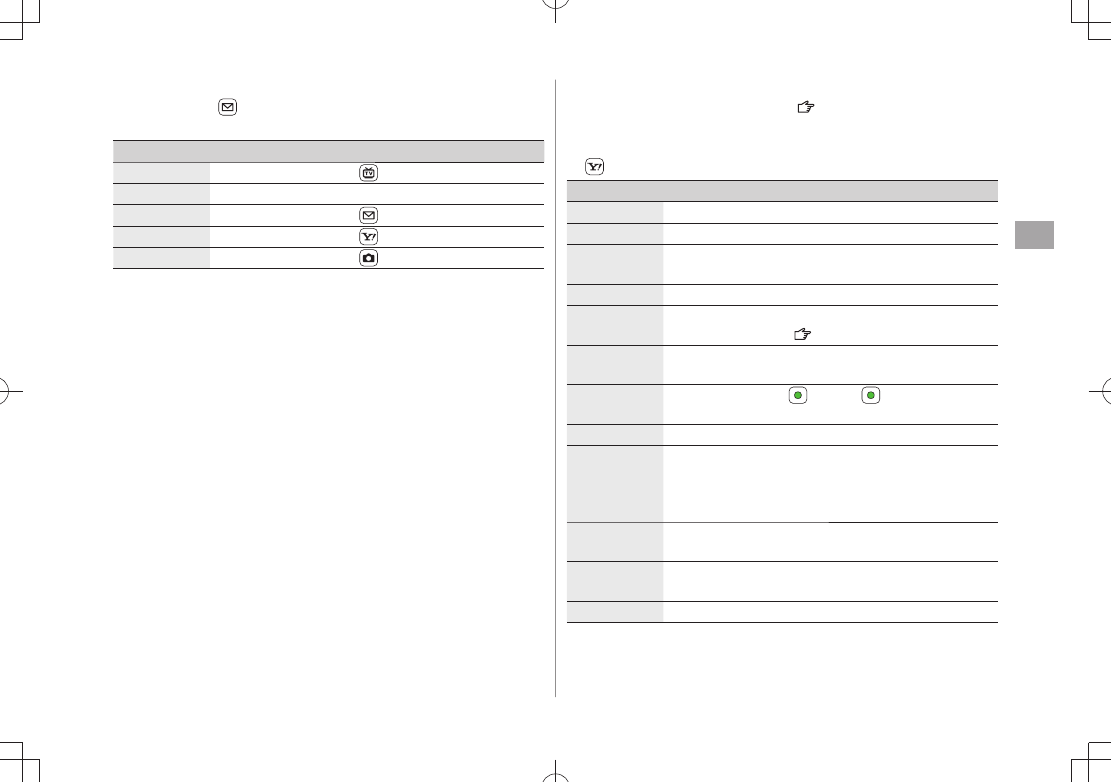
Camera
6-11
6
Save as
■Original Setting
Press and hold
>
Photo mode MyOriginal
Follow the steps
(See below)
Item Operation/Description
Save setting Highlight a setting
> [Save] (
YES
) Edit title
Open setting Select a setting
>
Edit title Highlight a setting
> [Edit] Edit title
View detail Highlight a setting
> [Detail]
Delete setting
Highlight a setting
> [Delete]
YES
Functions Available after Shooting
■
Available only when
Auto save set
( P.6-11) is
OFF
Some operations are not available depending on camera mode or image
size.
>[Menu] Select an item (See below)
Item Operation/Description
Play Play back recorded video
Save Save still image/video
Store all/
animat'n
Save
> or
Mirror save
<New>
Mirror save Save mirror image
Attach to
S! Mail
Send file via S! Mail
Create a message (
>From Step 2 on P.13-4)
Set display Set as wallpaper, Phone Book image, etc.
Select an item
>
Change
frame*
Select a frame
> [Set] [Save]
Store in
Phone
> or
microSD
Mirror
display/
Normal
display
Switch Mirror/Normal display
Display size Set image size in Viewfinder
Actual size
> or
Fit in display
Icon Show/hide display indicators
ON
> or
OFF
Cancel Discard image to return to Viewfinder
* Available only when shooting with frame
BEGIN_E_OI.indb 11 2009/12/14 16:30:03
Camera
6-12
6
Focus Functions (Outside Camera)
Changing Focus Settings
<Default> Camera mode: Face Detection
Video camera/Action mode: Auto
Select a focus setting according to occasion.
Focus on Individual scenes automatically.
Face Detection (Camera mode only): For portraits
Auto: Auto detection
Close-up: For nearby objects
Landscape: For distant landscapes
1 In Picture/Video Viewfinder,
2 to select a setting
Face Detection
Detect up to five faces within 2.5 meters.
Show yellow Focus Guide when a face is detected.
Automatically focus on one face when more than one is detected
(Focus guide turns yellow once focus is on the face.).
Faces may not be detected in following conditions:
Face is tilted.
・
A part of face is covered by glasses, hat, mask or shadow.
・
Face is too small, big or dark for screen.
・
Face is at edge of screen.
・
Shoot with Auto focus if detection fails.
Auto Focus Lock
Bring focus on subject at center of display automatically.
Lock focus on subject, and recompose your picture.
1 In Picture/Video Viewfinder, , or
halfway
①
When in focus, handset sounds.
②
Focus Guide turns green, and focus is locked.
When out of focus, Focus Guide turns red.
To cancel focus locked by
or :
To cancel focus locked by
: Release finger from
2 Determine composition
3
Capture image in selected camera mode (Camera mode:
P.6-6/Action mode: P.6-7/Video camera mode:
P.6-8)
In Step 1, press
halfway to lock focus, then press
firmly to shoot.
BEGIN_E_OI.indb 12 2009/12/14 16:30:05
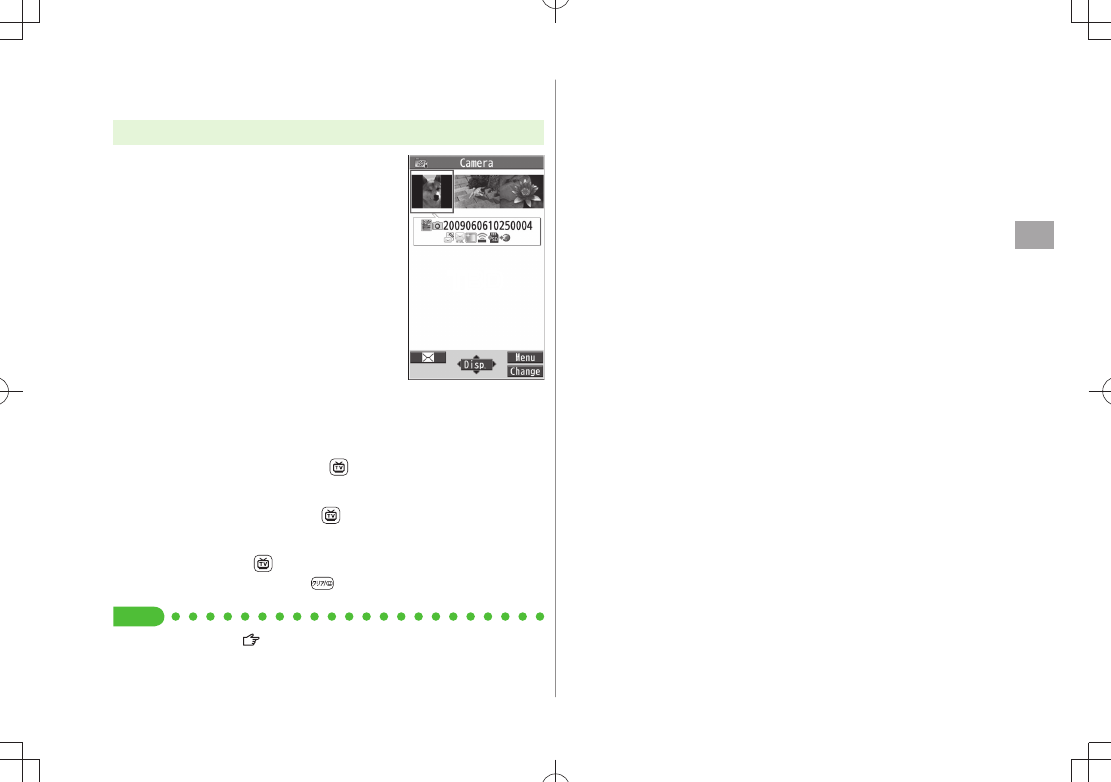
Camera
6-13
6
Viewing Saved Images
Main Menu Camera
1 Open Pictures
Pictures
Open Videos
Videos
2 Select a folder
3 Select a file
Open Pictures Saved on microSD Card
■
After selecting
>
Pictures
in Step 1, [microSD] Select a folder
Open Videos Saved on microSD Card
■
After selecting
>
Videos
in Step 1, [microSD] Select a folder
Check Still Images in Picture Viewfinder
■
In Picture Viewfinder,
>[Folder]
To return to Picture Viewfinder:
Tip
●Editing Still Images ( P.9-12)
Example: Pictures
TBD
BEGIN_E_OI.indb 13 2009/12/14 16:30:06

6-14
Camera
6
BEGIN_E_OI.indb 14 2009/12/14 16:30:06
7
7-1
Entertainment
Mobile Widget (Japanese) .................................... 7-2
Pasting Widgets to Standby ........................................................7-2
Using Widgets ............................................................................7-2
Downloading Widgets ................................................................7-3
Arranging Widgets in Standby .....................................................7-3
S! Quick News (Japanese) .................................... 7-4
Registering S! Quick News Items ................................................7-4
Opening New Information ..........................................................7-4
S! Information Channel/Weather (Japanese) ........ 7-6
Registering/Canceling ................................................................. 7-6
Using S! Information Channel .....................................................7-6
Using Weather Indicator .............................................................7-7
Option Menu Items .....................................................................7-8
E-Books (Japanese) ............................................... 7-8
BEGIN_E_OI.indb 1 2009/12/14 16:30:06
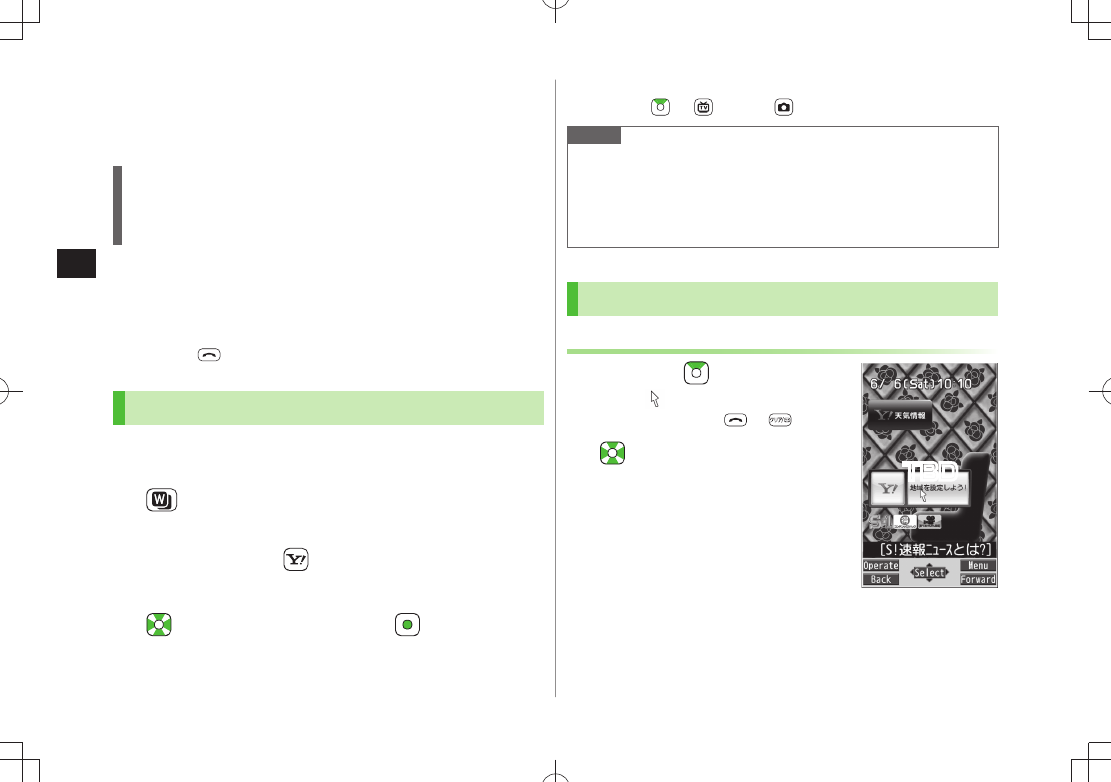
Entertainment
7-2
7
Mobile Widget (Japanese)
Paste widgets to Standby to access information or tools
from Standby.
Network Widget
Some widgets may periodically connect to network, incurring packet
transmission fees.
During transmission, other functions (e.g. Video Calls) may be disabled.
View Mobile Widget Overview
■
Main Menu
> Entertainment Mobile Widget Information
Show/Hide Widget
■
Main Menu
> Entertainment Mobile Widget Information
In Standby,
>
Pasting Widgets to Standby
Paste up to five widgets per sheet. Select from four sheets
and organize sheets by theme.
1
Widget List appears.
2 Select a widget [Menu]
Paste on Stand-by
Select a sheet
3 to move to target location
Toggle Sheets
■
In Standby,
>
[Back] or [Forward]
Note
Alternatively,
Main Menu Entertainment Mobile Widget
Widget Contents or Main Menu Data Folder Widget to
select widgets
When saving widgets from microSD to Standby, do not remove microSD
Card.
Using Widgets
Selecting Widgets in Standby
1 In Standby,
Pointer ( ) appears.
To disable pointer:
or
2 to move pointer Select a
widget
Follow onscreen instructions.
TBD
BEGIN_E_OI.indb 2 2009/12/14 16:30:14
Entertainment
7-3
7
Selecting Widgets from Widget List
1
Widget List appears.
2 Select a widget
Move Widgets in List
■
>
Highlight a widget
[Move]
to determine a target
location
[OK]
Tip
Settings
●Mobile Widget ( P.18-15)
Downloading Widgets
Main Menu Entertainment Mobile Widget
Widget Contents
1
Download Widget
YES
941P connects to the Network, and download site appears.
Follow onscreen instructions.
Widget List
Installing Widgets
Some widgets may require you install them manually; follow steps below:
In download completion window,
>[Menu]
Install
Once installation is completed, widgets appear in Widget List. Widget
folder in Data Folder includes widgets that are not yet installed.
Note
Alternatively,
Main Menu Data Folder Widget
Download Widget YES to download
Arranging Widgets in Standby
1 In Standby, to move pointer Highlight a
widget [Operate]
2 Select an item (See below)
Item Operation/Description
Move
> to move to a target location
Delete frm
Standby
YES
>
Forward Move overlapping widget to foreground
Rear Move overlapping widget to background
Reload Update widget
TBD
BEGIN_E_OI.indb 3 2009/12/14 16:30:19