Panasonic of North America 5Z6KX-P8415 Color Laser Printer With Parallel Port User Manual Instructions
Panasonic Corporation of North America Color Laser Printer With Parallel Port Instructions
UserManual.wiki
>
Panasonic of North America
>
5Z6KX P8415 User Manual
User Manual
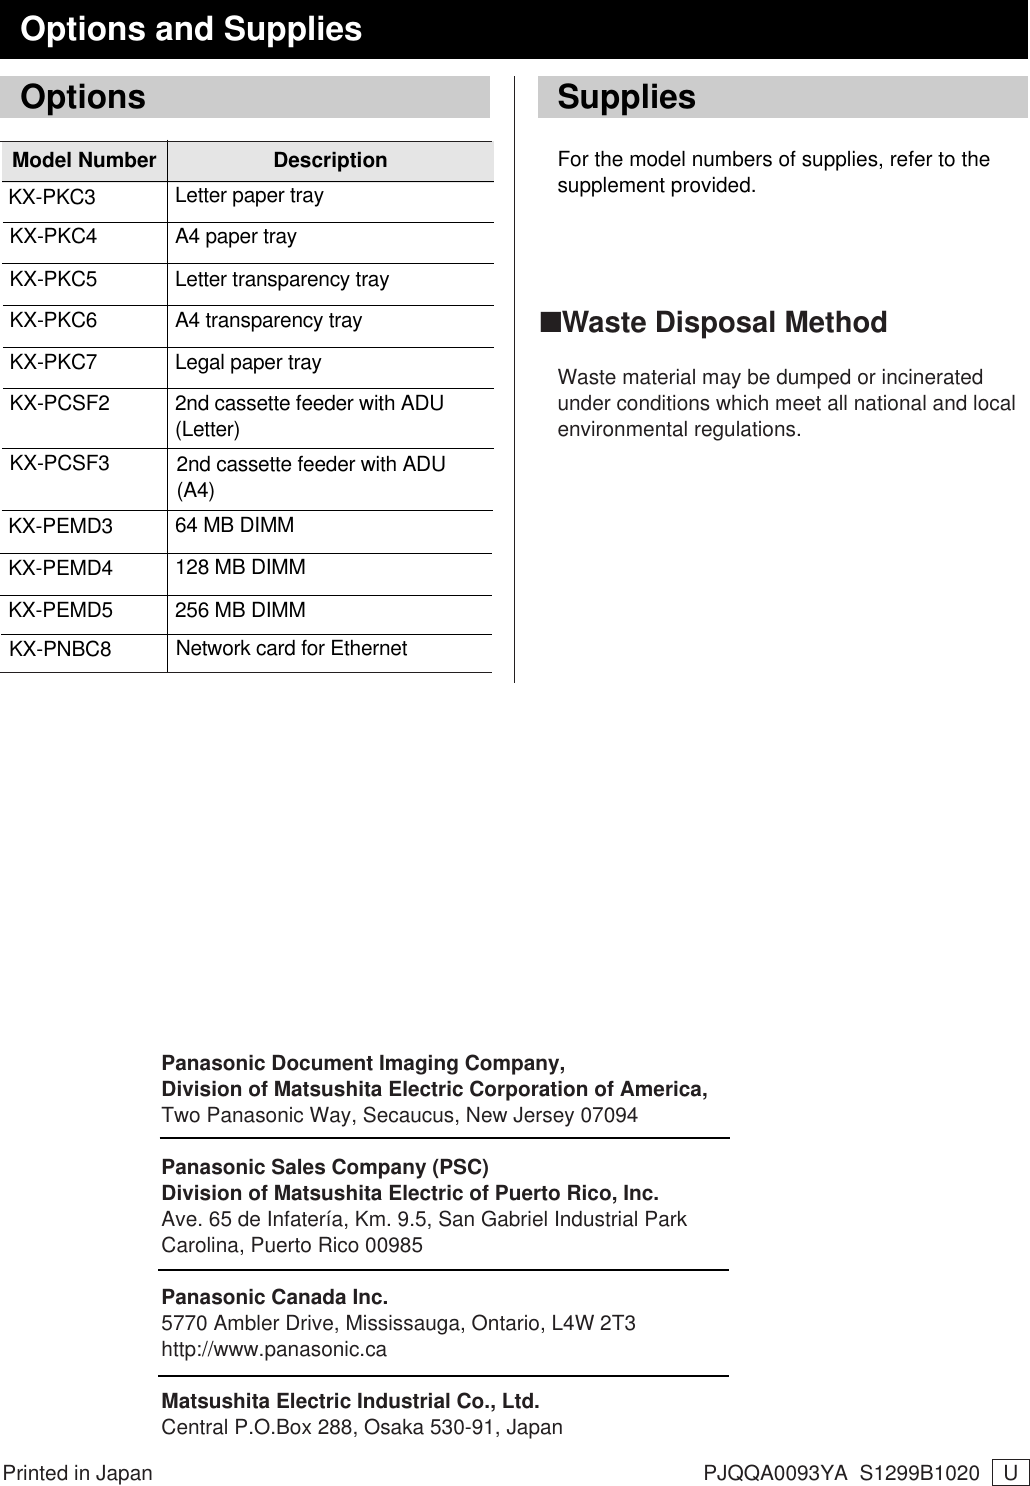
Navigation menu
Upload a User Manual
Namespaces
Wiki Guide
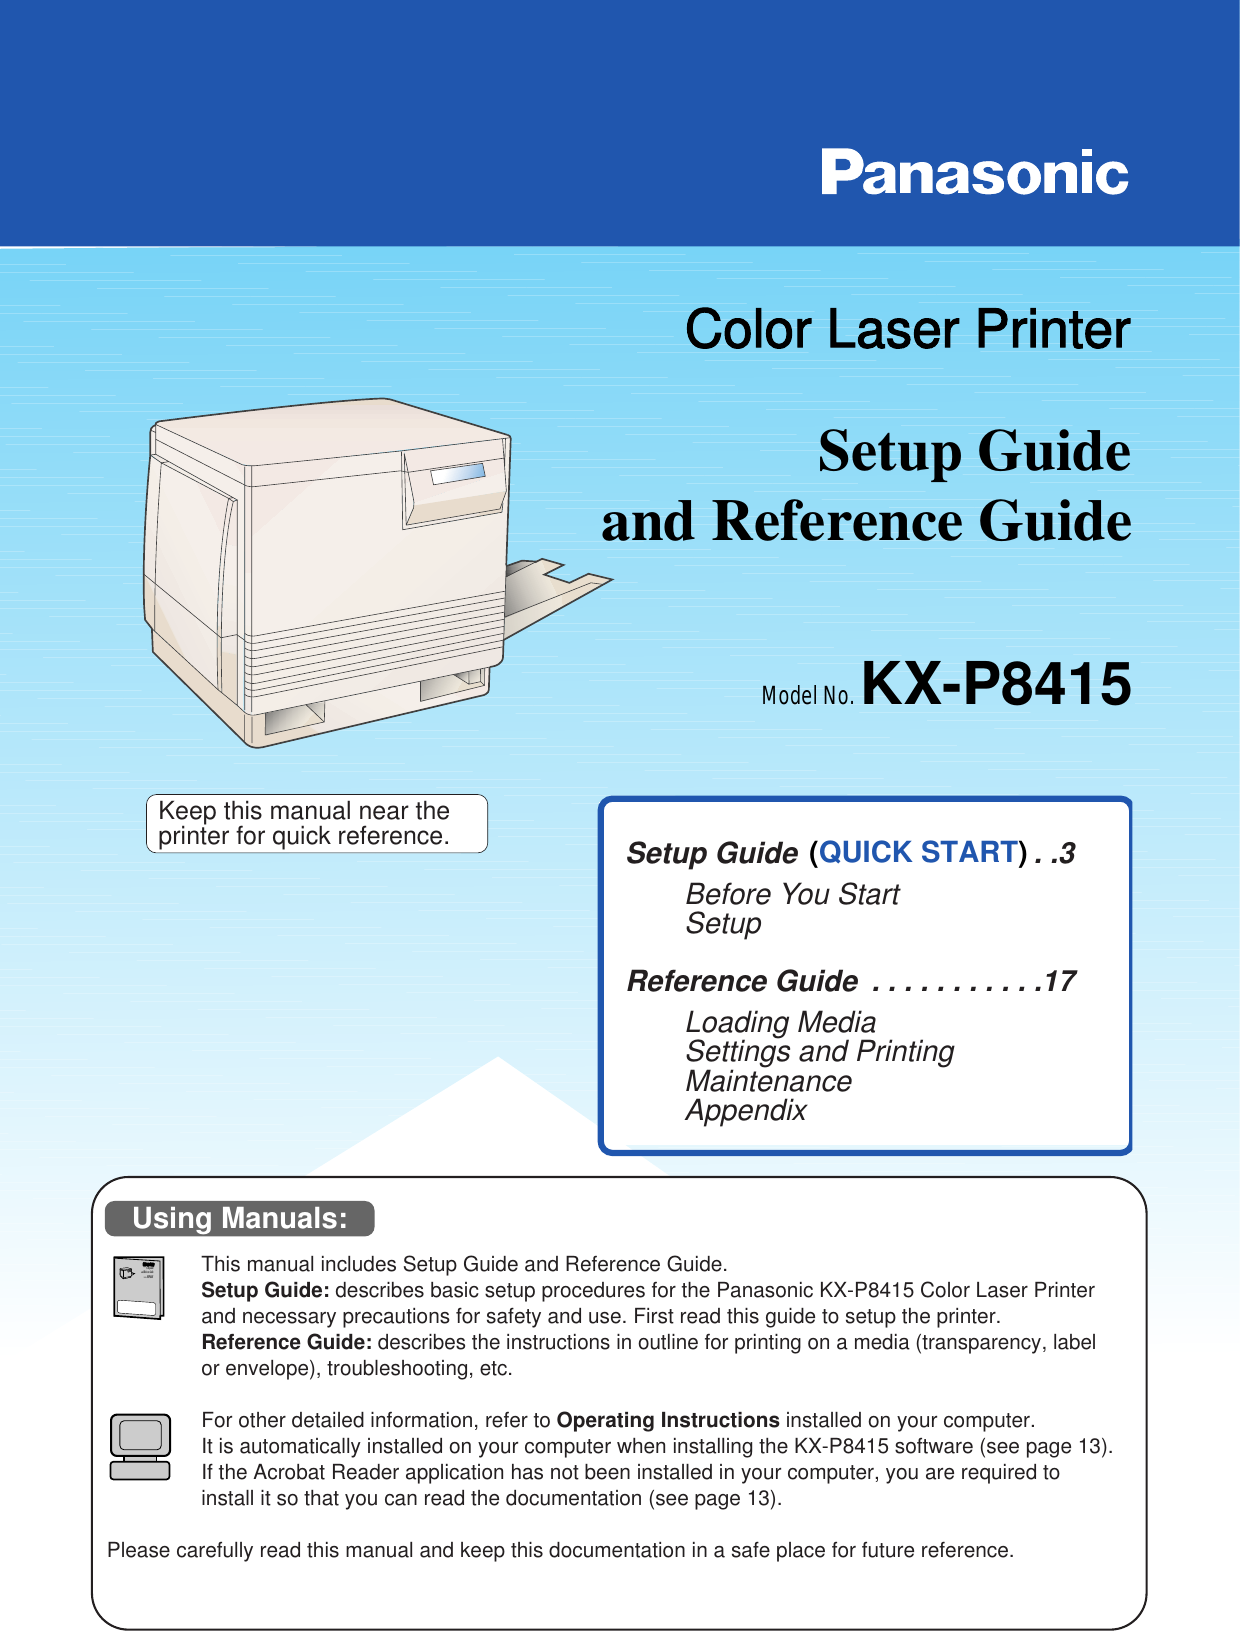
HTML
PDF
Info
Views
User Manual
Discussion / Help
Navigation


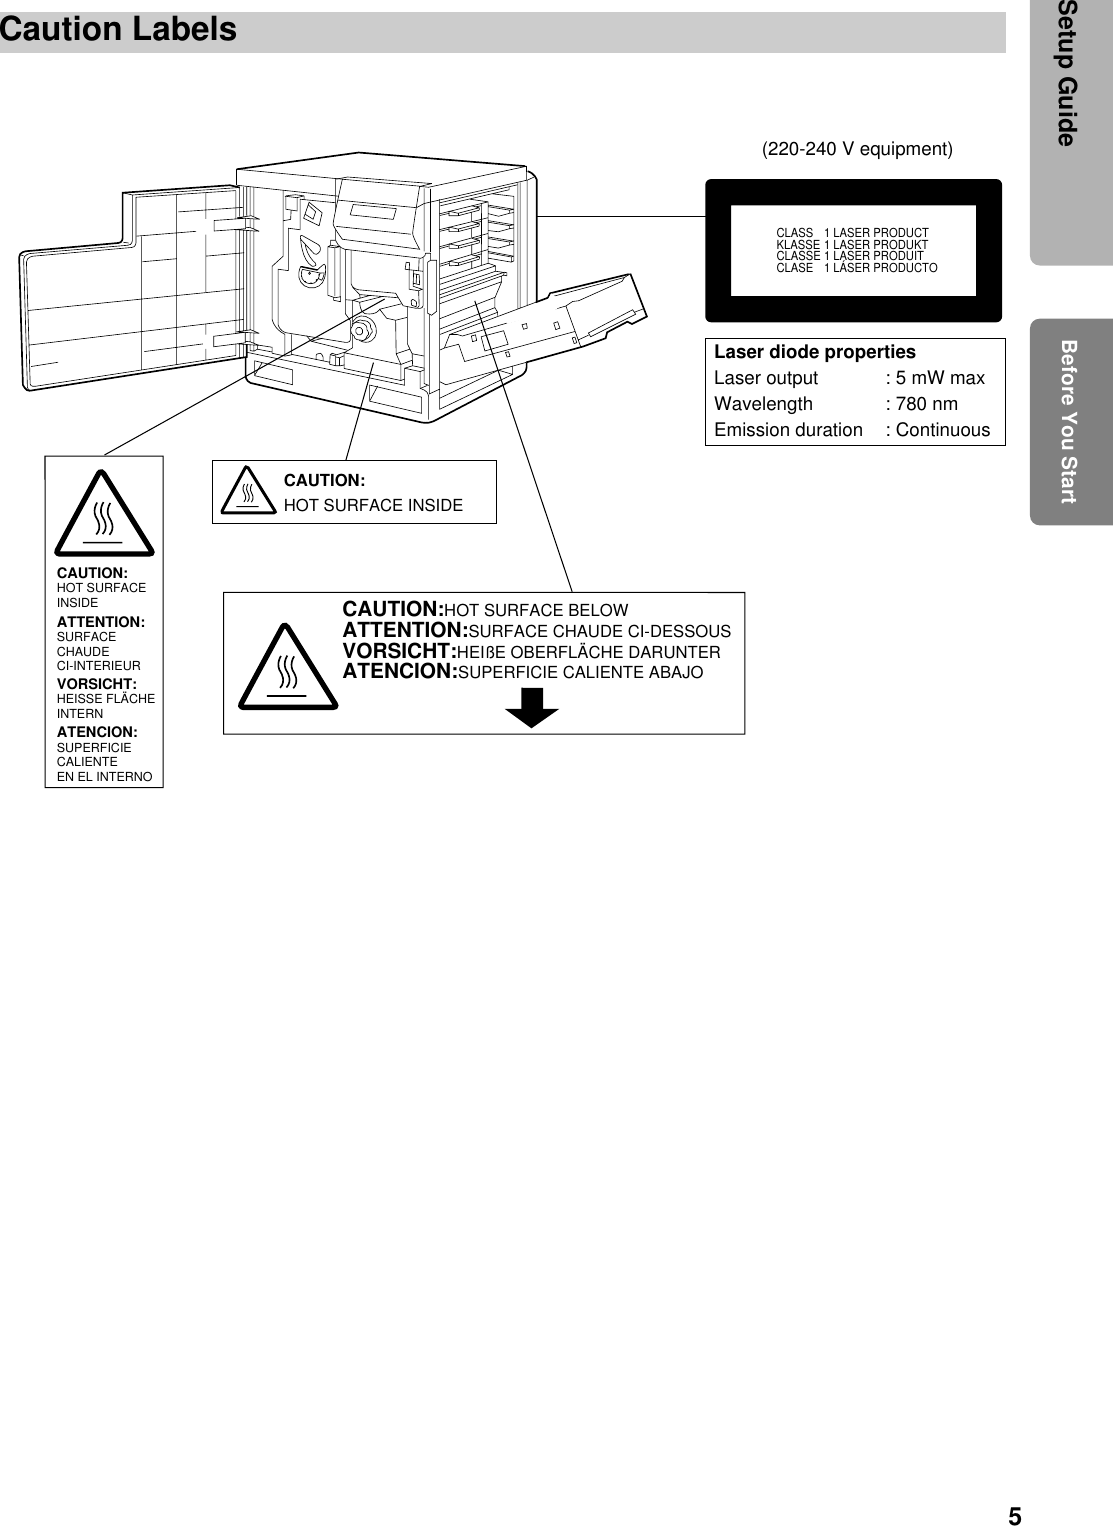

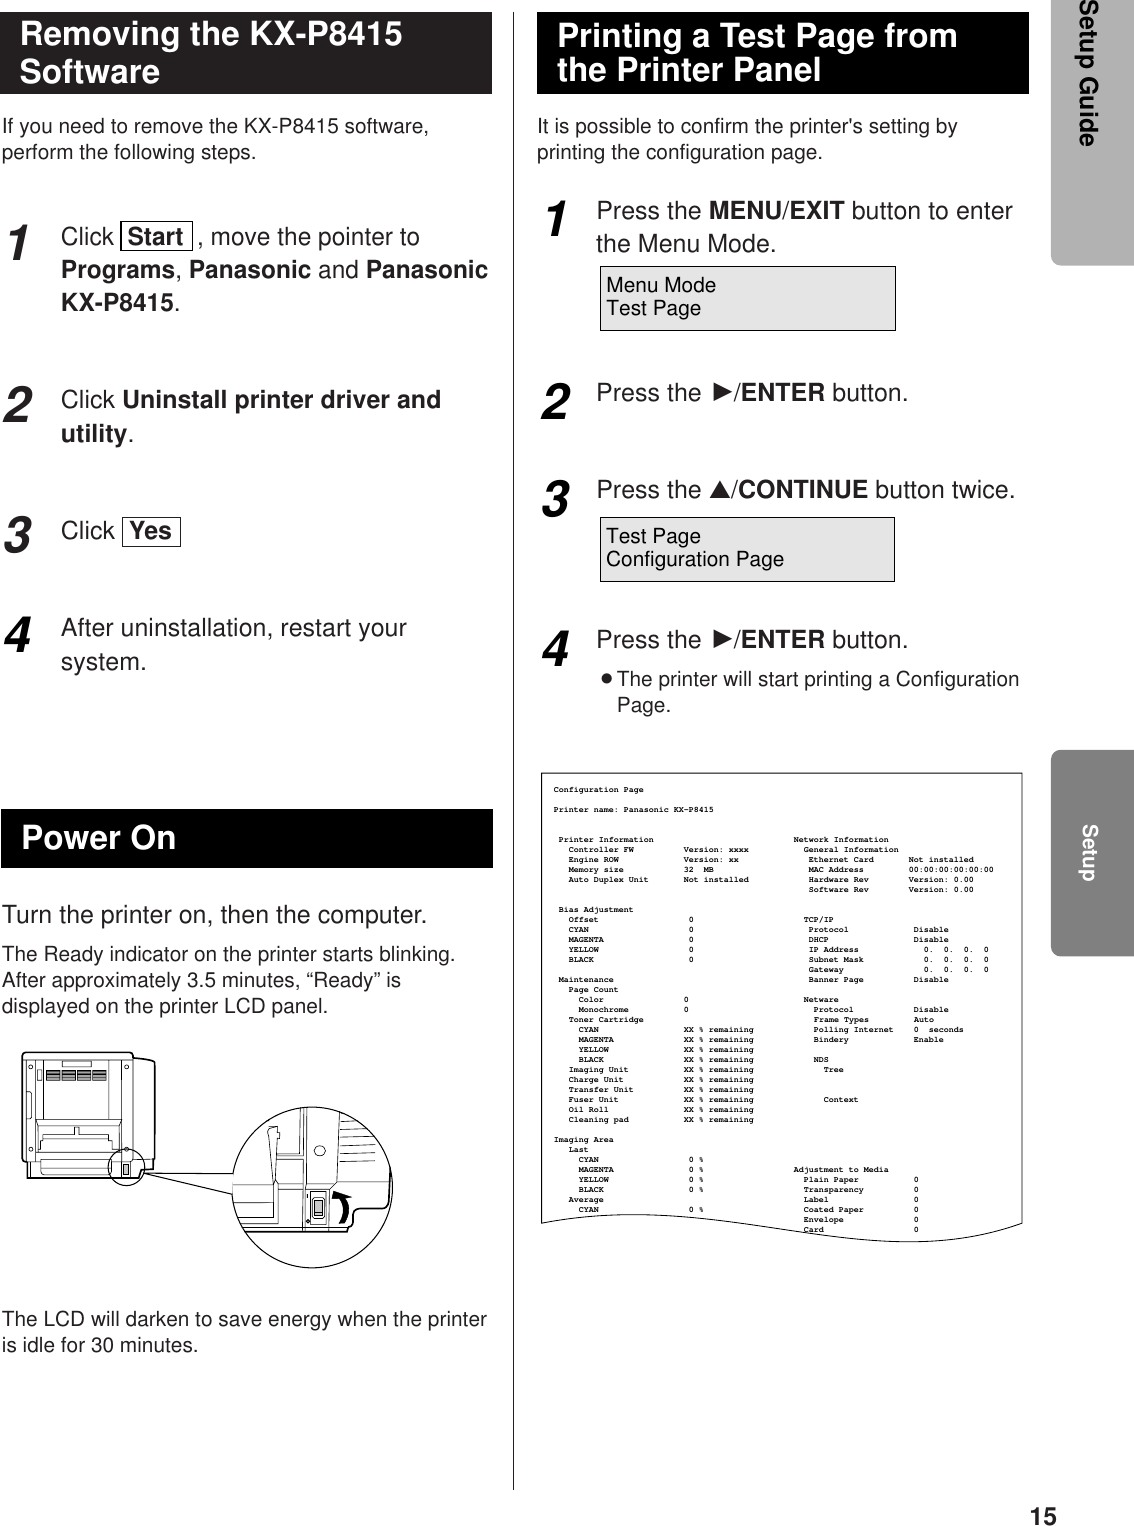
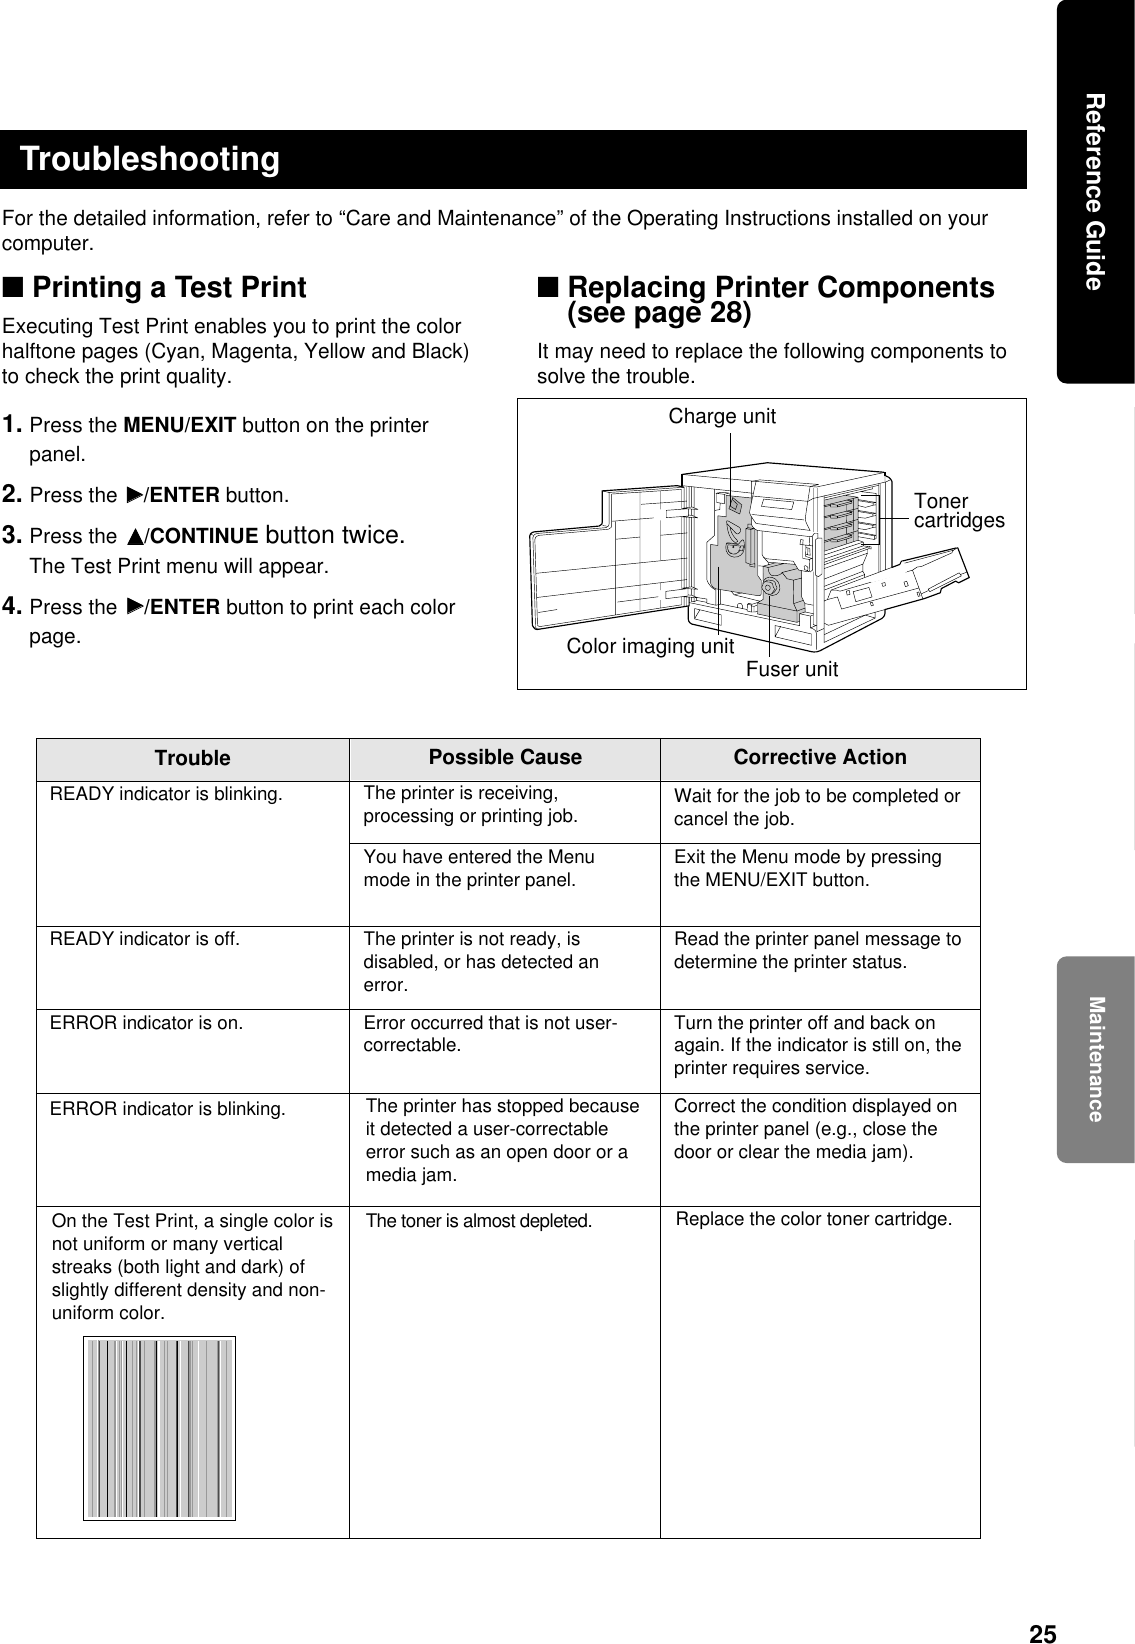
![7To avoid machine malfunction, do not use the equipment under the following conditions:BLiquids near the equipmentBUnstable or unlevel surfaces BDirectly in front of airconditioning ventsCautionsBDirect exposure to sunlightBExtremely high or low temperature[temperature range: 10˚C to 32.5˚C(50˚F to 90.5˚F)]BExtremely high or low humidity(humidity range: 20% to 80% RH)BCondensation due to rapid changeof temperatureBAreas of poor ventilationBAreas of high dust or chemicalfume concentration (solvent etc.)BToo much media/documentwhich exceeds the limit mark( ) on the guide of the tray.BAny toner other than genuinePanasonic toner; it maydamage the printer.Not genuine tonerBDo not use a media for ink jet(paper, transparency, etc.) thatmay be wrapped around thefuser roller and cause damage.Ink jetmedia■ Static Electricity DamageTo prevent static electricity damage to any of the following components, touch a grounded metal surface,such as the printer’s bare metal frame prior to touching the component.BThe interface connectors : parallel and optional networkBElectrical components, connectors inside the printer and any components on the optional board (RAMExpansion Board or Ethernet Card)BThe connector pins on the optional 2nd cassette feeder or auto duplex printing unit for the printer■ Interface CableAlways use a shielded interface cable. Use of an unshielded cable can result in radio interference with data.Before You StartSetup Guide](https://usermanual.wiki/Panasonic-of-North-America/5Z6KX-P8415/User-Guide-85125-Page-8.png)
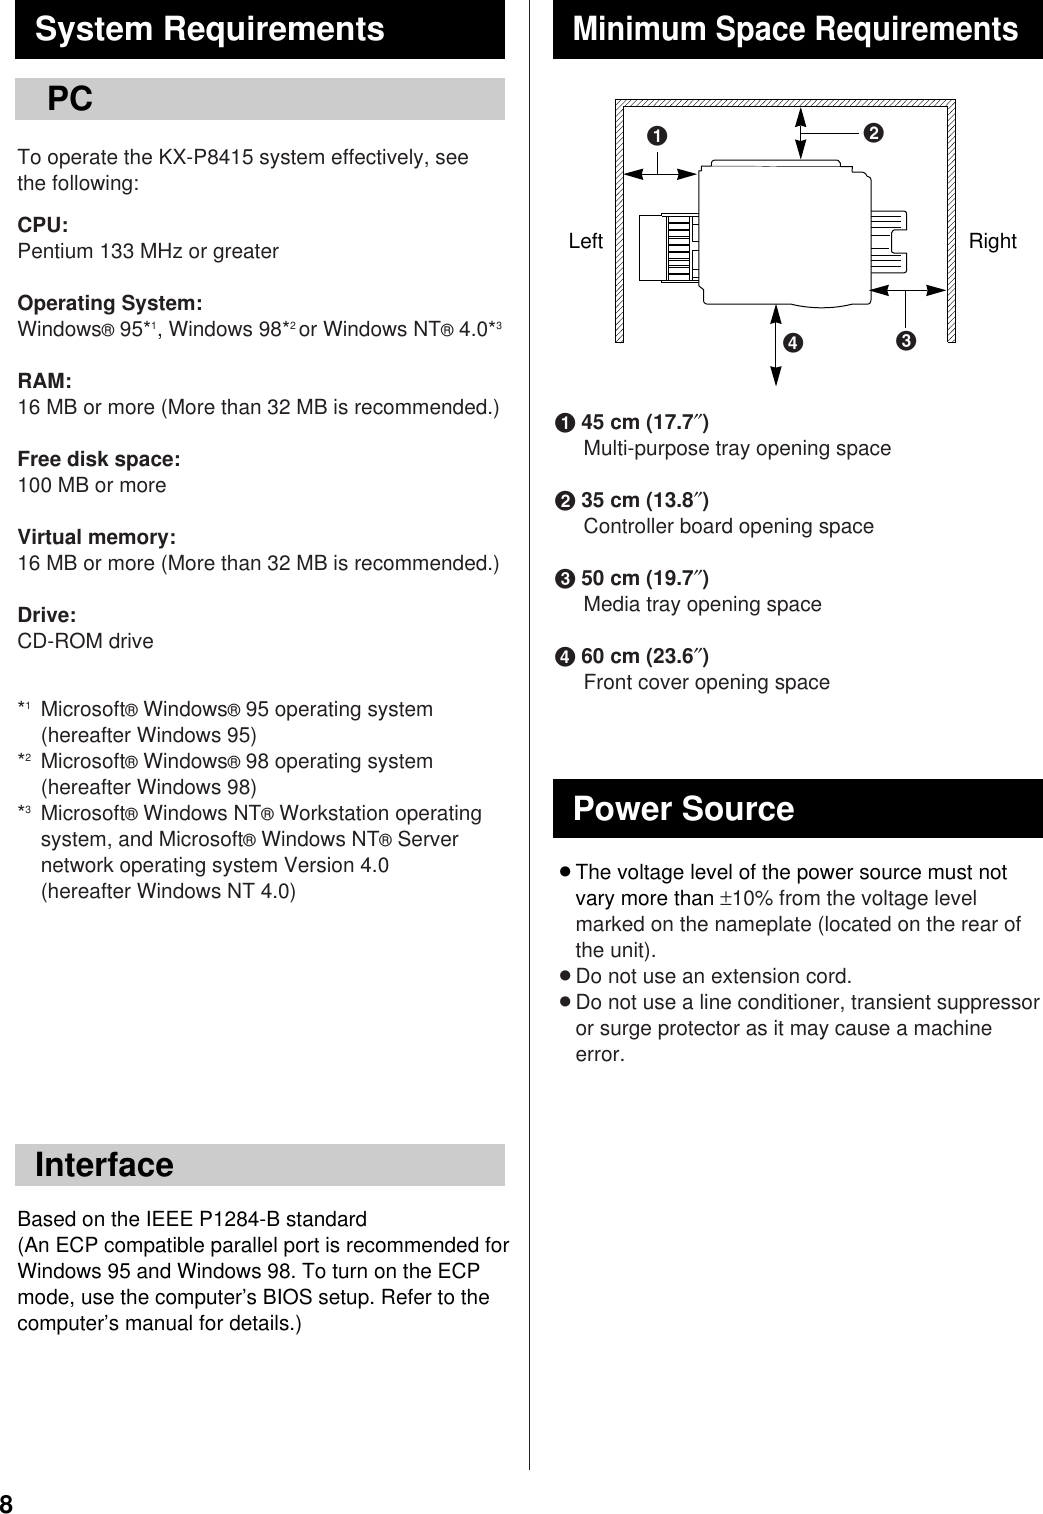
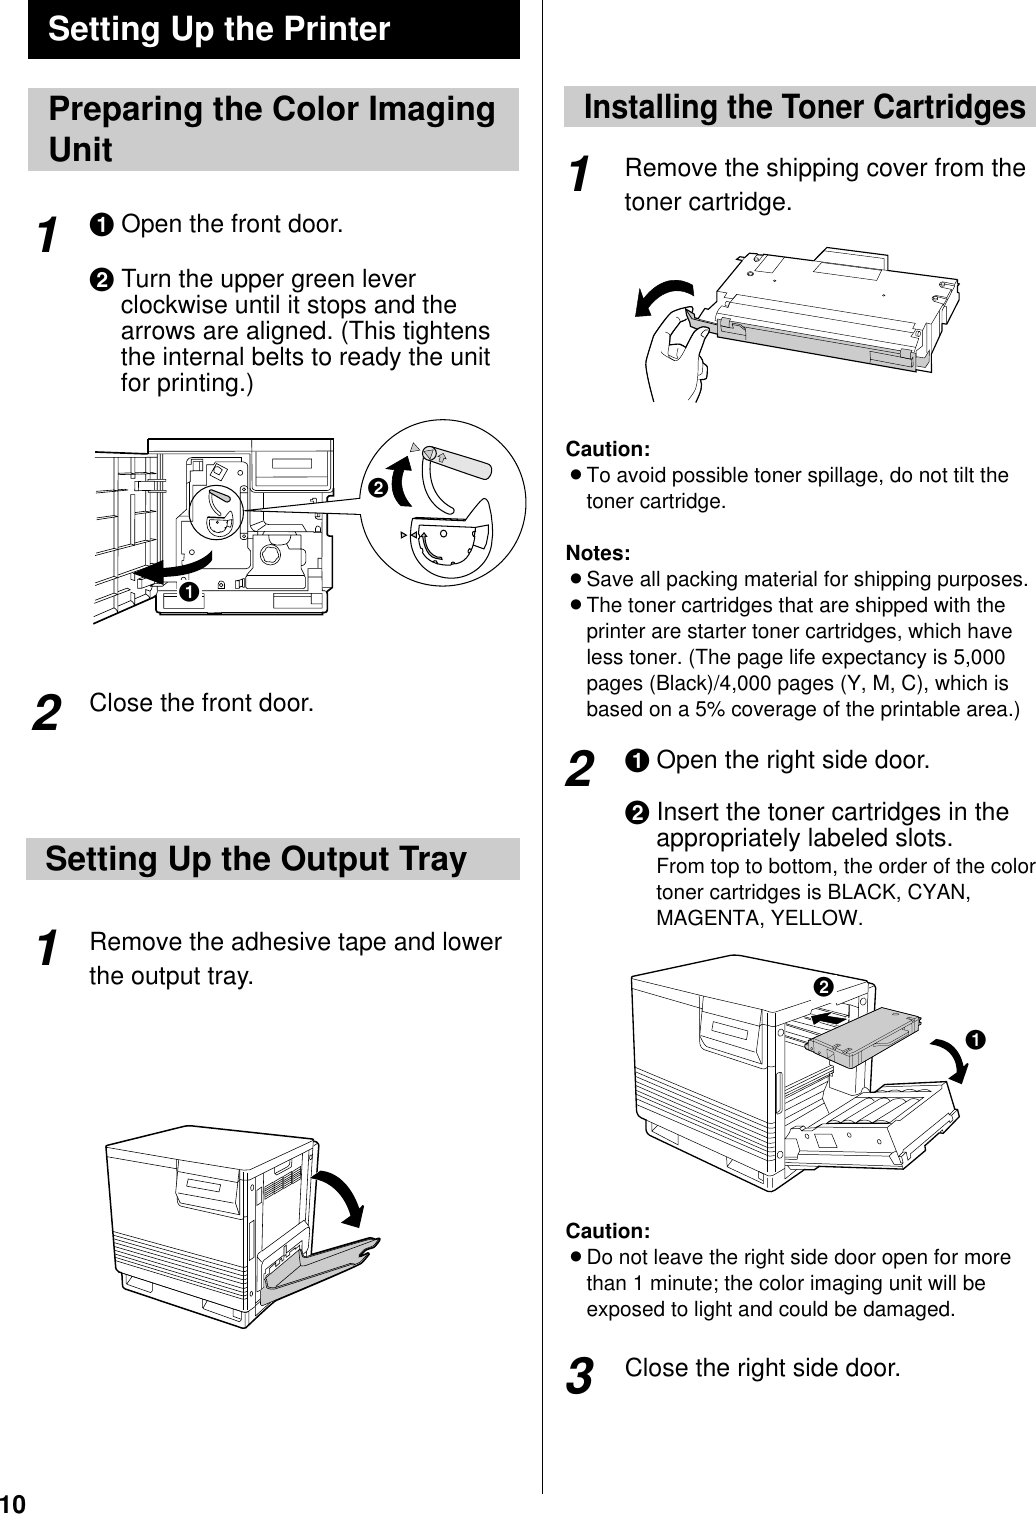
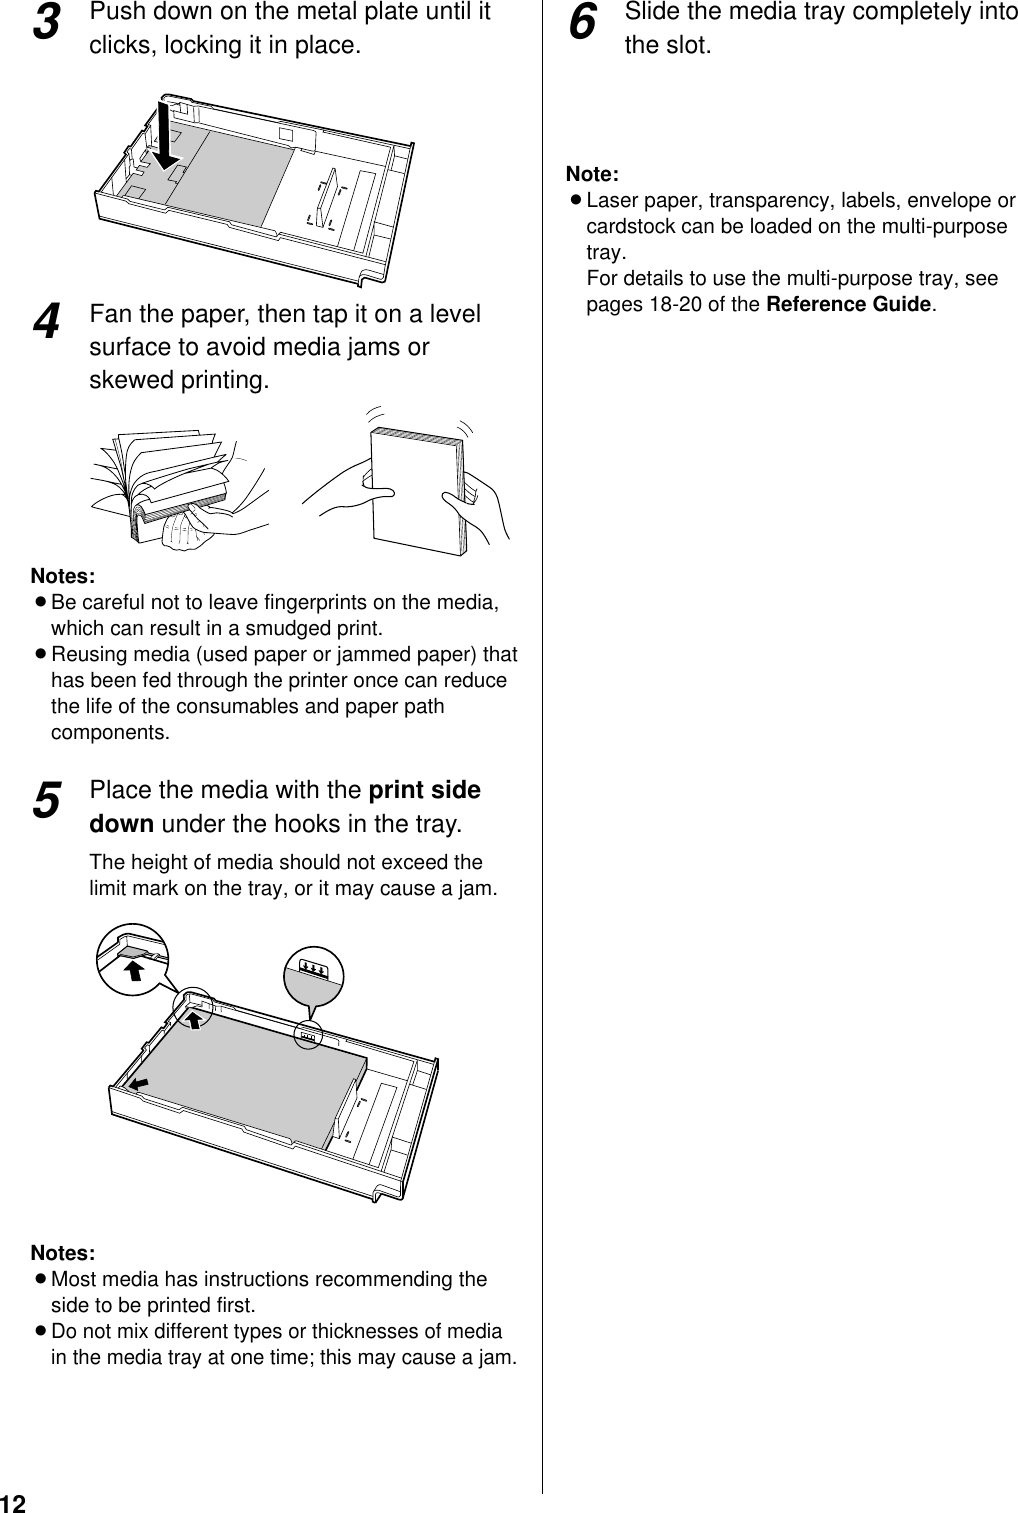
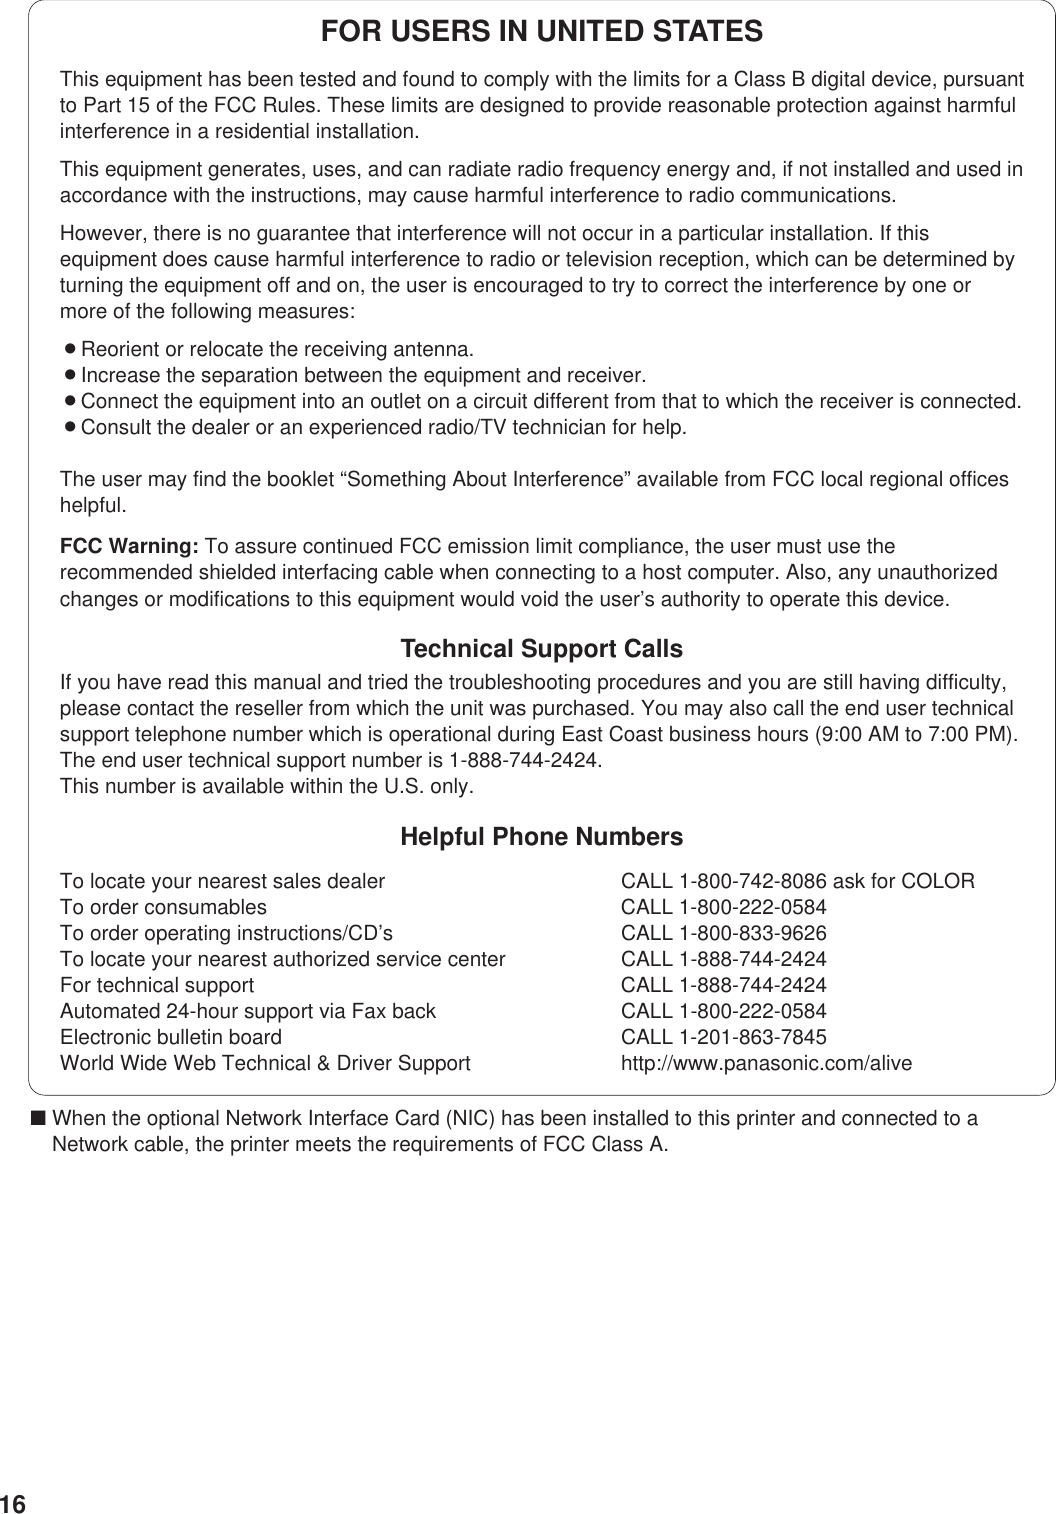
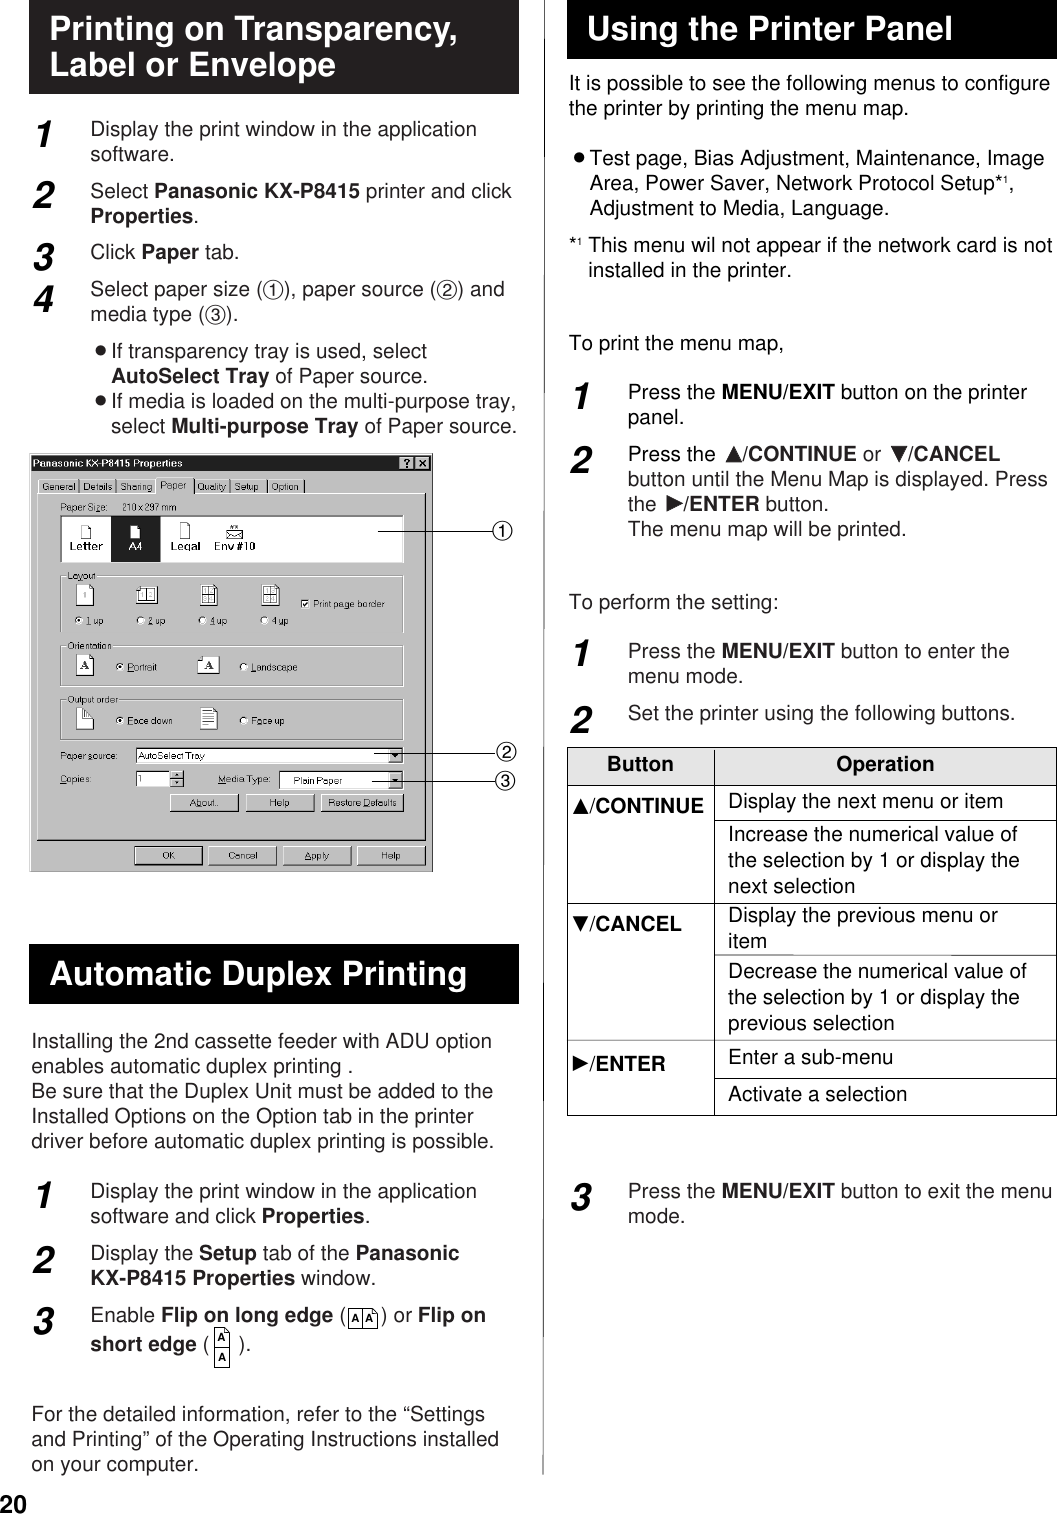
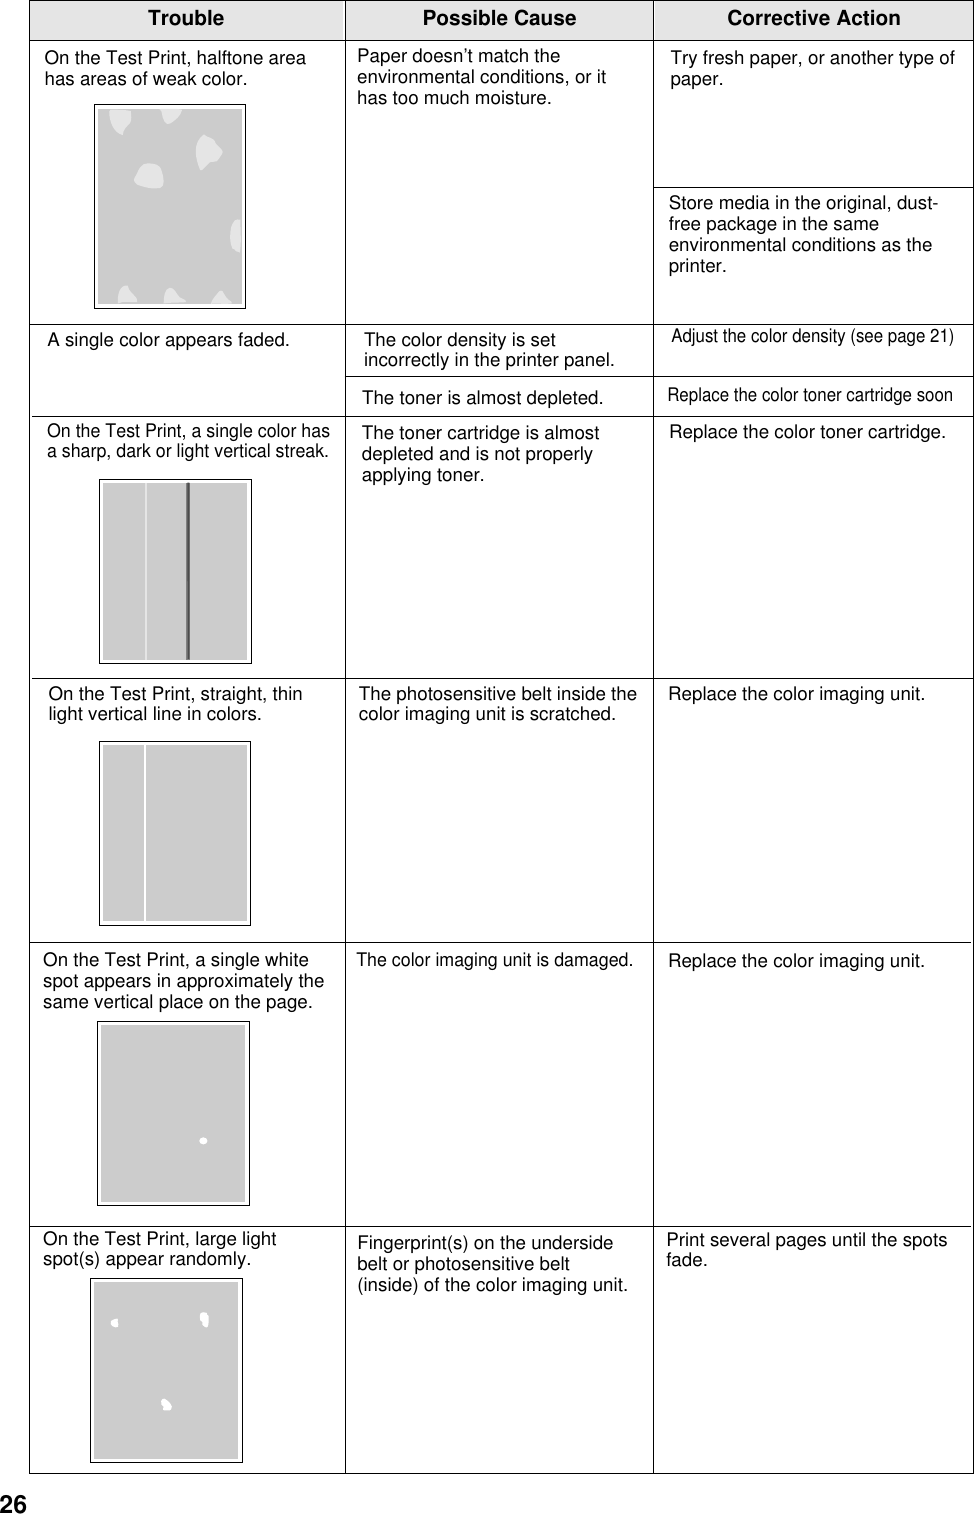
![9Make sure that all accessories shown below wereprovided and have not been damaged. Reportdamage or shortages to the reseller from which theunits were purchased. Page 3 includes an area forrecording important information such as the name ofreseller, serial number, and date of purchase.Note:BSave the original carton and packing materials forfuture shipping and transporting of the unit. Theyhave been specifically designed to protect theequipment during shipment.UnpackingToner cartridges(black, cyan, magenta, andyellow)(see page 10)Power cord (see page 11) Color Calibration Card(see page 21)KX-P8415 CD-ROM(includes printer driver,manuals and AcrobatReader program(see page 13, 14)Setup Guide andReference GuidePart NamesFront side viewRear side view#Charge unit (see page 28)$Printer panel %Right side door (see page 10)&Output tray (see page 10)'Media tray (see page 11)(Fuser unit )Color imaging unit (see page 10)*Front door (see page 10)$%&'()*#Multi-purpose tray (MPT) [see page 19]$Left side door [Media thickness switch is accessible by opening the left side door (see page 19)]%Parallel interface connector (see page 11)&AC inlet (see page 11)'Power switch (see page 15)&%$#'Supplement(for model numbers ofsupplies)Before You StartSetup Guide#](https://usermanual.wiki/Panasonic-of-North-America/5Z6KX-P8415/User-Guide-85125-Page-10.png)
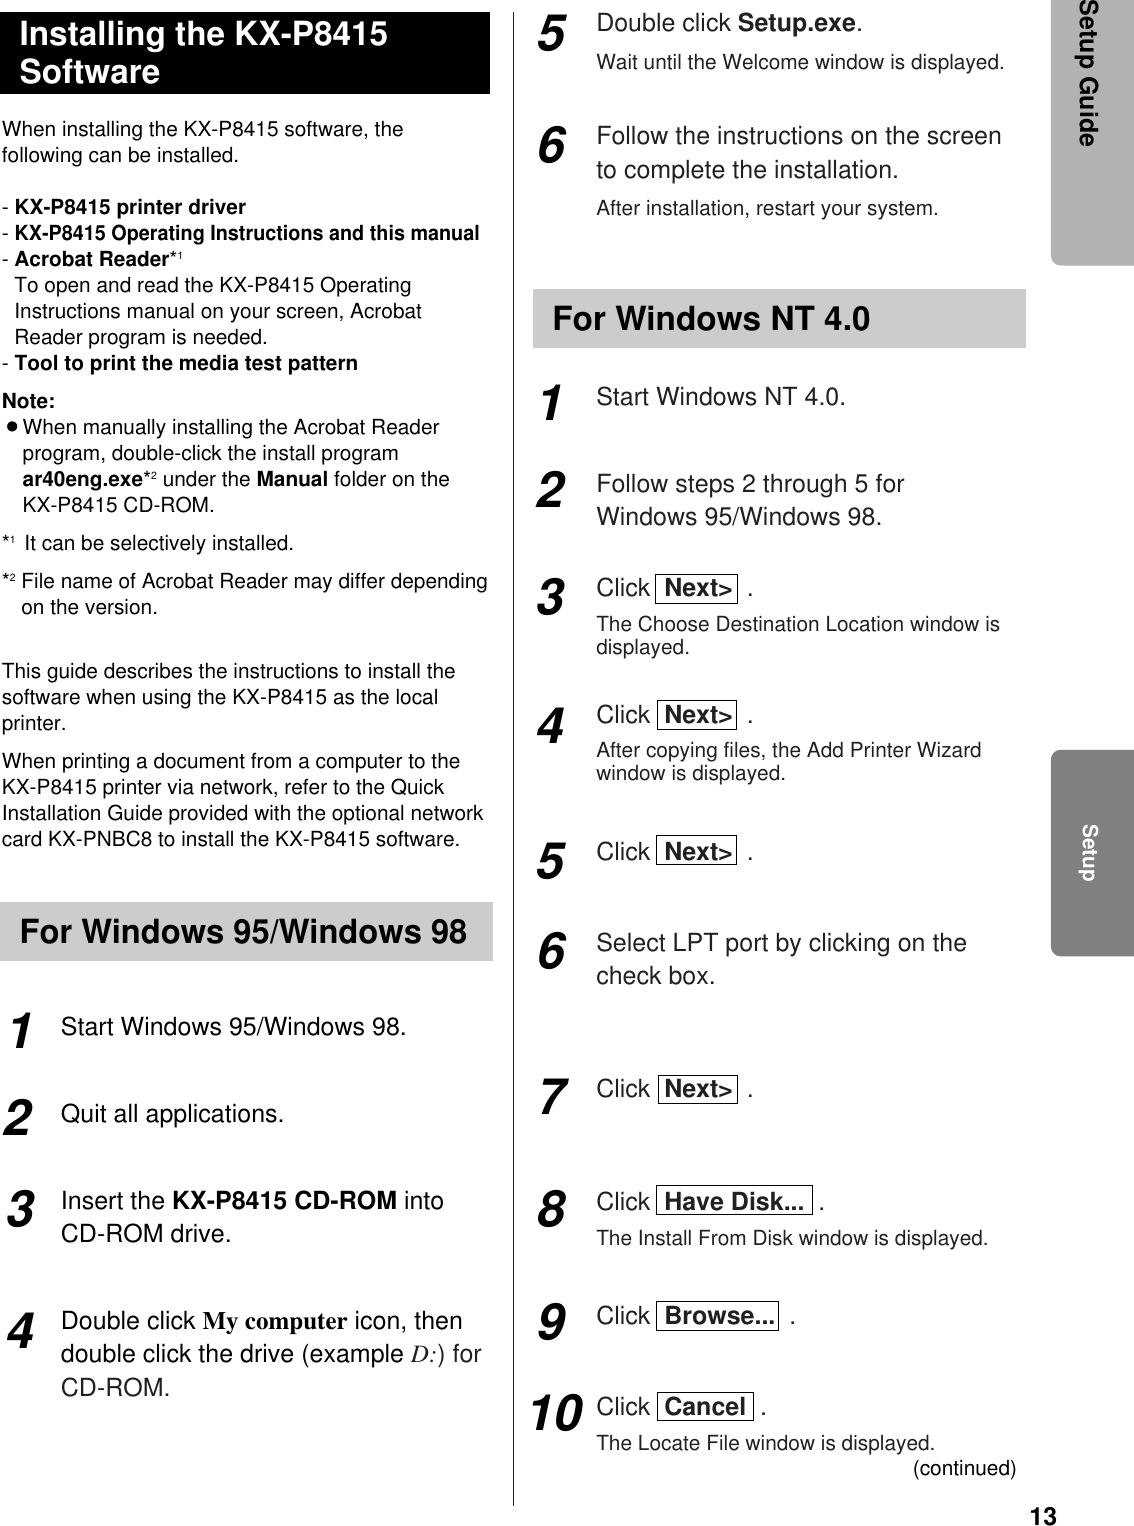
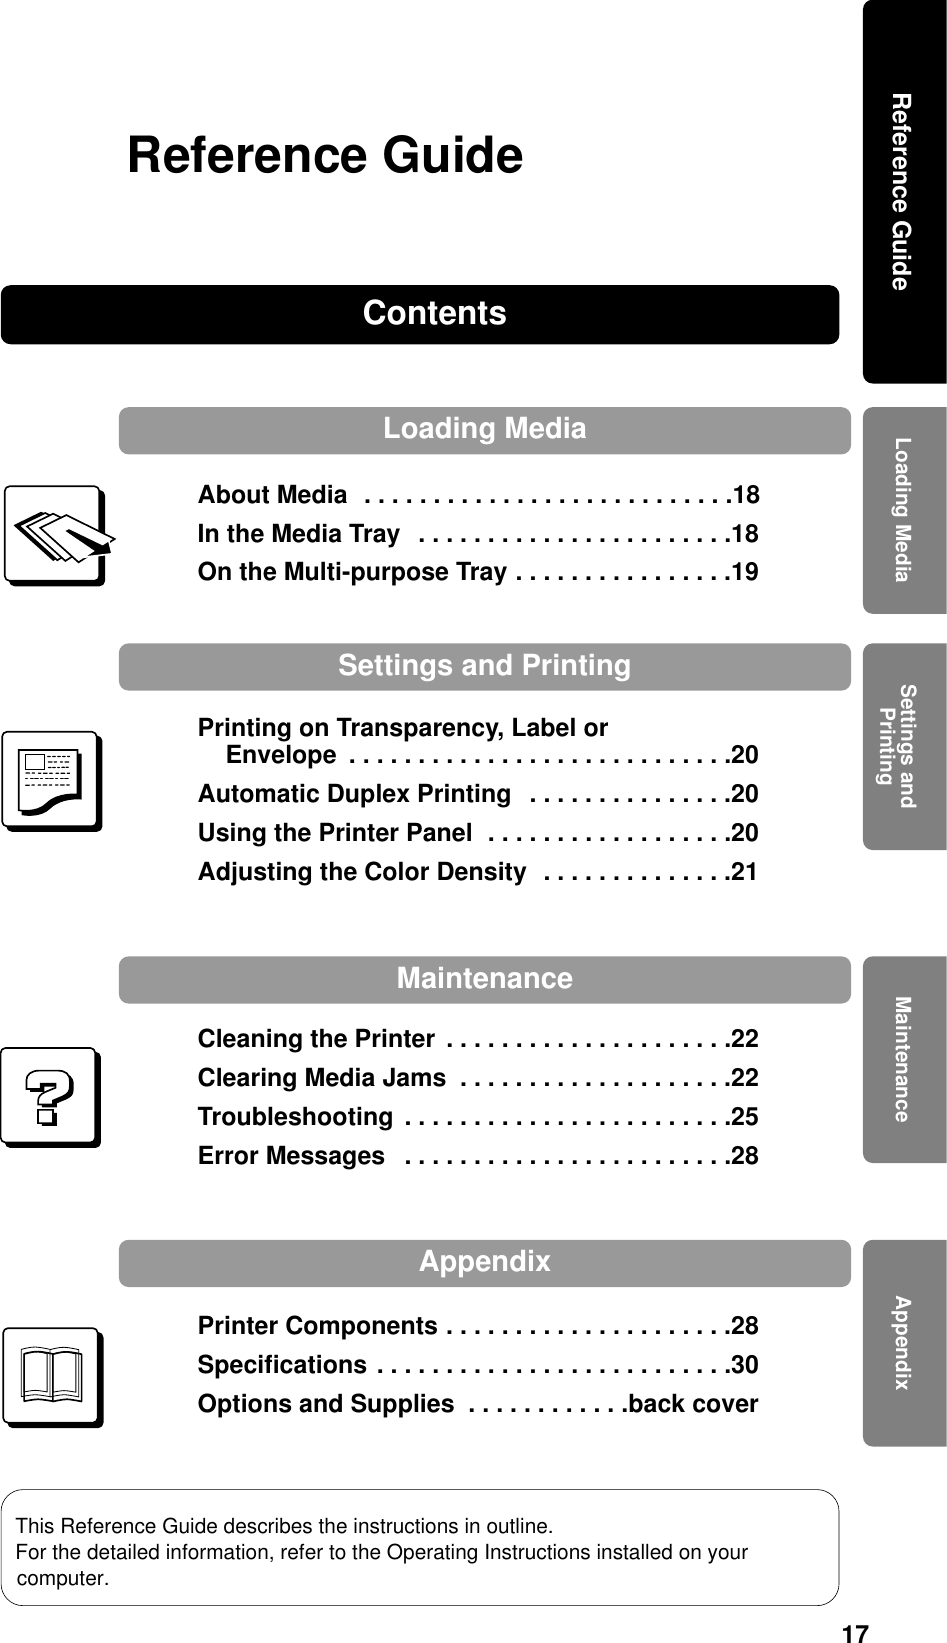
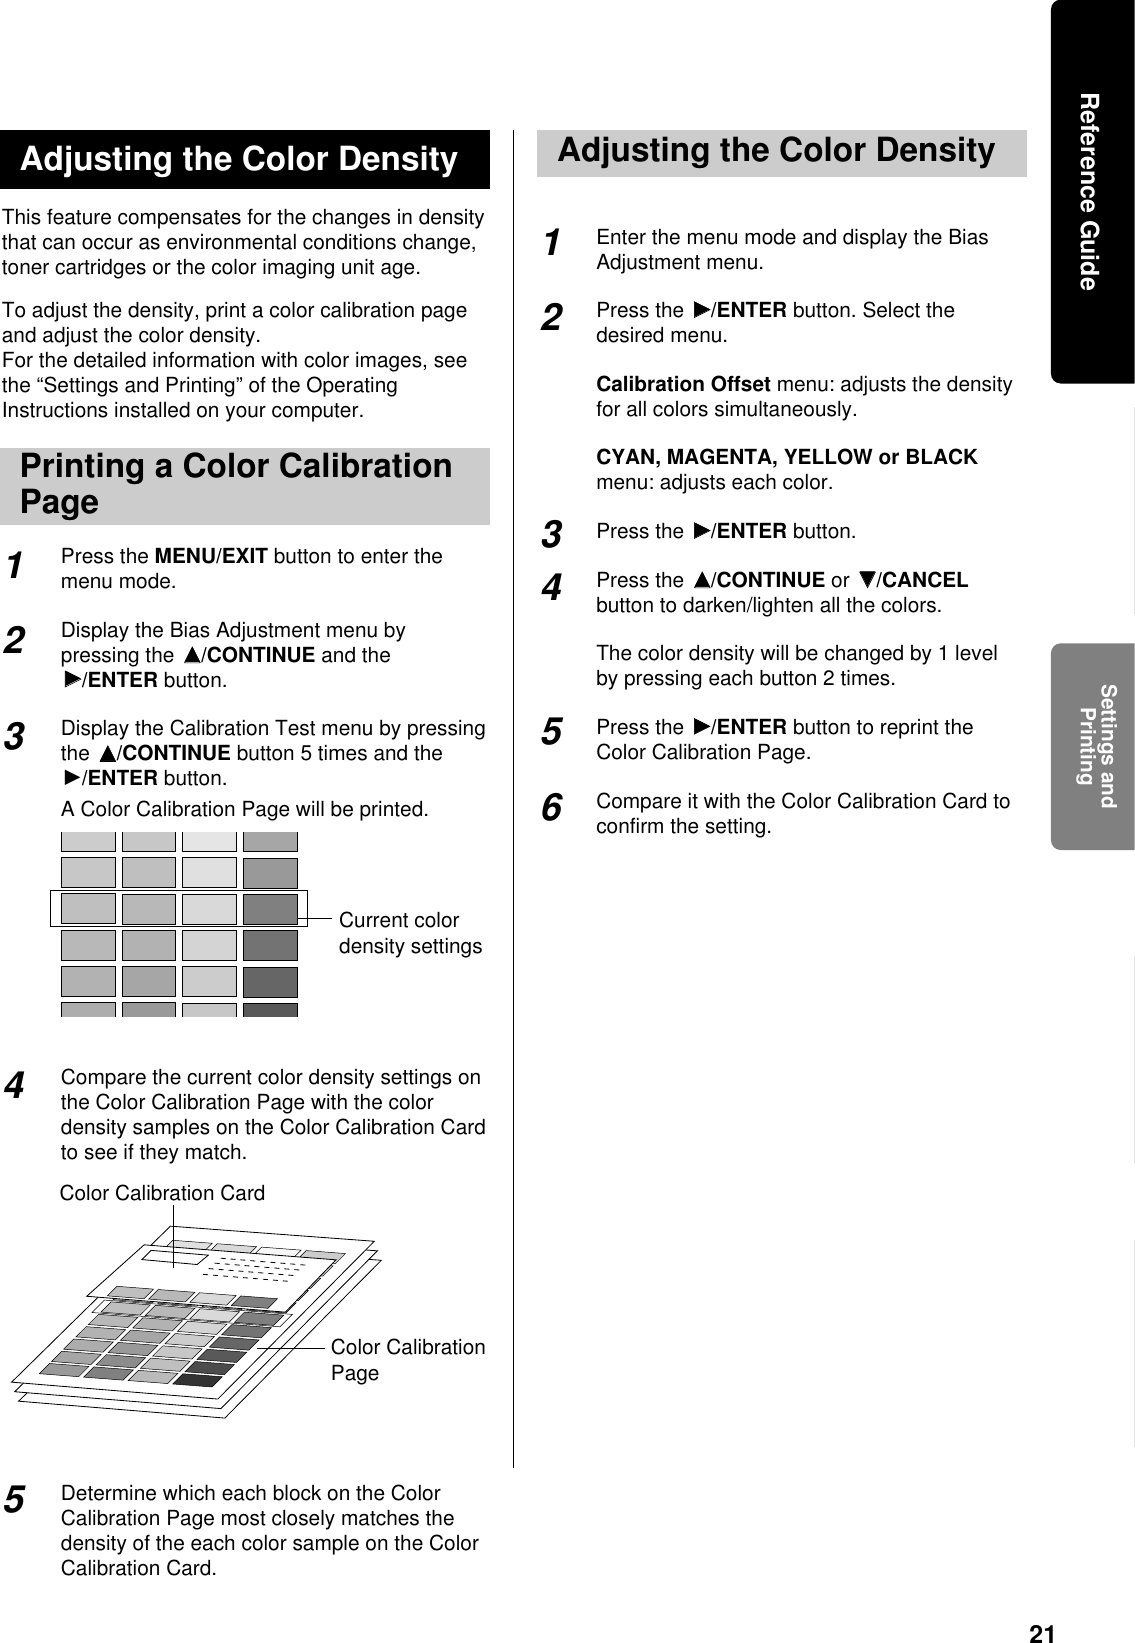
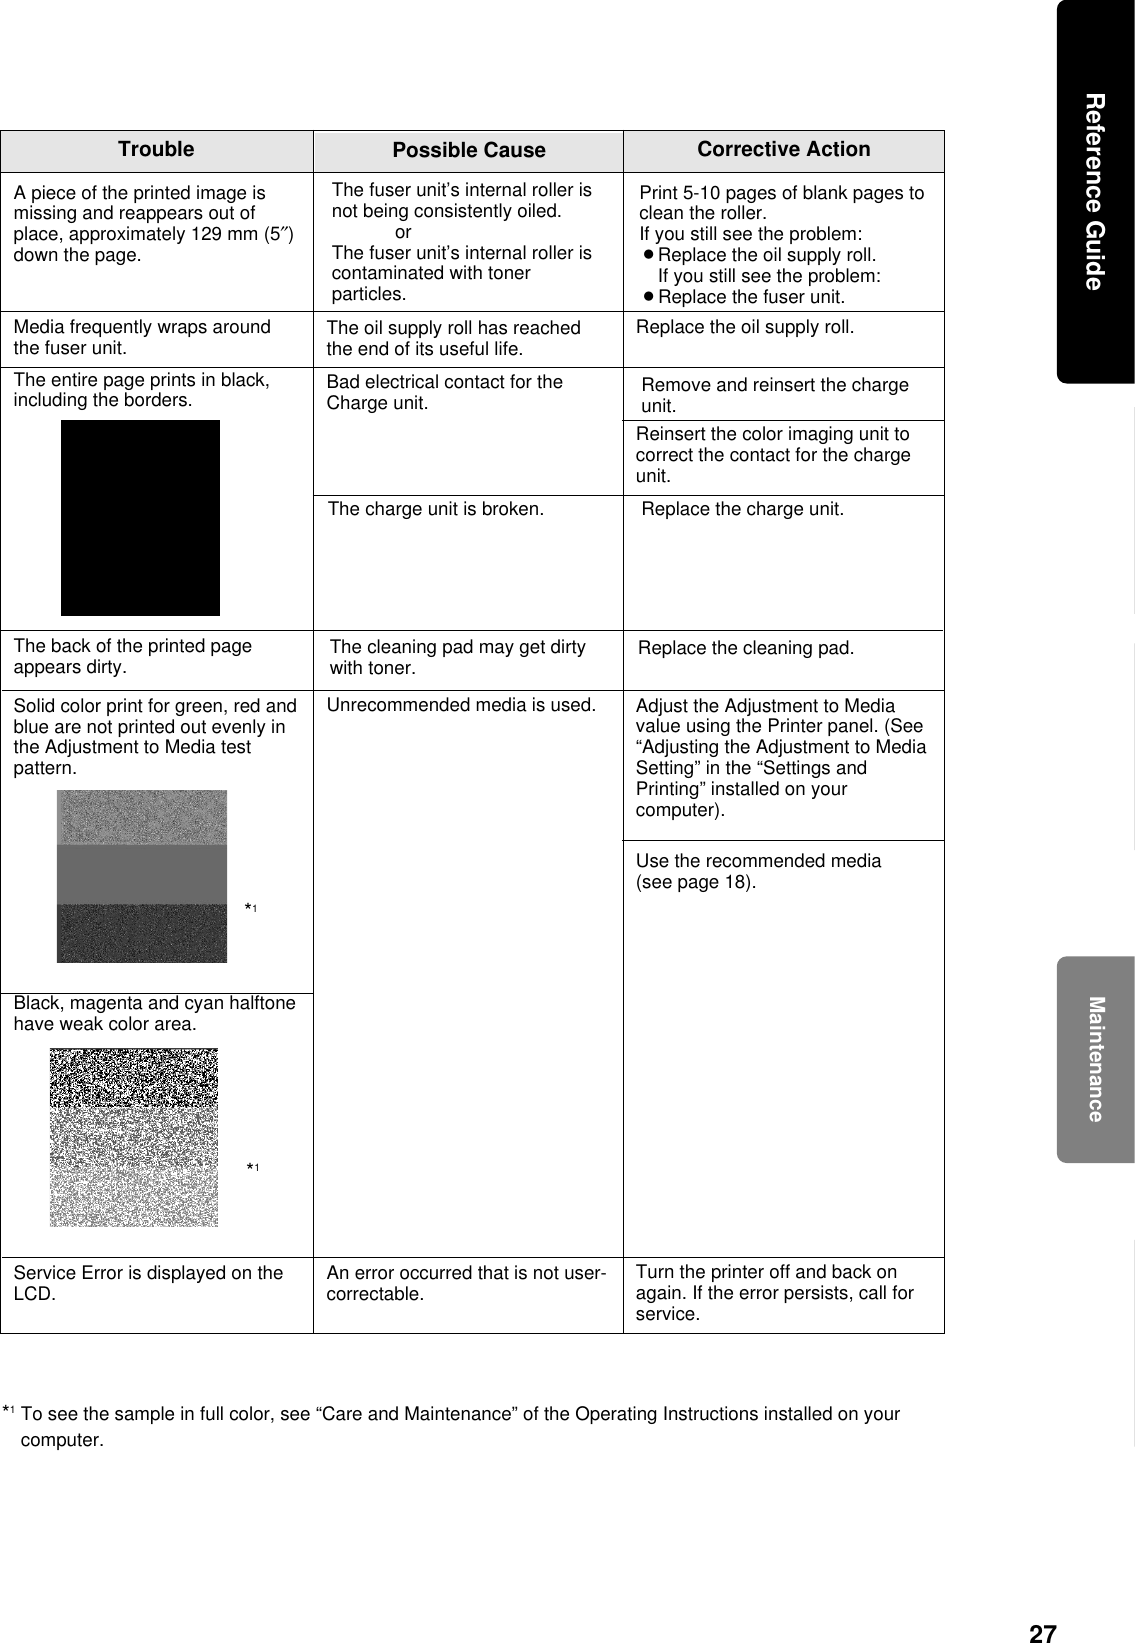
![TransparencyPaper 18Caution:BDo not use a media for ink jet that may bewrapped around the fuser roller and causedamage.Available media tray:A4 PaperA4 TransparencyLetter PaperLetter TransparencyLegal PaperPush down on the metal plate until it clicks,locking it in place.Place the media with the print side downunder the hooks in the tray.BThe height of media should not exceed thelimit mark on the tray, or it may cause a jam.*1Recommended paper is as follows: Letter/Legal: Hammermill LASERPRINT 90 g/m2(24 lbs.)A4: 4CC 80 g/m2*1When you perform the manual duplex printing,you should not expect the same print quality andreliability that you get with single-sided printing.See the notes on page 30.*2The print quality may not be stable. Use themedia tray for best reliability.For the notes and detailed media specification, referto “Specifications” of the Operating Instructionsinstalled on your computer.About MediaMedia TrayMedia DescriptionLaser paper*1TransparencyB&W: 60 to 105 g/m2(16 to 28 lbs.)Color: 75 to 105 g/m2(20 to 28 lbs.)3M CG3710Media DescriptionLaser paperTransparency*2Single-sided printing:75 to 165 g/m2(20 to 44 lbs.)Manual duplex printing*1:75 to 165 g/m2(20 to 44 lbs.)3M CG3710Labels Avery 5163-5165,L7163, L7165-L7169Envelope #10 [Black text only]Cardstock Up to 165 g/m2In the Media Tray12Print side down3M CG3710:Leading tape side upPaperTransparencyMulti-purpose Tray](https://usermanual.wiki/Panasonic-of-North-America/5Z6KX-P8415/User-Guide-85125-Page-19.png)
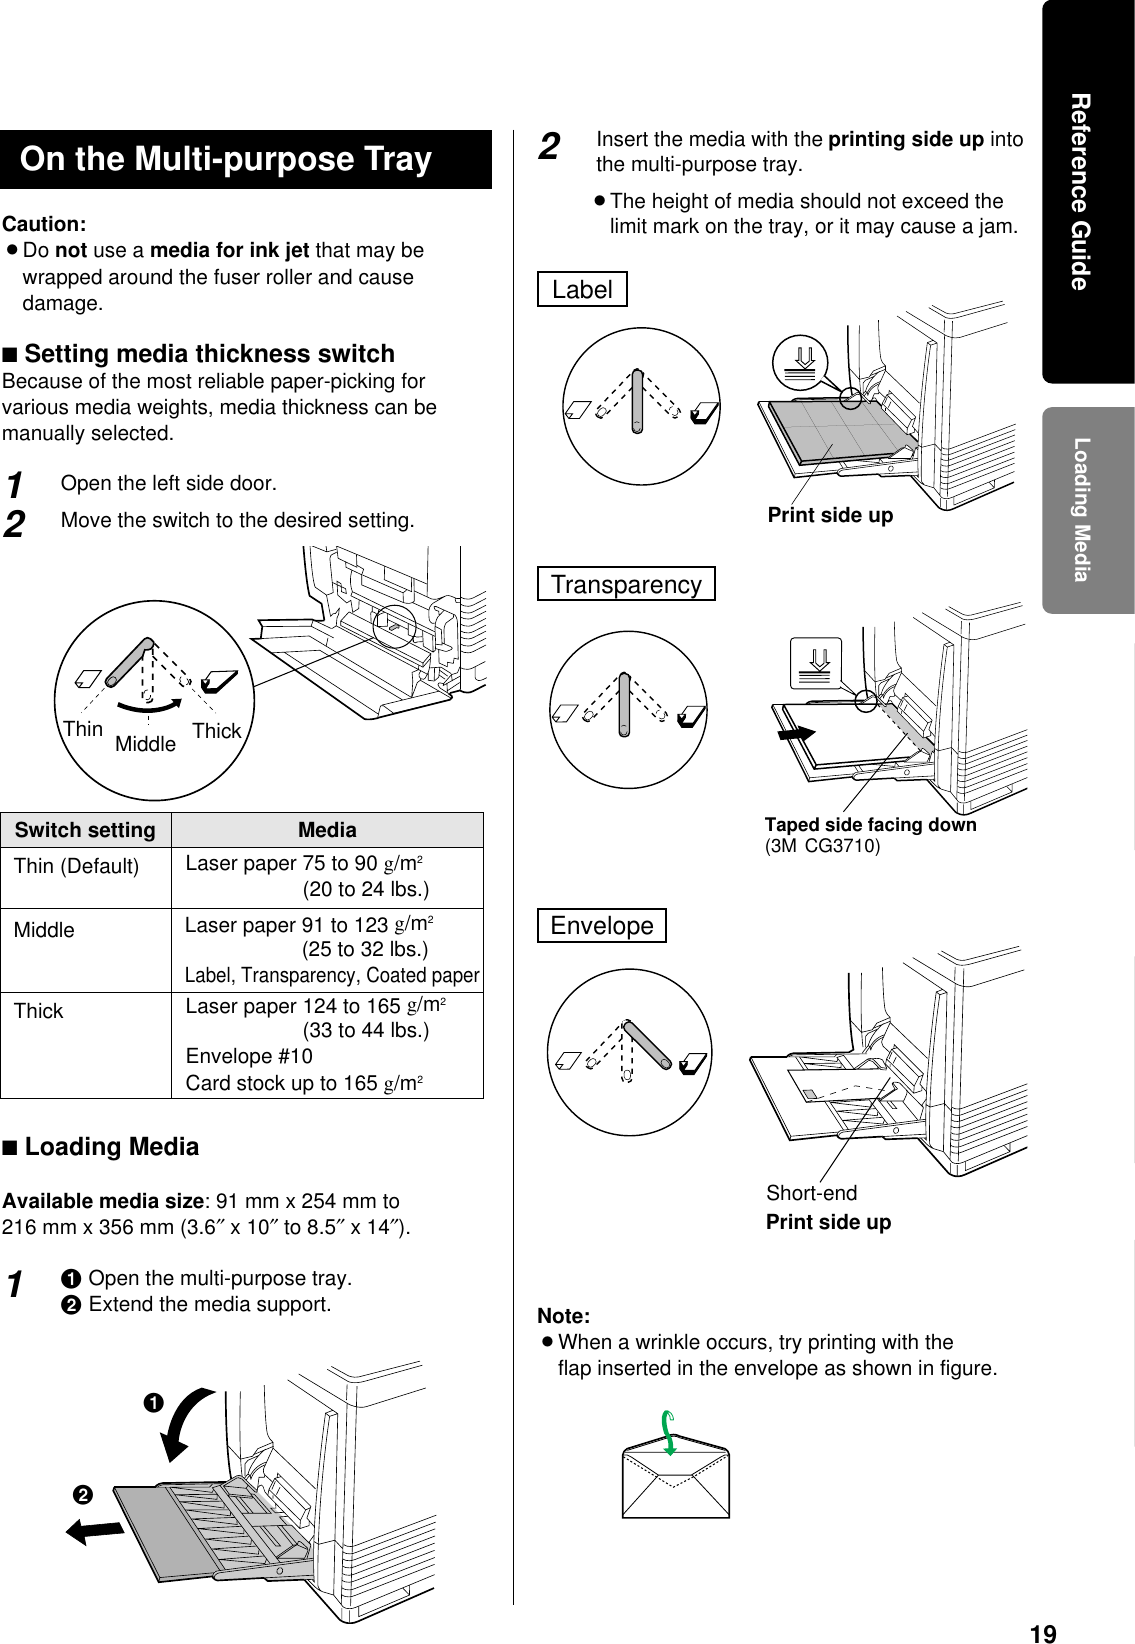
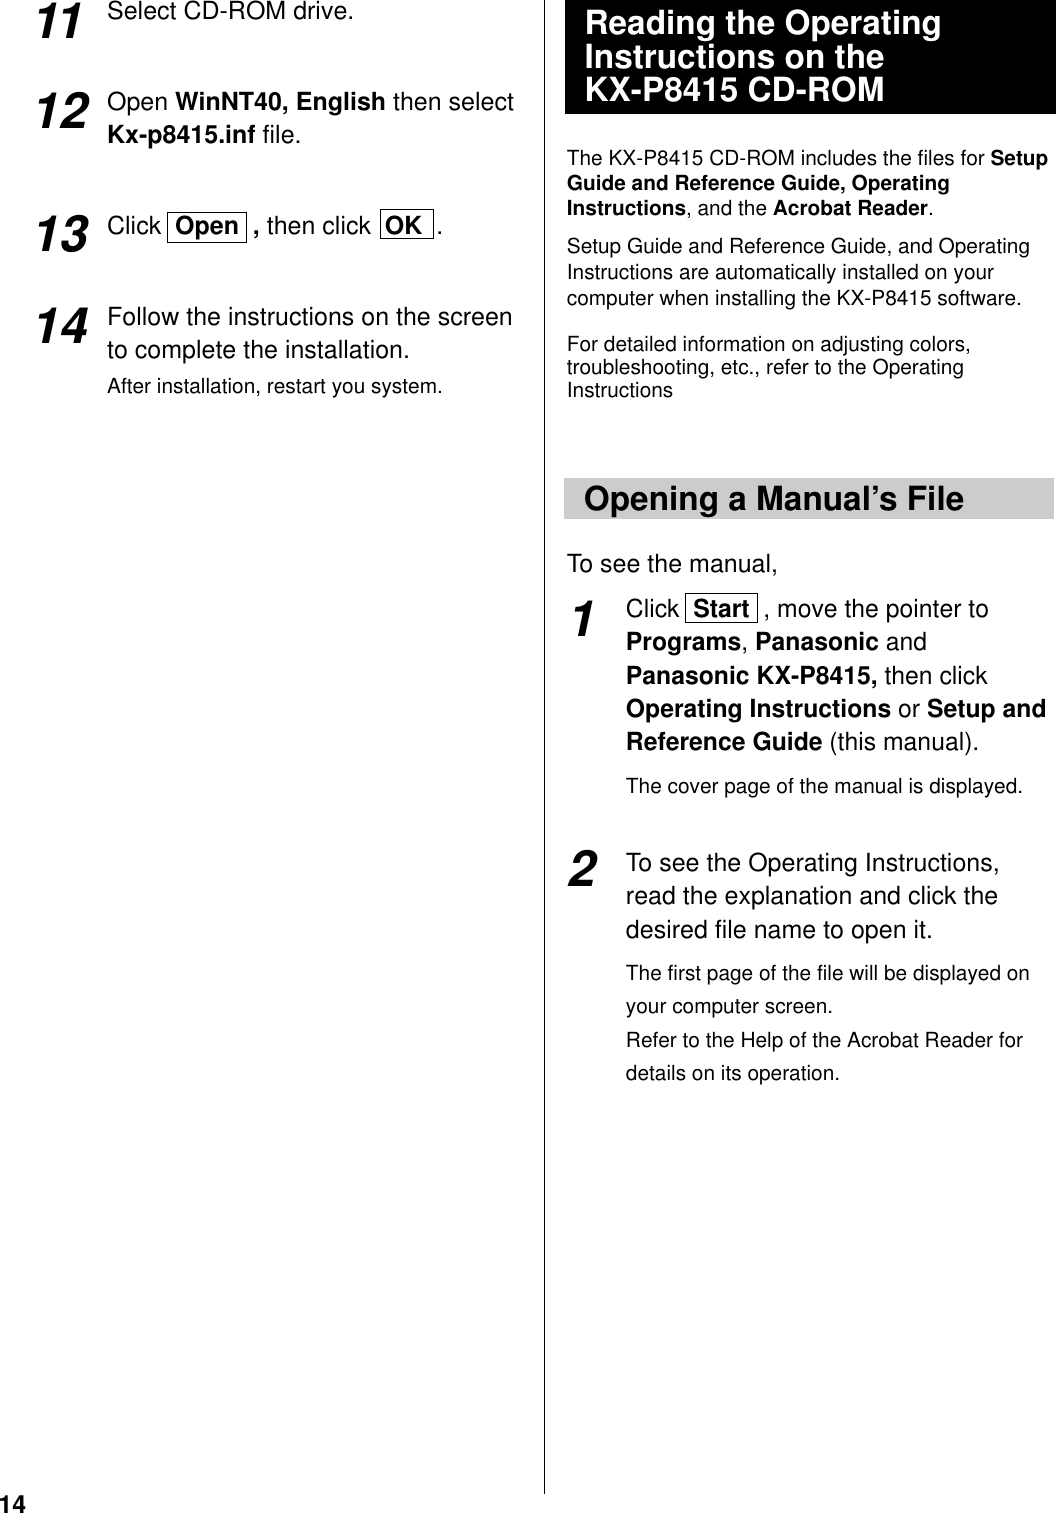
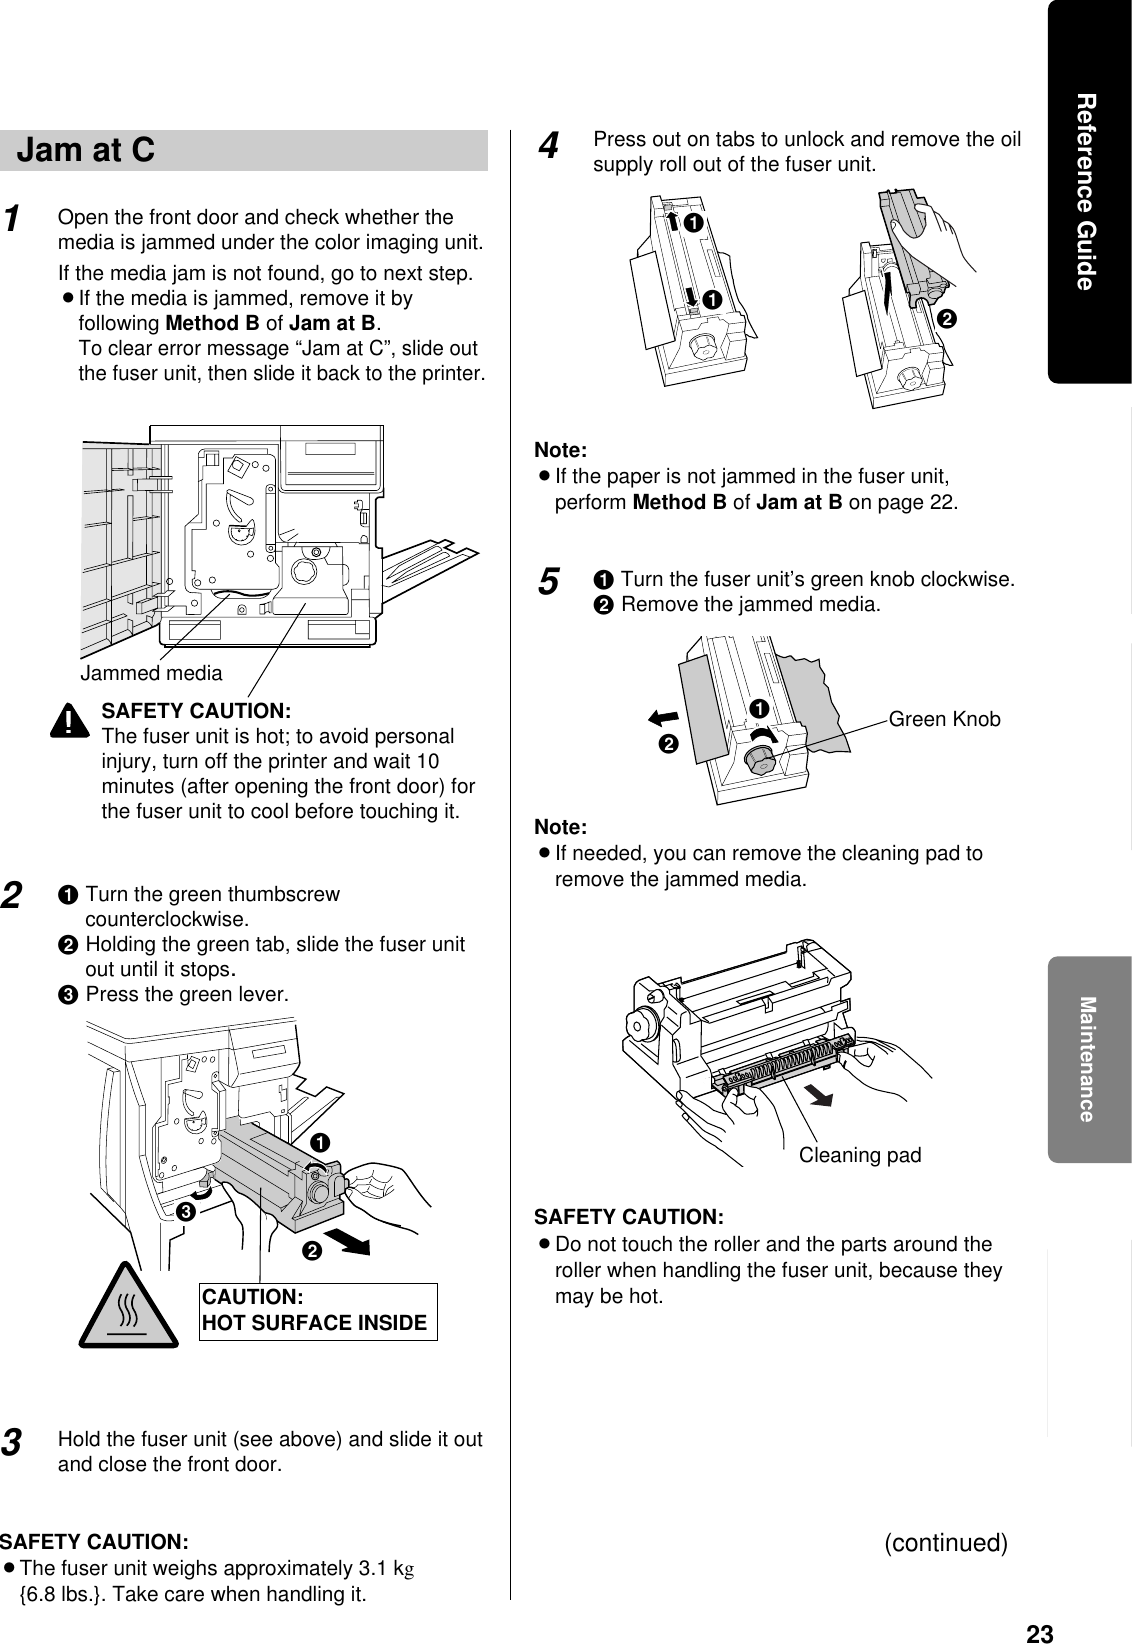
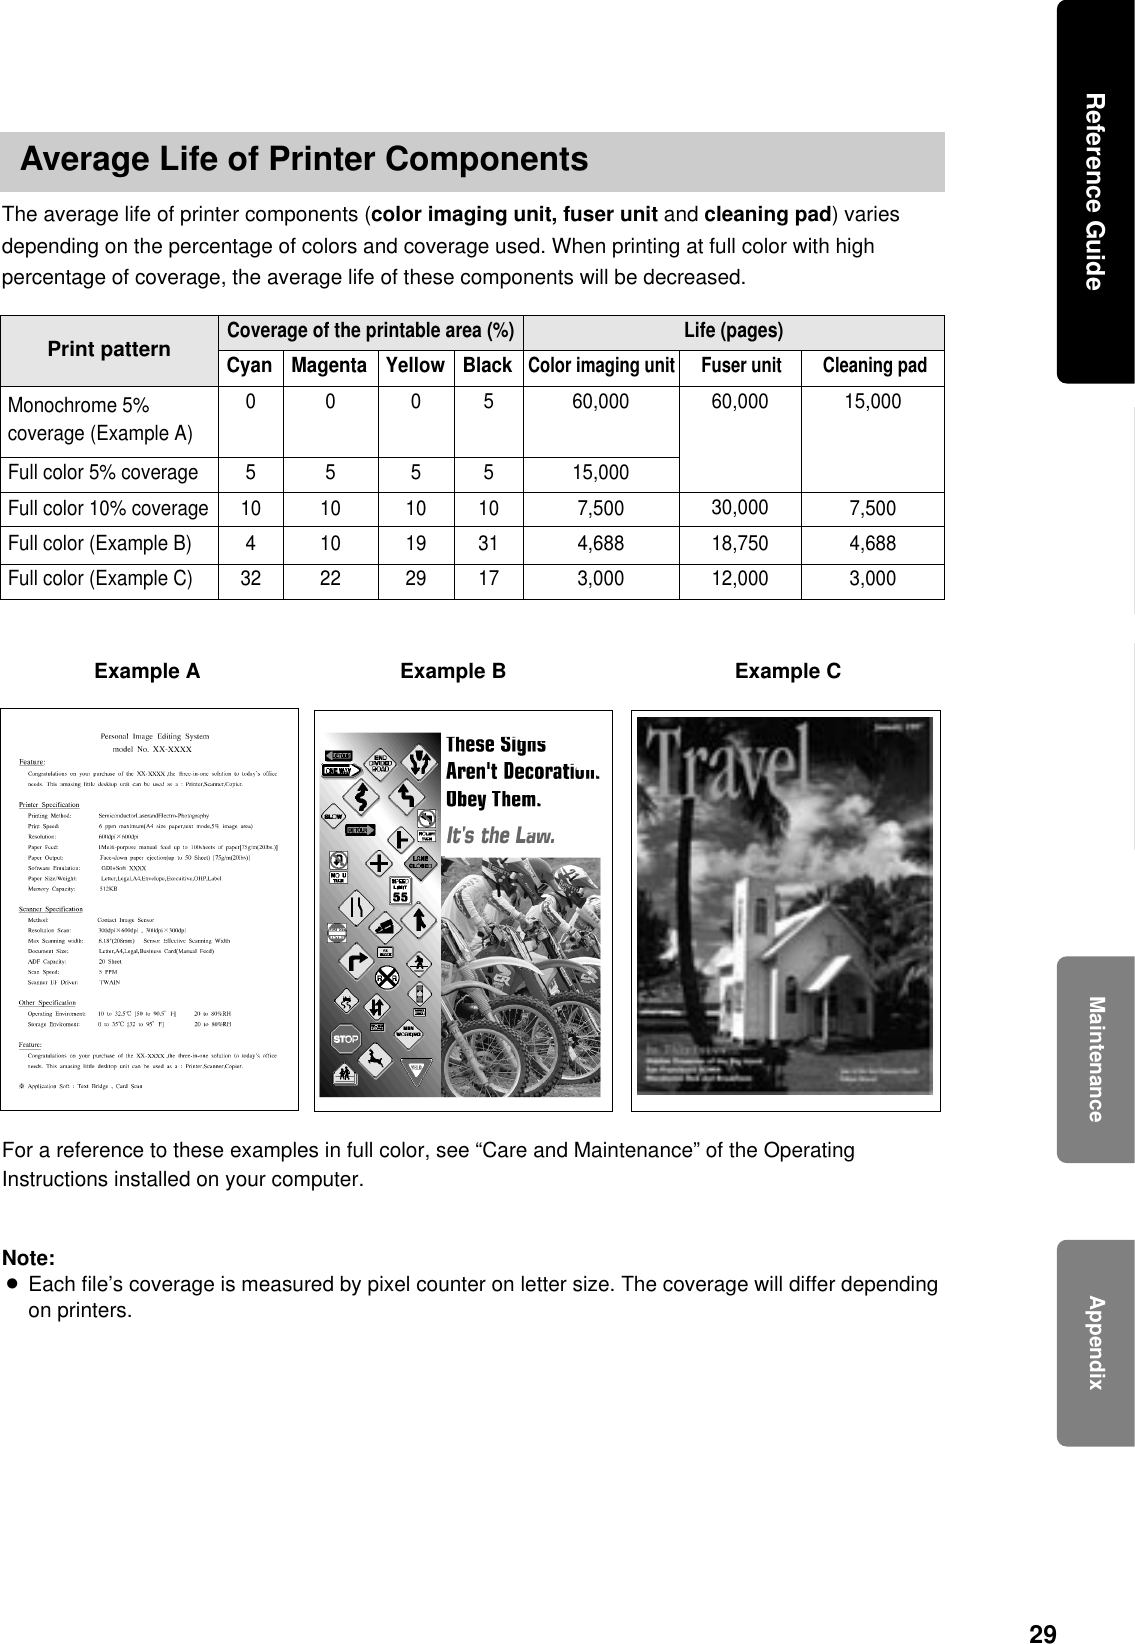
![22Periodic cleaning of the printer is recommended.The frequency of cleaning is dependent upon theenvironment in which the printer is used. You shouldclean the printer:BAt least once a month.BWhen the printer experiences frequent mediajams.BWhen print quality has deteriorated.For the detailed information, refer to “Care andMaintenance” of the Operating Instructions installedon your computer.■Jam at B, C, G, H:To clear a jam, see the instructions on thisReference Guide and “Care and Maintenance” of theOperating Instructions installed on your computer.■Jam at A, D, E, F, MPT:To clear a jam, refer to the label inside the front doorand “Care and Maintenance” of the OperatingInstructions installed on your computer.■ Incorrect media or wrong media settingsWhen “Media type mismatch” appears on theprinter panel, remove the jammed media [ seeinstruction above in “Jam at A” or “Jam at MPT(multi-purpose tray)”], then load the media in thecorrect media tray or select the correct media in theprinter driver (see “Settings and Printing” of theOperating Instructions installed on your computer).Note:BIf the error message is not cleared after removingjammed media, open and close the front door toclear it.Remove the jammed media from the multi-purpose tray.Open and close the front door to clear theerror message.Open the left side door.Pull out the paper feeder using the greenhandles. Remove the jammed media on orunder the paper feeder.Insert the paper feeder and close the left sidedoor.Clearing Media JamsLabel2Method AMethod B2113Jam at B (Method A or B)Cleaning the Printer](https://usermanual.wiki/Panasonic-of-North-America/5Z6KX-P8415/User-Guide-85125-Page-23.png)
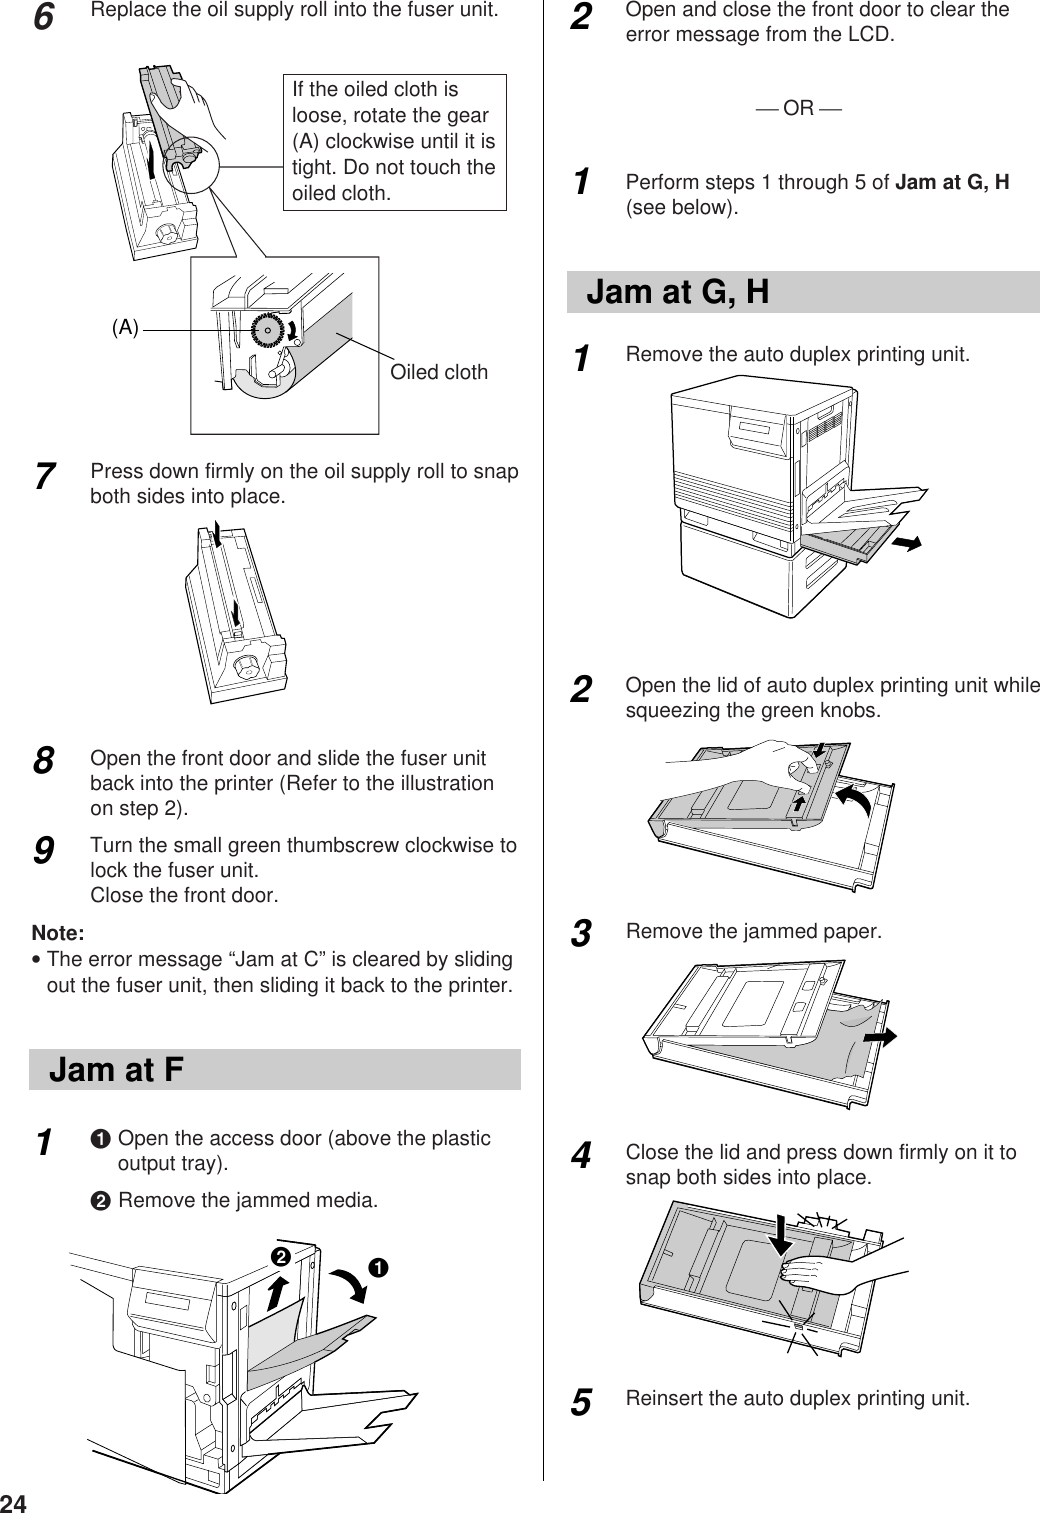

![30■Media sizes/Margins and printareaRefer to “Specifications” of the OperatingInstructions installed on your computer.■Types of Paper to avoidBExtremely smooth or shiny paper or paper that ishighly texturedBLetterhead imprinted with low temperature orthermography. These materials may transfer ontothe fusing roller and cause damage. Any pre-printed paper should use inks compatible with200°C (392°F) for 0.1 second.BDamaged or wrinkled paper, or paper withirregularities such as tabs, staples, etc.BMultipart forms or carbonless paperBPaper with a 25% or more cotton and/or fibercontentBInk jet media (paper, transparency,etc.) (It may transfer onto the fuser unit roller and causedamage.)■Duplex printingManual duplex printing is possible by using the multi-purpose tray. Automatic duplex printing is possibleby installing the optional 2nd cassette feeder withADU. However, you should not expect the sameprint quality and reliability that you get with single-sided printing. We strongly recommend that youfollow the guidelines below.Notes for manual duplex printing:BDo not load more than 50 sheets in the multi-purpose tray.BBefore loading paper in the multi-purpose tray,adjust it so that the edges of the media are lightlytouching the media guides of the multi-purposetray.BUse multi-purpose tray for second side printing.SpecificationsFor detailed information on specifications, refer to“Specifications” of the Operating Instructionsinstalled on your computer.Notes for manual / automatic duplex printing:BIt is strongly suggested to use color laser bondpaper.BBefore printing on the first side, set the unprintablearea [at least 15 mm (0.59″) in length] on the topof paper (see below.)BWhen printing on the first side, avoid printingphotograph or graphic in solid color to preventpaper jamming. It may cause a damage to theprinter.Unprintable area[a : at least 15 mm (0.59")]Paper feed directionPollution of WorldaIt is stronglyrecommended thatthe sizes ofphotograph andgraphic printed onthe page are assmall as possible.The first side printingOK N.G.Ex. CharactersEx. Photograph in solid colorMedia](https://usermanual.wiki/Panasonic-of-North-America/5Z6KX-P8415/User-Guide-85125-Page-31.png)