Panasonic of North America 96NKX-TD7690 2.4GHz FHSS Handset User Manual operating instruction
Panasonic Corporation of North America 2.4GHz FHSS Handset operating instruction
UserManual.wiki
>
Panasonic of North America
>
96NKX TD7690 User Manual
operating instruction
Navigation menu
Upload a User Manual
Namespaces
Wiki Guide
HTML
PDF
Info
Views
User Manual
Discussion / Help
Navigation

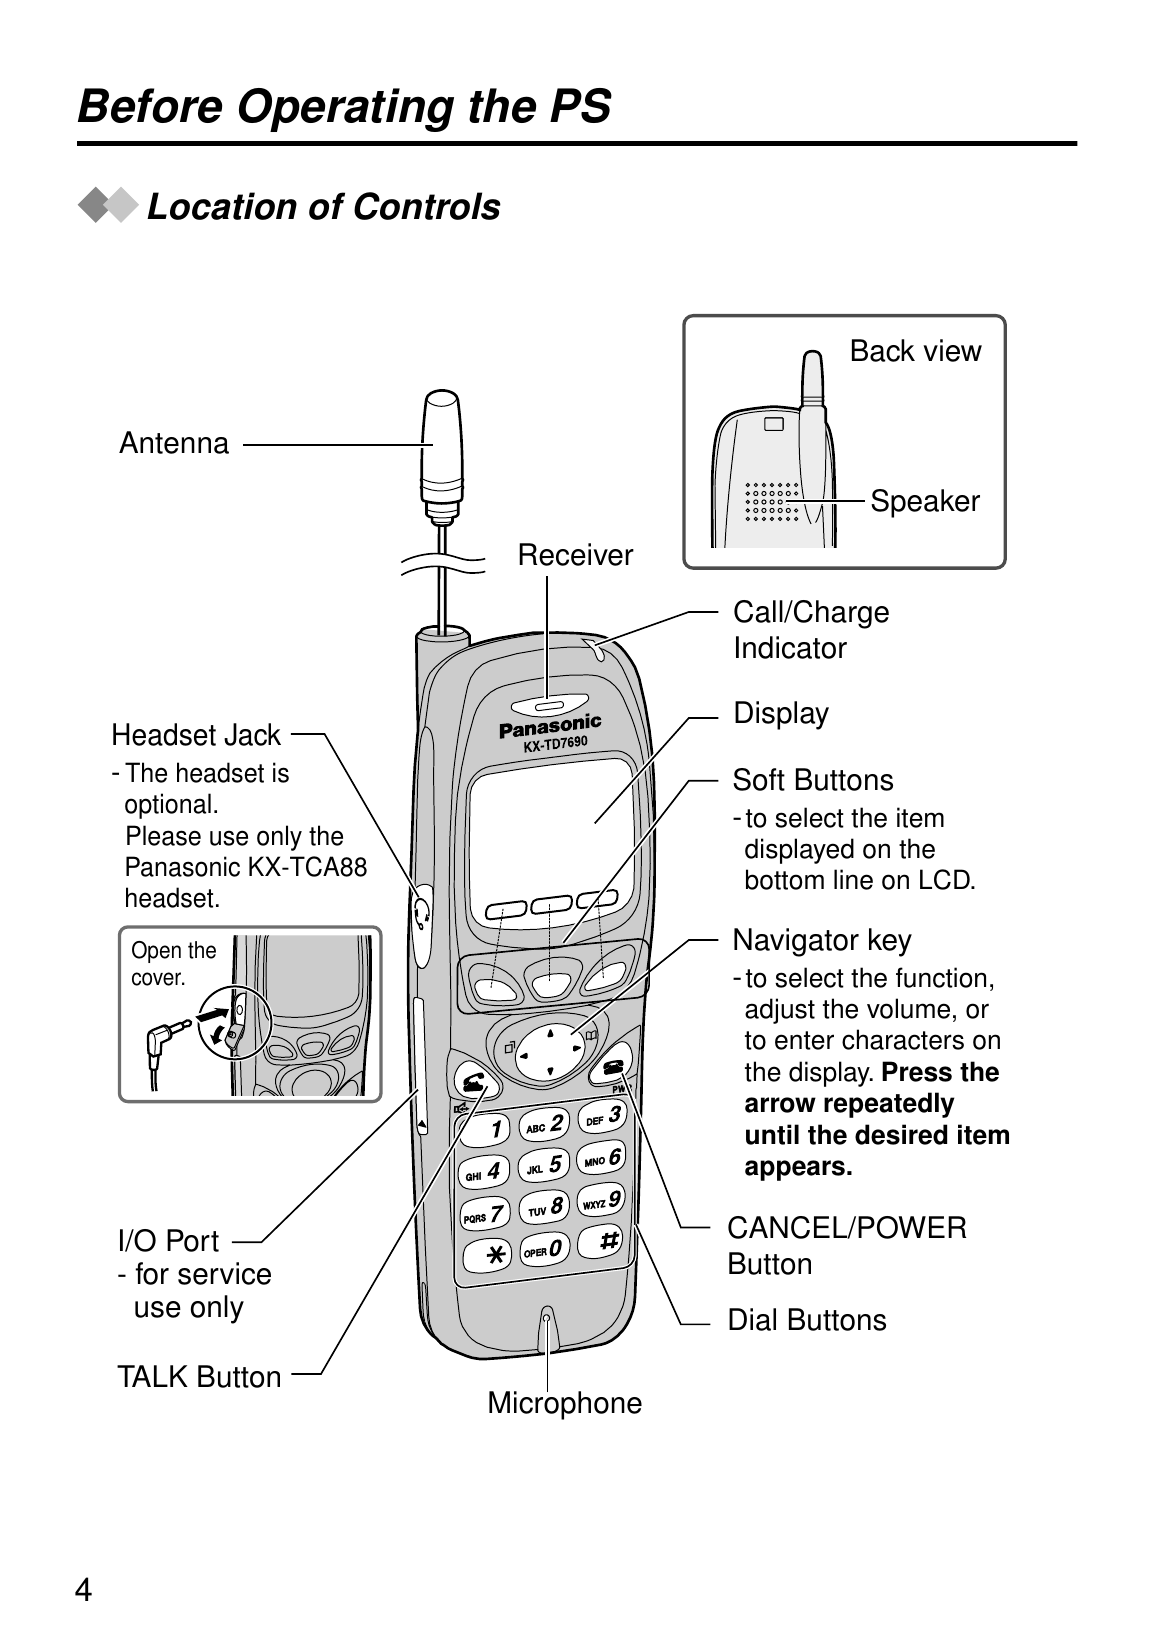

![11Before Operating the PSF-CO Key Display ExampleKey MenuThe following keys can be activated using a display operation.• You can change the key menu assignment (see page 38).1GDN[200]2CO013Loop-CO4DSS[1234]key numberF-CO Key Conditionblank: idle(On): You are using the line.(flashing rapidly): You have an incoming call.(flashing slowly): You have a held call.(On): Others are using the line.(flashing rapidly): Others have an incoming call.(flashing slowly): Others have a held call.ICMUsed to make or receive intercom calls.PAUSEUsed to insert a pause between numbers.TRANSFERHOLDUsed to tranfer a call to another extention.Used to place a call on hold.FWD/DNDUsed to set the Call Forwarding or Do Not Disturb features. MESSAGEUsed to leave a message to the called party or call back the message sender.FLASH(RECALL)AUTO ANSWERUsed to disconnect a current call and make another call without hanging up.Used to answer an incoming call automatically.CONFERENCETONE21345678Used to establish a multiple-party conversation.Used to change the dialing mode to tone temporarily. Key no.(default)KeyDescription](https://usermanual.wiki/Panasonic-of-North-America/96NKX-TD7690/User-Guide-181430-Page-11.png)


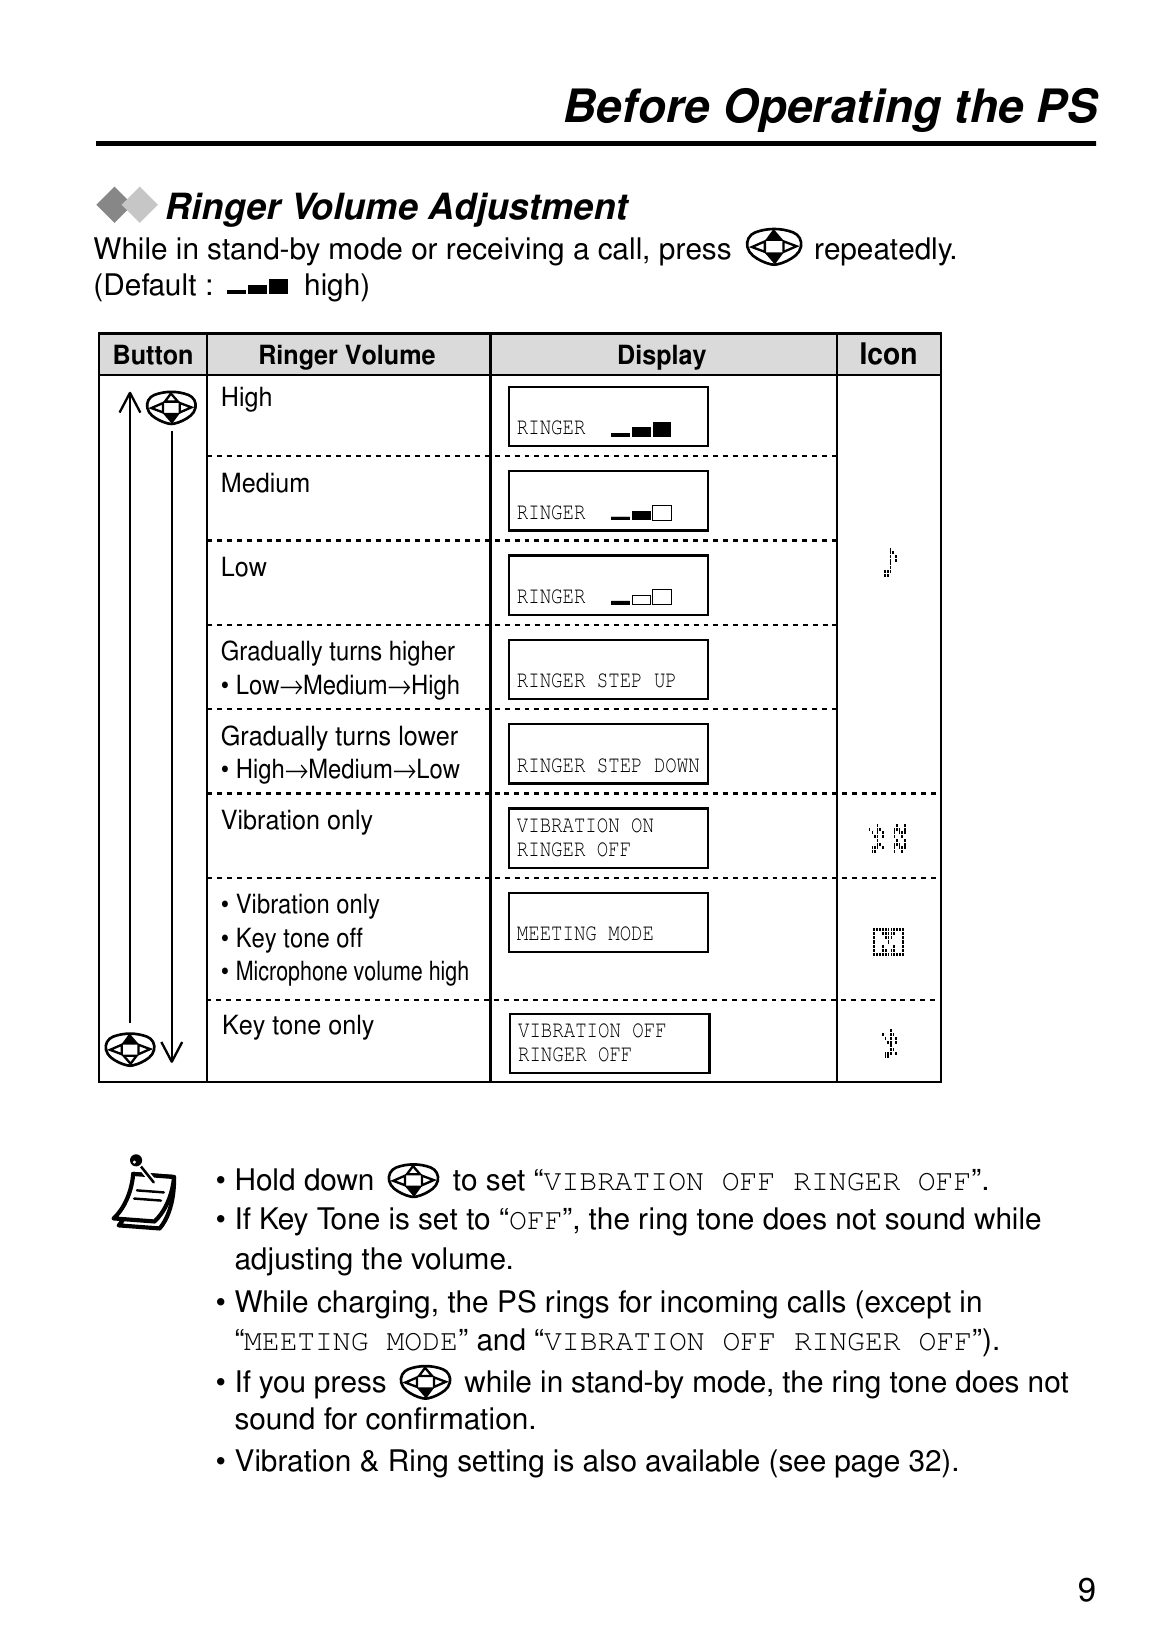
![39Battery InformationAfter your Panasonic battery is fully charged [at 25°C (77°F)]:• Battery life may be shortened depending on usage conditions and ambient temperature.• You need not worry about overcharging.• The battery will drain even while the unit is "OFF".• The PS can receive calls even while charging.• If " " flashes, power off the handset, otherwise battery life will be shortened greatly.Low Battery WarningWhen the battery needs to be charged, " " flashes or beeps sound every five seconds. During a conversation, the call will hang up automatically within one minute. If idle or in a programming status, "CHARGE BATTERY" is displayed and no key is operated, but the key is available. In these cases, recharge the battery.Replacing the BatteriesIf " " flashes after a few telephone calls even when the handset batteries have been fully charged, it is time to replace the batteries with new ones.Before replacing the batteries, turn the power off to prevent memory loss. Make sure you charge the new batteries for about 6 hours in order to display the battery strength prompt correctly.• Please order Panasonic battery with service part No. to replace.OperationWhile in use (Talk)While not in use (Standby)Approx. battery lifeUp to about 6 hoursUp to about 60 hoursDanger of explosion if battery is incorrectly replaced.Replace only with the same or equivalent type of battery recommended by the manufacturer.Dispose of used batteries according to the manufacturer's instructions.The product that you have purchased contains a rechargeable battery. The battery is recyclable. At the end of its useful life, under various state and local laws, it may be illegal to dispose of this battery into the municipal waste stream. Check with your local solid waste officials for details in your area for recycling options or proper disposal.CAUTION:The lithium ion/polymer battery you have purchased is recyclable. Please call 1-800-BATTERY for information on how to recycle this battery.Important Information](https://usermanual.wiki/Panasonic-of-North-America/96NKX-TD7690/User-Guide-181430-Page-39.png)