Panasonic of North America 96NKX-TG1031 Cordless Telephone Base User Manual
Panasonic Corporation of North America Cordless Telephone Base
UserManual.wiki
>
Panasonic of North America
>
96NKX TG1031 User Manual
User manual
Navigation menu
Upload a User Manual
Namespaces
Wiki Guide
HTML
PDF
Info
Views
User Manual
Discussion / Help
Navigation
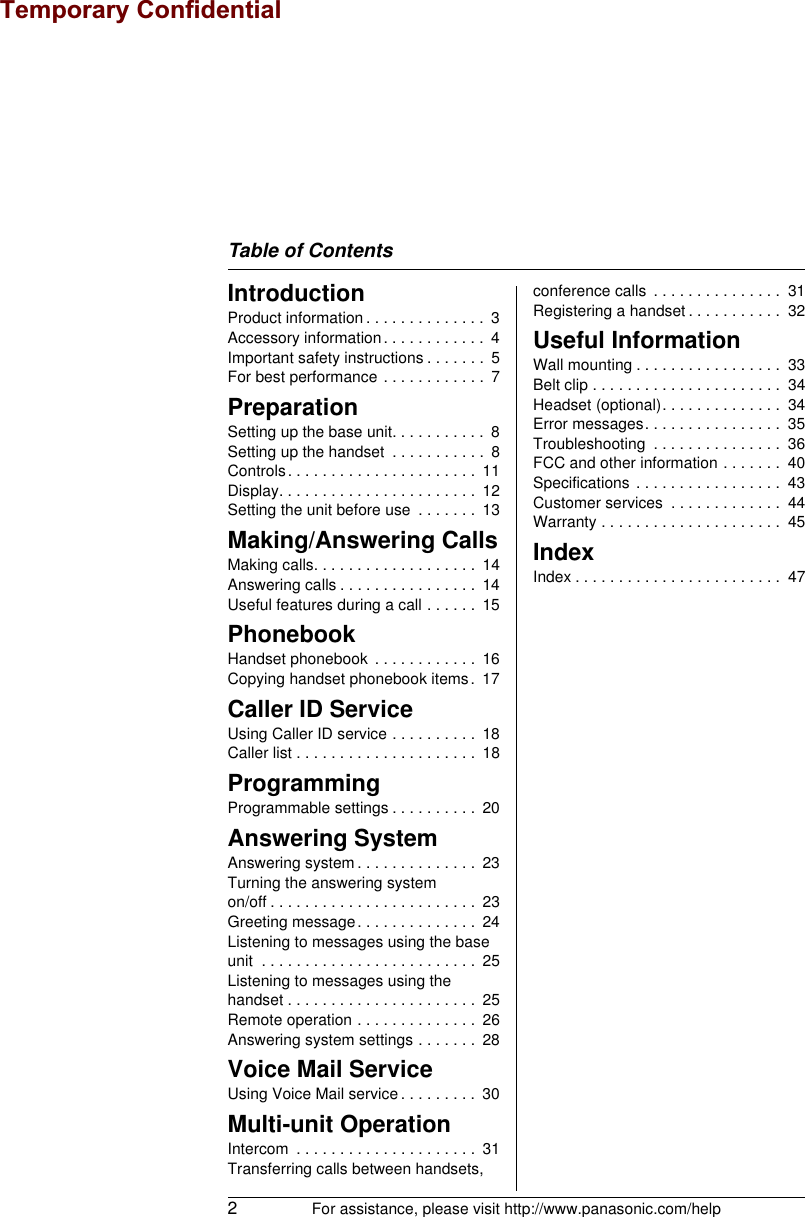
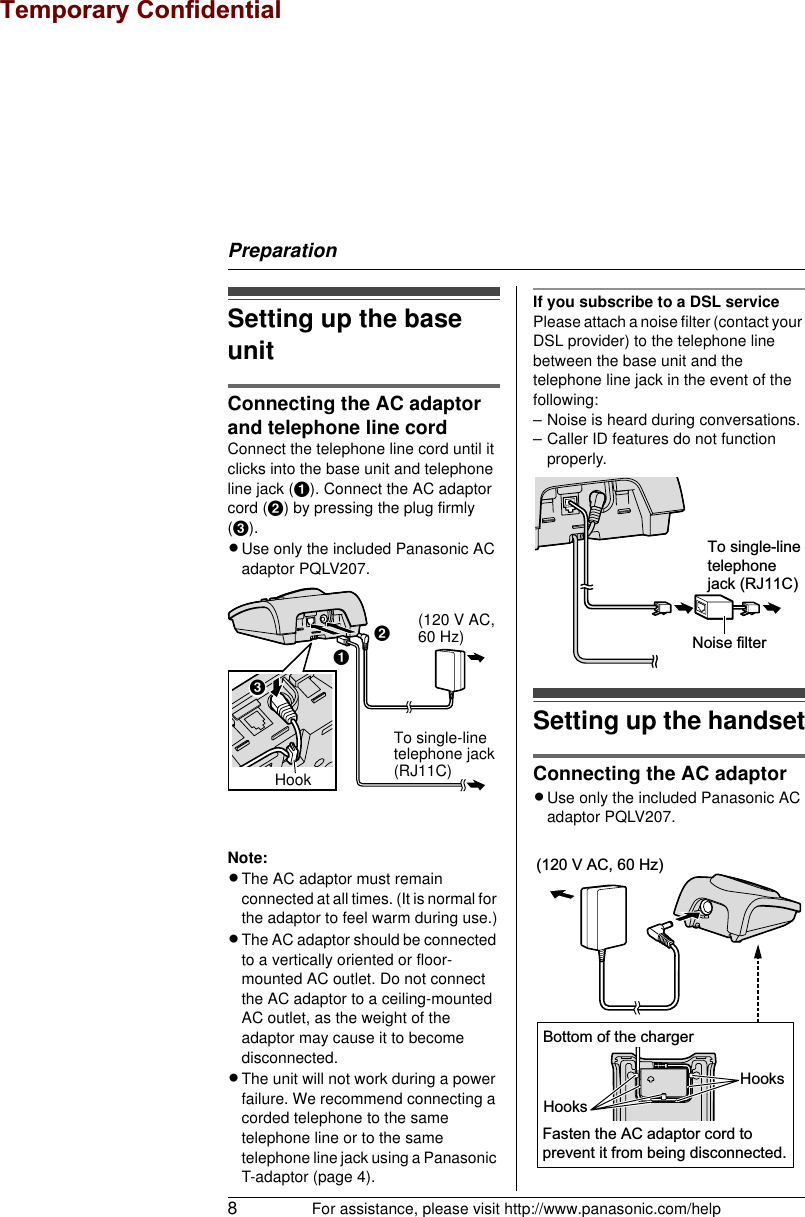
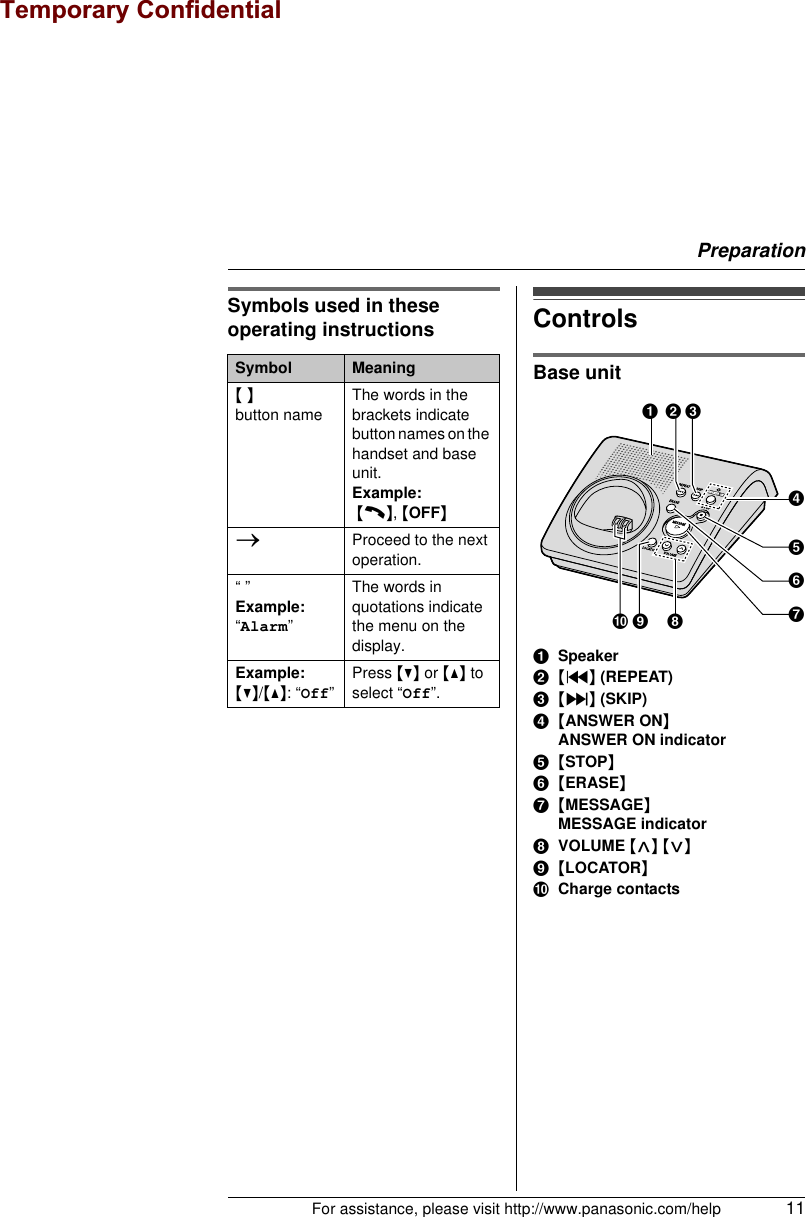
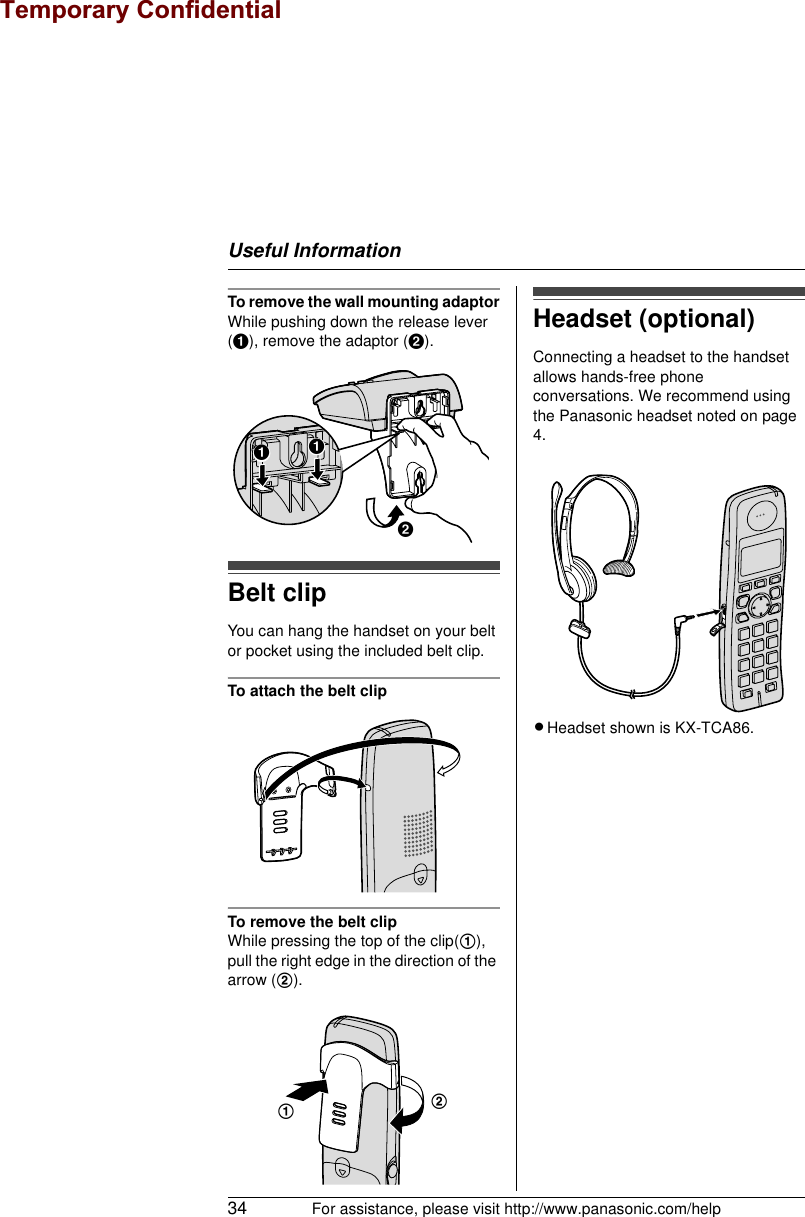
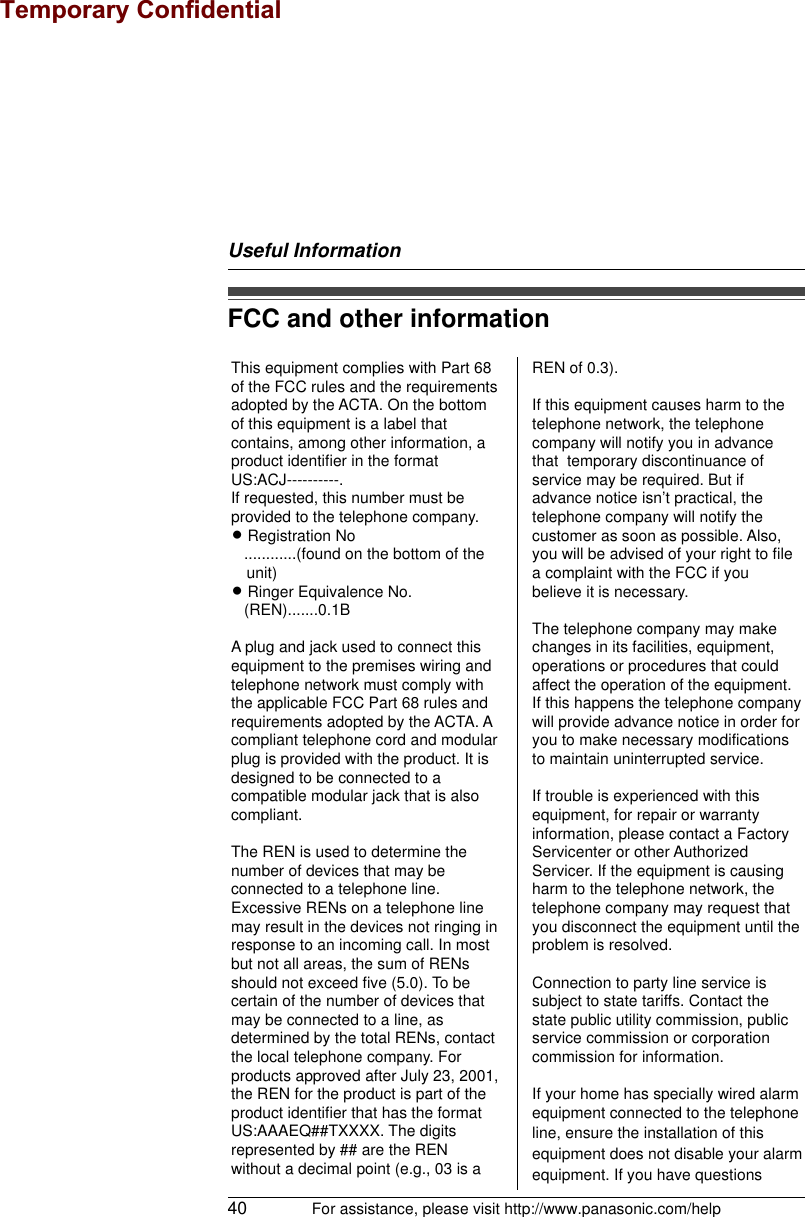
![Preparation12 For assistance, please visit http://www.panasonic.com/helpHandsetASpeakerB{k} (PHONEBOOK)C{MENU} {OK}D{C} (TALK)EHeadset jackF{s} (SP-PHONE)G{*} (TONE)H{FLASH} {CALL WAIT}ICharge contactsJCharge indicatorRinger indicatorMessage indicatorKReceiverLDisplayM{REDIAL} {PAUSE}N{OFF}ONavigator key ({^} {V} {<} {>})P{MUTE} {CLEAR}Q{INTERCOM} {TRANSFER}RMicrophoneUsing the navigator keyThe handset navigator key can be used to navigate through menus and to select items shown on the display by pressing {^}, {V}, {<}, or {>}.Adjusting audio volumePress {^} or {V} repeatedly while talking.DisplayHandset display itemsALMNQROPBCEFGHIJKPAU SEPHONEBOOKOKDDisplayed item MeaningwWithin range of the base unitLWhen flashing: Handset is searching for base unit. (out of range of base unit, handset is not registered to base unit, no power on base unit)5Battery levelExample: [1]The handset’s extension number (example shown here: handset 1){V}{^}{<}{>}Temporary Confidential](https://usermanual.wiki/Panasonic-of-North-America/96NKX-TG1031/User-Guide-740473-Page-12.png)
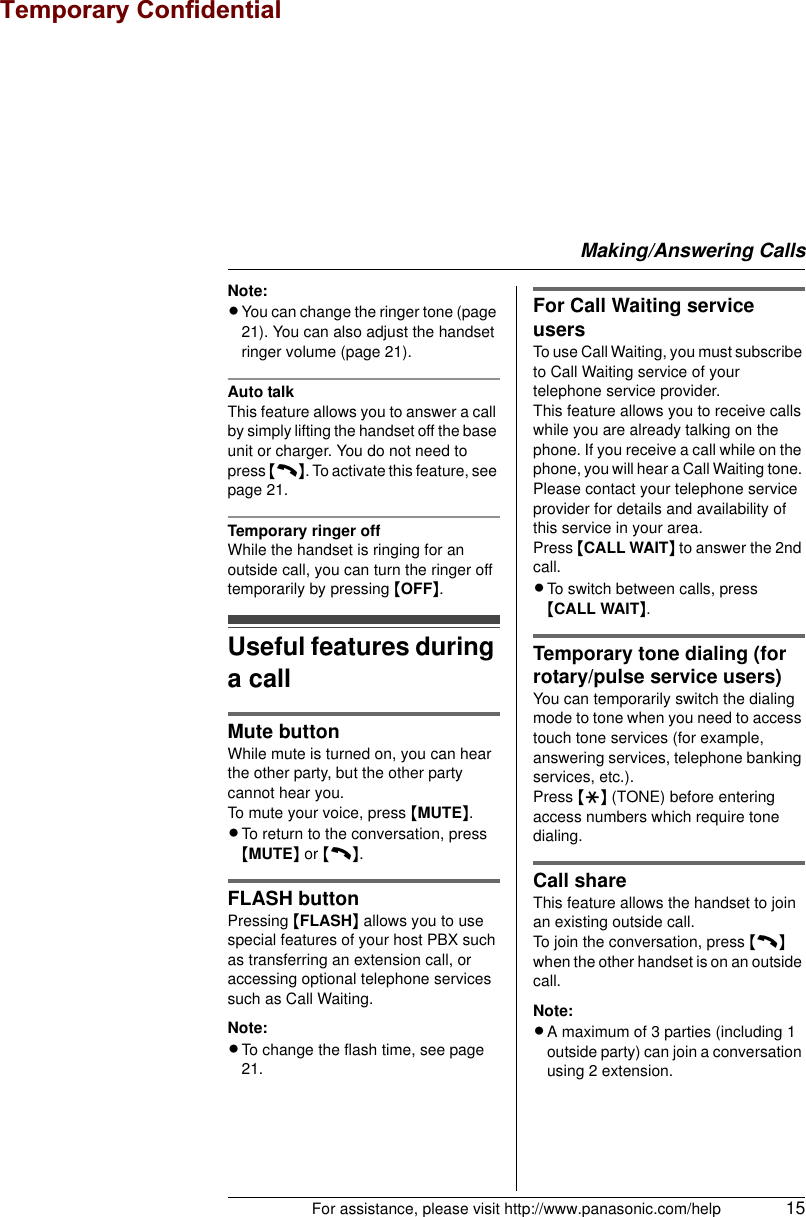
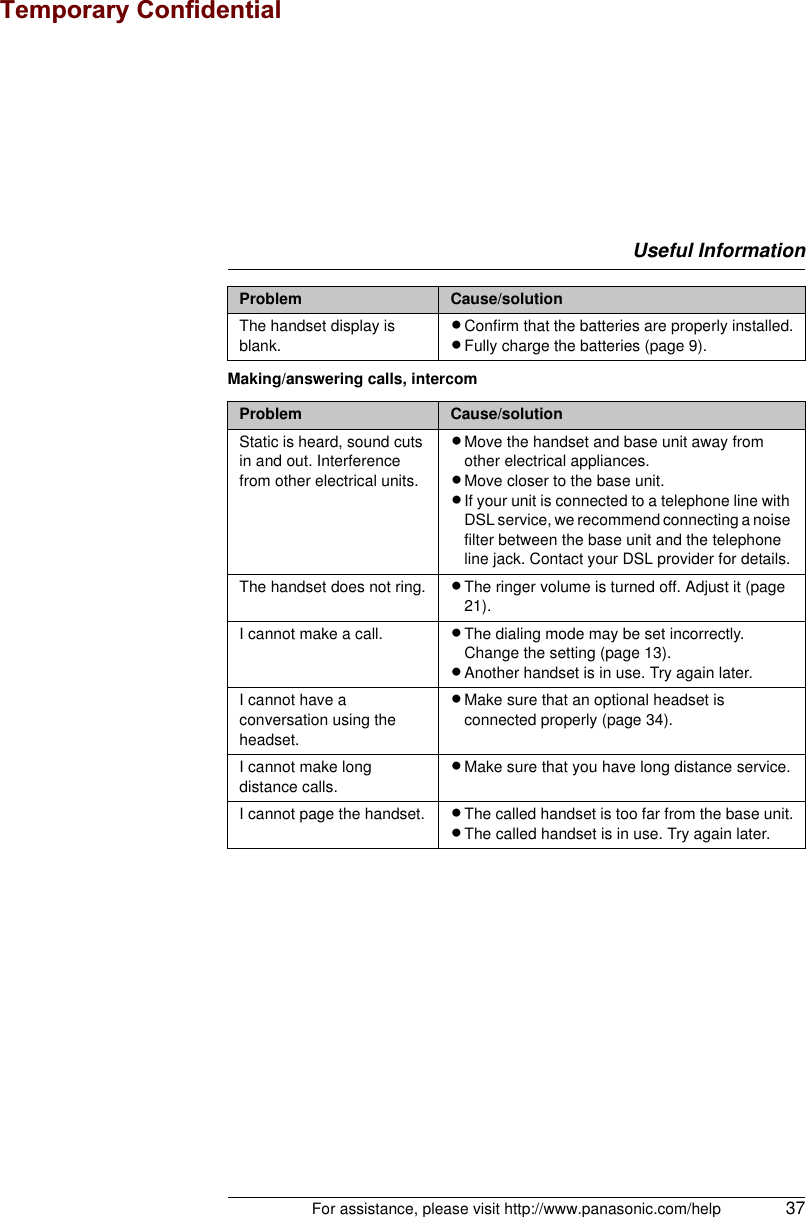
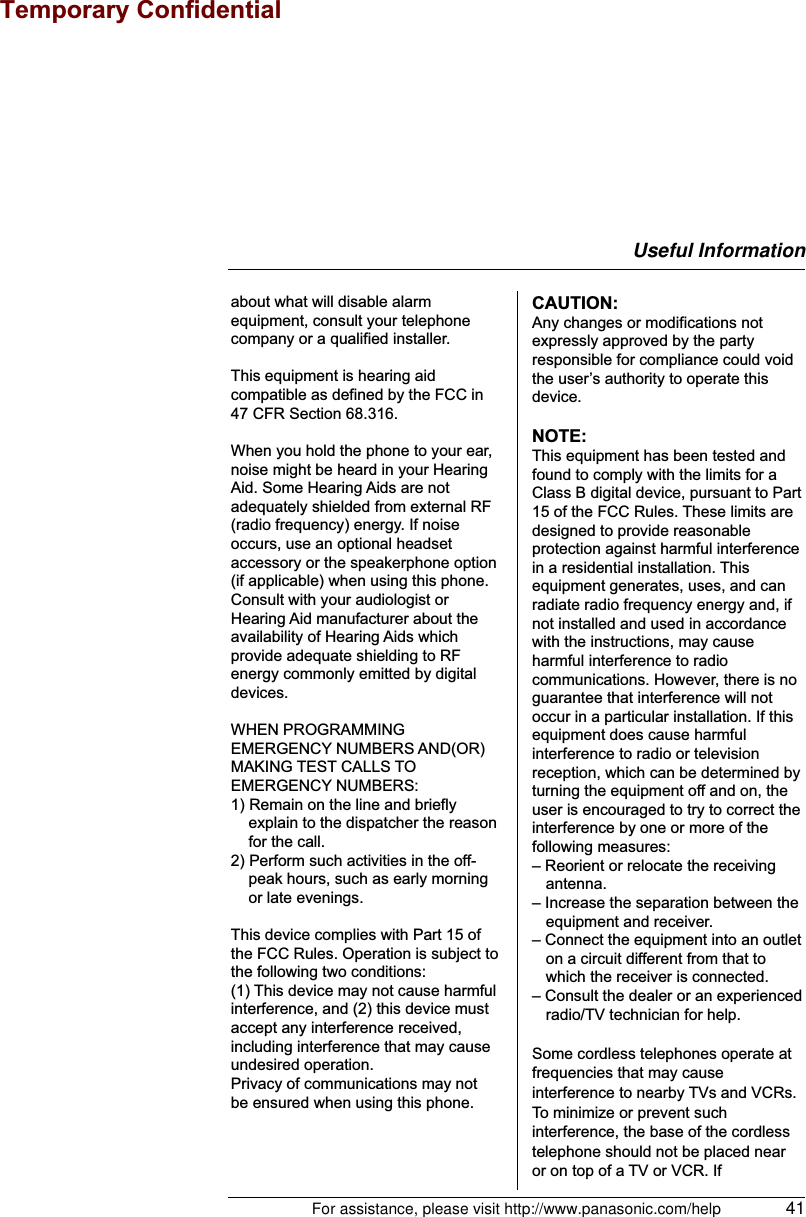
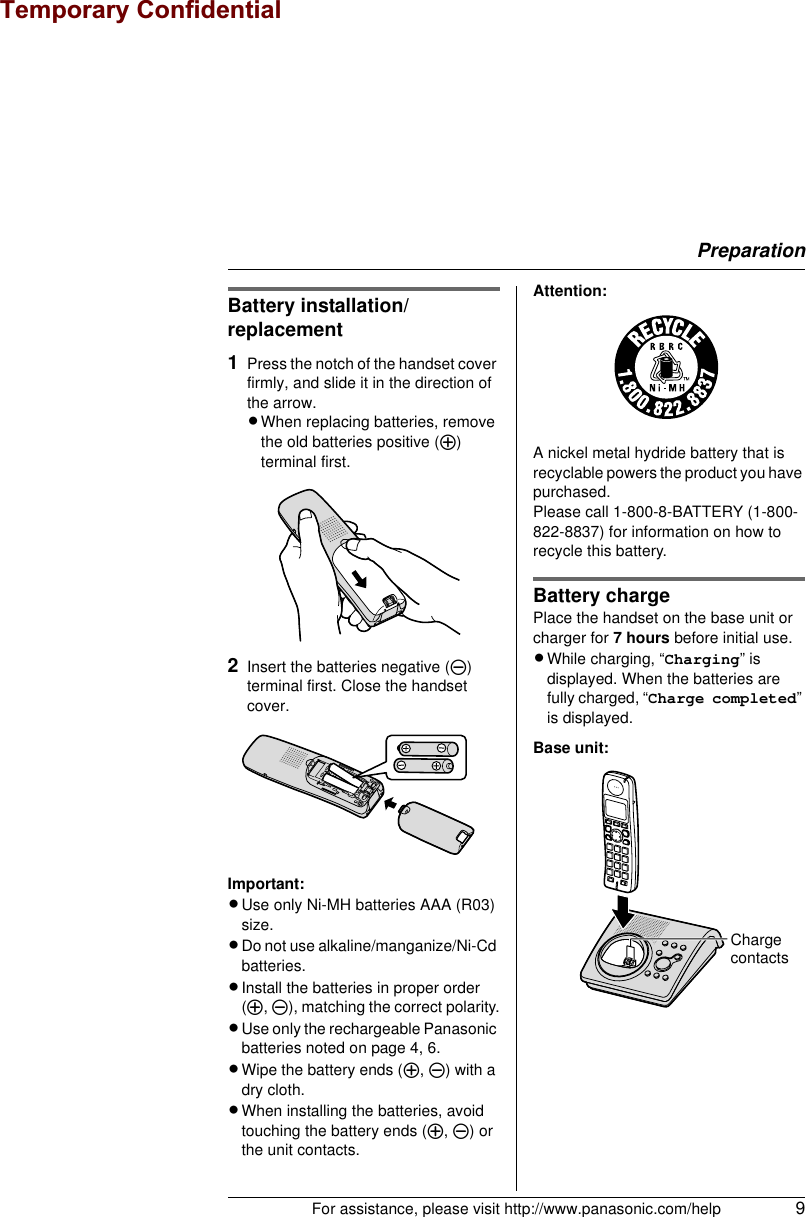
![ProgrammingFor assistance, please visit http://www.panasonic.com/help 21*1 If you program these settings using one of the handsets, you do not need to program the same item using another handset.*2 If you subscribe to a distinctive ring service (such as IDENTA-RING), select a tone (tone 1 to 3). If you select a melody, you cannot distinguish lines by their ringers.*3 Turn this feature off if you prefer not to hear key tones while you are dialing or pressing any keys, including confirmation tones and error tones.*4 If you subscribe to Caller ID service and want to view the caller’s information after lifting up the handset to answer a call, turn off this feature.*5 This feature allows the unit to automatically adjust the date and time setting when caller information is received. To use this feature, set the date and time first.Ph.book settings New entry –16Copy all –17Erase all –17Handset settings Ringer settings Ringer volume <Level 6>–Ringer tone*2 <Tone 1>–Display settings Change language <English>13Contrast <Level 3> –Registration HS registration 32Deregistration 32Other settings Message alert <Off>29Key tone*3 <On>–Auto talk*4 <Off>–Caller ID edit <On>–Set date & time Date and time*1 –13Time adjustment*1, *5 <Caller ID[auto]>––Set tel line Set dial mode*1, *6 <Tone>–13Set flash time*1 <700ms>––Customer support ––22Main menu Sub-menu 1 Sub-menu 2 PageTemporary Confidential](https://usermanual.wiki/Panasonic-of-North-America/96NKX-TG1031/User-Guide-740473-Page-21.png)