Panasonic of North America 96NKX-TH1211 Cordless Telephone UPCS Base Station with BT User Manual EXHIBIT H Draft
Panasonic Corporation of North America Cordless Telephone UPCS Base Station with BT EXHIBIT H Draft
UserManual.wiki
>
Panasonic of North America
>
96NKX TH1211 User Manual
user manual
Navigation menu
Upload a User Manual
Namespaces
Wiki Guide
HTML
PDF
Info
Views
User Manual
Discussion / Help
Navigation
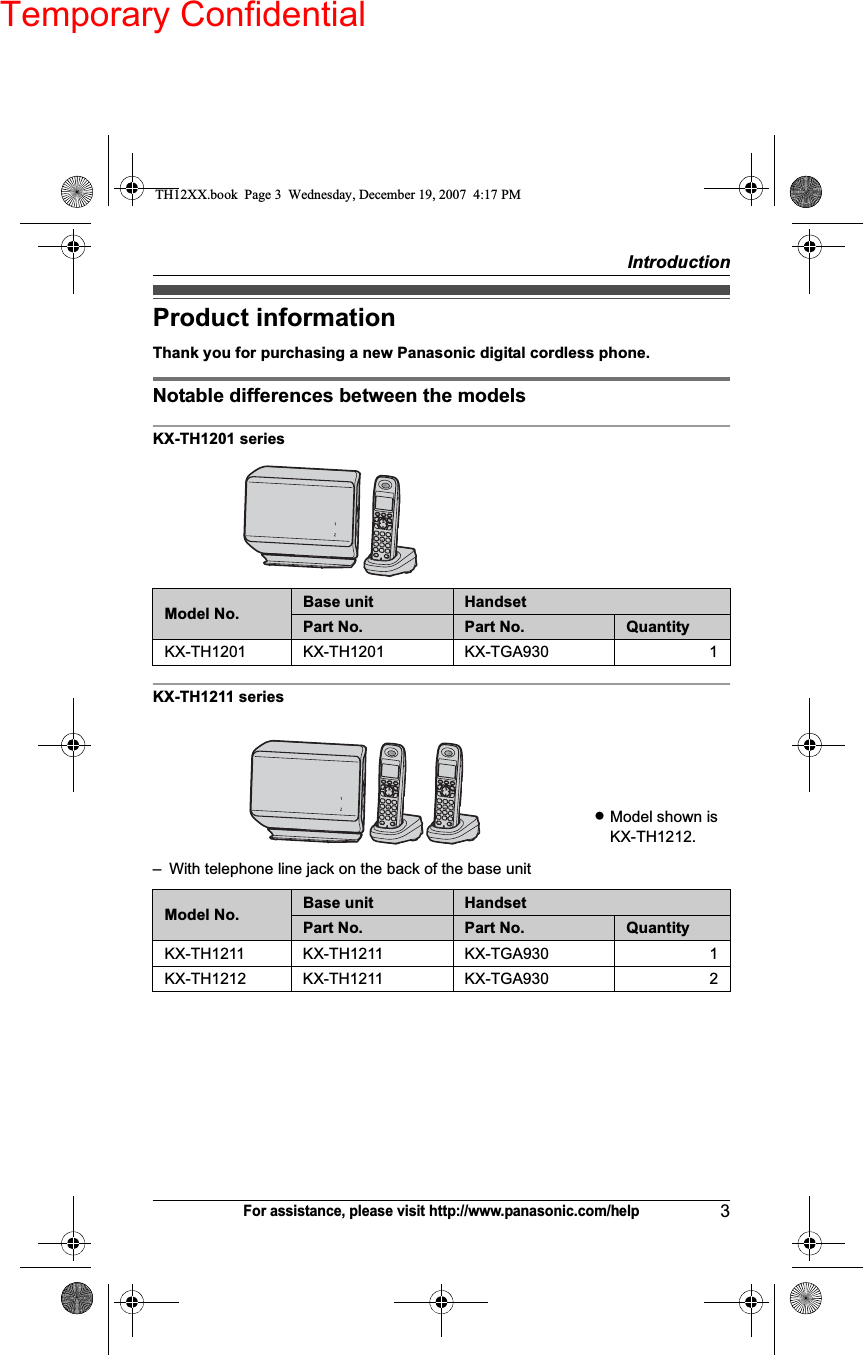

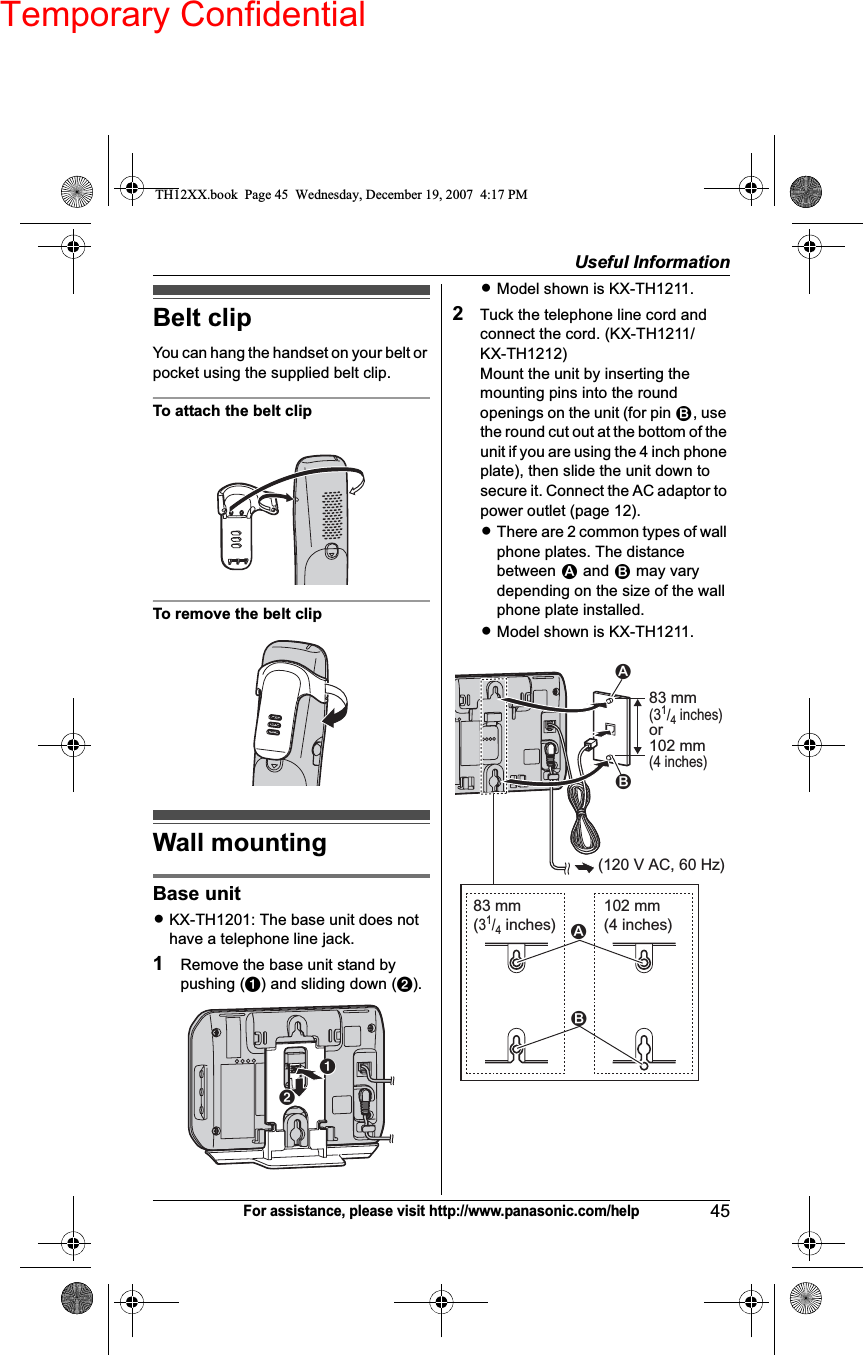
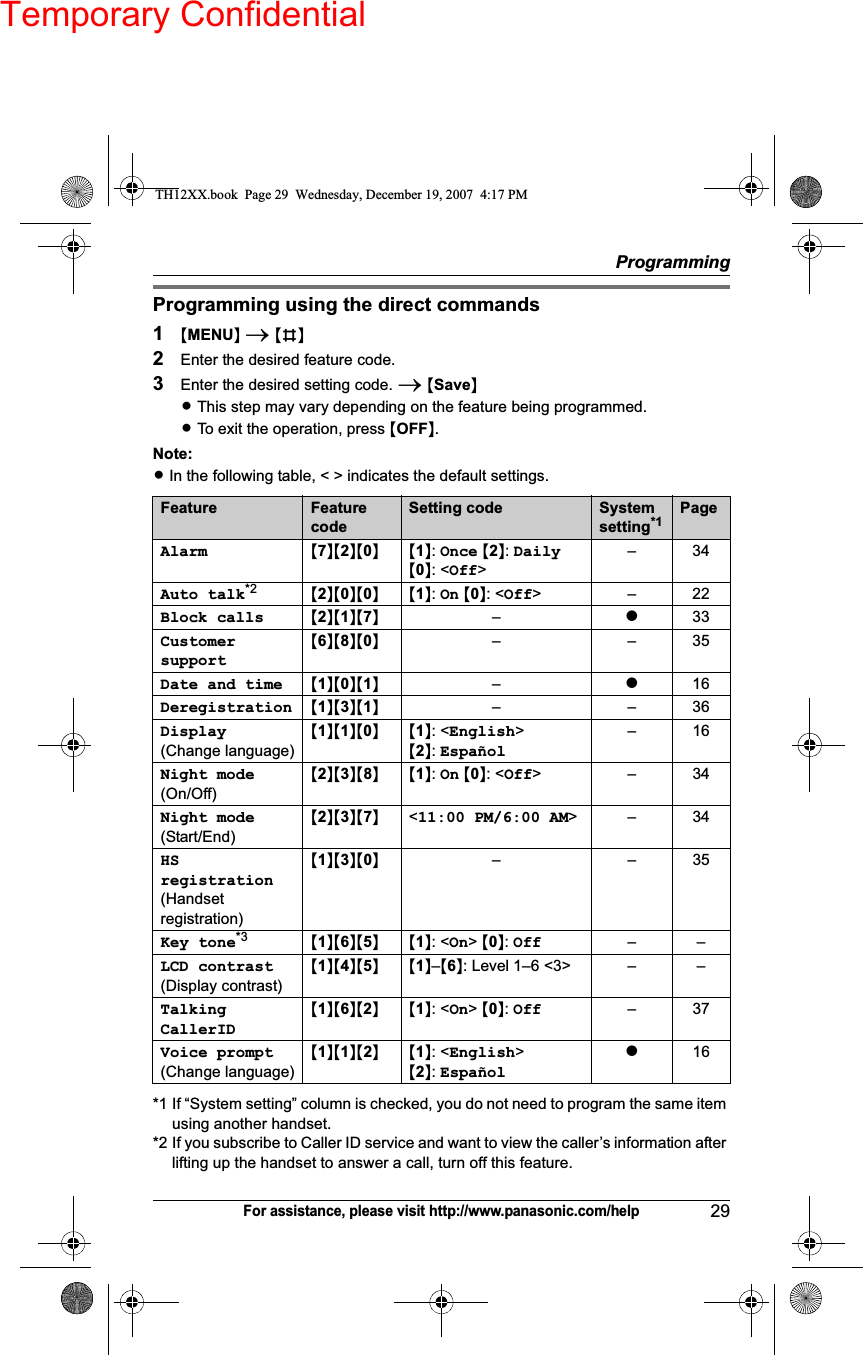
![Temporary ConfidentialPreparation11For assistance, please visit http://www.panasonic.com/help*1 KX-TH1211/KX-TH1212Using the navigator keyThe handset navigator key can be used to navigate through menus and to select items shown on the display by pressing {^},{V},{<}, or {>}.To adjust the receiver or speaker volume, press {^} to increase the volume, or press {V} to decrease the volume repeatedly while talking.Soft keysThe handset features 2 soft keys. By pressing a soft key, you can select the feature shown directly above it on the display.Display/IndicatorsHandset display items*1 KX-TH1211/KX-TH1212LINK TO CELL indicator 1, 2The LINK TO CELL indicators on the base unit show the status of cellular lines.Item Meaning5Battery level[1] Handset number{V}{^}{<}{>}Volume downVolume up View PhoneKCID book L(displayed in the left)The cellular phone is connected. You are ready to make/receive cellular calls.(displayed in the right)– The cellular line is selected for the ringer setting.– A cellular call is being received or blocked on that line.Cell in useSomeone is using a cellular line.Line in use*1Someone is using the landline.Status MeaningColor Light patternGreen On The cellular phone is connected. You are ready to make/receive cellular calls.Flashing The base unit is registering a cellular phone.Flashing rapidlyThe base unit is searching for the registered cellular phone to connect (page 18).Item MeaningTH12XX.book Page 11 Wednesday, December 19, 2007 4:17 PM](https://usermanual.wiki/Panasonic-of-North-America/96NKX-TH1211/User-Guide-898196-Page-11.png)


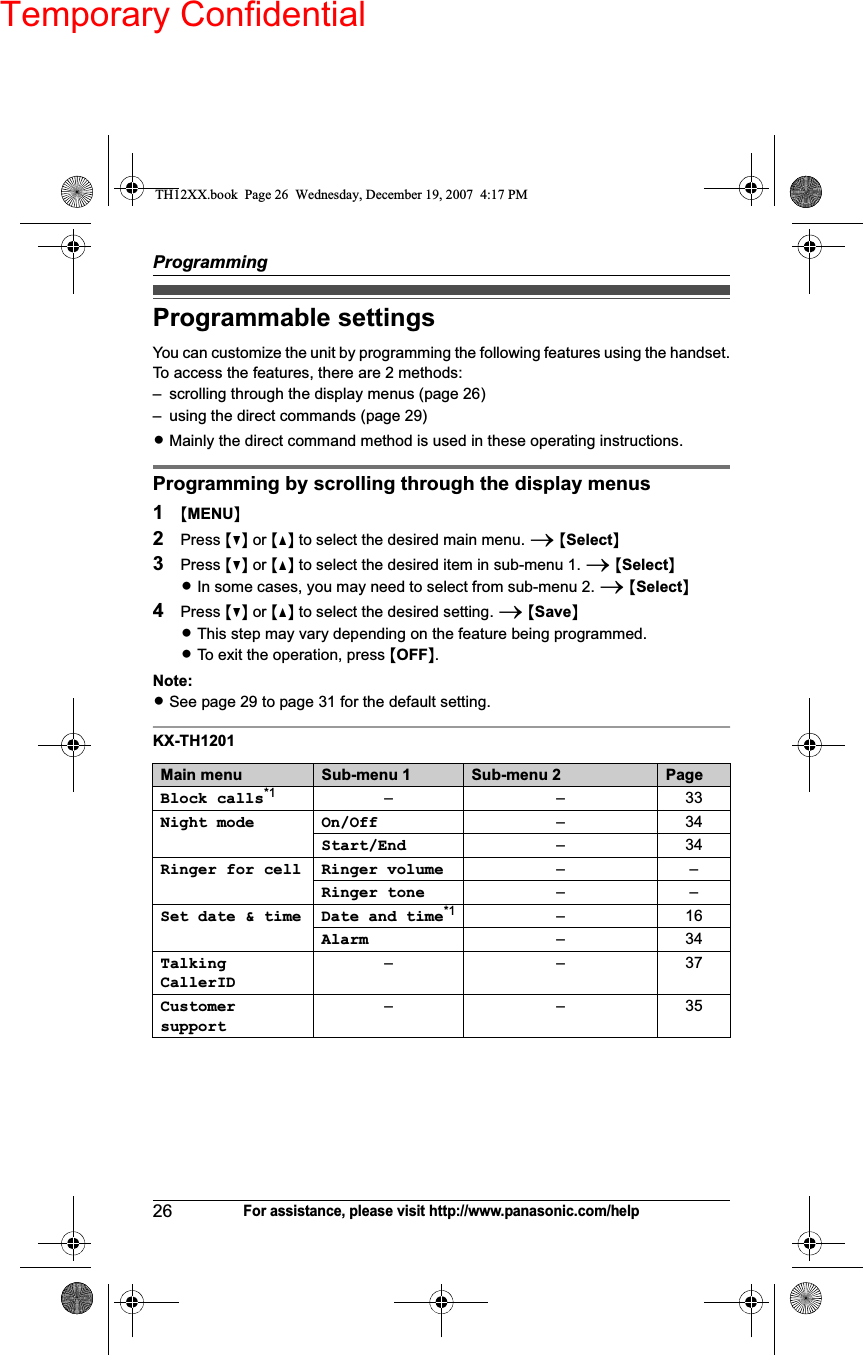
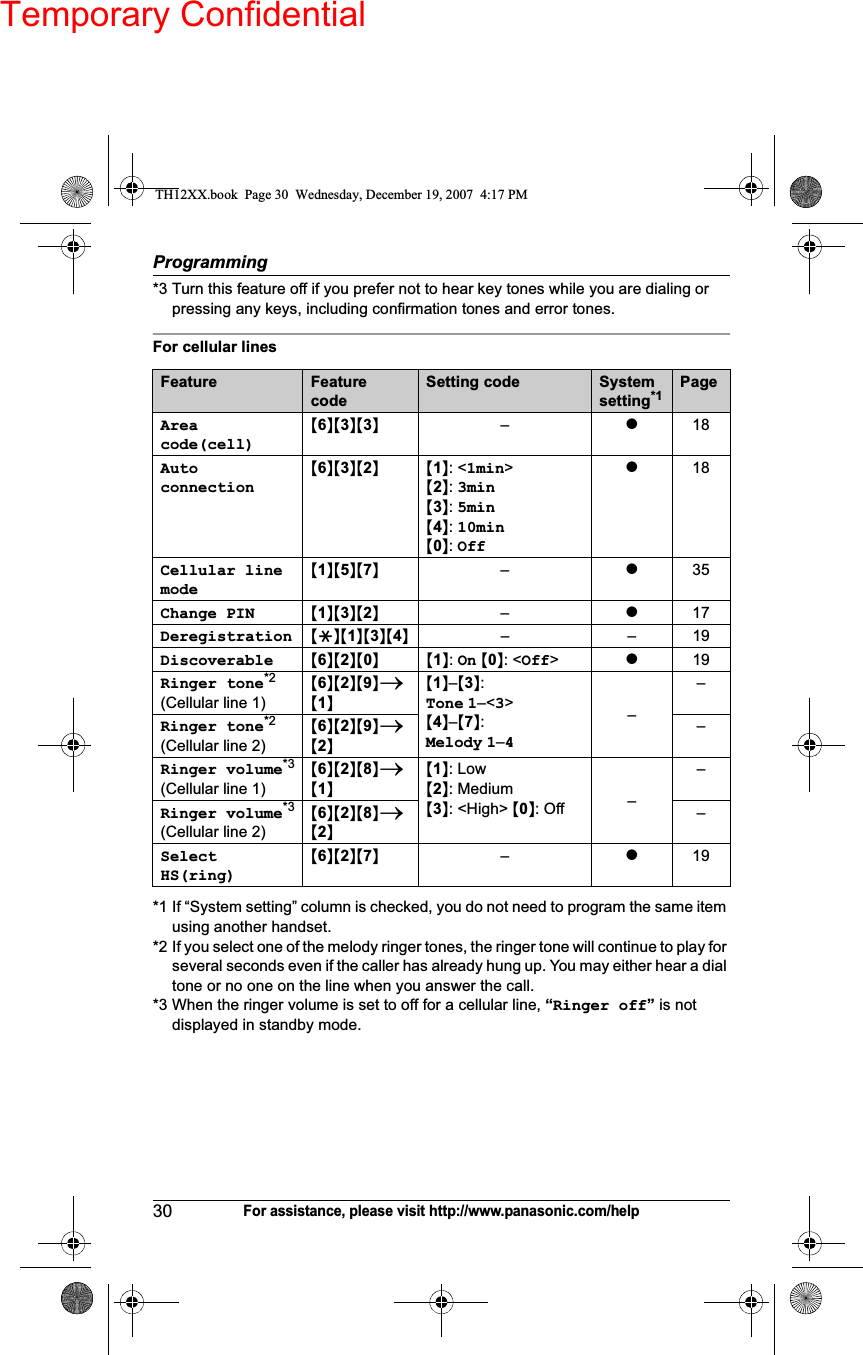
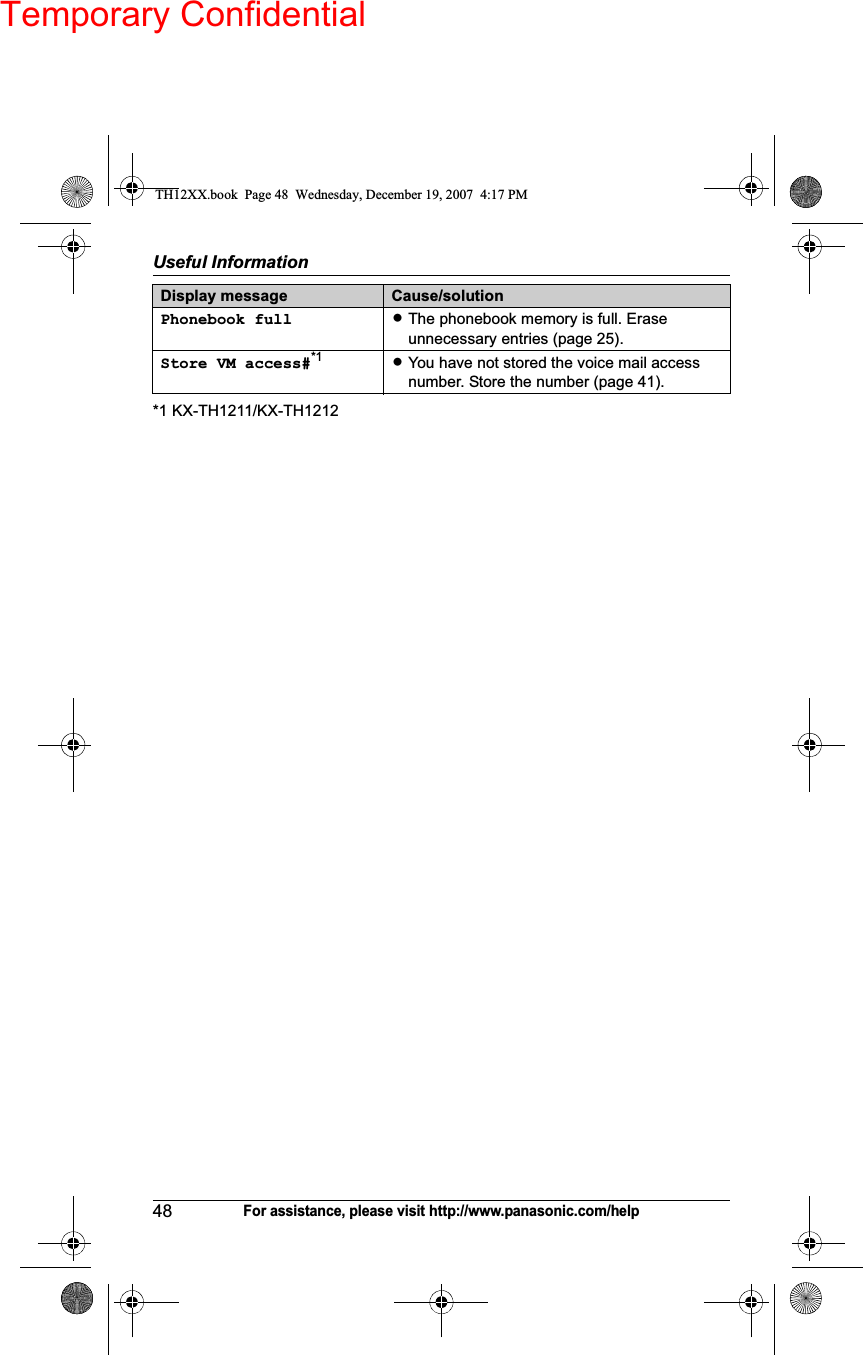
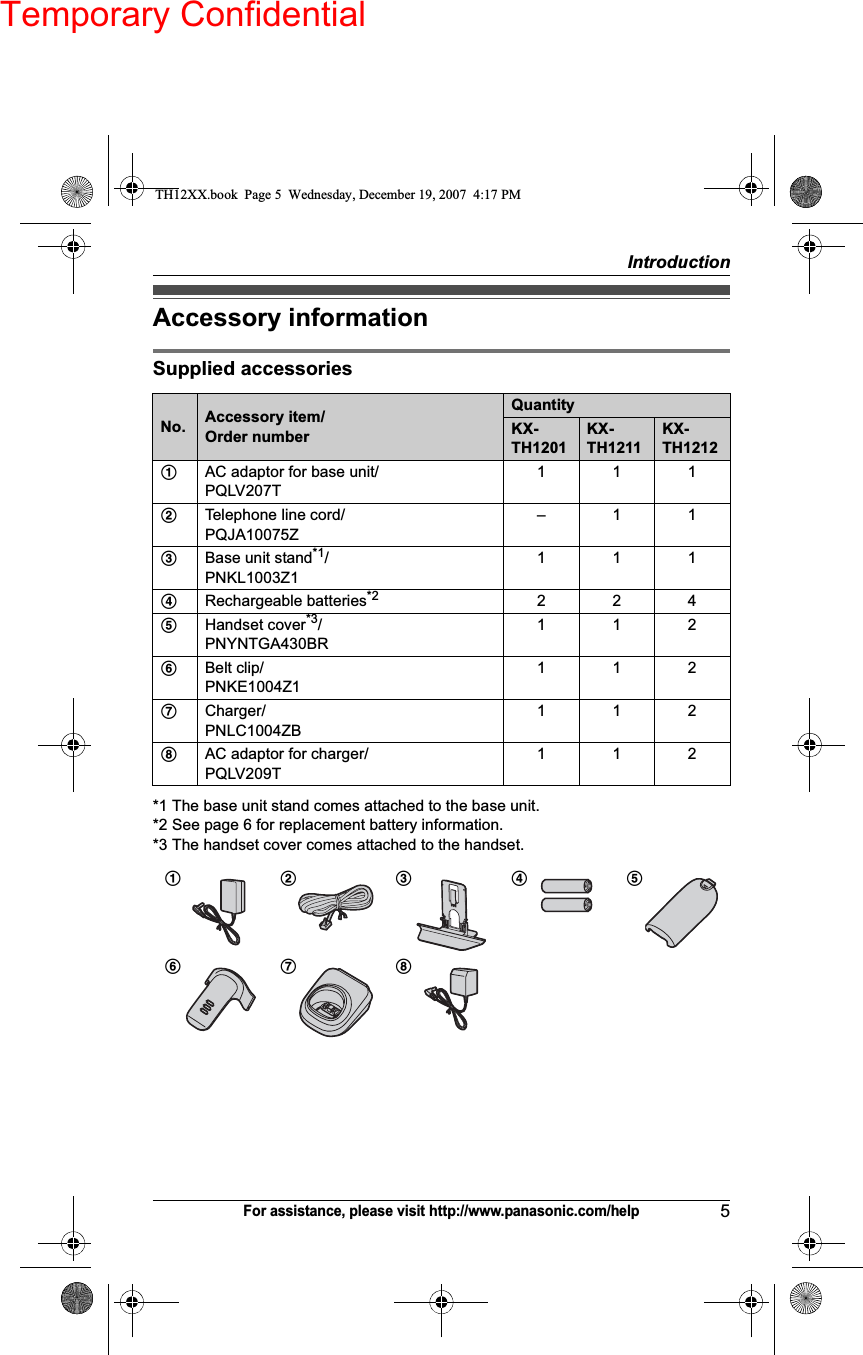
![Temporary ConfidentialProgramming31For assistance, please visit http://www.panasonic.com/helpFor landline (KX-TH1211/KX-TH1212)*1 If “System setting” column is checked, you do not need to program the same item using another handset.*2 If you subscribe to a distinctive ring service (such as IDENTA-RING), select a tone (tone 1 to 3). If you select a melody, you cannot distinguish lines by their ringers.*3 If you select one of the melody ringer tones, the ringer tone will continue to play for several seconds even if the caller has already hung up. You may either hear a dial tone or no one on the line when you answer the call.*4 The flash time depends on your telephone exchange or host PBX. Contact your PBX supplier if necessary. The setting should stay at “700ms” unless pressing {FLASH} fails to pick up the waiting call.Feature FeaturecodeSetting code System setting*1PageCaller ID edit(Caller ID number auto edit){2}{1}{4}{1}: <On>{0}:Off r39Message alert {3}{4}{0}{1}: <On>{0}:Off –42Ringer tone*2, *3 {1}{6}{1}{1}–{3}:Tone <1>–3{4}–{7}:Melody 1–4––Ringer volume {1}{6}{0}{1}: Low {2}: Medium{3}: <High> {0}: Off––Set dial mode {1}{2}{0}{1}:Pulse{2}: <Tone>r16Set flash time*4{1}{2}{1}{1}: <700ms>{2}:600ms{3}:400ms{4}:300ms{5}:250ms{6}:110ms{7}:100ms{8}:90msr22Set line mode*5 {1}{2}{2}{1}:A{2}: <B>r–Store VM access#{3}{3}{1}–r41Timeadjustment*6(Caller ID subscribers only){2}{2}{6}{1}: <Caller ID[auto]>{0}:Manualr–V.M. access {3}{3}{0}––42VM tone detect {3}{3}{2}{1}: <On>{0}:Off r41TH12XX.book Page 31 Wednesday, December 19, 2007 4:17 PM](https://usermanual.wiki/Panasonic-of-North-America/96NKX-TH1211/User-Guide-898196-Page-31.png)