Panasonic of North America 9TGCF-293A Panasonic Toughbook w/ WLAN and GPRS User Manual Operating Instructions
Panasonic Corporation of North America Panasonic Toughbook w/ WLAN and GPRS Operating Instructions
Contents
- 1. Users Manual 1
- 2. Users Manual 2
- 3. Supplemental Users Manual for EGPRS
Users Manual 1
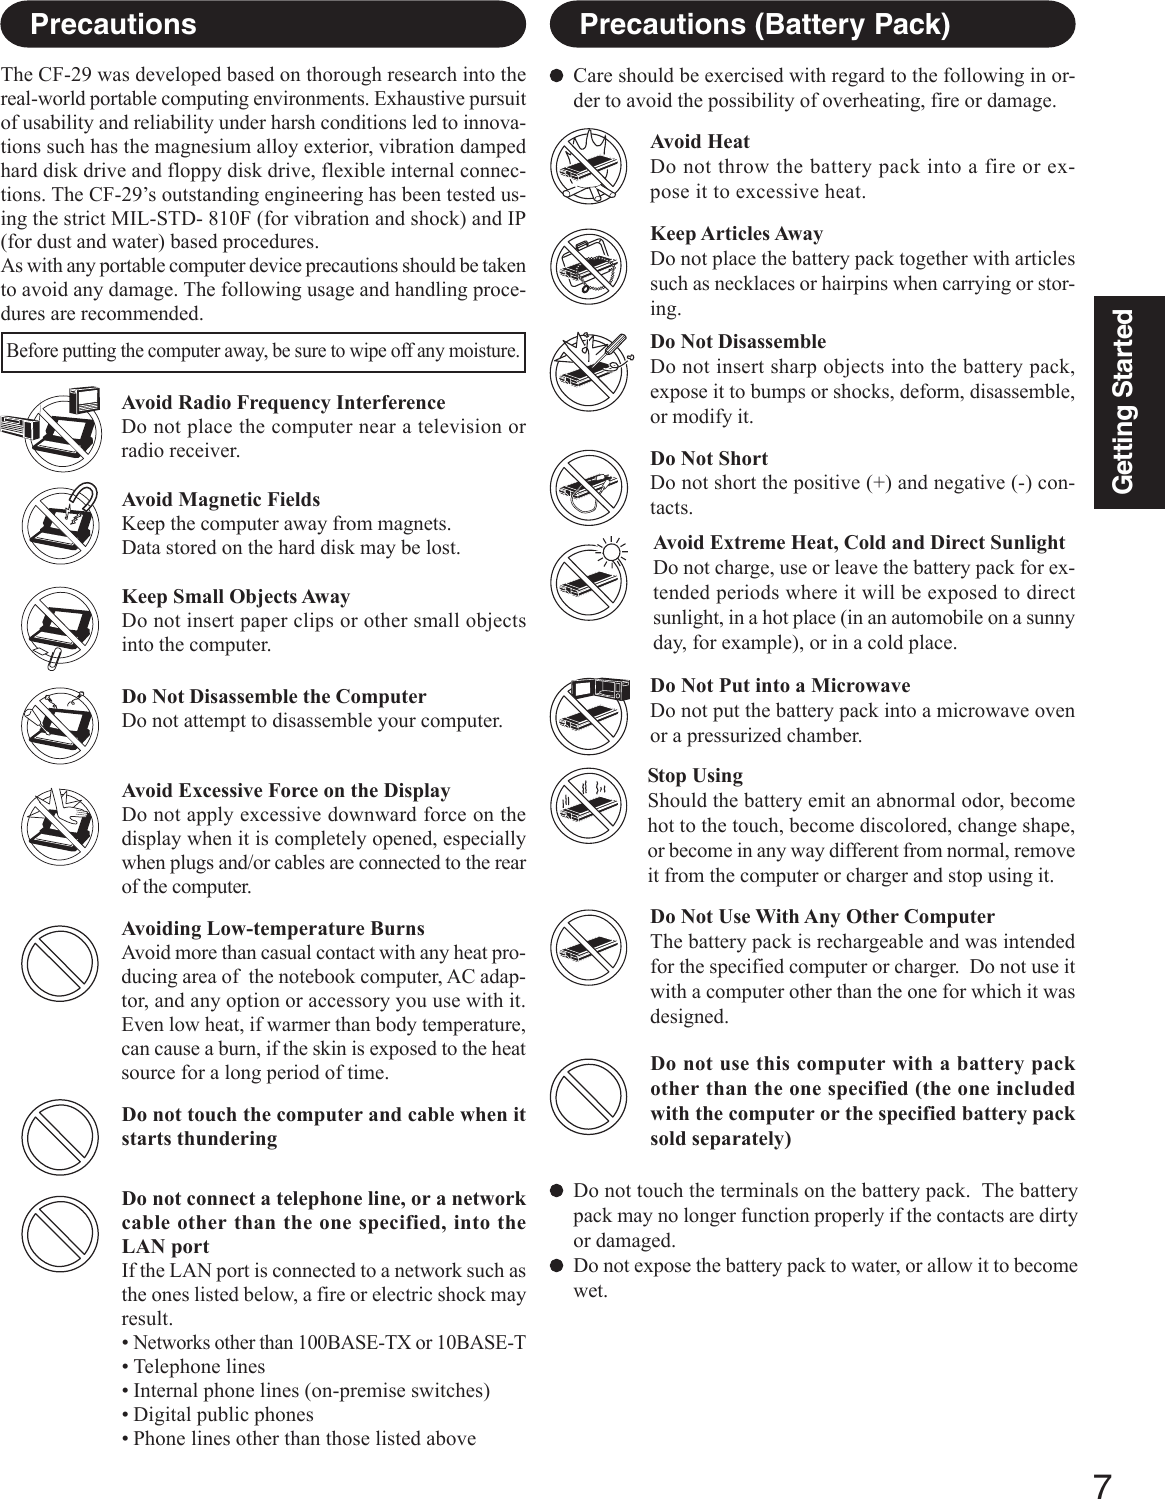
![Personal ComputerAppendixLIMITED USE LICENSE AGREEMENT .......... 35Hard Disk Backup Function ............................. 37Hard Disk Data Erase Utility ............................ 41Specifications ................................................... 42LIMITED WARRANTY ..................................... 44TroubleshootingList of Error Codes ........................................ 25Dealing with Problems (Summary) ....................... 26Reinstalling Software .................................... 33OperationStarting Up/Shutting Down............................ 16Touch Pad (Basic Operation) ........................ 19Reference Manual ......................................... 20Useful Information ......................................... 21Getting StartedRead Me First ................................................. 3Names and Functions of Parts ........................ 9First-time Operation ...................................... 11Contents[Additional Manual]Reference ManualThis manual can be accessed on your computer.Refer to page 20 on how to access the Reference Manual.Reference Manual•Read Me First•Key CombinationsReference Manual•Touch Pad•Touchscreen*1•Panasonic Hand Writing•Standby/HibernationFunctions•Security Measures•Computing on the Road•Battery Power•Multimedia Pocket•PC Cards•RAM Module•Port Replicator•External Display•Printer•USB Devices•Modem•LAN•Wireless LAN*2•Hard Disk Drive•Setup Utility•Icon Enlarger•Loupe UtilityReference Manual•Technical Information•DMI Viewer•List of Error Codes•Dealing with Problems(Advanced)Appendix Getting StartedOperationTroubleshootingModel No. CF-29 SeriesPlease read these instructions carefully before using this product and save this manual for future use.XP•LED Indicators*1Only for models with touchscreen*2Only for models with wireless LANOPERATING INSTRUCTIONS](https://usermanual.wiki/Panasonic-of-North-America/9TGCF-293A.Users-Manual-1/User-Guide-544551-Page-1.png)
![2Getting StartedIntroductionThank you for purchasing the Panasonic computer. Read the operating instructions thoroughly for proper operation of your newcomputer.Illustrations and Terminology in this ManualCopyrightThis manual is copyrighted by Matsushita Electric Industrial Co., Ltd. with all rights reserved. No part of this manual may be reproduced in anyform without the prior written permission of Matsushita Electric Industrial Co., Ltd.No patent liability is assumed with respect to the use of the information contained herein.© 2004 Matsushita Electric Industrial Co., Ltd. All Rights Reserved.DisclaimerComputer specifications and manuals are subject to change without notice. Matsushita Electric Industrial Co., Ltd. assumes no liability fordamage incurred directly or indirectly from errors, omissions or discrepancies between the computer and the manuals.TrademarksMicrosoft, Windows and the Windows logo are registered trademarks of Microsoft Corporation of the United States and/or other countries.Intel, Pentium and PROSet are either registered trademarks or trademarks of Intel Corporation.Adobe, the Adobe logo and Adobe Reader are either registered trademarks or trademarks of Adobe Systems Incorporated in the United Statesand/or other countries.Panasonic is a registered trademark of Matsushita Electric Industrial Co., Ltd.Names of products, brands, etc., appearing in this manual are trademarks or registered trademarks of their respective owner companies.* For the Model No., insert the 12 digit number (for example, CF-29HTLGZBM) located onthe bottom of the computer.NOTE:NOTE provides a useful fact or helpful information.CAUTION:CAUTION indicates a condition that may result in minor or moderate injury.Enter : This illustration means to press the [Enter] key.Fn + F5 : This illustration means to press and hold the [Fn] key, then press the [F5] key.[start] - [Run]: This illustration means to click [start], then to click [Run]. For some applications, you may need to double-click.: Where to go for referred information. : This illustration means to refer to the Reference Manual, which is available on your computer.Refer to page 20 on how to access this manual.Some of the illustrations in this manual may differ slightly in shape from the actual items in order to make the explanationeasier to understand.The “CD/DVD drive” is a description about drives, such as DVD-ROM, CD-ROM, CD-R/RW, and DVD-ROM & CD-R/RW drives.This manual covers two types of models, as distinguished by the type of LCD screen (models with touchscreen and modelswithout touchscreen).If the user has logged on without the administrator authority, some functions may not be executable, and some screens maybe not displayed as shown in this manual. If this happens, log on with the administrator authority to enable these functions.Confirm the latest information on optional products in catalogs, etc.In this manual, “Microsoft® Windows® XP Professional Service Pack 2 with Advanced Security Technologies” is indicatedas “Windows” or “Windows XP”.Customer's RecordSerial No.orDate of PurchaseModel No.*Code No.Dealer's NameDealer's Address](https://usermanual.wiki/Panasonic-of-North-America/9TGCF-293A.Users-Manual-1/User-Guide-544551-Page-2.png)

![13Getting Started7Setup Windows.Moving the cursor ( ) or clicking buttons can be performed with the touch pad.The touchscreen does not work properly during the Windows setup.NOTESelect settings for your region, then select [Next].4Enter your name and organization and then select [Next].5Enter your computer name and administrator password and then select [Next].Do not press any keys or touch the touch pad until [Windows XP ProfessionalSetup] is displayed.CAUTION1At [Welcome to the Windows XP Setup Wizard], select [Next].2After reading the agreement, select [I accept this agreement] or [I don’t accept thisagreement], then select [Next].NOTEIf [I don’t accept this agreement] is selected, the Windows setup will be aborted.3CAUTIONRemember this password! If the password is forgotten, Windows cannot beoperated.6Enter the correct date, time and time zone, then select [Next].The computer will restart.7Enter your administrator password and select .Wait until the hard disk drive indicator ( ) has turned off.NOTE8<Only for models with touchscreen>Calibrate the touchscreen.1Select [start] - [Control Panel] - [Printers and Other Hardware] - [Mouse] -[TouchScreen] - [Calibration].2Touch the “+” mark on the calibration screen with the stylus (included) for about onesecond.3After the calibration procedure is executed (e.g., after the nine “+” marks are touched),the procedure ends when Enter is pressed.4Select [OK].It may take some time before the computer restarts and the screen of step 7 isdisplayed. Wait, and do not press any keys, or touch the touch pad, etc.NOTEWhen Windows setup is completed, the following message will be displayed atthe bottom right of the screen: “Your computer might be at risk.” Continue tothe next step.The message is generated by the [Security Center] function in [Control Panel],and does not indicate an error or malfunction. For more information about [Se-curity Center]: page 22.](https://usermanual.wiki/Panasonic-of-North-America/9TGCF-293A.Users-Manual-1/User-Guide-544551-Page-13.png)
![14Getting StartedThis concludes the first-time use operation guidelines.9Create a new account.CAUTIONRemember this password! If the password is forgotten, Windows cannot be oper-ated. You can create a password reset disk beforehand ( page 15).When creating a new user account:• If you make mail settings, create password reset disks ( page 15), or conduct otherrelated operations before creating the user account, you will be unable to use any pre-vious mail history or settings.• When you create the first new account, you can only select [Computer administrator].Once a “Computer Administrator” account has been created, you can create additionallimited user accounts.Note also that only the added user account will be displayed in the Welcome screen.The account for the administrator created during Windows setup will not be displayed.The message “Your computer might be at risk,” which is displayed at the bottom right ofthe screen, is generated by the “Security Center” function in Windows XP, and does notindicate an error or malfunction.To prevent this message from being displayed, select (red icon) on the taskbar, thenselect [Turn on Automatic Updates].About the Icon Enlarger:• If the characters or icons on the screen are too small and difficult to see, after complet-ing step 9, select [start] - [All Programs] - [Panasonic] - [Icon Enlarger]. This willallow you to magnify the display of characters and icons on the screen.• The [Icon Enlarger] can be set separately for each account.You can also use [Loupe Utility], which enlarges a part of the screen.( “LoupeUtility”)<Only for models with wireless LAN>If you use the wireless LAN, be sure to refer to the Reference Manual’s “Wireless LAN”.NOTEFirst-time Operation1Select [start] - [Control Panel] - [User Accounts] - [Create a new account].2Enter a name for the new account, then select [Next].3Select [Computer administrator], then select [Create Account].4<When you want to create a password for the new account>Select the new account you have created and select [Create a password].Follow the instructions on the screen to create a password.5Select [start] - [Turn Off Computer] - [Restart] to restart the computer.](https://usermanual.wiki/Panasonic-of-North-America/9TGCF-293A.Users-Manual-1/User-Guide-544551-Page-14.png)
![15Getting StartedInformation for Windows XPDepending on the Windows settings, installed applications, and drivers, menus and otherdisplays may differ, or some functions (such as use of the password reset disk) may be inop-erable. Check with your system administrator for details.You can select Classic view for the Control Panel or select the Classic Start menu. You canalso change the way a user logs on or off.The procedure in this manual uses the method or view of the Windows XP default setting(not Classic view or Classic Start menu etc.).Resetting the passwordWindows XP has a function to reset a forgotten password.To use this function, you need to create a password reset disk beforehand following the stepsbelow.1Select [start] - [Control Panel] - [User Accounts].2Select [Prevent a forgotten password] from the [Related Tasks] menu of the account youhave logged on to, and create a password reset disk following the on-screen instructions.Store the password reset disk in a safe place.• Only the logon password for each account can be reset.The password set in the Setup Utility ( “Setup Utility”) cannot be reset.](https://usermanual.wiki/Panasonic-of-North-America/9TGCF-293A.Users-Manual-1/User-Guide-544551-Page-15.png)