Panasonic of North America 9TGCF-294A Panasonic Toughbook w/ WLAN, CDMA & Bluetooth User Manual VZW EM5625 online Help
Panasonic Corporation of North America Panasonic Toughbook w/ WLAN, CDMA & Bluetooth VZW EM5625 online Help
Contents
- 1. Supplemental Users Manual for CDMA
- 2. Users Manual 1
- 3. Users Manual 2
Supplemental Users Manual for CDMA
Personal Computer
Supplementary Instructions for EVDO
This Supplementary Instructions manual points out cases where the operation of the computer will differ from that in the Operating
Instructions.
Model No. CF-29 Series
Replace the “Federal Communications Commission Radio Frequency Interference Statement” ( Operating Instructions “Read
Me First”) with the following.
For U.S.A
Federal Communications Commission Radio
Frequency Interference Statement
Note: This equipment has been tested and found to comply with the
limits for a Class B digital device, pursuant to Part 15 of the FCC
Rules. These limits are designed to provide reasonable protection
against harmful interference in a residential installation. This
equipment generates, uses and can radiate radio frequency energy
and, if not installed and used in accordance with the instructions,
may cause harmful interference to radio communications. However,
there is no guarantee that interference will not occur in a particular
installation. If this equipment does cause harmful interference to
radio or television reception, which can be determined by turning the
equipment off and on, the user is encouraged to try to correct the
interference by one or more of the following measures:
Reorient or relocate the receiving antenna.
Increase the separation between the equipment and receiver.
Connect the equipment into an outlet on a circuit different
from that to which the receiver is connected.
Consult the Panasonic Service Center or an experienced ra-
dio/TV technician for help.
Warning
To assure continued compliance, use only shielded interface
cables when connecting to a computer or peripheral. Also, any
changes or modifications not expressly approved by the party
responsible for compliance could void the user’s authority to
operate this equipment.
FCC RF Exposure Warning:
• This equipment complies with FCC radiation exposure limits
set forth for an uncontrolled environment.
• This equipment has been approved for mobile operation, and
unless otherwise advised in separate supplemental instruc-
tions for individual wireless transmitter(s), requires minimum
20 cm spacing be provided between antenna(s) and all person’s
body (excluding extremities of hands, wrist and feet) during
wireless modes of operation.
• This equipment may use multiple installed transmitters, which
may be capable of simultaneous transmission.
• This equipment is provided with PC Card slot that could be
used with wireless transmitters, which will be specifically rec-
ommended when they become available.
Other third-party wireless transmitters have not been RF ex-
posure evaluated for use with this computer and may not com-
ply with FCC RF exposure requirements.
• This equipment is provided with external antenna connector(s)
for connection to optional Car Mounter or Port Replicator for
mobile external mounted antenna(s). External antenna(s) must
be professionally installed and cannot exceed recommended
maximum antenna gain as described in individual provided
supplement instructions for wireless transmitters. Also, user
must maintain minimum 20 cm spacing between external
antenna(s) and all person’s body (excluding extremities of
hands, wrist and feet) during wireless modes of operation.
This device complies with Part 15 of the FCC Rules. Operation is
subject to the following two conditions:
(1) This device may not cause harmful interference, and
(2) This device must accept any interference received, including
interference that may cause undesired operation.
Responsible Party: Panasonic Corporation of North America
One Panasonic Way
Secaucus, NJ 07094
Tel No:1-800-LAPTOP-5 (1-800-527-8675)
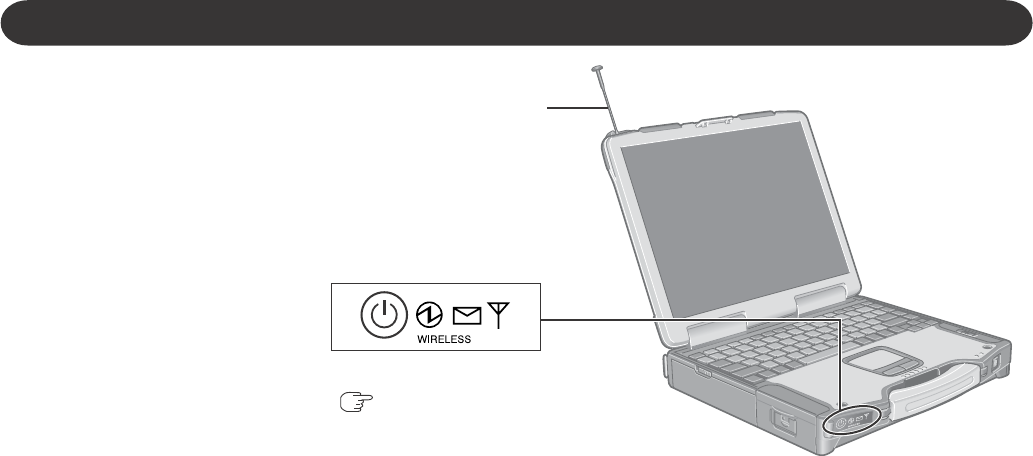
Names and Functions of Parts
Except the followings, refer to the Operating Instructions.
Antenna
LED Indicators
( User Manual for Toughbook with
integrated SB555 CDMA modem)

Rev 0.21 Dec.04 1
Table of Contents
The EM5625 wireless modem . . . . . . . . . . . . . . . . . . . . . . . . . . . . . . . . . . . . . . . . . .9
About your EM5625 . . . . . . . . . . . . . . . . . . . . . . . . . . . . . . . . . . . . . . . . . . . . . . . . . 9
Feature availability . . . . . . . . . . . . . . . . . . . . . . . . . . . . . . . . . . . . . . . . . . . 9
CDMA networks . . . . . . . . . . . . . . . . . . . . . . . . . . . . . . . . . . . . . . . . . . . . . . . . 9
Network account and coverage. . . . . . . . . . . . . . . . . . . . . . . . . . . . . . . . 10
Roaming . . . . . . . . . . . . . . . . . . . . . . . . . . . . . . . . . . . . . . . . . . . . . . . . . . . . . 10
System Select (roaming options) . . . . . . . . . . . . . . . . . . . . . . . . . . . . . . 11
WiFi . . . . . . . . . . . . . . . . . . . . . . . . . . . . . . . . . . . . . . . . . . . . . . . . . . . . . . . . . . 11
Watcher overview . . . . . . . . . . . . . . . . . . . . . . . . . . . . . . . . . . . . . . . . . . . . . . . . . 11
Interpreting icons . . . . . . . . . . . . . . . . . . . . . . . . . . . . . . . . . . . . . . . . . . . . . . 12
Windows system tray icons . . . . . . . . . . . . . . . . . . . . . . . . . . . . . . . . . . . . . 13
About EM5625 Watcher . . . . . . . . . . . . . . . . . . . . . . . . . . . . . . . . . . . . . . . . 13
The Watcher Window . . . . . . . . . . . . . . . . . . . . . . . . . . . . . . . . . . . . . . . . . . . . . . . .15
Watcher views . . . . . . . . . . . . . . . . . . . . . . . . . . . . . . . . . . . . . . . . . . . . . . . . . . . . 15
Full view . . . . . . . . . . . . . . . . . . . . . . . . . . . . . . . . . . . . . . . . . . . . . . . . . . . . . . 15
Compact view . . . . . . . . . . . . . . . . . . . . . . . . . . . . . . . . . . . . . . . . . . . . . . . . . 16
Docking . . . . . . . . . . . . . . . . . . . . . . . . . . . . . . . . . . . . . . . . . . . . . . . . . . . . . . 16
Always On Top . . . . . . . . . . . . . . . . . . . . . . . . . . . . . . . . . . . . . . . . . . . . . . . . 16
Display components . . . . . . . . . . . . . . . . . . . . . . . . . . . . . . . . . . . . . . . . . . . . . . . 16
Status box . . . . . . . . . . . . . . . . . . . . . . . . . . . . . . . . . . . . . . . . . . . . . . . . . . . . 17
Connection status area . . . . . . . . . . . . . . . . . . . . . . . . . . . . . . . . . . . . . . . . . 18
Call status area . . . . . . . . . . . . . . . . . . . . . . . . . . . . . . . . . . . . . . . . . . . . . . . . 19
Clear status messages . . . . . . . . . . . . . . . . . . . . . . . . . . . . . . . . . . . . . . . 20
Indicator area . . . . . . . . . . . . . . . . . . . . . . . . . . . . . . . . . . . . . . . . . . . . . . . . . 21
Menus . . . . . . . . . . . . . . . . . . . . . . . . . . . . . . . . . . . . . . . . . . . . . . . . . . . . . . . . . . . 21
VIEW menu . . . . . . . . . . . . . . . . . . . . . . . . . . . . . . . . . . . . . . . . . . . . . . . . . . . 21
TOOLS menu . . . . . . . . . . . . . . . . . . . . . . . . . . . . . . . . . . . . . . . . . . . . . . . . . . 22
HELP menu . . . . . . . . . . . . . . . . . . . . . . . . . . . . . . . . . . . . . . . . . . . . . . . . . . . 22

Online Help for VZW EM5625 NB
22130548
Data Services . . . . . . . . . . . . . . . . . . . . . . . . . . . . . . . . . . . . . . . . . . . . . . . . . . . . . . .23
Data features . . . . . . . . . . . . . . . . . . . . . . . . . . . . . . . . . . . . . . . . . . . . . . . . . . . . . 23
Data tab . . . . . . . . . . . . . . . . . . . . . . . . . . . . . . . . . . . . . . . . . . . . . . . . . . . . . . 23
Connection Manager . . . . . . . . . . . . . . . . . . . . . . . . . . . . . . . . . . . . . . . . . . . . . . 24
Connection Manager window . . . . . . . . . . . . . . . . . . . . . . . . . . . . . . . . . . . 24
Restrict to default profiles . . . . . . . . . . . . . . . . . . . . . . . . . . . . . . . . . . . . . . 24
Add a data profile . . . . . . . . . . . . . . . . . . . . . . . . . . . . . . . . . . . . . . . . . . . . . . 25
Connection profile properties . . . . . . . . . . . . . . . . . . . . . . . . . . . . . . . . . . . . 25
Specifying the autolaunch properties for the connection . . . . . . . . . . . . 26
Restore default settings . . . . . . . . . . . . . . . . . . . . . . . . . . . . . . . . . . . . . . . . 27
Default data profile . . . . . . . . . . . . . . . . . . . . . . . . . . . . . . . . . . . . . . . . . . . . 27
Delete a data profile . . . . . . . . . . . . . . . . . . . . . . . . . . . . . . . . . . . . . . . . . . . . 28
Opening and closing connections . . . . . . . . . . . . . . . . . . . . . . . . . . . . . . . . . . . 28
Establish a data connection . . . . . . . . . . . . . . . . . . . . . . . . . . . . . . . . . . . . . 28
Make a high-speed data connection . . . . . . . . . . . . . . . . . . . . . . . . . . . . . . 29
Always-on connection . . . . . . . . . . . . . . . . . . . . . . . . . . . . . . . . . . . . . . . 29
Determine the amount of data transferred . . . . . . . . . . . . . . . . . . . . . . 30
Quick 2 Net . . . . . . . . . . . . . . . . . . . . . . . . . . . . . . . . . . . . . . . . . . . . . . . . . . 31
End a data session . . . . . . . . . . . . . . . . . . . . . . . . . . . . . . . . . . . . . . . . . . . . . 31
Automatic data call disconnection. . . . . . . . . . . . . . . . . . . . . . . . . . . . . 31
Determining the signal strength. . . . . . . . . . . . . . . . . . . . . . . . . . . . . . . . . . . . . 32
WiFi Connections . . . . . . . . . . . . . . . . . . . . . . . . . . . . . . . . . . . . . . . . . . . . . . . . . . .33
Enabling support for a WiFi network adapter . . . . . . . . . . . . . . . . . . . . . . . . . . 33
Broadcasting and non-broadcasting WiFi hotspots . . . . . . . . . . . . . . . . . 34
WEP keys . . . . . . . . . . . . . . . . . . . . . . . . . . . . . . . . . . . . . . . . . . . . . . . . . . . . . 35
WiFi tab. . . . . . . . . . . . . . . . . . . . . . . . . . . . . . . . . . . . . . . . . . . . . . . . . . . . . . . . . . 35
WiFi Profiles tab (Connection Manager window) . . . . . . . . . . . . . . . . . . . . . . 35
Establishing a WiFi connection . . . . . . . . . . . . . . . . . . . . . . . . . . . . . . . . . . . . . 36
Determining the signal strength. . . . . . . . . . . . . . . . . . . . . . . . . . . . . . . . . . . . . 37
Ending a WiFi connection . . . . . . . . . . . . . . . . . . . . . . . . . . . . . . . . . . . . . . . . . . 37
Managing both VZAccess and WiFi connections . . . . . . . . . . . . . . . . . . . . . . 37

Contents
Rev 0.21 Dec.04 3
Monitoring hotspots . . . . . . . . . . . . . . . . . . . . . . . . . . . . . . . . . . . . . . . . . . . . . . . 38
Viewing hotspot details . . . . . . . . . . . . . . . . . . . . . . . . . . . . . . . . . . . . . . . . . 39
Managing WiFi profiles . . . . . . . . . . . . . . . . . . . . . . . . . . . . . . . . . . . . . . . . . . . . 40
Creating WiFi profiles . . . . . . . . . . . . . . . . . . . . . . . . . . . . . . . . . . . . . . . . . . 41
Editing WiFi profiles . . . . . . . . . . . . . . . . . . . . . . . . . . . . . . . . . . . . . . . . . . . . 42
Deleting WiFi profiles . . . . . . . . . . . . . . . . . . . . . . . . . . . . . . . . . . . . . . . . . . 42
Ranking WiFi profiles for autoconnection . . . . . . . . . . . . . . . . . . . . . . . . . 42
Text Messaging Services . . . . . . . . . . . . . . . . . . . . . . . . . . . . . . . . . . . . . . . . . . . .45
Short text messaging . . . . . . . . . . . . . . . . . . . . . . . . . . . . . . . . . . . . . . . . . . . . . . 45
SMS message notification . . . . . . . . . . . . . . . . . . . . . . . . . . . . . . . . . . . . . . 45
Mobile Messenger window . . . . . . . . . . . . . . . . . . . . . . . . . . . . . . . . . . . . . . . . . 46
Mobile Messenger - Inbox . . . . . . . . . . . . . . . . . . . . . . . . . . . . . . . . . . . . . . . . . . 46
Read SMS messages . . . . . . . . . . . . . . . . . . . . . . . . . . . . . . . . . . . . . . . . . . . 47
Forward SMS messages . . . . . . . . . . . . . . . . . . . . . . . . . . . . . . . . . . . . . . . . 47
Reply to SMS messages . . . . . . . . . . . . . . . . . . . . . . . . . . . . . . . . . . . . . . . . 48
Phone the sender of a text message . . . . . . . . . . . . . . . . . . . . . . . . . . . . . . 49
Add SMS callback to contacts . . . . . . . . . . . . . . . . . . . . . . . . . . . . . . . . . . . 49
Mobile Messenger - Outbox. . . . . . . . . . . . . . . . . . . . . . . . . . . . . . . . . . . . . . . . . 50
Create a new SMS message . . . . . . . . . . . . . . . . . . . . . . . . . . . . . . . . . . . . . 50
SMS message composition . . . . . . . . . . . . . . . . . . . . . . . . . . . . . . . . . . . . . 51
Address an SMS message . . . . . . . . . . . . . . . . . . . . . . . . . . . . . . . . . . . . . . 51
Send an SMS message to a contact. . . . . . . . . . . . . . . . . . . . . . . . . . . . 51
Add SMS Recipients window . . . . . . . . . . . . . . . . . . . . . . . . . . . . . . . . . 52
Save a draft message . . . . . . . . . . . . . . . . . . . . . . . . . . . . . . . . . . . . . . . . . . . 52
Revise a draft message . . . . . . . . . . . . . . . . . . . . . . . . . . . . . . . . . . . . . . . . . 53
Send an SMS message . . . . . . . . . . . . . . . . . . . . . . . . . . . . . . . . . . . . . . . . . 53
Override the callback number . . . . . . . . . . . . . . . . . . . . . . . . . . . . . . . . . . . 54
Retain sent messages . . . . . . . . . . . . . . . . . . . . . . . . . . . . . . . . . . . . . . . . . . 54
Review SMS messages . . . . . . . . . . . . . . . . . . . . . . . . . . . . . . . . . . . . . . . . . 55
Enhanced SMS delivery acknowledgement . . . . . . . . . . . . . . . . . . . . . . . . 55

Online Help for VZW EM5625 NB
42130548
Managing SMS messages. . . . . . . . . . . . . . . . . . . . . . . . . . . . . . . . . . . . . . . . . . 56
Delete SMS messages . . . . . . . . . . . . . . . . . . . . . . . . . . . . . . . . . . . . . . . . . 56
Expire SMS messages . . . . . . . . . . . . . . . . . . . . . . . . . . . . . . . . . . . . . . . . . . 56
Voice Services . . . . . . . . . . . . . . . . . . . . . . . . . . . . . . . . . . . . . . . . . . . . . . . . . . . . . .57
Voice features . . . . . . . . . . . . . . . . . . . . . . . . . . . . . . . . . . . . . . . . . . . . . . . . . . . . 57
Headset / TTY use . . . . . . . . . . . . . . . . . . . . . . . . . . . . . . . . . . . . . . . . . . . . . 57
Headset volume. . . . . . . . . . . . . . . . . . . . . . . . . . . . . . . . . . . . . . . . . . . . . 57
Mute a call . . . . . . . . . . . . . . . . . . . . . . . . . . . . . . . . . . . . . . . . . . . . . . . . . 58
Use a TTY . . . . . . . . . . . . . . . . . . . . . . . . . . . . . . . . . . . . . . . . . . . . . . . . . . 58
Call Privacy . . . . . . . . . . . . . . . . . . . . . . . . . . . . . . . . . . . . . . . . . . . . . . . . . . . 58
Minute Alert . . . . . . . . . . . . . . . . . . . . . . . . . . . . . . . . . . . . . . . . . . . . . . . . . . 58
Service Alert . . . . . . . . . . . . . . . . . . . . . . . . . . . . . . . . . . . . . . . . . . . . . . . . . . 59
The Voice tab . . . . . . . . . . . . . . . . . . . . . . . . . . . . . . . . . . . . . . . . . . . . . . . . . . . . 59
Scratch Pad . . . . . . . . . . . . . . . . . . . . . . . . . . . . . . . . . . . . . . . . . . . . . . . . . . . 59
Outgoing calls . . . . . . . . . . . . . . . . . . . . . . . . . . . . . . . . . . . . . . . . . . . . . . . . . . . . 60
Dial a voice call . . . . . . . . . . . . . . . . . . . . . . . . . . . . . . . . . . . . . . . . . . . . . . . . 61
Manual dialing. . . . . . . . . . . . . . . . . . . . . . . . . . . . . . . . . . . . . . . . . . . . . . 61
Auto-Hyphenation feature . . . . . . . . . . . . . . . . . . . . . . . . . . . . . . . . . . . . 61
Prefix dialing with “1”. . . . . . . . . . . . . . . . . . . . . . . . . . . . . . . . . . . . . . . . 62
Redial a number . . . . . . . . . . . . . . . . . . . . . . . . . . . . . . . . . . . . . . . . . . . . 62
Auto-Retry feature . . . . . . . . . . . . . . . . . . . . . . . . . . . . . . . . . . . . . . . . . . . 62
3-way calling . . . . . . . . . . . . . . . . . . . . . . . . . . . . . . . . . . . . . . . . . . . . . . . . . . 63
KeyGuard . . . . . . . . . . . . . . . . . . . . . . . . . . . . . . . . . . . . . . . . . . . . . . . . . . . . . 63
Mute key tones (overdial) . . . . . . . . . . . . . . . . . . . . . . . . . . . . . . . . . . . . . . . 63
Incoming calls . . . . . . . . . . . . . . . . . . . . . . . . . . . . . . . . . . . . . . . . . . . . . . . . . . . . 64
Incoming call notification . . . . . . . . . . . . . . . . . . . . . . . . . . . . . . . . . . . . . . . 64
Any-Key Answer . . . . . . . . . . . . . . . . . . . . . . . . . . . . . . . . . . . . . . . . . . . . . . . 65
Auto-Answer feature . . . . . . . . . . . . . . . . . . . . . . . . . . . . . . . . . . . . . . . . . . . 65
Call Waiting Alert . . . . . . . . . . . . . . . . . . . . . . . . . . . . . . . . . . . . . . . . . . . . . . 66
Missed Call notification . . . . . . . . . . . . . . . . . . . . . . . . . . . . . . . . . . . . . . . . 66
Ending a voice call . . . . . . . . . . . . . . . . . . . . . . . . . . . . . . . . . . . . . . . . . . . . . . . . 66

Contents
Rev 0.21 Dec.04 5
Voice Mail. . . . . . . . . . . . . . . . . . . . . . . . . . . . . . . . . . . . . . . . . . . . . . . . . . . . . . . . 67
Voice Mail notification . . . . . . . . . . . . . . . . . . . . . . . . . . . . . . . . . . . . . . . . . . 67
Clear the Voice Mail icon . . . . . . . . . . . . . . . . . . . . . . . . . . . . . . . . . . . . . 67
Access your Voice Mail . . . . . . . . . . . . . . . . . . . . . . . . . . . . . . . . . . . . . . . . . 68
Configure DTMF tones . . . . . . . . . . . . . . . . . . . . . . . . . . . . . . . . . . . . . . . 68
Change your Voice Mail access number . . . . . . . . . . . . . . . . . . . . . . . . . . 68
Contact Management . . . . . . . . . . . . . . . . . . . . . . . . . . . . . . . . . . . . . . . . . . . . . . . .71
Phone Book . . . . . . . . . . . . . . . . . . . . . . . . . . . . . . . . . . . . . . . . . . . . . . . . . . . . . . 71
Contact Properties . . . . . . . . . . . . . . . . . . . . . . . . . . . . . . . . . . . . . . . . . . . . . 71
Dial a contact . . . . . . . . . . . . . . . . . . . . . . . . . . . . . . . . . . . . . . . . . . . . . . . . . 72
Link Dialing . . . . . . . . . . . . . . . . . . . . . . . . . . . . . . . . . . . . . . . . . . . . . . . . . . . 72
Call Log. . . . . . . . . . . . . . . . . . . . . . . . . . . . . . . . . . . . . . . . . . . . . . . . . . . . . . . . . . 73
Reply to logged calls . . . . . . . . . . . . . . . . . . . . . . . . . . . . . . . . . . . . . . . . . . . 73
Copy the Call Log to a text file . . . . . . . . . . . . . . . . . . . . . . . . . . . . . . . . . . . 74
Copy a phone number from the Call Log to the clipboard . . . . . . . . . . . . 74
Add a Call Log entry to your contacts . . . . . . . . . . . . . . . . . . . . . . . . . . . . . 74
Call Log view options . . . . . . . . . . . . . . . . . . . . . . . . . . . . . . . . . . . . . . . . . . . 75
Sort the Call Log display . . . . . . . . . . . . . . . . . . . . . . . . . . . . . . . . . . . . . 75
Delete entries from the Call Log . . . . . . . . . . . . . . . . . . . . . . . . . . . . . . . . . 75
Outlook integration . . . . . . . . . . . . . . . . . . . . . . . . . . . . . . . . . . . . . . . . . . . . . . . . .77
Enabling Outlook integration . . . . . . . . . . . . . . . . . . . . . . . . . . . . . . . . . . . . . . . 77
Sending SMS messages . . . . . . . . . . . . . . . . . . . . . . . . . . . . . . . . . . . . . . . . . . . 77
Viewing sent messages . . . . . . . . . . . . . . . . . . . . . . . . . . . . . . . . . . . . . . . . . 79
Viewing unsent outgoing messages . . . . . . . . . . . . . . . . . . . . . . . . . . . . . . 79
Reading SMS messages . . . . . . . . . . . . . . . . . . . . . . . . . . . . . . . . . . . . . . . . . . . 80
Replying to SMS messages . . . . . . . . . . . . . . . . . . . . . . . . . . . . . . . . . . . . . 80
Forwarding SMS messages . . . . . . . . . . . . . . . . . . . . . . . . . . . . . . . . . . . . . 81
Deleting SMS messages . . . . . . . . . . . . . . . . . . . . . . . . . . . . . . . . . . . . . . . . 82
Dialing from Outlook . . . . . . . . . . . . . . . . . . . . . . . . . . . . . . . . . . . . . . . . . . . . . . 82
Synchronizing Phone Book contacts (in Watcher) with Outlook . . . . . . . . . 83

Online Help for VZW EM5625 NB
62130548
Security . . . . . . . . . . . . . . . . . . . . . . . . . . . . . . . . . . . . . . . . . . . . . . . . . . . . . . . . . . . .85
Security features . . . . . . . . . . . . . . . . . . . . . . . . . . . . . . . . . . . . . . . . . . . . . . . . . . 85
Unlock the modem . . . . . . . . . . . . . . . . . . . . . . . . . . . . . . . . . . . . . . . . . . 85
Initial lock code . . . . . . . . . . . . . . . . . . . . . . . . . . . . . . . . . . . . . . . . . . . . . 85
Warning . . . . . . . . . . . . . . . . . . . . . . . . . . . . . . . . . . . . . . . . . . . . . . . . . . . . . . 86
Functionality when the EM5625 is locked . . . . . . . . . . . . . . . . . . . . . . . . . 86
Enable/disable the lock code . . . . . . . . . . . . . . . . . . . . . . . . . . . . . . . . . . . . . . . 86
Lock the EM5625 immediately . . . . . . . . . . . . . . . . . . . . . . . . . . . . . . . . . . . 87
Change the lock code. . . . . . . . . . . . . . . . . . . . . . . . . . . . . . . . . . . . . . . . . . . . . . 87
Customization Options . . . . . . . . . . . . . . . . . . . . . . . . . . . . . . . . . . . . . . . . . . . . . .89
Options window . . . . . . . . . . . . . . . . . . . . . . . . . . . . . . . . . . . . . . . . . . . . . . . . . . 89
General tab in Options . . . . . . . . . . . . . . . . . . . . . . . . . . . . . . . . . . . . . . . . . . 90
Auto-launch Watcher, Launch minimized . . . . . . . . . . . . . . . . . . . . . . . 90
Warning messages . . . . . . . . . . . . . . . . . . . . . . . . . . . . . . . . . . . . . . . . . . . . 90
Prompt before exit . . . . . . . . . . . . . . . . . . . . . . . . . . . . . . . . . . . . . . . . . . . . . 91
Data tab in Options . . . . . . . . . . . . . . . . . . . . . . . . . . . . . . . . . . . . . . . . . . . . 91
Disable Microsoft network bindings for VZAccess connection . . . . . 91
Messaging tab in Options . . . . . . . . . . . . . . . . . . . . . . . . . . . . . . . . . . . . . . . 91
Network tab in Options . . . . . . . . . . . . . . . . . . . . . . . . . . . . . . . . . . . . . . . . . 92
Update the system clock with CDMA time . . . . . . . . . . . . . . . . . . . . . . 92
Security tab in Options . . . . . . . . . . . . . . . . . . . . . . . . . . . . . . . . . . . . . . . . . 92
Sounds tab in Options . . . . . . . . . . . . . . . . . . . . . . . . . . . . . . . . . . . . . . . . . . 92
Customize sounds. . . . . . . . . . . . . . . . . . . . . . . . . . . . . . . . . . . . . . . . . . . 93
Voice tab in Options . . . . . . . . . . . . . . . . . . . . . . . . . . . . . . . . . . . . . . . . . . . 93
Activation . . . . . . . . . . . . . . . . . . . . . . . . . . . . . . . . . . . . . . . . . . . . . . . . . . . . . . . . . .95
Activation overview. . . . . . . . . . . . . . . . . . . . . . . . . . . . . . . . . . . . . . . . . . . . . . . . 95
CDMA service provider account . . . . . . . . . . . . . . . . . . . . . . . . . . . . . . . . . 95

Contents
Rev 0.21 Dec.04 7
Activation Wizard . . . . . . . . . . . . . . . . . . . . . . . . . . . . . . . . . . . . . . . . . . . . . . . . . 96
Activation Wizard - Select Option . . . . . . . . . . . . . . . . . . . . . . . . . . . . . . . . 96
Manual Activation . . . . . . . . . . . . . . . . . . . . . . . . . . . . . . . . . . . . . . . . . . . . . 97
Input Activation Code . . . . . . . . . . . . . . . . . . . . . . . . . . . . . . . . . . . . . . . . 97
Enter Phone Number . . . . . . . . . . . . . . . . . . . . . . . . . . . . . . . . . . . . . . . . 97
Enter Provider Specific Data . . . . . . . . . . . . . . . . . . . . . . . . . . . . . . . . . . 97
Congratulations . . . . . . . . . . . . . . . . . . . . . . . . . . . . . . . . . . . . . . . . . . . . . 97
Voice-Assisted / Automated Activation . . . . . . . . . . . . . . . . . . . . . . . . . . . 98
Troubleshooting . . . . . . . . . . . . . . . . . . . . . . . . . . . . . . . . . . . . . . . . . . . . . . . . . . . .99
Not in Service . . . . . . . . . . . . . . . . . . . . . . . . . . . . . . . . . . . . . . . . . . . . . . . . . . . . 99
Modem is In Use . . . . . . . . . . . . . . . . . . . . . . . . . . . . . . . . . . . . . . . . . . . . . . . . . . 99
SMS Failed . . . . . . . . . . . . . . . . . . . . . . . . . . . . . . . . . . . . . . . . . . . . . . . . . . . . . . . 99
Cannot send or receive SMS . . . . . . . . . . . . . . . . . . . . . . . . . . . . . . . . . . . . . . . . 99
Optimize performance . . . . . . . . . . . . . . . . . . . . . . . . . . . . . . . . . . . . . . . . . . . . 100
Glossary . . . . . . . . . . . . . . . . . . . . . . . . . . . . . . . . . . . . . . . . . . . . . . . . . . . . . . . . . .101
Definitions . . . . . . . . . . . . . . . . . . . . . . . . . . . . . . . . . . . . . . . . . . . . . . . . . . . . . . 101

Online Help for VZW EM5625 NB
82130548

Rev 0.21 Dec.04 9
1
1: The EM5625 wireless modem
About your EM5625
Your EM5625 wireless modem allows you to do the following
(subject to feature availability), without using a wireline phone
or network:
•Connect to the Internet, VPN and corporate networks
•Send and receive e-mail
•Connect to a dial-up service
•Send and receive SMS messages
•Make and receive phone calls
Your EM5625 connects to wireless CDMA networks, providing
data transmission speeds up to 2.4 Mbps.
To use the EM5625, you must have an account that gives you
access to the Verizon Wireless VZAccessSM service.
Feature availability
The EM5625 provides a wide range of capabilities using
CDMA wireless network technology.
Some features described may not be available with your
network account. For details of the services and accounts
available, contact Verizon.
CDMA networks
The EM5625 provides a variety of connectivity features,
depending on your account:
•BroadbandAccessSM high-speed packet data, sometimes
known as 1xEV-DO, supports Internet connections with
data rates up to 2.4 Mbps (downlink from the network),
and 153.6 kbps (uplink to the network). Actual speed
depends on the network conditions.
•NationalAccess high-speed packet data, sometimes
known as 1X, supports Internet connections with data
rates up to 153.6 kbps (downlink from the network) and
76.8 kbps (uplink to the network). Actual speed depends
on the network conditions.
•Circuit switched (dial-up) data, using the earlier CDMA
IS-95 specification, supports dial-up data connections at
rates up to 14.4 kbps.
Online Help for VZW EM5625 NB
10 2130548
•Quick 2 NetSM provides a simplified way to dial into an
Internet connection (using circuit switched data).
•SMS (Short Message Service) allows you to send and
receive short text messages using the EM5625.
•Voic e calling, including E911 (Phase I) support for
emergency services.
Network account and coverage
To use the network, you require a Verizon Wireless account.
The area in which you can obtain CDMA network service is
called the coverage area. To obtain coverage you must:
•Be in proximity to a CDMA network, operating in a
frequency band supported by the modem.
•Have an account that allows you to access that network.
You can make phone calls (subject to feature availability)
wherever you have coverage and the network accepts your
account.
In areas where there is CDMA coverage but no VZAccess
(NationalAccess or BroadbandAccess) service, you can use the
EM5625 for dial-up and Quick 2 Net connections (subject to
feature availability). Where VZAccess is implemented, you can
make NationalAccess or BroadbandAccess high-speed packet
data connections. To determine available services, check the
Connection status area icons.
With roaming service, you can use your account on networks
outside of the Verizon Wireless VZAccess coverage area.
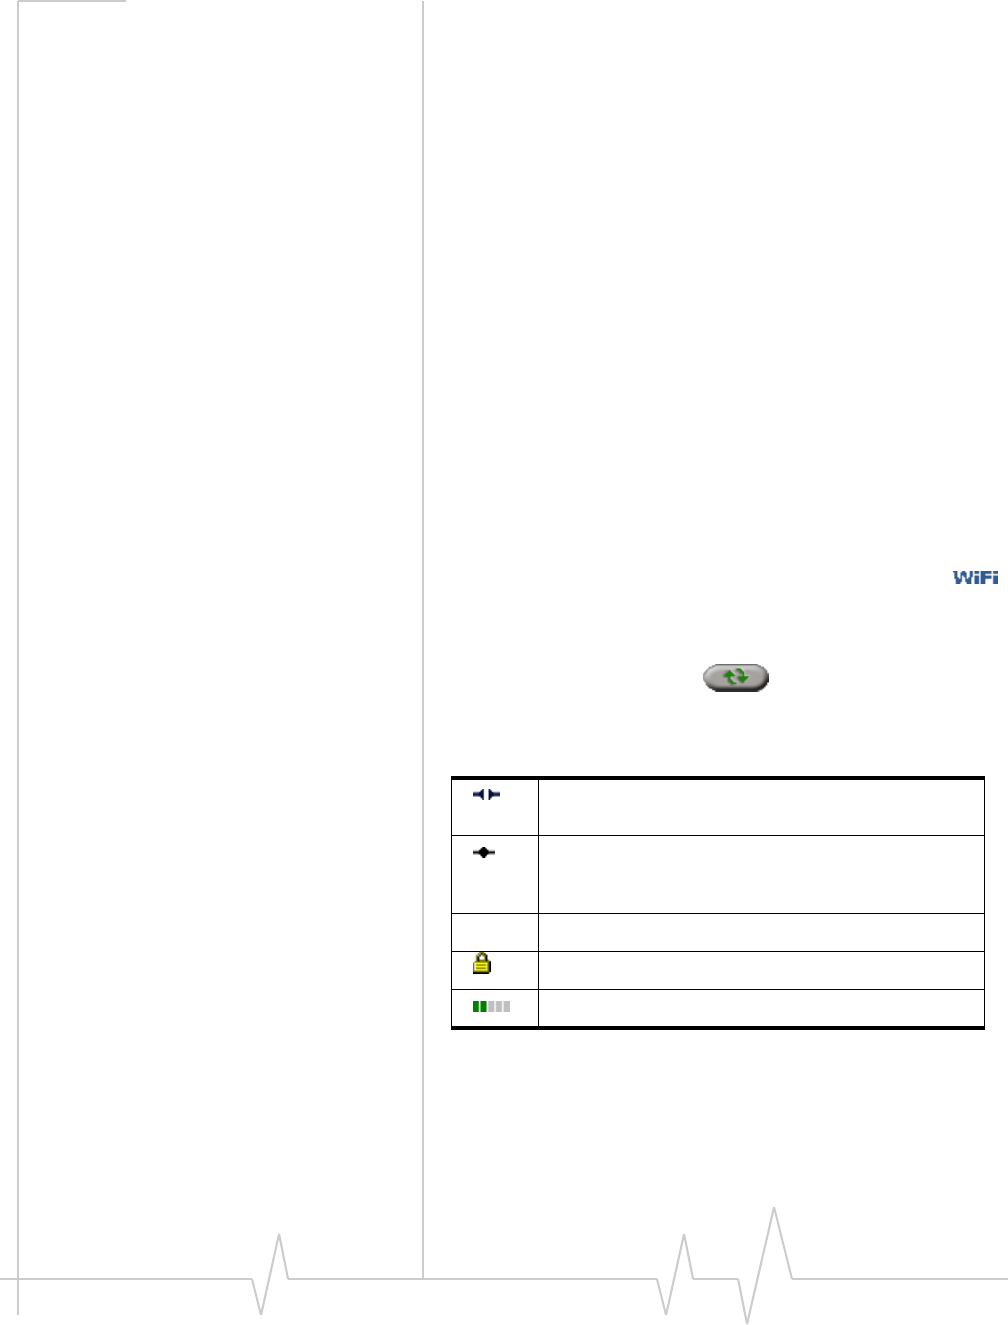
Roaming
An icon in the Connection status area of Watcher indicates
roaming.
You can configure a Service Alert to notify you when your
coverage changes.
>>| Service Alert
You are in a preferred roaming area. If this icon is flashing,
you are in a non-preferred roaming area, and you may not be
able to complete your calls.
You are within your own service provider's network.

The EM5625 wireless modem
Rev 0.21 Dec.04 11
System Select (roaming options)
Note: Change the setting ONLY if instructed to do so by your service
provider.
To change the roaming setting:
1. From the Network tab of the Options window, use the
“System select” drop-down list to select the option recom-
mended by your service provider.
·Home Only - roaming is not allowed.
·Home Preferred or Automatic - roam on “preferred” service
provider networks.
·Automatic A - roaming is allowed on “preferred” service
provider networks and on non-preferred A-side
providers.
·Automatic B - roaming is allowed on “preferred” service
provider networks and on non-preferred B-side
providers.
2. Click OK to save the setting.
WiFi
The Watcher application also allows you to manage and
monitor connections with a WiFi network adapter.
Watcher overview
Watcher for the EM5625 wireless modem is the application
that allows you to manage and monitor the connection
between the EM5625 and the CDMA network.
Without running Watcher, you can make a VZAccess high-
speed data connection simply by launching whatever appli-
cation you want to use (such as your web browser or e-mail
application). Prerequisites: you must have previously enabled,
in Watcher, “Always-on” for the high-speed connection, and
•(If you have enabled auto-launch:) WiFi coverage is either
not available, or is available but no WiFi profiles have been
set to autoconnect.
However, to make use of other features of the EM5625, you
must run Watcher.
Watcher also allows you to manage and monitor connections
with a WiFi network adapter.
Explore:
Online Help for VZW EM5625 NB
12 2130548
>>| The Watcher Window
>>| Data Services
>>| Text Messaging Services
>>| Voice Services
>>| WiFi Connections
>>| Contact Management
>>| Security
>>| Customization Options
>>| Activation
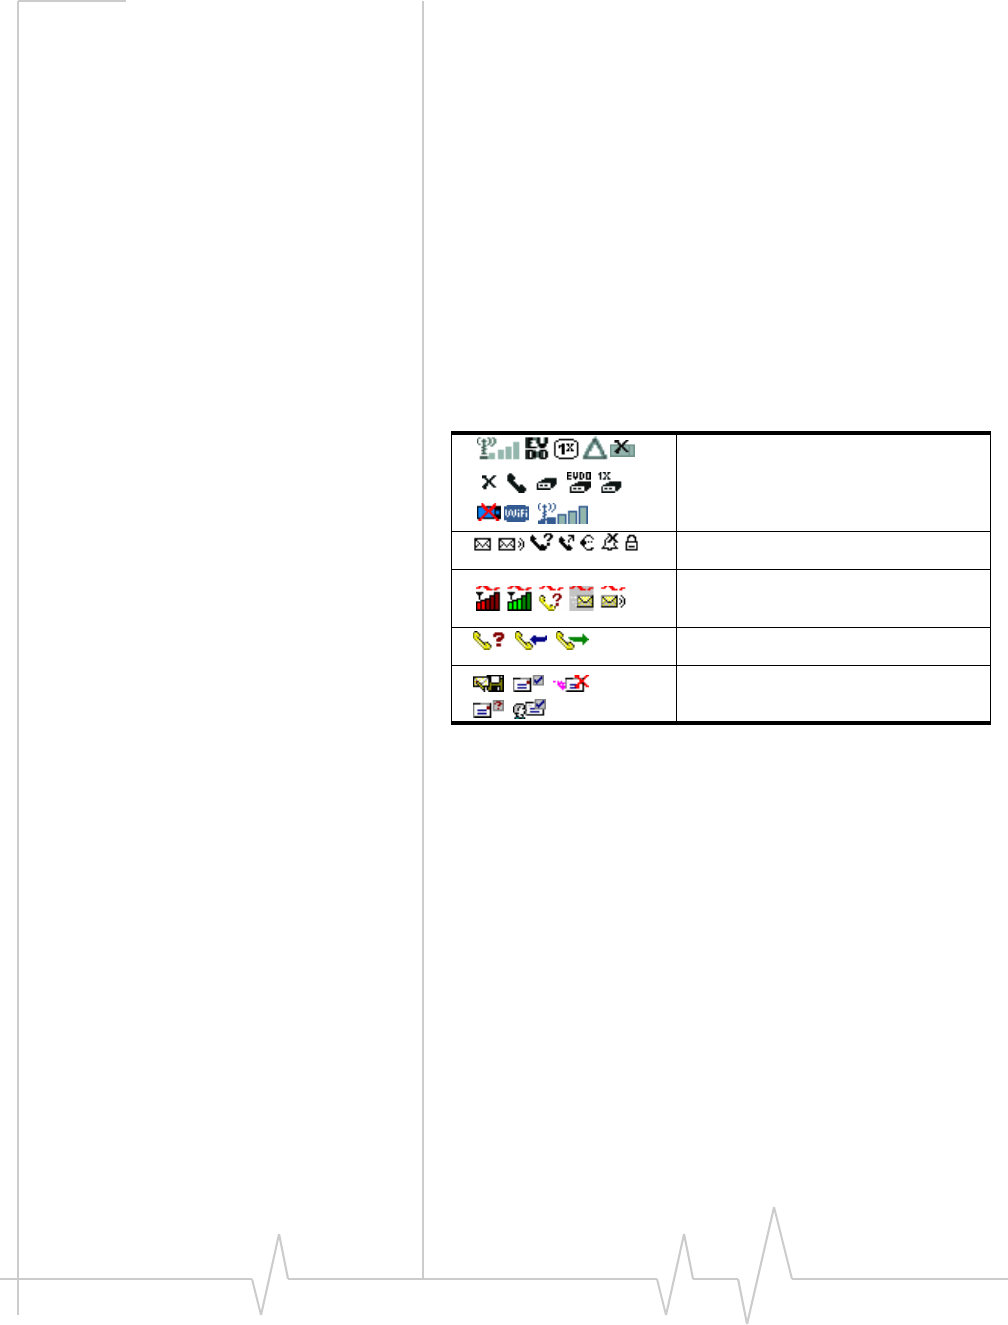
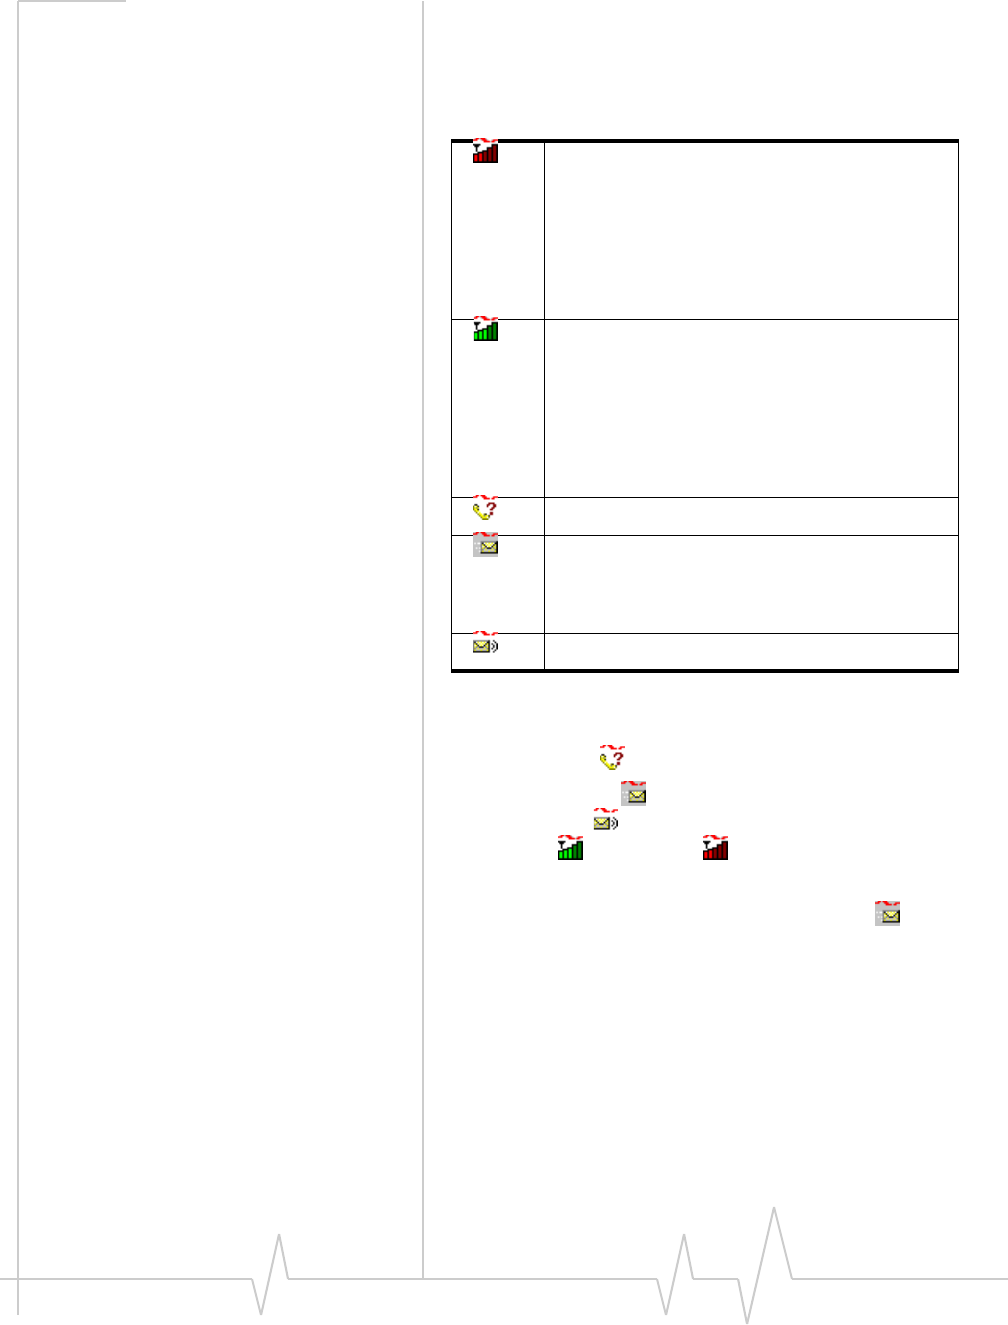
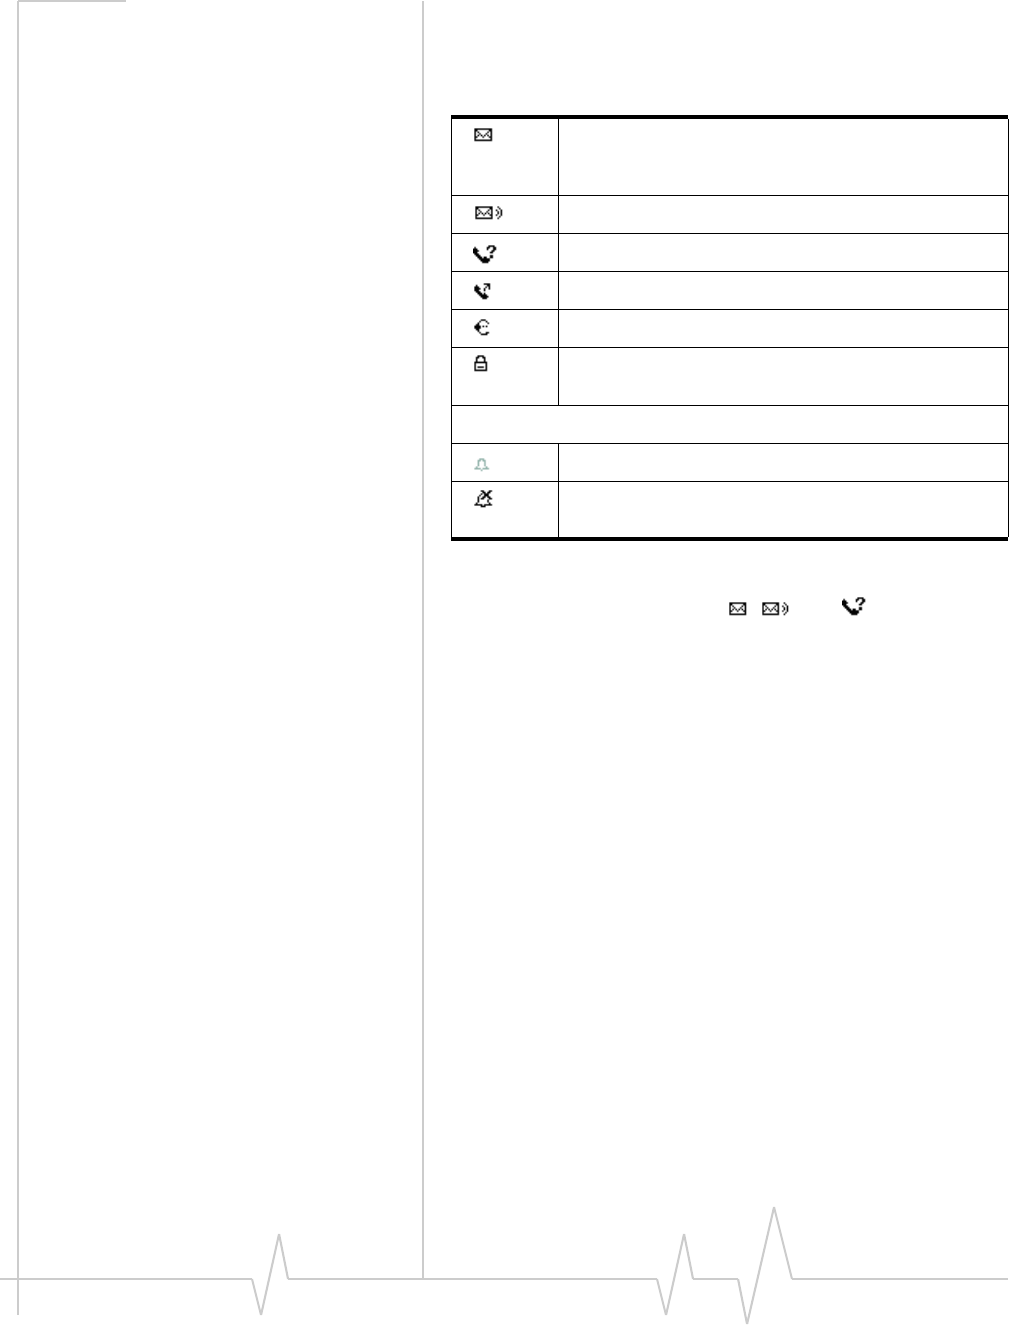
Interpreting icons
See Connection status area
See Indicator area
See Windows system tray icons
See Call Log
See Review SMS messages
The EM5625 wireless modem
Rev 0.21 Dec.04 13
Windows system tray icons
The bottom right of the screen is the Windows system tray.
Watcher places an icon in this area when it is running. Click
the icon to restore a minimized Watcher window.
Only one icon can be displayed at a time. The priority of icons,
from highest to lowest, is:
•Missed call ( )
•SMS message ( )
•Voice mail ( )
•Active ( ) or inactive ( ) data or voice connection.
For example, if you have unread SMS messages, and then
make a connection, the icon is still displayed as (SMS
message).
About EM5625 Watcher
The About EM5625 Watcher window displays:
•Your wireless phone number
•The unit's ESN (Electronic Serial Number)
•Versions of the software, driver, hardware (the modem
itself), and firmware.
There is no active data or voice connection.
The number of red bars indicates the signal
strength.
If you have a WiFi network adapter, and the
EM5625 is in service on the CDMA network, the
signal strength is that of the CDMA network. If the
EM5625 is not in service, the signal strength is
that of the WiFi hotspot.
A data or voice connection is active.
The number of green bars indicates the signal
strength.
If you have a WiFi network adapter, and the
EM5625 is in service on the CDMA network, the
signal strength is that of the CDMA network. If the
EM5625 is not in service, the signal strength is
that of the WiFi hotspot.
You have a missed call.
(If you have Outlook integration enabled and
Outlook is running, the following information does
not apply.)
You have a new SMS message.
You have new voice mail.


Rev 0.21 Dec.04 15
2
2: The Watcher Window
Watcher views
Watcher has two formats: Full view and Compact view.
You can control the Watcher window by:
•Switching between full view and compact view (by using
the view toggle button in the top right, or by selecting
VIEW > Toggle Full/Compact).
•Minimizing Watcher so that the window is closed but the
application remains running. (You can use the icon in the
system tray to determine the status or to restore the
window).
•Enabling/disabling the Docking and Always On Top
features (from the VIEW menu).
Explore:
>>| Display components (full view)
>>| Menus
>>| Interpreting icons
Full view
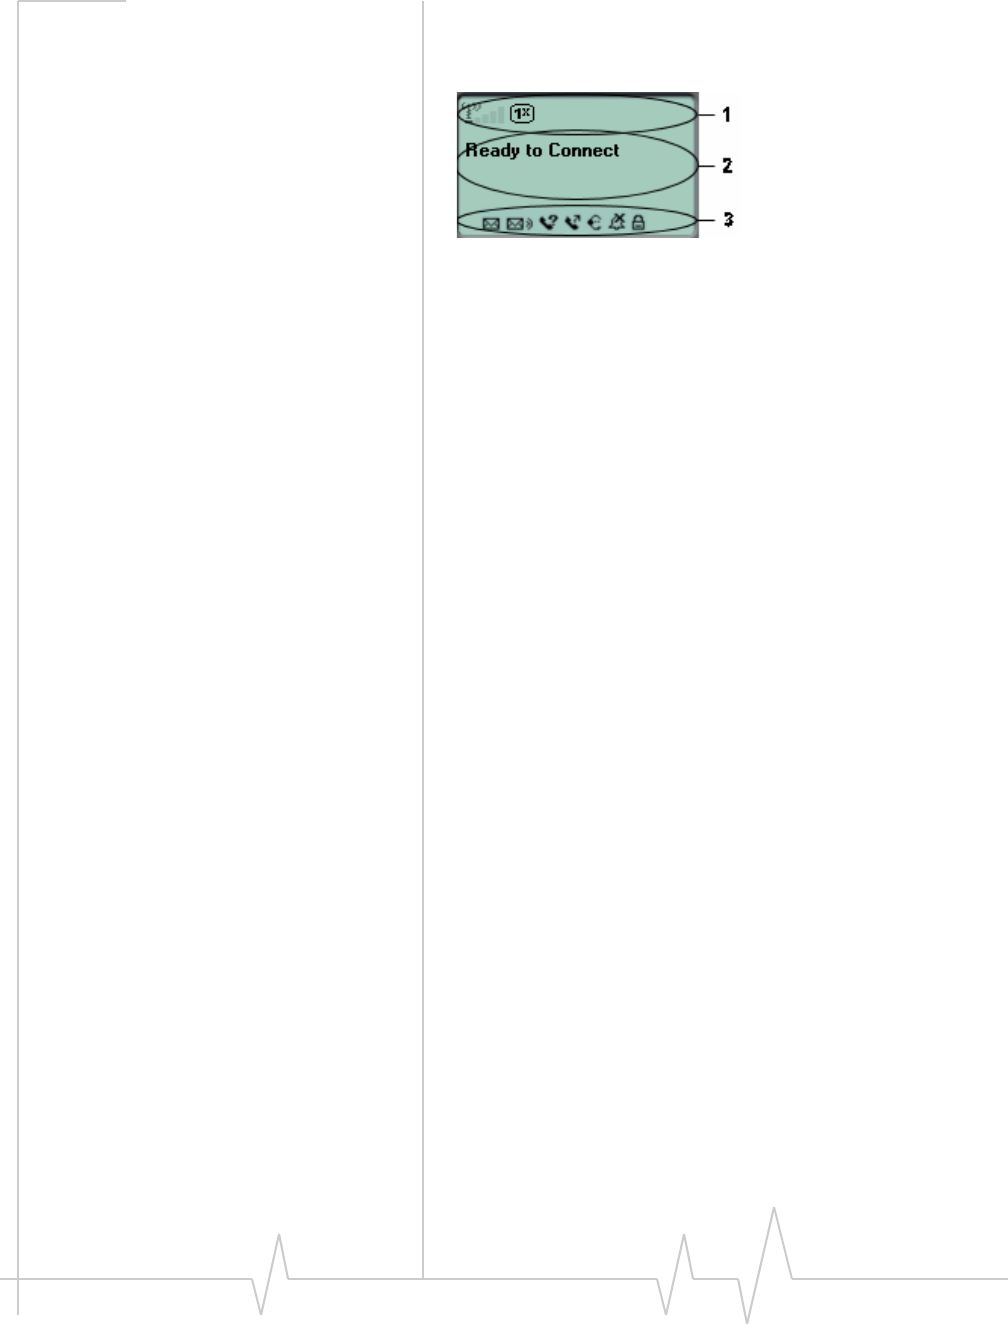
The window includes a display much like a cell phone. The
Status box has three areas that display messages and icons,
including signal strength.
Subject to feature availability, there are several tabs:
•Voice , with a dial pad for making calls
•Data , allowing you to connect and disconnect
Internet and dial-up data services
•WiFi , allowing you to manage and monitor connec-
tions with a WiFi network adapter
There is a menu offering: VIEW, TOOLS, and HELP.
Related Topics:
>>| Watcher views
>>| Display components
>>| Compact view
>>| Interpreting icons

Online Help for VZW EM5625 NB
16 2130548
Compact view
The compact view displays only the Connection status area
and Indicator area of the Status box. This permits monitoring
the connection with a minimum of screen space.
You must use Full view to make voice calls, data connections,
disconnect, or access Watcher features. To return to full view,
select the view toggle button in the top right.
If there is an incoming voice call, full view is restored.
Related Topics:
>>| Watcher views
>>| Display components (full view)
>>| Full view
>>| Interpreting icons
Docking
You can set the Watcher window to “jump” to the edge of your
screen when you move the window close to an edge. This lets
you easily position Watcher in a corner of the screen.
•Select VIEW > Docking
Always On Top
You can set Watcher to always display in front of other
windows. This allows you to monitor connection status while
using another maximized application, such as your web
browser.
•Select VIEW > Always On Top
Display components
>>| Status box
>>| Connection status area
>>| Call status area
>>| Indicator area
>>| Menus
>>| Data tab
>>| The Voice tab
>>| WiFi tab
Online Help for VZW EM5625 NB
18 2130548
Connection status area
The upper portion of the Status box shows connection icons to
indicate status:
EM5625 not detected.
CDMA network signal strength, indicated by the
number of bars (displayed in the left part of the
connection status area). A crossed out antenna
indicates no service is available (Not in Service).
BroadbandAccess (1xEV-DO) service is available.
High-speed packet data calls can be made.
Note: You may incur a premium charge when placing
a BroadbandAccess data call, depending on your
account.
If high-speed connections fail, or the indicator is not
lit, a data connection may be made using
Quick 2 Net, if supported by your account.
NationalAccess (1X) service is available. High-speed
packet data calls can be made; you can send and
receive SMS.
Note: You may incur a premium charge when placing
a NationalAccess data call, depending on your
account.
If high-speed connections fail, or the indicator is not
lit, a data connection may be made using
Quick 2 Net, if supported by your account.
Note: If you are in an area with 1X voice service but
high-speed packet data service is not available, this
indicator may be on although you cannot make a
high-speed packet data connection.
You are roaming.
A voice call is in progress.
A BroadbandAccess (1xEV-DO) packet data call is
active.
A NationalAccess (1X) packet data call is active.
A dial-up data call is in progress.
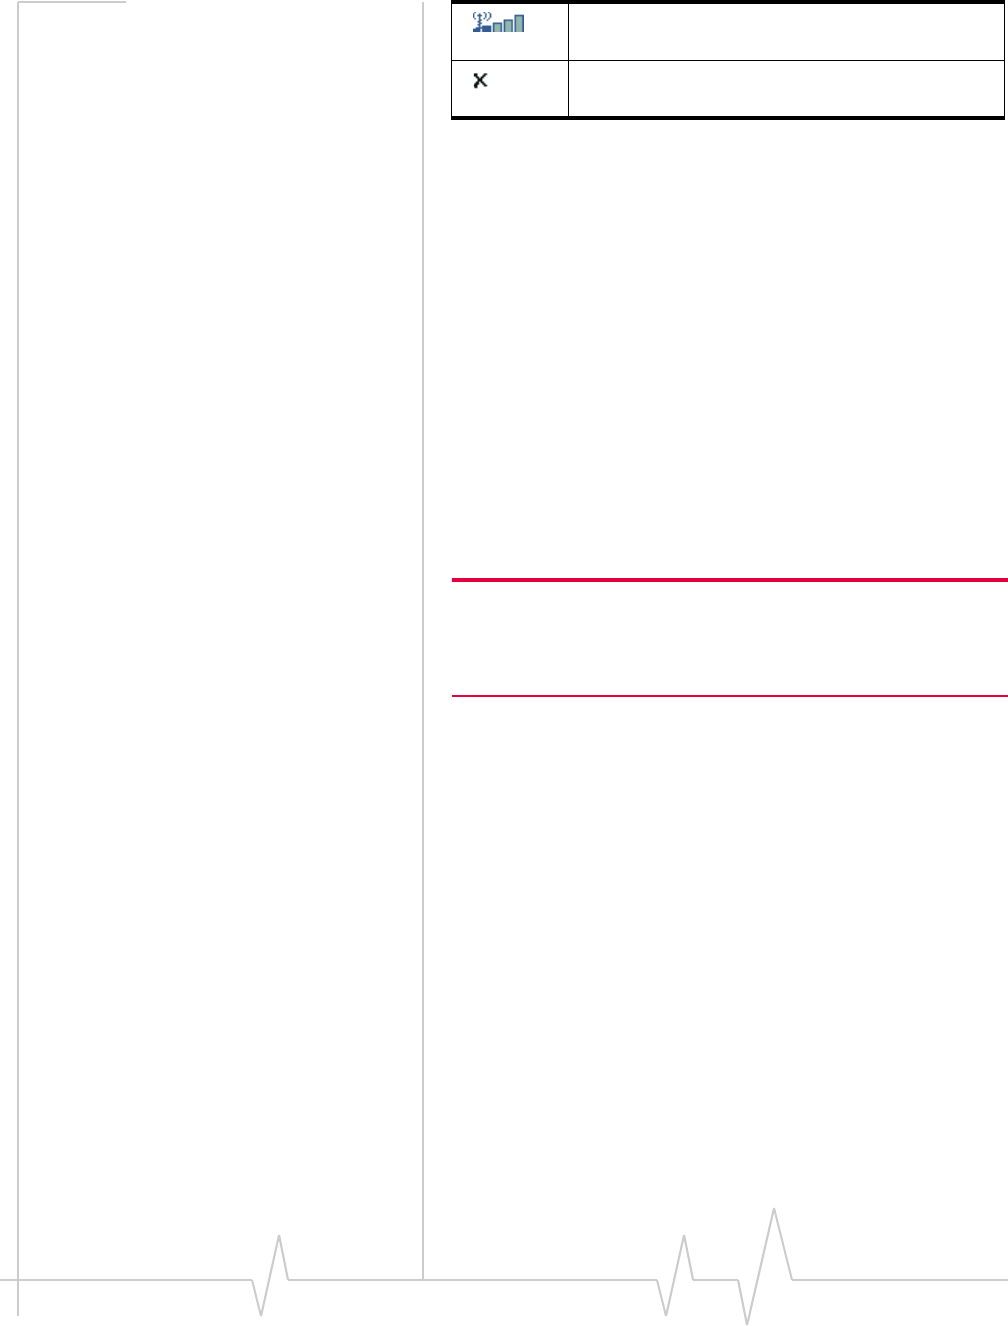
WiFi network adapter not detected (displayed in the
right part of the connection status area)
No hotspots are detected (no WiFi coverage).
At least one hotspot has been detected.
You have a WiFi connection.
The Watcher Window
Rev 0.21 Dec.04 19
Some icons are subject to feature availability.
Call status area
The call status is shown in the central part of the Status box
while in Full view. Information about the current call is
provided as noted below:
Data calls
Subject to feature availability.
•“Ready to connect”
•“Connecting”, and the connection name and phone number.
•“Authenticating”
•“Connecting to Internet” - the wireless device is acquiring an
IP address via DHCP.
•Once connected: duration of the connection, number of
bytes received (Rx), and transmitted (Tx).
Note: Even though the approximate number of bytes sent and
received is displayed while the connection is running, this is not
necessarily the actual amount of data being transmitted across the
network.
WiFi
Subject to feature availability.
•“Ready to connect”
•“Connecting to” (hotspot name)
•“Connected to” (hotspot name)
•“Unable to connect to the Internet”
Voice calls
Subject to feature availability.
•“Ready to connect”
•The phone number as you are entering it
•“Dialing” and the name (if available) and phone number of
the person you are calling; then, if you are using Link
Dialing, “Link Dial Mode”
•For incoming calls:
·“Voice Call From”, or, if you are roaming, “Roam Call
From”
WiFi signal strength (displayed in the right part of the
connection status area)
An error has occurred; the device is not working
properly. If this icon persists, reset the device.
Online Help for VZW EM5625 NB
20 2130548
·The name and phone number of the caller (may be
“Unknown”)
·If the call results in a voice mail message - “You have new
Voice Mail!”
·If the call is not answered and no voice message is left -
“new missed call(s)”
•Once connected: duration of the current connection, name
and phone number.
•“Muted” flashes when you Mute a call.
You can clear some status messages, if not needed.
Clear status messages
To clear status messages displayed in the Call status area:
•Click in the Call status area, or
•Use the BACK button on the Voice tab , or
•Press <Esc> on the wireless device’s keyboard
Note: Certain status messages for voice calls cannot be cleared.
Status messages for data calls cannot be cleared.
Related topics:
>>| Clear the Voice Mail icon
>>| Data features
>>| Voice features
>>| WiFi Connections
The Watcher Window
Rev 0.21 Dec.04 21
Indicator area
The bottom line of the Status box displays icons for these
events and settings:
Some icons are subject to feature availability.
By selecting some of the icons ( , , and ), you can open
the related window.
Menus
There are three menu options. Select one for additional detail:
>>| VIEW menu
>>| TOOLS menu
>>| HELP menu
VIEW menu
From the VIEW menu, you can control the Watcher window:
•Set the window to be Always On Top
•Enable Docking
•Toggle Full/Compact Watcher views
(If you have Outlook integration enabled and Outlook
is running, the following information does not apply.)
You have unread SMS messages.
Voice Mail notification
Missed Call notification
Auto-Answer feature enabled
Headset / TTY use (connected)
Call Privacy (Encryption) is on (for voice calls);
automatically enabled when supported by the network
Incoming call notification
Normal ring (the icon is off, indicating normal ringing)
Silent Ring (the icon is on as a reminder that there is
no sound for rings)

Online Help for VZW EM5625 NB
22 2130548
TOOLS menu
Options are subject to feature availability.
From the TOOLS menu, you can call up other windows that
allow you to:
•Read and manage Short text messaging
(Mobile Messenger...) — Unavailable if Outlook Integration is
enabled; for SMS, use Outlook.
•Access your Phone Book
•Use the Call Log
•Manage connection profiles (Connection Manager...)
•Prevent accidental dialing (KeyGuard)
•Access Customization Options
•Start the Activation Wizard
HELP menu
From the HELP menu, you can call up other windows that
allow you to:
•Access this help system (Help Topics)
•View information About EM5625 Watcher
Rev 0.21 Dec.04 23
3
3: Data Services
Data features
Subject to feature availability.
Watcher allows you to:
•Make a VZAccess (NationalAccess or BroadbandAccess)
high-speed packet data connection
•Make a Quick 2 Net circuit switched connection to the
Internet
•Connect to a dial-up server
•Disconnect a data session
Related Topics:
>>| Data tab
>>| Connection Manager
>>| Always-on connection
>>| Automatic data call disconnection
>>| Call Log
Data tab
From the Data tab of Watcher, you can:
VZAccess/Dial-up connections:
•Establish a connection using the default profile (Connect
button)
•Select a profile to dial
•End the connection (Cancel or Disconnect button)
•Access the Connection Manager
•(Dial-up/Quick 2 NetSM (14.4kbps) connections only:)
Temporarily override the properties of the selected profile
(the Dial-Up # field)
WiFi connections:
•Establish a WiFi connection
•End the connection (Cancel or Disconnect button)
•Access the Connection Manager
To access the Data tab, select below the title bar of the
main Watcher window (Full view).
The Call status area displays information about the connection.
Online Help for VZW EM5625 NB
24 2130548
Note: Depending on the connection status of the EM5625, the text on
the button is Connect, Cancel, or Disconnect.
Connection Manager
Subject to feature availability.
>>| Connection Manager window
>>| Add a data profile (Dial-up connections only)
>>| Connection profile properties
>>| Restore default settings
>>| Default data profile
>>| Delete a data profile
>>| Opening and closing connections
Connection Manager window
Subject to feature availability.
The Connection Manager is used to:
VZAccess/Dial-up connections:
•Create a connection profile (Dial-up connections only)
•Change the properties of a profile
•Delete a profile
•Set a default profile
•Restore default settings
WiFi connections:
•Manage WiFi profiles
•Restore default settings
To access the Connection Manager:
•Select TOOLS > Connection Manager..., or
•On the Data tab , use the button.
Restrict to default profiles
The data profiles available in Watcher are those defined in
Windows Dial-up Networking (DUN) and attached to the
EM5625 wireless modem.

Data Services
Rev 0.21 Dec.04 25
When Watcher starts, it verifies (and creates if needed)
standard profiles appropriate to Verizon Wireless and your
account. If your account includes access to dial-up data
services, you can create custom data profiles.
If you have a large number of defined data profiles, Watcher
may take a long time to initialize. To prevent this, you can
limit Watcher to use only its original default profiles.
1. From the Data tab of the Options window, select the “Allow
default connections only” check box.
2. Click OK to save the setting.
Watcher must be restarted for this setting to take effect.
Add a data profile
Subject to feature availability.
Note: Applies only to dial-up connections. Does not apply to
VZAccess (NationalAccess or BroadbandAccess) connections.
To add a dial-up data profile to your list of profiles:
1. Access the Connection Manager window.
2. Select the Connections tab.
3. Click Add to open the profile properties window.
4. Enter the configuration in the profile properties window.
You must give the profile a name.
5. Optionally, select the Options tab, to set the auto-launch
properties.
6. Click OK to save the profile.
Related Topic:
>>| Restrict to default profiles
>>| Creating WiFi profiles
Connection profile properties
Note: You cannot change profile properties while there is an active
data connection. You must first disconnect.
To access the properties of a profile:
1. Access the Connection Manager window.
2. Select the Connections tab.
3. Select the profile you want to view.

Online Help for VZW EM5625 NB
26 2130548
4. Select Edit.
Editing properties:
•You cannot change the Connection Name of an existing
profile. (For dial-up connections, youYou can delete the
profile and make a new one.)
•If the number is a long distance number, select the Use area
code check box to enter the area code. If applicable, select
the Use 1 check box.
•If connecting to a system that requires you to log-in, enter
your Username and Password.
•If you prefer not to enter your password each time you
make this connection, select the “Save password” check
box.
5. Optionally, select the Options tab, to set the auto-launch
properties.
6. Click OK to save the profile.
(Dial-up/Quick 2 NetSM (14.4kbps) connections only:) You
may be able to make a one-time change to the number to be
dialed by using the Dial-Up # field in the main Watcher
window. For example, you can add a “1” in front of a number
that is normally a local call, but that you are now calling long
distance.
Related Topic:
>>| Restore default settings
Specifying the autolaunch properties for
the connection
1. After completing the fields in the General tab of the profile,
you can optionally specify, in the Options tab, which appli-
cation you want Watcher to automatically launch when a
connection is established:
·None—Do not autolaunch any application.
·Website—Autolaunch Internet Explorer. In the URL
field, specify the web site (such as http://
www.sierrawireless.com) you want to view on
connection.
·Microsoft VPN (PPTP) Connection—Autolaunch a
Windows VPN connection. From the drop-down list,
select the VPN connection. (The list may be unavailable,
if you have set, under TOOLS > Options> Data, the option
Allow default connections only.)
·Application (VPN client, etc.)—Autolaunch an installed
VPN program, or any other program. In the field, enter
Data Services
Rev 0.21 Dec.04 27
the path to the program, or use the Browse button to
locate the program.
2. Select OK.
Restore default settings
Subject to feature availability.
If you modify the profiles provided with your wireless device,
and then want to restore their initial settings:
1. Access the Connection Manager window.
2. Select the Connections or the WiFi Profiles tab.
Regardless of which tab you have selected, settings for
both VZAccess/dial-up and WiFi profiles will be restored.
3. Select Restore Defaults.
Note: This does not affect profiles you have created.
Default data profile
The default profile is used when you use the Connect button in
the Data tab without making a selection from the drop-
down list of profiles.
To set a profile as the default profile:
1. Select TOOLS > Connection Manager... or use the
button.
2. Select the Connections tab.
3. Select the desired profile.
4. Select the Default column.
Note: When you launch an Internet application without first starting a
profile using Watcher, the wireless device uses the profile defined
through Start > Settings > Control Panel > Internet Options. Watcher
initially sets this to the profile appropriate to your account. Changing
the default profile in Watcher does not change the wireless device’s
default Internet connection.
Related Topics:
>>| Restrict to default profiles
>>| Creating WiFi profiles
>>| Ranking WiFi profiles for autoconnection
Online Help for VZW EM5625 NB
28 2130548
Delete a data profile
To delete a profile:
1. Access the Connection Manager window.
2. Select the Connections tab.
3. Select the desired profile.
4. Select Delete.
If you delete a profile that is standard with your account, the
profile is re-created the next time you start Watcher.
Related Topics:
>>| Restrict to default profiles
>>| Deleting WiFi profiles
Opening and closing
connections
>>| Establish a data connection
>>| Make a high-speed data connection
>>| Always-on connection
>>| Quick 2 Net
>>| Determine the amount of data transferred
>>| End a data session
Establish a data connection
Note: You cannot establish a
data connection if a voice call is
active. You must first end the
voice call.
Connections are made using profiles defined the Connection
Manager.
Using the default profile:
1. In the Data tab , click Connect, without making a
selection from the drop-down list of profiles.
Using a profile that is not the default:
1. From the drop-down list in the Data tab of Watcher,
select the profile you want to use.
2. (Dial-up/Quick 2 NetSM (14.4kbps) connections only:)
Optionally, you may be able to make a one-time change to
the number to be dialed (for profiles you create) by using
the Dial-Up # field in Watcher. For example, you can add a
Data Services
Rev 0.21 Dec.04 29
“1” in front of a number that is normally a local call, but
that you are now calling long distance.
3. Click Connect.
The connection progress is displayed in the Call status area.
Related Topics:
>>| End a data session
>>| Default data profile
>>| Always-on connection
>>| Restrict to default profiles
>>| Establishing a WiFi connection
Make a high-speed data connection
Note: You cannot establish a
data connection if a voice call is
active. You must first end the
voice call.
Note: You may incur a premium charge when placing a VZAccess
(NationalAccess or BroadbandAccess) packet data call, depending on
your account.
To make a high-speed packet data connection:
1. Select the Data tab of Watcher.
2. Ensure high-speed data service is available; the and/or
icon is shown.
3. If your VZAccess profile is not the default profile, use the
drop-down menu to select it.
4. Click Connect.
The connection progress is displayed in the Call status area.
Related Topics:
>>| End a data session
>>| Default data profile
>>| Determine the amount of data transferred
Always-on connection
Subject to feature availability.
Note: This feature works only with VZAccess (NationalAccess or
BroadbandAccess) packet data connections.

Online Help for VZW EM5625 NB
30 2130548
You can set Watcher to automatically establish a VZAccess
(NationalAccess or BroadbandAccess) packet data connection
when it starts.
If the packet data connection is lost, the connection is restarted
automatically. This provides an “always-on” network
connection (as far as permitted by network coverage).
The “always-on” connection is stopped by your command to
disconnect. It is restored when you reconnect manually or
restart Watcher.
To enable autoconnection:
1. From the General tab of the Connection Manager window,
select the Connections tab.
2. Select the VZAccess profile.
3. Select Edit.
4. Select the “Always-on” check box.
(The exact text may vary, depending on your service
provider.)
5. Select OK to save the setting.
Related Topic:
>>| Auto-launch Watcher, Launch minimized
Determine the amount of data transferred
Subject to feature availability.
Note: This feature works only with VZAccess (NationalAccess or
BroadbandAccess) high-speed packet data connections. The infor-
mation is not intended for billing purposes.
The byte counter shows you approximately how much data
was transmitted and received since the counter was last reset.
(The Call status area also displays the amount of data trans-
mitted and received, but only for the current call.)
To view the byte counter:
1. Access the Call Log.
2. Select VIEW > Call Timers > Data Byte Counter.
To reset the counter (so that it begins counting from 0):
1. In the Data Byte Counter window, select Reset Counter.
2. Select OK.
Data Services
Rev 0.21 Dec.04 31
Quick 2 Net
Subject to feature availability.
Note: You cannot establish a
data connection if a voice call is
active. You must first end the
voice call.
Quick 2 Net (QNC) uses a circuit switched method to connect
to the Internet. The connection is slower (maximum speed of
14.4 kbps) than a VZAccess (NationalAccess or Broadban-
dAccess) packet data connection.
Quick 2 Net can be used when you have CDMA coverage but
not VZAccess (NationalAccess or BroadbandAccess )
service. This connection is treated like a standard phone call.
You can set the modem to automatically disconnect an idle
Quick 2 Net connection.
To make a Quick 2 Net connection:
1. Select the Data tab of Watcher.
2. From the drop-down menu, select
“Quick 2 NetSM (14.4kbps)”.
3. Click Connect.
The connection progress is displayed in the Call status area.
Quick 2 Net calls connect faster than standard dial-up connec-
tions.
Related Topics:
>>| End a data session
>>| Default data profile
>>| Automatic data call disconnection
End a data session
To end a data session:
•From the Data tab , select Disconnect (if connected) or
Cancel (during the connection process)
If Always-on connection is in use, manually disconnecting will
leave the EM5625 disconnected. It will not reconnect until one
of the following occurs:
•You make a VZAccess (NationalAccess or Broadban-
dAccess) high-speed packet data connection
•Watcher is restarted
Automatic data call disconnection
Subject to feature availability.
You can set Watcher to automatically disconnect dial-up and
Quick 2 Net data calls that have been inactive (no data trans-
mitted) for a specified period of time.

Online Help for VZW EM5625 NB
32 2130548
This enables your device to receive voice calls and can save
you money if you are billed for connection time and forget to
disconnect a call.
To set the inactivity timer:
1. From the Data tab of the Options window, use the “Data
Inactivity: Disconnect” drop-down list to select the desired
idle time to disconnection.
To disable automatic disconnection, select Never.
2. Click OK to save the setting.
Determining the signal strength
You can determine the CDMA signal strength from the:
•Left part of the Connection status area in Watcher
•Windows system tray icons (in certain cases)
•Toolbar in Outlook (if Outlook integration is enabled)
Rev 0.21 Dec.04 33
1
1: WiFi Connections
Enabling support for a WiFi
network adapter
Subject to feature availability.
In addition to CDMA connections, Watcher allows you to
manage and monitor connections with a WiFi network
adapter. Your WiFi network adapter might be a PC Card or an
internal module.
Note: Watcher supports WiFi only on Windows 2000 or XP.
To enable WiFi support, so that Watcher monitors your WiFi
network adapter:
1. From the main Watcher window, select TOOLS > Options >
General.
2. Select the Enable WiFi support field.
Once WiFi support is enabled, icons on the right side of the
Status box in the Watcher window indicate whether a WiFi
network adapter is active and whether WiFi service is
available:
WiFi network adapter. When displayed, no WiFi
network adapter is detected; WiFi connections are not
possible.
WiFi coverage:
No hotspots are detected.
At least one hotspot has been detected. Detected
hotspots are shown on the WiFi tab (if they are
broadcasting hotspots). The ToolTip shows the
number of WiFi networks detected.
Online Help for VZW EM5625 NB
34 2130548
Your ability to connect to a hotspot depends on how it is
operated. Some hotspots are operated by wireless service
providers, and you require a subscription to use them. Some
are privately operated within homes, businesses, and organi-
zations. To connect to a hotspot, you may require a WEP key
and/or an SSID (Service Set Identifier), depending on how the
hotspot is configured. You obtain these from the WiFi network
operator.
Note: Every manufacturer designs their WiFi network adapters to
perform to different specifications. For example, some network
adapters do not present signal strength; for such network adapters,
Watcher is unable to indicate hotspot signal strength. Your WiFi
network adapter may not operate exactly as described here.
Related topics
>>| Broadcasting and non-broadcasting WiFi hotspots
>>| WEP keys
Broadcasting and non-broadcasting WiFi
hotspots
A WiFi hotspot can be “broadcasting” or “non-broadcasting”.
Broadcasting WiFi hotspots transmit their SSID, allowing any
WiFi network adapter within coverage to detect them.
Non-broadcasting hotspots do NOT transmit their SSIDs. In
Watcher, you can configure your WiFi network adapter to use
a non-broadcasting hotspot by creating a profile for that
hotspot, containing the SSID.
The WiFi tab in Watcher shows all detected broadcasting
hotspots. If you connect to a non-broadcasting hotspot, that
hotspot is also displayed on this tab.
You have a WiFi connection. The ToolTip shows the
number of WiFi networks detected.
WiFi signal strength. The indicator on the right side
of the Status box shows the signal strength of the
hotspot with the strongest signal. The number of bars
increases as signal strength increases, to a maximum
of five bars. The ToolTip shows the numeric value of
the RSSI (Received Signal Strength Indicator).
Blank bars mean that you are outside of the coverage
area or have insufficient signal strength to maintain a
WiFi connection.
WiFi Connections
Rev 0.21 Dec.04 35
Related topics
>>| Creating WiFi profiles
>>| Monitoring hotspots
WEP keys
A WEP key is a security code used to control access to a
hotspot. A WEP key may be required to connect to the hotspot
(depending on how the hotspot is configured).
If you attempt a connection to a hotspot (listed on the WiFi tab)
that has a lock icon next to it, Watcher prompts you for the
WEP key.
Note: If you will be repeatedly using this hotspot, you can create a
profile that contains the WEP key. You will not be required to enter the
WEP key to connect thereafter.
WEP keys are composed of hexidecimal characters, and are
either 5 characters in length (where 64-bit encryption is in use)
or 26 characters in length (where 128-bit encryption is in use).
Watcher supports both standards.
Related topics
>>| Creating WiFi profiles
>>| Monitoring hotspots
WiFi tab
Subject to feature availability.
From the WiFi tab of Watcher, you can:
• Monitor the hotspots and update the hotspot
information
• Establish a WiFi connection
• End a WiFi connection
• Add or edit a profile for a hotspot
WiFi Profiles tab (Connection
Manager window)
From the WiFi Profiles tab of Connection Manager, you can:
•Add or edit a profile for a hotspot
•Delete a profile for a hotspot
Online Help for VZW EM5625 NB
36 2130548
•Rank WiFi profiles ( , ) for autoconnection
•Restore default settings
Establishing a WiFi connection
A WiFi connection may be initiated automatically as soon as
your wireless device is on, or Watcher is launched. This
depends on your settings in Watcher and any other applica-
tions that control your WiFi network adapter.
To establish a WiFi connection in Watcher:
1. From the Data tab , select a WiFi profile from the
drop-down list and select Connect. (The “WiFi” label
appears on all WiFi profiles.)
Note: This method of connecting to a hotspot is available only if you
have a profile for this hotspot. You may be able to connect to other
WiFi hotspots from the WiFi tab in Watcher.
—or—
Select the WiFi tab, select a hotspot, and select the connect
button .
Note: Non-broadcasting hotspots are not displayed in this list (unless
you are connected to a non-broadcasting hotspot).
2. If you are prompted, enter the WEP key. If you want
Watcher to save the key to a profile, select the Create a
profile for this hotspot check box. (This saves you having to
enter the key again the next time you connect.) Select OK.
Note: If you have a VZAccess (NationalAccess or Broadban-
dAccess) connection, you cannot initiate a WiFi connection in
Watcher.
If the WiFi tab is displayed, an icon next to the hotspot shows
the progress of the connection:
A radio connection has been established with the hotspot.
The WiFi network adapter is in communication with the
hotspot, but no IP address has yet been assigned to the
network adapter; you cannot access Internet services with this
connection.

WiFi Connections
Rev 0.21 Dec.04 37
The connection is complete. An IP address has been
assigned to the WiFi network adapter, and you can access
Internet services.
Related topics
>>| Broadcasting and non-broadcasting WiFi hotspots
>>| WEP keys
>>| Monitoring hotspots
>>| Creating WiFi profiles
>>| Managing both VZAccess and WiFi connections
Determining the signal strength
You can determine the WiFi signal strength from the:
• —Indicator on the right side of the Status box in
Watcher (shows the signal strength of the hotspot with the
strongest signal)
• — WiFi tab in Watcher (shows the signal strength of
each hotspot)
•Networks window (shows the signal strength of each
hotspot)
• Windows system tray icons (in certain cases)
Ending a WiFi connection
To end a WiFi connection:
1. On the Data tab , select Disconnect.
—or—
On the WiFi tab, select the connected hotspot and click the
disconnect button .
Managing both VZAccess and
WiFi connections
Simultaneous WiFi and VZAccess (BroadbandAccess/Nationa-
lAccess) connections can cause radio signal interference
problems and instability in some applications. For this reason,
Watcher prevents you from having simultaneous WiFi and
VZAccess connections:
Online Help for VZW EM5625 NB
38 2130548
•If both the VZAccess and WiFi profiles are set to
autoconnect and both networks are available, then during
start-up of Watcher a WiFi connection is initiated (if one is
not already in place). If a VZAccess connection is in place,
it is ended. No warning message is displayed.
•If you have a WiFi connection, Watcher does not allow you
to initiate a VZAccess connection until you end the WiFi
connection.
•If a VZAccess connection is in place, you cannot initiate a
WiFi connection.
•If a VZAccess connection is in place, and another program
initiates a WiFi connection, Watcher shuts down your
VZAccess connection and notifies you of the shutdown.
Related topics
>>| Creating WiFi profiles
>>| Establishing a WiFi connection
Monitoring hotspots
To display a list of broadcasting hotspots:
1. From the main Watcher window, select the WiFi tab .
The list of hotspots is updated every 15 seconds. You can also
initiate an update:
1. Select the search button .
The SSID of each detected hotspot is shown in the Network
column; the icons indicate:
To view more information about the hotspots:
1. Right-click any hotspot and, from the shortcut menu,
select Networks.
To connect to a hotspot:
There is a radio connection to this hotspot. You are not
connected to the Internet.
There is a connection to this hotspot and an IP
address is assigned. You are connected to the
Internet.
(no icon) There is no connection to this hotspot.
A WEP key is required to connect to this hotspot.
The signal strength of this hotspot.
WiFi Connections
Rev 0.21 Dec.04 39
1. From the WiFi tab , select the hotspot and select the
connect button .
Note: If you have a VZAccess (NationalAccess or Broadban-
dAccess) connection, you cannot initiate a WiFi connection in
Watcher. You must first close the VZAccess connection.
To cancel the connection process:
1. From the WiFi tab , select the hotspot and select the
cancel button .
To disconnect from a hotspot:
1. Select the hotspot and select the disconnect button .
You can determine whether a profile has been created for a
hotspot by the appearance of the profile button when you
select the hotspot:
• A profile for this hotspot exists. (The button is not
available.)
• There is no profile for this hotspot.
To add a profile for a hotspot:
1. Select the hotspot and select the button .
2. Enter the information for the profile.
To edit a profile for a hotspot:
1. Right-click the hotspot and, from the shortcut menu, select
Properties.
2. Modify the information for the profile.
Related topics
>>| Creating WiFi profiles
>>| Establishing a WiFi connection
>>| Broadcasting and non-broadcasting WiFi hotspots
>>| WEP keys
>>| Restore default settings
Viewing hotspot details
To display detailed information about the hotspots in your
area:
1. On the WiFi tab, right-click any hotspot and, from the
shortcut menu, select Networks.
This window shows:

Online Help for VZW EM5625 NB
40 2130548
•Network—SSID of this hotspot
•BSSID—(Basic Service Set Identifier) MAC address of the
hotspot
•Channel—Radio frequency channel used by the hotspot
•WEP—Icon indicating whether a WEP key is required
to use the hotspot
•Signal Strength—Radio signal strength in dBm
•Status—Connection status (connected or disconnected)
Related topics
>>| Monitoring hotspots
>>| Broadcasting and non-broadcasting WiFi hotspots
>>| WEP keys
Managing WiFi profiles
To connect to a non-broadcasting hotspot, you require a
profile.
To connect to a broadcasting hotspot, you do not require a
profile. However, there are benefits to creating profiles for
broadcasting hotspots that you use frequently:
•If you are required to enter a WEP key to connect to a
hotspot, you can store the WEP key in a profile so that you
do not need to enter it each time you connect.
•You can configure the profile to autolaunch a VPN,
Internet browser, or other application, and you can set the
profile to autoconnect at Watcher start-up.
From the WiFi Profiles tab in the Connection Manager window,
you can:
•Create a WiFi profile
•Edit a WiFi profile
•Restore default settings
•Delete a WiFi profile
•Set the priority Watcher uses in autoconnecting to WiFi
hotspots.
To access the WiFi Profiles tab:
1. From the main window, select TOOLS > Connection Manager
> WiFi Profiles.
Related topics
>>| Broadcasting and non-broadcasting WiFi hotspots
>>| WEP keys
WiFi Connections
Rev 0.21 Dec.04 41
Creating WiFi profiles
You will need information from the wireless service provider
(if the profile is for a subscribed WiFi service) or the IT
department (if the profile is for a private WiFi network in a
business or organization), for the following fields:
•Network SSID—Name assigned to the hotspot.
•Broadcasted—Whether the WiFi hotspot is “broad-
casting” or “non-broadcasting”.
•WEP Key—Security code used to control access to the
hotspot. A WEP key may or may not be required.
To create a profile:
1. Access the profile window in one of these ways:
·From the WiFi tab, select a hotspot and select the Add
Profile button . (If this button appears dimmed, a
profile already exists for this hotspot.)
·Select TOOLS > Connection Manager > WiFi Profiles and
select the Add button.
2. Complete the fields in the General tab of the profile, using
the information you’ve obtained (see above), plus the
following:
·Notes—Comments regarding this hotspot. This is for
your own use, and is typically used to record the
location of the hotspot.
·Autoconnect—Determines whether a connection is
established automatically. When enabled (the box is
checked), a connection using this profile is automatically
initiated based on its rank in the WiFi profile list. (If a
VZAccess (NationalAccess or BroadbandAccess)
connection exists when Watcher is started, the
connection is ended, and a WiFi connection is
attempted.)
Note: If the Broadcasted check box is NOT selected, and the profile is
set to autoconnect, Watcher’s performance may be impacted. On
start-up of Watcher, a connection is attempted using any profiles set
to autoconnect, based on how the profiles are ranked. The process
required to connect to a non-broadcasting hotspot requires several
seconds. Thus, Watcher may be slow to respond after start-up, if one
or more profiles are set to autoconnect, and the profiles are set as
non-broadcasting. It is important that the Broadcasted check box be
set correctly to match the hotspot.
3. Select the Options tab and complete the fields.

Online Help for VZW EM5625 NB
42 2130548
Editing WiFi profiles
To edit a WiFi profile:
1. Select the profile you want to edit:
·Select the WiFi tab. Right-click the hotspot that corre-
sponds to the profile you want to edit, and, from the
shortcut menu, select Properties. (If this menu option is
unavailable, a profile for this hotspot doesn’t exist. You must
first create a profile.)
—or—
·From the main window, select TOOLS > Connection
Manager > WiFi Profiles. Select a profile and select the Edit
button.
2. Make any necessary changes on the General and Options
tabs.
3. Click OK.
Related topics
>>| Managing WiFi profiles
>>| Deleting WiFi profiles
>>| Restore default settings
>>| Ranking WiFi profiles for autoconnection
Deleting WiFi profiles
To delete a WiFi profile:
1. From the main window, select TOOLS > Connection Manager
> WiFi Profiles.
2. Select the profile and select the Delete button.
Ranking WiFi profiles for autoconnection
If you have multiple WiFi profiles that are set to autoconnect,
the order in which a connection is attempted (at startup of
Watcher) is based on the order in which the profiles are listed
on the WiFi Profiles tab of the Connection Manager window.
Note: Where Watcher is set to autoconnect using both the VZAccess
profile and a WiFi profile, and where both connections are possible,
the WiFi connection is attempted.
To change this order:
1. From the main window, select TOOLS > Connection Manager
> WiFi Profiles.

WiFi Connections
Rev 0.21 Dec.04 43
2. Select a profile that you want to move up or down in
ranking.
3. To move the profile up, use the up arrow button ; to
move the profile down, use the down arrow button .
4. Repeat steps 2 and 3 until the profiles are in the order in
which you would like Watcher to connect to them.
Related topics
>>| Managing WiFi profiles

Online Help for VZW EM5625 NB
44 2130548

Rev 0.21 Dec.04 45
2
2: Text Messaging Services
Short text messaging
The SMS (Short Messaging Service) feature allows you to send
and receive short text messages through the CDMA network.
The exact message length limit is determined by the service
provider; usually up to 160 characters.
Note: To send/receive SMS messages, you must have Nationa-
lAccess service ( ) or an active dial-up/Quick 2 NetSM (14.4kbps)
connection ( ).
Depending on the service provider, one or more of these
methods of sending SMS messages may be available:
•A web page on which anyone can enter a message and
direct it to your phone number. Anyone who has access to
the Internet can send you a message.
•Through Internet e-mail. Your phone number is used as an
e-mail address (for example, 6045553993@provider.com).
•Some products, such as the EM5625, support (subject to
feature availability) sending messages.
Watcher notifies you when you have messages.
Explore:
>>| Mobile Messenger window
>>| Enabling Outlook integration
>>| Cannot send or receive SMS
SMS message notification
Note: If Watcher is integrated with Outlook (subject to feature avail-
ability) and Outlook is running, the following information does not
apply.
Online Help for VZW EM5625 NB
46 2130548
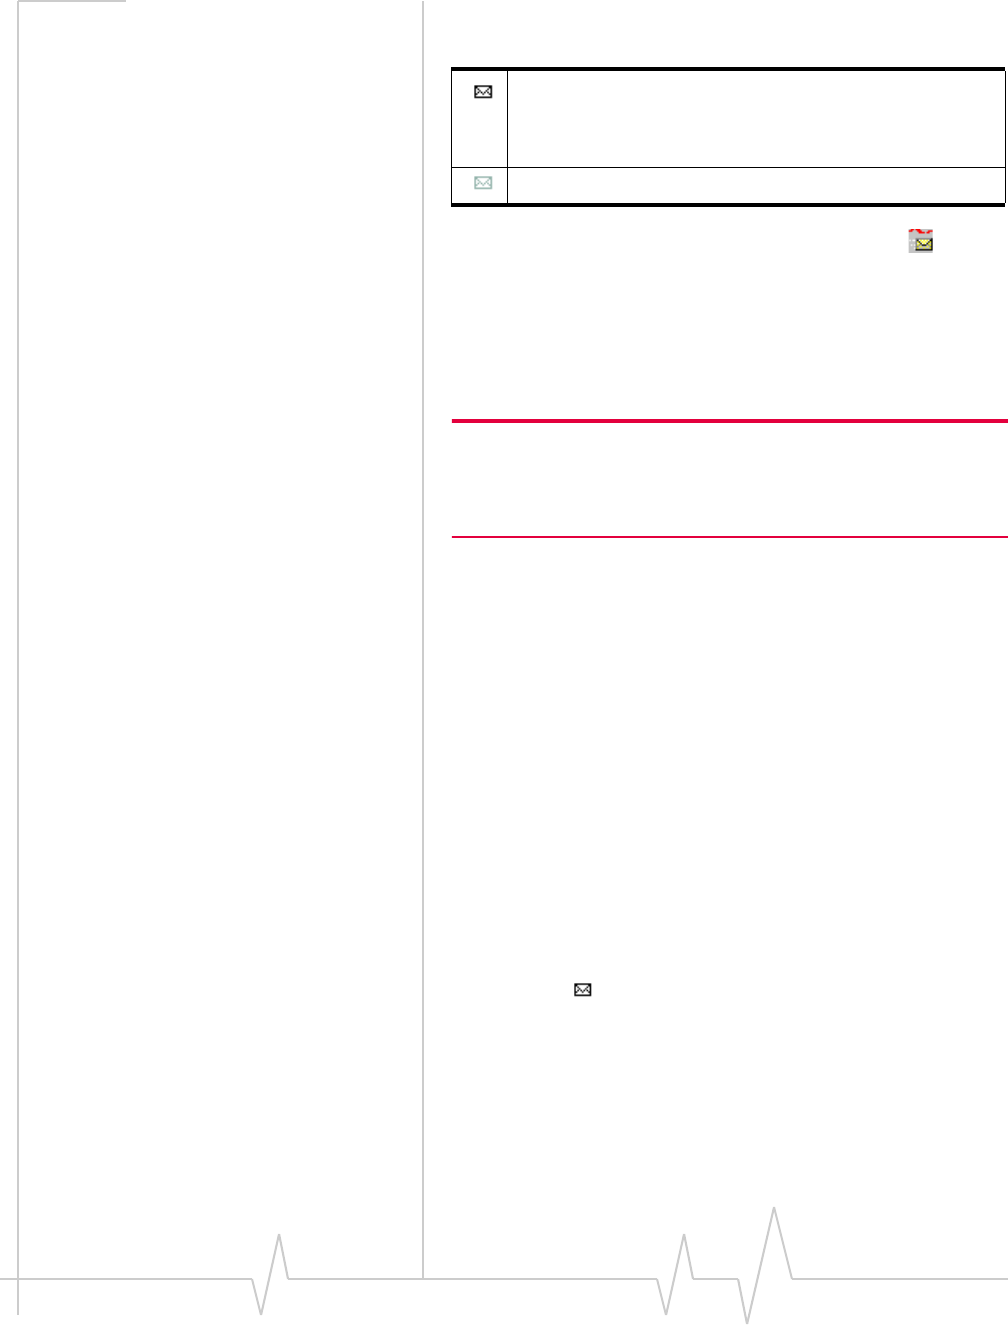
An icon in the Indicator area shows whether you have unread
SMS messages.
The Windows system tray icons may show an SMS icon.
You can also specify a sound to be played when new messages
arrive.
Mobile Messenger window
Note: If Watcher is integrated with Outlook (subject to feature avail-
ability), you can send, read, reply to, forward , and delete SMS
messages from Outlook. You cannot access the Mobile Messenger
window from Watcher, unless you disable Outlook integration.
The Mobile Messenger window opens on the Inbox tab.
Subject to feature availability, there may also be an Outbox tab
for creating and sending messages.
From Mobile Messenger you can:
•Read SMS messages
•Delete SMS messages
Subject to feature availability, you may also be able to:
•Forward SMS messages to others
•Reply to SMS messages
•Phone the sender of a text message (if a callback number is
included in the message)
•Add the callback number to your Phone Book
•Create a new SMS message to send
To access Mobile Messenger:
•Click the icon in the Indicator area, or
•Select TOOLS > Mobile Messenger...
Mobile Messenger - Inbox
>>| Read SMS messages
You have unread SMS messages. If you have urgent
messages, the icon flashes. By selecting the icon, you can
access the Mobile Messenger window to read the
messages.
You do not have unread SMS messages.

Text Messaging Services
Rev 0.21 Dec.04 47
>>| Forward SMS messages
>>| Reply to SMS messages
>>| Phone the sender of a text message
>>| Add SMS callback to contacts
>>| Delete SMS messages
Read SMS messages
Note: If Watcher is integrated with Outlook (subject to feature avail-
ability), you can read SMS messages from Outlook. You cannot
access the Mobile Messenger window from Watcher, unless you
disable Outlook integration.
Incoming messages are stored in the Inbox until you delete
them or until they expire.
To read SMS messages:
1. Access the Mobile Messenger window.
Each line is a message header for one message. Unread
messages are displayed in bold.
2. Click anywhere in the message header.
The message and its status are displayed in the lower
panel.
Web addresses within messages may work as links that open
the page in your browser.
Phone numbers within messages may also work as links that
can be dialed by clicking them. Right-click them to open a
context menu allowing you to:
•Dial the number
•Send a text message
•Add the number to your Phone Book
Once viewed, the message is marked as read.
Forward SMS messages
Subject to feature availability.
Note: If Watcher is integrated with Outlook (subject to feature avail-
ability), you can forward SMS messages from Outlook. You cannot
access the Mobile Messenger window from Watcher, unless you
disable Outlook integration.
Online Help for VZW EM5625 NB
48 2130548
To forward SMS messages:
1. Ensure you have NationalAccess service ( ) or an active
dial-up/Quick 2 NetSM (14.4kbps) connection ( ).
2. In the Inbox of the Mobile Messenger window, select the
message you want to forward.
3. Select File > Forward Message...
The message composition window opens with a copy of
the selected message.
4. In the “To” field, enter the desired destination.
5. Optionally, add your comments to the message body.
6. From the “Priority” drop-down list, set the priority of this
message.
7. Click Send.
Related topics
>>| Cannot send or receive SMS
>>| SMS Failed
Reply to SMS messages
Subject to feature availability.
Note: If Watcher is integrated with Outlook (subject to feature avail-
ability), you can reply to SMS messages from Outlook. You cannot
access the Mobile Messenger window from Watcher, unless you
disable Outlook integration.
This option is available only if the SMS address of the sender is
included in the message. This won’t be available if, for
example, the message was sent from a web site.
To reply to SMS messages:
1. Ensure you have NationalAccess service ( ) or an active
dial-up/Quick 2 NetSM (14.4kbps) connection ( ).
2. In the Inbox of the Mobile Messenger window, select the
message you want to reply to.
3. Select File > Reply to Sender...
The message composition window opens with the address
of the sender filled in.
4. Enter your response in the message body.
5. Optionally, in the “To” field, enter additional destinations
to receive a copy of your reply.

Text Messaging Services
Rev 0.21 Dec.04 49
6. From the “Priority” drop-down list, set the priority of this
message.
7. Click Send.
Related topics
>>| Cannot send or receive SMS
>>| SMS Failed
Phone the sender of a text message
Subject to feature availability.
Note: If Watcher is integrated with Outlook (subject to feature avail-
ability), you can phone the sender of an SMS message from Outlook.
You cannot access the Mobile Messenger window from Watcher,
unless you disable Outlook integration.
You can phone the sender of a text message, provided the
message includes a valid callback number.
To phone the sender of a message:
1. In the Inbox of the Mobile Messenger window, select the
message from the person you want to phone.
2. Select File > Call back Sender.
Watcher then dials the callback number.
Add SMS callback to contacts
Subject to feature availability.
If the selected SMS message has a callback number, you can
add the number to a new or existing Phone Book entry.
1. In the Inbox of the Mobile Messenger window, select the
message from the person you want to add to your contacts.
2. Select Edit > Add Contact to Phone Book.
Note: The contact is added to the Phone Book (in Watcher). If you
want this contact to appear in your Outlook contacts, synchronize the
Phone Book with Outlook.
This option is not available if the message does not have a
callback number.
Online Help for VZW EM5625 NB
50 2130548
Mobile Messenger - Outbox
Subject to feature availability.
Note: If Watcher is integrated with Outlook (subject to feature avail-
ability), use Outlook to deal with outgoing SMS messages. You
cannot access the Mobile Messenger window from Watcher, unless
you disable Outlook integration.
From the Outbox of the Mobile Messenger window you can:
•Create, save, and send messages.
•Determine the status of sent messages.
•Review your sent messages and drafts.
•Edit and send saved drafts.
•Delete messages.
Related Topics:
>>| Retain sent messages
>>| Override the callback number
Create a new SMS message
Subject to feature availability.
Note: If Watcher is integrated with Outlook (subject to feature avail-
ability), you can create and send SMS messages from Outlook. You
cannot access the Mobile Messenger window from Watcher, unless
you disable Outlook integration.
To create an SMS message:
1. If you will be sending the message immediately after you
create it, ensure you have NationalAccess service ( ) or
an active dial-up/Quick 2 NetSM (14.4kbps) connection
().
2. In the Mobile Messenger window, select New...
The message composition window opens.
3. In the “To” field, enter the desired destination address(es).
4. Enter the text in the message body.
5. From the “Priority” drop-down list, set the priority of this
message.
6. If your message is ready to be sent, click Send.
Alternatively, you can save the draft, then edit and send it
later.

Text Messaging Services
Rev 0.21 Dec.04 51
Before sending, you can override your callback number if
desired.
Related topics
>>| Cannot send or receive SMS
>>| SMS Failed
SMS message composition
Subject to feature availability.
Note: If Watcher is integrated with Outlook (subject to feature avail-
ability), you can create and send SMS messages from Outlook. You
cannot access the Mobile Messenger window from Watcher, unless
you disable Outlook integration.
Message composition allows you to:
•Address an SMS message to up to 10 recipients (“To”
button).
•Set the priority of the message (“Priority“).
•Compose the text of the message.
•Send the message. (The button is enabled when an address
and body are entered.)
•Save a draft message without sending it (File > Save).
Message composition is accessed when you: create, revise,
forward, or reply to a message.
Address an SMS message
Subject to feature availability.
To address an SMS message:
•In the “To” field, enter the person’s CDMA e-mail address
or phone number.
To separate multiple recipients, use a comma “,” or a semi-
colon “;”. Spaces are ignored.
•Click the To... button to open the Add SMS Recipients
window, giving you access to your Phone Book/Outlook
contacts.
•Repeat until all the recipients have been added. A message
can have up to 10 recipients.
Send an SMS message to a contact
Subject to feature availability.
To send an SMS message to a contact:

Online Help for VZW EM5625 NB
52 2130548
1. From the SMS message composition window, click To...
The Phone Book (Watcher) or Outlook contacts appear in
the Add SMS Recipients window that opens.
Add SMS Recipients window
Subject to feature availability.
You can have up to 10 recipients to a single SMS message.
To add recipients:
•Enter an address or phone number directly, or
•Select an entry from the Phone Book or Outlook contacts
list provided.
Click Add -> to include the address / number in the list of recip-
ients.
Remove a recipient from the list by selecting it in the “Recip-
ients” panel and clicking <- Remove.
Click OK to return to the SMS message composition window.
To access the Add SMS Recipients window:
1. From the Message Composition window, click the To...
button.
Save a draft message
Subject to feature availability.
Note: If Watcher is integrated with Outlook (subject to feature avail-
ability), you can save a draft message in Outlook.
SMS message composition allows you to save drafts of
messages for future editing and sending. To save a draft
message:
•Select File > Save, or
•Close message composition and select Yes when asked if
you want to save changes.
Drafts are saved in the Outbox.
You can revise, send, or delete the message later.
Related Topics:
>>| Retain sent messages
>>| Revise a draft message
Text Messaging Services
Rev 0.21 Dec.04 53
Revise a draft message
Subject to feature availability.
Note: If Watcher is integrated with Outlook (subject to feature avail-
ability), you can revise a draft SMS message in Outlook. You cannot
access the Mobile Messenger window from Watcher, unless you
disable Outlook integration.
Saved messages in the Outbox can be recalled for editing or
sending. To recall a saved message:
1. In the Outbox of the Mobile Messenger window, select the
message you want to access.
2. Select File > Edit Message...
The message opens in SMS message composition.
Alternatively, you can double-click the message in the Outbox
to open it in message composition.
Related Topic:
>>| Save a draft message
Send an SMS message
Subject to feature availability.
Note: To send SMS messages, you must have NationalAccess
service ( ) or an active dial-up/Quick 2 NetSM (14.4kbps)
connection ( ).
Additional features related to sending messages:
•Override the callback number of sent messages.
•Retain a copy of the message in the Outbox.
•Check the status of sent messages.
To send the message, click Send in SMS message composition.
Related topics:
>>| Cannot send or receive SMS
>>| SMS Failed

Online Help for VZW EM5625 NB
54 2130548
Override the callback number
Subject to feature availability.
You can override the callback number that is included in SMS
messages you send. The default is the phone number of your
EM5625.
To override the callback number:
1. From the Messaging tab of the Options window, select the
“Override Callback #” check box.
The displayed override number is used.
2. To change the override number, select Change... and enter
the new number (no spaces or other formatting
characters). To have no callback number in your messages,
leave the entry blank.
3. Select OK to save the setting.
To use the phone number of the EM5625 as the callback
number, clear the “Override Callback #” check box.
Retain sent messages
Subject to feature availability.
You can save SMS messages you send to the Outbox (of
Watcher), or to Outlook (Sent Items).
Note: If you do not save messages to the Outbox, you cannot check
the status of messages you send.
To save sent messages:
1. From the Messaging tab of the Options window, use the
“Save to Outbox” drop-down menu to select:
·automatically
·ask first
·never
2. Click OK to save the setting.
Outbox/Outlook messages are not automatically deleted. You
must manually delete them.
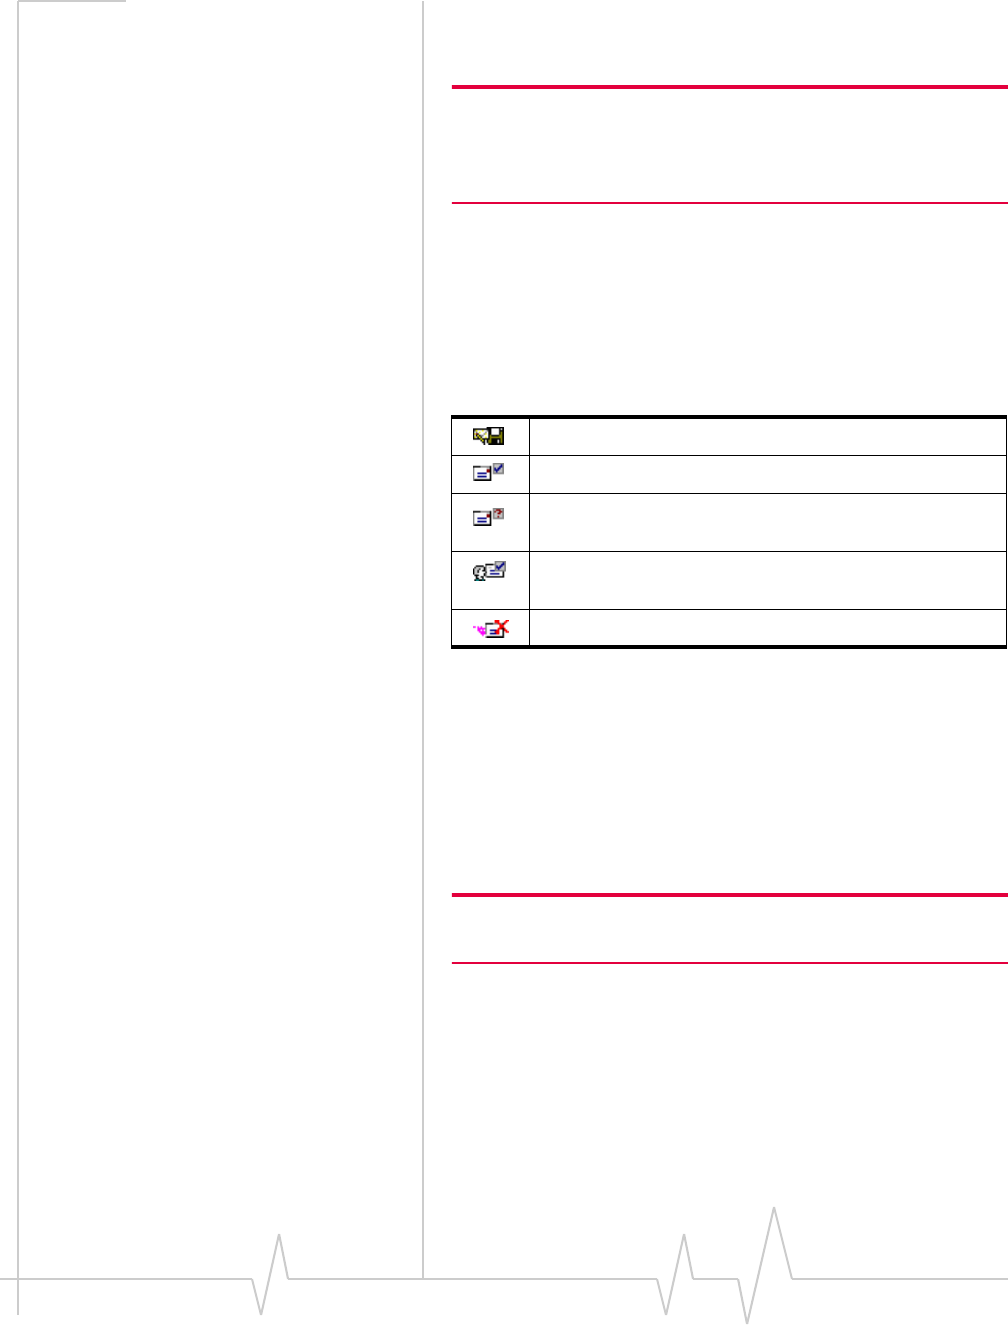
Text Messaging Services
Rev 0.21 Dec.04 55
Review SMS messages
Subject to feature availability.
Note: If Watcher is integrated with Outlook (subject to feature avail-
ability), use Outlook to deal with retained SMS messages and drafts.
You cannot access the Mobile Messenger window from Watcher,
unless you disable Outlook integration.
From the Outbox of the Mobile Messenger window you can
check the status and review the contents of retained SMS
messages and drafts.
You must retain a copy of sent messages in the Outbox to
review the status and content.
The status is shown as an icon in the list of message headers.
The status is also shown within the review panel for each
message. Select a message header to review the message status
and content in the lower panel.
Enhanced SMS delivery
acknowledgement
Subject to feature availability.
Note: If Watcher is integrated with Outlook, then this feature is not
available.
For sent messages that are retained, you can set Watcher to
request enhanced delivery status. Where supported by the
network, this advises you of delivery of the message to the
CDMA subscriber.
To enable enhanced delivery acknowledgements:
1. From the Messaging tab of the Options window, select the
“Enhanced Delivery Acknowledgements” check box.
Saved draft; not sent.
Sent; received by the network.
Sent; received by some, but not all, recipients (where
enabled and supported by the network).
Delivered to all recipients (where enabled and supported
by the network).
Error in sending. Resend the message.

Online Help for VZW EM5625 NB
56 2130548
2. Click OK to save the setting.
Managing SMS messages
>>| Delete SMS messages
>>| Expire SMS messages
Delete SMS messages
Note: If Watcher is integrated with Outlook (subject to feature avail-
ability), use Outlook to delete SMS messages.
To delete SMS messages:
•Selectively: in the Mobile Messenger window, select the
check boxes next to those messages you want to delete,
then select Edit > Delete.
•All at once: in Mobile Messenger, select Edit > Delete All.
Note that this also deletes unread/unsent messages!
You can also specify that read messages be automatically
deleted (expire) from the Inbox after a set period. This does not
affect the Outbox.
Expire SMS messages
Note: If Watcher is integrated with Outlook, then this feature is not
available.
Unread SMS messages are kept indefinitely, as are messages in
the Outbox.
To set an expiry period for read messages (after which they are
deleted from the Inbox):
1. From the Messaging tab of the Options window, use the
“Automatically delete” drop-down menu to select the
number of days after which read messages are to be
deleted.
If you want to keep read messages indefinitely, select
“never”.
2. Click OK to save the setting.
You can also manually delete messages.

Rev 0.21 Dec.04 57
3
3: Voice Services
Voice features
Subject to feature availability.
Watcher provides these voice features:
•Make and receive calls
•3-way calling
•Redial the last number called or unanswered
•Call Waiting Alert
•Missed Call notification
•Voice Mail notification
•Call Privacy (where available on the network)
Additional voice-related features:
•Customize incoming call notification
•Dial from your Phone Book or Outlook
•Prefix dialing with “1”
•Call Log
•KeyGuard to prevent accidental dialing
•Mute the microphone
•Customize features for dialing, answering, and alerts
The Call status area displays information about the voice call.
Headset / TTY use
Subject to feature availability.
For voice calls, you must connect an approved cellular headset
(or TTY device) to the wireless device.
An icon in the Indicator area shows whether the headset or
TTY is detected by the wireless device.
Headset volume
To increase or decrease the volume of the headset:
Connected.
Not detected. Check the connection of the headset or
TTY to the device.
Online Help for VZW EM5625 NB
58 2130548
•Use the volume up and down buttons on the Voice tab
, or
•Move the slider in the Sounds tab of the Options
window.
For alerts and rings played on the wireless device’s speaker,
use the system volume control in the Windows system tray:
Mute a call
To mute the microphone during a call, select the mute
button on the Voice tab .
When your call is muted, the message “Muted” flashes in the
Call status area.
The message is displayed until the call is ended, or until you
release it by selecting the mute button again.
Use a TTY
If you are using a TTY with your wireless device:
1. From the Network tab of the Options window, use the “TTY
mode” drop-down menu to select either:
·Off - to use an approved headset, or
·On (Full) - to use a TTY.
2. Click Save.
Call Privacy
To prevent your voice calls from being monitored, the EM5625
automatically uses encryption where it is available on the
network in your current coverage area.
An icon in the Indicator area shows whether encryption (the
privacy feature) is on.
Minute Alert
The Minute Alert feature plays a sound in the headset at one-
minute intervals, allowing you to monitor the duration of your
call. This feature is useful if your billing plan includes a limited
number of minutes.
Encryption is on.
Encryption is off.
Voice Services
Rev 0.21 Dec.04 59
Note: The counting of the time
starts from when the connection
is being established, and not
from the time the other party
answers.
To allow you time to end the call, the tone is played 10 seconds
before the minute elapses.
To turn the Minute Alert feature on/off:
1. From the Voice tab of the Options window, select or clear
the “Minute alert” check box.
2. Click OK to save the setting.
Service Alert
The Service Alert feature plays a sound to notify you that your
coverage status has changed: roaming, or passing in or out of
network coverage.
To turn the Service Alert feature on/off:
1. From the Voice tab of the Options window, select or clear
the “Service alert” check box.
2. Click OK to save the setting.
The Voice tab
Subject to feature availability.
From the Voice tab of Watcher, you can:
•Place a voice call
•End a voice call
•Redial a number
•Answer a voice call
•Increase/decrease the headset volume
•Mute the microphone
•Set the notification of incoming calls
•Access your Phone Book
•Access the Scratch Pad
•Clear status messages
To access the Voice tab, select below the title bar of the
main Watcher window.
The Call status area displays information about the voice call.
Scratch Pad
Subject to feature availability.
The Scratch Pad allows you to type brief notes, such as short
reminders or a name and phone number.
Online Help for VZW EM5625 NB
60 2130548
To access the Scratch Pad:
1. From the Voice tab , use the button.
Use the keyboard or the dial pad to enter text.
The Scratch Pad automatically saves your data and closes
when:
•There is an incoming voice call
•You click ok in the top right corner of the Scratch Pad
•You use SEND or END
•You select the Data tab of Watcher
Next time you display the Scratch Pad, your data is displayed.
To erase the data from the Scratch Pad, click clear in the top
right corner of the pad, or use the BACK button.
To copy the text from the Scratch Pad to the clipboard (for use
in other applications):
1. Select the text.
2. Use the keyboard ctrl+c to copy.
3. Change applications.
4. Use the keyboard ctrl+v to paste.
Outgoing calls
Subject to feature availability.
Note: You cannot make phone
calls during an active data
connection.
To place a voice call:
1. Ensure your headset or TTY is connected.
2. Select the Voice tab of Watcher.
3. Dial the number.
4. Use the SEND button, or press <enter> to initiate the
call.
Note: Some accounts may bill voice calls differently from data
services.
The connection progress is displayed in the Call status area.
Note: If Watcher is integrated with Outlook (subject to feature avail-
ability), you can dial a contact from Outlook.
Voice Services
Rev 0.21 Dec.04 61
Related Topics:
>>| Dial a voice call
>>| Ending a voice call
>>| Headset / TTY use
>>| KeyGuard - prevent accidental dialing
Dial a voice call
Subject to feature availability.
A call can be dialed in several ways:
•Dial the number directly (from the Voice tab of
Watcher)
•Use your Phone Book (in Watcher)
•Dial a contact from Outlook
•Redial the last number called or unanswered
•Select a number from the Call Log
•Call back the sender of a text message
Related Topics:
>>| Auto-Hyphenation feature
>>| Prefix dialing with “1”
>>| Auto-Retry feature
Manual dialing
You can enter a number in several ways:
•Select the numbers of the dial pad of the Voice tab ,
much like the dial pad on a cellular phone.
•Use the number or letter keys of the keyboard. Letters
translate to the dial pad equivalents (A, B, or C = 2, and so
on).
To delete the last digit you entered (to make a correction), use
the BACK button, or the backspace key.
To delete all the numbers you entered, use the END
button or the <esc> key.
Use SEND , or the <enter> key, to initiate the call.
Auto-Hyphenation feature
The Auto-Hyphenation feature automatically inserts hyphens
into a phone number as you enter the digits. The number is
displayed in the format xxx-yyy-yyyy. The hyphens have no
effect on what is dialed.
Online Help for VZW EM5625 NB
62 2130548
To turn the Auto-Hyphenation feature on/off:
1. From the Voice tab of the Options window, select or clear
the “Auto-Hyphenation” check box.
2. Click OK to save the setting.
Prefix dialing with “1”
The prefix feature automatically inserts a “1” before numbers
dialed from all sources, except:
•Numbers that begin with “1” or “*”
•Emergency (911) calls
•Data connections
Note: This feature does affect numbers you enter manually so it will
impact local dialing. The “1” does not appear on the display.
This feature may allow you to continue to use your Phone
Book when traveling.
To turn the prefix feature on/off:
1. From the Voice tab of the Options window, select or clear
the “Prefix all voice calls with ‘1’ ” check box.
2. Click OK to save the setting.
Redial a number
Note: The redial number is the
most recent of: a missed call, or
number you dialed.
To redial a number, on the Voice tab use the SEND
button, or press the <enter> key.
With no number displayed, Watcher redials the last number
called or unanswered.
Auto-Retry feature
Note: This is not the same as
redialing a number that connects
but is busy.
The Auto-Retry feature retries a connection (up to five times),
when the wireless device is temporarily unable to connect with
the cellular base station. (The base station is not assigning a
traffic channel to the modem. This situation is called “fast
busy”.)
You can set the interval at which the connection is retried:
1. From the Voice tab of the Options window, use the “Auto-
retry” drop-down list to select the number of seconds to
wait before retrying.
To turn Auto-Retry off, select “off” from the drop-down
list.
2. Click OK to save the setting.
Voice Services
Rev 0.21 Dec.04 63
3-way calling
Subject to feature availability.
If you are subscribed to a 3-way calling service, you can have a
call between more than two parties.
To establish a 3-way call:
1. Connect with one of the parties.
2. Use the SEND button to place that party on hold.
3. Dial and connect to the second party.
4. Use the SEND button to join the 3-way call.
To end the call and disconnect both parties, use the END
button, or press <esc> on the keyboard.
To disconnect only the second party, continuing with the first
party, use the SEND button, or press <enter> on the
keyboard.
KeyGuard
Subject to feature availability.
The KeyGuard feature prevents accidental dialing. When
enabled, using the SEND button or any other button on
the Voice tab has no effect.
To turn KeyGuard on/off:
1. Select TOOLS > KeyGuard.
A check mark next to the menu item indicates whether
KeyGuard is on. The Call status area shows: “KeyGuard
enabled”.
If you have an incoming call, KeyGuard is automatically
turned off. When the incoming call ends or is declined, your
KeyGuard setting is restored.
Note: KeyGuard does not prevent other forms of dialing: data connec-
tions, dialing from Phone Book or the Call Log, or SMS message
callback.
Mute key tones (overdial)
Subject to feature availability.
You can turn off (mute) the key tones from being played while
in a call (overdialing). Note that this prevents Link Dialing.
To mute or enable overdial key tones:
Online Help for VZW EM5625 NB
64 2130548
1. From the Voice tab of the Options window, select or clear
the “Mute” check box.
2. Click OK to save the setting.
Incoming calls
Subject to feature availability.
When you have an incoming voice call:
•The device plays a sound, based on your preferences. (You
can also change the sound played.)
•The Call status area displays information about the caller
(if supplied by the network).
•The Voice tab of Watcher is displayed. (If you were in
Compact view or minimized, the Full view is restored.)
To answer a call:
1. Ensure your headset or TTY is connected.
2. Use the SEND button, or press the <enter> key.
If the Any-Key Answer feature is enabled, you have more
options to answer a call.
You can set Watcher to automatically answer any incoming
voice calls after a selected number of rings.
To decline a call:
•Use the END button on the Voice tab , or
•Press <esc> on the keyboard.
A declined call is put through to Voice Mail (if subscribed),
and appears as a missed call.
If you missed a call, you can view and reply to missed calls
using the Call Log.
Note: Some accounts may bill voice calls differently from data
services.
Related Topic:
>>| Headset / TTY use
Incoming call notification
The device can be set to play a sound or use a “silent ring”.
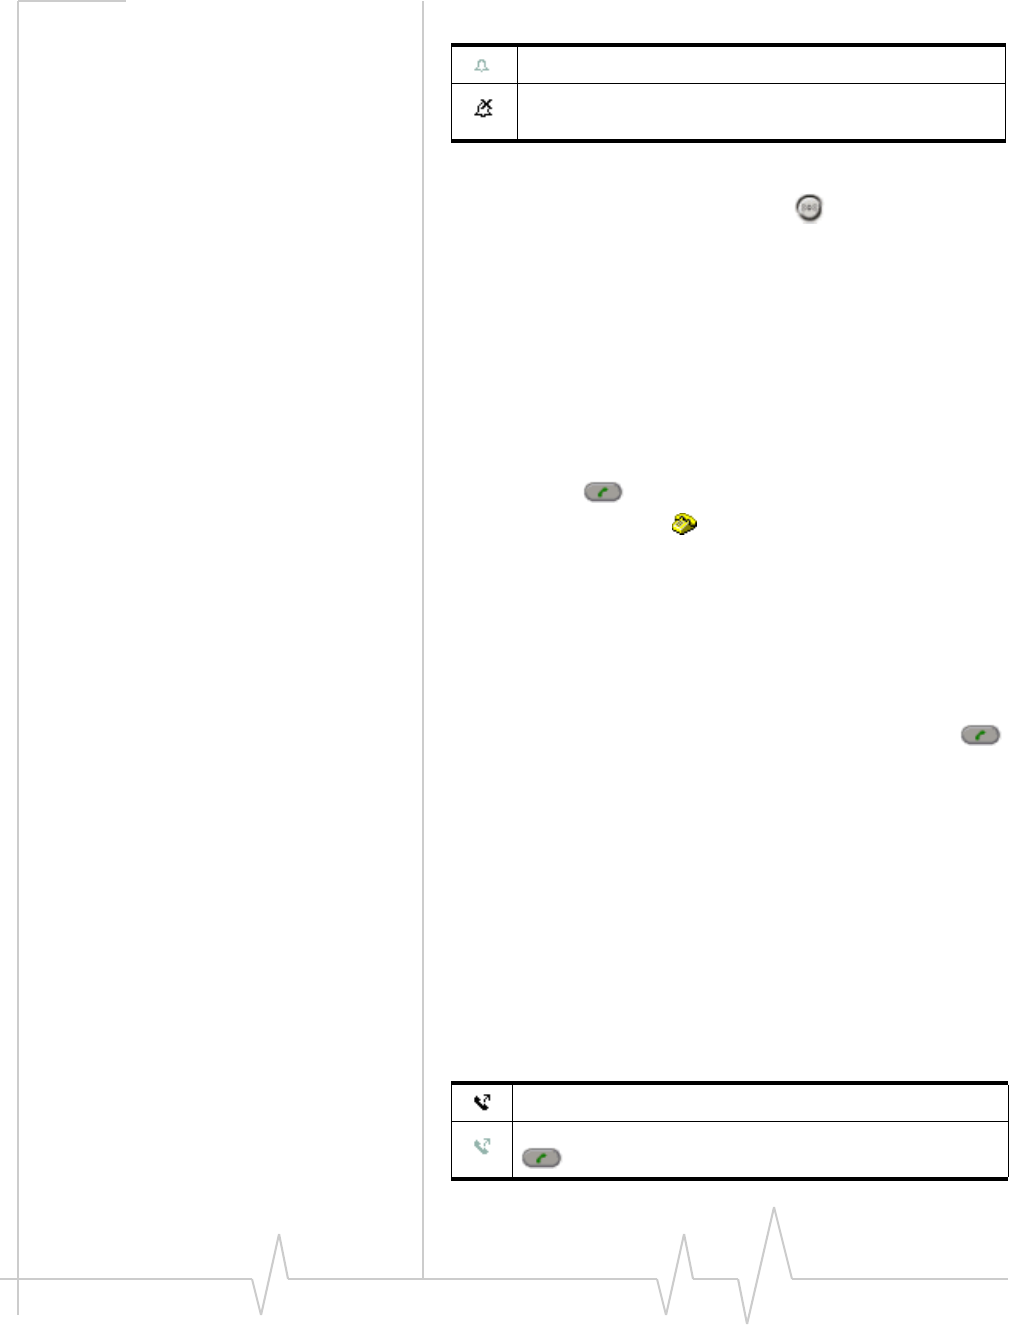
Voice Services
Rev 0.21 Dec.04 65
An icon in the Indicator area shows the setting.
To set how the device responds to an incoming call:
•While not in a call, select the mute button to toggle the
ring on and off.
•Use the Sounds tab of the Options window to enable or
disable the sound, and to select the .wav file to play as the
audible ring.
Any-Key Answer
Subject to feature availability.
The Any-Key Answer feature allows you to answer a call by
pressing:
•The SEND button
•Any of the Voice tab dial-pad buttons (0 through 9, *,
or # key)
•Any key on the keyboard (except <esc>)
To turn the Any-Key Answer feature on/off:
1. From the Voice tab of the Options window, select or clear
the “Any-key answer” check box.
2. Click OK to save the setting.
If the Any-Key Answer feature is off, you must use SEND
or press <enter> on the keyboard to answer incoming calls.
Related topic:
>>| Auto-Answer feature
Auto-Answer feature
Subject to feature availability.
The Auto-Answer feature automatically answers incoming
voice calls without you having to press any keys.
An icon in the Indicator area shows whether the Auto-Answer
feature is on.
Ring on
Silent ring. The Call status area displays a message for
incoming calls.
Auto-Answer is on.
Auto-Answer is off. To answer the call, you must use SEND
. See also Any-Key Answer.
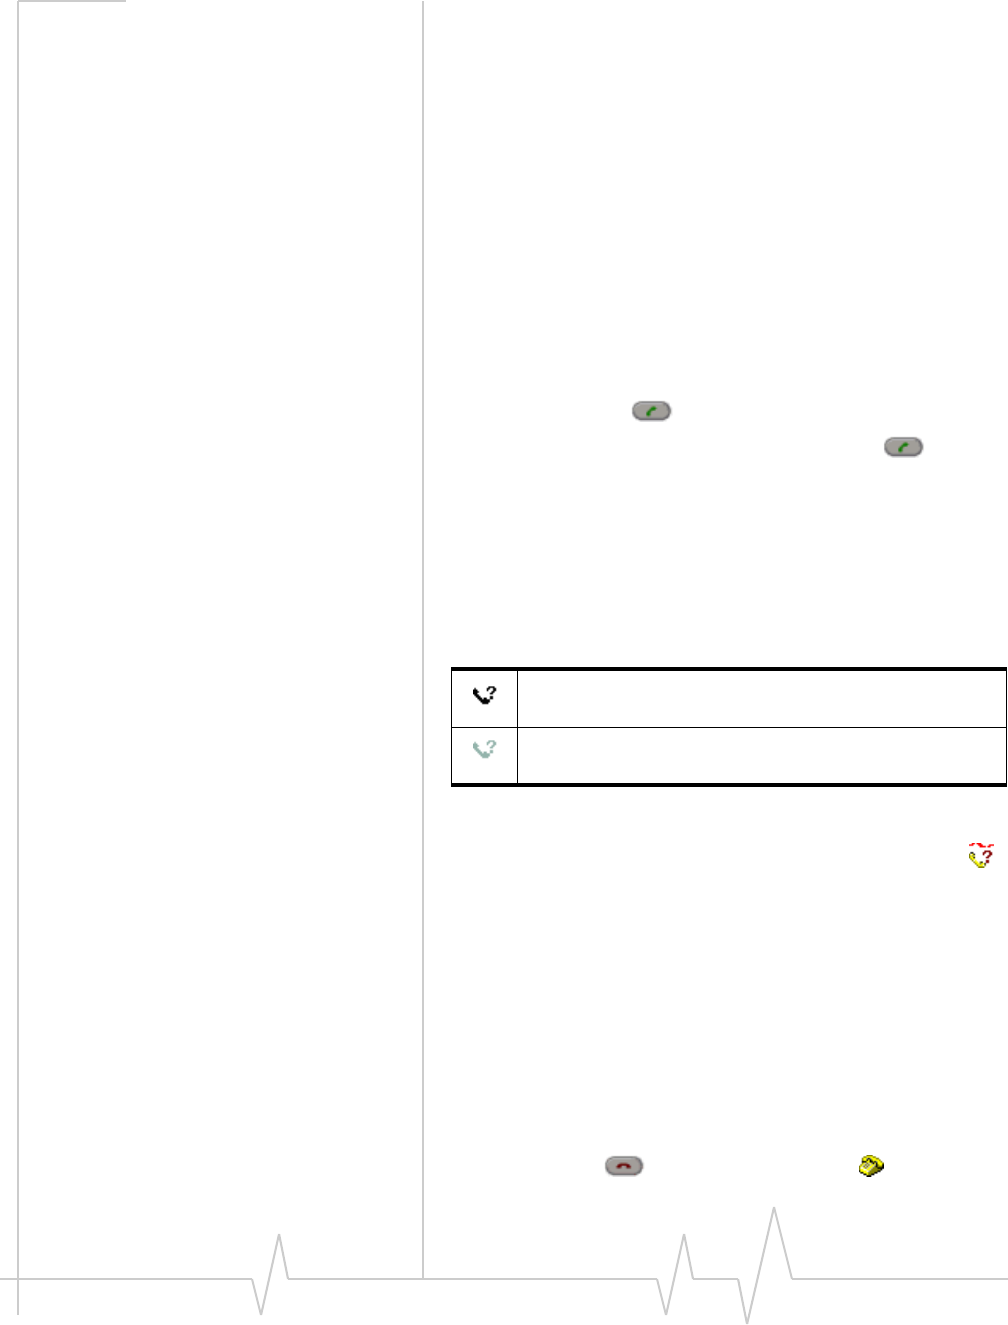
Online Help for VZW EM5625 NB
66 2130548
To set the number of rings for Auto-Answer:
1. From the Voice tab of the Options window, use the “Auto-
answer incoming calls” drop-down list to select the number
of rings.
To turn Auto-Answer off, select “off” from the drop-down
list.
2. Click OK to save the setting.
Call Waiting Alert
Subject to feature availability.
When you are on a call, this feature notifies you when you
have another incoming call. You can then:
•Ignore the new incoming call, or
•Put your current caller on hold and answer the new call by
using the SEND button.
To switch between the two callers, use the SEND button.
For more information about call waiting alert, contact Verizon
Wireless.
Missed Call notification
An icon in the Indicator area shows whether you have any
missed calls.
The Call status area shows the message “new missed call(s)”.
The Windows system tray icons also include a missed call
icon.
The redial feature calls the number of the most recent
unanswered or dialed call.
Related Topic:
>>| Clear status messages
Ending a voice call
To end a voice call:
•Use the END button on the Voice tab , or
You have missed calls. By selecting the icon, you can
display the Call Log and reply.
There have not been any missed calls since the Call Log
was last viewed.
Voice Services
Rev 0.21 Dec.04 67
•Press <esc> on the keyboard.
If the other party hangs up first, the call may be released
without you taking any action.
Voice Mail
Depending on your account, you may have a voice mail
feature. Unanswered calls are directed to your voice mail box
where messages can be left. You are notified of new voice mail
messages.
To manage your voice mail service, these features are available:
•Access your Voice Mail
•Change your Voice Mail access number
•Customize the notification
•Clear the Voice Mail icon
•Configure DTMF tones (if directed by a service represen-
tative)
Voice Mail notification
Subject to feature availability.
The message “You have new Voice Mail!” in the Call status area
and an icon in the Indicator area show whether you have new
voice mail.
The Windows system tray icons may also include a voice mail
icon.
You can also specify a sound to be played when new voice
mail messages are left.
Clear the Voice Mail icon
When you retrieve voice mail, the network normally informs
the EM5625. However if the network notification is missed, the
icon may remain in the Indicator area. You can clear (turn
off) the icon.
1. From the Messaging tab of the Options window, select the
Clear Indicator button.
You have voice mail. By selecting the icon, you can access
your voice mail box.
You do not have voice mail.

Online Help for VZW EM5625 NB
68 2130548
Access your Voice Mail
Subject to feature availability.
To access your voice mail:
1. Click the icon (whether lit or not)
Following a confirmation, Watcher places a voice call to the
phone number used by your voice mail system.
The voice mail number is automatically set up for you during
the installation and activation process. If this number changes,
you can change it in Watcher.
Configure DTMF tones
Some Voice Mail systems require a longer than normal DTMF
tone length.
To set the DTMF tone length:
1. From the Voice tab of the Options window, use the
“Length” drop-down list to select the desired length.
Select normal unless your service provider indicates that a
different length is required.
2. Click OK to save the setting.
The continuous setting generates tone until the keypress is
released.
Note: The duration of tones over the air is governed by the network.
The EM5625 requests tones as configured by you, but the network
may impose its own duration.
Change your Voice Mail access number
Subject to feature availability.
If your account includes a Voice Mail feature, you access your
voice mail box by dialing a particular number. This number is
automatically set up for you during the activation process, or
when you are notified of your first voice mail message.
If this phone number should change, or your service provider
is using another number, you must manually change it in
Watcher:
1. From the Messaging tab of the Options window, in the
Voice Mail section select the Change... button to open the
dialog.
2. Type in the new voice mail number. Use only numbers
from 1 through 9, and the * or # keys. Link Dialing is

Voice Services
Rev 0.21 Dec.04 69
supported, but do not include spaces, brackets, or
hyphens.
3. Click OK to close the dialog.
4. In the Messaging options tab, click OK to save the setting.

Online Help for VZW EM5625 NB
70 2130548
Rev 0.21 Dec.04 71
4
4: Contact Management
Phone Book
Watcher has a Phone Book of contacts to track phone
numbers and e-mail addresses. Subject to feature availability,
you can use these entries to easily:
•Make a voice call to a contact
•Send an SMS message to a contact
Note: If Watcher is integrated with Outlook (subject to feature avail-
ability), you can also phone and send SMS messages to your Outlook
contacts.
To access your Phone Book from Watcher:
•Select TOOLS > Phone Book..., or
•From the Voice tab , use the button.
In the PhoneBook window, you can:
•Add a new contact (Add New Contact...).
•Edit a selected contact (File > Edit Contact...).
•Delete a selected contact (File > Delete Contact)
•Synchronize the Phone Book with Microsoft® Outlook®
contacts
Related topic:
>>| Link Dialing
>>| Add a Call Log entry to your contacts
Contact Properties
The Contact Properties window is used to add or edit entries
in the Watcher Phone Book.
Note: If Watcher is integrated with Outlook (subject to feature avail-
ability) and Outlook is running, you can also use your Outlook
contacts.
Items in this window can be synchronized with Outlook
Contacts.
To add an entry to the Phone Book:
1. In the Phone Book, select Add New Contact, or

Online Help for VZW EM5625 NB
72 2130548
Right-click any entry, and select Add New Contact.
To edit an entry:
1. In the Phone Book, select the entry.
2. Click File > Edit Contact, or
Right-click the entry, and select Edit Contact.
Related topics:
>>| Synchronizing Phone Book contacts (in Watcher) with
Outlook
Dial a contact
Subject to feature availability.
Note: If Watcher is integrated with Outlook (subject to feature avail-
ability) and Outlook is running, you can also phone your Outlook
contacts.
To dial a Contact:
1. From the Phone Book window, double-click the contact
entry you want to dial.
Alternatively you can:
1. Select the contact entry you want to dial.
2. Select File > Dial.
Link Dialing
Subject to feature availability.
Link Dialing allows you to dial numbers after pauses. This is
useful for phone banking, calling cards, and so on, where you
are prompted to enter a sequence of numbers (overdial).
Use your Phone Book to enter the Link Dial number just as you
would any other phone number (including digits, *, or #). To
separate the linked numbers, use:
•“L” or “l” if you need to use the SEND button after a
specific part of the number is dialed, allowing you to listen
for prompts before continuing.
•“P” or “p” if you want part of the number to be automati-
cally dialed after a 2-second pause. For a longer pause, you
can use multiple pause characters in a row.
For example, when you dial the entry
“430-7767#L123#PP456”:
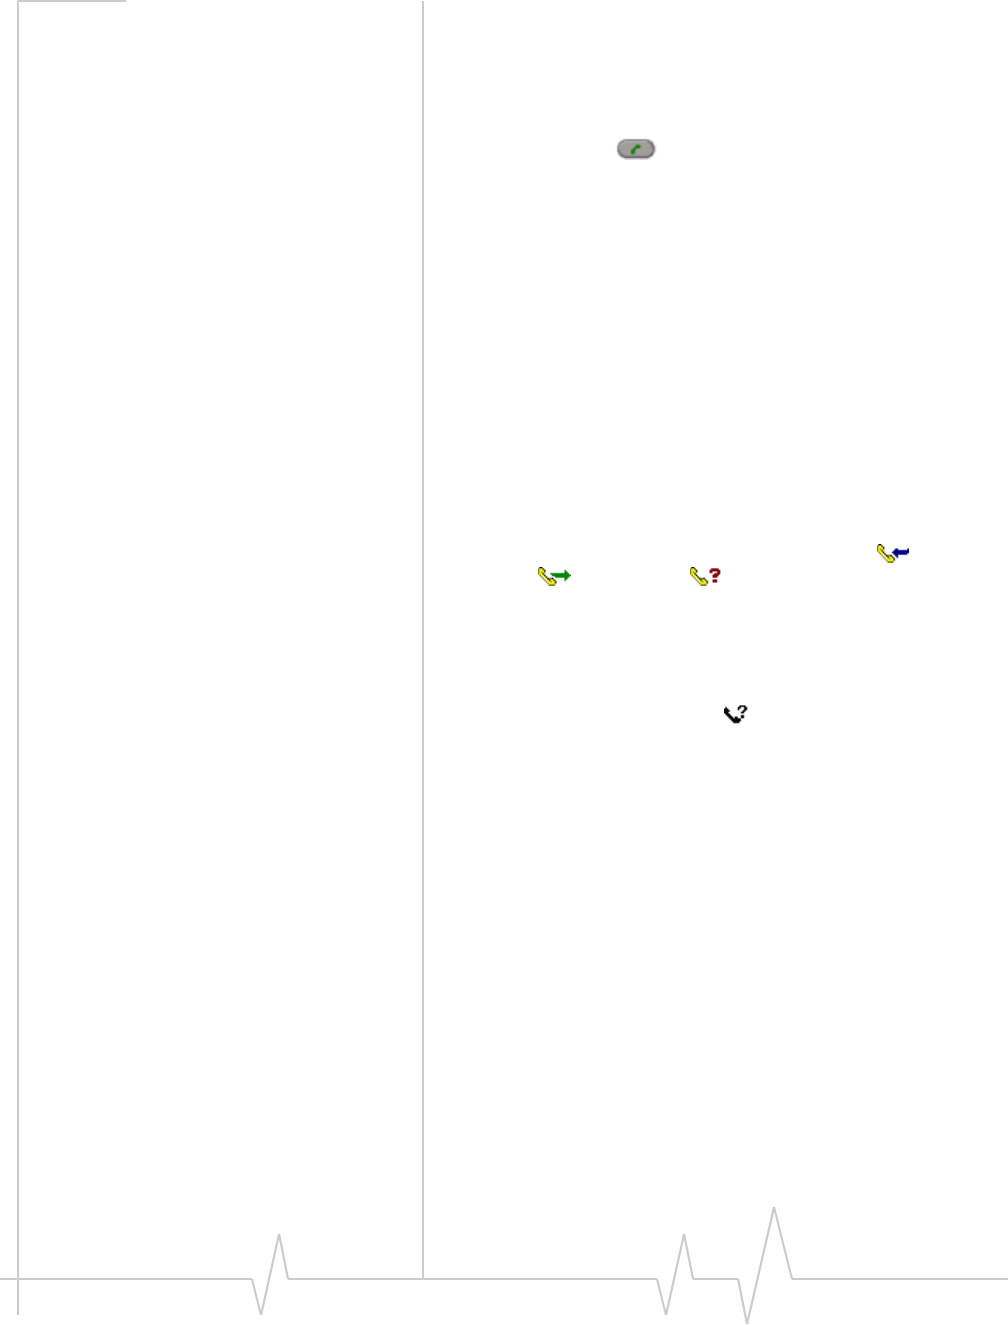
Contact Management
Rev 0.21 Dec.04 73
1. The phone number “4307767#” is dialed (including the #
key) to make the connection.
2. The Call status area shows:
Link Dial Mode.
‘Send’ for next link
3. Use the SEND button to dial the next “123#”.
4. The Call Status Area shows:
Link Dial Mode.
Wait for next link...
5. Four seconds later, “456” is dialed automatically.
The spaces and hyphens are optional, making it easier to read
the sequence.
Related topics:
>>| Configure DTMF tones
>>| Mute key tones (overdial)
Call Log
The Call Log records details about all incoming ,
outgoing , and missed calls of all supported types:
voice and data (subject to feature availability). It provides
useful information such as the phone numbers of missed calls.
To access the Call Log:
•Select TOOLS > Call Log..., or
•Click the Missed Call icon in the Indicator area
Scroll left and right if needed to display the date, time, caller,
and type of call.
From the Call Log, you can:
•Reply to logged calls (voice only)
•Copy the Call Log to a text file
•Copy a phone number from the Call Log to the clipboard,
then paste it into another application
•Add a Call Log entry to your contacts (in Watcher)
•Set the type of calls to be displayed
•Determine the amount of data transferred
•Sort the calls
•Delete entries
Reply to logged calls
Subject to feature availability.

Online Help for VZW EM5625 NB
74 2130548
To reply to a call logged in the Call Log:
•In the Call Log, double-click the entry you want to reply
to, or
•Select the entry, then select File > Dial.
From the Call Log you can place only voice calls.
Copy the Call Log to a text file
To save the information in the Call Log to a text file:
1. In the Call Log, select File > Save As...
2. Select a name and location for the file.
3. Click Save.
Copy a phone number from the Call Log
to the clipboard
To copy a phone number to the clipboard:
1. In the Call Log, select the entry.
2. Select Edit > Copy Phone Number.
The phone number that is copied is:
•For incoming calls: the number in the From column
•For outgoing calls: the number in the To column
You can then paste the number into another application.
Add a Call Log entry to your contacts
To add a phone number from the Call Log to your Phone Book
(in Watcher):
1. In the Call Log, select the entry.
2. Select Edit > Add Number to Phonebook.
If adding a new contact, enter the first and last name.
3. From the “Add phone number as” drop-down list, select the
type of phone number.
4. Click Save.
Note: The contact is added to the Phone Book (in Watcher). If you
want this contact to appear in your Outlook contacts, synchronize the
Phone Book with Outlook.

Contact Management
Rev 0.21 Dec.04 75
Call Log view options
You can view all calls, or only specified calls: voice or data.
1. From the Call Log, select View, then the item you want to
view or hide. A check mark next to each item indicates if it
is displayed.
2. Repeat until you have selected all desired items.
The icon in the first column indicates whether the call was an
incoming , outgoing , or missed call .
Sort the Call Log display
To sort the calls in the Call Log, click the column label (for
example, “From”) that you want to sort by. To reverse the sort
order, click the column label one more time.
Delete entries from the Call Log
To delete a single entry from the Call Log:
1. Select the entry.
2. Select Edit > Delete.
To delete all entries:
1. Select Edit > Delete All.
2. Click Yes to confirm the deletion.

Online Help for VZW EM5625 NB
76 2130548

Rev 0.21 Dec.04 77
1
1: Outlook integration
Enabling Outlook integration
Subject to feature availability.
When Outlook integration is enabled, a new toolbar is added
to Outlook so that you can:
•Read and send SMS messages from Outlook
•Phone people in your contacts list or the sender of an SMS
message.
Note: The Outlook integration feature works with Outlook 2000 or
newer, on Windows 2000 or XP. For this feature to work, Watcher
must also be running. Outlook Express is not supported.
To enable Outlook integration:
1. In Watcher, select TOOLS > Options > General.
2. Select the Outlook Integration check box.
3. Restart Outlook.
4. Confirm that you have a new toolbar in Outlook. (The
toolbar displays New SMS; SMS Reply; ...)
When Outlook integration is enabled, you cannot access the
Mobile Messenger window in Watcher.
These SMS messages are NOT transferred to Outlook:
•Messages you sent and received prior to enabling Outlook
integration
Messages you send and receive when Outlook is not running
are saved in the Mobile Messenger window in Watcher. The
messages get transferred to Outlook the next time Watcher and
Outlook are both running.
Related topics
>>| Synchronizing Phone Book contacts (in Watcher) with
Outlook
Sending SMS messages
If Outlook integration is enabled, you can send SMS messages
from Outlook.
To send a message to a contact:
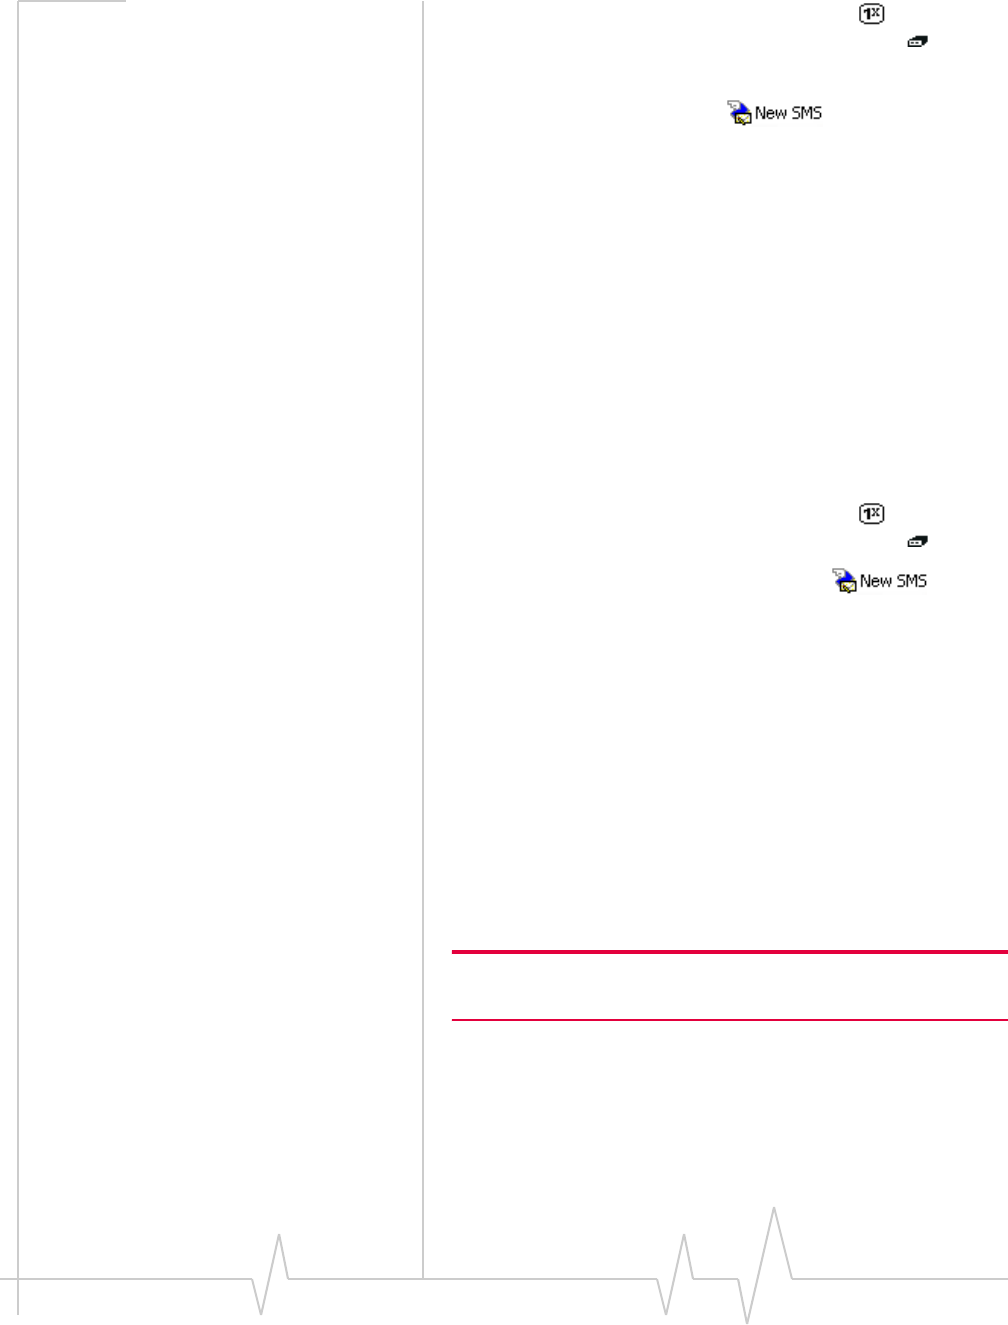
Online Help for VZW EM5625 NB
78 2130548
1. Ensure you have NationalAccess service ( ) or an active
dial-up/Quick 2 NetSM (14.4kbps) connection ( ).
2. In Outlook, select the contact.
3. Select the New SMS button .
4. If more than one phone number is associated with the
contact, a window appears listing all the numbers. Select
the number you want from the list and select the Send SMS
button.
5. In the bottom part of the message composition window,
type your message.
(The maximum length of an SMS message is usually about
160 characters.)
6. Select the Send button.
Alternatively, you can save the message (by selecting File >
Save), then edit and send it later.
To create and send an SMS message to a recipient who is not in
your contacts list, or to multiple recipients:
1. Ensure you have NationalAccess service ( ) or an active
dial-up/Quick 2 NetSM (14.4kbps) connection ( ).
2. In Outlook, select the New SMS button .
3. In the To field, enter the recipient's phone number.
—or—
Select To to open the Add SMS Recipients window, which
allows you to select recipients from your contacts list:
a. Select a name in the list to display the person’s phone
number, then select the number and select the Add
button to include the number in the Recipients list.
b. If you want to remove a number from the Recipients
list, select the number and select the Remove button.
c. Repeat steps a and b until the Recipients list includes
all the numbers to which you want to send the
message.
Note: If the contacts listed in this window are not up-to-date with your
contact list in Outlook, select the Refresh button.
d. Select OK to close the Add SMS Recipients window.
4. In the bottom part of the message composition window,
type your message.
(The maximum length of an SMS message is usually about
160 characters.)
Outlook integration
Rev 0.21 Dec.04 79
5. Select the Send button.
Alternatively, you can save the message (by selecting File >
Save), then edit and send it later.
Your message remains on the network until the recipient is in
service, unless the expiry period is exceeded.
Messages you send are automatically saved to the Sent Items
folder in Outlook. SMS messages can be distinguished from e-
mail messages by this icon: .
Related topics
>>| Enabling Outlook integration
>>| Synchronizing Phone Book contacts (in Watcher) with
Outlook
>>| Viewing sent messages
>>| Viewing unsent outgoing messages
>>| Replying to SMS messages
Viewing sent messages
If Outlook integration is enabled, SMS messages that you send
from Outlook are stored in the Sent Items folder.
To view sent SMS messages:
1. In Outlook, select the Sent Items folder.
SMS messages can be distinguished from e-mail messages
by this icon: .
2. Double-click the message header, or select the header and
press <Enter>.
Related topics
>>| Enabling Outlook integration
>>| Sending SMS messages
>>| Viewing unsent outgoing messages
>>| Cannot send or receive SMS
>>| SMS Failed
Viewing unsent outgoing messages
If Outlook integration is enabled, any SMS messages that were
created in Outlook but not sent, are stored in the Drafts folder.
To view or edit unsent outgoing messages:
1. In Outlook, select the Drafts folder.
Online Help for VZW EM5625 NB
80 2130548
SMS messages can be distinguished from e-mail messages
by this icon: .
2. Double-click the message header, or select the header and
press <Enter>, or right-click the header and select Open.
Related topics
>>| Enabling Outlook integration
>>| Sending SMS messages
>>| Viewing sent messages
Reading SMS messages
If Outlook integration is enabled, any SMS messages you
receive are displayed in the Inbox in Outlook.
To read SMS messages:
1. In Outlook, select the Inbox folder.
SMS messages can be distinguished from e-mail messages
by this icon: .
2. Double-click the message header, or select the header and
press <Enter>.
Related topics
>>| Enabling Outlook integration
>>| Replying to SMS messages
>>| Forwarding SMS messages
>>| Cannot send or receive SMS
Replying to SMS messages
If Outlook integration is enabled, you can reply to SMS
messages from Outlook. You cannot send an SMS reply to an
e-mail message in Outlook.
To reply to an SMS message:
1. Ensure you have NationalAccess service ( ) or an active
dial-up/Quick 2 NetSM (14.4kbps) connection ( ).
2. In Outlook, select the Inbox folder.
SMS messages can be distinguished from e-mail messages
by this icon: .
3. Select the message header.
4. Select the SMS Reply button .
Outlook integration
Rev 0.21 Dec.04 81
5. Enter your message and select Send.
Related topics
>>| Enabling Outlook integration
>>| Reading SMS messages
>>| Forwarding SMS messages
>>| Cannot send or receive SMS
>>| SMS Failed
Forwarding SMS messages
If Outlook integration is enabled, you can forward SMS
messages from Outlook. You cannot forward e-mail messages
as SMS messages.
To send an SMS message you received to someone else:
1. Ensure you have NationalAccess service ( ) or an active
dial-up/Quick 2 NetSM (14.4kbps) connection ( ).
2. Select the Inbox or Sent Items folder in Outlook.
SMS messages can be distinguished from e-mail messages
by this icon: .
3. Select the message header.
4. Select the SMS Forward button .
5. In the To field, enter the recipient's phone number.
—or—
Select To to open the Add SMS Recipients window, which
allows you to select recipients from your contacts list:
a. Select a name in the list to display the person’s phone
number, then select the number and select the Add
button to include the number in the Recipients list.
b. If you want to remove a number from the Recipients
list, select the number and select the Remove button.
c. Repeat steps a and b until the Recipients list includes
all the numbers to which you want to send the
message.
Note: If the contacts listed in this window are not up-to-date with your
contact list in Outlook, select the Refresh button.
d. Select OK to close the Add SMS Recipients window.
6. Edit the message, if you choose, and select Send.
Related topics
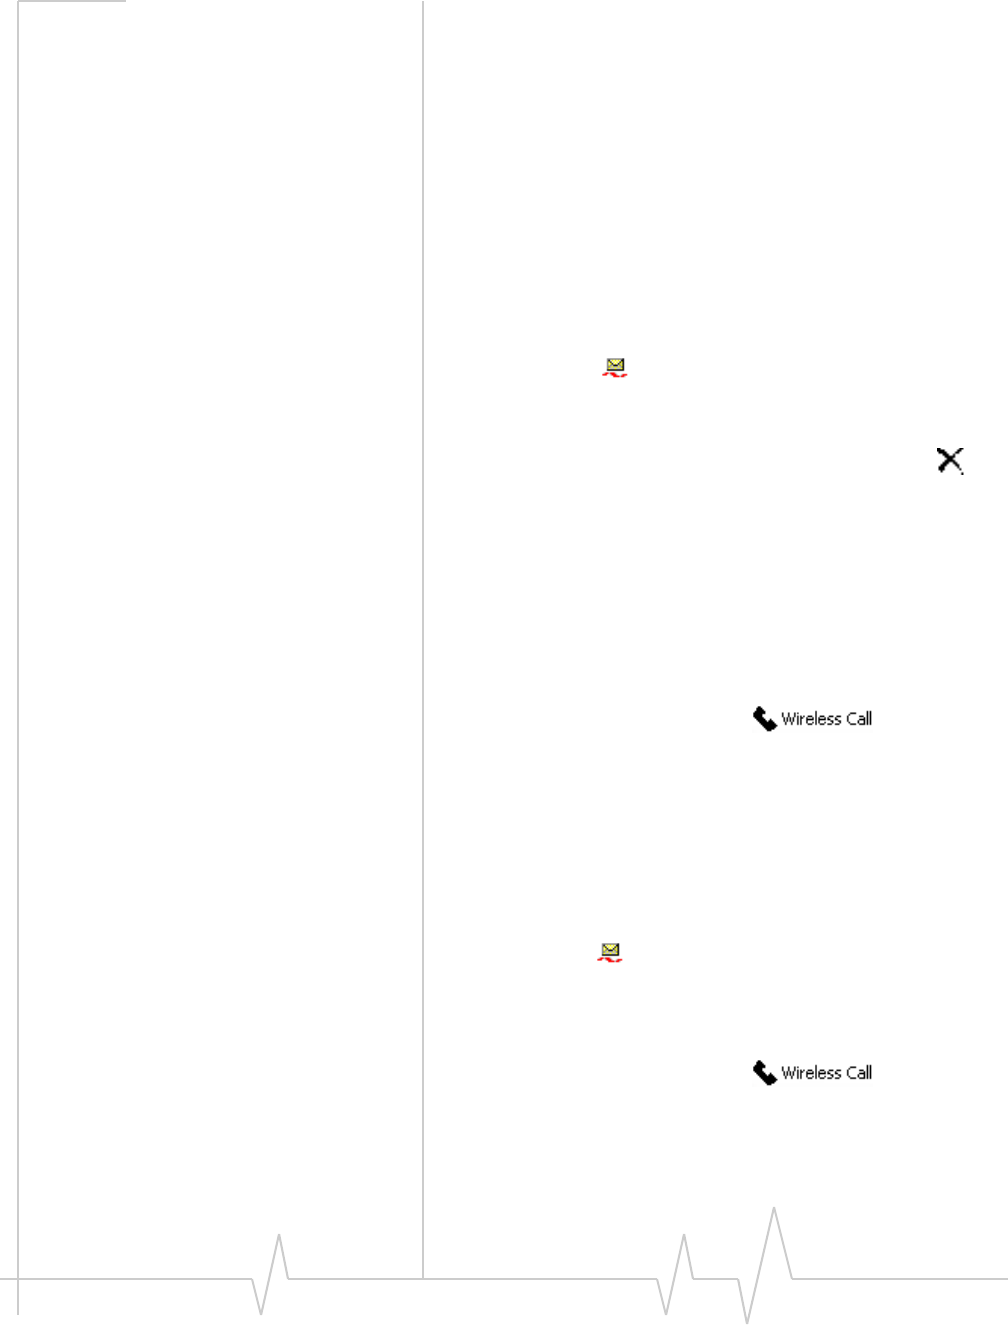
Online Help for VZW EM5625 NB
82 2130548
>>| Enabling Outlook integration
>>| Reading SMS messages
>>| Replying to SMS messages
>>| Cannot send or receive SMS
>>| SMS Failed
Deleting SMS messages
To delete SMS messages from Outlook:
1. In the Inbox, Outbox, Sent Items or Drafts folder of Outlook,
select the SMS message(s) you want to delete.
SMS messages can be distinguished from e-mail messages
by this icon: .
•To select more than one message, use Ctrl+click, or
Shift+click, or select Edit > Select All.
2. Press the Delete key, or select Edit > Delete, or click .
Dialing from Outlook
If Outlook integration is enabled, you can call any of your
contacts or the sender of an SMS message.
To call a contact:
1. In Outlook, select or double-click the contact.
2. Select the Wireless Call button .
3. If more than one phone number is associated with the
contact, a window appears listing all the numbers. Select
the number you want from the list and select the Dial
button.
To call the sender of an SMS message:
1. In Outlook, select the Inbox folder.
SMS messages can be distinguished from e-mail messages
by this icon .
2. Select the message header sent by the person you want to
call. (This must be an SMS message header and not an e-
mail message header.)
3. Select the Wireless Call button .
The phone number (from which the SMS message was
sent) is dialed.
Related topics

Outlook integration
Rev 0.21 Dec.04 83
>>| Enabling Outlook integration
>>| Synchronizing Phone Book contacts (in Watcher) with
Outlook
Synchronizing Phone Book
contacts (in Watcher) with
Outlook
If Outlook integration is enabled, you can synchronize your
contacts in Watcher’s Phone Book with your Outlook contacts.
Note: Only the name and phone number are synchronized.
To synchronize the records in your phone book with Outlook:
1. Open Outlook if it is not already open.
2. In Watcher, select TOOLS > Phone Book.
3. Select File > Synchronize with Outlook. Watcher then begins
synchronizing the contacts.
4. Outlook (Contacts) may flash in the taskbar, or may
display a message about a program trying to access data
stored in Outlook. If Outlook (Contacts) on the taskbar is
flashing, click it to display the message. To allow the
synchronization to continue, click Yes.
Related topics
>>| Enabling Outlook integration
>>| Sending SMS messages
>>| Dialing from Outlook

Online Help for VZW EM5625 NB
84 2130548

Rev 0.21 Dec.04 85
2
2: Security
Security features
Watcher can lock the EM5625 so that others cannot use the
wireless modem and account (except for emergency 911 calls).
A four-digit lock code is needed to unlock the modem.
You can set the EM5625 to lock:
•Whenever Watcher is started, (requiring the lock code each
time), or
•Immediately (without restarting Watcher) - useful if you
are lending your wireless device, or leaving it for a short
time.
>>| Warning
Security features:
>>| Functionality when the EM5625 is locked
>>| Enable/disable the lock code
>>| Lock the EM5625 immediately
>>| Change the lock code
Unlock the modem
When locked, the Call status area displays “Modem is locked”.
To unlock the modem:
1. Select TOOLS > Unlock Modem...
2. Enter the lock code (PIN).
Initial lock code
The initial lock code value is determined by your service
provider.
For service provider configurations that do not require account
activation, a default lock code is set at the factory to a value
determined by the service provider. For assistance, contact
your service provider.
Configurations that do use the Activation Wizard set the intial
lock code to the last four digits of your account phone number
whenever a new phone number is activated.
After activation, you can change the lock code from the initial
value to any four-digit code you choose.

Online Help for VZW EM5625 NB
86 2130548
Note: The security lock code is reset to the last four digits of any new
phone number whenever an account is activated. This may change a
custom value you have set.
Warning
If you lock the EM5625 and forget the lock code, you will not
be able to use the EM5625 until you receive assistance from
Verizon.
Functionality when the EM5625 is locked
When the EM5625 is locked:
You can:
•Dial pre-determined emergency (911) numbers
•Receive incoming voice calls, but the caller ID display is
hidden
•Turn KeyGuard on and off
•Unlock the modem
•Receive Voice Mail notifications, but not dial to pick up the
messages
•Receive text messages, but not access the
Mobile Messenger window to read them or originate them
You cannot:
•Make outgoing voice calls
•Make data connections (including Always-on connection)
•Access most menu items
Enable/disable the lock code
You can set the EM5625 to never lock, or to lock on power up.
Note: If you lock the EM5625 and forget the lock code, you will not be
able to use the EM5625 until you receive assistance from Verizon.
To enable/disable the lock feature:
1. From the Security tab of the Options window, use the “Lock
modem” drop-down menu to select one of the following:
·never - anybody who has access to your wireless device
can use Watcher and your account.
·on power up - when you start Watcher, the modem will be
locked.

Security
Rev 0.21 Dec.04 87
2. Click OK to save the setting.
Related Topics:
>>| Lock the EM5625 immediately
>>| Change the lock code
>>| Functionality when the EM5625 is locked
>>| Unlock the modem
Lock the EM5625 immediately
>>| Warning
To lock the EM5625 immediately:
1. Close any active connection.
2. From the Security tab of the Options window, select Lock
Modem Now.
3. In the confirmation window, select Yes.
Related Topics:
>>| Enable/disable the lock code
>>| Change the lock code
>>| Functionality when the EM5625 is locked
>>| Unlock the modem
Change the lock code
>>| Warning
To change the lock code:
1. From the Security tab of the Options window, select Change
Lock Code....
2. Enter the existing lock code and click OK.
3. Enter a new four-digit lock code.
4. Enter the new lock code for confirmation.
5. Click OK.
Related topic:
>>| Initial lock code

Online Help for VZW EM5625 NB
88 2130548

Rev 0.21 Dec.04 89
3
3: Customization Options
Options window
Access the Options by selecting TOOLS > Options...
You can customize features of Watcher (subject to feature
availability):
General
•Auto-launch Watcher on module detection, launch
minimized
•Enable support for a WiFi network adapter
•Enable Outlook integration with Watcher
•Suppress/display warning messages
•Suppress/display prompt on exit
Data
•Data-Call Inactivity Timeout
•Allow default connections only
•Disable Microsoft network bindings for VZAccess
connection
Messaging
•Expire received SMS messages
•Override callback number
•Save outgoing messages
•Enhanced SMS delivery acknowledgements
•Set voice mail number and clear indicator
Network
•Roaming options (System select)
•Use of a TTY
•System clock update with CDMA time
Security
•Prevent others from using your wireless account
Sounds
•Enable sounds for specific events
•Select sounds for events
•Set the volume of the headset
Voic e
•Auto-Answer

Online Help for VZW EM5625 NB
90 2130548
•Auto-Retry
•Any-Key Answer
•Auto-Hyphenation
•Prefix dialing for long distance
•Key tone settings and mute
•Audible alerts
The Restore Defaults button restores the factory settings of all
options.
General tab in Options
From the General tab in the Options window, you can:
•Auto-launch Watcher, Launch minimized
•Enable support for a WiFi network adapter
•Enable Outlook integration with Watcher
•Suppress/display warning messages
•Suppress/display prompt on exit
Auto-launch Watcher, Launch minimized
You can set Watcher to start automatically whenever your
computer detects the powered-up module.
To set Watcher to auto-launch:
1. From the General tab of the Options window, select the
“Autolaunch on module detection” check box.
2. Optionally, to have Watcher minimized when it starts up,
select the “Launch minimized“ check box.
3. Click OK to save the setting.
Warning messages
Warning messages for specific events (subject to feature avail-
ability) can be turned on or off:
•“Data connection lost” - you lost your wireless connection to
the network. (See also: Always-on connection)
•“Prompt before exit”
To enable/disable the warning messages:
1. From the General tab of the Options window, select or clear
the check box next to the desired message.
2. Click OK to save the setting.

Customization Options
Rev 0.21 Dec.04 91
Prompt before exit
When you close Watcher, there is a prompt reminding you that
any open connections will be closed and you cannot receive
any incoming voice calls.
To enable/disable this exit prompt:
1. From the General tab of the Options window, select or clear
the “Prompt before exit” check box. (The prompt will appear
when the box is checked.)
2. Click OK to save the setting.
Data tab in Options
From the Data tab in the Options window, you can:
•Automatically disconnect inactive data calls
•Allow default connections only
•Disable network bindings
Disable Microsoft network bindings for VZAccess
connection
When the EM5625 is configured, bindings to Microsoft
network and file and printer sharing protocols are automati-
cally created. These bindings are not required and may create
additional over-the-air traffic, or cause security concerns.
These bindings can be disabled from the Windows Control
Panel or in Watcher. To disable the bindings in Watcher:
1. From the Data tab of the Options window, select the
“Disable Microsoft network bindings for VZAccess connection”
check box.
2. Click OK to save the setting.
Messaging tab in Options
From the Messaging tab in the Options window, you can
(subject to feature availability):
•Specify how long to keep read SMS messages in the Inbox
•Override your callback number on outgoing SMS
messages
•Select whether to save outgoing SMS messages to your
Outbox
•Enable or disable Enhanced SMS delivery acknowl-
edgement
•Change your Voice Mail access number
•Clear the Voice Mail icon

Online Help for VZW EM5625 NB
92 2130548
Network tab in Options
From the Network tab in the Options window, you can:
•Set the roaming options (“System Select”)
•Use a TTY instead of a headset
•Update the system clock automatically from the CDMA
network
Update the system clock with CDMA time
If you frequently change time zones, you can have your
system’s clock set automatically from the CDMA network each
time you start Watcher.
1. From the Network tab of the Options window, select the
“Update system clock with CDMA time” check box.
2. Click OK to save the setting.
Security tab in Options
From the Security tab in the Options window you can:
•Enable/disable the lock code
•Change the lock code
•Lock the EM5625 immediately
>>| Warning
>>| Security features
Sounds tab in Options
From the Sounds tab in the Options window you can (subject
to feature availability):
•Enable/disable audible alerts
•Set the sound for Call Waiting Alert
•Set the Incoming call notification
•Set the sound for SMS message notification
•Set the sound for Voice Mail notification
•Set the Headset volume
Use the check boxes to enable or disable alerts played on the
wireless device’s speaker. The “Enable” check box can be used
to disable all alerts (for example, when in a theater) or enable
those that are individually set.
Related topics:
>>| Call Waiting Alert
>>| Service Alert
Customization Options
Rev 0.21 Dec.04 93
>>| Minute Alert
Customize sounds
The .wav file assigned to each alert is shown.
To test the sound, select the > button to the right of the event
description.
To change the sound file used:
1. Select the Browse... button to right of the event description.
2. Navigate to the sound file (.wav) you want to use.
3. Select Open in the file selection dialog.
4. Click OK to save your settings.
For alerts and rings played on the wireless device’s speaker,
use the system volume control in the Windows system tray:
Voice tab in Options
From the Voice tab in the Options window, you can:
•Set the number of rings for the Auto-Answer feature
•Enable the Auto-Retry feature
•Enable the Any-Key Answer feature
•Enable the Auto-Hyphenation feature
•Prefix dialing with “1”
•Set the overdial tone length and mute the key tones
•Enable audible indicators for the length of your call
(Minute Alert) and change in coverage status (Service
Alert)

Online Help for VZW EM5625 NB
94 2130548

Rev 0.21 Dec.04 95
4
4: Activation
Activation overview
Your EM5625 connects to a CDMA network. To use the
network, you require an account with a service provider. The
process of activation configures your EM5625 with the
required account parameters (phone number, etc.).
The Activation Wizard guides you through the process.
If your EM5625 does not have an activated account, then,
when you run Watcher or it autostarts, the Activation Wizard
should autostart. If this does not happen: To start the wizard
manually, select TOOLS > Activation Wizard...
To display information about your account, use HELP >
About Watcher..., or the Connection Manager properties.
CDMA service provider account
Companies that operate CDMA networks and provide access
to these networks are called service providers. You must have an
account with Verizon Wireless to use the EM5625.
Each service provider has its own pricing options. There may
be flat rate accounts, which provide you a maximum number
of minutes of network usage for a fixed monthly fee. There
may be accounts for which you are charged for network usage
by the minute or by the amount of data transmitted.
Your account may include a variety of other services such as
text messaging and voice mail.
Each EM5625 has been provisioned at the factory for use with
a particular service provider (Verizon Wireless). This sets the
EM5625 to use particular radio channels and enable services
specific for that provider.
The process of setting up your account is called activation.
Activation involves action by Verizon Wireless and configu-
ration of the EM5625.
Your service provider needs to know what billing information
to use to collect payment for your network usage. They also
need to know the ESN (Electronic Serial Number) assigned to
your modem during the manufacturing process. (The ESN can
be displayed in Watcher.) This number is used to help authen-
ticate your account when you connect for service.

Online Help for VZW EM5625 NB
96 2130548
Configuring the EM5625 involves setting the phone number
assigned by Verizon Wireless and may involve entering other
network parameters and settings such as a user name and
password to access services.
If you purchased your wireless device directly from Verizon
Wireless, you may already have an account; your EM5625 may
be pre-activated.
Unless your EM5625 has been pre-activated, Watcher automat-
ically detects that no account has been configured when you
run it for the first time. Watcher then runs the Activation
Wizard to guide you through the activation and configuration
process.
Activation Wizard
>>| Activation Wizard - Select Option
>>| Manual Activation
>>| Voice-Assisted / Automated Activation
Activation Wizard - Select Option
The Activation Wizard walks you through the process of
configuring an account. The process and options vary based on
the service provider. This section is a guide only. Consult your
product documentation, and follow the directions on screen
and given by your service provider representative.
If your EM5625 does not have an activated account, then,
when you run Watcher or it autostarts, the Activation Wizard
should autostart. If this does not happen:
1. Ensure Watcher is running.
2. Start the Activation Wizard: select TOOLS >
Activation Wizard...
Depending on your modem configuration, either or both of
these options appear when the wizard is launched:
•Manual Activation involves phoning your service
provider, exchanging information, and entering your
account information into the appropriate fields in the
wizard. (To use this method, you require a phone, other
than your wireless device.)
•Voice-Assisted / Automated Activation involves the
EM5625 placing a call to a special number at the service
provider. Much of the process is automated, but you may
require a headset (or TTY). Follow onscreen prompts.

Activation
Rev 0.21 Dec.04 97
To begin activation of the EM5625, select the method and click
Next.
Manual Activation
Additional notes may advise you what to have ready. Consult
the product documentation if needed. When you have
collected the required information, call your service provider.
Inform the representative that you are activating a Sierra
Wireless EM5625 for Verizon.
In the Activation Wizard, click Next.
Input Activation Code
For the activation code, enter six zeroes (000000), then click
Next.
Enter Phone Number
This is the phone number assigned by your service provider. It
is usually in the form of a 10-digit number: the area code and
local number, without spaces or hyphens.
For service providers supporting Wireless Local Number
Portability (WLNP), the phone number may appear in separate
parts, adding an entry for MSID or IMSI. For assistance, consult
your product documentation or your service provider.
Enter the information that the service provider gives you, then
click Next.
Related topic:
>>| Security lock code setting
Enter Provider Specific Data
Different service providers may require additional infor-
mation. If prompted by the Activation Wizard, enter the infor-
mation as provided by your service representative.
SID:
The System ID (SID) governs which networks are “home” and
which are roaming.
Enter the SID assigned by your service provider, then click
Next.
Congratulations
Click Finish to close the Activation Wizard.

Online Help for VZW EM5625 NB
98 2130548
The modem reinitializes. After Verizon sets up your account
on the network, your EM5625 should be configured and ready
for use.
Voice-Assisted / Automated Activation
To use voice-assisted or automated activation:
1. If prompted to, connect your headset (or TTY) to the
wireless device.
2. In the Activation Wizard, after selecting Automated
Activation, click Next.
3. Read the message on the screen, and click Next.
A call is placed to the special activation number shown. (Enter
a number only if instructed to do so by a service provider
representative.)
Follow any instructions or prompts provided.
When complete, the message “Ready to Connect” appears in the
Call status area of Watcher.
If you encounter any problems, please contact your service
provider.
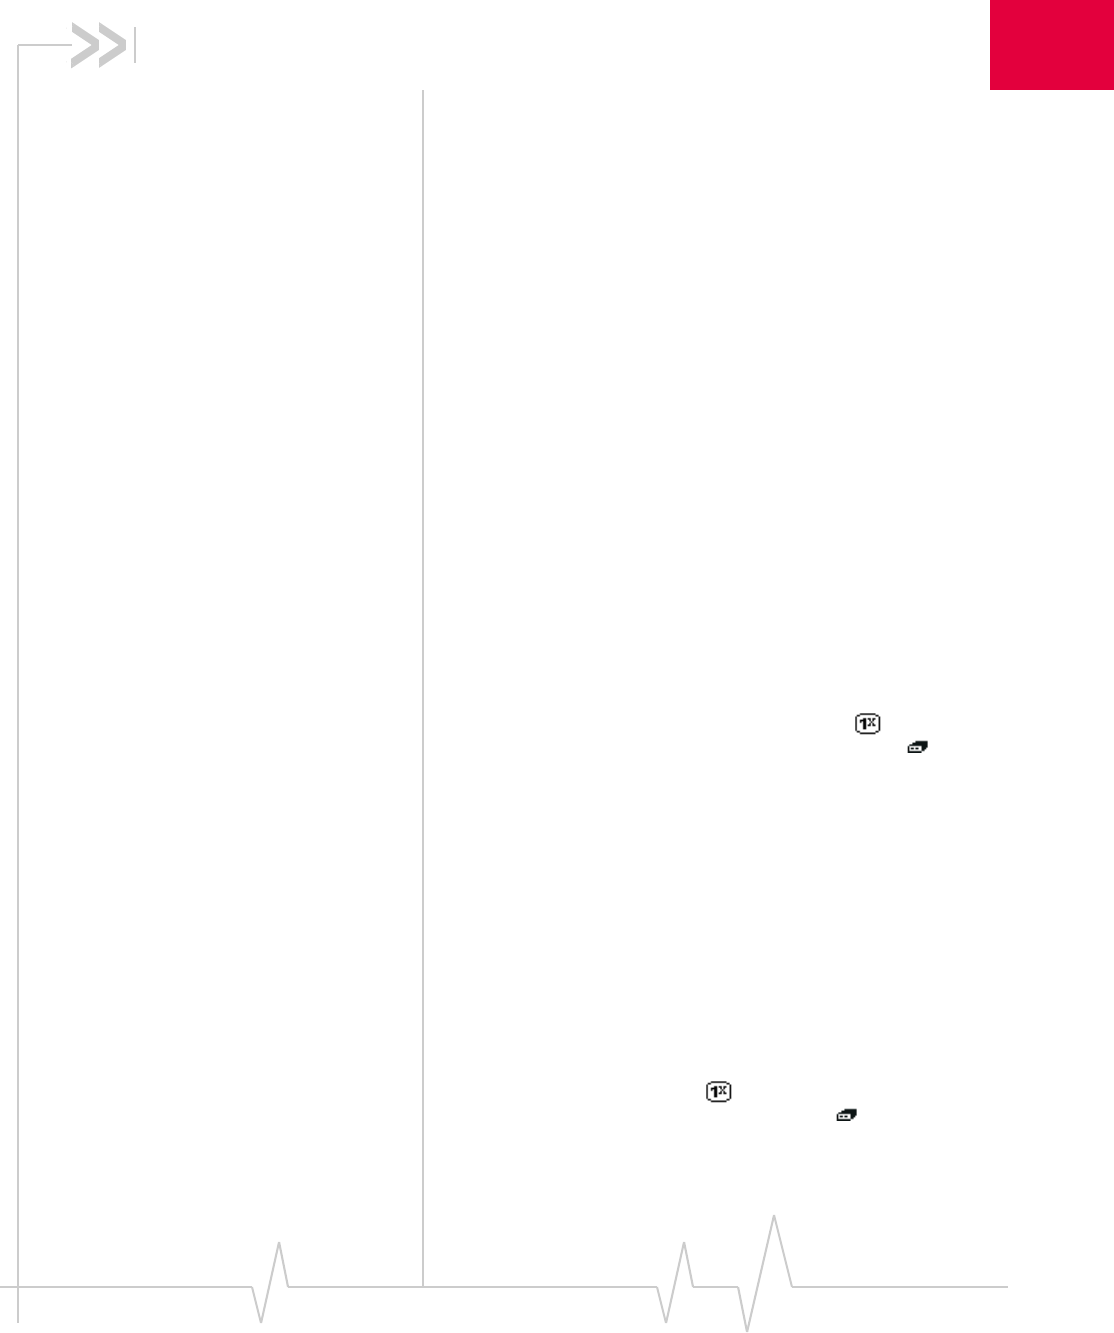
Rev 0.21 Dec.04 99
5
5: Troubleshooting
Not in Service
•If you are inside a building or near a structure that may be
blocking the signal, change the position or location of your
computer.
•Ensure you are within the CDMA network coverage area.
For coverage information, contact Verizon.
•Check with Verizon - a network or account problem may
be preventing the EM5625 from obtaining service.
Modem is In Use
The EM5625 already has a connection when you attempt to
make another connection.
•End the first call before you initiate the next one.
SMS Failed
Some possible reasons for a failure to send are:
•You do not have a subscription to a service that allows you
to send SMS messages.
•You do not have NationalAccess service ( ) or an active
dial-up/Quick 2 NetSM (14.4kbps) connection ( ).
•A destination in the “To” field is not valid.
•The message exceeded the maximum length for SMS
messages (usually around 160 characters).
•There is a CDMA network problem or a problem with
your account.
Cannot send or receive SMS
Ensure you have:
•A subscription to a service that allows you to send and
receive SMS messages
•NationalAccess service ( ) or an active dial-up/
Quick 2 NetSM (14.4kbps) connection ( )

Online Help for VZW EM5625 NB
100 2130548
Optimize performance
To optimize your settings to achieve the fastest speeds and
conserve data while using e-mail:
•Work in “offline” mode, and connect when you need to
send and receive e-mail.
•Save attachments to a desktop folder and then open from
that folder, rather than opening the attachment directly
from the message.
•Remove the Preview Pane, or use the AutoPreview for
headers only.

Rev 0.21 Dec.04 101
6
6: Glossary
Definitions
1X One Times Radio Transmission Technology (the "one times"
refers to the frequency spectrum). A high-speed standard for
cellular communications. Supports Internet connections with
data rates up to 153.6 kbps (downlink from the network) and
76.8 kpbs (uplink to the network).
1xEV-DO A high-speed standard for cellular packet data communica-
tions. Supports Internet connections with data rates up to 2.4
Mbps (downlink from the network) and 153.6 kbps (uplink to
the network). Average data rates are roughly 700 kbps
(downlink from the network) and 153.6 kbps (uplink to the
network). Actual speed depends on the network conditions.
Compare to 1X.
BroadbandAccess A high-speed standard for cellular packet data communica-
tions. Supports Internet connections with data rates up to 2.4
Mbps (downlink from the network) and 153.6 kbps (uplink to
the network). Average data rates are roughly 700 kbps
(downlink from the network) and 153.6 kbps (uplink to the
network). Actual speed depends on the network conditions.
Also known as 1xEV-DO. Compare to NationalAccess.
callback number A number that the sender of an SMS message can specify, and
that the receiver of the message can place a voice call to, in
reply to the SMS message. (Related Topic: Override the
callback number)
CDMA Code Division Multiple Access
CDMA 1X A high-speed standard for cellular communications. Also
known as 1X, and NationalAccess.
CDMA 1xEV-DO A high-speed standard for cellular communications. Also
known as 1xEV-DO, and BroadbandAccess.
dBm decibels relative to 1 milliwatt
DHCP Dynamic Host Configuration Protocol - a protocol used to
automatically assign IP addresses and related information.
DHCP also provides safe, reliable TCP/IP network configu-
ration.
DTMF Dual Tone Multi-Frequency - the tone generation system used
by standard telephone networks. Each key is allocated a row
and column tone; both are played at once to create the DTMF
signal.

Online Help for VZW EM5625 NB
102 2130548
duration Time that has elapsed since the EM5625 started establishing
the current call.
Note: The timer starts when the connection is being estab-
lished - not when the two parties are connected and can start
talking.
ESN The Electronic Serial Number is a unique code assigned to
your EM5625 during the manufacturing process. The ESN is
displayed in the About Watcher window.
hotspot A wireless LAN node that provides Internet connection and
virtual private network (VPN) access from a given location.
IP Internet Protocol
kbps Kilobits per second
Mbps Megabits per second
missed call An incoming call that was not answered.
NationalAccess A high-speed standard for cellular communications. Supports
Internet connections with data rates up to 153.6 kbps
(downlink from the network) and 76.8 kpbs (uplink to the
network). Also known as 1X.
overdial Pressing keys to generate tones while in a call. This is
commonly used for credit card dialing and to access features of
automated answering systems. (Related Topics: Link Dialing,
Mute key tones (overdial).)
packet A short fixed-length block of data including a header that is
transmitted as a unit in a communications network.
PRL The Preferred Roaming List is an account configuration item
set by your service provider. It controls the radio channels
used by the device.
The PRL version in use can be displayed using HELP > About
Watcher...
profile A data or WiFi connection configuration defined in the
Connection Manager.
roaming Being connected to a network other than your service
provider's network. This may be subject to roaming charges.
(Related Topics: System Select (roaming options), Roaming
(indicator))
SSID Service Set IDentifier—the name assigned to the network.

Glossary
Rev 0.21 Dec.04 103
TCP Transmission Control Protocol—The common underlying
communication protocol used on the Internet. A connection
handshake establishes a point to point logical connection. In
contrast to UDP, TCP ensures both ends of the connection are
present and active on the network. TCP ensures delivery of
datagrams.
ToolTip Text that displays when you position the mouse pointer over
an area of the screen (for example, over an indicator).
TTY (TeleTYpe) A device that allows people who are deaf, hard of
hearing, or speech-impaired to use the telephone to commu-
nicate.
UDP User Datagram Protocol—A low overhead, connectionless,
packet delivery IP protocol. Unlike TCP, UDP does not
guarantee delivery of datagrams.
VPN Virtual Private Network
WEP Wired Equivalent Privacy—A WEP key is a security code
used to control access to a hotspot.
WiFi Wireless Fidelity—a high-frequency wireless local area
network (WLAN), known as 802.11.

Online Help for VZW EM5625 NB
104 2130548

Rev 0.21 Dec.04 105
Index
Numerics
1 - dialing prefix, 62
1X connection
overview, 9
amount of data transferred, 30
auto-launch properties, 26
coverage indicator, 18
end, 31
make, 29
restore default settings, 27
restrict to default profiles, 24
service indicator, 18
warning messages, 90
WiFi connection, during, 37
1xEV-DO connection
overview, 9
amount of data transferred, 30
auto-launch properties, 26
coverage indicator, 18
end, 31
make, 29
restore default settings, 27
restrict to default profiles, 24
service indicator, 18
warning messages, 90
WiFi connection, during, 37
3G connection
overview, 9
amount of data transferred, 30
auto-launch properties, 26
coverage indicator, 18
default, 27
end, 31
make, 29
restore default settings, 27
restrict to default profiles, 24
service indicator, 18
warning messages, 90
WiFi connection, during, 37
3-way calling, 63
A
about
current call, 19
EM56XX, 9
Watcher, 13
account, service provider, 95
acknowledgement, enhanced SMS delivery, 55
activation
overview, 95
automated, 98
manual, 97
voice-assisted, 98
Activation Wizard, 96
add
Call Log entry to contacts, 74
connection profile, 25
contact, 71
SMS callback to contacts, 49
Add SMS Recipients window, 52
address an SMS message, 51
alerts
audible, 92
call waiting, 66
customize sounds, 93
incoming voice call, 64
minute, 58
service, 59
SMS message, 45
voice mail, 67
volume, 93
Allow default connections only, 25
always on top, 16
always-on connection
enable, 29
WiFi profiles, rank, 42
answer
auto-answer, 65
voice calls, 64
any-key answer, 65
audible alerts, 92
Authenticating, 19
auto-answer, 65
autoconnect
data, 29
WiFi, 42
auto-hyphenation (voice calls), 61
auto-launch application, 90
auto-launch properties of connection, 26
automated activation, 98
automatic data call disconnection, 31
auto-retry (voice calls), 62
B
binding - network
disable, 91

Index
Rev 0.21 Dec.04 106
BroadbandAccess
overview, 9
amount of data transferred, 30
auto-launch properties, 26
coverage indicator, 18
end connection, 31
make connection, 29
restore default settings, 27
restrict Watcher to default profiles, 24
service indicator, 18
warning messages, 90
WiFi connection, during, 37
broadcasting hotspots, 34
BSSID, 39
byte counter, 30
bytes transferred, 30
C
Call Log
add entry to contacts, 74
delete entries, 75
features, 73
reply, 73
view options, 75
call privacy (voice calls), 58
call status area, 19
call waiting, 66
callback number (SMS)
add to contacts, 49
call sender, 49
override, 54
CDMA 1X connection
overview, 9
amount of data transferred, 30
auto-launch properties, 26
coverage indicator, 18
end, 31
make, 29
restore default settings, 27
restrict to default profiles, 24
service indicator, 18
warning messages, 90
WiFi connection, during, 37
CDMA 1xEV-DO connection
overview, 9
amount of data transferred, 30
auto-launch properties, 26
coverage indicator, 18
end, 31
make, 29
restore default settings, 27
restrict to default profiles, 24
service indicator, 18
warning messages, 90
WiFi connection, during, 37
CDMA coverage, 10
CDMA network
coverage, 10
service providers, 95
signal strength, 32
circuit switched data
overview, 9
add dial-up profile, 25
end data session, 31
indicator, 18
make connection, 28
Quick 2 Net, 31
clear
Scratch Pad, 59
status messages, 20
voice mail indicator, 67
clock (update), 92
close prompt, 91
closing connections, 28
compact view, 16
conference calls, 63
connect automatically
data, 29
WiFi, 42
Connecting to Internet, 19
connection
auto-launch properties, 26
automatic disconnect, 31
BroadbandAccess - make connection, 29
BroadbandAccess - overview, 9
BroadbandAccess and WiFi, 37
default, 27
dial-up, 28
end, 31
make, 28
make high-speed connection, 29
NationalAccess - make connection, 29
NationalAccess - overview, 9
NationalAccess and WiFi, 37
Quick 2 Net, 31
restore default settings, 27
restrict to default profiles, 24
service indicator, 18
VZAccess - make connection, 29
VZAccess - overview, 10
VZAccess and WiFi, 37, 37
warning messages, 90
WiFi and BroadbandAccess/NationalAccess/VZA-
ccess, 37
Connection Manager
overview, 24
1X/Dial-up tab, 24
WiFi Profiles tab, 35
connection status area, 18

Index
Rev 0.21 Dec.04 107
connection, data
3G and WiFi, 37
add dial-up profile, 25
amount of data transferred, 30
auto-launch properties, 26
BroadbandAccess - overview, 9
BroadbandAccess and WiFi, 37
default, 27
dial-up, 28
end, 31
make, 28
make high-speed connection, 29
NationalAccess - overview, 9
NationalAccess and WiFi, 37
Quick 2 Net, 31
restore default settings, 27
restrict to default profiles, 24
service indicator, 18
VZAccess - overview, 10
VZAccess and WiFi, 37
warning messages, 90
WiFi and 3G, 37
WiFi and BroadbandAccess/NationalAccess/VZA-
ccess, 37
connection, WiFi
1X, during, 37
1xEV-DO, during, 37
3G connection, during, 37
add profile for hotspot, 41
autoconnect, 42
BroadbandAccess, during, 37
broadcasting hotspots, 34
connect to hotspot, 38
delete hotspot profile, 42
disconnect from hotspot, 39
edit hotspot profile, 42
enable WiFi support, 33
hotspots -manage profiles, 40
hotspots, list of - view, 38
make, 36
NationalAccess, during, 37
non-broadcasting hotspots, 34
rank hotspots for autoconnection, 42
restore default settings, 27
signal strength, 37
signal strength - from connection status area, 19
supported operating systems, 33
view details of hotspots, 39
VZAccess, during, 37
WEP key, 35
contact management, 71
contacts
add entry, 71
add from Call Log, 74
add from SMS callback, 49
dial, 72
edit entry, 71
Phone Book, 71
properties, 71
send SMS to, 51
synchronize with Outlook, 83
copy a phone number from Call Log to the clipboard, 74
copy the Call Log to a text file, 74
counter, bytes transferred, 30
coverage
1X service indicator, 18
1xEV-DO service indicator, 18
BroadbandAccess service indicator, 18
CDMA, 10
NationalAccess service indicator, 18
customization options, 89
customize sounds, 93
D
data
1X, 9
1xEV-DO, 9
3G (1X & 1xEV-DO), 9
amount transferred, 30
BroadbandAccess - overview, 9
circuit switched, 9
dial-up, 9
NationalAccess - overview, 9
Quick 2 Net, 31
VZAccess - make connection, 29
VZAccess - overview, 10
WiFi, 33
Data Byte Counter, 30

Online Help for VZW EM5625 NB
108 2130548
data connection
1X - overview, 9
1X - make connection, 29
3G and WiFi, 37
add dial-up profile, 25
amount of data transferred, 30
auto-launch properties, 26
automatic disconnect, 31
BroadbandAccess - make connection, 29
BroadbandAccess - overview, 9
coverage indicator, 18
default, 27
dial-up, 28
end, 31
make, 28
make high-speed connection, 29
NationalAccess - make connection, 29
NationalAccess - overview, 9
NationalAccess and WiFi, 37
Quick 2 Net, 31
restore default settings, 27
restrict to default profiles, 24
service indicator, 18
VZAccess - make connection, 29
VZAccess - overview, 10
warning messages, 90
WiFi and 3G, 37
WiFi and BroadbandAccess/NationalAccess/VZA-
ccess, 37
Data connection lost, 90
data connection, WiFi
1X, during, 37
1xEV-DO, during, 37
3G connection, during, 37
add profile for hotspot, 41
autoconnect, 42
BroadbandAccess, during, 37
broadcasting hotspots, 34
connect to hotspot, 38
delete hotspot profile, 42
disconnect from hotspot, 39
edit hotspot profile, 42
enable WiFi support, 33
hotspots -manage profiles, 40
hotspots, list of - view, 38
make, 36
NationalAccess, during, 37
non-broadcasting hotspots, 34
rank hotspots for autoconnection, 42
restore default settings, 27
signal strength, 37
signal strength - from connection status area, 19
supported operating systems, 33
view details of hotspots, 39
VZAccess, during, 37
WEP key, 35
data features, 23
data tab
main window, 23
options screen, 91
default connection, 27
default profiles
restrict to, 24
default settings - restore, 27
delete
Call Log entries, 75
connection profile, 28
contact, 71
hotspot profile, 42
SMS, 56
SMS from Outlook, 82
SMS (expire), 56
delivery acknowledgement of SMS messages, 55
dialing
Call Log, 73
contacts, 72
KeyGuard, 63
Outlook - dial from, 82
prefix with “1”, 62
redial, 62
SMS callback, 49
voice, 61
Dial-Up # field, 28
dial-up connection
overview, 9
add dial-up profile, 25
end, 31
indicator, 18
make, 28
Quick 2 Net, 31
disable
KeyGuard, 63
notifications, 92
ringing, 92
security lock, 86
warning messages, 90
Disable Microsoft network bindings, 91
disconnect
data session, 31
WiFi, 37
display components, 16
docking, 16
draft SMS message
revise, 53
save, 52
E
enable
KeyGuard, 63
notifications, 92
Outlook integration, 77
security lock, 86
TTY, 58
warning messages, 90
WiFi support, 33

Index
Rev 0.21 Dec.04 109
encryption, 58
end
data session, 31
voice call, 66
WiFi connection, 37
enhanced SMS delivery acknowledgement, 55
error messages, 99
ESN, 95
exit prompt, 91
expire SMS messages, 56
F
feature availability, 9
features
Call Log, 73
customize options, 89
data, 23
options, 89
Outlook integration, 77
Phone Book (contacts), 71
Scratch Pad, 59
security, 85
SMS, 45
voice, 57
WiFi, 33
forward SMS, 47
forward SMS in Outlook, 81
full view, 15
G
general tab (options), 90
H
headset
connection, 57
muting the microphone, 58
volume, 57
HELP menu, 22
high-speed connection
overview, 9
amount of data transferred, 30
auto-launch properties, 26
coverage indicator, 18
default, 27
end, 31
make connection, 29
restore default settings, 27
restrict to default profiles, 24
service indicator, 18
warning messages, 90
WiFi connection, during, 37
hotspots
add profile for, 41
broadcasting and non-broadcasting, 34
connect to, 37, 37, 38
delete profile, 42
details - view, 39
disconnect, 39
edit profile, 42
list of - view, 38
manage profiles, 40
monitor, 38
rank for autoconnection, 42
signal strength, 37
signal strength - from connection status area, 19
WEP key, 35
hyphenation, auto (voice calls), 61
I
icons
connection status, 18
indicators, 21
interpreting, 12
Windows system tray, 13
incoming voice call
overview, 64
mute ring, 65
indicator area, 21
initial lock code, 85
K
key, WEP, 35
KeyGuard, 63
L
launch minimized, 90
link dialing, 72
lock
change code, 87
enable, 86
features, 85
functionality, 86
immediate, 87
initial code, 85
unlock, 85
lock icon, 35
logged calls, reply to, 73
long distance prefix, 62
lsecurity
initial code, 85
M
manual activation, 97
manual dialing, 61

Online Help for VZW EM5625 NB
110 2130548
menus
HELP, 22
TOOLS, 22
VIEW, 21
messaging
overview, 45
add callback to contacts, 49
addressing, 51
cannot send or receive SMS, 99
compose, 51
create, 50
delete, 56
delete from Outlook, 82
enable in Outlook, 77
expire read messages, 56
failed to send, 99
forward, 47
forward in Outlook, 81
Messaging tab (options), 91
notification, 45
options, set, 91
Outlook - enable integration, 77
override callback, 54
read, 47
read in Outlook, 80
reply, 48
reply in Outlook, 80
retain sent, 54
review (status), 55
revise draft, 53
save draft, 52
send from Outlook, 77
send options, 53
send to contact, 51
sent messages - view in Outlook, 79
SMS Failed, 99
unsent messages - view in Outlook, 79
messaging tab (options), 91
Microsoft network bindings, 91
minute alert, 58
missed call
Call Log, 73
notification, 66
Mobile Messenger
inbox, 46
outbox, 50
window, 46
Modem is In Use, 99
mute
key tones, 63
microphone, 58
ring for incoming voice call, 65
N
NationalAccess
overview, 9
amount of data transferred, 30
auto-launch properties, 26
coverage indicator, 18
end connection, 31
make connection, 29
restore default settings, 27
restrict Watcher to default profiles, 24
service indicator, 18
warning messages, 90
WiFi connection, during, 37
network
account, 10
coverage, 10
WiFi - 3G connection, during, 37
WiFi - add profile for hotspot, 41
WiFi - autoconnect, 42
WiFi - broadcasting hotspots, 34
WiFi - connect to hotspot, 38
WiFi - connection - make, 36
WiFi - delete hotspot profile, 42
WiFi - disconnect from hotspot, 39
WiFi - edit hotspot profile, 42
WiFi - hotspots, manage profiles of, 40
WiFi - hotspots, view list of, 38
WiFi - non-broadcasting hotspots, 34
WiFi - rank hotspots for autoconnection, 42
WiFi - restore default settings, 27
WiFi - signal strength, 37
WiFi - signal strength - from connection status area,
19
WiFi - supported operating systems, 33
WiFi - view details of hotspots, 39
WiFi - WEP key, 35
network bindings
disable, 91
network tab (options), 92
non-broadcasting hotspots, 34
Not in Service, 99
notification
call waiting, 66
customize sounds, 93
incoming voice call, 64
missed call, 66
SMS message, 45
voice mail, 67
volume, 93
O
opening connections, 28

Index
Rev 0.21 Dec.04 111
options
overview of Options screen, 89
data tab, 91
general tab, 90
messaging tab, 91
network tab, 92
security tab, 92
sounds tab, 92
voice tab, 93
outgoing voice calls, 60
Outlook
enable Outlook integration, 77
Phone Book - synchronize contacts with, 83
SMS messages - forward, 81
SMS messages - read, 80
SMS messages - reply to, 80
SMS messages - view sent, 79
SMS messages - view unsent, 79
SMS messaging and Outlook - overview, 77
synchronize contacts with Phone Book, 83
versions supported, 77
voice call - make, 82
Outlook Express, 77
overdial
disable, 63
link dialing, 72
override SMS callback number, 54
P
performance
optimize, 100
Phone Book
overview, 71
add contact from SMS message, 49
add entry, 71
delete entry, 71
edit entry, 71
send SMS to contact, 51
synchronize contacts with Outlook, 83
phone calls
feature summary, 57
answer, 64
dialing, 61
ending a call, 66
incoming calls, 64
mute, 58
notification of incoming voice call, 64
outgoing calls, 60
outgoing calls from Outlook, 82
privacy, 58
redial, 62
phone number, copy from Call Log to the clipboard, 74
prefix dialing with “1”, 62
priority
3G and WiFi, 37
BroadbandAccess and WiFi, 37
NationalAccess and WiFi, 37
VZAccess and WiFi, 37
WiFi and 3G, 37
WiFi and BroadbandAccess/NationalAccess/VZA-
ccess, 37
WiFi connections, 42
privacy, 58
profile (connection)
add, 25
default, 27
delete, 28
properties, 25
restrict to default profiles, 24
WiFi, 40
prompt before exit, 91
properties
data connection profile, 25
WiFi profiles, 40
Q
QNC, 31
Quick 2 Net data connection, 31
R
rank WiFi connections for autoconnection, 42
read SMS, 47
read SMS in Outlook, 80
Ready to connect
data, 19
WiFi, 19
redial, 62
reply to logged calls, 73
reply to SMS, 48
reply to SMS in Outlook, 80
restore default settings, 27
restrict connections, 24
retain sent SMS messages, 54
retry, auto (voice calls), 62
review the status of SMS messages, 55
revise a draft SMS message, 53
ringing, 64
roaming
indicator, 10
options, 11
RSSI, 32
S
save a draft SMS message, 52
Scratch Pad, 59

Online Help for VZW EM5625 NB
112 2130548
security
change code, 87
enable, 86
features, 85
functionality, 86
unlock, 85
security tab (options), 92
send SMS, 53
send SMS from Outlook, 77
sent SMS messages, view, 55
sent SMS messages, view in Outlook, 79
service alert, 59
service indicator
1X, 18
1xEV-DO, 18
BroadbandAccess, 18
NationalAccess, 18
VZAccess (BroadbandAccess), 18
VZAccess (NationalAccess), 18
service provider, 95
short messaging
overview, 45
add callback to contacts, 49
addressing, 51
cannot send or receive, 99
compose, 51
create, 50
delete, 56
delete from Outlook, 82
enable in Outlook, 77
expire read messages, 56
failed to send, 99
forward, 47
forward in Outlook, 81
Messaging tab (options), 91
notification, 45
options, set, 91
Outlook - enable integration, 77
override callback, 54
read, 47
read in Outlook, 80
reply, 48
reply in Outlook, 80
retain sent, 54
review (status), 55
revise draft, 53
save draft, 52
send from Outlook, 77
send options, 53
send to contact, 51
sent messages - view in Outlook, 79
SMS Failed, 99
unsent messages - view in Outlook, 79
signal strength
CDMA network, 32
system tray, 13
WiFi, 37
WiFi - from connection status area, 19
silent ring, 92
SMS
overview, 45
add callback to contacts, 49
addressing, 51
callback sender, 49
cannot send or receive, 99
compose, 51
create, 50
delete, 56
delete from Outlook, 82
delivery acknowledgement, 55
enable in Outlook, 77
expire read messages, 56
failed to send, 99
forward, 47
forward in Outlook, 81
Messaging tab (options), 91
notification, 45
options, set, 91
Outlook - enable integration, 77
override callback, 54
read, 47
read in Outlook, 80
reply, 48
reply in Outlook, 80
retain sent, 54
review (status), 55
revise draft, 53
save draft, 52
send from Outlook, 77
send options, 53
send to contact, 51
sent messages - view in Outlook, 79
SMS Failed, 99
unsent messages - view in Outlook, 79
SMS Failed, 99
sort the Call Log display, 75
sounds tab (options), 92
SSID, 34
status area - Windows, 13
status box, 17
synchronize Phone Book with Outlook, 83
system clock, 92
system select, 11
system tray icons, 13

Index
Rev 0.21 Dec.04 113
T
text messaging
overview, 45
add callback to contacts, 49
addressing, 51
cannot send or receive, 99
compose, 51
create, 50
delete, 56
delete from Outlook, 82
enable in Outlook, 77
expire read messages, 56
failed to send, 99
forward, 47
forward in Outlook, 81
Messaging tab (options), 91
notification, 45
options, set, 91
Outlook - enable integration, 77
override callback, 54
read, 47
read in Outlook, 80
reply, 48
reply in Outlook, 80
retain sent, 54
review (status), 55
revise draft, 53
save draft, 52
send from Outlook, 77
send options, 53
send to contact, 51
sent messages - view in Outlook, 79
SMS Failed, 99
unsent messages - view in Outlook, 79
three-way calling, 63
tips on optimizing performance, 100
TOOLS menu, 22
transferred data, amount, 30
troubleshooting, 99
TTY
connection to wireless device, 57
enabling, 58
U
Unable to connect to the Internet, 19
unlock modem, 85
unsent SMS messages, view, 55
unsent SMS messages, view in Outlook, 79
update clock, 92
V
version information, 13
versions of Outlook supported, 77
view
Call Log, 75
compact, 16
full, 15
VIEW menu, 21
views (Watcher), 15
voice
feature summary, 57
answer, 64
dialing, 61
ending a call, 66
incoming calls, 64
mute, 58
notification, 64
outgoing calls, 60
outgoing calls from Outlook, 82
privacy, 58
redial, 62
voice mail
accessing, 68
change access number, 68
features, 67
notification, 67
voice tab
main window, 59
options, 93
voice-assisted activation, 98
volume
headset, 57
notifications, 93
VZAccess
description, 10
amount of data transferred, 30
auto-launch properties, 26
BroadbandAccess service indicator, 18
coverage indicator (BroadbandAccess), 18
default connection, set as, 27
end connection, 31
make connection, 29
NationalAccess service indicator, 18
restore default settings, 27
restrict Watcher to default profiles, 24
service indicator (BroadbandAccess), 18
service indicator (NationalAccess), 18
warning messages, 90
WiFi connection, during, 37
W
warning messages, 90
Watcher (overview), 11
Watcher window
always on top, 16
views, 15
WEP, 35

Online Help for VZW EM5625 NB
114 2130548
WiFi
3G connection, during, 37
add profile for hotspot, 41
autoconnect, 42
BroadbandAccess/NationalAccess/VZAccess con-
nection, during, 37
broadcasting hotspots, 34
connect to hotspot, 38
connection - make, 36
delete hotspot profile, 42
disconnect from hotspot, 39
edit hotspot profile, 42
enable support, 33
hotspots, list of - view, 38
NationalAccess/BroadbandAccess/VZAccess con-
nection, during, 37
non-broadcasting hotspots, 34
profiles, 40
rank hotspots for autoconnection, 42
restore default settings, 27
signal strength, 37
signal strength - from connection status area, 19
supported operating systems, 33
view details of hotspots, 39
VZAccess/NationalAccess/BroadbandAccess con-
nection, during, 37
WEP key, 35
WiFi Profiles tab (Connection Manager window),
35
WiFi Profiles tab (Connection Manager window), 35
Windows system tray, 13
Wireless Call button, 82