Panasonic of North America 9TGCF-TW71 Personal Computer Models CF-T71 and CF-W71 User Manual CF W7mk2 PCSC
Panasonic Corporation of North America Personal Computer Models CF-T71 and CF-W71 CF W7mk2 PCSC
Contents
- 1. User Manual EVDO
- 2. Final User Manual for CF T7
- 3. Final User Manual for CF W7
Final User Manual for CF W7
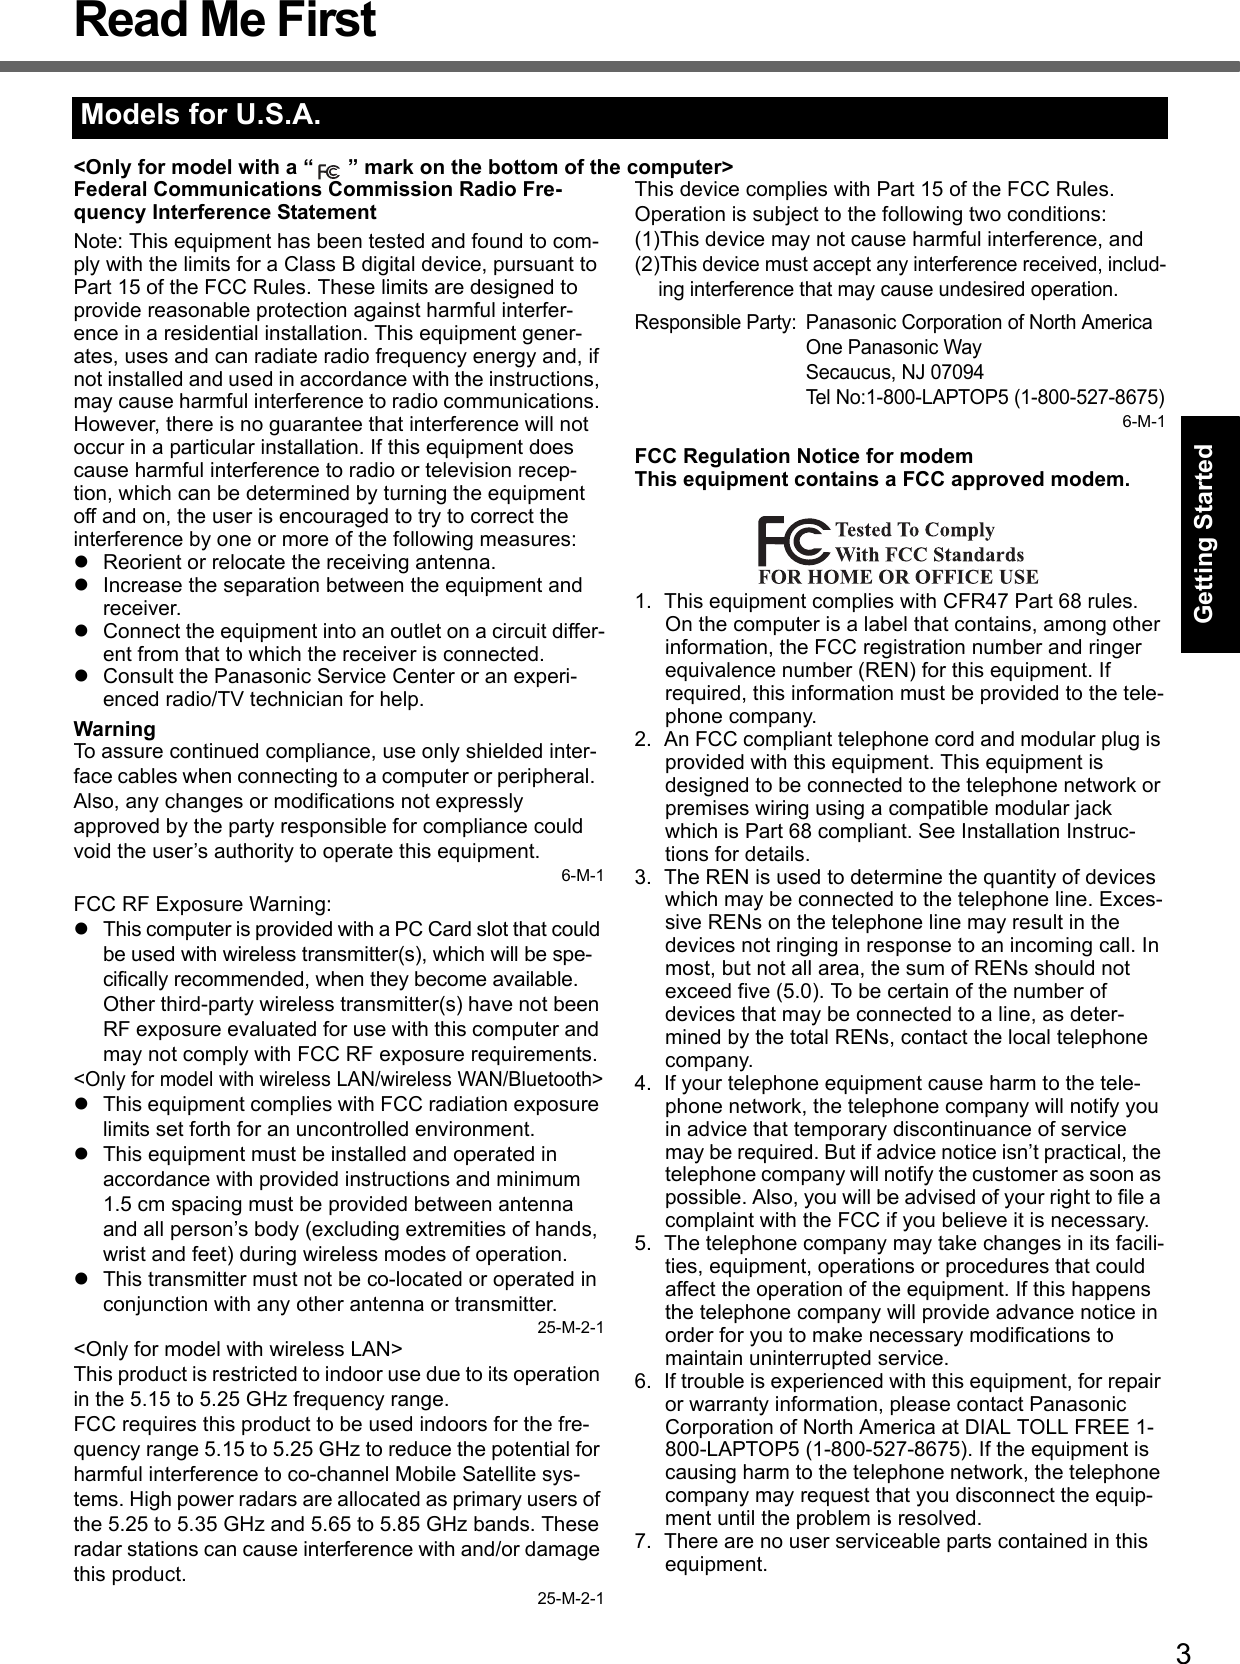
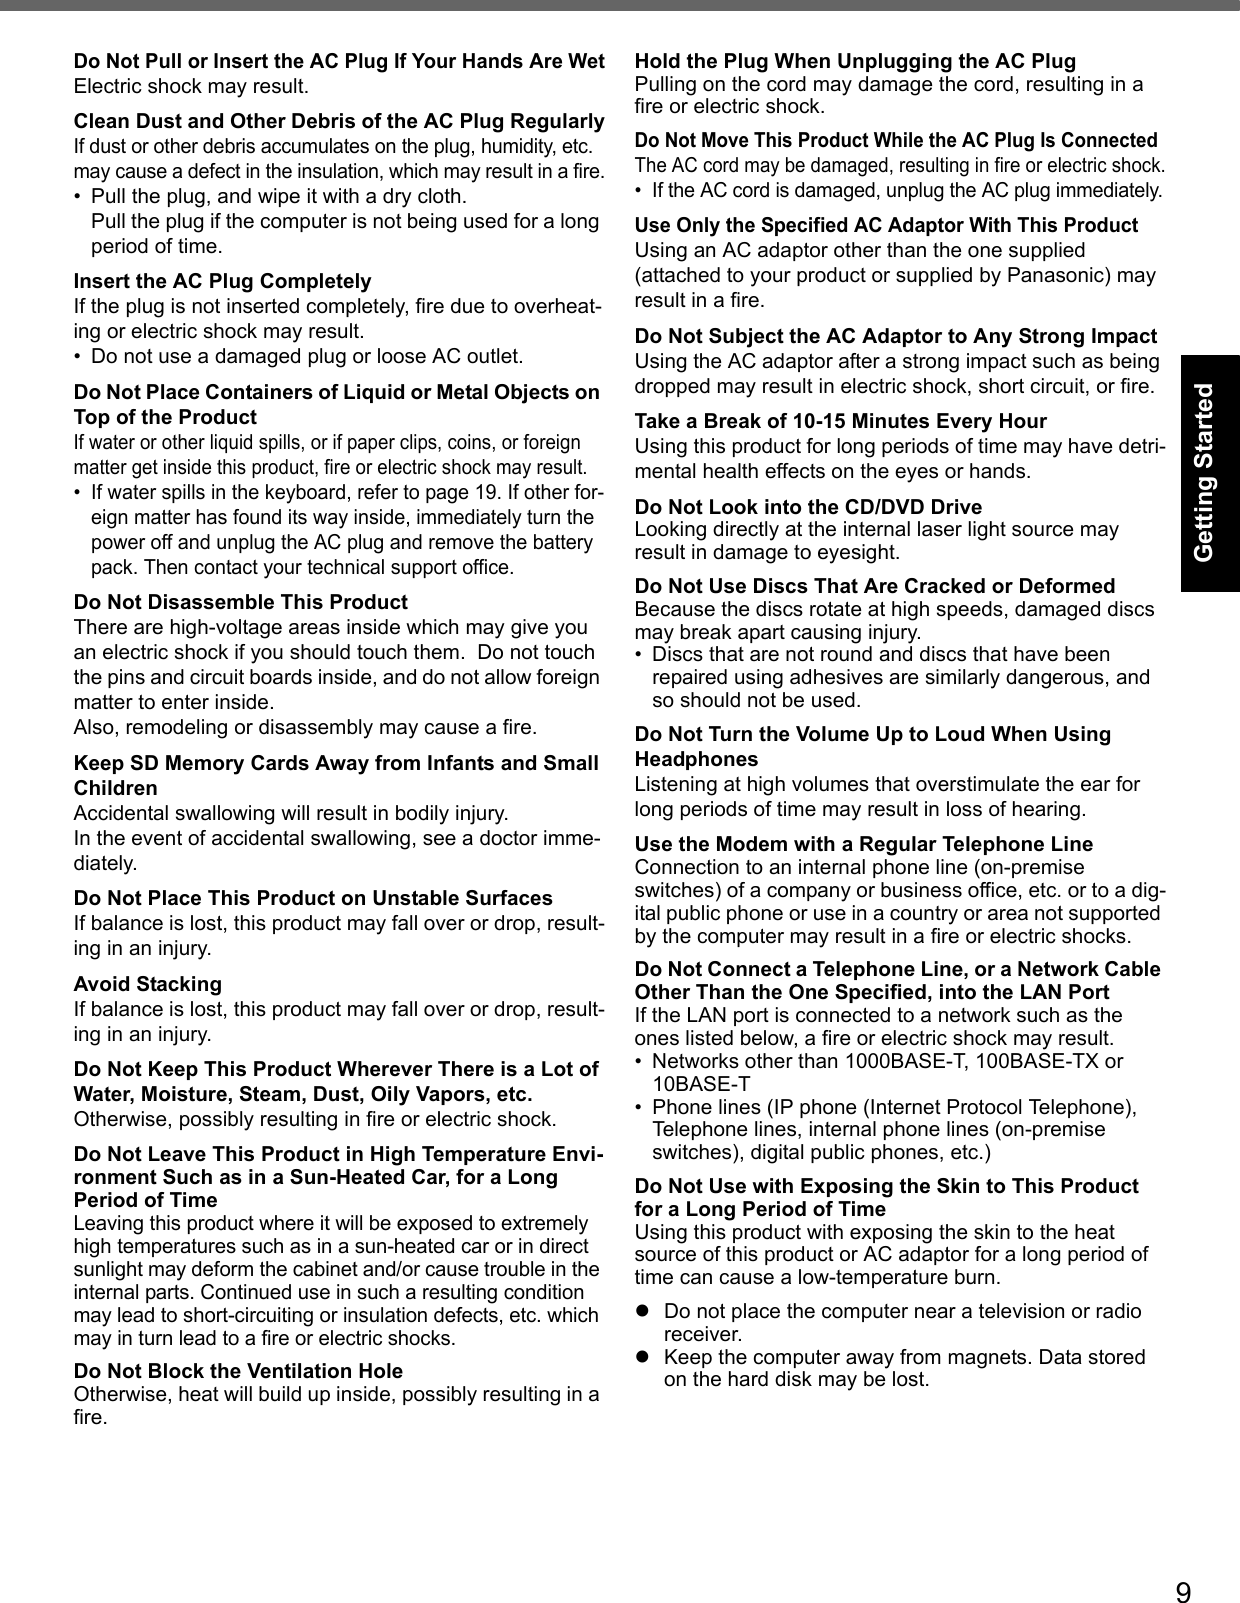
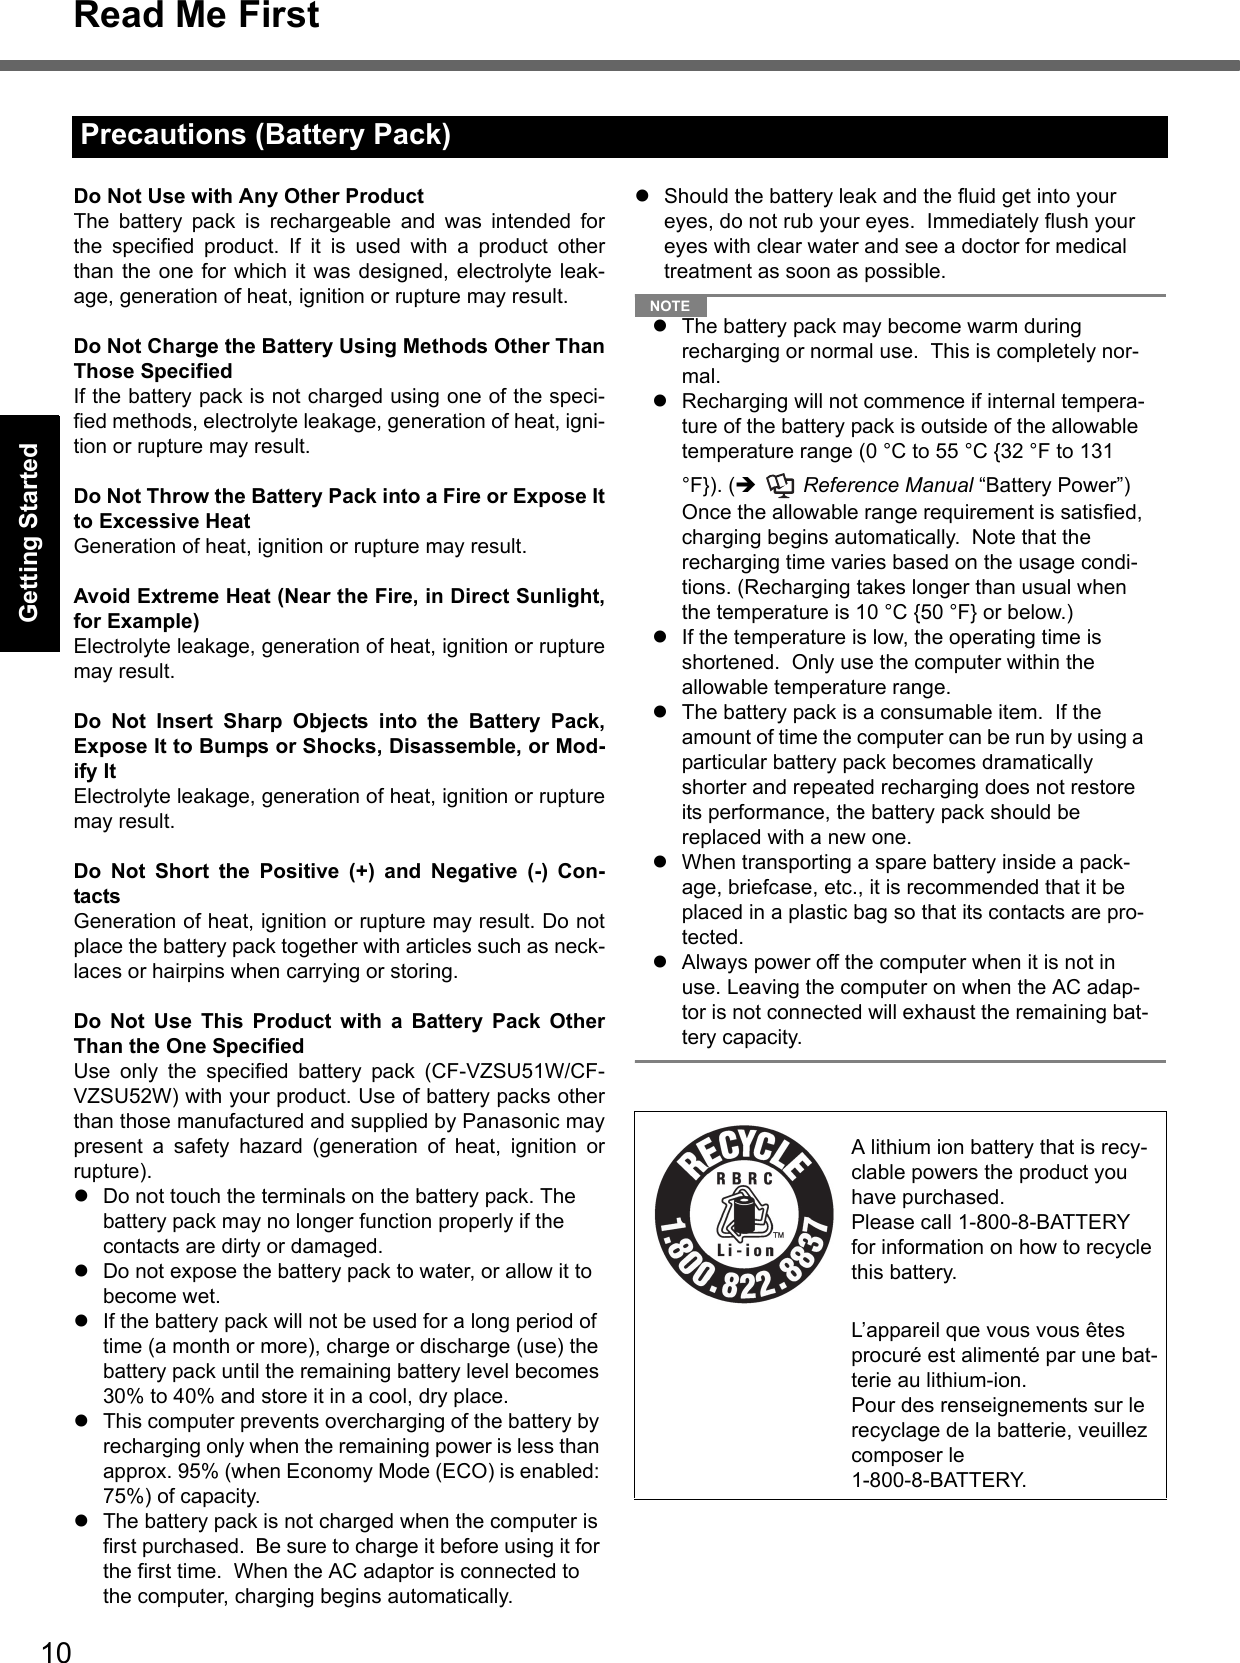
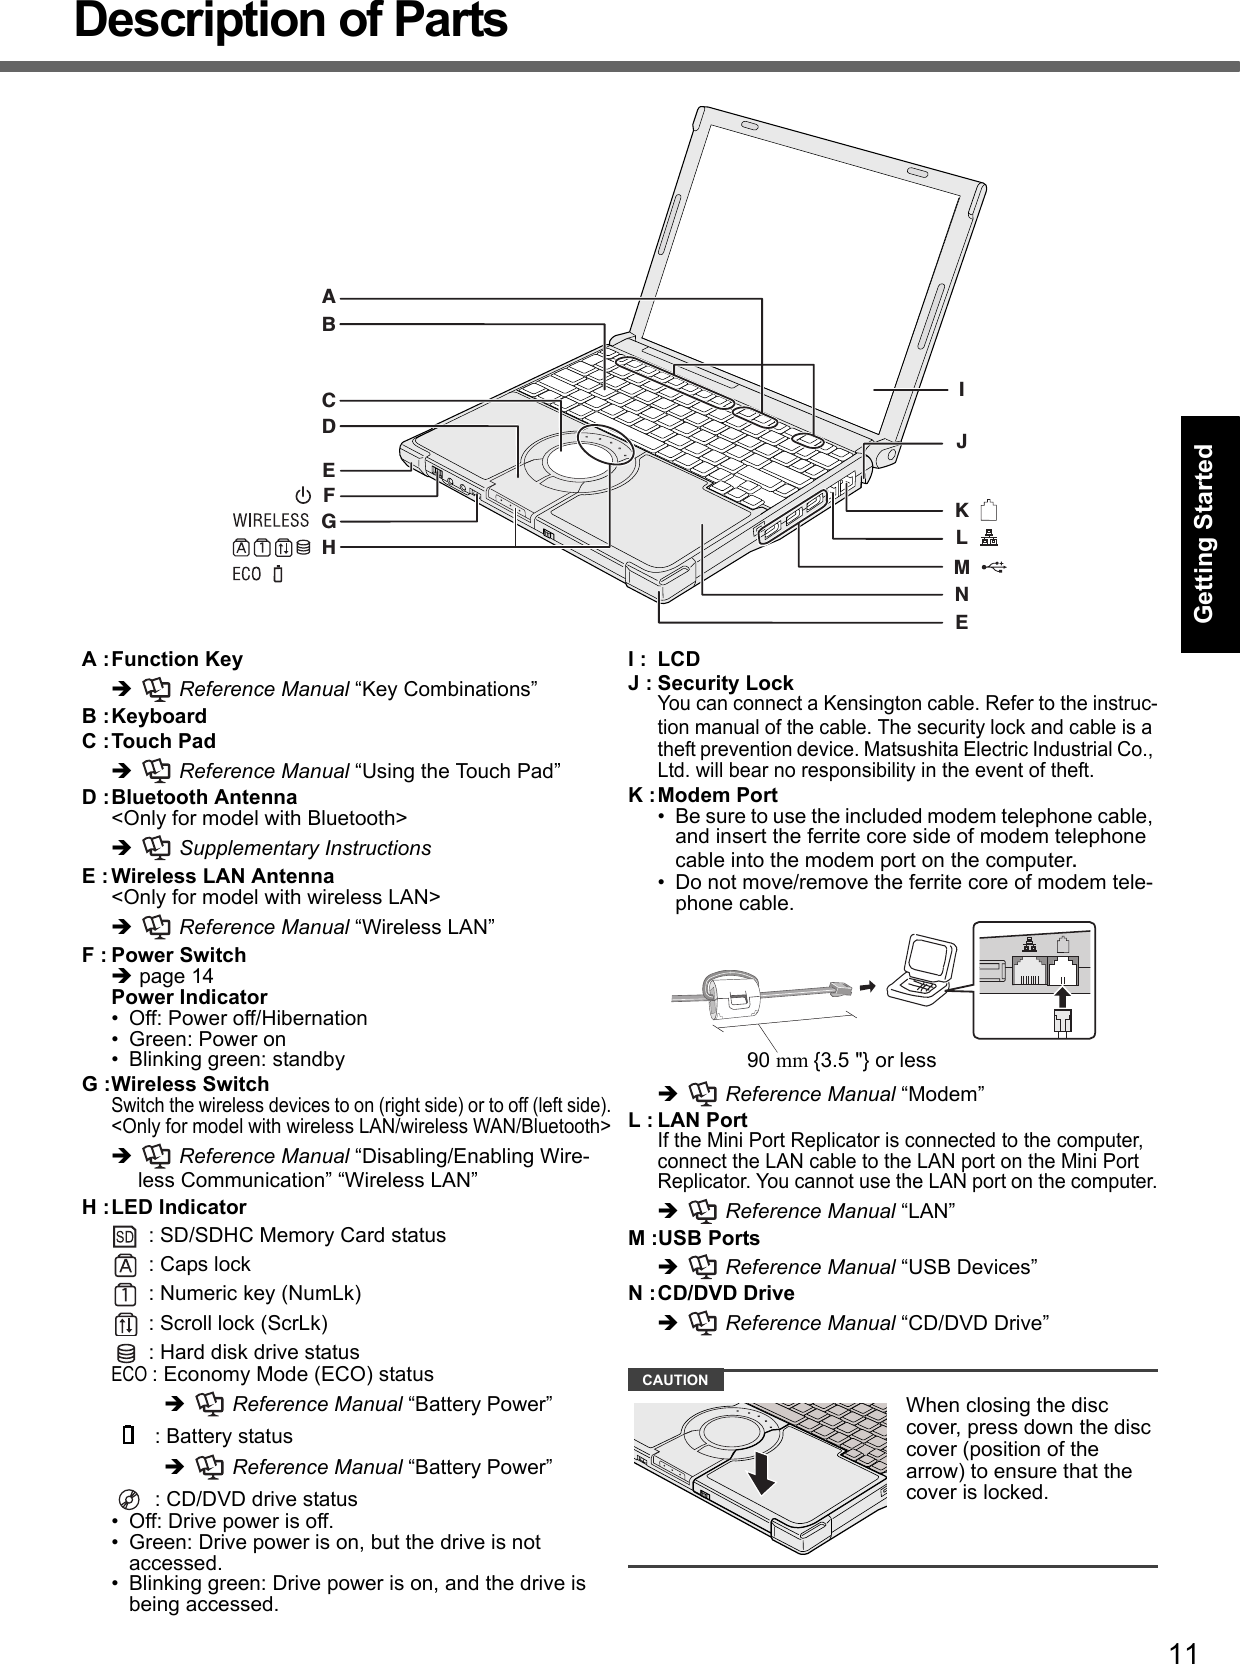
![2Getting StartedUseful InformationTroubleshootingAppendixIntroductionThank you for purchasing this Panasonic computer. For optimum performance and safety, please read these instruc-tions carefully.Terms and illustrations in these instructionsSome illustrations are simplified to help your understanding and may look different from the actual unit.If you do not log on as an administrator, you cannot use some functions or cannot display some screens.Refer for the latest information about optional products to the catalogs, etc.In these instructions, the names and terms are referred as follows.• “Microsoft® Windows® XP Professional Service Pack 2 with Advanced Security Technologies” as “Windows” or “Windows XP”• “WinDVD™ 5 (OEM Version)” as “WinDVD”• “B’s Recorder GOLD9 BASIC” as “B’s Recorder”• “B’s CLiP 7” as “B’s CLiP”The display modes are referred as follows. ( ) indicates the terms in [Intel® Graphics Media Accelerator Driver for mobile] screen. To display the screen, click [start] - [Control Panel] - [Other Control Panel Options] - [Intel(R) GMA Driver for Mobile].• Internal LCD (Notebook): The computer’s display• External display (Monitor): External display• Simultaneous display (Intel(R) Dual Display Clone): The same screen is displayed on the internal LCD and the external display.• Extended desktop: The extended working area across the internal LCD and the external display.CopyrightThis manual is copyrighted by Matsushita Electric Industrial Co., Ltd. with all rights reserved. No part of this manual may be reproduced in any form without the prior written permission of Matsushita Electric Industrial Co., Ltd.No patent liability is assumed with respect to the use of the information contained herein.© 2007 Matsushita Electric Industrial Co., Ltd. All Rights Reserved.DisclaimerComputer specifications and manuals are subject to change without notice. Matsushita Electric Industrial Co., Ltd. assumes no liability for damage incurred directly or indirectly from errors, omissions or discrepancies between the com-puter and the manuals.TrademarksMicrosoft®, Windows® and the Windows logo are registered trademarks of Microsoft Corporation of the United States and/or other countries.Intel, Core, Centrino and PROSet are either registered trademarks or trademarks of Intel Corporation.SDHC Logo is a trademark. Adobe, the Adobe logo and Adobe Reader are either registered trademarks or trademarks of Adobe Systems Incorpo-rated in the United States and/or other countries.Bluetooth™ is a trademark owned by Bluetooth SIG, Inc., U.S.A. and licensed to Matsushita Electric Industrial Co., Ltd.InterVideo, WinDVD™, the InterVideo logo, Ulead and the Corel logo are trademarks or registered trademarks of Corel Corporation and/or its subsidiaries in Canada, the United States and/or other countries.Computrace is a registered trademark of Absolute® Software Corp.Panasonic® is a registered trademark of Matsushita Electric Industrial Co., Ltd.Names of products, brands, etc., appearing in this manual are trademarks or registered trademarks of their respective own companies. : Conditions that may result in minor or moderate injury. : Useful and helpful information.Enter : Press [Enter] key.Fn + F5 : Press and hold [Fn] key, and then press [F5] key.[start] - [Run] : Click [start], and then click [Run]. : Page in these Operating Instructions. : Reference to the on-screen manuals.CAUTIONNOTE](https://usermanual.wiki/Panasonic-of-North-America/9TGCF-TW71.Final-User-Manual-for-CF-W7/User-Guide-864347-Page-2.png)
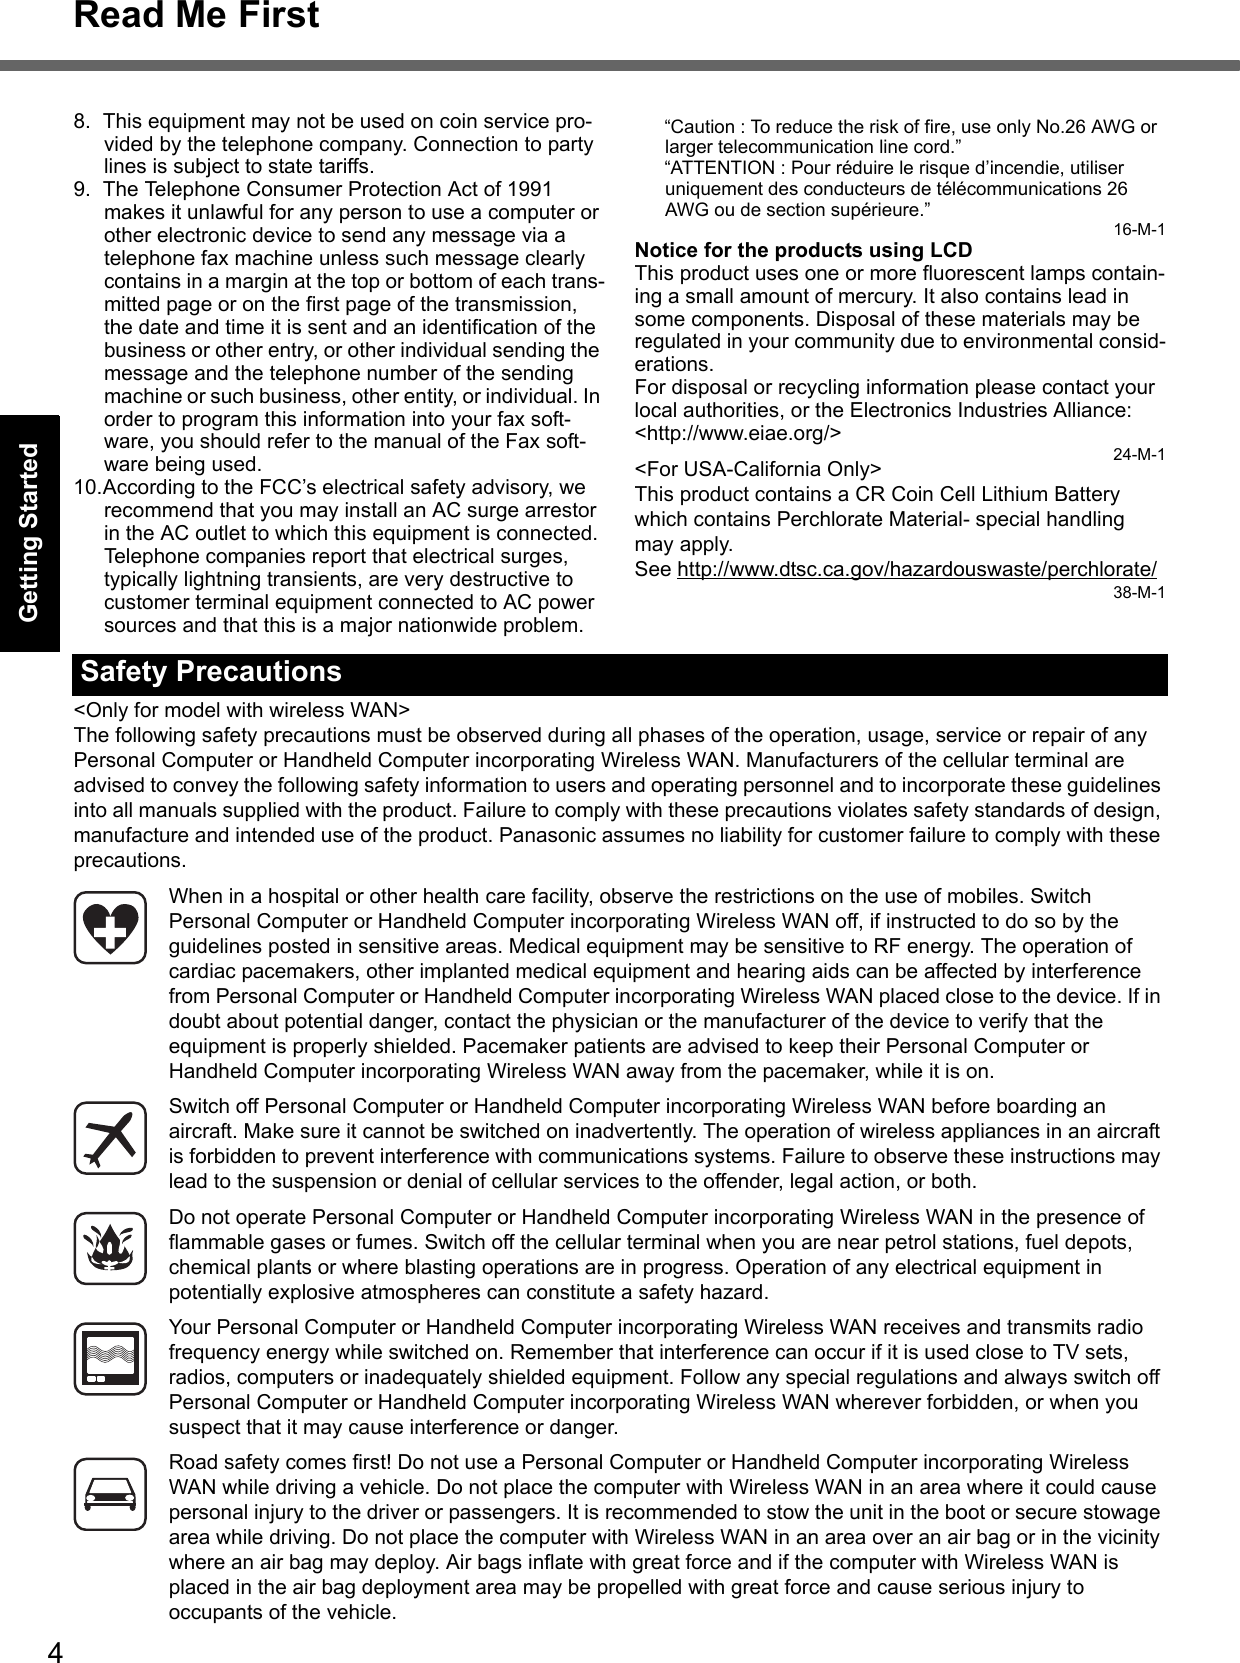
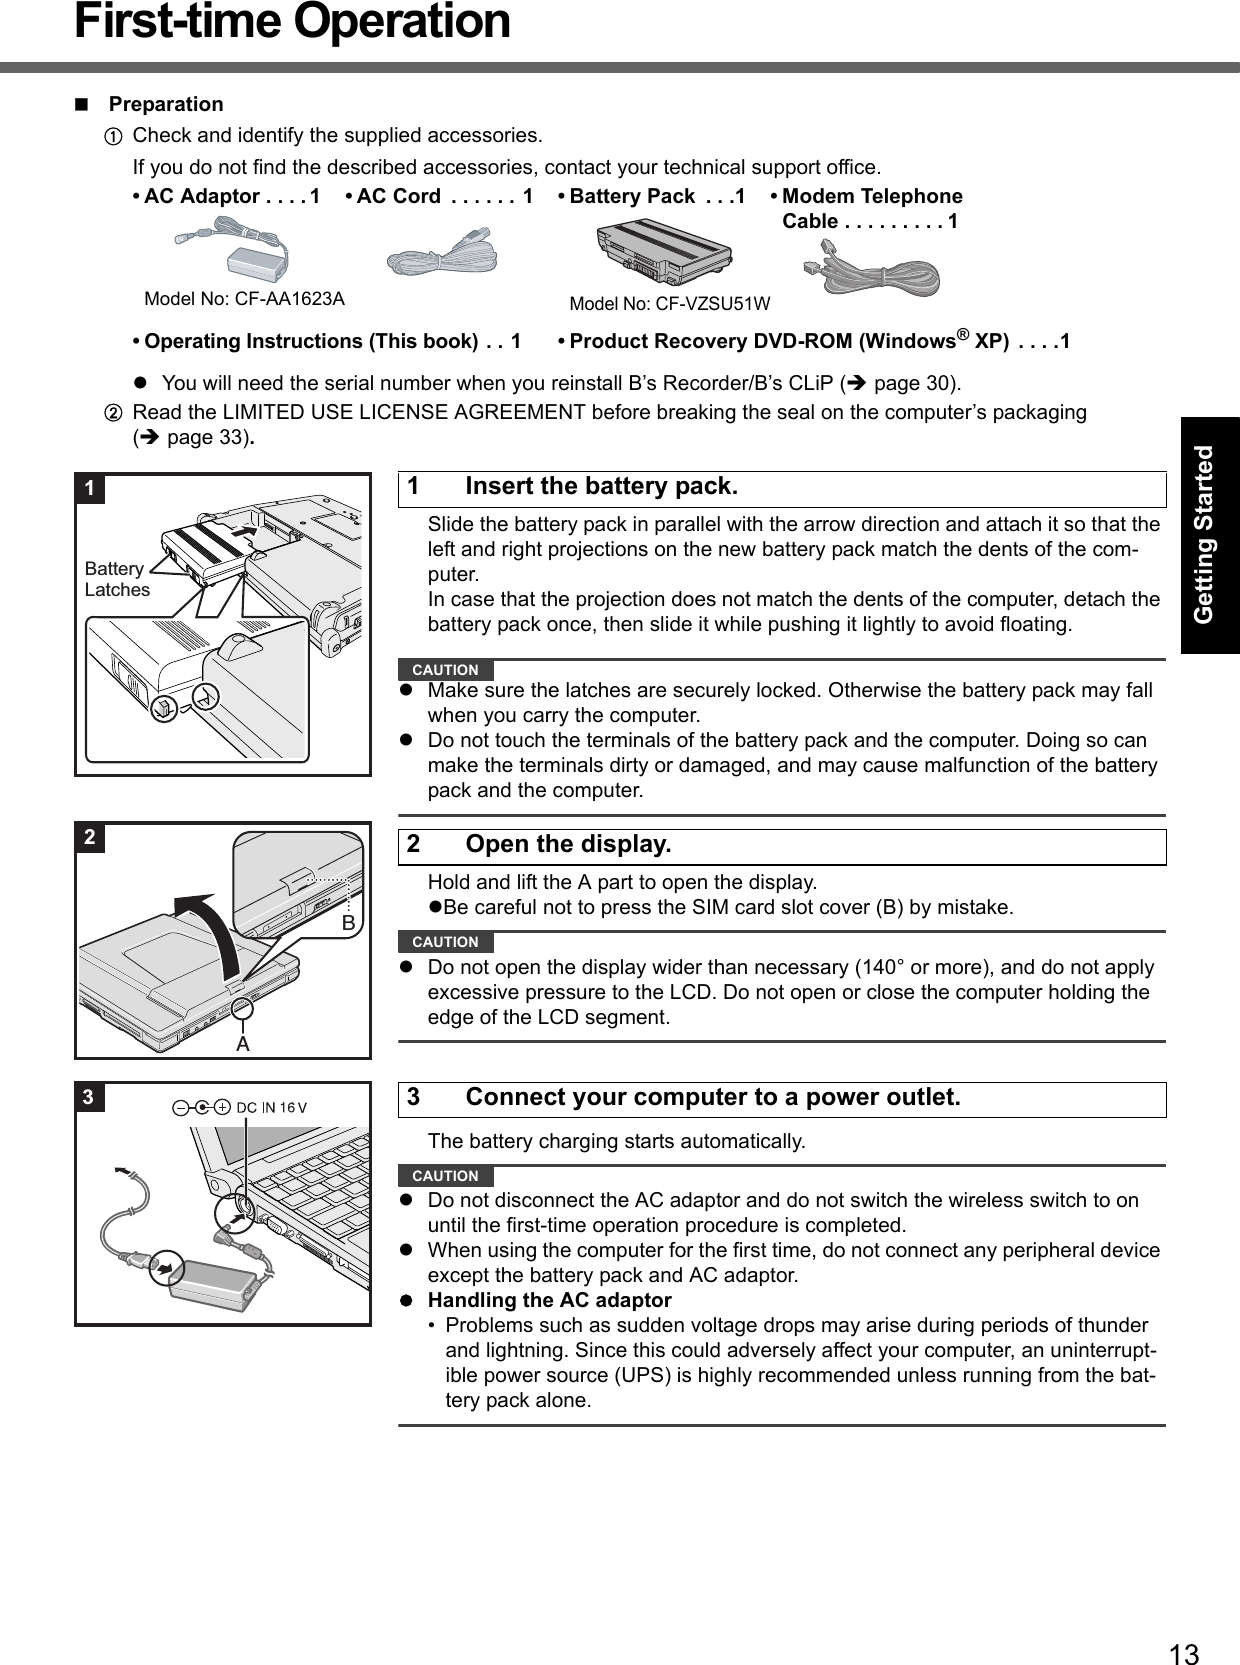
![12Description of PartsGetting StartedUseful InformationTroubleshootingAppendix':6GABCDEFHINKJMLA :DC-IN JackB :External Display PortIf the Mini Port Replicator is connected to the com-puter, connect the external display to the external dis-play port on the Mini Port Replicator. You cannot use the external display port on the computer. Reference Manual “External Display”C :Mini Port Replicator ConnectorConnect the Mini Port Replicator (optional). Reference Manual “Mini Port Replicator”D :Ventilation HoleE : PC Card Slot Reference Manual “PC Cards”F : SD Memory Card Slot Reference Manual “SD/SDHC Memory Card”G :CD/DVD Drive Power/Open Switch• Slide the switch to the right to open the disc cover. • Slide the switch to the left to turn on/off the drive power.H :Microphone JackA condenser microphone can be used. If other types of microphones are used, audio input may not be pos-sible, or malfunctions may occur. • When recording in stereo using a stereo microphone: Click [start] - [All Programs] - [SoundMAX] - [Control Panel] and select [Microphone], and then select [No Filtering] in [Microphone Enhancements].• When using a monaural microphone with a 2-termi-nal plug: Click [start] - [All Programs] - [SoundMAX] - [Control Panel] and select [Microphone], and then select [Voice Recording] in [Microphone Enhancements]. Otherwise only audio on the left track will be heard when recorded in stereo.I : Headphone JackYou can connect headphones or amplified speakers. When they are connected, audio from the internal speakers is not heard.J : Battery Latchespage 13K :Battery PackL : RAM Module Slotpage 20M :SpeakerN :Emergency Hole Reference Manual “CD/DVD Drive”For model with EVDO or without wireless WAN:The SIM card slot under this cover is not used for this model. Do not open the cover.For other models:Refer to the additional instructions.Wireless WAN Antenna](https://usermanual.wiki/Panasonic-of-North-America/9TGCF-TW71.Final-User-Manual-for-CF-W7/User-Guide-864347-Page-12.png)
![14First-time OperationGetting StartedUseful InformationTroubleshootingAppendixSlide and hold the power switch for approximately one second until the power indicator lights.CAUTIONDo not slide the power switch repeatedly.The computer will forcibly be turned off if you slide and hold the power switch for four seconds or longer.Once you turn off the computer, wait for ten seconds or more before you turn on the computer again.Do not perform the following operation until the hard disk drive indicator turns off.• Connecting or disconnecting the AC adaptor• Sliding the power switch or CD/DVD drive power/open switch• Touching the keyboard or touch pad• Closing the displayDo not change the Setup Utility until completing step 5. If you do so, Windows setup may not operate properly.Follow the on-screen instructions.The computer will restart after the setup is complete.To go to the next step, wait until the hard disk drive indicator has turned off.CAUTIONWhen you set date/time/time zone and click [Next], the screen may not go to the next step for a few minutes. Do not touch the keyboard or touch pad, and wait until the screen changes.Click [start] - [Control Panel] - [User Accounts] - [Create a new account].CAUTIONRemember your password. If you forget the password, you cannot use the Windows operation system. Creating a password reset disk beforehand is recommended. Reference Manual “CD/DVD Drive”NOTERegarding Windows XPYou can select the Classic view of Control Panel or the Classic Start menu. You can also change the way a user logs on or off. This manual explains using the Windows XP default setting (not Classic view or Classic Start menu etc.).Windows UpdateYou can update to the latest patches and service packs for Windows with the following menus. [start] - [All Programs] - [Windows Update]Do not apply “Driver Updates” even if a message to update a driver appears. If a driver update is required, contact your technical support office.If the message “Your computer might be at risk” is displayedSelect (red icon) on the notification area and make the appropriate settings. The Windows Security Center reg-ularly gives you notice so that you can make the optimum settings. This is not an error message and you can use the computer. However, making appropriate measures is recommended to reduce the risk of virus and other attacks.If you hear the sounds from CD/DVD driveIn the following situations, the sounds from the CD/DVD drive can be heard.• Immediately after the CD/DVD drive is turned on• Just after turning on the computer with [DVD Drive Power] set to [On] in the Setup Utility• When a CD or DVD is playingThe sounds you hear are normal operating sounds created by the motor in the CD/DVD drive operating; it is not a malfunction.4 Turn on the computer.5 Setup Windows.6 Create a new account.7 Change the internal CD/DVD drive letter if necessary.4](https://usermanual.wiki/Panasonic-of-North-America/9TGCF-TW71.Final-User-Manual-for-CF-W7/User-Guide-864347-Page-14.png)
![15Getting StartedUseful InformationTroubleshootingAppendixPC Information ViewerThis computer periodically records the management information including the hard disk information such as number of hours powered-on, number of times powered-on, internal temperature, replacement sector. The maximum data volume for each record is 750 byte.These information are only used for estimating the cause when the hard disk goes down by any possibility. They are never sent to outside via network nor used for any other purpose except for the purpose described the above.To disable the function, add the check mark for [Disable the automatic save function for management information history] in [Hard Disk Status] of PC Information Viewer, and click [OK]. When you disable the function, information on how to use the hard disk is not displayed.( Reference Manual “Check the Computer’s Usage Status” and Hard Disk Handling)To conserve power, the following power saving methods are set at the time of purchase (When AC adaptor is connected).• The screen automatically turns off after 15 minutes of inactivity.• The computer automatically enters standby*1 after 20 minutes of inactivity.*1 Refer to Reference Manual “Standby and Hibernation Functions” about resuming from standby.Power consumption in each mode is as follows. (When AC adaptor is connected)• When the screen is off Approx. 12 W• In standby Approx. 2.2 W• The battery pack is fully charged (or not being charged) and the computer is off Approx. 0.7 WNote that the computer consumes electricity even when the computer power is off. If the battery pack is fully charged, the battery will be fully discharged in the following period of time:When using the battery pack (CF-VZSU51W)•When power is off: Approx. 1.5 months•In standby: Approx. 2 days*2•In hibernation: Approx. 3 days*2When using the battery pack (CF-VZSU52W)•When power is off: Approx. 0.7 months•In standby: Approx. 1 days*2•In hibernation: Approx. 1.5 days*2*2 If “Wake Up from wired LAN” is disabled, the period of time will become slightly longer.If “Wake Up from wireless LAN” is enabled, the period of time will become shorter.If the computer feels warm while you are using it• Check the usage environment- Avoid using the computer on a highly heat retentive surfaces (e.g., rubber pads). If possible, use the computer on surfaces with good heat dissipation, such as a steel desk.- Do not use a keyboard cover, as this prevents heat dissipation.- Always keep the display open when using the computer.• Check the computer settings- If the computer becomes warm while the screen saver is displayed, set the screen saver to [Windows XP]. Screen savers that use 3-D images or other complex images increase the CPU utilization rate. - Use recommended RAM module products. Non-recommended RAM modules may not operate properly, and may cause damage to your computer.- If you are not using a wireless LAN, turn the wireless LAN off.• Double-click on the desktop and click [High speed], then [OK].- When you set [High speed], rotation of the cooling fan speeds up and the computer can be cooled down. Note that the battery operation time will be shorter.- When you do not frequently use CPU or the rotation sound of the fan bothers you, set [Standard] or [Low speed] as necessary.When Starting Up/Shutting DownDo not do the following• Connecting or disconnecting the AC adaptor• Sliding the power switch or CD/DVD drive power/open switch• Touching the keyboard, touch pad or external mouse• Closing the display](https://usermanual.wiki/Panasonic-of-North-America/9TGCF-TW71.Final-User-Manual-for-CF-W7/User-Guide-864347-Page-15.png)
![16Getting StartedUseful InformationTroubleshootingAppendixOn-screen ManualYou can access the Reference Manual, the Important Tips and the Bluetooth Supplementary Instructions (Only for mod-els with Bluetooth) on the computer screen after completing the “First-time Operation”.When you access the Reference Manual, the Important Tips or the Bluetooth Supplementary Instructions (Only for models with Bluetooth) for the first time, the License Agreement of the Adobe Reader may be displayed. Read it care-fully and select [Accept] to proceed.Reference Manual The Reference Manual contains the practical information to help you fully enjoy the computer’s performance.To access the Reference Manual:Click [start] - [Reference Manual].Important Tips The Important Tips will provide you with the helpful information about the battery. Read to use the battery pack in the optimum condition to obtain longer operation time.To access the Important Tips:Double-click on the desktop.Alternatively click [start] - [All Programs] - [Panasonic] - [On-Line Manuals] - [Important Tips].Hard Disk HandlingThe Hard Disk Handling will provide you with the helpful information on how to use the hard disk.To access the Hard Disk Handling Supplementary Instructions:Click [start] - [All Programs] - [Panasonic] - [On-Line Manuals] - [Hard Disk Handling].Bluetooth Supplementary Instructions The Supplementary Instructions will provide you with the helpful information about the Bluetooth.To access the Bluetooth Supplementary Instructions:Click [start] - [All Programs] - [Panasonic] - [On-Line Manuals] - [Bluetooth Manual].NOTEWhen Adobe Reader update notice is displayed, we recommend you follow the on-screen procedure to update.See http://www.adobe.com/ for the latest version of Adobe Reader.ContentsRead Me FirstUsing the Touch PadKey CombinationsBattery PowerComputing on the RoadStandby or Hibernation FunctionsSecurity MeasuresCD/DVD DriveWinDVDB’s Recorder/B’s CLiPPC CardsSD/SDHC Memory CardSD SecurityMini Port ReplicatorExternal DisplayUSB DevicesModemLANDisabling/Enabling Wireless CommunicationWireless LANSetup UtilityIcon EnlargerLoupe UtilityDMI ViewerRecover ProTroubleshooting (Advanced)Check the Computer’s Usage Sta-tusPC Information PopupProtecting Your Computer from VirusesTechnical Information](https://usermanual.wiki/Panasonic-of-North-America/9TGCF-TW71.Final-User-Manual-for-CF-W7/User-Guide-864347-Page-16.png)
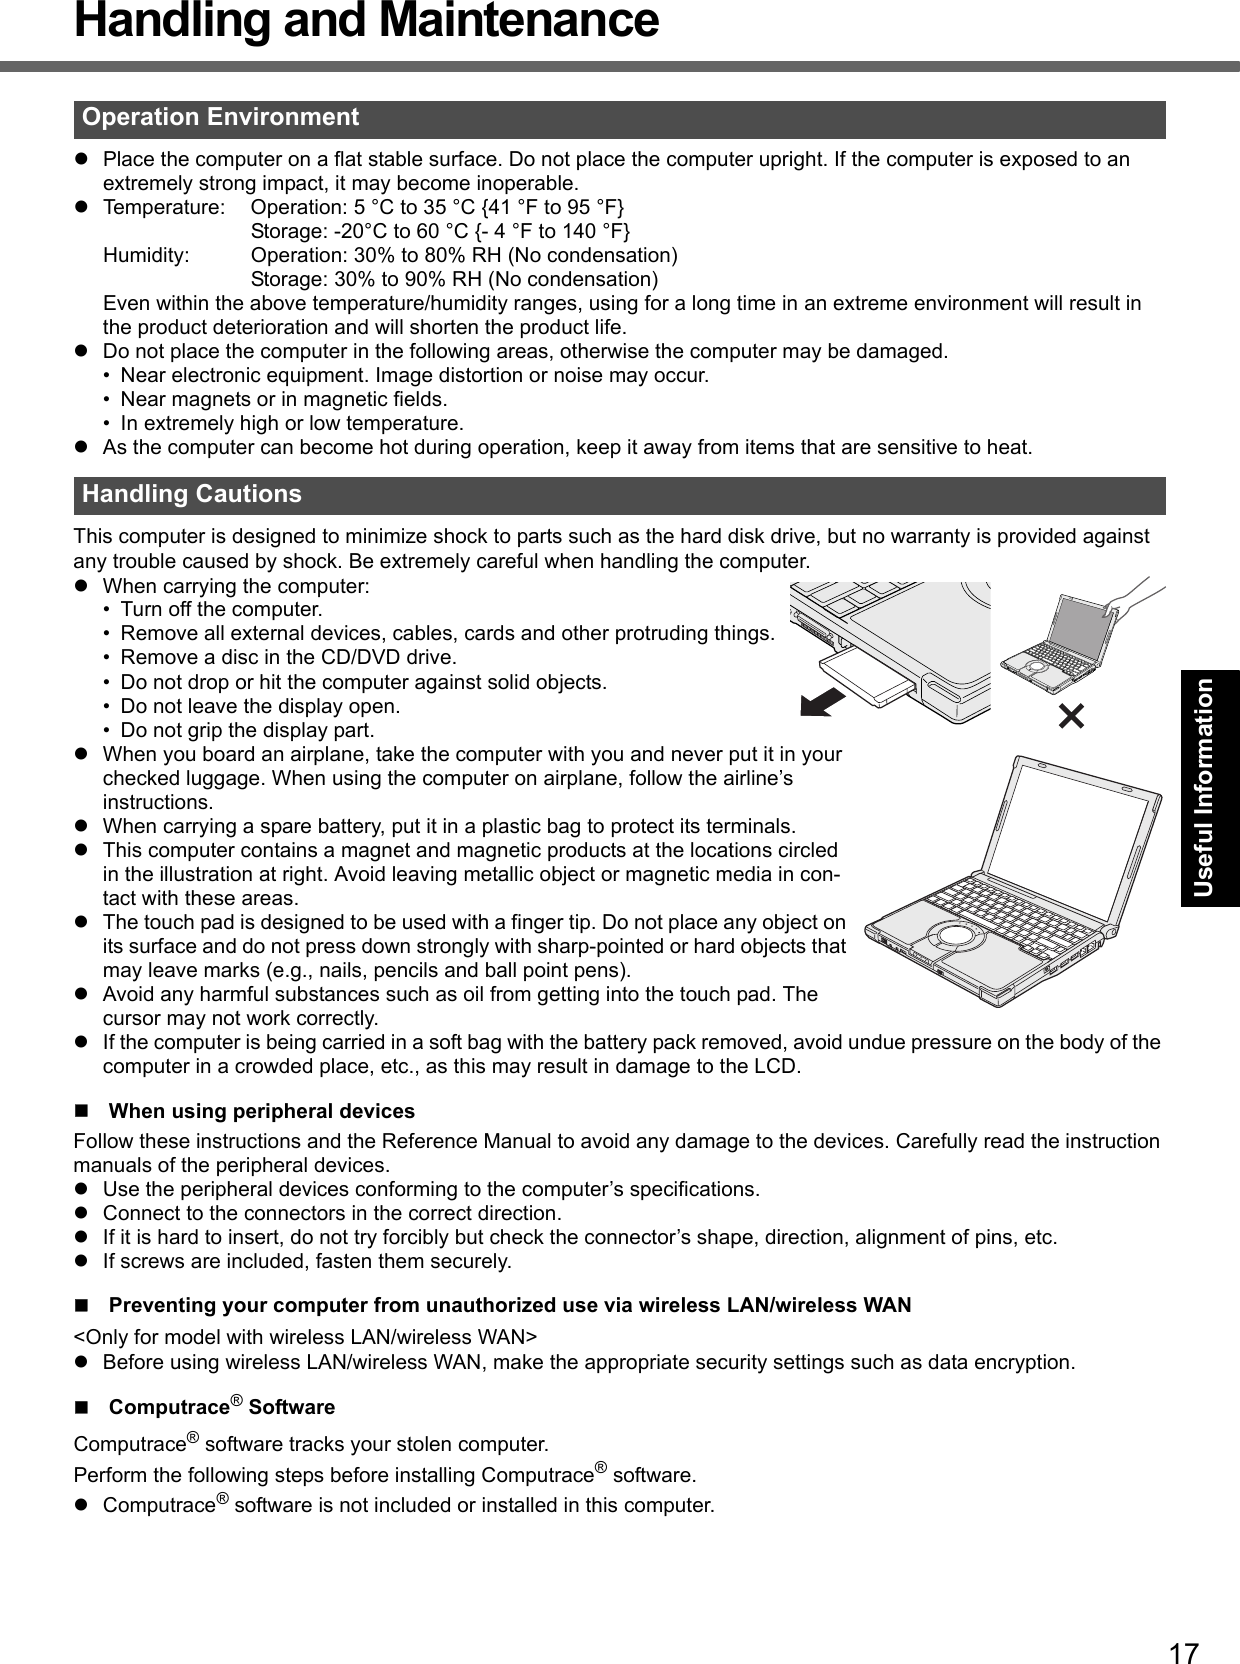
![18Handling and MaintenanceGetting StartedUseful InformationTroubleshootingAppendixCAUTIONYou will be unable to set [Computrace (R) BIOS Module] to [Disable] once you have set to [Enable]. Do not change the setting when not used.• Even if you have set [Computrace (R) BIOS Module] to [Enable], this setting may return to [Disable] after repairs to the motherboard, etc. have been made. NOTEConsult Absolute Software Corp. before disposal.Refer to the following URL for Computrace® software for installation and available service regions. Note that this service is only available in certain regions. http://www.absolute.com1 Turn on or restart the computer, and press F2 while [Panasonic] boot screen is dis-played.The Setup Utility starts up.If the password is requested, enter the Supervisor Password.2 Select the [Security] menu, then select [Computrace (R) Sub-Menu] and press Enter.3 Select [Computrace (R) BIOS Module], and set to [Enable].4 At the confirmation message, select [Execute] and press Enter.5 At the reconfirmation message, select [Execute] and press Enter.6 Press F10.At the confirmation message, select [Yes] and press Enter.The computer restarts.To clean the LCD panel and touch padWipe lightly with a gauze or other dry, soft cloth.To clean areas other than the LCD panel and touch padWet a soft cloth with water or a diluted kitchen cleanser (neutral), wring the cloth out thoroughly, and wipe the dirty area gently. Using a detergent other than a neutral kitchen cleanser (e.g., a weak alkali cleanser) may adversely affect painted surfaces.CAUTIONDo not use benzene, thinner, or rubbing alcohol since it may adversely affect the surface causing discoloration, etc. Do not use commercially-available household cleaners and cosmetics, as they may contain components harmful to the surface.Do not apply water or detergent directly to the computer, since liquid may enter inside of the computer and cause malfunction or damage.Maintenance](https://usermanual.wiki/Panasonic-of-North-America/9TGCF-TW71.Final-User-Manual-for-CF-W7/User-Guide-864347-Page-18.png)
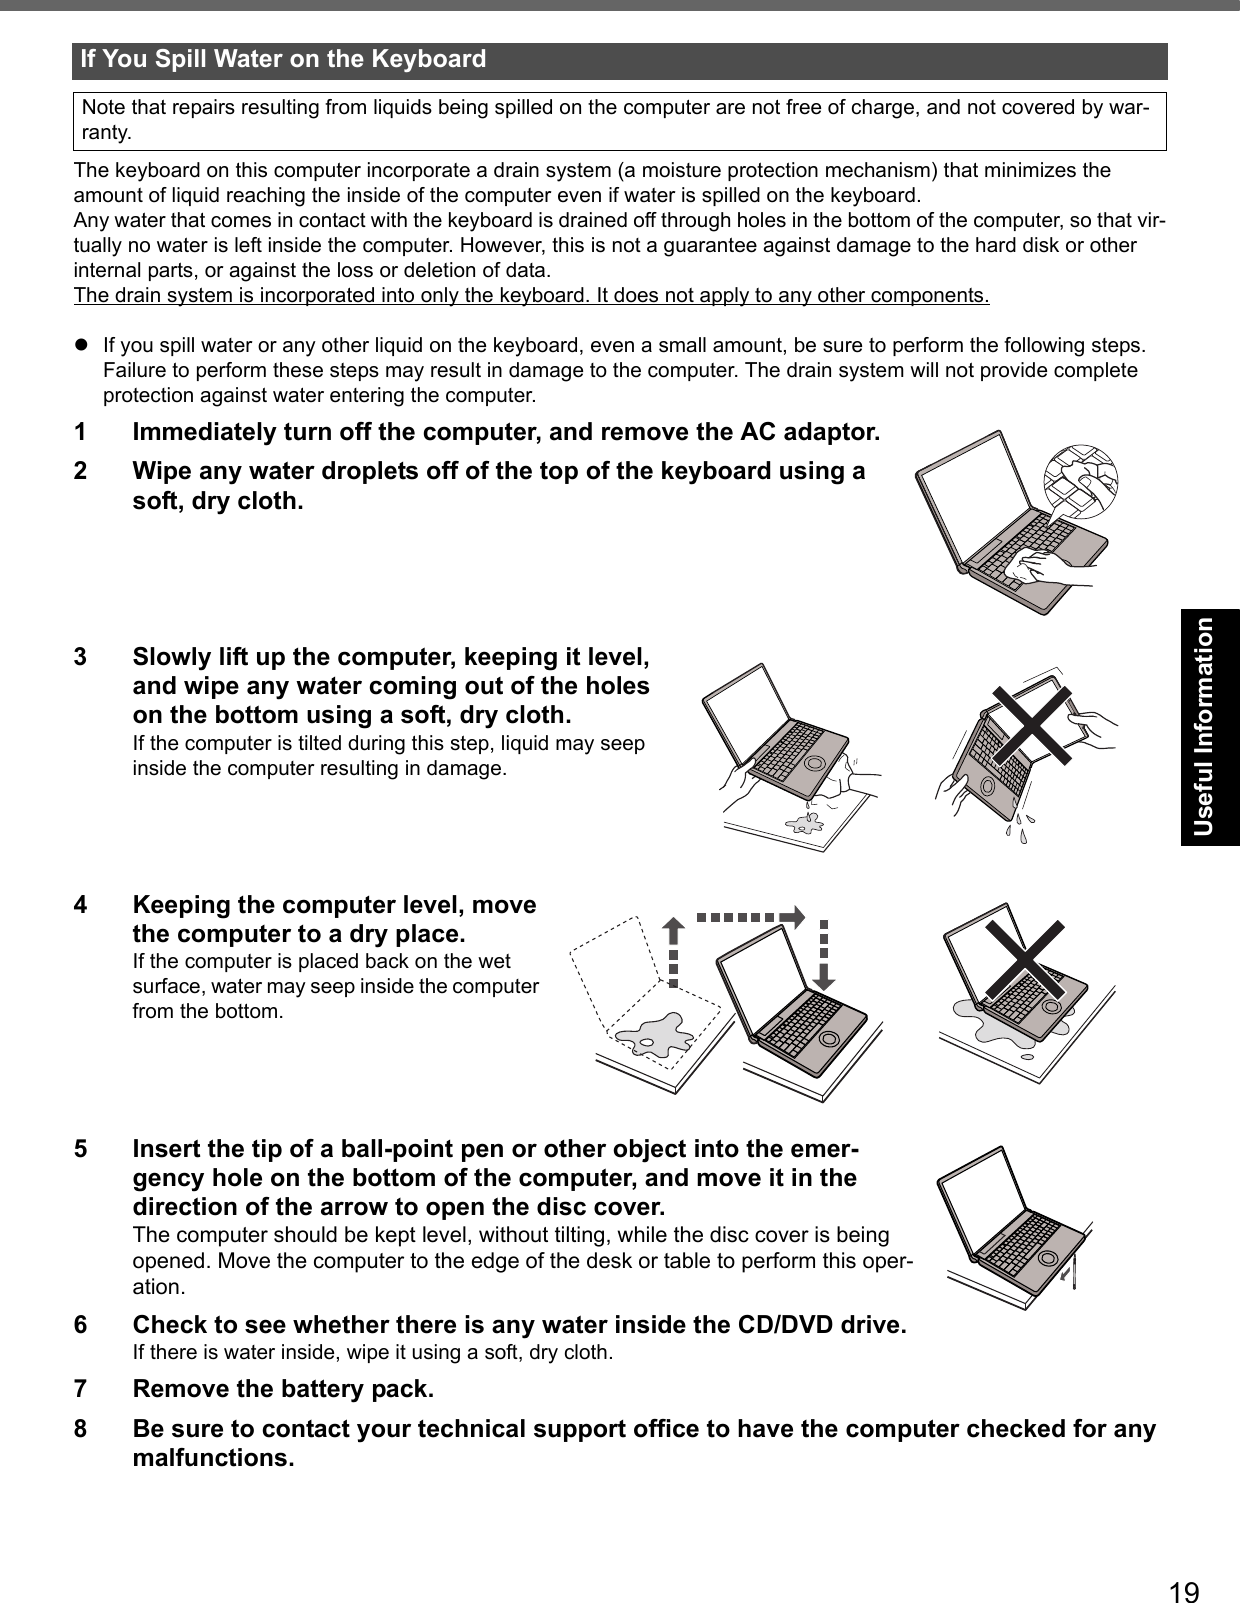
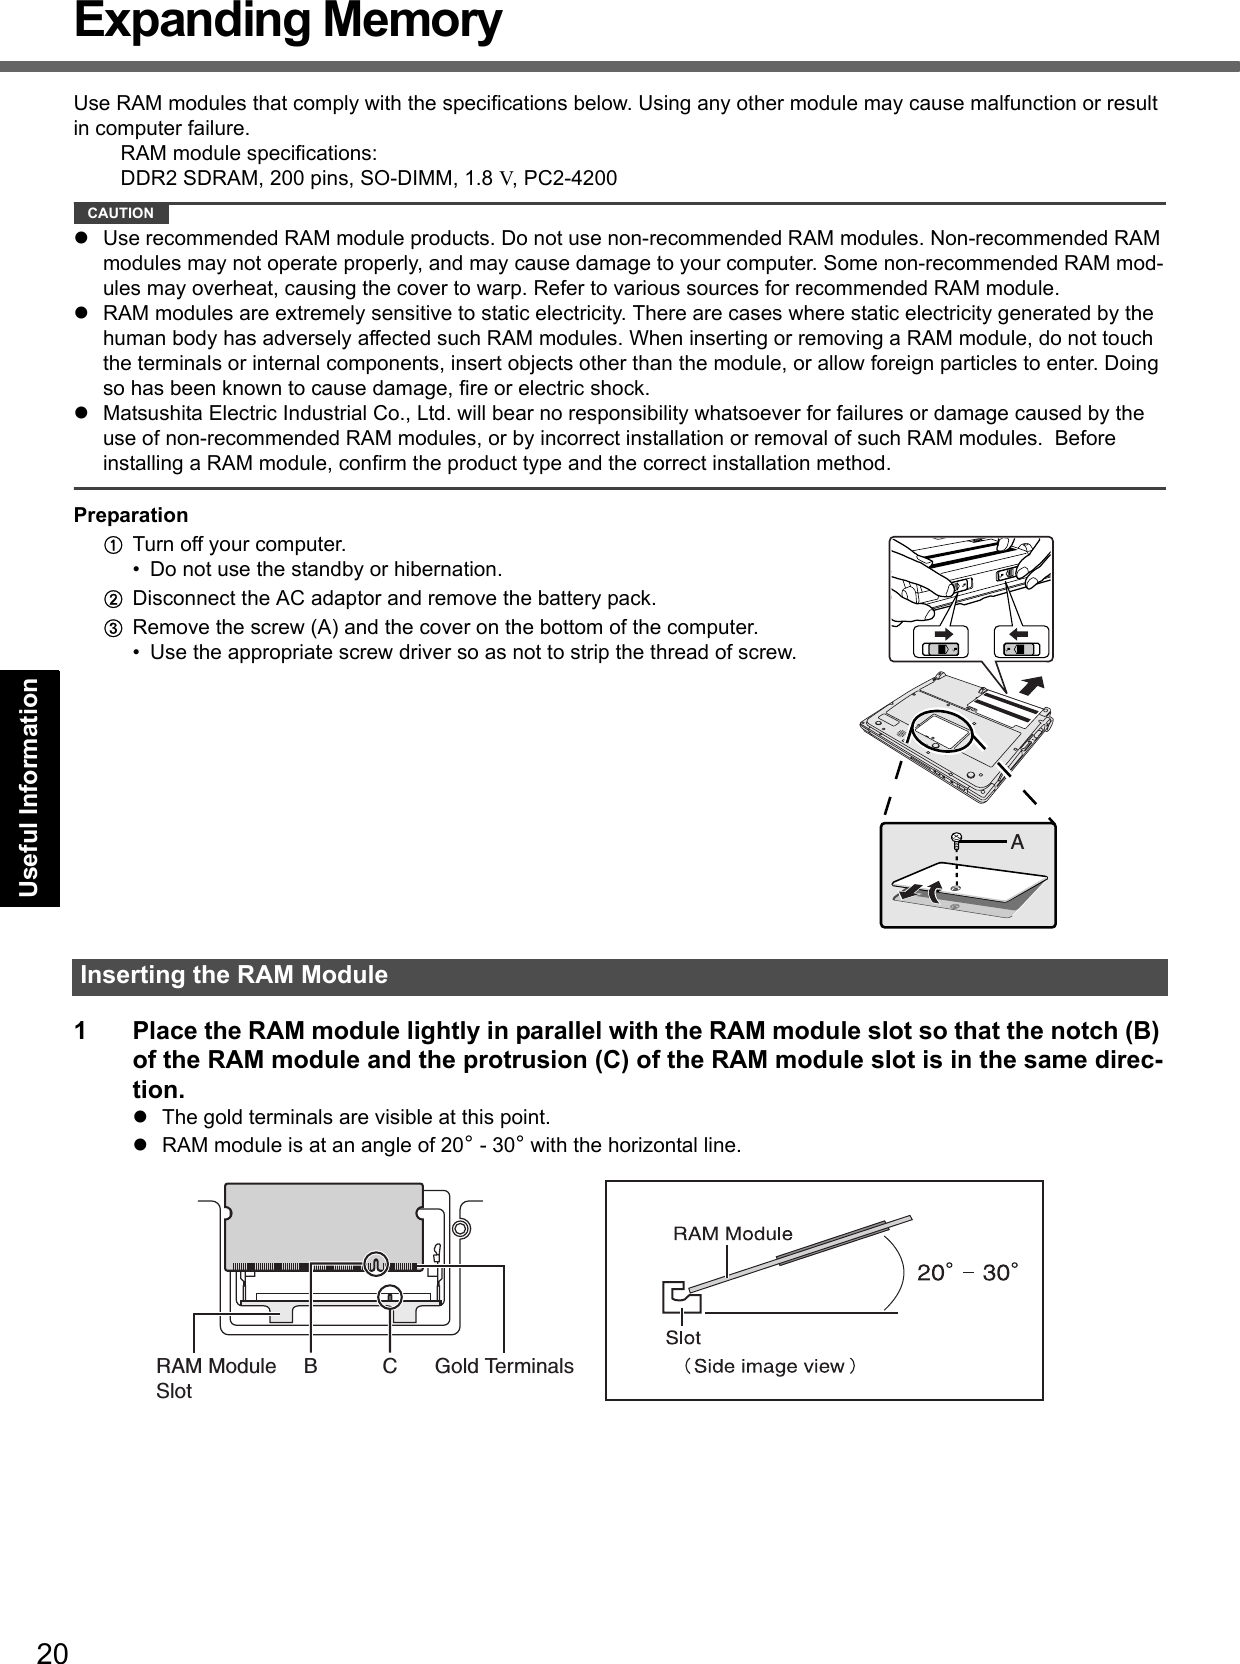
![21Getting StartedUseful InformationTroubleshootingAppendix2 Insert the RAM module parallel to the slot firmly until the gold terminals are invisible.If it is hard to insert the RAM module, do not try forcibly but check the mod-ule’s direction.3 Press the RAM module down until the right and left hooks (D) lock into place.When pressing down the module, the right and left hooks will open slightly and will return after locking.If it is hard to press down the RAM module, do not try forcibly but check the module’s direction.4 Set the cover and battery pack back.NOTEIf the RAM module is recognized correctly, the total size of this computer’s memory and RAM module memory is dis-played on the [Information] menu of the Setup Utility.If the RAM module is not recognized, turn off the computer and insert it again.1 Carefully open the left and right hooks (E).The RAM module will be raised.2 Carefully remove the RAM module from the slot.3 Set the cover and battery pack back.Removing the RAM ModuleDE](https://usermanual.wiki/Panasonic-of-North-America/9TGCF-TW71.Final-User-Manual-for-CF-W7/User-Guide-864347-Page-21.png)
![22Getting StartedUseful InformationTroubleshootingAppendixHard Disk Backup Function (Recover Pro)The Recover Pro creates a backup area (storage area) on the hard disk to back up (store) the hard disk data, and restores the backup data to its original location when it is lost or corrupted by operational errors or other factors. You do not need external media or peripheral devices to back up or restore hard disk data on this computer.At purchase, the Recover Pro is not installed. Install using the instructions below. The Recover Pro provides 3 types of backup as follows:Quick Backup: Scheduled backup of the updated dataFile Backup: File backup at file save and changeComplete Backup: Backup of the entire data on the internal hard diskHere, we will explain the procedures for installation, complete backup (backing up hard disk contents in case Windowscannot be booted), and complete restore (recovering the hard disk data to its condition at the time of the complete backup).For further information, refer to the software’s online manual (page 23).CAUTIONAll operations should be executed with the AC adaptor connected. Do not turn the power off while operations are in progress. If the power is turned off while installation, backup, or restore operations are in progress, these operations may not function properly, and it may be impossible to start Windows. Also, do not press any keys or slide any switches, including hot keys.When restarting the computer, the message “Check file system on C:” will appear. Follow the on-screen instructions. Do not skip the check process.Make sure you allow enough space on the hard disk when choosing settings during installation. To change these settings you must reinstall Recover Pro. To execute Complete Backup reliably, we recommend performing [Typical] installation in the following cases.• Hard disk with a single partition• Immediately after reinstalling software (when more than half of the entire space of the hard disk is available) (page 25)Be sure to use the internal hard disk drive to create the backup area. Never use disk or device other than the internal hard disk drive.Some software (security software, backup software, encryption software, or hard disk accessible specific software, etc.) may be incompatible with Recover Pro. For further information, refer to:http://www.phoenix.com/en/Customer+Services/White+Papers-Specs/Recover+Pro/default.htmWhen using Personal Secure Drive ( Installation Manual of "Trusted Platform Module (TPM)"), do not execute File Backup for Personal Secure Drive.The “Create recovery CD-DVD” function in Recover Pro is designed to help you save complete backup data to CD or DVD. When using the “Create recovery CD-DVD”, you can view the complete backup data on the hard disk, but take care to avoid accidentally deleting this data. PreparationConnect the AC adaptor.1 Log on to Windows as an administrator.2 Close all programs.3 Disable anti-virus software.4 Click [start] - [Run], enter [c:\util\rcvpro\setup.exe], and click [OK].The InstallShield Wizard screen appears.5 Click [Next].Follow the on-screen instructions.Carefully read the License Agreement, and click [I accept the agreement.].The computer restarts several times to complete installation. appears in the notification area.The Recover Pro cannot back up or restore data correctly if a hard disk problem occurs during data backup or restoring.If an error occurs due to an unexpected malfunction, incorrect operation, or other reason while data is beingrestored, the hard disk data (data before restoration) may be lost.Matsushita Electric Industrial Co., Ltd. will bear no responsibility for any damage suffered (including loss of data) as aresult of the use of this function.Installation](https://usermanual.wiki/Panasonic-of-North-America/9TGCF-TW71.Final-User-Manual-for-CF-W7/User-Guide-864347-Page-22.png)
![23Getting StartedUseful InformationTroubleshootingAppendixCAUTIONDuring the installation, the screen may become black (no display) momentarily. This is not a malfunction.If you select [Typical] in installation, approximately 40% (max.) of the hard disk drive space is allocated as the backup area.You cannot change the size of backup area after creation.Backs up all data on the hard disk.PreparationConnect the AC adaptor.1 Log on to Windows as an administrator.2 Close all programs.3 Click [start] - [All Programs] - [Phoenix Applications] - [Phoenix Recover Pro 6].“Recover Pro 6” screen appears.4 Click [Complete Backup], and click [Yes].The computer restarts, and “Recover Pro 6” screen appears.Follow the on-screen instructions.NOTEYou can completely backup only one set of the whole data in the hard disk to the backup area.Do not touch the power switch while using the Recover Pro.This function uses the data created during complete backup. It restores the hard disk data to the condition when you performed the complete backup. Files created and changes made to settings after the latest complete backup is made will be deleted. PreparationConnect the AC adaptor.1 Click [start] - [All Programs] - [Phoenix Applications] - [Phoenix Always Launcher] and click [Run].The computer restarts, and “Phoenix Always” screen appears.Alternatively turn on or restart the computer, and hold down F4 while [Panasonic] boot screen is displayed until “Phoenix Always” screen appears.2 Click [Protect / Recover], and click [Phoenix Recover Pro 6].“Recover Pro 6” screen appears.3 Click [Complete Restore].Follow the on-screen instructions.NOTEDo not touch the power switch while using the Recover Pro.To access the online manualAClick [start] - [All Programs] - [Phoenix Applications] - [Docs], and double-click [UserGuides].BDouble-click the file of Recover Pro user’s guide or Phoenix Always user’s guide.Complete BackupComplete Restore](https://usermanual.wiki/Panasonic-of-North-America/9TGCF-TW71.Final-User-Manual-for-CF-W7/User-Guide-864347-Page-23.png)
![24Getting StartedUseful InformationTroubleshootingAppendixHard Disk Data Erase UtilityWhen disposing the computer or transferring the ownership, erase all hard disk data in order to avoid data leakage. Even if you erase the data or initialize the hard disk using normal Windows commands, the data can be read with some special software. Use the hard disk data erase utility to erase the data completely.Note that transferring of the ownership without uninstalling the commercial software will be a violation of the software’s license agreement.CAUTIONWhen the hard disk contains the Recover Pro backup data, the Recover Pro backup area is lost as well.NOTEEven if hard disk data erase is performed, the number of times of DVD’s region code setting will not be reset.This utility cannot erase data for specific partitions.It will take 2 to 5 hours to erase the data. (Erasing time varies depending on the capacity of the hard disk.)PreparationPrepare the Product Recovery DVD-ROM for Windows® XP (included).Remove all peripherals.Connect the AC adaptor and do not remove it until hard disk data erase is complete.1 Perform the steps 1 to 9 of “Reinstalling Software” (page 25)In step 2, you do not have to write down all of the contents of the Setup Utility.If [Enter Password] is displayed during the following procedures, input the Supervisor Password or the User Password.2 Press 2 to execute [2. [Erase HDD]].To cancel this operation, press 0.3 At the confirmation message, press Y.4 When [<<< Start menu >>>] is displayed, press Enter.The approximate time required for erasing data will be displayed.5 Press Space.At the confirmation message, press Enter. The hard disk erase process starts. When the operation is completed, the “Hard disk data has been deleted.” message will appear. If a problem has occurred during the operation, an error message will appear.To cancel partway, press Ctrl + C. The data erasure will be up to that point.6 Remove the Product Recovery DVD-ROM, and then press any key to turn off the com-puter.The hard disk data erase utility erases data using an overwriting method, but there is a possibility that due to malfunc-tions or other operational errors, data may not be completely erased. There are also specialized devices that may be able to read data that has been erased using this method. If you need to erase highly confidential data, we recom-mend that you contact a company that specializes in this process. Matsushita Electric Industrial Co., Ltd. will bear no responsibility for losses or damages suffered as a result of the use of this utility.](https://usermanual.wiki/Panasonic-of-North-America/9TGCF-TW71.Final-User-Manual-for-CF-W7/User-Guide-864347-Page-24.png)
![25Getting StartedUseful InformationTroubleshootingAppendixReinstalling SoftwarePreparationPrepare the Product Recovery DVD-ROM for Windows® XP (included).Remove all peripherals.Connect the AC adaptor and do not remove it until reinstallation is complete.CAUTIONWhen using Recover Pro, in the following step 12,• If you select [1] or [2], the backup area will be erased.• If you select [3], Recover Pro will no longer function properly. Select [1] or [2].• Only when you want to save the data which you stored in the separate partitions other than the first partition and the Recover Pro backup area, perform the following steps.ASelect [3].BAfter reinstallation, back up data to external media (e.g., removable disk).CStart the reinstallation again, then select [1] or [2] in the step 12.DReturn the data backed up in external media to the internal hard disk.NOTEEven if reinstallation is performed, the number of times of DVD’s region code setting will not be reset.1 Turn on the computer, and press F2 while [Panasonic] boot screen is displayed.The Setup Utility starts up.If the password is requested, enter the Supervisor Password.2 Write down all of the contents of the Setup Utility and press F9.At the confirmation message, select [Yes] and press Enter.3 Select the [Main] menu, then select [DVD Drive Power] and press Enter.4 Select [On] and press Enter.5 Select the [Boot] menu, then select [Optical Drive] and press F6 until [Optical Drive] is at the top of [Boot priority order].6 Press F10.At the confirmation message, select [Yes] and press Enter.The computer will restart.7 Press F2 while [Panasonic] boot screen is displayed.If the password is requested, enter the Supervisor Password.8 Set the Product Recovery DVD-ROM into the CD/DVD drive.When the disc cover does not open, confirm the following settings.• [DVD Drive] is set to [Enable] in the [Advanced] menu.• [DVD Drive Power] is set to [On] in the [Main] menu.If the setting has not been made, take the following steps.ASet [DVD Drive] to [Enable] and set [DVD Drive Power] to [On].BPress F10. At the confirmation message, select [Yes] and press Enter .The computer will restart.CPress F2 while [Panasonic] boot screen is displayed.DSet the Product Recovery DVD-ROM. 9 Press F10.At the confirmation message, select [Yes] and press Enter.The computer will restart.When you reinstall the software, the hard disk data will be erased. Back up important data to other media or an exter-nal hard disk before reinstallation.Reinstalling software will return the computer to the default condition. The hard disk backup area and the backup data (page 22) will be erased. (If you reinstall Windows in the first partition, the backup area and data will not be erased.) Even if the data is stored in partitions on the hard disk, it may be erased or corrupted.](https://usermanual.wiki/Panasonic-of-North-America/9TGCF-TW71.Final-User-Manual-for-CF-W7/User-Guide-864347-Page-25.png)
![26Getting StartedUseful InformationTroubleshootingAppendixReinstalling Software10 Press 1 to execute [1. [Recovery]].The License Agreement screen appears.To cancel partway, press 0.11 Press 1 to select [1. Yes, I agree to the provisions above and wish to continue!].12 Select the settings.[2]: Enter the size of operating system partition and press Enter.(The size of data partition will be determined by subtracting the operating system partition size from the maximum size.)[3]: Windows will be installed in the first partition. (If the size of the first partition is smaller than the specific value, installation will not be possible.)13 At the confirmation message, press Y.Reinstallation starts automatically. (It will take approximately 20 minutes.)Do not interrupt reinstallation, for example by turning off the computer or pressing Ctrl + Alt + Del. Other-wise reinstallation may become unavailable as Windows may not start up or the data may be corrupted.14 Remove the Product Recovery DVD-ROM, and then press any key to turn off the com-puter.15 Turn on the computer, and press F2 while [Panasonic] boot screen is displayed.The Setup Utility starts up.If the password is requested, enter the Supervisor Password.16 Press F9.At the confirmation message, select [Yes] and then press Enter.The Setup Utility settings excluding the password(s) will return to the default values.17 Press F10.At the confirmation message, select [Yes] and press Enter.The Setup Utility will close, and the computer will restart.18 Perform the first-time operation (page 14).19 Start the Setup Utility and change the settings as necessary.20 Perform Windows Update.](https://usermanual.wiki/Panasonic-of-North-America/9TGCF-TW71.Final-User-Manual-for-CF-W7/User-Guide-864347-Page-26.png)
![27Getting StartedUseful InformationTroubleshootingAppendixTroubleshooting (Basic)/Error Code/MessageFollow the instructions below when a problem has occurred. There is also an advanced troubleshooting guide in the “Reference Manual”. For a software problem, refer to the software’s instruction manual. If the problem persists, contact your technical support office. You can also check the computer’s status in the PC Information Viewer ( Reference Manual “Check the Computer’s Usage Status”).Troubleshooting (Basic)Starting Up and Standby and Hibernation ModeThe computer does not power on/The power indicator or bat-tery indicator is not lit.Connect the AC adaptor.Insert a fully charged battery.Remove the battery pack and the AC adaptor, then connect them again. If an additional RAM module has been inserted, remove the RAM module and check to see if the RAM module is the recommended one.When the CPU temperature is high, the computer may not start up to prevent overheating of the CPU. Wait until the computer cools down, and then turn the power on again. If the com-puter does not power on even after cooling down, contact your technical support office.Windows does not start up. Remove all peripheral devices.• If a device is connected to the USB port, disconnect the device or set [Legacy USB Support] to [Disable] in the [Advanced] menu of the Setup Utility.If an additional RAM module has been inserted, remove the RAM module and check to see if the RAM module is the recommended one.If the power indicator is lit, slide the power switch for four seconds or longer to turn off, then turn on again.Using the following procedure, start up in Safe Mode, and check the error details.ATurn on the computer, and when the [Panasonic] boot screen disappears (after enter-ing the password*1 if one is set) hold down F8.BRelease the key when the Windows Advanced Options Menu appears, and with or , select [Safe Mode], then press Enter.Follow the onscreen instructions.*1 Supervisor Password or User Password set with the Setup UtilityPress F9 in the Setup Utility (page 30 “To start the Setup Utility”) to return the Setup Utility settings (excluding the passwords) to the default values. Start the Setup Utility and make the settings again.There is a beep sound, and either "Extended RAM Mod-ule Failed" or "Standard RAM Failed" appearsIf "Extended RAM Module Failed" appears, the RAM module is not correctly inserted. Turn off the computer, check that the RAM module is a recommended module, then insert it correctly.If "Standard RAM Failed" appears, contact your technical support office.Cannot boot from internal CD/DVD drive.Make sure that the bootable CD/DVD is set properly.Start the Setup Utility, and confirm the following settings.• [DVD Drive] is set to [Enable] in the [Advanced] menu.• [DVD Drive Power] is set to [On] in the [Main] menu.• [Optical Drive] is the first device shown in [Boot priority order] in the [Boot] menu.Bootable CD/DVD created using B’s Recorder in the CF-W4/CF-W5/CF-Y4/CF-Y5 series cannot be used on this computer. If you want to share bootable CD/DVD with those series, create a new bootable CD/DVD.When an external CD/DVD drive is connected, you cannot boot from the internal CD/DVD drive.You have forgotten the password.Supervisor Password or User Password: Contact your technical support office.Administrator password: • If you have a password reset disk, you can reset the administrator password. Set the disk and enter any wrong password, then follow the on-screen instructions and set a new password.• If you do not have a password reset disk, reinstall (page 25) and set up Windows, and then set a new password.Cannot log on to Windows with the SD memory card.The Windows user name and password may not set correctly on the SD memory card. Enter the Windows user name and password without using the SD memory card. After logging on to Windows, set the same user name and the password on the SD memory card and Windows again. ( Reference Manual “SD Security”)Set [SD Slot] to [Enable] in the [Advanced] menu of the Setup Utility.“Remove disks or other media. Press any key to restart” or a similar mes-sage appears.A floppy disk is in the floppy disk drive and it does not contain system startup informa-tion. Remove the floppy disk and press any key.This message may appear with some devices connected to the USB port. Remove the device or set [Legacy USB Support] to [Disable] in the [Advanced] menu of the Setup Utility.If the problem persists after removing the disk, it may be a hard disk failure. Perform the rein-stallation and return the hard disk to its condition at the time of purchase. (page 25) If the problem persists even after the reinstallation, contact your technical support office.](https://usermanual.wiki/Panasonic-of-North-America/9TGCF-TW71.Final-User-Manual-for-CF-W7/User-Guide-864347-Page-27.png)
![28Getting StartedUseful InformationTroubleshootingAppendixTroubleshooting (Basic)/Error Code/Message[Executing Battery Recali-bration] screen appears.The Battery Recalibration was canceled before Windows was shut down last time. To start up Windows, turn off the computer by the power switch, and then turn on.The computer will not auto-matically enter standby/hibernation.If you connect to a network using wireless LAN function, perform access point settings. ( Reference Manual “Wireless LAN”)If you do not use wireless LAN function, turn off wireless LAN function. ( Refer-ence Manual “Wireless LAN”)Make sure that you are not using any software that regularly accesses the hard disk.When logging on (e.g., resuming the computer), audio is distorted.Perform the following steps to change the audio settings to prevent audio output.AClick [start] - [Control Panel] - [Sounds, Speech, and Audio Devices] - [Sounds and Audio Devices], and click [Sounds].BSet [Windows Logon] and [Windows Logoff] to [(None)].Cannot resume. One of the following operations may have been carried out.• In standby mode, the AC adaptor or battery pack was disconnected, or a peripheral was connected or disconnected.• The power switch was slid for four seconds or longer to forcibly turn off the computer.Slide the power switch to turn on the computer. Data not saved will be lost.Other startup problems. Check to see if there was a disk error.ARemove all peripheral devices including an external display.BClick [start] - [My Computer] and right-click [Local Disk(C:)], and click [Properties].CClick [Tools] - [Check Now].DSelect the option in [Check disk options] and click [Start].Start the computer in Safe Mode and check the error details. (Refer to “Windows does not start up” on page 27.)Shutting DownWindows does not shut down.Remove all peripheral devices.Wait one or two minutes. It is not a malfunction.PasswordEven after entering the password, [Type your pass-word] is displayed againIf lights up, press NumLk to disable the ten-key mode, and then input.If lights up, press Caps Lock to disable the Caps Lock mode, and then input.DisplayWhen the screen becomes black for a moment.When you set [Intel video driver power saving function (Intel(R) Display Power Sav-ing Technology)] of Power Saving Utility to [Enable], if you do the following opera-tions, the screen becomes black for a moment, but this is not a malfunction. You can continue to use this.• Adjust the brightness of the screen with Fn + F1 / Fn + F2.• Remove and insert the AC adaptor.While you are using motion video playback software, benchmark software for graphic, if error screen is displayed or application software does not function normally, set [Intel video driver power saving function (Intel(R) Display Power Saving Technology)] to [Disable].No display. The external display is selected. Press Fn + F3 to switch the display. Wait until the dis-play has been switched completely before pressing Fn + F3 again.The display is turned off by the power-saving function. To resume, do not press the direct selection keys, but press any other key like Ctrl.The computer entered standby or hibernation by the power-saving function. To resume, slide the power switch.The screen may become darker. Press Fn + F2 to make the screen brighter.The screen is disordered. Changing the number of display colors and resolution may affect the screen. Restart the computer.The refresh rate of the internal LCD may be 40 hertz. Change the refresh rate of the internal LCD.AClick [start] - [Control Panel] - [Other Control Panel Options] - [Intel(R) GMA Driver for Mobile].BClick [Display Devices] - [Intel(R) Dual Display Clone] - [Display Settings].CIf [Refresh Rate] of the Notebook is [40 Hertz], change to [60 Hertz] and click [OK].The external display does not work normally.If the external display does not support the power saving function, it may not work nor-mally when the computer enters the power saving mode. Turn off the external display.Starting Up and Standby and Hibernation Mode](https://usermanual.wiki/Panasonic-of-North-America/9TGCF-TW71.Final-User-Manual-for-CF-W7/User-Guide-864347-Page-28.png)
![29Getting StartedUseful InformationTroubleshootingAppendix“Phoenix Always Launcher” was used to change the res-olution setting, but that set-ting is not applicable.You cannot set the resolution setting to a value of resolution this computer does not sup-port.BatteryThe battery indicator is lights red.The battery level is very low (the charge is approx. 9% or less).Connect the AC adaptor. You can use the computer when the indicator light is orange. If you do not have an AC adaptor, save your data and power off your computer. After replacing the battery pack with a fully charged one, turn your computer on again.The battery indicator is blinking.If blinking red:Quickly save your data and power off your computer. Remove the battery pack and dis-connect the AC adaptor, then connect them again. If the problem persists, contact your technical support office. The battery pack or charging circuit may be defective.If blinking orange:• Battery cannot be recharged temporarily because the internal temperature of the bat-tery pack is outside the acceptable temperature range for recharging. Your computer can be used normally in this state. Once the range requirement is satisfied, charging begins automatically.• Software applications and peripheral devices (USB devices, etc.) are consuming too much power. Exit the software applications currently running. Once the range require-ment is satisfied, charging begins automatically.The battery indicator is flashing.The battery is recharging. If [Battery Charging Indicator] in [Main] menu of the Setup Utility is set to [Flashing], the indicator will alternately become lighter and darker.Touch PadThe cursor does not work. When using the external mouse, connect it correctly.Restart the computer by using the keyboard. Press , U, and R to select [Restart].If the computer does not respond to keyboard commands, read “No response” (page 30).Cannot input using the touch pad.Set [Touch Pad] to [Enable] in the [Main] menu of the Setup Utility.The drivers for some mice may disable the touch pad. Check your mouse’s operating instructions.Recover ProCannot install Recover Pro Recover Pro cannot be installed when four primary partitions exist. Reduce the number of primary partitions to three or less before installation. You can check the number of the primary partitions in the order of [start] - [Control Panel] - [Performance and Mainte-nance] - [Administrative Tools] - [Computer Management] - [Disk Management].Recover Pro cannot be installed when a backup area is remaining on the hard disk. Try one of the following methods:• If the backup area has complete backup data and you want to restore that data:Follow the “Complete Restore” instructions in “Hard Disk Backup Function (Recover Pro)” to restore the data.• To return the computer to its condition at the time of shipment:Reinstall the software (page 25).• In step 12, do not select “3. Reinstall Windows to the first partition.”• If you do not need the data in the backup area, or if it is corrupted, or if does not include complete backup data: AAccess [http://www.phoenix.com/en/Customer+Services/Utilities/ Recover+Pro+6.htm#Where], and download/install “Cleanup Utility for Recover Pro 6”.BDelete the backup area using “Cleanup Utility for Recover Pro 6”.CReinstall Recover Pro.In this case, all data in the backup area will be lost.An unnecessary backup area is present (is left) when Recover Pro is not installed.AAccess [http://www.phoenix.com/en/Customer+Services/Utilities/ Recover+Pro+6.htm#Where], and download/install “Cleanup Utility for Recover Pro 6”.BDelete the backup area using “Cleanup Utility for Recover Pro 6”.Some parts of the hard disk cannot be File Backed up.The hard disk area encrypted by security software may not be backed up. Exclude the area from the File Backup object.Display](https://usermanual.wiki/Panasonic-of-North-America/9TGCF-TW71.Final-User-Manual-for-CF-W7/User-Guide-864347-Page-29.png)
![30Getting StartedUseful InformationTroubleshootingAppendixTroubleshooting (Basic)/Error Code/MessageFollow the instructions below when an error code or message appears. If the problem persists or if the error code/mes-sage displayed is not shown here, contact your technical support office.To start the Setup UtilityARestart the computer.BPress F2 while [Panasonic] boot screen is displayed.Reference ManualThe Reference Manual is not displayed.Install Adobe Reader.ALog on to Windows as an administrator.BClick [start] - [Run], input [c:\util\reader\AdbeRdr70_enu_full.exe], then click [OK]. Follow the on-screen instructions.CUpdate Adobe Reader to its latest version.If your computer is connected to the internet, start up Adobe Reader and click [Help] - [Check for updates now].Reinstalling B’s Recorder/B’s CLiPA serial number is requested when reinstalling.Input the following serial numberB’s Recorder: LK5PAB-AAAK-8225-0869B’s CLiP: LL5PAB-AAAI-9969-4244OthersNo response. Press Ctrl+Shift+Esc to open Task Manager and close the software application that is not responding.An input screen (e.g., password input screen at startup) may be hidden behind another window. Press Alt+Tab to check.Slide the power switch for four seconds or longer to shut down the computer, and then slide the power switch to turn it on. If the application program does not work normally, uninstall and reinstall the program. To uninstall, click [start] - [Control Panel] - [Add or Remove Programs].Error Code/MessageError Code/Message Solution0211 Keyboard error Disconnect external keyboard.0251 System CMOS checksum bad - Default configuration usedAn error has occurred in the memory of Setup Utility settings. This occurs when the memory con-tent is changed by an unexpected program operation, etc. Start the Setup Utility and return the settings to the default values, and then change the set-tings as necessary.If the problem persists, the internal clock battery may need to be replaced. Contact your tech-nical support office.0271 Check date and time settings The date and time settings are not correct.Start the Setup Utility and set the correct date and time.If the problem persists, the internal clock battery may need to be replaced. Contact your tech-nical support office.0280 Previous boot incomplete - Default configuration usedStartup has failed repeatedly, so the Setup Utility settings have been returned to the default val-ues to startup the computer.Start the Setup Utility and return the settings to the default values, and then change the set-tings as necessary.Press <F2> to Setup Write down the error details and press F2 to start the Setup Utility. Change the settings if necessary.Operating System not foundThe operating system is not installed in the floppy disk or the hard disk that you are going to boot from.If using a floppy disk, change the disk to the one you can use for boot.If using the hard disk, check if the hard disk is recognized in [Information] menu of the Setup Utility. If the hard disk is recognized, perform the reinstallation (page 25). If not, contact your technical support office.If a device is connected to the USB port, disconnect the device, or set [Legacy USB Support] to [Disable] in the [Advanced] menu of the Setup Utility.](https://usermanual.wiki/Panasonic-of-North-America/9TGCF-TW71.Final-User-Manual-for-CF-W7/User-Guide-864347-Page-30.png)
![31Getting StartedUseful InformationTroubleshootingAppendixHardware DiagnosticsIf the hardware installed in this computer is not operating properly, you can use the PC-Diagnostic Utility to determine whether or not there is a problem. If the utility discovers a problem in the hardware, contact your technical support office.Hardware below can be checked using this utility. (Software cannot be checked.)CPUMemoryHard DiskCD/DVD DriveVideo ControllerSound*1ModemLANWireless LAN*2Wireless WAN*3Bluetooth*4USBPC Card ControllerSD Card ControllerKeyboardTouch Pad*1 When the PC-Diagnostic Utility is running, a loud beep will sound, so do not use headphones at this time. (The beep will not sound if mute is using Windows.)*2 Only for model with wireless LAN*3 Only for model with wireless WAN*4 Only for model with BluetoothWhen the video diagnostic check is running, the display may be distorted, and when the audio diagnostic check is running, sounds may be generated from the speaker. These are not malfunctions. NOTEFor the hard disk only, you can select standard diagnostic check or extended diagnostic check.When the PC-Diagnostic Utility starts up, it will run the standard diagnostic check. We recommend that you use the touch pad for operations. When not using the touch pad, you can operate using the internal keyboard instead. If the touch pad does not operate properly, press Ctrl + Alt + Del to restart the computer, or slide the power switch to turn the power off, and then restart the PC-Diagnostic Utility. Run this utility using the default settings in the Setup Utility. If the Setup Utility or other settings will not allow a hardware to be executed, the hardware icon will be displayed in gray.1 Connect the AC adaptor, and turn on the wireless switch. During the diagnostic check, do not remove the AC adaptor, or attach any peripheral devices.2Turn on or restart the computer, and press F2 while [Panasonic] boot screen is displayed.The Setup Utility starts up.If the password is requested, enter the Supervisor Password.If you are using the computer after changing the settings from the status at the time of purchase, we recom-mend that you make a note of the settings that are changed.Hardware that can be checked using the PC-Diagnostic UtilityRegarding the PC-Diagnostic UtilityOperations Touch pad operations Internal keyboard operationsSelect icon Place the cursor above the iconPress Space and then press ( (close) cannot be selected)Click the icon Tap or click (right click cannot be used) Press Space above the iconComplete the PC- Diagnos-tic Utility and then restart the computerClick (close) Press Ctrl + Alt + Del.Running the Diagnostic Check](https://usermanual.wiki/Panasonic-of-North-America/9TGCF-TW71.Final-User-Manual-for-CF-W7/User-Guide-864347-Page-31.png)
![32Getting StartedUseful InformationTroubleshootingAppendixHardware Diagnostics3 Press F9.At the confirmation message, select [Yes] and press Enter.4 Select the [Main] menu, set [DVD Drive Power] to [On].5 Press F10.At the confirmation message, select [Yes] and press Enter.The computer will restart.6 Press Ctrl + F7 while [Panasonic] boot screen is displayed.When the PC-Diagnostic Utility starts up, it will automatically begin the diagnostic check for all hardware components. If the password is requested, enter the password.The touch pad and the internal keyboard cannot be used until alternating blue and yellow colors are displayed on the left side of the hardware icon (A). By clicking the icon, you can execute the following operations:• : Start the diagnostic check from the beginning• : Stop the diagnostic check (You cannot restart the check partway through by clicking )• : Display help (click the screen or press Space to return to the original diagnostic check screen)You can check the status of the diagnostic check by the display color on the left side of the hardware icon (A). • Aqua: Not running diagnostic check• Alternating blue and yellow: Currently running diagnostic check. The interval of the alternating colors differs depending on the type of diagnostic check currently running. During memory diagnostic check, the display may freeze for a long period of time. Wait until the process is complete. • Green: No problems discovered• Red: Problems discoveredNOTEUsing the following procedure, you can run a diagnostic check on a specified hardware component, or run an extended diagnostic check on the hard disk (The extended diagnostic check is only for the hard disk). The extended diagnostic check is more detailed, and so requires a longer period of time to run.AClick to stop the diagnostic check.BClick the icon for the hardware that is not to be checked, so that the icon is displayed in gray (B). When running a check on the hard disk, clicking the icon once will turn on the extended diagnostic check (“FULL” (C) will be displayed below the icon); click again, and the icon will be displayed in gray.CClick to start the diagnostic check.7 When all the hardware has been checked, confirm the diagnostic check results. If the display is red and the message “Check Result TEST FAILED” is displayed, you can assume that there is a problem with the computer’s hardware. Confirm which hardware component is displayed as red, and contact your technical support office. If the display is green and the message “Check Result TEST PASSED” is displayed, the computer’s hardware is operating normally. Continue using the computer as it is. If the computer still does not operate properly, reinstall the software. (page 25)NOTEIf you run a memory diagnostic check after installing a new RAM module (sold separately) and the message “Check Result TEST FAILED” is displayed:Remove the additional RAM module and run the diagnostic check again. If the message “Check Result TEST FAILED” is still displayed, you can assume that there is a problem with the internal RAM module. 8 After the diagnostic check is complete, click (close), or press Ctrl + Alt + Del to restart the computer. NOTEWhen you set [DVD Drive Power] to [On] in the [Main] menu of Setup Utility, you will hear operation sound from CD/DVD drive soon after the computer starts the startup procedure. To avoid the sound when the computer is starting up, set [DVD Drive Power] to [Off].ABC](https://usermanual.wiki/Panasonic-of-North-America/9TGCF-TW71.Final-User-Manual-for-CF-W7/User-Guide-864347-Page-32.png)
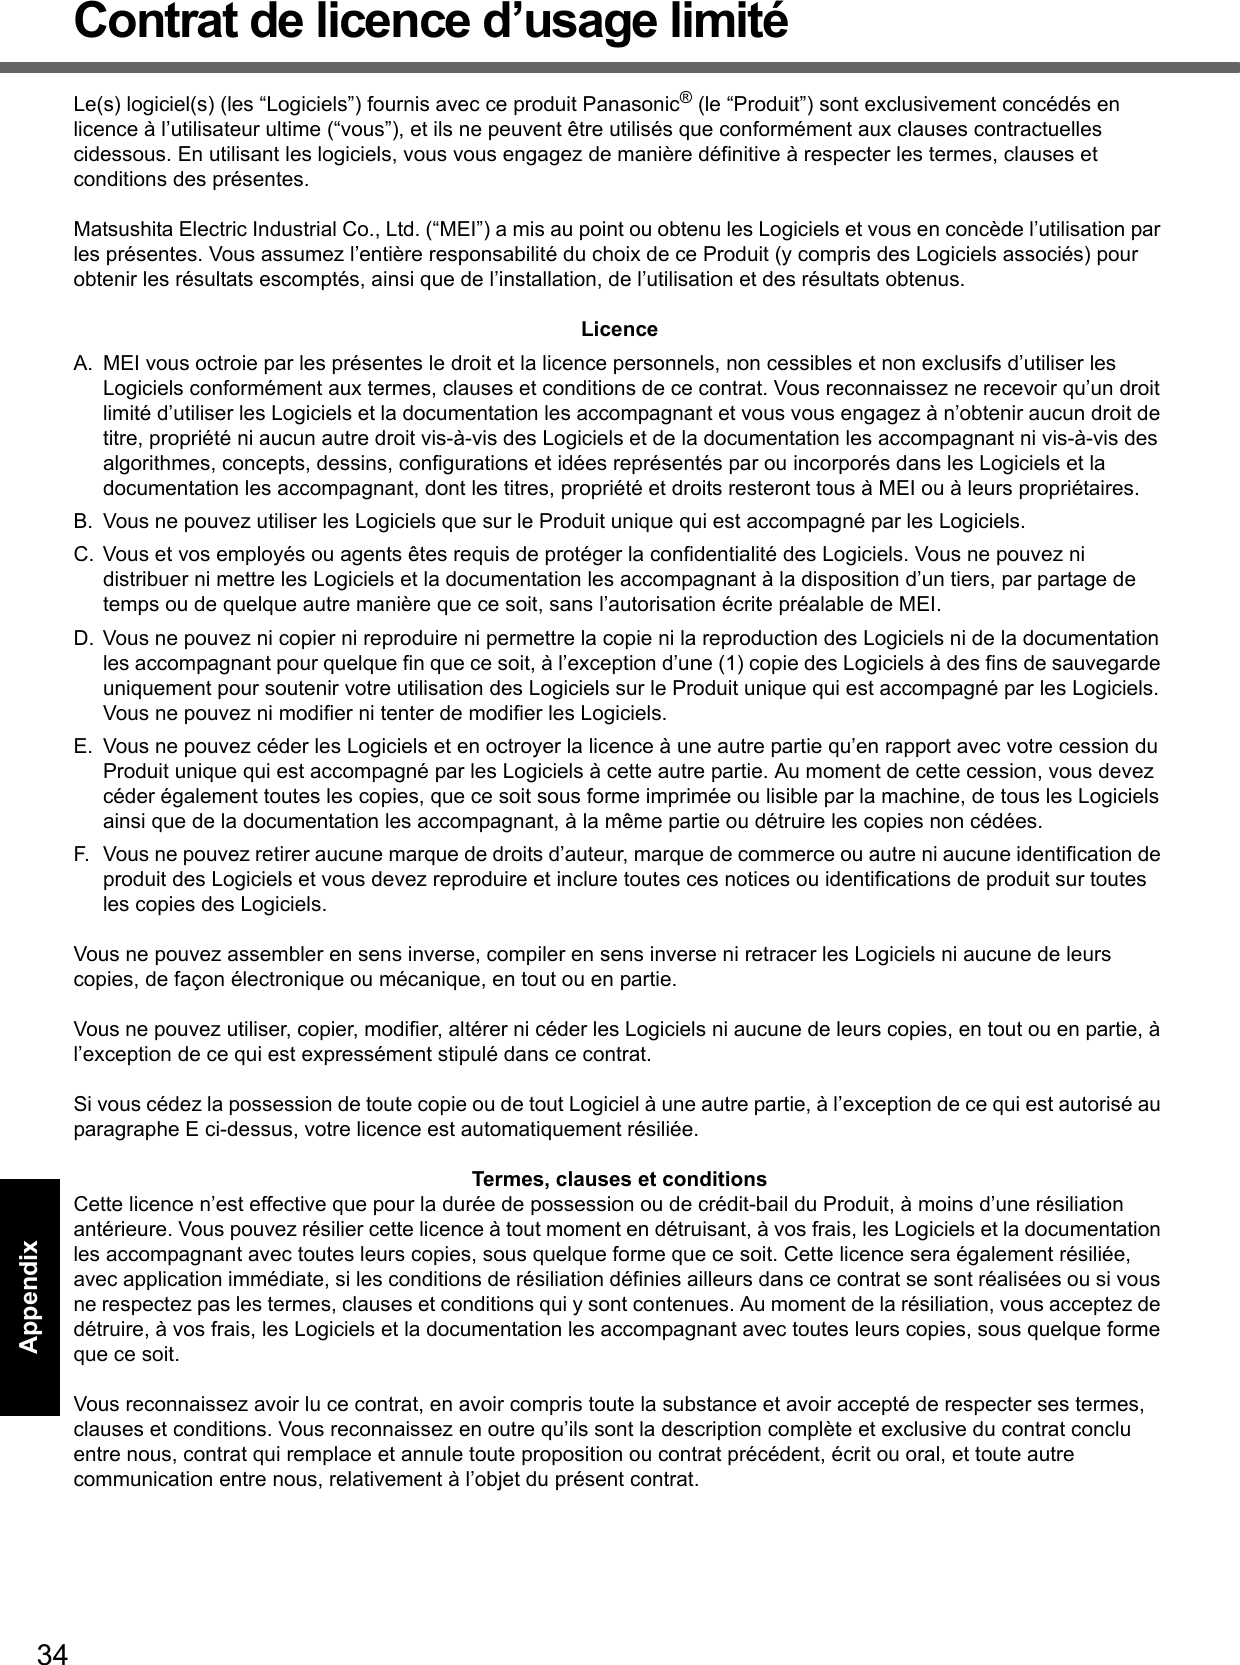
![35Getting StartedUseful InformationTroubleshootingAppendixSpecificationsTo check CPU speed, memory size and the hard disk drive (HDD) size:Start the Setup Utility ( Reference Manual “Setup Utility”) and select [Information] menu.[CPU Speed]: CPU speed, [System Memory]: Memory size, [Primary Master]: Hard disk drive sizeMain SpecificationsModel No. CF-W7BWAZZAMCPU/Secondary cache memory Intel® Core™ 2 Duo Processor Ultra Low Voltage U7500 (1.06 GHz, 2 MB*1 L2 cache, 533 MHz FSB)Chip Set Mobile Intel® GM965 Express chip setMain Memory*2 1 GB*1, DDR2 SDRAM (2 GB*1 Max.)Video Memory UMA (384 MB*1 Max.)*3Hard Disk Drive 80 GB*4CD/DVD Drive DVD MULTI Drive built-in, Buffer underrun error prevention function: SupportedContinuous Data Trans-fer Speed*5*6 Reading*7 DVD-RAM*8: 3X (4.7 GB*4) DVD-R*9: 8X (Max.) DVD-R DL: 4X (Max.) DVD-RW: 4X (Max.) DVD-ROM: 8X (Max.) CD-ROM: 24X (Max.) CD-R: 24X (Max.) CD-RW: 24X (Max.) +R: 8X (Max.) +R DL: 4X (Max.) +RW: 4X (Max.)Writing*10 DVD-RAM*8: 2X/2-3X (4.7 GB*4) DVD-R: 1X/2X/2-4X/2-8X DVD-RW: 1X/2X/2-4X +R: 2.4X/2.4-4X/2.4-8X +RW*11: 2.4X/2.4-4X CD-R: 4X/8X/8-12X/8-16X CD-RW: 4X High-Speed CD-RW: 4X/8X/10XSupported Discs/For-mat*6 Reading DVD-ROM (Single Layer, Dual Layer) DVD-Video DVD-R*9(1.4 GB, 4.7 GB)*4 DVD-R DL (8.5 GB)*4 DVD-RW (Ver.1.1/1.2 1.4 GB, 2.8 GB, 4.7 GB, 9.4 GB)*4 DVD-RAM*8 (1.4 GB, 2.8 GB, 4.7 GB, 9.4 GB)*4 +R (4.7 GB)*4 +R DL (8.5 GB)*4 +RW (4.7 GB)*4CD-Audio CD-ROM (XA compatible) CD-R Photo CD (multiple session compatible) Video CD CD-EXTRA CD-RW CD-TEXTWriting DVD-RAM*8 (1.4 GB, 2.8 GB, 4.7 GB, 9.4 GB)*4 DVD-R (1.4 GB, 4.7 GB for Gen-eral)*4 DVD-RW (Ver.1.1/1.2 1.4 GB, 2.8 GB, 4.7 GB, 9.4 GB)*4 +R (4.7 GB*4) +RW*11 (4.7 GB*4) CD-R CD-RWDisplay Method 12.1 XGA type (TFT) (1024 × 768 dots)Internal LCD 65,536/16,777,216 colors (1024 × 768 dots)*12External Display*13 65,536/16,777,216 colors (800 × 600 dots/1024 × 768 dots/1280 × 768 dots/1280 × 1024 dots/1400 × 1050 dots/1440 × 900 dots/1600 × 1200 dots)Simultaneous Display on LCD + Exter-nal Display*13 65,536/16,777,216 colors (800 × 600 dots, 1024 × 768 dots)*12Wireless LAN Intel® Wireless WiFi Link 4965 AGN*14 (page 36)Bluetooth*15 page 36LAN*16 IEEE 802.3 10Base-T, IEEE 802.3u 100Base-TX, IEEE 802.3ab 1000Base-TModem Data: 56 kbps (V.92) FAX: 14.4 kbpsSound WAVE and MIDI playback, Intel® High Definition Audio subsystem support, Monaural Speaker (built in)Security Chip TPM (TCG V1.2 compliant)*17Card Slots PC Card Slot × 1, Type I or Type II, Allowable current 3.3 V: 400 mA, 5 V: 400 mASD Memory Card Slot*18 × 1RAM Module Slot × 1, DDR2 SDRAM, 200-pin, 1.8 V, SO-DIMM, PC2-4200 Compliant*19Interface USB Ports × 3 (USB2.0 × 3)*20 / Modem Port (RJ-11) / LAN Port (RJ-45) *16 /External Display Port: Mini Dsub 15-pin female / Microphone Jack: Miniature jack, 3.5 DIA / Headphone Jack: Miniature jack, 3.5 DIA / Mini Port Replicator connector: Dedi-cated 50-pin maleKeyboard/Pointing Device 83 keys/Touch PadPower Supply AC adaptor or Battery packAC Adaptor*21 Input: 100 V - 240 V AC, 50 Hz/60 Hz Output: 16 V DC, 3.75 A](https://usermanual.wiki/Panasonic-of-North-America/9TGCF-TW71.Final-User-Manual-for-CF-W7/User-Guide-864347-Page-35.png)
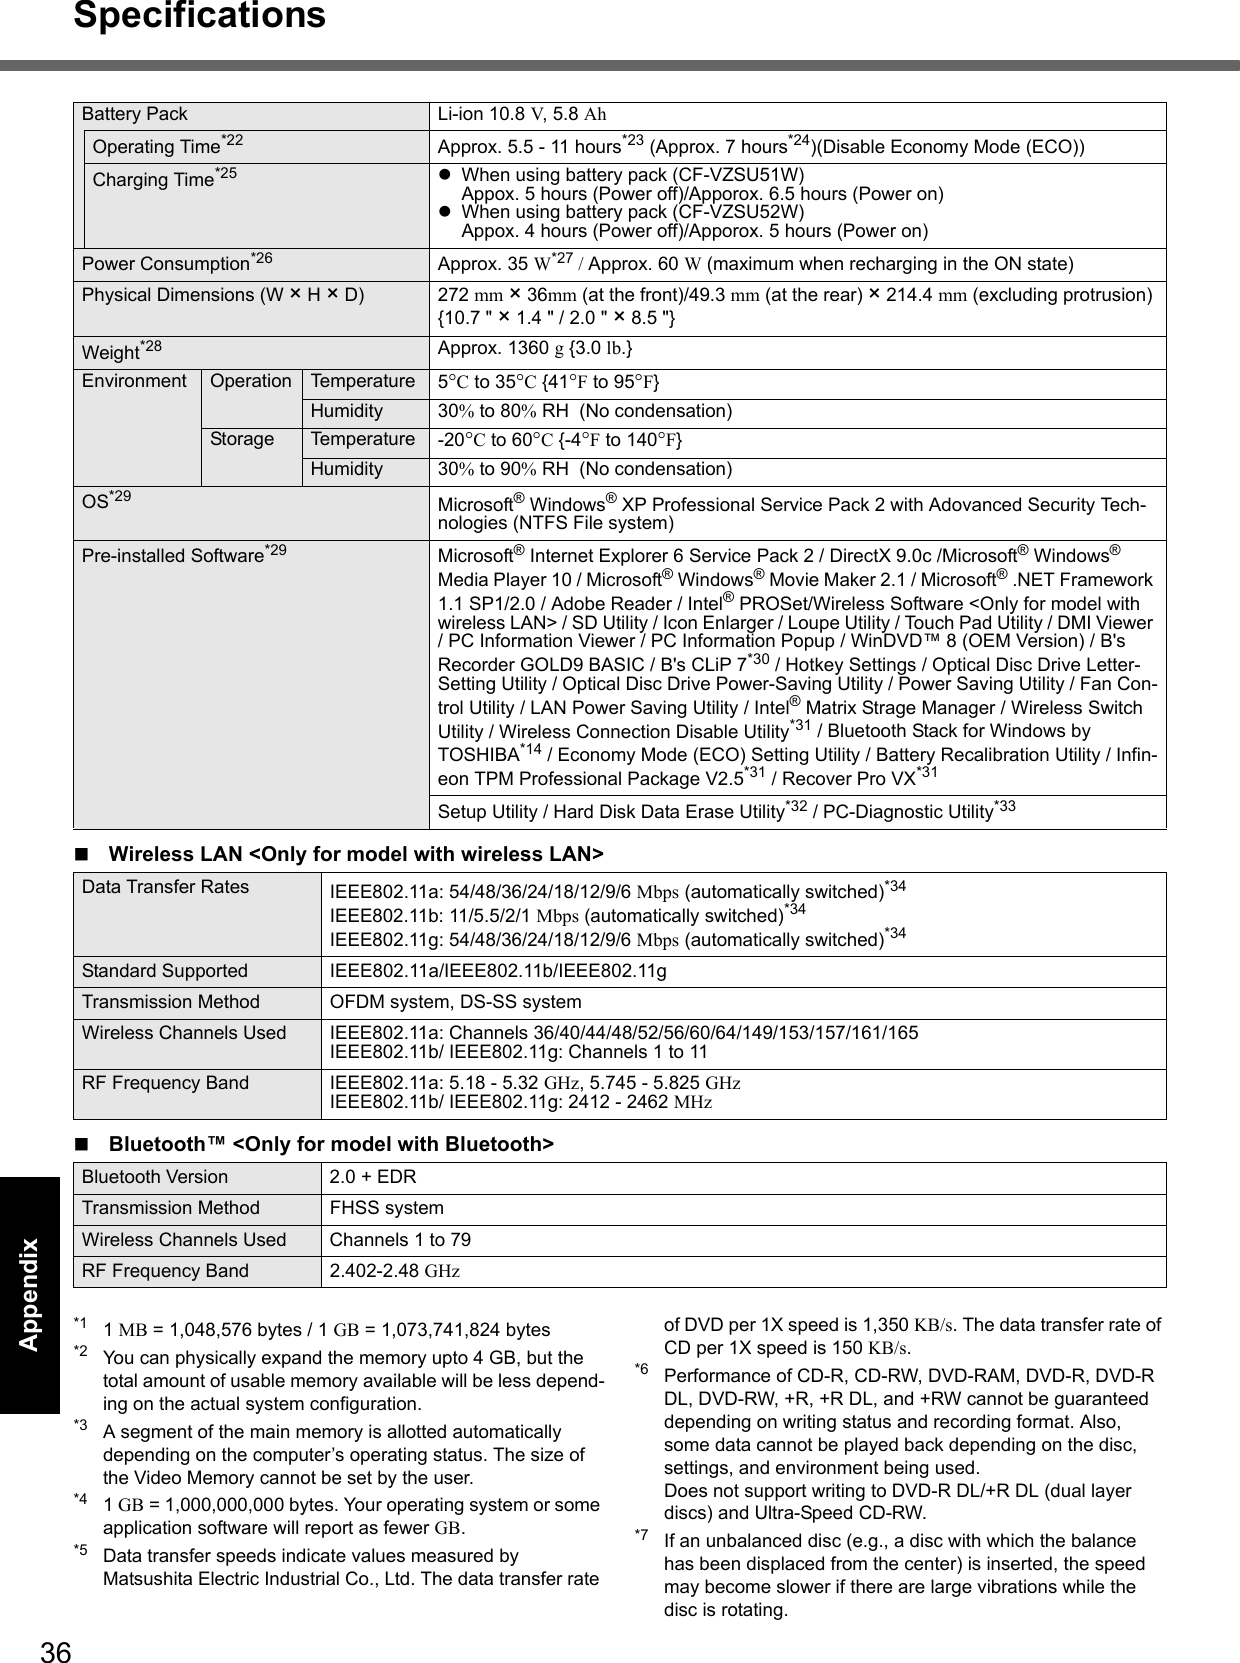
![37Getting StartedUseful InformationTroubleshootingAppendix*8 Only non-cartridge type or removable cartridge type can be used. *9 DVD-R is compatible with 4.7 GB (for General) playback. DVD-R (for Authoring) playback is compatible with discs recorded using Disc-at-Once recording.*10 Depending on the disc, the writing speed may become slower.*11 Does not support writing to High Speed +RW.*12 A 16,777,216 color display is achieved by using the dithering function. *13 Display may be impossible using some connected external displays.*14 Only for model with wireless LAN. It does not correspond to IEEE802.11n.*15 Only for model with Bluetooth.*16 Some devices cannot be used depending on the port type.*17 For information on TPM, click [start] - [Run] and input “c:\util\drivers\tpm\README.pdf” and refer to the Installation Manual of “Trusted Platform Module (TPM)”.*18 Operation has been tested and confirmed using Panasonic SD/SDHC Memory Cards with a capacity of up to 8 GB.Operation on other SD equipment is not guaranteed.*19 Only a RAM module designed for DDR2 (PC2-4200) can be added (Panasonic : CF-BAK0512U, CF-BAK1024U).172 pin Micro DIMM used in CF-T5/CF-W5 series cannot be used.*20 Does not guarantee operation of all USB-compatible periph-erals.*21 <Only for North America>The AC adaptor is compatible with power sources up to 240 V AC adaptor. This computer is supplied with a 125 V AC compatible AC cord.20-M-2-1*22 Varies depending on the usage conditions, or when an optional device is attached. When Economy Mode (ECO) is enabled, the operating time becomes approximately 20% shorter than when it is dis-abled.*23 Measured using Battery Mark™ Version 4.0.1 (LCD bright-ness : Maximum - Minimum).*24 Measured using MobileMark™ 2007 (LCD brightness : 60 cd/m2)*25 Varies depending on the usage conditions, CPU speed, etc.It may take a long time to charge a fully discharged battery.*26 Approx. 0.7 W when the battery pack is fully charged (or not being charged) and the computer is off.*27 Rated power consumption.23-E-1*28 Average value. May differ depending on models.*29 Operations of this computer are not guaranteed except for the pre-installed OS.*30 Preinstalled B’s CLiP does not support CD-R, DVD-R, +R and DVD-RAM.*31 Must be installed before use. *32 The Product Recovery DVD-ROM is required.*33 For startup methods, refer to “Hardware Diagnostics” (page 31). *34 These are speeds specified in IEEE802.11a+b+g standards. Actual speeds may differ.](https://usermanual.wiki/Panasonic-of-North-America/9TGCF-TW71.Final-User-Manual-for-CF-W7/User-Guide-864347-Page-37.png)
