Panasonic of North America 9TGWL13A Model 7260NGW Wireless Network Adapter User Manual DFQW5986ZAT FZ G1mk2 8 1Update OI M indb
Panasonic Corporation of North America Model 7260NGW Wireless Network Adapter DFQW5986ZAT FZ G1mk2 8 1Update OI M indb
Contents
User manual 2 of 2
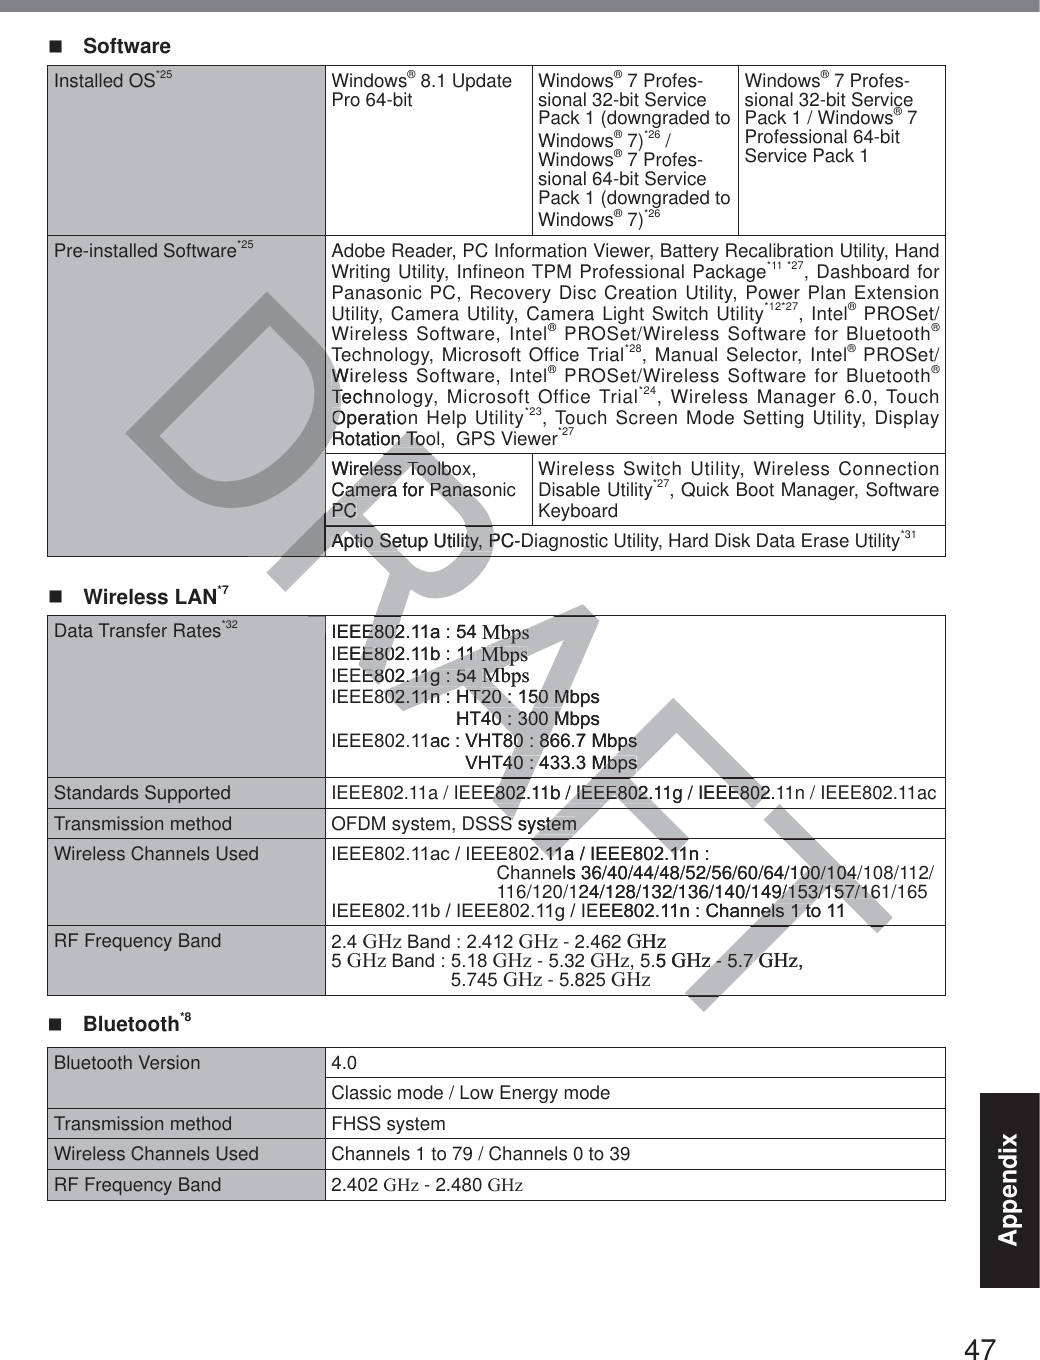
![8Read Me FirstInformation to the User / Informations destinées aux utilisateurs<Only for model with wireless LAN/Bluetooth>This product and your HealthThis product, like other radio devices, emits radio frequency electromagnetic energy. The level of energy emitted by this product how-ever is far much less than the electromagnetic energy emitted by wireless devices like for example mobile phones.Because this product operates within the guidelines found in radio frequency safety standards and recommendations, we be-lieve this product is safe for use by consum-ers. These standards and recommendations UHÀHFWWKHFRQVHQVXVRIWKHVFLHQWL¿FFRP-munity and result from deliberations of panels and committees of scientists who continually review and interpret the extensive research literature.In some situations or environments, the use of this product may be restricted by the propri-etor of the building or responsible represen-tatives of the organization. These situations PD\IRUH[DPSOHLQFOXGHz Using this product on board of airplanes, orz In any other environment where the risk of interference to other devices or services is SHUFHLYHGRULGHQWL¿HGDVKDUPIXOIf you are uncertain of the policy that applies RQWKHXVHRIZLUHOHVVGHYLFHVLQDVSHFL¿FRU-ganization or environment (e.g. airports), you are encouraged to ask for authorization to use this product prior to turning on the product.Regulatory InformationWe are not responsible for any radio or tele-vision interference caused by unauthorized PRGL¿FDWLRQRIWKLVSURGXFW7KHFRUUHFWLRQof interference caused by such unauthorized PRGL¿FDWLRQZLOOEHWKHUHVSRQVLELOLW\RIWKHuser. We and its authorized resellers or dis-tributors are not liable for damage or violation of government regulations that may arise from failing to comply with these guidelines. 26-M-1<Uniquement pour les modèles avec réseau ORFDOVDQV¿OHWRX%OXHWRRWK!Ce produit et votre santéCe produit, comme tout autre appareil radio, émet de l’énergie radioélectrique. Toutefois, la quantité d’énergie émise par ce produit est beaucoup moins importante que l’énergie radioélec-WULTXHpPLVHSDUGHVDSSDUHLOVVDQV¿OWHOVque les téléphones portables. L’utilisation de ce produit ne comporte aucun risque pour le consommateur du fait que cet appareil opère dans les limites des directives concernant les normes et les recommendations de sécu-rité sur les fréquences radio. Ces normes et UHFRPPDQGDWLRQVUHÀqWHQWOHFRQVHQVXVGHODFRPPXQDXWpVFLHQWL¿TXHHWUpVXOWHQWGHdélibérations de jurys et comités de scienti-¿TXHVTXLH[DPLQHQWHWLQWHUSUqWHQWFRQWLQXHO-lement les nouveautés de la vaste littérature sur les recherches effectuées. Dans certaines situations ou environnements, l’utilisation de ce produit peut être restreinte par le proprié-taire du bâtiment ou par les représentants responsables de l’organisation. Ces situations SHXYHQWrWUHOHVVXLYDQWHVSDUH[HPSOHz A bord d’un avion, ouz Dans tout autre environnement où les risques d’interférence sur d’autres appa-reils ou services sont perçus ou identi-¿DEOHVFRPPHGDQJHUHX[Si vous n’êtes pas sûr de la réglementation applicable à O¶XWLOLVDWLRQG¶DSSDUHLOVVDQV¿OGDQVXQHRUJD-QL]DWLRQRXXQHQYLURQQHPHQWVSpFL¿TXHSDUexemple dans un aéroport) nous vous invitons à demander l’autorisation d’utiliser ce produit avant sa mise en marche.Informations concernant la réglementationNous déclinons toute responsabilité pour toute interférence radio ou télévision causée SDUGHVPRGL¿FDWLRQVQRQDXWRULVpHVDSSRU-tées à ce produit. La correction G¶LQWHUIpUHQFHVFDXVpHVSDUGHWHOOHVPRGL¿-cations non autorisées sera la seule respon-sabilité de son utilisateur. Nousmêmes, les UHYHQGHXUVRI¿FLHOVHWOHVGLVWULEXWHXUVQHsommes pas responsable de tout dégât ou de toute violation des règlements de l’État pou-vant découler du non-respect de ces direc-tives. 26-F-1Regulatory Informationin rain rrecommrecommduct is safe fduct is safe standards and rstandards and HFRQVHQVXVRIWKHVHFRQVHQVXVRIWKHy and result from deliberatiy and result from delib committees of scientists who c committees of scientistiew and interpret the extensive reiew and interpret the extensive reture.ture.e situations or environments, the ue situations or environments, the uoduct may be restricted by the propduct may be restricted by the prouilding or responsible represen-esponsible represen-organization. These situations zation. These situationsLQFOXGHQFOXGHuct on boaruct od of airplanes, of airplanement wwhere the risk of herevices or services is ces or services is VKDUPIXOKDUPIXOcy that applies cy that applies DVSHFL¿FRUDVSHFL¿FRU--ports), you uon to use e uct.OQL]DQL]Dexempexeà demanà dd’utiliser cedInformations cations cNous déclinons todéclinons totoute interférence rae interférence raSDUGHVPRGL¿FDWLRQVQSDUGHVPRGL¿FDWLRQVtées à ce produit. La corrtées à ce produit. La corrG¶LQWHUIpUHQFHVFDXVpHVSDUG¶LQWHUIpUHQFHVFDXVpHVSDcations non autorisées sera laon autorisées sera lasabilité de son utilisateur. Nousm. NousmHYHQGHXUVRI¿FLHOVHWOHVGLVWULEXWOHVGLVWULEXWmmes pas responsable de tout dénsable de tout déviolation des règlements de ls règlements de lppcouler du non-respect dedu non-](https://usermanual.wiki/Panasonic-of-North-America/9TGWL13A.User-manual-2-of-2/User-Guide-2291061-Page-8.png)
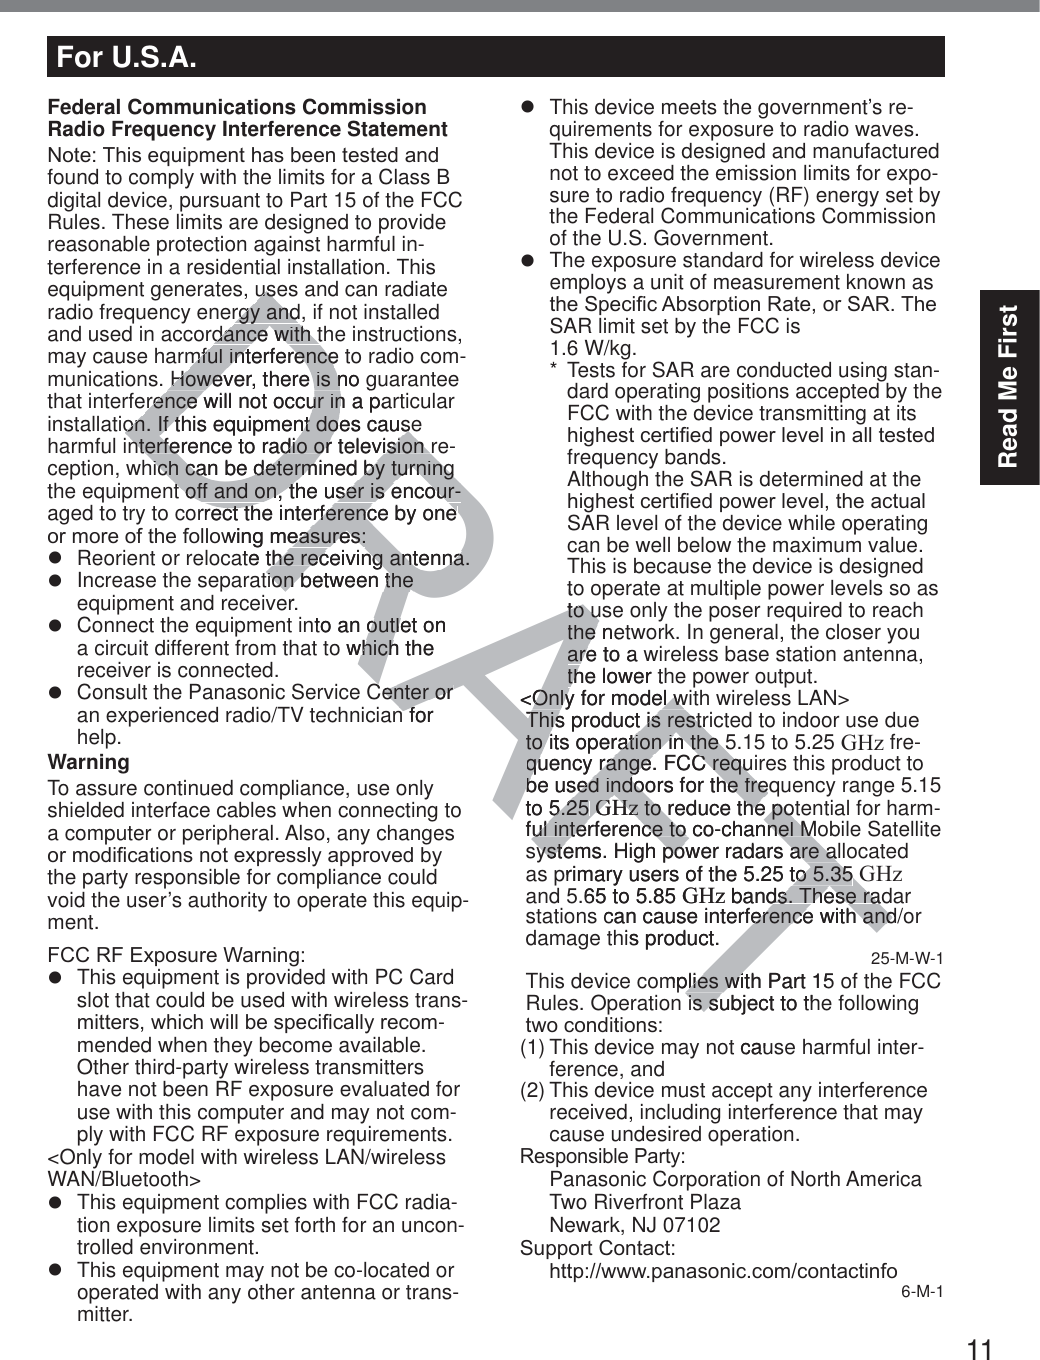
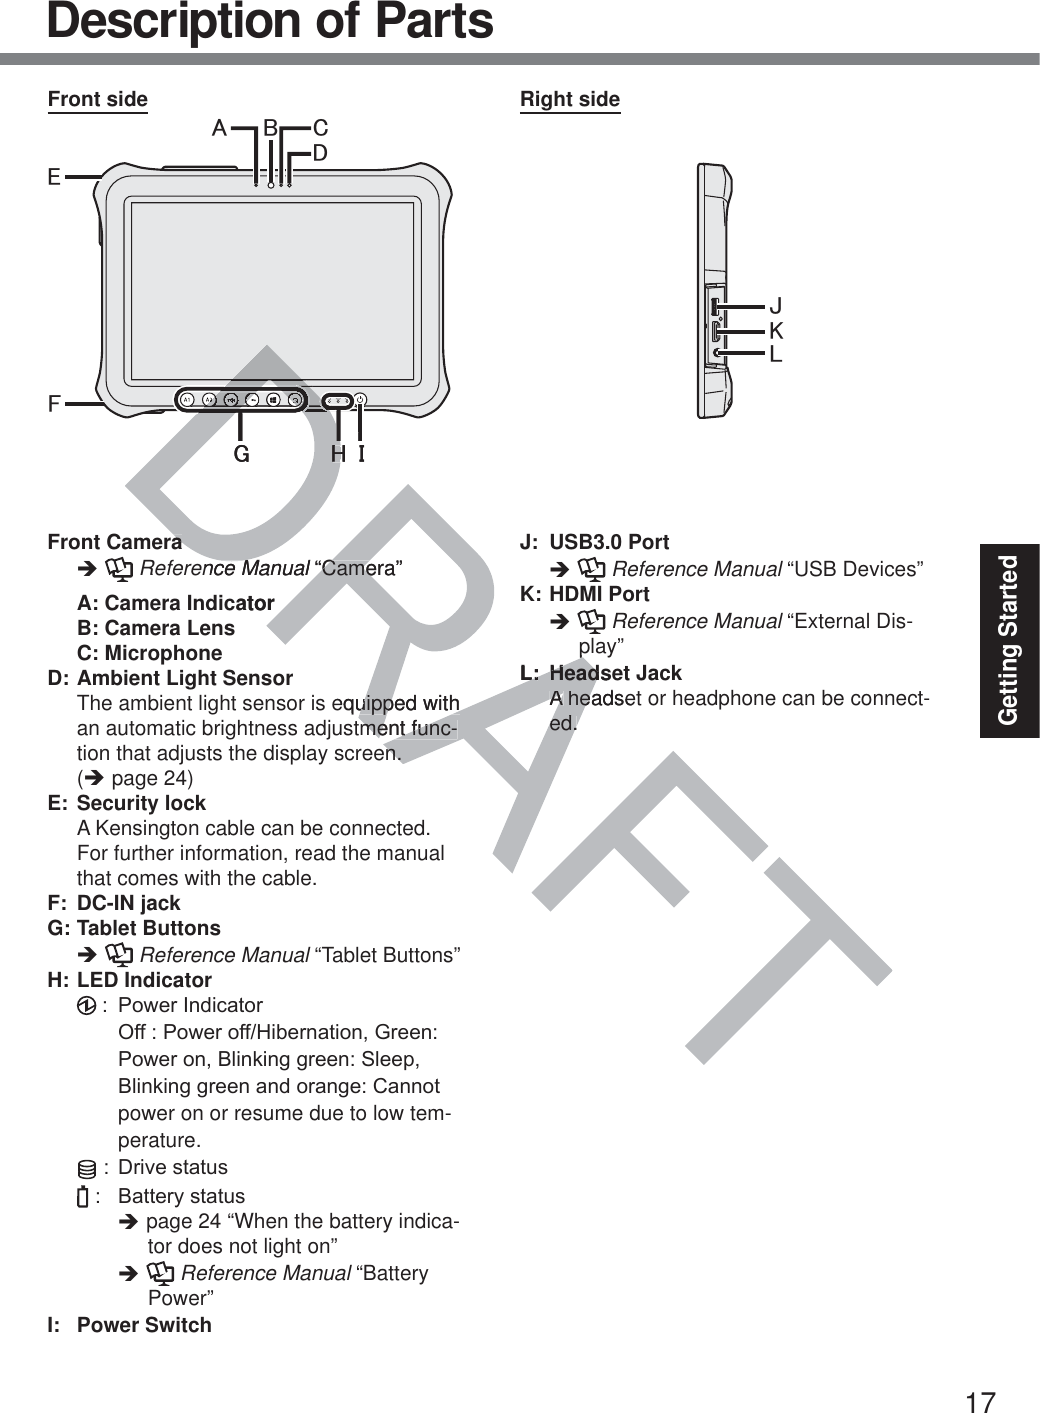
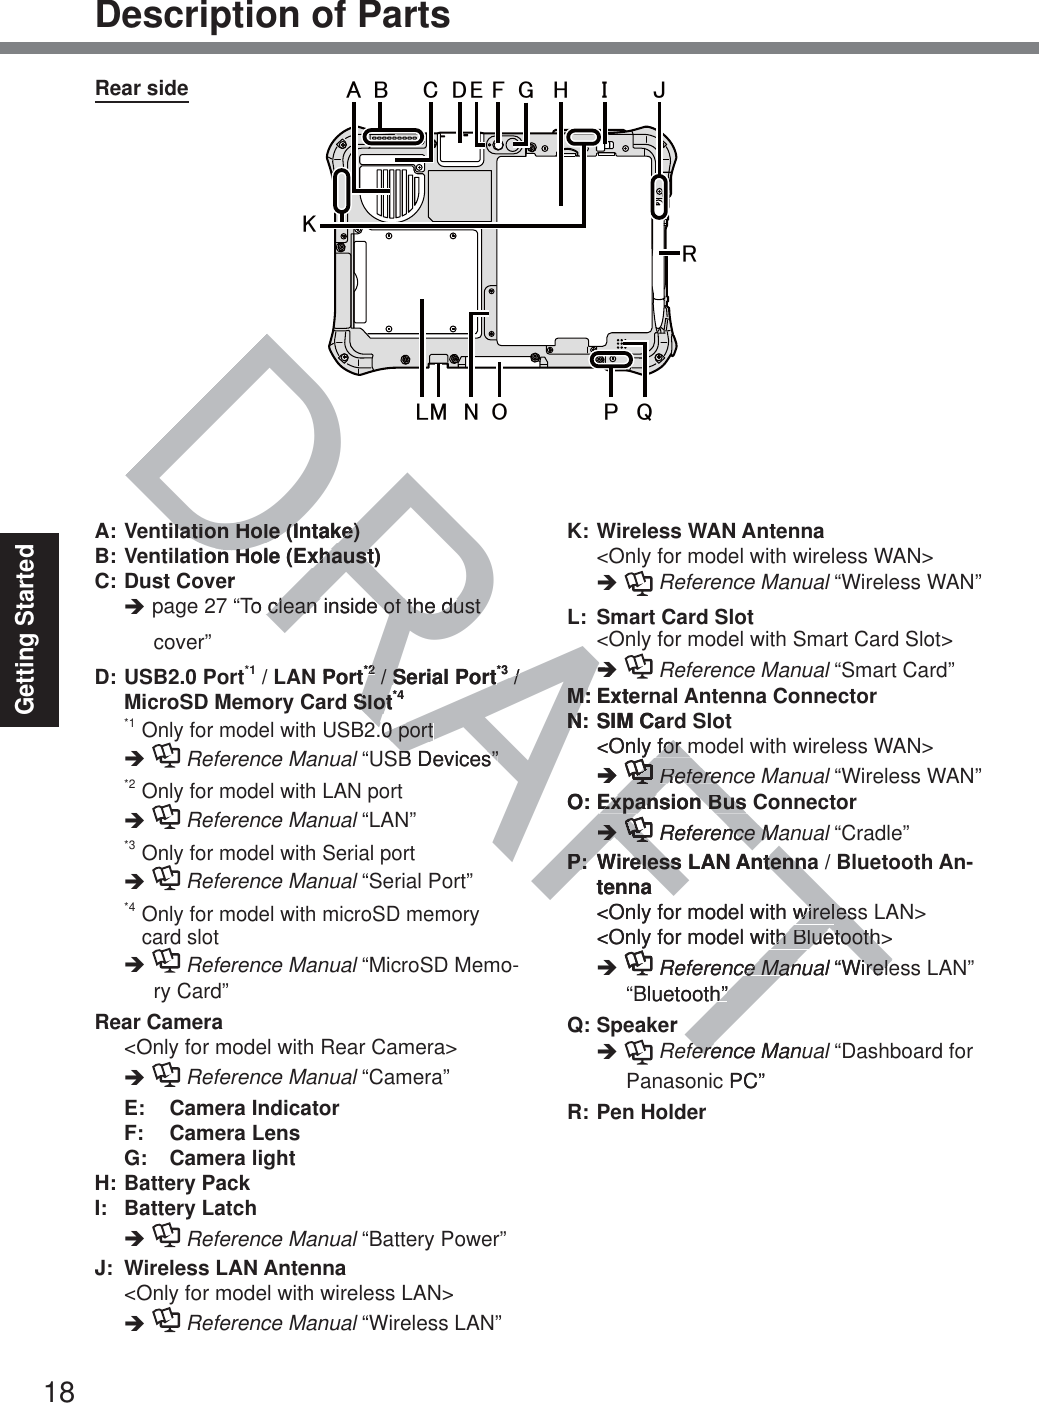
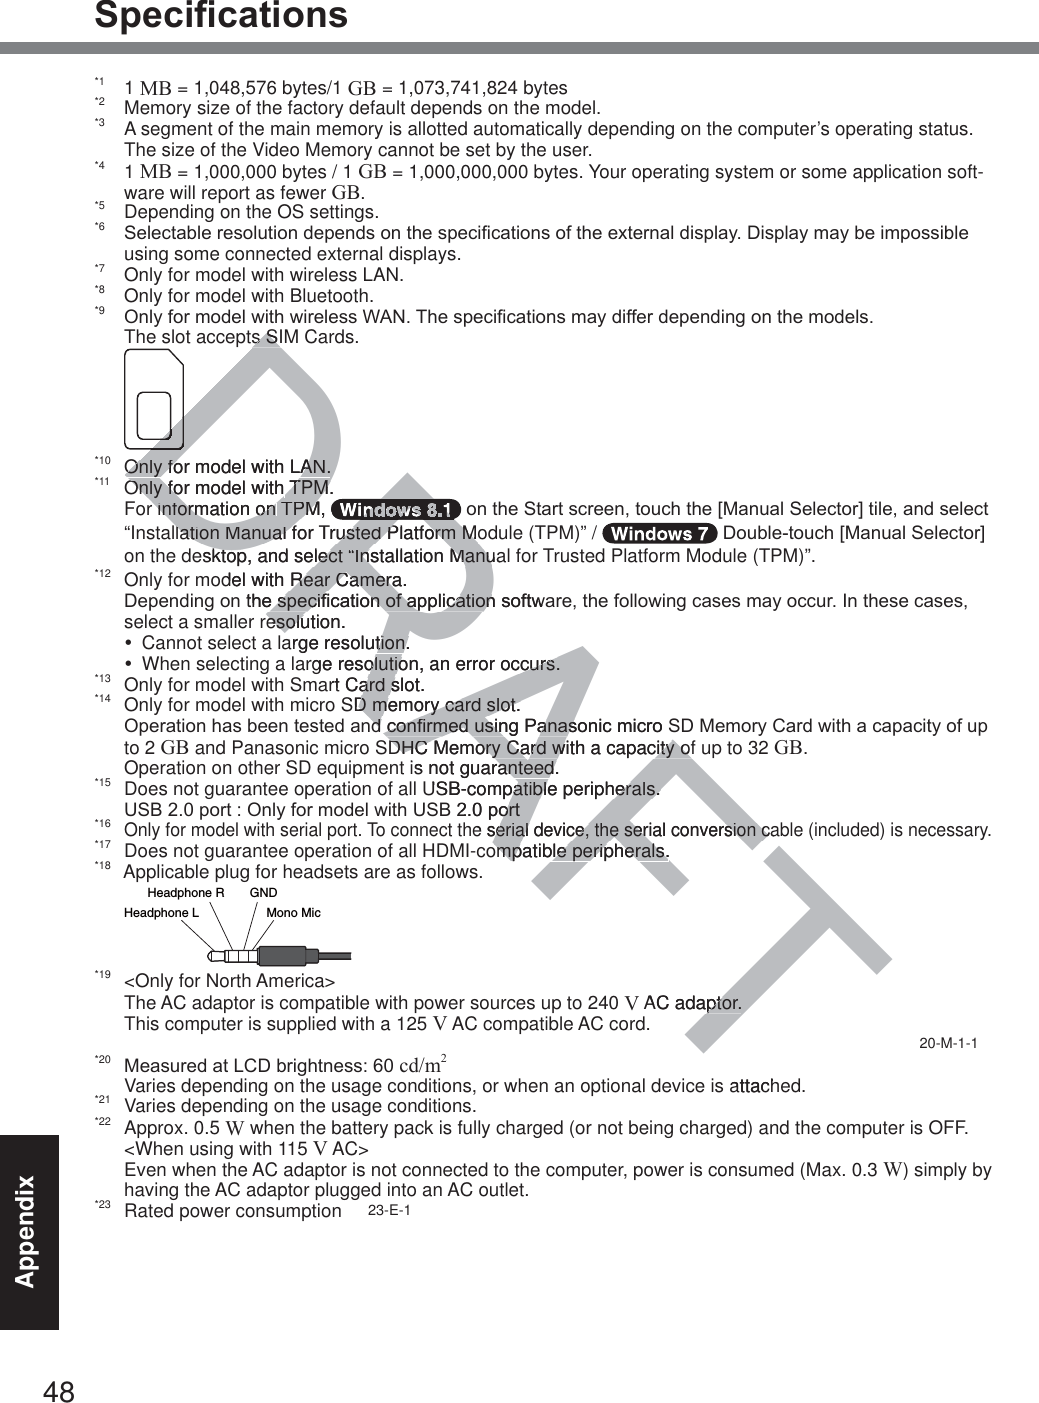
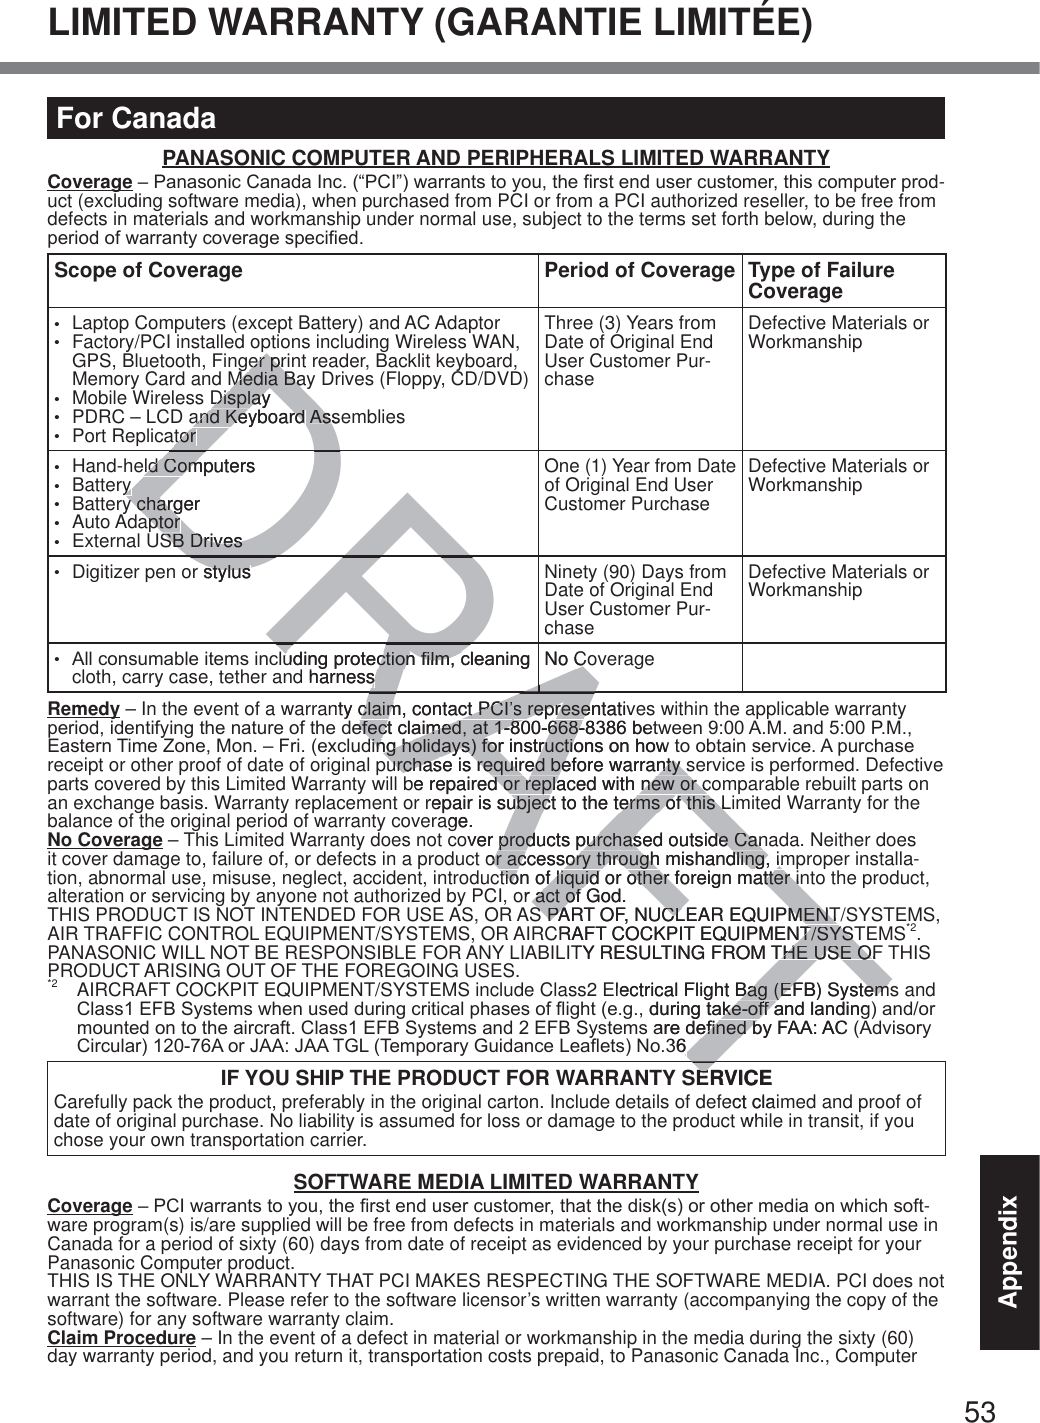
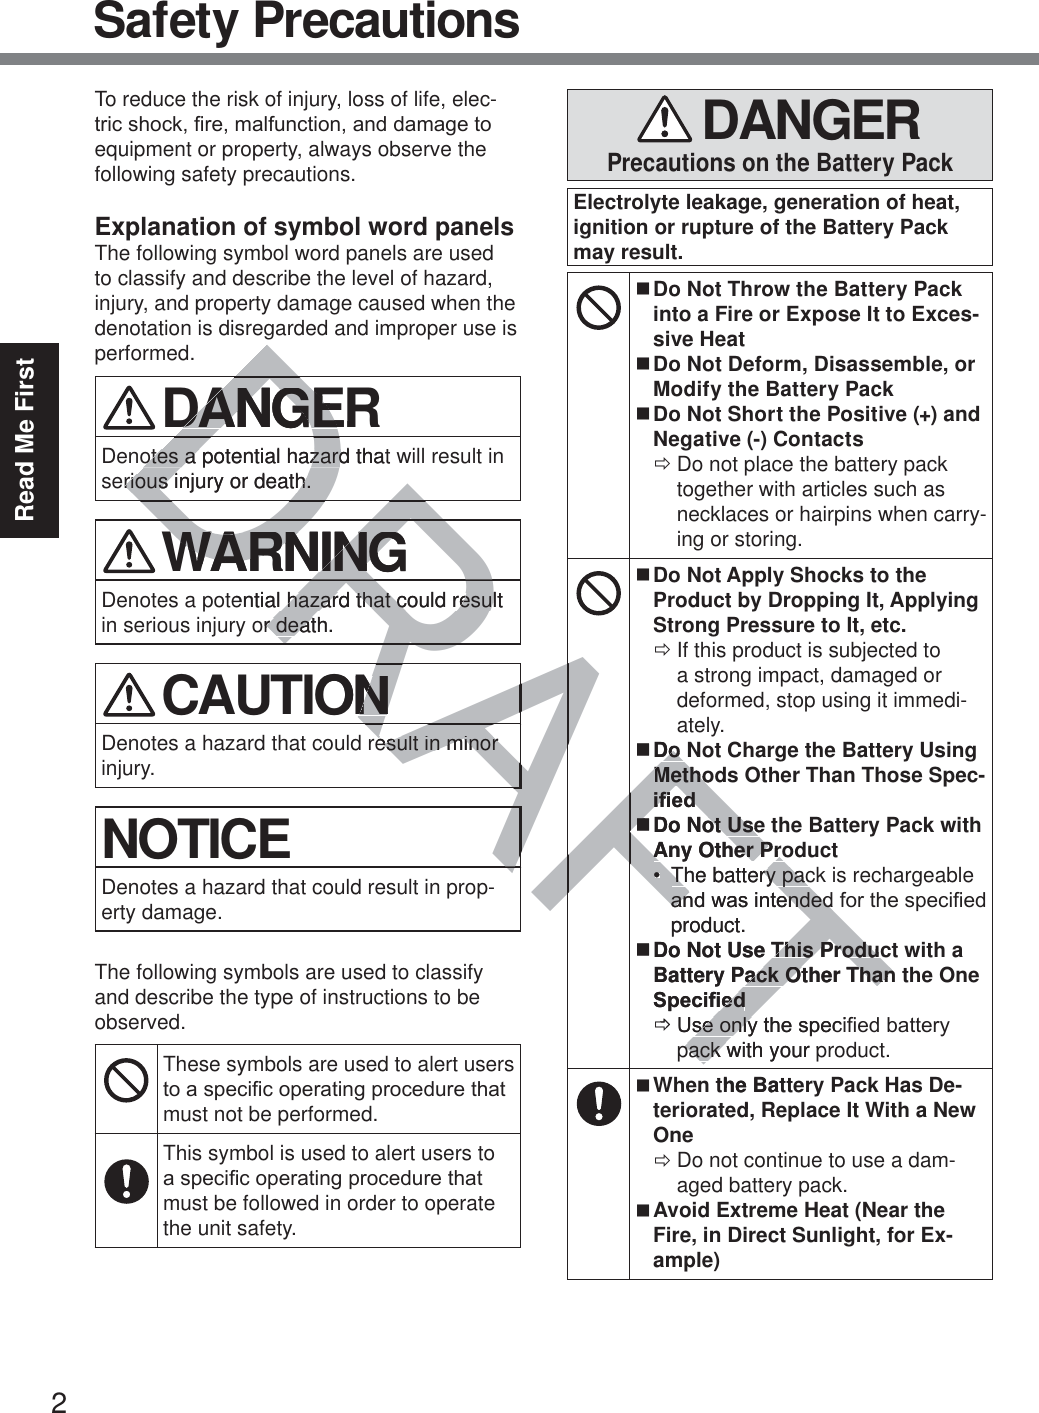
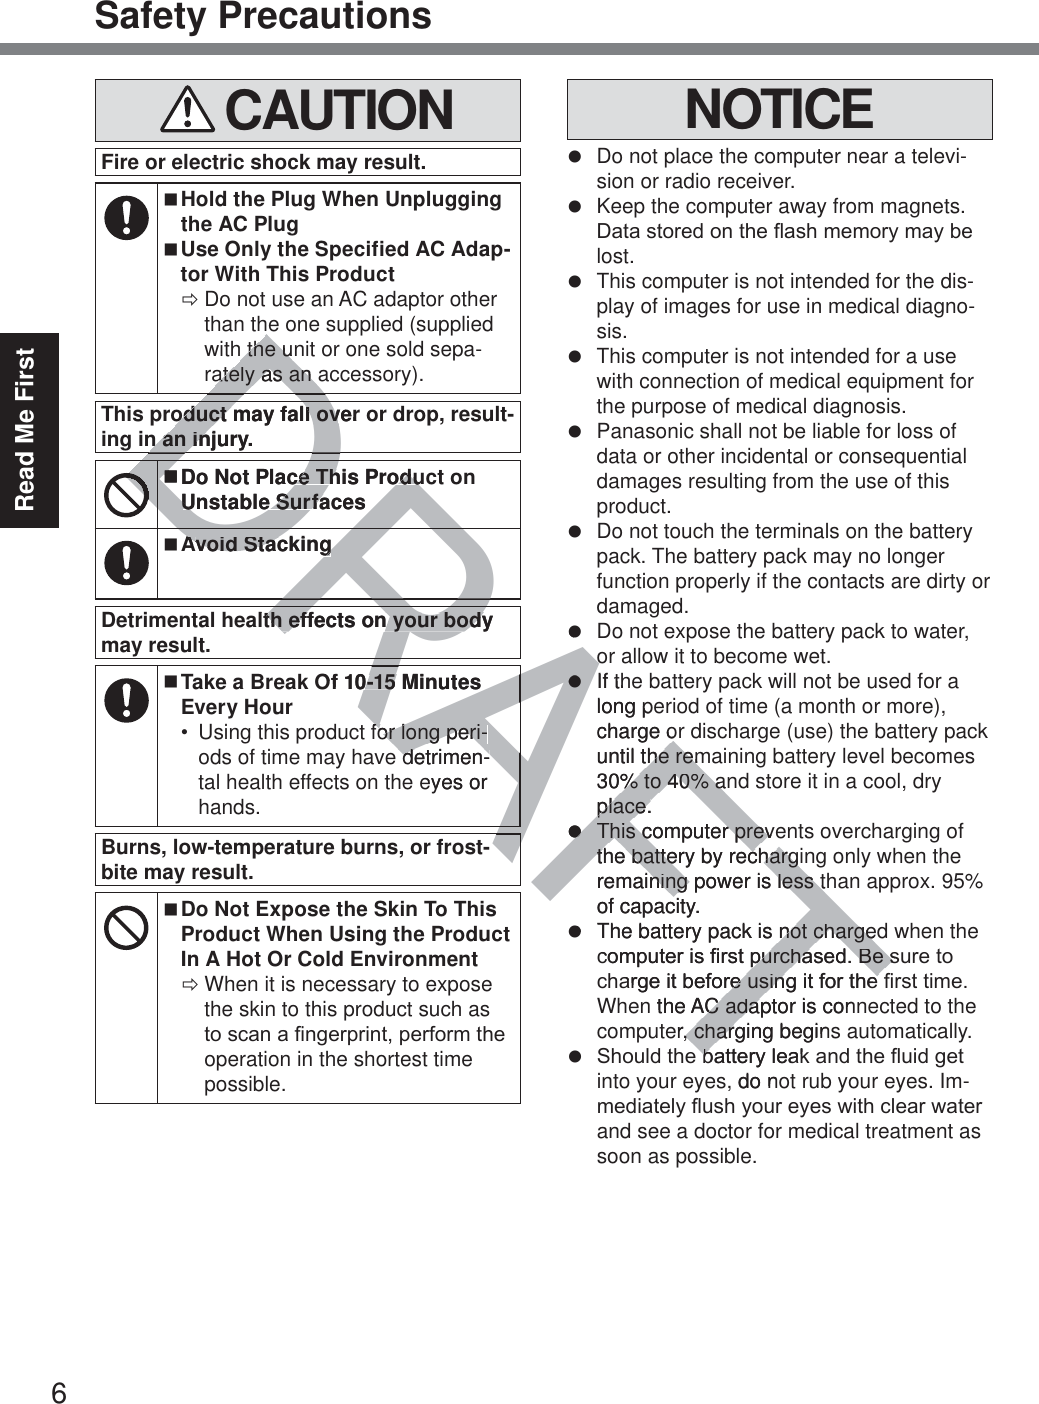
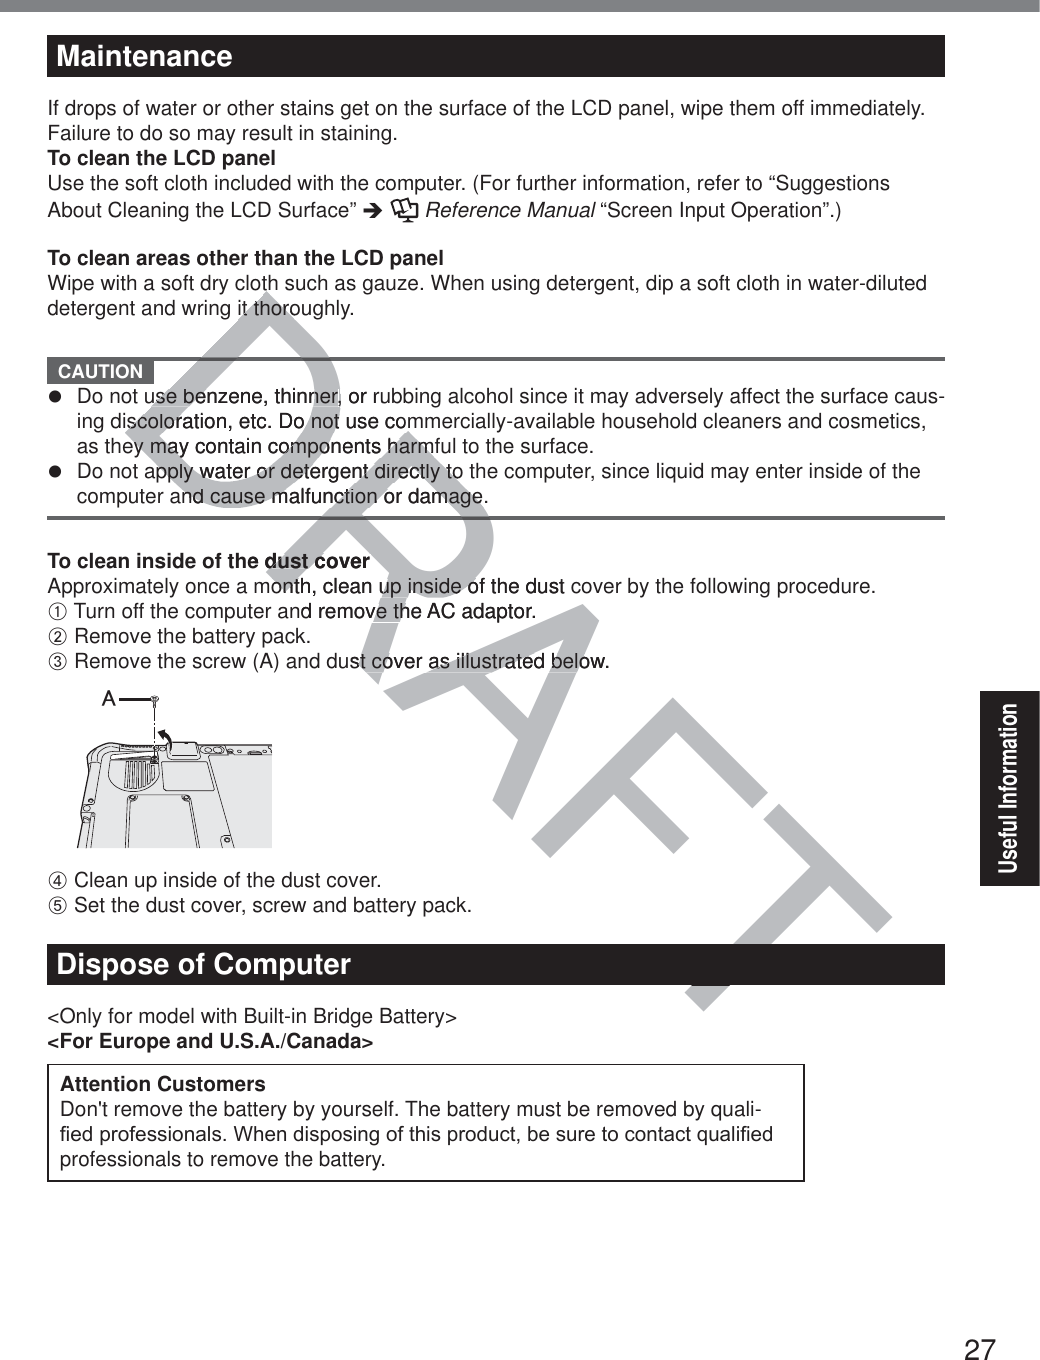
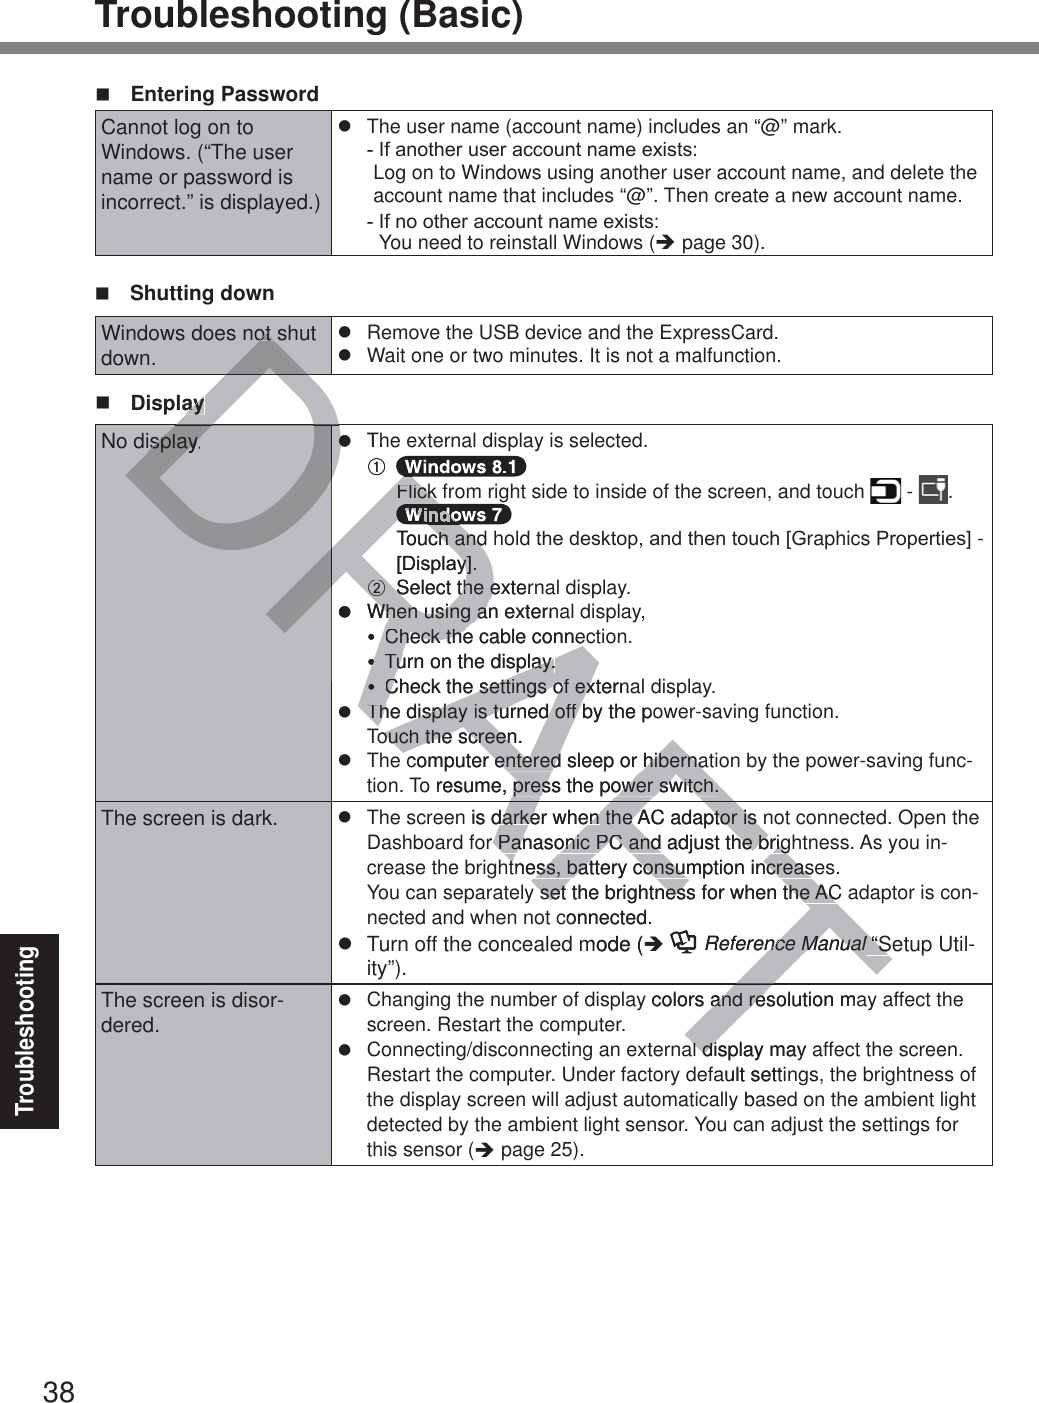
![19Getting Started PreparationA Check and identify the supplied accessories. ,I\RXGRQRW¿QGWKHGHVFULEHGDFFHVVRULHVFRQWDFW3DQDVRQLF7HFKQLFDO6XSSRUW (Î page 50).$&$GDSWRU .. 10RGHO1R CF-AA64B3C$&&RUG .... 1 %DWWHU\3DFN ..... 10RGHO1R)=9=688RU)=9=688'LJLWL]HUSHQ ...... 1Î Reference Manual “Screen Input Operation”7HWKHU ......1 6RIW&ORWK ... 1Î Reference Manual “Screen Input Operation”23(5$7,1*,16758&7,2167KLVERRN ................... 1B Read the LIMITED USE LICENSE AGREEMENT before breaking the seal on the comput-er’s packaging (Î page 41).1 Inserting the Battery Pack. Turn over the computer and insert the battery pack until it touch to the secured position.z Make sure no foreign objects are under the computer. CAUTION z Make sure the latch is securely locked. Otherwise the battery pack may fall when you carry the computer.z Do not touch the terminals of the battery pack and the computer. Doing so can make the terminals dirty or damaged, and may cause malfunction of the battery pack and the computer. NOTE z Note that the computer consumes electricity even when the com-puter power is off. If the battery pack is fully charged, the battery ZLOOIXOO\GLVFKDUJHLQWKHIROORZLQJSHULRGRIWLPHStatus Discharge period&)9=688 &)9=688When power is off Approx. @@ weeks Approx. @@ weeksIn sleep Approx. @@ days Approx. @@ daysIn hibernation Approx. @@ days Approx. @@ days1ABFirst-time OperationAFTAFDRAF........11DDDDDDDDDDDDDDDDDDDDDDDDDDDDDDDDDDDDDDDDDDDDDDDDDDDDDDDDDDDDDDDDDDDDDDDDDDDDDDDDDDDDDDDDDDDDDDDDDDDDDDDDDR6R6DRDRDRDRDRDRDÎÎDRReference Meference 5$7,1*,16758&7,2167KLVE5$7,1*,16758&7,2167KLVEMITED USE LICENSE AGREEMEUSE LICENSE AGREE(ÎÎ page pag41).TTRAAFInserting the Battery PackInserting the Battery Packover the computer and insert the bcomputer and insert the ecured position.ositioure no foreign objeco foreign objects are under thts are under thch is securely locked. Otherwise this securely locked. Otherwise thou carry the computer.ou carry the coals of the battery pack and the comand the cominals dirty or damaged, and mamaged, and maery pack and the computer.d the coctricity even ctully chaW](https://usermanual.wiki/Panasonic-of-North-America/9TGWL13A.User-manual-2-of-2/User-Guide-2291061-Page-19.png)
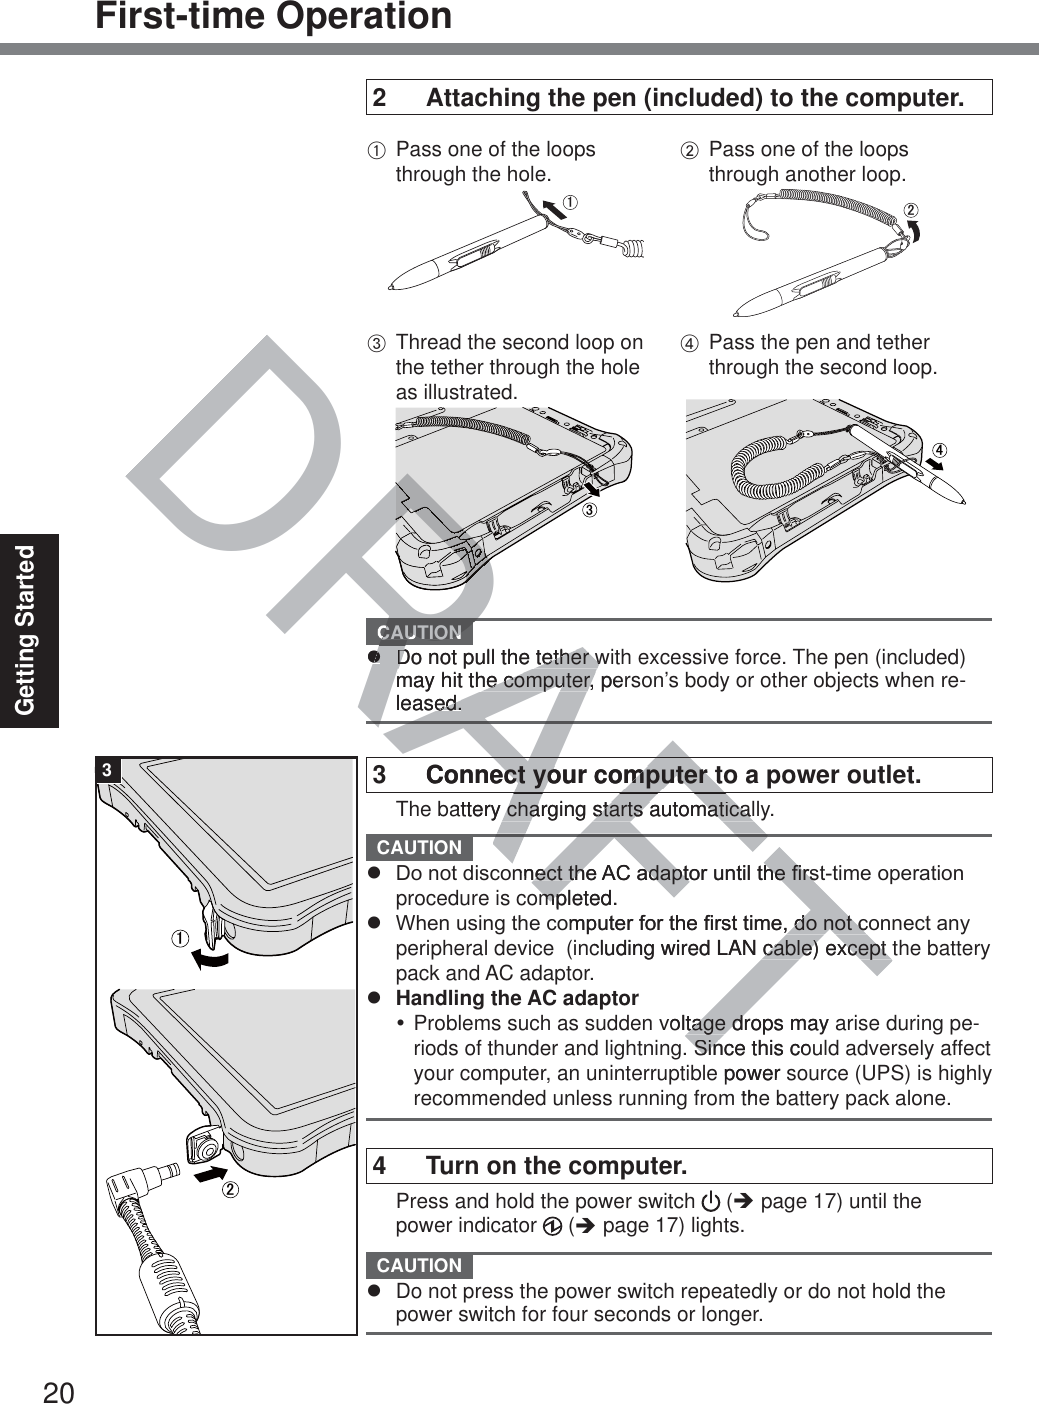
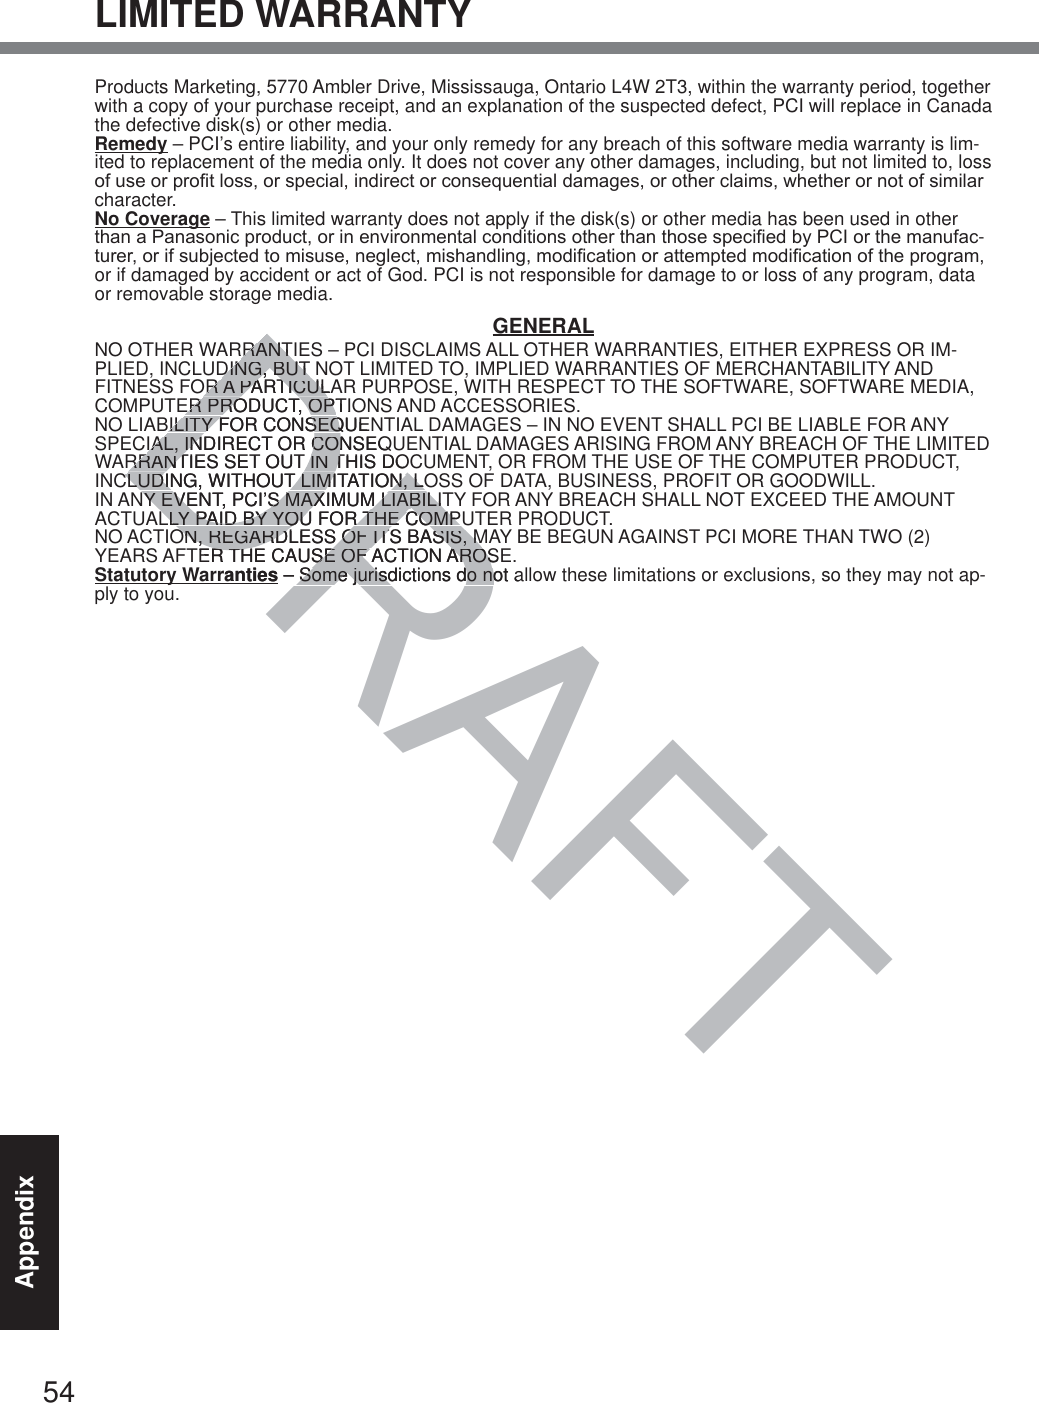
![22Getting StartedFirst-time Operation NOTE z PC Information Viewer 7KLVFRPSXWHUSHULRGLFDOO\UHFRUGVWKHPDQDJHPHQWLQIRUPDWLRQRIWKHÀDVKPHPRU\HWF7KHmaximum data volume for each record is 1024 bytes. 7KLVLQIRUPDWLRQLVRQO\XVHGIRUHVWLPDWLQJWKHFDXVHZKHQWKHÀDVKPHPRU\JRHVGRZQE\any possibility. They are never sent to outside via network nor used for any other purpose except for the purpose described the above. 7RGLVDEOHWKHIXQFWLRQDGGWKHFKHFNPDUNIRU>'LVDEOHWKHDXWRPDWLFVDYHIXQFWLRQIRUPDQDJHPHQWLQIRUPDWLRQKLVWRU\@LQ>+DUG'LVN6WDWXV@RI3&,QIRUPDWLRQ9LHZHUDQGWRXFK>2.@Then follow the on-screen instructions. (Î Reference Manual “Checking the Computer’s Usage Status”) Before using wireless functionA Display “Charm” and touch >&KDQJH3&6HWWLQJV@>1HWZRUN@>$LUSODQHPRGH@ SHW>$LUSODQHPRGH@WR>2II@DQGWKHQ sHW>:L)L@WR>2Q@IRUZLUHOHVV/$1 sHW>0RELOHEURDGEDQG@ WR>2Q@IRUZLUHOHVV:$1 sHW>*36@WR>2Q@IRUZLUHOHVV:$1 sHW>%OXHWRRWK@ WR>2Q@IRU%OXHWRRWKA Touch the Wireless Switch Utility icon to show the pop-up menu.B Select ON for the device you want to enable. To change the partition structureYou can shrink a part of an existing partition to create unallocated disk space, from which you can create a new partition. In the default setting, you can use a single partition.A Perform either of the following procedures.y Touch and hold at the bottom left corner of the Desktop screen.y Flick from the middle of the Start screen to the top. Touch (Start) and touch and hold>&RPSXWHU@WKHQWouch>0DQDJH@z A standard user needs to enter an administrator password.B Touch>'LVN0DQDJHPHQW@C Touch and hold the partition for Windows (“c” drive in the default setting), and touch>6KULQN9ROXPH@z 7KHSDUWLWLRQVL]HGHSHQGVRQWKHFRPSXWHUVSHFL¿FDWLRQVD ,QSXWWKHVL]HLQ>(QWHUWKHDPRXQWRIVSDFHWRVKULQNLQ0%@DQGWouch>6KULQN@z You cannot input a larger number than the displayed size.z 7RVHOHFW>5einstall to the System and OS partitions.@LQLnstalling OS (Î page 32), 70 GB / 60 GBRUPRUHLVQHFHVVDU\IRU>7RWDOVL]HDIWHUVKULQNLQ0%@E Touch and hold>8QDOORFDWHG@WKHVKUXQNVSDFHLQWKHVWHSD) and touch>1HZ6LPSOH9ROXPH@F Follow the on-screen instructions to make the settings, and touch>)LQLVK@Wait until formatting is completed. NOTE z You can create an additional partition using remaining unallocated space or newly creating unallocated space.z 7RGHOHWHDSDUWLWLRQWRXFKDQGKROGWKHSDUWLWLRQDQGWRXFK>'HOHWH9ROXPH@LQWKHVWHSC.DRAFTng wireng wireDDDDDplay “Charm” and tplay “Charm” andSSHW>$LUSODQHPRGH@WR>2HW>$LUSODQHPRGH@ssHW>:L)L@WR>2Q@IRUZLUHOHW>:L)L@WR>2Q@IRssHW>0RELOHEURDGEDQG@HW>0RELOHEURDGEDWR>2Q>2QssHW>*36@WR>2Q@IRUZLUHOHVV:HW>*36@WR>2Q@IRUZLUHOHVV:HW>%OXHWRRWK@HW>%OXHWRRWK@WR>2Q@IRU%OXHWRRWR>2Q@IRU%OXHWRRDDDDh the Wireless Switch Utility icon toess Switch Utility iconON for the device you want to enabthe device you want to e partition structuree partition structureof an existing partition to create usting partition to create un the default setting, you can use default setting, you can usollowing procedures.ollowing procedures.he bottom left corner of the Desktohe bottom left corner of the Deskthe Start screen to the top.creen to the top.old>&RPSXWHU@WKHQW&RPSXWHU@WKHQouch>0DQD>0DQDan administrator password.n administrator pass (“c” drive in the default setting), a(“c” drive in the default setting), HUVSHFL¿FDWLRQVVKULQNLQ0%@DQGWouchouch>6KULQN@>6KULQN@layed size.ns.@LQLnstalling OS (nstallingÎpVQHFHVVDU\IRU>7RWQHFHVVDD) and to](https://usermanual.wiki/Panasonic-of-North-America/9TGWL13A.User-manual-2-of-2/User-Guide-2291061-Page-22.png)
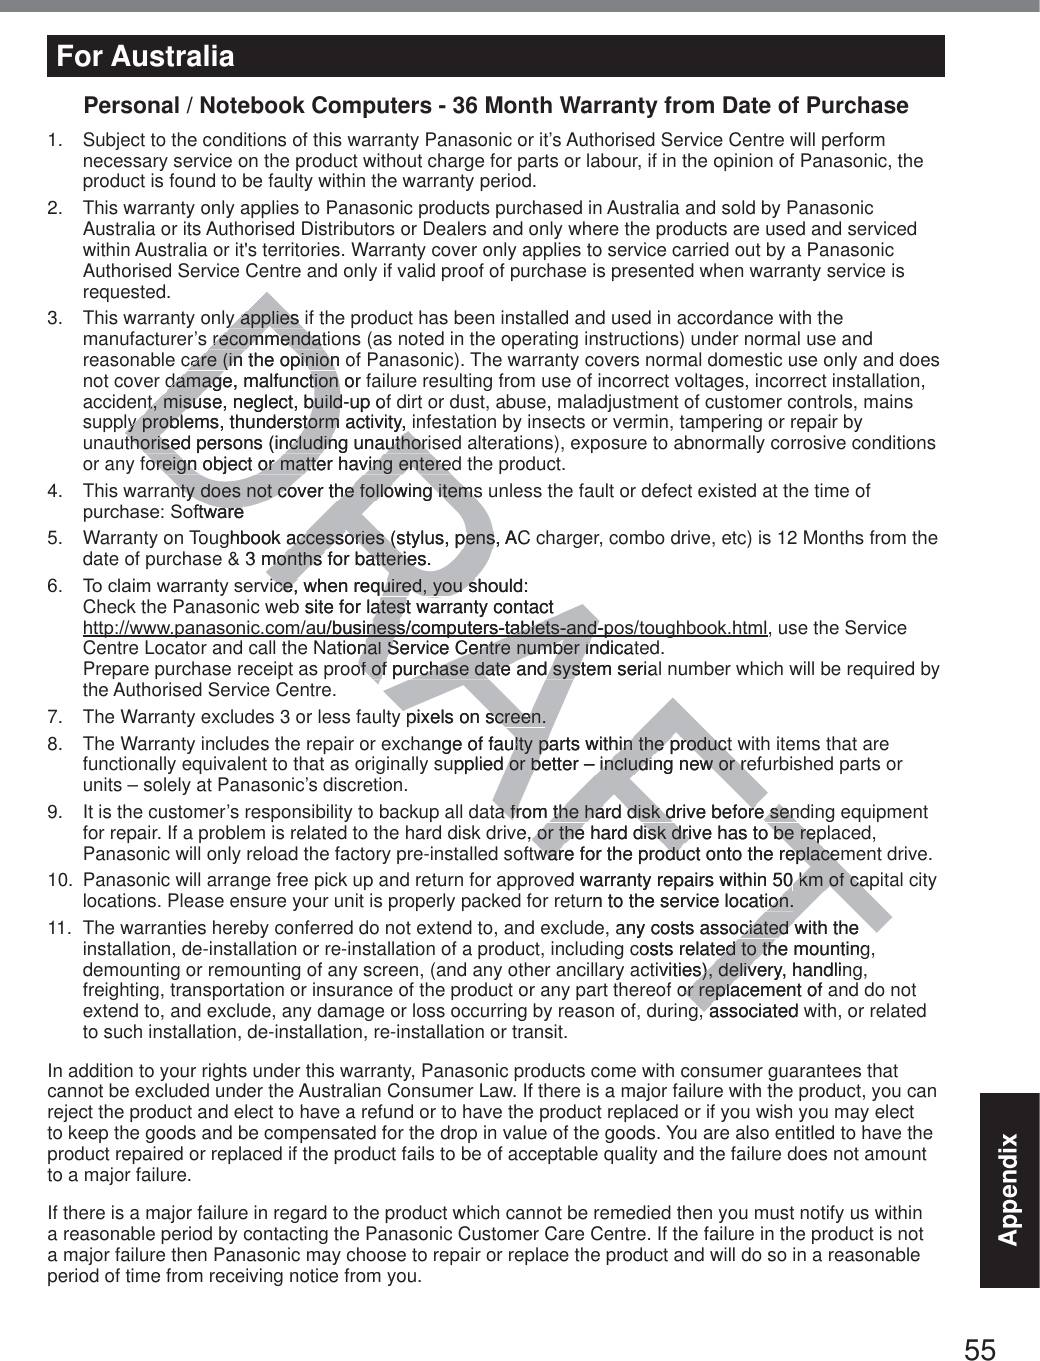
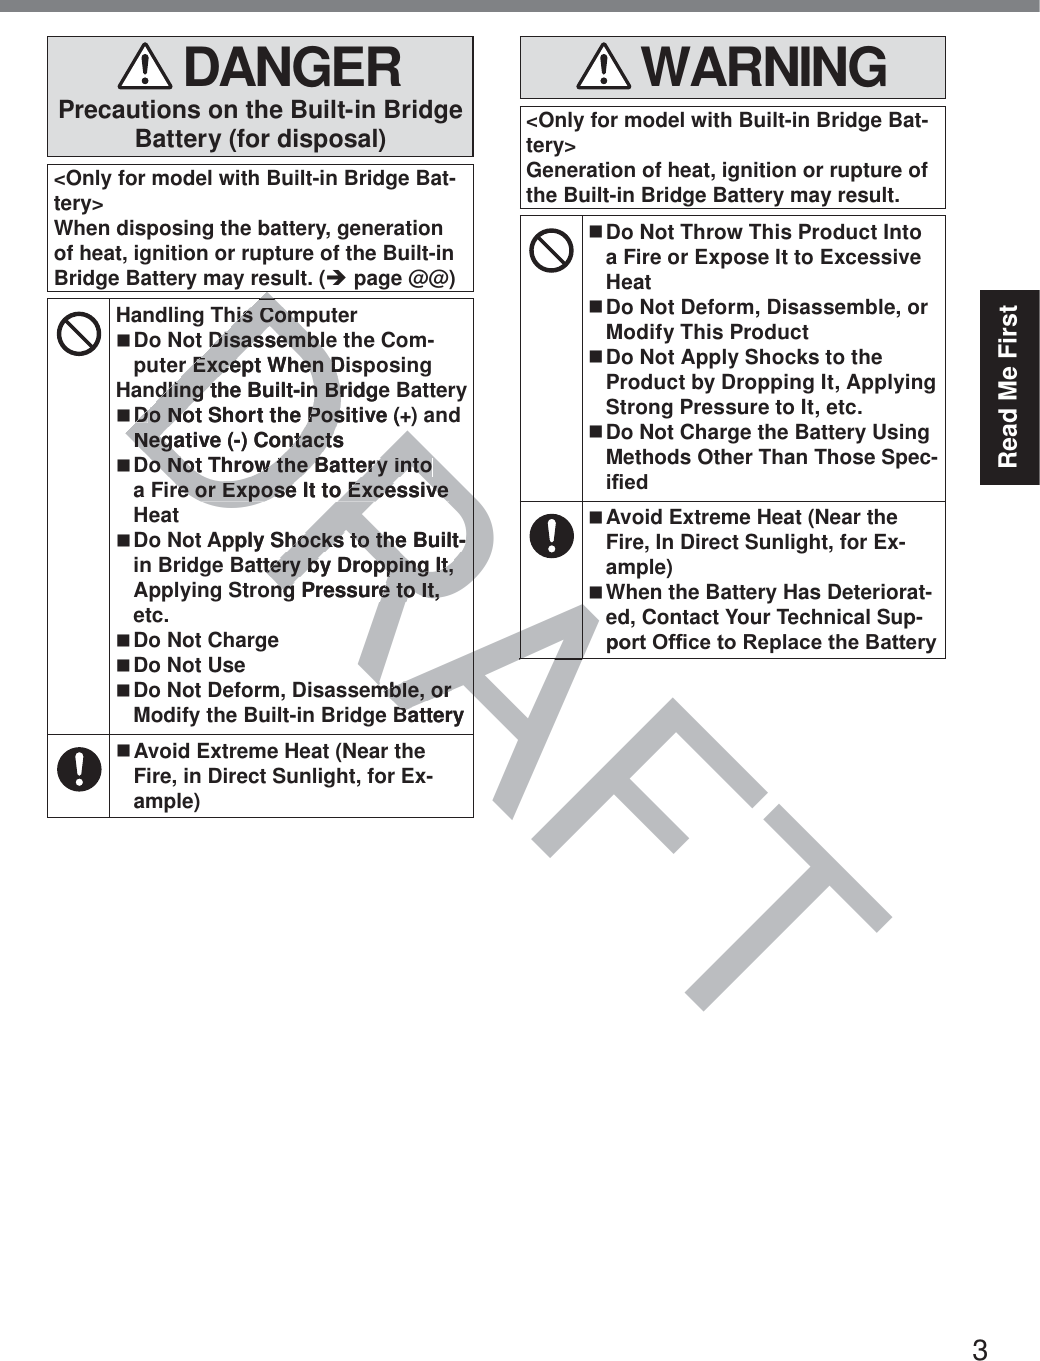
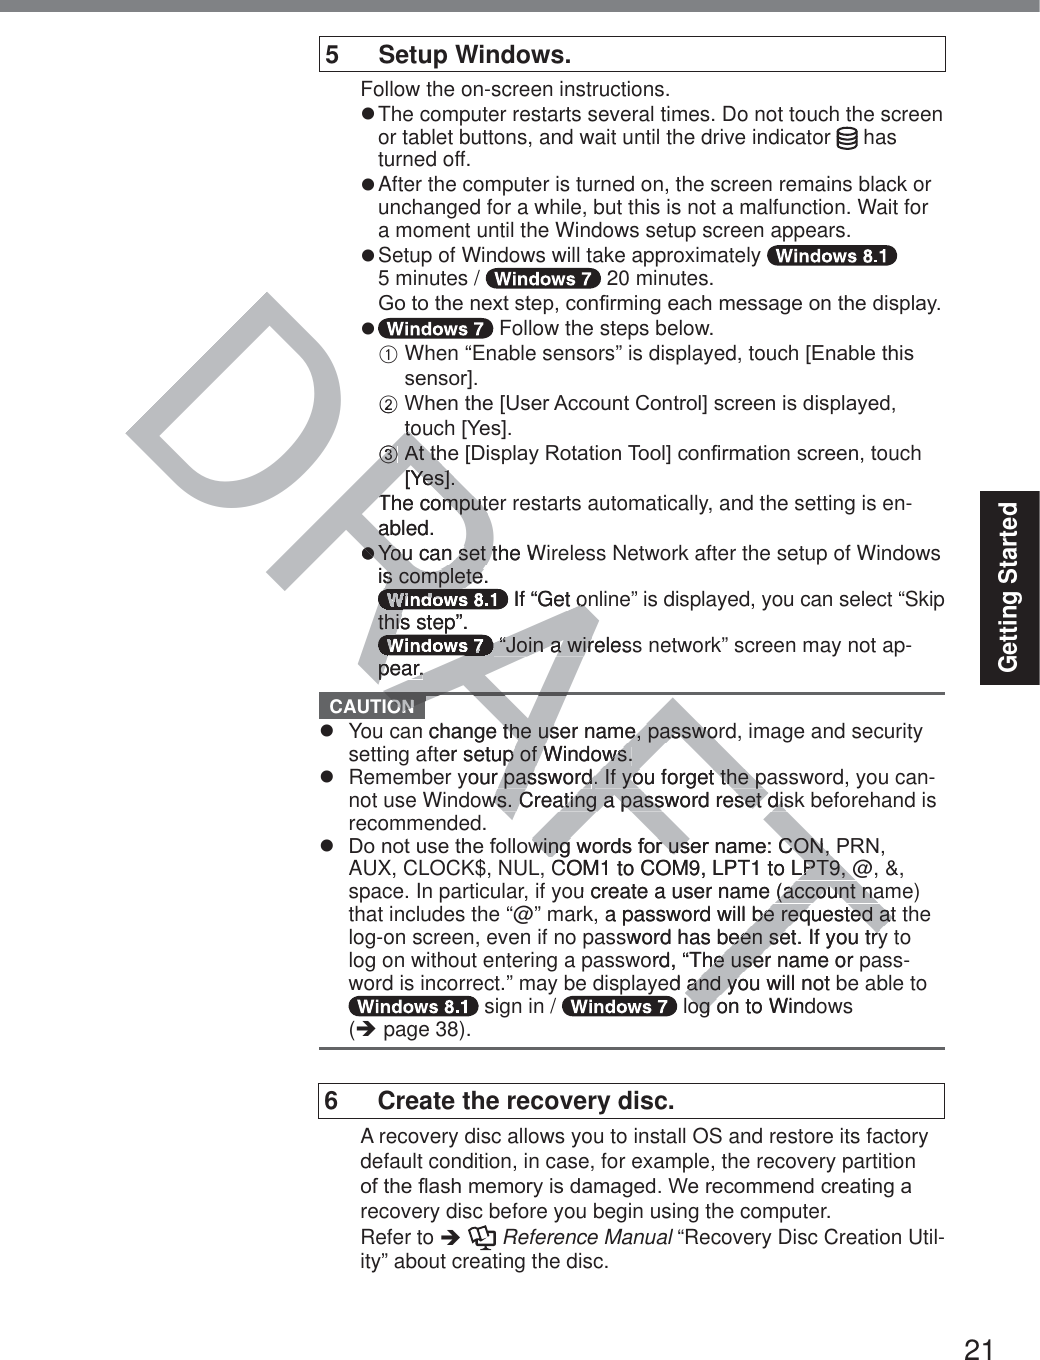
![24Useful InformationOperation environmentz 3ODFHWKHFRPSXWHURQDÀDWVWDEOHVXUIDFHQRWVXEMHFWWRVKRFNYLEUDWLRQDQGGDQJHURIdropping. Do not place the computer upright or turn it over. If the computer is exposed to an extremely strong impact, it may become damaged.z Operating environment 7HPSHUDWXUH2SHUDWLRQ°C to 50 °C {14 °F to 122 °F} (IEC60068-2-1, 2)*1 6WRUDJH°C to 60 °C {-4 °F to 140 °F} +XPLGLW\ 2SHUDWLRQ% to 80% RH (No condensation) 6WRUDJH% to 90% RH (No condensation)Even within the above temperature/humidity ranges, operation for a long time in extreme en-vironments, smoking nearby, or operation in places where oil is used or where there is a lot of dust will result in the product deterioration and will shorten the product life.*1 Do not expose the skin to this product when using the product in a hot or cold environment. (Î page 3) If the computer is wet in temperatures of 0 °C {32 °F} or below, freeze damage may occur. Make sure to dry off the computer in such temperatures.z Do not place the computer in the following areas, otherwise the computer may be damaged.y Near electronic equipment. Image distortion or noise may occur.y In extremely high or low temperature.z As the computer can become hot during operation, keep it away from items that are sensitive to heat.Handling cautions7KLVFRPSXWHULVGHVLJQHGWRPLQLPL]HVKRFNWRSDUWVVXFKDVWKH/&'DQGWKHÀDVKPHPRU\drive, but no warranty is provided against any trouble caused by shock. Be extremely careful when handling the computer.z :KHQFDUU\LQJWKHFRPSXWHUy Turn off the computer.y Remove all external devices, cables, Smart Cards and other protruding objects.y Do not drop or hit the computer against solid objects.y Do not grip the display part.z When you board an airplane, take the computer with you and never put it in your checked lug-gage. When using the computer on airplane, follow the airline’s instructions.z When carrying a spare battery, put it in a plastic bag to protect its terminals.z Avoid any harmful substances such as oil from getting into the touch pad. The pointer may not work correctly.z Be careful not to get injured by dropping or getting hit when carrying the computer.z Use only the included digitizer pen to touch the screen. Do not place any object on its surface and do not press down strongly with sharp-pointed or hard objects that may leave marks (e.g., nails, pencils and ball point pens).z Do not use the screen when dust or dirt (e.g., oil) is on the screen. Otherwise foreign particles on the screen/digitizer pen can scratch the screen surface or obstruct the digitizer pen operation.z Use the digitizer pen only for touching the screen. Using it for any other purpose may damage the digitizer pen and result in scratches on the screen.z The digitizer uses electromagnetic induction and may not work properly near strong electrical ¿HOGRUPDJQHWLF¿HOGVXFKDVy Near AM radio base station or relay station antennasy1HDU&57GLVSOD\VWKDWJHQHUDWHVWURQJHOHFWURPDJQHWLF¿HOGQRLVH Move the digitizer away from such locations so it will work properly.z The pointer cannot follow the digitizer pen movement if you move the digitizer pen too quickly.Handling and MaintenanceDRAFTRAhe abhe a, smoking, smokingresult in the prresult in the pot expose the skin to ot expose the skin page page3) If the computer is wet in temperIf the computer is wet in tempeMake sure to dry off the computerMake sure to dry off the computernot place the computer in the follonot place the computer in the follar electronic equipment. Image disar electronic equipment. Image disemely high or low temperature.or low temperature.puter can becocan become hot during opeme hot during GWRPLQLPL]HVKRFNWRSDUWVVXFKDRPLQLPL]HVKRFNWRSDUWVvided against any trouble caused bided against any troublees, Smart Cards and other protrudSmart Cards and other protrudnst solid objects.st solid objects.uter with you and never put it in youter with you and never put it in yollow the airline’s instructions.ons.ag to protect its terminals.minals.g into the touch pad. The pointech pad. The pointen carrying the comparryingot place any obot placts that m](https://usermanual.wiki/Panasonic-of-North-America/9TGWL13A.User-manual-2-of-2/User-Guide-2291061-Page-24.png)


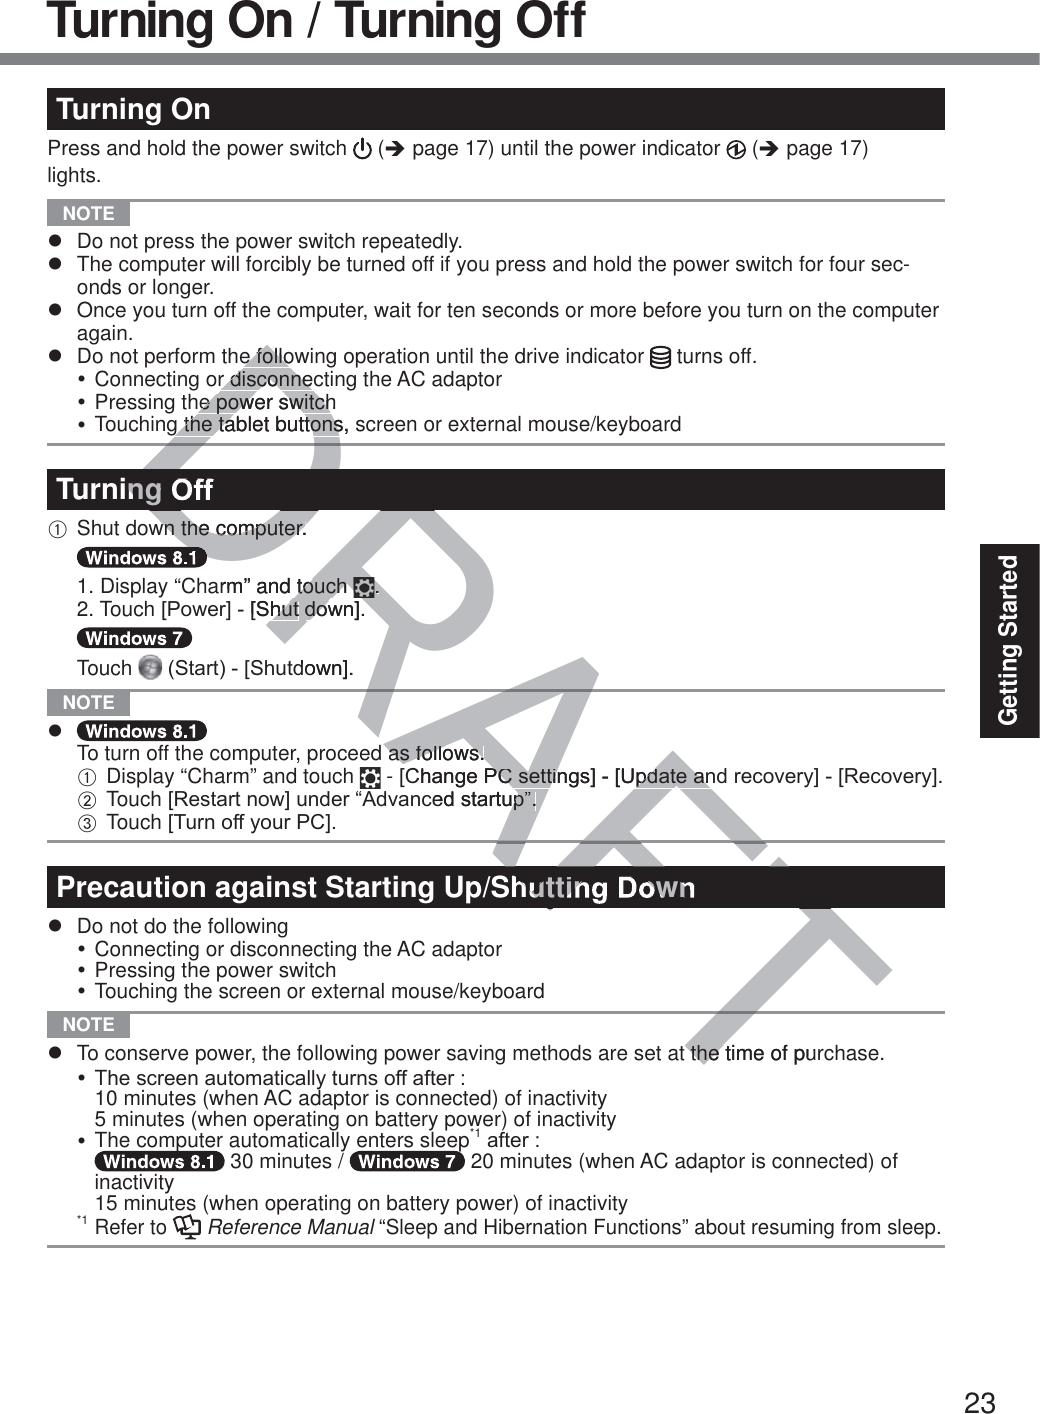
![31Useful Information4 <Only for model with TPM> Clear TPM.A Perform either of the following procedures.y Touch and hold at the bottom left corner of the Desktop screen.y Flick from the middle of the Start screen to the top.B 7RXFK>5XQ@DQGLQSXW>WSPPVF@DQGWRXFK>2.@C 7RXFK>&OHDU730«@XQGHU³$FWLRQV´RQWKHULJKWRIWKH³7300DQDJHURQ/RFDO&RPputer” screen.D 7RXFK>5HVWDUW@RIWKH³0DQDJHWKH730VHFXULW\KDUGZDUH´VFUHHQThe computer will restart. E :KHQ³730FRQ¿JXUDWLRQFKDQJHZDVUHTXHVWHGWR´LVGLVSOD\HGSUHVVF12. F 7RXFKWKH'HVNWRSWLOHDQGZKHQ³730LVUHDG\´DSSHDUVWRXFK>&ORVH@ Hard disk (Flash memory) recoveryPreparationz Remove all peripherals.z Connect the AC adaptor and do not remove it until installation is complete.You can reinstall the OS that was pre-installed at the time of purchase (Windows 8.1 or Windows 7). If reinstallation using the method described in “Remove everything and reinstall Windows” above is not successful, follow the steps below.1 Start the Setup Utility.A Display “Charm”, and touch >&KDQJH3&VHWWLQJV@>8SGDWHDQGUHFRYHU\@>5HFRYHU\@B 7RXFK>5HVWDUWQRZ@XQGHU³$GYDQFHGVWDUWXS´C 7RXFK>7URXEOHVKRRW@>$GYDQFHGRSWLRQV@>8(),)LUPZDUH6HWWLQJV@>5HVWDUW@7XUQRQWKHFRPSXWHUDQGWRXFKWRSOHIWRIWKHVFUHHQZKLOH>3DQDVRQLF@ERRWVFUHHQLVdisplayed.z ,IWKH>3DQDVRQLF@ERRWVFUHHQLVQRWGLVSOD\HGWXUQRQWKHFRPSXWHUZKLOHWouching top left of the screen.z If the password is requested, enter the Supervisor Password.2 Write down all of the contents of the Setup Utility and touch [Exit] and double-touch [Load Default Values].$WWKHFRQ¿UPDWLRQPHVVDJHWRXFK><HV@3 Check the [UEFI Boot] setting of the Setup Utility.>8(),%RRW@VKRXOGEHVHWWRDVIROORZV:KHQLQVWDOOLQJ:LQGRZV>(QDEOHG@:KHQLQVWDOOLQJ:LQGRZV >'LVDEOHG@4 Touch [Exit] and double-touch [Save Values and Reboot].$WWKHFRQ¿UPDWLRQPHVVDJHWRXFK><HV@Computer will restart.5 Touch top left of the screen while [Panasonic] boot screen is dis-played.The Setup Utility starts up.z If the password is requested, enter the Supervisor Password.6 Touch [Exit] and double-touch [Recovery Partition].DRAFTHVNWRHVNWFlash memory)Flash memoryRemove all peripherals.Remove all peripheralsConnect the AC adaptor and dConnect the AC adaptor and dreinstall the OS that was pre-installreinstall the OS that was pre-installDD If reinstallation using the metho If reinstallation using the methove is not successful, follow the steve is not successful, follow the steSetup Utility.Utility.m”, and touch m”, and touch >&KDQJH3&VHW>&KD@XQGHU³$GYDQFHGVWDUWXS´HU³$GYDQFHGVWDUWXS´>$GYDQFHGRSWLRQV@>8(),)LUPZ$GYDQFHGRSWLRQV@>8()FKWRSOHIWRIWKHVFUHHQZKLOH>3DQFKWRSOHIWRIWKHVFUHHQZKLOH>3DQQRWGLVSOD\HGWXUQRQWKHFRPSXWSOD\HGWXUQRQWKHFRPSXe Supervisor Password.Supervisor Passwthe Setup Utility and touch the Setup Utility and touchup Utility.Reboot].Reb](https://usermanual.wiki/Panasonic-of-North-America/9TGWL13A.User-manual-2-of-2/User-Guide-2291061-Page-31.png)
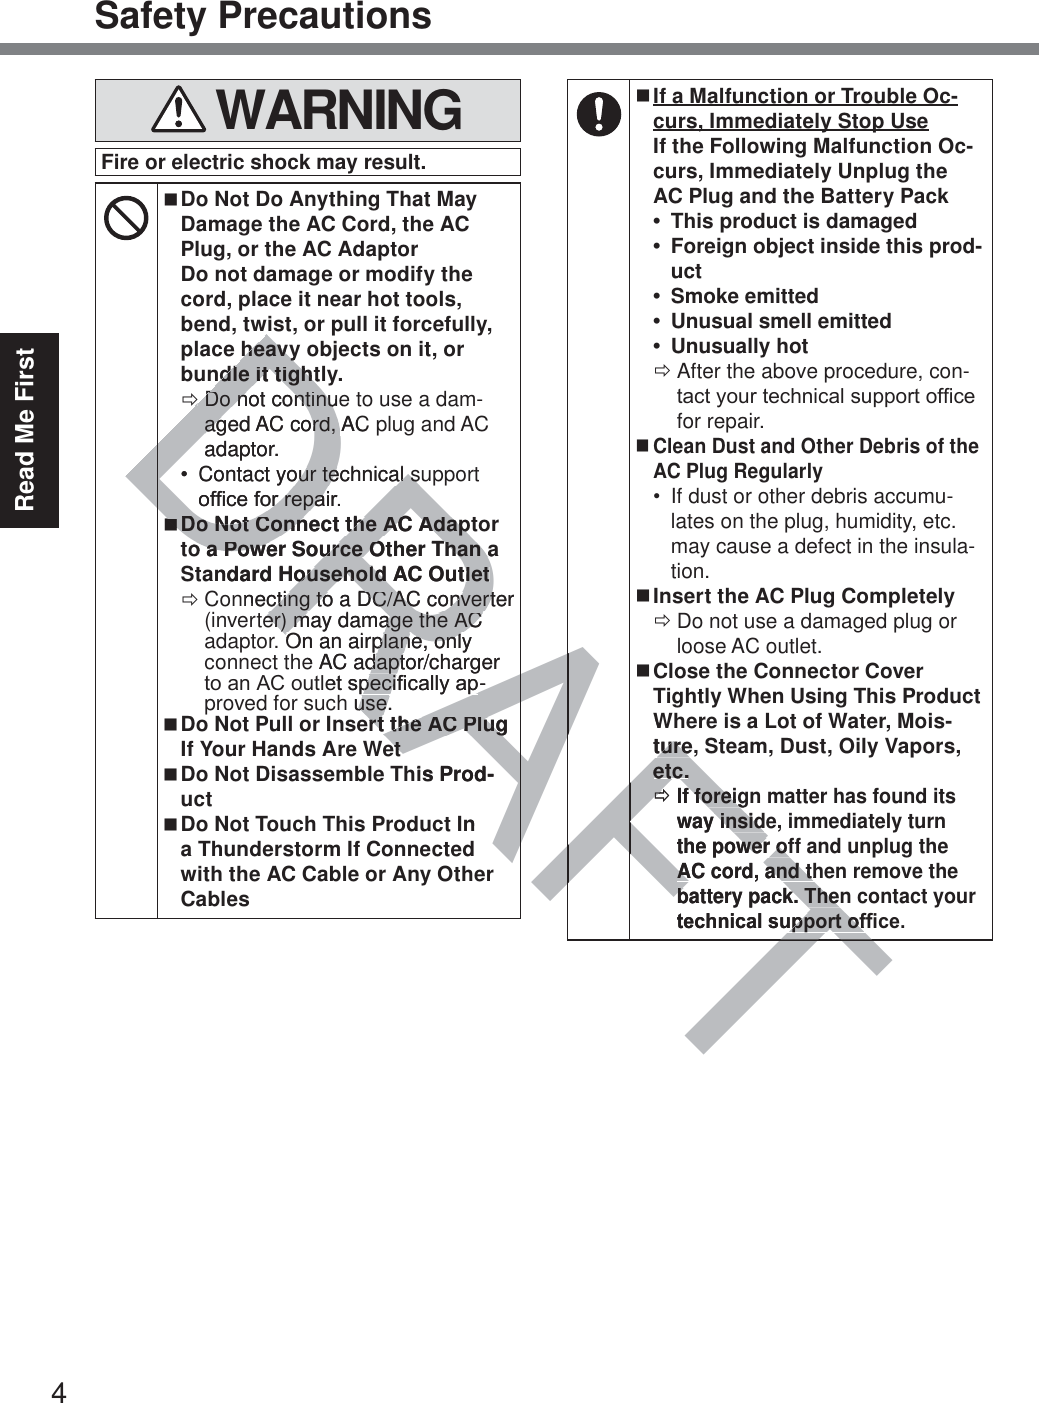
![32Useful InformationInstalling Software7 Touch [Next] and touch [YES]. Touch [Reinstall Windows] and touch [Next].8 At the License Agreement screen, touch [Yes, I agree to the provisions above and wish to continue!] and touch [Next].9 Touch [Next].,IWKHRSWLRQLVGLVSOD\HGVHOHFWWKHVHWWLQJDQGWRXFK>1H[W@z >5HLQVWDOO:LQGRZVWRWKH6ystem'LVNWRIDFWRU\GHIDXOW@ Select this option when you want to install Windows to the factory default. After instal-lation, you can create a new partition. For how to create a new partition, refer to “To change the partition structure” (Î page @@).z >5HLQVWDOOWRWKH26UHODWHGSDUWLWLRQV@*1 6HOHFWWKLVRSWLRQZKHQWKHÀash memory has already been divided into several partitions and you want to keep the partition structure. For how to create a new partition, refer to “To change the partition structure” (Î page @@).*1 This does not appear if Windows cannot be installed to the recovery partition and the area usable by Windows.10 $WWKHFRQ¿UPDWLRQPHVVDJHWRXFK><(6@11 Select OS (32-bit or 64-bit) and touch [OK]. $WWKHFRQ¿UPDWLRQPHVVDJHWRXFK><(6@Installation starts according to the instructions on the screen. (It will take approximately 20 minutes.)z Do not interrupt installation, for example by turning off the computer or performing other operation.Otherwise installation may become unavailable as Windows may not start up or the data may be corrupted.13 When Ending process screen is displayed, touch [OK] to turn off the computer.14 Turn on the computer.z If the password is requested, enter the Supervisor Password.15 Perform the “First-time Operation” (Î page @@). NOTE z The date and time, and the time zone may not be correct. Be sure to set them correctly.16 Start the Setup Utility and change the settings as necessary.17 Perform Windows Update.18 <Only for model with TPM> Clear TPM (Î page @@). Using Recovery DiscUse the Recovery Disc in the following conditions.y You have forgotten the administrator password.y ,QVWDOODWLRQLVQRWFRPSOHWH7KHUHFRYHU\SDUWLWLRQLQWKHÀDVKPHPRU\PD\EHEURNHQy <Only for Windows 7 downgrade model> To change OS from Windows 7 to Windows 8.1, or vice versa.FTFTDRAFTFThishisyou cayou cnge the parnge the par5HLQVWDOOWR5HLQVWDOOWRWKH2WKH6HOHFWWKLVRSWLRQZK6HOHFWWKLVRSWLRQaand you want to keep tnd you want to kchange the partition strucchange the partiti*1This does not appear if Windonot appear if WindWindows.s.DRDDDDDDDD$WWKHFRQ¿UPDWLR$WWKHFRQ¿UPDWLRDRDDDDD Select OS (32-bit or lect OS (32-bit oFRQ¿UPDWLR¿UPDWLRQPHVVDJHWRXQPHVVDJHstarts according to the instructionstarts according to the insupt installationallati, for example by turple by tuation may become unavailable as on may become unavailated.ted.ss screen is displayed, touss screen is displayed, touter the Supervisor Password.er the Supervisor Password.ation” (ation” (ÎÎ pageage@@).@time zone may not be correct. Be orrect. Be ttings as necessary.as necTPM (TPÎp](https://usermanual.wiki/Panasonic-of-North-America/9TGWL13A.User-manual-2-of-2/User-Guide-2291061-Page-32.png)
![33Useful Information NOTE z To change OS from 32-bit to 64-bit, or vice versa, install OS using the recovery SDUWLWLRQLQWKHÀDVKPHPRU\Preparationz 3UHSDUHWKHIROORZLQJLWHPV5HFRYHU\'LVFÎ Reference Manual “Recovery Disc Creation Utility”)86%'9'GULYHRSWLRQDOUHIHUWRUHFHQWFDWDORJVDQGRWKHUVRXUFHVIRULQIRUPDWLRQabout the products available)z Remove all peripherals (except for the USB DVD drive).z Connect the AC adaptor and do not remove it until installation is complete. NOTE z You can use the following buttons instead of the keyboard. )NH\'HIDXOWVHWWLQJ ĻNH\ ĹNH\ (QWHUNH\ 7DENH\Preparationz 3UHSDUHWKHIROORZLQJLWHPV5HFRYHU\'LVFÎ Reference Manual “Recovery Disc Creation Utility”)86%'9'GULYHRSWLRQDOUHIHUWRUHFHQWFDWDORJVDQGRWKHUVRXUFHVIRULQIRUPDWLRQabout the products available)z Remove all peripherals (except for the USB DVD drive).z Connect the AC adaptor and do not remove it until installation is complete.1 Connect the DVD drive to the USB port.2 Start the Setup Utility.A Display “Charm”, and touch >&KDQJH3&VHWWLQJV@>8SGDWHDQGUHFRYHU\@>5HFRY-HU\@B 7RXFK>5HVWDUWQRZ@XQGHU³$GYDQFHGVWDUWXS´C 7RXFK>7URXEOHVKRRW@>$GYDQFHGRSWLRQV@>8(),)LUPZDUH6HWWLQJV@>5HVWDUW@7XUQRQWKHFRPSXWHUDQGWRXFKWRSOHIWRIWKHVFUHHQZKLOH>3DQDVRQLF@ERRWVFUHHQLVdisplayed.z ,IWKH>3DQDVRQLF@ERRWVFUHHQLVQRWGLVSOD\HGWXUQRQWKHFRPSXWHUZKLOHWRXFKLQJWRSleft of the screen.z If the password is requested, enter the Supervisor Password.3 Write down all of the contents of the Setup Utility and touch [Exit] and double-touch [Load Default Values].$WWKHFRQ¿UPDWLRQPHVVDJHWRXFK><HV@4 Check the [UEFI Boot] setting of the Setup Utility. >8(),%RRW@VKRXOGEHVHWWRDVIROORZV:KHQWKHUHFRYHU\GLVFIRU:LQGRZVLVXVHG>(QDEOHG@:KHQWKHUHFRYHU\GLVFIRU:LQGRZVLVXVHG>'LVDEOHG@DRAFTDDRAC ACe the following butte the following buH\'HIDXOWVHWWLQJH\'HIDXOWVHWWLQJNH\NH\ĹNH\ĹNH\QWHUNH\QWHUNHH\H\HIROORZLQJLWHPVORZLQJLWHPVVFVFÎÎRReference Manualference Ma “RelHRSWLRQDOUHIHUWRUHFHQWFDWDOROUHIHUWRUHFHQWFDWDORJJs available)lables (except for the USB DVD drive)(except for the USB DVD and do not remove it until installatand do not remove it uno the USB port.o the USB portJH3&VHWWLQJV@>8SGDWHDQGUHFJH3&VHWWLQJV@>8SGDWHDQGUHFS´S´(),)LUPZDUH6HWWLQJV@>5HVWDUW@>5HVWDUW@KLOH>3DQDVRQLF@ERRWVFUHHQVRQLF@EFRPSXWHUZKLOHFRPS](https://usermanual.wiki/Panasonic-of-North-America/9TGWL13A.User-manual-2-of-2/User-Guide-2291061-Page-33.png)
![34Useful InformationInstalling Software5 Set the Recovery Disc into the DVD drive.6 Touch [Exit] and double-touch [Save Values and Reboot].$WWKHFRQ¿UPDWLRQPHVVDJHWRXFK><HV@Computer will restart.7 Touch top left of the screen while [Panasonic] boot screen is dis-played.The Setup Utility starts up.z If the password is requested, enter the Supervisor Password.8 Touch [Exit] and double-touch your DVD drive in [Boot Override].The computer will restart.9 Touch [Reinstall Windows] and touch [Next].10 $WWKHFRQ¿UPDWLRQPHVVDJHWRXFK><(6@11 At the License Agreement screen, touch [Yes, I agree to the provisions above and wish to continue!] and touch [Next].12 Touch [Next].,IWKHRSWLRQLVGLVSOD\HGVHOHFWWKHVHWWLQJDQGWRXFK>1H[W@z >5HLQVWDOO:LQGRZVWRWKH6\VWHP'LVNWRIDFWRU\GHIDXOW@ Select this option when you want to install Windows to the factory default. After instal-lation, you can create a new partition. For how to create a new partition, refer to “To change the partition structure” (Î page @@).z >5HLQVWDOOWRWKH26UHODWHGSDUWLWLRQV@*2 Select this option when the hard disk has already been divided into several partitions and you want to keep the partition structure. For how to create a new partition, refer to “To change the partition structure” (Î page @@).*2 This does not appear if Windows cannot be installed to the recovery partition and the area usable by Windows. $WWKHFRQ¿UPDWLRQPHVVDJHWRXFK><(6@Installation starts according to the instructions on the screen. (It will take approximately 30 - 45 minutes.)z Do not interrupt installation, for example by turning off the computer.Otherwise installation may become unavailable as Windows may not start up or the data may be corrupted.14 When Ending process screen is displayed, remove the Recovery Disc and DVD Drive and then touch [OK].Follow the on-screen instructions.Some models may take approximately 40 minutes.15 Perform the “First-time Operation” (Î page @@).16 Start the Setup Utility and change the settings as necessary.17 Perform Windows Update.18 <Only for model with TPM> Clear TPM (Î page @@).DRAFTputer wputer wch [Reinstach [ReinstaDDDDDDDDDD$WWKH$WWKAt the License At the License AgreeAabove and wish to conabove and wish to conTTouch [Next].ouch [Next].TTTWKHRSWLRQLVGLVSOD\HGVHOHFWWKHWKHRSWLRQLVGLVSOD\HGVHOHFWWKH5HLQVWDOO:LQGRZVWRWKH6\VWHP'HLQVWDOO:LQGRZVWRWKH6\VWHPect this option when you want to inoption when you want tyou can create a new partition. Fou can create a new partithe partition structure”he partition structure” ( (ÎÎ page@@RWKH26UHODWHGSDUWLWLRQV@UHODW*2ion when the hard disk has alreadyhen the hard disk has alreakeep the partition structure. For hoep the partition structure. Fn structure”n structure” ( (ÎÎpage@@@@).Windows cannot be installed to the recWindows cannot be installed to the recVVDJHWRXFK><(6@WRXFK><(6@instructions on the screen. (It will structions on the screen. (It wilmple by turning off the computer.ple by turning off the computer.available as Windows may not staavailable as Windows may not staayed, remove the Recovee the Recove@).](https://usermanual.wiki/Panasonic-of-North-America/9TGWL13A.User-manual-2-of-2/User-Guide-2291061-Page-34.png)


![43AppendixContrat de licence d’usage limitéLe(s) logiciel(s) (les “Logiciels”) fournis avec ce produit Panasonic (le “Produit”) sont exclusive-ment concédés en licence à l’utilisateur ultime (“vous”), et ils ne peuvent être utilisés que confor-mément aux clauses contractuelles cidessous. En utilisant les logiciels, vous vous engagez de PDQLqUHGp¿QLWLYHjUHVSHFWHUOHVWHUPHVFODXVHVHWFRQGLWLRQVGHVSUpVHQWHVPanasonic Corporation a mis au point ou obtenu les Logiciels et vous en concède l’utilisation par les présentes. Vous assumez l’entière responsabilité du choix de ce Produit (y compris des Logiciels associés) pour obtenir les résultats escomptés, ainsi que de l’installation, de l’utilisation et des résultats obtenus.LicenceA. Panasonic Corporation vous octroie par les présentes le droit et la licence personnels, non cessibles et non exclusifs d’utiliser les Logiciels conformément aux termes, clauses et condi-tions de ce contrat. Vous reconnaissez ne recevoir qu’un droit limité d’utiliser les Logiciels et la documentation les accompagnant et vous vous engagez à n’obtenir aucun droit de titre, propriété ni aucun autre droit vis-à-vis des Logiciels et de la GRFXPHQWDWLRQOHVDFFRPSDJQDQWQLYLVjYLVGHVDOJRULWKPHVFRQFHSWVGHVVLQVFRQ¿JXUD-tions et idées représentés par ou incorporés dans les Logiciels et la documentation les ac-compagnant, dont les titres, propriété et droits resteront tous à Panasonic Corporation ou à leurs propriétaires.B. Vous ne pouvez utiliser les Logiciels que sur le Produit unique qui est accompagné par les Logiciels.& 9RXVHWYRVHPSOR\pVRXDJHQWVrWHVUHTXLVGHSURWpJHUODFRQ¿GHQWLDOLWpGHV/RJLFLHOV9RXVne pouvez ni distribuer ni mettre les Logiciels et la documentation les accompagnant à la disposition d’un tiers, par partage de temps ou de quelque autre manière que ce soit, sans l’autorisation écrite préalable de Panasonic Corporation.D. Vous ne pouvez ni copier ni reproduire ni permettre la copie ni la reproduction des Logiciels QLGHODGRFXPHQWDWLRQOHVDFFRPSDJQDQWSRXUTXHOTXH¿QTXHFHVRLWjO¶H[FHSWLRQG¶XQHFRSLHGHV/RJLFLHOVjGHV¿QVGHVDXYHJDUGHXQLTXHPHQWSRXUVRXWHQLUYRWUHXWLOLVDWLRQGHVLogiciels sur le Produit unique qui est accompagné par les Logiciels. Vous ne pouvez ni modi-¿HUQLWHQWHUGHPRGL¿HUOHV/RJLFLHOVE. Vous ne pouvez céder les Logiciels et en octroyer la licence à une autre partie qu’en rapport avec votre cession du Produit unique qui est accompagné par les Logiciels à cette autre par-tie. Au moment de cette cession, vous devez céder également toutes les copies, que ce soit sous forme imprimée ou lisible par la machine, de tous les Logiciels ainsi que de la documen-tation les accompagnant, à la même partie ou détruire les copies non cédées.F. Vous ne pouvez retirer aucune marque de droits d’auteur, marque de commerce ou autre ni DXFXQHLGHQWL¿FDWLRQGHSURGXLWGHV/RJLFLHOVHWYRXVGHYH]UHSURGXLUHHWLQFOXUHWRXWHVFHVQRWLFHVRXLGHQWL¿FDWLRQVGHSURGXLWVXUWRXWHVOHVFRSLHVGHV/RJLFLHOVVous ne pouvez assembler en sens inverse, compiler en sens inverse ni retracer les Logiciels ni aucune de leurs copies, de façon électronique ou mécanique, en tout ou en partie.9RXVQHSRXYH]XWLOLVHUFRSLHUPRGL¿HUDOWpUHUQLFpGHUOHV/RJLFLHOVQLDXFXQHGHOHXUVFRSLHVen tout ou en partie, à l’exception de ce qui est expressément stipulé dans ce contrat.Si vous cédez la possession de toute copie ou de tout Logiciel à une autre partie, à l’exception de ce qui est autorisé au paragraphe E ci-dessus, votre licence est automatiquement résiliée.DRAFTrporation vourporation vounon exclusifs d’utnon exclusifs d’uce contrat. Vous reconnce contrat. Vous recoumentation les accompagnanumentation les accompenir aucun droit de titre, propriétéenir aucun droit de titre, propriétéHQWDWLRQOHVDFFRPSDJQDQWQLYLVHQWDWLRQOHVDFFRPSDJQDQWQLYLVées représentés par ou incorporésées représentés par ou incorporé, dont les titres, propriété et droitsdont les titres, propriété et droitporation ou à leurs propriétaires.ou à leurs propriétaireliser les Logiciels que sur le Produser les Logiciels que sur DJHQWVrWHVUHTXLVGHSURWpJHUODWVrWHVUHTXLVGHSURWpJHUettre les Logiciels et la documentatre les Logiciels et la docuge de temps ou de quelque autre ge de temps ou de quelanasonic Corporation.anasonic Corporatie ni permettre la copie ni la reprodettre la copie ni la reprodQWSRXUTXHOTXH¿QTXHFHVRLWjO¶UTXHOTXH¿QTXHFHVRLWjOGHXQLTXHPHQWSRXUVRXWHQLUYRWUHXQLTXHPHQWSRXUVRXWHQLUYRWUHagné par les Logiciels. Vous ne poagné par les Logiciels. Vous ne plicence à une autre partie qu’en rae qu’en rané par les Logiciels à cette autre ps à cette autre ment toutes les copies, que ce s copies, que ce ogiciels ainsi que de la doainsi qus non cédées.non céde commercHWLQF](https://usermanual.wiki/Panasonic-of-North-America/9TGWL13A.User-manual-2-of-2/User-Guide-2291061-Page-43.png)
![45Appendix6SHFL¿FDWLRQV7KLVSDJHSURYLGHVWKHVSHFL¿FDWLRQVIRUWKHEDVLFPRGHO 7KHPRGHOQXPEHULVGLIIHUHQWDFFRUGLQJWRWKHXQLWFRQ¿JXUDWLRQz 7RFKHFNWKHPRGHOQXPEHU Check the bottom of the computer or the box the computer came in at the time of purchase.z 7RFKHFN&38VSHHGPHPRU\VL]HDQGWKHÀDVKPHPRU\GULYHVL]H Run the Setup Utility (Î Reference Manual³6HWXS8WLOLW\´DQGVHOHFW>,QIRUPDWLRQ@PHQX >3URFHVVRU6SHHG@&38VSHHG>0HPRU\6L]H@0HPRU\VL]H>+DUG'LVN@)ODVK0HPRU\drive size 0DLQ6SHFL¿FDWLRQVModel No. )=*)$+$;%0CPU Intel® Core™ i5-4310U Processor (3 MB*1 cache, up to 3 GHz) with Intel® Turbo Boost TechnologyChipset CPU embeddedVideo controller Intel® HD Graphics 4400 (Built-in CPU)Memory*1*2 8 GBVideo Memory*1*3 UMA @@@ MB Max. UMA <32-bit> @@@ MB Max. <64-bit> @@@ MBStorage*4 )ODVKPHPRU\GULYHGBApprox. @@ GB is used as a partition with HDD recovery tools. (Users cannot use this partition.)Approx. @@ GB is used as a partition with system tools. (Users cannot use this partition.) <Only for Windows 7 downgrade model>Approx. @@ GB is used as a partition with HDD recovery tools. (Users cannot use this partition.)Approx. @@ MB is used as a partition with system tools. (Users cannot use this partition.)Display Method 10.1 WUXGA typeInternal LCD*5 Max. 16,777,216 colors (1920 × 1200 dots)External Display (HDMI)*6 65,536/16,777,216 colors (1920 x 1200 dots Max.)Wireless LAN*7 Intel® Dual Band Wireless-AC 7260 (Î page 47)Bluetooth*8 Î page 47Wireless WAN*9 (Optional) Sierra Wireless™ High-speed moduleLAN*10 IEEE 802.3 10Base-T/IEEE 802.3u 100Base-TX/IEEE 802.3ab 1000Base-TSound WAVE and MIDI playback, Intel®+LJK'H¿QLWLRQ$XGLRVXEV\VWHPVXS-port, Monaural speakerSecurity Chip TPM (TCG V1.2 compliant)*11Camera Front 1280 × 720 dots, 30 fps (Video), Monaural MicrophoneRear*12 1280 × 720 dots, 30 fps (Video) / 2592 × 1944 dots (Still)Sensor Ambient light sensorEquippedMagnetic sen-sorGyro sensorAcceleration sensorTTTTRAFTAFAFFTFTFTFTTDRADRDDDDDDDDDDDDDDDDDDDDDDDDDRDRDDDDDDDRDRDDDRDRDRDDRDDRDRDRRRRRTCPUCtrollerIntelIn® HD®*1*28 8GBry*1*3DRDRDRDRDRRRRRRRDRDRRDRDRDRRRRR UMA UMA)ODVKPHPRU\GULYH)ODVKPHPRU\GULYHRARRRRARARARARARARAApprox. @@ x. @@ GBGB is used as cannot use this partition.)ot use thisApprox. @@ rox. GB is used as a pased as a puse this partition.)this partition.)RARRRRARARARARA <Only for Windows 7 dow <Only for Windoox. @@ ox. @@ GBGB is used as a partition w is used as a partition wuse this partition.)use this partition.)@@ MB is used as a partition with syused as a partition with stition.)ypeolors (1920 × 1200 dots)olors (1920 × 1200 dotors (1920 x 1200 dots Max.)rs (1920 x 1200 dotsAC 7260 (Î page47)speed module00Base-TX/IEEE 802.3ab TX/IEELWLRQ$XGLRVXELWLR](https://usermanual.wiki/Panasonic-of-North-America/9TGWL13A.User-manual-2-of-2/User-Guide-2291061-Page-45.png)
![46Appendix6SHFL¿FDWLRQV 0DLQ6SHFL¿FDWLRQVCard Slot Smart Card Slot*13 x 1micro SD Memory Card Slot*14microSDXC compatibleSIM Card Slot*9 × 1Interface USB port 3.0 x 1, 2.0 x 1*15, Serial Port (Dsub 9-pin male)*16, LAN port (RJ-45)*10, HDMI Port (Type A)*17, Expansion Bus Connector, Headset 0LQLDWXUHMDFN',$+HDGSKRQH,PSHGDQFHȍ, Output Power 4 mWî6WHUHR0LFURSKRQH0RQDXUDO,QSXW*18Pointing Device 'LJLWL]HU0XOWLWRXFK&DSDFLWLYH$QWL5HÀHFWLRQ'LJLWL]HUSHQLQFOXG-ed) touch capable)Power Supply AC adaptor or Battery packAC Adaptor*19 ,QSXWV to 240 V AC, 50 Hz/60 Hz2XWSXWV DC, 4.06 ABattery Pack Li-ion 10.8 V, 4400 mAh (typ.), 4100 mAhPLQZLWK&)9=688Li-ion 10.8 V, 9300 mAh (typ.), 8700 mAhPLQZLWK&)9=688Operating Time*20 $SSUR[##KRXUVZLWK&)9=688$SSUR[KRXUVZLWK&)9=688Charging Time*21 Power on $SSUR[KRXUVZLWK&)9=688$SSUR[##KRXUVZLWK&)9=688Power off $SSUR[KRXUVZLWK&)9=688$SSUR[##KRXUVZLWK&)9=688Built-in bridge battery(not replaceable) (Optional) Li-Polymer 7.4 V, 500 mAh (typ.), 490 mAh (min.)Power Consumption*22 Approx. @@ W*23 / Approx. @@ W (maximum when recharging in the ON state) Physical Dimensions (W × D × H) 270 mm × 188 mm × 19 mm {10.6 " × 7.4 " × 0.75 "}Weight Approx. @@ kg {Approx. @@ lb`ZLWK&)9=688Approx. 1.3 kg {Approx. 2.87 lb`ZLWK&)9=688Envi-ron-mentOperat-ing Tempera-ture -10 °C to 50 °C {14 °F to 122 °F} (IEC60068-2-1, 2)*24Humidity 30% to 80% RH (No condensation)Storage Tempera-ture -20 °C to 60 °C {-4 °F to 140 °F}Humidity 30% to 90% RH (No condensation) SoftwareBase OS Windows® 8.1 Update Pro 64-bit Windows® 7 Profes-sional 32-bit Service Pack 1 / Windows® 7 Professional 64-bit Service Pack 1DRAFTDRAFFTFTFTTTDDDDDDDDDDDDDDDDDDDDDDRDRDDDDDDDDDDDRDRDDDRDRDRDDDDRDRDDRDRDRDRDRDRRRRRRRRRARRRRRRARRAAFiceSupplyAdapto,QSXery PaLi-ion 1Li-ion 1Li-ion 10.8Li-ion 10.8Time*20$SSUR[##K$SSUR[##K$SSUR[KRX$SSUR[Kwer on$SSUR[KRXUVZLWK$SSUR[KRX$SSUR[##KRXUVZLW$SSUR[##$SSUR[KRXUVZLWK&)$SSUR[KRXUVZLWK&)$SSUR[##KRXUVZLWK&)$SSUR[##KRXUVZLWK&(Optional) Li-Polymer 7.4 (Optional) Li-Polymer 7.4V, 500pprox. @@ pprox @@WW*23*2 / Approx. @@ / ApWWximum when recharging in the ON staen recharging in the ON st × 188 mmmm × 19 mmm {10.6 " × 7.4 " × {10.6 " × 7.4 " ×kgkg {Approx. @@ {Approx. @@ lblb`ZLWK&)9=68`ZLWK&)9=68Approx. 2.87 Approx. 2lbb`ZLWK&)9=688`ZLWK&)9=688°F°F to 122 °F} (IEC60068-2-1, 2)EC60068-2-1, 2)*24*24ensation)°F}](https://usermanual.wiki/Panasonic-of-North-America/9TGWL13A.User-manual-2-of-2/User-Guide-2291061-Page-46.png)