Panasonic of North America SC-C50 Wireless Speaker System User Manual basic sc c50pp Eng indb
Panasonic Corporation of North America Wireless Speaker System basic sc c50pp Eng indb
UserManual.wiki
>
Panasonic of North America
>
SC C50 User Manual
User Manual
Navigation menu
Upload a User Manual
Namespaces
Wiki Guide
HTML
PDF
Info
Views
User Manual
Discussion / Help
Navigation
![07English Installation (07) Installation Turn off all the equipment before connection and read the appropriate operating instructions. Be sure to raise this unit when moving, and do not drag this unit. Notes on the speakers These speakers do not have magnetic shielding. Do not place them near TV, PC or other equipment easily influenced by magnetism. • Playing music at high volumes for a long period can cause damage to the system and shorten the life of the system. • Decrease the volume in the following conditions to prevent damage. - When playing distorted sound - When adjusting the sound quality - When turning on/off this unit For optimum sound effects The quality and volume of the bass sound, sound localization performance, sound ambience, etc. will change depending on the installation location of this unit, listening position, room conditions, and other factors. Refer to the information below when installing this unit. Determining the installation location • Place this unit on a flat safe surface. Adjusting the distances between this unit and the wall • If you install this unit close to a wall or a corner, the bass sound will be more powerful, however, if the unit is too close to it, sound localization performance and sound ambience may deteriorate. Adjusting with the Space Tune function You can adjust the sound quality automatically according to the installation location (near the wall or the corner of the room). Press and hold [ ] for 5 seconds. • ”Space Tune (Auto)” is displayed. Press [ ] again while “Space Tune (Auto)” is displayed. • A test tone outputs quite big while the measurement is in progress. • When the adjustment is complete, “Success” is displayed. • To cancel the adjustment in the middle, press [ ]. Unit care Pull out the AC power supply cord from the socket before maintenance. Clean this unit with a soft cloth. • When dirt is heavy, wring a wet cloth tightly to wipe the dirt, and then wipe it with a soft cloth. • Do not use solvents including benzine, thinner, alcohol, kitchen detergent, chemical wiper, etc. Doing so may cause the exterior case to be deformed or the coating to come off. Using “Technics Audio Center” If you install the dedicated app “Technics Audio Center” (free of charge) on your tablet/smartphone, you can stream music files from the device on your network to this unit and configure the settings of sound quality, etc. For details, visit: www.technics.com/support/ Firmware updates Occasionally, Panasonic may release updated firmware for this unit that may add or improve the way a feature operates. These updates are available free of charge. • Update via Internet ( 10) • For details of the update via USB flash memory, refer to the following website. www.technics.com/support/firmware/ To dispose of or transfer this unit Before disposing of or transferring this unit, be sure to erase all the recorded information by restoring the settings to factory default. To restore the settings to factory default, press and hold both [•DIMMER/-INFO] and [ ] simultaneously for 5 seconds or longer while the unit is on. The unit restarts automatically, and all the settings are restored to factory default. • Before you dispose of or transfer this unit to a third party, be sure to log out of your music streaming services accounts to prevent unauthorized use of your accounts.](https://usermanual.wiki/Panasonic-of-North-America/SC-C50/User-Guide-3979738-Page-7.png)
![08 Control reference guide (08) This unit (front/top) 01 [] Standby/on switch Press to switch the unit from on to standby mode or vice versa. In standby mode, the unit is still consuming a small amount of power. 02 Adjust volume • 0 (min) to 100 (max) 03 Display Input source, etc. are displayed. 04 [ ] Favorite You can register your favorite station or playlist (USB, Podcasts, Spotify, etc.), and call them. • You can register up to 9 favorite stations or playlists. To register, press and hold [ ] until “Memorised” is displayed while a station tuned in or music is being played back. Then, the station or music is automatically registered to an unused number from 1 to 9. 05 [] Play/Pause 06 [] Switch the input source 07 Built-in microphone 08 Product identification marking (Bottom of this unit) • The model number is indicated. This unit (rear) 10BASE-T/100BASE -TXOPT INLAN AUX INDIMMERINFOAC IN500mA5V10BASE -T/100BASE-TXOPT INLAN AUX INDIMMERINFOAC IN500m A5V 09 [•D IMMER /- INFO] Adjust the brightness of illumination of the display and bottom of the unit. • When the display is turned off, it will light up for a few seconds only when you operate this unit. Before the display turns off, “Display Off” will be displayed for a few seconds. • Press [•DIMMER/-INFO] repeatedly to switch the brightness. • Press and hold [•DIMMER/-INFO] to display the network status or settings. The displayed items are changed by pressing [•DIMMER/-INFO] repeatedly. (The brightness does not change during this period.) 10 USB-A terminal (DC 5 V 500 mA) You can play back music stored on the connected USB device using the dedicated app “Technics Audio Center” (free of charge) on your tablet/smartphone ( 09). For details, visit: www.technics.com/support/ • If a USB device is connected, [•DIMMER/-INFO] is difficult to press. Remove the USB device as necessary. 11 LAN terminal ( 11) 12 Optical digital input terminal You can connect a CD player, etc. with optical digital audio cable (not supplied) and play back music. ( 09) 13 AUX IN terminal You can connect a portable audio player, etc. with an analog audio cable (3.5 mm (1/8”)) (not supplied) and play back music. ( 09) 14 AC IN terminal ( ) ( 09)](https://usermanual.wiki/Panasonic-of-North-America/SC-C50/User-Guide-3979738-Page-8.png)
![09English Connections Basic (09) Connecting analog audio output device 10BA SE -T/100 BAS E-TXOPT INLAN AUX INDIMMERINFOAC IN500m A5V Portable audio player, etc. Analog audio cable (3.5 mm (1/8”)) (not supplied) Note • When enjoying video contents with this function, the video and audio output may not be synchronized. Connecting digital audio output device 10BA SE -T/100 BAS E-TXOPT INLAN AUX INDIMMERINFOAC IN500m A5V Optical digital audio cable (not supplied) CD player, etc. Note • When enjoying video contents with this function, the video and audio output may not be synchronized. Connecting USB device 10BA SE -T/100 BAS E-TXOPT INLAN AUX INDIMMERINFOAC IN500m A5V USB device AC power supply cord connection Connect only after all other connections are completed. 10BA SE -T/100 BAS E-TXOPT INLAN AUX INDIMMERINFOAC IN500m A5V To a household AC outlet • Use only the supplied AC power supply cord. • Do not connect the AC power supply cord until all other connections are complete. • Insert the plugs of the cables to be connected all the way in. • Do not bend cables at sharp angles. • Wireless LAN (Wi-Fi®) setting may start when this unit is turned on. If you stop the Wi-Fi setting, press [ ]. To keep the Wi-Fi setting, start the “Google Home” app and follow the on-screen instructions. ( 11) Note • This unit consumes a small amount of AC power ( 18) even when the unit is in standby mode. Remove the plug from the main electrical outlet if you will not be using the unit for an extended period of time. Place the unit so the plug can be easily removed.](https://usermanual.wiki/Panasonic-of-North-America/SC-C50/User-Guide-3979738-Page-9.png)
![10 Network settings (10) Basic You can stream online music services or music files from your smartphone/tablet to this unit. This unit can be connected to a router using a LAN cable or built-in Wi-Fi®. For a stable connection to the network, a wired LAN connection is recommended. ■ Preparation If you install the “Google Home” app on your smartphone/tablet, you can set up a connection using the application. • When using the Chromecast-enabled apps to play music on this unit ( 16), set up a connection using the “Google Home” app. • Make sure that the Wi-Fi function is activated on your smartphones/tablet. 1 Install the “Google Home” app on your smartphone/tablet. • To download the “Google Home” app, visit: https://www.google.com/cast/setup/ 2 Connect your smartphone/tablet to the same network as this unit before setting. Note • After turning on this unit, it may take some time until this unit is activated. • If “Firmware update is available” is displayed after the network connection is set up, the firmware for this unit is available. Press and hold [ ] for 5 seconds or longer to start the update. - The progress is displayed as “Updating %” while updating. (“ ” stands for a number.) - When the update has finished successfully, “Success” is displayed. Turn this unit off and on. • “ ” blinks while the network connection is not established. When the network connection is established, “ ” disappears. The network setting using the “Google Home” app may be available while “ ” blinks. Start the “Google Home” app and follow the on-screen instructions. ( 13)](https://usermanual.wiki/Panasonic-of-North-America/SC-C50/User-Guide-3979738-Page-10.png)
![English11 (11) Basic Wired LAN connection 10BA SE -T/100 BAS E-TXOPT INLAN AUX INDIMMERINFOAC IN500m A5V Broadband router, etc. LAN cable (not supplied) 1 Disconnect the AC power supply cord. 2 Connect this unit to a broadband router, etc. using a LAN cable. 3 Connect the AC power supply cord to this unit. ( 09) 4 Press [ ] to turn this unit on. 5 (To use the Chromecast-enabled apps with this unit ( 16)) Make sure to set up a connection using “Google Home” app on your smartphone/tablet. Note • While the AC power supply cord is disconnected, the LAN cable must be connected or disconnected. • Use category 7 or above straight LAN cables (STP) when connecting to peripheral devices. • Inserting any cable other than a LAN cable in the LAN port can damage the unit. • Even when the Wi-Fi function is set to “On”, the wired LAN function is activated while a LAN cable being connected. (“ ” disappears.) Wireless LAN connection ■ Preparation Disconnect the AC power supply cord. Disconnect the LAN cable. Place this unit as close to the wireless router as possible. Connect the AC power supply cord to this unit. ( 09) Note • The setting will be cancelled after the set time limit. In that case, try the setting again. • “ ” disappears when the Wi-Fi setting is complete. • To cancel this setting in the middle, press [ ] or turn the unit to standby mode. Network setting for the first time using the “Google Home” app 1 Press [ ] to turn this unit on. • “Wi-Fi Setup” starts blinking. Wi-FiSetup 2 Start the “Google Home” app and follow the on-screen instructions. Note • This unit will be displayed as “Technics-SC-C50-****” if the device name is not set. (“****” stands for characters unique to each set.) • You can check your network information (SSID, MAC address and IP address) from the “Google Home” app or “Technics Audio Center” app. • Some items on the “Google Home” app are irrelevant to this unit. • When this unit is turned off and on before the Wi-Fi setting is complete, “Wi-Fi Setup” is displayed again. Perform the Wi-Fi setting or set the Wi-Fi function to “Off” so that it is not displayed thereafter. To switch the Wi-Fi function between “On” and “Off”, press [ ] to cancel the Wi-Fi setting in the middle, press and hold the volume [ ] on the top and [•DIMMER/-INFO] on the rear of this unit for approx. 5 seconds. • For other connection methods ( 12)](https://usermanual.wiki/Panasonic-of-North-America/SC-C50/User-Guide-3979738-Page-11.png)
![12 Network settings (Continued) (12) Basic Setting the network from the setup menu 1 Press and hold [ ] on the top and [•DIMMER/-INFO] on the rear of this unit. 2 Connection methods (WPS/WPS PIN/Wi-Fi Setup) are displayed in turn. • The display changes every 5 seconds. WPS • If your wireless broadband router supports the WPS (Wi-Fi Protected Setup™) push button (Using the WPS button) WPS PIN64428147 • If your wireless broadband router support the WPS PIN code method (Using the WPS PIN code) Wi-FiSetup • When using the “Google Home” app to set up a connection (Using the “Google Home” app) 3 Release [ ] and [•DIMMER/-INFO] while the selected connection method is displayed. Note • When using the Chromecast-enabled apps to play music on this unit ( 16), set up a connection using the “Google Home” app. ■ Using the WPS button “WPS” (When not using the Chromecast-enabled apps with this unit) If your wireless router supports WPS, you can set up a connection by pressing the WPS button. • A compatible wireless router may have the WPS identifier mark. • Complete the settings within 2 minutes while “WPS” is displayed. 1 After “WPS” is displayed, press the WPS button on the wireless router. Example: • When the connection is established, “Success” is displayed. - “Fail” may be displayed if the connection was not complete. Try this method again from the setup menu. If “Fail” is still displayed, try other methods. 2 Press [ ] to exit the setting. ■ Using the WPS PIN code “WPS PIN” (When not using the Chromecast-enabled apps with this unit) If your wireless router supports WPS, you can set up a connection by entering the WPS PIN code. • For details on how to enter the PIN code, refer to the operating instructions of the wireless router. • Complete the settings within 2 minutes while “WPS PIN” and the PIN code are displayed. 1 Enter the PIN code into the wireless router from PC, etc. • When the connection is established, “Success” is displayed. - “Fail” may be displayed if the connection was not complete. Try this method again from the setup menu. If “Fail” is still displayed, try other methods.](https://usermanual.wiki/Panasonic-of-North-America/SC-C50/User-Guide-3979738-Page-12.png)
![English13 (13) Basic 2 Press [ ] to exit the setting. Note • Depending on a router, other connected devices may temporarily lose their connection. • For details, refer to the operating instructions of the wireless router. ■ Using the “Google Home” app “Wi-Fi Setup” (When using the Chromecast-enabled apps with this unit) You can set up a connection using the “Google Home” app. 1 Start the app and follow the on-screen instructions. 2 Press [ ] to exit the setting. Note • This unit will be displayed as “Technics-SC-C50-****” if the device name is not set. (“****” stands for characters unique to each set.) • You can check your network information (SSID, MAC address and IP address) from the “Google Home” app or “Technics Audio Center” app. • Some items on the “Google Home” app are irrelevant to this unit. To use Chromecast-enabled apps When using the Chromecast-enabled apps to play music on this unit, you need to set up a network connection using “Google Home” app. When the network has been set up with another method, try the setting again with the following procedure. 1 Press and hold [ ] on the top and [•DIMMER/-INFO] on the rear of this unit. • The displayed connection method is switched every 5 seconds. 2 When “Wi-Fi Setup” is displayed, release [ ] and [•DIMMER/-INFO]. • “Wi-Fi Setup” starts blinking. 3 Proceed to “Using the “Google Home” app”.](https://usermanual.wiki/Panasonic-of-North-America/SC-C50/User-Guide-3979738-Page-13.png)
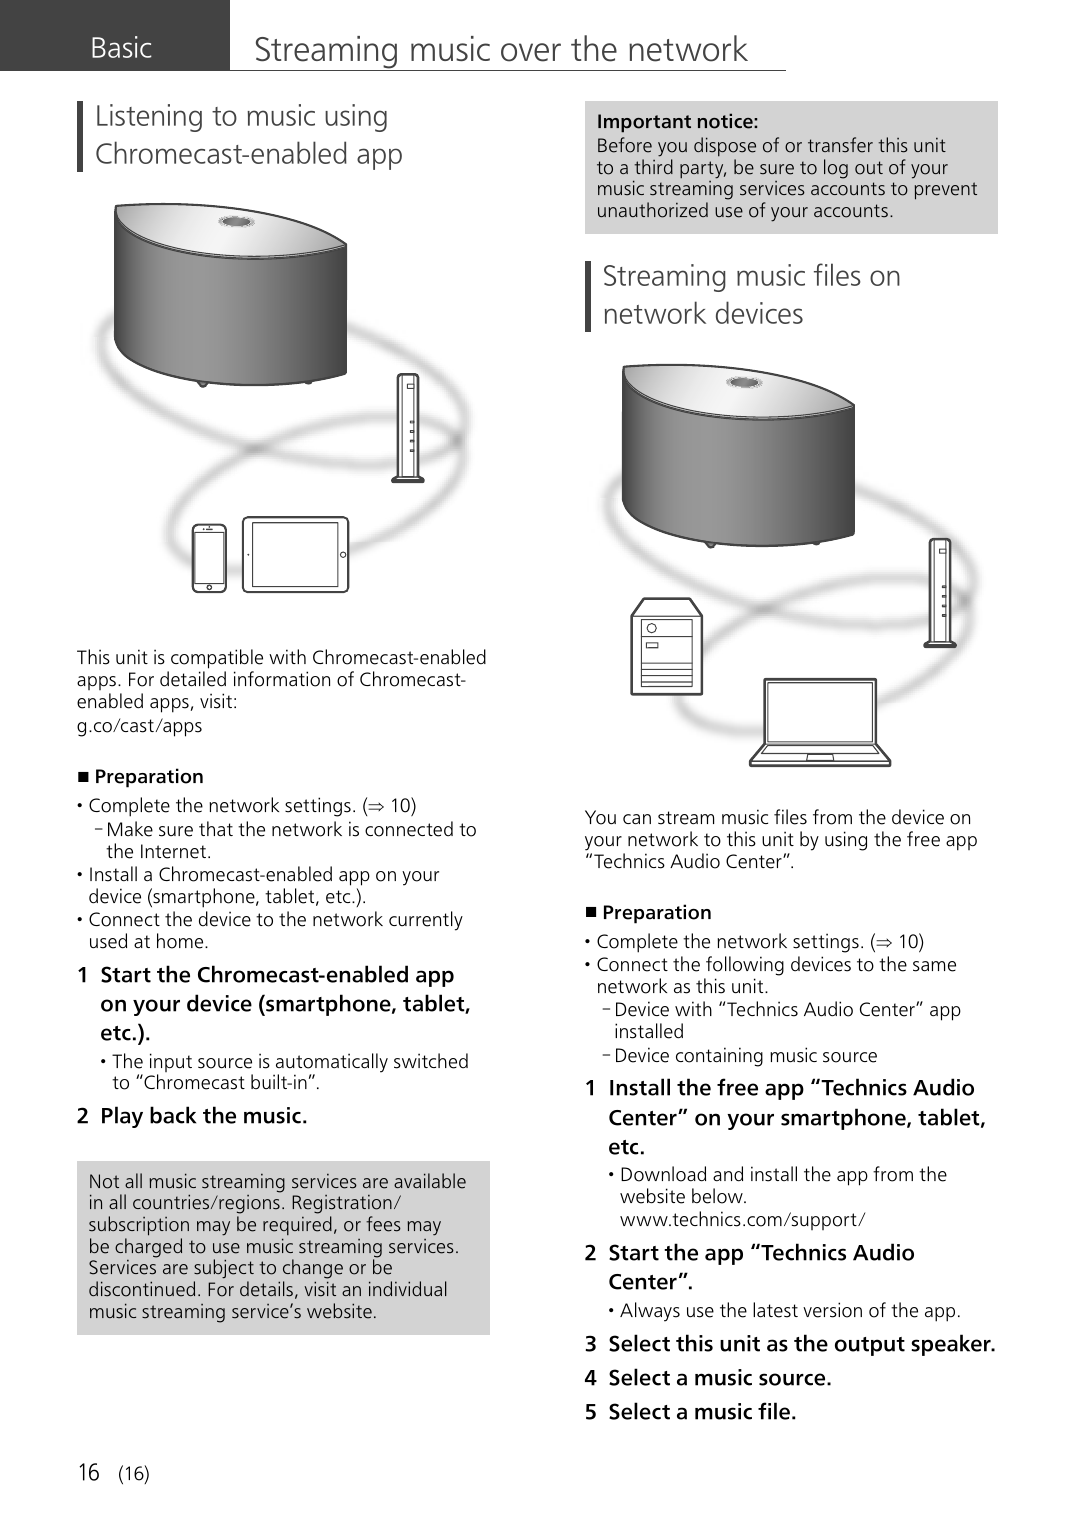
![14 (14) Available input sources Basic 1 Press [ ] to turn this unit on. 2 Press [ ] repeatedly to select the input source. • Each input source can be played back with this unit (see below). • Some inputs can be available when using “Google Home” or “Technics Audio Center” (free of charge). For details, visit: www.technics.com/support/ - Complete the network settings. ( 10) Using the auxiliary input Using digital audio output device Using Bluetooth® You can connect a portable audio player, etc. with an analog audio cable (3.5 mm (1/8”)) (not supplied) and play back music. ( 09) • Start playback on the connected device. You can connect a CD player, etc. with optical digital audio cable (not supplied) and play back music. ( 09) • Start playback on the connected device. You can listen to the sound from the Bluetooth® audio device from this unit wirelessly. ( 15) • Start playback on the Bluetooth® device. Using USB device Playing Internet Radio and PodcastsPodcasts You can play back music stored on the connected USB device. • Use the dedicated app “Technics Audio Center” (free of charge) to play back. Using the free app “Technics Audio Center”, you can play an internet radio by setting this unit as a speaker for the internet radio. • Use the dedicated app “Technics Audio Center” (free of charge) to play back. Chromecastbuilt-in Using Chromecast-enabled apps Using music streaming services (Spotify, etc.) This unit has the Chromecast built-in. You can stream music files from your device (smartphone, tablet, etc.) with Chromecast-enabled apps and select this unit as the output speaker. ( 16) • For detailed information of Chromecast-enabled apps, visit: g.co/cast/apps You can play music from music streaming services, such as Spotify etc. by setting this unit as a speaker. • For music streaming services supported by this unit, visit: www.technics.com/support/ Streaming music files on network devices AirPlay Using AirPlay You can stream music files from the device on your network to this unit by using the free app “Technics Audio Center”. ( 16) You can play back music stored on iOS device, etc. using AirPlay.](https://usermanual.wiki/Panasonic-of-North-America/SC-C50/User-Guide-3979738-Page-14.png)
![English15 Using Bluetooth® (15) BasicUsing B Pairing a Bluetooth® device • Turn on this unit, Bluetooth® device and place the device near this unit. • Turn on the Bluetooth® feature of the device. 1 Press [ ] repeatedly to select “ ”. • “ ” blinks at 1 second interval. • “ ” blinks per second and this unit tries to connect to the last connected Bluetooth® device. After the connection is complete, proceed to step 4. 2 Press and hold [ ]. • “ ” blinks at 1 second interval and this unit enters the registration standby state. 3 Open the Bluetooth® connection screen, etc. on the Bluetooth® device, and select “Technics-SC-C50-****”. • “****” stands for numbers unique to each set. • If the device name is set on the “Google Home” app, the set name is displayed. 4 Play music by operating the Bluetooth® device. Note • If prompted for the passkey, input “0000”. • You can register up to 8 devices with this unit. If a 9th device is paired, the device that has not been used the longest will be replaced. Listening to music stored on a Bluetooth® device • If a Bluetooth® device is already connected, disconnect it. 1 Press [ ] repeatedly to select “ ”. • “ ” blinks per second and this unit will automatically try to connect to the last connected Bluetooth® device. After the connection is complete, proceed to step 3. 2 Open the Bluetooth® connection screen, etc. on the Bluetooth® device, and select “Technics-SC-C50-****”. 3 Play music by operating the Bluetooth® device. Note • Refer to the operating instructions of the Bluetooth® device for details. • This unit can only be connected to one device at a time. • The Bluetooth® device will be disconnected if a different audio source is selected. Bluetooth® device](https://usermanual.wiki/Panasonic-of-North-America/SC-C50/User-Guide-3979738-Page-15.png)
![07Français Installation (25) Installation Avant de brancher, mettez tout l’équipement en position arrêt et lisez les instructions d’utilisation correspondantes. Pour la déplacer, veillez à soulever cette unité et à ne pas la faire glisser. Remarques sur les haut-parleurs Ces haut-parleurs n’ont pas de blindage magnétique. Ne les placez pas près d’un téléviseur, un ordinateur ou d’autres appareils facilement influencés par le magnétisme. • L’écoute de musique à fort volume pendant de longues périodes peut endommager le système et en diminuer la durée de vie. • Diminuez le volume dans les conditions suivantes afin d’éviter tout dommage. - En cas de sons déformés - Lors du réglage de la qualité sonore - Lors de la mise en marche/l’arrêt de cette unité Pour des effets sonores optimaux La qualité et le volume des basses fréquences, les performances de la localisation du son, l’ambiance sonore, etc., varient en fonction de l’emplacement d’installation de cette unité, de l’emplacement d’écoute, des caractéristiques de la pièce et d’autres facteurs. Consultez les informations qui suivent pour installer cette unité. Choix de l’emplacement d’installation • Placez cette unité sur une surface plane. Réglage de la distance entre l’unité et le mur • Si vous installez cette unité près d’un mur ou d’un coin, le rendu des basses fréquences sera plus puissant, cependant, si l’unité est trop proche de celui-ci, les performances de la localisation du son et de l’ambiance sonore peuvent en être amoindries. Réglage avec la fonction de calibrage acoustique “Space Tune” Vous pouvez régler automatiquement la qualité sonore en fonction de l’emplacement d’installation (près du mur ou du coin de la pièce). Maintenir [ ] enfoncé pendant 5 secondes. • “Space Tune (Auto)” s’affiche. Appuyez une nouvelle fois sur [ ] quand “Space Tune (Auto)” est affiché. • Une tonalité d’essai retentit assez fort pendant que la mesure est en cours. • Une fois le réglage effectué, “Réussite” est affiché. • Pour annuler ce réglage en cours, appuyez sur [ ]. Entretien de l’appareil Débranchez le cordon d’alimentation de la prise secteur avant de procéder à l’entretien de l’appareil. Nettoyez cet appareil avec un chiffon doux. • Si l’appareil est particulièrement sale, utilisez un chiffon humide bien essoré pour essuyer la saleté, puis essuyez l’appareil avec un chiffon doux. • N’utilisez pas de solvants tels que de la benzine, du diluant, de l’alcool, du détergent de cuisine, etc. Cela pourrait déformer le boîtier externe ou décoller son revêtement. Utilisation de l’application “Technics Audio Center” Si vous installez l’application dédiée “Technics Audio Center” (gratuite) sur votre tablette/smartphone, vous pouvez diffuser des fichiers musique de votre périphérique sur votre réseau vers cet appareil et configurer les paramètres de qualité du son, etc. Pour plus de détails, visitez : www.technics.com/support/ Mises à jour du micrologiciel Panasonic diffuse à l’occasion des mises à jour du micrologiciel de cet appareil qui peuvent ajouter des fonctionnalités ou améliorer celles en place. Ces mises à jour sont mises à votre disposition sans frais. • Mise à jour via Internet ( 10) • Pour obtenir des détails sur la mise à jour via la mémoire flash USB, reportez-vous au site Web suivant. www.technics.com/support/firmware/ Pour mettre cet appareil au rebut ou le donner Avant de vous débarrasser de cet appareil ou de le transférer, assurez-vous d’effacer toutes les informations enregistrées en rétablissant les paramètres d’usine par défaut. Pour rétablir les paramètres d’usine par défaut, appuyez et maintenez enfoncées les touches [•DIMMER/-INFO] et [ ] simultanément pendant 5 secondes au moins quand l’appareil est allumé. L’appareil redémarre automatiquement et tous les paramètres d’usine sont rétablis. • Avant de vous débarrasser de cet appareil ou de le transférer à un tiers, assurez-vous de vous déconnecter de vos comptes de services de diffusion de musique en continu afin d’empêcher toute utilisation non autorisée de vos comptes.](https://usermanual.wiki/Panasonic-of-North-America/SC-C50/User-Guide-3979738-Page-25.png)
![08 Guide de référence (26) Cette unité (avant/dessus) 01 [] Interrupteur d’attente/marche Appuyez sur cet interrupteur pour commuter l’appareil du mode d’attente au mode de marche et vice versa. En mode d’attente, l’appareil continue de consommer une petite quantité de courant. 02 Réglage du volume • 0 (min) à 100 (max) 03 Afficheur Source d’entrée, etc., sont affichés. 04 [] Favoris Vous pouvez enregistrer votre station ou liste de lecture favorite (USB, Podcasts, Spotify, etc.) et lui donner un nom. • Vous pouvez enregistrer jusqu’à 9 stations ou listes de lecture favorites. Pour enregistrer, maintenez la touche [ ] enfoncée jusqu’à ce que “Mémorisé” s’affiche lorsque qu’une station est réglée ou qu’une musique est en cours de lecture. Puis la station ou la musique est automatiquement enregistrée avec un numéro inutilisé entre 1 et 9. 05 [] Lecture/Pause 06 [] Pour sélectionner la source d’entrée 07 Microphone intégré 08 Repère d’identification du produit (au bas de cette unité) • Le numéro du modèle est indiqué. Cette unité (arrière) 10BASE-T/100BASE -TXOPT INLAN AUX INDIMMERINFOAC IN500mA5V10BASE -T/100BASE-TXOPT INLAN AUX INDIMMERINFOAC IN500m A5V 09 [•D IMMER /- INFO] Réglez la luminosité de l’éclairage de l’écran et du bas de l’appareil. • Quand l’écran est éteint, il ne s’éclaire quelques secondes que lorsque vous utilisez cette unité. Avant la désactivation de l’écran, “Affichage éteint” s’affiche durant quelques secondes. • Appuyez plusieurs fois sur la touche [•DIMMER/-INFO] pour changer la luminosité. • Maintenez la touche [•DIMMER/-INFO] enfoncée pour afficher le statut ou les paramétrages du réseau. Les éléments affichés sont modifiés en appuyant à plusieurs reprises sur [•DIMMER/-INFO]. (La luminosité ne change pas pendant ce laps de temps.) 10 Borne USB-A (5 V c.c. 500 mA) Vous pouvez écouter de la musique enregistrée sur le périphérique USB connecté avec l’application dédiée “Technics Audio Center” (gratuite) sur votre tablette/smartphone ( 09). Pour plus de détails, visitez : www.technics.com/support/ • Quand un périphérique USB est connecté, il est difficile d’appuyer sur [•DIMMER/-INFO]. Retirez le périphérique USB si nécessaire. 11 Borne LAN ( 11) 12 Borne d’entrée optique numérique Vous pouvez raccorder un lecteur CD, etc., avec un câble audio optique numérique (non fourni) et écouter de la musique. ( 09) 13 Borne d’entrée AUX Vous pouvez raccorder un lecteur audio portable, etc., avec un câble audio analogique (3,5 mm (1/8 po)) (non fourni) et écouter de la musique. ( 09) 14 Prise d’alimentation c.a. ( ) ( 09)](https://usermanual.wiki/Panasonic-of-North-America/SC-C50/User-Guide-3979738-Page-26.png)
![09Français Connexions Bases (27) Connexion d’un périphérique à sortie audio analogique 10BA SE -T/100 BAS E-TXOPT INLAN AUX INDIMMERINFOAC IN500m A5V Lecteur audio portable, etc. Câble audio analogique (3,5 mm (1/8 po)) (non fourni) Nota • Lorsque vous regardez un contenu vidéo avec cette fonction, il se peut que la sortie audio et vidéo ne soit pas synchronisée. Connexion d’un périphérique à sortie audio numérique 10BA SE -T/100 BAS E-TXOPT INLAN AUX INDIMMERINFOAC IN500m A5V Câble audio numérique optique (non fourni) Lecteur CD, etc. Nota • Lorsque vous regardez un contenu vidéo avec cette fonction, il se peut que la sortie audio et vidéo ne soit pas synchronisée. Connexion du périphérique USB 10BA SE -T/100 BAS E-TXOPT INLAN AUX INDIMMERINFOAC IN500m A5V L’appareil USB Connexion du cordon d’alimentation secteur Branchez le cordon d’alimentation une fois tous les autres branchements effectués. 10BA SE -T/100 BAS E-TXOPT INLAN AUX INDIMMERINFOAC IN500m A5V À une prise secteur murale • N’utilisez que le cordon d’alimentation secteur fourni. • Ne branchez pas le cordon d’alimentation secteur avant d’avoir effectué tous les autres raccordements. • Insérez à fond les fiches des câbles à brancher. • Ne tordez pas les câbles. • Le paramétrage LAN sans fil (Wi-Fi®) peut démarrer lorsque cette unité est mis en marche. Si vous arrêtez le paramétrage Wi-Fi, appuyez sur [ ]. Pour conserver le paramétrage Wi-Fi, lancez l’application “Google Home” et suivez les instructions à l’écran. ( 11) Nota • Cette unité consomme une petite quantité de courant alternatif ( 18) même lorsqu’elle est en veille. Retirez la prise du secteur lorsque vous n’utilisez pas l’unité pendant une longue période. Positionnez l’unité pour pouvoir facilement débrancher la prise.](https://usermanual.wiki/Panasonic-of-North-America/SC-C50/User-Guide-3979738-Page-27.png)
![10 Configuration réseau (28) Bases Vous pouvez diffuser des services de musique en ligne ou des fichiers musique depuis votre smartphone/tablette vers cette unité. Cette unité peut être connectée à un routeur à l’aide d’un câble réseau ou du Wi-Fi® intégré. Pour obtenir une connexion au réseau stable, une connexion LAN filaire est préférable. ■ Préparatifs Si vous installez l’application “Google Home” sur votre téléphone intelligent/tablette, vous pouvez configurer une connexion avec l’application. • Lorsque vous utilisez l’application activée par Chromecast pour écouter de la musique sur cet appareil ( 16), configurez une connexion avec l’application “Google Home”. • Veillez à ce que la fonction Wi-Fi soit activée sur votre téléphone intelligent/tablette. 1 Installez l’application “Google Home” sur votre téléphone intelligent/tablette. • Pour télécharger l’application “Google Home”, accédez à : https://www.google.com/cast/setup/ 2 Connectez votre téléphone intelligent/tablette au même réseau que cet appareil avant le paramétrage. Nota • Après la mise sous tension de cet appareil, il peut s’écouler un certain temps avant qu’il soit activé. • Si “Une mise à jour du micrologiciel est disponible” est affiché après la configuration de la connexion réseau, le micrologiciel de cette unité est disponible. Maintenez [ ] enfoncé pendant au moins 5 secondes pour démarrer la mise à jour. - La progression est affichée en tant que “Updating %” pendant la mise à jour. (“ ” représente un chiffre.) - Une fois la mise à jour faite, “Success” s’affiche. Mettre cet appareil hors tension puis sous tension. • “ ” clignote quand la connexion réseau n’est pas établie. Quand la connexion réseau est établie, “ ” disparaît. Le paramètre réseau utilisant l’application “Google Home” peut être disponible quand “” clignote. Lancez l’application “Google Home” et suivez les instructions à l’écran. ( 13)](https://usermanual.wiki/Panasonic-of-North-America/SC-C50/User-Guide-3979738-Page-28.png)
![Français11 (29) Bases Connexion au réseau local branché 10BA SE -T/100 BAS E-TXOPT INLAN AUX INDIMMERINFOAC IN500m A5V Routeur à large bande, etc. Câble réseau local (non fourni) 1 Débranchez le cordon d’alimentation secteur. 2 Connectez cet appareil à un routeur à large bande, etc., à l’aide d’un câble réseau local. 3 Branchez le cordon d’alimentation secteur de cette unité. ( 09) 4 Appuyez sur [ ] pour mettre cette unité en marche. 5 (Pour utiliser les applications activées par Chromecast avec cet appareil ( 16)) Veillez à configurer une connexion avec l’application “Google Home” sur votre téléphone intelligent/tablette. Nota • Tandis que le cordon d’alimentation secteur est débranché, le câble réseau doit être branché ou débranché. • Utilisez des câbles de réseau local droits de catégorie 7 ou supérieure (STP) lors de leur connexion à des appareils périphériques. • Si vous insérez un câble autre qu’un câble réseau local dans la prise réseau, vous pourriez endommager l’unité. • Même lorsque la fonction Wi-Fi est réglée sur “Activé”, la fonction LAN filaire est activée si un câble LAN est connecté. (“ ” disparaît.) Connexion LAN sans fil ■ Préparatifs Débranchez le cordon d’alimentation secteur. Débranchez le câble réseau. Rapprochez cette unité aussi près que possible du routeur sans fil. Branchez le cordon d’alimentation secteur de cette unité. ( 09) Nota • Le paramétrage est annulé une fois la limite de temps définie écoulée. Dans ce cas, recommencez le paramétrage. • “ ” clignote jusqu’à la fin du paramétrage Wi-Fi. • Pour annuler ce paramétrage à mi-chemin, appuyez sur [ ] ou mettez l’unité en veille. Premier paramétrage du réseau avec l’application “Google Home” 1 Appuyez sur [ ] pour mettre cette unité en marche. • “Conf. Wi-Fi” commence à clignoter. Wi-FiSetup 2 Lancez l’application “Google Home” et suivez les instructions à l’écran. Nota • Cet appareil sera affiché sous “Technics-SC-C50-****” si le nom du périphérique n’est pas paramétré. (“****” représente des caractères uniques pour chaque réglage.) • Vous pouvez vérifier vos informations réseau (SSID, adresse MAC et adresse IP) depuis l’application “Google Home” ou l’application “Technics Audio Center”. • Certains éléments de l’application “Google Home” ne sont pas pertinents pour cet appareil. • Lorsque cette unité est mise hors tension puis sous tension avant que le paramétrage Wi-Fi ne soit terminé, “Conf. Wi-Fi” s’affiche à nouveau. Effectuez le paramétrage Wi-Fi ou réglez la fonction Wi-Fi sur “Désactivé” de sorte qu’il ne s’affiche plus par la suite. Pour commuter la fonction Wi-Fi entre “Activé” et “Désactivé”, appuyez sur [ ] pour annuler le paramétrage Wi-Fi au milieu, maintenez enfoncé le [] de volume du haut et [•DIMMER/-INFO] sur l’arrière de cet appareil pendant environ 5 secondes. • Pour d’autres méthodes de connexion ( 12)](https://usermanual.wiki/Panasonic-of-North-America/SC-C50/User-Guide-3979738-Page-29.png)
![12 Configuration réseau (suite) (30) Bases Paramétrage du réseau depuis le menu de configuration 1 Maintenez [ ] enfoncé sur le dessus et [•DIMMER/-INFO] sur l’arrière de cette unité. 2 Les méthodes de connexion (WPS/PIN WPS/Conf. Wi-Fi) sont affichées à tour de rôle. • L’affichage change toutes les 5 secondes. WPS • Si votre routeur haut débit sans fil prend en charge le WPS (Wi-Fi Protected Setup™), appuyez sur la touche (Utilisation du bouton WPS) WPS PIN64428147 • Si votre routeur haut débit sans fil prend en charge la méthode de code PIN WPS (Utilisation du code PIN (NIP) WPS) Wi-FiSetup • Lorsque vous utilisez l’application “Google Home” pour paramétrer une connexion (Utilisation de l’application “Google Home”) 3 Relâchez les touches [ ] et [•DIMMER/-INFO] quand la méthode de connexion sélectionnée s’affiche. Nota • Lorsque vous utilisez l’application activée par Chromecast pour écouter de la musique sur cet appareil ( 16), configurez une connexion avec l’application “Google Home”. ■ Utilisation du bouton WPS “WPS” (Lorsque vous n’utilisez pas l’application activée par Chromecast avec cet appareil) Si votre routeur sans fil prend en charge le WPS, vous pouvez configurer une connexion en appuyant sur le bouton WPS. • Il se peut qu’un routeur sans fil compatible dispose de l’identifiant WPS. • Terminez les paramétrages dans les 2 minutes quand “WPS” est affiché. 1 Une fois que “WPS” est affiché, appuyez sur le bouton WPS du routeur sans fil. Exemple : • Une fois la connexion établie, “Réussite” est affiché à l’écran. - “Échec” peut s’afficher si la connexion n’a pas été effectuée. Essayez à nouveau cette méthode depuis le menu de configuration. Si “Échec“ s’affiche à nouveau, essayez d’autres méthodes. 2 Appuyez sur [ ] pour quitter les réglages. ■ Utilisation du code PIN (NIP) WPS “PIN WPS” (Lorsque vous n’utilisez pas l’application activée par Chromecast avec cet appareil) Si votre routeur sans fil prend en charge le WPS, vous pouvez configurer une connexion en saisissant le code PIN (NIP) WPS. • Pour plus de détails sur la manière dont saisir le code PIN (NIP), référez-vous au mode d’emploi du routeur sans fil. • Terminez les paramétrages dans les 2 minutes quand “PIN WPS” et le code PIN sont affichés.](https://usermanual.wiki/Panasonic-of-North-America/SC-C50/User-Guide-3979738-Page-30.png)
![Français13 (31) Bases 1 Entrez le code PIN (NIP) dans le routeur sans fil depuis le PC, etc. • Une fois la connexion établie, “Réussite” est affiché à l’écran. - “Échec” peut s’afficher si la connexion n’a pas été effectuée. Essayez à nouveau cette méthode depuis le menu de configuration. Si “Échec“ s’affiche à nouveau, essayez d’autres méthodes. 2 Appuyez sur [ ] pour quitter les réglages. Nota • En fonction du routeur, les autres périphériques connectés peuvent momentanément perdre leur connexion. • Pour plus de détails, référez-vous au mode d’emploi du routeur sans fil. ■ Utilisation de l’application “Google Home” “Conf. Wi-Fi” (Lorsque vous utilisez l’application activée par Chromecast avec cet appareil) Vous pouvez paramétrer une connexion en utilisant l’application “Google Home”. 1 Lancez l’application et suivez les instructions à l’écran. 2 Appuyez sur [ ] pour quitter les réglages. Nota • Cet appareil sera affiché sous “Technics-SC-C50-****” si le nom du périphérique n’est pas paramétré. (“****” représente des caractères uniques pour chaque réglage.) • Vous pouvez vérifier vos informations réseau (SSID, adresse MAC et adresse IP) depuis l’application “Google Home” ou l’application “Technics Audio Center”. • Certains éléments de l’application “Google Home” ne sont pas pertinents pour cet appareil. Pour utiliser des applications activées par Chromecast Lorsque vous utilisez des applications activées par Chromecast pour écouter de la musique sur cet appareil, vous devez paramétrer une connexion réseau avec l’application “Google Home”. Lorsque le réseau a été paramétré avec une autre méthode, essayer de paramétrer à nouveau avec la procédure suivante. 1 Maintenez [ ] enfoncé sur le dessus et [•DIMMER/-INFO] sur l’arrière de cette unité. • La méthode de connexion affichée change toutes les 5 secondes. 2 Lorsque “Conf. Wi-Fi” est affiché, relâchez les touches [ ] et [•D IM MER /- IN FO] . • “Conf. Wi-Fi” commence à clignoter. 3 Passez à “Utilisation de l’application “Google Home””.](https://usermanual.wiki/Panasonic-of-North-America/SC-C50/User-Guide-3979738-Page-31.png)
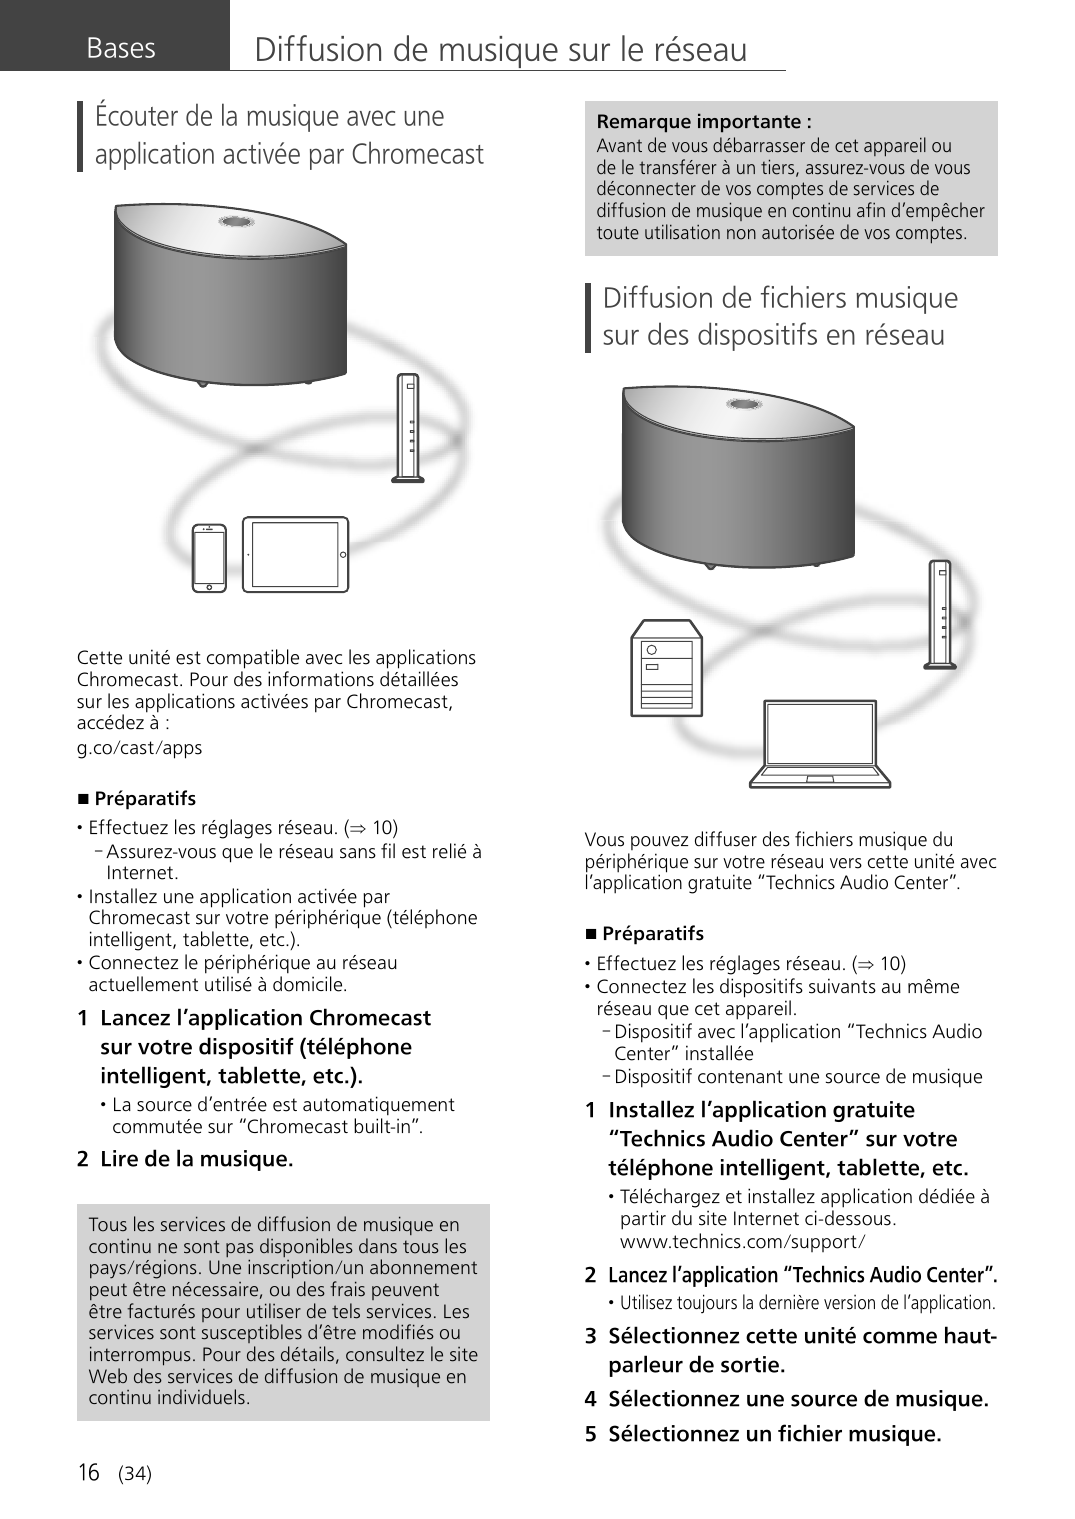
![14 (32) Sources d’entrée disponibles Bases 1 Appuyez sur [ ] pour mettre cette unité en marche. 2 Appuyez plusieurs fois sur [ ] pour sélectionner la source d’entrée. • Chaque source d’entrée peut être lue avec cet appareil (voir ci-dessous). • Certaines entrées peuvent être disponibles avec “Google Home” ou “Technics Audio Center” (gratuites). Pour plus de détails, visitez : www.technics.com/support/ - Effectuez les réglages réseau. ( 10) Utilisation de l’entrée auxiliaire Utilisation d’un périphérique à sortie audio numérique Utilisation de Bluetooth® Vous pouvez raccorder un lecteur audio portable, etc., avec un câble audio analogique (3,5 mm (1/8 po)) (non fourni) et écouter de la musique. ( 09) • Démarrez la lecture sur l’appareil connecté. Vous pouvez raccorder un lecteur CD, etc., avec un câble audio optique numérique (non fourni) et écouter de la musique. ( 09) • Démarrez la lecture sur l’appareil connecté. Vous pouvez écouter le son provenant du dispositif audio Bluetooth® depuis cet appareil, et ce sans fil. ( 15) • Commencez la lecture sur le dispositif Bluetooth®. Avec un dispositif USB Lecture de Radio Internet et de PodcastsPodcasts Vous pouvez lire de la musique enregistrée sur le périphérique USB connecté. • Utilisez l’application dédiée “Technics Audio Center” (gratuite) pour la lecture. Avec l’application gratuite “Technics Audio Center”, vous pouvez écouter la radio Internet en paramétrant cet appareil comme haut-parleur pour la radio Internet. • Utilisez l’application dédiée “Technics Audio Center” (gratuite) pour la lecture. Chromecastbuilt-in Utilisation d’applications activées par Chromecast Utilisation de services de diffusion de musique en continu (Spotify, etc.) Cet appareil dispose de Chromecast built-in. Vous pouvez diffuser des fichiers de musique en continu depuis votre dispositif (téléphone intelligent, tablette, etc.) avec des applications activées par Chromecast et sélectionner cet appareil comme haut-parleur de sortie. ( 16) • Pour des informations détaillées sur les applications activées par Chromecast, accédez à : g.co/cast/apps Vous pouvez écouter de la musique depuis des services de diffusion de musique en continu comme Spotify etc. en paramétrant cet appareil comme haut-parleur. • Pour connaître les services de diffusion de musique en continu pris en charge par cet appareil, accédez à : www.technics.com/support/ Diffusion de fichiers musique sur des dispositifs en réseau AirPlay Utilisation de AirPlay Vous pouvez diffuser des fichiers musique du périphérique sur votre réseau vers cette unité avec l’application gratuite “Technics Audio Center”. ( 16) Vous pouvez lire de la musique stockée sur un appareil iOS, etc., avec AirPlay.](https://usermanual.wiki/Panasonic-of-North-America/SC-C50/User-Guide-3979738-Page-32.png)
![Français15 Utilisation de Bluetooth® (33) BasesUtilisation de B Couplage d’un périphérique Bluetooth® • Allumez cette unité, le dispositif Bluetooth® et placez-le à proximité de cette unité. • Activez la fonction Bluetooth® du dispositif. 1 Appuyez plusieurs fois sur [ ] pour sélectionner “ ”. • “ ” clignote à 1 seconde d’intervalle. • “ ” clignote à 1 seconde d’intervalle et cet appareil tente de se connecter au dernier périphérique Bluetooth® connecté. Une fois la connexion effectuée, passez à l’étape 4. 2 Maintenez [ ] enfoncé. • “ ” clignote à 1 seconde d’intervalle et cet appareil passe en état d’attente d’enregistrement. 3 Ouvrez l’écran de connexion Bluetooth®, etc. sur le périphérique Bluetooth® et sélectionnez “Technics-SC-C50-****”. • “****” représente des nombres uniques pour chaque réglage. • Si le nom du périphérique est réglé dans l’application “Google Home”, ce nom s’affiche. 4 Écoutez de la musique en utilisant le périphérique Bluetooth®. Nota • Sur demande du mot de passe, entrer “0000”. • Il est possible d’enregistrer jusqu’à 8 dispositifs auprès de cet appareil. Si un 9e dispositif est couplé, il remplacera le dispositif n’ayant pas été utilisé depuis le plus longtemps. Écoute de la musique stockée sur un périphérique Bluetooth® • Si un dispositif Bluetooth® est déjà connecté, déconnectez-le. 1 Appuyez plusieurs fois sur [ ] pour sélectionner “ ”. • “ ” clignote à 1 seconde d’intervalle et cet appareil tente automatiquement de se connecter au dernier périphérique Bluetooth® connecté. Une fois la connexion effectuée, passez à l’étape 3. 2 Ouvrez l’écran de connexion Bluetooth®, etc. sur le périphérique Bluetooth® et sélectionnez “Technics-SC-C50-****”. 3 Écoutez de la musique en utilisant le périphérique Bluetooth®. Nota • Reportez-vous au manuel d’utilisation du dispositif Bluetooth® pour de plus amples instructions sur la façon de connecter un tel dispositif. • Cet appareil ne peut être connecté qu’à un dispositif à la fois. • Si une source audio différente est sélectionnée, le dispositif Bluetooth® se déconnecte. Appareil Bluetooth®](https://usermanual.wiki/Panasonic-of-North-America/SC-C50/User-Guide-3979738-Page-33.png)