Pantech Co P2050 GSM/WCDMA Phone with Bluetooth User Manual
Pantech Co Ltd GSM/WCDMA Phone with Bluetooth
UserManual.wiki
>
Pantech Co
>
P2050 User Manual
user manual
Navigation menu
Upload a User Manual
Namespaces
Wiki Guide
HTML
PDF
Info
Views
User Manual
Discussion / Help
Navigation

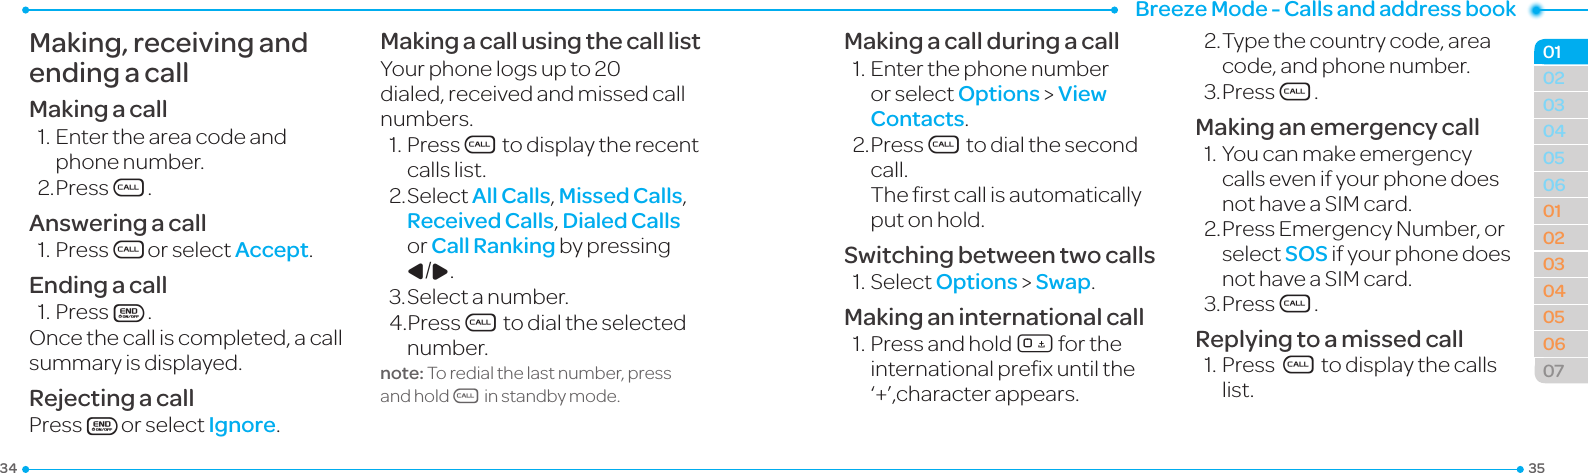
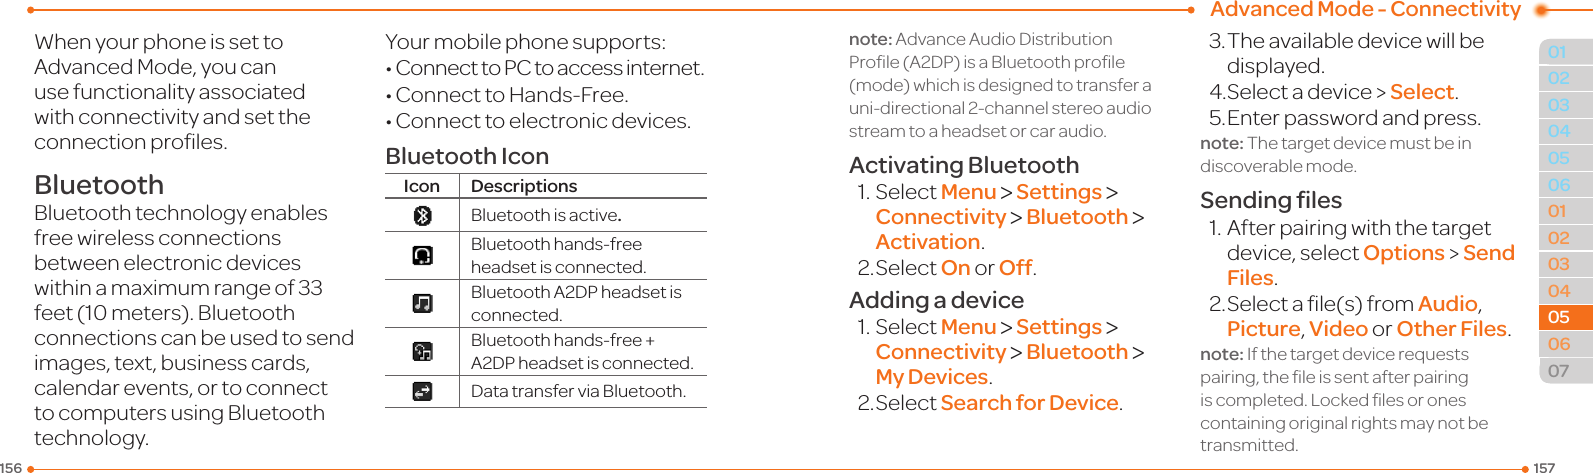
![Breeze Mode - Calls and address book3736030405060102030405060701022.SelectMissed Calls by pressing L/R. 3.Selectanumbertocallbypressing U/D.4.PressS.Answering a second call N1.PressS.Therstcallisautomatically put on hold.2. PressEto end the second call. The call on hold is automatically reconnected.note: For answering a second call, you shouldactivate Call Waiting inadvance.(Select Menu > Settings > Call > Call Waiting > ActivateinAdvancedMode.)Options during a callMicrophone off and onSwitching your phone’s microphone off1.SelectOptions > Mute [ ].Switching your phone’s microphone back on1.SelectOptions > Unmute.Talking on speaker1.Select[ ].Removing background noiseYou can eliminate background noisefromconversationsandimprovethevoicequalityofcommunications by setting NoiseSuppressiontoOn.1.SelectOptions> Noise Suppression.Putting a call on hold and returning NPutting a call on hold1.SelectOptions > Hold or pressS.Returning to a held call1.SelectOptions > Unhold or pressS again.Multi-party calls NYou can talk with more than one personorhaveaconferencecall.Making a multi-party call1.Calltherstparticipant.2. Call the second participant. Therstcallisautomaticallyput on hold.3.SelectOptions > Join.Having a private conversation with one participant1.SelectOptions > Split.2.Selectaparticipant>Select.](https://usermanual.wiki/Pantech-Co/P2050/User-Guide-2030675-Page-19.png)