Pantech Co PC-1000N Dual- Mode CDMA Phone (CDMA/ PCS CDMA) User Manual 1
Pantech Co Ltd Dual- Mode CDMA Phone (CDMA/ PCS CDMA) 1
UserManual.wiki
>
Pantech Co
>
PC 1000N User Manual
User Manual
Navigation menu
Upload a User Manual
Namespaces
Wiki Guide
HTML
PDF
Info
Views
User Manual
Discussion / Help
Navigation


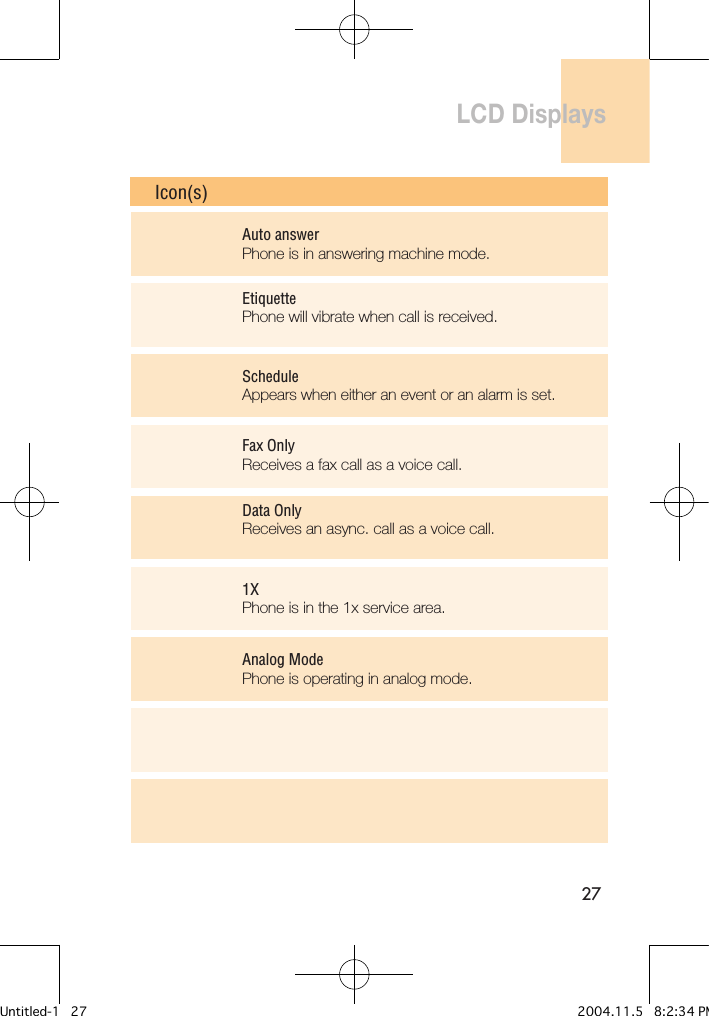
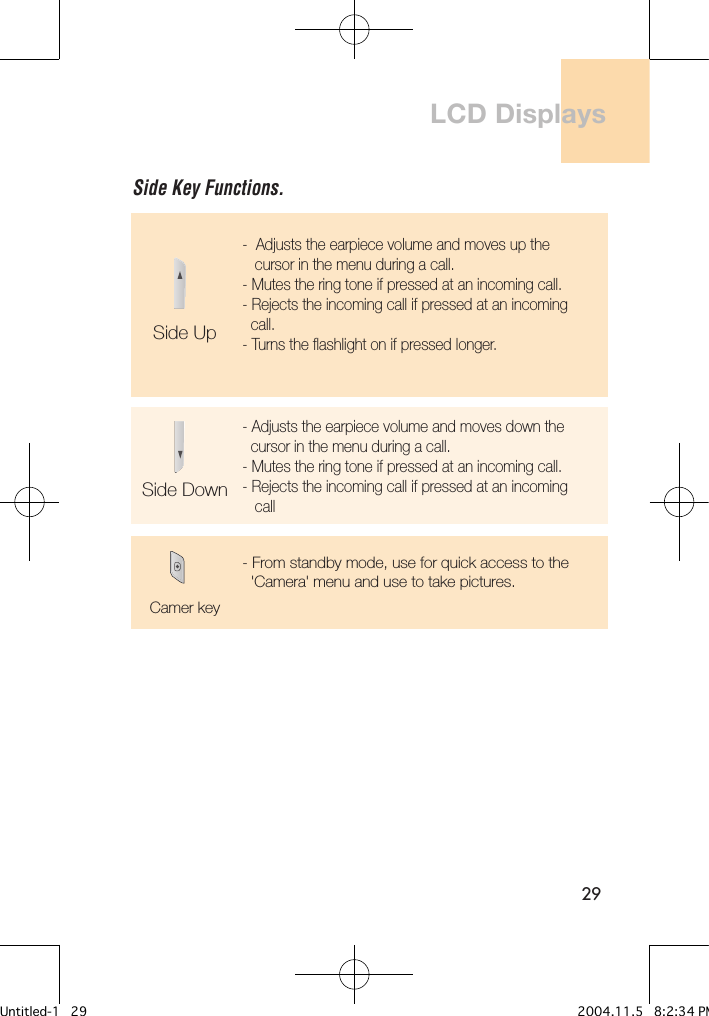
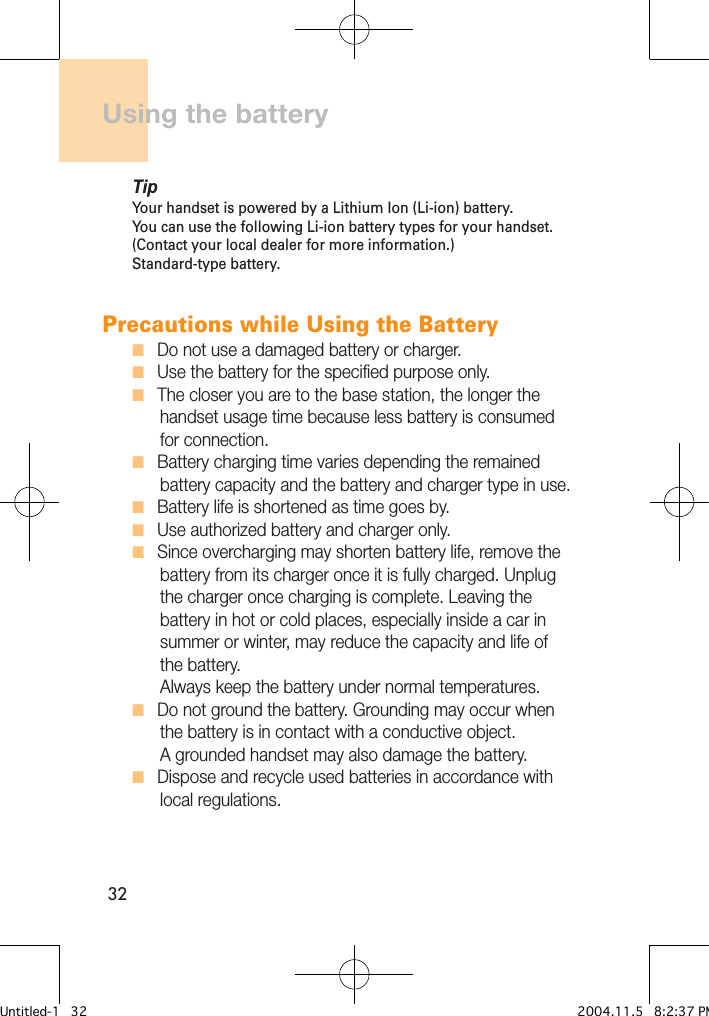
![28LCD DisplaysDisplay Off Mode.If you don’t press any key in a minute when the display are dimmed, the internal display goes into the Off Mode to save the power. Press any key to restore the display from the Off Mode.Selecting Functions and Options. Handset provides several customization functions, which are arranged in menus and sub-menus. You can access to these function using three Soft keys ([ ] , [ ] and [ ] key). Each menu and sub-menu allow you to view and change the settings of the particular function.Soft key function varies depending on the current context; the labels or icons at the bottom line of the display indicate the current function.To view various functions/options available or select the one that is required:1 Press the appropriate Soft key.2 To select function displayed or option highlighted, press the [ ] [Select] Soft key or [ ] Soft key.3 To highlight the next option on a list, press the Up key or Down key.4 To move back to the previous function or option on a list, press the [ ] key5 To return to Standby Mode, press the [ ] key.Untitled-1 28 2004.11.5 8:2:34 PM](https://usermanual.wiki/Pantech-Co/PC-1000N/User-Guide-493758-Page-28.png)
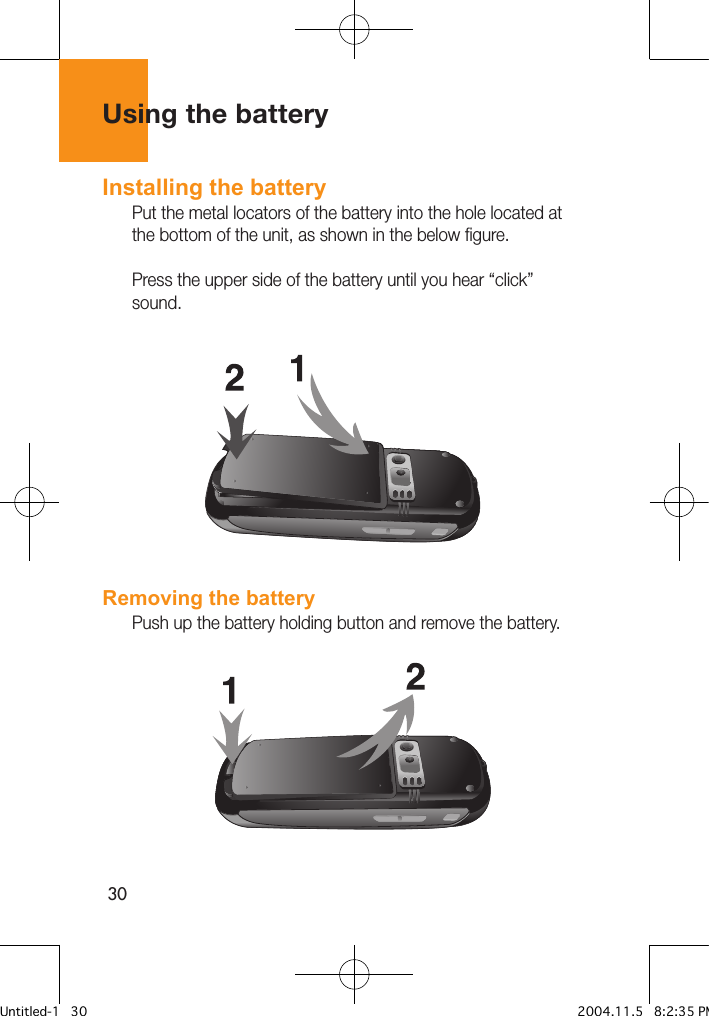
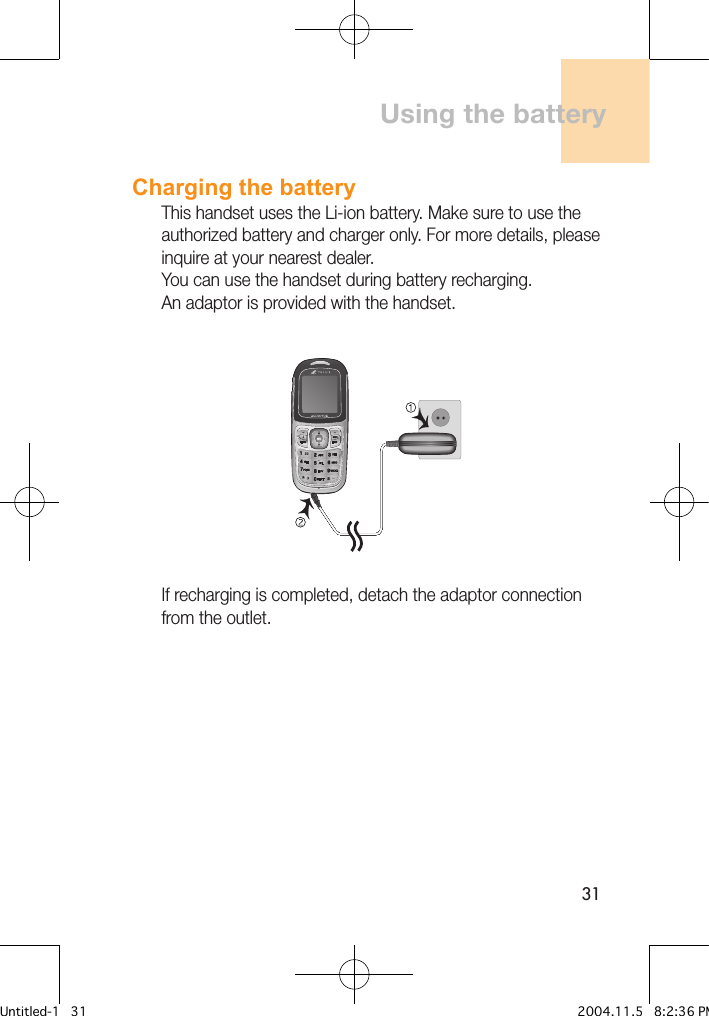
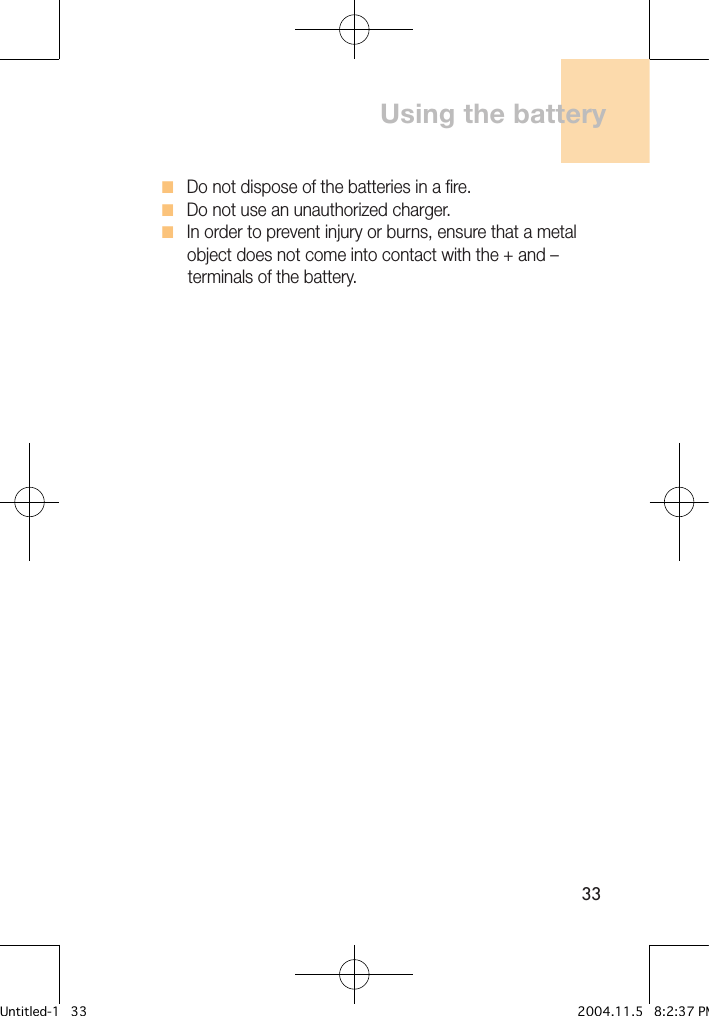
![36Switching the Phone On or OffSwitching the Phone On 1 Press the [ ] key until the phone switches on.Your handset starts to search for the available network and the current date and time will appear on the LCD displays. Once connected to the network, you can send or receive a call.If the malfunction occurs while using the handset or it is not turned on, remove the battery and install it again after 5 or 10 seconds.Switching the Phone OffTo switch the phone off, press the [ ] key until the power-off animation displays.Untitled-1 36 2004.11.5 8:2:37 PM](https://usermanual.wiki/Pantech-Co/PC-1000N/User-Guide-493758-Page-36.png)
![37Making a Call Enter the area code and the phone number to make a call in the standby mode, and press the [ ] key. To clear the last digit displayed, press the [ ] key.To clear the all digits displayed, press the [ ] key longer.Ending a Call When you want to finish your call, press the [ ] key.Once the call is completed, the call summary (Receiver Name or Number, Service Time) will be displayed.Using Call LogsThe phone stores up to 40 dialled, received or missed calls chronologically. The last call is saved in the first position. If the same number was dialled more than once, only the latest occurrence will be saved.1 Press the [ ] key shortly to see call log list aligning dialled, received, or missed numbers chronologically. Making a CallIf you have set the [Auto Redial] option (Menu 5.6.5) to [On], the handset will attempt to make a call automatically for up to 10 times if it is not answered. NOTEUntitled-1 37 2004.11.5 8:2:37 PM](https://usermanual.wiki/Pantech-Co/PC-1000N/User-Guide-493758-Page-37.png)
![38Making a Call2 Press the [ / ] key to select a number.3 Press the [ ] key for dialling. TipPress the [ ] key longer to redial the last number in the call log.Speed dialingCalls can be placed to numbers stored in the speed dial by pressing & holding the last digit of speed dial # on the keypad.1 Press [ ] under 'Menu' then press [ ] for 'Phonebook' and press [ ] for 'Speed Dialing'.2 To assign a phone number to a location, select the location then press [ ].3 The phonebook list will be displayed alphabetically. Select a name then press [ ]. To call the number press [ ].Untitled-1 38 2004.11.5 8:2:38 PM](https://usermanual.wiki/Pantech-Co/PC-1000N/User-Guide-493758-Page-38.png)
![39Voice DialingTo dial a name using voice signal :1 Press [ ] under 'Menu' then press [ ] for 'Voice Tools' and press [ ] for 'Voice Dial'.See Voice Dial Setting for more details.Making a CallUntitled-1 39 2004.11.5 8:2:39 PM](https://usermanual.wiki/Pantech-Co/PC-1000N/User-Guide-493758-Page-39.png)
![40Answering a CallAnswering a Call When you receive a call, the phone rings (or vibrates) and screen will display the name or the number of the caller (If network supports and you have subscribed to it). If the caller can be identified, the caller’s phone number or name will be displayed if it is stored in your Contacts.1 To answer a call press the [ ]. If the answer type is set as [AnyKey Answer], you can answer a call by pressing any key except [ ] key.Viewing Missed CallsIf the incoming call could not be answered for any reason, a missed call message will appear on the screen to remind you of the call you have missed (Network and subscription dependent feature, not available at all areas necessarily)To reply to the missed call;To reply to the missed call;1 Press the [ ] Soft key to display a list of recent calls.2 Using [ ] to select a Missed call and press [ ] to view it.3 If necessary, scroll to the number you want by pressing the [ / ] key.Untitled-1 40 2004.11.5 8:2:39 PM](https://usermanual.wiki/Pantech-Co/PC-1000N/User-Guide-493758-Page-40.png)
![414 Press the [ ] key to recall the missed call.Adjusting the Volume during a CallDuring a call, if you wish to adjust the earpiece volume, use the volume keys on the left side of the phone.Press the [ ] key to increase the volume level and the [ ] key to decrease it.Answering a CallUntitled-1 41 2004.11.5 8:2:39 PM](https://usermanual.wiki/Pantech-Co/PC-1000N/User-Guide-493758-Page-41.png)
![42Options in CallingDialing TELUS Client CareSimply dial 611 and press [ ].Three way callingThis service is an optional service. please contact telus mobility client care at 611 if you would like this service.1 Dial the first number you wish to call and press [ ] to place the call.2 Wait for the call to connect and press [ ] to place the call on hold.3 Enter the second number and press [ ] to connect.4 When the second party answers, press [ ] to begin the three way conversation.Emergency DialingEmergency numbers can be called at all times, even when your phone is locked. you can place call to 911, telus mobility client care(611), and one other specified number by simply dialing the nuber and pressing [ ].Untitled-1 42 2004.11.5 8:2:39 PM](https://usermanual.wiki/Pantech-Co/PC-1000N/User-Guide-493758-Page-42.png)
![43Dialing Directory AssistanceDial 411 and press [ ] to access directory assistance.Options in CallingUntitled-1 43 2004.11.5 8:2:39 PM](https://usermanual.wiki/Pantech-Co/PC-1000N/User-Guide-493758-Page-43.png)
![45Entering the Menu Function Selecting the Menu FunctionKey FunctionGoes to the main menu in the standby mode.Goes to the Phonebook menu.Moves among the main menus.[ ], [ ] keySearches for the sub-menu.[ ], [ ] keyGoes to the sub-menu[ ] keyUntitled-1 45 2004.11.5 8:2:40 PM](https://usermanual.wiki/Pantech-Co/PC-1000N/User-Guide-493758-Page-45.png)
![46Input Mode On many occasions you need to input the text while you are using your handset, (i.e., storing a name in the Contacts, writing a new message, creating your greeting or scheduling events on your calendar).The available text input mode includes.T9 modeYou can input the letter only one keystroke per letter. The keypad has more than one letter on it – when you press the[ ] key once, J, K or L may be displayed. The T9 mode automatically compares your keystrokes with an internal linguistic dictionary to determine the correct word, thus requiring far fewer keystrokes than the conventional Multi-tap mode.Numeric modeYou can input the number in this mode.Symbol modeYou can input the special characters like Greek letter, currency unit, or period mark in this mode.Emoticon modeYou can input the emoticon in this mode.Entering the TextUntitled-1 46 2004.11.5 8:2:40 PM](https://usermanual.wiki/Pantech-Co/PC-1000N/User-Guide-493758-Page-46.png)
![47Inserting a SpaceTo insert a space between words, press the [ ] key.Clearing Letters and WordsTo clear the letter to the left of the cursor, press the [ ] key. You can clear all of the letters on the display by long pressing the [ ] key.Returning to the Previous ScreenWhen the text input field is empty, press the [ ] key to return to the previous screen.Using the T9 ModeIn the T9 alphabet Editor, the word is composed completely as you input the text.1 Press the keys numbered [ ] to [ ] to input texts. For example, press [ ][ ][ ][ ][ ] in sequence to input ‘hello’. The word you are typing appears on the display. It may change with each key you press.2 Enter the whole word before editing or deleting any keystrokes.Entering the TextUntitled-1 47 2004.11.5 8:2:41 PM](https://usermanual.wiki/Pantech-Co/PC-1000N/User-Guide-493758-Page-47.png)
![48Entering the Text3 Upon searching a word, input the next text.4 If you fail to search a word, press the [ ] key to search which text can be typed in. If several texts are searched, the text in thze most frequently used will be listed first.5 Continue entering the next word.KEY Characters in the displaying order[English ]. : - ) 1a b c 2d e f 3g h i 4j k l 5m n o 6p q r s 7t u v 8w x y z 90Untitled-1 48 2004.11.5 8:2:41 PM](https://usermanual.wiki/Pantech-Co/PC-1000N/User-Guide-493758-Page-48.png)
![49Using the Number ModeThe Number mode enables you to enter numbers in the text. Press the key corresponding to the digit you want to enter.Using the Symbol ModeThe Symbolic mode enables you to enter symbols in your text.To display more symbols, press the [ / ] key.Using the Emoticon ModeThe emoticon mode enables you to enter symbols in your text.Introducir textosUntitled-1 49 2004.11.5 8:2:42 PM](https://usermanual.wiki/Pantech-Co/PC-1000N/User-Guide-493758-Page-49.png)

![52PhoneBookViewing/Searching the phonebookSelect ‘Menu > 1.PhoneBook > Find name'.1 From the standby mode, press the right soft key to access the phonebook.2 The list of names in your phonebook is displayed alphabetically. Use navigation key to select the name.3 Enter a name or its character string or scroll through the list with the navigation key. 4 Matching entries will be displayed. highlight an entry. To edit an entry press [ ]. Press [ ] under 'Edit'.5 To call the selected number, press [ ] or press [ ] under 'menu', select 'call' then press [ ]. Add new entrySelect ‘Menu > 1.PhoneBook > Add new entry'.1 The first filed highlighted is name. enter the name for the entry, then press [ ].2 Press the navigation key down to enter all the other information.3 When all information for the entry is entered, press [ ] to save the entry.Untitled-1 52 2004.11.5 8:2:42 PM](https://usermanual.wiki/Pantech-Co/PC-1000N/User-Guide-493758-Page-52.png)
![53Speed Dial #Press a number in the Contacts in the standby mode for Speed Dial. To add Speed Dial, use [Add to Speed Dial] option. The Speed Dial number ranges from No. 2 to No. 99, totalling 98 dials.Select ‘Menu > 1.PhoneBook > Speed dial #'.1 To assign a phone number to a location, select the location then press [ ]. 2 The phonebook list will be displayed alphabetically. Select a name then press [ ].3 Speed dial # edited will be displayed.Group Setting Select ‘Menu > 1.Phonebook > Groups’.Changes the settings for the five predefined caller groups.Default Groups: Family, Friends, Business, Colleagues, Others, new groupsPhoneBookUntitled-1 53 2004.11.5 8:2:42 PM](https://usermanual.wiki/Pantech-Co/PC-1000N/User-Guide-493758-Page-53.png)
![54PhoneBookAddress GroupsSelect ‘Menu > 1.Phonebook > Addres Groups’.Changes the settings for the five predefined address groups.Default Groups: Family, Friends, Business, Colleagues, Others, new groupsServicesSelect ‘Menu > 1.Phonebook > Services’.Press the navigation key down to access sevices menu.Non-Emergency1 Dial 211 and press [ ] to access non-emergency.Air & Marine Rescue1 Dial 311 and press [ ] to access air & marine rescue.Dir. Assistance1 Dial 411 and press [ ] to access directory assistance.Client Care1 Dial 611 and press [ ] to access client care.Untitled-1 54 2004.11.5 8:2:42 PM](https://usermanual.wiki/Pantech-Co/PC-1000N/User-Guide-493758-Page-54.png)
![55PhoneBookService for Deaf1 Dial 711 and press [ ] to access service for deaf.Emergency Service1 Dial 911 and press [ ] to access emergency service.Operator Dialing1 Dial 0 and press [ ] to access operator dialing.This service is an optional service. Please contact TELUS mobility client care at 611 if you would like this service.My Phone #Select ‘Menu > 1.Phonebook > My Phone #’.Displays your phone number and service provider.PhoneBook StatusSelect ‘Menu > 1.Phonebook > PhoneBook Status’.Displays your phoneBook status.Untitled-1 55 2004.11.5 8:2:42 PM](https://usermanual.wiki/Pantech-Co/PC-1000N/User-Guide-493758-Page-55.png)
![56Call HistoryDisplays information about the 40 most recently dialed, missed and received calls. Call a number by simply pressing [ ].Outgoing CallsDisplays information about the 40 most recently outgoing calls. Place a call to a received call by simply pressing [ ].Select ‘Menu > Call history > Outgoing Calls'.Displays the outgoing calls list accompanied by the time and date of a missed call as well as the number or name of the receiver. Press the [ / ] key for selection.Press the [Memu] Soft key [ ] to;• Delete: Deletes the missed call record indicated by the list • Delete All: Deletes all missed call records from the list.Incoming CallsDisplays information about the 40 most recently answered calls. Place a call to a received call by simply pressing [ ].Select ‘Menu > Call history > Incoming Calls'.Displays the received call list accompanied by the time and date of a received call as well as the number or name of the caller. Press the [Left/Right] key to select.Untitled-1 56 2004.11.5 8:2:43 PM](https://usermanual.wiki/Pantech-Co/PC-1000N/User-Guide-493758-Page-56.png)
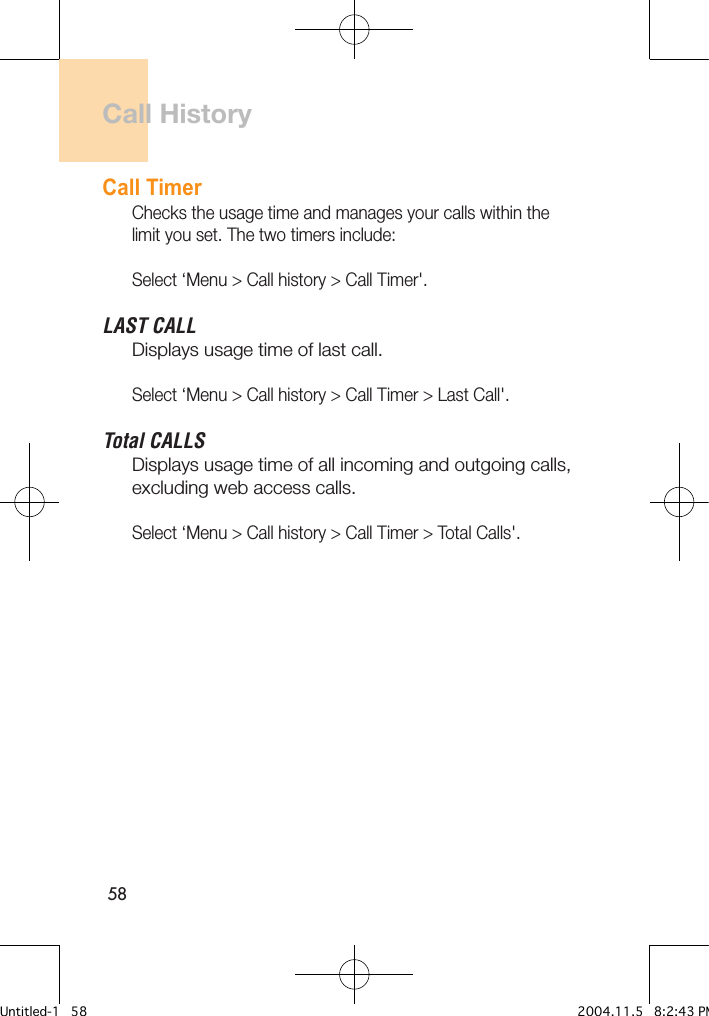
![57Press the [Memu] Soft key [ ] to;• Delete: Deletes the missed call record indicated by the list • Delete All: Deletes all missed call records from the list.Missed CallsDisplays information about the 40 most recently missed calls. Place a call to a received call by simply pressing [ ].Select ‘Menu > Call history > Missed Calls'.Displays the missed calls list accompanied by the time and date of a missed call as well as the number or name of the receiver. Press the [ / ] key for selection.Press the [Memu] Soft key [ ] to;• Delete: Deletes the missed call record indicated by the list • Delete All: Deletes all missed call records from the list.Erase HistorySelect ‘Menu > Call history > Erase History'.It deletes the missed, received, or dialled calls or deletes all the call records with ‘All Calls’. Press the [Yes] Soft key [ ] or [No] Soft key [ ] to execute or cancel this function.Call HistoryUntitled-1 57 2004.11.5 8:2:43 PM](https://usermanual.wiki/Pantech-Co/PC-1000N/User-Guide-493758-Page-57.png)
![59New Message NotificationThe following display appears when a new message arrives.To display the message, press [ ] under 'Read'.VOICE MAILSetting Up Voice Mail1 From the standby mode, press [ ] for 'Menu' and [ ] for 'Messaging'.2 Press [ ] for 'Voice Mail'. 3 Wait for the greeting and enter the default password 1234.4 Follow the voice prompts to setup your voice mail.Messaging Untitled-1 59 2004.11.5 8:2:43 PM](https://usermanual.wiki/Pantech-Co/PC-1000N/User-Guide-493758-Page-59.png)
![60Messaging RETRIEVING VOICE MAIL1 From the standby mode, press [ ] for 'Menu' and [ ] for 'Messaging'.2 Press [ ] for 'Voice Mail' and [ ] to call your voice mail. 3 Wait for the greeting to start, then press [ ].4 Enter your password and follow the voice prompts to set up your voice mail.The default password is usually 0000 or the ten digits in your phone number.NOTEUntitled-1 60 2004.11.5 8:2:43 PM](https://usermanual.wiki/Pantech-Co/PC-1000N/User-Guide-493758-Page-60.png)
![61Text Messaging1 From the standby mode, press [ ] for 'Menu' and [ ] for 'Messaging'.2 Press [ ] for 'Send Messaging'. 3 Under “Send To”, input the phone number and press [ ].By pressing [MENU], you can choose from the following:1. Phonebook : Search the phone number which is stored in the phone book.2. Call history : Search the phone number which is stored in the call history.4 Under “Message”, input a new txt message and press [ ].5 The default call back number is automatically inputted into the Default CB# field. You can scroll to the number and edit it or simply press [EDIT]. -4 Messaging While entering text, press [ ] for different text entry options.NOTEUntitled-1 61 2004.11.5 8:2:43 PM](https://usermanual.wiki/Pantech-Co/PC-1000N/User-Guide-493758-Page-61.png)
![62Messaging 6 Press the Navigation Key down for more fields. Under “Priority”, select “Normal’ or “Urgent”.7 Under “Insert Signature”, select “On” or “Off”.8 8.1. To send the TXT message, press [MENU] and select “Send” then press [OK]. 8.2. To save the TXT message, press [MENU] and select “Save to Outbox” then press [OK].InboxThe Inbox manages received Text messages. To access:1 From the standby mode, press [ ] for 'Menu' and [ ] for 'Messaging'.2 Press [ ] for 'Inbox'. 3 Select a message then press [ ]. The message is displayed. to delete a message, press [ ] under 'Erase'. -4 Untitled-1 62 2004.11.5 8:2:44 PM](https://usermanual.wiki/Pantech-Co/PC-1000N/User-Guide-493758-Page-62.png)
![63OutboxManages sent Text messages or messages waiting to be sent.1 From the standby mode, press [ ] for 'Menu' and [ ] for 'Messaging'.2 Press [ ] for 'Outbox'. 3 Select a message, then press [ ]. The text message is displayed.4 To erase message, press [ ] under 'Erase' or press [ ].5 Press [ ] under 'options' for options.SavedTo save the TXT message in your phone.1 From the standby mode, press [ ] for 'Menu' and [ ] for 'Messaging'.2 Press [ ] for 'Saved'. 3 Select a message, then press [ ]. The text message is displayed. Messaging Untitled-1 63 2004.11.5 8:2:44 PM](https://usermanual.wiki/Pantech-Co/PC-1000N/User-Guide-493758-Page-63.png)
![64Messaging 4 To erase message, press [ ].Message Settings1 From the standby mode, press [ ] for 'Menu' and [ ] for 'Messaging'.2 Press [ ] for 'Message settings'. 3 Press one of the following: - Press [ ] for 'Callback Number'. - Press [ ] for 'Notification'. - Press [ ] for 'Overwrite'. - Press [ ] for 'Signature'.4 Use the keypad navigation key to make your desired settings and press [ ] to save the settings.ERASE1 From the standby mode, press [ ] for 'Menu' and [ ] for 'Messaging'.2 Press [ ] for 'Erase'. Untitled-1 64 2004.11.5 8:2:44 PM](https://usermanual.wiki/Pantech-Co/PC-1000N/User-Guide-493758-Page-64.png)
![653 Press one of the following: - Press [ ] for 'Inbox'. - Press [ ] for 'Outbox'. - Press [ ] for 'Saved'. - Press [ ] for 'All Messages'.4 Press [ ] to confirm or for 'cancel' to cancel the deletion.Messaging Untitled-1 65 2004.11.5 8:2:44 PM](https://usermanual.wiki/Pantech-Co/PC-1000N/User-Guide-493758-Page-65.png)
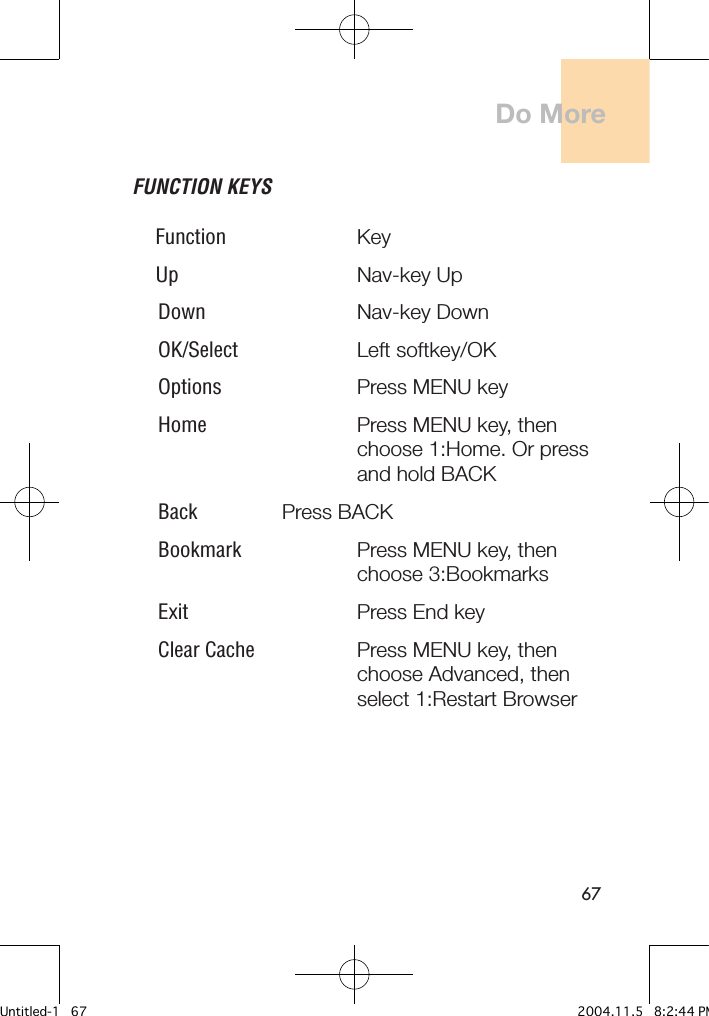
![66Do MoreWIRELESS WEB1 From the standby mode, press [ ] for 'Menu' and [ ] for 'Do More'.2 Press [ ] for 'Wireless WEB'. 3 Press [ ] for 'Launch WEB'. 3 A message will appear : "Security is not enabled. enabling security can take several minutes. Proceed?". press the left soft key(ok) to select YES and create a new uniqye security key for your phone. This will take seceral minutes, do not turn off your phone.HOW DO I NAVIGATE THE MENUS?1 Press the menu key on the left side of the screen, then press 4 to select do more, then 1 to select wireless web, then 1 to select launch web.2 Your personal main menu will appear.3 Use the handset's keypad to scroll and select menu items and services.Untitled-1 66 2004.11.5 8:2:44 PM](https://usermanual.wiki/Pantech-Co/PC-1000N/User-Guide-493758-Page-66.png)
![69SOUND & IMAGEGetting ringtones and imagesThere are two ways to get a ringtone or image:1 From the standby mode, press [ ] for 'Menu' and [ ] for 'Do More'.2 Press [ ] for 'Sound' or press [ ] for 'Image'.3 Press 1 for "Ringtones" or press 1 for "Wallpaper".4 Highlight "Get New" and press OK.5 Select your language preference (first time only).6 Press 2 to select "Ringtones" or 3 to select "Images".7 Select the item you want to download and press the OK soft key to start downloading over-the-air.Do MoreUntitled-1 69 2004.11.5 8:2:45 PM](https://usermanual.wiki/Pantech-Co/PC-1000N/User-Guide-493758-Page-69.png)
![71MANAGING YOUR RINGTONES AND IMAGES ASSIGNING A RINGTONE OR IMAGE TO USE ON YOUR PHONE:1 From the standby mode, press [ ] for 'Menu' and [ ] for 'Do More'.2 Press [ ] for 'Sound' or press [ ] for 'Image'.3 Highlight "Ringtones" or "Wallpaper" and press OK.4 Highlight "Play" or "View" and press OK.5 Highlight the ringtone or image that you wish to use, Press the "Options" key and select "Assign".ASSIGNING A RINGTONE OR IMAGE TO A SPECIFIC PHONE NUMBER:1 Press the "Menu" key on your phone.2 Press 1 to select "Phonebook" .3 Press 1 and highlight the entry that you want to add a custom ringtone or image, then press OK. Do MoreUntitled-1 71 2004.11.5 8:2:45 PM](https://usermanual.wiki/Pantech-Co/PC-1000N/User-Guide-493758-Page-71.png)
![78SettingsRINGER TYPESVoice calls1 Press [Menu] under 'Menu' then press 5 for 'Settings', press 1 for 'Sounds', press 2 for 'Ringers', press 1 for 'Voice Calls'.2 Select With 'Caller ID' or 'No Caller ID' then press [ok].3 Select your desired ringer type and, press [ok] to save it.Messages1 Press [Menu] under 'Menu' then press 5 for 'Settings', press 1 for 'Sounds', press 2 for 'Ringers', press 2 for 'Messages'.2 Select one of the following item then press [ok].3 Select your desired ringer type and, press [ok] to save it.Untitled-1 78 2004.11.5 8:2:46 PM](https://usermanual.wiki/Pantech-Co/PC-1000N/User-Guide-493758-Page-78.png)
![79Alarm1 Press [Menu] under 'Menu' then press 5 for 'Settings', press 1 for 'Sounds', press 2 for 'Ringers', press 3 for 'Alarm'.2 Select your desired ringer type and, press [ok] to save it.Roam Ringer1 Press [Menu] under 'Menu' then press 5 for 'Settings', press 1 for 'Sounds', press 2 for 'Ringers', press 4 for 'Roam Ringer'.2 Select 'Distinct' or 'Normal' then press [ok] to save it.ALERTSService Alerts1 Press [Menu] under 'Menu' then press 5 for 'Settings', press 1 for 'Sounds', press 3 for 'Alerts', press 1 for 'Service Alerts'.2 Select 'Off' or 'On' then press [ok] to save it.SettingsUntitled-1 79 2004.11.5 8:2:46 PM](https://usermanual.wiki/Pantech-Co/PC-1000N/User-Guide-493758-Page-79.png)
![80SettingsMinute Beep1 Press [Menu] under 'Menu' then press 5 for 'Settings', press 1 for 'Sounds', press 3 for 'Alerts', press 2 for 'Minute Beep'.2 Select 'Off' or 'On' then press [ok] to save it.Messaging Alerts1 Press [Menu] under 'Menu' then press 5 for 'Settings', press 1 for 'Sounds', press 3 for 'Alerts', press 3 for 'Messaging Alerts'.2 Select 'Once' , 'Repeat' or 'Off' then press [ok] to save it.Call Failue1 Press [Menu] under 'Menu' then press 5 for 'Settings', press 1 for 'Sounds', press 3 for 'Alerts', press 4 for 'call failue'.2 Select 'Off' or 'On' then press [ok] to save it.Untitled-1 80 2004.11.5 8:2:46 PM](https://usermanual.wiki/Pantech-Co/PC-1000N/User-Guide-493758-Page-80.png)
![81Call Lost1 Press [Menu] under 'Menu' then press 5 for 'Settings', press 1 for 'Sounds', press 3 for 'Alerts', press 5 for 'Call lost'.2 Select 'Off' or 'On' then press [ok] to save it.TONESTone Length1 Press [Menu] under 'Menu' then press 5 for 'Settings', press 1 for 'Sounds', press 4 for 'Tones', press 1 for 'Tone Length'.2 Select 'Long' or 'Short' then press [ok] to save it.Power Up Tone1 Press [Menu] under 'Menu' then press 5 for 'Settings', press 1 for 'Sounds', press 4 for 'Tones', press 2 for 'Power Up Tone'.2 Select 'ToneA' or 'Off' then press [ok] to save it.SettingsUntitled-1 81 2004.11.5 8:2:46 PM](https://usermanual.wiki/Pantech-Co/PC-1000N/User-Guide-493758-Page-81.png)
![82SettingsPower Down Tone1 Press [Menu] under 'Menu' then press 5 for 'Settings', press 1 for 'Sounds', press 4 for 'Tones', press 4 for 'Power Down Tone'.2 Select 'ToneA' or 'Off' then press [ok] to save it.Setting DisplayGREETING1 Press [Menu] under 'Menu' then press 5 for 'Settings', press 2 for 'Display', press 1 for 'Greetings'.2 Enter a greeting of your own and press [ok] to save it.BACKLIGHT CONTROLDisplay1 Press [Menu] under 'Menu' then press 5 for 'Settings', press 2 for 'Display', press 2 for 'Backlight Control', press 1 for 'Display'.2 Select one of the following display options and press [ok] to save it.Untitled-1 82 2004.11.5 8:2:46 PM](https://usermanual.wiki/Pantech-Co/PC-1000N/User-Guide-493758-Page-82.png)
![83Keypad1 Press [Menu] under 'Menu' then press 5 for 'Settings', press 2 for 'Display', press 2 for 'Backlight Control', press 2 for 'Keypad'.2 Select one of the following keypad time and press [ok] to save it.CONTRAST1 Press [Menu] under 'Menu' then press 5 for 'Settings', press 2 for 'Display', press 3 for 'Contrast'.2 Use [navigation left / right key] to select a contrast level.STANDBY DISPLAYSCREENSAVER1 Press [Menu] under 'Menu' then press 5 for 'Settings', press 2 for 'Display', press 5 for 'Standby Display' for 'Screensaver'.2 Select 'Animation' or 'Standby Time' then press [ok] to save it.SettingsUntitled-1 83 2004.11.5 8:2:46 PM](https://usermanual.wiki/Pantech-Co/PC-1000N/User-Guide-493758-Page-83.png)