Pantech Co PC-1000N Dual- Mode CDMA Phone (CDMA/ PCS CDMA) User Manual 1
Pantech Co Ltd Dual- Mode CDMA Phone (CDMA/ PCS CDMA) 1
User Manual

1
PC-1000N
Untitled-1 1 2004.11.5 8:2:2 PM
2
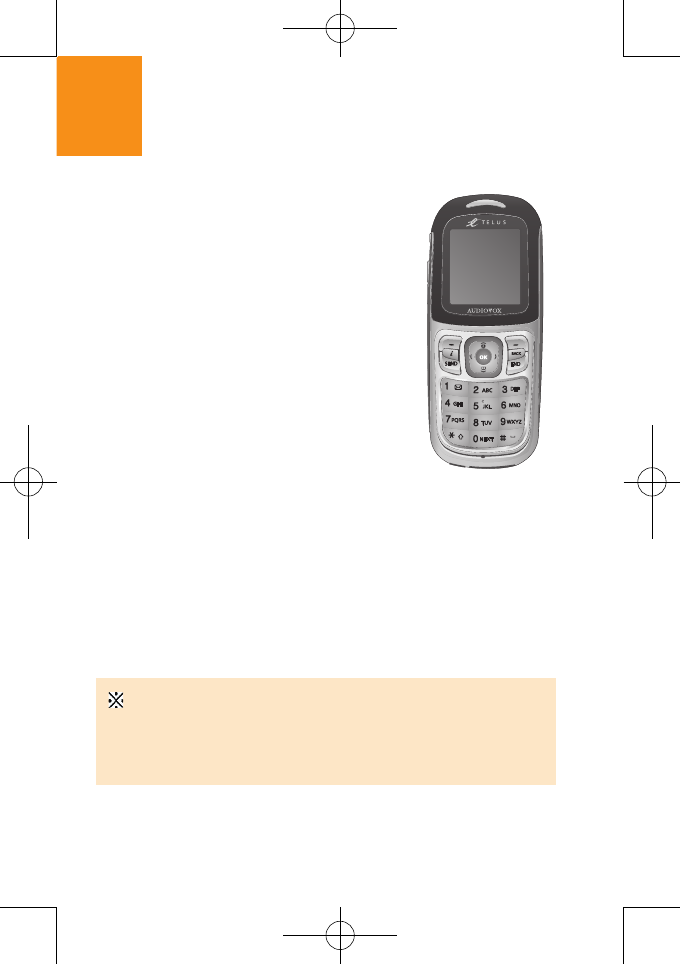
Welcome to Pantech PC-1000N
Welcome to the wireless mobile
communication network with this
tri-band mobile phone, PC-1000N.
We, Pantech, are pleased to
introduce this brand new portable
handset.
Our product always keeps you
connected to the network.
Thank you for choosing Pantech
PC-1000N.
The user manual explains in detail how
it works and what unique features are
available.
Some of the contents in this User Manual could vary from your
phone.
It may differ depending on the S/W version and the network
provider you subscribed to.
Untitled-1 2 2004.11.5 8:2:5 PM

3
Display
H 28.032 mm x 35.04 mm display for ” LCD
H True TFT colour display
H Supports up to 262,000 colours within 128 x 160 pixels
H 8 lines for text in basic mode with 16-pixel font
H Three Soft keys with four-way scroll including selection
function
(OK key)
H List and grid menu
Melody
Yamaha poly sound
Dynamic 3D stereo sound
Camera
Integrated VGA Camera.
H Resolution up to 640 x 480 (330,000 pixels)
H
Phone display used as a viewfinder
H
Standard, wide (portrait) modes on external viewfinder
H
Photo album in Picture Album
H
Photo Gallery for image storing and editing
Dimension & Weight
H
Weight: g
H
Dimensions: mm x mm x mm
Characteristic Specification of PC-1000N
Untitled-1 3 2004.11.5 8:2:5 PM

4
Power Management (Performance)
Operating Frequency
H
H
Characteristic Specification of PC-1000N
Battery Type
Standard
(Li-ion)
850 mAh 200 Hours 5 Hours
Capacity Talk Time
Standby Time
Untitled-1 4 2004.11.5 8:2:5 PM
5
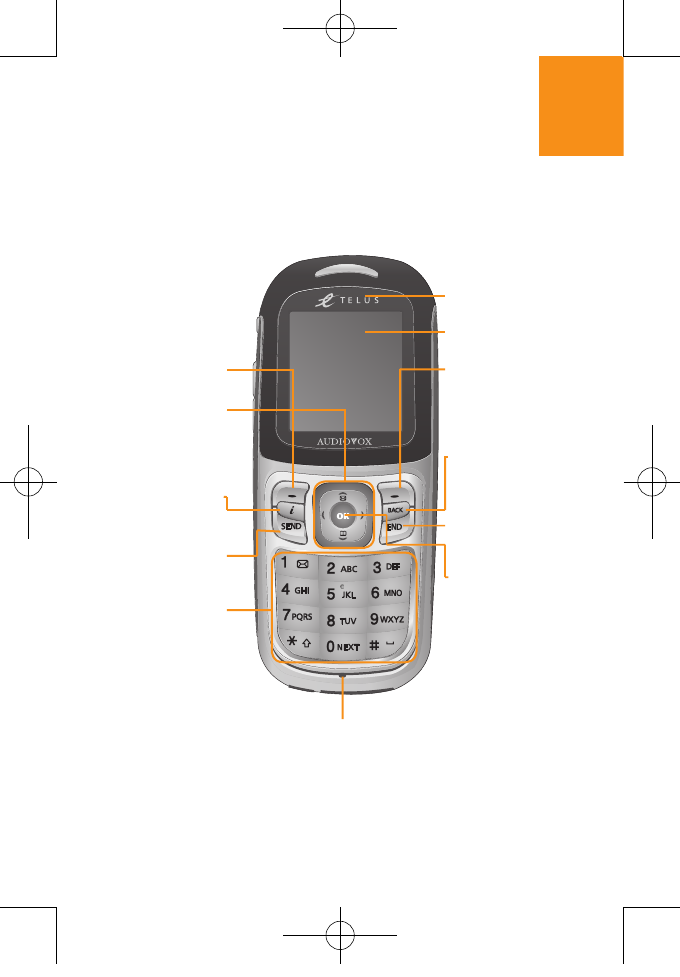
Views of Pantech PC-1000N
Earpiece
LCD
Cancel/Back
Text Clear/
Edit exit key
4-way Menu
Navigation
Special Menu
Short key
Left Softkey
Wap Access
key
Dial key
Call Accept
Right Softkey
Alphanumeric
Key
Microphone
Power On/Off
Menu exit key
Select/Menu
Confirm key
Untitled-1 5 2004.11.5 8:2:6 PM
6
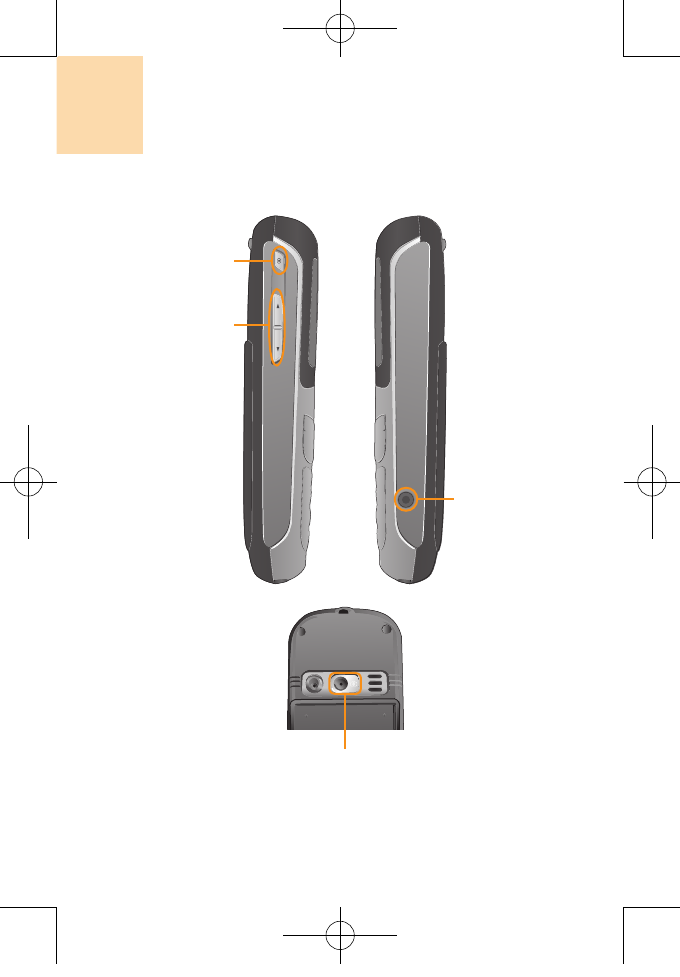
Views of Pantech PC-1000N
Camera Access
Key
Volume Up/Down
Menu Scroll
Earjack
Camera
Untitled-1 6 2004.11.5 8:2:7 PM
7
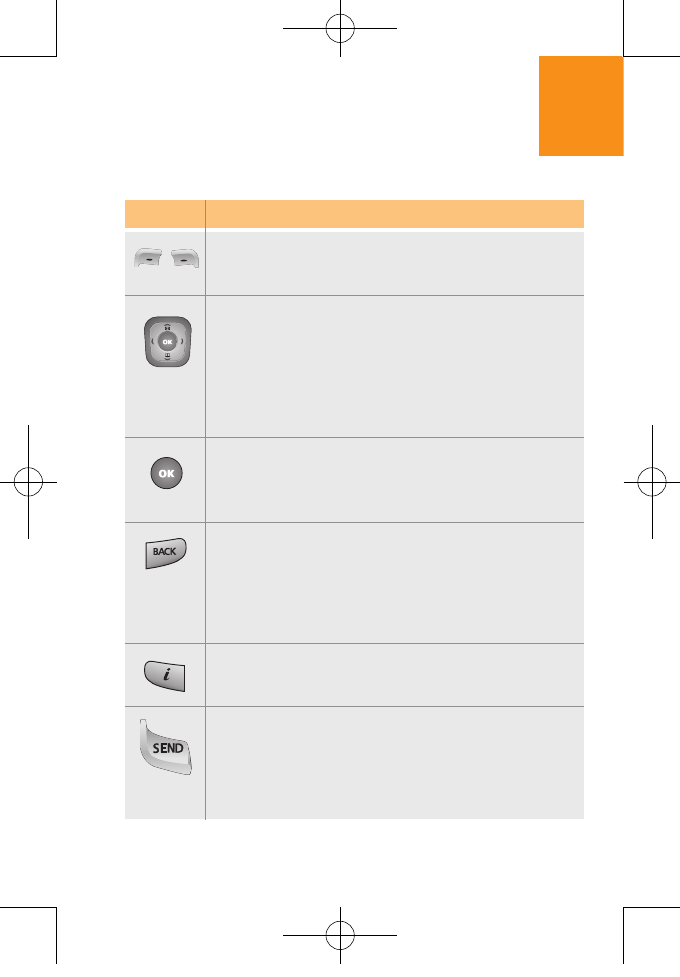
Quick & Easy
Quick & Easy
Keys Functions
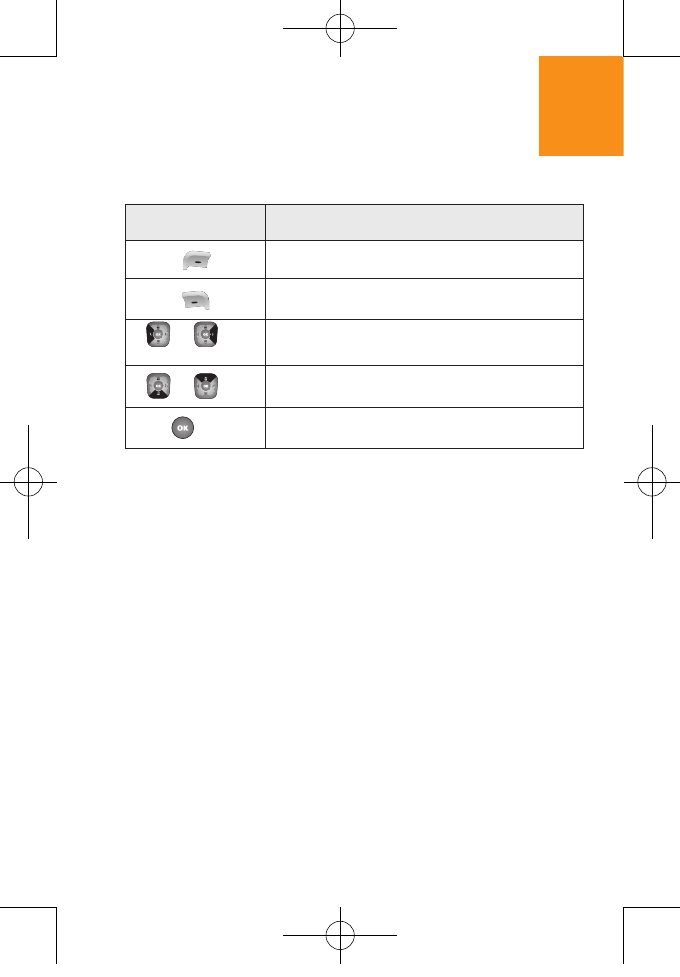
SOFT KEYS : (Menu Key) Press to access the menu or
function displayed on bottom line of the display.
(Left Key) Press to access a phonebook.
NAVIGATION KEY :
In Idle Mode : Press up to access Messaging, down
to access Recent Calls, right for Do More and left for
Settings.
Inside the menu : Within a menu, use to scroll through
menu options, or to select a function displayed on the
bottom line of the screen.
OK KEY
In Idle Mode : Press to access the menu.
Inside the menu : Press it in to make your selection.
In Camera Mode, Take Picture as Camera Key.
BACK KEY
While viewing menus, press to go back to the previoius
menu.
While entering characters with the keypad, press once to
clear one character at a time.
INTERNET KEY
From standby mode, use for quick access to the
'Wireless Web' menu.
SEND KEY
Press to place or receive a call.
Press and hold to redial last outgoing call.
Untitled-1 7 2004.11.5 8:2:8 PM
8
Keys Functions
to
When entering text, press to shift between upper
and lower case.
While in standby mode, press and hold to quickly
activate/de-activate Vibration Mode.
When entering text, press to place spaces between
characters.
While in standby mode, press and hold to enter key
guard mode.
In edit screen :
Cycle through candidate words matched when T9
word mode Insert '0' when alphabet mode.
From standby mode, use for quick access to the
'Camera' menu and use to take pictures.
Adjusts earpiece volume while making a call, and
moves the cursor upward in the menu.
Controls the key tone volume in the standby mode
if the handset flip is opened, and moves the cursor
upward in the menu.
Press and hold to turn the phone on or off.
While in a call, press to end the call.
while viewing any screen, press to return to stanby
Quickly connects to the voice mail server if pressed
longer in the standby mode.
Use to enter characters or numbers.
Also used to access different menu options.
Quick & Easy
Untitled-1 8 2004.11.5 8:2:9 PM
9
Quick & Easy
Keys Functions
Adjusts earpiece volume while making a call, and
moves the cursor downward in the menu.
Controls the key tone volume in the standby mode
if the handset flipis opened, and moves the cursor
downward in the menu.
Untitled-1 9 2004.11.5 8:2:9 PM

10
Using a handset while driving is prohibited.
With regards to the regulation about prohibition of handset
usage while driving, please check relevant laws and
regulation and comply with them
H Use of your cellular while you are driving may disturb your
concentration on driving and consequently incur accidents.
Please turn it off as far as possible.
H Should you use your handset in an emergency, please make use
of the hands free built in your car or pull over your car in a safe
place for a while for your utmost safety.
H The electronic wave energy emitting from your handset may
affect the electronic device built in your car. Please pay attention
to this characteristic.
Cellular Use Restriction Area
Make sure to turn your handset off in the handset usage
restricted area.
Using a Handset in the Explosive or Dangerous Area is
not Allowed Please turn your handset off in the area with
explosive or dangerous materials (such as gas, gas station,
or chemical goods) and abide by any instruction or signal.
Never try to detach your cellular battery from the handset in
such areas, either.
Boarding Airplane
H Please turn your handset off when you are on the airplane. The
electronic wave from your handset may affect the electronic
navigation device in your airplane.
Safety Precautions
Untitled-1 10 2004.11.5 8:2:9 PM

11
Using Medical Equipment
H Please turn your handset off while you are in the hospital.
H Please abide by the regulations or rules of the hospital.
H Please turn off your handset when using the medical equipment
for private purposes if possible. You should consult with the
manufacturer or an expert before you use it.
Installing a Vehicle Hands Free
H Please keep a vehicle hands free off the driving radius, air bag
expansion range, or whatever area may cause injury.
Effect of Cellular and Electronic Device
H Few electronic devices may be affected by the electronic wave
emitting from the cellular in service. Please be careful.
Safety Precautions
Untitled-1 11 2004.11.5 8:2:9 PM

12
1. Phone Book
1.1 List Entries
1.2 New Entry
1.3 Speed Dial
1.4 Groups
1.5 Address Groups
1.6 Services
1.6.1 Non-Emergency Services
1.6.2 Air and Maring Rescue
1.6.3 Directory Assistance
1.6.4 Client Care
1.6.5 Services for the Deaf
1.6.6 Emergency Services
1.6.6 Operator Dialing
1.7 My Phone #
1.8 Phonebook Status
2. Call History
2.1 Outgoing calls
2.2 Incoming calls
2.3 Missed calls
2.4 Erase Calls
2.4.1 Outgoing Calls
2.4.2 Incoming Calls
2.4.3 Missed Calls
2.4.4 All Calls
2.5 Call Timers
2.5.1 Last Call
2.5.2 Total Calls
3. Call History
3.1 Voicemail
3.1.1 Call Voicemail
3.1.2 Details
3.1.3 Clear Envelope
3.2 Send Message
3.3 Inbox
3.4 Outbox
3.5 Saved
3.6 Msg Settings
3.6.1 Callback Number
3.6.1.1 None
3.6.1.2 My Phone Number
Menu Tree (PC-1000N)
Untitled-1 12 2004.11.5 8:2:10 PM

13
3.6.1.3 Other
3.6.2 Notification
3.6.2.1 Message and Icon
3.6.2.2 Icon only
3.6.3 Overwrite
3.6.3.1 On
3.6.3.2 Off
3.6.3 Signature
3.7 Erase
4. Do More
4.1 Wireless Web
4.2 Sounds
4.2.1 Get New
4.2.2 Ringtones
4.2.3 Sound Clips
4.3 Images
4.3.1 Get New
4.3.2 Wallpaper
4.3.3 Picture Album
4.4 Games
4.4.1 Get New
4.5 Tools
4.5.1 Get New
4.6 Memory Status
5. Settings
5.1 Sounds
5.1.1 Volume
5.1.1.1 Ringer Volume
5.1.1.2 Voice Volume
5.1.1.3 Headset Volume
5.1.1.4 Alarm Volume
5.1.1.5 Messages Volume
5.1.1.6 Key Beep
5.1.1.7 Auto Volume
5.1.2 Ringer Types
5.1.2.1 Voice calls
5.1.2.1.1 With caller ID
5.1.2.1.2 Without caller ID
Menu Tree (PC-1000N)
Untitled-1 13 2004.11.5 8:2:10 PM

14
Menu Tree (PC-1000N)
5.1.2.1.3 Restricted ID
5.1.2.2 Messages
5.1.2.2.1 Voicemail
5.1.2.2.2 Text Message
5.1.2.2.3 Multimedia Message
5.1.2.2.3 WAP Push/Alert
5.1.2.3 Alarm
5.1.2.4 Roam Ringer
5.1.2.4.1 Distinct
5.1.2.4.2 Normal
5.1.2.5 Shutter Sound
5.1.3 Alerts
5.1.3.1 Service Alerts
5.1.3.1.1 On
5.1.2.1.2 Off
5.1.3.2 Minute Beep
5.1.3.2.1 On
5.1.2.2.2 Off
5.1.3.3 Messages
5.1.3.3.1 On
5.1.2.3.2 Off
5.1.3.4 Call Failure (on Origination)
5.1.3.4.1 On
5.1.2.4.2 Off
5.1.3.5 Call Lost
5.1.3.5.1 On
5.1.2.5.2 Off
5.1.4 Tones
5.1.4.1 Tone Length
5.1.4.1.1 Long
5.1.4.1.2 Short
5.1.4.2 Power On Tone
5.1.4.2.1 Get New
5.1.4.2.2 Tone A
5.1.4.2.3 Tone B
5.1.4.2.4 Off
5.1.4.3 Power Down Tone
5.1.4.3.1 Get New
5.1.4.3.2 Tone A
5.1.4.3.3 Tone B
5.1.4.3.4 Off
Untitled-1 14 2004.11.5 8:2:10 PM

15
Menu Tree (PC-1000N)
5.2 Display
5.2.1 Greeting
5.2.2 Backlight Control
5.2.2.1 Display
5.2.2.2 Keypad
5.2.3 Contrast
5.2.4 Font Size
5.2.4.1 Normal
5.2.4.2 Large
5.2.5 Standby Display
5.2.5.1 Screensaver
5.2.5.2 Wallpaper
5.2.6 Shortcut ( My Menu)
5.2.6.1 Navigation Key
5.2.6.2 SoftKeys
5.3 System
5.3.1 System Selection
5.3.2 Call Guard
5.4 Security
5.4.1 Lock Phone
5.4.2 Change Lock Code
5.4.3 Erase Phonebook
5.4.4 Erase Downloads
5.4.5 Restrict
5.4.6 Special Numbers
5.4.7 Reset Phone
5.5 Airplane Mode
5.6 Setup
5.6.1 Language
5.6.2 Answer Options
5.6.3 Abbrev. Dial
5.6.4 Auto Prepend
5.6.5 Auto Redial
5.6.6 TTY Settings
5.7 Data
5.7.1 Connect Service
5.7.2 Data Speed
5.7.3 Data Port
5.8 Voice Dial
Untitled-1 15 2004.11.5 8:2:10 PM

16
Menu Tree (PC-1000N)
6. Voice Tools
6.1 Voice Memo
6.1.1 Record
6.1.2 Play
6.1.2 Delete all
6.2 Voice Dial
6.1.1 Record
6.1.2 Review
6.1.2 Delete all
6.3 Train Words
7. Utilities
7.1 Calendar/Schedule
7.2 Alarm Clock
7.3 Notepad
7.4 Calculator
7.5 World Clock
7.6 Stopwatch
8. Camera
8.1 Take Picture
8.2 Picture Album
8.3 Picture Messaging
9. Phone Info
9.1 My phone number
9.2 Legend of Icons
9.3 Version
9.4 Advanced
Untitled-1 16 2004.11.5 8:2:10 PM

17
Memo
Untitled-1 17 2004.11.5 8:2:10 PM

18
Table of Contents
WELCOME TO PANTECH ...........................................................3
CHARACTERISTIC SPECIFICATION OF ....................................4
DISPLAY ............................................................................................................. 4
MELODY ............................................................................................................. 4
CAMERA ............................................................................................................. 4
DIMENSION & WEIGHT ..................................................................................... 4
POWER MANAGEMENT (PERFORMANCE) .................................................... 5
OPERATING FREQUENCY ............................................................................... 5
VIEWS OF PANTECH .................................................................6
QUICK & EASY ........................................................................................ 8
SAFETY PRECAUTIONS ....................................................................... 10
MENU TREE ...........................................................................12
GETTING STARTED
PACKAGE CONTENTS .................................................................................. 26
INTERNAL & EXTERNAL DISPLAYS ............................................................. 27
INTERNAL LCD DISPLAY ................................................................................ 27
EXTERNAL LCD DISPLAY ............................................................................... 31
SIM CARD ....................................................................................................... 33
SIM CARD ........................................................................................................ 33
INSTALLING/REMOVING THE SIM CARD ...................................................... 33
USING THE BATTERY .................................................................................... 35
INSTALLING THE BATTERY ............................................................................ 35
REMOVING THE BATTERY ............................................................................. 35
CHARGING THE BATTERY ............................................................................. 36
PRECAUTIONS WHILE USING THE BATTERY .............................................. 37
NEW FUNCTIONS
VIDEO CALLER ID .......................................................................................... 40
CONTACTS.................................................................................................. .... 40
FUN & TOOLS.............................................................................................. .... 40
SETTING MJPEG FOR IDLE SCREEN........................................................... 42
Untitled-1 18 2004.11.5 8:2:10 PM

19
Table of Contents
BASIC FUNCTIONS
SWITCHING THE PHONE ON OR OFF ......................................................... 46
SWITCHING THE PHONE ON ......................................................................... 46
SWITCHING THE PHONE OFF ....................................................................... 46
MAKING A CALL ............................................................................................. 47
MAKING A CALL ............................................................................................... 47
ENDING A CALL ............................................................................................... 47
USING CALL LOGS .......................................................................................... 47
USING CONTACTS .......................................................................................... 48
MAKING AN INTERNATIONAL CALL ............................................................... 48
SPEED-DIALING FROM CONTACTS .............................................................. 49
MAKING THE EMERGENCY CALL ................................................................. 49
ANSWERING A CALL ..................................................................................... 50
ANSWERING A CALL ....................................................................................... 50
VIEWING MISSED CALLS ............................................................................... 50
REJECTING A CALL ......................................................................................... 51
ADJUSTING THE VOLUME DURING A CALL ................................................. 51
OPTIONS IN CALLING ................................................................................... 52
SWITCHING THE MICROPHONE OFF (MUTE) ............................................. 52
PUTTING A CALL ON HOLD ............................................................................ 52
ANSWERING A SECOND CALL WHILE YOU ARE ON
A PHONE CALL ................................................................................................ 53
SEARCHING FOR A PHONE NUMBER IN CONTACTS ................................. 54
USING THE DTMF TONES .............................................................................. 55
TRANSFERRING A CALL ................................................................................. 55
USING THE MESSAGE SERVICE ................................................................... 56
MAKING A MULTI-PARTY CALL ...................................................................... 56
USING THE EARPIECE .................................................................................. 59
SELECTING THE MENU FUNCTION ............................................................. 60
ENTERING THE MENU FUNCTION ................................................................ 60
CHARACTERISTIC SPECIFICATION OF GF200 .......................................... 61
USING THE SHORTCUT KEY IN THE STANDBY MODE ............................... 61
Untitled-1 19 2004.11.5 8:2:10 PM

20
Table of Contents
ENTERING THE TEXT ................................................................................... 62
INPUT MODE ................................................................................................... 62
CHANGING THE TEXT INPUT MODE ........................................................... 63
USING THE T9 MODE ..................................................................................... 65
USING THE MULTI-TAP MODE ....................................................................... 67
USING THE NUMBER MODE .......................................................................... 68
USING THE SYMBOL MODE ........................................................................... 68
APPLICATIONS
MESSAGES .................................................................................................... 72
TEXT MESSAGES ........................................................................................... 72
MULTIMEDIA MESSAGES ............................................................................... 80
BROADCAST ................................................................................................... 90
VOICE MAIL ..................................................................................................... 91
CONTACTS ..................................................................................................... 92
ADDING A NEW CONTACT ............................................................................. 92
EDITING THE CONTACTS ............................................................................... 92
SEARCHING A NAME/GROUP/PHOTO .......................................................... 92
GROUP SETTING ............................................................................................ 94
SPEED DIAL SETTING .................................................................................... 94
DELETE ALL ..................................................................................................... 95
MEMORY INFO ................................................................................................ 95
SERVICE NUMBER ......................................................................................... 95
CALL LOGS .................................................................................................... 96
MISSED CALLS ................................................................................................ 96
RECEIVED CALLS ........................................................................................... 97
DIALLED CALLS .............................................................................................. 97
DELETE CALL LOGS ....................................................................................... 98
CALL TIMER ..................................................................................................... 98
CALL COST ...................................................................................................... 98
GPRS INFO ...................................................................................................... 99
FUN & TOOLS .............................................................................................. 100
CAMERA ......................................................................................................... 100
MEDIA GALLERY ........................................................................................... 106
GAME ............................................................................................................. 112
JAVA ................................................................................................................ 114
AUTO ANSWER ............................................................................................. 116
Untitled-1 20 2004.11.5 8:2:10 PM

21
Table of Contents
VOICE MEMO ................................................................................................ 118
PROFILES .....................................................................................................119
RING TONE .................................................................................................... 119
MESSAGE ALERT .......................................................................................... 120
KEY TONE ...................................................................................................... 120
FLIP OPEN TONE .......................................................................................... 120
SOUND EFFECT ............................................................................................ 121
PROFILE NAME ............................................................................................. 121
RESET ............................................................................................................ 121
SETTINGS .................................................................................................... 122
DISPLAY SETTINGS ...................................................................................... 122
CALL SETTINGS ............................................................................................ 125
LANGUAGE .................................................................................................... 127
FAVORITE ...................................................................................................... 127
TIME & DATE ................................................................................................. 127
NETWORK SELECTION ................................................................................ 127
SECURITY SETTINGS ................................................................................... 128
SYSTEM RESET ............................................................................................ 131
ORGANIZER ................................................................................................. 132
ALARM ........................................................................................................... 132
CALENDAR .................................................................................................... 133
MEMO ............................................................................................................. 136
WORLD TIME ................................................................................................. 136
CALCULATOR ................................................................................................ 137
CONVERTER ................................................................................................. 137
STOP WATCH ................................................................................................ 138
TIMER ............................................................................................................. 138
ADVANCED
WAP .............................................................................................................. 142
NAVIGATING THE WAP BROWSER ............................................................. 142
ENTERING THE TEXT IN THE WAP BROWSER .......................................... 142
HOME ............................................................................................................. 143
RESUME ........................................................................................................ 143
BOOKMARKS ................................................................................................. 143
PUSH MESSAGES ......................................................................................... 144
Untitled-1 21 2004.11.5 8:2:11 PM

22
Memo
Untitled-1 22 2004.11.5 8:2:11 PM

23
GETTING STARTED
1. Package Contents
2. Views of Pantech PC-1000N
3. Internal & External Displays
4. Using the battery
Untitled-1 23 2004.11.5 8:2:11 PM

24
Package Contents
Phone
Battery
Manual
Travel Charger
Hand Strap Ear Microphone
Untitled-1 24 2004.11.5 8:2:30 PM
25
LCD Display
Icons Area
Text and Graphic Area
Display in Standby screen with information.
• Area Information through Cell broadcast
service
• Network Name
• Time and Date, or Standby Greeting message.
LCD Displays
This handset has LCDand icons on the top of the LCD display to
show the phone condition.
Signal Strength
Current signal strength-the more lines, the stronger the
signal.
Service Indicator
Indicates a call is in progress.
Service Indicator
Indicates the phone cannot receive a signal.
You have a new voice message.
Icon(s)
Untitled-1 25 2004.11.5 8:2:34 PM
26
LCD Displays
Indicates you have a text, numeric page, or web alert
message waiting.
Indicates you have a picture MSG waiting.
Indicates you have a voicemail message waiting.
Roaming
Indicates the phone is roaming.
Digital Mode
Phone is operating in digital mode.
Battery
Battery charging level - the more blocks, the stronger
the charge.
Mute
Phone is mute during a call.
Ring mode
Appears when a ringer is set as a ringer mode.
Emergency call
Blinks when an emergency call is in progress.
Icon(s)
Untitled-1 26 2004.11.5 8:2:34 PM
27
LCD Displays
Auto answer
Phone is in answering machine mode.
Etiquette
Phone will vibrate when call is received.
Schedule
Appears when either an event or an alarm is set.
Fax Only
Receives a fax call as a voice call.
Data Only
Receives an async. call as a voice call.
1X
Phone is in the 1x service area.
Analog Mode
Phone is operating in analog mode.
Icon(s)
Untitled-1 27 2004.11.5 8:2:34 PM
28
LCD Displays
Display Off Mode.
If you don’t press any key in a minute when the display are
dimmed, the internal display goes into the Off Mode to save
the power. Press any key to restore the display from the Off
Mode.
Selecting Functions and Options.
Handset provides several customization functions, which are
arranged in menus and sub-menus. You can access to these
function using three Soft keys ([ ] , [ ] and [ ] key).
Each menu and sub-menu allow you to view and change the
settings of the particular function.
Soft key function varies depending on the current context;
the labels or icons at the bottom line of the display indicate
the current function.
To view various functions/options available or select the one
that is required:
1
Press the appropriate Soft key.
2
To select function displayed or option highlighted, press the
[ ] [Select] Soft key or [ ] Soft key.
3
To highlight the next option on a list, press the Up key or Down
key.
4
To move back to the previous function or option on a list, press
the [ ] key
5
To return to Standby Mode, press the [ ] key.
Untitled-1 28 2004.11.5 8:2:34 PM
29
Side Key Functions.
LCD Displays
- Adjusts the earpiece volume and moves up the
cursor in the menu during a call.
- Mutes the ring tone if pressed at an incoming call.
- Rejects the incoming call if pressed at an incoming
call.
- Turns the flashlight on if pressed longer.
Side Up
- Adjusts the earpiece volume and moves down the
cursor in the menu during a call.
- Mutes the ring tone if pressed at an incoming call.
- Rejects the incoming call if pressed at an incoming
call
Side Down
- From standby mode, use for quick access to the
'Camera' menu and use to take pictures.
Camer key
Untitled-1 29 2004.11.5 8:2:34 PM
30
Using the battery
Installing the battery
Put the metal locators of the battery into the hole located at
the bottom of the unit, as shown in the below figure.
Press the upper side of the battery until you hear “click”
sound.
Removing the battery
Push up the battery holding button and remove the battery.
Untitled-1 30 2004.11.5 8:2:35 PM
31
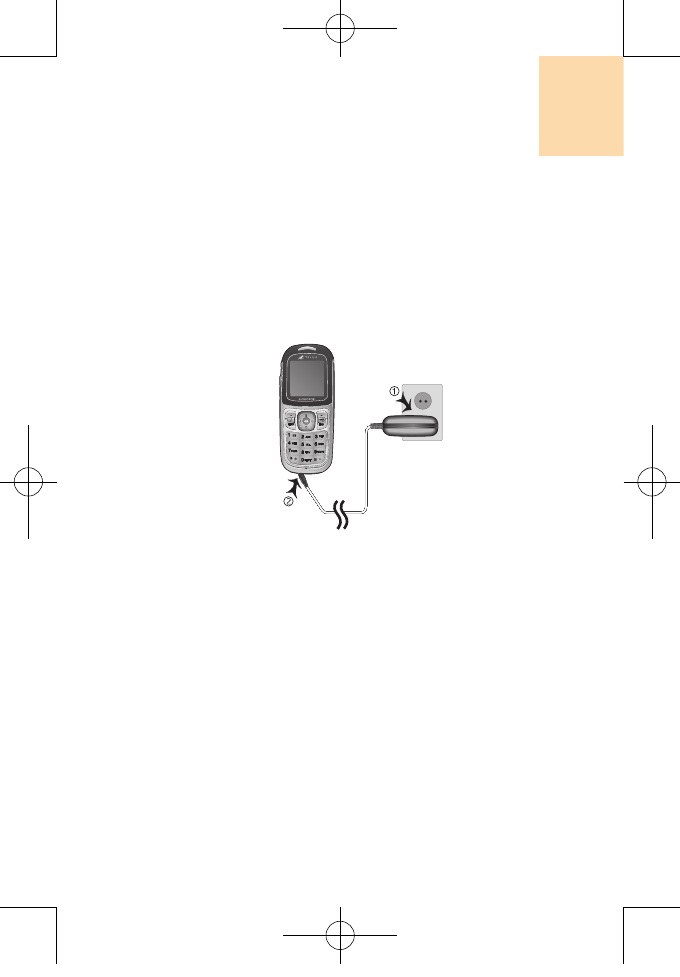
Charging the battery
This handset uses the Li-ion battery. Make sure to use the
authorized battery and charger only. For more details, please
inquire at your nearest dealer.
You can use the handset during battery recharging.
An adaptor is provided with the handset.
If recharging is completed, detach the adaptor connection
from the outlet.
Using the battery
Untitled-1 31 2004.11.5 8:2:36 PM

32
Using the battery
Tip
Your handset is powered by a Lithium Ion (Li-ion) battery.
You can use the following Li-ion battery types for your handset.
(Contact your local dealer for more information.)
Standard-type battery.
Precautions while Using the Battery
H
Do not use a damaged battery or charger.
H
Use the battery for the specified purpose only.
H
The closer you are to the base station, the longer the
handset usage time because less battery is consumed
for connection.
H
Battery charging time varies depending the remained
battery capacity and the battery and charger type in use.
H
Battery life is shortened as time goes by.
H
Use authorized battery and charger only.
H
Since overcharging may shorten battery life, remove the
battery from its charger once it is fully charged. Unplug
the charger once charging is complete. Leaving the
battery in hot or cold places, especially inside a car in
summer or winter, may reduce the capacity and life of
the battery.
Always keep the battery under normal temperatures.
H
Do not ground the battery. Grounding may occur when
the battery is in contact with a conductive object.
A grounded handset may also damage the battery.
H
Dispose and recycle used batteries in accordance with
local regulations.
Untitled-1 32 2004.11.5 8:2:37 PM

33
H Do not dispose of the batteries in a fire.
H Do not use an unauthorized charger.
H In order to prevent injury or burns, ensure that a metal
object does not come into contact with the + and –
terminals of the battery.
Using the battery
Untitled-1 33 2004.11.5 8:2:37 PM

34
Memo
Untitled-1 34 2004.11.5 8:2:37 PM

35
BASIC FUNCTIONS
1. Switching the Phone On or Off
2. Making a Call
3. Answering a Call
4. Options in Calling
5. Using the Earpiece
6. Selecting the Menu Function
7. Entering the Texts
Untitled-1 35 2004.11.5 8:2:37 PM
36
Switching the Phone On or Off
Switching the Phone On
1
Press the [ ] key until the phone switches on.
Your handset starts to search for the available network and
the current date and time will appear on the LCD displays.
Once connected to the network, you can send or receive a
call.
If the malfunction occurs while using the handset or it is not
turned on, remove the battery and install it again after 5 or 10
seconds.
Switching the Phone Off
To switch the phone off, press the [ ] key until the
power-off animation displays.
Untitled-1 36 2004.11.5 8:2:37 PM
37
Making a Call
Enter the area code and the phone number to make a call in
the standby mode, and press the [ ] key.
To clear the last digit displayed, press the [ ] key.
To clear the all digits displayed, press the [ ] key longer.
Ending a Call
When you want to finish your call, press the [ ] key.
Once the call is completed, the call summary (Receiver
Name or Number, Service Time) will be displayed.
Using Call Logs
The phone stores up to 40 dialled, received or missed calls
chronologically. The last call is saved in the first position. If
the same number was dialled more than once, only the latest
occurrence will be saved.
1
Press the [ ] key shortly to see call log list aligning dialled,
received, or missed numbers chronologically.
Making a Call
If you have set the [Auto Redial] option (Menu 5.6.5) to [On], the
handset will attempt to make a call automatically for up to 10 times if
it is not answered.
NOTE
Untitled-1 37 2004.11.5 8:2:37 PM
38
Making a Call
2
Press the [ / ] key to select a number.
3
Press the [ ] key for dialling.
Tip
Press the [ ] key longer to redial the last number in the call log.
Speed dialing
Calls can be placed to numbers stored in the speed dial
by pressing & holding the last digit of speed dial # on the
keypad.
1
Press [ ] under 'Menu' then press [ ] for 'Phonebook'
and press [ ] for 'Speed Dialing'.
2
To assign a phone number to a location, select the location then
press [ ].
3
The phonebook list will be displayed alphabetically.
Select a name then press [ ].
To call the number press [ ].
Untitled-1 38 2004.11.5 8:2:38 PM

39
Voice Dialing
To dial a name using voice signal :
1
Press [ ] under 'Menu' then press [ ] for 'Voice Tools'
and press [ ] for 'Voice Dial'.
See Voice Dial Setting for more details.
Making a Call
Untitled-1 39 2004.11.5 8:2:39 PM
40
Answering a Call
Answering a Call
When you receive a call, the phone rings (or vibrates) and
screen will display the name or the number of the caller (If
network supports and you have subscribed to it).
If the caller can be identified, the caller’s phone number or
name will be displayed if it is stored in your Contacts.
1
To answer a call press the [ ].
If the answer type is set as [AnyKey Answer], you can answer
a call by pressing any key except [ ] key.
Viewing Missed Calls
If the incoming call could not be answered for any reason,
a missed call message will appear on the screen to remind
you of the call you have missed (Network and subscription
dependent feature, not available at all areas necessarily)
To reply to the missed call;
To reply to the missed call;
1
Press the [ ] Soft key to display a list of recent calls.
2
Using [ ] to select a Missed call and press [ ] to view it.
3
If necessary, scroll to the number you want by pressing the
[ / ] key.
Untitled-1 40 2004.11.5 8:2:39 PM

41
4
Press the [ ] key to recall the missed call.
Adjusting the Volume during a Call
During a call, if you wish to adjust the earpiece volume, use
the volume keys on the left side of the phone.
Press the [ ] key to increase the volume level and the
[ ] key to decrease it.
Answering a Call
Untitled-1 41 2004.11.5 8:2:39 PM
42
Options in Calling
Dialing TELUS Client Care
Simply dial 611 and press [ ].
Three way calling
This service is an optional service. please contact telus
mobility client care at 611 if you would like this service.
1
Dial the first number you wish to call and press [ ] to place
the call.
2
Wait for the call to connect and press [ ] to place the call on
hold.
3
Enter the second number and press [ ] to connect.
4
When the second party answers, press [ ] to begin the three
way conversation.
Emergency Dialing
Emergency numbers can be called at all times, even
when your phone is locked. you can place call to 911,
telus mobility client care(611), and one other specified
number by simply dialing the nuber and pressing
[ ].
Untitled-1 42 2004.11.5 8:2:39 PM

43
Dialing Directory Assistance
Dial 411 and press [ ] to access directory
assistance.
Options in Calling
Untitled-1 43 2004.11.5 8:2:39 PM

44
Using the Earpiece
You can send or receive a call without touching the handset,
using he ear-microphone.
When you connect the ear-microphone to the jack located
at the top of the phone, the button on the ear-microphone
works as described below;
To show the recent calls, press the button in the standby
mode.
To redial the last call, press the button twice in the standby
mode.
To answer a call, press the button when you receive a call.
To complete a call, press the button when you have finished
a call.
Untitled-1 44 2004.11.5 8:2:39 PM
45
Entering the Menu Function
Selecting the Menu Function
Key Function
Goes to the main menu in the standby mode.
Goes to the Phonebook menu.
Moves among the main menus.
[ ], [ ] key
Searches for the sub-menu.
[ ], [ ] key
Goes to the sub-menu
[ ] key
Untitled-1 45 2004.11.5 8:2:40 PM
46
Input Mode
On many occasions you need to input the text while you are
using your handset, (i.e., storing a name in the Contacts,
writing a new message, creating your greeting or scheduling
events on your calendar).
The available text input mode includes.
T9 mode
You can input the letter only one keystroke per letter. The
keypad has more than one letter on it – when you press the
[ ] key once, J, K or L may be displayed.
The T9 mode automatically compares your keystrokes with
an internal linguistic dictionary to determine the correct word,
thus requiring far fewer keystrokes than the conventional
Multi-tap mode.
Numeric mode
You can input the number in this mode.
Symbol mode
You can input the special characters like Greek letter,
currency unit, or period mark in this mode.
Emoticon mode
You can input the emoticon in this mode.
Entering the Text
Untitled-1 46 2004.11.5 8:2:40 PM
47
Inserting a Space
To insert a space between words, press the [ ] key.
Clearing Letters and Words
To clear the letter to the left of the cursor, press the [ ]
key.
You can clear all of the letters on the display by long pressing
the [ ] key.
Returning to the Previous Screen
When the text input field is empty, press the [ ] key to
return to the previous screen.
Using the T9 Mode
In the T9 alphabet Editor, the word is composed completely
as you input the text.
1
Press the keys numbered [ ] to [ ] to input texts.
For example, press [ ][ ][ ][ ][ ] in sequence
to input ‘hello’.
The word you are typing appears on the display. It may change
with each key you press.
2
Enter the whole word before editing or deleting any keystrokes.
Entering the Text
Untitled-1 47 2004.11.5 8:2:41 PM
48
Entering the Text
3
Upon searching a word, input the next text.
4
If you fail to search a word, press the [ ] key to search which
text can be typed in. If several texts are searched, the text in thze
most frequently used will be listed first.
5
Continue entering the next word.
KEY Characters in the displaying order
[English ]
. : - ) 1
a b c 2
d e f 3
g h i 4
j k l 5
m n o 6
p q r s 7
t u v 8
w x y z 9
0
Untitled-1 48 2004.11.5 8:2:41 PM
49
Using the Number Mode
The Number mode enables you to enter numbers in the text.
Press the key corresponding to the digit you want to enter.
Using the Symbol Mode
The Symbolic mode enables you to enter symbols in your
text.
To display more symbols, press the [ / ] key.
Using the Emoticon Mode
The emoticon mode enables you to enter symbols in your
text.
Introducir textos
Untitled-1 49 2004.11.5 8:2:42 PM

50
Memo
Untitled-1 50 2004.11.5 8:2:42 PM

51
APPLICATIONS
1. Phonebook
2. Call History
3. Messaging
4. Do more
5. Settings
6. Voice Tools
7. Utilities
8. Camera
9. Phonebook
Untitled-1 51 2004.11.5 8:2:42 PM
52
PhoneBook
Viewing/Searching the phonebook
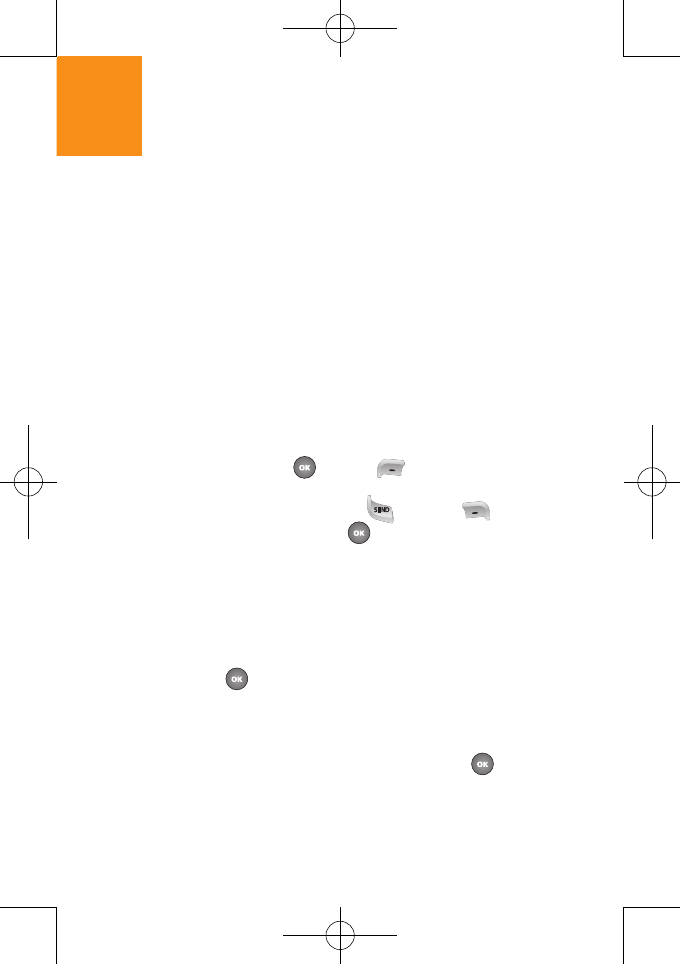
Select ‘Menu > 1.PhoneBook > Find name'.
1
From the standby mode, press the right soft key to access the
phonebook.
2
The list of names in your phonebook is displayed alphabetically.
Use navigation key to select the name.
3
Enter a name or its character string or scroll through the list with
the navigation key.
4
Matching entries will be displayed. highlight an entry.
To edit an entry press [ ]. Press [ ] under 'Edit'.
5
To call the selected number, press [ ] or press [ ] under
'menu', select 'call' then press [ ].
Add new entry
Select ‘Menu > 1.PhoneBook > Add new entry'.
1
The first filed highlighted is name. enter the name for the entry,
then press [ ].
2
Press the navigation key down to enter all the other information.
3
When all information for the entry is entered, press [ ] to save
the entry.
Untitled-1 52 2004.11.5 8:2:42 PM
53
Speed Dial #
Press a number in the Contacts in the standby mode for
Speed Dial.
To add Speed Dial, use [Add to Speed Dial] option. The
Speed Dial number ranges from No. 2 to No. 99, totalling 98
dials.
Select ‘Menu > 1.PhoneBook > Speed dial #'.
1
To assign a phone number to a location, select the location then
press [ ].
2
The phonebook list will be displayed alphabetically.
Select a name then press [ ].
3
Speed dial # edited will be displayed.
Group Setting
Select ‘Menu > 1.Phonebook > Groups’.
Changes the settings for the five predefined caller groups.
Default Groups: Family, Friends, Business, Colleagues,
Others, new groups
PhoneBook
Untitled-1 53 2004.11.5 8:2:42 PM
54
PhoneBook
Address Groups
Select ‘Menu > 1.Phonebook > Addres Groups’.
Changes the settings for the five predefined address groups.
Default Groups: Family, Friends, Business, Colleagues,
Others, new groups
Services
Select ‘Menu > 1.Phonebook > Services’.
Press the navigation key down to access sevices menu.
Non-Emergency
1
Dial 211 and press [ ] to access
non-emergency.
Air & Marine Rescue
1
Dial 311 and press [ ] to access
air & marine rescue.
Dir. Assistance
1
Dial 411 and press [ ] to access directory
assistance.
Client Care
1
Dial 611 and press [ ] to access client care.
Untitled-1 54 2004.11.5 8:2:42 PM
55
PhoneBook
Service for Deaf
1
Dial 711 and press [ ] to access
service for deaf.
Emergency Service
1
Dial 911 and press [ ] to access
emergency service.
Operator Dialing
1
Dial 0 and press [ ] to access
operator dialing.
This service is an optional service. Please contact TELUS
mobility client care at 611 if you would like this service.
My Phone #
Select ‘Menu > 1.Phonebook > My Phone #’.
Displays your phone number and service provider.
PhoneBook Status
Select ‘Menu > 1.Phonebook > PhoneBook Status’.
Displays your phoneBook status.
Untitled-1 55 2004.11.5 8:2:42 PM
56
Call History
Displays information about the 40 most recently dialed,
missed and received calls. Call a number by simply pressing
[ ].
Outgoing Calls
Displays information about the 40 most recently outgoing
calls. Place a call to a received call by simply pressing [ ].
Select ‘Menu > Call history > Outgoing Calls'.
Displays the outgoing calls list accompanied by the time and
date of a missed call as well as the number or name of the
receiver.
Press the [ / ] key for selection.
Press the [Memu] Soft key [ ] to;
•
Delete: Deletes the missed call record indicated by the list
•
Delete All: Deletes all missed call records from the list.
Incoming Calls
Displays information about the 40 most recently answered
calls. Place a call to a received call by simply pressing [ ].
Select ‘Menu > Call history > Incoming Calls'.
Displays the received call list accompanied by the time and
date of a received call as well as the number or name of the
caller. Press the [Left/Right] key to select.
Untitled-1 56 2004.11.5 8:2:43 PM
57
Press the [Memu] Soft key [ ] to;
•
Delete: Deletes the missed call record indicated by the list
•
Delete All: Deletes all missed call records from the list.
Missed Calls
Displays information about the 40 most recently missed calls.
Place a call to a received call by simply pressing [ ].
Select ‘Menu > Call history > Missed Calls'.
Displays the missed calls list accompanied by the time and
date of a missed call as well as the number or name of the
receiver.
Press the [ / ] key for selection.
Press the [Memu] Soft key [ ] to;
•
Delete: Deletes the missed call record indicated by the list
•
Delete All: Deletes all missed call records from the list.
Erase History
Select ‘Menu > Call history > Erase History'.
It deletes the missed, received, or dialled calls or deletes all
the call records with ‘All Calls’.
Press the [Yes] Soft key [ ] or [No] Soft key [ ] to
execute or cancel this function.
Call History
Untitled-1 57 2004.11.5 8:2:43 PM

58
Call History
Call Timer
Checks the usage time and manages your calls within the
limit you set. The two timers include:
Select ‘Menu > Call history > Call Timer'.
LAST CALL
Displays usage time of last call.
Select ‘Menu > Call history > Call Timer > Last Call'.
Total CALLS
Displays usage time of all incoming and outgoing calls,
excluding web access calls.
Select ‘Menu > Call history > Call Timer > Total Calls'.
Untitled-1 58 2004.11.5 8:2:43 PM
59
New Message Notification
The following display appears when a new message arrives.
To display the message, press [ ] under 'Read'.
VOICE MAIL
Setting Up Voice Mail
1
From the standby mode, press [ ] for 'Menu'
and [ ] for 'Messaging'.
2
Press [ ] for 'Voice Mail'.
3
Wait for the greeting and enter the default
password 1234.
4
Follow the voice prompts to setup your voice mail.
Messaging
Untitled-1 59 2004.11.5 8:2:43 PM
60
Messaging
RETRIEVING VOICE MAIL
1
From the standby mode, press [ ] for 'Menu'
and [ ] for 'Messaging'.
2
Press [ ] for 'Voice Mail' and [ ] to call your
voice mail.
3
Wait for the greeting to start, then press [ ].
4
Enter your password and follow the voice prompts
to set up your voice mail.
The default password is usually 0000 or the ten digits in your
phone number.
NOTE
Untitled-1 60 2004.11.5 8:2:43 PM
61
Text Messaging
1
From the standby mode, press [ ] for 'Menu'
and [ ] for 'Messaging'.
2
Press [ ] for 'Send Messaging'.
3
Under “Send To”, input the phone number and
press [ ].
By pressing [MENU], you can choose from the following:
1. Phonebook : Search the phone number which is stored in the
phone book.
2. Call history : Search the phone number which is stored in the
call history.
4
Under “Message”, input a new txt message and
press [ ].
5
The default call back number is automatically
inputted into the Default CB# field. You can
scroll to the number and edit it or simply
press [EDIT].
-
4
Messaging
While entering text, press [ ] for different text entry
options.
NOTE
Untitled-1 61 2004.11.5 8:2:43 PM
62
Messaging
6
Press the Navigation Key down for more fields.
Under “Priority”, select “Normal’ or “Urgent”.
7
Under “Insert Signature”, select “On” or “Off”.
8
8.1. To send the TXT message, press [MENU]
and select “Send” then press [OK].
8.2. To save the TXT message, press [MENU] and
select “Save to Outbox” then press [OK].
Inbox
The Inbox manages received Text messages.
To access:
1
From the standby mode, press [ ] for 'Menu'
and [ ] for 'Messaging'.
2
Press [ ] for 'Inbox'.
3
Select a message then press [ ]. The message
is displayed. to delete a message, press [ ]
under 'Erase'.
-
4
Untitled-1 62 2004.11.5 8:2:44 PM
63
Outbox
Manages sent Text messages or messages waiting to
be sent.
1
From the standby mode, press [ ] for 'Menu'
and [ ] for 'Messaging'.
2
Press [ ] for 'Outbox'.
3
Select a message, then press [ ]. The text
message is displayed.
4
To erase message, press [ ] under 'Erase' or
press [ ].
5
Press [ ] under 'options' for options.
Saved
To save the TXT message in your phone.
1
From the standby mode, press [ ] for 'Menu'
and [ ] for 'Messaging'.
2
Press [ ] for 'Saved'.
3
Select a message, then press [ ]. The text
message is displayed.
Messaging
Untitled-1 63 2004.11.5 8:2:44 PM
64
Messaging
4
To erase message, press [ ].
Message Settings
1
From the standby mode, press [ ] for 'Menu'
and [ ] for 'Messaging'.
2
Press [ ] for 'Message settings'.
3
Press one of the following:
- Press [ ] for 'Callback Number'.
- Press [ ] for 'Notification'.
- Press [ ] for 'Overwrite'.
- Press [ ] for 'Signature'.
4
Use the keypad navigation key to make your desired
settings and press [ ] to save the settings.
ERASE
1
From the standby mode, press [ ] for 'Menu'
and [ ] for 'Messaging'.
2
Press [ ] for 'Erase'.
Untitled-1 64 2004.11.5 8:2:44 PM

65
3
Press one of the following:
- Press [ ] for 'Inbox'.
- Press [ ] for 'Outbox'.
- Press [ ] for 'Saved'.
- Press [ ] for 'All Messages'.
4
Press [ ] to confirm or for 'cancel' to cancel the
deletion.
Messaging
Untitled-1 65 2004.11.5 8:2:44 PM

66
Do More
WIRELESS WEB
1
From the standby mode, press [ ] for 'Menu'
and [ ] for 'Do More'.
2
Press [ ] for 'Wireless WEB'.
3
Press [ ] for 'Launch WEB'.
3
A message will appear : "Security is not enabled.
enabling security can take several minutes.
Proceed?". press the left soft key(ok) to select YES
and create a new uniqye security key for your
phone.
This will take seceral minutes, do not turn off your
phone.
HOW DO I NAVIGATE THE MENUS?
1
Press the menu key on the left side of the screen,
then press 4 to select do more, then 1 to select
wireless web, then 1 to select launch web.
2
Your personal main menu will appear.
3
Use the handset's keypad to scroll and select menu
items and services.
Untitled-1 66 2004.11.5 8:2:44 PM

67
FUNCTION KEYS
Function Key
Up Nav-key Up
Down Nav-key Down
OK/Select Left softkey/OK
Options Press MENU key
Home Press MENU key, then
choose 1:Home. Or press
and hold BACK
Back Press BACK
Bookmark Press MENU key, then
choose 3:Bookmarks
Exit Press End key
Clear Cache Press MENU key, then
choose Advanced, then
select 1:Restart Browser
Do More
Untitled-1 67 2004.11.5 8:2:44 PM

68
Do More
RESETTING THE CACHE
Cache files are designed to help load Web pages
quicker. Each time you open a Web page, your
Microbrowser creates a cache file (a temporary copy)
of the page's text and graphics.
It is good to periodically reset your cache so that
the links and pages you see will always be the latest
version. Resetting the cache can also help if you are
experiencing a problem with a page you can normally
view.
To reset your cache:
1. Launch your microbrowser.
2. Press MENU key
3. Choose Advanced
4. Select 1:Restart Browser.
The microbrowser must be connected for this to work.
Untitled-1 68 2004.11.5 8:2:45 PM
69
SOUND & IMAGE
Getting ringtones and images
There are two ways to get a ringtone or image:
1
From the standby mode, press [ ] for 'Menu'
and [ ] for 'Do More'.
2
Press [ ] for 'Sound' or press [ ] for 'Image'.
3
Press 1 for "Ringtones" or press 1 for "Wallpaper".
4
Highlight "Get New" and press OK.
5
Select your language preference (first time only).
6
Press 2 to select "Ringtones" or 3 to select
"Images".
7
Select the item you want to download and press
the OK soft key to start downloading over-the-air.
Do More
Untitled-1 69 2004.11.5 8:2:45 PM

70
Do More
FROM MYTELUSMOBILITY.COM:
- Go to mytelusmobility.com
- Select "Login" if you already have a
mytelusmobility.com account or "Register Now" if
you're a new user.
- You can preview a ringtone or image before you
make your selection.
- Once you've purchased your ringtone or image, a
text message containing your selection will be
delivered to your phone.
- Opening the message will initiate the process of
downloading your ringtone or image to your phone.
- Once the files are downloaded, you can pick which
ringtones and images you'd like to use on your
phone. See Managing your ringtones and images for
more information.
Untitled-1 70 2004.11.5 8:2:45 PM

71
MANAGING YOUR RINGTONES AND IMAGES
ASSIGNING A RINGTONE OR IMAGE TO USE ON YOUR
PHONE:
1
From the standby mode, press [ ] for 'Menu'
and [ ] for 'Do More'.
2
Press [ ] for 'Sound' or press [ ] for 'Image'.
3
Highlight "Ringtones" or "Wallpaper" and press OK.
4
Highlight "Play" or "View" and press OK.
5
Highlight the ringtone or image that you wish to use,
Press the "Options" key and select "Assign".
ASSIGNING A RINGTONE OR IMAGE TO A SPECIFIC
PHONE NUMBER:
1
Press the "Menu" key on your phone.
2
Press 1 to select "Phonebook" .
3
Press 1 and highlight the entry that you want to add
a custom ringtone or image, then press OK.
Do More
Untitled-1 71 2004.11.5 8:2:45 PM

72
Do More
4
Highlight the "Ringer" symbol for ringtone and
highlight the "Graphic" symbol for image.
5
Press the "Options" to select "Change" then OK.
6
Press the OK key to switch to edit mode.
7
To select a ringtone, use the left and right arrows to
select Downloads, then select the one you wish to
use and press OK to save. To use a downloaded
image, select "Downloads", then use the left and
right arrow to select the image you wish to use and
press OK to save.
CHANGING YOUR RINGTONE OR IMAGE:
1
Press the "Menu" key on your phone.
2
Press 4 to select the "Do More" Menu.
3
Press 2 for "Sounds" or press 3 for "Images".
4
Highlight "Ringtones" or "Wallpaper" and press OK.
5
Highlight "Play" or "View" and press OK.
6
Highlight the ringtone or image that you wish to use,
press the "Options" key and select "Assign"
Untitled-1 72 2004.11.5 8:2:45 PM

73
DELETING A RINGTONE OR IMAGE:
1
Press the "Menu" key on your phone.
2
Press 4 to select the "Do More" Menu.
3
Press 2 for "Sounds" or press 3 for "Images".
4
Highlight "Ringtones" or "Wallpaper" and press OK.
5
Highlight the ringtone or image that you wish to
delete, press the "Options" key and select "Erase".
6
Press OK.
GAME
GETTING A GAME DIRECTLY FROM YOUR PHONE
1
Press the Do More key (plus sign) then choose
Games.
2
Select Get New and press OK.
3
Select New Releases, Top 10, or Category to make
your selection.
Do More
Untitled-1 73 2004.11.5 8:2:45 PM

74
Do More
4
Select Buy Now, then pick your purchase option.
5
After confirming your purchase, the My Storage
menu will appear on your screen.
6
The game you purchased will be highlighted - just
press OK.
7
You will then need to download the game.
Download Now will be highlighted on your screen -
just press OK to start downloading.
8
The game will then be downloaded to your phone.
9
Once the game has downloaded to your phone,
you can access it at any time through the Games
menu. Just select Do More from your phone's
menu, then choose Games.
HOW TO PLAY GAMES
Using the navigation key
Your phone's navigation key allows you to point up,
down, left and right to control your game play.
Untitled-1 74 2004.11.5 8:2:45 PM

75
Getting game help
- All games include specific instructions. They can be
found through one of two ways:
- Using a specific Help key on the screen while you
are playing the game.
- In the game's main menu before you start to play.
PLAYING WEB GAMES ON YOUR PC-1000N
1
Press the Do More key (plus sign).
2
Select Wireless Web from the menu.
3
Choose Launch Web.
4
Then choose Play Games.
5
Follow the menus to choose the game you would
like to play. Game prices will be listed beside each
game (some are even free).
Do More
You are charged a pay per use fee for the game only once it
actually begins. You can get instructions or find out about the
game at no charge.
NOTE
Untitled-1 75 2004.11.5 8:2:45 PM

76
Tools
1
Press the "Menu" key on your phone.
2
Press 4 to select the "Do More" Menu.
3
Press 5 for "Tools".
Do More
Untitled-1 76 2004.11.5 8:2:45 PM

77
Setting Sound
VOLUME
1
Press the "Menu" key on your phone.
2
Press 5 to select the "Settings" Menu.
3
Press 1 for "Sounds".
4
Press 1 for "Volume".
5
Select one of the following options:
- Ringer Volume
- Voice Volume
- Handset Volume
- Alarm Volume
- Message Volume
- Key Beep
- Auto Volume
Settings
Untitled-1 77 2004.11.5 8:2:46 PM

78
Settings
RINGER TYPES
Voice calls
1
Press [Menu] under 'Menu' then press 5 for
'Settings', press 1 for 'Sounds', press 2 for
'Ringers', press 1 for 'Voice Calls'.
2
Select With 'Caller ID' or 'No Caller ID' then press
[ok].
3
Select your desired ringer type and, press [ok] to
save it.
Messages
1
Press [Menu] under 'Menu' then press 5 for
'Settings', press 1 for 'Sounds', press 2 for
'Ringers', press 2 for 'Messages'.
2
Select one of the following item then press [ok].
3
Select your desired ringer type and, press [ok] to
save it.
Untitled-1 78 2004.11.5 8:2:46 PM

79
Alarm
1
Press [Menu] under 'Menu' then press 5 for
'Settings', press 1 for 'Sounds', press 2 for
'Ringers', press 3 for 'Alarm'.
2
Select your desired ringer type and, press [ok] to
save it.
Roam Ringer
1
Press [Menu] under 'Menu' then press 5 for
'Settings', press 1 for 'Sounds', press 2 for
'Ringers', press 4 for 'Roam Ringer'.
2
Select 'Distinct' or 'Normal' then press [ok] to save
it.
ALERTS
Service Alerts
1
Press [Menu] under 'Menu' then press 5 for
'Settings', press 1 for 'Sounds', press 3 for
'Alerts', press 1 for 'Service Alerts'.
2
Select 'Off' or 'On' then press [ok] to save it.
Settings
Untitled-1 79 2004.11.5 8:2:46 PM

80
Settings
Minute Beep
1
Press [Menu] under 'Menu' then press 5 for
'Settings', press 1 for 'Sounds', press 3 for
'Alerts', press 2 for 'Minute Beep'.
2
Select 'Off' or 'On' then press [ok] to save it.
Messaging Alerts
1
Press [Menu] under 'Menu' then press 5 for
'Settings', press 1 for 'Sounds', press 3 for
'Alerts', press 3 for 'Messaging Alerts'.
2
Select 'Once' , 'Repeat' or 'Off' then press [ok] to
save it.
Call Failue
1
Press [Menu] under 'Menu' then press 5 for
'Settings', press 1 for 'Sounds', press 3 for
'Alerts', press 4 for 'call failue'.
2
Select 'Off' or 'On' then press [ok] to save it.
Untitled-1 80 2004.11.5 8:2:46 PM

81
Call Lost
1
Press [Menu] under 'Menu' then press 5 for
'Settings', press 1 for 'Sounds', press 3 for
'Alerts', press 5 for 'Call lost'.
2
Select 'Off' or 'On' then press [ok] to save it.
TONES
Tone Length
1
Press [Menu] under 'Menu' then press 5 for
'Settings', press 1 for 'Sounds', press 4 for
'Tones', press 1 for 'Tone Length'.
2
Select 'Long' or 'Short' then press [ok] to save it.
Power Up Tone
1
Press [Menu] under 'Menu' then press 5 for
'Settings', press 1 for 'Sounds', press 4 for
'Tones', press 2 for 'Power Up Tone'.
2
Select 'ToneA' or 'Off' then press [ok] to save it.
Settings
Untitled-1 81 2004.11.5 8:2:46 PM

82
Settings
Power Down Tone
1
Press [Menu] under 'Menu' then press 5 for
'Settings', press 1 for 'Sounds', press 4 for
'Tones', press 4 for 'Power Down Tone'.
2
Select 'ToneA' or 'Off' then press [ok] to save it.
Setting Display
GREETING
1
Press [Menu] under 'Menu' then press 5 for
'Settings', press 2 for 'Display', press 1 for
'Greetings'.
2
Enter a greeting of your own and press [ok] to save
it.
BACKLIGHT CONTROL
Display
1
Press [Menu] under 'Menu' then press 5 for
'Settings', press 2 for 'Display', press 2 for
'Backlight Control', press 1 for 'Display'.
2
Select one of the following display options and
press [ok] to save it.
Untitled-1 82 2004.11.5 8:2:46 PM

83
Keypad
1
Press [Menu] under 'Menu' then press 5 for
'Settings', press 2 for 'Display', press 2 for
'Backlight Control', press 2 for 'Keypad'.
2
Select one of the following keypad time and
press [ok] to save it.
CONTRAST
1
Press [Menu] under 'Menu' then press 5 for
'Settings', press 2 for 'Display', press 3 for
'Contrast'.
2
Use [navigation left / right key] to select a contrast
level.
STANDBY DISPLAY
SCREENSAVER
1
Press [Menu] under 'Menu' then press 5 for
'Settings', press 2 for 'Display', press 5 for
'Standby Display' for 'Screensaver'.
2
Select 'Animation' or 'Standby Time' then press
[ok] to save it.
Settings
Untitled-1 83 2004.11.5 8:2:46 PM

Safety Information
1 . SAFETY INFORMATION FOR FIXED WIRELESS TERMINALS
.POTE NTIALLY EXPLOSIVE ATMOSPHERES
Turn your phone OFF when in any area with a potentially explosive atmosphere
and obey all signs and instructions. Sparks in such areas could cauls e an
explosion or fire resulting in bodily injury or even death.
.
INTERFERENCE TO MEDICAL DIVICES
Certain electronic equipment may be shielded against RF signal from you wireless
phone. (pacemakers, Hearing Aids, and so on) Turn your phone OFF in health care
facilities when any regulations posted in these areas instruct you to do so.
RF signals may affect improperly installed or inadequately shielded electronic
system in motor vehicles.
.EXPOSURE TO RF ENERGY
Use only the supplied or an approved replacement antenna.
Do not touch the antenna unnecessarily when the phone is in use.
Do not move the antenna close to, or touching any exposed part of the body when
making a call.

SAR INFORMATION
THIS MODEL PHONE MEETS THE GOVERNMENT’S
REQUIREMENTS FOR EXPOSURE TO RADIO WAVES.
Your wireless phone is a radio transmitter and receiver. It is designed and manufactured not to
exceed the emission limits for exposure to radiofrequency (RF) energy set by the Federal
Communications Commission of the U.S. Government. These limits are part of comprehensive
guidelines and establish permitted levels of RF energy for the general population. The
guidelines are based on standards that were developed by independent scientific organizations
through periodic and thorough evaluation of scientific studies. The standards include a
substantial safety margin designed to assure the safety of all persons, regardless of age and
health. The exposure standard for wireless mobile phones employs a unit of measurement
known as the Specific Absorption Rate, or SAR. The SAR limit set by the FCC is 1.6 W/kg. *
Tests for SAR are conducted with the phone transmitting at its highest certified power level in all
tested frequency bands. Although the SAR is determined at the highest certified power level,
the actual SAR level of the phone while operating can be well below the maximum value. This is
because the phone is designed to operate at multiple power levels so as to use only the power
required to reach the network. In general, the closer you are to a wireless base station antenna,
the lower the power output. Before a phone model is available for sale to the public, it must be
tested and certified to the FCC that it does not exceed the limit established by the government
adopted requirement for safe exposure. The tests are performed in positions and locations (e.g.,
at the ear and worn on the body) as required by the FCC for each model. The highest SAR
value for this model phone when tested for use at the ear is 1.35 W/Kg and when worn on the
body, as described in this user guide, is 1.29 W/Kg . (Body-worn measurements differ among
phone models, depending upon available accessories and FCC requirements). While there may
be differences between the SAR levels of various phones and at various positions, they all meet
the government requirement for safe exposure. The FCC has granted an Equipment
Authorization for this model phone with all reported SAR levels evaluated as in compliance with
the FCC RF exposure guidelines. SAR information on this model phone is on file with the FCC
and can be found under the Display Grant section of http://www.fcc.gov/ oet/fccid after
searching on FCC ID: JYCPC-1000N
.
Additional information on Specific Absorption Rates (SAR) can be found on the Cellular
Telecommunications Industry Association (CTIA) web-site at http://www.wow-com.com.
* In the United States and Canada, the SAR limit for mobile phones used by the public is 1.6
watts/kg (W/kg) averaged over one gram of tissue. The standard incorporates a sub-stantial
margin of safety to give additional protection for the public and to account for any variations in
measurements.

SAFETY INFORMATION FOR RF EXPOSURE
Body worn operation
This device was tested for typical body-worn operations with the back of the phone
kept 15 mm. from the body. To maintain compliance with FCC RF exposure
requirements, use only belt-clips, holsters or similar accessories that maintain a 15 mm.
separation distance between the user’s body and the back of the phone, including the
antenna. The use of belt-clips, holsters and similar accessories should not contain
metallic components in its assembly. The use of accessories that do not satisfy these
requirements may not comply with FCC RF exposure requirements, and should be
avoided.
FCC Compliance Information
This device complies with Part 15 of FCC Rules.
Operation is subject to the following two conditions:
(1) This device may not cause harmful interference, and
(2) This device must accept any interference received.
Including interference that may cause undesired operation.
U.S.A.
U.S.FEDERAL COMMUNICATIONS COMMISSION
RADIO FREQUENCY INTERFERENCE STATEMENT
INFORMATION TO THE USER
NOTE : This equipment has been tested and found to comply with the limits for a Class B
digital device pursuant to Part 15 of the FCC Rules.
These limits are designed to provide reasonable protection against harmful Interference in
a residential installation This equipment generates, uses, and can radiate radio frequency
energy and, if Not installed and used in accordance with the instructions, may cause
harmful Interference to radio communications. However, there is no guarantee that
interference will not occur in a particular Installation. If this equipment does cause harmful
interference to radio or television reception, which can be determined by turning the
equipment off and on, the user is encouraged to try to correct the interference by one or
more of the following measures:
z Reorient or relocate the receiving antenna.
z Increase the separation between the equipment and receiver.
z Connect the equipment into an outlet of a circuit different from that to which
the receiver is connected.
z Consult the dealer or an experienced radio/TV technician for assistance.
Changes or modification not expressly approved by the party responsible for Compliance
could void the user’s authority to operate the equipment. Connecting of peripherals requires
the use of grounded shielded signal cables.