Pantech IM Single Band Phone with Bluetooth User Manual 080325 CDM8964 IM indd
Pantech Co., Ltd. Single Band Phone with Bluetooth 080325 CDM8964 IM indd
UserManual.wiki
>
Pantech
>
IM User Manual
Users Manual
Navigation menu
Upload a User Manual
Namespaces
Wiki Guide
HTML
PDF
Info
Views
User Manual
Discussion / Help
Navigation

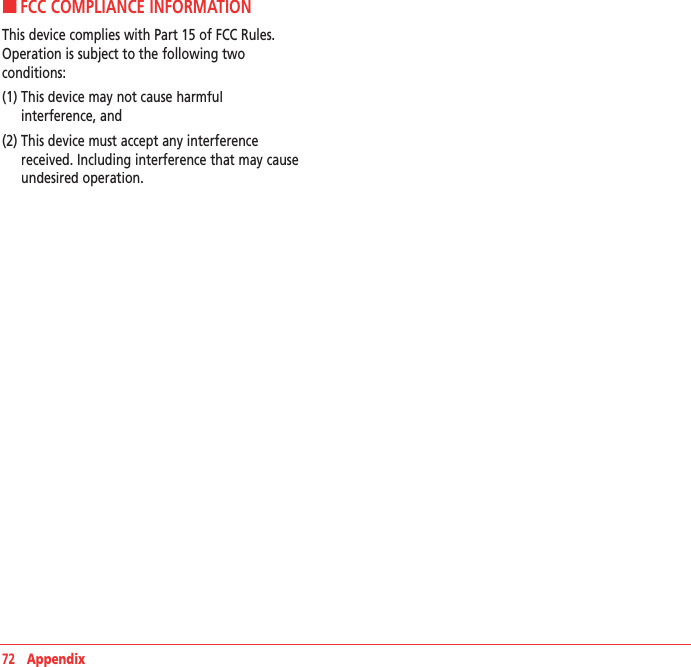
![H �INSTALL/REMOVE THE microSD CARD The microSD card stores sounds, images, photos and videos, music, and other files.1. With the microSD card slot opened, and the gold con-tacts facing down, insert the microSD card into the slot. Push the card in until it it clicks into place. Close the microSD card slot.2. To remove the microSD card, open the microSD card slot. Use your thumb to press and release the microSD card. It will pop-out to allow you to remove the card. Remove the card and close the microSD card slot.HUSING SENSITIVE TOUCH KEYS Press,,, touch key sensors are sensitive to your light touch. When press touch key sensors, use the tip of your finger to touch the center of a touch key. If you touch off-center, it may a activate the nearby function instead.Note: The touch sensor level can be adjusted to your preference. For Touch key, see page 48.HTURN ON/OFF THE PHONETo turn on1. Press and hold [].To turn off1. Press and hold [].HDISPLAY ICONSDisplay indicatorsIconNameSignal StrengthCurrent signal strength: the more lines, the stronger the signal.Phone Status (Normal Voice Call/No Service/Emergency Mode/Speakerphone Mode/1X data call/EVDO data call)Normal Ring/Ring and Vibrate/Silence All/Vibrate only/Manner modeText, Voice, Picture, WAP, Multi, Email, IM (Instant Message)Alarm/Schedule is setBluetooth (On/Connected/Pairing)TTY/GPS (Location)/Lock ModeBattery (Strength/Charging)* Network dependent 8 Getting Started Getting Started 9HENTERING TEXT The input mode (Alpha editor) will automatically be activated when necessary to enter letters and numbers. As shown below, there are 4 available modes ; Standard input mode (Abc), Input mode (T9Word), Numeric mode (123) and Symbols. The input mode indicator appears on the upper right of the display when letters and numbers are entered. To select the desired input mode among the 4 modes below, press Options and then select input mode.Useful keysKeyFunctionPress to accept a word and add a space.In T9Word Mode, press to view the next matching word if the highlighted word is not the word you intended.Press to delete a character to the left of the cursor.Confirm the letters and numbers you entered. Press to select a letter case of the standard text input or text input mode. and indicate the standard text input. and indicate the predictive text input. To enter text using the keypadKeyEnglishSpanish1 Key . @ ? ! - , & : ’ / 12 Key a b c 2 a á b c 23 Key d e f 3 d e é f 34 Key g h i 4 g h i í 45 Key j k l 56 Key m n o 6 m n ñ o ó 67 Key p q r s 78 Key t u v 89 Key w x y z 90 Key 0Predictive mode (T9Word)T9 mode automatically compares your keystrokes with an internal dictionary to determine the correct word. The most commonly used word will appear first. To use T9Abc mode, press Options > T9Word.1. Press Options > change the mode to Options > change the mode to OptionsT9Word.2. Press [] to [] to input text. For example, to write ‘hello’ press [] [] [] [] [].3. Press [] to search for the word.](https://usermanual.wiki/Pantech/IM/User-Guide-934425-Page-5.png)
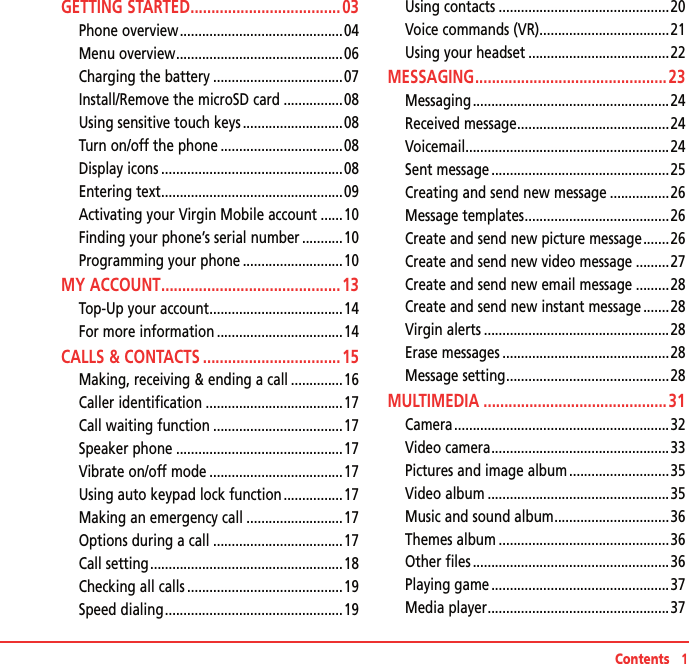
![Multi-tap input modePress the key labeled with the target letter once for the first letter; press it twice for the second letter, and so on. 1. Press Options > change the mode to Options > change the mode to OptionsAbc.2. Press [] to [] to input text repeatedly. For example, to write the letter “C”, press [] 3 times.Numeric modeNumber mode allows you to enter numbers.1. Press Options > change the mode to Options > change the mode to Options123.2. Press [] to [] to input numbers.Symbol modeAllows you to enter symbols.1. Press Options > change the mode to Options > change the mode to OptionsSymbols.2. Press the number for the symbol, and the symbol appears in the text input screen.3. To display more symbols, press [ / ].H �ACTIVATING YOUR VIRGIN MOBILE ACCOUNT Before you can start talking, messaging, or downloading, you need to activate service with Virgin Mobile. You need your phone’s serial number to activate your Virgin Mobile account. To activate your account online go to www.virgin‐www.virgin‐mobileusa.com and click on Activate. Or call Virgin Mobile at 1‐888‐322‐1122.H �FINDING YOUR PHONE’S SERIAL NUMBER To activate your Virgin Mobile account, you need your phone’s serial number.1. In standby mode, select Menu > Tools&Settings> Phone Info > My Number.2. The serial number is under the letters MEID. It has 18 digits.H �PROGRAMMING YOUR PHONE Once your account is active, you’ll receive your Virgin Mobile phone number. When you are ready, follow these steps to program it into your phone:1. Turn on your phone and wait for it to power up.2. Dial ##VIRGIN# (that’s #-#-8-4-7-4-4-6-#)##VIRGIN# (that’s #-#-8-4-7-4-4-6-#)##VIRGIN#3. You are now in the Programming menu. Scroll down to Activate Phone > Select.4. Your screen will say, “Do you want to activate your phone ?” > Yes.5. Your phone will connect to the network, and then the screen will say “Hi. Press Start to continue the activation process”. Scroll down to Start > Start > StartOK.6. Your phone will say “We’re getting your phone number for you,” then your phone will display your new Virgin Mobile phone number. Write it down.10 Getting Started Getting Started 117. Scroll down to Finish > OK to complete the OK to complete the OKactivation process. Your phone will turn off and back on by itself.That's it: It might take a couple of hours to get you set up on our network, but we’ll send a text message to your phone to let you know you can start talking. Also, it may take up to 4 hours for VirginXL, voicemail, and Top-Up features to come online. But it will be worth the wait. Enjoy!](https://usermanual.wiki/Pantech/IM/User-Guide-934425-Page-6.png)
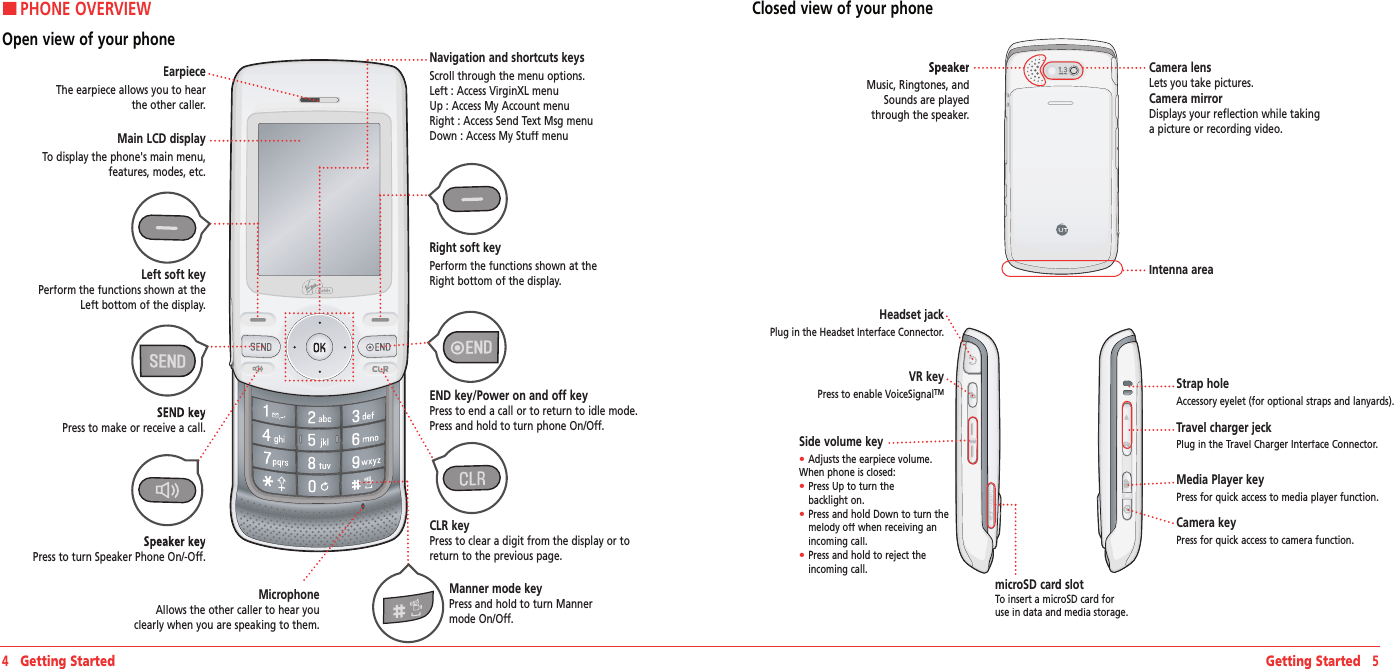
![14 My AccountCHAPTER 3CALLS & CONTACTSMaking, receiving & ending a callCaller identificationCall waiting functionSpeaker phoneVibrate on/off modeUsing auto keypad lock functionMaking an emergency callOptions during callCall settingChecking all callsSpeed dialingUsing contactsVoice commands (VR)Using your headsetCHAPTER 3 CALLS & CONTACTSHTOP-UP YOUR ACCOUNTWhen you balance is low, you can Top-Up your account from your phone:Top-Up with a Top-Up Card1. In standby mode, press Menu > My Account.2. Scroll down to the Top‐Up link and press OKkey.3. Enter your Account Pin (vKey) and press OK key.OK key.OK4. Scroll down to select Login and press OK key.OK key.OK5. Enter your Top-Up card’s PIN number and press OK key.OK key.OK6. Scroll down to select Top‐Up Now and press Top‐Up Now and press Top‐Up NowOK key.OK key.OK7. You are now topped up. Press [ ] to exit.Top-Up with a Debit Card, Credit Card, or PayPal AccountBefore you can Top-Up from your phone with a debit card, credit card, or PayPal account, you need to register the card or PayPal account at www.virginmobileusa.com. 1. In standby mode, press Menu > My Account.2. Scroll down to the Top‐Up link and press OKkey.3. Enter your Account Pin (vKey) and press OK key.OK key.OK4. Scroll down to select Login and press OK key.OK key.OK5. Scroll down and select Credit Card or Credit Card or Credit CardPayPal.6. Enter the amount you want to Top-Up and press OK key. You can OK key. You can OKTop‐Up in amounts of $20, $30, $50, or $90.7. Scroll down to select Top‐Up Now and press Top‐Up Now and press Top‐Up NowOK key.OK key.OK8. At the confirmation screen, select Yes.9. You are now topped up. Press [ ] to exit.Note: You can also Top-Up at www.virginmobileusa.com.HFOR MORE INFORMATIONFor more information about your Virgin Mobile account or Virgin Mobile service, visit www.virgin‐www.virgin‐mobileusa.com.](https://usermanual.wiki/Pantech/IM/User-Guide-934425-Page-8.png)
![Calls & Contacts 17HMAKING, RECEIVING & ENDING A CALLTo make a call1. Enter the area code and phone number.2. Press [].To answer a call1. Press [].To end a call1. Press [].Once the call is completed, a call summary is displayed.To reject a call1. Press [] or Ignore.To make a call using call listYour phone logs up to 270 dialed, received and missed call numbers.1. In standby mode, press [] to display the Recent Calls list.Recent Calls list.Recent Calls2. Select a number.3. Press [] to dial the selected number.Note: • To redial the last number in the Recent Calls list, press [ ]. • After 270 received, dialed or missed calls, the oldest call will automatically be erased from the history.To make a call using contacts1. In standby mode, press Contacts to access the contacts list. Select the desired phone number and press [].To adjusting the call volume1. In call, press Side volume key up or down to adjust the earpiece volume.To insert a Time/Hard Pause featureInsert a pause after a phone number and then enter another group of numbers. The second set of numbers is dialed automatically after the pause.1. Enter a phone number and then press Options. Select either Hard pause (“P”) or Time pause (“T”).To switch between two calls1. Press [To reply to a missed call**1. Press View to display the list of missed calls.View to display the list of missed calls.View2. Select a number to call by pressing the [/].3. Press [To answer a second call**1. Press []. The first call is automatically put on hold.2. Press [] to end the second call.16 Calls & ContactsThe call on hold is automatically reconnected.HCALLER IDENTIFICATIONIdentifies caller by displaying their phone number. If the caller’s name and number are already stored in your contact list, name will appear. The caller ID is stored in the Recent Calls Menu.HCALL WAITING FUNCTIONNotifies you of an incoming call when you are already on a call by sounding a beep tone and displaying the caller’s phone number.To answer another call while on the phone, press []. This places the first call on hold. To switch back to the first caller, press [] again.HSPEAKER PHONEThe Speaker Phone feature lets you hear audio through the speaker and talk without holding the phone.To activate the Speaker Phone in idle mode or while on a call, press [].HVIBRATE ON/OFF MODEIn standby mode, press and hold to turn vibrate mode On/Off.HUSING AUTO KEYPAD LOCK FUNCTIONThe slide is closed, touch keypad and navigation key are automatically locked. If you want to use touch keypad and navigation key, press and hold side any keys.HMAKING AN EMERGENCY CALLThe 911 feature automatically places the phone in Emergency Call Mode when you dial the preprogrammed emergency number, 911.To making an call 911 in lock mode1. Enter “911” and then press [].2. The phone maintains the Emergency Mode for until press Exit. To making an call 911 using any available system1. Enter “911” and then press [].2. The phone will stay in Emergency Mode for until pess []. While the phone is in Emergency Mode for until pess [], the phone can receive an incoming call from any available system or you can make outgoing calls even in the Emergency Callback Mode.HOPTIONS DURING A CALLMicrophone off and onTo switch your phone’s microphone off1. Press Mute.To switch your phone’s microphone back on1. Press Unmute.](https://usermanual.wiki/Pantech/IM/User-Guide-934425-Page-9.png)
![18 Calls & Contacts Calls & Contacts 19To talk on speaker1. Press Speaker.To put a call on hold and return**To put a call on hold1. Press [].To return to a held call1. Press [] again.To save a number in contacts list during a call1. Press Options > Options > OptionsSave.To search a number in contact list during a call1. Press Options > Options > OptionsContacts > Contacts > ContactsContact List.To search for a name or group in contact listEnter the first letters of the name for Name Search. The entries are displayed starting with the first entry matching your input.To find a name manually in contact list1. Press the [/] key.To view the details of highlighted entry in contact list1. Press OK. For contacts, see page 20.To search a number in recent calls during a call1. Press Options > Options > OptionsRecent Calls.To read a message during a call1. Press Options > Options > OptionsMessaging > Inbox > select a Inbox > select a Inboxmessage.To write a text message during a call1. Press Options > Options > OptionsMessaging > Send Text Msg.For creating message, see page 26.Note: During the call, you can only send text messages. Multimedia messages cannot be sent or saved.HCALL SETTINGTo set call reminder1. In standby mode, press Menu > Tools&Settings> Call options > Call reminder. 2. Select Every 2 Minutes, Every 15 Minutes or Off> Select.To set auto answer1. In standby mode, press Menu > Tools&Settings> Call options > Auto answer.2. Select 5 Seconds, 10 Seconds, 20 Seconds or 20 Seconds or 20 SecondsOff> Select.To answer with any key press1. In standby mode, press Menu > Tools&Settings> Call options > Call answer.2. Select Slide open + any key > Slide open + any key > Slide open + any keySelect.Note: You can answer with any key except [ ] and Ignore. HCHECKING ALL CALLSYou can view information about all Recent Calls. For more options for all, missed, received and outgoing calls press Options.To view all calls1. In standby mode, press []>ALL CALLS.2. Select the call list and press OK to view the OK to view the OKdetails.To view missed calls1. In standby mode, press []>MISSED CALLS.2. Select the missed call and press OK to view the OK to view the OKdetails.To view received calls1. In standby mode, press []>RECEIVED CALLS.2. Select the received call and press OK to view OK to view OKthe details.To view dialed calls1. In standby mode, press [DIALED CALLS.2. Select the dialed call and press OK to view the OK to view the OKdetails.To send a message from the recent call list1. Select the call then press Options.2. Select Send txt msg, Send pic msg or Send video msg.3. Write the message> Send.To delete call logs1. Select the call then press Options.2. Select Erase > Yes.Note: If no logs exist, the message “All calls empty” appears.HSPEED DIALINGYou can dial quickly using speed dialing. Nineteen numbers from 2 to 10 can be saved.To set speed dial1. In standby mode, press Menu > Contacts >Speed dial.2. Select an empty entry> Assign.3. Select a person > Select phone number > Done.](https://usermanual.wiki/Pantech/IM/User-Guide-934425-Page-10.png)
![20 Calls & Contacts Calls & Contacts 21To update speed dial1. Select a number > Reassign > Yes.2. Select a person > Select phone number > Done.To remove from speed dial1. Select a number and press Erase > Yes.HUSING CONTACTSYou can save names, phone numbers, and up to 500 contacts in the phone.To add a contact1. In standby mode, press Menu > Contacts > Add new.2. To save a new contact > SAVE.To view contact list1. In standby mode, press Menu > Contacts > Find name.To search for a phone number1. In standby mode, press Menu > Contacts > Find name.2. Input a name.3. Press OK to view the details.OK to view the details.OKTo call from contact list1. In standby mode, press Menu > Contacts > Find name.2. Select a contact > [].To send contacts information1. In standby mode, press Menu > Contacts > Find name.2. Select a contact > Send msg.3. You can send the information via Send text msg, Send pic msg or Send video msg.4. Write the message > Send.To delete a contact1. In standby mode, press Menu > Contacts > Find name.2. Select a contact > Options > Options > OptionsErase > Yes.To make groups1. In standby mode, press Menu>Contacts>Groups.2. Select an empty entry > Edit.3. To save a group options > SAVE.To send a group message1. In standby mode, press Menu>Contacts>Groups.2. Select an existing group and press Options > Options > OptionsSend text msg, Send pic msg or Send video msg > OK.3. Write the message > Send.To add member in group1. In standby mode, press Menu>Contacts>Groups.2. Select an existing group and press Options > Options > OptionsAdd member.3. Select to the entry you wish to add>Select.To erase a group1. In standby mode, press Menu>Contacts>Groups.2. Select an existing group and press Options > Options > OptionsErase > Yes.HVOICE COMMANDS (VR)Your phone is equipped with an VR (Voice Recognition) feature. This feature allows you to make calls or use the phone’s functions by simply using your voice. All you have to do is talk into the phone, and the phone will recognize your voice and complete tasks by itself.To using VR (Voice Recognition)1. In standby mode, press Menu>Tools&Settings>Tools >Voice commands. Or, in standby mode, press the Side VR Key.2. The phone displays the Command menu and prompts you to say the name of the command you want to use. To complete your task, simply follow the voice prompts. You can say the name of the command after you hear a beep.Call <Name or #>1. Say Call <Name>. Your phone will ask you to confirm the name you said. Say “Yes“ if it was repeated correctly. That phone number will be dialed. If there is more than one number saved for that contact, you will be asked to confirm which number to dial.Send text <Name or #>1. Say Send Text <Name>. (Examples: - Send Text Tom Smith)Follow instructions for sending a new message on page 26.Send picture <Name or #>Send picture <Name or #>1. Say Send Picture <Name>. (Examples: - Send Picture Tom Smith)Follow instructions for sending a new message on page 26.Lookup <Name>Lookup <Name>1. Say Lookup <Name>. (Examples: - Lookup Tom Jones)2. The View Contact page will be displayed for that contact name.Go to <Menu>1. Say Go To followed immediately by one of the items: (Messaging, Contacts, Media Player, My account, Virgin XL, My stuff, PicturesVideos, Surf the Web, Tools&Settings)](https://usermanual.wiki/Pantech/IM/User-Guide-934425-Page-11.png)
![Messaging 25HMESSAGINGThe messaging feature is an integrated messaging application that lets you send and receive Text, Picture, Email, and Instant Messaging (IM) messages. To delete a message 1. Select a message > Options > Erase > Yes.To reply to a message1. Select a message > Select > View > Reply.HRECEIVED MESSAGETo view new received messages1. Press View.To read message using Inbox 1. In standby mode, press Menu > Messaging > Inbox.2. Select a received message > OK.To save new numbers from received message1. In standby mode, press Menu > Messaging > Inbox.2. Select a received message > View > View > ViewOptions > Save Contact. 3. Select Add new or Add new or Add newExisting Entry.4. Edit contacts list > Save. To launch URL address from a received message1. Open the message with URL address is in.2. Press Options > Options > OptionsLaunch URL. 3. Select the URL address in the message. To save an object in a received multimedia message1. Open the multimedia message.2. Select the object > Options > Save attached.Note: If image file saved, It will be saved in one of the categories in My Stuff. If sound file saved, It will be saved in Voice Memo.For My Stuff, see page 35.To listen to voice messages1. In standby mode, press Menu > Messaging > Voicemail. It will automatically call the voicemail center.HVOICEMAILNew voicemail alerts are sent via an SMS text message. These messages indicate how many new and urgent voicemails are in your voicemail box. Open the text message to view the number of new voice messages in your voicemail. If a caller leaves a callback number, this number will also be sent via an SMS text message. Displays the number of voice mails and accesses them by pressing and holding the [ ].24 MessagingTo setup your voicemailBefore your phone can receive voicemail messages, you must set up a 4-10 digit passcode and record a personal voicemail greeting. When you have set up your voicemail, all unanswered calls to your phone are automatically transferred to voicemail, even if your phone is in use or turned off.1. In standby mode, press Menu > Messaging >Voicemail or press and holdVoicemail or press and holdVoicemail[].2. Follow the system prompts to setup your password and record a greeting.To access your voicemail box1. In standby mode, press Menu > Messaging >Voicemail or press and holdVoicemail or press and holdVoicemail[].2. Follow the system prompts to enter your password and retrieve your messages.HSENT MESSAGETo edit a sent message1. In standby mode, press Menu > Messaging > Sent.2. Select a sent message > View > View > ViewOptions > Options > OptionsEdit. 3. To send the edited message > Send. Note: In case of pening or failed msg, this option is displayed. To call a number in a sent message1. In standby mode, press Menu > Messaging > Sent.2Select a sent message > View > Options > Call ]. To forward message to another recipient1. In standby mode, press Menu > Messaging > Sent.2. Select a sent message > View > View > ViewOptions > Options > OptionsForward. 3. Enter phone number > Done > Send. To save sent message1. In standby mode, press Menu > Messaging > Sent.2. Select a sent message > View > Options > Save msg. Note: It will be saved in Saved folder. To save new numbers from sent message1. In standby mode, press Menu > Messaging > Sent.2. Select a sent message > View > View > ViewOptions > Options > OptionsSave Contact. 3. Select Add new or Add new or Add newExisting Entry.4. Edit contacts list > SAVE.](https://usermanual.wiki/Pantech/IM/User-Guide-934425-Page-13.png)
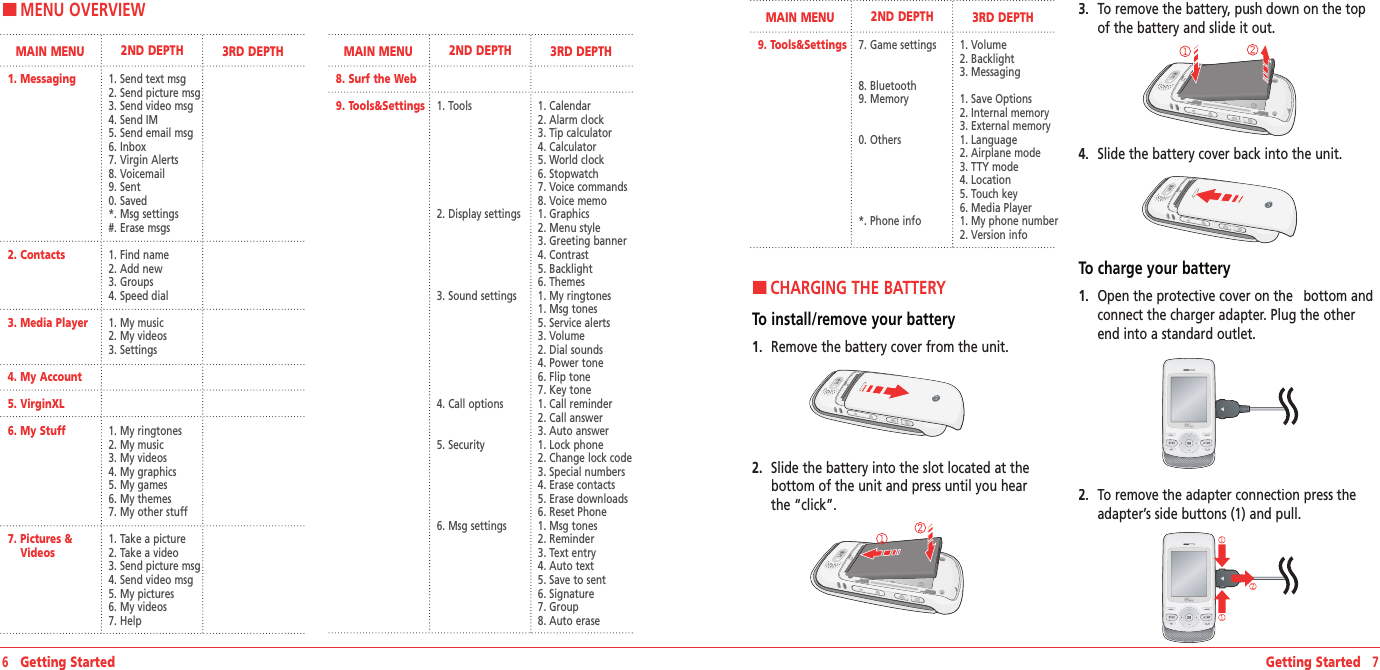
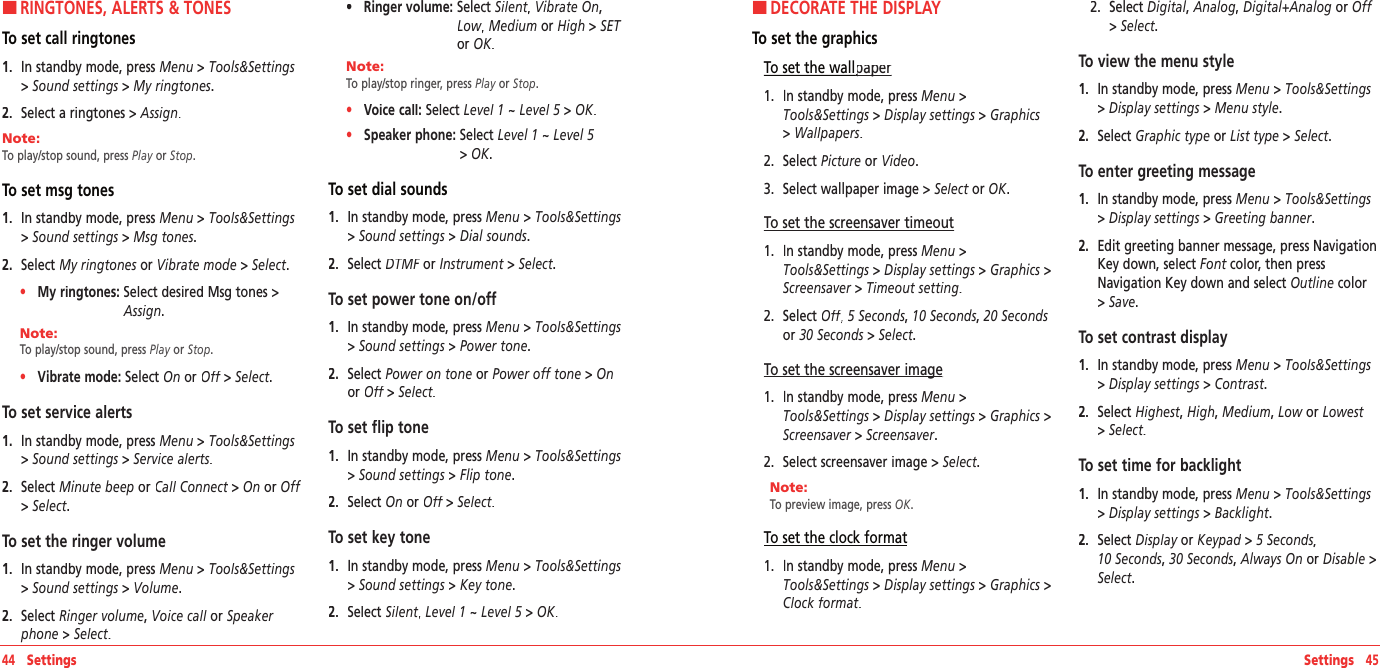
![Multimedia 33HCAMERAYou can take pictures using built-in camera. The photos can be saved and sent using multimedia messages.To set camera settings1. In standby mode, press Menu > Pictures & Videos > Take a picture.2. Press Options before you take a picture.Options before you take a picture.OptionsIcons for cameraIcon MenuOptionsResolutionDisplay photo resolution 1280x960, 1024x768, 640x480, 320x240, 176x144, 160x120 Zoom 1x, 2x, 4x, 8xBrightness +2, +1 0 -1, -2Settings for cameraMenu Sub MenuOptionsTake video To switch video mode.Self timer Off, 5 Seconds, 10 Seconds, 15 SecondsFun framesNormal, I love you, Clown, Mona Lisa, I miss you, Punch, Happy bus, Frame, Happy birthday, Monkey, RabbitImage controls White balanceAuto, Sunny, Cloudy, Tungsten, FluorescentColor effect Normal, Gray, Sepia, NegativeSettingsResolution1280x960, 1024x768, 640x480, 320x240, 176x144, 160x120 Quality High, Medium, LowShutter soundOff, Default, Say “Cheese”, “Ready! 123” To increase or decrease the brightness1. Press [ /].To zoom in and out1. Press [ /].To take a picture1. In standby mode, press Menu > Pictures & Picture modeZoomResolusionSelf timer32 MultimediaVideos > Take a picture. 2. Focus on the object > OK.Note: Your picture will be saved automatically to My Stuff > My graphics > My pictures or Menu > Pictures & Videos > My pictures.To view the taken picture1. In standby mode, press Menu > Pictures & Videos > My pictures. 2. Select the picture > View.3. To use options > Options.My pictures optionFunctionsProcessTo send picture message Options > SendSet a photo for a specific contact Options > Assign > Caller IDSet as standby screen Options > Assign > WallpaperSet as screensaver Options > Assign > ScreensaverTo upload web site Options > Upload to My PixTo move the picture to the miniSD card Options > Move to cardDelete the picture Options > EraseTake a new picture Options > Take picRename the picture Options > RenameLock/Unlock the picture Options > Lock/UnlockView the information Options > File infoDelete all pictures Options > Erase allTo send pictures using multimedia message1. In standby mode, press Menu > Pictures & Videos > Send picture msg. 2. Write the message> Send.HVIDEO CAMERAYou can record videos using built-in camera. The videos can be saved and sent using multimedia message.To set video camera settings1. In standby mode, press Menu > Pictures & Videos > Take a video.2. Press Options before you take a picture.Options before you take a picture.OptionsBrightnessVideo modeZoomFile sizeSelf timerBrightness](https://usermanual.wiki/Pantech/IM/User-Guide-934425-Page-17.png)
![34 Multimedia Multimedia 35Icons for videoIcon MenuOptionsResolution Display photo resolution 176x144 Zoom 1x, 2x, 4x, 8xBrightness +2, +1 0 -1, -2Settings for videoMenu Sub MenuOptionsTake pic To switch camera mode.Self timer Off, 5 Seconds, 10 Seconds, 15 SecondsImage controls White balanceAuto, Sunny, Cloudy, Tungsten, FluorescentColor effect Normal, Gray, Sepia, NegativeSettingsQuality High, Medium, LowCue sound Off, Default, “Action”/ “Cut”, “Ready”/“Stop”Mute/Unmute To set mute On/OffTo increase or decrease the brightness1. Press [ /].To zoom in and out1. Press [ /].To take a video1. In standby mode, press Menu > Pictures & Videos > Take a video. 2. Focus on the object > Record.Note: Your picture will be saved automatically to My Stuff > My videos > All videos or Menu > Pictures & Videos > My videos.To view the recorded video1. In standby mode, press Menu > Pictures & Videos > My videos. 2. Select the video clip > Play.3. To use options > Options.My videos optionFunctionsProcessTo send video message Options > SendDelete the video clip Options > EraseSet as standby screen Options > Assign > WallpaperSet as screensaver Options > Assign > ScreensaverTo move the video clip to the miniSD card Options > Move to cardRecord a new video clip Options > Take videoRename the video clip Options > RenameLock/Unlock the video clip Options > Lock/UnlockView the information Options > File infoDelete all video clips Options > Erase allTo send videos using multimedia message1. In standby mode, press Menu > Pictures & Videos > Send video msg. 2. Write the message, press Send.HPICTURES AND IMAGE ALBUMYou can view, assign, delete, moves to external memory or to phone the saved pictures. The supported formats are JPEG, GIF, BMP and PNG.To view the downloaded or saved image and pictures1. In standby mode, press Menu > My Stuff > My graphics > My pictures.2. Select the picture > View.To set as wallpaper in the display1. In standby mode, press Menu > My Stuff > My graphics > Wallpapers.2. Select a picture > Assign.3. Select Wallpaper or Screensaver > Select.To set as screensaver in the display1. In standby mode, press Menu > My Stuff > My graphics > Screensaver.2. Select a picture > Assign.3. Select Wallpaper or Screensaver > Select.HVIDEO ALBUMYou can play, delete, moves to external memory or to phone the saved videos.To play the downloaded or saved video clip1. In standby mode, press Menu > My Stuff > My graphics > My videos.2. Select All videos > Select the video > Play.To move videos to external memory1. In standby mode, press Menu > My Stuff > My graphics > My videos.2. Select All videos > Select the video > Options >Move to card >Move to card >Move to card Yes.Video player fuction keyKeyDescriptionPress Fast forwardPress Play next video clipPress Fast rewindPress Play previous video clip](https://usermanual.wiki/Pantech/IM/User-Guide-934425-Page-18.png)
![36 MultimediaOK Play/PauseLeft Soft Key Mute/UnmuteRight Soft Key (Options Menu) Full screen/RepeatSide Volume Key Volume Up/DownHMUSIC AND SOUND ALBUMSaved sounds can be played, set, deleted or moved to external memory or the phone. Supported formats MIDI, SMAF, iMelody and MP3.To listen the saved music file1. In standby mode, press Menu > My Stuff >My music.2. Select All songs > Select a music > Play.Music player fuction keyKeyDescriptionPress Play next music filePress Fast forwardPress Play previous music filePress Fast rewindOK Play/PauseLeft Soft Key Mute/UnmuteRight Soft Key(Options Menu)Play all/Shuffle/Repeat/Full screen/HideSide Volume Key Volume Up/DownTo listen the recorded sound1. In standby mode, press Menu >Tools&Settings > Tools > Voice memo.2. Select a sound > OK.To set as a ringtone1. In standby mode, press Menu > My Stuff >My ringtones.2. Select a sound > Assign.3. Select Contact, Contact, ContactGroup, All contacts or All callers > Select.HTHEMES ALBUMTo set as the theme1. In standby mode, press Menu > My Stuff >My themes.2. Select an image > Set.HOTHER FILES To view the list of the files1. In standby mode, press Menu > My Stuff >My other stuff.My other stuff.My other stuffMultimedia 37HPLAYING GAMEYour phone contains game to play. To play the game1. In standby mode, press Menu > My Stuff > My games.2. Select a game> Play.To end the game1. Press [] > Yes.To set the game optionsTo set the game volume1. In standby mode, press Menu >Tools&Settings > Game settings > Volume. 2. Select Silent orSilent orSilent Level 1 ~ Level 5 > OK.To set the game backlightTo set the game backlight1. In standby mode, press Menu >Tools&Settings > Game settings > Backlight. 2. Select 5 Seconds, 10 Seconds, 30 Seconds,Always On or Disable > Select.To display incoming messages while playing To display incoming messages while playing a gamea game1. In standby mode, press Menu >Tools&Settings > Game settings > Messaging. 2. Select Icon & Message or Icon only > Select.HMEDIA PLAYERYou can easy to use playback feature with a Media Player. It allows you to play video clip or music file.To play music file in my music folder1. In standby mode, press Menu > Media Player > My music.2. Select music play mode > Select.For music and sound album, see page 36.To create a playlist (Artist/Album/Genre)1. In standby mode, press Menu > Media Player >My music >My music >My music Playlists.2. Press Options > Create new > OK.To add a music in playlist (Artist/Album/Genre)1. In standby mode, press Menu > Media Player >My music >My music >My music Playlists.2. Press Options > Add song > Select a music file> Mark > OK.To play video clip in my videos folder1. In standby mode, press Menu > Media Player >My videos.2. Select Play all or All videos > All videos > All videos Select.For video album, see page 35.](https://usermanual.wiki/Pantech/IM/User-Guide-934425-Page-19.png)
![HCALENDARCalendar helps you manage your schedule including your time for calls or special days. You can set alarm service on a set date with this function.To view calendar1. In standby mode, press Menu > Tools&Settings > Tools > Calendar.Note: Monthly view is displayed as default.In the monthly viewToPressMove to another day[] for Previous [] for Next Move to another week[] for Previous [] for Next To create a new event1. In standby mode, press Menu > Tools&Settings > Tools > Calendar.2. Select a day> New.3. On the Edit schedule screen, select and input an event item by item for registration > Save.To edit a event1. In standby mode, press Menu > Tools&Settings > Tools > Calendar.2. Select a saved event> Edit.3. On the Edit schedule screen, select and edit an event item by item for registration > Save.To erase a saved event1. In standby mode, press Menu > Tools&Settings > Tools > Calendar.2. Select a saved event> Erase > Yes.HALARM CLOCKTo set an alarm1. In standby mode, press Menu > Tools&Settings > Tools > Alarm clock.2. Select location > Select > Edit a new alarm > Select > Edit a new alarm > SelectSave.To view the saved alarms1. In standby mode, press Menu > Tools&Settings > Tools > Alarm clock.To edit existing alarms1. In standby mode, press Menu > Tools&Settings > Tools > Alarm clock.2. Select an existing alarm > Select > Edit an alarm Select > Edit an alarm Select> Save.40 Useful Features Useful Features 41H �CALCULATOR, TIP CALCULATOR, STOPWATCH & WORLD CLOCKTo use the calculatorUse the Calculator for basic mathematical equations.1. In standby mode, press Menu > Tools&Settings > Tools > Calculator.2. Enter the first number and use [///].3. Enter the second number and press OK to OK to OKcalculate.Use [] to use the decimal point and [] to change the number from positive or negative.To use tip calculatorThe Tip Calculator helps you calculate how much tip to include with a bill.1. In standby mode, press Menu > Tools&Settings > Tools > Tip calculator.2. Enter the amount of your bill and move the next field Tip(%).3. Enter the percentage amount to tip and move the next field Split.4. Enter the amount of split number. The new bill amount is shown.To use the stopwatchThe Stopwatch counts the time your spend for an activity.1. In standby mode, press Menu > Tools&Settings > Tools > Stopwatch.2. Press Start to start stopwatch.Start to start stopwatch.Start3. Press Cont to save Lap time (Max eight Lap Cont to save Lap time (Max eight Lap Conttime).4. Press Stop to stop stopwatch.5. Press Reset to reset stopwatch.Reset to reset stopwatch.ResetTo use world clock1. In standby mode, press Menu > Tools&Settings > Tools > World clock.2. Use [///] to select different cities.3. To set daylight saving, press DST.DST.DST4. Edit a DST item by item for registration > Save. HVOICE MEMOTo record voice memo1. In standby mode, press Menu > Tools&Settings > Tools > Voice memo > New.2. To stop recording and save voice memo, press Save.To listen to the recording voice memo1. In standby mode, press Menu > Tools&Settings > Tools > Voice memo.2. Select recorded voice memo > OK.](https://usermanual.wiki/Pantech/IM/User-Guide-934425-Page-21.png)

![To reviewe information about the paired device1. In standby mode, press Menu > Tools&Settings > Bluetooth >Select device> Options > Device Info.To call using a hands-free headset1. Press the button once to call the last person.To answer a call using a hands-free headset1. Press the button once to receive the call.HUSING THE INTERNETTo access internet 1. In standby mode, press Menu > Surf the Web.Note: This will access your Wireless Web service provider’s homepage.To view visited sites1. In standby mode, press Menu > Surf the Web >Menu > History.2. Move the cursor up and down > Select.To set new bookmarks1. In standby mode, press Menu > Surf the Web >Menu > Mark Page.2. Press Save.3. To edit, press Menu > Edit.To view bookmarks 1. In standby mode, press Menu > Surf the Web > Menu.2. Move Bookmarks Tab with Navigation Key left or right. To search web site1. In standby mode, press Menu > Surf the Web >Menu > Search.To refresh the current page1. In standby mode, press Menu > Surf the Web >Menu > Reload.To show the URL on the current page1. In standby mode, press Menu > Surf the Web >Menu > Show Link.To access the web site directly by entering the address1. In standby mode, press Menu > Surf the Web >Menu > Goto Page.2. Enter the web address > GO.To go to the homepage1. In standby mode, press Menu > Surf the Web >Menu > Home.52 Connectivity Connectivity 53To send the current page's URL information using the text message 1. In standby mode, press Menu > Surf the Web >Menu > Send Link.To set enable/disable download objects1. In standby mode, press Menu > Surf the Web >Menu > Settings > Downloads.To restart web browser 1. In standby mode, press Menu > Surf the Web >Menu > Settings > Restart Browser.To clear cache memory1. In standby mode, press Menu > Surf the Web > Menu > Settings > Clear >Check Clear Cache > Clear.To clear saved history1. In standby mode, press Menu > Surf the Web >Menu > Settings > Clear >Check Clear History > Clear.To clear saved cookies1. In standby mode, press Menu > Surf the Web >Menu > Settings > Clear >Check Clear Cookies > Clear.To clear autofill1. In standby mode, press Menu > Surf the Web > Menu > Settings > Clear >Check Autofill >Clear.HVirginXLTo access VirginXL1. In standby mode, press Menu > VirginXL.VirginXL is a fun collection of features which you can access directly from your phone - download ringtones, games, graphics, and more. Charges apply. Visit www.virginmobileusa.com for details.Note: You cannot receive incoming calls when a VirginXL session is in progress. All incoming calls will be automatically for-warded to voicemail.Note: A scroll bar on the right side of the screen indicates that there is more text. Scroll down to go to the next screen of text. Press the CLR key to move back one screen.Ending a VirginXL session1. Press [ ].](https://usermanual.wiki/Pantech/IM/User-Guide-934425-Page-27.png)


![70 Appendix Appendix 71of UTStarcom, Inc. and its subsidiaries.VIRGIN and the Virgin Signature logo are registered trademarks of Virgin Enterprises Limited and are used under license.Bluetooth is a trademark of Bluetooth SIG, Inc. Trademarks are owned by Bluetooth SIG, Inc. All other trademarks are the property of their respective owners.H �FCC HEARING-AID COMPATIBILITY (HAC) REGULATIONS FOR WIRELESS DEVICESTHIS PHONE HAS A HAC RATING OF M3On July 10, 2003, the U.S. Federal Communications Commission (FCC) Report and Order in WT Docket 01-309 modified the exception of wireless phones under the Hearing Aid Compatibility Act of 1988 (HAC Act) to require digital wireless phones be compatible with hearing-aids. The intent of the HAC Act is to ensure reasonable access to telecom-munications services for persons with hearing disabilities.While some wireless phones are used near some hearing devices (hearing aids and cochlear implants), users may detect a buzzing, humming, or whining noise. Some hearing devices are more immune than others to this interference noise, and phones also vary in the amount of interference they generate.The wireless telephone industry has developed a rating system for wireless phones to assist hearing device users find phones that may be compatible with their hearing devices. Not all phones have been rated. Phones that are rated have the rating on their box or a label located on the box.The ratings are not guarantees. Results will vary depending on the user’s hearing device and hear-ing loss. If your hearing device happens to be vulnerable to interference, you may not be able to use a rated phone successfully.Trying out the phone with your hearing device is the best way to evaluate it for your personal needs.M-Ratings: Phones rated M3 or M4 meet FCC requirements and are likely to generate less inter-ference to hearing devices than phones that are not labeled. M4 is the better/higher of the two ratings.Hearing devices may also be rated. Your hearing device manufacturer or hearing health profes-sional may help you find this rating. Higher ratings mean that the hearing device is relatively immune to interference noise. The hearing aid and wireless phone rating values are then added together. A sum of 5 is considered acceptable for normal use. A sum of 6 is considered for best use. In the above example, if a hearing aid meets the M2 level rating and the wireless phone meets the M3 level rating, the sum of the two values equal M5. This should provide the hearing aid user with “normal usage” while using their hearing aid with the particular wireless phone. “Normal usage” in this context is defined as a signal quality that is acceptable for normal operation.The M mark is intended to be synonymous with the U mark. The T mark is intended to be synonymous with the UT mark. The M and T marks are recommended by the Alliance for Telecommunications Industries Solutions (ATIS). The U and UT marks are referenced in Section 20.19 of the FCC Rules. The HAC rating and measurement procedure are described in the American National Standards Institute (ANSI) C63.19 standard.For information about hearing aids and digital wireless phones• Fcc Hearing Aid Compatibility and Volume Control http://www.fcc.gov/cgb/dro/hearing.html• Gallaudet University, RERC http://tap.gallaudet.edu/DigWireless.KS/DigWireless.html• Self Help for Hard of Hearing People Inc. [SHHH] www.hearingloss.org/hat/TipsWirelessPhones.htm• The Hearing Aid Compatibility FCC Order http://hraunfoss.fcc.gov/edocs_public/attach‐match/FCC‐03‐168A1.pdfH �U.S.FEDERAL COMMUNICATIONS COMMISSION RADIO FREQUENCY INTERFERENCE STATEMENTINFORMATION TO THE USERNOTE : This equipment has been tested and found to comply with the limits for a Class B digital device pursuant to Part 15 of the FCC Rules. These limits are designed to provide reasonable protec-tion against harmful Interference in a residential installation This equipment generates, uses, and can radiate radio frequency energy and, if Not installed and used in accordance with the instruc-tions, may cause harmful Interference to radio communications. However, there is no guarantee that interference will not occur in a particular Installation. If this equipment does cause harmful interference to radio or television reception, which can be determined by turning the equipment off and on, the user is encouraged to try to correct the interference by one or more of the following measures:• Reorient or relocate the receiving antenna. Increase the separation between the equipment and receiver.• Connect the equipment into an outlet of a circuit different from that to which the receiver is connected.• Consult the dealer or an experienced radio/TV technician for assistance.Changes or modification not expressly approved by the party responsible for Compliance could void the user’s authority to operate the equipment. Connecting of peripherals requires the use of grounded shielded signal cables.](https://usermanual.wiki/Pantech/IM/User-Guide-934425-Page-36.png)