Paradox Security Systems SR130 Outdoor Wireless Siren User Manual SR130 Wireless Siren EQ01 11x8 5 2
Paradox Security Systems Outdoor Wireless Siren SR130 Wireless Siren EQ01 11x8 5 2
UserManual.wiki
>
Paradox Security Systems
>
SR130 User Manual
Users Manual
Navigation menu
Upload a User Manual
Namespaces
Wiki Guide
HTML
PDF
Info
Views
User Manual
Discussion / Help
Navigation
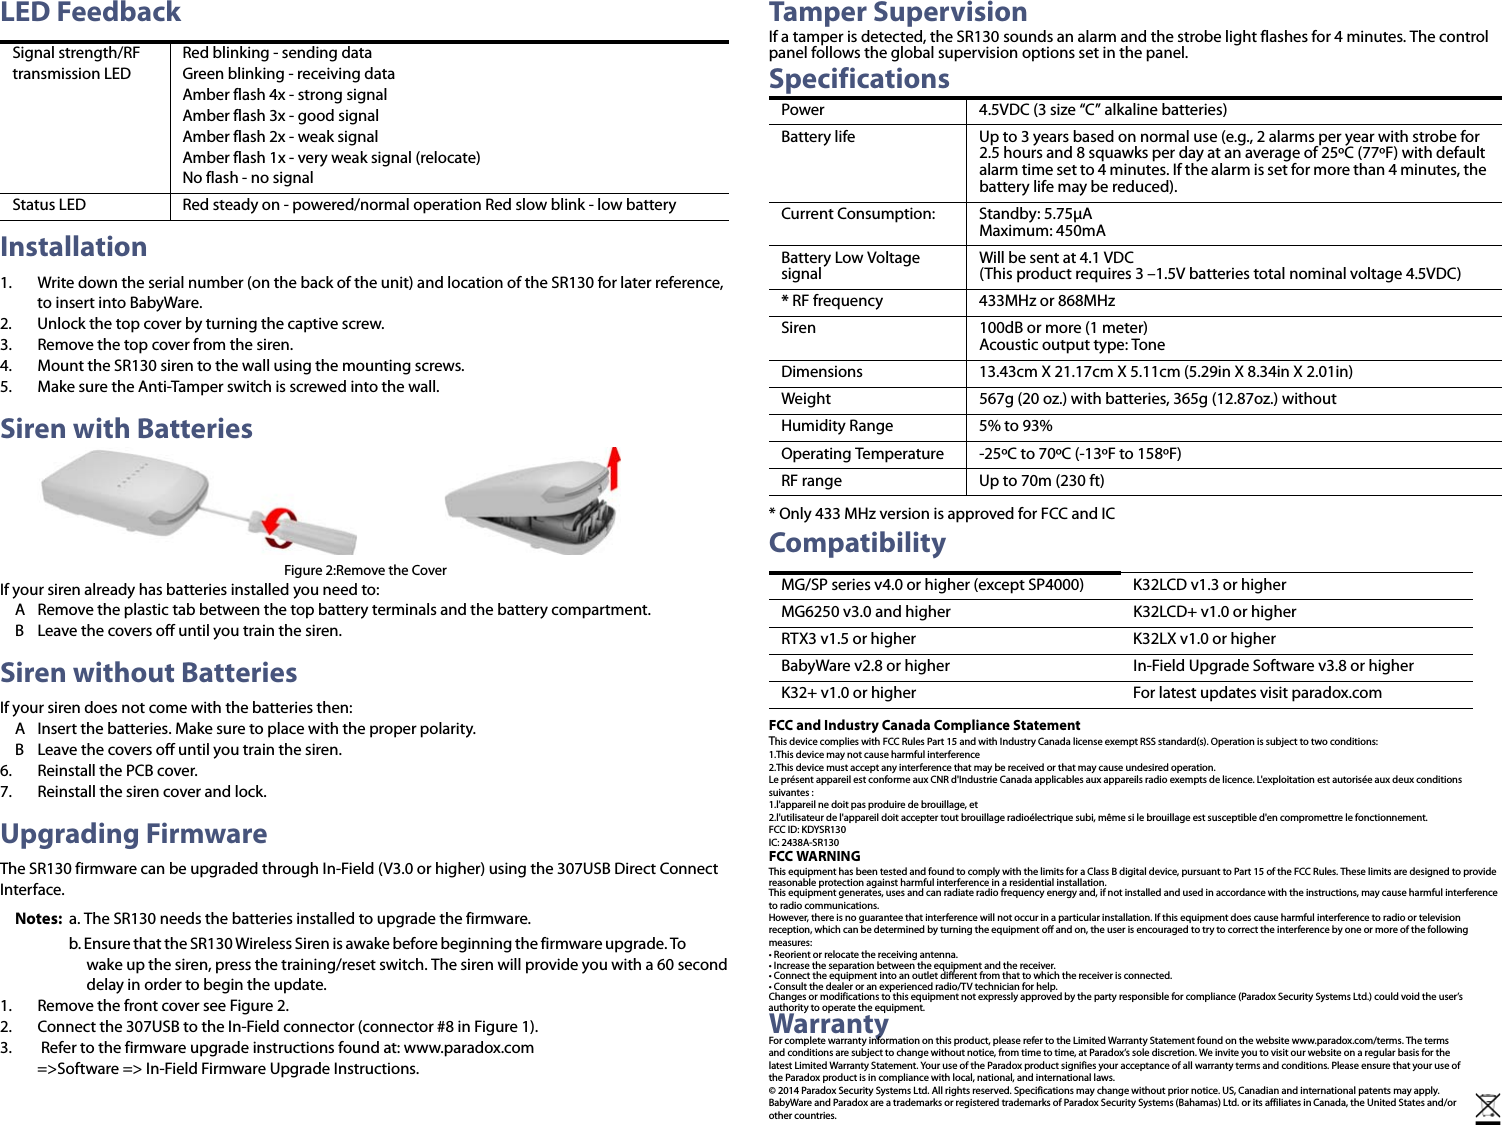
![ProgrammingThe following provides instructions on how to program your siren via a keypad or by using BabyWare. For more details on how to program, please refer to the MG/SP Programming Guide.To Program Using a KeypadTo Program Using BabyWare1. Open BabyWare and connected to your system.2. Go to BabyWare => Add Item => Wireless Sirens.3. Fill-in the label, location, and serial number of the SR130.4. Click Save.CertificationsSR130: Outdoor Wireless Siren w/Built-In Strobe LightDescriptionThe SR130 is a stand-alone, fully supervised outdoor wireless siren with built-in strobe light and wireless transceiver. With normal use, the SR130 will function up to three years without the need to replace the batteries. The SR130 uses 2-way wireless communication, which provides continuous supervision between the panel and siren with fast response to alarm signals within 4 seconds.The SR130 operates using three size “C” alkaline batteries.Overview Figure 1:ISR130 Back coverMG6250 MG/SP Feature Details[0801] [683] Learn Siren #1 Press and hold “Reset/Training” switch for 3 seconds after entering the section to learn the siren. WARNING: When you press the "Reset/Training" switch, the SR130 will squawk and the strobe light will flash five times to confirm registration to the panel.[0802] [684] Learn Siren #2[0803] [685] Learn Siren #3[0804] [686] Learn Siren #4[0801] [687] Display Signal Strength Siren #1Press and hold "Reset/Training" switch for 3 seconds after entering the section to display, on a K32LCD V1.3 or higher, the signal strength the panel is receiving from the siren. [0802] [688] Display Signal Strength Siren #2[0803] [689] Display Signal Strength Siren #3[0804] [690] Display Signal Strength Siren #4[0811] [691] Label Siren #1 These labels are used when reporting events via e-mail through the IP100/ IP150 (MG/SP only) or SMS personal reporting (MG6250 only) and for troubleshooting purposes. Maximum 16 characters. [0812] [692] Label Siren #2[0813] [693] Label Siren #3[0814] [694] Label Siren #4[0800] [695] Temporary Tamper Switch Deactivation for MaintenancePress the [enter] key after entering the section to deactivate tamper alarm until the cover is reinstalled or after 30 minutes.[0820] [587] Panel Supervision of SirenOFF = disabled ON = enabled (default)Option [1] Option [3] Siren #1 (OFF/ON)The control panel supervises the presence of the SR130. If lost, the control panel will follow global supervision loss option set in the panel.Option [2] Option [4] Siren #2 (OFF/ON)Option [3] Option [5] Siren #3 (OFF/ON)Option [4] Option [6] Siren #4 (OFF/ON)EN50131-4 Grade 2, Type W EN 50130-5 Class IVCertification Body: Applica Test and CertificationDESIGNSR120 Outdoor 1. Siren (100dB or more) *2. Wall tamper switch and cover tamper switch3. Reset/Training switch4. Tamper Switch connector5. Battery pack (3 size “C” alkaline batteries)6. Strobe lights 7. In-Field connector8. Signal Strength and transmission LED9. Antenna10. Status LED11. Mounting screw12. Captive screw* Warning! High Voltage. Remove batteries before maintenanceSR130-EI00Version 1.0Printed in Canada12/2014](https://usermanual.wiki/Paradox-Security-Systems/SR130/User-Guide-2497988-Page-1.png)