Park Air Systems B3060V2 Defence Radio for Civil and Military applications User Manual G DO JDBIN GA8784 Issue 1 eps
Park Air Systems Limited Defence Radio for Civil and Military applications G DO JDBIN GA8784 Issue 1 eps
UserManual.wiki
>
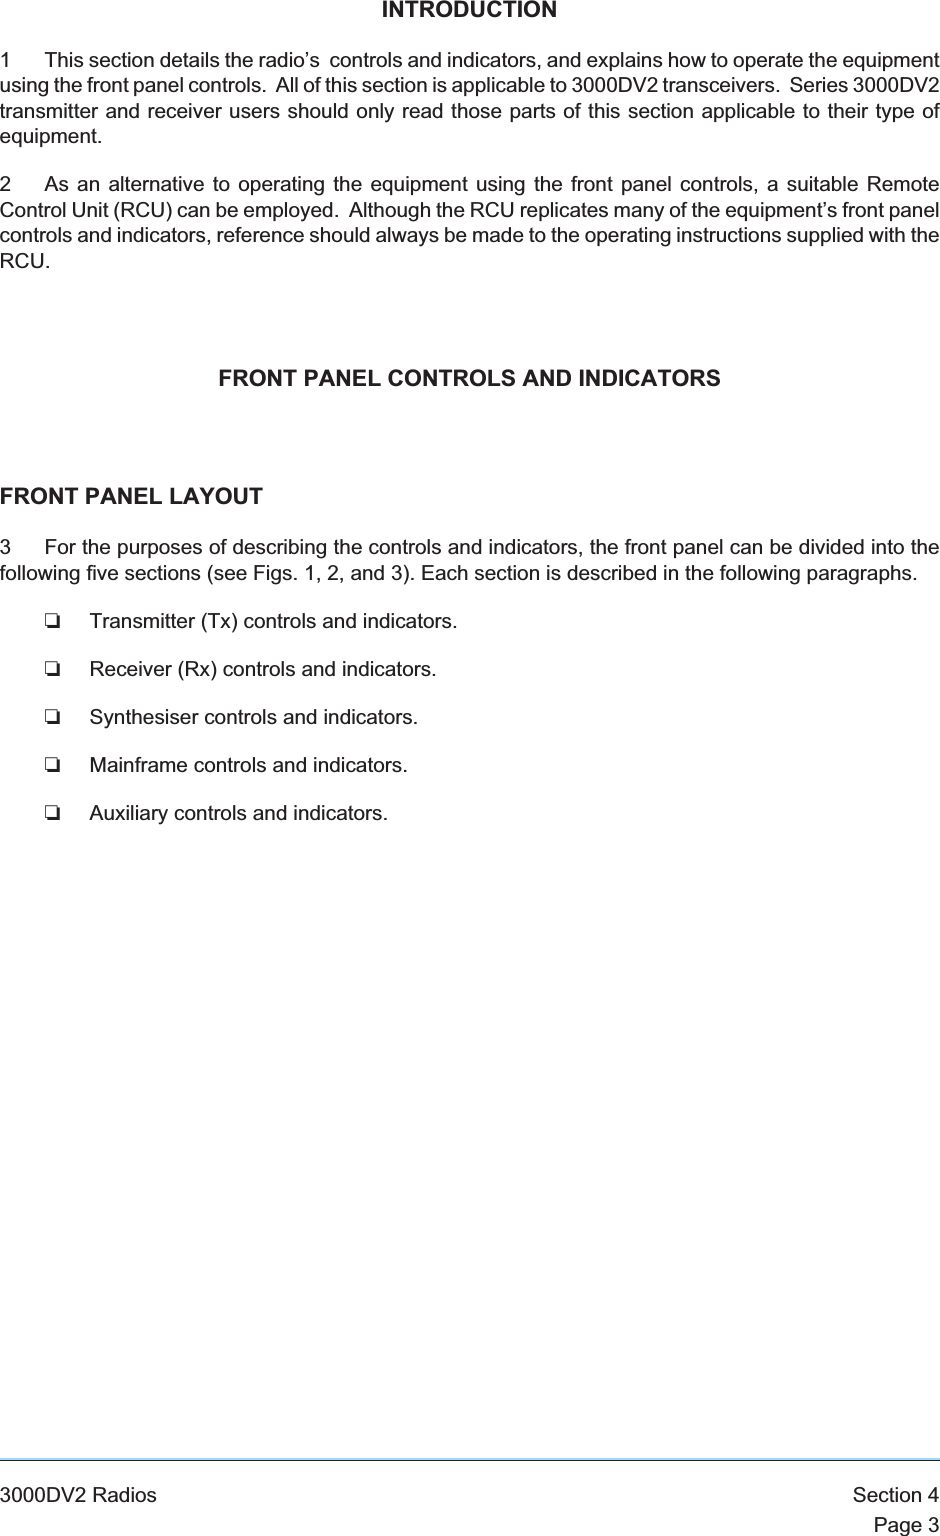
Park Air Systems
>
B3060V2 User Manual
User guide
Navigation menu
Upload a User Manual
Namespaces
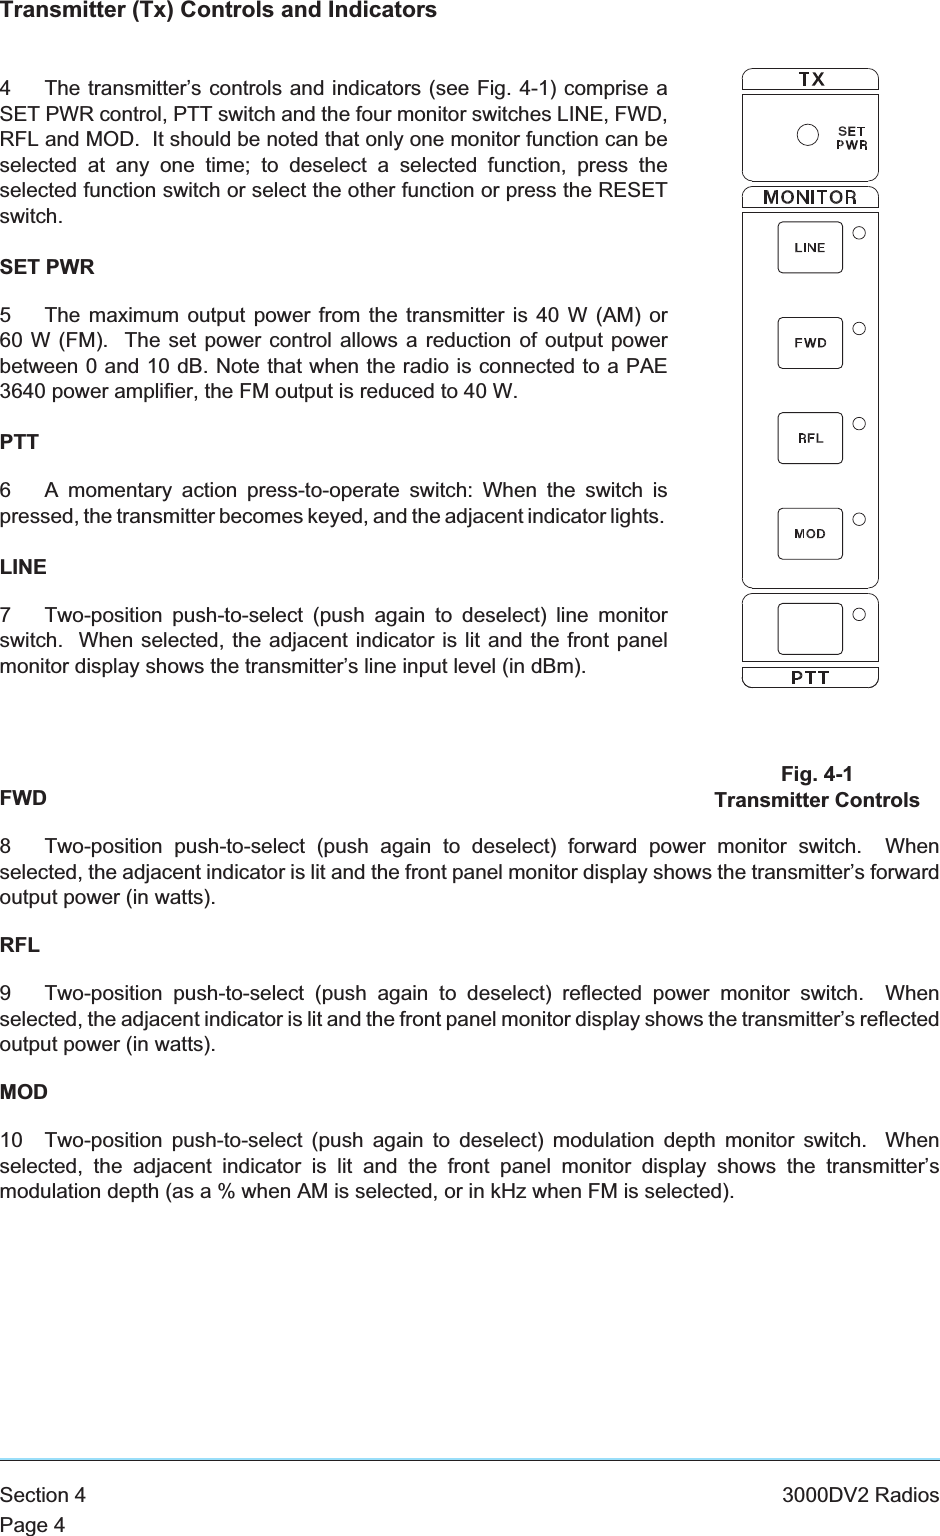
Wiki Guide
HTML
PDF
Info
Views
User Manual
Discussion / Help
Navigation