Openfiler Installation And Configuration Guide V1.0
User Manual: Pdf
Open the PDF directly: View PDF ![]() .
.
Page Count: 34
Installation and Configuration Guide V 1.0
Alok Chilka
CodeSocial
info@codesocial.net
OpenFiler 2.99.1
X86_64

About
Openfiler is an operating system that provides file-based network-attached storage and block-
based storage area network.
•Unified Storage
•NAS Features – CIFS, NFS, HTTP
•SAN Features – iSCSI, FC
•High Availability / Failover
•Block Replication ( LAN & WAN )
•Web-Based Management
•Cost-free Storage Capacity Expansion
Openfiler addresses all the key data storage concerns:
Reliability - Openfiler supports both software and hardware RAID with monitoring and alert
facilities; volume snapshot and recovery
Availability - Openfiler supports active/passive high availability clustering, MPIO, and block level
replication
Performance - Linux 2.6 kernel supports the latest CPU, networking and storage hardware
Scalability - filesystem scalability to 60TB+, online filesystem and volume growth support
VM Configuration used in this guide
Guest OS : Linux Mint 17.3 Cinnamon 64bit username : enigma
password : !@root123
VirtualBox : 5.1.30
RAM : 4GB/6GB
OpenFiler : 2.99.1
VDI Space / Storage : 30GB
Guest OS : OpenFiler username : openfiler
passwd : password
root username : root
root password : !@Ilg007su
VirtualBox : 5.1.30
RAM : 4GB/6GB
VDI Space / Storage : 15GB
Alok Chilka | CodeSocial.net | info@codesocial.net

Step 31 :
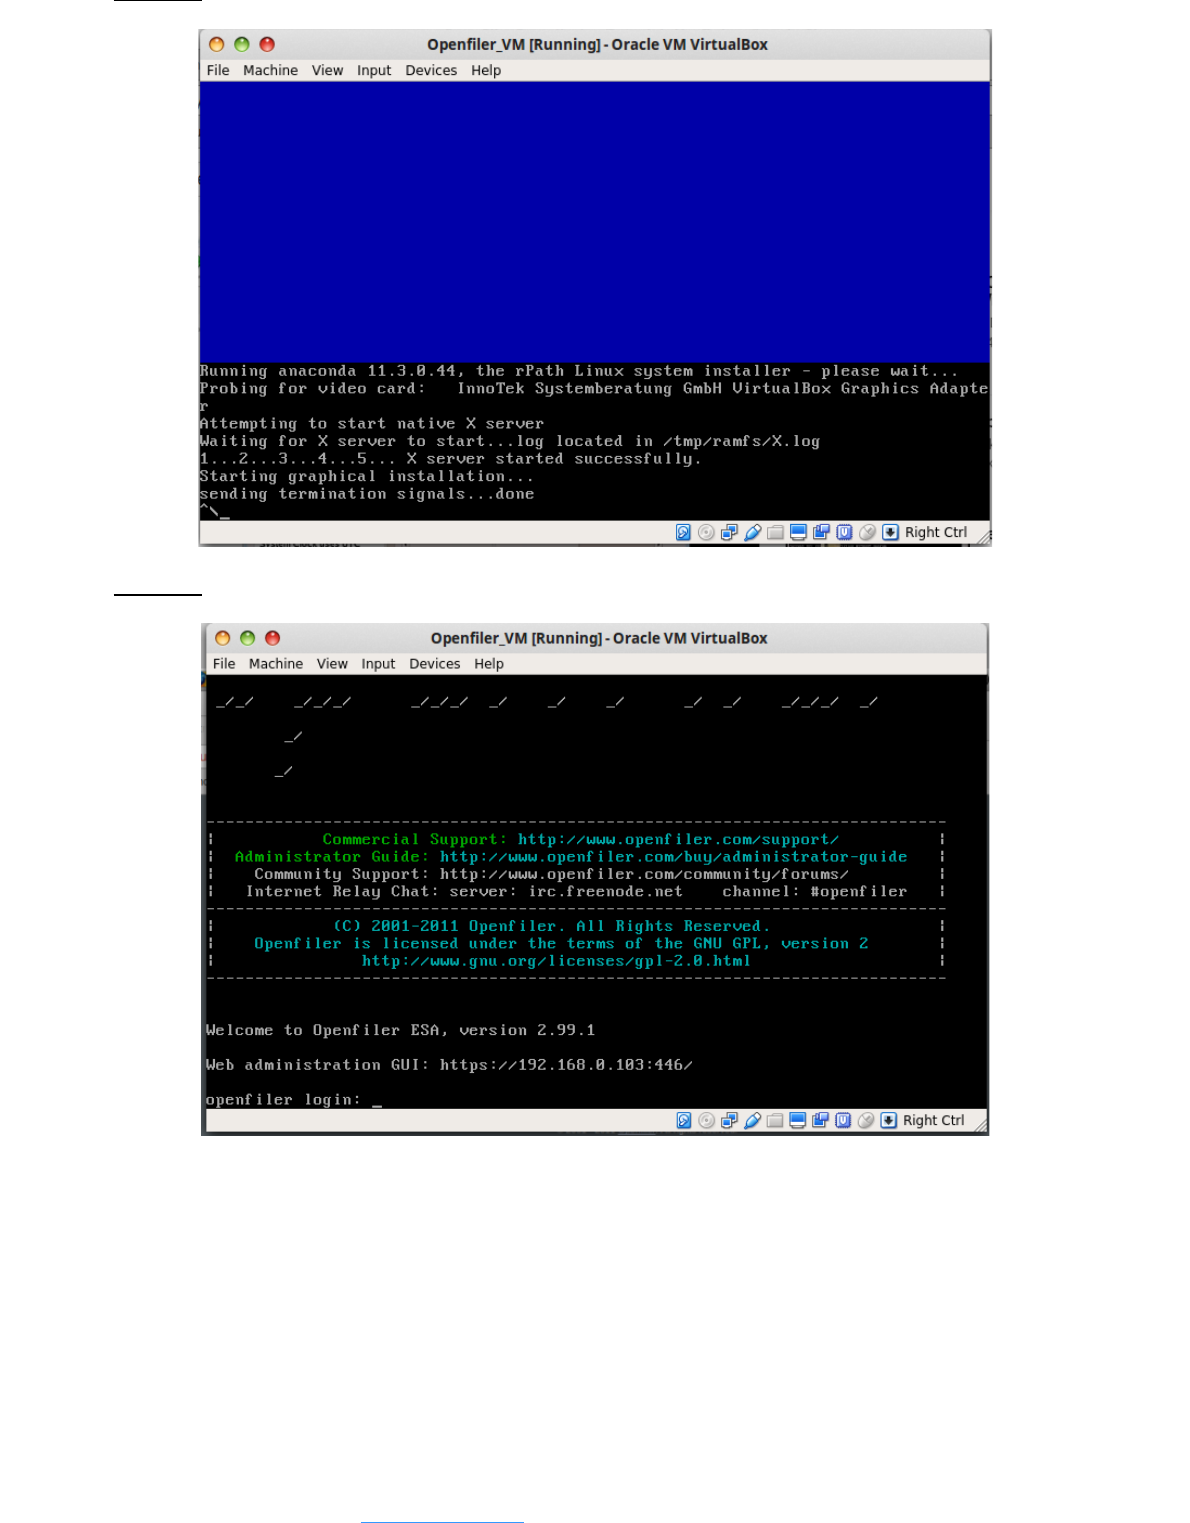
Step 32 :
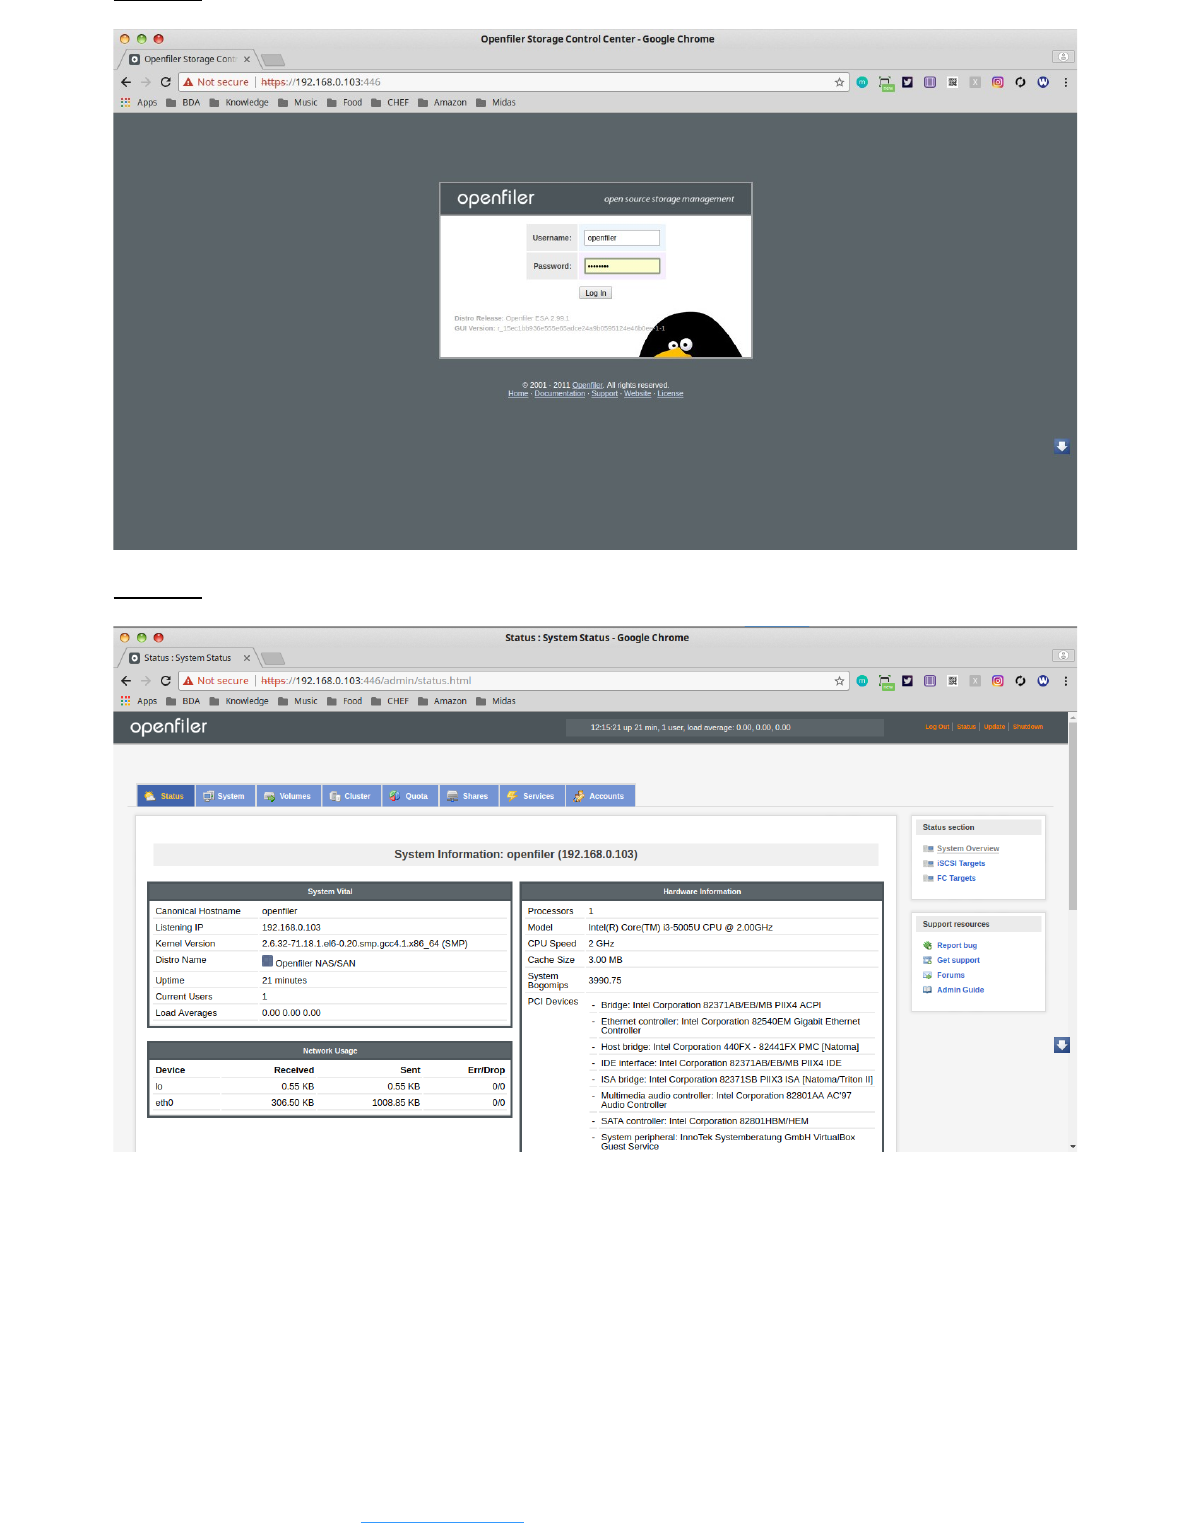
Here you can use command line option to work along with the storage provided if you know the
commands well or else you have the GUI version too that makes your work lot more easier.
GUI version URL is given on the terminal itself.
Remember : Openfiler runs on port 446 and HTTPS protocol.
Default Login Credentials for GUI are as follows :
username : openfiler
password : password
Alok Chilka | CodeSocial.net | info@codesocial.net
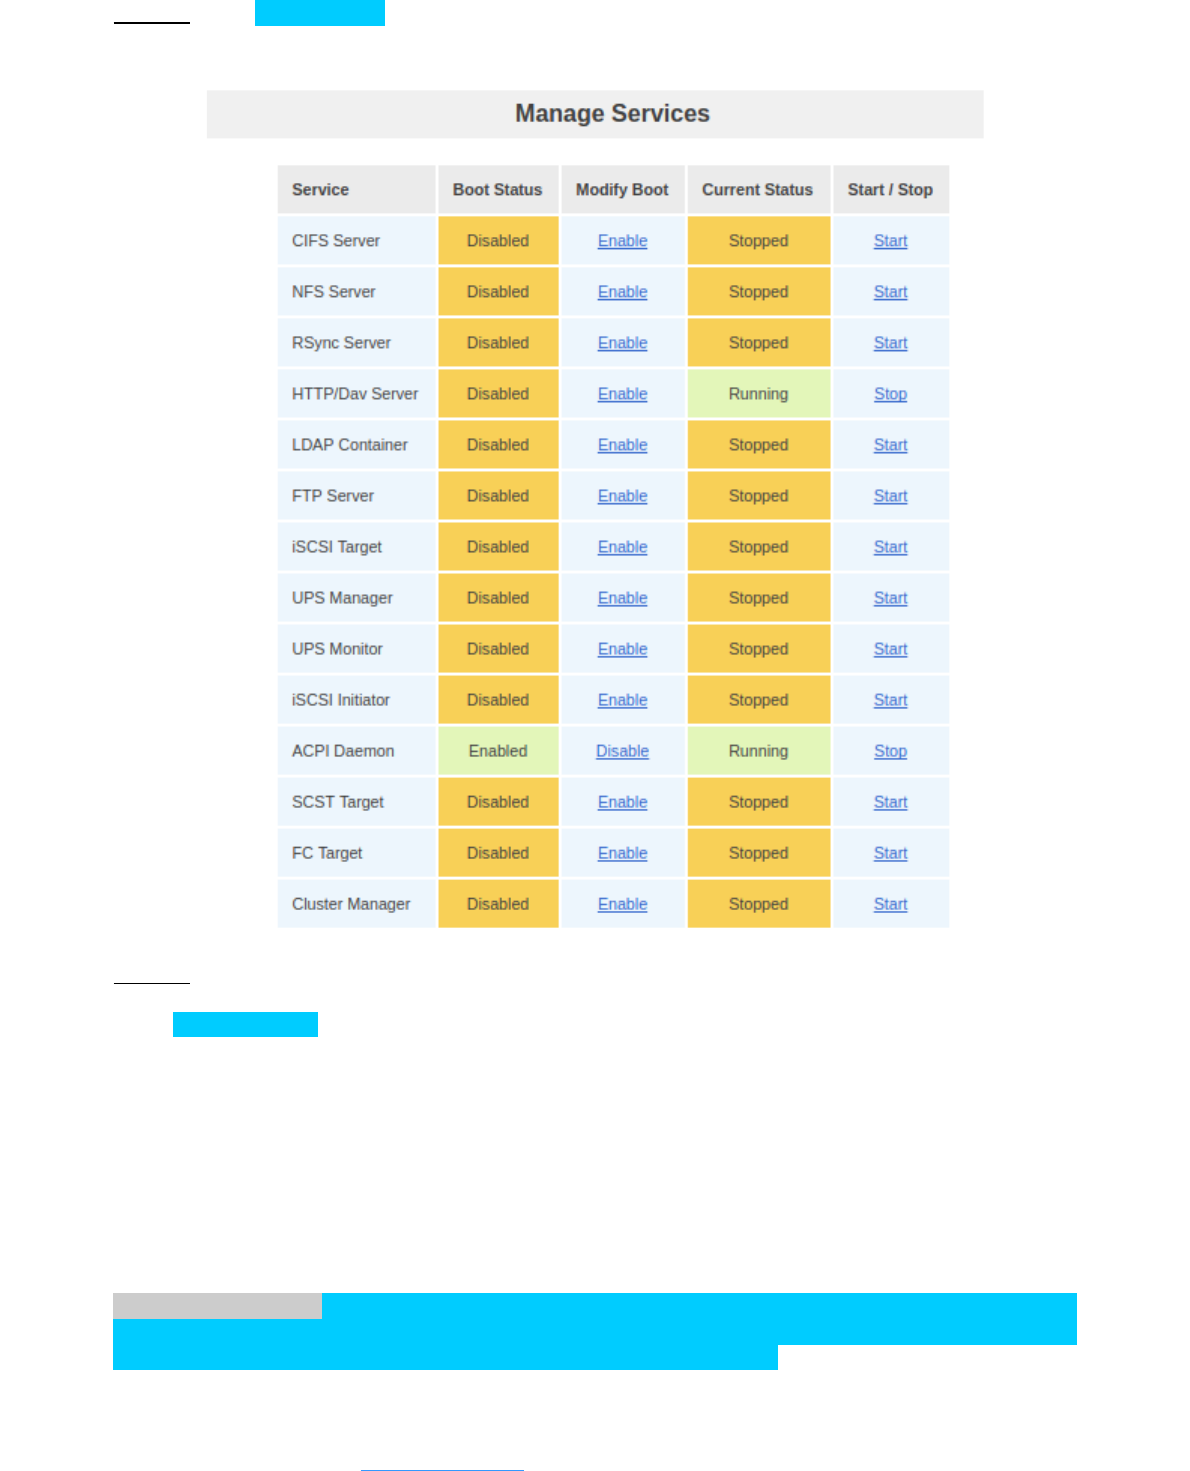
Configuration
Step 1 : Go to Services Tab and nable the necessary services and start them. ( CIFS, LDAP, iSCSI
Target, iSCSI initiator )
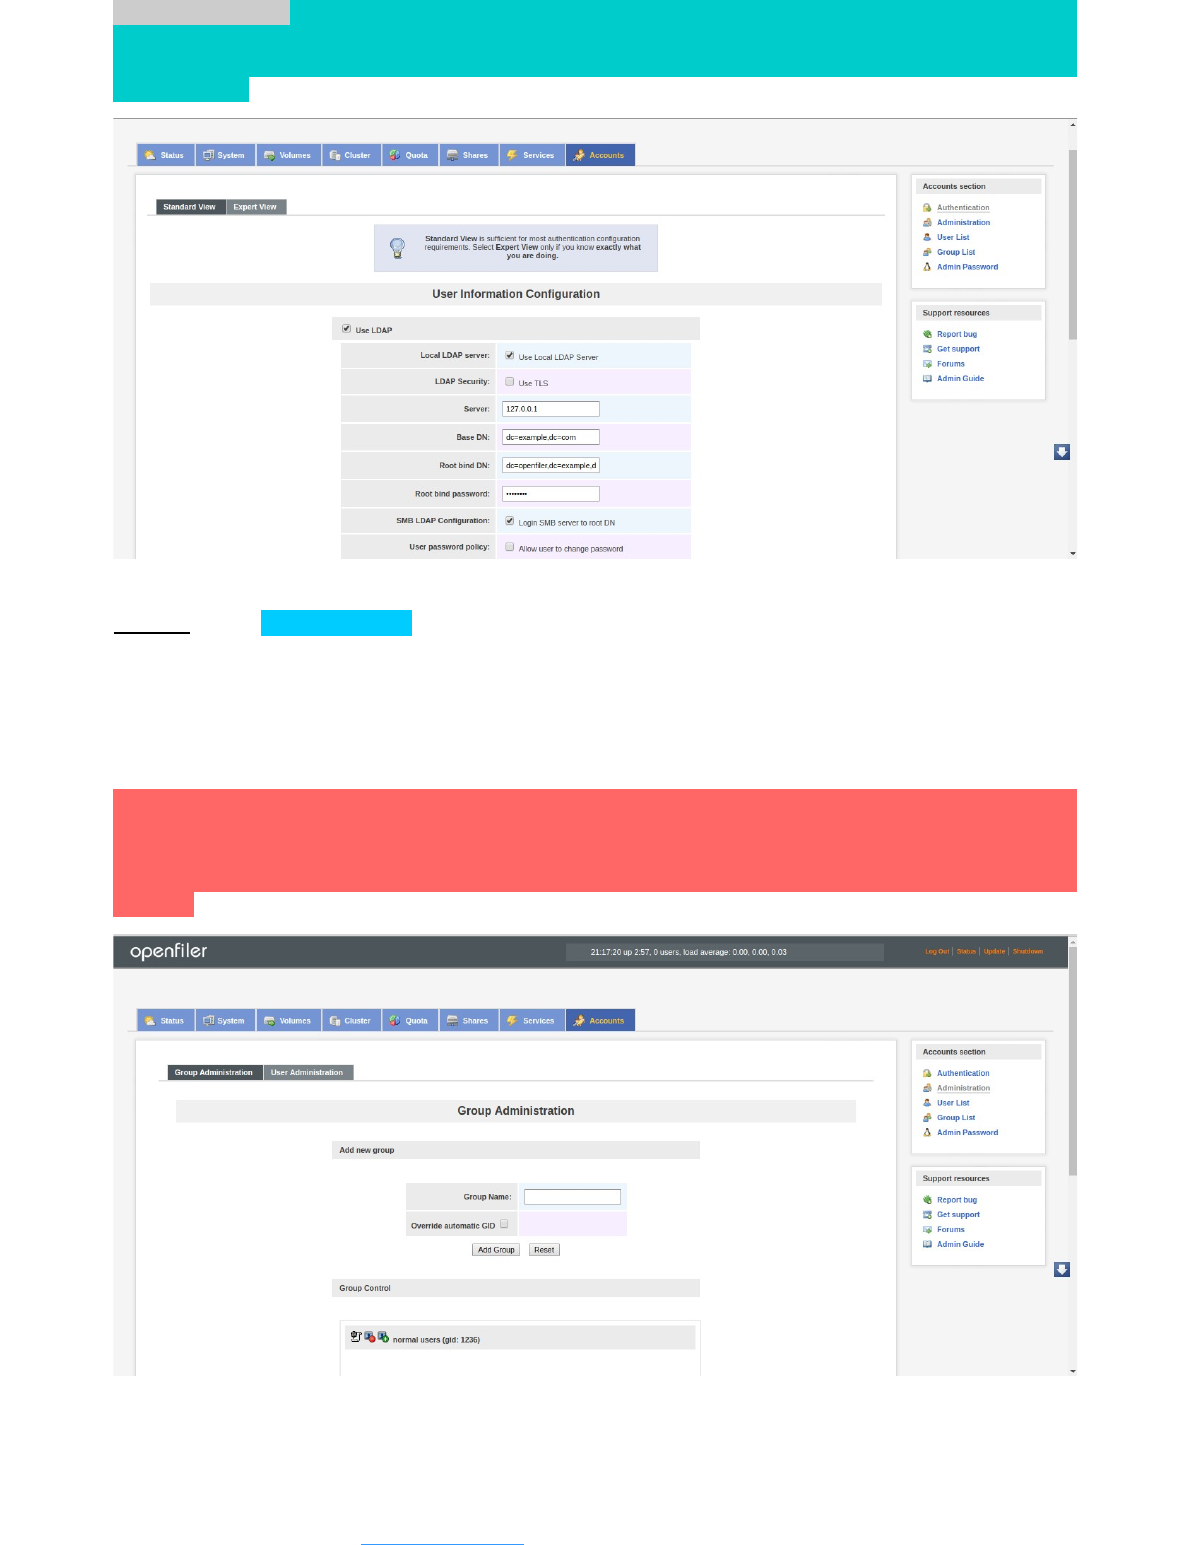
Step 2 :
Go to Accounts Tab. Now lets configure accounts.
Select the check box : Use LDAP
Select the check box : Local LDAP server
Server : 127.0.0.1
Base DN : dc=example,dc=com
Root bind DN : dc=openfiler,dc=example,dc=com
Root bind password : <your_default_password> i.e. “password”
After making the necessary changes
What is LDAP ??? - (Lightweight Directory Access Protocol) is a software protocol for enabling
anyone to locate organizations, individuals, and other resources such as files and devices in a
network, whether on the public Internet or on a corporate intranet.
Alok Chilka | CodeSocial.net | info@codesocial.net
What is DN ??? - The LDAP API references an LDAP object by its distinguished name (DN). A DN
is a sequence of relative distinguished names (RDN) connected by commas. An RDN is an
attribute with an associated value in the form attribute=value; normally expressed in a UTF-8
string format.
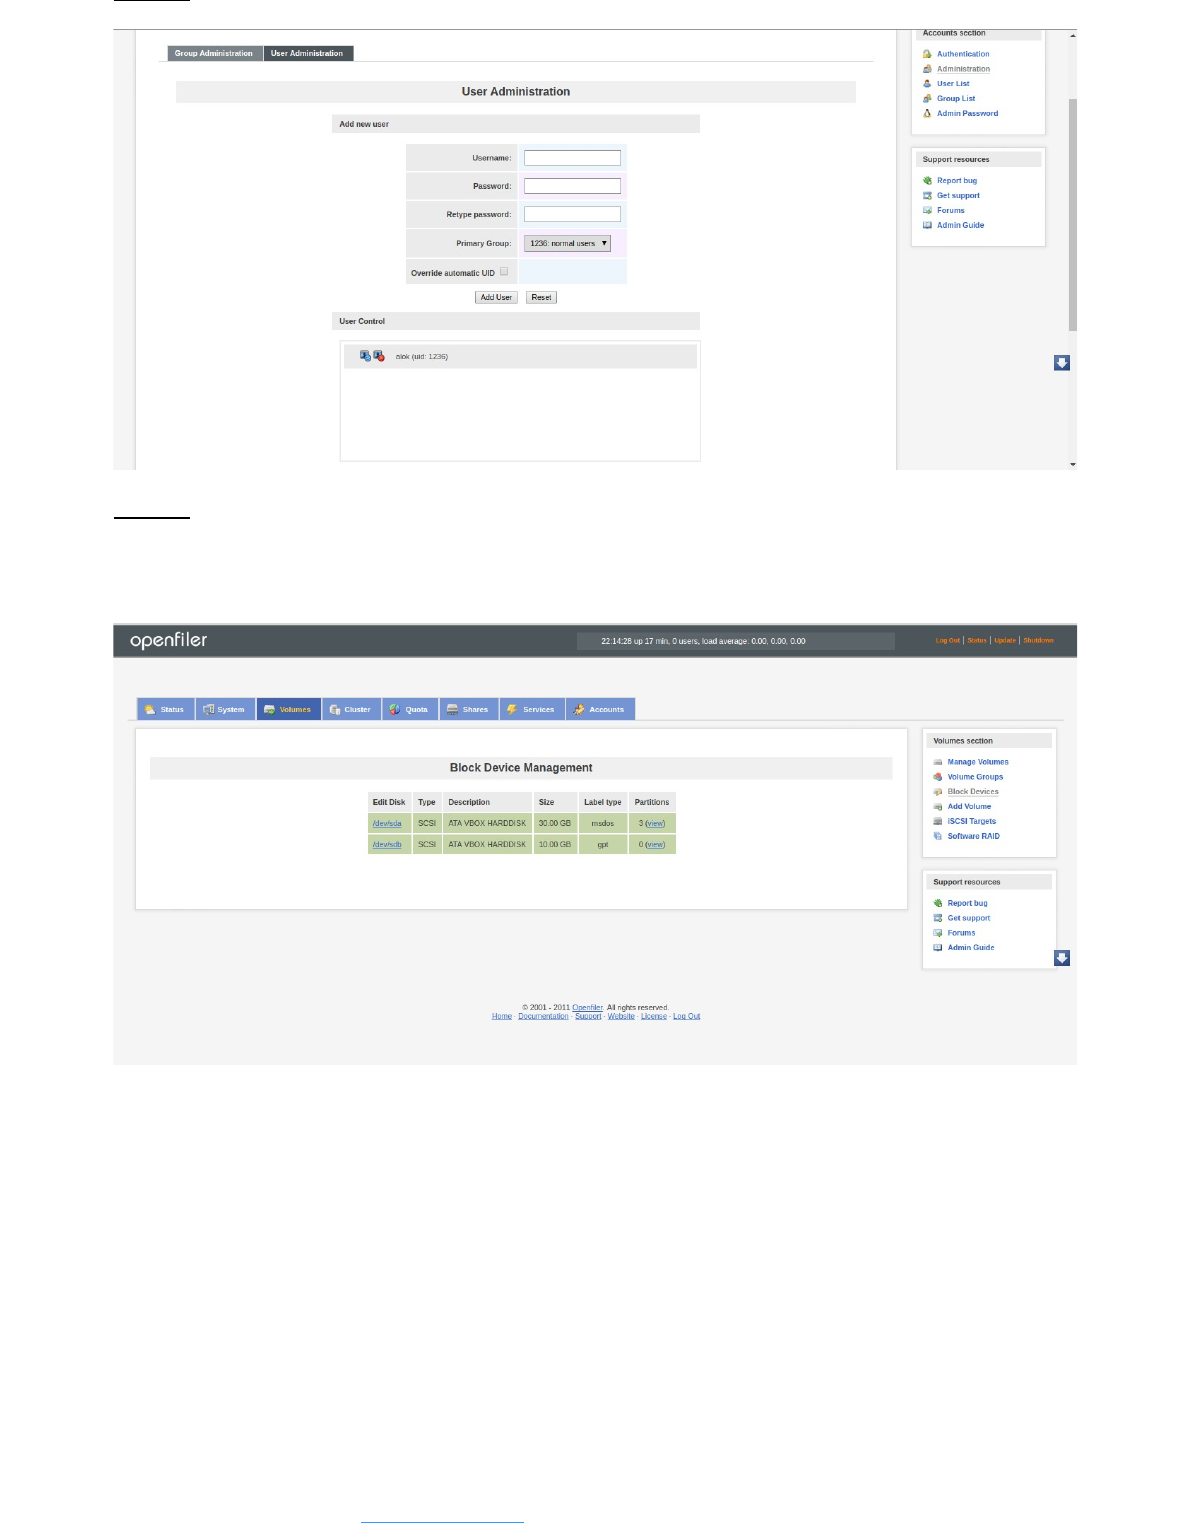
Step 3 : Go to Accounts Tab. and Click on Administration and create a user group and atleast
one user account.
Here we have created user group - “normal users“ and user account with username - “alok”
and password - “pass123”. This username and password will be used at the time of accessing
the shared folder over network.
Note : Make sure that the gid ( group id) is same as that of the uid (user id). For ex. If gid for
group - normal user is 1236 in below image then the user id for user – alok should be 1236. If by
default it is not so then delete the user and create it again and while creating the user select the
option Override Automatic UID and enter the id in the textbox same as that of the group you
created.
Alok Chilka | CodeSocial.net | info@codesocial.net
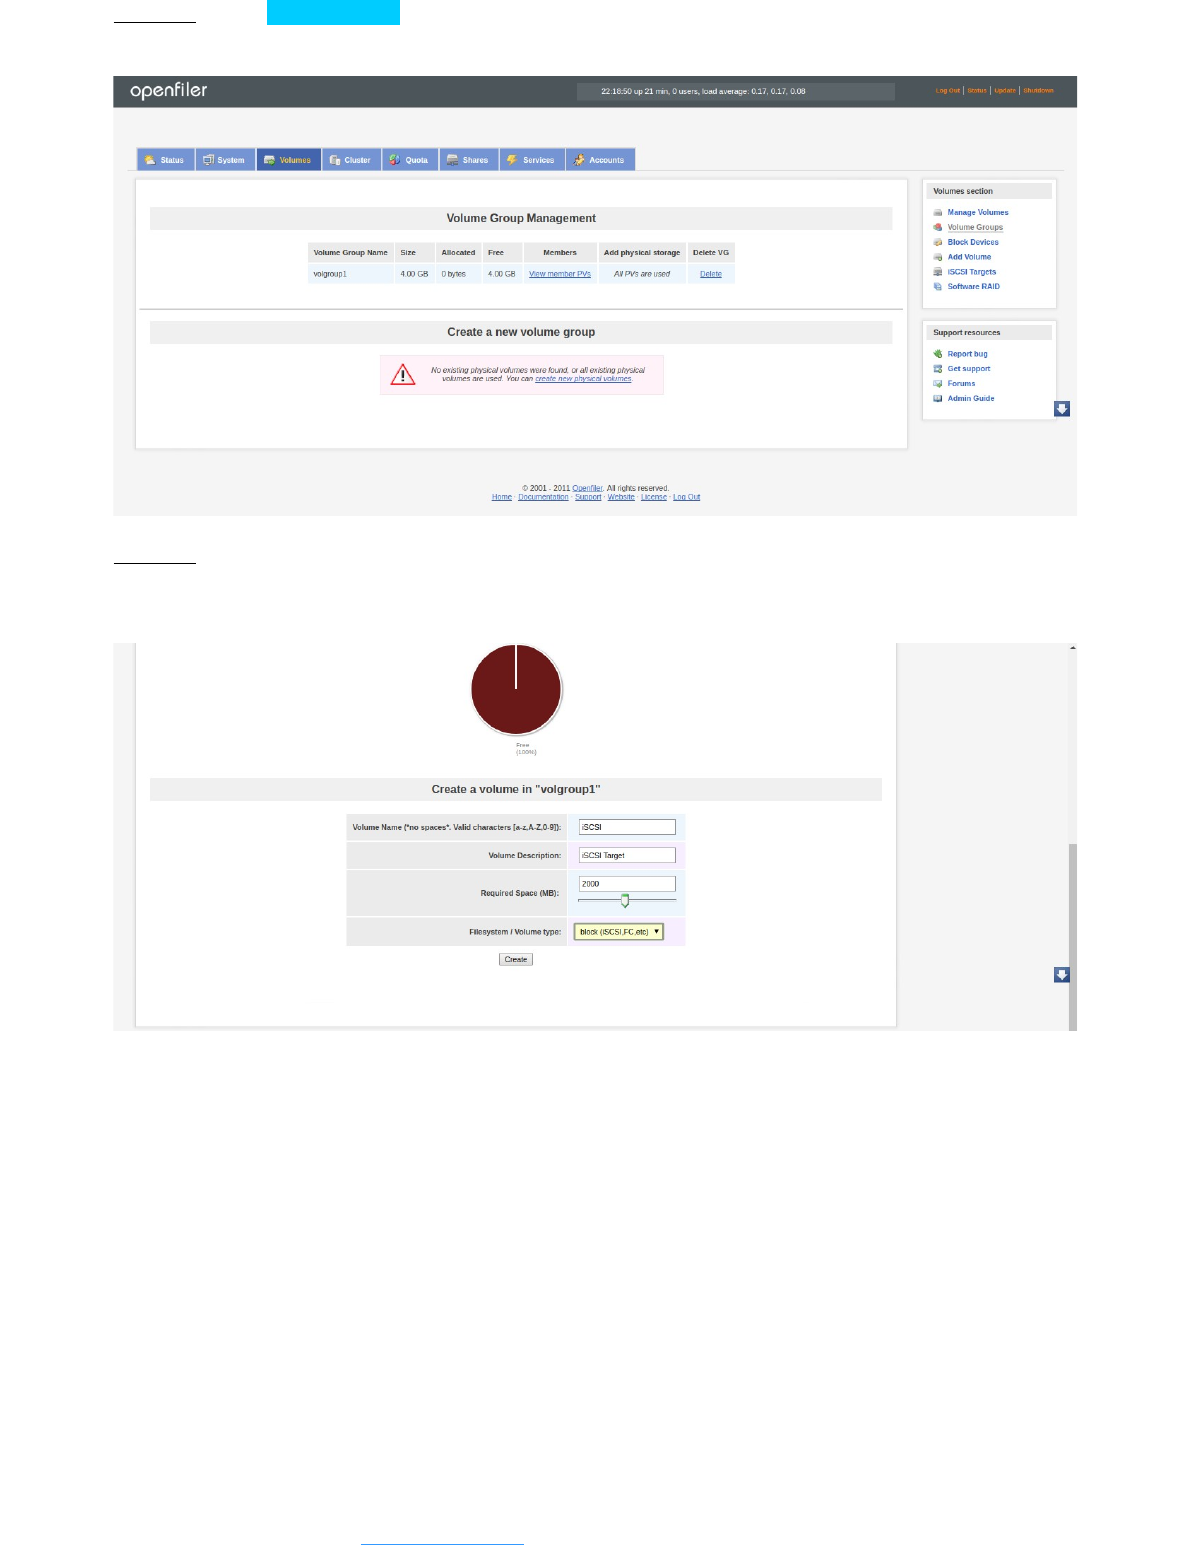
Step 8 : Go to Volumes Tab and click on Volume Groups and create a volume group and select
the disk you want to add to the group. Here we have created “volgroup1”.
Step 9 : Now create volumes from Add Volume option on right side of the page.
We have created one share volume ( partition type : ext3 / ext4 ).
Alok Chilka | CodeSocial.net | info@codesocial.net

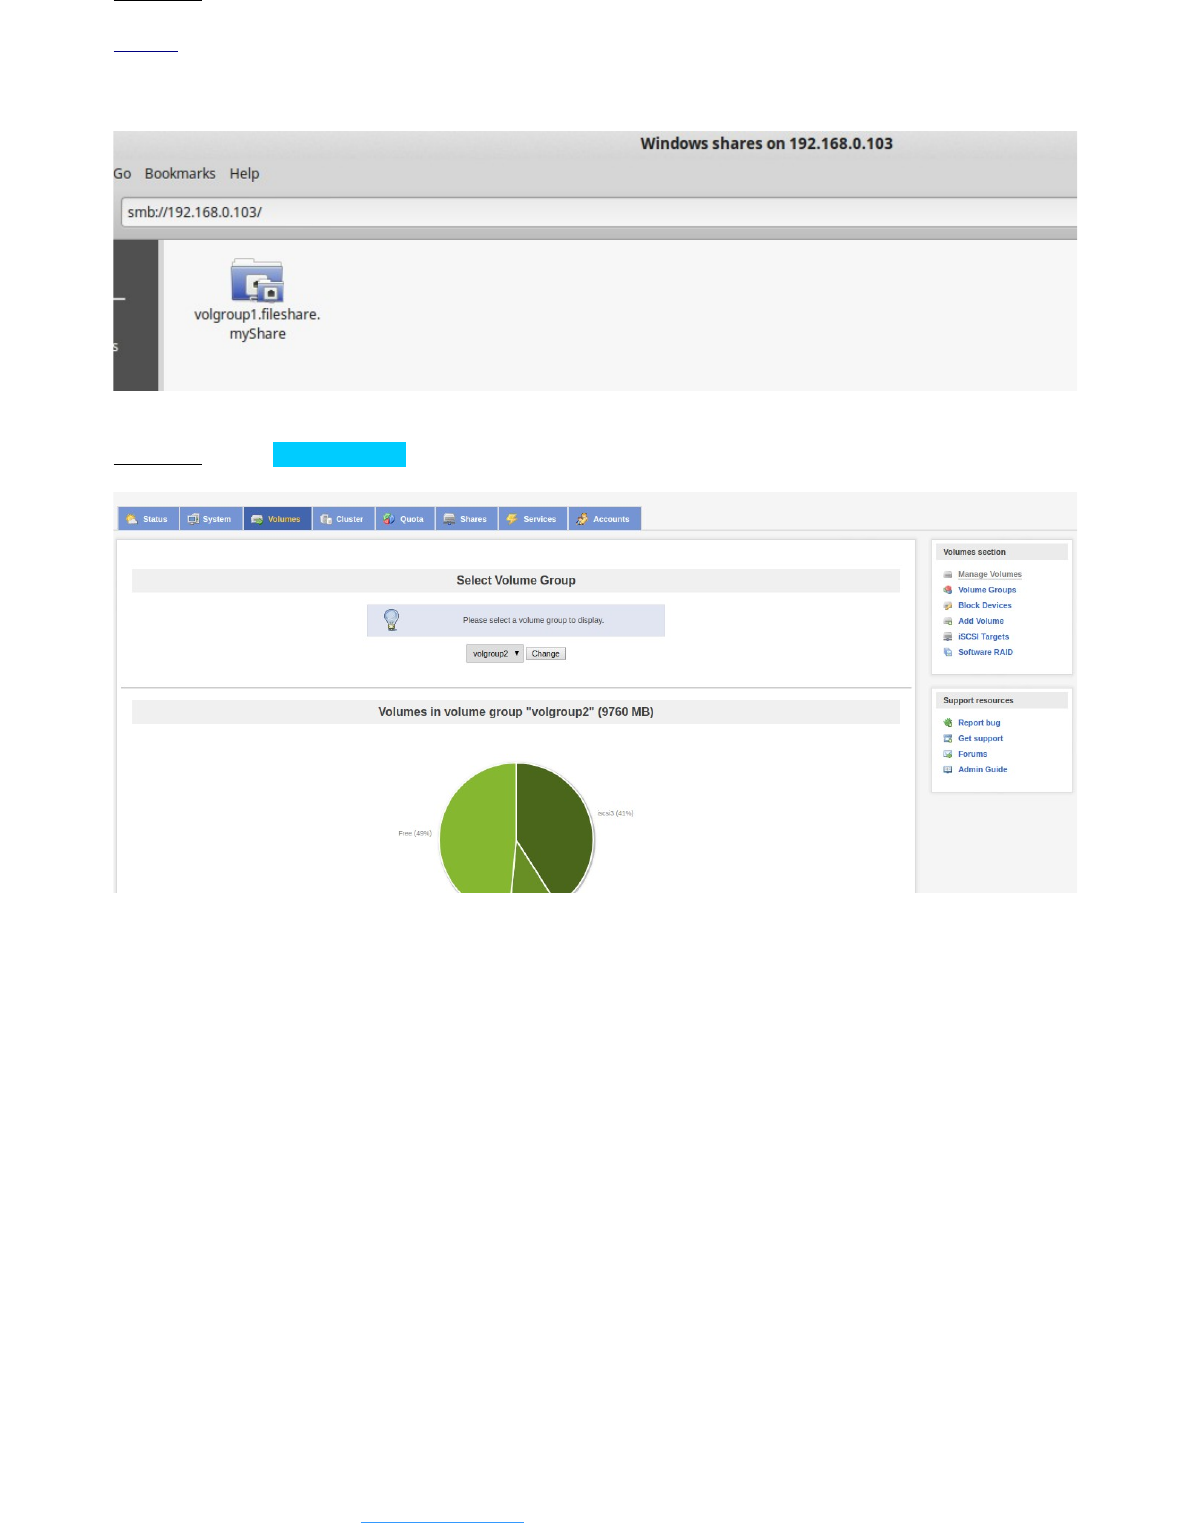
Step 10 : Go to System Tab and you will see the hostname and interface configuration details.
Here you have to add entry for incoming connections under Network Access Configuration
area. i.e when we will access the volume from outside network we need to add the host and
netmask entry in openfiler. For ex. If our ip address range is 192.168.x.x and netmask range is
255.255.255.x then we will add the entry as 192.168.0.0 and 255.0.0.0 so it will accept all ip
address within that range.
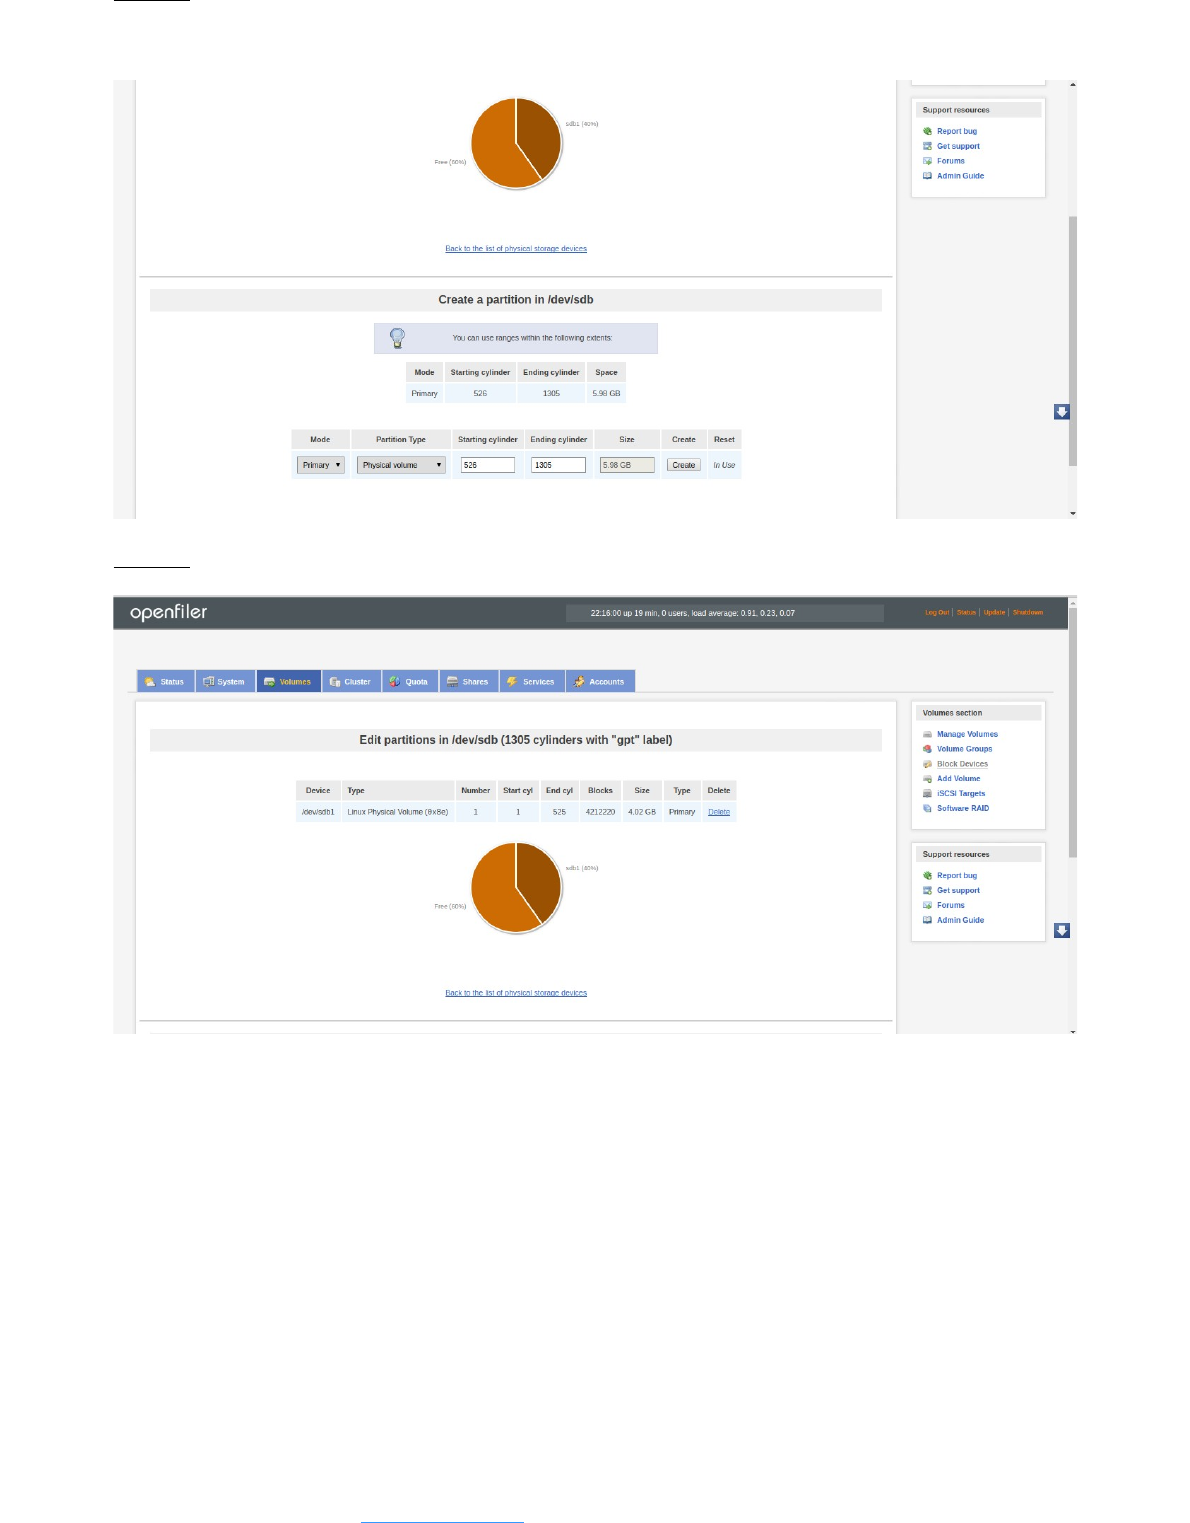
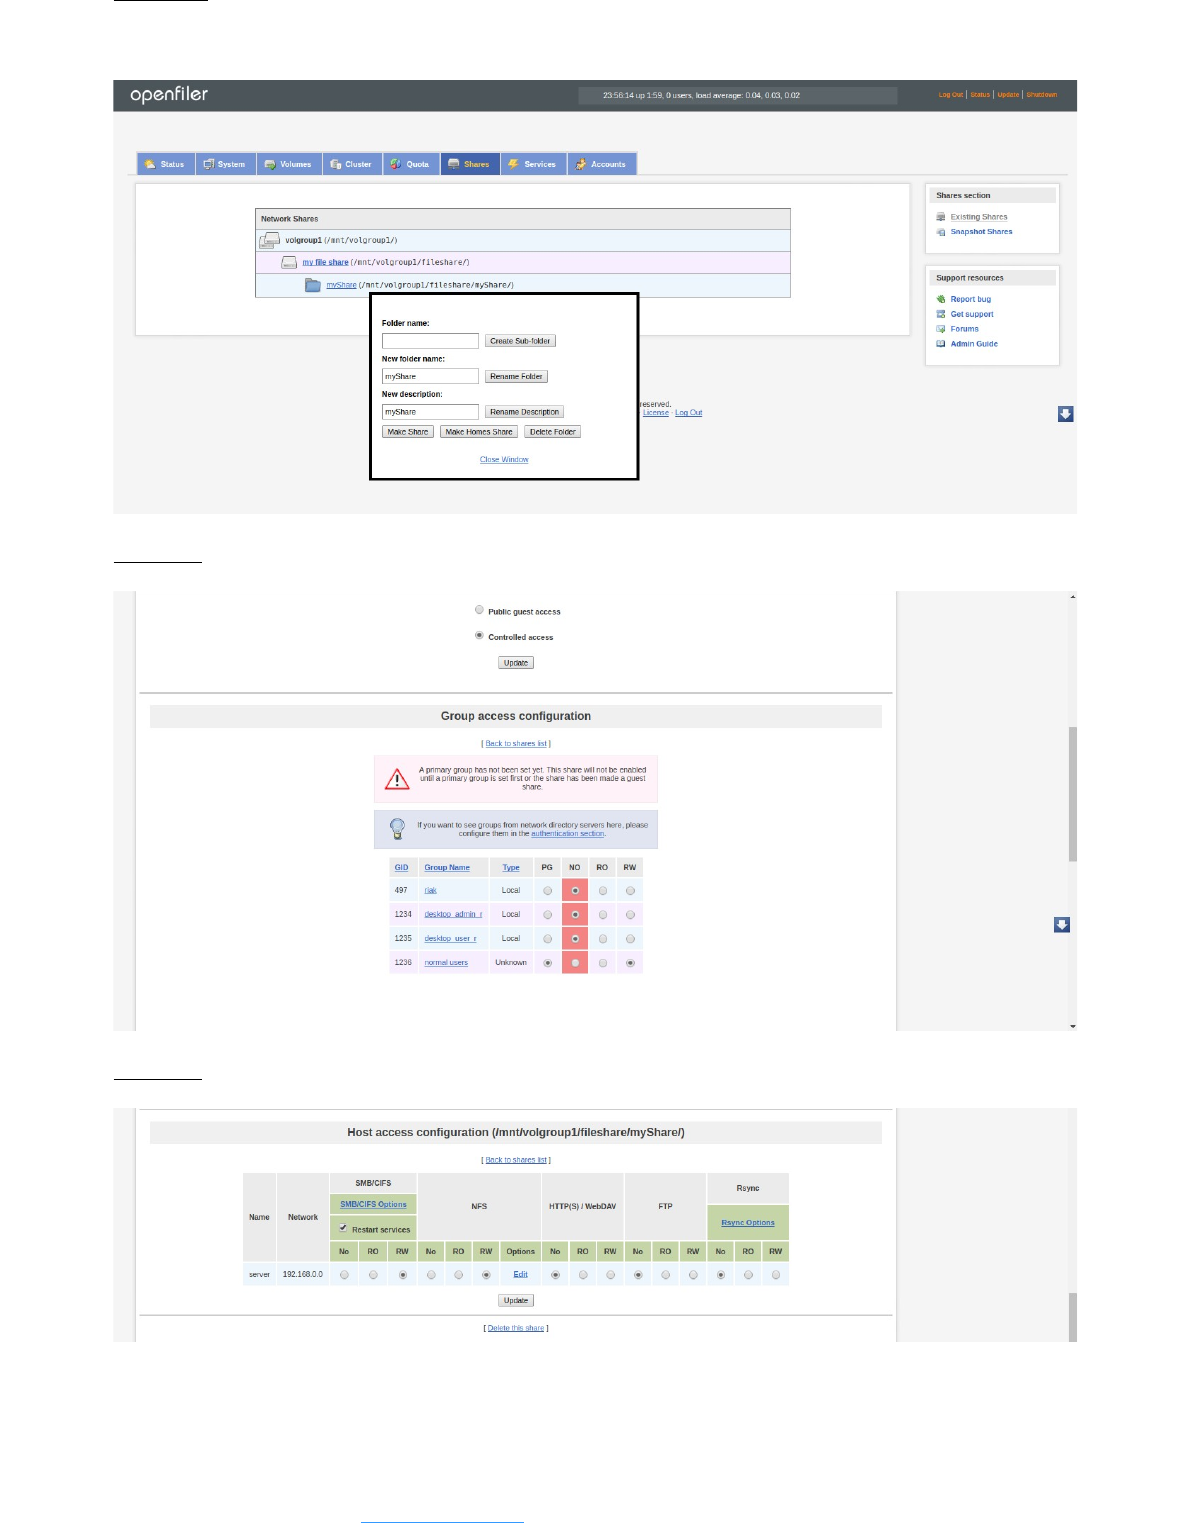
Step 11 : Go to Shares Tab and you will see the share volume you created listed under the
volume group. Right click on the shared volume and create a folder to share.
Alok Chilka | CodeSocial.net | info@codesocial.net
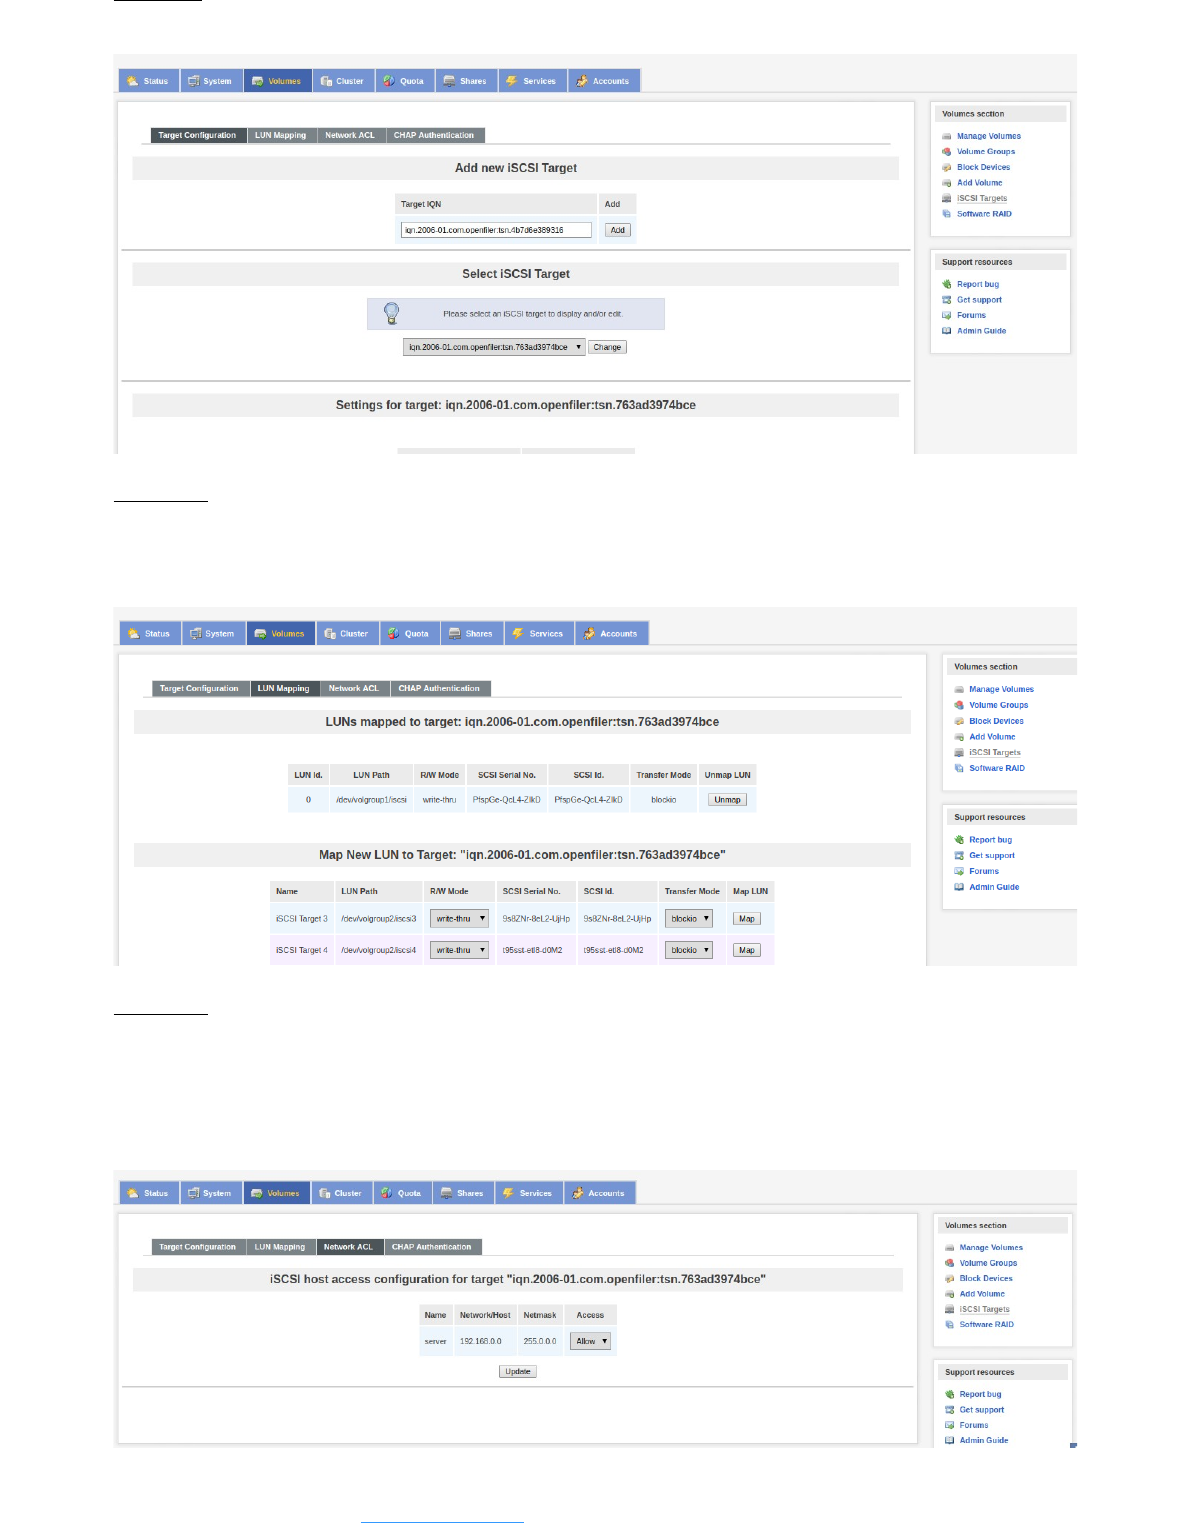
Step 17 :
It will by default create a target name which we have to add by clicking on Add Button.
Step 18 :
The added target name will appear under LUN mapping tab where we have to actually map the
iSCSI volume we created earlier to the target name. Select the appropriate volume name and
map it to target name.
Step 19 :
After mapping the volume then enable the access for the requests coming via incoming
connections. Select Allow from the dropdown under Access column show below and click on
Update button. Thats it your iSCSI volume is ready to export now and accessed from another
location.
Alok Chilka | CodeSocial.net | info@codesocial.net
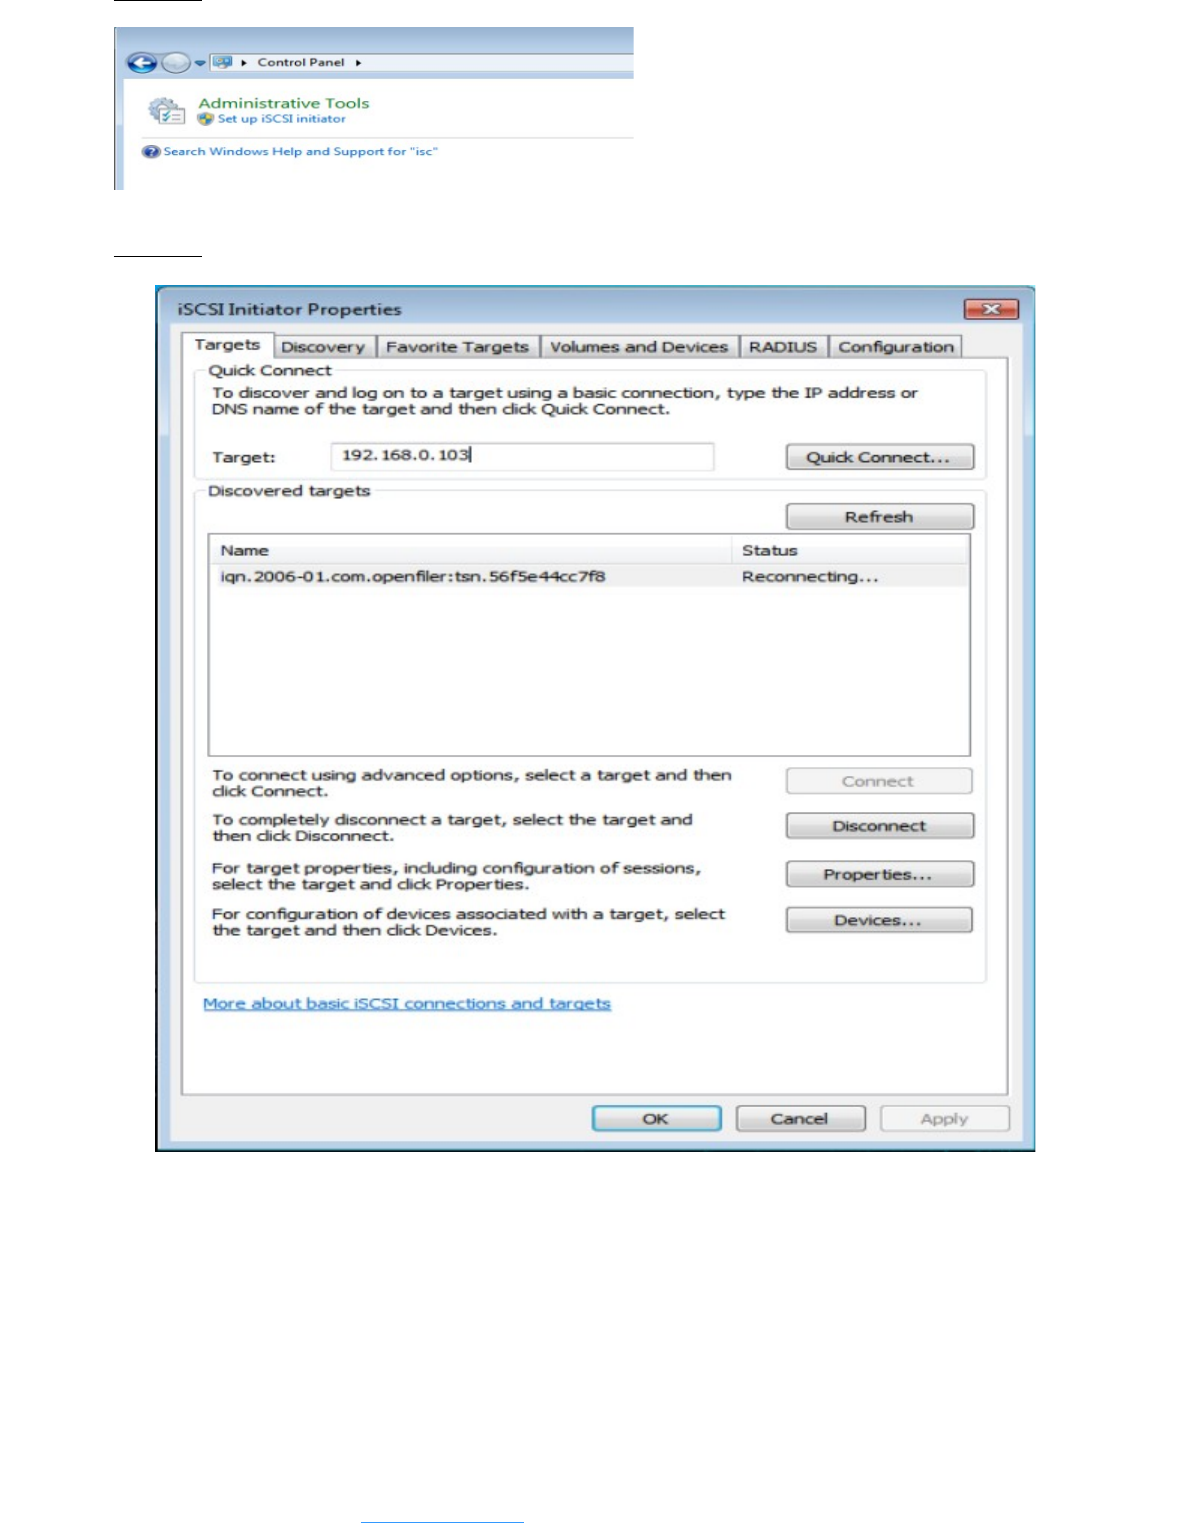
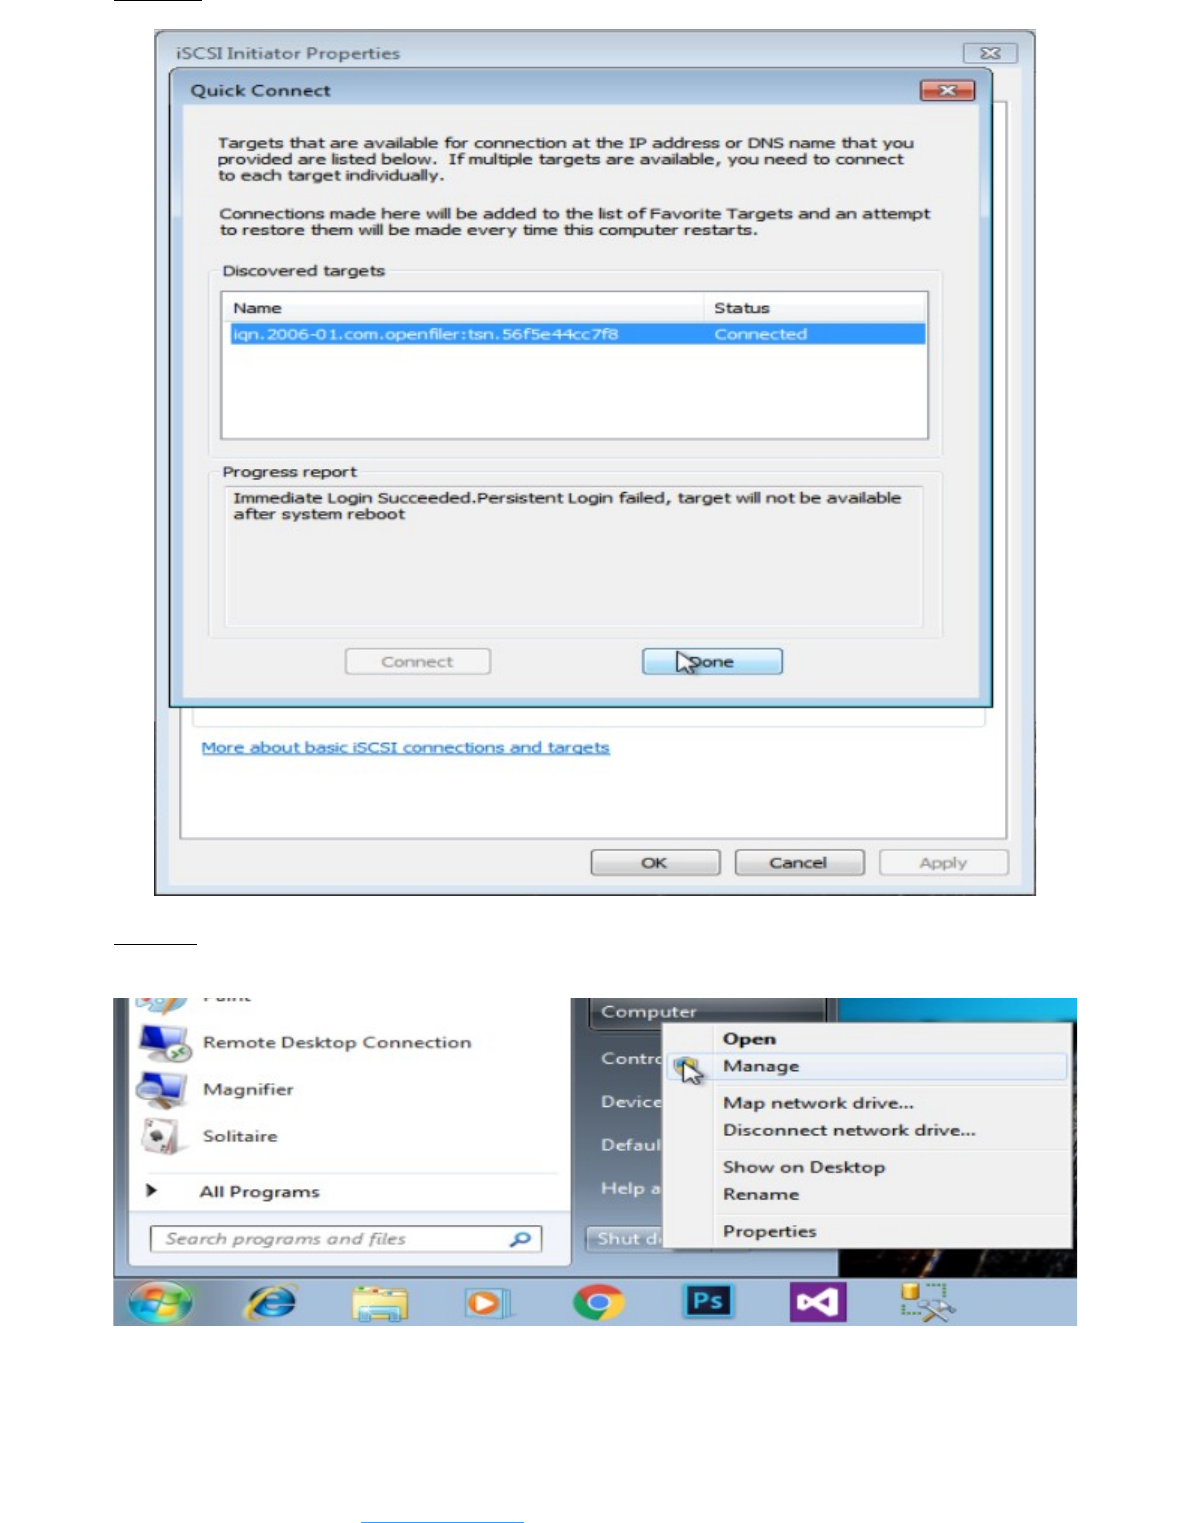
Step 22 : Your mapped iSCSI target names should appear here. Select the name and click Done.
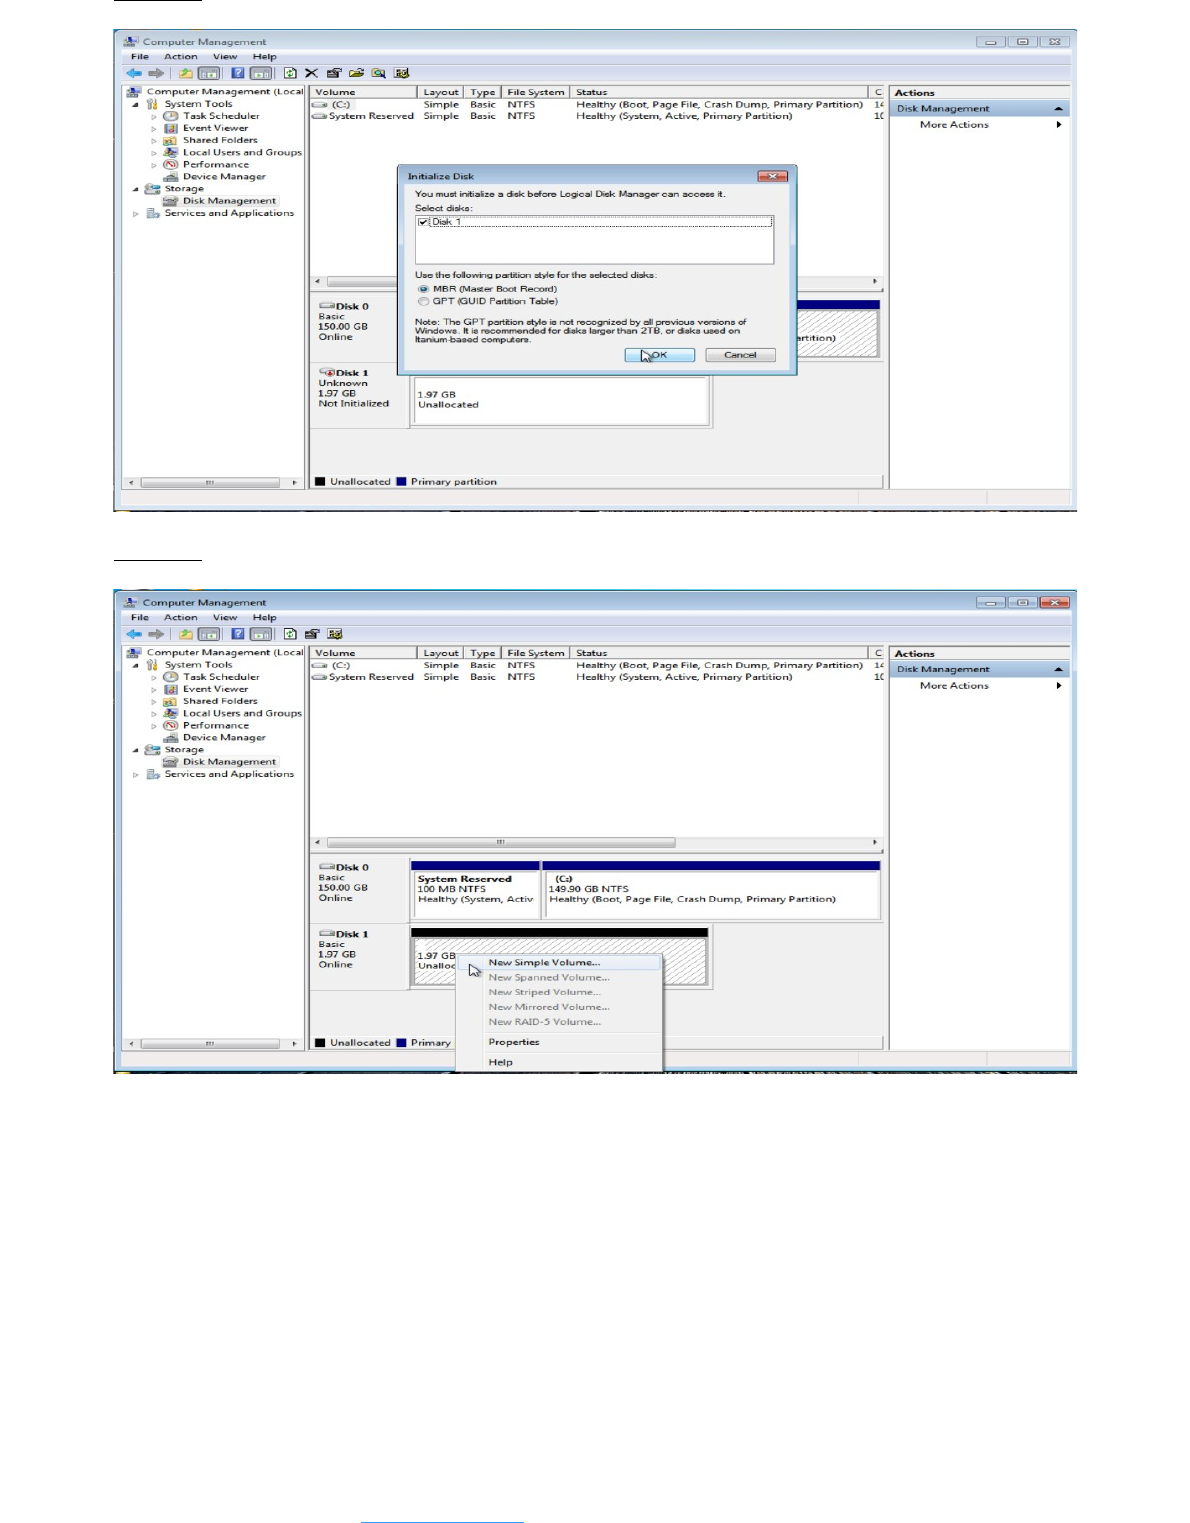
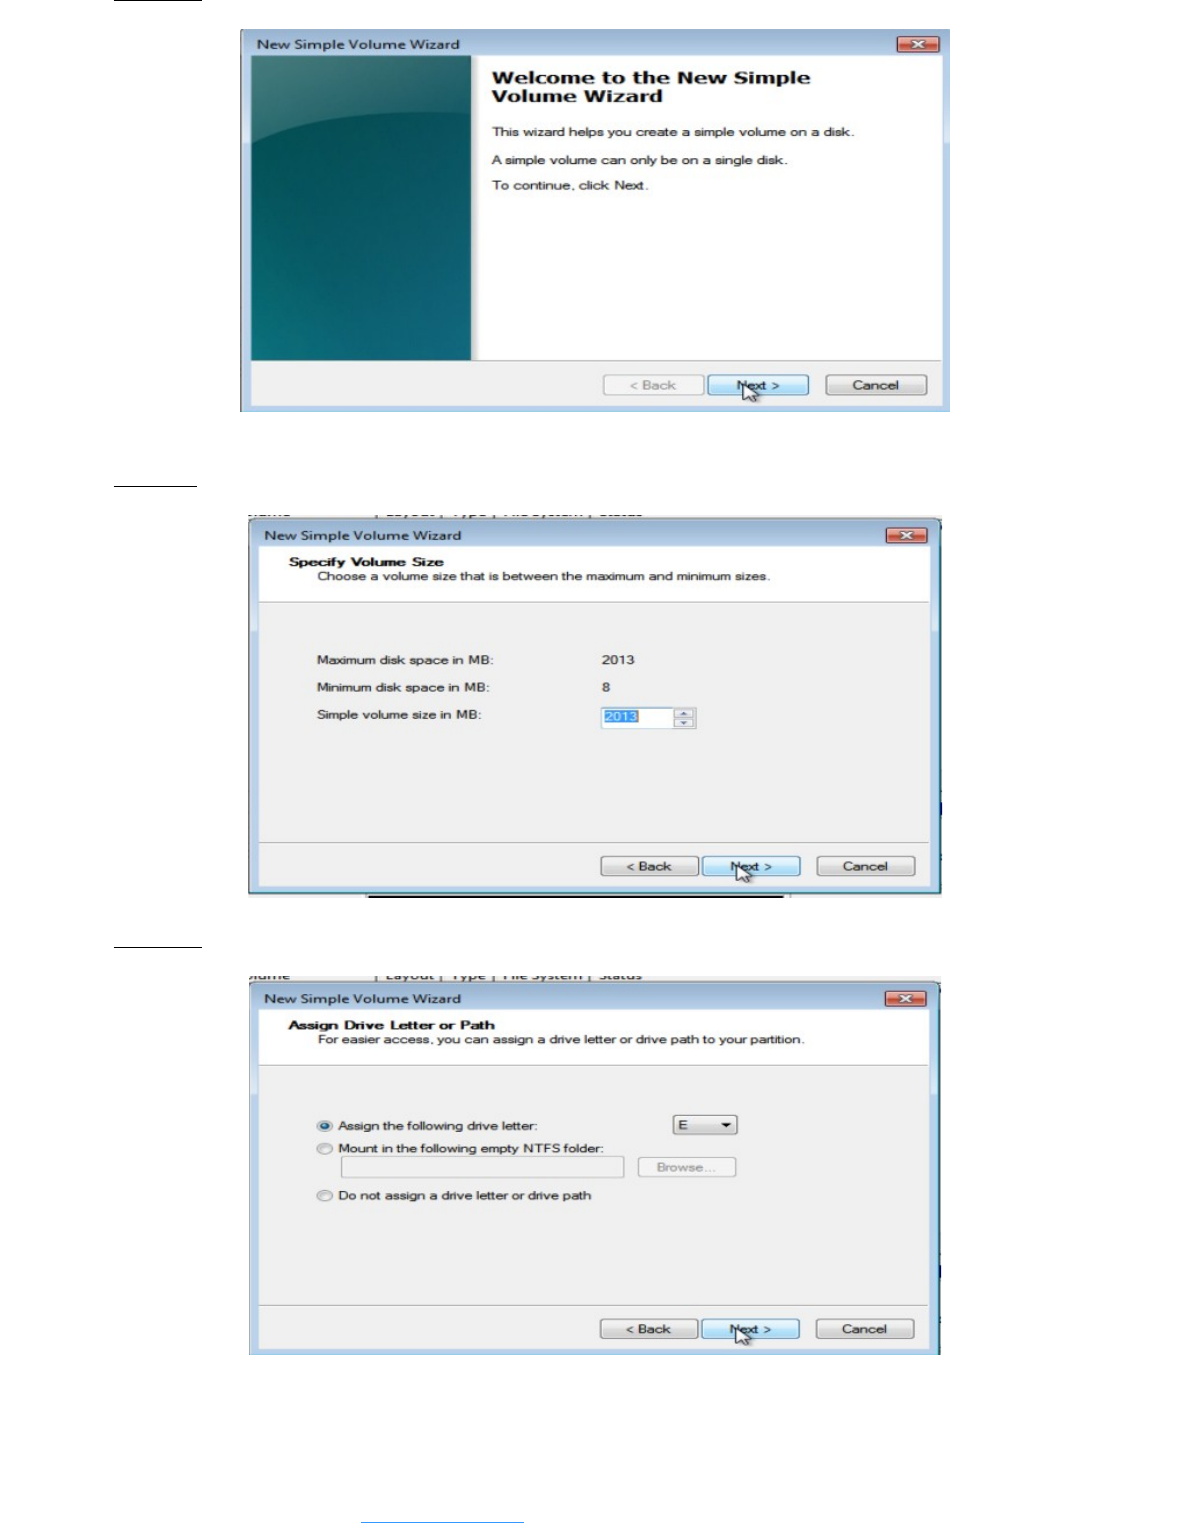
Step 23: Now open Computer Management window and check for the new disk added under Disk
Management section. The new disk will be appear as unallocated space.
Alok Chilka | CodeSocial.net | info@codesocial.net