INSTRUCTIONS FOR MAKING YOUR OWN CIRCUIT DRAWINGS Snap Designer
User Manual: Pdf SnapDesigner
Open the PDF directly: View PDF ![]() .
.
Page Count: 4

INSTRUCTIONS FOR MAKING YOUR OWN CIRCUIT DRAWINGS
(BASED ON MICROSOFT® WORD 2010)
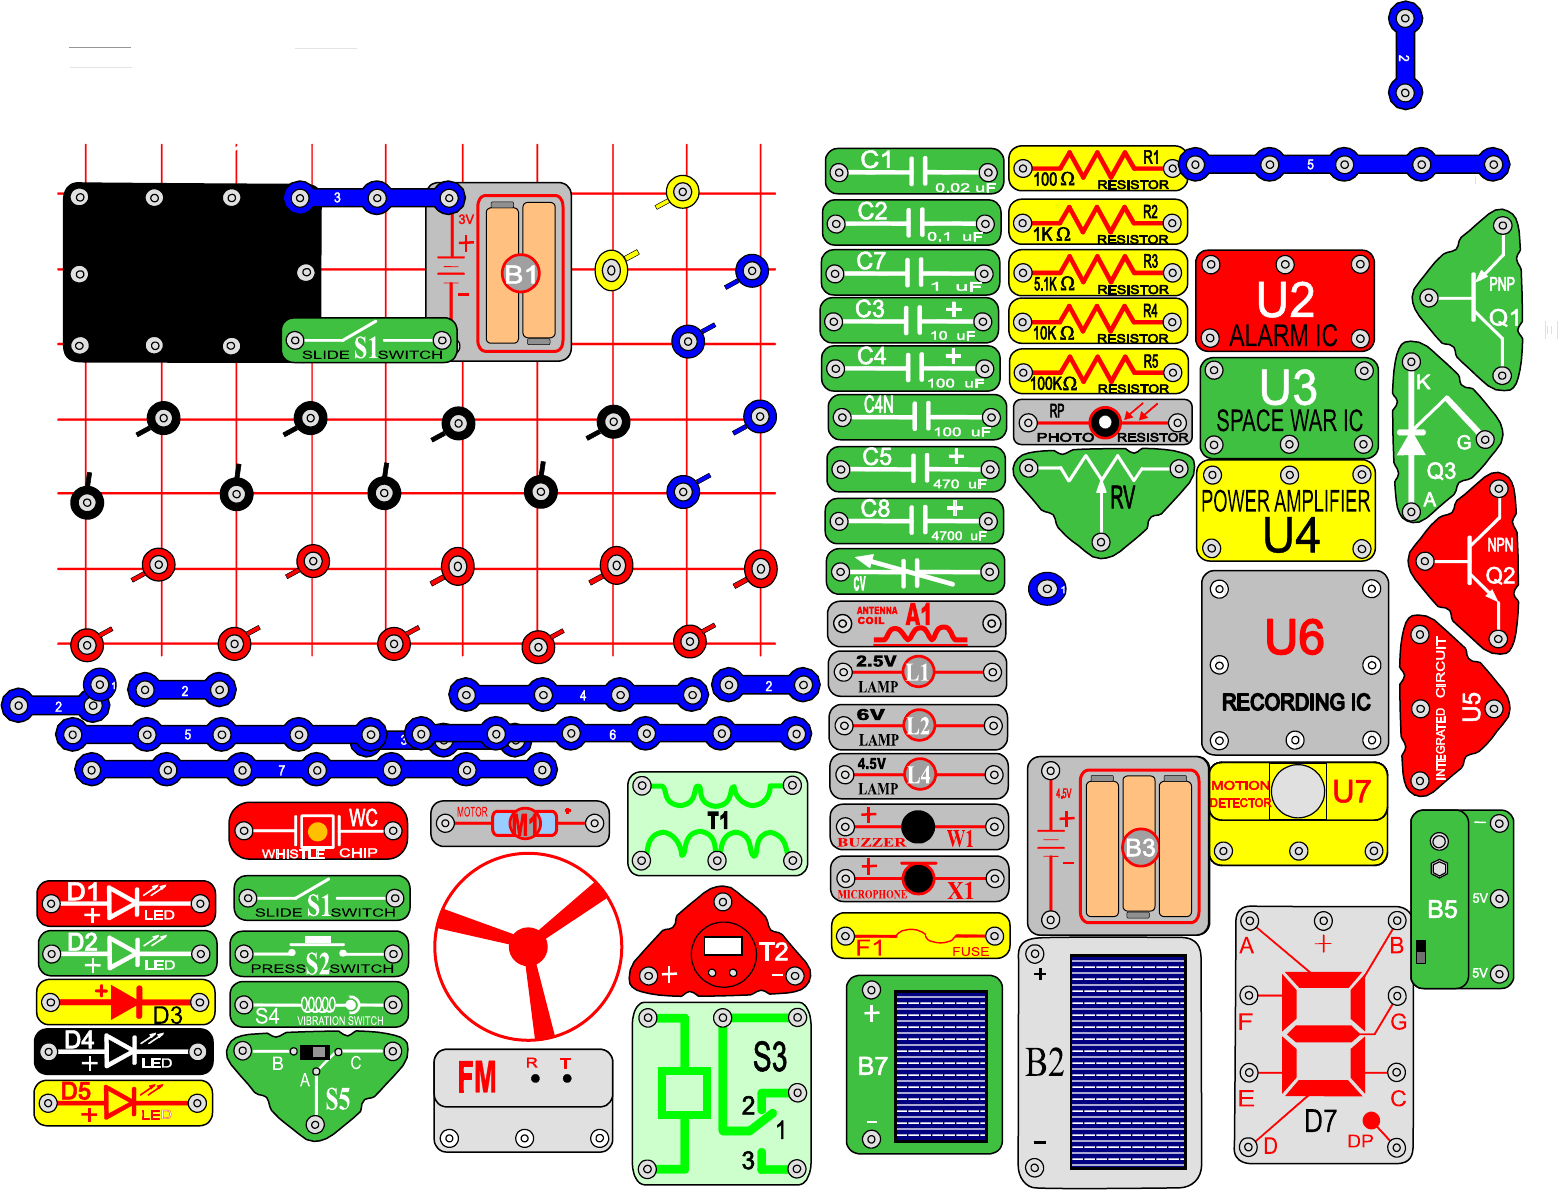
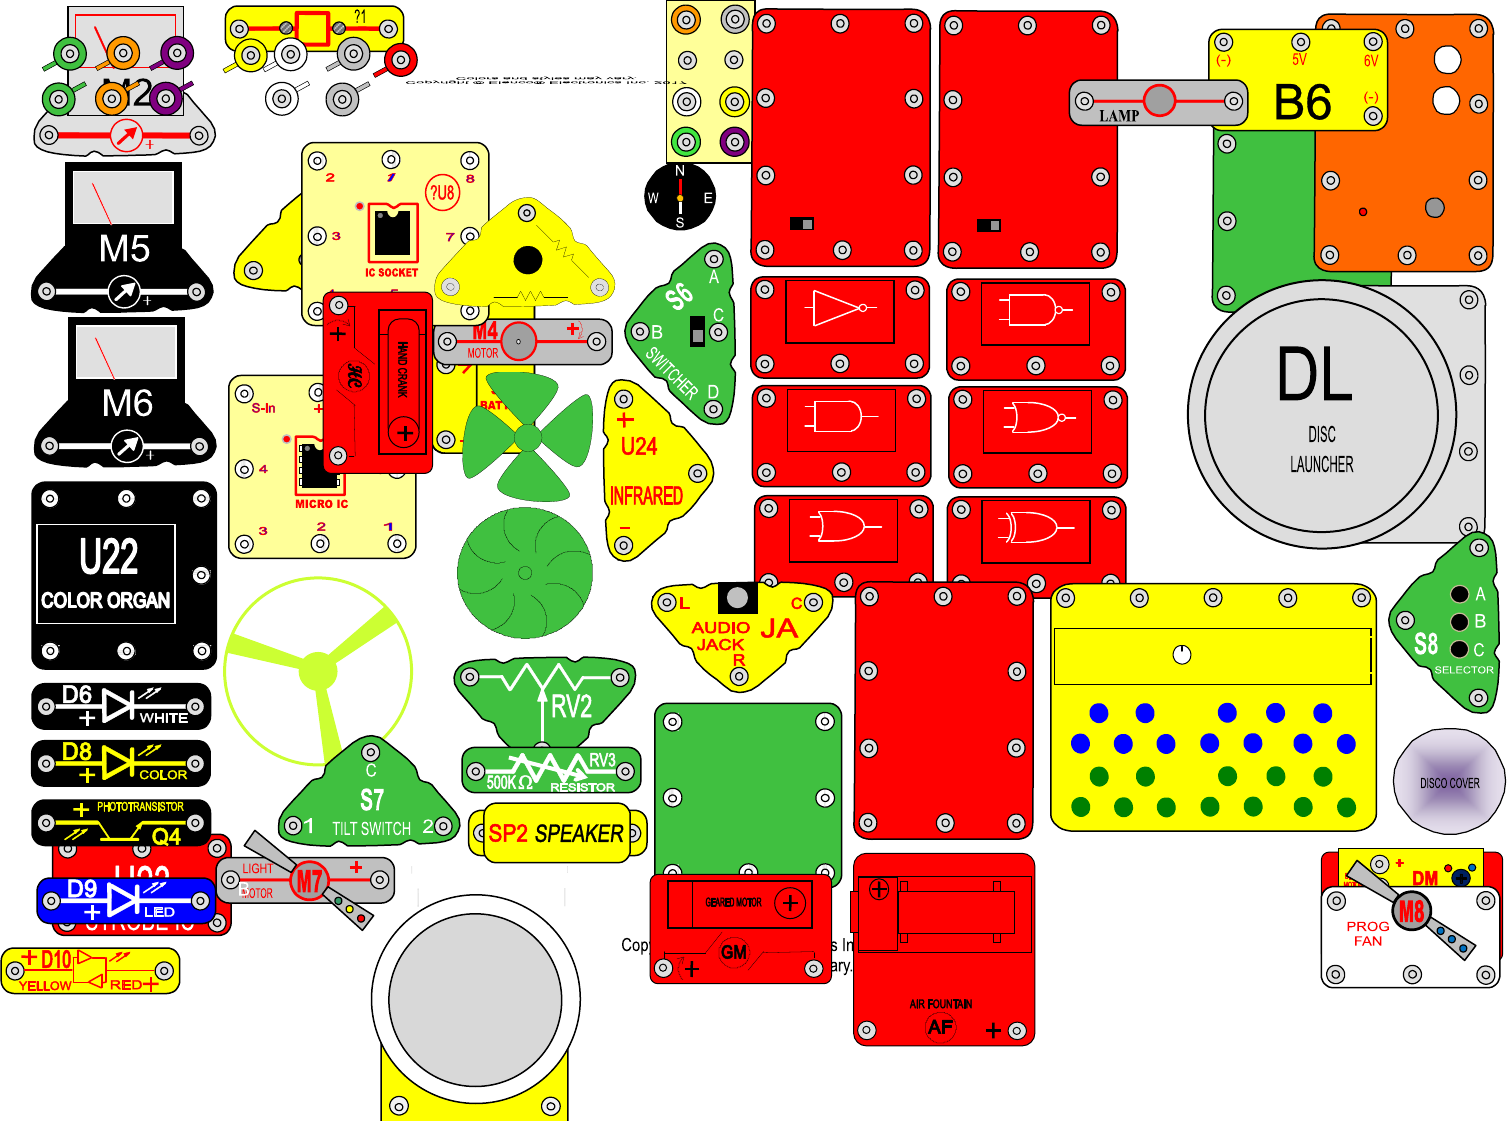
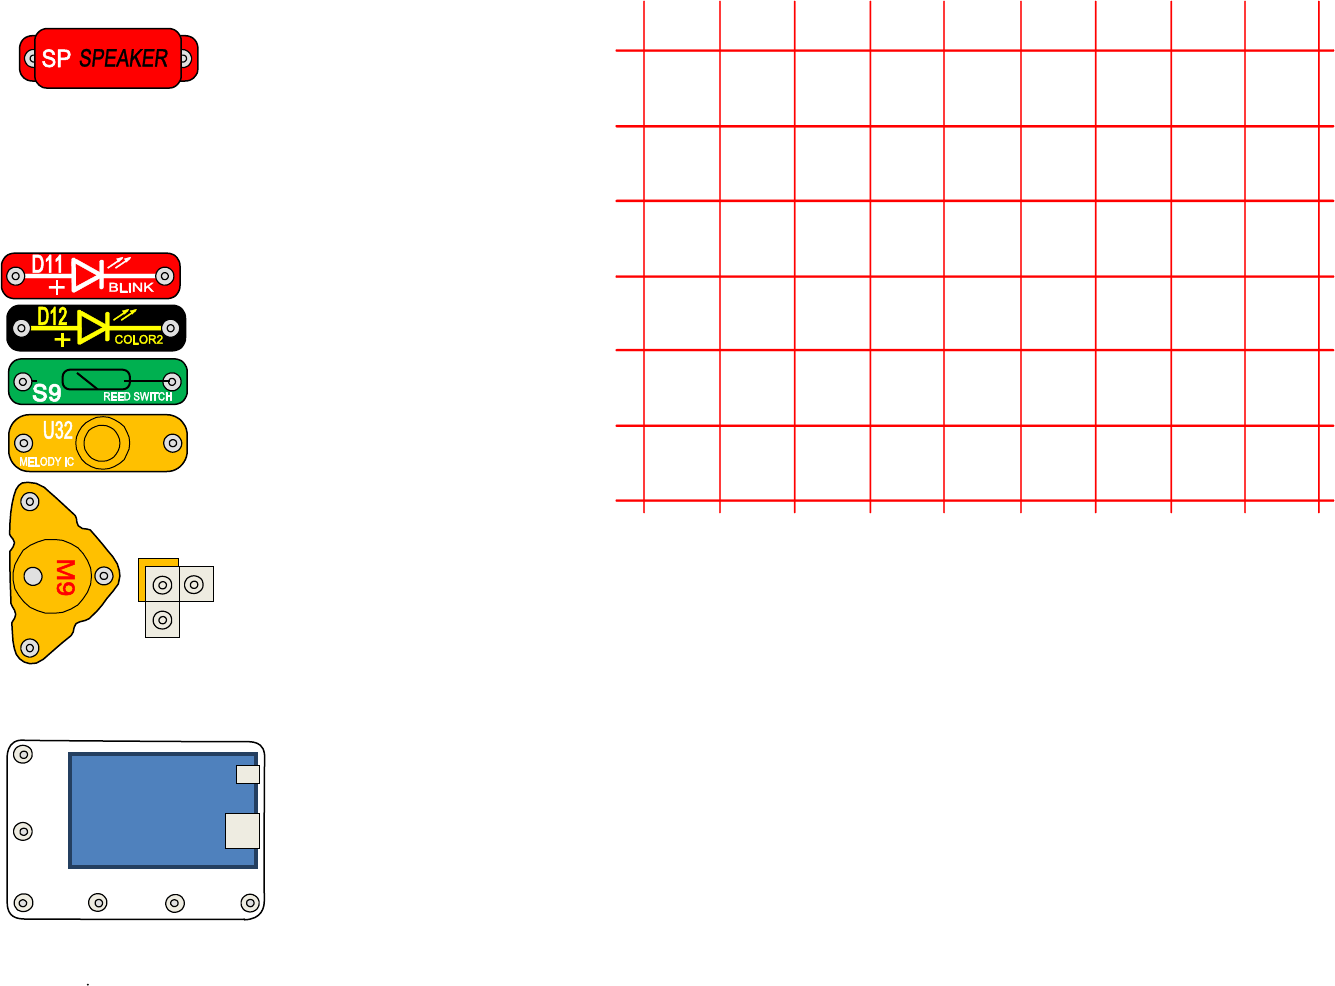
Elenco® provides the part symbols below so that our customers can make their own custom circuit drawings.
Use the drawing features available in Microsoft® Word 2010. If the drawing toolbar is not visible select
<View> - <Toolbar> - <Drawing>. If you have any questions about how to use Word, click on <Help> with
left mouse button or press <Alt> + <H>. Contact Elenco® to purchase upgrade sets or individual parts by
clicking on the link shown here: https://www.elenco.com/
1. While holding down the control key <Ctrl>, click and drag any part to the grid to make a copy of that
part on the grid. You may drag any number of parts to the grid as long as you hold down the control
key and they will be duplicated on the grid. The original part should still be on the page in its original
position if needed again.
2. To rotate a part, select the part then click on <Draw> in the drawing menu. Move to <Rotate or Flip>
and then click on <Rotate Left> or <Rotate Right>.
3. To move parts from bottom to top click on the part you want to move with the left mouse button, and
then click on <Draw>. Next go to <Order> and select <Bring to Front>.
4. To print your drawing, use <Select Objects> to select all the parts on the grid, including the grid. After
all parts have been selected you can press <Ctrl> + <C> keys to place them on the clipboard. Then
open a new drawing and paste your clipboard in this new drawing with <Ctrl> + <V>. Print this
document and save it as your drawing.
5. When closing the original drawing do not save changes and the master will remain ready for next
drawing.
Customer-designed circuits are posted on our website. To be considered for this, circuits must be
unique, use proper design techniques, and be exciting for others to build. Submit your circuit to
webmaster@elenco.com.
Wired LED Display & Microcontroller
B
C
D
E
F
2
3
4
5
6
A
G
1
7
8
9
10
8.8.
U29
LED
MC
ROVER REAR
RX1
R/C
RECEIVER
+
-
A B C
U8
MOTOR
CONTROL
+
-
RX2
DELUXE
RECEIVER
+
-
A B C
U9
SOUND &
RECORDING
G
+
-
o
n
m
o
t
o
r
s
h
a
f
t
on motor shaft
PIVOT STAND
U16
U18
U15
U17
U19
U20
U27
VOICE
CHANGER
+
-
TUNE
U26
KEYBOARD
U28
ECHO IC
U31
SNAPINO
B
C
D
E
F
2
3
4
5
6
A
G
1
7
8
9
10
