Pektron Group 009 KCU Keyless Control Unit 2 User Manual OHB VG3 US 01
Pektron Group Ltd KCU Keyless Control Unit 2 OHB VG3 US 01
User Manual
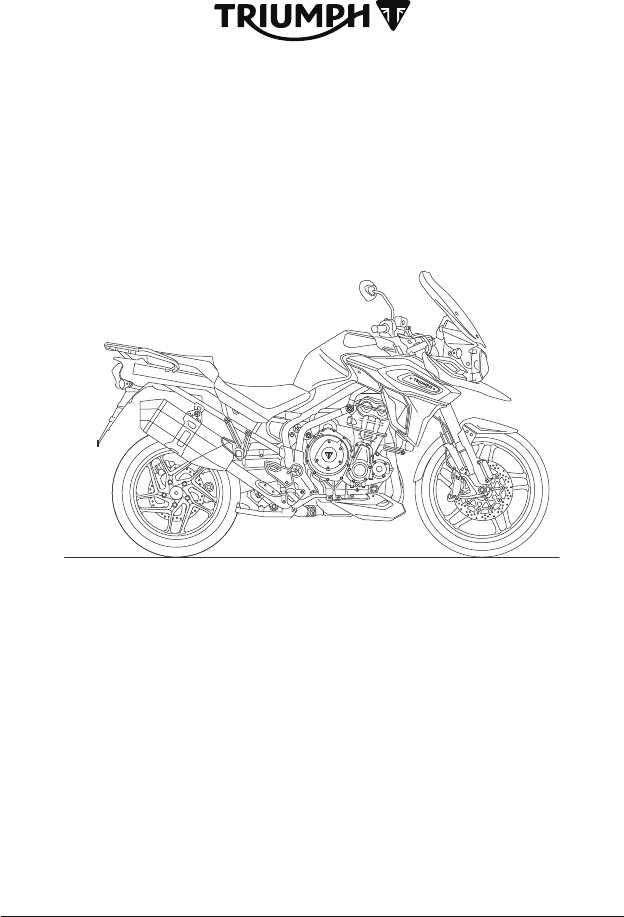
Owner's Handbook
Tiger 1200 XR, Tiger XR, Tiger XR-LRH,
Tiger XC, Tiger XR and Tiger XC
This handbook contains information on the Triumph Tiger 1200 XR, Tiger XR,
Tiger XR-LRH, Tiger XC, Tiger XR and Tiger XC motorcycles. Always store this
Owner's Handbook with the motorcycle and refer to it for information whenever
necessary.
The information contained in this publication is based on the latest information
available at the time of printing. Triumph reserves the right to make changes at any
time without prior notice, or obligation.
Not to be reproduced wholly or in part without the written permission of Triumph
Motorcycles America Limited.
© Copyright 10.2017 Triumph Motorcycles America Limited.
Publication part number 3855518-US issue 1
1

2
TABLE OF CONTENTS
This handbook contains a number of different sections. The table of contents below
will help you find the beginning of each section where, in the case of the major
sections, a further table of contents will help you find the specific subject required.
Foreword 3
Safety First 7
Warning Labels 14
Parts Identification 16
Serial Numbers 20
Instruments 21
General Information 89
How to Ride the Motorcycle 139
Accessories, Loading and Passengers 158
Maintenance 163
Cleaning and Storage 207
Specifications 217
Index 222
Foreword
3
FOREWORD
Warnings, Cautions and
Notes
Throughout this Owner's Handbook
particularly important information is
presented in the following form:
Warning
This warning symbol identifies special
instructions or procedures, which if not
correctly followed could result in
personal injury, or loss of life.
Caution
This caution symbol identifies special
instructions or procedures, which, if
not strictly observed, could result in
damage to, or destruction of,
equipment.
Note:
• This note symbol indicates points of
particular interest for more
efficient and convenient operation.
Warning Labels
At certain areas of the motorcycle, the
symbol (above) can be seen. The symbol
means CAUTION: REFER TO THE
HANDBOOK and will be followed by a
pictorial representation of the subject
concerned.
Never attempt to ride the motorcycle or
make any adjustments without
reference to the relevant instructions
contained in this handbook.
See page 14 for the location of all labels
bearing this symbol. Where necessary,
this symbol will also appear on the
pages containing the relevant
information.
Maintenance
To ensure a long, safe and trouble free
life for your motorcycle, maintenance
should only be carried out by an
authorized Triumph dealer.
Only an authorized Triumph dealer will
have the necessary knowledge,
equipment and skills to maintain your
Triumph motorcycle correctly.
To locate your nearest Triumph dealer,
visit the Triumph website at
www.triumph.co.uk or telephone
Triumph Motorcycles America Limited
on (678) 854 2010.

Foreword
4
Off-Road Use
All models are designed for on-road and
light off-road use. Light off-road use
includes use on unpaved, dirt or gravel
roads, but does not include riding on
any motocross course, any off-road
competition (such as motocross or
enduro riding), or riding off-road with a
passenger.
Light off-road use does not include
jumping the motorcycle or riding over
obstacles. Do not attempt to jump over
any bumps or obstacles. Do not attempt
to ride over any obstacles.
Noise Control System
Tampering with the noise control
system is prohibited.
Owners are warned that the law may
prohibit:
1. The removal or rendering
inoperative by any person other
than for purposes of maintenance,
repair or replacement, of any device
or element of design incorporated
into any new vehicle for the
purpose of noise control prior to its
sale or delivery to the ultimate
purchaser or while it is in use and,
2. the use of the vehicle after such
device or element of design has
been removed or rendered
inoperative by any person.
Immobilizer and Tire Pressure
Monitoring System
This device complies with part 15 of the
Federal Communications Commission
(FCC) Rules.
Operation is subject to the following two
conditions:
1. This device may not cause harmful
interference.
2. This device must accept any
interference received, including
interference that may cause
undesired operation.
Changes or modifications to the device
could void the user’s authority to
operate the equipment.
Tires
With reference to the Pneumatic Tires
and Tubes for Automotive Vehicles
(Quality Control) Order, 2009, Cl. No. 3 (c),
it is declared by M/s. Triumph
Motorcycles Ltd. that the tires mounted
on this motorcycle meet the
requirements of IS 15627: 2005 and
comply with the requirements under
Central Motor Vehicle Rules (CMVR), 1989.
Foreword
5
Tiger 1200 XRx-LRH
(Low Ride Height) Models
Unless stated otherwise, information,
instructions, and specifications for
Tiger 1200 XRx-LRH models are identical
to those detailed in this Owner’s
Handbook for the Tiger 1200 XRx
standard ride height models.
Note:
• The Tiger 1200 XRx-LRH models
cannot be equipped with a center
stand.
Owner's Handbook
Warning
This Owner's Handbook, and all other
instructions that are supplied with
your motorcycle, should be considered
a permanent part of your motorcycle
and should remain with it even if your
motorcycle is subsequently sold.
All riders must read this Owner's
Handbook and all other instructions
which are supplied with your
motorcycle, before riding, in order to
become thoroughly familiar with the
correct operation of your motorcycle's
controls, its features, capabilities and
limitations. Do not lend your
motorcycle to others as riding when
not familiar with your motorcycle's
controls, features, capabilities and
limitations can lead to an accident.
Thank you for choosing a Triumph
motorcycle. This motorcycle is the
product of Triumph's use of proven
engineering, exhaustive testing, and
continuous striving for superior
reliability, safety and performance.
Please read this Owner's Handbook
before riding in order to become
thoroughly familiar with the correct
operation of your motorcycle's controls,
its features, capabilities and limitations.
This handbook includes safe riding tips,
but does not contain all the techniques
and skills necessary to ride a motorcycle
safely.
Triumph strongly recommends that all
riders undertake a safety course
approved by the Motorcycle Safety
Foundation to ensure safe operation of
this motorcycle. Information about the
nearest Motorcycle Safety Foundation
course to you can be obtained by calling
the following nationwide toll free
number: 800-447-4700, or by writing to
the Motorcycle Safety Foundation at:
2, Jenner Street, Irvine, California 92718.
To ensure a long and trouble free life for
your motorcycle, maintenance should be
carried out as described in this manual
by an authorized Triumph dealer.

Foreword
6
This handbook is available from your
local dealer in:
• English
• US English
• French
• German
• Italian
• Dutch
• Spanish
• Portuguese
• Swedish
• Japanese
• Thai.
Talk to Triumph
Our relationship with you does not end
with the purchase of your Triumph. Your
feedback on the buying and ownership
experience is very important in helping
us develop our products and services
for you.
Please help us by ensuring your
authorized Triumph dealership has your
email address and registers this with us.
You will then receive an online customer
satisfaction survey invitation to your
email address where you can give us
this feedback.
Your Triumph Team.
Safety First
7
SAFETY FIRST
The Motorcycle
Warning
All models are designed for on-road
use and light off-road use. Light off-
road use includes use on unpaved, dirt
or gravel roads, but does not include
riding on any motocross course, any
off-road competition (such as
motocross or enduro riding), or riding
off-road with a passenger.
Light off-road use does not include
jumping the motorcycle or riding over
obstacles. Do not attempt to jump over
any bumps or obstacles. Do not
attempt to ride over any obstacles.
Extreme off-road use could lead to loss
of motorcycle control and an accident.
Warning
Tiger 1200 XRx-LRH (Low Ride Height)
Model
The Tiger 1200 XRx-LRH motorcycles
are equipped with lowered suspension
and have reduced ground clearance.
As a result, the cornering bank angles
that can be achieved by the Tiger 1200
XRx-LRH are reduced, when compared
with the standard ride height
Tiger 1200 XRx.
When riding, keep in mind that your
motorcycle’s ground clearance is
limited. Operate your motorcycle in an
area free from traffic to gain familiarity
with the motorcycle’s ground clearance
and bank angle limitations.
Banking to an unsafe angle or
unexpected contact with the ground
may cause instability, loss of
motorcycle control and an accident.
Warning
This motorcycle is not designed to tow
a trailer or be mounted with a sidecar.
Installing a sidecar and/or a trailer may
result in loss of motorcycle control and
an accident.
Safety First
8
Warning
This motorcycle is designed for use as
a two-wheeled vehicle capable of
carrying a rider on their own, or a rider
and one passenger.
The total weight of the rider, and any
passenger, accessories and luggage
must not exceed the maximum load
limit of:
Tiger 1200 XR - 507 lb (230 kg)
Tiger 1200 XRx - 502 lb (228 kg)
Tiger 1200 XRx-LRH - 507 lb (230 kg)
Tiger 1200 XRT - 502 lb (228 kg)
Tiger 1200 XCx - 491 lb (223 kg)
Tiger 1200 XCA - 493 lb (224 kg).
Warning
This motorcycle is equipped with a
catalytic converter below the engine,
which along with the exhaust system
reaches very high temperature during
engine operation.
Flammable materials such as grass,
hay/straw, leaves, clothing and luggage
etc. could ignite if allowed to come into
contact with any part of the exhaust
system and catalytic converter.
Always make sure that flammable
materials are not allowed to contact the
exhaust system or catalytic converter.
Fuel and Exhaust Fumes
Warning
GASOLINE IS HIGHLY FLAMMABLE:
Always turn off the engine when
refueling.
Do not refuel or open the fuel filler cap
while smoking or in the vicinity of any
open (naked) flame.
Take care not to spill any gasoline on
the engine, exhaust pipes or mufflers
when refueling.
If gasoline is swallowed, inhaled or
allowed to get into the eyes, seek
immediate medical attention.
Spillage on the skin should be immedi-
ately washed off with soap and water
and clothing contaminated with gaso-
line should immediately be removed.
Burns and other serious skin conditions
may result from contact with gasoline.
Warning
Never start your engine or let it run for
any length of time in a closed area.
The exhaust fumes are poisonous and
may cause loss of consciousness and
death within a short time.
Always operate your motorcycle in the
open-air or in an area with adequate
ventilation.
Safety First
9
Helmet and Clothing
Warning
When riding the motorcycle, both rider
and passenger must always wear a
motorcycle helmet, eye protection,
gloves, boots, trousers (close fitting
around the knee and ankle) and a
brightly colored jacket. Brightly colored
clothing will considerably increase a
rider’s (or passenger’s) visibility to
other operators of road vehicles.
Although full protection is not possible,
wearing correct protective clothing can
reduce the risk of injury when riding.
Warning
A helmet is one of the most important
pieces of riding gear as it offers
protection against head injuries. You
and your passenger’s helmet should
be carefully chosen and should fit you
or your passenger’s head comfortably
and securely. A brightly colored helmet
will increase a rider’s (or passenger’s)
visibility to other operators of road
vehicles.
An open face helmet offers some
protection in an accident though a full
face helmet will offer more.
Always wear a visor or approved
goggles to help vision and to protect
your eyes.
cbma
When choosing a helmet, always look for
a DOT (Department of Transport) sticker
indicating that the helmet has DOT
approval. Do not buy a helmet without
DOT approval.
Riding
Warning
Never ride the motorcycle when
fatigued or under the influence of
alcohol or other drugs.
Riding when under the influence of
alcohol or other drugs is illegal.
Riding when fatigued or under the
influence of alcohol or other drugs
reduces the rider's ability to maintain
control of the motorcycle and may lead
to loss of control and an accident.
Warning
All riders must be licensed to operate
the motorcycle. Operation of the
motorcycle without a license is illegal
and could lead to prosecution.
Operation of the motorcycle without
formal training in the correct riding
techniques that are necessary to
become licensed is dangerous and may
lead to loss of motorcycle control and
an accident.
Safety First
10
Warning
Always ride defensively and wear the
protective equipment mentioned
elsewhere in this foreword. Remember,
in an accident, a motorcycle does not
give the same impact protection as a
car.
Warning
This Triumph motorcycle should be
operated within the legal speed limits
for the particular road traveled.
Operating a motorcycle at high speeds
can be potentially dangerous since the
time available to react to given traffic
situations is greatly reduced as road
speed increases. Always reduce speed
in potentially hazardous driving
conditions such as bad weather or
heavy traffic.
Warning
Continually observe and react to
changes in road surface, traffic and
wind conditions. All two-wheeled
vehicles are subject to external forces
which may cause an accident. These
forces include but are not limited to:
Wind draft from passing vehicles
Potholes, uneven or damaged road
surfaces
Bad weather
Rider error.
Always operate the motorcycle at
moderate speed and away from heavy
traffic until you have become
thoroughly familiar with its handling
and operating characteristics. Never
exceed the legal speed limit.
Warning
Ensure that you know and respect the
rules of the road. Read and observe
publications such as ‘MOTORCYCLE
SAFETY’, ‘YOU AND YOUR MOTORCYCLE,
RIDING TIPS’ and also read and become
familiar with the contents of the
MOTORCYCLE HANDBOOK for your state.
Safety First
11
Caution
This Triumph motorcycle is not
equipped with spark arresters.
Operation in forests, brush or grass
areas may violate state and local laws
and regulations.
Wobble/Weave
A weave is a relatively slow oscillation of
the rear of the motorcycle, while a
wobble is a rapid, possibly strong
shaking of the handlebar. These are
related but distinct stability problems
usually caused by excessive weight in
the wrong place, or by a mechanical
problem such as worn or loose bearings
or under-inflated or unevenly worn tires.
Your solution to both situations is the
same. Keep a firm hold on the
handlebars without locking arms or
fighting the steering. Smoothly ease off
the throttle to slow gradually. Do not
apply the brakes, and do not accelerate
to try to stop the wobble or weave. In
some cases, it helps to shift your body
weight forward by leaning over the tank.
Copyright © 2005 Motorcycle Safety
Foundation. All rights reserved. Used
with permission.
Handlebars and Footrests
Warning
The rider must maintain control of the
vehicle by keeping hands on the
handlebars at all times.
The handling and stability of a
motorcycle will be adversely affected if
the rider removes their hands from the
handlebars, resulting in loss of
motorcycle control and an accident.
Warning
The rider and passenger must always
use the footrests provided, during
operation of the vehicle.
By using the footrests, both rider and
passenger will reduce the risk of
inadvertent contact with any
motorcycle components and will also
reduce the risk of injury from
entrapment of clothing.
Safety First
12
Parking
Warning
Always switch off the engine and never
leave any keys with the motorcycle
before leaving it unattended. By
removing any keys, the risk of use of
the motorcycle by unauthorized or
untrained persons is reduced.
When parking the motorcycle, always
remember the following:
Engage first gear to help prevent the
motorcycle from rolling off the stand.
The engine and exhaust system will be
hot after riding. DO NOT park where
pedestrians, animals and/or children
are likely to touch the motorcycle.
Do not park on soft ground or on a
steeply inclined surface. Parking under
these conditions may cause the
motorcycle to fall over.
For further details, please refer to the
'How to Ride the Motorcycle' section of
this Owner's Handbook.
Parts and Accessories
Warning
Owners should be aware that the only
approved parts, accessories and
conversions for any Triumph motorcycle
are those which carry official Triumph
approval and are installed to the
motorcycle by an authorized dealer.
In particular, it is extremely hazardous
to install or replace parts or
accessories whose installation requires
the dismantling of, or addition to,
either the electrical or fuel systems
and any such modification could cause
a safety hazard.
The installation of any non-approved
parts, accessories or conversions may
adversely affect the handling, stability
or other aspect of the motorcycle
operation that may result in an
accident causing injury or death.
Triumph does not accept any liability
whatsoever for defects caused by the
installation of non-approved parts,
accessories or conversions or the
installation of any approved parts,
accessories or conversions by non-
approved personnel.
Safety First
13
Maintenance/Equipment
Warning
Consult your authorized Triumph dealer
whenever there is doubt as to the
correct or safe operation of this
Triumph motorcycle.
Remember that continued operation of
an incorrectly performing motorcycle
may aggravate a fault and may also
compromise safety.
Warning
Ensure all equipment that is required
by law is installed and functioning
correctly. The removal or alteration of
the motorcycle’s lights, mufflers,
emission or noise control systems can
violate the law. Incorrect or improper
modification may adversely affect the
handling, stability or other aspect of
the motorcycle operation, which may
result in an accident causing injury or
death.
Warning
If the motorcycle is involved in an
accident, collision or fall, it must be
taken to an authorized Triumph dealer
for inspection and repair. Any accident
can cause damage to the motorcycle
that, if not correctly repaired, may
cause a second accident that may
result in injury or death.
Warning Labels
14
WARNING LABELS
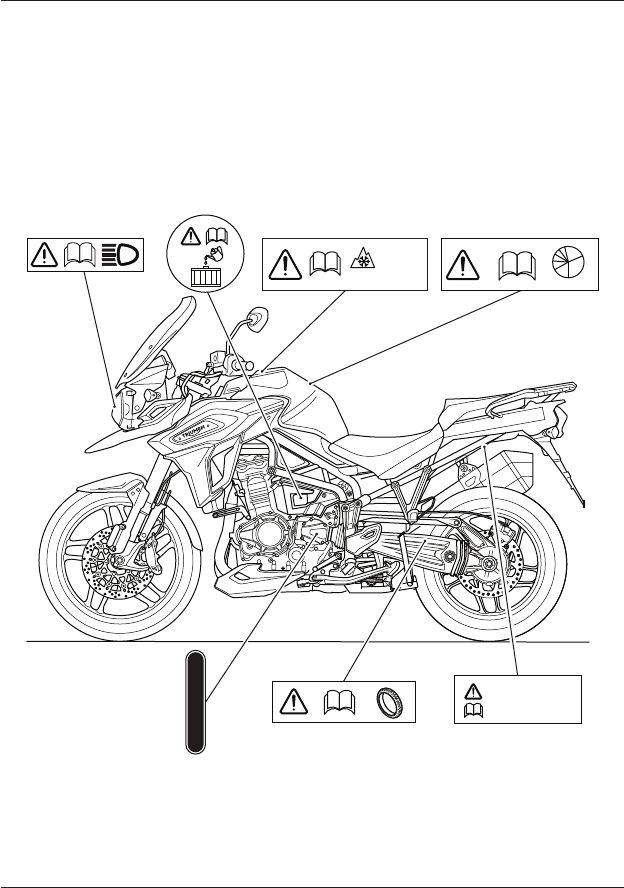
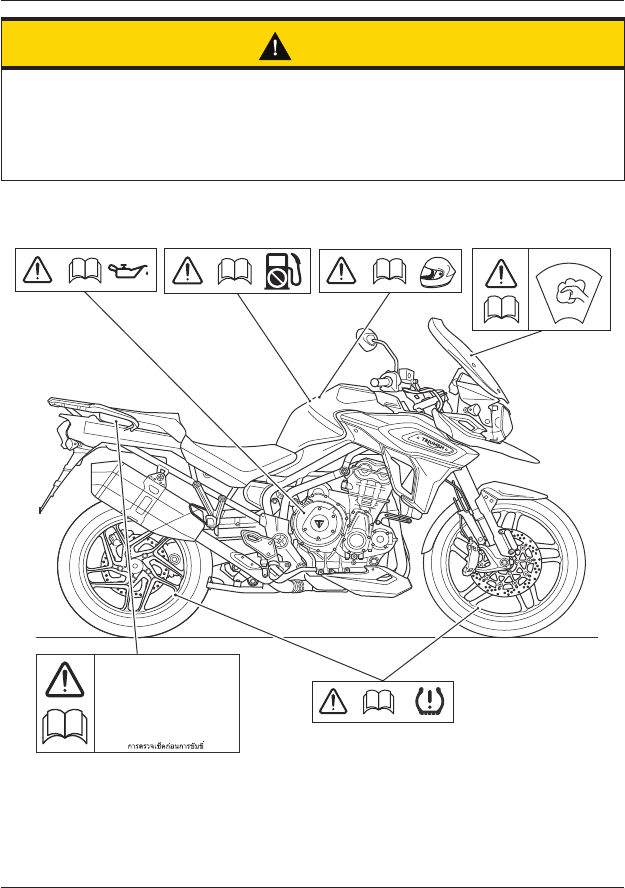
The labels detailed on this and the following pages indicate important safety
information found in this handbook. Before riding, make sure that all riders have
understood and complied with all the information to which these labels relate.
For illustration purposes, the Tiger 1200 XR motorcycle is shown.
Warning Label Locations
MAX LOAD
5 kg (11 lbs)
6
5
4
3
2
N
1
1
2
R.P.M.
34
56
100 KM/H
(60 MPH)
MAX
M S
+
7
1. Headlight (page 201)
2. Coolant (page 172)
3. Snow and Mud Tires (page 217)
4. Breaking-In (page 136)
5. Gear Position (page 145)
6. Tires (page 188)
7. Panniers (if equipped) (page 129)
Warning Labels
15
Caution
All warning labels and decals, with the exception of the Breaking-in label, are
mounted on the motorcycle using a strong adhesive. In some cases, labels are
installed prior to an application of paint lacquer.
Therefore, any attempt to remove the warning labels will cause damage to the
paintwork or body work.
P
b
1234
5
6
DAILY SAFETY CHECKS
TÄGLICHE SICHERHEITSKONTROLLEN
CONTROLES DE SECURITE QUOTIDIENS
CHEQUEOS DE SEGURIDAD DIARIOS
VERIFICAÇÕES DIÁRIAS DE SEGURANÇA
VERIFICHE GIORNALIERE DI SICUREZZA
DAGELIJSKE VEILIGHEIDSINSPECTIES
DAGLIG SÄKERHETSKONTROLL
運
行前点検
1. Engine Oil (page 169)
2. Unleaded Fuel (page 115)
3. Helmet (page 9)
4. Windshield (page 118)
5. Daily Safety Checks (page 137)
6. Tire Pressure Monitoring System (TPMS)
(if equipped) (page 111)
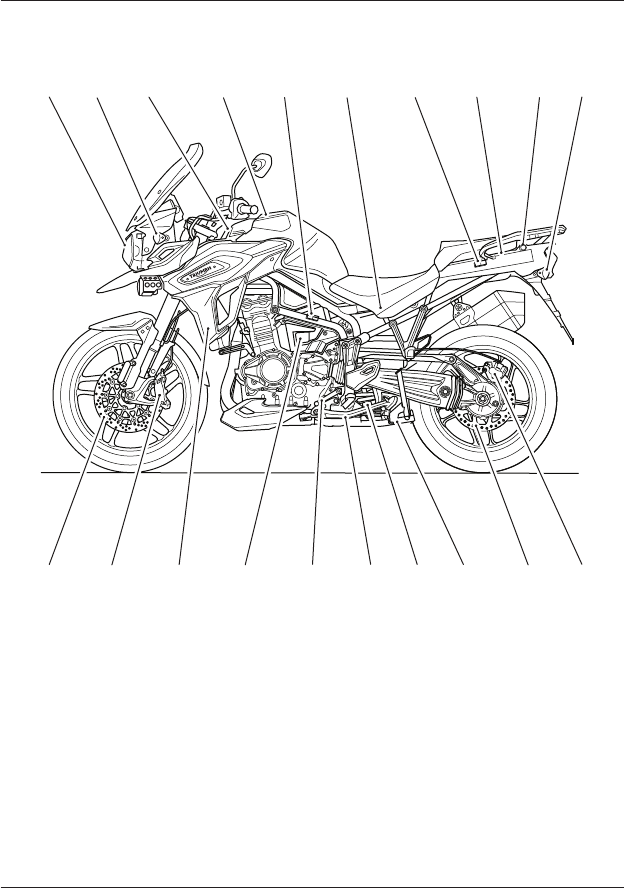
Parts Identification
16
PARTS IDENTIFICATION
123456910
20 19 18 17 16 15 13 12 11
8
14
7
1. Headlight
2. Front turn signal
3. Electrical accessory socket
4. Fuel tank and fuel filler cap
5. Rider’s heated seat switch
(Tiger 1200 XR only)
6. Battery and fuse boxes (under the seat)
7. Passenger’s heated seat switch
(if equipped)
8. USB socket (under the seat)
9. Electrical accessory socket
(if equipped)
10. Rear turn signal
11. Rear brake caliper
12. Rear brake disc
13. Center stand (if equipped)
14. Rear suspension damping adjuster
(Tiger 1200 XR only)
15. Side stand
16. Gear shift pedal
17. Coolant expansion tank
18. Radiator cowl
19. Front brake caliper
20. Front brake disc
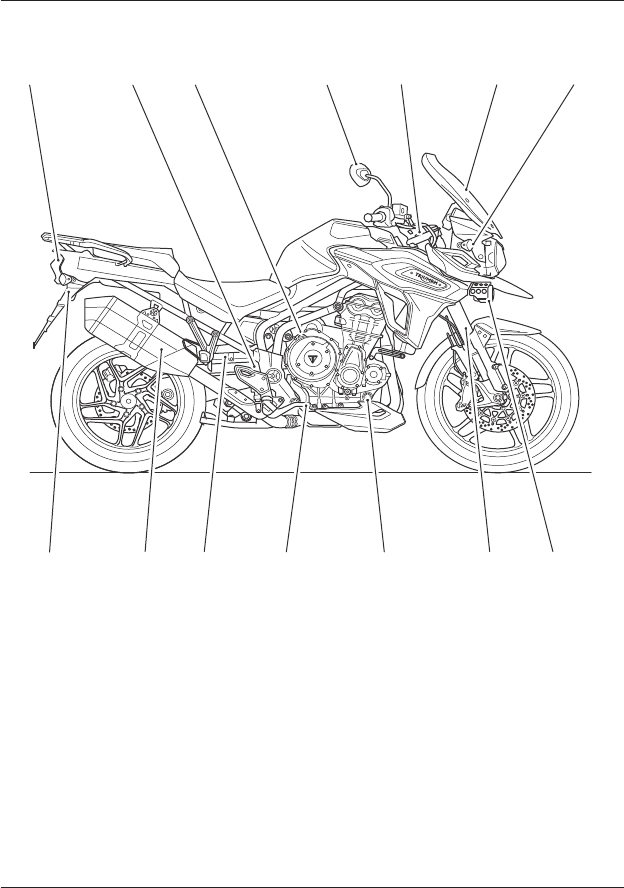
Parts Identification
17
Parts Identification (Continued)
123 4 7
6
13 12 11 10 9 8
14
5
1. Brake/tail light
2. Rear brake fluid reservoir
3. Oil filler cap
4. Mirror
5. Front suspension damping adjusters
(Tiger 1200 XR only)
6. Windshield
7. Headlight adjuster
8. Front fog lights (if equipped)
9. Front fork
10. Engine oil level sight glass
11. Rear brake pedal
12. Rear suspension spring preload
adjuster (model specific)
13. Muffler
14. Seat lock
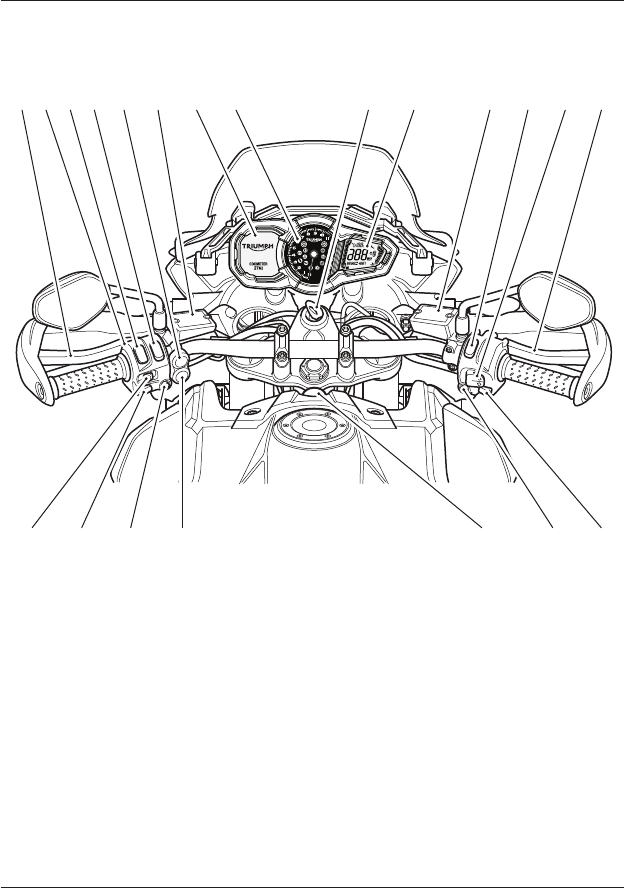
Parts Identification
18
Rider View Parts Identification
Tiger 1200 XR Only
1 2 34 5 6 7 8 9 10 11 12 13 14
15
1617
18192021
1. Clutch lever
2. Instrument select button
3. Headlight dimmer switch
4. Instrument scroll button
5. Fog lights switch (if equipped)
6. Clutch fluid reservoir
7. Multifunction display screen
8. Tachometer
9. Ignition switch
10. Motorcycle status display screen
11. Front brake fluid reservoir
12. Engine stop switch
13. Cruise control adjust button
14. Front brake lever
15. Starter button
16. Hazard warning lights button
17. Electrical accessory socket
18. Heated grips switch (if equipped)
19. Mode button
20. Horn button
21. Turn signal switch
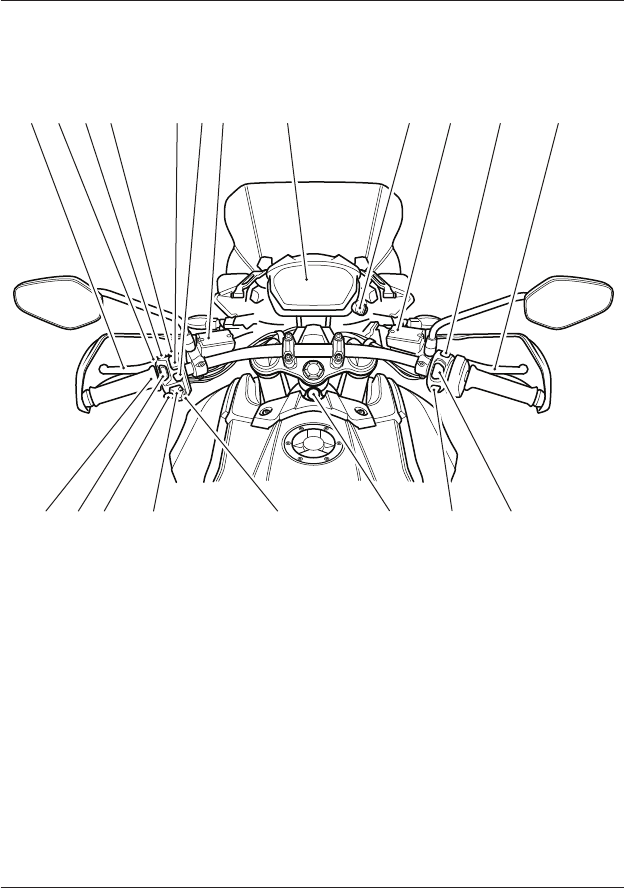
Parts Identification
19
Rider View Parts Identification
All Models except Tiger 1200 XR
ckcx
1 2 34 56
7 9 10 11 12
17
181920 1316 14
8
15
1. Clutch lever
2. Headlight dimmer switch
3. Heated seats switch (if equipped)
4. Front fog lights switch (if equipped)
5. Cruise control adjust switch
6. MODE button
7. Clutch fluid reservoir
8. Multifunction display screen
9. Master ignition switch (if equipped)
10. Front brake fluid reservoir
11. Hazard warning lights switch
12. Front brake lever
13. Engine start/stop switch
14. HOME button
15. Joystick button
16. Electrical accessory socket
17. Turn signal switch
18. Horn button
19. Daytime Running Lights (DRL) switch
(if equipped)
20. Heated grips switch (if equipped)
Serial Numbers
20
SERIAL NUMBERS
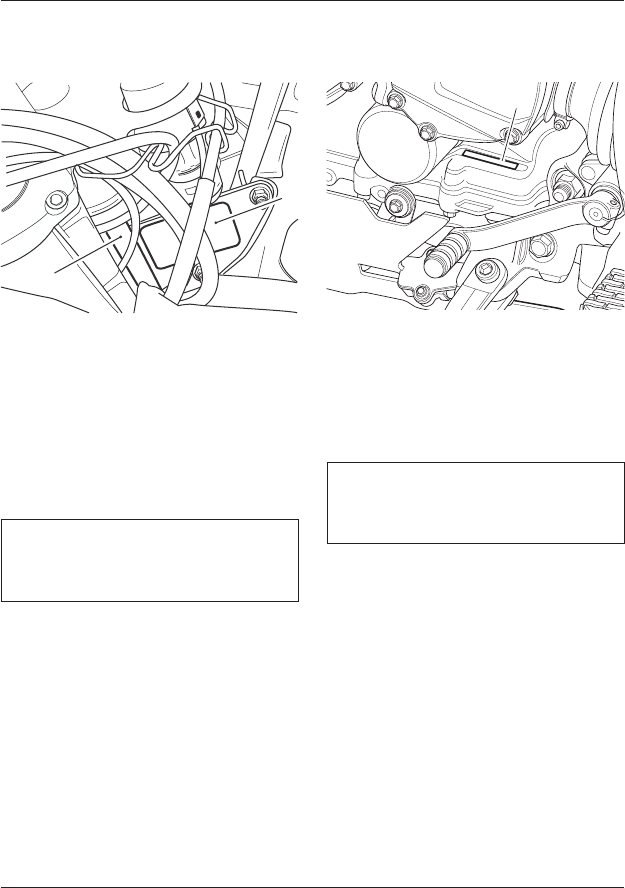
Vehicle Identification Number (VIN)
1
2
1. VIN number
2. Label
The Vehicle Identification Number (VIN)
is stamped into the steering head area
of the frame. In addition, It is displayed
on a label which is mounted on the right
hand side of the front subframe.
Record the vehicle identification number
in the space provided below.
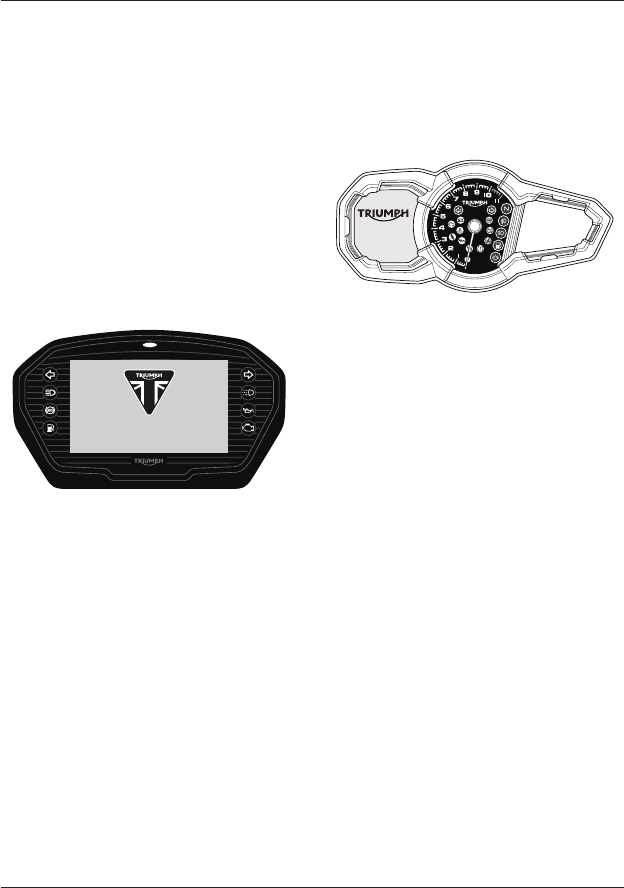
Engine Serial Number
1
1. Engine serial number
The engine serial number is stamped on
the engine crankcase, immediately
below the gearbox.
Record the engine serial number in the
space provided below.
Instruments
21
INSTRUMENTS
Instrument Displays
Overview
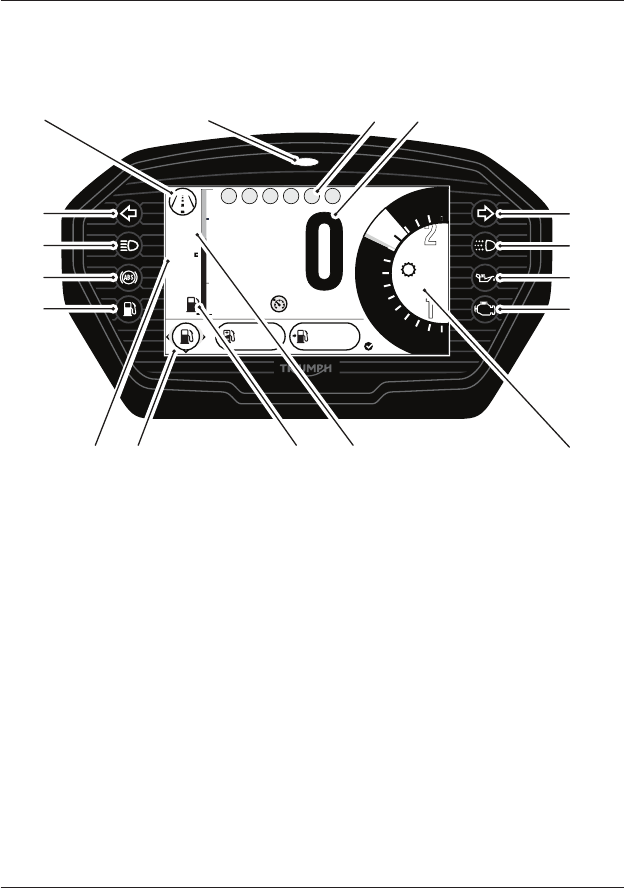
There are two types of instrument
displays mounted to specific
motorcycles models.
All Models except Tiger 1200 XR
All models except for Tiger 1200 XR are
equipped with a full color Thin Film
Transistor (TFT) digital instrument
display.
ODOMETER
0
MILES
Thin Film Transistor (TFT) Instrument
Display
For more information on the TFT
instrument display and its operation,
see page 22.
Tiger 1200 XR Models Only
Only Tiger 1200 XR models are equipped
with a Liquid Crystal Display (LCD)
instrument display.
Liquid Crystal Display (LCD) Instrument
Display
For more information on the LCD
instrument display and its operation,
see page 57.

Instruments
22
Thin Film Transistor (TFT) Instrument Display
Table of Contents
Instrument Panel Layout 23
TFT Display Navigation 24
TFT Themes and Styles 24
Warning Lights 24
Speedometer and Odometer 30
Tachometer 31
Gear Position Display 31
Fuel Gage 32
Service Interval Announcement 32
Ambient Air Temperature 32
Riding Modes 33
Riding Mode Selection 34
Information Tray 36
Main Menu 42
Instrument Panel Position Adjustment 56
Instruments
23
Instrument Panel Layout
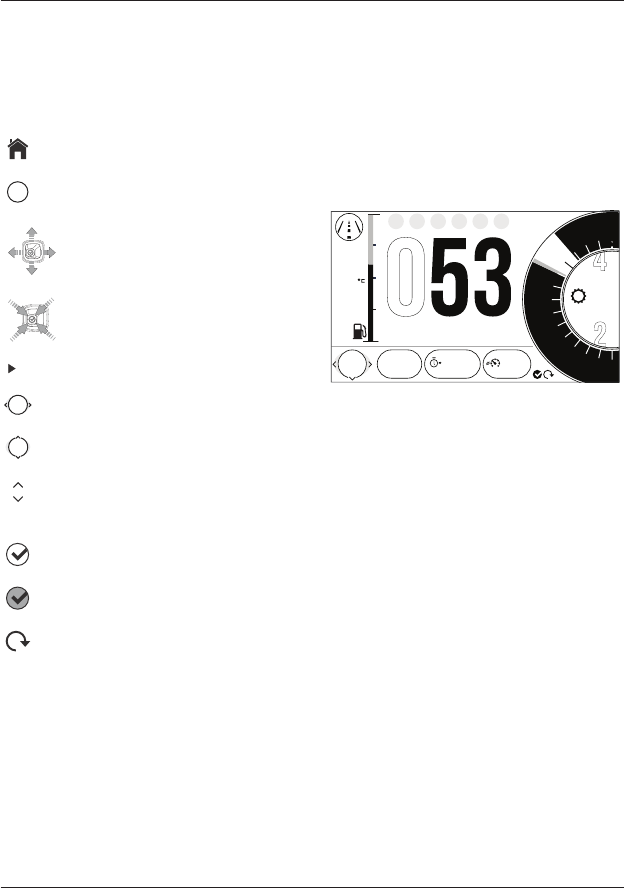
The TFT instrument display is mounted to all models except Tiger 1200 XR. Not all
instrument features are available on all models.
o7:29
17.5
8
6N
4
2
0
12
14
F
E
AM
RPM
x1000
mph
42 122 mi
RANGE
mpg
10
16
15
14
13
4
5
6
7
1
1012
17
9
23
8
11
1. Alarm/immobilizer status indicator
light (alarm is an accessory kit)
2. Warning lights
3. Speedometer
4. Right hand turn signal
5. Daytime Running Light (DRL)
(if equipped)
6. Oil pressure warning light
7. Engine management Malfunction
Indicator Light (MIL)
8. Gear position symbol
9. Clock
10. Fuel gage
11. Information tray
12. Ambient air temperature
13. Fuel level low warning light
14. ABS warning light
15. High beam warning light
16. Left hand turn signal
17. Current riding mode
Instruments
24
TFT Display Navigation
The table below describes the
instrument icons and buttons used to
navigate through the instrument menus
described in this handbook.
Home button (right hand
switch housing).
m
Mode button (left hand switch
housing).
Joystick left/right or up/down.
Joystick Centre (press).
Selection arrow (right shown).
Information Tray - left/right
scroll via joystick.
Information Tray - up/down
scroll via joystick.
Option available within the
Information Tray - scroll via
joystick up/down.
Short press (press and
release) via joystick center.
Long press (press and hold)
via joystick center.
Reset current feature, (only
available with joystick long
press).
TFT Themes and Styles
There is the option to change the style
of the instrument display.
Depending on the motorcycle model,
there are either one or two themes.
Each theme has three different styles to
select from.
To select a theme or style, see page 51.
Styles can also be selected through the
Style Options tray, see page 41.
Theme 1, Style 1 is used for visual
recognition throughout this Owner’s
Handbook.
Theme 1
o7:29
12.5
19999 02:25
8
63
4
2
0
12 14
25.2
F
E
TRIP
mi mp/hHH:MM
PM
RPM
x1000
10
Theme 1 Style 1
Warning Lights
Note:
• When the ignition is switched on,
the instrument warning lights will
illuminate for 1.5 seconds and will
then go off (except those which
remain on until the engine starts,
as described in the following pages).
For additional warning and information
messages, see page 37.
Instruments
25
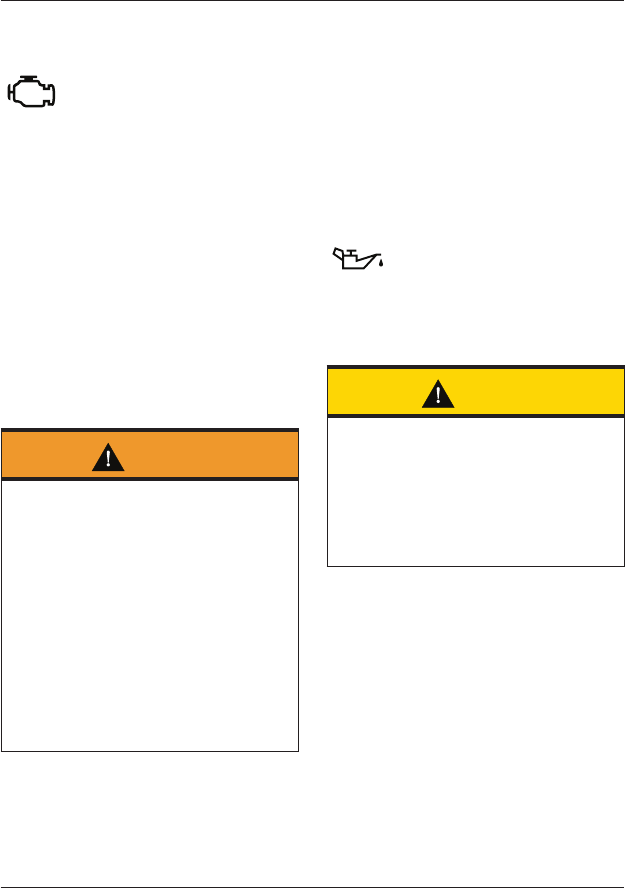
Engine Management System
Malfunction Indicator Light (MIL)
The Malfunction Indicator Light
(MIL) for the engine management
system illuminates when the ignition is
switched ON (to indicate that it is
working) but should not become
illuminated when the engine is running.
If the MIL becomes illuminated when the
engine is running, this indicates that a
fault has occurred in one or more of the
systems controlled by the engine
management system. In such
circumstances, the engine management
system will switch to 'limp-home' mode
so that the journey may be completed, if
the fault is not so severe that the
engine will not run.
Warning
Reduce speed and do not continue to
ride for longer than is necessary with
the MIL illuminated. The fault may
adversely affect engine performance,
exhaust emissions and fuel
consumption.
Reduced engine performance could
cause a dangerous riding condition,
leading to loss of control and an
accident.
Contact an authorized Triumph dealer
as soon as possible to have the fault
checked and rectified.
Note:
• If the MIL flashes when the ignition
is switched ON contact an
authorized Triumph dealer as soon
as possible to have the situation
rectified. In these circumstances
the engine will not start.
Low Oil Pressure Warning Light
With the engine running, if the
engine oil pressure becomes
dangerously low, the low oil pressure
warning light will illuminate.
Caution
Stop the engine immediately if the low
oil pressure warning light illuminates.
Do not restart the engine until the
fault has been rectified.
Severe engine damage will result from
running the engine when the low oil
pressure warning light is illuminated.
Note:
• The low oil pressure warning light
will illuminate if the ignition is
switched ON without running the
engine.
Immobilizer/Alarm Indicator Light
This Triumph motorcycle is equipped
with an engine immobilizer which is
activated when the ignition is switched
off.
Instruments
26
Not Equipped With Alarm
When the ignition is switched off, the
immobilizer light will flash on and off for
24 hours to show that the engine
immobilizer is on. When the ignition is
switched on, the immobilizer and the
indicator light will be off.
If the indicator light remains on it
indicates that the immobilizer has a
malfunction that requires investigation.
Contact an authorized Triumph dealer
as soon as possible to have the fault
checked and rectified.
Equipped With Alarm
The immobilizer/alarm light will only
illuminate when the conditions
described in the genuine Triumph
accessory alarm instructions are met.
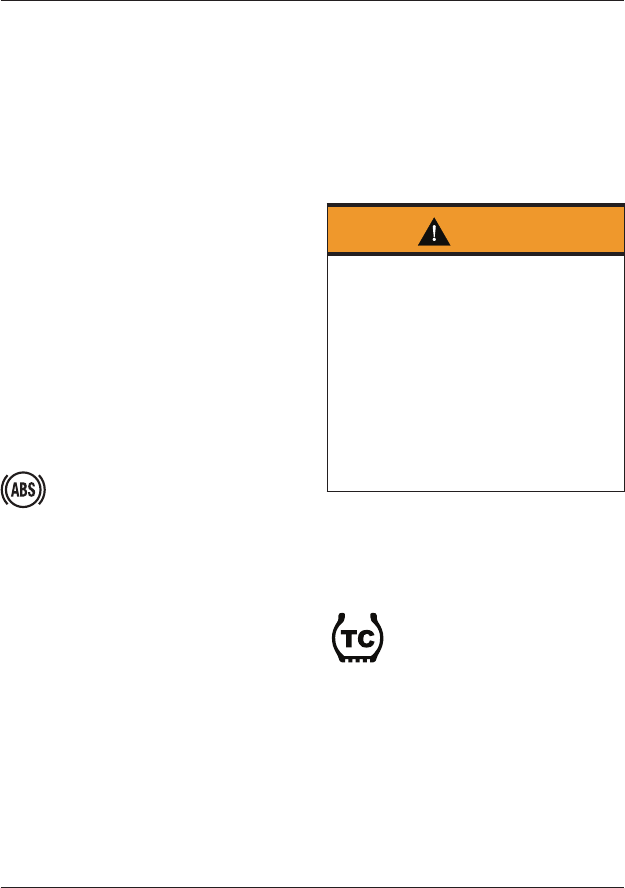
ABS (Anti-Lock Brake System)
Warning Light
When the ignition is switched on,
it is normal that the ABS warning light
will flash on and off. The light will
continue to flash after engine start-up
until the motorcycle first reaches a
speed exceeding 6 mph (10 km/h) when
it will go off.
Note:
• Traction control will not function if
there is a malfunction with the ABS.
The warning lights for the ABS,
traction control and the MIL will be
illuminated.
The warning light should not illuminate
again until the engine is restarted
unless there is a fault, or the ABS is
switched off - the warning light will
remain illuminated.
If the warning light becomes illuminated
at any other time while riding it
indicates that the ABS has a
malfunction that requires investigation.
Warning
If the ABS is not functioning, the brake
system will continue to function as a
non-ABS equipped brake system. Do
not continue to ride for longer than is
necessary with the warning light
illuminated. Contact an authorized
Triumph dealer as soon as possible to
have the fault checked and rectified. In
this situation braking too hard will
cause the wheels to lock resulting in
loss of motorcycle control and an
accident.
For details on how to select different
ABS settings, see page 33.
Traction Control (TC) Indicator Light
The TC indicator light is used to
indicate that the traction control
system is active and is working to limit
rear wheel slip during periods of hard
acceleration or under wet or slippery
road conditions.
Instruments
27
Warning
If the traction control is not functioning,
care must be taken when accelerating
and cornering on wet/slippery road
surfaces to avoid rear wheel spin. Do
not continue to ride for longer than is
necessary with the Engine Management
System Malfunction Indicator Light (MIL)
and traction control warning lights
illuminated. Contact an authorized
Triumph dealer as soon as possible to
have the fault checked.
Hard acceleration and cornering in this
situation may cause the rear wheel to
spin resulting in loss of motorcycle
control and an accident.
TC Indicator Light Operation:
TC Switched On:
• Under normal riding conditions the
indicator light will remain off.
• The indicator light will flash rapidly
when the traction control system is
working to limit rear wheel slip
during periods of hard acceleration
or under wet or slippery road
conditions.
TC Switched Off:
The indicator light will not illuminate.
Instead the TC disabled warning light
will be illuminated (see page 27).
Note:
• Traction control will not function if
there is a malfunction with the ABS
system. The warning lights for the
ABS, traction control and the MIL
will be illuminated.
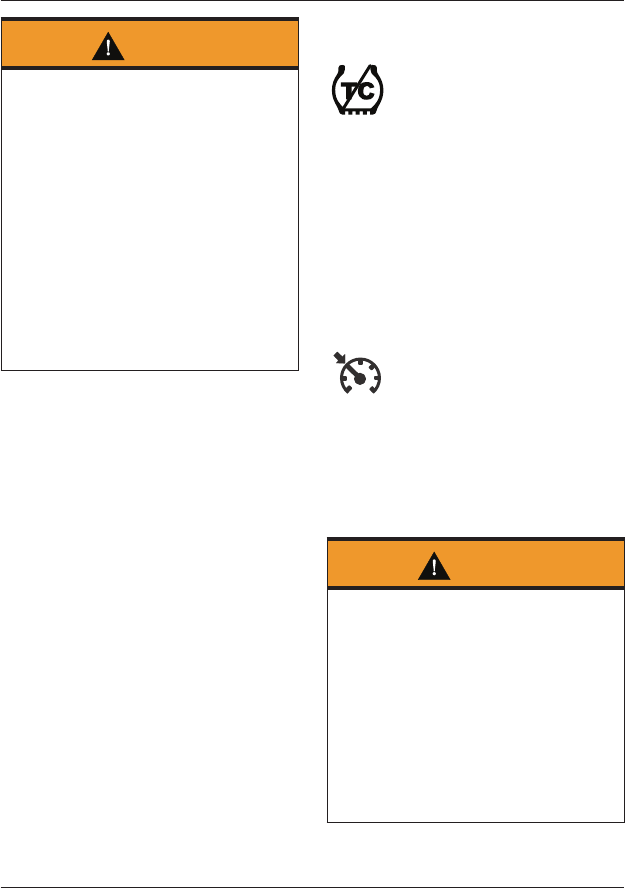
Traction Control (TC) Disabled
Warning Light
The TC disabled warning light
should not illuminate unless traction
control is switched off or there is a
malfunction.
If the warning light becomes illuminated
at any other time while riding, it
indicates that the traction control
system has a malfunction that requires
investigation.
Cruise Control Light
The cruise control can only be
activated when the motorcycle is
traveling at a speed between
19 to 100 mph (30 to 160 km/h) and is in
3rd gear or higher. When activated, the
cruise control light will be illuminated
(see page 104).
Warning
Cruise control must only be used
where you can ride safely at a steady
speed.
Cruise control should not be used
when riding in heavy traffic, on roads
with sharp/blind bends or when they
are slippery.
Using cruise control in heavy traffic, on
roads with sharp/blind bends or when
they are slippery, may result in loss of
motorcycle control and an accident.

Instruments
28
Triumph Semi Active Suspension
(TSAS) Warning Light
When the ignition is switched on
the warning light will illuminate for
1.5 seconds and then go out.
The warning light has two modes:
Calibration
The TSAS system will recalibrate
adjustment motors under the following
conditions:
• If the battery has been
disconnected for any reason.
• If a fault occurs with the TSAS
system during normal operation.
The warning light will flash twice every
second during system recalibration, and
a message will be shown in the display.
During recalibration the motorcycle
must remain stationary. Riding the
motorcycle will cause the recalibration
to be stopped and the warning light to
remain lit.
Fault
If the warning light illuminates
continuously or at any other time it
indicates one of the following:
• A system recalibration has been
interrupted. Allow the system to
recalibrate.
• A fault has occurred with the
system that requires investigation.
Warning messages will be shown in
the display. Allow the system to
recalibrate. If the fault is still
present after recalibration, contact
an authorized Triumph dealer as
soon as possible to have the fault
checked and rectified.
Full details of the Triumph Semi Active
Suspension (TSAS) system and the
system calibration are described
starting on page 108.
Turn Signals
When the turn signal switch is
turned to the left or right, the indicator
warning light will flash on and off at the
same speed as the turn signals.
Hazard Warning Lights
To turn the hazard warning lights on or
off, press and release the hazard
warning light switch.
The ignition must be switched ON for
the hazard warning lights to function.
The hazard warning lights will remain on
if the ignition is switched off, until the
hazard warning light switch is pressed
again.
High Beam Button
When the high beam button is
pressed the high beam will be switched
on. Each press of the button will swap
between dip and high beam.
Note:
• If daytime running lights are
installed on the motorcycle, the
high beam button has additional
functionality.
Instruments
29
If the DRL switch is in the daytime
running lights position, then press and
hold the high beam button to turn the
high beam on. It will remain on as long
as the button is held in and will turn off
as soon as the button is released.
Note:
• A lighting on/off switch is not
installed on this model. The brake/
tail light and license plate light all
function automatically when the
ignition is turned to the ON position.
• The headlight will function when
the ignition switch is turned to the
ON position. The headlight will go
off while pressing the starter
button until the engine starts.
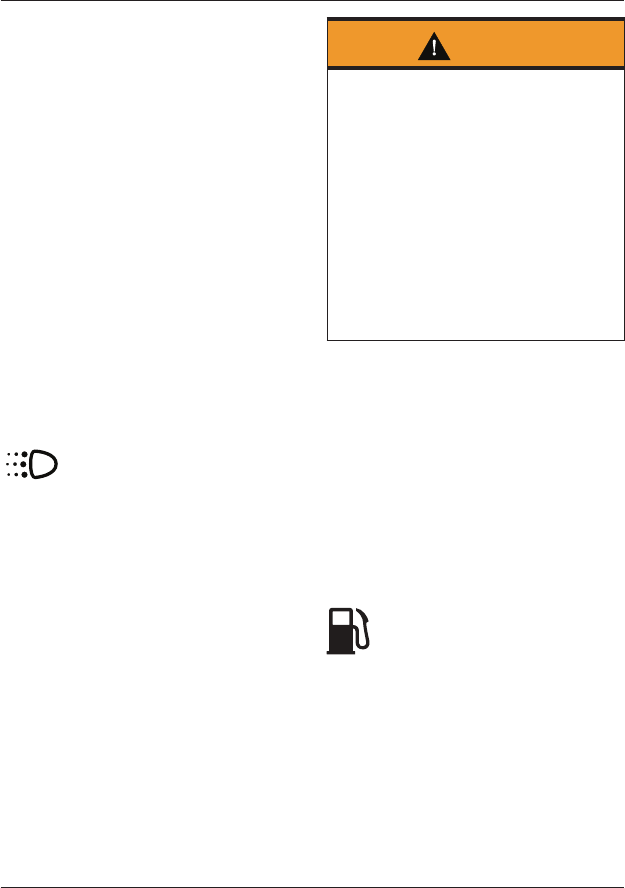
Daytime Running Lights (DRL)
When the ignition is switched
ON and the daytime running lights
switch is set to DAYTIME RUNNING
LIGHTS, the daytime running lights
warning light will illuminate.
The daytime running lights and low
beam headlights are operated manually
using a switch on the left hand switch
housing, see page 97.
Warning
Do not ride for longer than necessary
in poor ambient light conditions with
the Daytime Running Lights (DRL) in
use.
Riding with the Daytime Running
Lights when dark, in tunnels or where
poor ambient light is apparent may
reduce the riders vision or blind other
road users.
Blinding other road users or reduced
vision in low ambient light levels may
result in loss of motorcycle control and
an accident.
Note:
• During daylight hours the Daytime
Running Lights improve the
motorcycles visibility to other road
users.
• Low beam headlights must be used
in any other conditions unless the
road conditions allow for high beam
headlights to be used.
Low Fuel Warning Light
The low fuel warning light will
illuminate when there is approximately
1.0 gallon (3.5 liters) of fuel remaining in
the tank.
Instruments
30
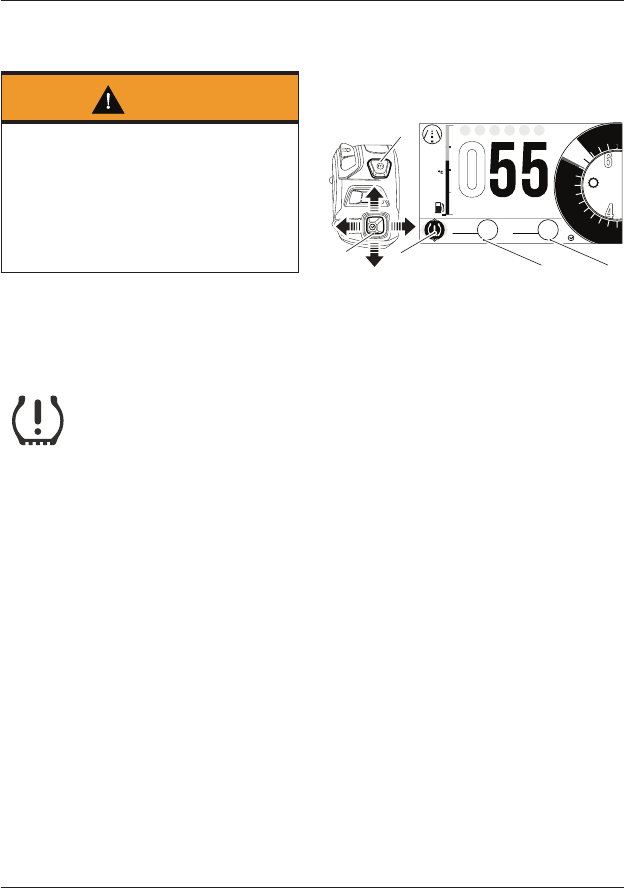
Tire Pressure Monitoring System
(TPMS) Warning Light (if equipped)
Warning
Stop the motorcycle if the Tire
Pressure Monitoring System (TPMS)
warning light illuminates red.
Do not ride the motorcycle until the
tires have been checked and the tire
pressures are at their recommended
pressure when cold.
Note:
• The Tire Pressure Monitoring
System (TPMS) is available as an
accessory option on all models.
The TPMS warning light will
only illuminate red when the front or
rear tire pressure is below the
recommended pressure, or no signal is
received. It will not illuminate if the tire
is over inflated. For more information,
see page 111.
When the warning light is illuminated,
the TPMS symbol indicating which is the
deflated tire and its pressure will
automatically be visible in the display
area.
o7:29
12.5
19999 02:25
8
65
4
2
0
12 14
25.2
F
E
TRIP
mi mp/hHH:MM
PM
RPM
x1000
mph
cjww
36
PSI
FR
18
PSI
10
1
4
5
2 3
1. TPMS light
2. Front tire indicator
3. Rear tire indicator
4. Mode button
5. Joystick control
The tire pressure at which the warning
light illuminates is temperature
compensated to 68°F (20°C) but the
numeric pressure display associated
with it is not, see page 189. Even if the
numeric display seems at or close to the
standard tire pressure when the
warning light is on, a low tire pressure is
indicated and a puncture is the most
likely cause.
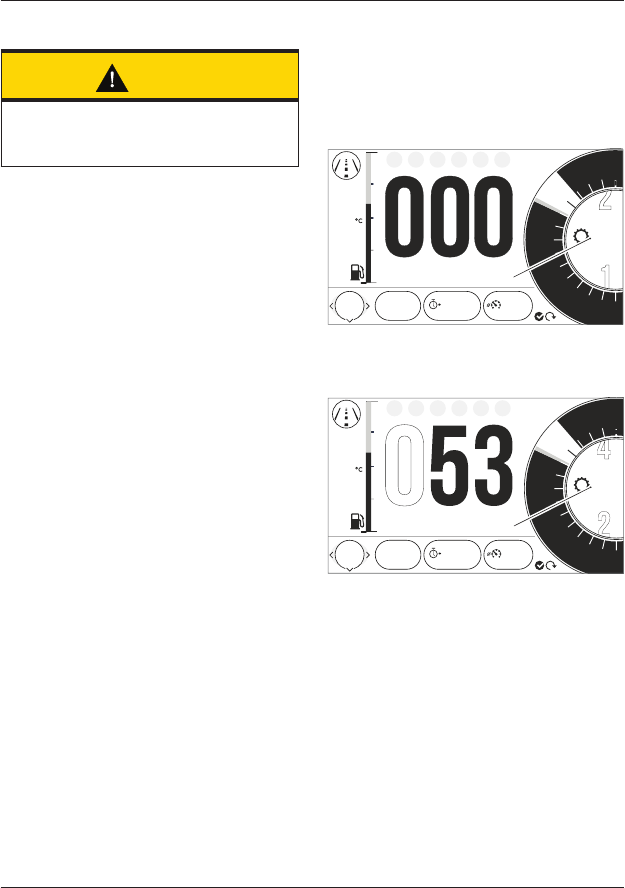
Speedometer and Odometer
The speedometer indicates the road
speed of the motorcycle.
The odometer shows the total distance
that the motorcycle has travelled.
Instruments
31
Tachometer
Caution
Never allow engine speed to enter the
red zone as severe engine damage may
result.
The tachometer shows the engine
speed in revolutions per minute - rpm
(r/min). At the end of the tachometer
range there is the red zone.
Engine speeds in the red zone are above
maximum recommended engine speed
and are also above the range for best
performance.
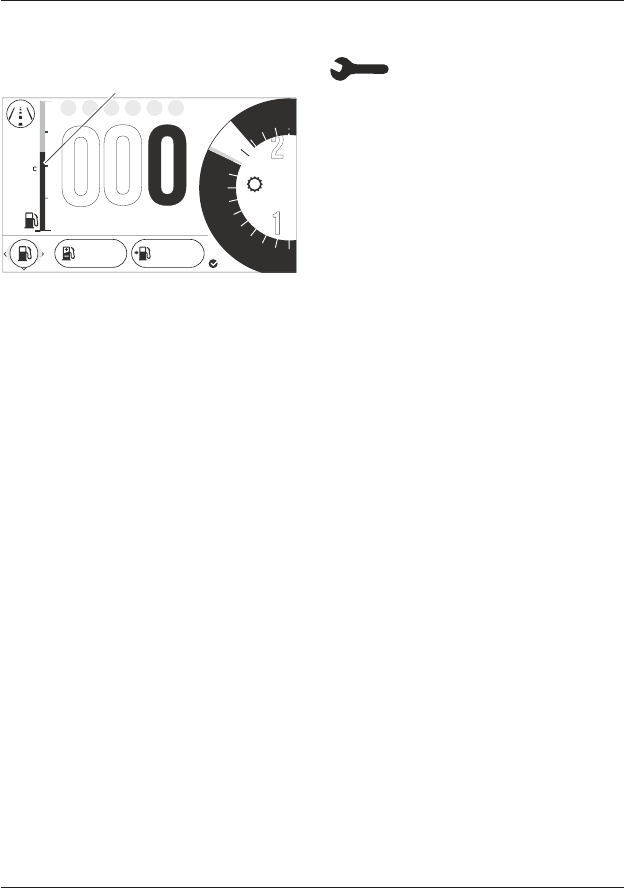
Gear Position Display
The gear position display indicates
which gear (one to six) has been
engaged. When the transmission is in
neutral (no gear selected), the display
will show N.
o7:29
12.5
19999 02:25
8
6
4
2
0
12 14
25.2
F
E
TRIP
mi mp/hHH:MM
PM
RPM
x1000
10
1
N
1. Gear position display (neutral position
shown)
o7:29
12.5
19999 02:25
8
63
4
2
0
12 14
25.2
F
E
TRIP
mi mp/hHH:MM
PM
RPM
x1000
10
1
1. Gear position display (third gear
shown)
Instruments
32
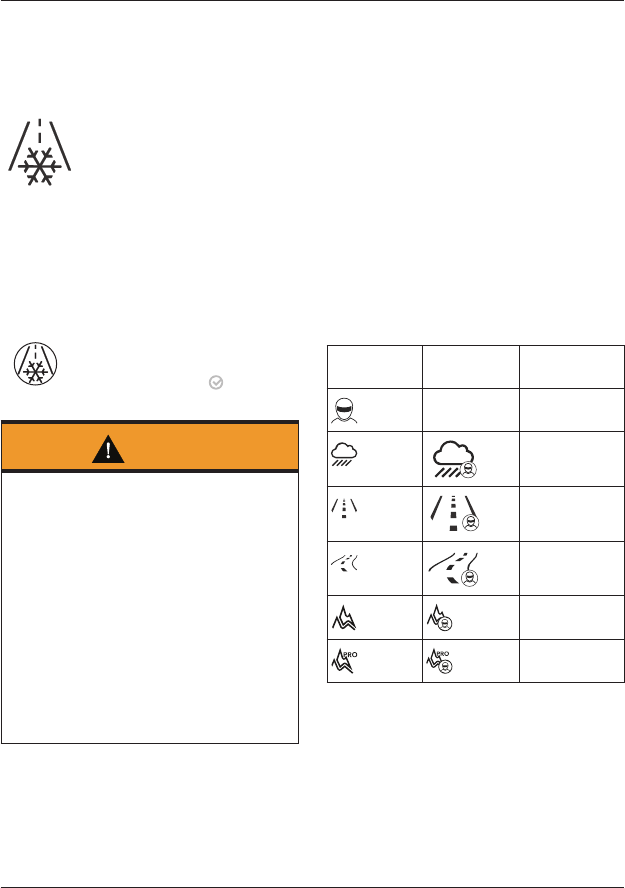
Fuel Gage
The fuel gage indicates the amount of
fuel in the tank.
o7:29
17.5
8
6N
4
2
0
12
14
F
E
AM
RPM
x1000
mph
1
42 122 mi
RANGE
mpg
10
1. Fuel gage
With the ignition switched on, a filled
line indicates the fuel remaining in the
fuel tank.
Note:
• The fuel gage colors may vary
depending on the theme or style
chosen.
The gage markings indicate
intermediate fuel levels between E
(empty) and F (full).
The low fuel warning light will illuminate
when approximately 1.0 gallon (3.5 liters)
of fuel is remaining in the tank and you
should refuel at the earliest opportunity.
The range to empty and instantaneous
fuel consumption will be also shown in
the information tray. Press the joystick
center to acknowledge and hide the low
fuel warning.
After refueling, the fuel gage and range
to empty information will be updated
only while riding the motorcycle.
Depending on the riding style, updating
could take up to five minutes.
Service Interval Announcement
The service interval
announcement shows the total distance
or time that the motorcycle has
remaining before a service is required.
When the remaining distance is 0 miles
(0 km), or the remaining time is 0 days,
the service symbol will remain on until
the service has been carried out and
the system has been reset by your
authorized Triumph dealer.
If the service is overdue then OVERDUE
will be shown and the service symbol
will be shown in the information tray.
When the service has been carried out
by your authorized Triumph dealer, the
system will be reset.
The distance to the next service or
OVERDUE message will also be shown
on the instrument start up screen when
the ignition is turned on.
The service symbol will also be shown if
a fault has occurred and the ABS and/
or MIL warning lights are illuminated.
Contact an authorized Triumph dealer
as soon as possible to have the fault
checked and rectified.
Ambient Air Temperature
The ambient air temperature is
displayed as either oC or oF.
When the motorcycle is stationary the
heat of the engine may affect the
accuracy of the ambient temperature
display.
Once the motorcycle starts moving the
display will return to normal after a
short time.
Instruments
33
To change the temperature from °C or
°F see page 53.
Frost Symbol
The frost symbol will
illuminate if the ambient air temperature
is 39°F (4°C) or lower.
The frost symbol will remain illuminated
until the temperature rises to 42°F (6°C).
An alert will also be displayed in the
information tray.
ACKNOWLEDGE
CAUTION: LOW AIR TEMPERATURE
RISK OF SURFACE ICE
1/3 warnings
Warning
Black ice (sometimes called clear ice)
can form at temperatures several
degrees above freezing (32°F (0°C)),
especially on bridges and in shaded
areas.
Always take extra care when the
temperatures are low and reduce
speed in potentially hazardous driving
conditions such as bad weather.
Excess speed, hard acceleration, heavy
braking or hard cornering when roads
are slippery may result in loss of
motorcycle control and an accident.
Riding Modes
The riding modes allow adjustment of
the throttle response (MAP), Anti-lock
Brake System (ABS) and Traction Control
(TC) settings to suit differing road
conditions and rider preferences.
Riding modes can be conveniently
selected using the MODE button and
joystick located on the left hand switch
housing, while the motorcycle is
stationary or moving, see page 34.
Up to six riding modes are available
depending on your model’s specification.
If a riding mode is edited (other than the
RIDER mode), the icon will change as
shown below.
Default Icon Rider Edited
Icon
Description
-RIDER
RAIN
ROAD
SPORT
OFF-ROAD
OFF-ROAD PRO
Each riding mode is adjustable. For more
information, see page 44.
Availability of the ABS, MAP and TC
setting options vary between models.
Instruments
34
Riding Mode Selection
Warning
The selection of riding modes while the
motorcycle is in motion requires the
rider to allow the motorcycle to coast
(motorcycle moving, engine running,
throttle closed, clutch lever pulled in
and no brakes applied) for a brief
period of time.
Riding mode selection while the
motorcycle is in motion should only be
attempted:
• At low speed
• In traffic-free areas
• On straight and level roads or
surfaces
• In good road and weather conditions
• Where it is safe to allow the
motorcycle to briefly coast.
Riding mode selection while the
motorcycle is in motion MUST NOT be
attempted:
• At high speeds
• While riding in traffic
• During cornering or on winding roads
or surfaces
• On steeply inclined roads or surfaces
• In poor road/weather conditions
• Where it is unsafe to allow the
motorcycle to coast.
Failure to observe this important
warning may lead to loss of motorcycle
control and an accident.
Warning
If ABS and/or traction control (TC) has
been disabled in the Main Menu as
described on, page 48 for ABS and/or
page 48 for TC settings saved for all
riding modes will be overridden.
ABS and/or TC will remain off
regardless of your riding mode
selection until they have been re-
enabled or, the ignition has been
switched off then on again, or the
MODE button is held in to return to the
default ROAD mode (which enables ABS
and/or TC when the motorcycle is next
stationary).
If the ABS is disabled, the brake system
will function as a non-ABS equipped
braking system. In this situation
braking too hard will cause the wheels
to lock, and may result in loss of
motorcycle control and an accident.
If the traction control is disabled, the
motorcycle will handle as normal but
without traction control. In this
situation accelerating too hard on wet/
slippery road surfaces may cause the
rear wheel to slip, and may result in
loss of motorcycle control and an
accident.
Instruments
35
Warning
After selecting a riding mode, operate
the motorcycle in an area free from
traffic to gain familiarity with the new
settings.
Do not loan your motorcycle to anyone
as they may change the riding mode
settings from the one you are familiar
with, causing loss of motorcycle control
and an accident.
Note:
• The riding mode will default to
ROAD when the ignition is switched
ON, if the OFF-ROAD or RIDER mode
was active the last time the ignition
was switched OFF with ABS or TC
set to OFF-ROAD or OFF in either of
those modes.
• Otherwise, the last selected riding
mode will be remembered and
activated when the ignition is
switched ON.
• If the mode icons are not visible
when the ignition switch is in the
ON position, make sure that the
engine stop switch is in the RUN
position.
Note:
• If the battery is disconnected, then
the RIDER mode settings will
default back to the original factory
settings.
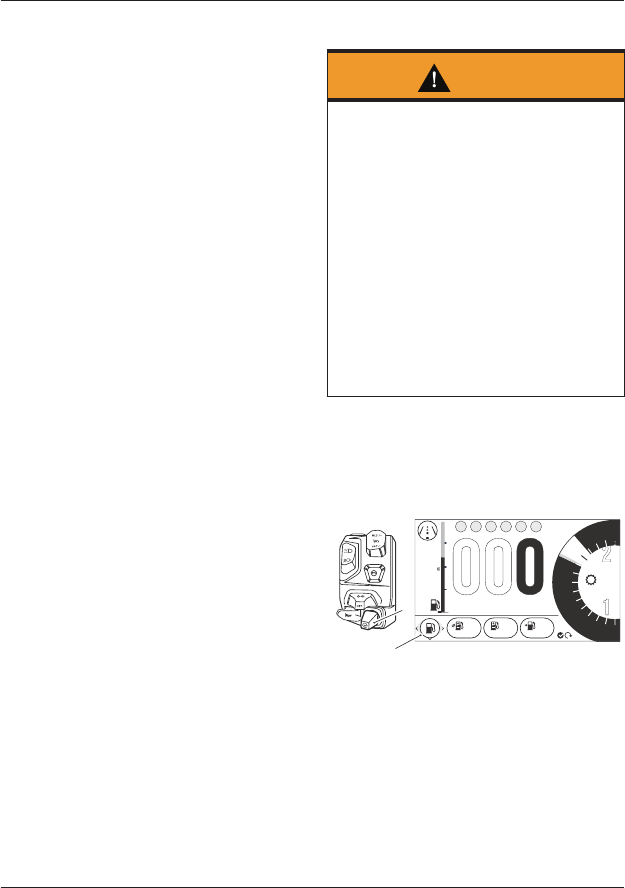
The current riding mode is shown in the
upper left of the display screen.
To select a riding mode:
• Press and release the MODE button
on the left hand switch housing to
activate the riding mode selection
tray at the bottom of the display
screen.
• The currently active riding mode
icon is highlighted with a blue
background.
To change the selected riding mode:
• Either push the joystick left or
right, or repeatedly press the MODE
button until the required mode is in
the center of the display screen,
highlighted with an arrow above it.
• A brief press of the joystick center
will select the required riding mode,
and the icon in the upper left of the
display screen will change.
o7:29
12.5
8
6N
4
2
0
12 14
1
F
E
2 3 4 5 6
PM
RPM
x1000
mph
m
10
3
2
2
1
1. MODE button
2. Current riding mode
3. New riding mode
• Push the joystick left/right or press
the MODE button to scroll through
the riding mode options in the
following order:
– RIDER
– RAIN
– ROAD
– SPORT
– OFF-ROAD
– OFF-ROAD PRO.
Instruments
36
The selected mode is activated once the
following conditions for switching modes
have been met:
Motorcycle Stationary - Engine Off
• The ignition is switched ON
• The engine stop switch is in the
RUN position.
Motorcycle Stationary - Engine Running
• Neutral gear is selected or the
clutch is pulled in.
Motorcycle in Motion
Within 30 seconds of selecting a riding
mode the rider must carry out the
following simultaneously:
• Close the throttle
• Pull the clutch in
• Make sure that the brakes are not
engaged (allow the motorcycle to
coast).
Note:
• It is not possible to switch into or
out of OFF_ROAD or RIDER modes
while the motorcycle is in motion, if
the ABS or TC settings are set to
OFF-ROAD or OFF in either of those
modes.
• In this case, the motorcycle must
be brought to a stop before the
riding mode change can take place.
If a riding mode change is not
completed, the icon will alternate
between the previous riding mode and
the newly selected riding mode until the
change is complete or it is canceled.
The riding mode selection is now
complete and normal riding can be
resumed.
Information Tray
Warning
When the motorcycle is in motion, only
attempt to switch between the
information tray modes or reset the
fuel information under the following
conditions:
• At low speed
• In traffic free areas
• On straight and level roads or
surfaces
• In good road and weather conditions.
Failure to observe this important
warning could lead to loss of
motorcycle control and an accident.
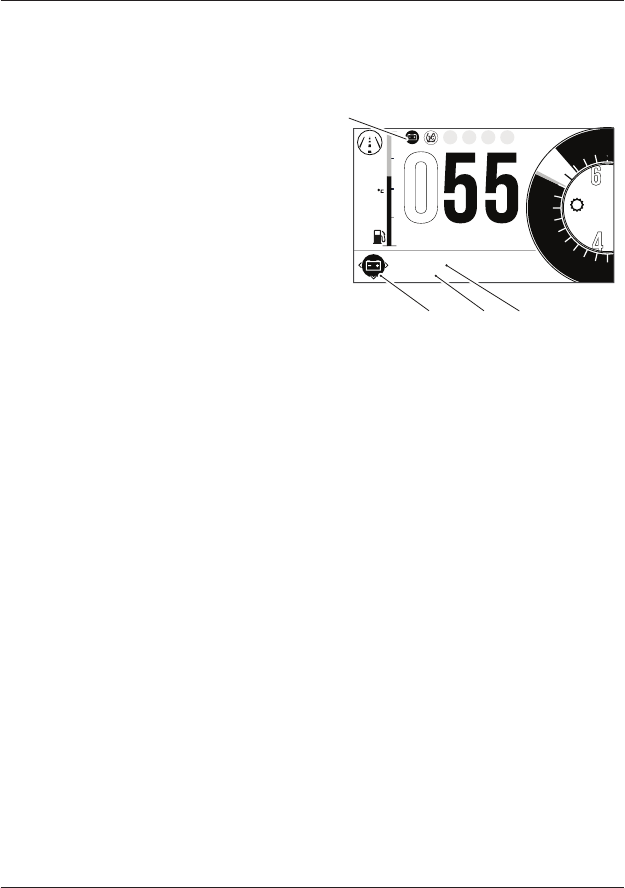
The information tray appears at the
bottom of the display screen and allows
easy access to different motorcycle
status information.
07:29
17.5 8
6N
4
2
0
12 14
F
E
AM
RPM
x1000
mph
o
10
59 42 12
MPG MPG RANGE
2
1
1. Joystick control
2. Information tray
To view the different information tray
items, push the joystick left/right until
the required information tray item is
shown.
Instruments
37
Note:
• To access the information tray, the
warning messages must first be
acknowledged, see page 37.
The information tray contains the
following information tray items:
• Warnings and Information
Messages, see page 37
• Fuel Information, see page 38
• Tire Pressure Monitoring System
(TPMS) (if equipped), see page 39
• Odometer, see page 39
• Service Interval Announcement, see
page 39
• Screen Contrast, see page 41
• Style Options, see page 41
• Coolant Temperature, see page 41
• Screen Adjustment Height, see
page 42
• Triumph Semi Active Suspension
(TSAS), see page 40
• Trip Meter, see page 38
Different information tray items can be
shown or hidden from the information
tray. For further information, refer to
page 52.
Warnings
Any warnings and information
messages are shown in the Warnings
tray. An example is shown below.
o7:29
12.5 8
65
4
2
0
12 14
F
E
PM
RPM
x1000
10
mph
LOW BATTERY
CHECK MANUAL
1/2 warnings
13
1
2
1. Low battery warning
2. Warning counter
3. Warning description
To view the warnings:
• Push the joystick left/right to scroll
through the options until the
warning review is shown.
• Push the joystick down/up to
review each warning (if more than
one). The warning counter will show
the number of warnings that are
present.
• Push the joystick left/right to
return to the information tray.

Instruments
38
Trip Meter
There are two trip meters that can be
accessed and reset in the information
tray.
10123 02:25 42.5
TRIP
mi
TRIP
HH:MM
mi
mph
HH:MM mph
20246 04:50 42.5
Trip Meter Information Tray
To view a specific trip meter:
• Push the joystick left/right to scroll
through the information tray items
until Trip 1 meter is shown.
• Select TRIP 1 or TRIP 2 by pushing
the joystick down/up.
Note:
• TRIP 2 meter can be shown or
hidden from the information tray.
For more information, see page 50.
To reset a trip meter:
• Select the trip meter to be reset.
• Press and hold the joystick center
for more than one second.
• The trip meter will then be reset.
The trip meter can also be reset from
the Main menu, see page 49.
Fuel Status Information
The Fuel Status information tray shows
fuel consumption information.
59 42 12
MPG MPG RANGE
1235
4
1. Fuel information light
2. Average fuel consumption
3. Instantaneous fuel consumption
4. Range to empty
5. Reset
Fuel Information Light
This light illuminates when the fuel level
warning light is activated.
Average Fuel Consumption
This is an indication of the average fuel
consumption. After being reset the
display will show dashes until 0.1 miles/
km has been covered.
Instantaneous Fuel Consumption
An indication of the fuel consumption at
an instant in time. If the motorcycle is
stationary, --.- will be shown in the
display area.
Range to Empty
This is an indication of the predicted
distance that can be traveled on the
remaining fuel in the tank.
Reset
To reset the average fuel consumption,
press and hold the joystick center.
Instruments
39
Note:
• After refueling, the fuel gage and
range to empty information will be
updated only while riding the
motorcycle. Depending on the riding
style, updating could take up to five
minutes.
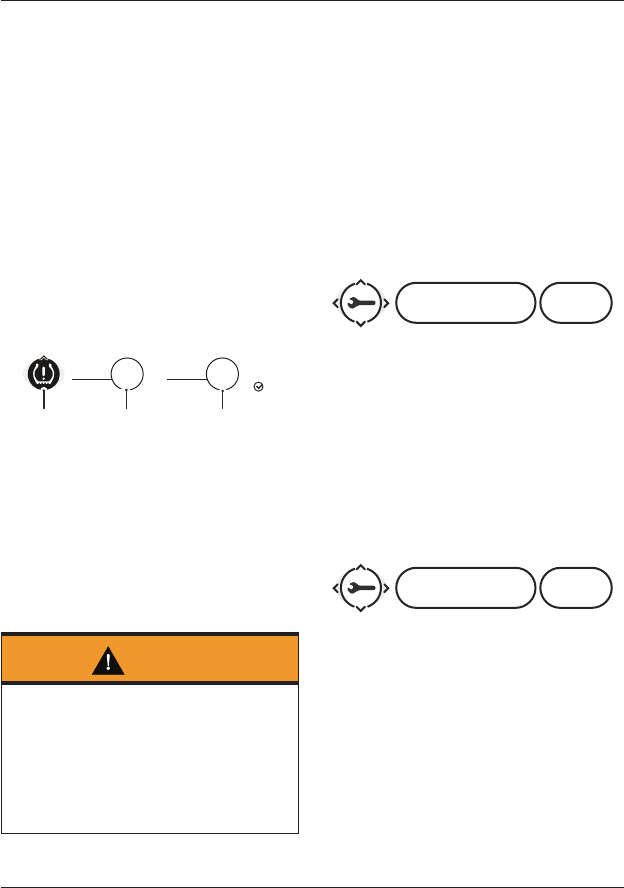
Tire Pressure Monitoring System
(TPMS) (if equipped)
The Tire Pressure Monitoring System
(TPMS) information tray item shows the
front and rear tire pressures and the
TPMS warning light. For more
information on TPMS, see page 111.
36
PSI
RF 18
PSI
123
1. TPMS warning light
2. Front tire pressure display
3. Rear tire pressure display
TPMS Warning Light
The warning light will only illuminate
when the front or rear tire pressure is
below the recommended pressure. It will
not illuminate if the tire is over inflated.
Warning
Stop the motorcycle if the Tire
Pressure Monitoring System (TPMS)
warning light illuminates.
Do not ride the motorcycle until the
tires have been checked and the tire
pressures are at their recommended
pressure when cold.
Front Tire Pressure Display
This shows the current front tire
pressure.
Rear Tire Pressure Display
This shows the current rear tire
pressure.
Odometer
The odometer shows the total distance
that the motorcycle has traveled.
9060 12/2018 0940OR
miODO
date
mi
Odometer Information Tray
Service Interval Announcement
The Service Interval Announcement
information tray shows the service
symbol, the distance/days remaining
before the next service and the current
odometer reading.
9060 12/2018 0940OR
miODO
date
mi
Service Interval Announcement
Information Tray
For more information on service interval
announcements, see page 32.

Instruments
40
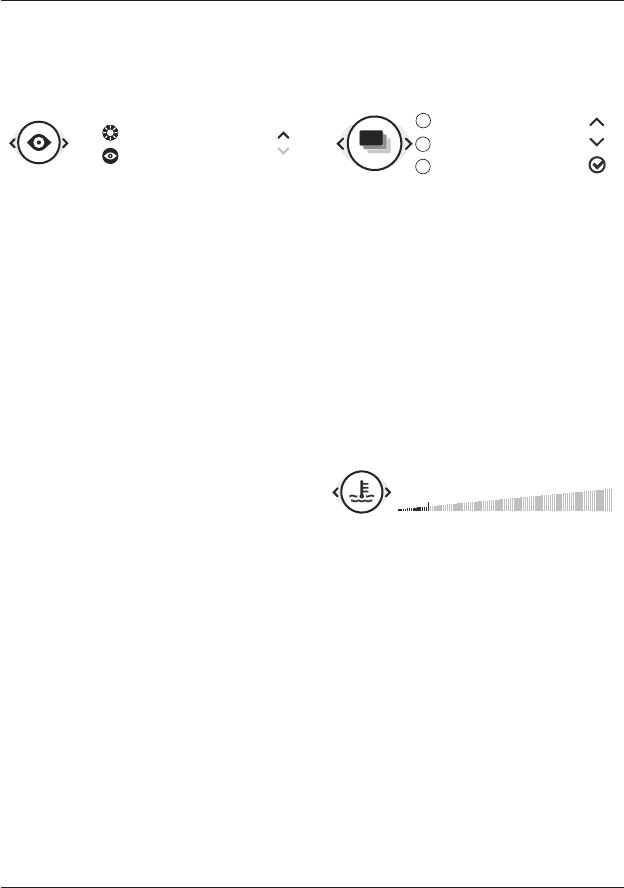
Triumph Semi Active Suspension
(TSAS)
The Triumph Semi Active Suspension
(TSAS) information tray item allows
adjustment of the TSAS settings.
COMFORT
AUTO ON-ROAD
NORMAL SPORT
TSAS Information Tray
(Showing SPORT Selected)
To adjust the TSAS settings:
• Push the joystick left/right to scroll
through the options until the TSAS
settings display is shown.
• Push the joystick center to activate
the TSAS adjustment mode.
Note:
• If the riding modes link is disabled,
changes made to the TSAS damping
settings will remain active until
further adjustment takes place,
regardless of riding mode selection.
• If the riding modes link is enabled,
any adjustments made to the TSAS
damping settings will be saved to
the currently active riding mode.
The new TSAS settings will be
automatically recalled whenever
the riding mode is reselected. The
riding mode’s previous TSAS
settings will be overwritten.
• If the riding modes link is enabled
and a new riding mode is selected,
the new riding mode’s TSAS
settings will automatically become
active.
• TSAS has nine damping settings
ranging from COMFORT (soft) to
SPORT (firm).
• Press and release the joystick
center allows individual selection of
each of the nine settings.
• Press and hold the joystick control
allows direct selection of the preset
COMFORT, NORMAL and SPORT
settings.
• There is a short time-out period to
allow for further scrolling to take
place. After the time-out period has
elapsed, the selected damping
setting will be automatically
activated and the display will
return to the home screen.
Alternatively, press the joystick
center to confirm the setting and
return to the home screen.
For more information on Triumph Semi
Active Suspension (TSAS), see page 108.
Instruments
41
Screen Contrast
The Screen Contrast information tray
item allows the display screen contrast
to be adjusted.
HIGH CONTRAST
AUTO CONTRAST
Screen Contrast Information Tray
There are two options available:
• HIGH CONTRAST - This option locks
the display screen to the white
background version of each display
screen style for maximum visibility.
• AUTO CONTRAST - This option uses
the instrument light sensor to
adjust the contrast to the most
suitable setting. In bright sunlight,
low brightness settings will be
overridden to make sure that the
instruments can be viewed at all
times.
To select an option:
• Push the joystick down/up to select
either the HIGH CONTRAST or AUTO
CONTRAST option and press the
joystick center to confirm.
If the rider defined brightness setting is
suitable this will be used, see page 52.
Note:
• Do not cover the light sensor on the
display screen as this will stop the
screen contrast from working
correctly.
Style Options
The Style Options information tray item
allows a different style to be applied to
the display screen.
STYLE 1
STYLE 2
STYLE 3
3
2
1
Style Options Information Tray
(Style 2 Selected)
To change the display screen style:
• Push the joystick down/up to select
the required style and then press
the joystick center to confirm.
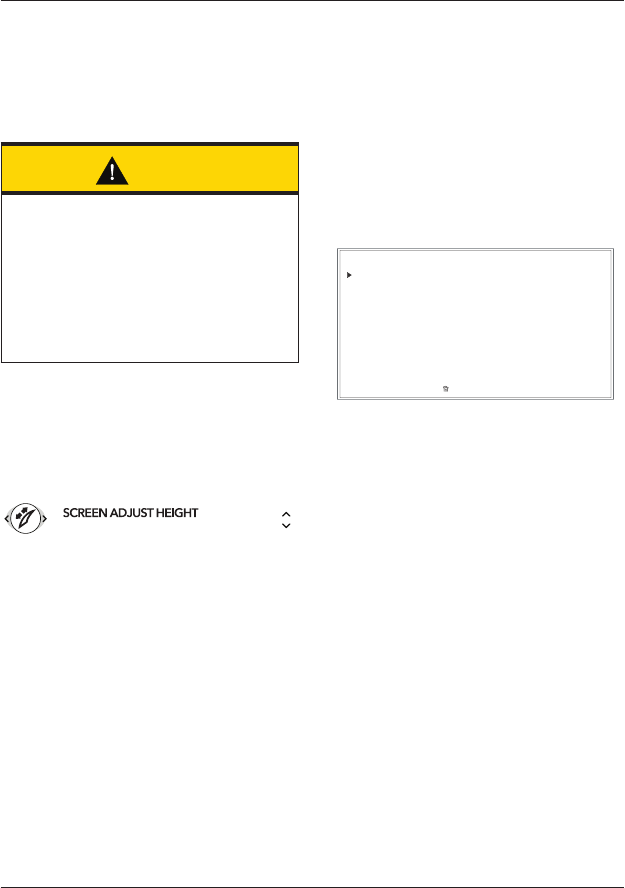
Coolant Temperature
The Coolant Temperature information
tray item indicates the temperature of
the engine coolant.
COOLANT
C
H
Coolant Temperature Information Tray
When the engine is started from cold
the display will show grey bars. As the
temperature increases more bars in the
display will be shown illuminated. When
the engine is started from hot the
display will show the relevant number of
illuminated bars, dependant on engine
temperature.
The range is between C (cold) and H
(hot) on the display.
Instruments
42
With the engine running, if the engine
coolant temperature becomes
dangerously high, the high coolant
temperature warning light on the
display will be illuminated and the gage
will be shown in the information tray.
Caution
Stop the engine immediately if the high
coolant temperature warning light
illuminates. Do not restart the engine
until the fault has been rectified.
Severe engine damage will result from
running the engine when the high
coolant temperature warning light is
illuminated.
Windshield Adjustment
The Windshield Adjustment information
tray option allows the windshield height
to be adjusted to an optimum setting.
Windshield Adjustment Mode
To adjust the windshield height:
• Push the joystick left/right until the
windshield adjust option is
highlighted.
• Push the joystick up/down to
adjust the windshield to the
required height.
• Push the joystick left/right to
access another tray item.
Main Menu
To access the Main menu:
• The motorcycle must be stationary
with the ignition switched on.
• Press the HOME button on the
right handlebar switch housing.
• Scroll the Main menu by pushing
the joystick down/up until the
required option is selected and
then press the joystick center to
confirm.
RIDING MODES
BIKE SETUP
TRIP SETUP
DISPLAY SETUP
EXIT
MAIN MENU
RESET TO DEFAULTS
Main Menu Screen
The Main menu allows access to the
following options:
Riding Modes
This menu allows configuration of the
riding modes. For more information, see
page 44.
Bike Set Up
This menu allows configuration of the
following different features of the
motorcycle. For more information, see
page 45.
Trip Set Up
This menu allows configuration of Trip 1
and Trip 2. For more information, see
page 49.

Instruments
43
Display Set Up
This menu allows configuration of the
display options. For more information,
see page 51.
Reset to Defaults
This menu allows all instrument settings
to be returned to the default setting.
For more information, see page 55.
Riding Modes Menu
The Riding Modes menu allows
configuration of the riding modes.
RIDING MODES
BIKE SETUP
TRIP SETUP
DISPLAY SETUP
EXIT
MAIN MENU
RESET TO DEFAULTS
To access the Riding Modes menu:
• Press the HOME button to display
the Main menu.
• Push the joystick down and then
press the joystick center to select
RIDING MODES.
The following model specific options are
available:
• Rider
• Rain
• Road
• Sport
• Off-Road
• Off-Road Pro
• Reset To Defaults.
Riding Modes
To change the riding modes settings:
• From the Riding Modes menu, push
the joystick down/up to select a
specific riding mode and press the
joystick center to confirm.
RIDING MODES
BIKE SETUP
TRIP SETUP
DISPLAY SETUP
EXIT
MAIN MENU RIDING MODES
RIDER
ROAD
SPORT
RESET TO DEFAULTS
RAIN
RESET ALL TO DEFAULTS
OFF-ROAD
OFF-ROAD PRO
• Push the joystick down/up until the
required setting option is selected
and press the joystick center to
confirm.
EXIT
RIDING MODES
ROAD
SPORT
ABS
MAP
TC
RESET TO DEFAULTS
RIDER
RAIN
RIDER
OFF-ROAD PRO
RESET ALL TO DEFAULTS
OFF-ROAD
• Push the joystick down/up until the
required option is selected and
press the joystick center to confirm.
EXIT
ABS
MAP
TC
RIDER ABS
ROAD
RESET TO DEFAULTS
OFF
OFF-ROAD
Instruments
44
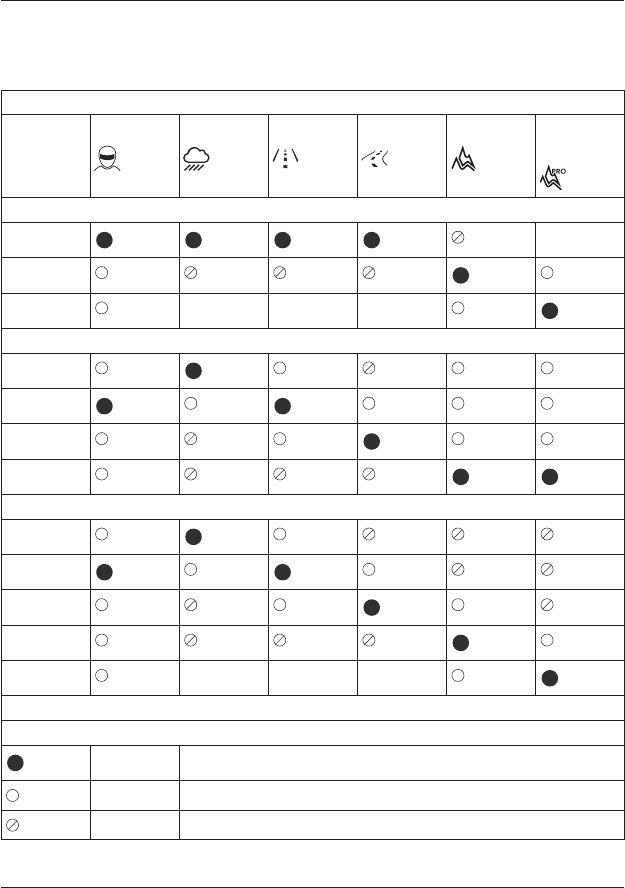
Riding Mode Configuration
Refer to the following table for the ABS, MAP and TC options available for each riding
mode.
Riding Mode
RIDER RAIN ROAD SPORT OFF-ROAD OFF-ROAD
PRO
ABS (Anti-lock Braking System)
Road
Off-Road1
Off Via Menu Via Menu Via Menu
MAP (Throttle Response)
Rain
Road
Sport1
Off-Road1
TC (Traction Control)
Rain
Road
Sport1
Off-Road1
Off Via Menu Via Menu Via Menu
1 Model Specific
Key
Standard (Factory Default Setting)
Selectable Option
Option Not Available

Instruments
45
Bike Set Up Menu
The Bike Set Up menu allows
configuration of the different features
of the motorcycle.
RIDING MODES
BIKE SETUP
TRIP SETUP
DISPLAY SETUP
EXIT
MAIN MENU
RESET TO DEFAULTS
BIKE SETUP
INDICATORS
ABS
TC
SERVICE
TSAS
TRIUMPH SHIFT ASSIST
HILL HOLD
To access the Bike Set Up menu:
• Press the HOME button to display
the Main menu.
• Push the joystick down and then
press the joystick center to select
BIKE SET UP.
The options available are:
• Triumph Semi Active Suspension
(TSAS)
• Triumph Shift Assist
• Hill Hold
• Turn Signals
• Anti-Lock Braking System (ABS)
• Traction Control (TC)
• Service.
Bike Set Up - TSAS
The Triumph Semi-Active Suspension
System (TSAS) controls adjustment of
the front and rear suspension damping
and automatic rear suspension preload
settings. For more information on TSAS,
see page 108.
TSAS
TRIUMPH SHIFT ASSIST
HILL HOLD
INDICATORS
EXIT
BIKE SETUP
ABS
TSAS
MODE
SETTING (ON-ROAD)
SETTING (OFF-ROAD)
RIDING MODES LINK
TC
SERVICE
Riding Modes Link
The riding modes link allows you to
enable or disable the link between TSAS
and the riding modes.
If the riding modes link is disabled,
changes made to the TSAS damping
settings will remain active until further
adjustment takes place, regardless of
riding mode selection.
If the riding modes link is enabled, any
adjustments made to the TSAS damping
settings will be saved to the currently
active riding mode. The new TSAS
settings will be automatically recalled
whenever the riding mode is reselected.
The riding mode’s previous TSAS
settings will be overwritten.
If the riding modes link is enabled and a
new riding mode is selected, the new
riding mode’s TSAS settings will
automatically become active.

Instruments
46
To disable or enable the TSAS riding
modes link:
• Press the joystick center to select
RIDING MODES LINK.
• Push the joystick down/up to scroll
between DISABLED and ENABLED.
• Press the joystick center to select
the required option.
Mode
This allows the adjustment of the
settings from soft to hard by adjusting
the rebound and compression damping
settings.
Selecting AUTO sets the TSAS system to
automatically detect the type of surface
being ridden on (road or off-road) and
will adjust the rebound and compression
damping settings accordingly.
Setting On-Road
This applies the optimal TSAS settings
for on-road use and adjusts the
rebound and compression damping
settings accordingly.
Setting Off-Road
This applies the optimal TSAS settings
for off-road use and adjusts the
rebound and compression damping
settings accordingly.
Bike Set Up - Triumph Shift Assist
(if equipped)
Triumph Shift Assist triggers a
momentary engine cut to allow gears to
engage, without closure of the throttle
or operation of the clutch. This feature
works for both up-shifts and down-
shifts of gear.
The clutch must be used for stopping
and pulling away.
Triumph Shift Assist will not operate if
the clutch is applied or if an up-shift is
attempted by mistake when in 6th gear.
It is necessary to use a positive pedal
force to make sure there is a smooth
gear shift.
TSAS
TRIUMPH SHIFT ASSIST
HILL HOLD
INDICATORS
EXIT
BIKE SETUP
ABS
TRIUMPH SHIFT ASSIST
DISABLED
ENABLED
TC
SERVICE
To enable/disable Triumph Shift Assist:
• From the Bike Set Up menu, push
the joystick down to select
TRIUMPH SHIFT ASSIST and press
the joystick to confirm.
• Push the joystick down/up to scroll
between ENABLED and DISABLED.
• Press the joystick center to confirm
the required selection.
• The display will then return to the
BIKE SET UP menu.

Instruments
47
Bike Set Up - Hill Hold Control
(if equipped)
Hill hold control assists in making hill
starts. The system (when activated) will
apply the rear brake to hold the
motorcycle in position. The system will
then automatically deactivate and
release the rear brake when it detects
that the motorcycle is attempting to
move off.
TSAS
TRIUMPH SHIFT ASSIST
HILL HOLD
INDICATORS
EXIT
BIKE SETUP
ABS
HILL HOLD
DISABLED
ENABLED
TC
SERVICE
To enable/disable hill hold control:
• From the Bike Set Up menu, push
the joystick down to select HILL
HOLD and press the joystick center
to confirm.
• Push the joystick down to select
either ENABLED or DISABLED.
• Press the joystick center to confirm
the required selection.
• The display will then return to the
Bike Set Up menu.
For more information on hill hold
control, see page 152.
Bike Set Up - Turn Signals
The turn signals can be set to Auto
Basic, Auto Advanced or Manual mode.
EXIT
BIKE SETUP INDICATORS
MANUAL
AUTO BASIC
AUTO ADVANCED
SERVICE
TC
ABS
INDICATORS
TSAS
TRIUMPH SHIFT ASSIST
HILL HOLD
Selecting a Turn Signals Mode
To select the required turn signals mode:
• From the Bike Set Up menu, push
the joystick down to select
INDICATORS and press the joystick
center to confirm.
• Push the joystick down/up to scroll
between AUTO BASIC, AUTO
ADVANCED and MANUAL.
– Auto Basic - The self-canceling
function is on. The turn signals
will activate for eight seconds
and an additional 213 ft. (65
meters).
– Auto Advanced - The self-
canceling function is on. A
quick short press activates the
turn signals for three flashes.
A longer press activates the
turn signals for eight seconds
and an additional 213 ft. (65
meters).
– Manual - The self-canceling
function is off. The turn signals
must be manually canceled
using the turn signal switch.
• Press the joystick center to confirm
the required selection.
• The display will then return to the
Bike Set Up menu.

Instruments
48
Bike Set Up - ABS
It is possible to temporarily disable the
ABS. The ABS cannot be permanently
disabled, it will be automatically enabled
when the ignition is turned off and then
on again, or if the default riding mode is
activated by a long press of the MODE
button.
EXIT
BIKE SETUP ABS
DISABLED
ENABLED
SERVICE
TC
ABS
INDICATORS
TSAS
TRIUMPH SHIFT ASSIST
HILL HOLD
To select the required option:
• From the Bike Set Up menu, push
the joystick down to select ABS and
press the joystick center to confirm.
• Push the joystick down/up to scroll
between ENABLED and DISABLED.
• Press the joystick center to confirm
the required selection.
• The display will then return to the
Bike Set Up menu.
Bike Set Up - Traction Control (TC)
It is possible to temporarily disable the
traction control system. The traction
control cannot be permanently disabled,
it will be automatically enabled when the
ignition is turned off and then on again,
or if the default riding mode is activated
by a long press of the MODE button.
EXIT
BIKE SETUP TC
DISABLED
ENABLED
SERVICE
TC
ABS
INDICATORS
TSAS
TRIUMPH SHIFT ASSIST
HILL HOLD
To select the required option:
• From the Bike Set Up menu, push
the joystick down to select TC and
press the joystick center to confirm.
• Push the joystick down/up to scroll
between ENABLED and DISABLED.
• Press the joystick center to select
the required option.
The display will then return to the BIKE
SET UP display.
Bike Set Up - Service
The service interval is set to a distance
and/or time period.
EXIT
BIKE SETUP
INDICATORS
ABS
SERVICE
5450 mi
01-01-2017 (335 DAYS)
TC
SERVICE
RESET

Instruments
49
To review the service interval:
• From the Bike Set Up menu, push
the joystick down to select SERVICE
and press the joystick center to
confirm.
• Press the joystick center to display
the SERVICE information.
• Selecting RESET allows you to reset
the standard time and distance,
and also any custom times and
distances.
• The display will then return to the
Bike Set Up menu.
Trip Setup
The Trip Set Up menu allows
configuration of the trip meters. Each
trip meter can be configured to be reset
either manually or automatically. The
setup procedure is the same for both
trip meters.
To access the Trip Set Up menu:
• Press the HOME button to display
the Main menu.
• Push the joystick down and then
press the joystick center to select
TRIP SET UP.
The options available are:
• TRIP 1 RESET
• TRIP 2 RESET
• TRIP 2 DISPLAY
Trip Setup - Manual Reset
Manual reset of the trip meters will only
reset the selected trip meter when the
rider chooses to do so.
EXIT
MAIN MENU
MANUAL
AUTOMATIC
RESET NOW AND CONTINUE
CONTINUE WITHOUT RESET
MANUAL
To set the trip meter to reset manually:
• Push the HOME button to display
the MAIN MENU.
• Push the joystick down and then
press the joystick center to select
TRIP SETUP.
• Push the joystick down and then
press the joystick center to select
TRIP 1 RESET or TRIP 2 RESET.
• Push the joystick center to select
MANUAL.
There are two options:
– RESET NOW AND CONTINUE -
Resets all trip meter data in
the relevant trip meter, and
the trip meter will only reset
when manually done so by the
rider.
– CONTINUE WITHOUT RESET -
The trip meter will not be
reset. The trip meter will only
reset when manually done so
by the rider.
• Press the joystick center to confirm
the selection and return to the
previous menu.
Instruments
50
Trip Setup - Automatic Reset
Automatic reset will reset each trip
meter after the ignition has been
switched off for a set time.
EXIT
TRIP 1 RESET
MANUAL
AUTOMATIC
AUTOMATIC
1 HR
2 HRS
4 HRS
8 HRS
12 HRS
16 HRS
To set the trip meters to reset
automatically:
• Push the HOME button to display
the MAIN MENU.
• Push the joystick down and then
press the joystick center to select
TRIP SETUP.
• Push the joystick down/up and
then press the joystick center to
select TRIP 1 RESET or TRIP 2
RESET.
• Push the joystick down/up and
select AUTOMATIC and then press
the joystick center.
• Push the joystick down/up to select
the timer setting and press the
joystick center to confirm the
required time limit. The required
time limit is then stored in the trip
memory.
When the ignition is turned off, the trip
meter is set to zero when the time
period has elapsed.
The following table shows two examples
of the automatic trip reset functionality.
Ignition
Turned Off
Selected
Time Delay
Trip Meter
Resets to
Zero
10:30 hrs 4 HRS 14:30 hrs
18:00 hrs 16 HRS 10:00 hrs
(next day)
Trip 2 Enable/Disable
Trip 2 meter can be enabled or disabled.
If Trip 2 is disabled it will no longer be
shown in the information tray.
TRIP SETUP
EXIT
TRIP 1 RESET
TRIP 2 DISPLAY
TRIP 2 RESET
TRIP 2 DISPLAY
ENABLED
DISABLED
To enable or disable the Trip 2 meter:
• Push the MODE button to display
the MAIN MENU.
• Push the joystick down to select
TRIP SET UP.
• Push the joystick center to display
the TRIP SET UP menu.
• Push the joystick down/up to scroll
to the TRIP 2 DISPLAY and press
the joystick center.
• Push the joystick down/up to scroll
between ENABLED and DISABLED
and press the joystick center.

Instruments
51
Display Set Up Menu
The Display Set Up menu allows
configuration of the different display
screen options.
EXIT
DISPLAY SETUP
LANGUAGE
UNITS
THEME
BRIGHTNESS (High Contrast)
CLOCK
BRIGHTNESS (Low Contrast)
VISIBLE TRAY
DATE
MAIN MENU
RIDING MODES
BIKE SETUP
TRIP SETUP
DISPLAY SETUP
RESET TO DEFAULTS
To access the Display Set Up menu:
• Press the HOME button to display
the Main menu.
• Push the joystick down and then
press the joystick center to select
DISPLAY SET UP.
The following options are available:
• Styles and Themes
• Brightness
• Visible Tray
• Shift Indicator
• Language
• Set Units
• Set Clock
• Set Date.
Display Set Up - Styles and Themes
Note:
• Themes are only available on
Tiger 1200 XRT and Tiger 1200 XCA.
EXIT
THEME
THEME 1
THEME 2
THEME 1
AUTO
STYLE 1
STYLE 2
STYLE 3
Theme and Style Menu Example
EXIT
STYLE
DISPLAY SETUP
AUTO
STYLE 1
STYLE
STYLE 2
STYLE 3
Style Menu Example
To select a style or theme:
• From the Display Set Up menu,
push the joystick down to select
the STYLES or THEME (if equipped)
menu.
– Tiger 1200 XRT and Tiger 1200
XCA: Push the joystick down/
up to scroll between the
THEMES.
– Press the joystick center to
confirm the selected THEME.
– All Models: Push the joystick
down/up to scroll between the
STYLES.
Instruments
52
– Press the joystick center to
confirm the selected STYLE.
• The new style or theme will be
saved. Press the HOME button to
exit.
Note:
• Selecting AUTO will prevent a style
tray from being displayed. The style
is changed with riding modes.
Display Set Up - Brightness
The brightness feature allows the
screen’s brightness contrast to be
changed for day time and night time
riding.
BRIGHTNESS
(LOW CONTRAST)
9
8
7
6
5
4
3
2
1
BRIGHTNESS (High Contrast)
THEME
BRIGHTNESS (Low Contrast)
VISIBLE TRAY
LANGUAGE
UNITS
CLOCK
DATE
DISPLAY SETUP
BRIGHTNESS (LOW CONTRAST) Shown
There are two brightness options to
choose:
• High contrast
(day time mode)
• Low contrast
(night time mode)
To change the brightness level:
• From the Display Set Up menu,
push the joystick down to select
BRIGHTNESS and press the joystick
center to confirm.
• Push the joystick down to select
BRIGHTNESS (High Contrast) or
BRIGHTNESS (Low Contrast) menu.
• Press the joystick center to select
the required menu.
• Push the joystick down/up to
adjust the brightness.
• Press the joystick center to confirm
the required level of brightness.
• Press the HOME button to return
to the main display.
Note:
• In bright sunlight, low brightness
settings will be overridden to make
sure that the instruments can be
viewed at all times.
Display Set Up - Visible Tray
The Visible Tray feature allows the
selection of required information tray
items to be shown in the information
tray.
EXIT
DISPLAY SETUP
LANGUAGE
UNITS
THEME
BRIGHTNESS (High Contrast)
CLOCK
BRIGHTNESS (Low Contrast)
VISIBLE TRAY
DATE
TRIP 2
TRIP 3
FUEL STATUS
CONTRAST
STYLE
VISIBLE TRAY
COOLANT
TPMS
SERVICE INTERVAL

Instruments
53
To select the Visible Tray menu:
• From the Display Set Up menu,
push the joystick down to select
VISIBLE TRAY and press the
joystick center to confirm.
• Push the joystick down/up until the
required information tray item is
selected.
• Press the joystick center to select/
deselect the information tray item.
An information tray item with a tick
next to it will be shown in the tray.
An information tray item without a
tick next to it will not be shown in
the tray.
Display Set Up - Language
There are several different languages
that can be selected to be shown in the
display screen.
EXIT
DISPLAY SETUP
LANGUAGE
UNITS
THEME
BRIGHTNESS (High Contrast)
CLOCK
LANGUAGE
ENGLISH
ESPAÑOL
ITALIANO
DEUTSCH
FRANÇAIS
BRIGHTNESS (Low Contrast)
VISIBLE TRAY
DATE
NEDERLANDS
PORTUGUÊS
SVENSKA
To select a different language:
• From the Display Set Up menu,
push the joystick down to select
LANGUAGE and press the joystick
center to confirm.
• Push the joystick down/up until the
required language is selected.
• Press the joystick center to select/
deselect the required language.
Display Set Up - Set Units
There are different units of
measurement options that can be
shown in the display screen.
EXIT
LANGUAGE
UNITS
THEME
BRIGHTNESS (High Contrast)
CLOCK
DISPLAY SETUP
BRIGHTNESS (Low Contrast)
VISIBLE TRAY
DATE
DISTANCE & ECONOMY
TEMPERATURE
PRESSURE
UNITS
To select the units of measurement
required:
• From the Display Set Up menu,
push the joystick down to select
SET UNITS and press the joystick
center to confirm.
• Push the joystick down/up to select
the required unit; DISTANCE &
ECONOMY, TEMPERATURE or
PRESSURE.
• Push the joystick down/up to select
the required unit of measurement
from the following options:
– DISTANCE & ECONOMY:
– MILES & MPG (UK)
– MILES & MPG (US)
– KM & L/100KM
– KM & KM/L
– TEMPERATURE:
– °C
– °F
– PRESSURE:
– PSI
– BAR
– KPa
• Press the joystick center to
confirm.
Instruments
54
Display Set Up - Set Clock
This function allows the adjustment of
the clock.
To set the clock:
• From the Display Set Up menu,
push the joystick down to select
SET CLOCK and press the joystick
center to confirm.
• Push the joystick down/up to select
between either 12 HR or 24 HR
clock and press the joystick center
to confirm selection. The clock will
display in either 12 or 24 hour
format. Once the clock format is set
the display will return to the SET
CLOCK menu.
To set the time, push the joystick down/
up to select HOUR or MINUTE.
To Adjust the Hour Setting
• Select HOUR on the display and
press the joystick center, a tick will
appear next to HOUR and the hour
display will flash as shown below.
• Push the joystick down/up to set
the hour and press the joystick
center to confirm.
EXIT
LANGUAGE
UNITS
THEME
BRIGHTNESS (High Contrast)
CLOCK
DISPLAY SETUP
12HR
MINUTE
HOUR
24HR
CLOCK
15:40
BRIGHTNESS (Low Contrast)
VISIBLE TRAY
DATE
To Adjust the Minute Setting
• Select MINUTE on the display and
press the joystick center, a tick will
appear next to MINUTE and the
minute display will flash as shown
below.
• Push the joystick down/up to set
the minute and press the joystick
center to confirm.
EXIT
LANGUAGE
UNITS
THEME
BRIGHTNESS (High Contrast)
CLOCK
DISPLAY SETUP
12HR
MINUTE
HOUR
24HR
CLOCK
15:40
BRIGHTNESS (Low Contrast)
VISIBLE TRAY
DATE
Display Set Up - Set Date
This function allows the adjustment of
the date and date format.
EXIT
LANGUAGE
UNITS
THEME
BRIGHTNESS (High Contrast)
CLOCK
DISPLAY SETUP
BRIGHTNESS (Low Contrast)
VISIBLE TRAY
DATE
DATE
DATE FORMAT
YEAR
MONTH
DAY

Instruments
55
To set the date format:
• From the Display Set Up menu,
push the joystick down to select
SET DATE and press the joystick
center to confirm.
• Press the joystick center to display
DATE FORMAT.
• Push the joystick down/up to select
either of the DD-MM-YYYY, MM-
DD-YYYY or YYYY-MM-DD formats
and press the joystick center to
confirm selection. Once the date
format is set the display will return
to the SET DATE menu.
EXIT
LANGUAGE
UNITS
THEME
BRIGHTNESS (High Contrast)
CLOCK
DISPLAY SETUP
BRIGHTNESS (Low Contrast)
VISIBLE TRAY
DATE
DATE
DATE FORMAT
YEAR
MONTH
DAY
To set the date, push the joystick down/
up to select the DAY, MONTH and YEAR.
• Select YEAR and then press the
joystick center, a tick will appear
next to the YEAR and the YEAR
display will flash.
• Push the joystick down/up to set
the current year and then press
the joystick center to confirm.
• To set the MONTH and DAY repeat
the procedure used to set the year.
Once the date is set the display will
return to the SET DATE menu.
Reset to Defaults
This function allows the main menu
display items to be reset to the default
setting.
RIDING MODES
BIKE SETUP
TRIP SETUP
DISPLAY SETUP
EXIT
MAIN MENU RESET TO DEFAULTS
CONFIRM
CANCEL
RESET TO DEFAULTS
To reset the Main menu display items:
• From the Main menu, push the
joystick down and select RESET TO
DEFAULTS.
• Press the joystick center to
confirm.
• Pushing the joystick down/up,
select CONFIRM or CANCEL from
the Reset to Defaults menu, and
press the joystick center to confirm.
• Confirm - The following main menu
settings and data will be reset to
the factory default values - Riding
Modes, Indicator Set Up, Trip
Computers, Visible Trays, Language,
ABS, Traction Control, Style, and
Display Brightness.
• Cancel - The main menu settings
and data will remain unchanged
and the display will return to the
previous level.
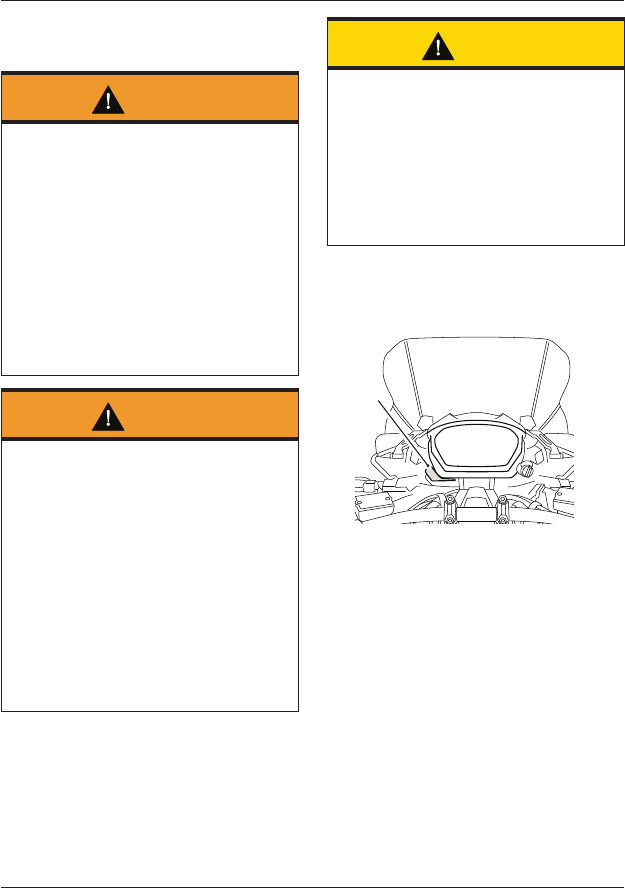
Instruments
56
Instrument Panel Position
Adjustment
Warning
Operation of the motorcycle with an
incorrectly adjusted instrument panel
is dangerous.
An incorrectly adjusted instrument
panel will result in loss of instrument
vision when riding and may cause a
distraction leading to loss of control of
the motorcycle and an accident.
Always adjust the instrument panel to
provide sufficient vision of the
instruments before riding the
motorcycle.
Warning
Never attempt to clean or adjust the
instrument panel while riding the
motorcycle. Removal of the rider’s
hands from the handlebars while riding
the motorcycle will diminish the ability
of the rider to maintain control of the
motorcycle.
Attempting to clean or adjust the
instrument panel while riding the
motorcycle may result in loss of control
of the motorcycle and an accident.
Only attempt to clean or adjust the
instrument panel while stationary.
Caution
Do not press directly onto the
instrument panel display screen.
Only adjust the position of the
instrument panel using the adjustment
handle.
Pressing directly on the instrument
panel display screen may damage the
instrument panel.
The instrument panel can be adjusted
to allow for improved visibility of the
display screen.
1
1. Adjustment handle
To adjust the instrument panel:
Note:
• Moderate force using the thumb
and finger is required to adjust the
position of the instrument panel.
Position the instrument panel to allow
an unobstructed view of the display
screen using the adjustment handle.
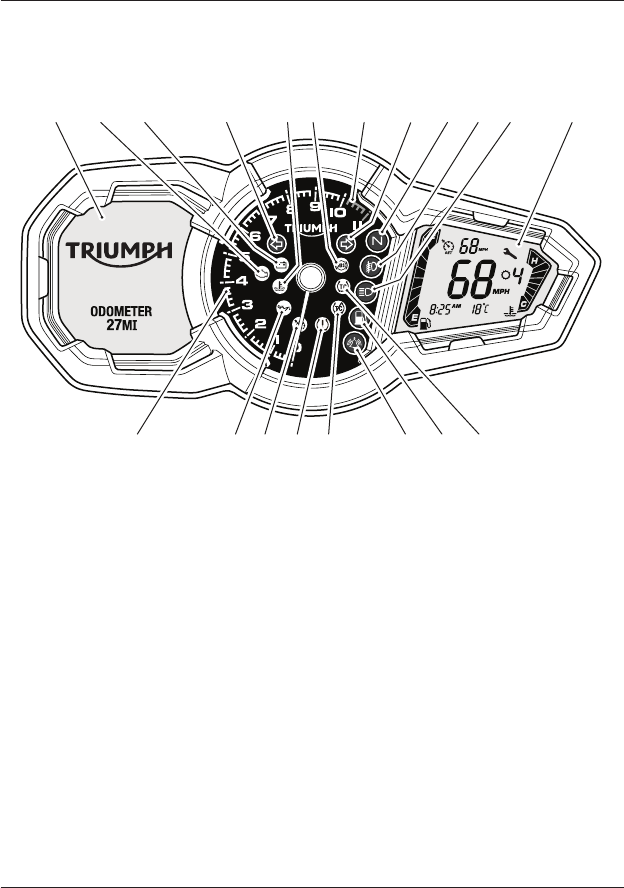
Instruments
58
Instrument Panel Layout
The LCD instrument display is only mounted to the Tiger 1200 XR model.
cisz
123 4 5 6 7 9 10 11 12
1314151617181920
8
1. Multifunction display screen
2. Engine management Malfunction
Indicator Light (MIL)
3. Battery warning light
4. Left hand turn signal light
5. High coolant temperature warning light
6. ABS warning light
7. Tachometer red zone
8. Right hand turn signal light
9. Neutral indicator light
10. Fog lights indicator light
11. High beam indicator light
12. Motorcycle status display screen
13. Traction control indicator light
14. Low fuel level indicator light
15. Alarm/immobilizer status indicator
light (alarm is an accessory kit)
16. Traction control disabled warning light
17. Tire pressure warning light (if equipped
with Tire Pressure Monitoring System
(TPMS))
18. Cruise control light
19. Low oil pressure warning light
20. Tachometer
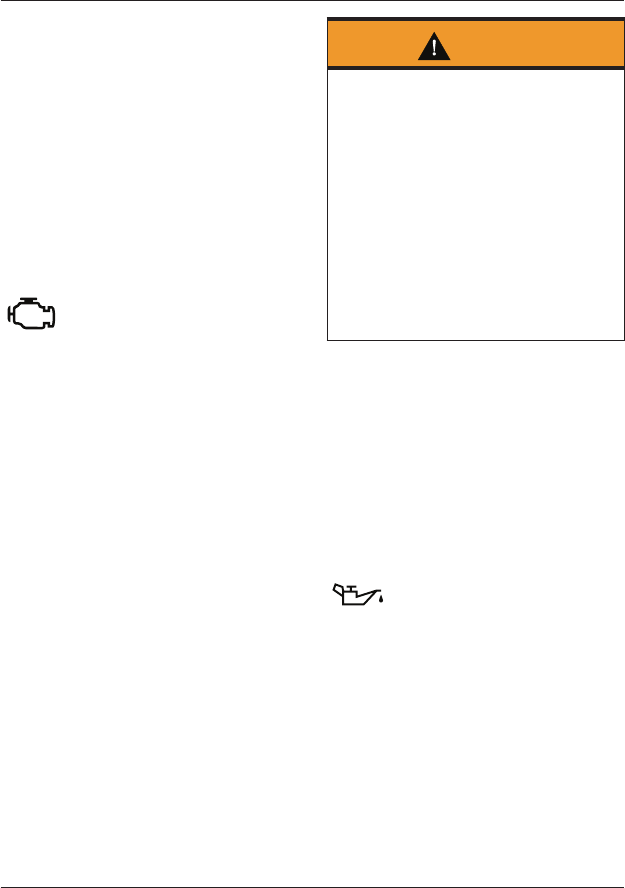
Instruments
59
Warning Lights
Note:
• When the ignition is switched on,
the instrument warning lights will
illuminate for 1.5 seconds and will
then go off (except those which
remain on until the engine starts,
as described in the following pages).
Engine Management System
Malfunction Indicator Light (MIL)
The Malfunction Indicator Light
(MIL) for the engine management
system illuminates when the ignition is
switched ON (to indicate that it is
working) but should not become
illuminated when the engine is running.
If the MIL becomes illuminated when the
engine is running, this indicates that a
fault has occurred in one or more of the
systems controlled by the engine
management system. In such
circumstances, the engine management
system will switch to 'limp-home' mode
so that the journey may be completed, if
the fault is not so severe that the
engine will not run.
Warning
Reduce speed and do not continue to
ride for longer than is necessary with
the MIL illuminated. The fault may
adversely affect engine performance,
exhaust emissions and fuel
consumption.
Reduced engine performance could
cause a dangerous riding condition,
leading to loss of control and an
accident.
Contact an authorized Triumph dealer
as soon as possible to have the fault
checked and rectified.
Note:
• If the MIL flashes when the ignition
is switched ON contact an
authorized Triumph dealer as soon
as possible to have the situation
rectified. In these circumstances
the engine will not start.
Low Oil Pressure Warning Light
With the engine running, if the
engine oil pressure becomes
dangerously low, the low oil pressure
warning light in the tachometer will
illuminate and WARNING - OIL
PRESSURE LOW will be displayed in the
multifunction display screen.
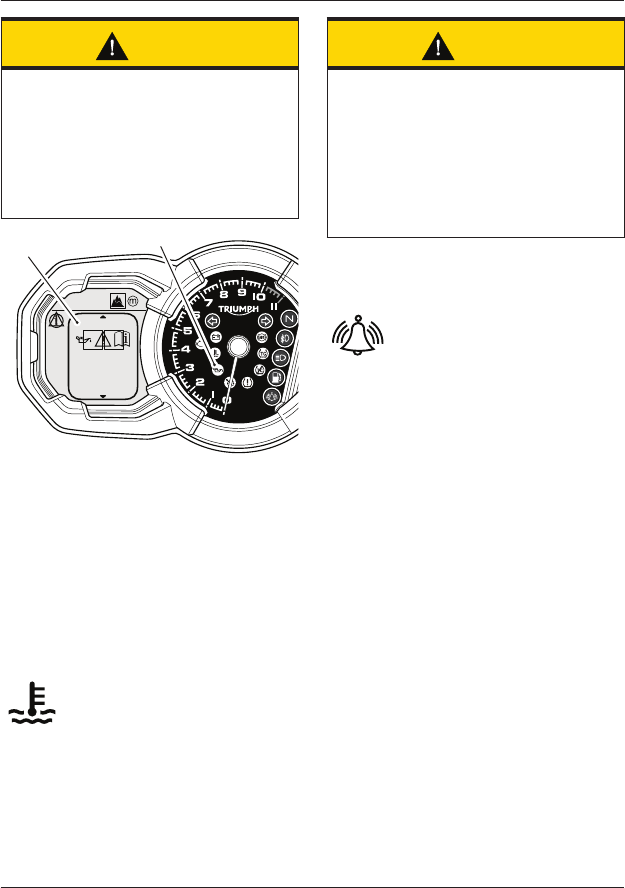
Instruments
60
Caution
Stop the engine immediately if the low
oil pressure warning light illuminates.
Do not restart the engine until the
fault has been rectified.
Severe engine damage will result from
running the engine when the low oil
pressure warning light is illuminated.
OFF-ROAD
WARNING
OIL PRESSURE
LOW
CHECK MANUAL
PRESS SELECT
TO CLEAR
1
2
1. Low oil pressure warning light
2. Instrument message
The low oil pressure warning light in the
tachometer will illuminate if the ignition
is switched on without running the
engine.
High Coolant Temperature Warning
Light
With the engine running, if the
engine coolant temperature becomes
dangerously high, the high coolant
temperature warning light will illuminate.
Caution
Stop the engine immediately if the high
coolant temperature warning light
illuminates. Do not restart the engine
until the fault has been rectified.
Severe engine damage will result from
running the engine when the high
coolant temperature warning light is
illuminated.
Immobiliser/Alarm Indicator Light
This Triumph motorcycle is
equipped with an engine immobilizer
which is activated when the ignition
switch is turned to the OFF position.
Without Alarm Equipped
When the ignition switch is turned to
the OFF position, the immobilizer/alarm
light will flash on and off for 24 hours to
show that the engine immobilizer is on.
When the ignition switch is turned to
the ON position the immobilizer and the
indicator light will be off.
If the indicator light remains on it
indicates that the immobilizer has a
malfunction that requires investigation.
Contact an authorized Triumph dealer
as soon as possible to have the fault
checked and rectified.
With Alarm Equipped
The immobilizer/alarm light will only
illuminate when the conditions
described in the genuine Triumph
accessory alarm instructions are met.
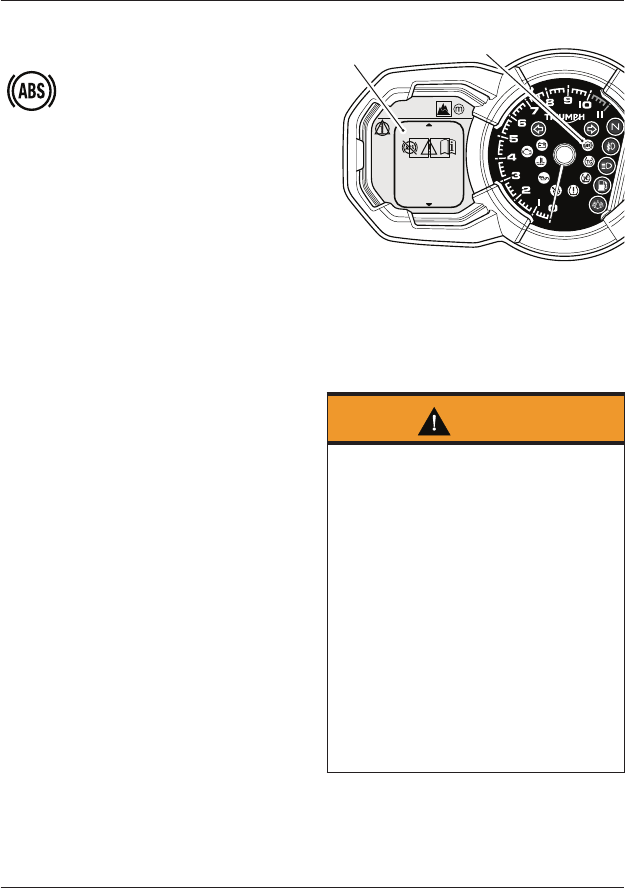
Instruments
61
ABS (Anti-Lock Brake System)
Warning Light
When the ignition switch is
turned to the ON position, it is normal
that the ABS warning light will flash on
and off. The light will continue to flash
after engine start-up until the
motorcycle first reaches a speed
exceeding 6 mph (10 km/h) when it will
go off.
The warning light should not illuminate
again until the engine is restarted
unless there is a fault, or:
• ABS is disabled by the rider - the
warning light will remain illuminated
(see Bike Setup on page 76 or
Riding Mode Configuration on
page 85).
• ABS is set to Off-Road – the
warning light will flash slowly (see
Riding Mode Configuration on
page 85).
Note:
• Traction control and cruise control
may not function if there is a
malfunction with the ABS system.
In this situation, the warning lights
for the ABS, traction control and
the MIL may be illuminated.
If the warning light becomes illuminated
at any other time while riding it
indicates that the ABS has a
malfunction that requires investigation.
The following warning message may be
displayed:
• WARNING - ABS SYSTEM DISABLED
The braking system will be affected as
follows:
WARNING - ABS SYSTEM DISABLED
OFF-ROAD
WARNING
ABS SYSTEM
DISABLED
CHECK MANUAL
PRESS SELECT
TO CLEAR
1
2
1. ABS warning light
2. Instrument message
The message WARNING - ABS SYSTEM
DISABLED indicates that the ABS is not
functioning.
Warning
If the ABS is not functioning or has
been disabled by the rider (see Bike
Setup on page 76 or Riding Mode
Configuration on page 85), the brake
system will continue to function as a
non-ABS braking system.
Do not continue to ride for longer than
is necessary with the warning light
illuminated. In the event of a fault,
contact an authorized Triumph dealer
as soon as possible to have the fault
checked and rectified.
In this situation, braking too hard will
cause the wheels to lock resulting in
loss of motorcycle control and an
accident.
See also Braking on page 146.

Instruments
62
Traction Control (TC) Indicator Light
The TC indicator light is used to
indicate that the TC system is active
and is working to limit rear wheel slip
during periods of hard acceleration or
under wet or slippery road conditions.
TC Indicator Light Operation:
TC Switched On (Rain, Road or Sport
Settings):
• Under normal riding conditions the
indicator light will remain off.
• The indicator light will flash rapidly
when the TC system is working to
limit rear wheel slip during periods
of hard acceleration or under wet
or slippery road conditions.
TC Switched On (Off-Road Setting):
• Under normal riding conditions, the
indicator light will flash slowly to
indicate that the TC system is set
to Off-Road.
• The TC indicator light will flash
rapidly when the TC system is
working to limit rear wheel slip
during periods of hard acceleration
or under wet or slippery conditions.
TC Switched Off:
The indicator light will not illuminate.
Instead the TC disabled warning light
will be illuminated.
Note:
• Traction control may not function if
there is a malfunction with the ABS
system. In this situation, the
warning lights for the ABS, TC and
the MIL may be illuminated.
Traction Control (TC) Disabled
Warning Light
The TC disabled warning light
should not illuminate unless TC is
disabled by the rider (see Bike Setup on
page 76 or Riding Mode Configuration on
page 85).
If the warning light becomes illuminated
at any other time while riding, it
indicates that the TC system has a
malfunction that requires investigation.
The following warning message may be
displayed:
• WARNING - TC SYSTEM DISABLED
The TC system will be affected as
follows:
The message WARNING - TC SYSTEM
DISABLED indicates that the traction
control system is not functioning.
Instruments
63
Warning
If the Traction Control (TC) system is
not functioning, care must be taken
when accelerating and cornering on
wet/slippery road surfaces to avoid
rear wheel spin.
In the event of a fault, the TC disabled
warning light may be accompanied by
the engine management system
malfunction indicator light and/or the
ABS warning light.
Do not continue to ride for longer than
is necessary with any of the above
warning lights illuminated. Contact an
authorized Triumph dealer as soon as
possible to have the fault checked and
rectified.
Hard acceleration and cornering in this
situation may cause the rear wheel to
spin resulting in loss of motorcycle
control and an accident.
Cruise Control Light
The cruise control can only be
activated when the motorcycle is
traveling at a speed between
19 to 100 mph (30 to 160 km/h) and is in
3rd gear or higher. When activated, the
cruise control light in the tachometer
will be illuminated (see page 104).
Warning
Cruise control must only be used
where you can ride safely at a steady
speed.
Cruise control should not be used
when riding in heavy traffic, on roads
with sharp/blind bends or when they
are slippery.
Using cruise control in heavy traffic, on
roads with sharp/blind bends or when
they are slippery, may result in loss of
motorcycle control and an accident.
Turn Signals
When the turn signal switch is
turned to the left or right, the indicator
warning light will flash on and off at the
same speed as the turn signals.
High Beam Switch
When the ignition is switched
ON and the headlight dimmer switch is
set to HIGH BEAM, the high beam
warning light will illuminate.
Fog Lights (if equipped)
When the ignition is switched on
and the fog lights are switched on, the
fog lights warning light will illuminate.
Instruments
64
Low Fuel Warning Light
The low fuel warning light will
illuminate when there is approximately
1.0 gallon (3.5 liters) of fuel remaining in
the tank.
Neutral
The neutral warning light
indicates when the transmission is in
neutral (no gear selected). The warning
light will illuminate when the
transmission is in neutral with the
ignition switch in the ON position.
Battery Warning Light
When the ignition is switched
on, the battery warning light will only
illuminate if a fault is recognized with
the battery.
With the engine running, if the battery
voltage becomes low, the battery
warning light in the tachometer will
illuminate and the message WARNING -
BATTERY LOW will also be shown in the
multifunction display screen.
Once the battery is fully charged the
warning light will go out and the
instrument message will be deactivated.
If the battery warning light remains on
it indicates that there is a malfunction
that requires investigation. Contact an
authorized Triumph dealer as soon as
possible to have the fault checked and
rectified.
Tire Pressure Warning Light
(if equipped with TPMS)
The tire pressure warning
light works in conjunction with the Tire
Pressure Monitoring System (TPMS) (see
page 111).
The warning light will only illuminate
when the front or rear tire pressure is
below the recommended pressure. It will
not illuminate if the tire is over inflated.
When the warning light is illuminated,
the message TPMS - FRONT/REAR TIRE
LOW PRESSURE will be shown in the
multifunction display screen.
Press the SELECT button to
acknowledge the message and return to
the home screen.
After pressing the SELECT button, the
tire pressures display will be
automatically shown in the motorcycle
information section of the home screen.
OFF-ROAD
AUTO
OFF-ROAD
MPG
MI
PSI
PSI
CNS
1
2
36
42
F
R
47
12
1
1. Tire pressures display
The tire pressure at which the warning
light illuminates is temperature
compensated to 68°F (20°C) but the
numeric pressure display associated
with it is not (see page 111). Even if the
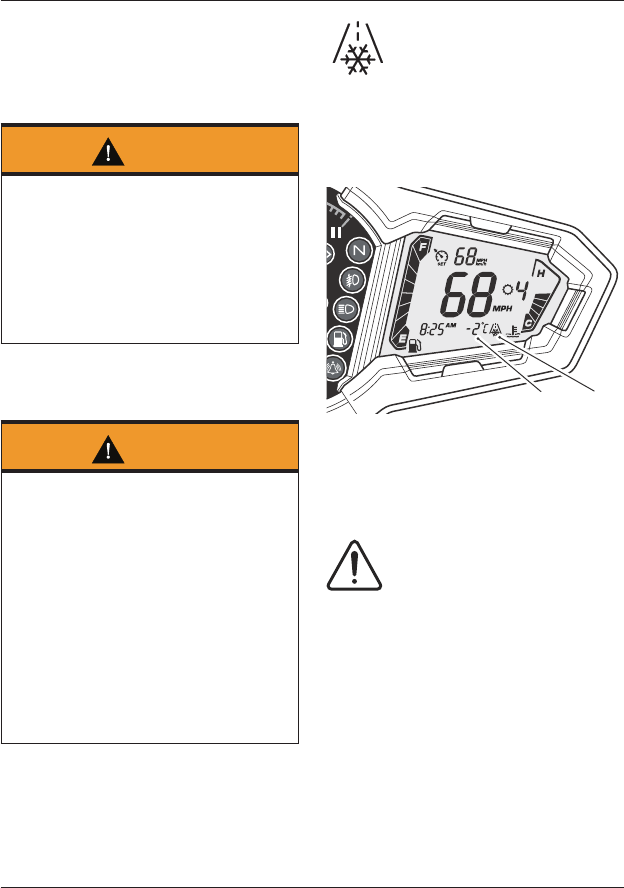
Instruments
65
numeric display seems at or close to the
standard tire pressure when the
warning light is on, a low tire pressure is
indicated and a puncture is the most
likely cause.
Warning
Stop the motorcycle if the tire pressure
warning light illuminates and the
message TPMS - FRONT/REAR TIRE
LOW PRESSURE is displayed.
Do not ride the motorcycle until the
tires have been checked and the tire
pressures are at their recommended
pressure when cold.
Frost Warning Light
Warning
Black ice (sometimes called clear ice)
can form at temperatures several
degrees above freezing (32°F (0°C)),
especially on bridges and in shaded
areas.
Always take extra care when the
temperatures are low and reduce
speed in potentially hazardous driving
conditions such as bad weather.
Excess speed, hard acceleration, heavy
braking or hard cornering when roads
are slippery may result in loss of
motorcycle control and an accident.
The frost warning light
illuminates if the ambient air
temperature is 39°F (4°C) or lower.
The frost warning light will remain
illuminated until the temperature rises
to 42°F (6°C).
1 2
1. Ambient air temperature
2. Frost symbol
Warning and Information Messages
Warning Messages
The following warning messages may be
displayed if a fault is detected:
• OIL PRESSURE LOW (see page 60)
• BATTERY LOW (see page 64)
• ABS SYSTEM DISABLED (see
page 61)
• TC SYSTEM DISABLED (see page 62)
• FRONT/REAR TIRE PRESSURE LOW
(see page 64)
• SENSOR SIGNAL FRONT/REAR TIRE
(see page 111).
Instruments
66
Information Messages
The following information message may
be displayed:
• TPMS - BATTERY LOW FRONT/
REAR TIRE (see page 64)
When a warning or information
message is activated, the message will
be accompanied by the relevant
warning or information symbol on the
left hand side of the multifunction
display.
It is possible for multiple warning and
information messages to be displayed
when a fault occurs. Where this is the
case, warning messages will take
priority over information messages and
the warning symbol will be displayed on
the left hand side of the multifunction
display.
The number of currently active warning
and information messages is displayed
over the warning/information symbol.
OFF-ROAD
WARNING
TTC SYSTEM
3
1
2
1. Symbol (warning symbol shown)
2. Multiple messages indicated
Use the SCROLL button to scroll
through the messages being displayed.
Press the SELECT button to
acknowledge and hide each message.
Note:
• Some messages are automatically
hidden after a short period.
• Hidden warning and information
messages remain active and will be
redisplayed each time the ignition is
switched on, until the condition
that triggered the message has
been rectified.
• The warning or information symbol
will remain visible in the
multifunction display while active
messages are hidden, along with
the number of hidden messages.
• Hidden warning or information
messages can be viewed using the
Show Warnings function as
described in the Settings Menu on
page 74.
Tachometer
Caution
Never allow engine speed to enter the
red zone as severe engine damage may
result.
The tachometer shows the engine
speed in revolutions per minute - rpm
(r/min). At the end of the tachometer
range there is the red zone.
Engine speeds in the red zone are above
maximum recommended engine speed
and are also above the range for best
performance.
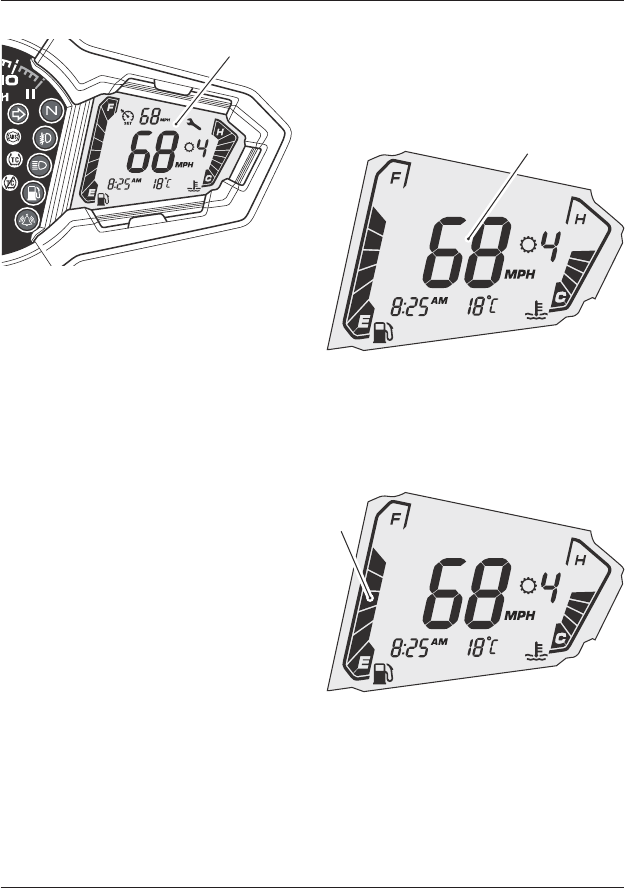
Instruments
67
Motorcycle Status Display Screen
1
1. Motorcycle status display screen
The motorcycle status display screen is
used to display the following:
• Speedometer
• Fuel gage
• Coolant temperature gage
• Gear position display
• Cruise control set speed
• Service indicator
• Clock
• Ambient air temperature and frost
symbol.
Speedometer
The digital speedometer indicates the
road speed of the motorcycle. The read-
out displays the motorcycle road speed
in increments of one mile (or kilometer)
per hour.
1
1. Speedometer
Fuel Gage
The fuel gage indicates the amount of
fuel in the tank.
1
1. Fuel gage
With the ignition switched on, the
number of bars shown in the display
indicates the level of fuel.
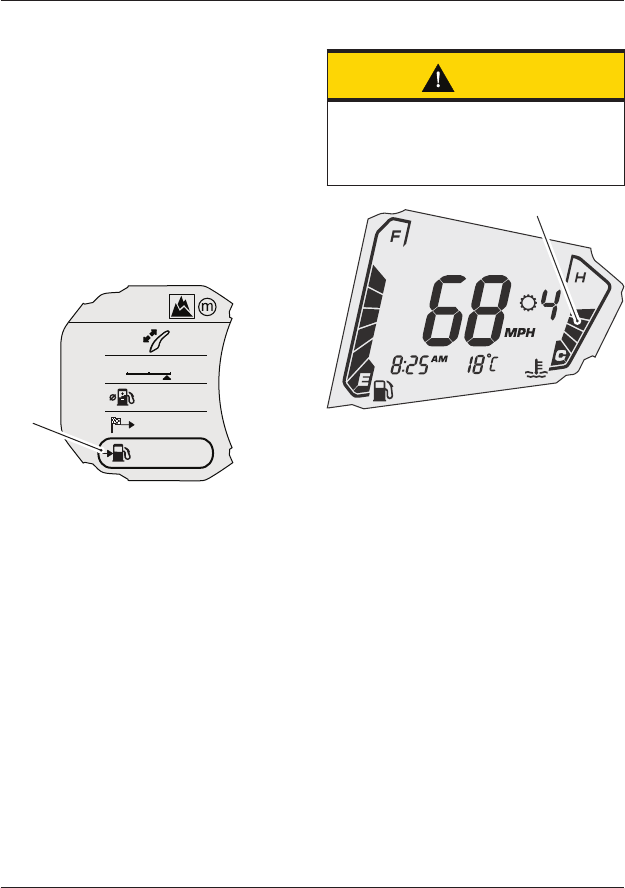
Instruments
68
When the fuel tank is full all eight bars
are displayed and when empty, no bars
are displayed. Other gage markings
indicate intermediate fuel levels
between full and empty.
The low fuel warning light will illuminate
when there is approximately 1.0 gallon
(3.5 liters) of fuel remaining in the fuel
tank (see page 64). At this point, two
bars will be visible in the fuel gage and
the information display in the
multifunction display screen will switch
to the Range to Empty display.
OFF-ROAD
AUTO
OFF-ROAD
MPG
MI
CNS
1
2
47
12
MI
120.1
1
1. Range to empty display
Refuel at the earliest opportunity when
the low fuel warning light is illuminated.
After refueling, the fuel gage and range
to empty information will be updated
only while riding the motorcycle.
Depending on the riding style, updating
could take up to five minutes.
Coolant Temperature Gage
Caution
Do not continue to run the engine if
either of the high temperature
warnings are displayed as severe
engine damage may result.
1
1. Coolant temperature gage
The coolant temperature gage indicates
the temperature of the engine coolant.
When the ignition is switched on, all
eight bars of the display will be shown.
When the engine is started from cold
the display will show no bars. As the
temperature increases more bars in the
display will be shown. When the engine
is started from hot the display will show
the relevant number of bars, dependent
on engine temperature.
The normal temperature range is
between four and six bars.
If the coolant temperature becomes too
high the display will show eight bars and
will start to flash. The high coolant
temperature light in the tachometer will
also flash.
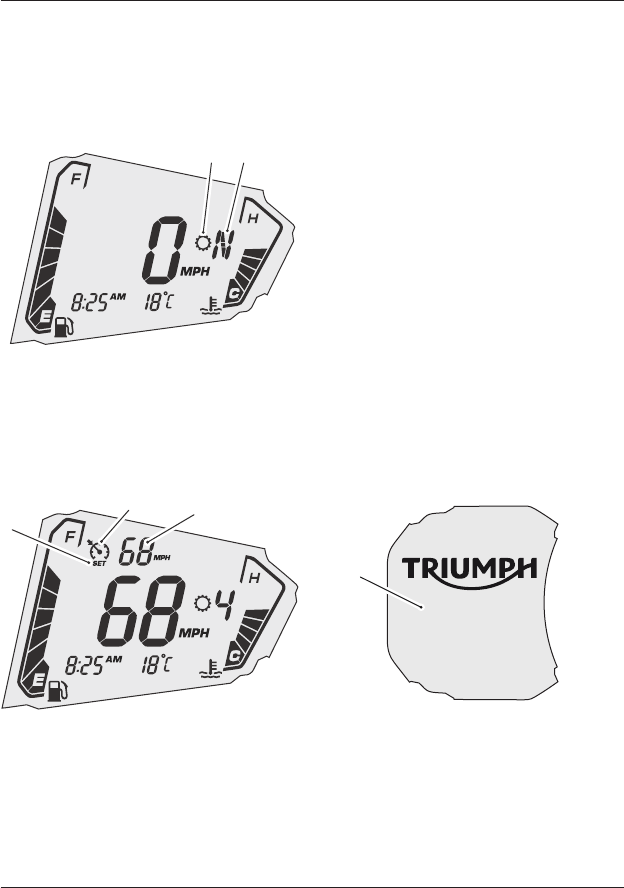
Instruments
69
Gear Position Display
The gear position display indicates
which gear (one to six) has been
engaged. When the transmission is in
neutral (no gear selected), the display
will show N.
1 2
1. Gear position symbol
2. Gear position display (neutral position
shown)
Cruise Control Set Speed
1
2
3
1. Cruise control symbol
2. Cruise control set indicator
3. Cruise control set speed
When cruise control is switched on, the
cruise control symbol will be visible in
the motorcycle status display screen.
The cruise control set speed will be
displayed as -- until a speed has been
set.
Upon setting a speed, the word SET will
be visible below the cruise control
symbol. The set speed will be displayed
and the cruise control light in the
tachometer will be illuminated.
When cruise control is deactivated, the
cruise control light in the tachometer
will go out but the set speed will remain
visible in the motorcycle status display
screen.
For more information, see Cruise Control
on page 104.
Service Indicator
When the ignition is switched on and
the distance to the next service is
500 miles (800 km) or less, the
multifunction display will briefly show
the distance remaining before the next
service in the startup screen.
SERVICE DUE
365 MI
ODOMETER
135 MI
1
1. Distance to next service
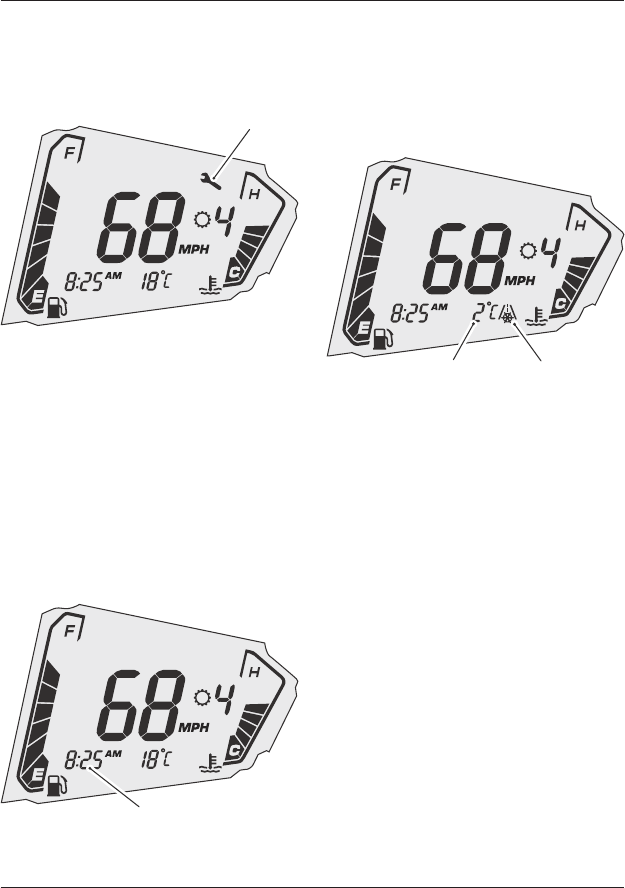
Instruments
70
If the service is overdue the distance
will be displayed as a negative number
and the service indicator will be
displayed in the motorcycle status
display screen.
1
1. Service indicator
When the service has been carried out
by your authorized Triumph dealer, the
system will be reset.
The service indicator will also be
displayed if a fault has occurred and the
ABS and/or MIL warning lights are
illuminated. Contact an authorized
Triumph dealer as soon as possible to
have the fault checked and rectified.
Clock
1
1. Clock - 12 hour format displayed
The clock can be displayed in 12 hour or
24 hour format.
To set the clock see Display Setup on
page 79.
Ambient Air Temperature
1
2
1. Ambient air temperature shown in °C
2. Frost symbol
The ambient air temperature is
displayed in °C or °F.
The frost symbol will illuminate if the
ambient air temperature is 39°F (4°C) or
lower (see page 65).
When the motorcycle is stationary the
heat of the engine may affect the
accuracy of the ambient temperature
display.
Once the motorcycle starts moving the
display will return to normal after a
short time.
To change the temperature from °C or
°F, see Display Setup on page 79.
Instruments
71
Multifunction Display Screen
OFF-ROAD
AUTO
OFF-ROAD
MPG
MI
PSI
PSI
CNS
1
2
36
42
F
R
F
R
47
12
1
1. Multifunction display screen
The multifunction display screen allows
the rider to view, select or configure:
• Riding modes
• Windshield position
• Trip computers
• Motorcycle information
• Motorcycle settings
• Display settings.
The multifunction display screen is also
used to display warning and information
messages.
For more information on warning and
information messages, see page 65.
Home Screen
The multifunction display home screen
is used to show the current riding mode,
windshield adjustment mode, trip
meters and motorcycle information.
OFF-ROAD
AUTO
OFF-ROAD
MPG
MI
PSI
PSI
CNS
1
2
36
42
F
R
47
12
1
2
3
4
5
6
1. Current riding mode
2. Windshield adjustment mode
3. Trip 1 display
4. Trip 2 display (if activated)
5. Tire Pressure Monitoring System
(TPMS) information (if equipped)
The home screen will show one trip
meter as default but can be configured
to show two trip meters. For more
information on trip set up, see page 75.
7
8
12
1. SCROLL button
2. SELECT button
Instruments
72
To adjust or edit the home screen items:
• Press and release the SCROLL
button until the required item is
selected.
• Press and release the SELECT
button to access the selected
item’s sub menu or adjustment
screen.
• Press and hold the SELECT button
to access the Settings menu. For
more information, see page 74.
Riding Mode Display
OFF-ROAD
AUTO
OFF-ROAD
MPG
MI
PSI
PSI
CNS
1
2
36
42
F
R
47
12
1
1. Current riding mode display
Shows the current riding mode. For
more information on riding modes, see
page 81.
Windshield Adjustment Mode
OFF-ROAD
AUTO
OFF-ROAD
MPG
MI
PSI
PSI
CNS
1
2
36
42
F
R
47
12
1
1. Windshield adjustment mode
To access the windshield adjustment
mode:
• Press the SCROLL button until the
windshield adjust display is
selected.
• Press the SELECT button to
activate the windshield adjustment
mode.
• Use the SCROLL button to adjust
the windshield to the required
height.
• There is a short time-out period to
allow for further adjustment to
take place before the instruments
automatically exit the windshield
adjustment mode.
• Alternatively, press the SELECT
button to exit the windshield
adjustment mode.
For more information on windshield
adjustment, see page 118.
Instruments
73
Trip Meters
OFF-ROAD
AUTO
OFF-ROAD
MPG
MI
PSI
PSI
CNS
1
2
36
42
F
R
47
12
1
2
1. Trip meter 1 display
2. Trip meter 2 display (if activated)
The home screen will permanently
display trip meter one as default, but
can be configured to display two trip
meters. For information on trip set up,
see page 75.
Trip Distance
The total trip distance traveled since
the trip meter was last reset to zero.
Trip Meter Reset
To reset either of the trip meters, from
the home screen select the trip meter to
be zeroed, then press and hold the
SCROLL button in either direction for
two seconds. After two seconds, all
items within the selected trip meter will
reset to zero.
Trip 2 can also be set to automatically
reset after an adjustable time delay of
between one and eight hours. See Trip
Setup on page 75.
Motorcycle Information
Warning
When the motorcycle is in motion, only
attempt to switch between the
information and trip meter display
modes or reset the trip meter under
the following conditions:
• At low speed
• In traffic-free areas
• On straight and level roads or
surfaces
• In good road and weather conditions.
Failure to observe this important
warning could lead to loss of
motorcycle control and an accident.
The motorcycle information display
shows the currently selected motorcycle
information item.
Note:
• If TPMS is equipped, the tire
pressures display will be available
for selection.
• The motorcycle information display
will automatically switch to the
Range to Empty display when the
low fuel warning light is illuminated.
To access the motorcycle information
menu:
• Press the SCROLL button until the
motorcycle information display is
selected.
• Press the SELECT button to enter
the motorcycle information menu.
Instruments
74
Motorcycle Information Menu
Any one of the available information
items can be selected to be shown in
the home screen.
OFF-ROAD
MI
120.1
MPG
48
MI
1892
ODO
PSI
4 2R
PSI
3 6F
1
2
3
4
1. Range to empty
2. Instantaneous fuel consumption
3. Odometer
4. Front and rear tire pressures
(if equipped with TPMS)
To select an information item to be
shown in the home screen:
• Press the SCROLL button until the
required information item is
selected.
• Press the SELECT button to confirm
the selection and return to the
home screen.
Each display provides the following
information:
Range to Empty
This is an indication of the probable
distance that can be traveled on the
remaining fuel in the tank.
The distance shown will adapt based on
the level of fuel in the tank and changes
to the riding style.
Instantaneous Fuel Consumption
An indication of the fuel consumption at
an instant in time. If the motorcycle is
stationary, --.- will be shown in the
display area.
Odometer
Shows the total distance that the
motorcycle has traveled.
Front and Rear Tire Pressures
(if equipped with TPMS)
The front and rear tire pressures are
shown only if the Tire Pressure
Monitoring System (TPMS) is installed.
Dashes will be shown in the tire
pressure display until the motorcycle
reaches a speed of approximately
12 mph (20 km/h).
Settings Menu
To access the SETTINGS menu:
• Press and hold the SELECT button
on the left hand switch housing
until the SETTINGS menu is shown
in the multifunction display screen.
SETTINGS
EXIT
SHOW WARNINGS
RIDING MODES
TRIP SETUP
BIKE SETUP
DISPLAY SETUP
SETTINGS Menu
Instruments
75
The following menu items are available
for selection:
• EXIT
• SHOW WARNINGS (see page 75)
• RIDING MODES (see page 75)
• TRIP SETUP (see page 75)
• BIKE SETUP (see page 76)
• DISPLAY SETUP (see page 79).
A description of each menu item is
described in the following pages.
Exit
Select EXIT to return to the home
screen.
Show Warnings
Select SHOW WARNINGS to exit the
SETTINGS menu and display all active
warning or information messages in the
multifunction display screen.
For more information on warning and
information messages, see page 65.
Riding Modes
From the SETTINGS menu, select RIDING
MODES to configure the ABS, MAP and
TC settings for each available riding
mode.
For more information on riding mode
configuration, see page 85.
Trip Setup
From the SETTINGS menu, select TRIP
SET UP to configure and reset the trip
meters.
TRIP SETUP
EXIT
TRIP 1 RESET
TRIP 2 RESET
TRIP 2 DISPLAY
AUTO RESET
TRIP SETUP Screen
The following menu items are available
for selection:
• EXIT
• TRIP 1 RESET
• TRIP 2 RESET
• TRIP 2 DISPLAY
• AUTO RESET.
Exit
Select EXIT to return to the SETTINGS
menu.
Trip 1 and Trip 2 Reset
TRIP 1 RESET
CONFIRM
TRIP 1 RESET (CONFIRM Shown)
Instruments
76
To reset TRIP 1 or TRIP 2:
• Press the SCROLL button to select
the required trip meter to reset,
either TRIP 1 RESET or TRIP 2
RESET.
• Press the SCROLL button to select
CONFIRM, then press the SELECT
button.
• All items within the selected trip
meter will be immediately reset to
zero and the display will return to
the TRIP SETUP menu.
Trip 2 Display
TRIP 2 DISPLAY
ENABLE
TRIP 2 DISPLAY (ENABLE Shown)
To enable or disable the TRIP 2 DISPLAY:
• Press the SCROLL button to select
TRIP 2 DISPLAY, then press the
SELECT button.
• Press the SCROLL button to select
ENABLE or DISABLE.
• Press the SELECT button to confirm
the selection and return to the
TRIP SETUP menu.
Auto Reset
The AUTO RESET function applies to
TRIP 2 only. TRIP 1 must be reset
manually using TRIP 1 RESET as
previously described.
AUTO RESET
4 HRS
AUTO RESET (4 HRS Shown)
To auto reset the trip meters:
• Press the SCROLL button to select
AUTO RESET, then press the
SELECT button.
• Press the SCROLL button to select
OFF, 1 HR, 2 HRS, 4 HRS or 8 HRS.
• Press the SELECT button to confirm
the selection and return to the
TRIP SETUP menu.
• After the ignition has been
switched OFF and the set time has
elapsed, all items within TRIP 2 will
be reset to zero.
Bike Setup
From the SETTINGS menu, select BIKE
SET UP to configure the Anti-Lock
Braking System (ABS) and Traction
Control (TC) settings.
BIKE SETUP
EXIT
ABS
TC
BIKE SETUP Menu
The following menu items are available
for selection:
• EXIT
• ABS
• TC.
Instruments
77
Exit
Select EXIT to return to the SETTINGS
menu.
Anti-Lock Braking System (ABS)
It is possible to temporarily disable the
ABS system. The ABS system cannot be
permanently disabled, it will be
automatically enabled when the ignition
is turned OFF and then ON again.
Warning
Selecting ABS DISABLE will disable the
anti-lock braking system.
The ABS settings stored for each riding
mode will be overridden, regardless of
whether they are set to Road, Off-
Road or OFF.
The ABS and the riding mode ABS
settings will not be enabled again until
ENABLE is selected from the ABS menu
or the ignition is turned OFF then ON
again.
If the ABS is disabled, the brake system
will function as a non-ABS braking
system. In this situation braking too
hard will cause the wheels to lock, and
may result in loss of motorcycle control
and an accident.
Warning
Do not attempt to adjust the ABS
settings while the motorcycle is in
motion as this may lead to loss of
motorcycle control and an accident.
To enable or disable the ABS system:
• Press the SCROLL button to select
ABS, then press the SELECT button
to confirm.
• Press the SCROLL button to select
ENABLE or DISABLE.
ABS
ENABLE
ABS (ENABLE Shown)
• Press the SELECT button to confirm
the selection and return to the
BIKE SETUP menu.
• If DISABLE is selected, the ABS
warning light will be illuminated and
the message WARNING - ABS
SYSTEM DISABLED will be briefly
shown in the multifunction display
screen.
• The ABS and all riding mode ABS
settings will be disabled until the
ABS is re-enabled. All ABS settings
are automatically enabled when the
ignition is turned OFF and then ON
again.
Note:
• If the ABS is disabled by the rider,
traction control and cruise control
(if equipped) will still function.
Traction Control (TC)
It is possible to temporarily disable the
Traction Control (TC) system. The TC
system cannot be permanently disabled,
it will be automatically enabled when the
ignition is turned OFF and then ON
again.
Instruments
78
Warning
Selecting TC DISABLE will disable the
traction control system.
All traction control settings stored for
each riding mode will be overridden
regardless of whether they are set to
Rain, Road, Sport, Off-Road or Off.
Traction control and the riding mode
TC settings will not be enabled again
until ENABLE is selected from the TC
menu, or the ignition is turned OFF
then ON again.
If traction control is disabled, the
motorcycle will handle as normal but
without traction control. In this
situation accelerating too hard on wet/
slippery road surfaces may cause the
rear wheel to slip, and may result in
loss of motorcycle control and an
accident.
To enable or disable the traction control:
• Press the SCROLL button to select
TC, then press the SELECT button
to confirm.
• Press the SCROLL button to select
ENABLE or DISABLE.
TC
ENABLE
TC (ENABLE Shown)
• Press the SELECT button to confirm
the selection and return to the
BIKE SETUP menu.
• If DISABLE is selected, the TC
disabled warning light will be
illuminated and the message
WARNING - TC SYSTEM DISABLED
will be briefly shown in the
multifunction display screen.
• Traction control and all riding mode
traction control settings will be
disabled until the traction control is
re-enabled. All traction control
settings are automatically enabled
when the ignition is turned OFF and
ON again.
Instruments
79
Display Setup
From the SETTINGS menu, select
DISPLAY SETUP to configure the display
settings.
DISPLAY SETUP
EXIT
LANGUAGE
SET UNITS
SET CLOCK
BRIGHTNESS
DISPLAY SETUP Menu
The following menu items are available
for selection:
• EXIT
• LANGUAGE
• SET UNITS
• SET CLOCK
• BRIGHTNESS.
Exit
Select EXIT to return to the SETTINGS
menu.
Language
LANGUAGE
ENGLISH
LANGUAGE Menu (ENGLISH Shown)
The following languages are available:
• English
• French
• German
• Italian
• Dutch
• Spanish
• Swedish
• Brazilian.
To select a language:
• Press the SCROLL button to select
LANGUAGE, then press the SELECT
button to confirm.
• Press the SCROLL button to select
the required language, then press
the SELECT button to confirm and
return to the DISPLAY SETUP
menu.
Note:
• All menu items displayed will
change to the newly selected
language when the SELECT button
is pressed.
Set Units
DISTANCE
MILES
DISTANCE Menu (MILES shown)
To set the display units:
• Press the SCROLL button to select
SET UNITS, then press SELECT to
confirm.
• The DISTANCE menu is then shown.
Press the SCROLL button to select
MILES or KM and then press the
SELECT button to confirm.
Instruments
80
Note:
• If DISTANCE has been set to MILES,
the menu options available will be
MPG (UK) or MPG (US).
• If DISTANCE has been set to KM, the
menu options available will be KM/L
or L/100 KM.
• Use the SCROLL button to select
the required unit and press the
SELECT button to confirm.
Note:
• If DISTANCE has been set to MILES,
then TEMP (temperature) is shown.
Press the SCROLL button to select
either °F or °C and then press the
SELECT button to confirm.
• If DISTANCE has been set to KM,
then the temperature display will
be automatically set to °C.
• If equipped with TPMS, then the
PRESSURE menu is shown.
• Press the SCROLL button to select
either PSI, BAR or kPa.
• Press the SELECT button to confirm
the settings and return to the
DISPLAY SETUP menu.
Set Clock
SET CLOCK
24 HR
SET CLOCK (24 HR Shown)
To set the clock:
• Press the SCROLL button to select
SET CLOCK, then press the SELECT
button to confirm.
• Press the SCROLL button to select
the required clock display either
12 HR or 24 HR format and press
the SELECT button to confirm.
• The SET HOUR menu is now shown.
Press the SCROLL button to select
the required hour display and press
the SELECT button.
• The SET MINUTE menu is now
shown. Press the SCROLL button to
select the required minute display
and press the SELECT button to
confirm and return to the DISPLAY
SETUP menu.
Brightness
BRIGHTNESS
BRIGHTNESS Menu
To adjust the brightness of the screen:
• Press the SCROLL button to select
BRIGHTNESS, then press the
SELECT button to confirm.
• Press the SCROLL button to adjust
the instrument brightness using
the adjustment slider between
levels 1 (lowest) to 10 (highest).
• Press the SELECT button to save
the selection and return to the
DISPLAY SETUP menu.
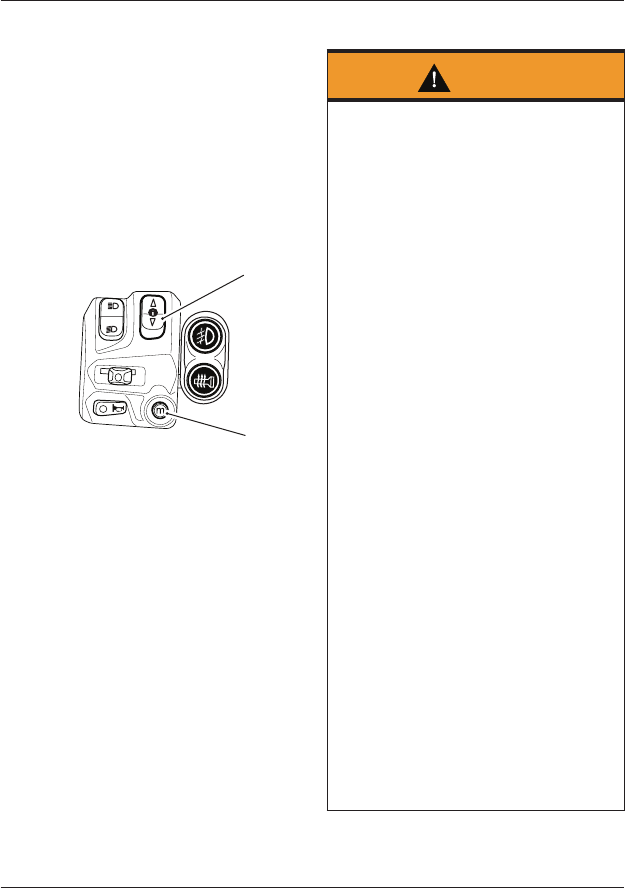
Instruments
81
Riding Modes
The riding mode system allows
adjustment of the Anti-lock Brake
System (ABS), throttle response (MAP)
and Traction Control (TC) settings to suit
different road conditions and rider
preferences.
Riding modes can be selected using the
MODE and SCROLL buttons on the left
hand switch housing, while the
motorcycle is stationary or moving.
2
1
1. MODE button
2. SCROLL button
The following riding modes are available:
• RAIN
• ROAD
• OFF-ROAD
Each riding mode is fully adjustable but
availability of the ABS, MAP and TC
settings options may vary between
modes. For more information on riding
mode configuration, see page 85.
Riding Mode Selection
Warning
The selection of riding modes while the
motorcycle is in motion requires the
rider to allow the motorcycle to coast
(motorcycle moving, engine running,
throttle closed, clutch lever pulled in
and no brakes applied) for a brief
period of time.
Riding mode selection while the
motorcycle is in motion should only be
attempted:
• At low speed
• In traffic-free areas
• On straight and level roads or
surfaces
• In good road and weather conditions.
• Where it is safe to allow the
motorcycle to briefly coast.
Riding mode selection while the
motorcycle is in motion MUST NOT be
attempted:
• At high speeds
• While riding in traffic
• During cornering or on winding roads
or surfaces
• On steeply inclined roads or surfaces
• In poor road/weather conditions
• Where it is unsafe to allow the
motorcycle to coast.
Failure to observe this important
warning may lead to loss of motorcycle
control and an accident.
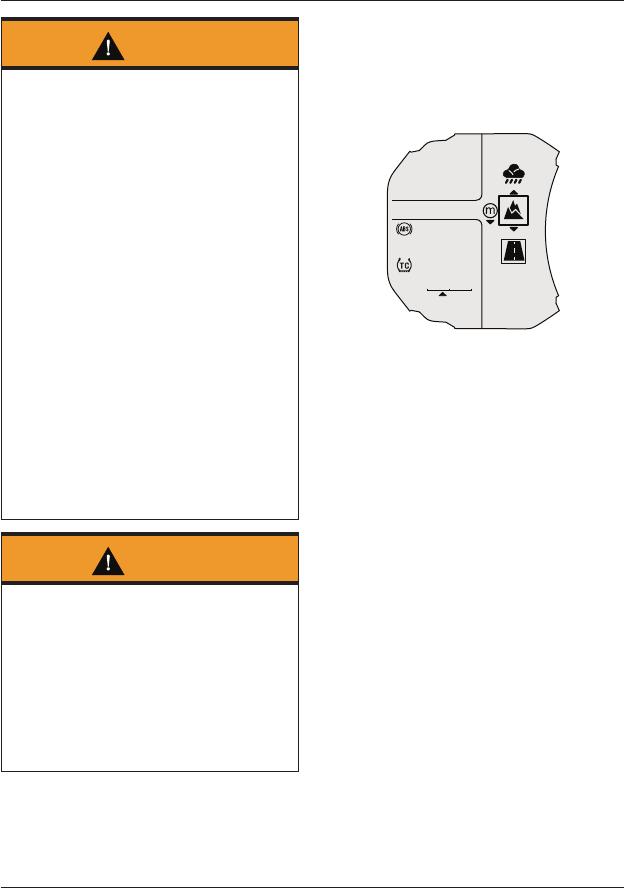
Instruments
82
Warning
If ABS and/or TC has been disabled
using the BIKE SETUP menu, the ABS
and/or TC settings saved for all riding
modes will be overridden.
ABS and/or TC will remain OFF
regardless of the riding mode selection,
until they have been re-enabled or, the
ignition has been switch OFF then ON
again.
If the ABS is disabled, the brake system
will function as a non-ABS braking
system. In this situation braking too
hard will cause the wheels to lock, and
may result in loss of motorcycle control
and an accident.
If the traction control is disabled, the
motorcycle will handle as normal but
without traction control. In this
situation accelerating too hard on wet/
slippery road surfaces may cause the
rear wheel to slip, and may result in loss
of motorcycle control and an accident.
Warning
After selecting a riding mode, operate
the motorcycle in an area free from
traffic to gain familiarity with the new
settings.
Do not loan your motorcycle to anyone
as they may change the riding mode
settings from those you are familiar
with, causing loss of motorcycle control
and an accident.
To select a riding mode:
Press and release the MODE button on
the left hand switch housing to activate
the riding mode selection menu in the
multifunction display.
OFF-ROAD
OFF-ROAD
OFF-ROAD
OFF-ROAD
OFF-ROAD
CNS
MAP
Riding Mode Selection Menu
Further presses of the MODE button will
scroll through the riding modes in the
following order:
• RAIN
• ROAD
• OFF-ROAD.
Alternatively, the SCROLL button can be
used to scroll up or down through the
riding modes.
Note:
• To allow the user to scroll between
each of the modes, there is a short
time-out to allow for further
scrolling to take place before the
highlighted riding mode is
automatically activated.
Scroll through the riding modes until the
desired mode is highlighted in the
selection window.
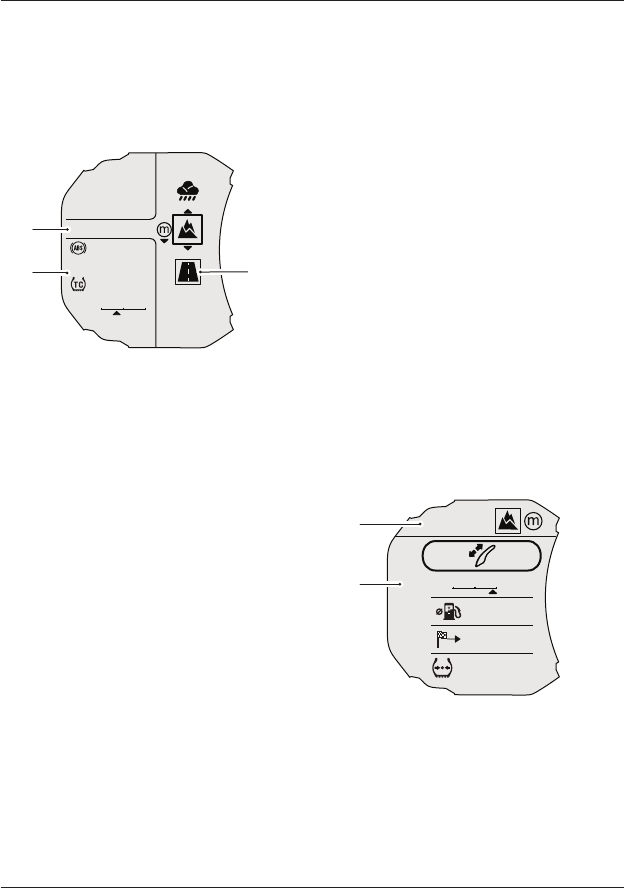
Instruments
83
The name of the highlighted riding mode
and its currently stored ABS, MAP and
TC settings, are displayed on the left
hand side of the multifunction display.
The currently active riding mode is
indicated with a border.
OFF-ROAD
OFF-ROAD
OFF-ROAD
OFF-ROAD
OFF-ROAD
CNS
MAP
1
23
1. Selected riding mode
2. Selected riding mode’s ABS, MAP and
TC settings
3. Currently active riding mode
The riding mode shown in the selection
window is automatically activated once
the time-out has elapsed, and the
following conditions for switching modes
have been met.
Motorcycle Stationary - Engine Off
• The ignition is switched ON.
• The engine stop switch is in the
RUN position.
Motorcycle Stationary - Engine On
• Neutral gear is selected or the
clutch is pulled in.
Motorcycle in Motion
Within 30 seconds of selecting a riding
mode the rider must carry out the
following simultaneously:
• Close the throttle
• Pull the clutch in
• Make sure that the brakes are not
engaged (allow the motorcycle to
coast).
Note:
• It is not possible to select OFF-
ROAD mode while the motorcycle is
in motion, if the ABS or TC settings
are set to OFF-ROAD or OFF.
• In this case, the motorcycle must
be brought to a stop before the
riding mode change can take place.
Once the ABS, MAP and TC settings
have changed, the multifunction display
will return to the home screen and the
selected riding mode will be shown.
OFF-ROAD
AUTO
OFF-ROAD
MPG
MI
PSI
PSI
CNS
1
2
36
42
F
R
47
12
2
1
1. Selected riding mode
2. Home screen
The riding mode change is now
complete and normal riding can be
resumed.
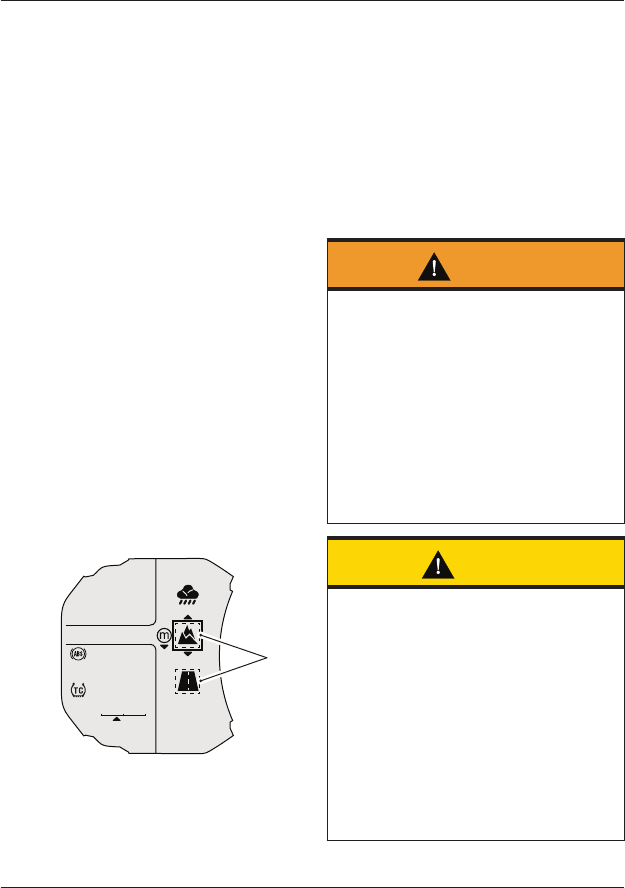
Instruments
84
Note:
• The riding mode will default to
ROAD when the ignition is switched
ON if the OFF-ROAD mode was
active the last time the ignition was
switched OFF, with ABS and/or TC
set to OFF-ROAD or OFF.
• Otherwise, the last selected riding
mode will be remembered and
activated when the ignition is
switched ON.
• If the mode icons are not visible
when the ignition switch is in the
ON position, make sure that the
engine stop switch is in the RUN
position.
Incomplete Riding Mode Changes
In the event of an incomplete riding
mode change, both the previous and
newly selected riding modes will be
highlighted with a dashed border. This
indicates that the ABS, MAP or TC
settings specified by the newly
requested riding mode have not been
correctly activated.
OFF-ROAD
OFF-ROAD
OFF-ROAD
OFF-ROAD
OFF-ROAD
CNS
MAP
1
1. Incomplete riding mode change
In this case the MIL, ABS or TC warning
light(s) may be illuminated depending on
the current state of each system.
In the event of an incomplete riding
mode change:
• Safely bring the motorcycle to a
stop.
• Select neutral gear.
• Turn the ignition OFF and then back
ON again.
• Select the required riding mode.
• Restart the engine and continue
riding.
Warning
Do not stop the engine using the
ignition switch or engine stop switch
while the motorcycle is moving.
Always bring the motorcycle to a stop
safely and engage neutral gear prior to
stopping the engine.
Stopping the engine by turning off the
ignition or engine stop switch while the
motorcycle is moving can lock the rear
wheel causing loss of motorcycle
control and an accident.
Caution
Do not stop the engine using the
ignition switch or engine stop switch
while the motorcycle is moving.
Always bring the motorcycle to a stop
safely and engage neutral gear prior to
stopping the engine.
The transmission is pressure lubricated
only when the engine is running.
Inadequate lubrication may cause
damage or seizure of the transmission,
which can lead to sudden loss of
motorcycle control and an accident.
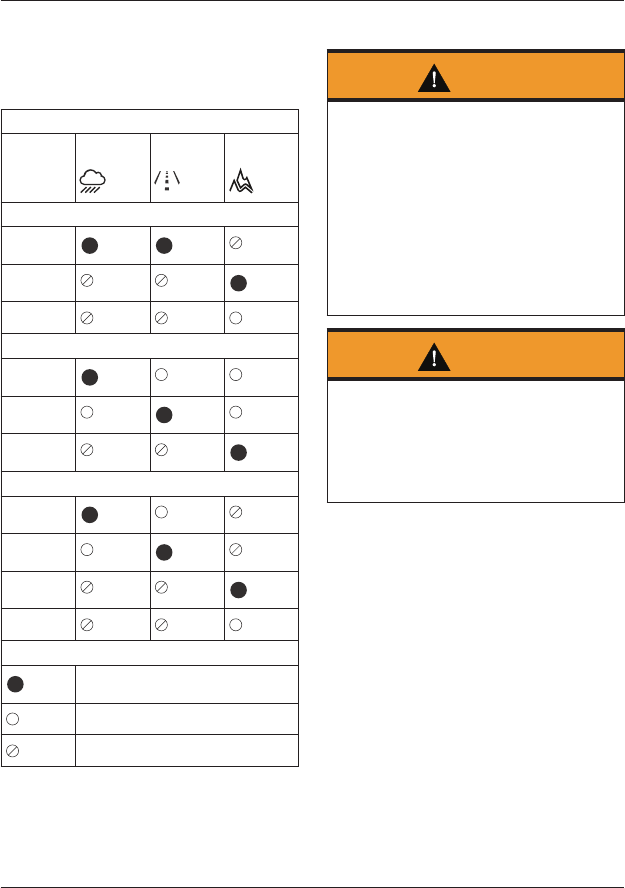
Instruments
85
Riding Mode Configuration
Refer to the following table for the ABS,
MAP and TC options available for each
riding mode.
Riding Mode
RAIN ROAD OFF-ROAD
ABS (Anti-lock Braking System)
Road
Off-Road
Off
MAP (Throttle Response)
Rain
Road
Off-Road
TC (Traction Control)
Rain
Road
Off-Road
Off
Key
Standard (Factory Default Setting)
Selectable Option
Option Not Available
ABS Option Descriptions
Warning
The OFF-ROAD ABS option is NOT
intended for use with normal, on-road
riding.
Use of the rear brake pedal in this
situation can cause the rear wheel to
lock under heavy braking.
Riding on-road with the ABS set to
OFF-ROAD can lead to instability when
braking which may result in loss of
motorcycle control and an accident.
Warning
If the ABS is disabled, the brake system
will function as a non-ABS braking
system. In this situation braking too
hard will cause the wheels to lock, and
may result in loss of motorcycle control
and an accident.
• Road - Optimal ABS setting for road
use.
• Off-Road - Optimal ABS setting for
off-road use as follows:
• Front Brake Lever Operation - If the
front brake lever is operated only,
the partially integrated braking
system will also apply a small
amount of rear brake as described
in Braking on page 146. In this
situation, the level of ABS
intervention is optimized for off-
road riding for both front and rear
wheels.
Instruments
86
• Rear Brake Pedal Operation - If the
rear brake pedal is operated at any
point, all rear braking input will be
controlled directly by the rear
brake pedal. Operating the rear
brake pedal will override any rear
braking input applied by the
partially integrated braking system,
through use of the front brake
lever. In this situation, the level of
ABS intervention is optimized for
off-road riding for the front wheel,
but the rear wheel will be allowed
to lock under heavy braking. Use of
the rear brake pedal alone will only
apply the rear brake and the rear
wheel will be allowed to lock under
heavy braking. The ABS warning
light will flash slowly.
• Off - ABS is turned off. The ABS
warning light will be illuminated.
MAP Option Descriptions
• Rain - Reduced throttle response
when compared to the Road
setting, for wet or slippery
conditions.
• Road - Standard throttle response.
• Off-Road - Optimal throttle
response setting for off-road use.
TC Option Descriptions
Warning
The OFF-ROAD TC option is not
intended for normal, on-road riding.
Riding on-road with TC set to OFF-
ROAD can produce instability under
acceleration due to the increased
amount of rear wheel slip allowed.
Instability caused by rear wheel slip
may lead to loss of motorcycle control
and an accident.
Warning
If the traction control is disabled, the
motorcycle will handle as normal but
without traction control. In this
situation accelerating too hard on wet/
slippery road surfaces may cause the
rear wheel to slip, and may result in
loss of motorcycle control and an
accident.
• Rain - Optimal TC setting for wet or
slippery conditions. Allows reduced
rear wheel slip when compared with
the Road setting.
• Road - Optimal TC setting for road
use, allows a small amount of rear
wheel slip.
• Off-Road - TC is set up for off-road
use, allowing increased rear wheel
slip when compared to the Rain,
Road and Sport settings. The TC
indicator light will flash slowly.
• Off - TC is turned OFF. The TC
disabled warning light will be
illuminated.
Instruments
87
Note:
• During riding mode configuration,
ABS and TC can be activated or
deactivated in the Off-Road and
Rider modes.
• If the riding mode being configured
is currently selected, adjustments
to the ABS, MAP and TC systems
will become immediately active.
• If the riding mode being configured
is not currently selected,
adjustments to the ABS, MAP and
TC systems are saved and will
become active the next time the
riding mode is selected.
To configure a riding mode:
With the motorcycle stationary, press
and hold the SELECT button to activate
the SETTINGS menu.
Use the SCROLL button to select RIDING
MODES then press the SELECT button
to confirm the selection.
RIDING MODES
EXIT
RAIN
ROAD
OFF-ROAD
RIDING MODES Menu
Use the SCROLL button to select the
riding mode to be configured, then
press the SELECT button to enter the
selected riding mode’s configuration
menu.
Alternatively, press and hold the MODE
button to provide direct access to a
riding mode’s configuration menu as
follows:
From the Home Screen
Press and hold the MODE button while
in the Home screen to activate the
configuration menu for the currently
active riding mode.
From the RIDING MODES Menu
Press and hold the MODE button while
in the RIDING MODES menu to activate
the configuration menu for the required
riding mode.
OFF-ROAD
EXIT
ABS
MAP
TC
RESET
OFF-ROAD Configuration Menu
(MAP Selected)
From a riding mode’s configuration
menu, press the SCROLL button until
the required option is selected. Press
the SELECT button to confirm and view
the option’s menu.
Exit
Select EXIT to return to the RIDING
MODES menu.
Instruments
88
ABS
ABS
ROAD
ABS Menu (ROAD Selected)
To change the ABS setting:
• From the ABS menu, press the
SCROLL button to select the
required option. Press the SELECT
button to confirm the selection and
return to the configuration menu.
Warning
If the ABS is disabled, the brake system
will function as a non-ABS braking
system. In this situation braking too
hard will cause the wheels to lock, and
may result in loss of motorcycle control
and an accident.
MAP
MAP
ROAD
MAP Menu (ROAD Selected)
To change the MAP setting:
• From the MAP menu, press the
SCROLL button to select the
required option. Press the SELECT
button to confirm the selection and
return to the configuration menu.
TC
TC
ROAD
TC Menu (ROAD Selected)
To change the TC setting:
• From the TC menu, press the
SCROLL button to select the
required option. Press the SELECT
button to confirm the selection and
return to the configuration menu.
Warning
If the traction control is disabled, the
motorcycle will handle as normal but
without traction control. In this
situation accelerating too hard on wet/
slippery road surfaces may cause the
rear wheel to slip, and may result in
loss of motorcycle control and an
accident.
Reset
RESET
CONFIRM
RESET Menu (CONFIRM Selected)
To reset the riding modes:
• From the RESET menu, press the
SCROLL button to select CONFIRM
to return the selected riding mode’s
configuration to the factory default
settings.
• Refer to the table on page 85 for
details of the factory default
settings for each riding mode.

General Information
89
GENERAL INFORMATION
Table of Contents
Hand Controls 91
Keyless Ignition (if equipped) 91
Master Ignition Switch (if equipped) 92
Ignition Key 92
Ignition Switch/Steering Lock 93
Right Handlebar Switches 94
Right Handlebar Switches 96
Left Handlebar Switches 97
Left Handlebar Switches 100
Throttle Control 102
Brake and Clutch Lever Adjusters 103
Cruise Control 104
Activating Cruise Control 105
Adjusting the Set Speed While in Cruise Control 106
Deactivating Cruise Control 106
Resuming the Cruise Control Set Speed 107
Triumph Semi Active Suspension (TSAS) (if equipped) 108
Traction Control (TC) 109
Optimized Cornering Traction Control (if equipped) 110
Traction Control Settings 111
Tire Pressure Monitoring System (TPMS) (if equipped) 111
Tire Pressure Sensor Serial Number 112
System Display 112
Sensor Batteries 113
TPMS System Fault 113
Tire Pressures 114
Low Tire Pressure 114
Fuel 115
Fuel 115
Fuel Tank Cap 116
Filling the Fuel Tank 117
Windshield 118
Handlebar Adjustment 119
Stands 121
Side Stand 121
Center Stand (if equipped) 121

General Information
90
Seats 122
Seat Care 122
Passenger Seat 122
Rider's Seat 123
Rider’s Seat Height Adjustment 124
Heated Seats (if equipped) 124
Helmet Hook 126
Tool Kit, Handbook and the Triumph Accessory D-Lock 126
Electrical Accessory Sockets 127
Universal Serial Bus (USB) Socket 128
Expedition Aluminum Panniers (if equipped) 129
Breaking-In 136
Daily Safety Checks 137
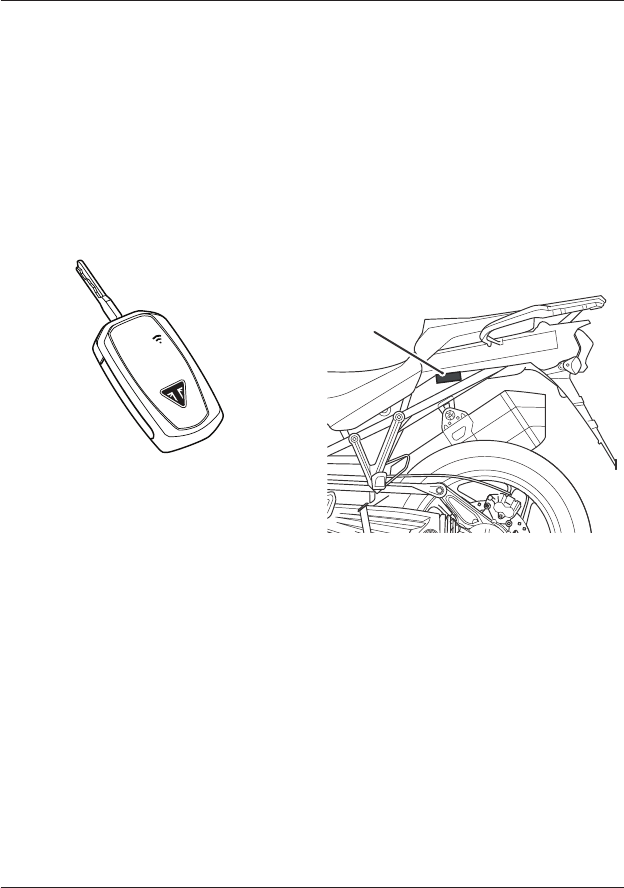
General Information
91
Hand Controls
Keyless Ignition (if equipped)
The keyless ignition system allows the
motorcycle to be started without the
use of a mechanical key.
There are three keys supplied with the
motorcycle. One smart key and two
standard keys.
Smart Key
Note:
• An additional smart key can be
purchased from your Triumph dealer.
However, only three keys can be
programmed to the motorcycle. This
can be a combination of smart keys
and standard keys.
Smart Key Operation
Press the button on the smart key to
turn the key on. The button light shows
green briefly to indicate that the smart
key is on.
A short press on the smart key button
shows the status of the smart key; red
is OFF and green is ON. A long press of
the button will change the status to OFF
or ON after briefly showing the original
status color first.
The smart key must be within close
proximity (three feet/one meter) of the
system sensor, which is located on the
left hand side of the motorcycle under
the passenger seat. If the smart key is
out of range of the sensor then it will be
unresponsive and the keyless ignition
cannot be activated.
1
Sensor Location
For more information on starting the
engine with keyless ignition, see
page 144.
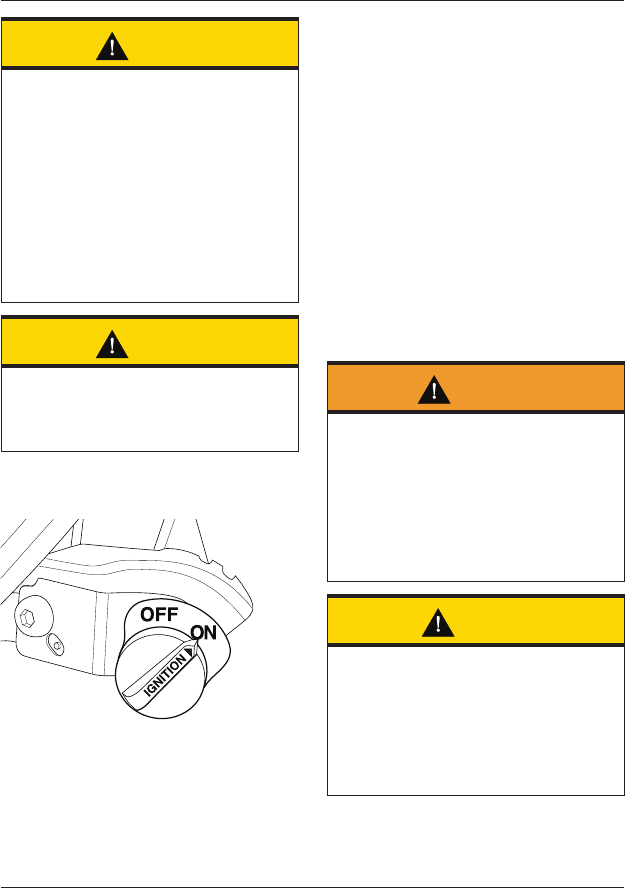
General Information
92
Caution
All keys supplied with the motorcycle
are specific to the individual
motorcycle. They cannot be used on
another motorcycle.
If all keys are lost, misplaced or
damaged, then the chassis control unit
on the motorcycle will need to be
replaced.
To avoid unnecessary cost and time,
make sure that all spare keys are kept
in a secure location.
Caution
If there is a fault with the smart key or
the smart key battery is flat then take
the smart key to the nearest Triumph
dealer to rectify.
Master Ignition Switch (if equipped)
ckde
Master Ignition Switch
The master ignition switch is only
mounted to motorcycles in the United
States and Canada. The master ignition
switch is located on the right hand side
of the instrument panel.
To operate the motorcycle with the
keyless ignition, the master ignition
switch must be in the ON position.
If the master ignition switch is in the
OFF position then the keyless ignition
cannot be used and the motorcycle
cannot be started.
Ignition Key
Tiger 1200 XR Only
Warning
Additional keys, key rings/chains or
items attached to the ignition key may
interfere with the steering, leading to
loss of motorcycle control and an
accident.
Remove all additional keys, key rings/
chains and items from the ignition key
before riding the motorcycle.
Caution
Additional keys, key rings/chains or
items attached to the ignition key may
cause damage to the motorcycle's
painted or polished components.
Remove all additional keys, key rings/
chains and items from the ignition key
before riding the motorcycle.
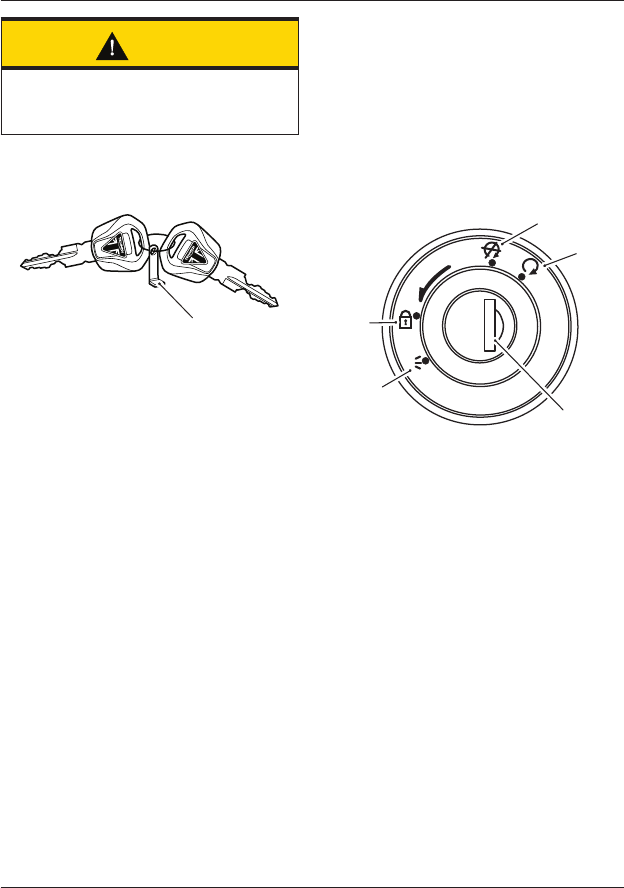
General Information
93
Caution
Do not store the spare key with the
motorcycle as this will reduce all
aspects of security.
1
cixj
1. Key number tag
In addition to operating the ignition
switch/steering lock, the ignition key is
required to operate the seat lock and
fuel tank cap.
When the motorcycle is delivered from
the factory, two ignition keys are
supplied together with a small tag
bearing the key number. Make a note of
the key number and store the spare key
and key number tag in a safe place
away from the motorcycle.
There is a transponder within the
ignition keys to turn off the engine
immobilizer. To make sure the
immobilizer functions correctly, always
have only one of the ignition keys near
the ignition switch. Having two ignition
keys near the switch may interrupt the
signal between the transponder and the
engine immobilizer. In this situation the
engine immobilizer will remain active
until one of the ignition keys is removed.
Always get replacement keys from your
authorized Triumph dealer. Replacement
keys must be 'paired' with the
motorcycle’s immobilizer by your
authorized Triumph dealer.
Ignition Switch/Steering Lock
Tiger 1200 XR Only
P
U
S
H
P
O
F
F
O
N
3
2
5
1
4
1. Ignition switch/steering lock
2. LOCK position
3. OFF position
4. ON position
5. PARK position
Engine Immobilizer
The ignition barrel housing acts as the
antenna for the engine immobilizer.
When the ignition switch is turned to
the OFF position and the ignition key is
removed, the engine immobilizer is on.
The engine immobilizer is turned off
when the ignition key is in the ignition
switch and it is turned to the ON
position.
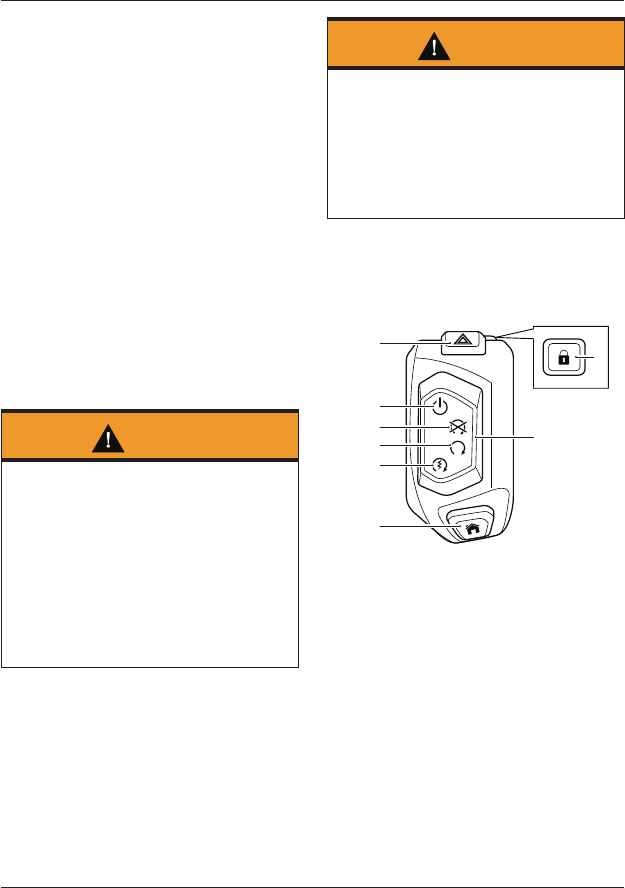
General Information
94
Ignition Switch Positions
This is a four-position, key operated
switch. The key can be removed from
the switch only when it is in the OFF,
LOCK or P (PARK) position.
TO LOCK: Turn the handlebar fully to the
left, turn the key to the OFF position,
push and fully release the key, then
rotate it to the LOCK position.
PARKING: Turn the key from the LOCK
position to the P position. The steering
will remain locked, and the position
lights will be switched on.
Note:
• Do not leave the steering lock in
the P position for long periods of
time as this will cause the battery
to discharge.
Warning
For reasons of security and safety,
always move the ignition switch to the
OFF, LOCK or PARK position and remove
the key when leaving the motorcycle
unattended.
Any unauthorized use of the
motorcycle may cause injury to the
rider, other road users and pedestrians
and may also cause damage to the
motorcycle.
Warning
With the key in the LOCK or P position
the steering will become locked.
Never turn the key to the LOCK or P
positions while the motorcycle is
moving as this will cause the steering
to lock. Locked steering will cause loss
of motorcycle control and an accident.
Right Handlebar Switches
All Models except Tiger 1200 XR
ckdp
1
3
4
5
7
6
2
8
1. HOME button
2. Engine start/stop switch
3. QUICK START position
4. RUN position
5. STOP position
6. Power ON/OFF position
7. Hazard warning lights switch
8. Steering lock button
HOME Button
The HOME button is used to access the
main menu on the instrument display.
Press and release the HOME button to
select between the main menu and
instrument display.
General Information
95
QUICK START Position
The QUICK START position operates the
electric starter allowing for a quicker
ignition start.
From the ignition off, press and hold the
engine start/stop switch in the
QUICKSTART position with all the correct
conditions met, to start the motorcycle.
For more information, see page 144.
RUN Position
The engine start/stop switch must be in
the RUN position for the motorcycle to
operate.
STOP Position
The STOP position stops the engine.
Note:
• Although the engine stop position
stops the engine, it does not turn
off all the electrical circuits and
may cause difficulty in restarting
the engine due to a discharged
battery.
Power ON/OFF Position
The Power ON/OFF position switches
the electrical circuits and the
instrument display between on or off.
This allows access to the instrument
display without starting the engine
when switched ON.
Caution
Do not leave the switch in the Power
ON position for a long period of time as
this may cause damage to electrical
components and will discharge the
battery.
Hazard Warning Lights Button
To turn the hazard warning lights on or
off, press and release the hazard
warning light button.
The ignition must be switched on for the
hazard warnings lights to be activated,
but the hazard lights will remain active
if the ignition is switched off until the
hazard warning light button is pressed
again.
Steering Lock Button
To lock the motorcycle, turn the
handlebar fully to the left and press the
steering lock button.
When the ignition is off then the engine
immobilizer is on. The engine immobilizer
is turned off when the ignition is started.
Warning
For reasons of security and safety,
always make sure the steering lock is
on when leaving the motorcycle
unattended.
Any unauthorized use of the
motorcycle may cause injury to the
rider, other road users and pedestrians
and may also cause damage to the
motorcycle.
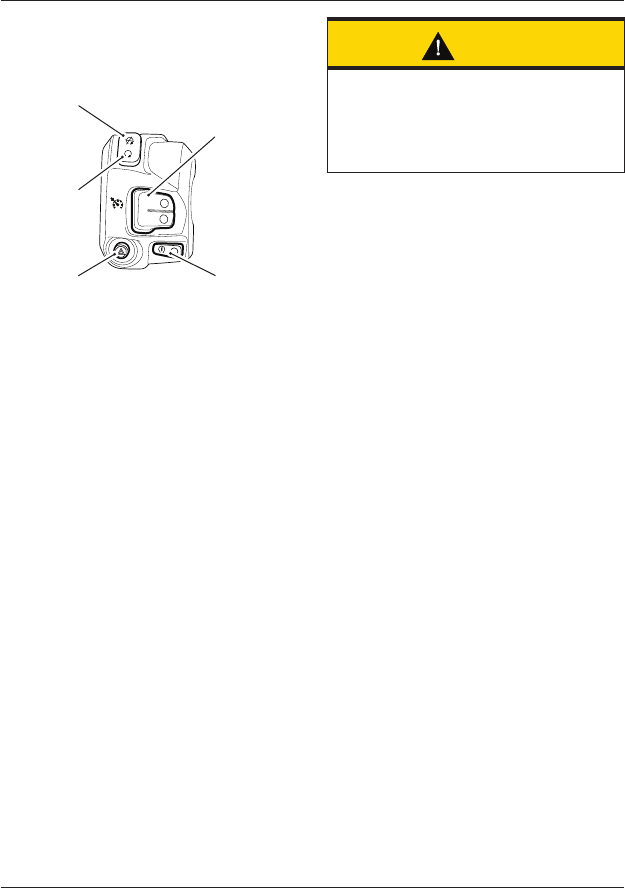
General Information
96
Right Handlebar Switches
Tiger 1200 XR Only
RES /+
SET /-
4
3
1
5
ON
2
1. Engine stop switch - STOP position
2. Engine stop switch - RUN position
3. Cruise control adjust button
4. Starter button
5. Hazard warning lights button
Engine Stop Switch
In addition to the ignition switch being
turned to the ON position, the engine
stop switch must be in the RUN position
for the motorcycle to operate.
The engine stop switch is for emergency
use. If an emergency arises which
requires the engine to be stopped, move
the engine stop switch to the STOP
position.
Note:
• Although the engine stop switch
stops the engine, it does not turn
off all the electrical circuits and
may cause difficulty in restarting
the engine due to a discharged
battery. Ordinarily, only the ignition
switch should be used to stop the
engine.
Caution
Do not leave the ignition switch in the
ON position unless the engine is
running as this may cause damage to
electrical components and will
discharge the battery.
Starter Button
The starter button operates the electric
starter. For the starter to operate, the
clutch lever must be pulled to the
handlebar.
Note:
• Even if the clutch lever is pulled to
the handlebar, the starter will not
operate if the side stand is down
and a gear is engaged.
Cruise Control Adjust Button
The cruise control adjust button is a
two way switch with the top marked
RES/+ and the bottom marked SET/-
(see page 104).
Hazard Warning Lights Button
To turn the hazard warning lights on or
off, press and release the hazard
warning light button.
The ignition must be switched on for the
hazard warnings lights to be activated,
but the hazard lights will remain active
if the ignition is switched off until the
hazard warning light button is pressed
again.
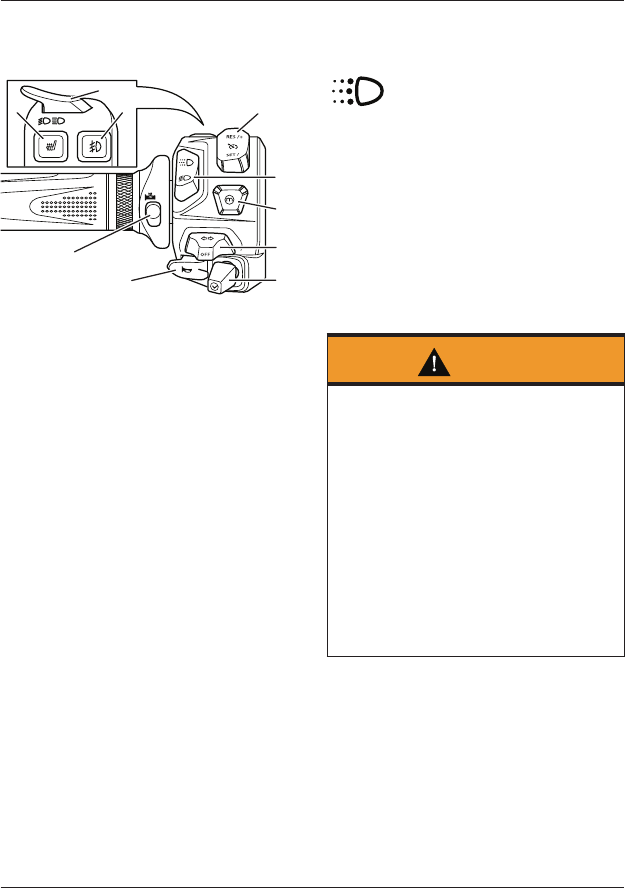
General Information
97
Left Handlebar Switches
All Models except Tiger 1200 XR
ckdf
5
6
1
2
3
7
8
9
10
4
1. Cruise control adjust switch
2. Daytime Running Lights (DRL) switch
(if equipped)
3. MODE button
4. Turn signal switch
5. Joystick button
6. Horn button
7. Heated grips switch
8. Front fog lights switch (if equipped)
9. High beam button
10. Rider’s heated seat switch (if equipped)
Cruise Control Adjust Button
The cruise control adjust button is a
two way switch with the top marked
RES/+ and the bottom marked SET/-.
For more information on cruise control
operation, see page 104.
Daytime Running Lights (DRL)
Switch (if equipped)
When the ignition is switched
ON and the daytime running lights
switch is set to DRL mode, the daytime
running lights warning light will
illuminate.
The daytime running lights and low
beam headlights are operated manually
using the DRL switch. Press the top of
the switch for DRL mode, and the
bottom of the switch for low beam
headlight mode.
Warning
Do not ride for longer than necessary
in poor ambient light conditions with
the Daytime Running Lights (DRL) in
use.
Riding with the daytime running lights
when dark, in tunnels or where poor
ambient light is apparent may reduce
the riders vision or blind other road
users.
Blinding other road users or reduced
vision in low ambient light levels may
result in loss of motorcycle control and
an accident.
Note:
• During daylight hours the daytime
running lights improve the motor-
cycles visibility to other road users.
• Low beam headlights must be used
in any other conditions unless the
road conditions allow for high beam
headlights to be used.

General Information
98
MODE Button
When the MODE button is pressed and
released it will activate the Riding Mode
Selection Menu in the display screen.
Further presses of the MODE button will
scroll through the available riding modes
(see Riding Mode Selection on page 81).
Press and hold the MODE button
provides direct access to a riding
mode’s configuration menu.
For more information on riding mode
selection and configuration, see
page 85).
Turn Signal Switch
When the turn signal switch is pushed
to the left or right and released, the
corresponding turn signals will flash on
and off. To turn off the turn signals,
push and release the switch in the
central position.
Models Equipped with Automatic
Self-Canceling Turn Signals
A short press and release of the turn
signal switch to the left or right will
cause the corresponding turn signals to
flash on and off three times, then go off.
A longer press and release of the turn
signal switch to the left or right will
cause the corresponding turn signals to
flash on and off until they are canceled
as follows:
The turn signal self-cancel system
becomes active eight seconds after
operating a turn signal. Eight seconds
after turning the turn signal on and
after riding a further 213 ft. (65 meters),
the turn signal self-cancel system will
automatically turn off the turn signals.
To disable the turn signal self-cancel
system refer to the Bike Setup section
on page 47.
The turn signals can be canceled
manually. To manually turn off the turn
signal, press and release the turn signal
switch in the central position.
Joystick Button
The Joystick is used to operate the
following functions of the instruments:
• Up - scroll the menu from the
bottom to the top
• Down - scroll the menu from the
top to the bottom
• Left - scroll the menu to the left
• Right - scroll the menu to the right
• Center - press to confirm selection.
Horn Button
When the horn button is pushed, with
the ignition switch turned to the ON
position, the horn will sound.
Heated Grips Switch
The heated grips will only heat when
the engine is running.
When the heated grips are switched on,
the heated grips symbol will appear in
the display and the selected heat level
will be shown.
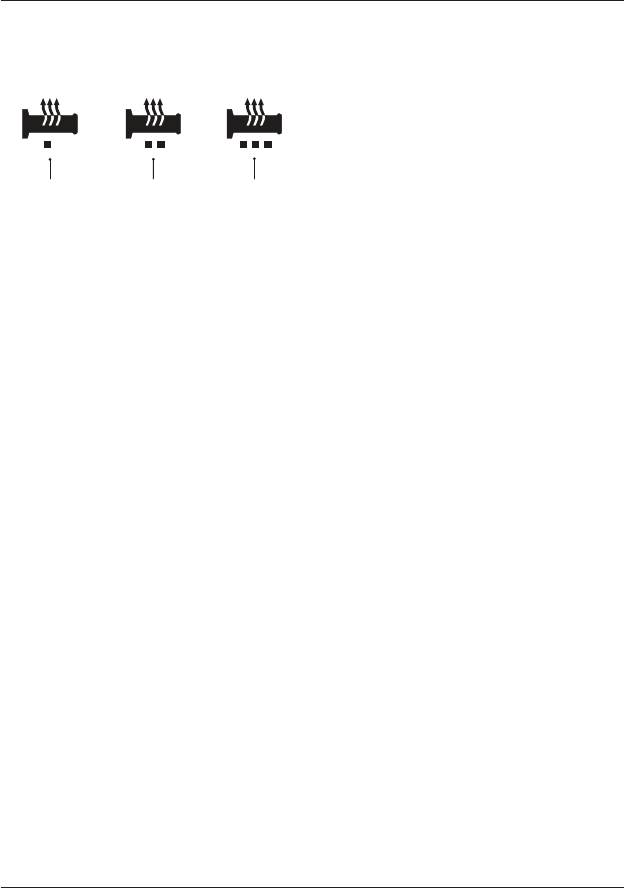
General Information
99
There are three levels of heat: low,
medium and high. This is indicated by
the different colors of the symbols
shown in the display.
1
23
1. Low heat symbol (yellow)
2. Medium heat symbol (orange)
3. High heat symbol (red)
For maximum benefit in cold conditions,
from the OFF position press the switch
once for the high heat setting initially
and then reduce the heat level by
pressing the switch again for a low heat
setting when the grips have warmed up.
To turn off the heated grips, press and
release the switch until the heated grips
symbol is no longer shown in the
display.
Low Power Voltage Cut Off
If a low voltage is detected, the heated
grips switch will power off. The heated
grips will not function again until the
voltage rises to a safe level.
The switch will not power back on
automatically even if the voltage rises to
the safe level. The user must manually
press the switch again to activate the
heated grips.
Fog Lights Switch (if equipped)
To turn the fog lights on or off, with the
headlights on, press and release the fog
lights switch. When the fog lights are
turned on, the fog lights indicator will
illuminate in the display.
Note:
• The fog lights switch will only
operate when the headlights are on.
• The fog lights switch will reset to
off when the ignition is turned off
then on again.
High Beam Button
The high beam button has a different
function depending on whether Daytime
Running Lights (DRL) are installed or
not. When the high beam is turned on,
the high beam indicator light will
illuminate in the display.
Models with Daytime Running
Lights (DRL)
If the DRL switch is in the Daytime
Running Lights (DRL) position, then
press and hold the high beam button to
turn the high beam on. It will remain on
as long as the button is held in and will
turn off as soon as the button is
released.
If the DRL switch is in the dip beam
position, press the high beam button to
switch the high beam on. Each press of
the button will swap between dip and
high beam.
Note:
• A lighting on/off switch is not
installed on this model. The brake/
tail light and license plate light all
function automatically when the
ignition is turned to the ON position.
• The headlight will function when
the ignition is turned on and the
engine is running.
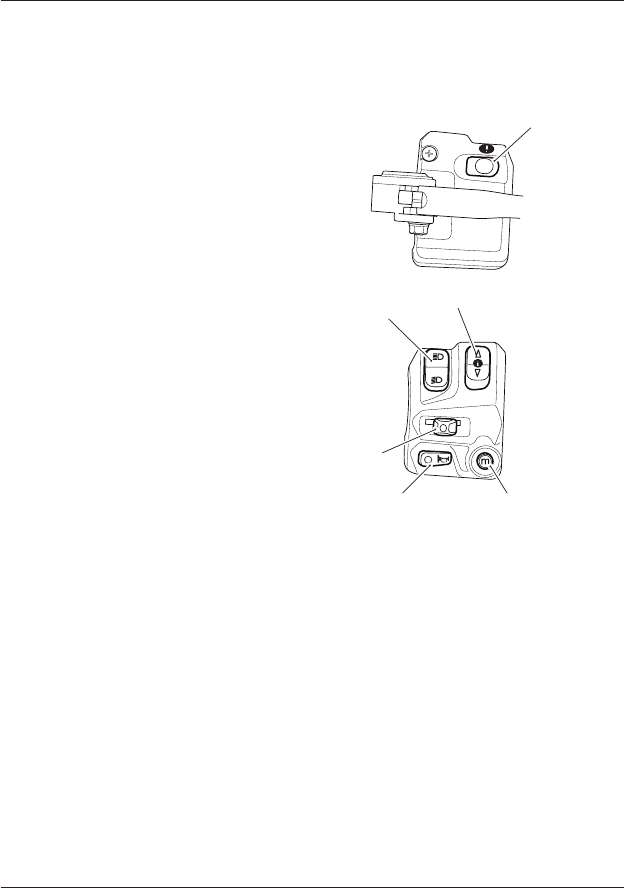
General Information
100
Models without Daytime Running
Lights (DRL)
Press the high beam button to switch
the high beam on. Each press of the
button will swap between dip and high
beam.
Note:
• A lighting on/off switch is not
installed on this model. The position
light, brake/tail light and license
plate light all function automatically
when the ignition is turned to the
ON position.
• The headlight will function when
the ignition is turned on and the
engine is running.
Rider’s Heated Seat Switch
(if equipped)
The rider’s heated seat will only heat
when the engine is running. When the
rider’s heated seat is switched on, then
the rider’s heated seat symbol will
appear in the display. The selected heat
level will also be indicated by the color
of the symbol.
For more information, see page 124.
Left Handlebar Switches
Tiger 1200 XR Only
4
5
1
2
36
1. Headlight dimmer switch
2. Turn signal switch
3. Horn button
4. Instruments SELECT button
5. Instruments SCROLL button
6. MODE button
Headlight Dimmer Switch
High or dip beam can be selected with
the headlight dimmer switch. To select
high beam, push the switch forward. To
select dip beam, push the switch
rearwards. When the high beam is
turned on, the high beam indicator light
will illuminate in the tachometer.

General Information
101
Pass Function
With the headlight dimmer switch set to
the dip beam position, pressing the
bottom of the switch will activate the
pass function.
When pressed, the headlight high beam
will be switched on. It will remain on as
long as the switch is held in and will
turn off as soon as the switch is
released.
Note:
• A lighting on/off switch is not
installed on this model. The position
light, brake/tail light and license
plate light all function automatically
when the ignition is turned to the
ON position.
• The headlight will function when
the ignition switch is turned to the
ON position and the engine is
running.
There are two alternate ways to turn on
the headlight without the engine
running:
• Pull in the clutch lever then turn
the ignition to the ON position. The
headlight will be on and will remain
on when the clutch lever is
released.
• With the ignition on and the
headlight dimmer switch set to the
dip beam position, pressing the
bottom of the switch will activate
the headlight. The headlight will
remain on when the switch is
released.
The headlight will go off while pressing
the starter button until the engine
starts.
Turn Signal Switch
When the turn signal switch is pushed
to the left or right and released, the
corresponding turn signals will flash on
and off. To turn off the turn signals,
push and release the switch in the
central position.
Horn Button
When the horn button is pushed, with
the ignition switch turned to the ON
position, the horn will sound.
Instrument SELECT Button
When the SELECT button is pressed and
released it will select the menu
highlighted in the multifunction display
screen.
Pressing and holding the SELECT button
when the motorcycle is stationary will
activate the Settings Menu in the
multifunction display (see Settings Menu
on page 74).
Instrument SCROLL Button
When the SCROLL button is pressed and
released it will scroll through the menu
visible in the instrument's display
screen.
MODE Button
When the MODE button is pressed and
released it will activate the Riding Mode
Selection Menu in the multifunction
display screen. Further presses of the
mode button will scroll through the
available riding modes (see Riding Mode
Selection on page 81).
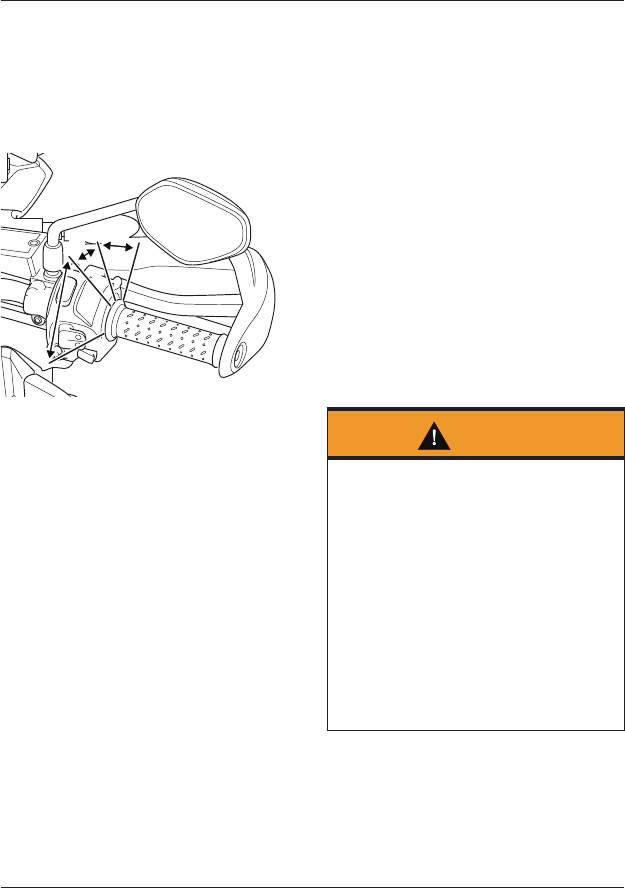
General Information
102
Pressing and holding the MODE button
will provide direct access to a Riding
Mode’s Configuration Menu (see Riding
Mode Configuration on page 85).
Throttle Control
2
1
3
1. Throttle open position
2. Throttle closed position
3. Cruise control cancel position
This Triumph model has an electronic
throttle twist grip to open and close the
throttle via the engine control unit.
There are no direct-acting cables in the
system.
The throttle grip has a resistive feel to it
as it is rolled rearwards to open the
throttle. When the grip is released it will
return to the throttle closed position by
its internal return spring and the
throttle will close.
From the closed position, the throttle
twist grip can be rolled forward
0.12 - 0.16 in (3 - 4 mm) to deactivate the
cruise control (see page 106).
There are no user adjustments for the
throttle control.
If there is a malfunction with the
throttle control the Malfunction
Indicator Light (MIL) becomes
illuminated and one of the following
engine conditions may occur:
• MIL illuminated, restricted engine
RPM and throttle movement
• MIL illuminated, limp-home mode
with the engine at a fast idle
condition only
• MIL illuminated, engine will not
start.
For all of the above conditions contact
an authorized Triumph dealer as soon
as possible to have the fault checked
and rectified.
Brake Use
Warning
Reduce speed and do not continue to
ride for longer than is necessary with
the malfunction indicator light
illuminated. The fault may adversely
affect engine performance, exhaust
emissions and fuel consumption.
Reduced engine performance could
cause a dangerous riding condition,
leading to loss of motorcycle control
and an accident.
Contact an authorized Triumph dealer
as soon as possible to have the fault
checked and rectified.
At low throttle opening (approximately
68°F (20°C)), the brakes and throttle can
be used together.
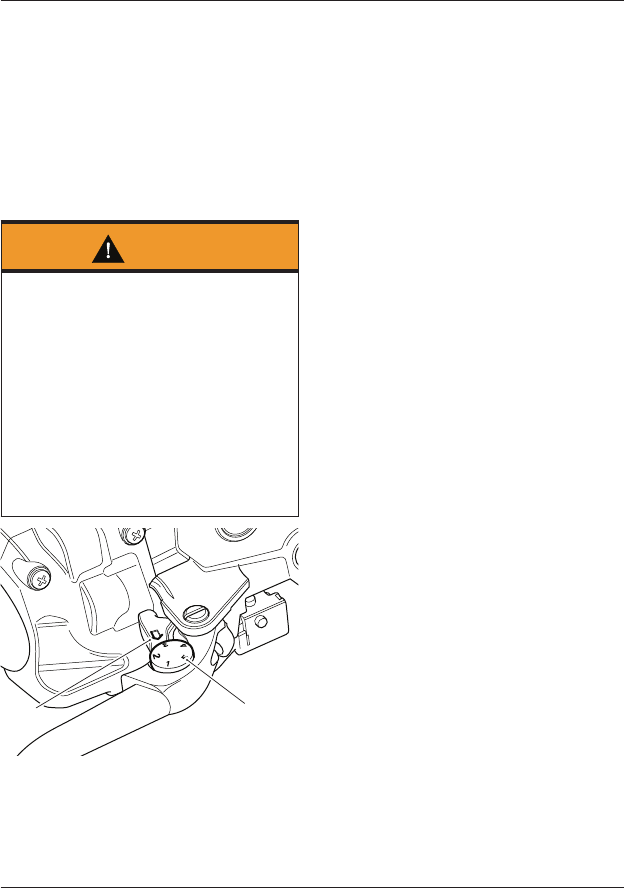
General Information
103
At high throttle opening (greater than
68°F (20°C)), if the brakes are applied for
more than two seconds the throttles will
close and the engine speed will reduce.
To return to normal throttle operation,
release the throttle control, release the
brakes and then re-open the throttle.
Brake and Clutch Lever Adjusters
Warning
Do not attempt to adjust the lever with
the motorcycle in motion as this may
lead to loss of motorcycle control and
an accident.
After adjusting the lever, operate the
motorcycle in an area free from traffic
to gain familiarity with the new lever
setting. Do not loan your motorcycle to
anyone as they may change the lever
setting from the one you are familiar
with causing loss of motorcycle control
and an accident.
21
chdd_2
1. Adjuster wheel, brake lever shown
2. Arrow mark
An adjuster is mounted to both the
front brake and clutch levers. The
adjusters allow the distance from the
handlebar to the lever to be changed to
one of five positions for the front brake
lever or four positions for the clutch
lever, to suit the span of the operator's
hands.
To adjust the lever:
• Push the lever forward and turn
the adjuster wheel to align one of
the numbered positions with the
arrow mark on the lever holder.
• The distance from the handlebar
grip to the released lever is
shortest when set to number five,
and longest when set to number
one.
General Information
104
Cruise Control
Warning
Cruise control must only be used
where you can drive safely at a steady
speed.
Cruise control should not be used
when riding in heavy traffic, on roads
with sharp/blind bends or when they
are slippery.
Using cruise control in heavy traffic, on
roads with sharp/blind bends or when
they are slippery, may result in loss of
motorcycle control and an accident.
Warning
This Triumph motorcycle should be
operated within the legal speed limits
for the particular road traveled.
Operating a motorcycle at high speeds
can be potentially dangerous since the
time available to react to given traffic
situations is greatly reduced as speed
increases. Always reduce speed in
consideration of weather and traffic
conditions.
Warning
Only operate this Triumph motorcycle
at high speed in closed-course, on-
road competition or on closed-course
racetracks. High speed operation
should only then be attempted by
riders who have been instructed in the
techniques necessary for high speed
riding and are familiar with the
motorcycle's behavior in all conditions.
High speed operation in any other
circumstances is dangerous and will
lead to loss of motorcycle control and
an accident.
Note:
• Cruise control may not function if
there is a malfunction with the ABS
system and the ABS warning light
is illuminated.
• Cruise control will continue to
function if a riding mode is selected
with ABS set to Off-Road or Off.
• Cruise control will continue to
function if ABS has been disabled.
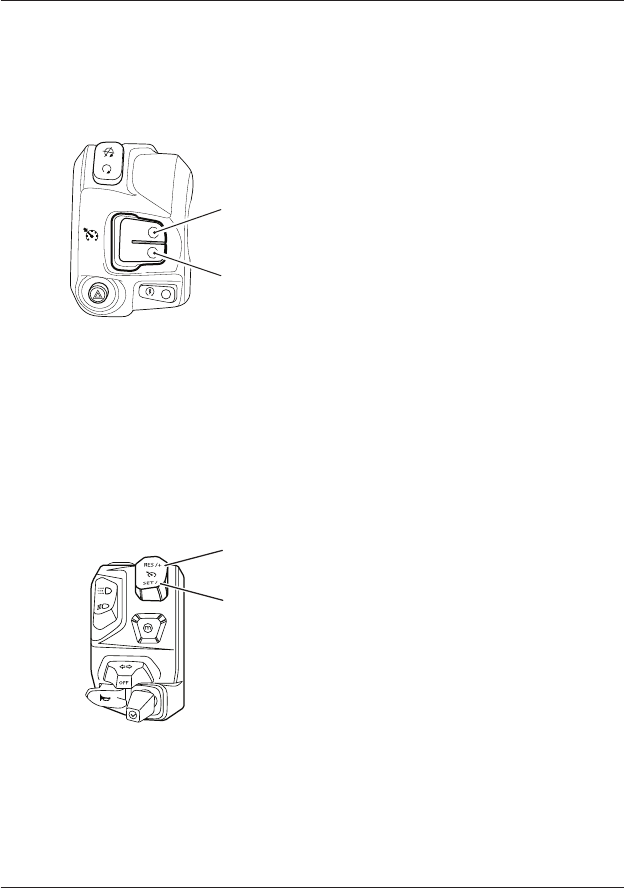
General Information
105
Tiger 1200 XR Only
The cruise control buttons are located
on the right hand switch housing and
can be operated with minimum
movement by the rider.
RES /+
SET /-
ON
2
1
1. Cruise control RES/+ button
2. Cruise control SET/- button
All Models except Tiger 1200 XR
The cruise control buttons are located
on the left hand switch housing and can
be operated with minimum movement
by the rider.
1
2
1. Cruise control RES/+ button
2. Cruise control SET/- button
Cruise control can be switched on or off
at any time but it cannot be activated
until all the conditions described on
page 105 have been met.
Activating Cruise Control
To turn on the cruise control system,
press the SET/- button. The cruise
control symbol will be shown in the
display screen. The cruise control set
speed will be shown as ‘--’ indicating
that a speed has not yet been set.
To activate cruise control, the following
conditions have to be met:
• The motorcycle must be traveling
at a speed between 19 to 100 mph
(30 to 160 km/h).
• The motorcycle must be in 3 rd gear
or higher.
• Once these conditions have been
met, press the SET/- button to
activate cruise control. The cruise
control symbol will be shown in a
green light in the TFT display to
indicate that cruise control is now
active.
The word SET will be shown next to the
cruise control symbol. The cruise control
set speed will be shown and the cruise
control light will illuminate in the
tachometer indicating that cruise
control is active.
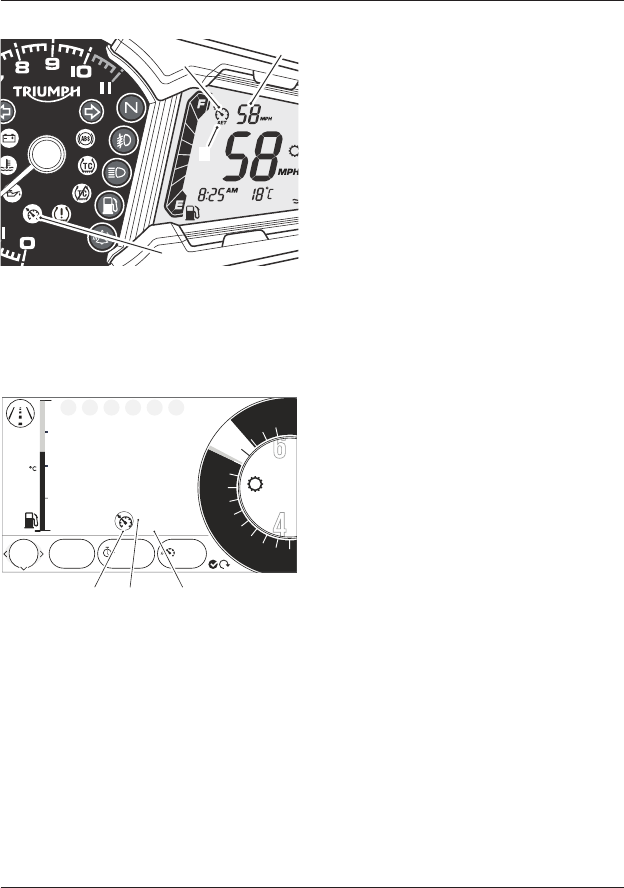
General Information
106
Tiger 1200 XR Only
4
1
2
3
1. Cruise control symbol
2. Cruise control set indicator
3. Cruise control set speed
4. Cruise control light
All Models except Tiger 1200 XR
o7:29
12.5
19999 02:25
8
6
4
2
0
25.2
F
E
TRIP
mi mp/hHH:MM
PM
SET
58
mp/h
10
585
12 14
RPM
x1000
123
1. Cruise control symbol
2. Cruise control set indicator
3. Cruise control set speed
The cruise control system will maintain
the set speed until:
• The set speed is adjusted as
described on page 106.
• Cruise control is deactivated as
described on page 106.
Adjusting the Set Speed While in
Cruise Control
To adjust the set speed while in cruise
control, press and release the:
• RES/+ button to increase the speed
• SET/- button to decrease the
speed.
Each press of the buttons will adjust
the speed by 1 mph or 1 km/h. If the
buttons are held, the speed
continuously increases or decreases in
single digit increments.
Stop pressing the adjust button when
the desired speed is shown in the
display.
Note:
• The cruise control set speed display
will flash until the new set speed
has been achieved.
• If riding up a steep incline and
cruise control is unable to maintain
the set speed, the cruise control set
speed display will flash until the
motorcycle has regained the set
speed.
An alternative way to increase the
speed in cruise control is to accelerate
to the desired speed using the throttle
grip and then press the SET/- button.
Deactivating Cruise Control
The cruise control can be deactivated
by one of the following methods:
• Roll the throttle twist grip fully
forward.
• Pull the clutch lever.
• Operate the front or rear brake.
• Increase speed by using the
throttle for more than 60 seconds.
General Information
107
Upon deactivation, the cruise control
light will go out in the tachometer but
the SET indicator and set speed will still
be shown in the display screen,
indicating that the cruise control set
speed has been stored.
The cruise control set speed can be
resumed as described on page 107,
provided the cruise control has not
been deactivated by turning the ignition
switch to the OFF position.
Resuming the Cruise Control Set
Speed
Warning
When resuming cruise control, always
make sure that the traffic conditions
are suitable for the set speed.
Using cruise control in heavy traffic, on
roads with sharp/blind bends or when
they are slippery, may result in loss of
motorcycle control and an accident.
Cruise control will be deactivated if one
of the following actions has been taken:
• Roll the throttle twist grip fully
forward.
• Pull the clutch lever.
• Operate the front or rear brake.
• Increase speed by using the
throttle grip for more than
60 seconds.
The cruise control set speed can be
resumed by pressing and releasing the
RES/+ button provided a set speed has
been stored.
The motorcycle must be traveling at a
speed between 19 to 100 mph (30 to
160 km/h) and be in 3rd gear or higher.
A stored set speed is indicated by the
word SET next to the cruise control
symbol in the display screen.
The stored set speed will remain in the
cruise control memory until the ignition
switch has been turned to the OFF
position.
Note:
• The cruise control set speed display
will flash until the resumed set
speed has been achieved.

General Information
108
Triumph Semi Active
Suspension (TSAS)
(if equipped)
Note:
• All models except for Tiger 1200 XR
are equipped with Triumph Semi
Active Suspension (TSAS).
Warning
After adjusting the suspension,
operate the motorcycle in an area free
from traffic to gain familiarity with the
new settings.
Do not loan your motorcycle to anyone
as they may change the suspension
settings from the one you are familiar
with causing loss of motorcycle control
and an accident.
The Triumph Semi-Active Suspension
System (TSAS) controls adjustment of
the front and rear suspension damping
and automatic rear suspension preload
settings.
TSAS allows a convenient remote
adjustment of the TSAS mode and
damping settings through the
instruments, while the motorcycle is
stationary or moving.
TSAS adjustments are made
instantaneously once a new mode or
damping setting has been selected and
the engine is running.
TSAS Modes
The following TSAS modes are available
for selection:
• Auto - The TSAS system will
automatically detect the type of
surface being ridden on (road or
off-road) and will adjust rebound
and compression damping settings
accordingly.
• Off-Road - Optimal TSAS settings
for off-road use.
TSAS Damping Settings
There are a total of nine damping
settings available for selection ranging
from COMFORT (soft) to SPORT (firm)
with the three main settings being:
• COMFORT
• NORMAL
• SPORT.
For more information on accessing the
TSAS settings, see page 45.
System Calibration
The TSAS system will recalibrate
adjustment motors under the following
conditions:
• If the battery has been
disconnected for any reason.
• If a fault occurs with the TSAS
system during normal operation.
The warning light will flash twice every
second during system recalibration.

General Information
109
To allow the system to calibrate
correctly, the following procedure must
be adhered to:
• Turn the ignition on. Do not start
the engine.
• Wait for the warning light to stop
flashing indicating that adjustment
motor calibration is complete.
• Start the engine. If the warning
light resumes flashing. the
adjustment motors are being
recalibrated due to low battery
voltage.
• Wait for the warning light to stop
flashing before riding the
motorcycle.
Failure to follow this procedure will
cause the recalibration to be stopped
and the warning light to remain lit.
In this case the warning light will
extinguish once the recalibration is next
allowed to complete.
Traction Control (TC)
Warning
The traction control and optimized
cornering traction control systems are
not a substitute for riding
appropriately for the prevailing surface
and weather conditions. The systems
cannot prevent loss of traction due to:
• excessive speed when entering turns
• accelerating at a sharp lean angle
• braking.
Traction control or optimized cornering
traction control cannot prevent the
front wheel from slipping.
Failure to observe any of the above
may result in loss of motorcycle control
and an accident.
All motorcycles are equipped with
Traction Control (TC).
Traction control is a system that helps
to maintain traction when accelerating
on wet/slippery road surfaces. If
sensors detect that the rear wheel is
losing traction (slipping), the traction
control system will engage and alter the
engine power until traction to the rear
wheel has been restored.
The traction control indicator light will
flash while it is engaged and the rider
may notice a change to the sound of
the engine.
For information on the traction control
indicator light operation, see page 26
and page 62.
General Information
110
Optimized Cornering Traction
Control (if equipped)
Note:
• All models except Tiger 1200 XR are
equipped with optimized cornering
Traction Control (TC).
Optimized cornering traction control is a
system designed to give the rider
increased control should the traction
control be activated while the
motorcycle is leaning in a corner.
The system constantly monitors the
lean angle of the motorcycle and adapts
the level of traction control intervention
to maintain rear wheel traction during
cornering.
Warning
If the TC system is not functioning,
care must be taken when accelerating
and cornering on wet/slippery road
surfaces to avoid rear wheel spin.
In the event of a fault, the TC disabled
warning light may be accompanied by
the engine management system
malfunction indicator light and/or the
ABS warning light.
Do not continue to ride for longer than
is necessary with any of the above
warning lights illuminated. Contact an
authorized Triumph dealer as soon as
possible to have the fault checked and
rectified.
Hard acceleration and cornering in this
situation may cause the rear wheel to
spin resulting in loss of motorcycle
control and an accident.
Warning
If a fault occurs with the optimized
cornering TC system, the TC disabled
warning light will illuminate and a
message will be shown in the display.
In this situation, the TC system will
continue to operate but without the
optimized cornering function, provided
that:
• There are no other faults with the TC
system.
• TC has NOT been disabled by the rider
(see Bike Setup on page 48 or Riding
Mode Configuration on page 44).
Care must be taken when accelerating
and cornering on wet/slippery road
surfaces to avoid rear wheel spin.
In the event of a fault, the TC disabled
warning light may be accompanied by
the engine management system
malfunction indicator light and/or the
ABS warning light.
Do not continue to ride for longer than
is necessary with any of the above
warning lights illuminated. Contact an
authorized Triumph dealer as soon as
possible to have the fault checked and
rectified.
Hard acceleration and cornering in this
situation may cause the rear wheel to
spin resulting in loss of motorcycle
control and an accident.
General Information
111
Note:
• TC and optimized TC control
(if equipped) may not function if
there is a malfunction with the ABS
system. In this situation, the
warning lights for the ABS, TC and
the MIL may be illuminated.
For full details of the TC disabled
warning light operation and its
associated instrument warning
messages, see page 27.
Traction Control Settings
Warning
If the traction control is disabled, the
motorcycle will handle as normal but
without traction control.
In this situation accelerating too hard
on wet/slippery road surfaces may
cause the rear wheel to slip, and may
result in loss of motorcycle control and
an accident.
The TC system can be disabled as
described in Bike Setup on page 48, or
set to the conditions described in Riding
Mode Configuration on page 44.
Tire Pressure Monitoring
System (TPMS) (if equipped)
Warning
The daily check of tire pressures must
not be excluded because of the
installation of the TPMS. Check the tire
pressure when the tires are cold and
using an accurate tire pressure gage
(see page 189).
Use of the TPMS system to set
inflation pressures may lead to
incorrect tire pressures leading to loss
of motorcycle control and an accident.
Function
Tire pressure sensors are mounted to
the front and rear wheels. These
sensors measure the air pressure inside
the tire and transmit pressure data to
the instruments. The sensors will not
transmit data until the motorcycle
reaches a speed of approximately
12 mph (20 km/h). Two dashes will be
visible in the system display until the
tire pressure signal is received.
After bring the motorcycle to a stop, the
sensors continue to transmit data for
approximately seven minutes before
switching off. The tire pressure values
remain visible in the system display until
the sensors switch off.
An adhesive label will be mounted to the
wheel rim to indicate the position of the
tire pressure sensor, which is near the
valve.
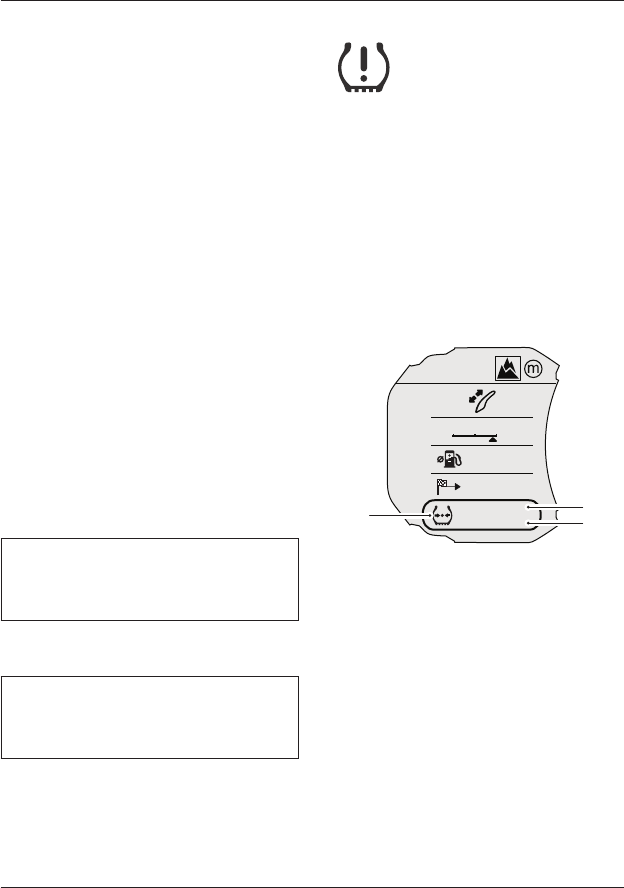
General Information
112
Note:
• The Tire Pressure Monitoring
System (TPMS) is available as an
accessory kit. It must be installed
by your authorized Triumph dealer.
• The TPMS display on the
instruments will only be activated
when the system has been installed.
Tire Pressure Sensor Serial Number
The serial number for the tire pressure
sensor is printed on a label attached to
the sensor. This number may be
required by your authorized Triumph
dealer for service or diagnostics.
When the tire pressure monitoring
system is being installed to the
motorcycle, make sure that your
authorized Triumph dealer records the
serial numbers of the front and rear tire
pressure sensors in the spaces provided
below.
Front Tire Pressure Sensor
Rear Tire Pressure Sensor
System Display
The tire pressure warning
light works in conjunction with the Tire
Pressure Monitoring System (TPMS).
The warning light will only illuminate
when the front or rear tire pressure is
below the recommended pressure. It will
not illuminate if the tire is over inflated.
When the warning light is illuminated,
the TPMS symbol indicating which is the
deflated tire and its pressure will
automatically be shown in the display.
Tiger 1200 XR Only
OFF-ROAD
AUTO
OFF-ROAD
MPG
MI
PSI
PSI
CNS
1
2
36
42
F
R
47
12
12
3
1. TPMS symbol
2. Front tire pressure indicator
3. Rear tire pressure indicator
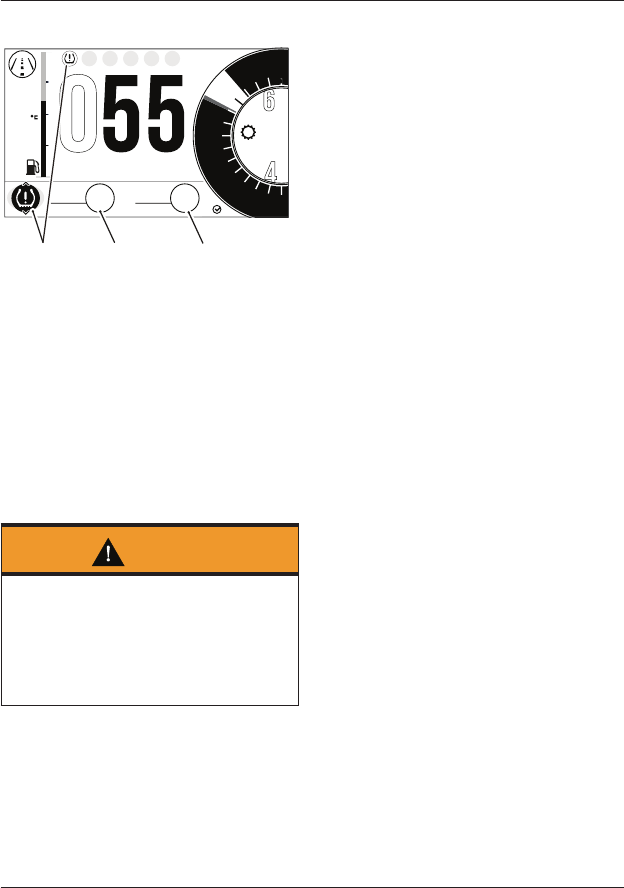
General Information
113
All Models except Tiger 1200 XR
o7:29
12.5
19999 02:25
8
65
4
2
0
12 14
25.2
F
E
TRIP
mi mp/hHH:MM
PM
RPM
x1000
mph
10
42
PSI
FR
30
PSI
1
2 3
1. Warning lights
2. Front tire pressure indicator
3. Rear tire pressure indicator
The tire pressure at which the warning
light illuminates is temperature
compensated to 68°F (20°C) but the
numeric pressure display associated
with it is not. Even if the numeric display
seems at or close to the standard tire
pressure when the warning light is on, a
low tire pressure is indicated and a
puncture is the most likely cause.
Warning
Stop the motorcycle if the tire pressure
warning light illuminates.
Do not ride the motorcycle until the
tires have been checked and the tire
pressures are at their recommended
pressure when cold.
The motorcycle information display will
automatically switch to the tire
pressure display when a low tire
pressure is detected.
Dashes will be displayed in the tire
pressure display until the motorcycle
reaches a speed of approximately
12 mph (20 km/h).
Sensor Batteries
When the battery voltage in a pressure
sensor is low a message will be shown in
the display, and the TPMS symbol or
message will indicate which wheel
sensor has the low battery voltage.
If the batteries are completely flat, only
dashes will be shown in the display
screen, the red TPMS warning light will
be on and the TPMS symbol will flash
continuously. A message will also be
shown in the display.
Contact your authorized Triumph dealer
to have the sensor replaced and the
new serial number recorded in the
spaces provided on page 112.
With the ignition switched on, if TPMS
symbol flashes continuously or the
TPMS warning light remains on there is
a fault with the TPMS system. Contact
your Triumph dealer to have the fault
rectified.
TPMS System Fault
If a fault occurs with the TPMS system,
the red TPMS warning light will be
illuminated and the message SENSOR
SIGNAL FRONT/REAR TIRE will be shown
in the display. Contact your authorized
Triumph dealer to have the fault
rectified.
