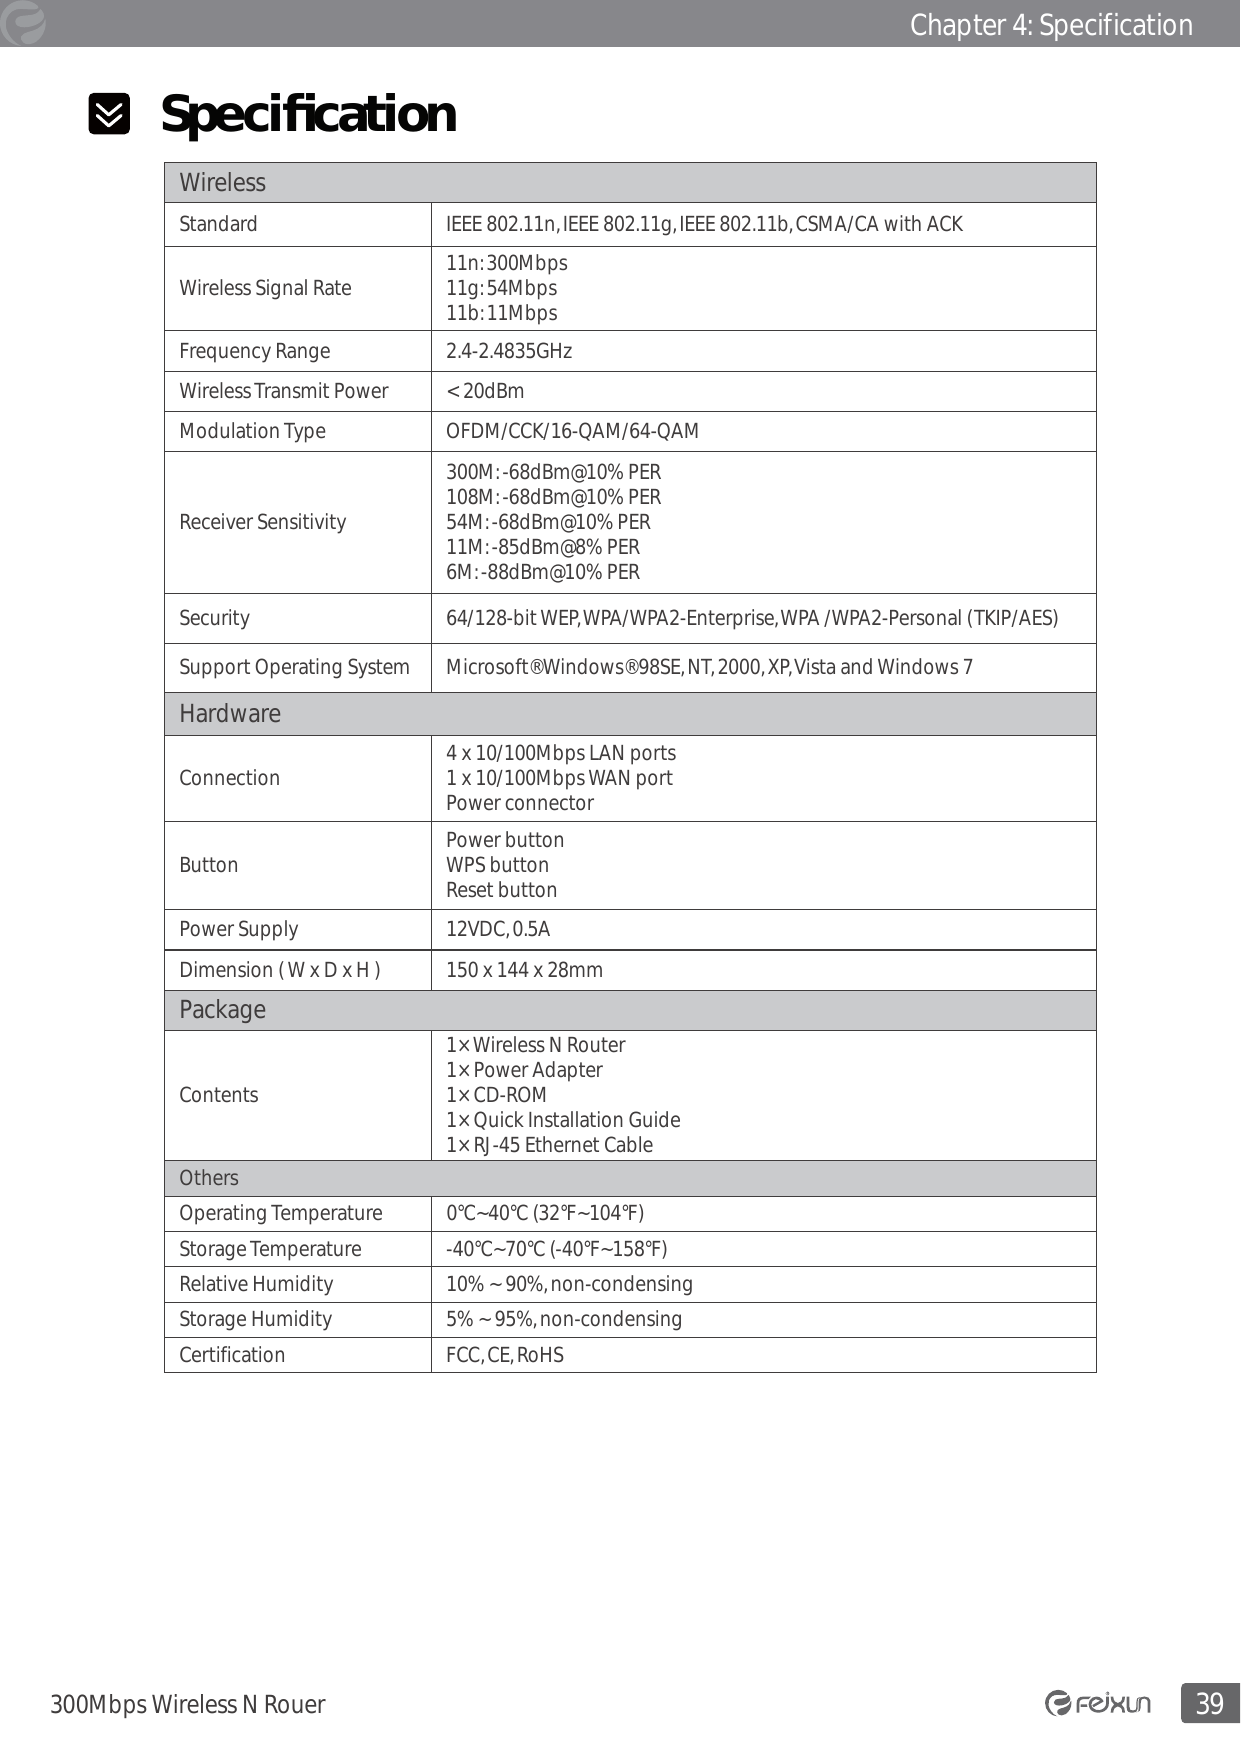
Phicomm WR203OA 300Mbps Wireless N Router User Manual UM FWR 734N V1 0 indd
Shanghai Feixun Communication Co., Ltd. 300Mbps Wireless N Router UM FWR 734N V1 0 indd
Phicomm >
Contents
- 1. User Manual I
- 2. User Manual II
User Manual II

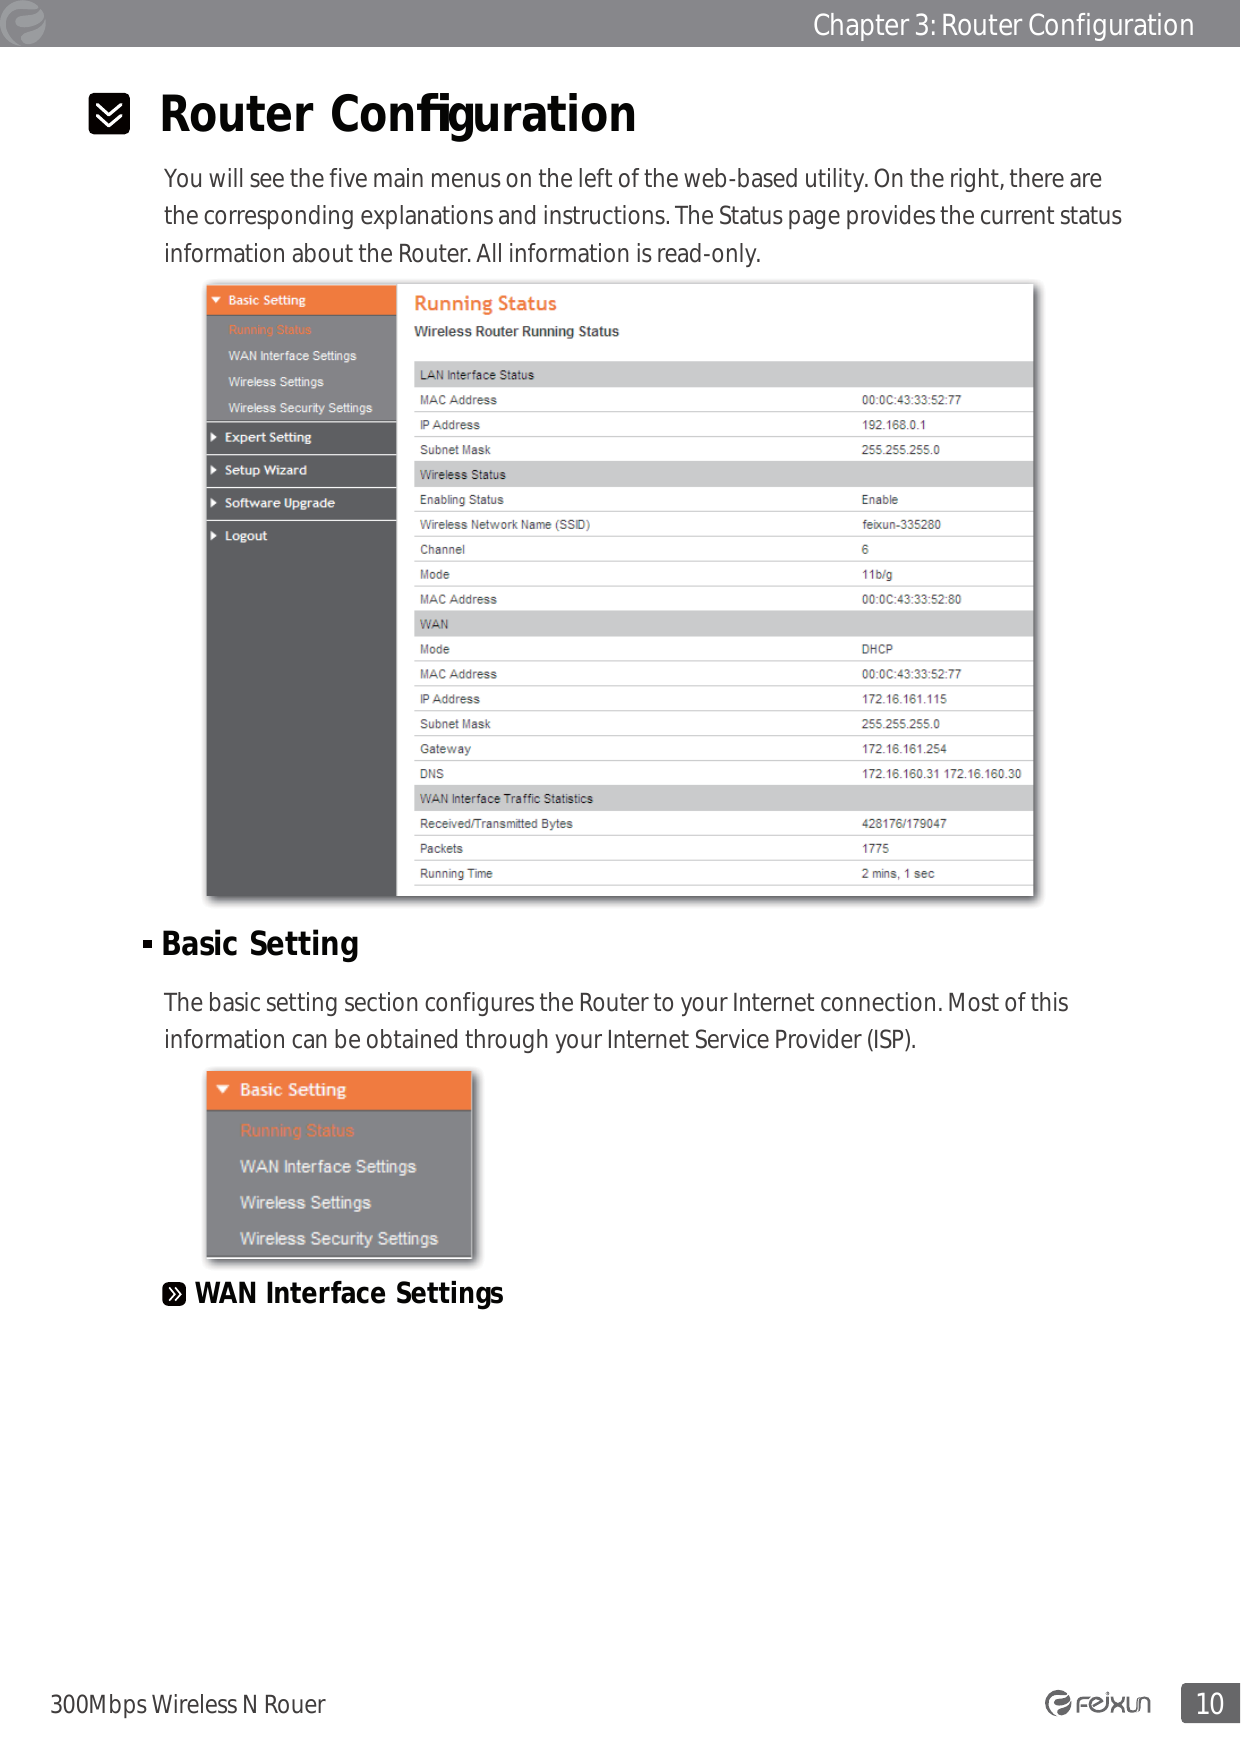
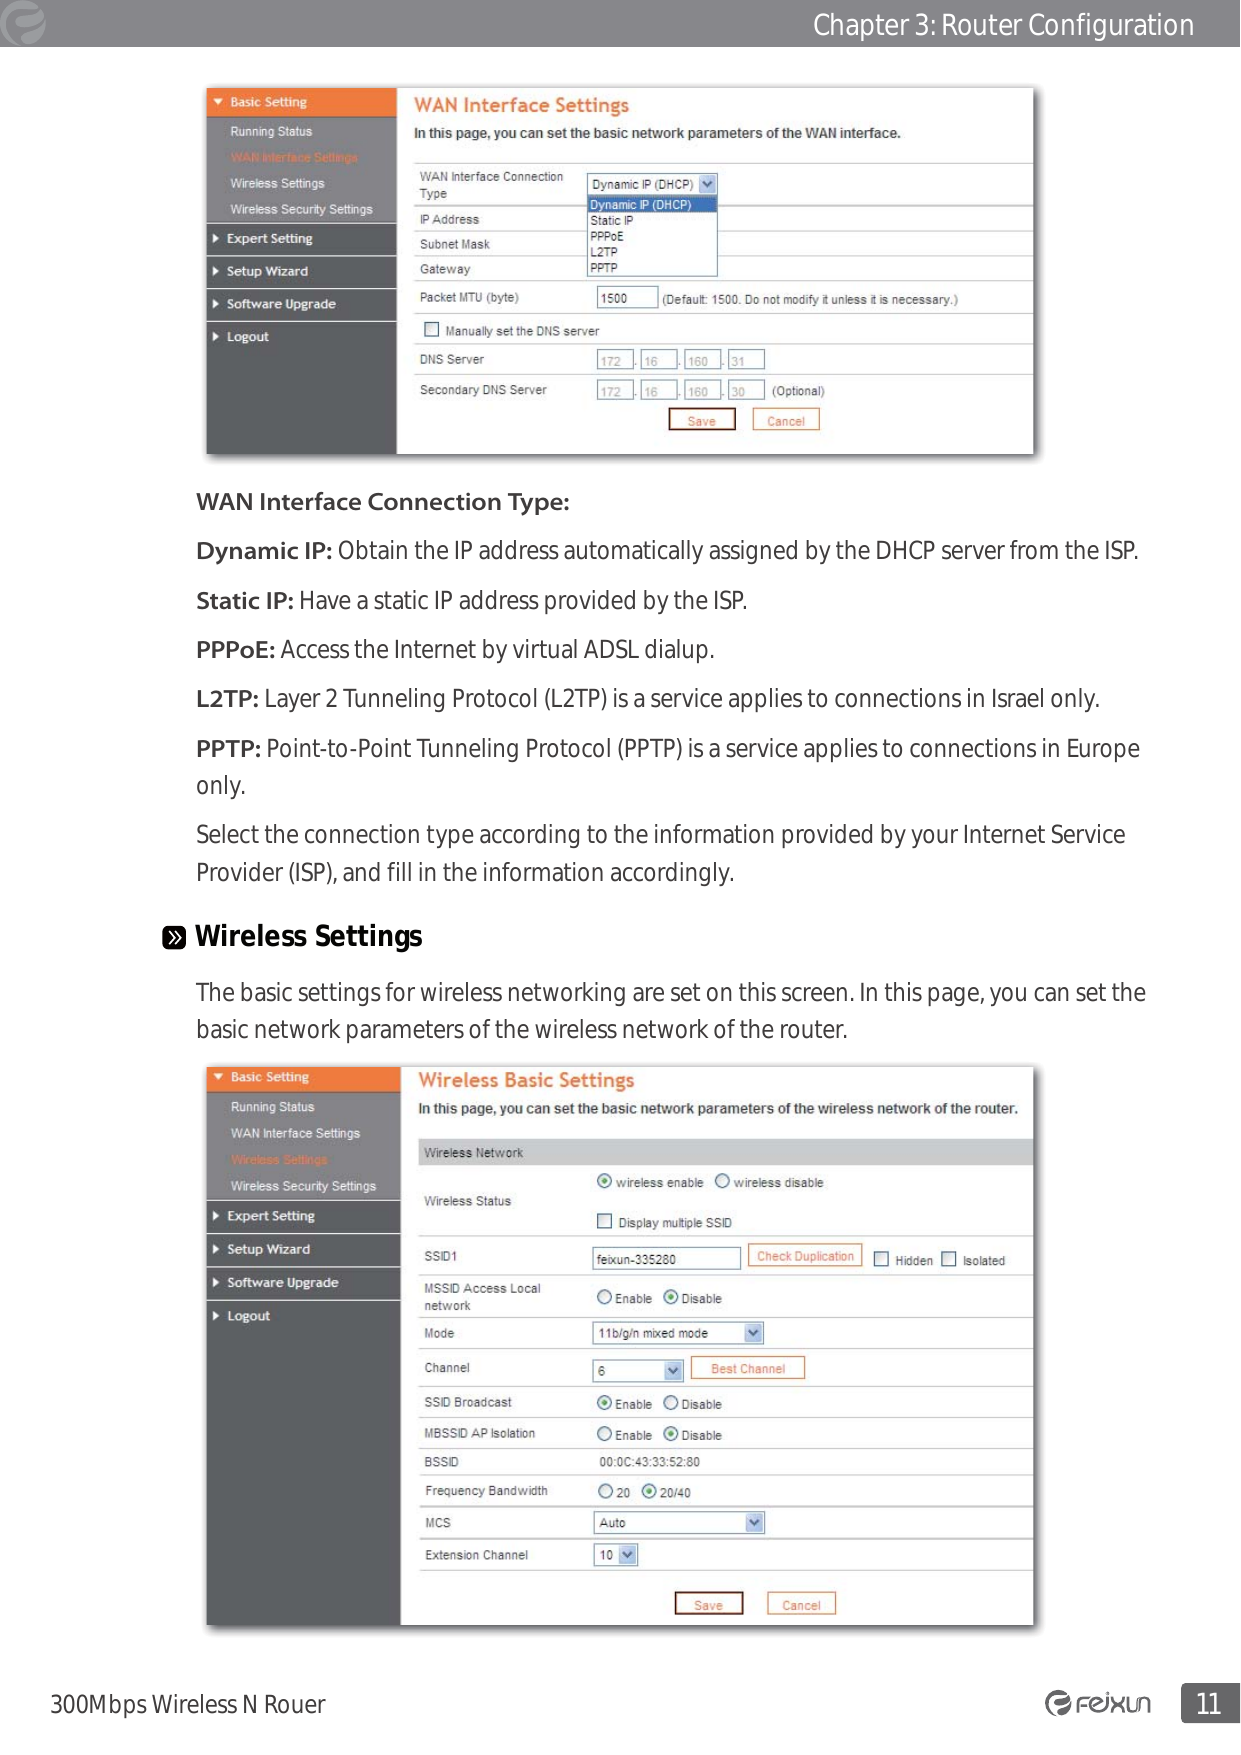
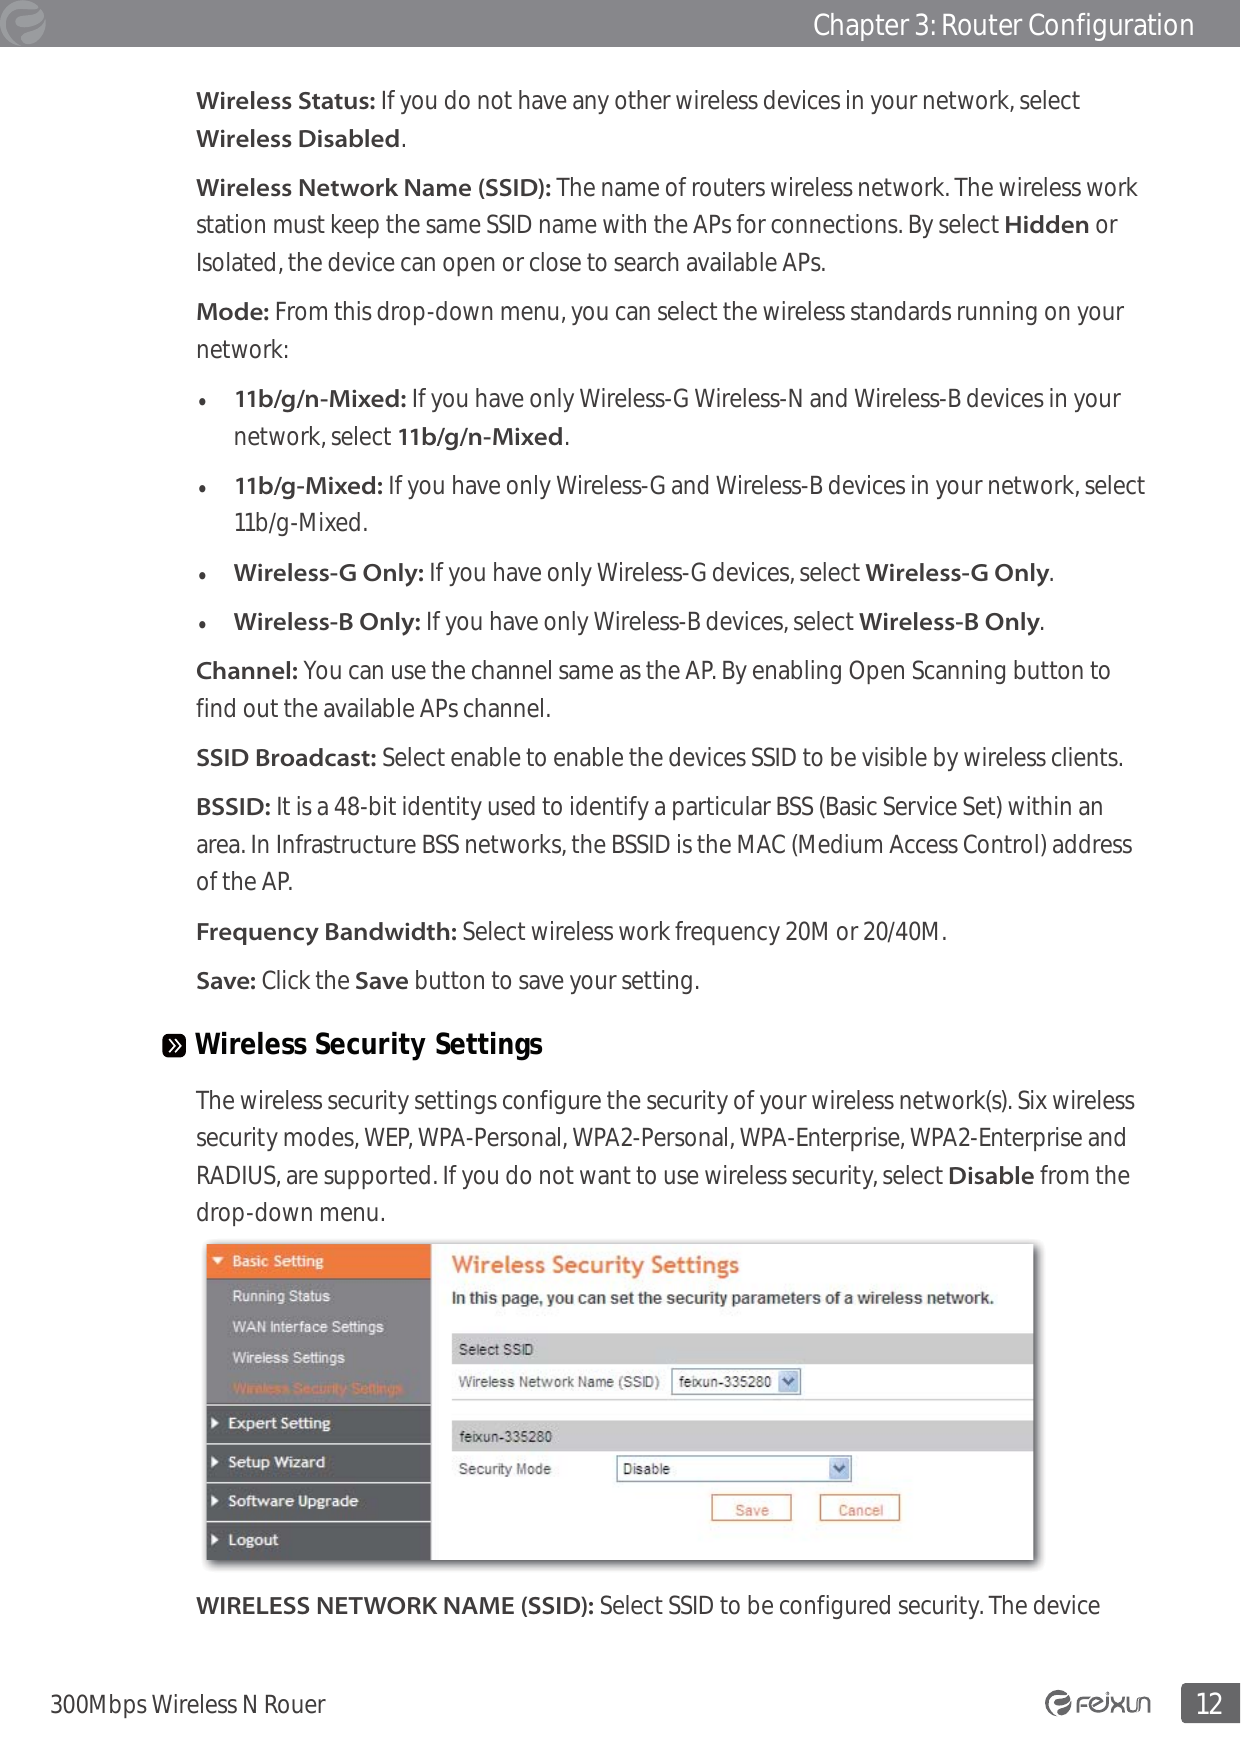
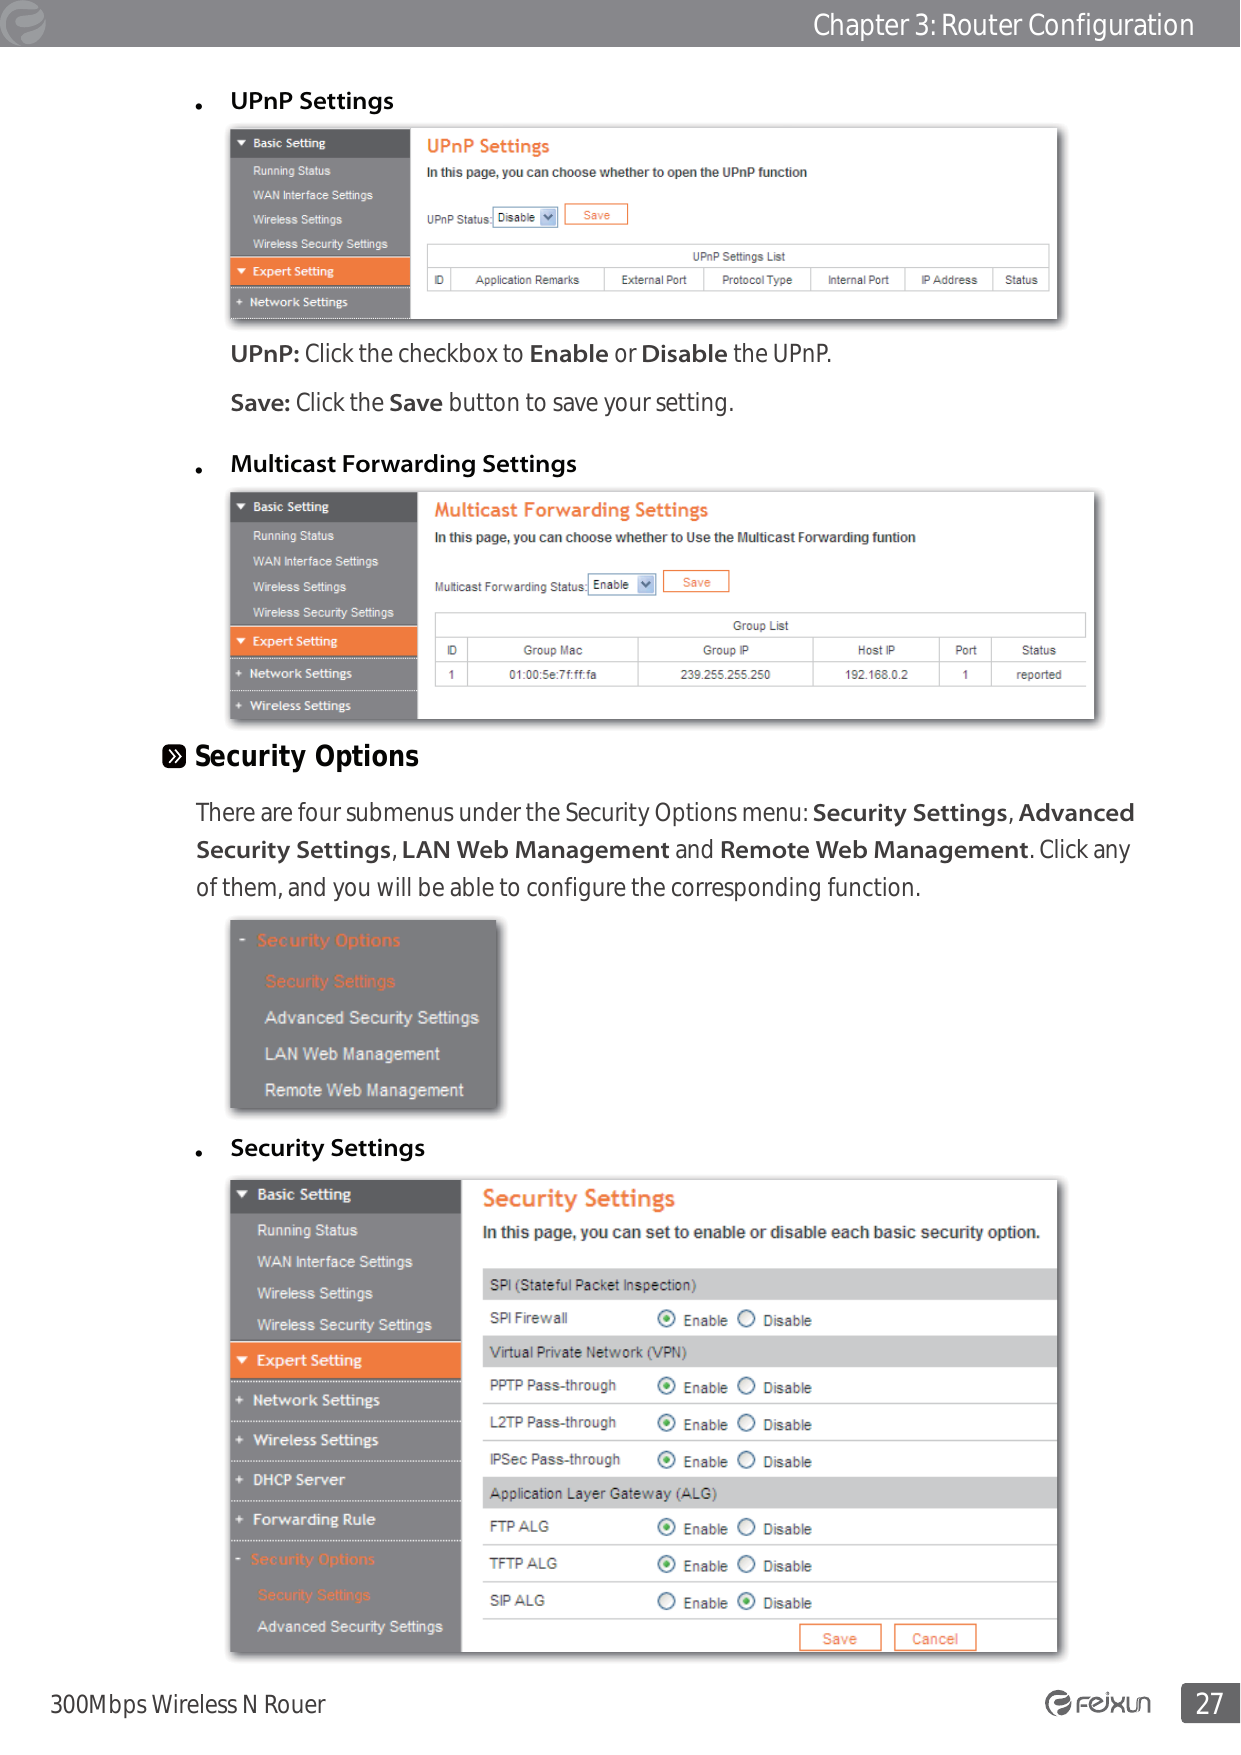
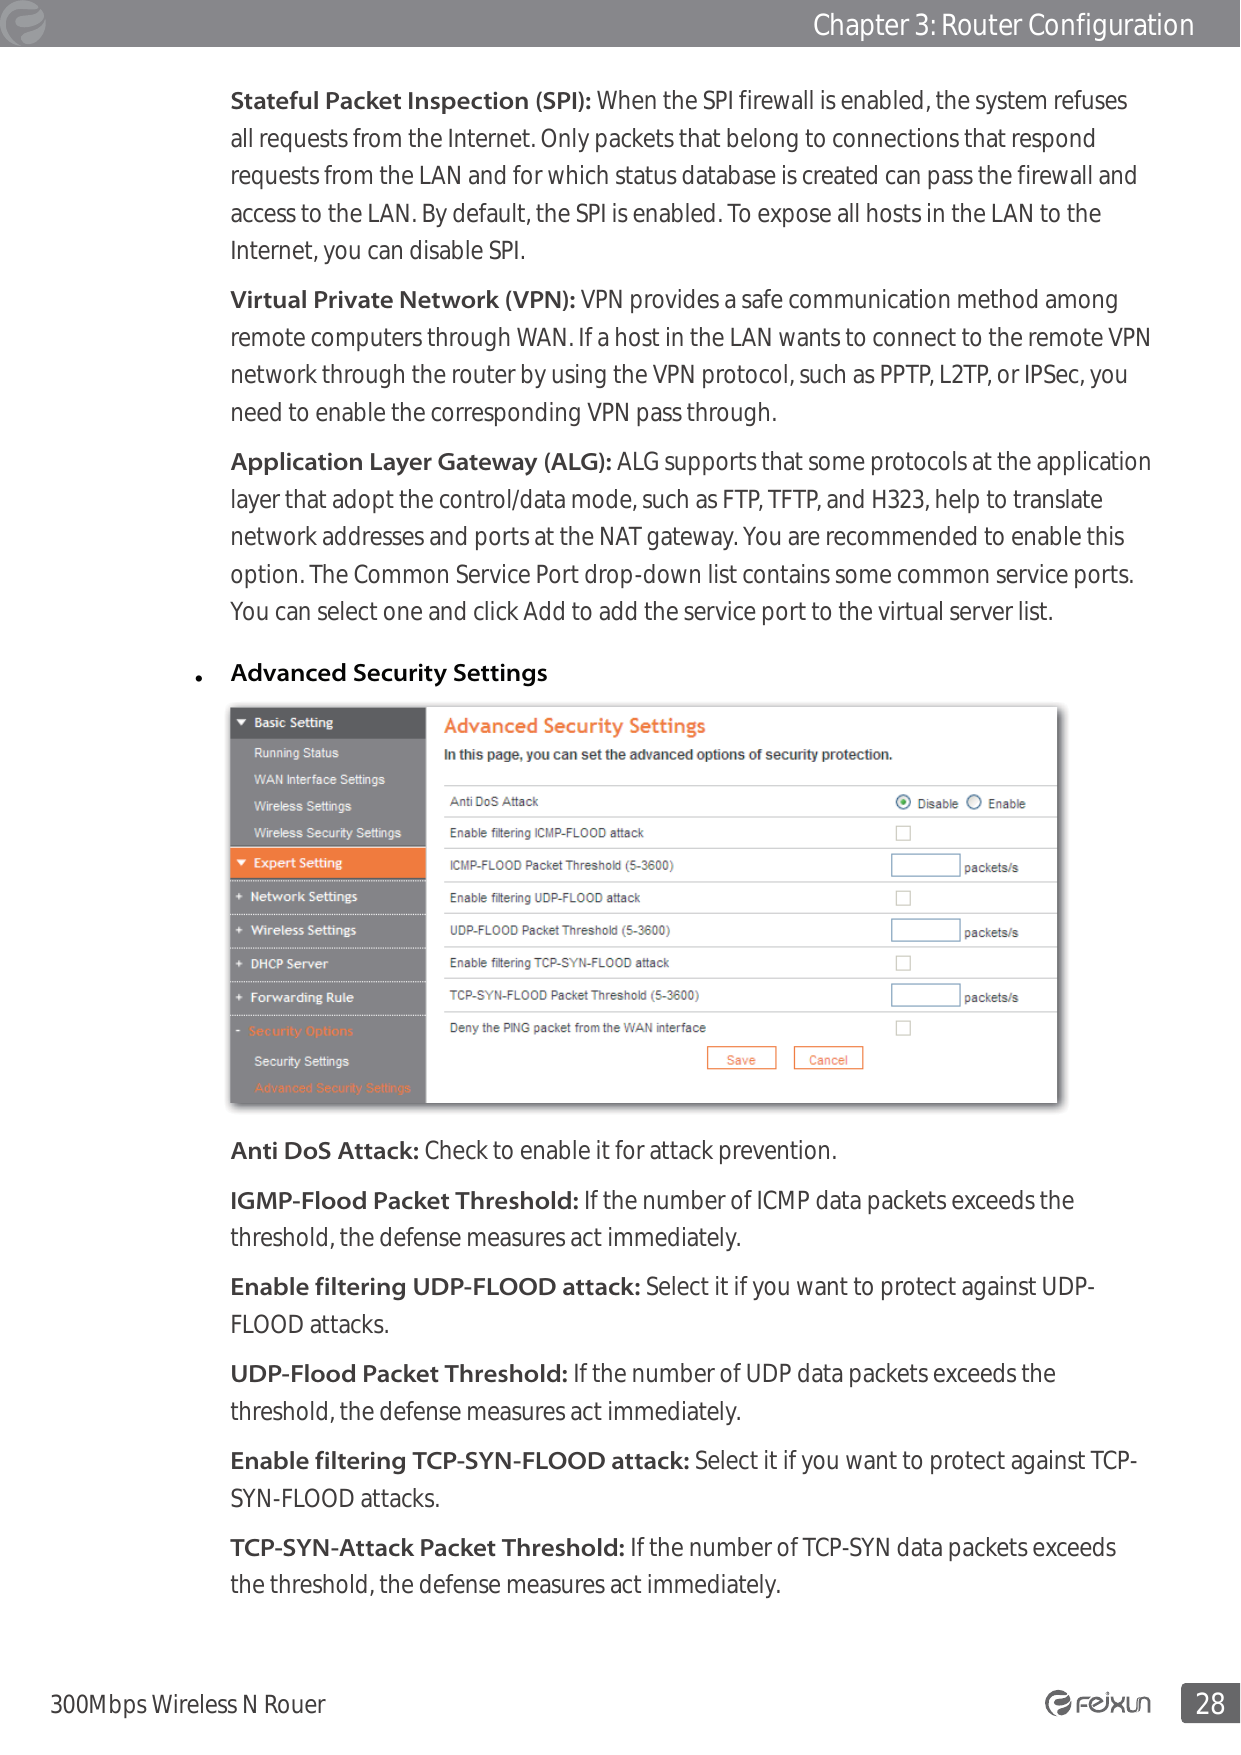
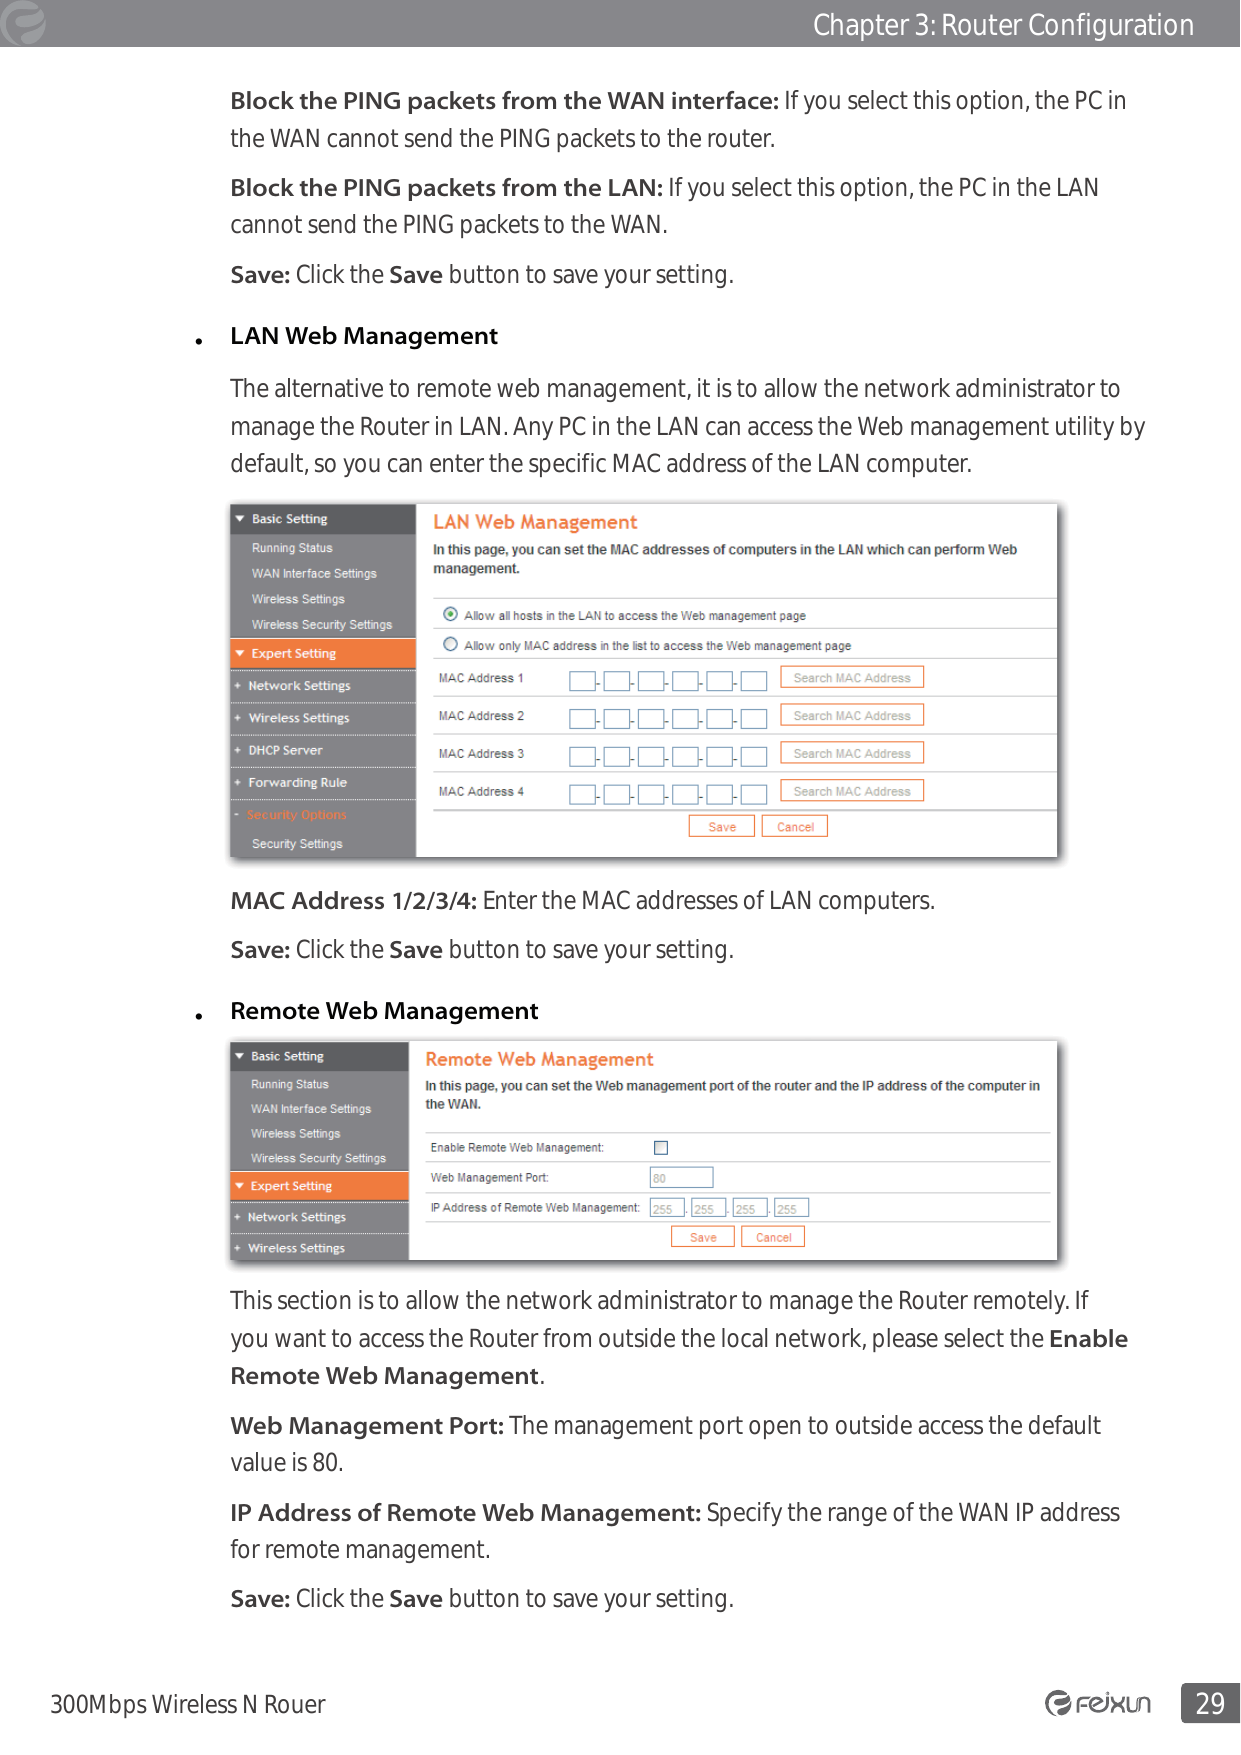
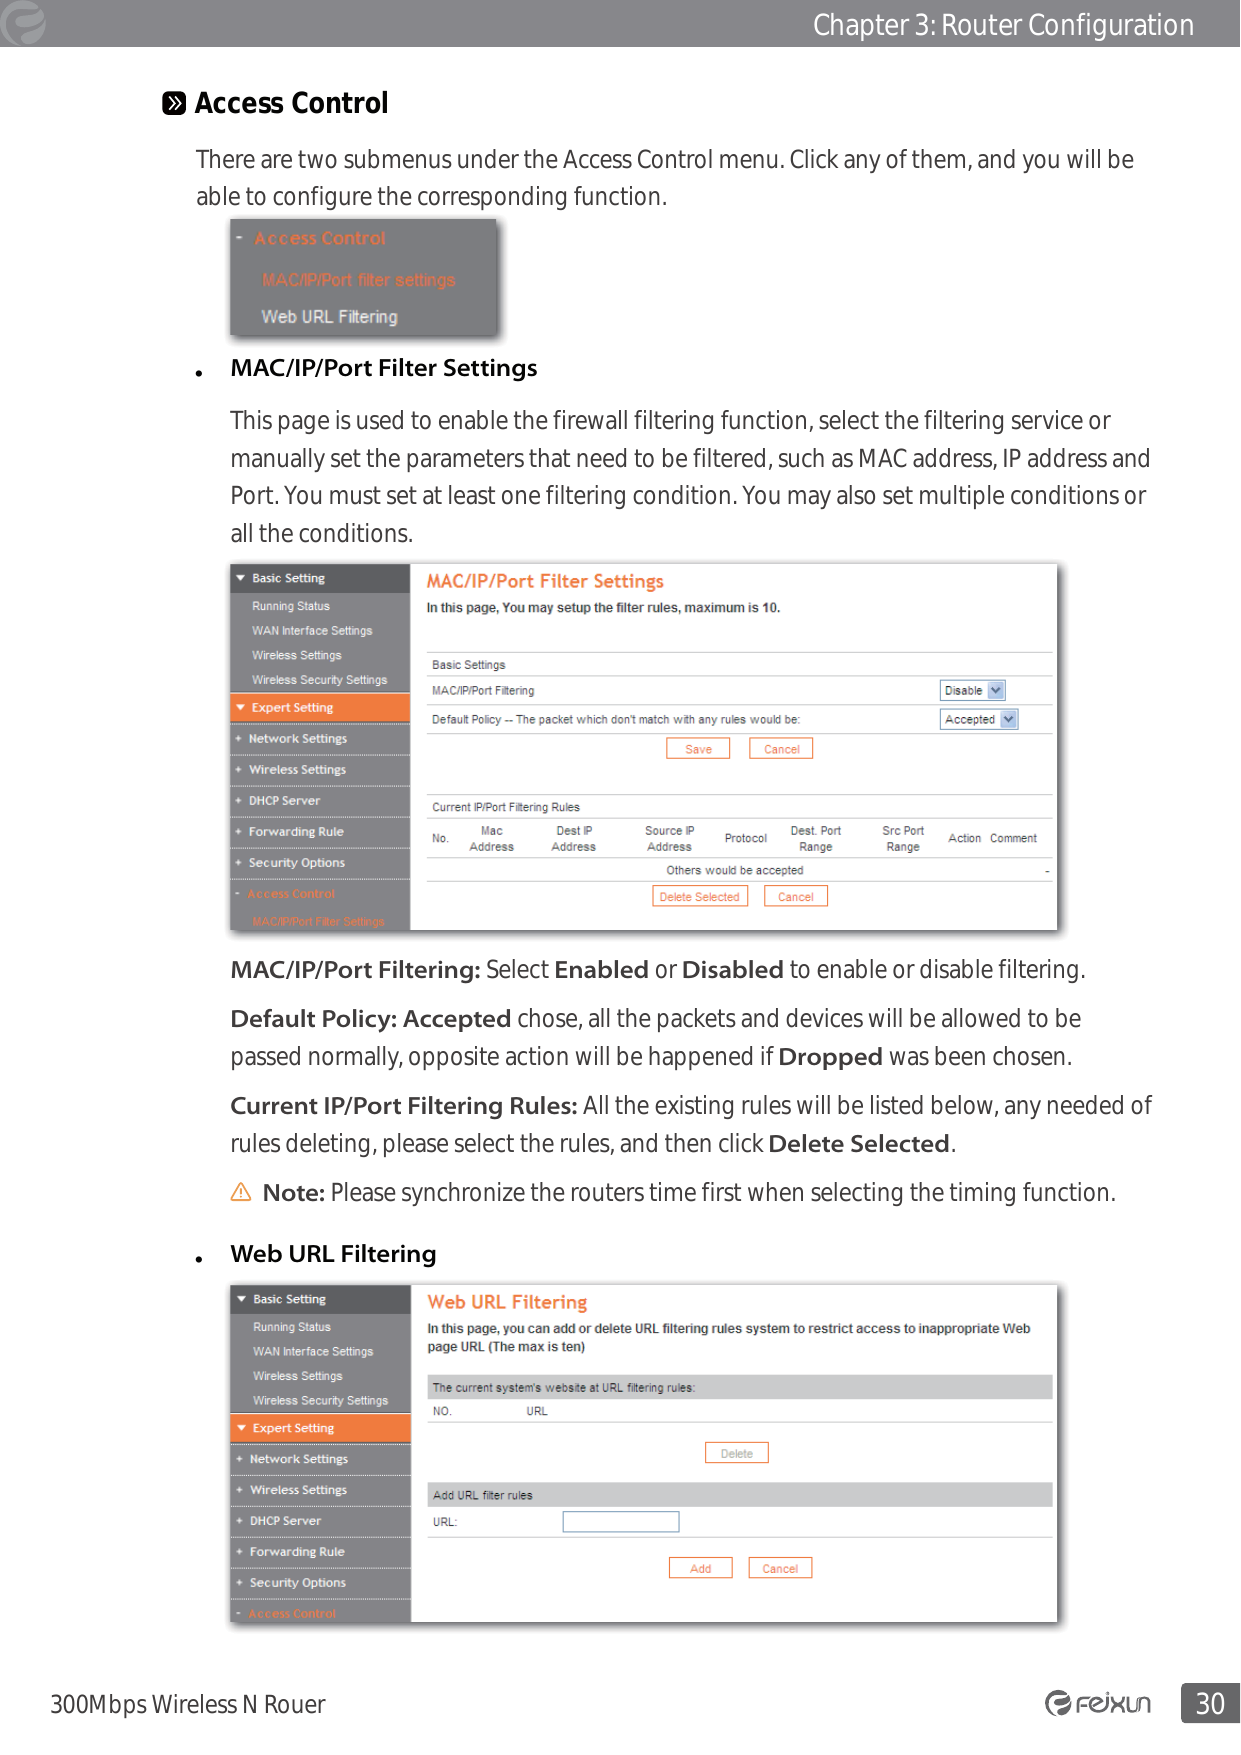
![13Chapter 3: Router Configuration300Mbps Wireless N Rouersupports to configure different security classes between the main SSID and the subordinate SSID. Security Mode: There are several different security modes; you can choose one from disable, open, share, WEPAUTO, WPA-PSK WPA2-PSK, and WPA-PSK/WPA2-PSK etc.. The operations of each security mode are as following:• Mode 1: Security Mode > DisableIf you do not want to use wireless security, check this radio button. • Mode 2: Security Mode > Open/Share/ WEPAUTO It is based on the IEEE 802.11 standard. If you check this radio button, you will find a notice in red as show in Figure 4-18. You can choose the type for the WEP security on the pull-down list. You can select Shared Key or Open System authentication type automatically based on the wireless stations capability and request. Default Key: Select a valid encryption key. WEP Key 1, 2, 3, 4: Enter the WEP key here. Please note that the key should be in accordance with the key format and be valid. The key should be ASCII Characters or Hexadecimal Digits. Note: If you do not set the key, the wireless security function is still disabled even if you have selected Shared Key as the Authentication Type. • Mode 3: Security Mode>WPA-Personal/WPA2-PersonalWPA PSK (Wi-Fi Protected Access): A Wi-Fi standard is a more recent wireless encryption scheme, designed to improve the security features of WEP. It applies more powerful encryption types (such as TKIP [Temporal Key Integrity Protocol] or AES [Advanced Encryption Standard]) and can change the keys dynamically on every authorized wireless device. WPA Algorithms: Select one encryption type, AES or TKIP. (AES is stronger than TKIP) Pass Phrase: Default as 12345678, please enter a new key (8-63 ASCII characters). Key Renewal Interval: It is to tell how often the Router changes key. The default time is 3600s; do not change it unless it is necessary. Note: To improve security level, do not set the keyword with words that can be found in a dictionary or too easy to remember. Expert SettingExpert Setting enables users to realize many advanced funtions of the router. Under this menu, there are ten submenus as follow:](https://usermanual.wiki/Phicomm/WR203OA.User-Manual-II/User-Guide-1559332-Page-18.png)