Philips Consumer Lifestyle BTM288V37 Bluetooth Micro System User Manual
Philips Consumer Lifestyle Bluetooth Micro System
UserManual.wiki
>
Philips Consumer Lifestyle
>
BTM288V37 User Manual
User Manual
Navigation menu
Upload a User Manual
Namespaces
Wiki Guide
HTML
PDF
Info
Views
User Manual
Discussion / Help
Navigation


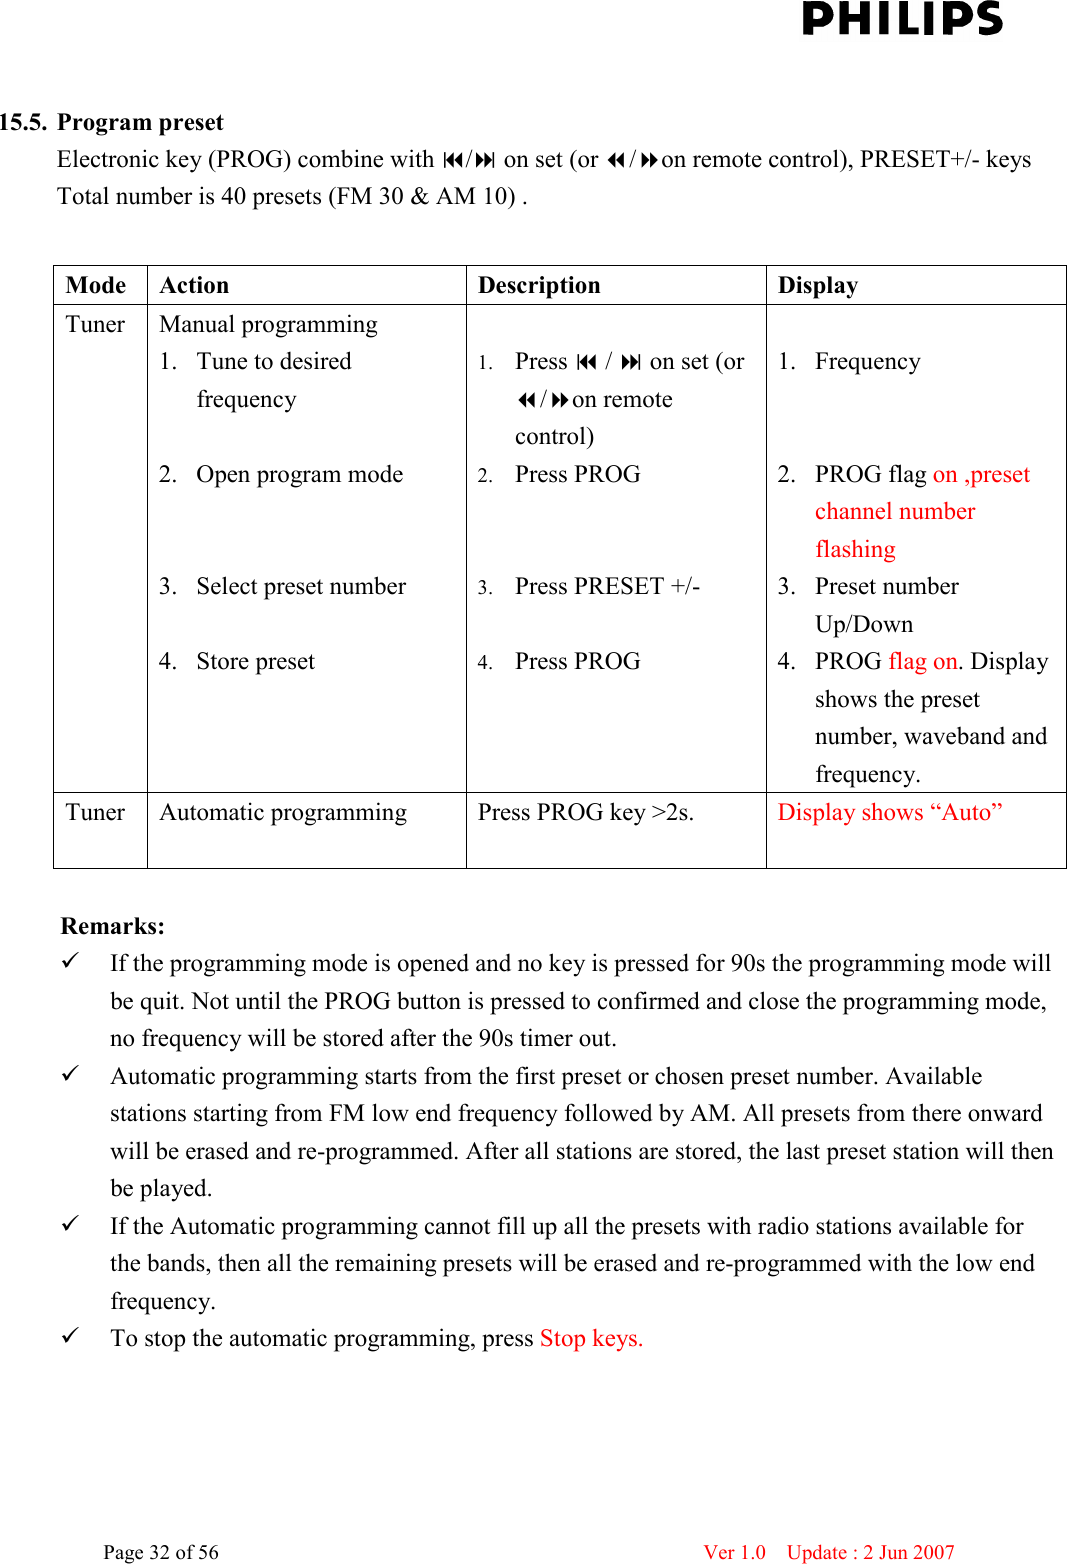
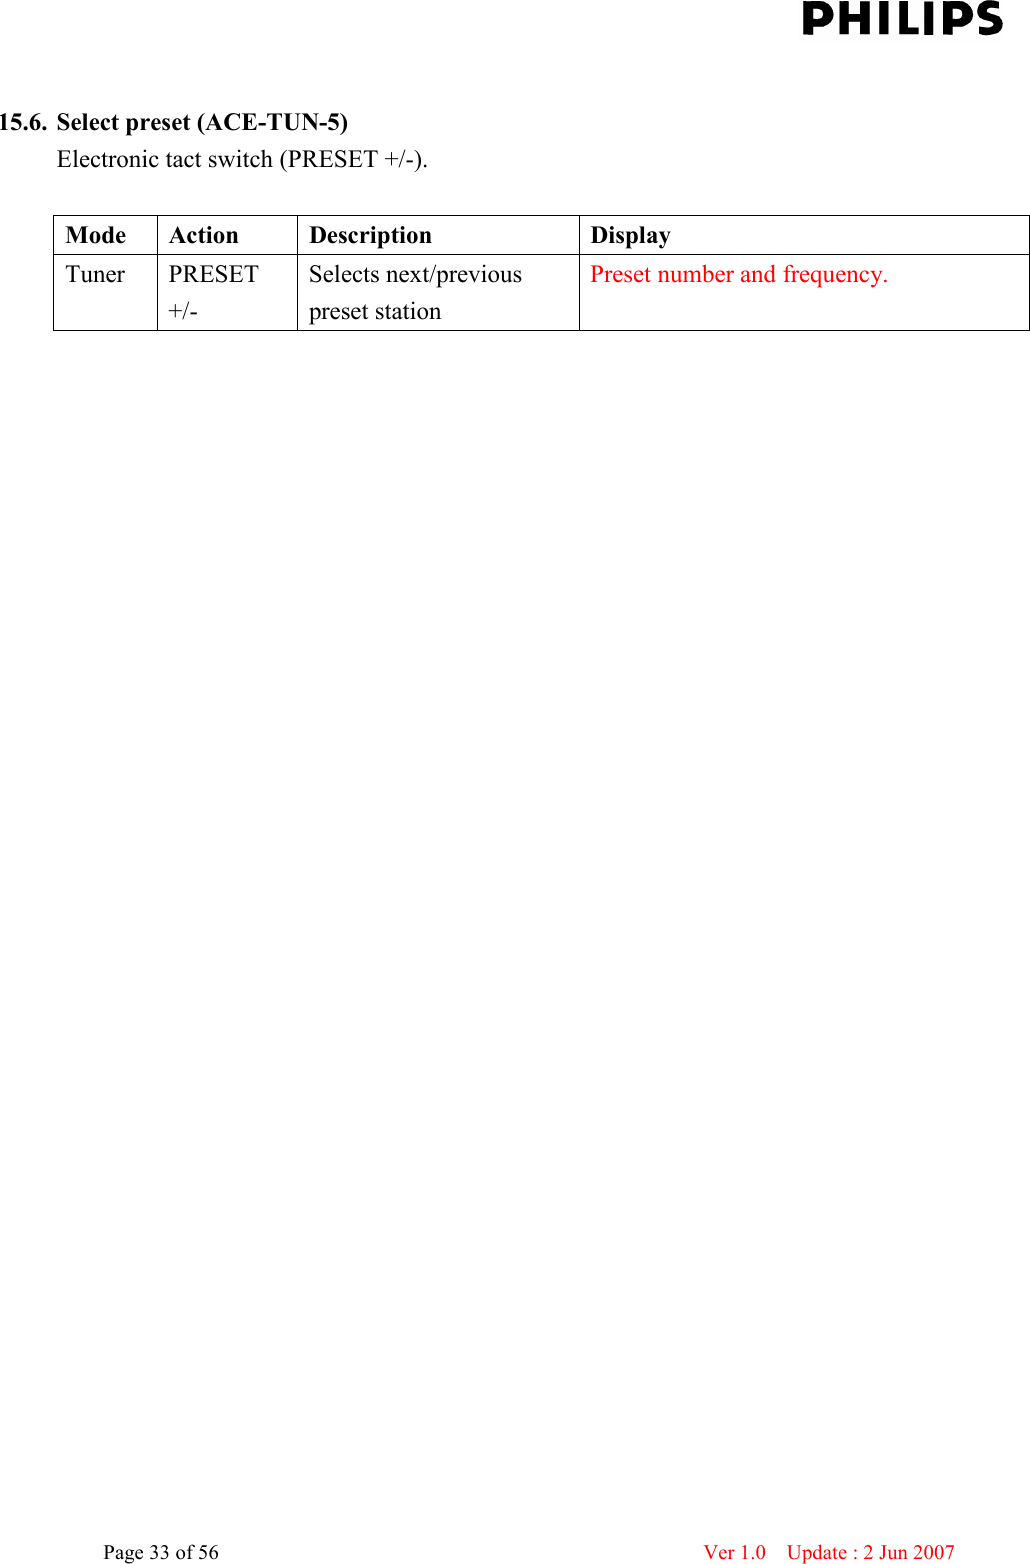
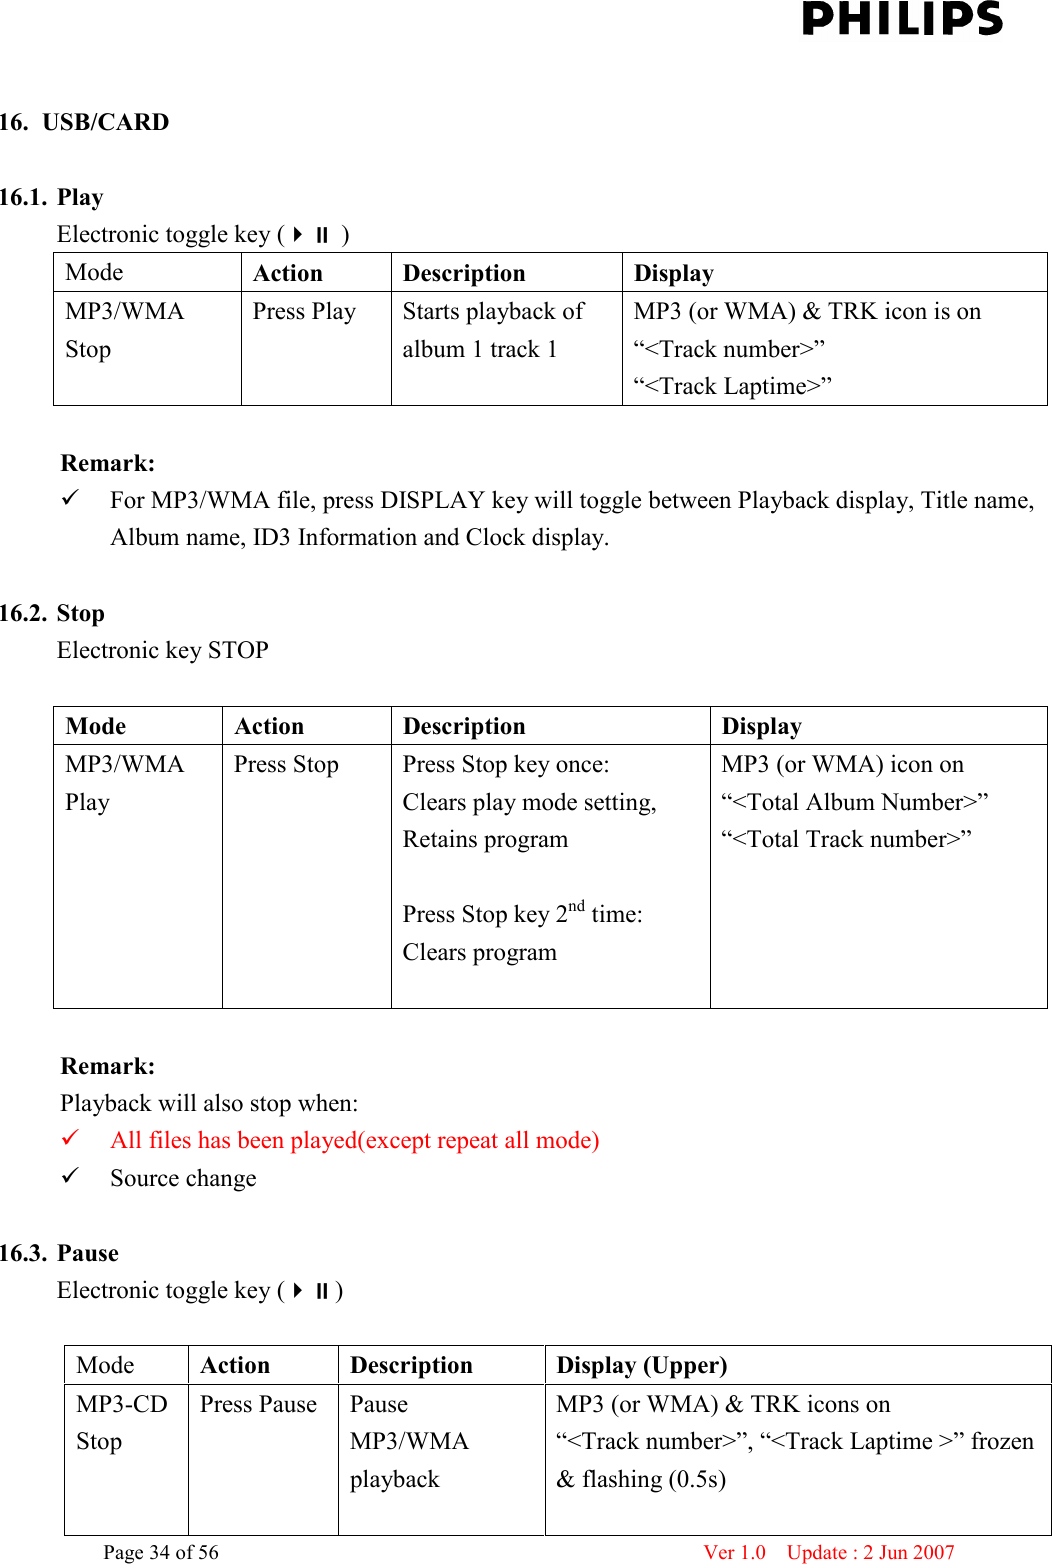
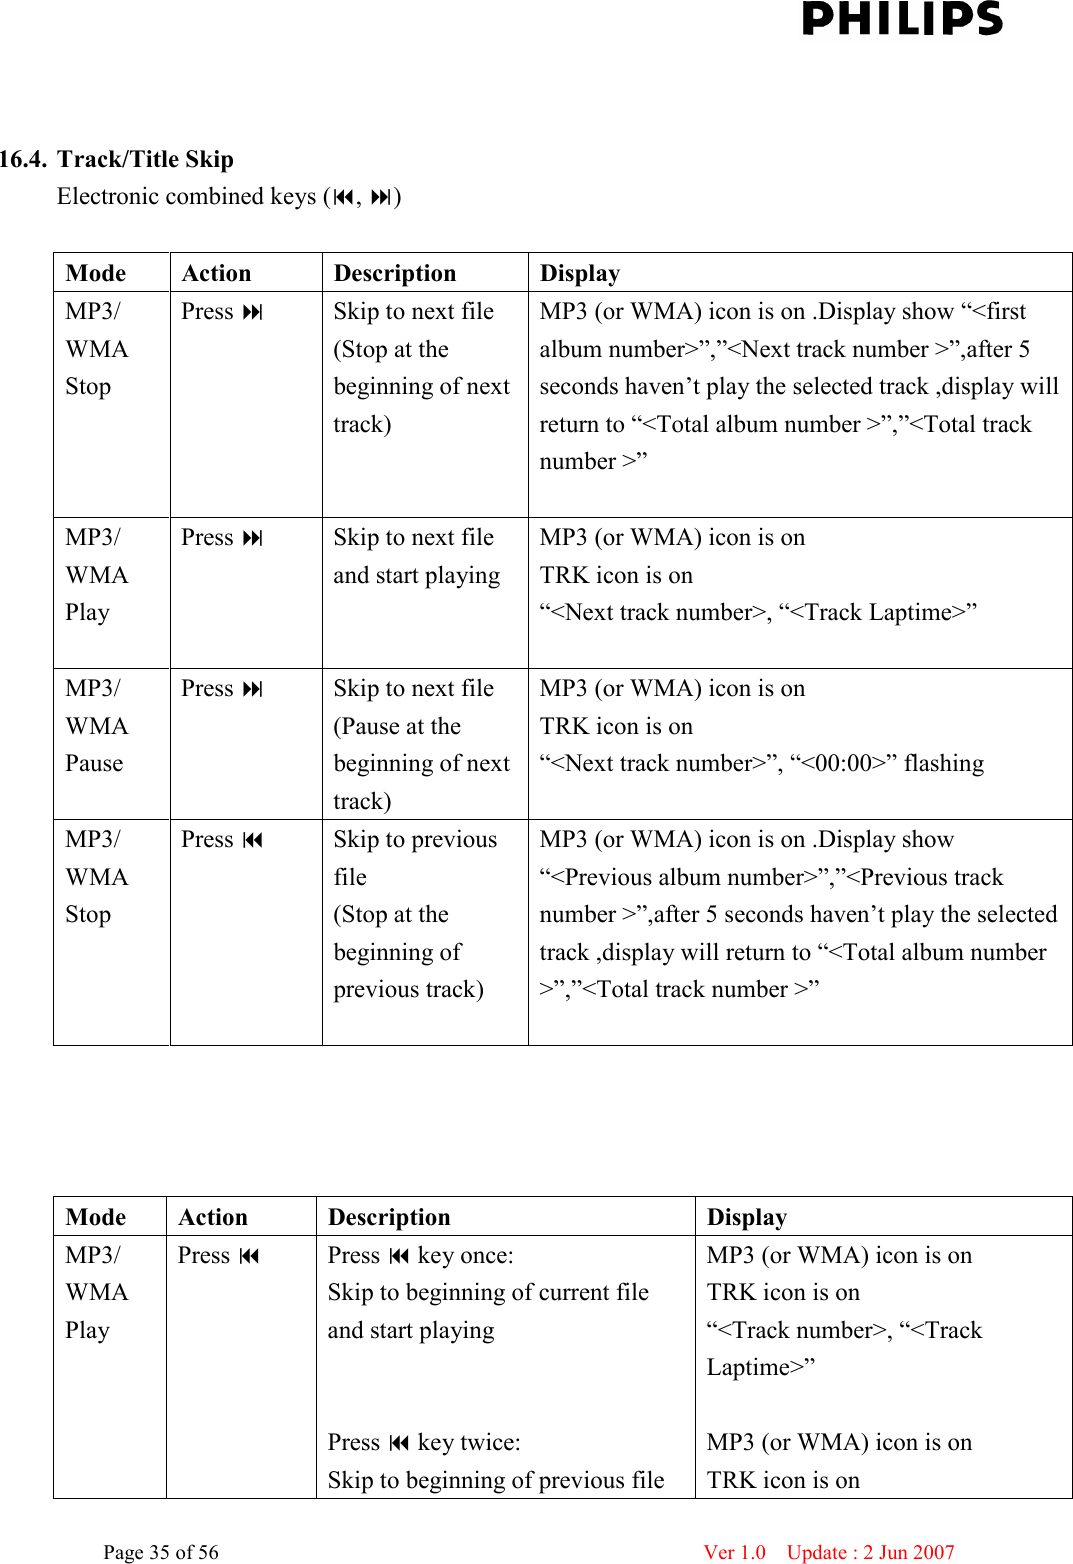


![Page 53 of 56 Ver 1.0 Update : 2 Jun 2007 REC 1 means start record the track from the beginning of the track to the end of the track .No matter the user press REC key in which time of the track, it will go back to 00:00 of that track and then start recording with Music playback . (2x speed is no music playback) If the target record source is CDDA format ,during recording ,display will show <Track number> , <Track time> ,and then the selected media and “REC” icon will keep flashing . If the target record source is MP3 format ,during recording , display will show <Track number> , <Percentage count >.Percentage count will start from [00] [100] .[100] means the ripping function for that file is finished . (MP3 ripping from one media to another media is no music playback) Anytime time Press STOP key can cancel recording. When CDDA track playback finish or CDMP3 format percentage count is complete, recording file will save to the selected flash media and recording file is created. Remarks: Ripping will be fail and the ripping file can not save cause from below reason Flash Device capacity is not enough . During ripping remove the Flash device or ripping source . During ripping if the Bluetooth connected mobile phone have call in . During ripping if that track haven’t yet save ,press STOP or POWER key to exit REC mode .e.g.Ripping from track 1-3 using 1x ripping ,if now ripping Track 2 and the time playing to “00:53” .At that time exit REC mode ,Track 1 can be stored in the flash device,but track 2 and 3 will be cancel . Recording from BLUETOOTH/AUX You may record from your BLUETOOTH/AUX. Press the SOURCE button to select ”BLUETOOTH” “AUX” mode. Start music/voice playback . Press the REC button once. “USB”, “CARD” or both appear on the display. If you have multiple media connected, use and to select the media. Press REC again to confirm or wait 10 seconds “REC” and “USB” or “CARD” shows flashing on the display. Recording begins. Until the user press STOP key to save the file and stop ripping.](https://usermanual.wiki/Philips-Consumer-Lifestyle/BTM288V37/User-Guide-833422-Page-53.png)