Philips Consumer Lifestyle PHSB170 Bluetooth Speaker User Manual SB170 37 UM V01 EN w1332 1 01
Philips Consumer Lifestyle Bluetooth Speaker SB170 37 UM V01 EN w1332 1 01
UserManual.wiki
>
Philips Consumer Lifestyle
>
PHSB170 User Manual
user manual
Navigation menu
Upload a User Manual
Namespaces
Wiki Guide
HTML
PDF
Info
Views
User Manual
Discussion / Help
Navigation
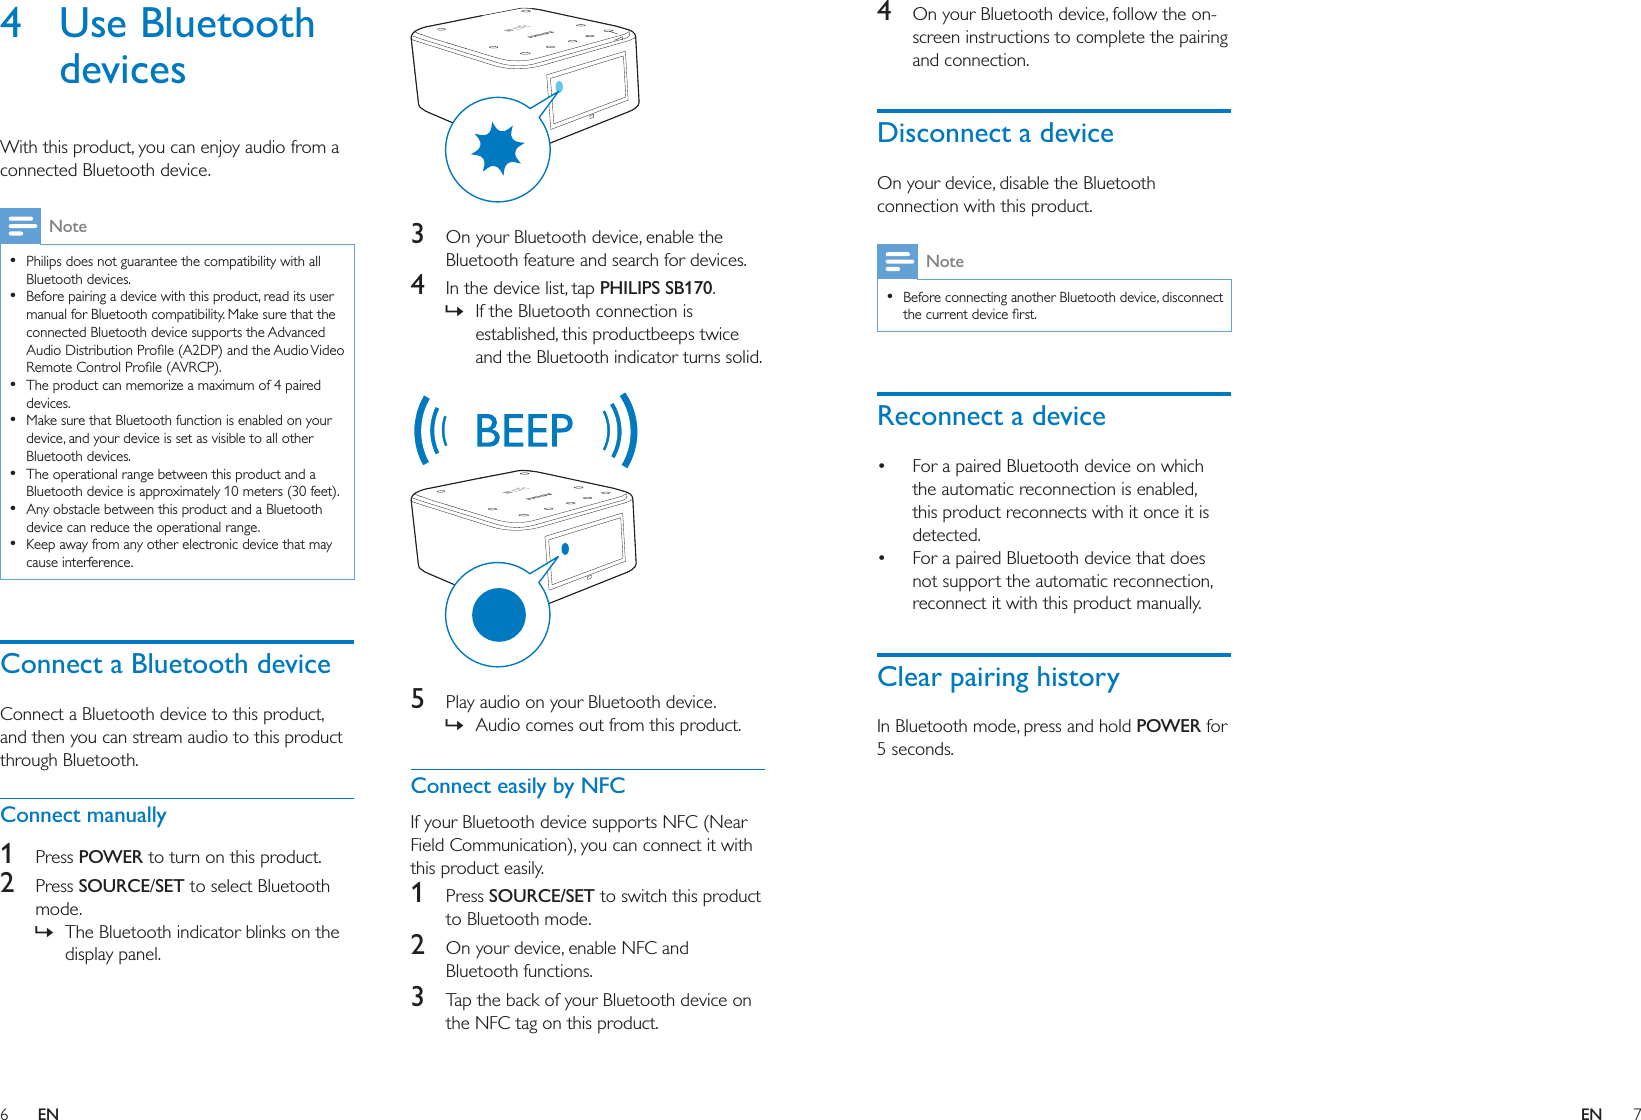
![4 5ENEN3 Get startedAlways follow the instructions in this chapter in sequence.Connect powerCaution Risk of product damage! Make sure that the power supply voltage matches the voltage printed on the bottom of this product. Risk of electric shock! When you unplug the AC power adaptor, always pull the plug from the socket. Never pull the cord.Connect the AC power adaptor between the DC IN socket at the back of this product, and the power supply. Turn onPress POWER. » The product switches to the last selected source.Switch to standby modePress POWER again to switch the product to standby mode. » The clock (if set) is displayed.DC INSelect a sourcePress SOURCE/SET repeatedly to select a source: FM preset, FM, Bluetooth, or AUX in. Set time1 Press and hold SOURCE/SET for two seconds. » [24H] or [12H] begins to blink.2 Press - TUNE/TIME or TUNE/TIME+ to select [24H] or[12H] for 12 or 24 hour format.3 Press SOURCE/SET » The hour and minute digits begin to blink.4 Press - TUNE/TIME or TUNE/TIME+ repeatedly to set the hour.5 Press SOURCE/SET » Minute digits begin to blink.6 Press - TUNE/TIME or TUNE/TIME+ repeatedly to set the minute.7 Press SOURCE/SET » The set time is displayed.2 Your productCongratulations on your purchase, and support that Philips offers, register your product at www.philips.com/welcome.IntroductionWith this product, you can enjoy audio from your Bluetooth devices or other external audio devices, listen to FM radio, and wake up to buzzer alarm or radio.What's in the boxCheck and identify the contents of your package: Main unit Power adaptor Audio input cable (3.5 mm connectors) Short user manual SB170Short User Manualwww.philips.com/welcomeAlways there to help youRegister your product and get support atQuestion?Contact Philips](https://usermanual.wiki/Philips-Consumer-Lifestyle/PHSB170/User-Guide-2044611-Page-4.png)
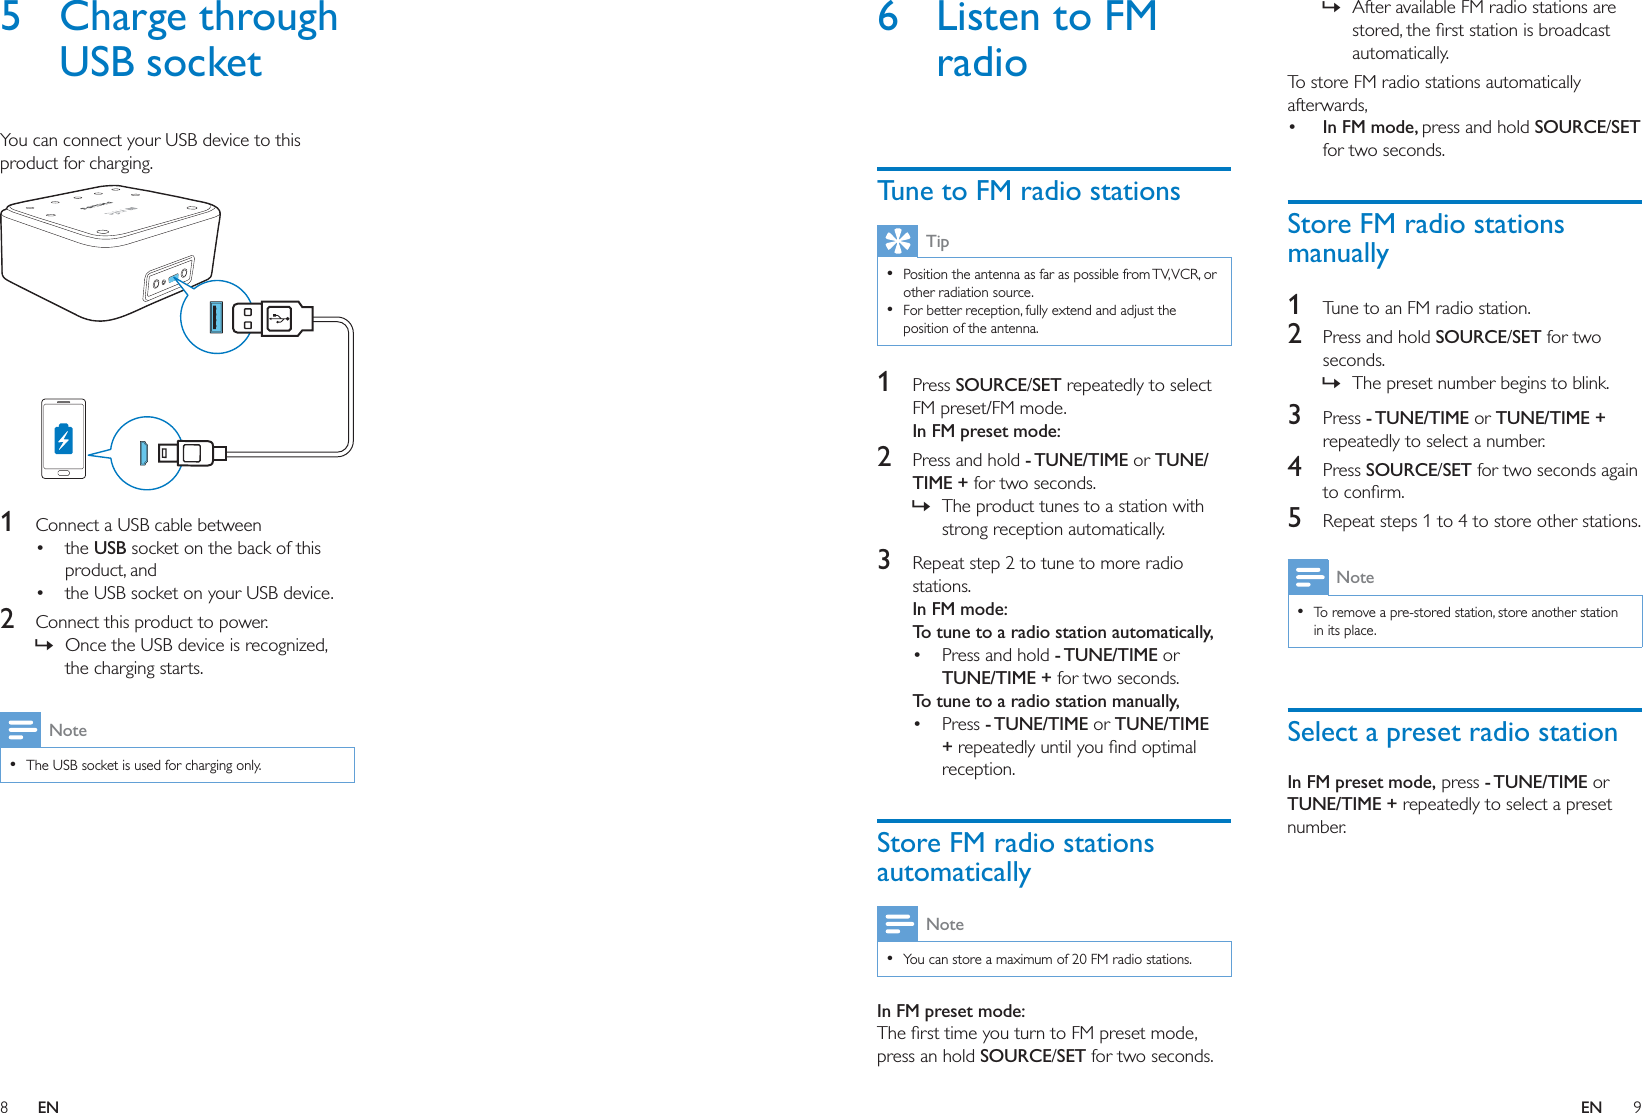
![10 11ENEN8 Other featuresSet alarm timerNote Make sure that you have set the clock correctly.1 Press and hold AL1/AL2 for 2 seconds to activate alarm setting. » The hour digits blink.2 Press - TUNE/TIME or TUNE/TIME+ repeatedly to adjust hour.3 Press SOURCE/SET » The minute digits blink.4 Repeat steps 2-3 to set the minute.5 Repeat steps 2-3 to select an alarm source. TUNE: select your last listened FM channel as alarm sound. BUZ: select buzzer as alarm sound. 6 Repeat steps 2-3 to set the alarm volume. » The alarm time and icon are displayed.Activate/deactivate alarm timer1 Press AL1/AL2 to view alarm settings.2 Press AL1/AL2 again to activate or deactivate the alarm timer. » The alarm icon appears if alarm timer is on and disappears if it is off. To stop the ringing alarm, press the corresponding AL1/AL2. » The alarm repeats ringing for the next day. Snooze alarmWhen alarm sounds, press SNOOZE. » The alarm snoozes and repeats ringing nine minutes later.Set sleep timerThis prodcut can switch to standby mode automatically after a preset period.Press SLEEP repeatedly to select the sleep timer period (in minutes). » When the sleep timer is activated, appears.To deactivate the sleep timerPress SLEEP repeatedly until [OFF] (off) appears. Adjust display brightnessPress BRIGHTNESS repeatedly to select different brightness levels.15 30 60 90 120OFF7 Play through audio cableThrough an MP3 link cable, you can also play audio input that is transfered from an external audio device, for example, an MP3 player. 1 Connect an audio input cable with a 3.5 mm connector on both ends between the AUDIO IN socket on this product, and the headphone socket of an external device.2 Press SOURCE/SET to select AUDIO IN mode.3 Play audio on the external device (refer to its user manual).](https://usermanual.wiki/Philips-Consumer-Lifestyle/PHSB170/User-Guide-2044611-Page-7.png)