Philips Electronics Singapore RC2843001 IR/RF Remote Control User Manual DCI401TCH1 draft v2 1 3 2010
Philips Electronics Singapore Pte Ltd IR/RF Remote Control DCI401TCH1 draft v2 1 3 2010
UserManual.wiki
>
Philips Electronics Singapore
>
RC2843001 User Manual
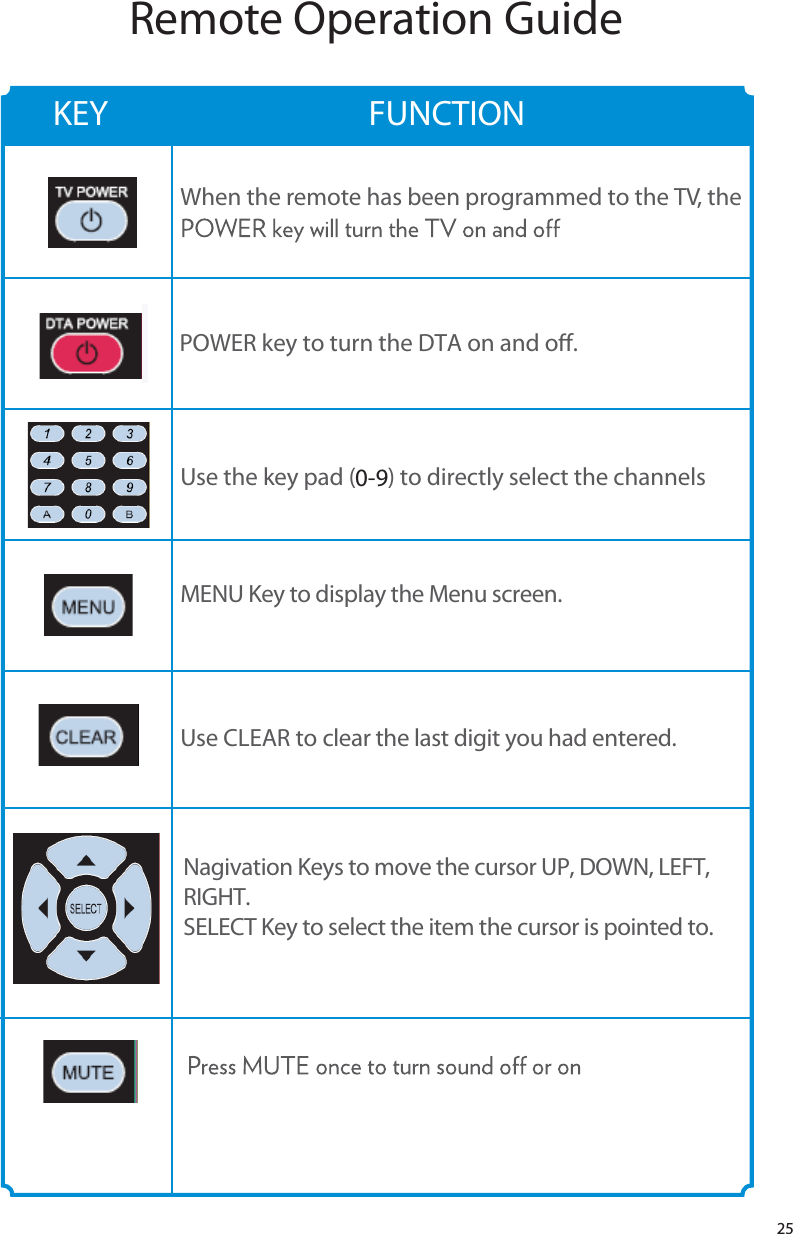
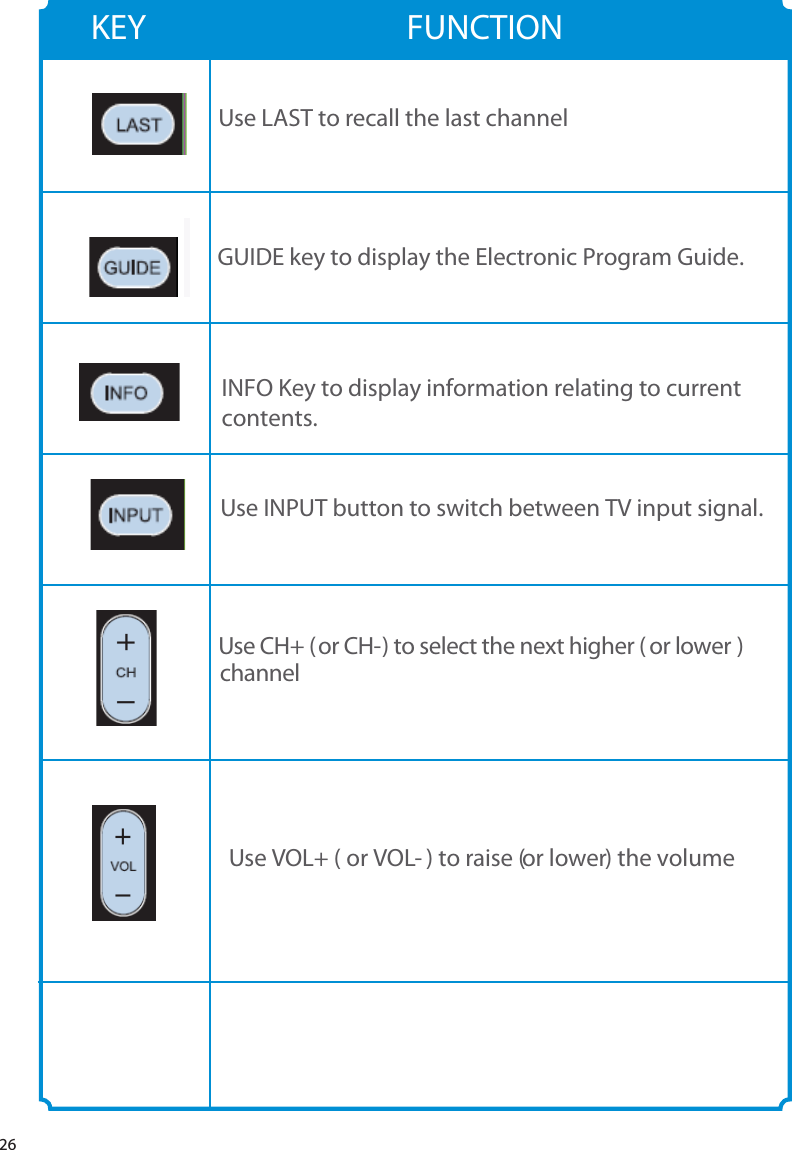
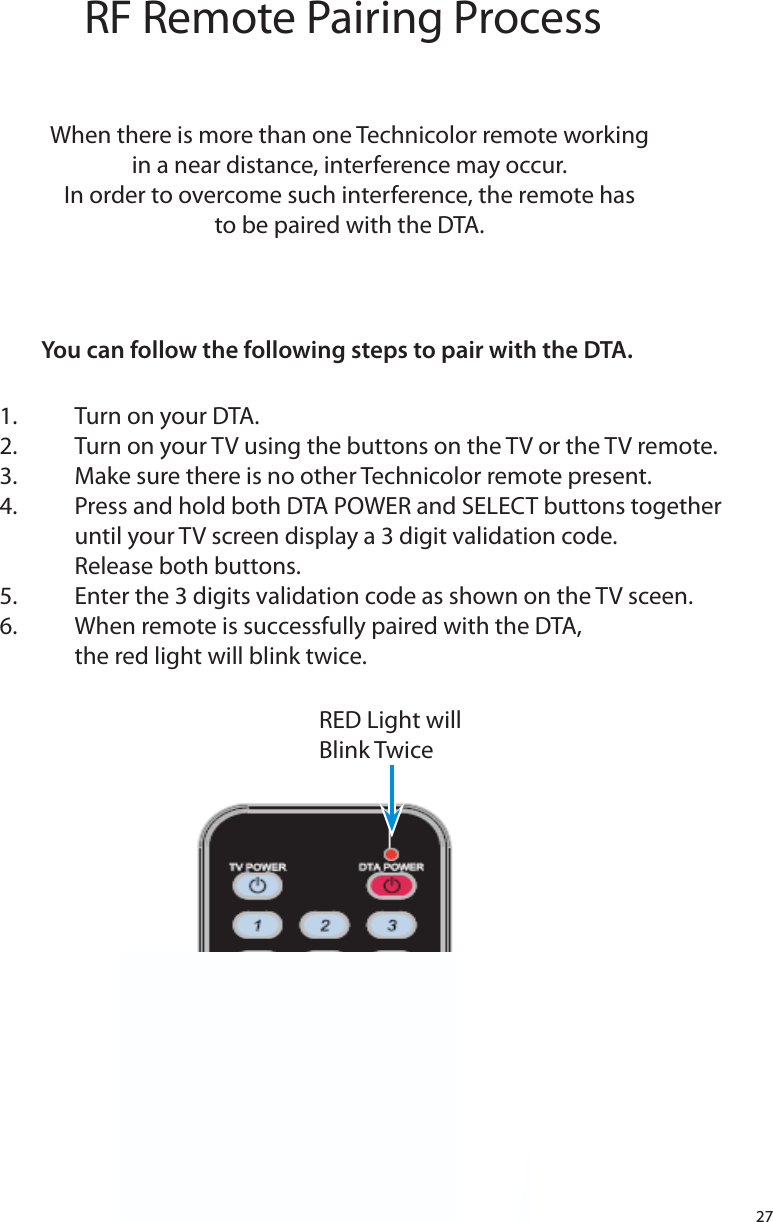
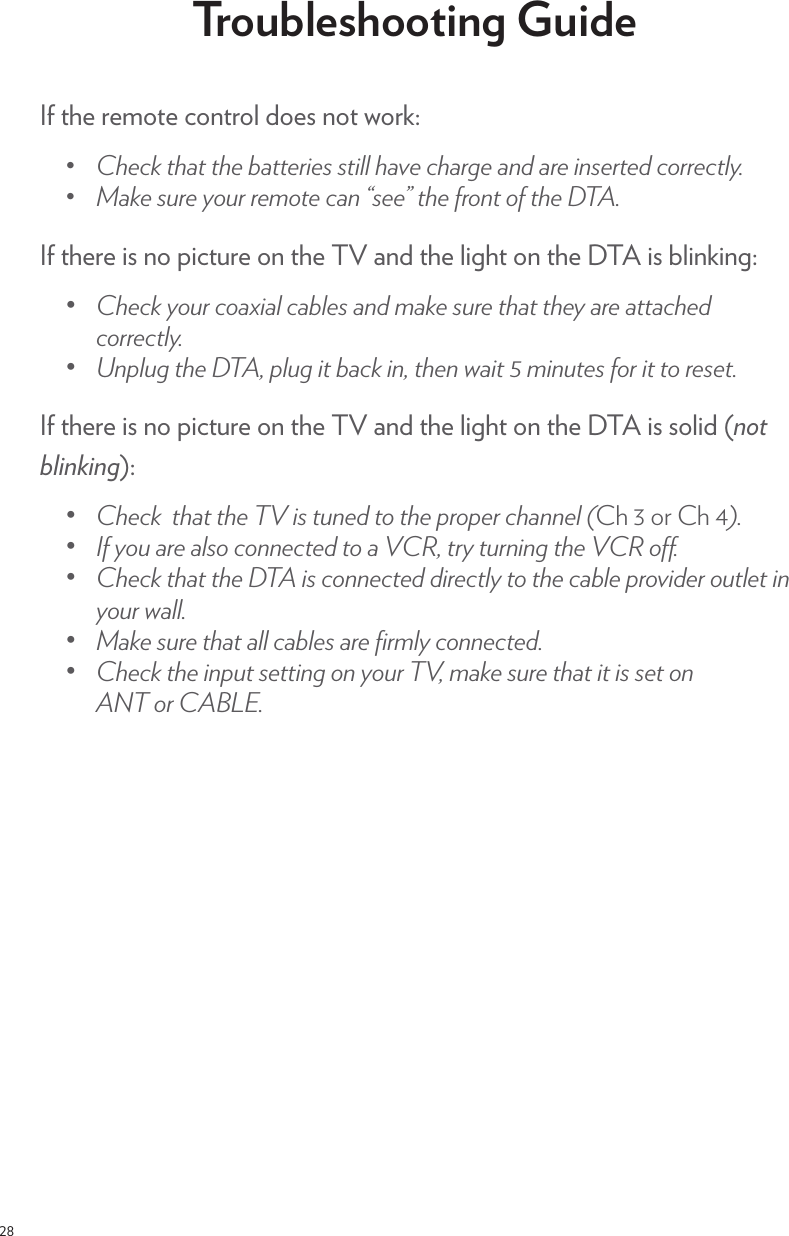
User manual
Navigation menu
Upload a User Manual
Namespaces
Wiki Guide
HTML
PDF
Info
Views
User Manual
Discussion / Help
Navigation