Philips Medical Systems North America M3813C M3813C STEADY SCALE User Manual M3810 90096
Philips Medical Systems North America Co. M3813C STEADY SCALE M3810 90096
UserManual.wiki
>
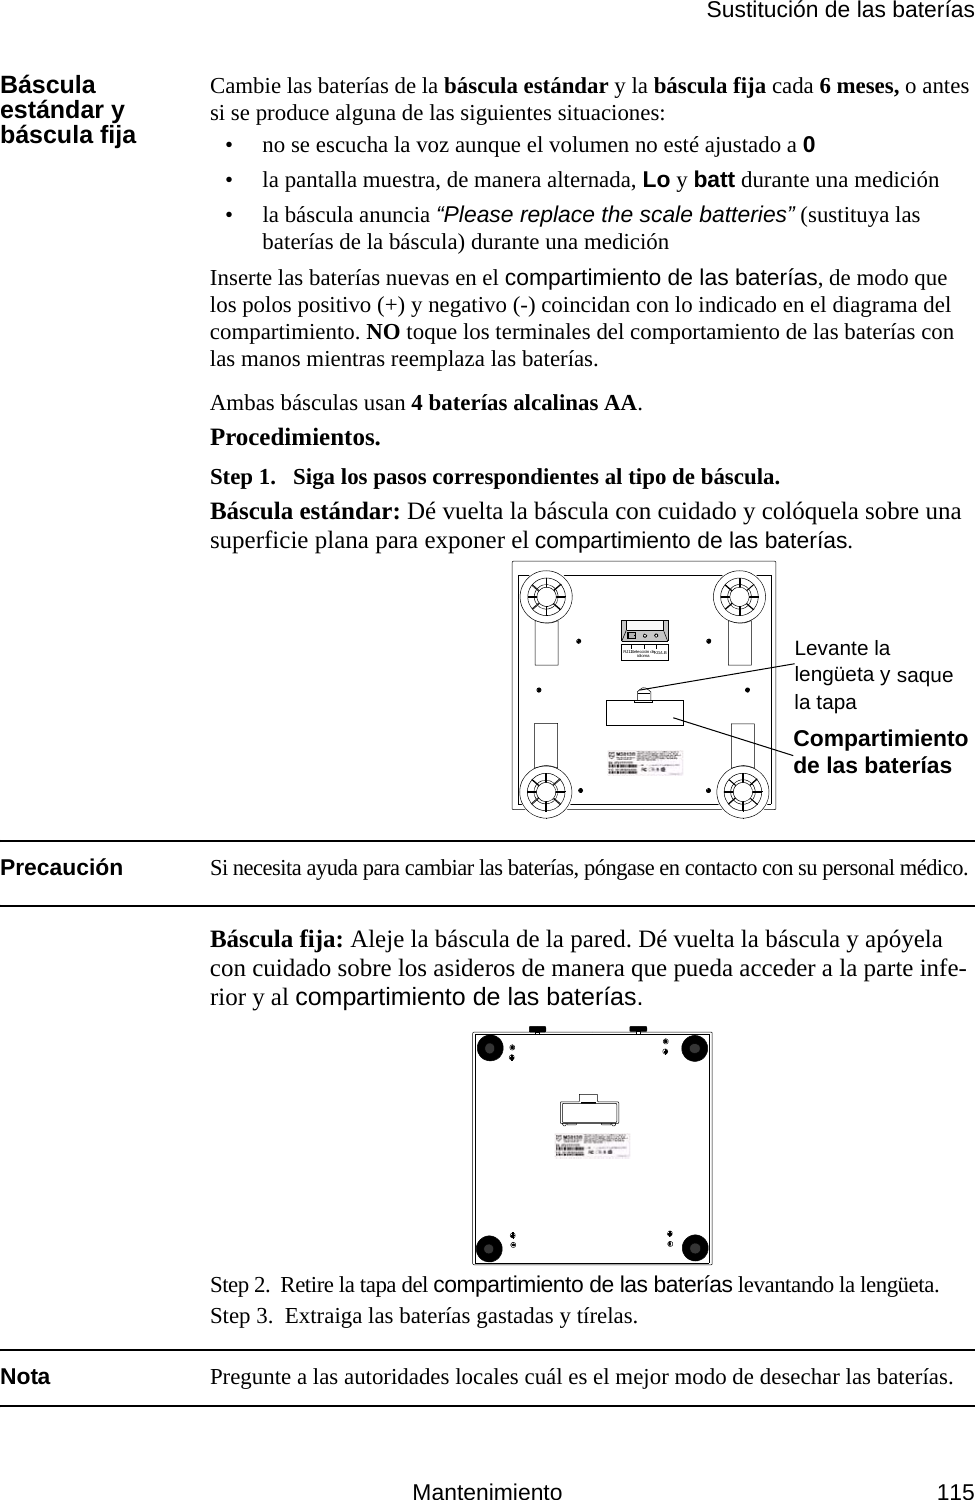
Philips Medical Systems North America
>
M3813C User Manual
>
Users Manual
Contents
1.
Users Manual Errata
2.
Users Manual
Users Manual
Navigation menu
Upload a User Manual
Namespaces
Wiki Guide
HTML
PDF
Info
Views
User Manual
Discussion / Help
Navigation

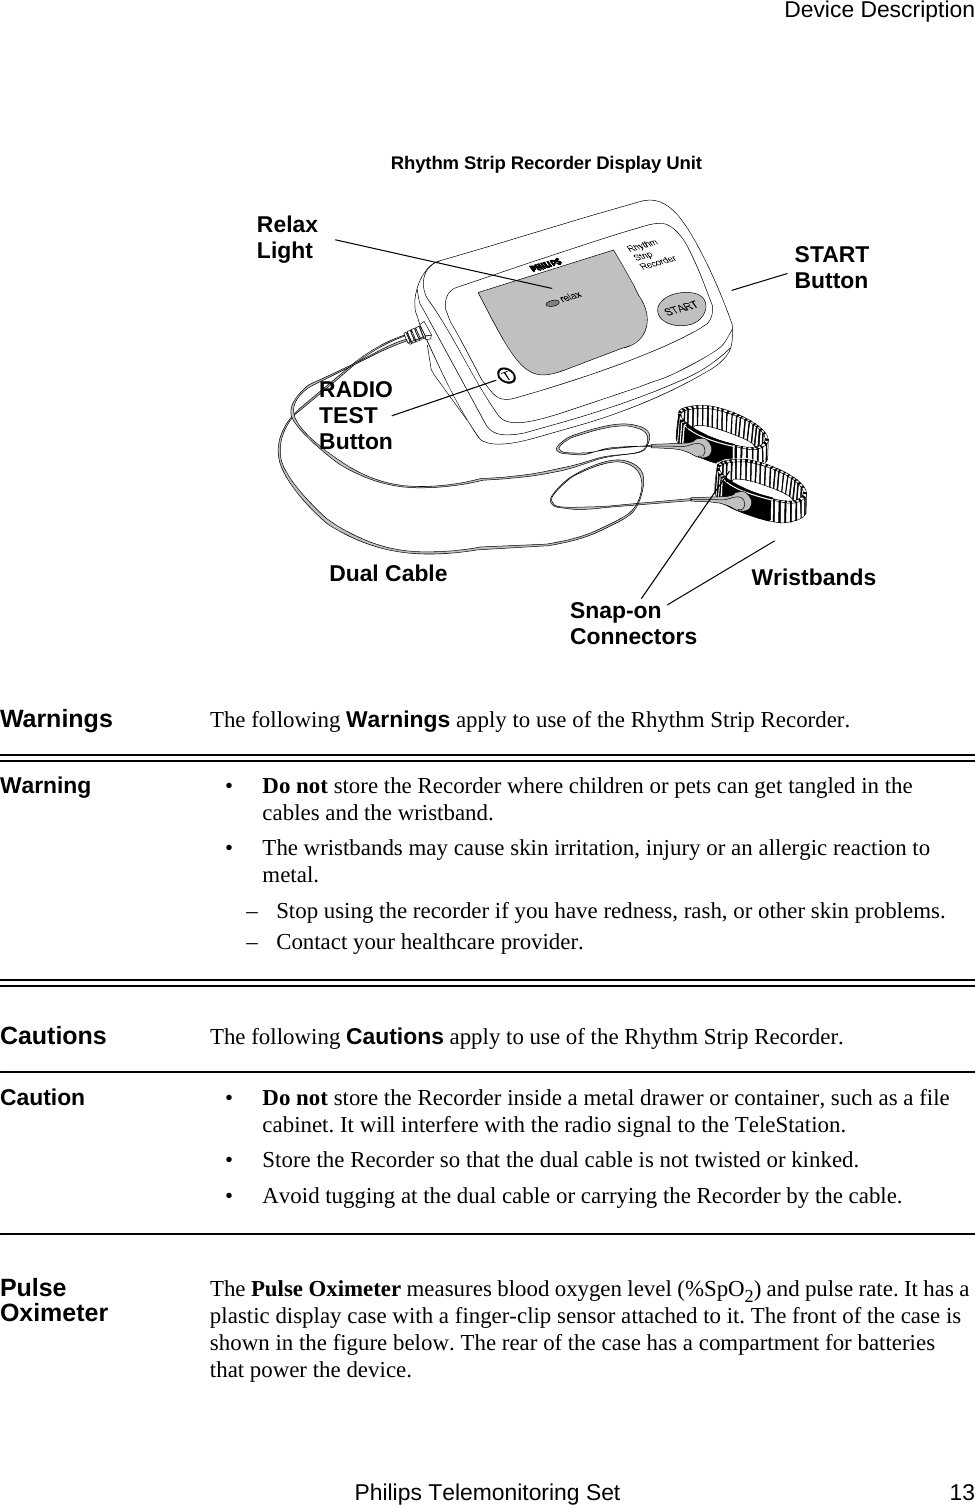
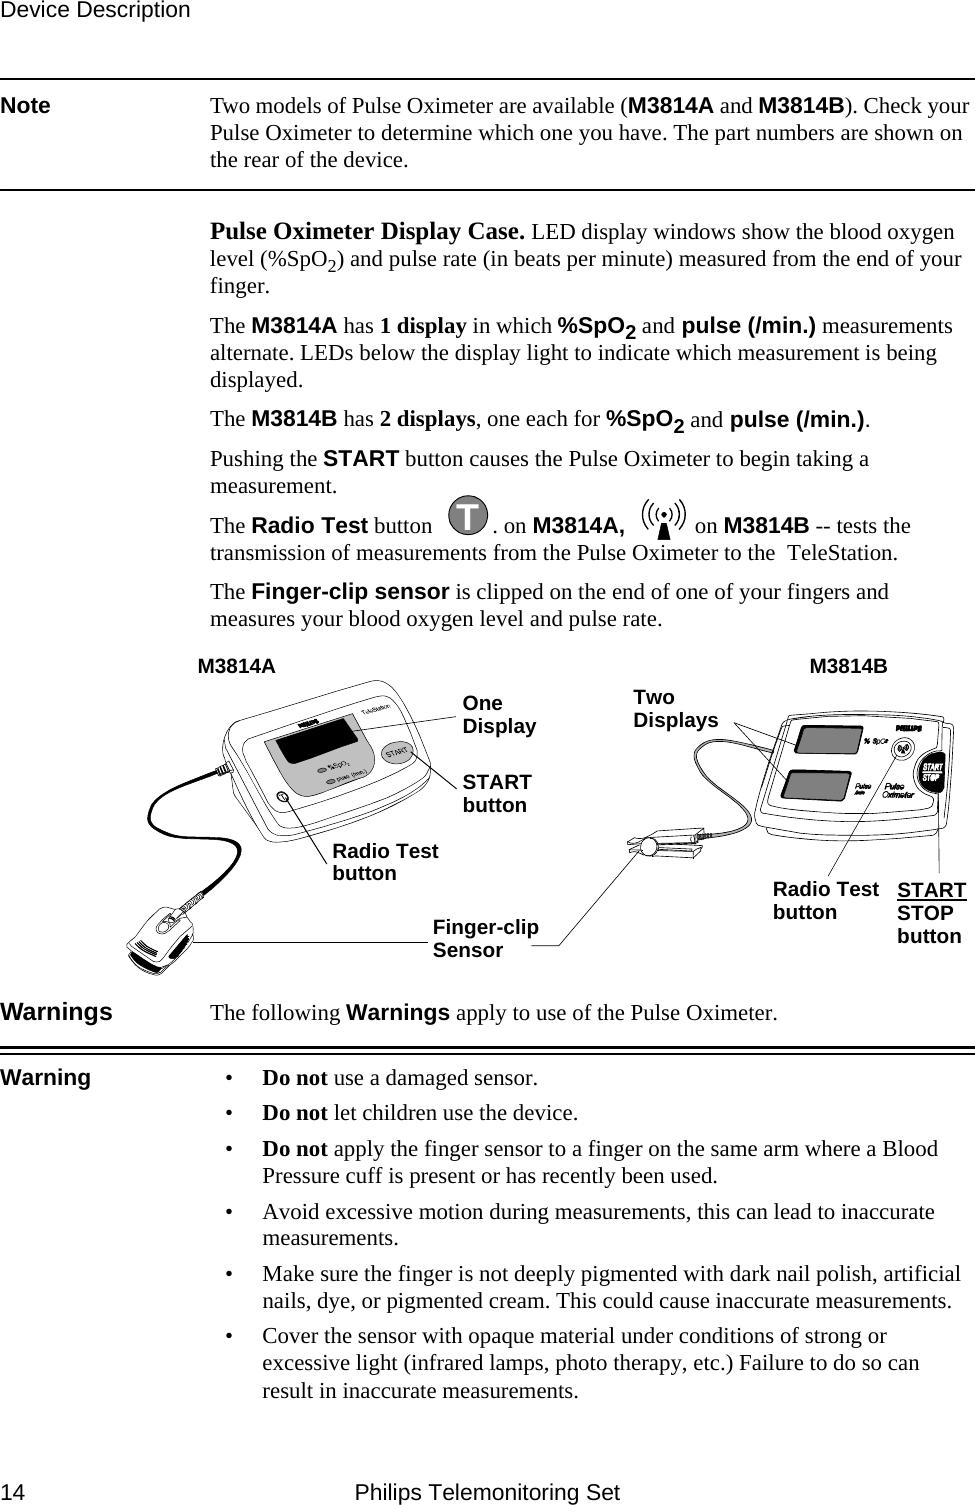

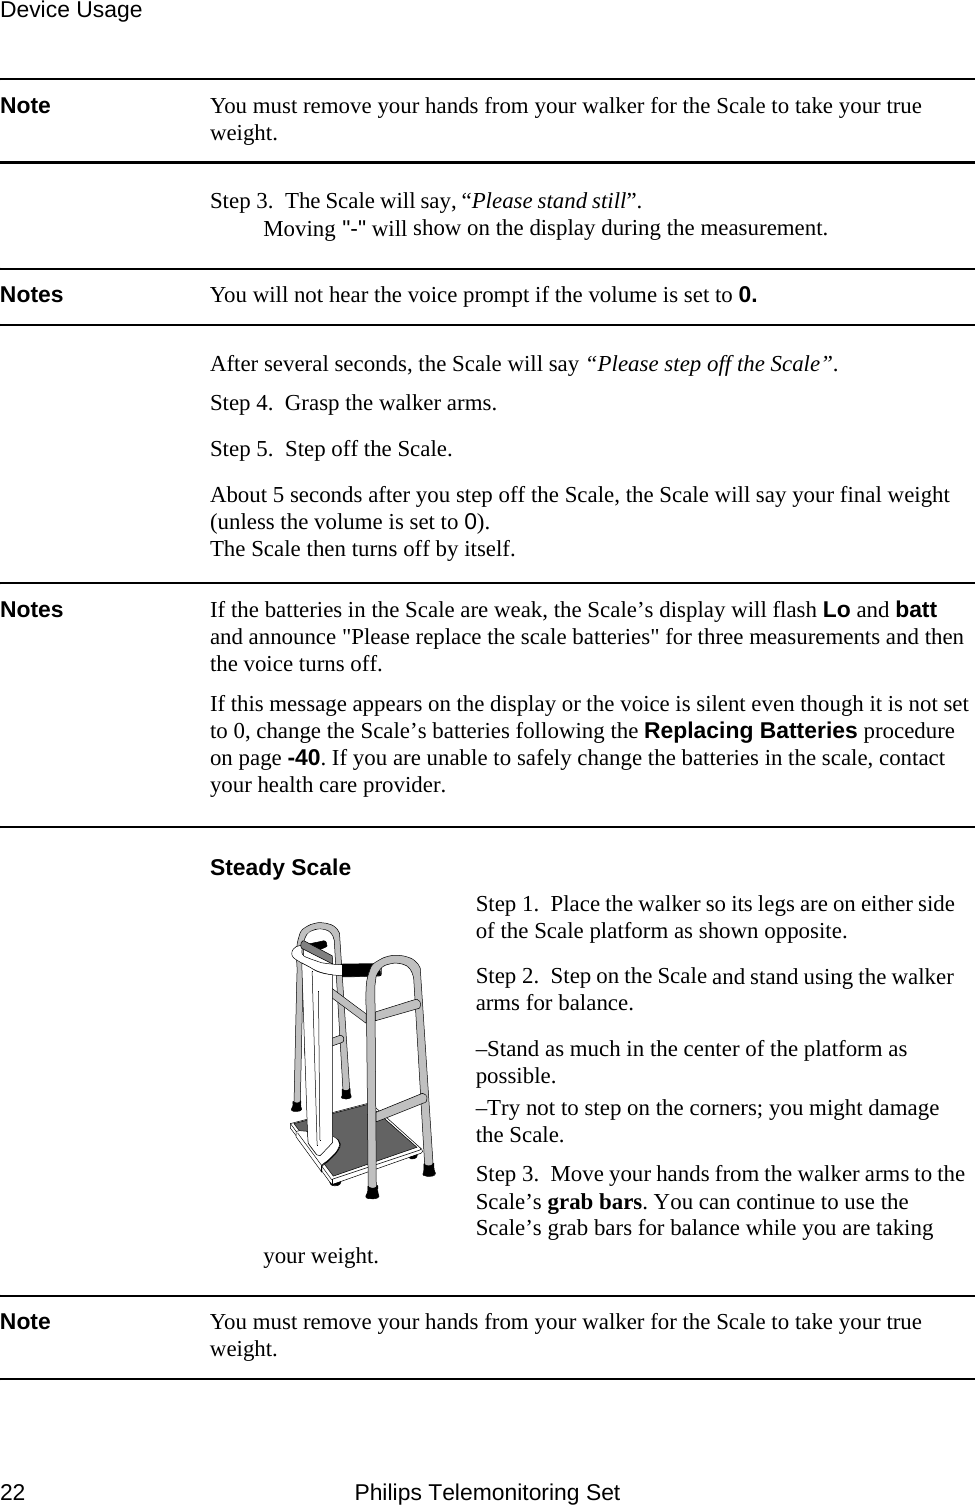
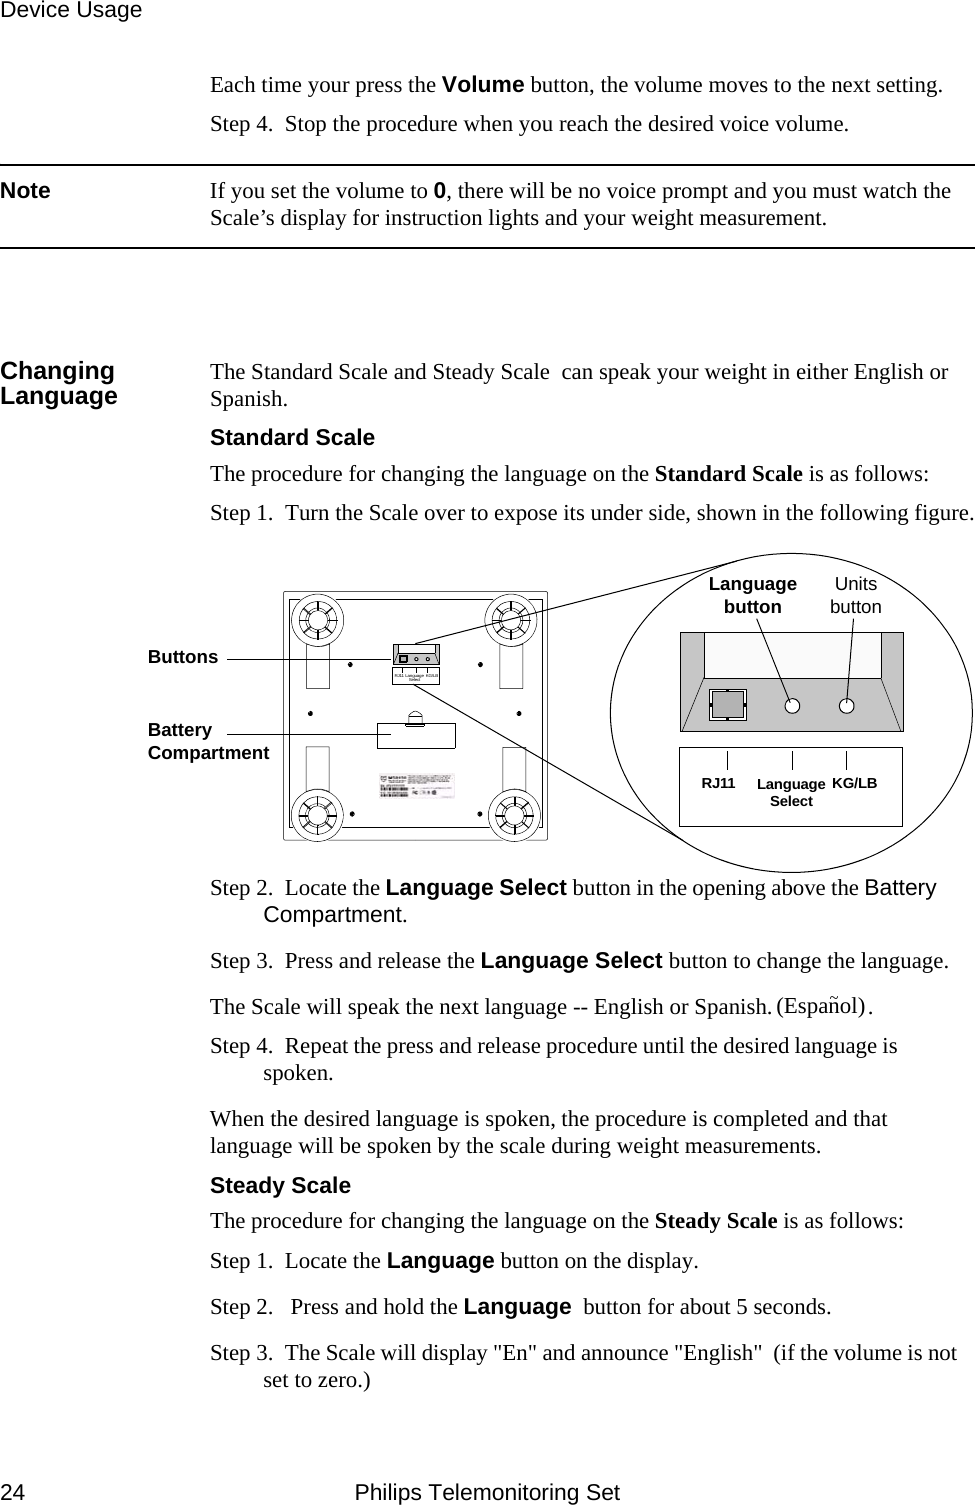
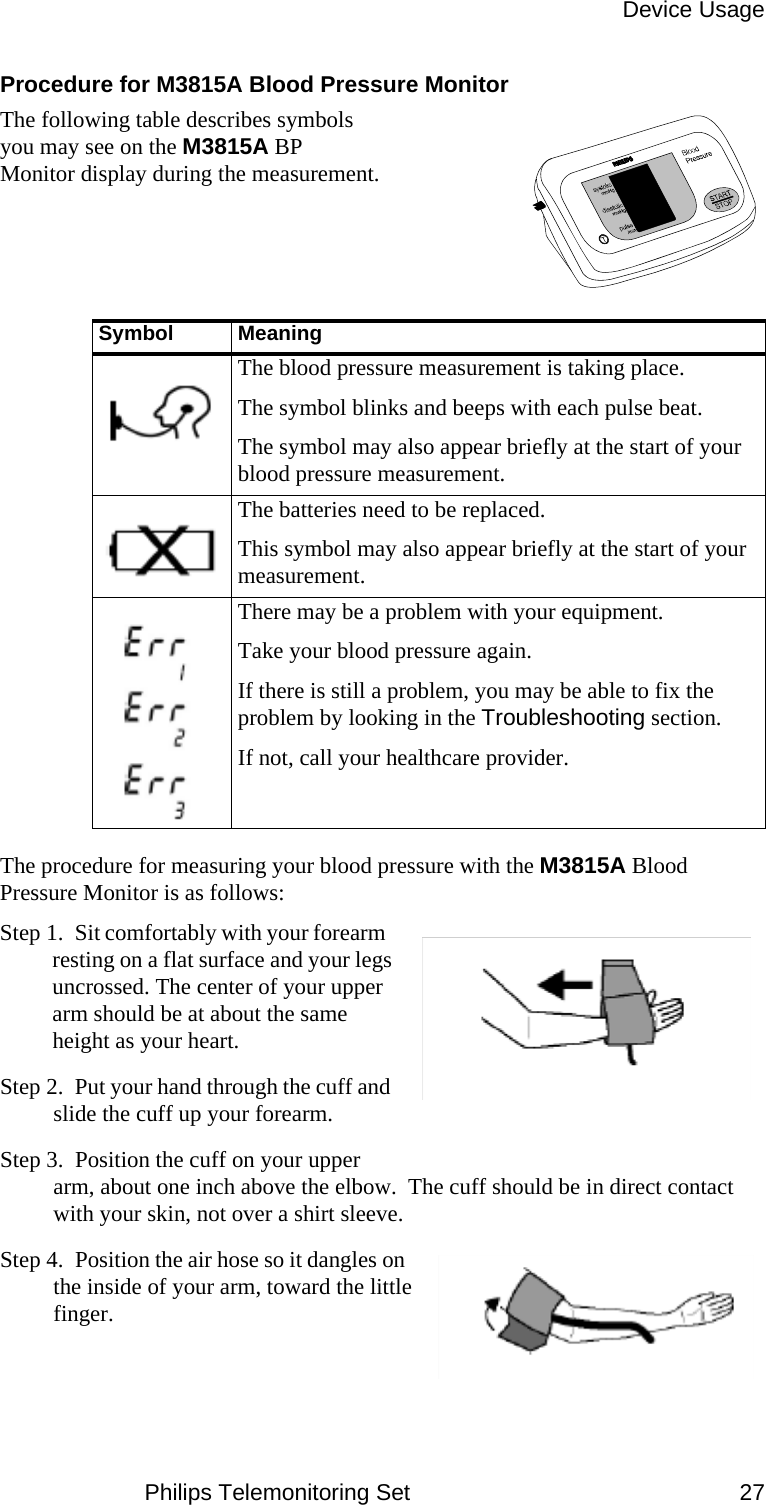
![Device UsagePhilips Telemonitoring Set 25Step 4. Press and hold the Language button for about five seconds and the Scale will display "SP" and announce "Espanol" (if the volume is not set to zero.)Changing Weight Units The Scale can measure your weight in either pounds or kilograms. The procedure for changing the weight units is different for the Standard Scale and the Steady Scale.Standard ScaleThe procedure for changing the Weight Units on the Standard Scale is as follows:Step 1. Turn the Scale over to expose its under side, shown in the following figure.RJ11 KG/LBRJ11 LanguageSelect KG/LBButtonsBattery CompartmentLanguage button Units buttonLanguage SelectStep 2. Locate the KG/LB Units button in the opening above the Battery Compartment. Step 3. Press and release the KG/LB Units button to change the weight units.The Scale will speak the next unit -- Kilograms or Pounds. [Kilogrammas or Libras in Spanish. ].Step 4. Repeat the press and release procedure until the desired unit is spoken.Step 5. When the desired unit is spoken, the procedure is completed and that unit will be spoken by the scale during weight measurements.Steady Scale M3813CThe procedure for changing the Weight Units on the Steady Scale M3813C is as follows:Step 1. Step off the Scale when changing the weight units.Step 2. Firmly press and hold the KG/LB button on the display for about 5 seconds.If the Scale had been measuring pounds, the display will now showKgs. (for kilograms) and the Scale will announce "kilograms" in English to "kilogramos" in Spanish. If the Scale was measuring kilograms, the scale will now show Lbs. (for pounds) and the Scale will announce "pounds" in English or "libras" in Spanish.(Espanol)~](https://usermanual.wiki/Philips-Medical-Systems-North-America/M3813C.Users-Manual/User-Guide-1485428-Page-32.png)
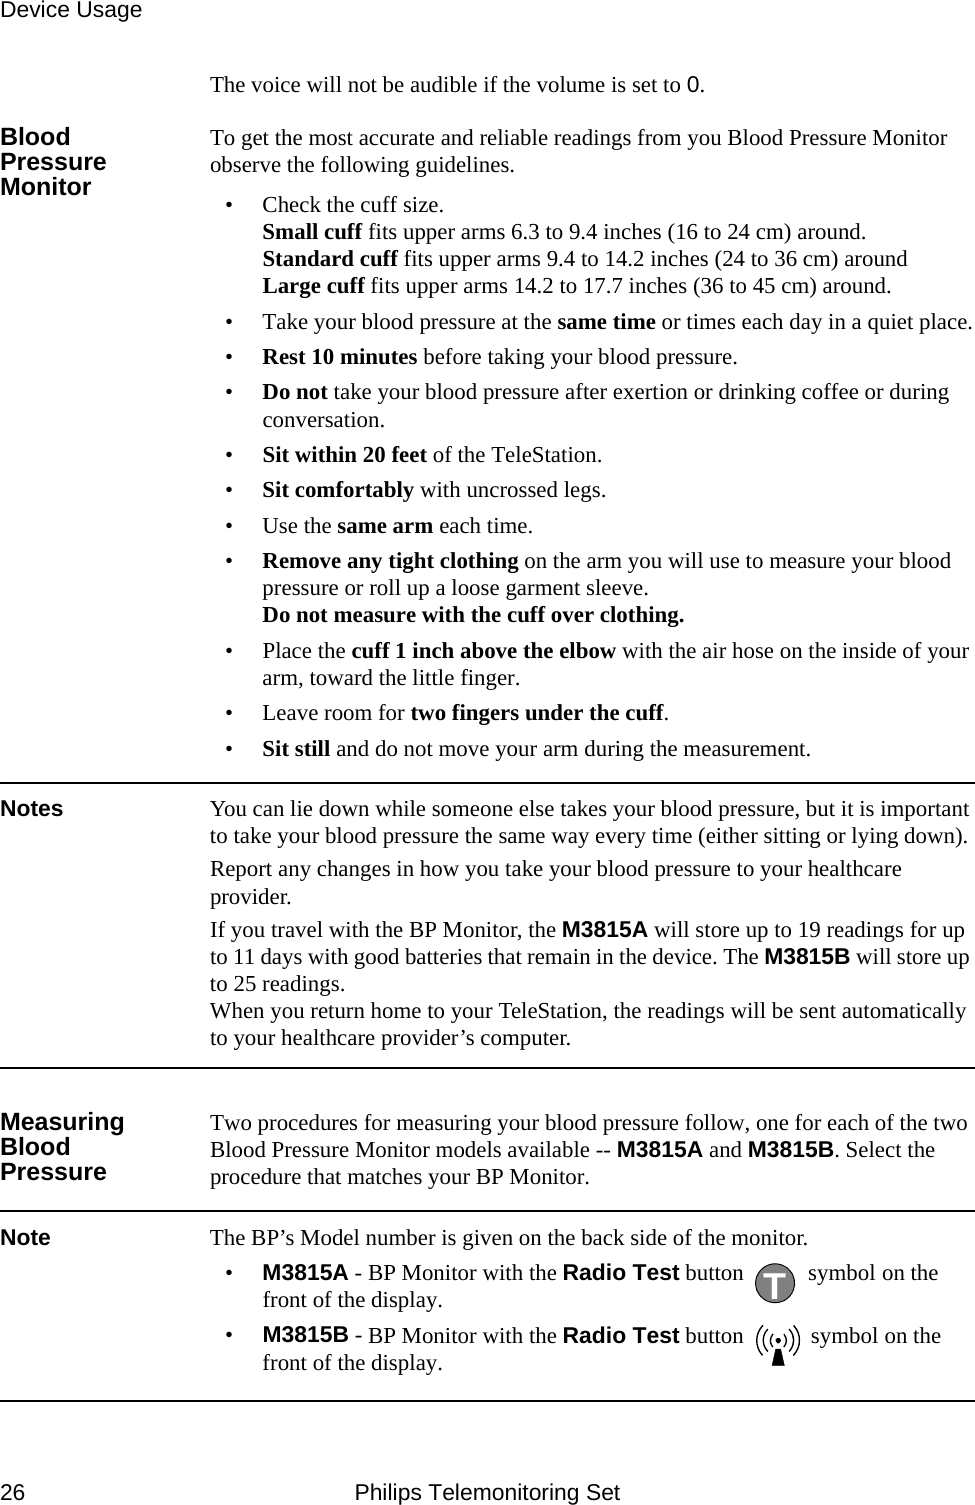


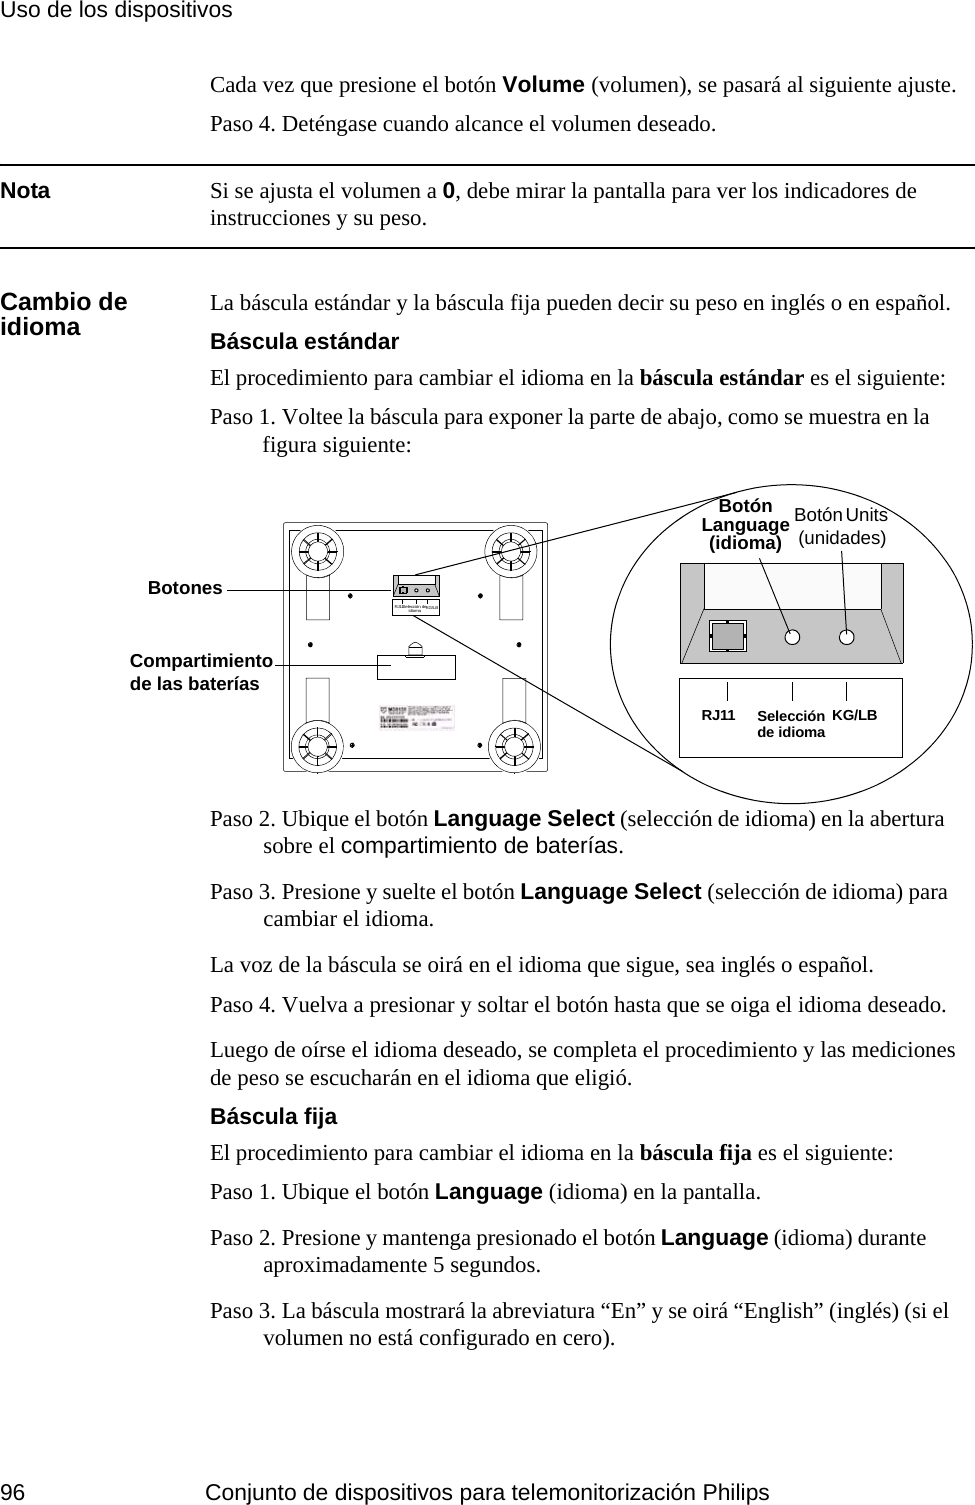
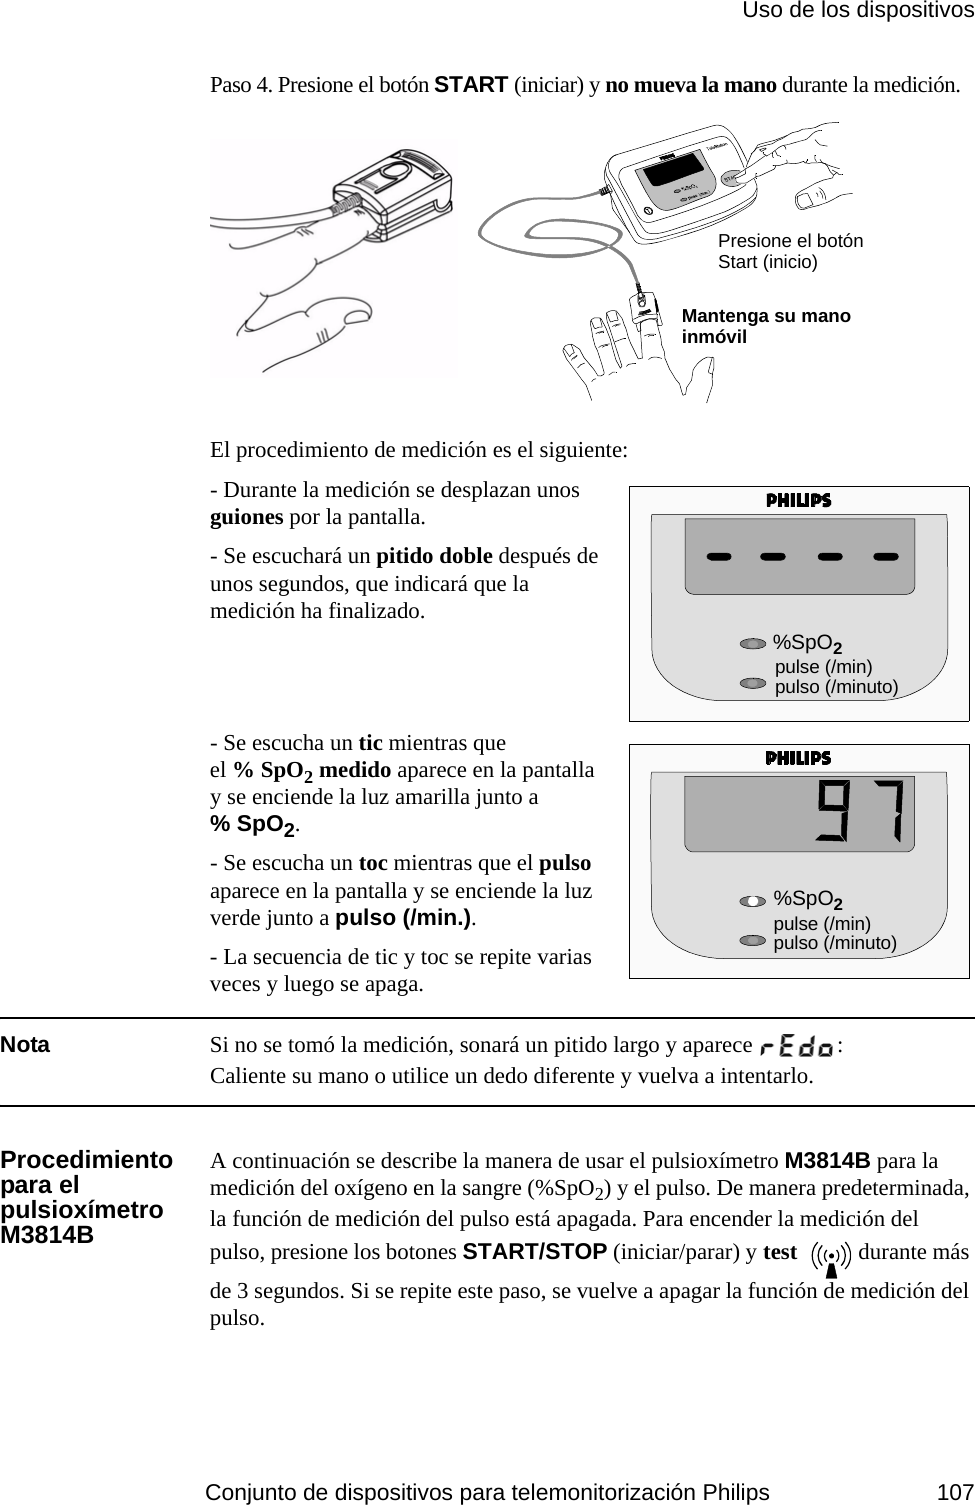
![Uso de los dispositivosConjunto de dispositivos para telemonitorización Philips 97Paso 4. Presione y mantenga presionado el botón Language (idioma) durante aproximadamente 5 segundos; entonces, la báscula mostrará la abreviatura “SP” y se oirá “Español” (si el volumen no está configurado en cero).Cómo cambiar la unidad de medida del pesoLa báscula puede pesar en libras o kilogramos. El procedimiento para cambiar las unidades de peso es diferente para ambas básculas, estándar o fija.Báscula estándarEl procedimiento para cambiar las unidades de peso en la báscula estándar es el siguiente:Paso 1. Voltee la báscula para exponer la parte de abajo, como se muestra en la figura siguiente:RJ11 KG/LBRJ11Selección deidioma KG/LBBotonesCompartimiento de las bateríasBotón Language (idioma)Botón Units (unidades)Selección de idiomaPaso 2. Ubique el botón KG/LB Units (unidades KG/LB) en la abertura sobre el compartimiento de baterías. Paso 3. Presione y suelte el botón KG/LB Units (unidades KG/LB) para cambiar las unidades de peso.Se oirá la unidad que sigue, sea “kilograms” o “pounds”. [“Kilogramos” o “libras” en español].Paso 4. Vuelva a presionar y soltar hasta que se oiga la unidad deseada. Paso 5. Luego de oírse la unidad deseada, se completa el procedimiento y las mediciones de peso se calcularán con la unidad que se eligió.Báscula fija M3813CEl procedimiento para cambiar las unidades de peso en la báscula fija M3813C es el siguiente:Paso 1. Baje de la báscula mientras cambia las unidades de peso.Paso 2. Presione y mantenga presionado con firmeza el botón KG/LB de la pantalla durante aproximadamente 5 segundos.Si la báscula pesaba en libras, la pantalla ahora mostrarákg (kilogramos) y se oirá “kilograms” en inglés o “kilogramos” en español.Si la báscula pesaba en kilogramos, la pantalla mostrará ahora lb (libras) y se oirá “pounds” en inglés o “libras” en español.La voz no se oirá si el volumen se ajustó a 0.](https://usermanual.wiki/Philips-Medical-Systems-North-America/M3813C.Users-Manual/User-Guide-1485428-Page-104.png)