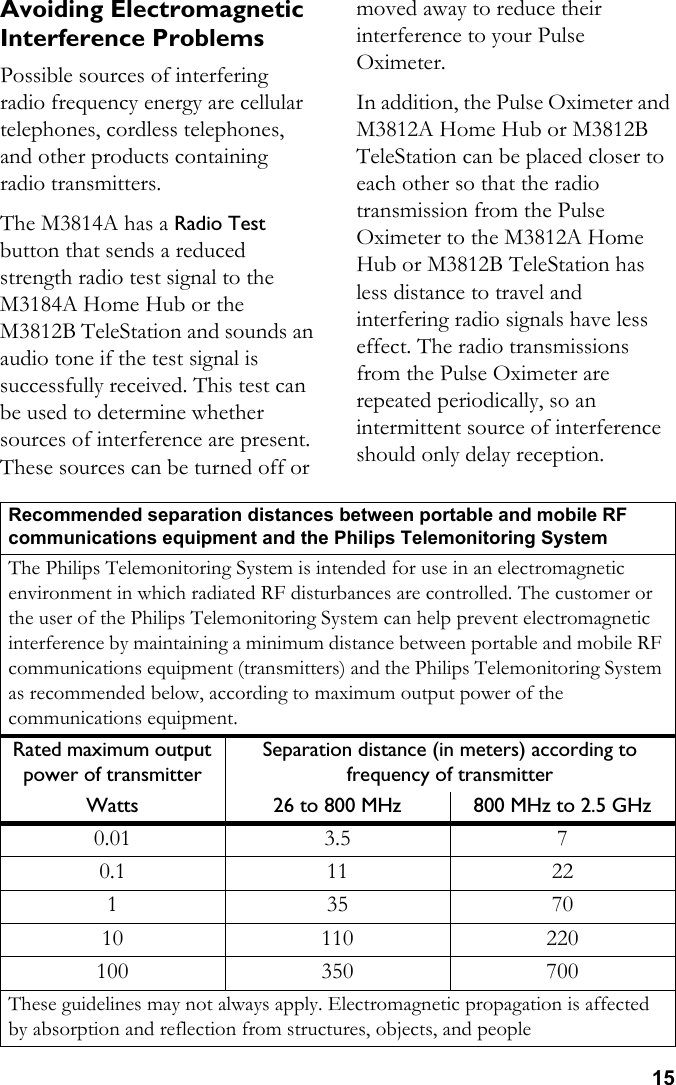
Philips Medical Systems North America M3814A HOME SP02 / PULSE MONITOR User Manual M3814 90003 Rev 4
Philips Medical Systems North America Co. HOME SP02 / PULSE MONITOR M3814 90003 Rev 4
UserManual.wiki
>
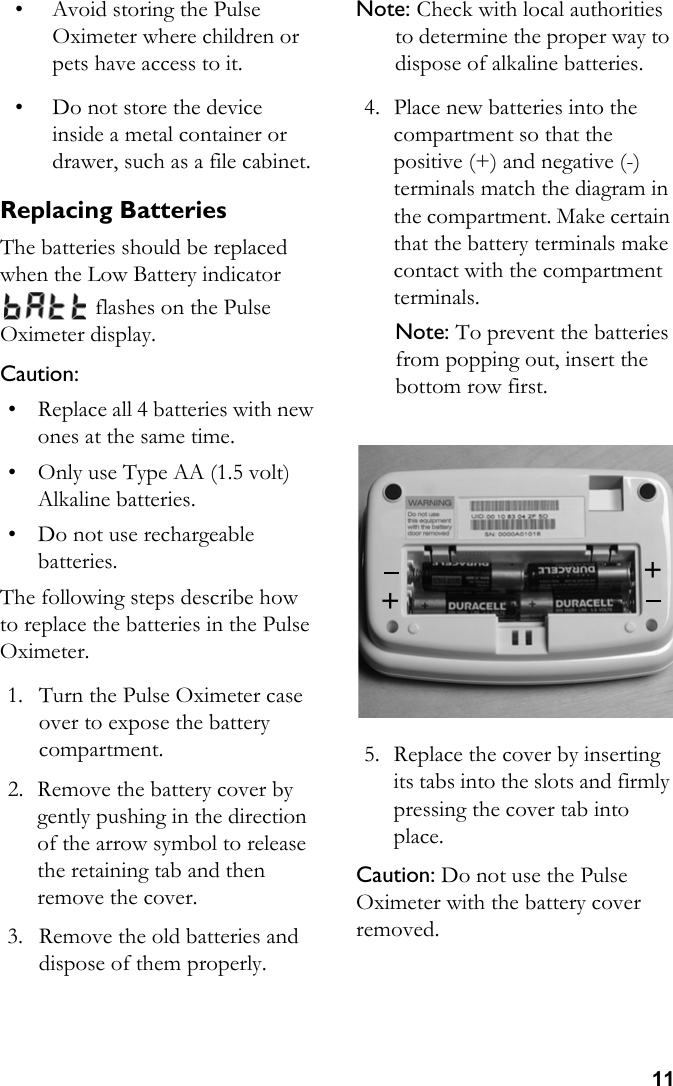
Philips Medical Systems North America
>
M3814A User Manual
USERS MANUAL
Navigation menu
Upload a User Manual
Namespaces
Wiki Guide
HTML
PDF
Info
Views
User Manual
Discussion / Help
Navigation