Philips Medical Systems North America M3815B M3815B Home Blood Pressure Monitor User Manual
Philips Medical Systems North America Co. M3815B Home Blood Pressure Monitor Users Manual
UserManual.wiki
>
Philips Medical Systems North America
>
M3815B User Manual
Users Manual
Navigation menu
Upload a User Manual
Namespaces
Wiki Guide
HTML
PDF
Info
Views
User Manual
Discussion / Help
Navigation

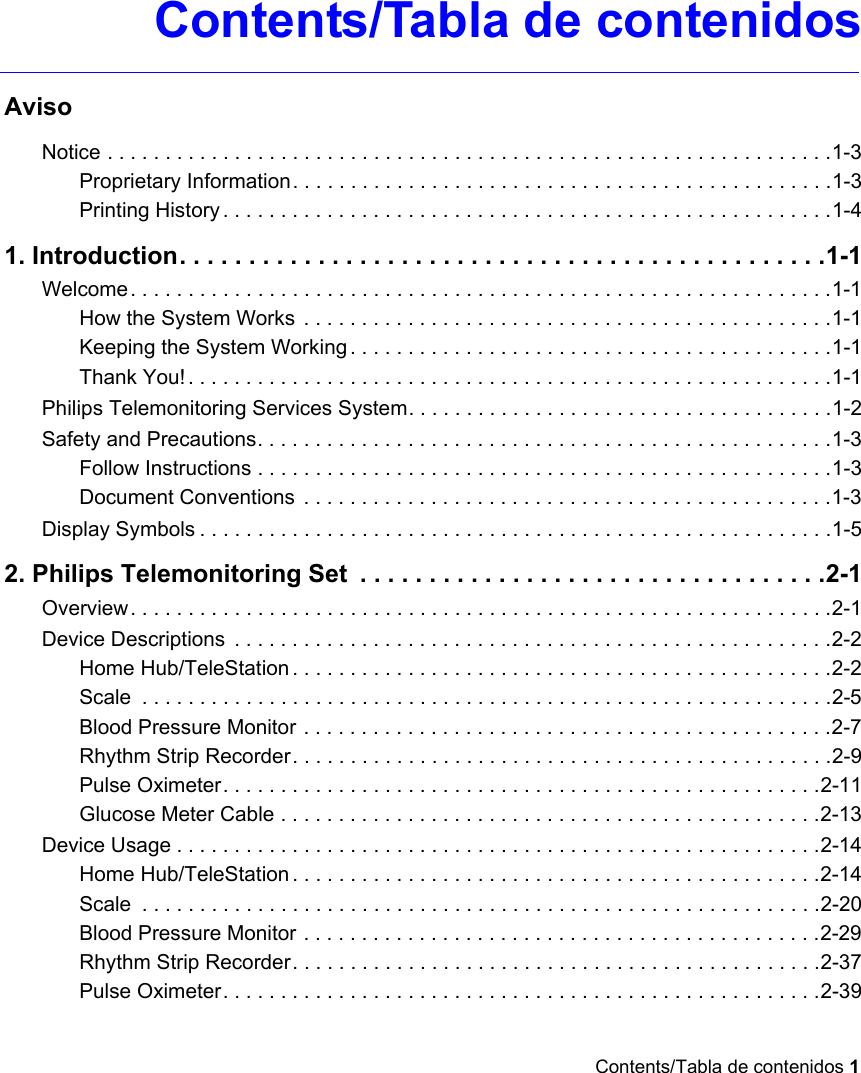


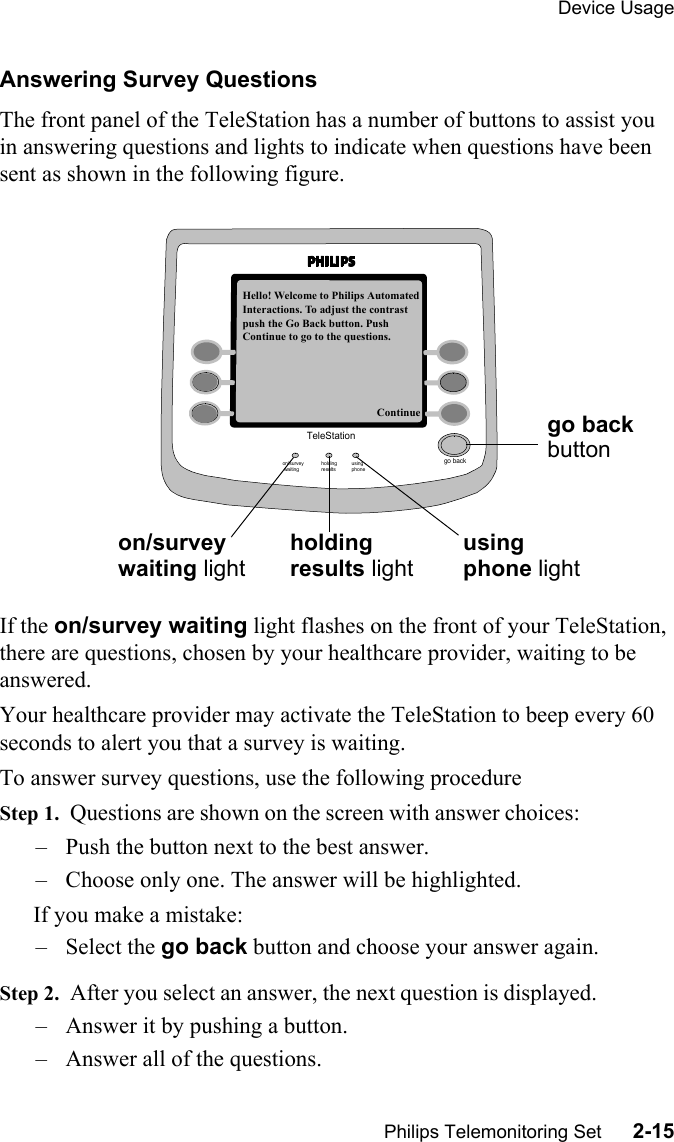

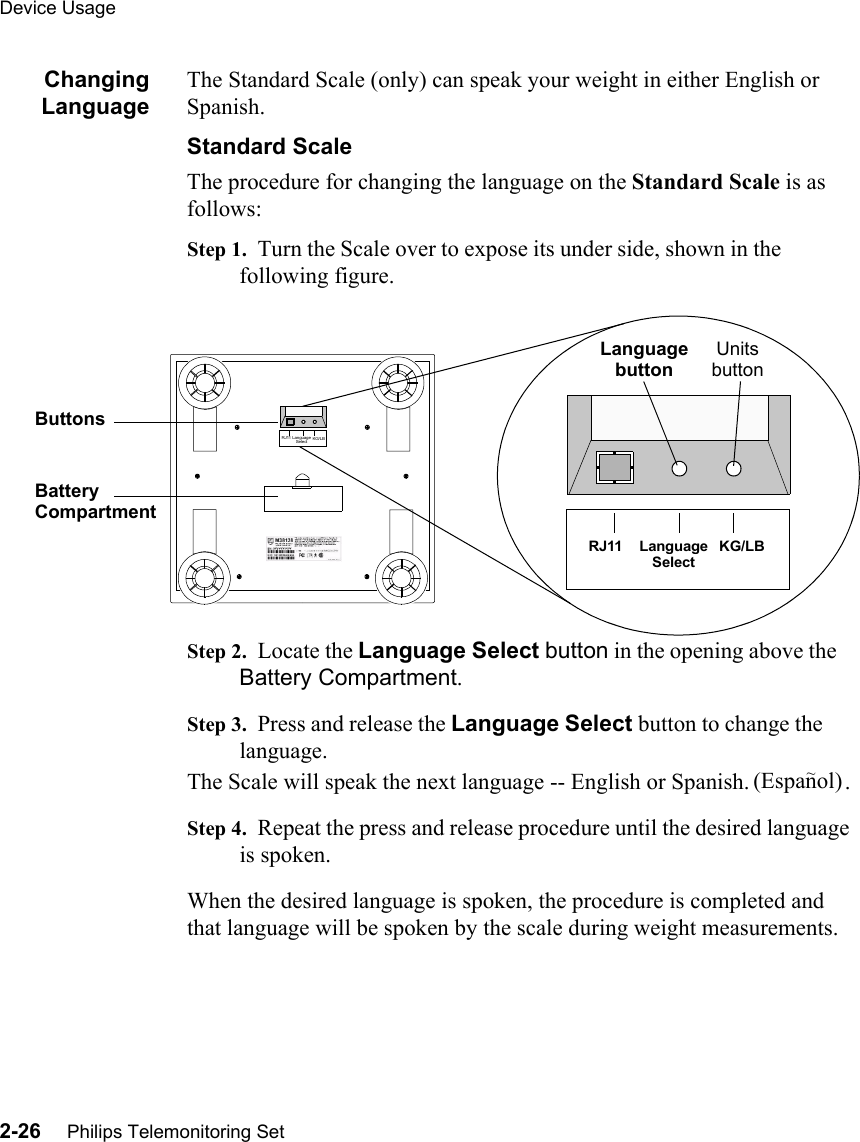
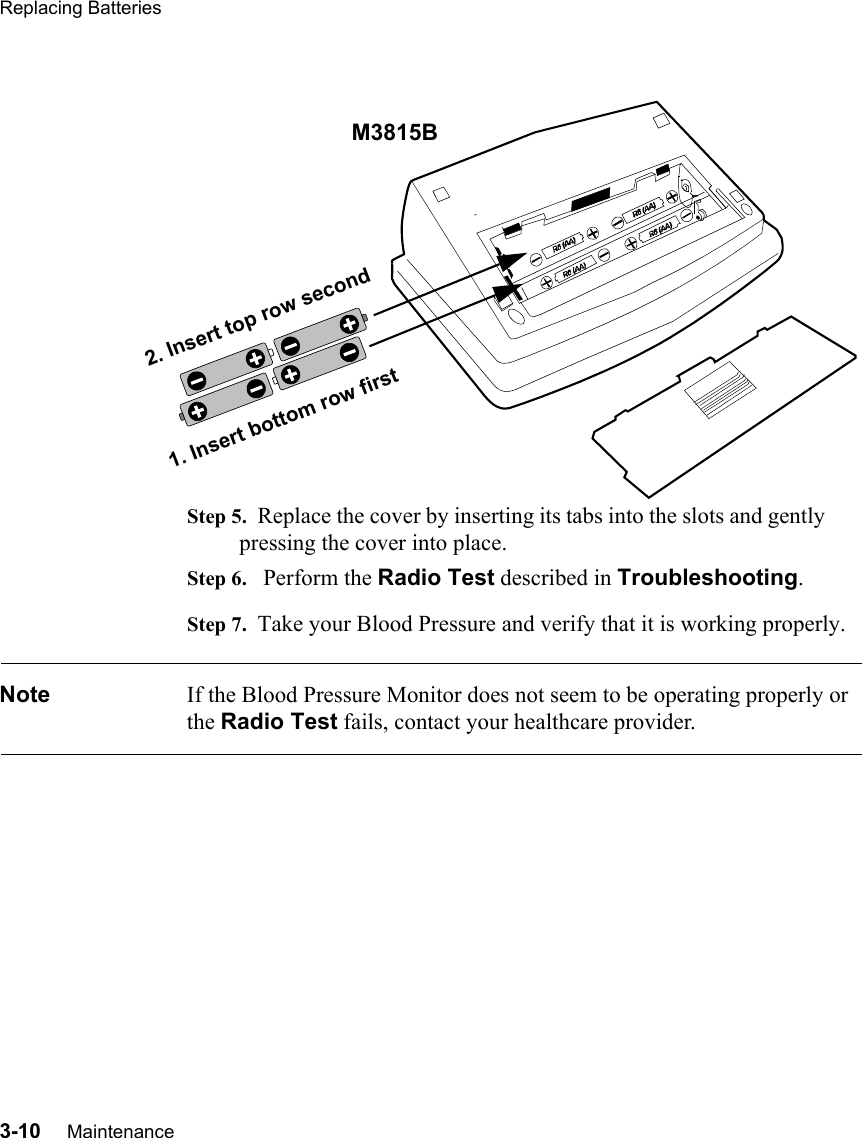
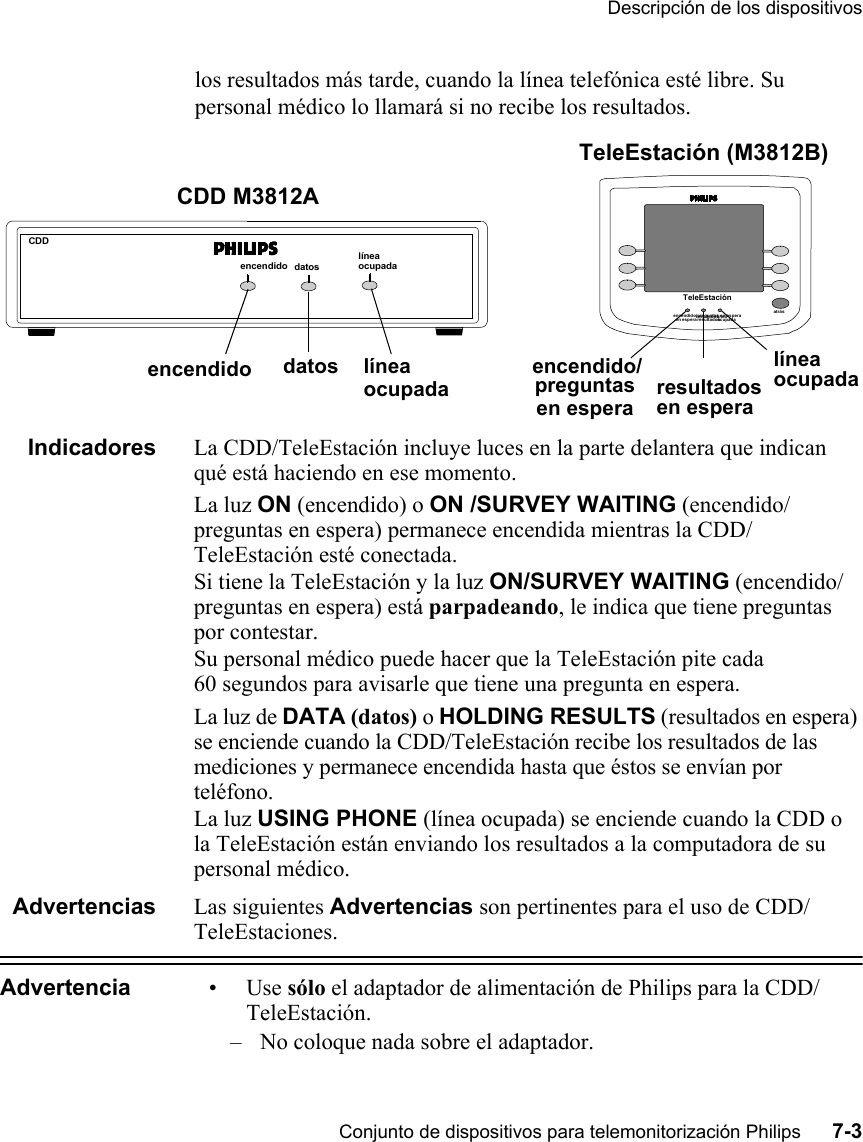
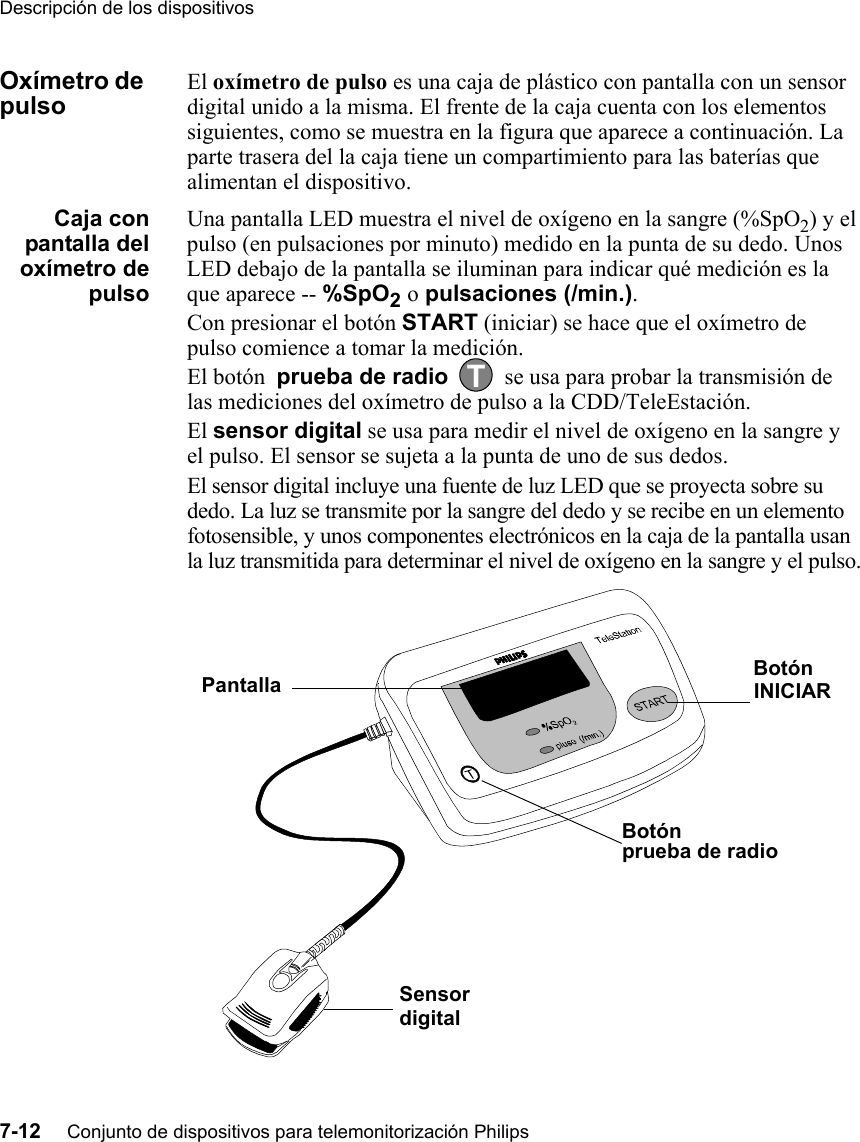
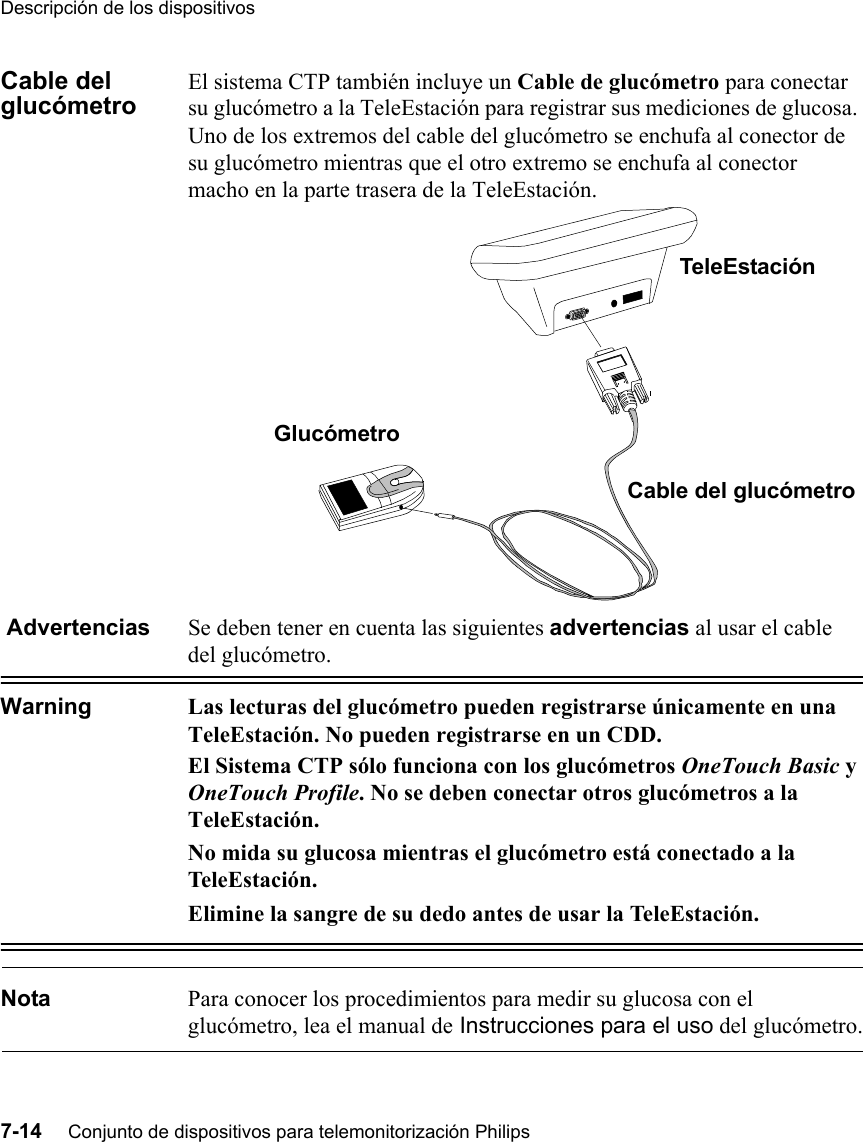
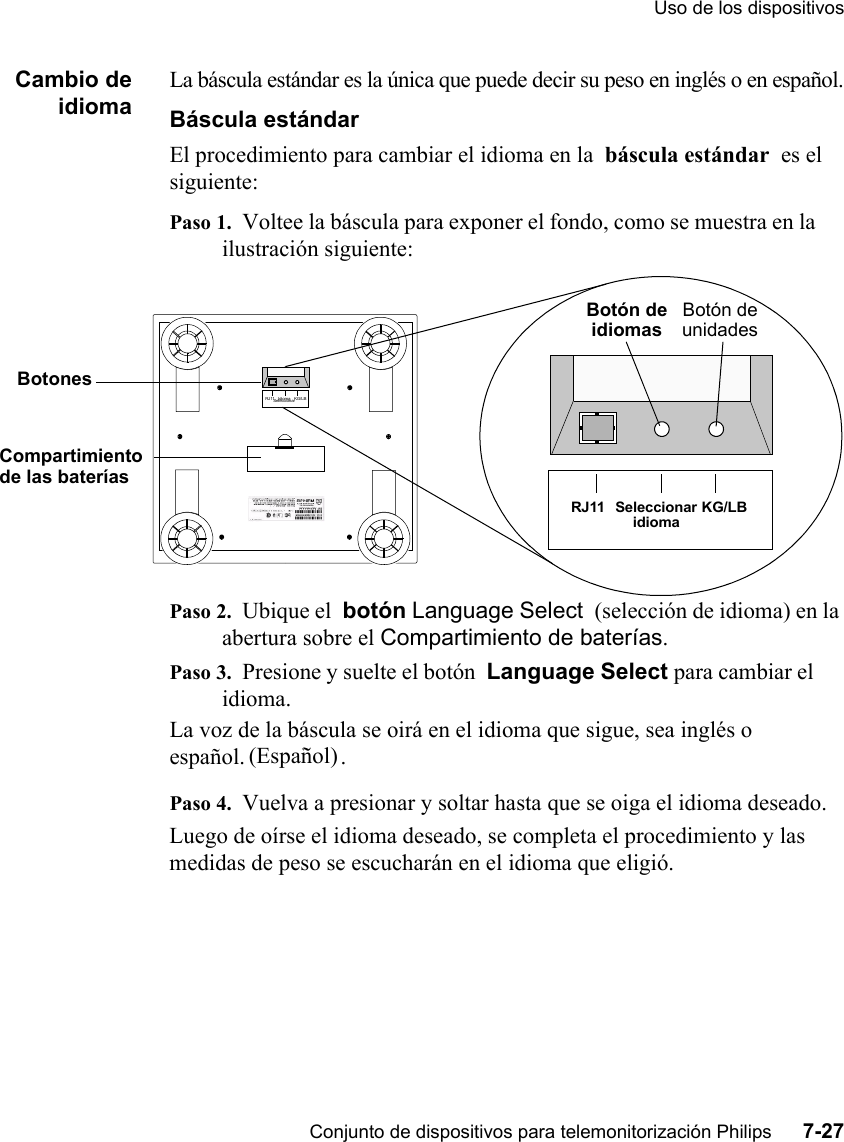
![Device UsagePhilips Telemonitoring Set 2-27ChangingWeight UnitsThe Scale can measure your weight in either pounds or kilograms. The procedure for changing the weight units is different for the Standard Scale and the Steady Scale.Standard ScaleThe procedure for changing the Weight Units on the Standard Scale is as follows:Step 1. Turn the Scale over to expose its under side, shown in the following figure.Step 2. Locate the KG/LB Units button in the opening above the Battery Compartment. Step 3. Press and release the KG/LB Units button to change the weight units.The Scale will speak the next unit -- Kilograms or Pounds. [Kilogrammas or Libras in Spanish. ].Step 4. Repeat the press and release procedure until the desired unit is spoken.Step 5. When the desired unit is spoken, the procedure is completed and that unit will be spoken by the scale during weight measurements.RJ11 LanguageSelectKG/LBRJ11 LanguageSelect KG/ LBBatteryCompartmentButtonsUnitsbuttonLanguagebutton(Espanol)~](https://usermanual.wiki/Philips-Medical-Systems-North-America/M3815B/User-Guide-981563-Page-43.png)


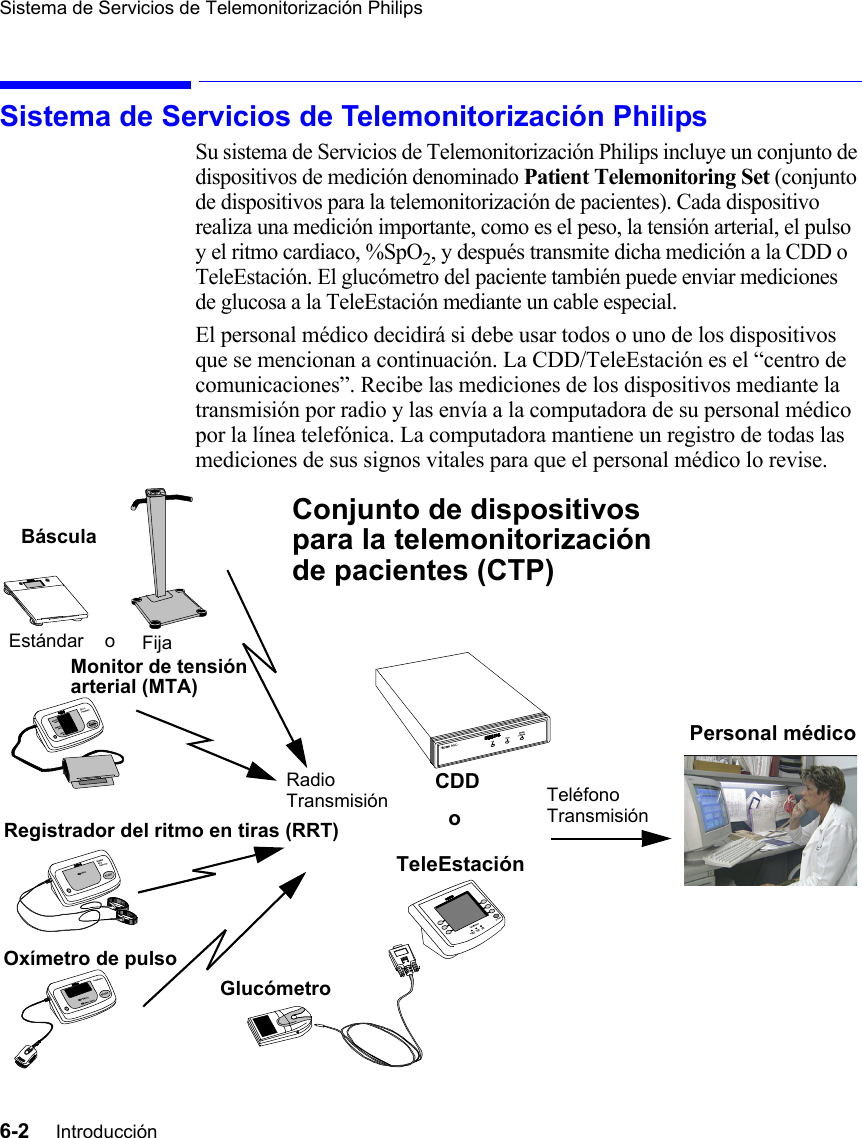


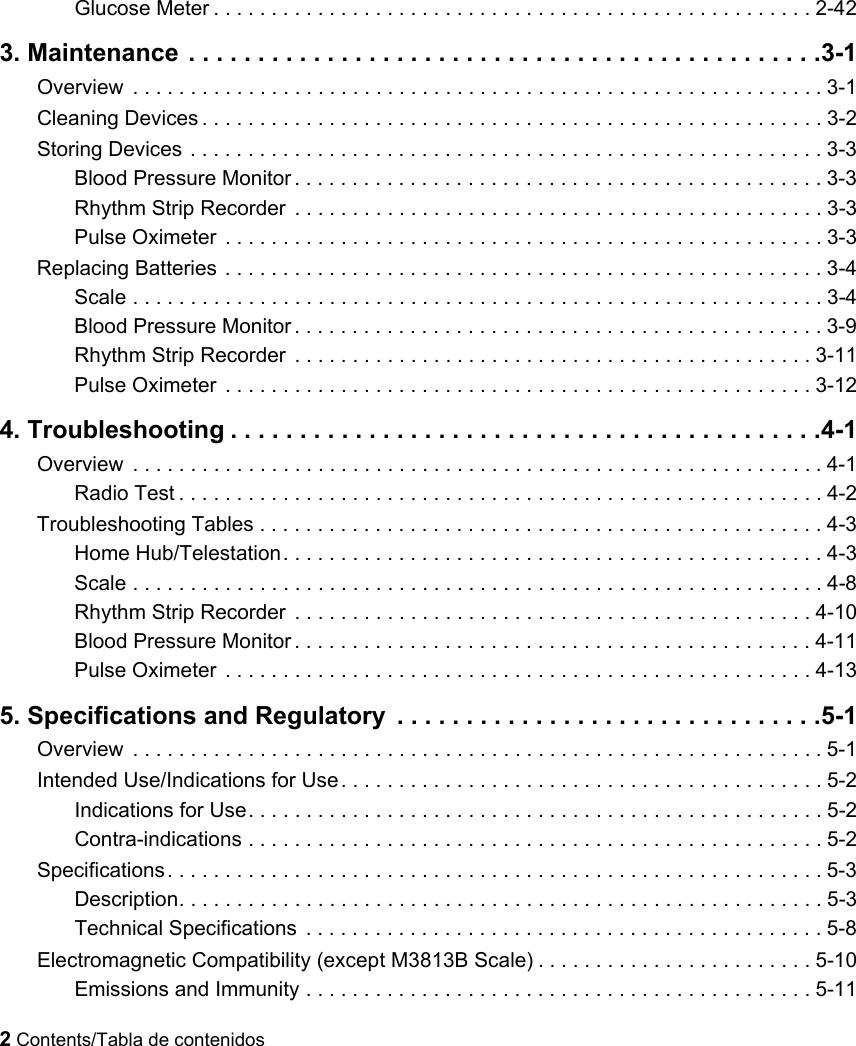
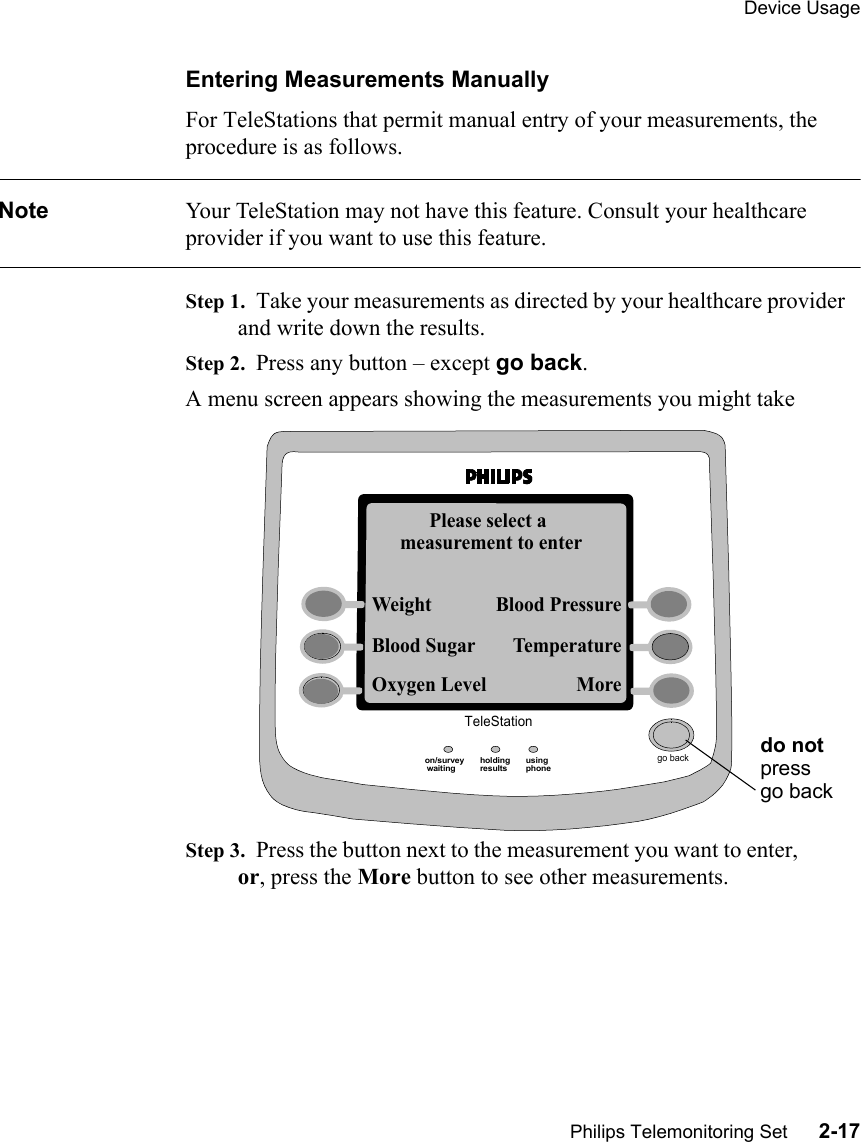
![Uso de los dispositivos7-28 Conjunto de dispositivos para telemonitorización PhilipsCómocambiar launidad demedida delpesoLa báscula puede pesar en libras o kilogramos. El procedimiento para cambiar las unidades de peso es diferente para ambas básculas, estándar o fija.Báscula estándarEl procedimiento para cambiar las unidades de peso en la báscula estándar es el siguiente:Paso 1. Voltee la báscula para exponer el fondo, como se muestra en la ilustración siguiente:Paso 2. Ubique el botón KG/LB en la abertura sobre el Compartimiento de baterías. Paso 3. Presione y suelte el botón KG/LB Units (unidades KG/LB) para cambiar las unidades de peso.Se oirá la unidad que sigue, sea kilogramos o libras. [Kilogramos o libras en español. ].Paso 4. Vuelva a presionar y soltar hasta que se oiga la unidad deseada.Paso 5. Luego de oírse la unidad deseada, se completa el procedimiento y las unidades de peso se escucharán en el idioma que eligió.RJ11 SeleccionaridiomasKG/LBRJ11 IdiomaSeleccionarKG/LBCompartimientode las bateríasBotonesBotón deunidadesBotón deidioma(Español)~](https://usermanual.wiki/Philips-Medical-Systems-North-America/M3815B/User-Guide-981563-Page-144.png)