Philips Medical Systems North America WLANBV2 WLAN Module IEEE 802.11 a/b/g/n User Manual IntelliVue CL
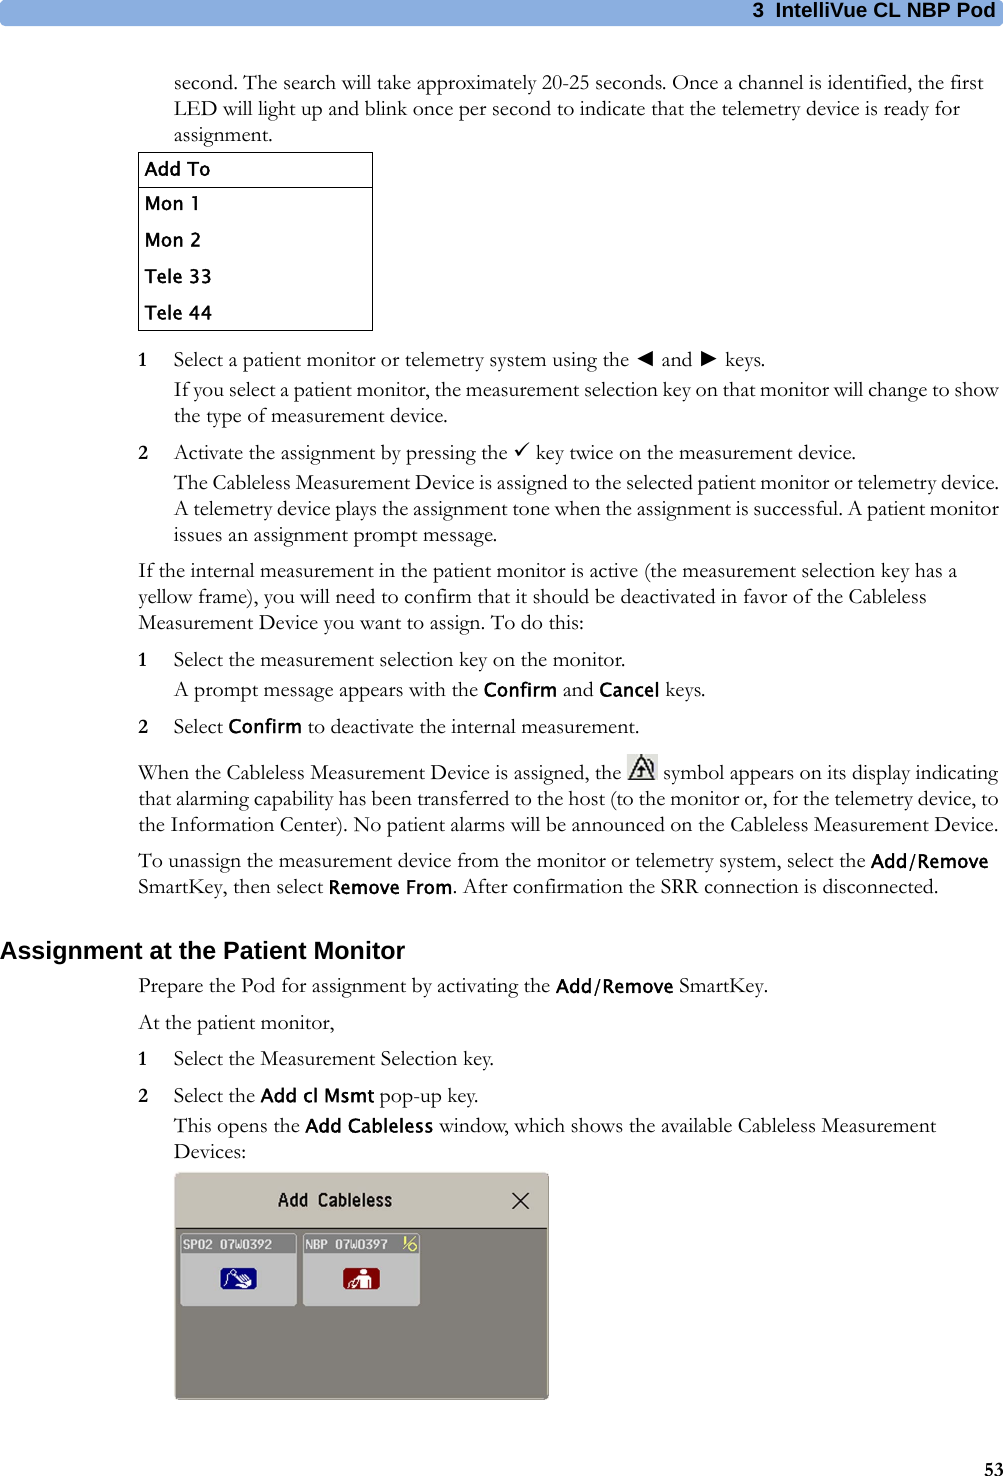
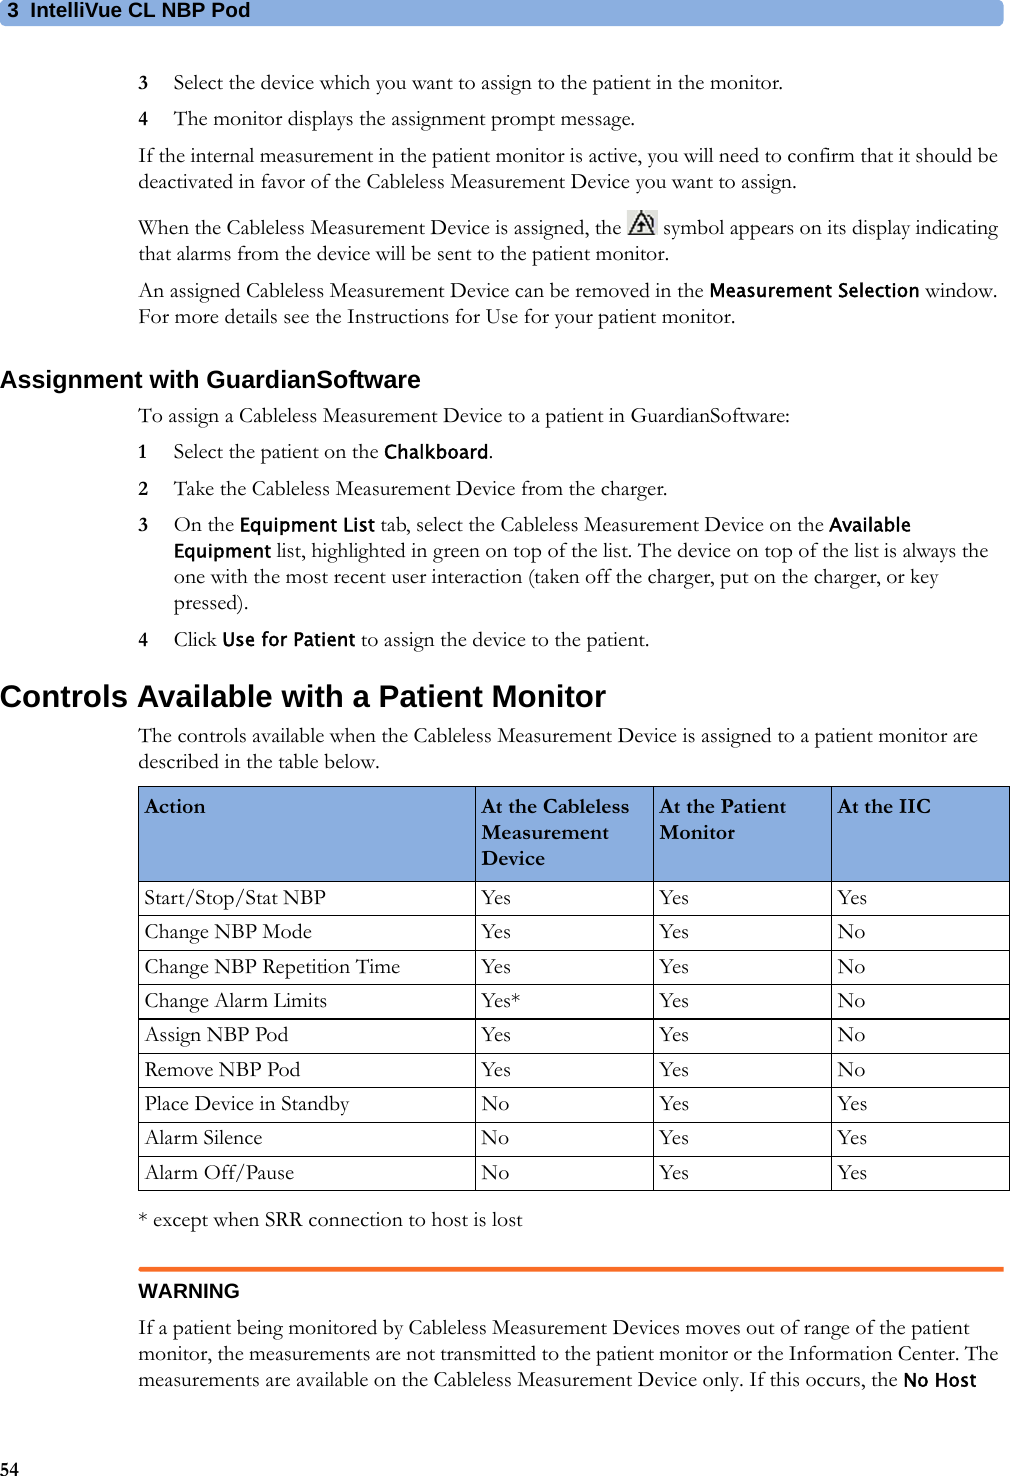
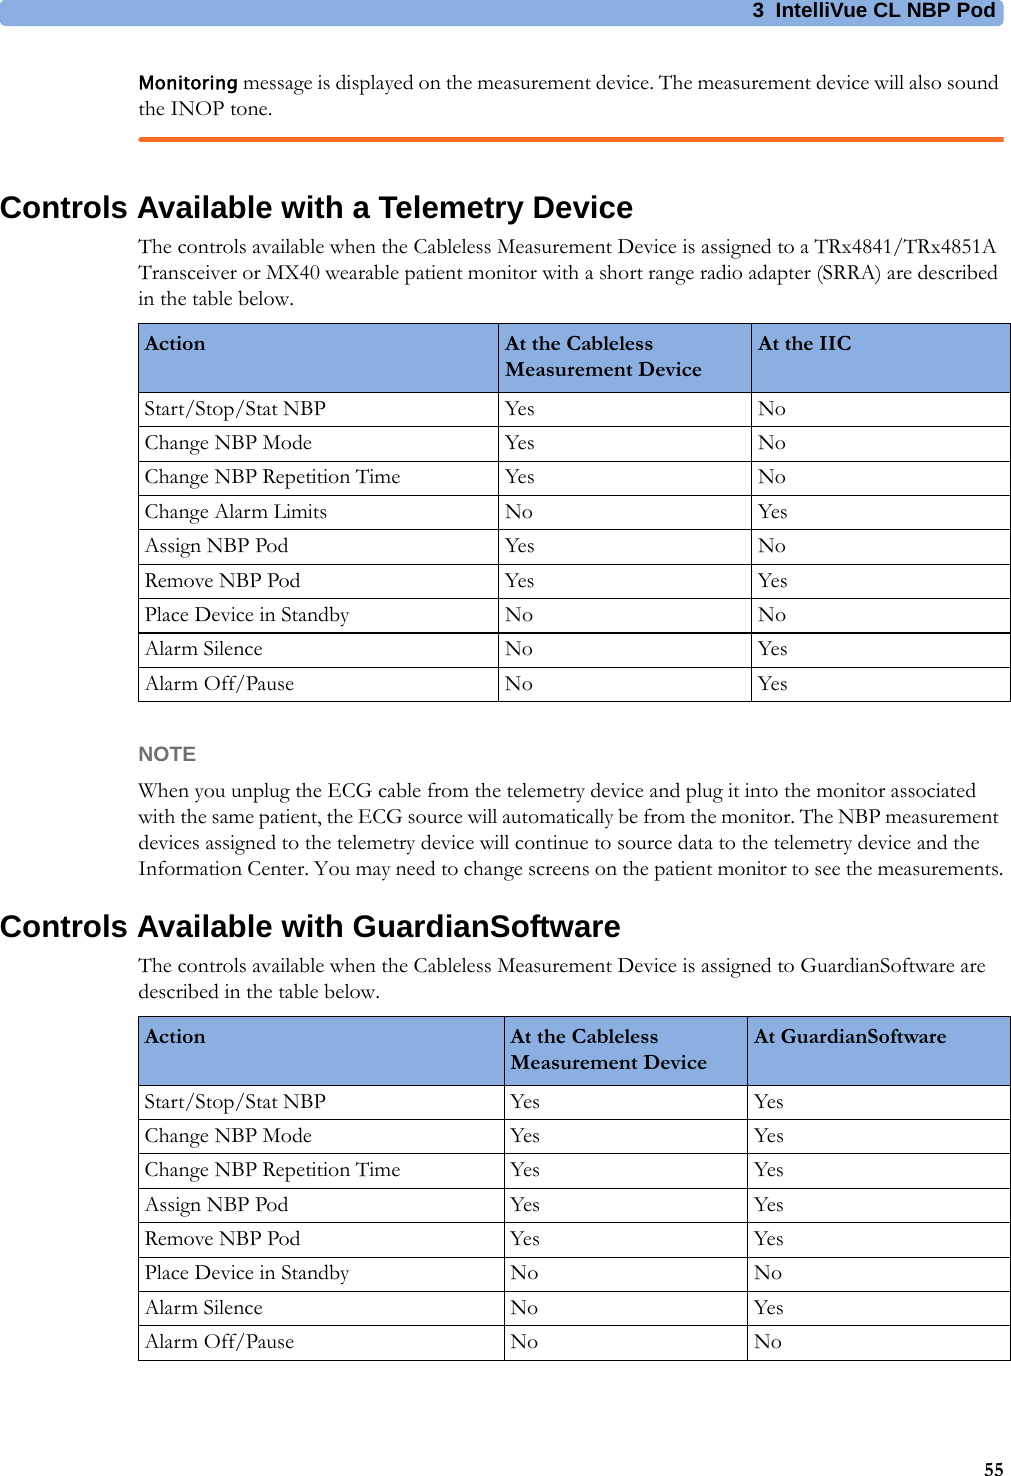
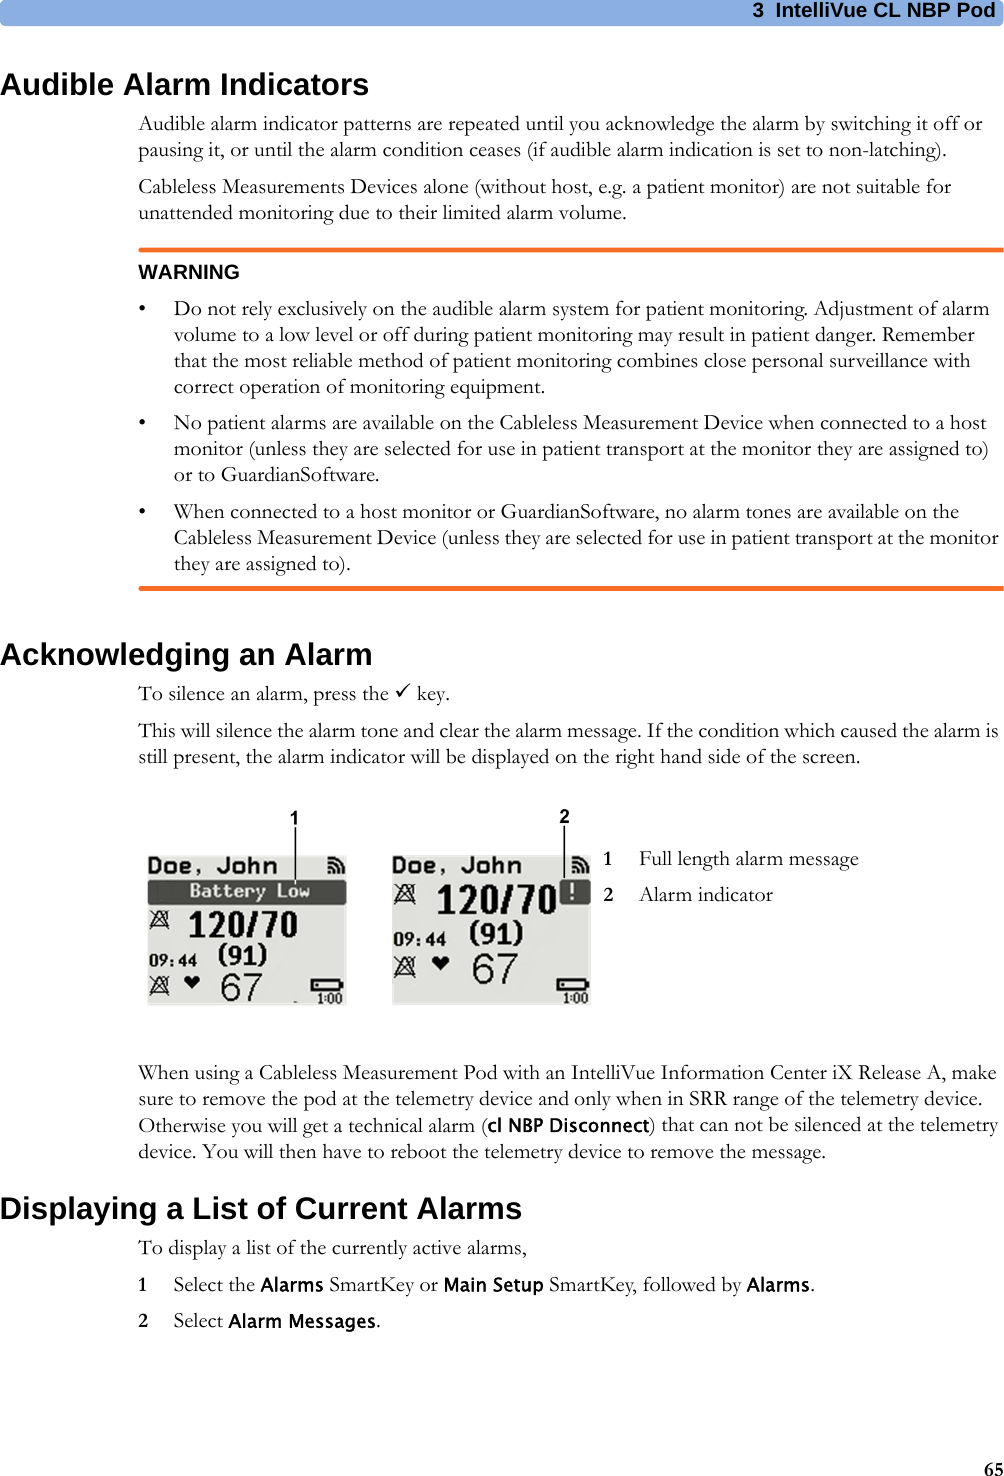
Philips Medical Systems North America Co. WLAN Module IEEE 802.11 a/b/g/n IntelliVue CL
Contents
- 1. Installation Instructions
- 2. User Manual IntelliVue MP2
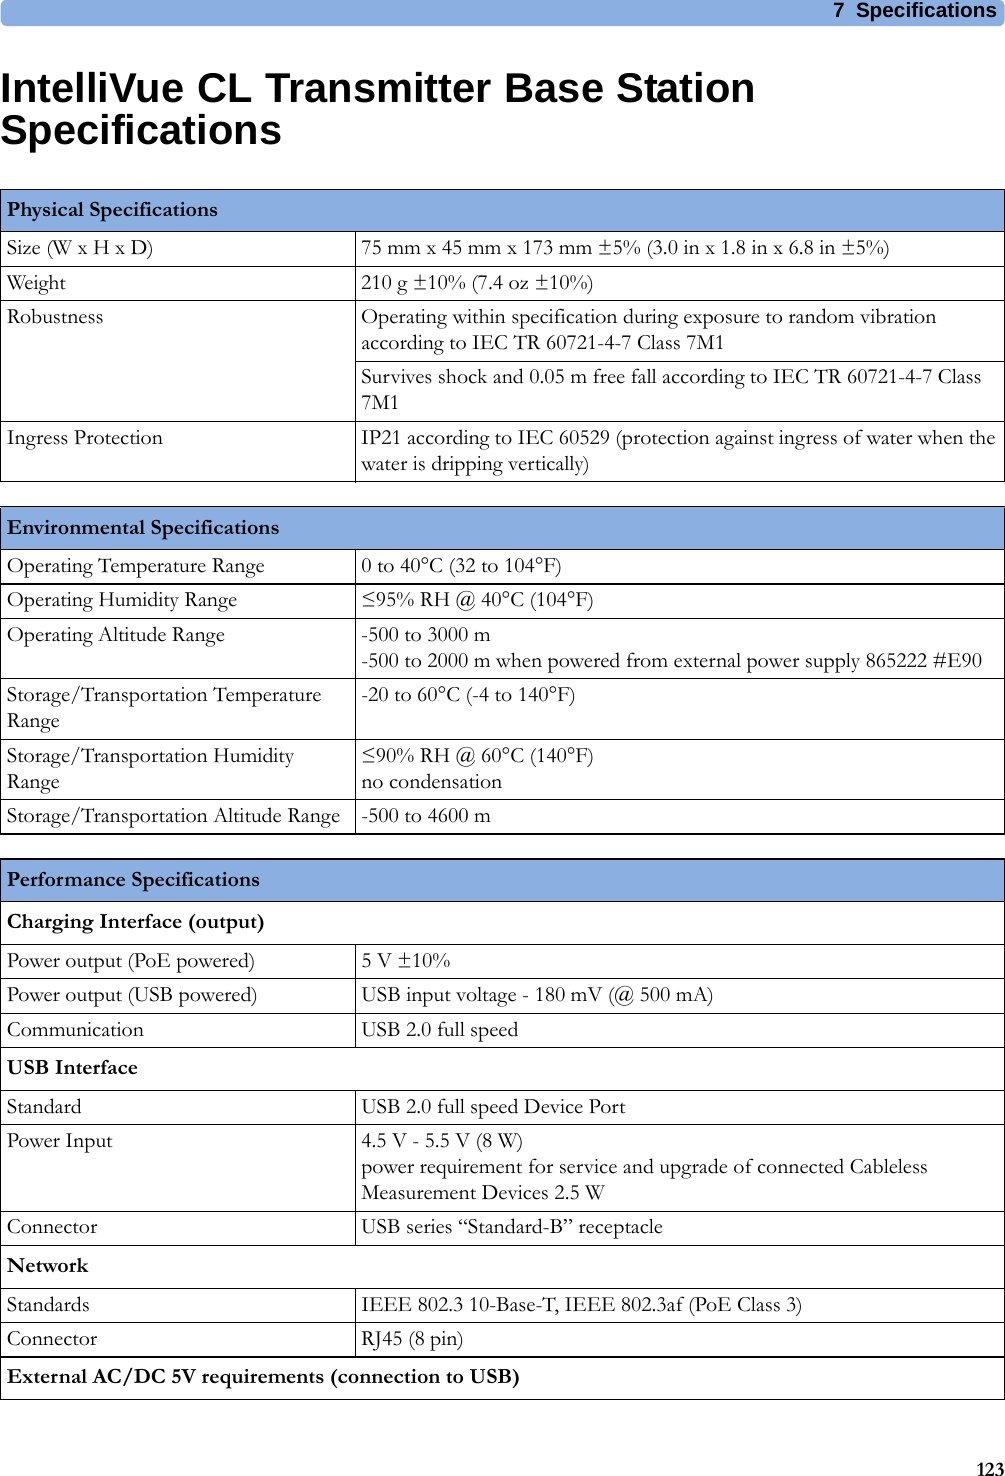
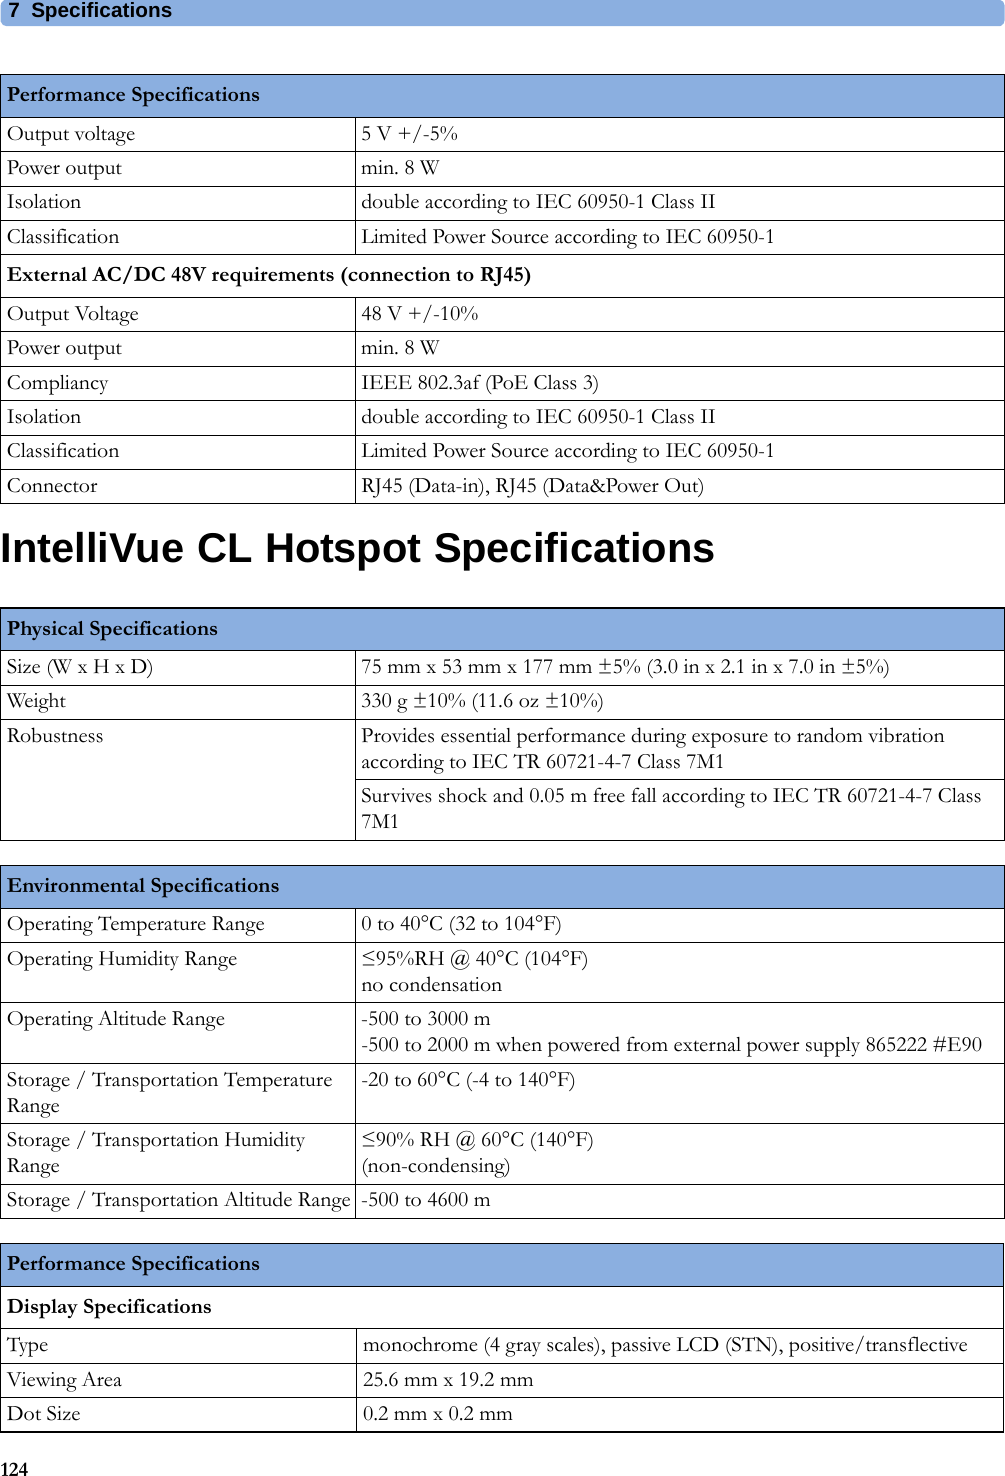
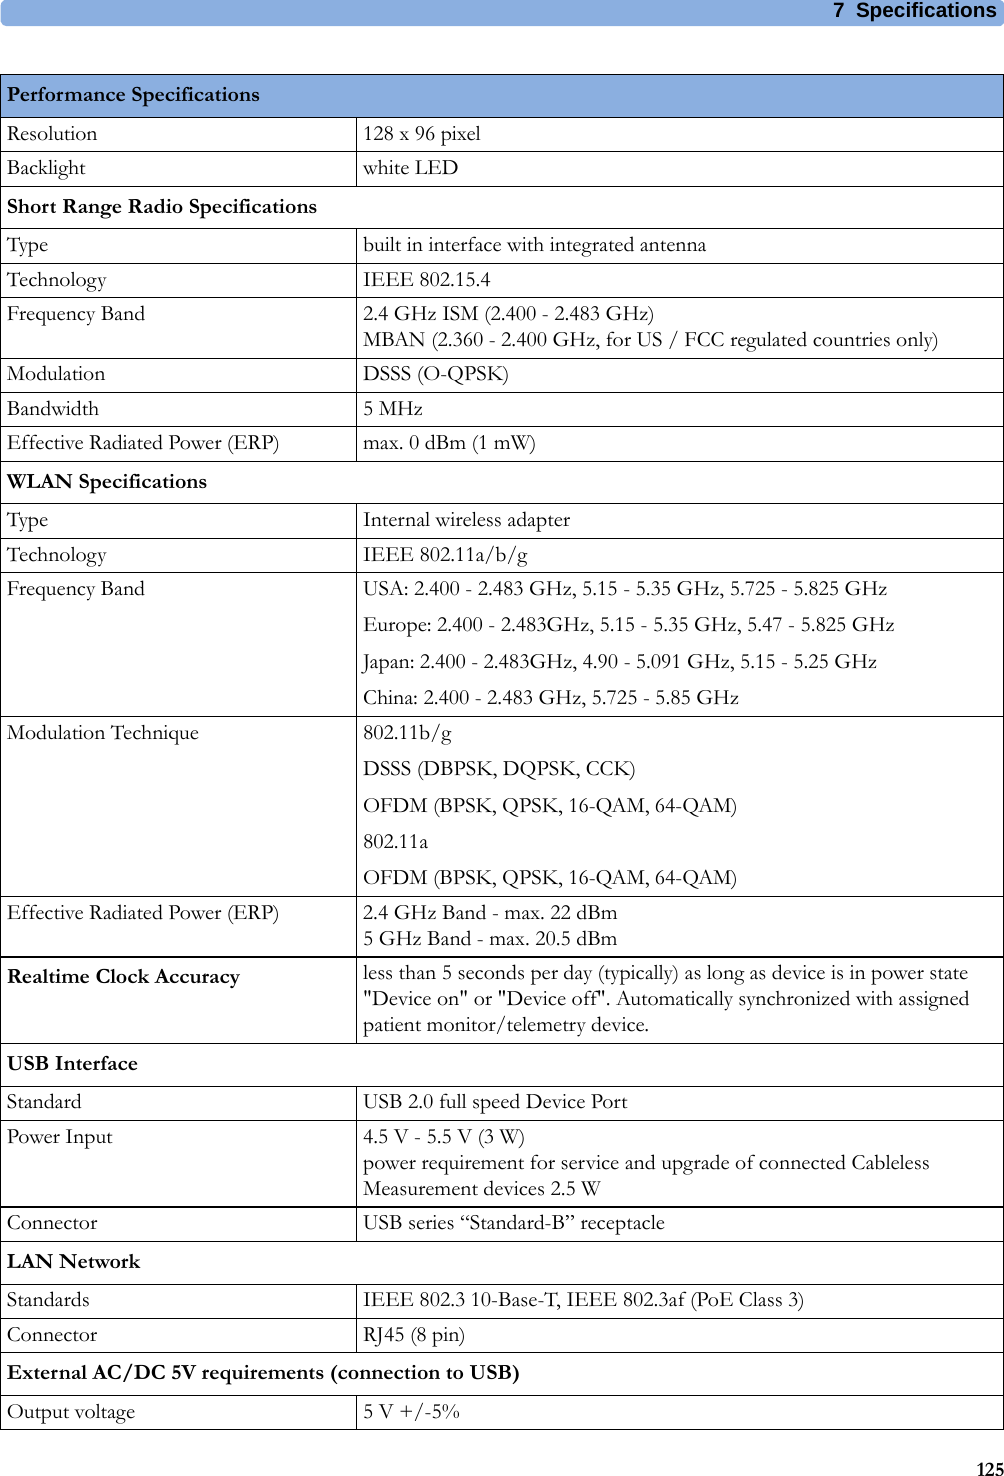
- 3. User Manual IntelliVue CL
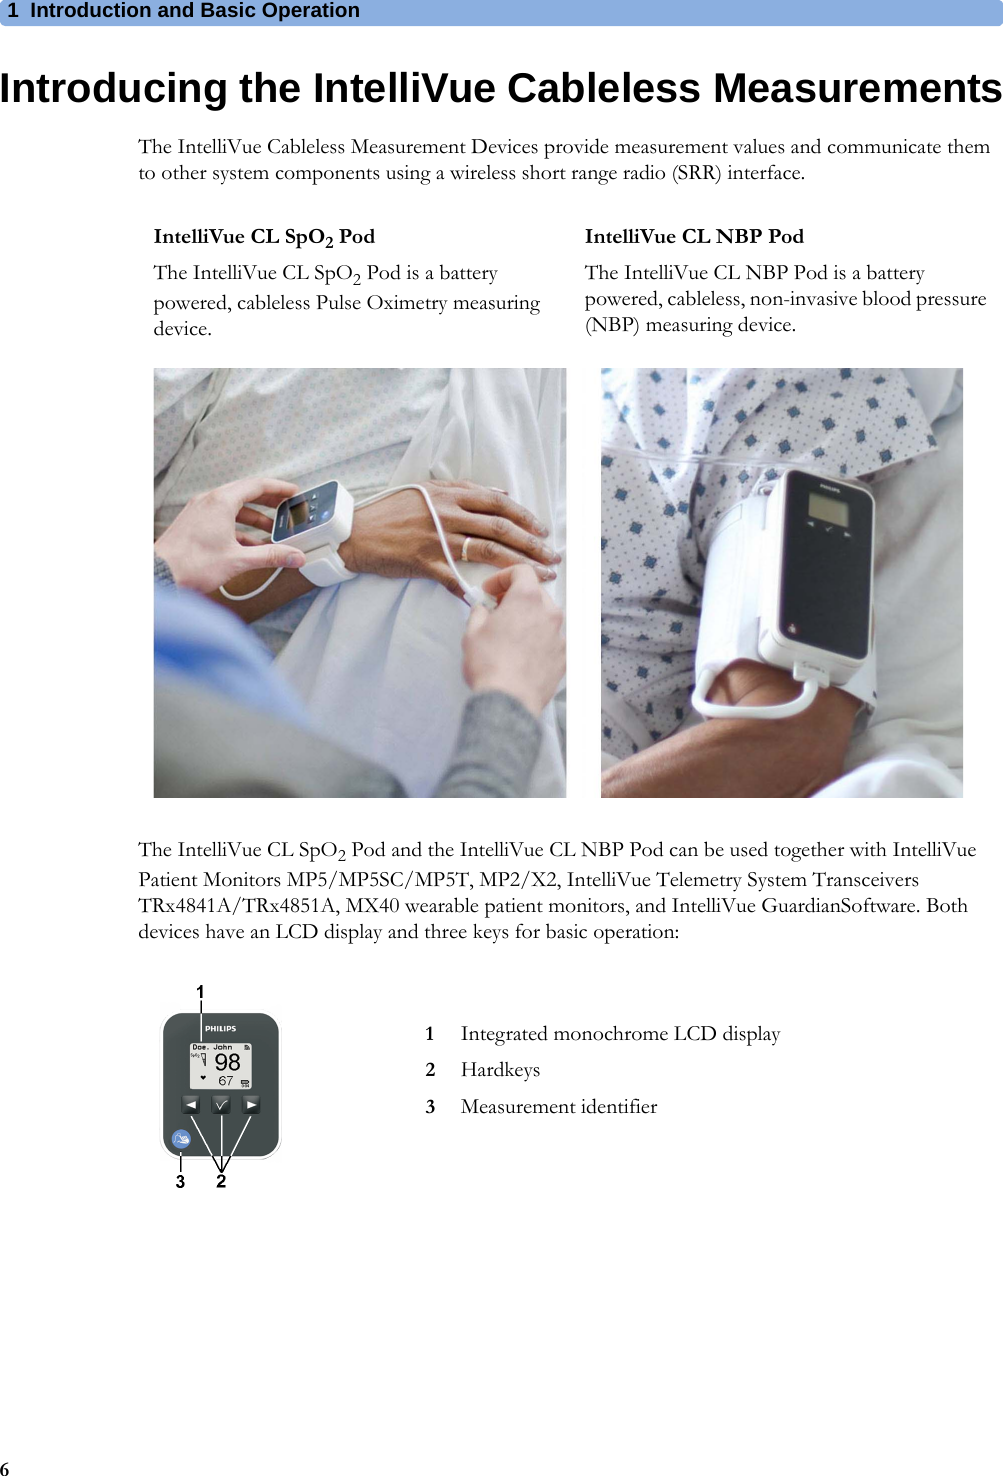
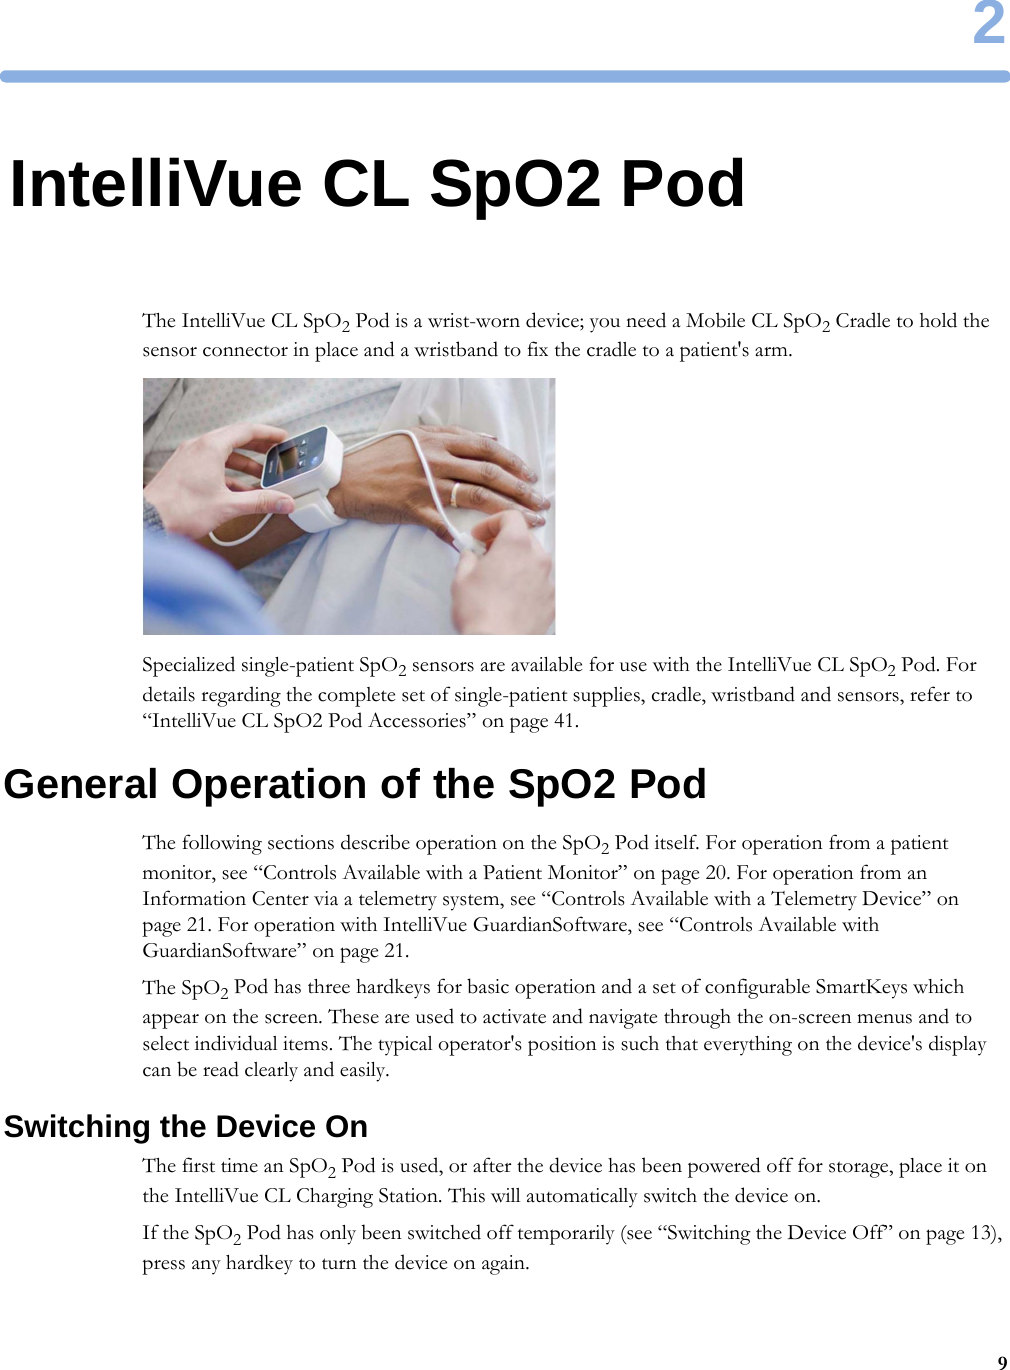
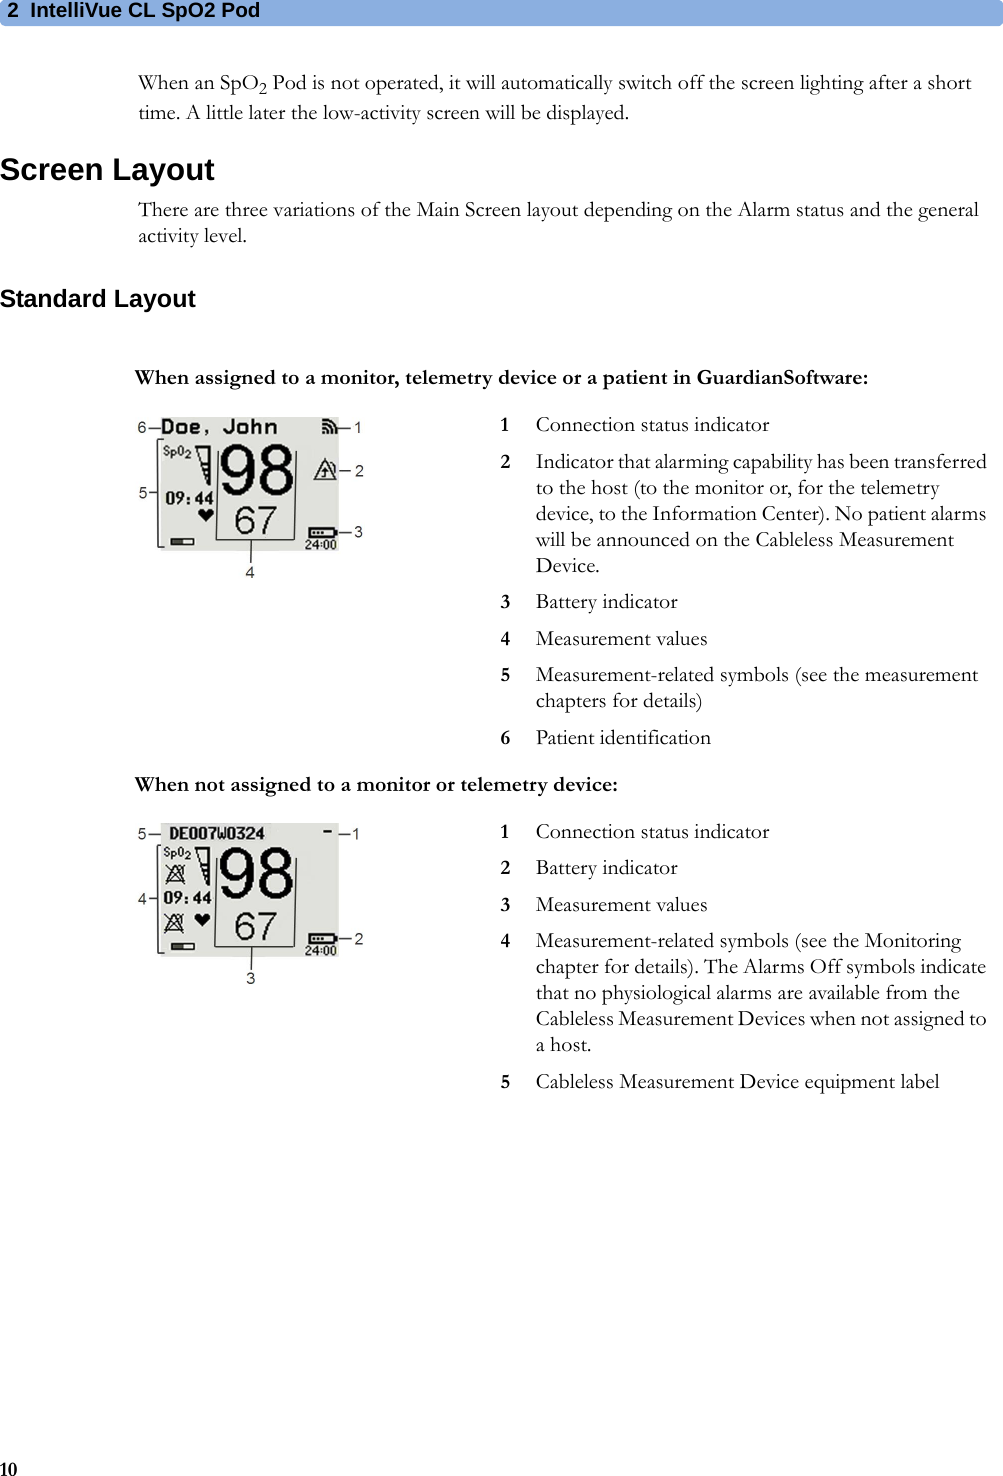
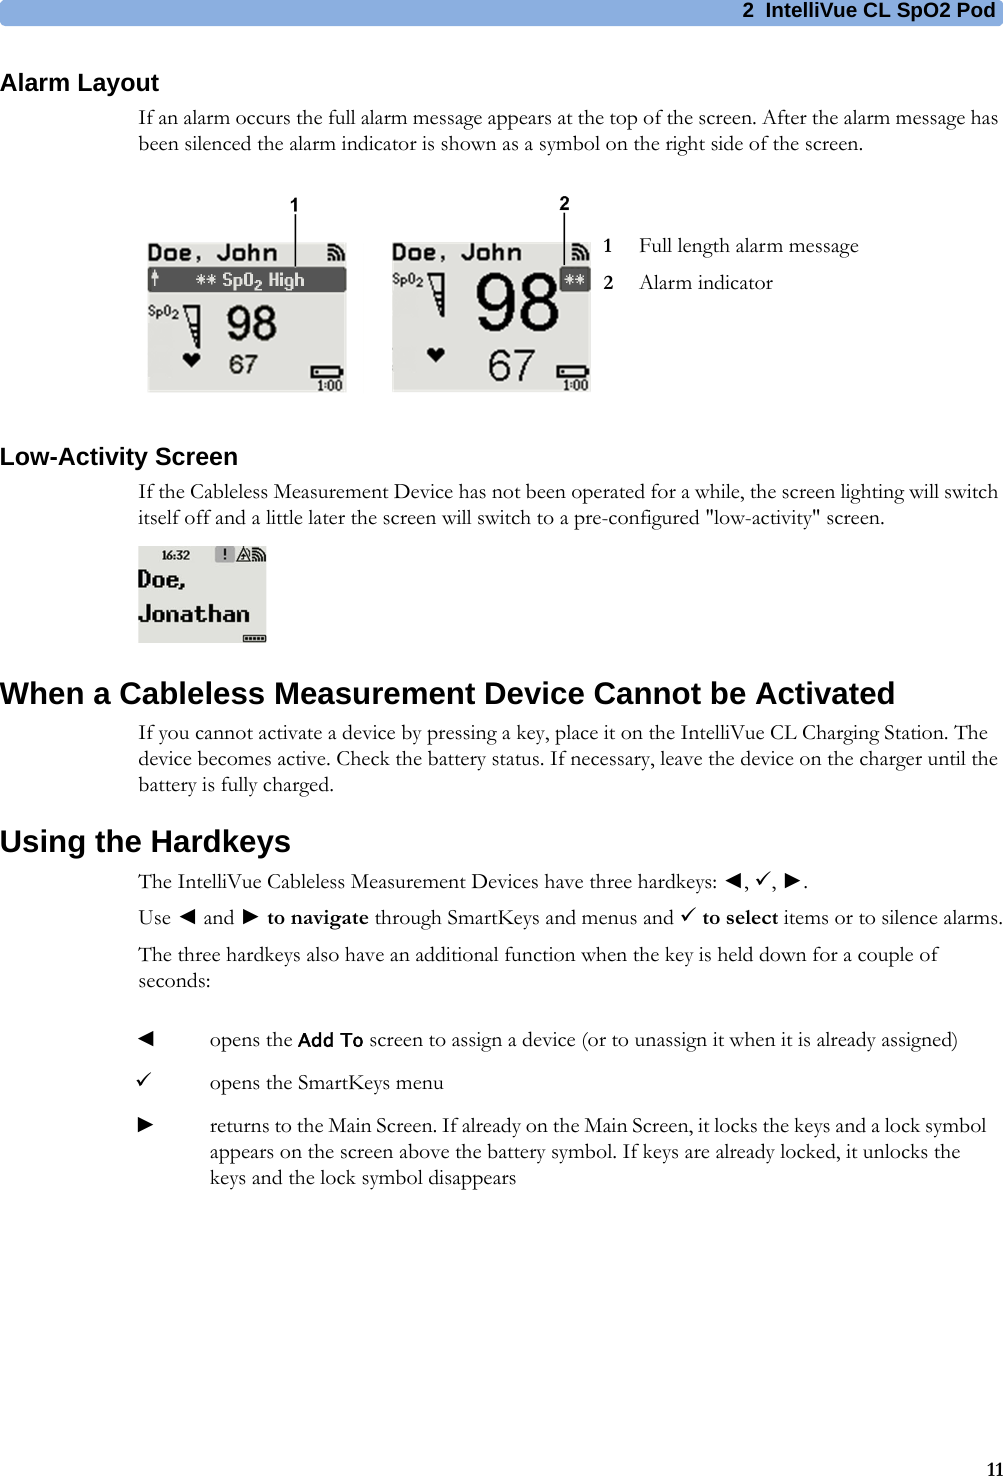
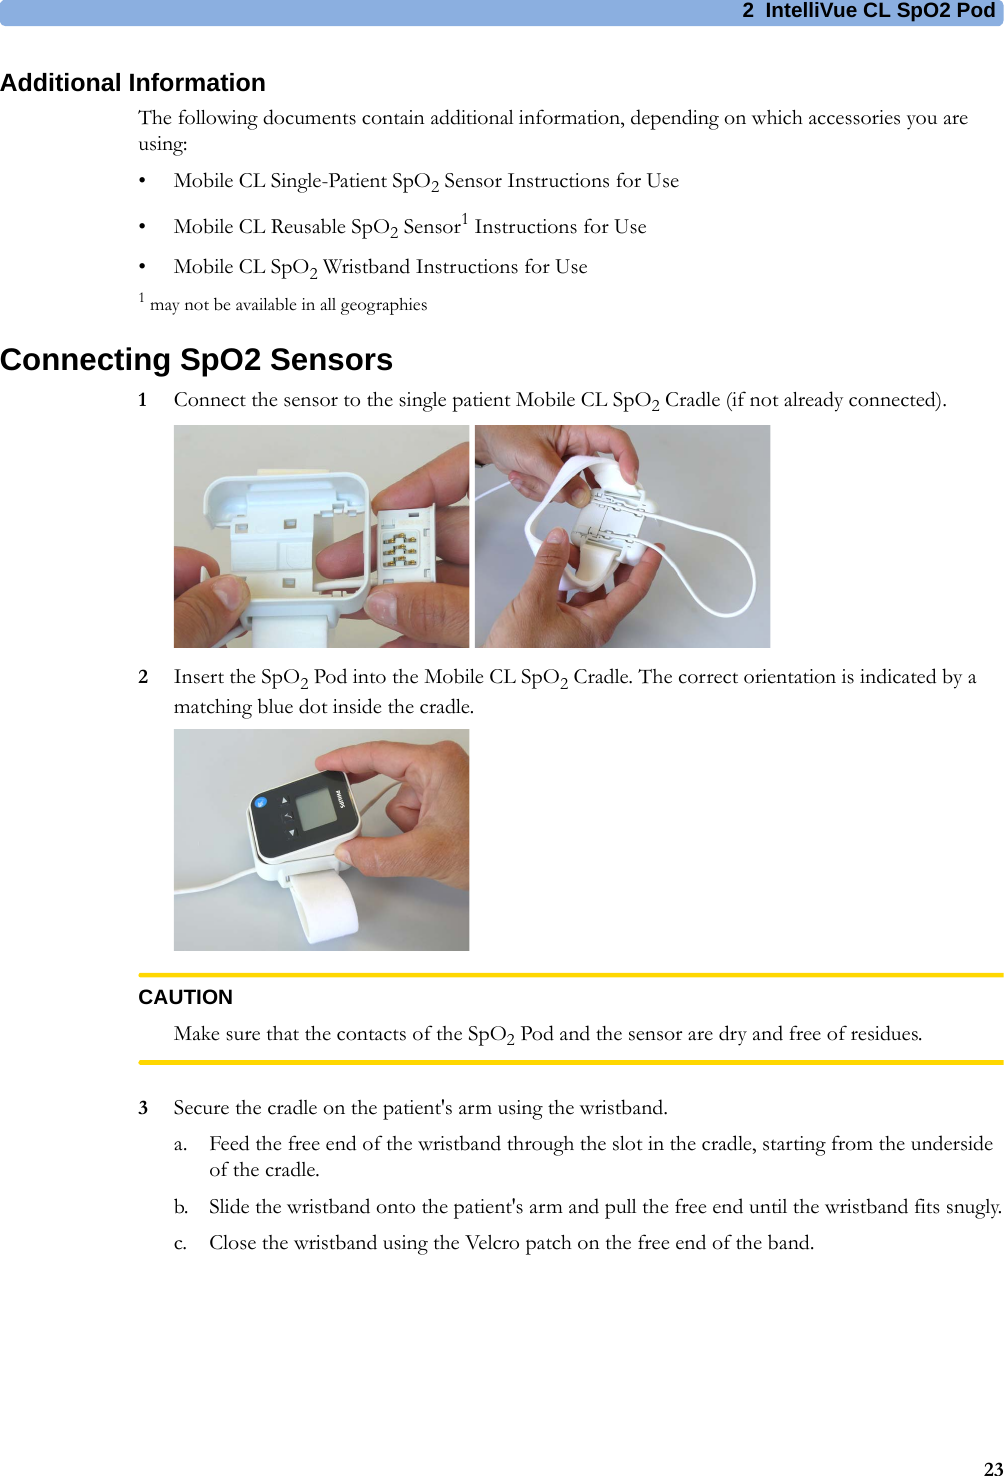
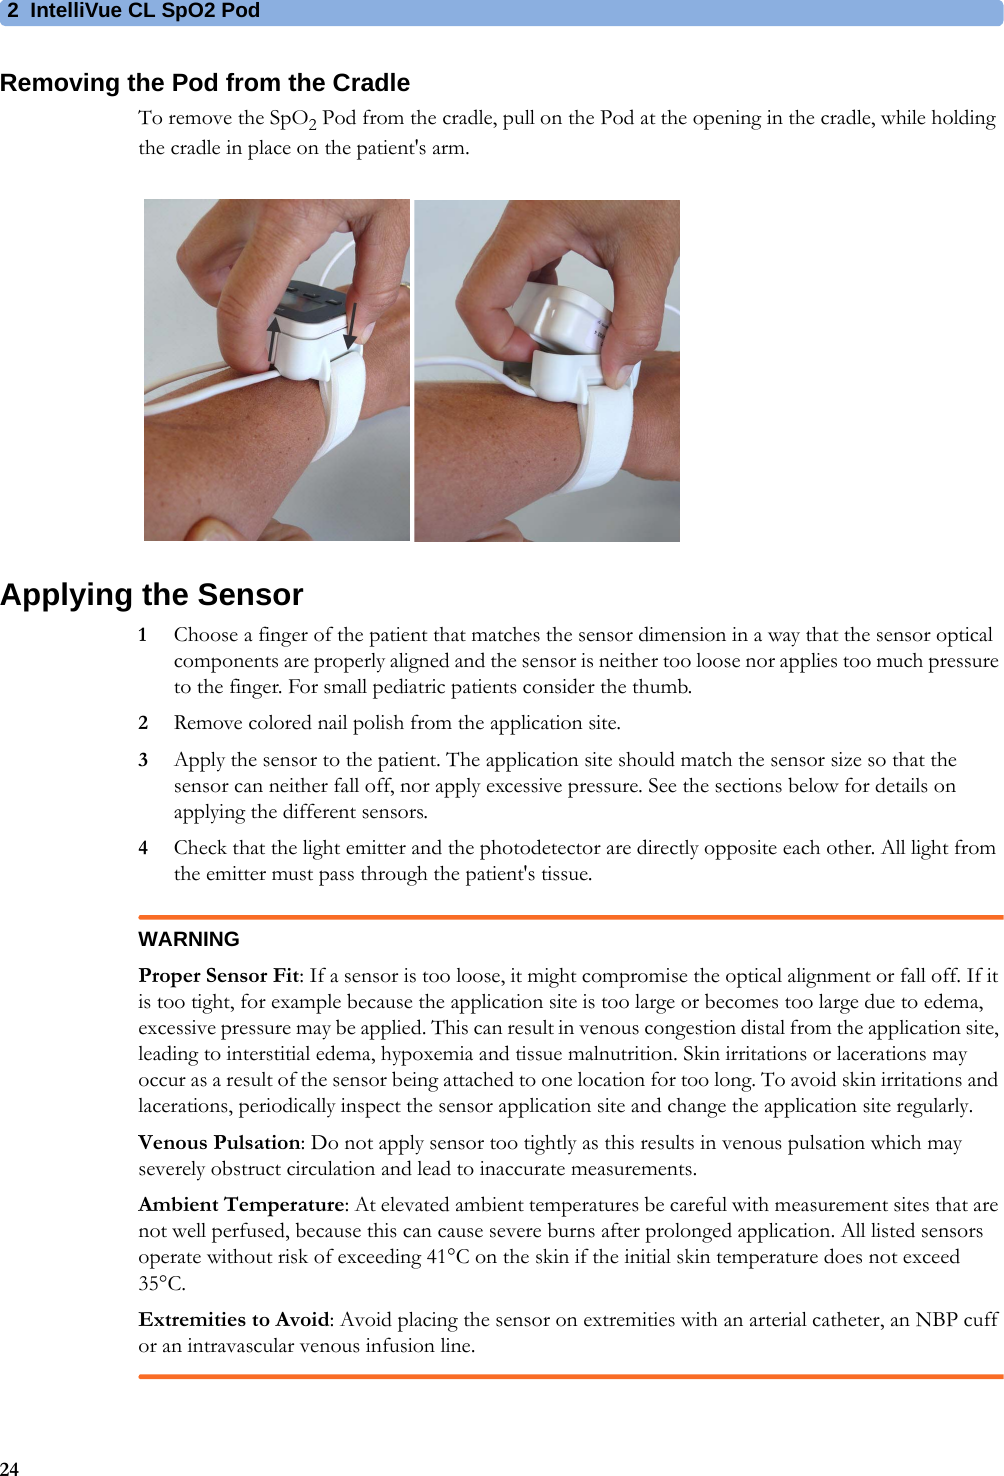
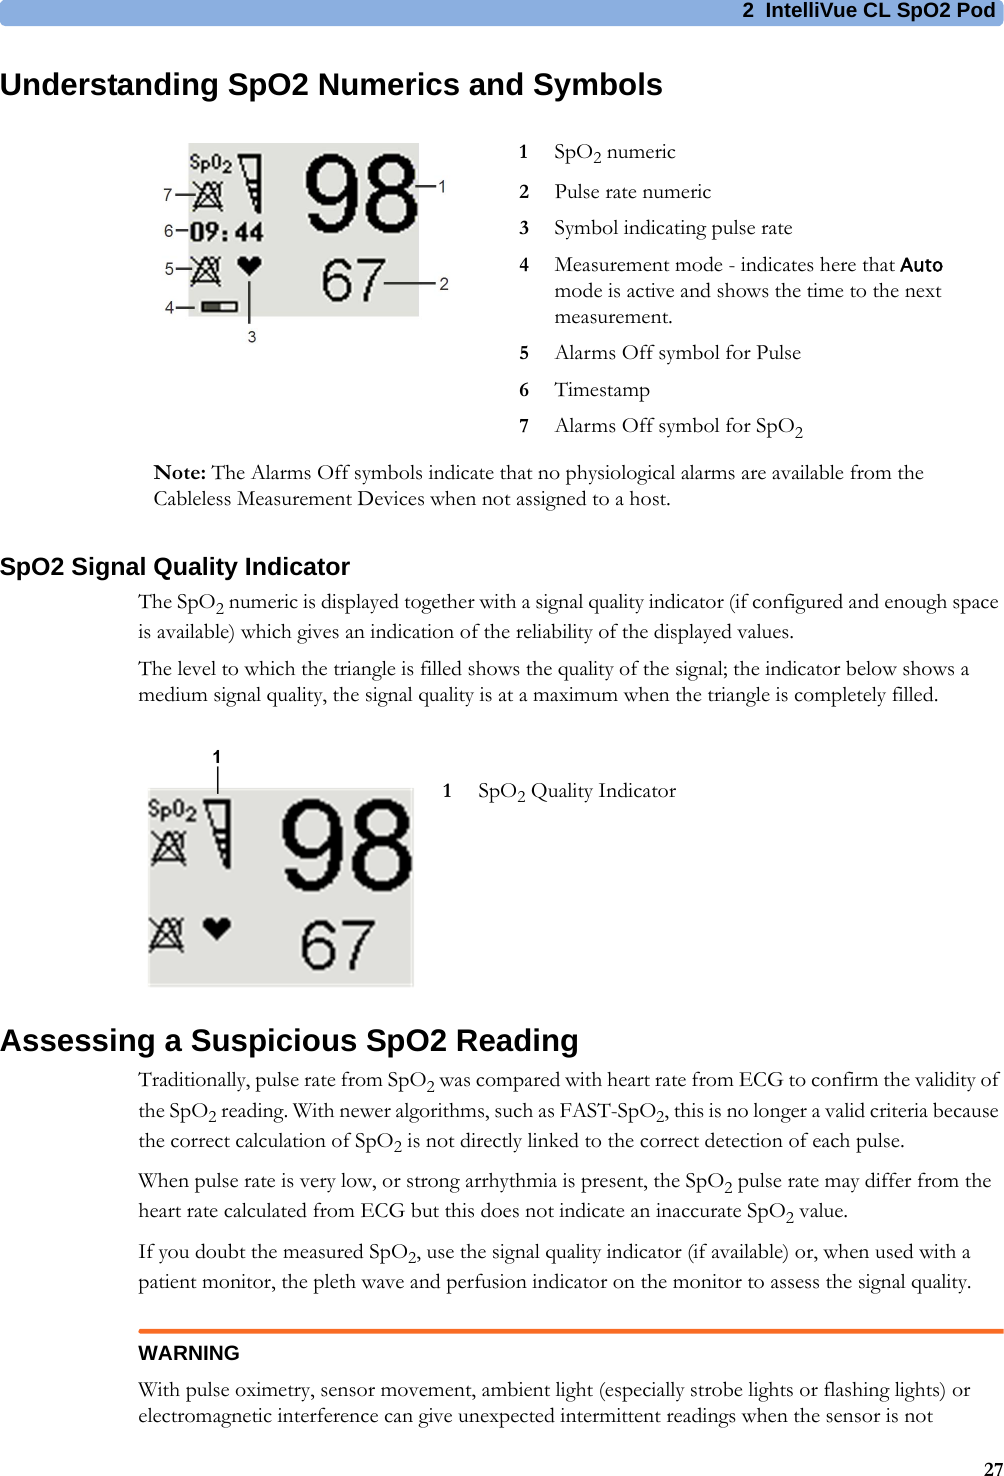
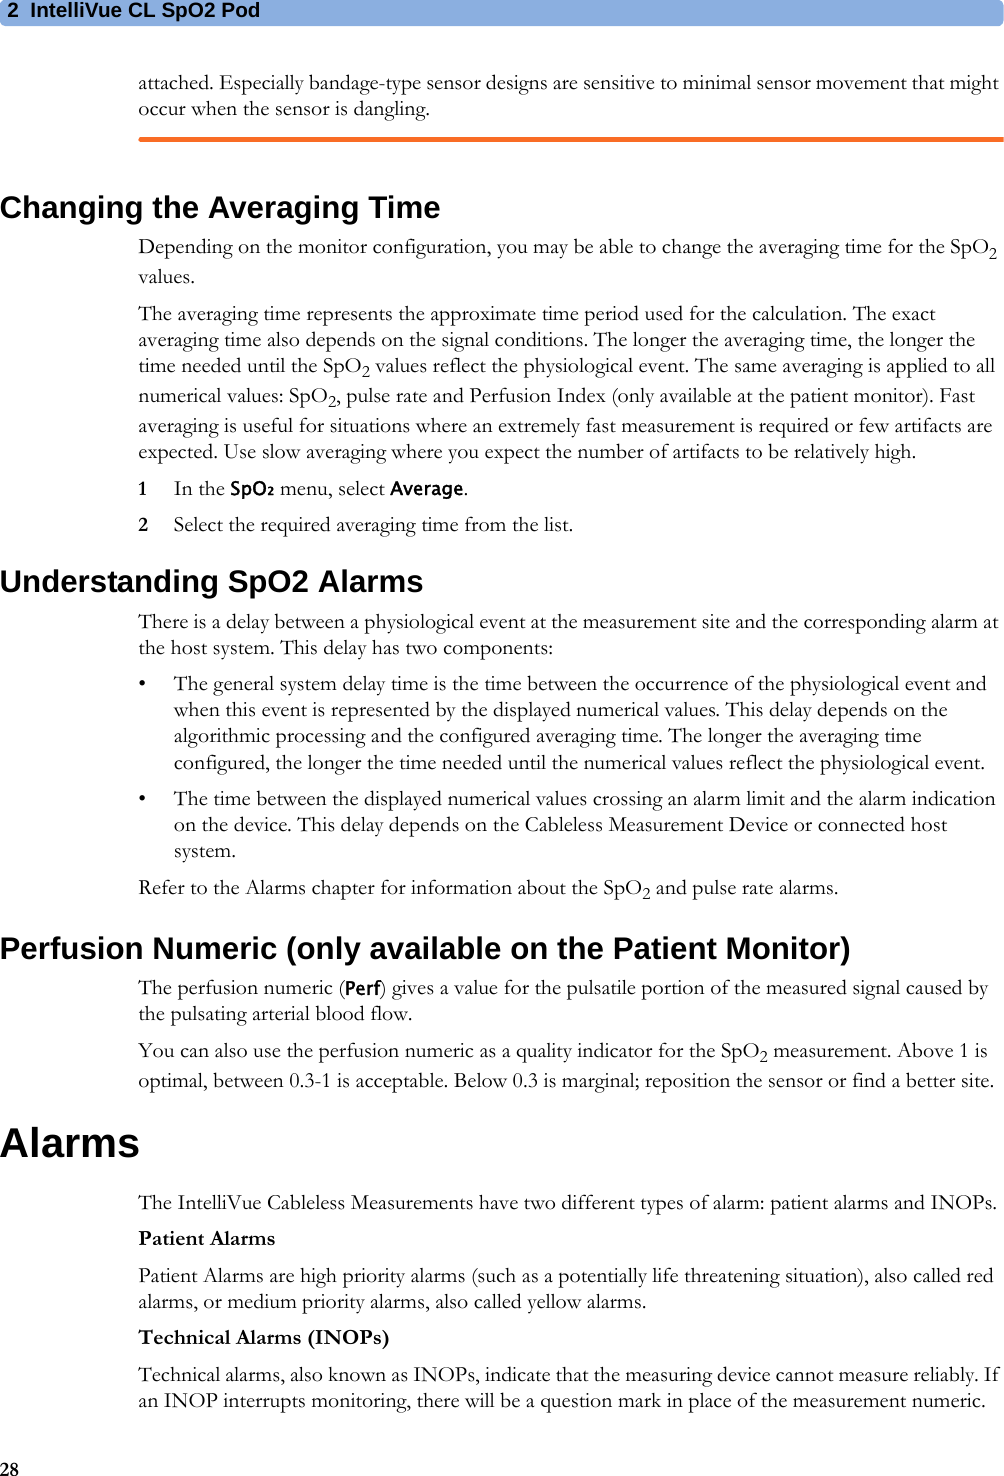
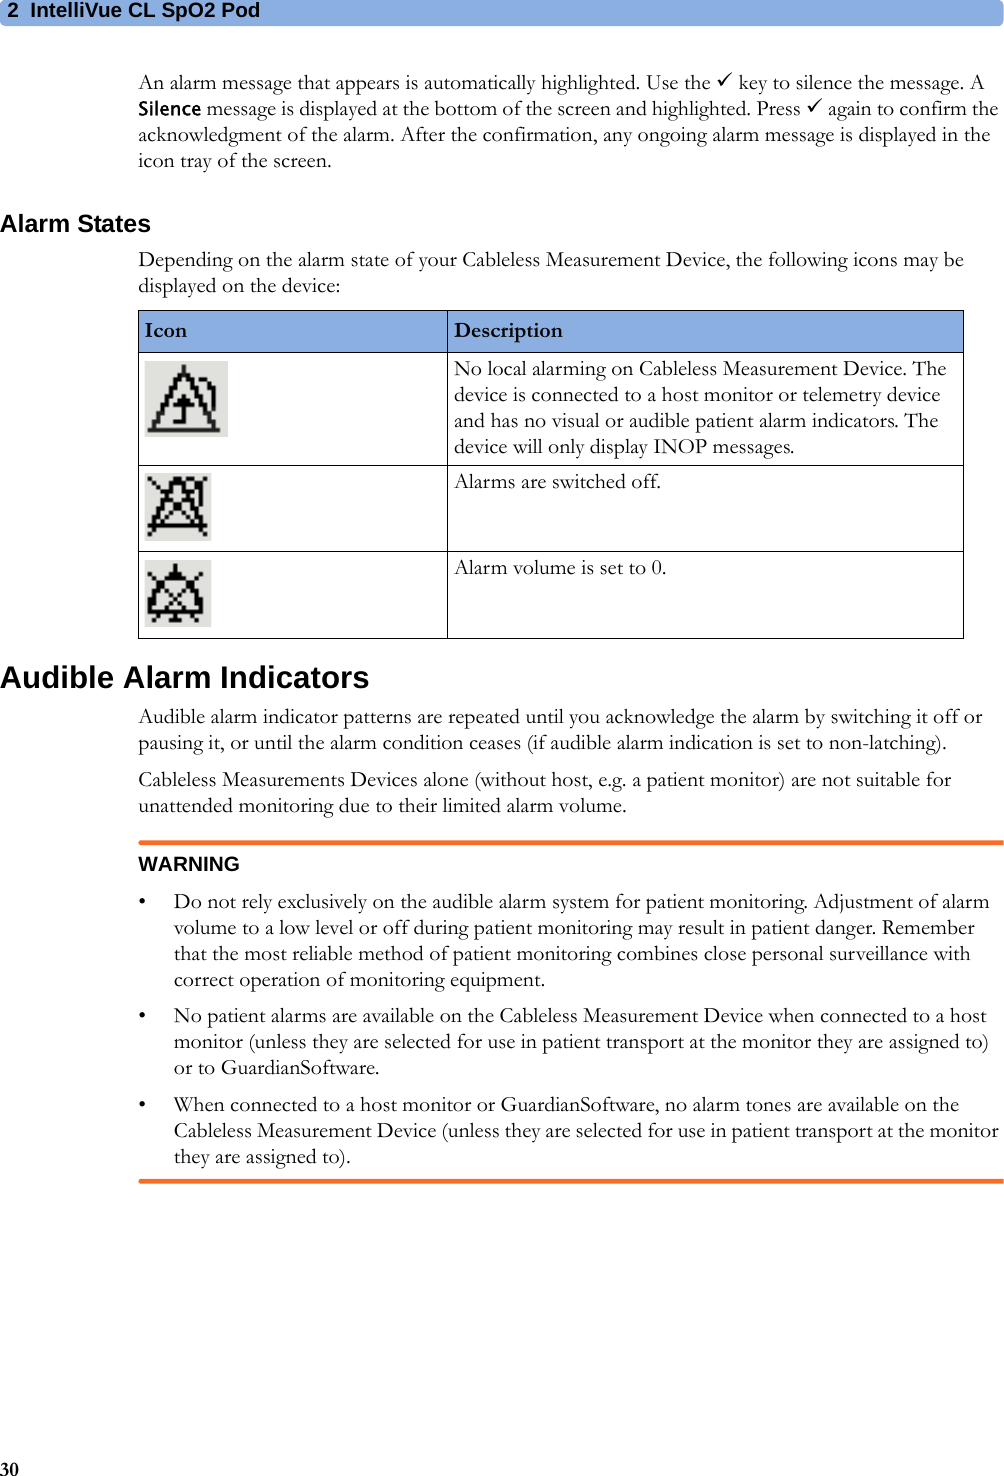
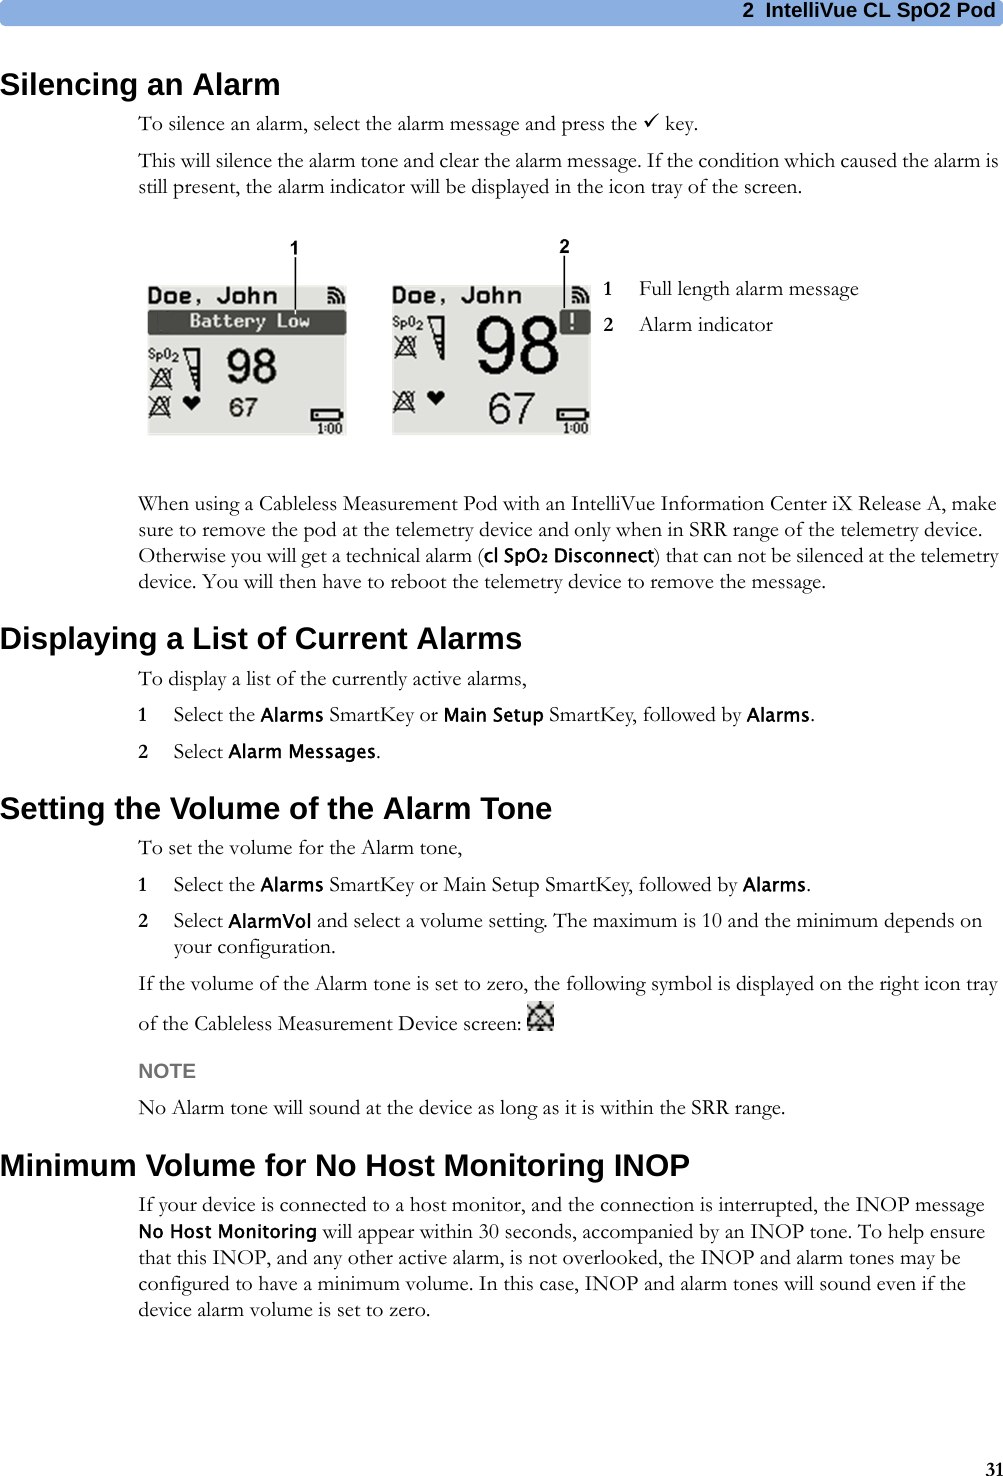
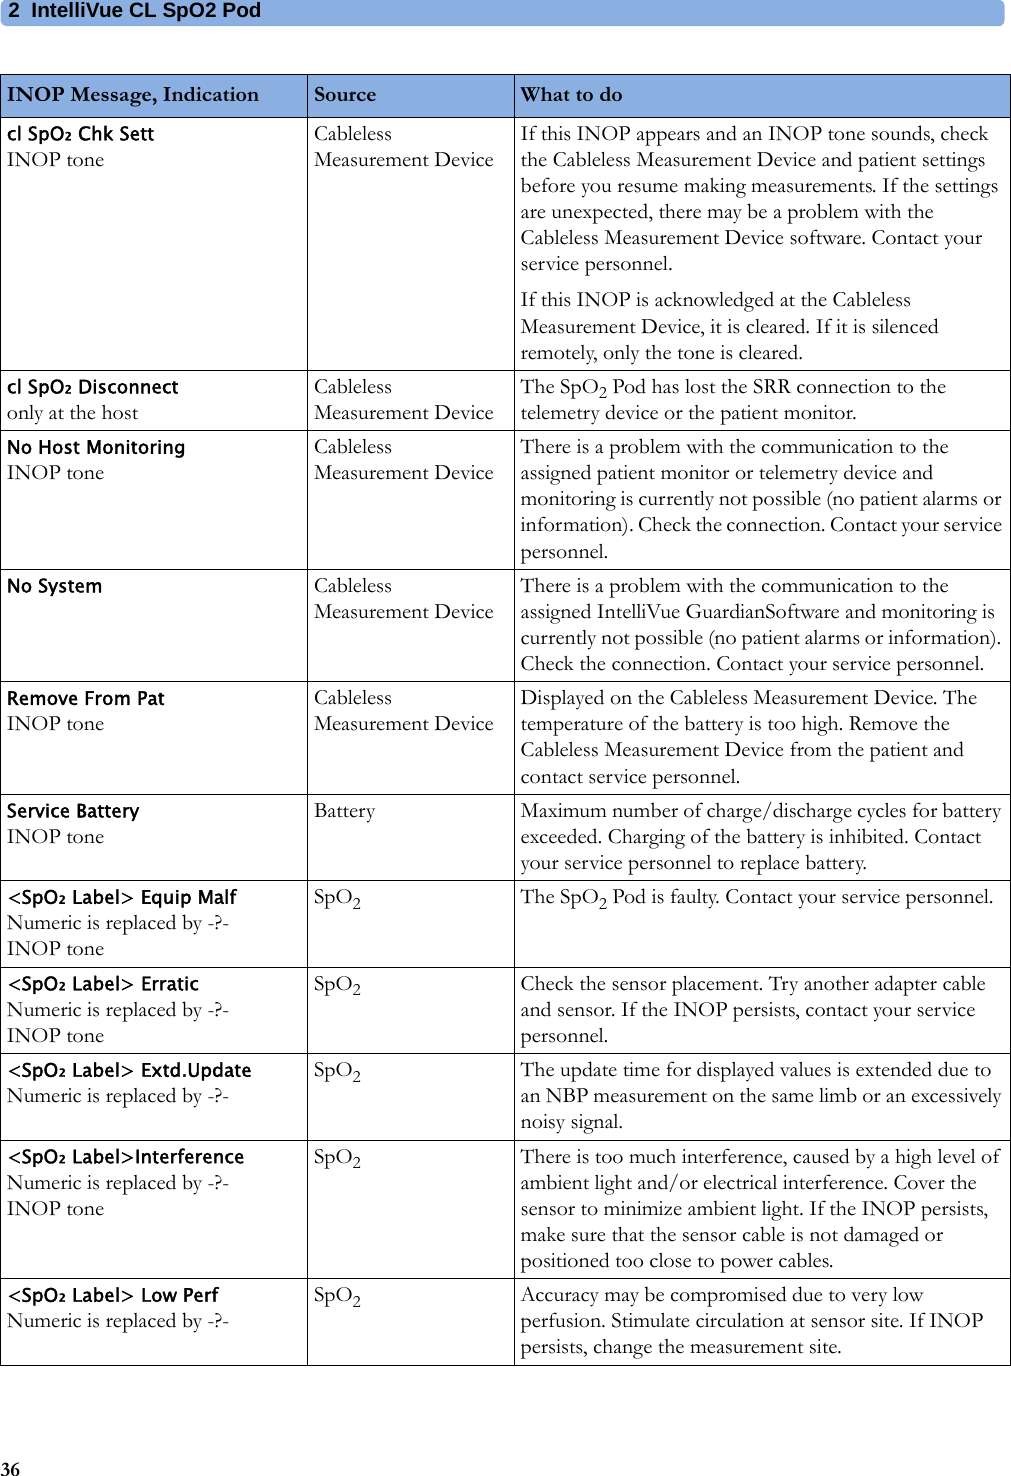
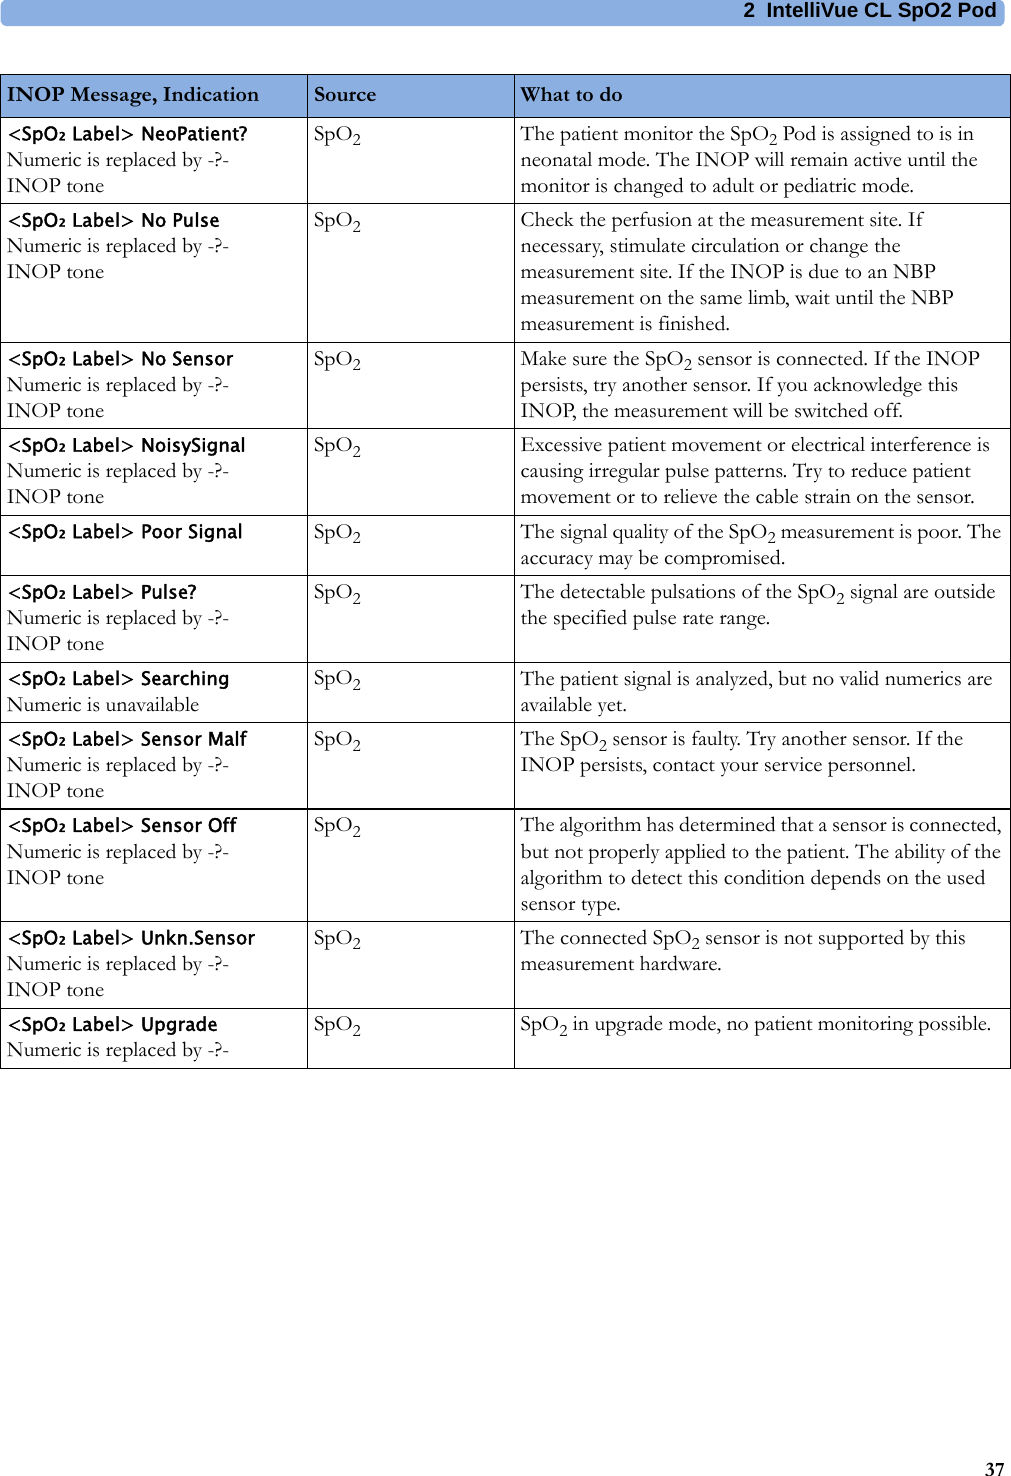
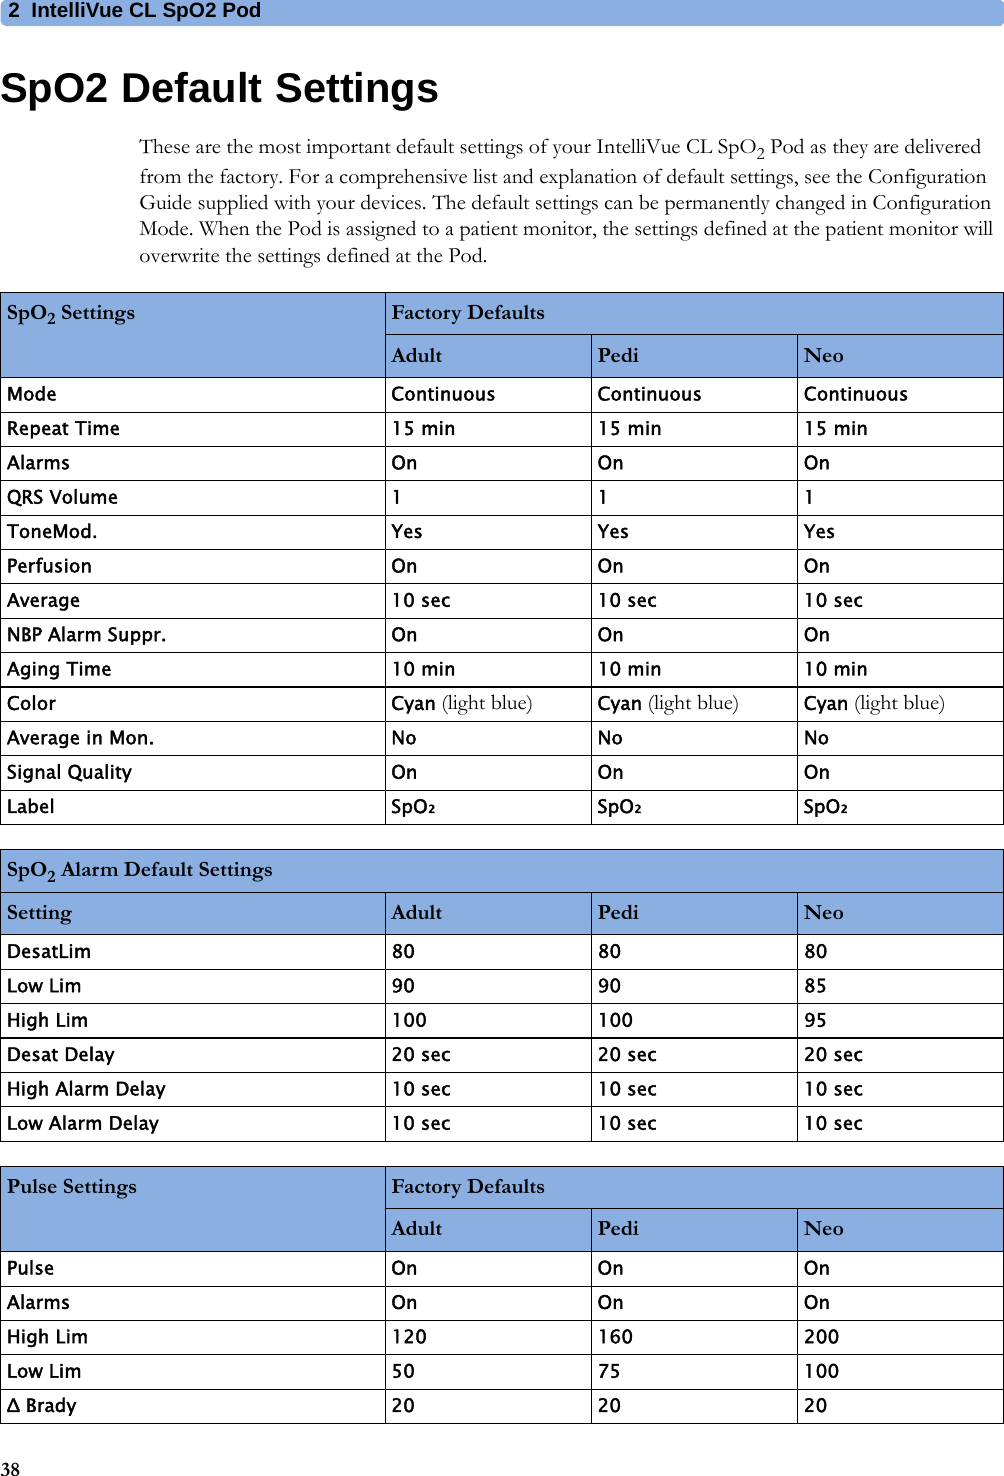
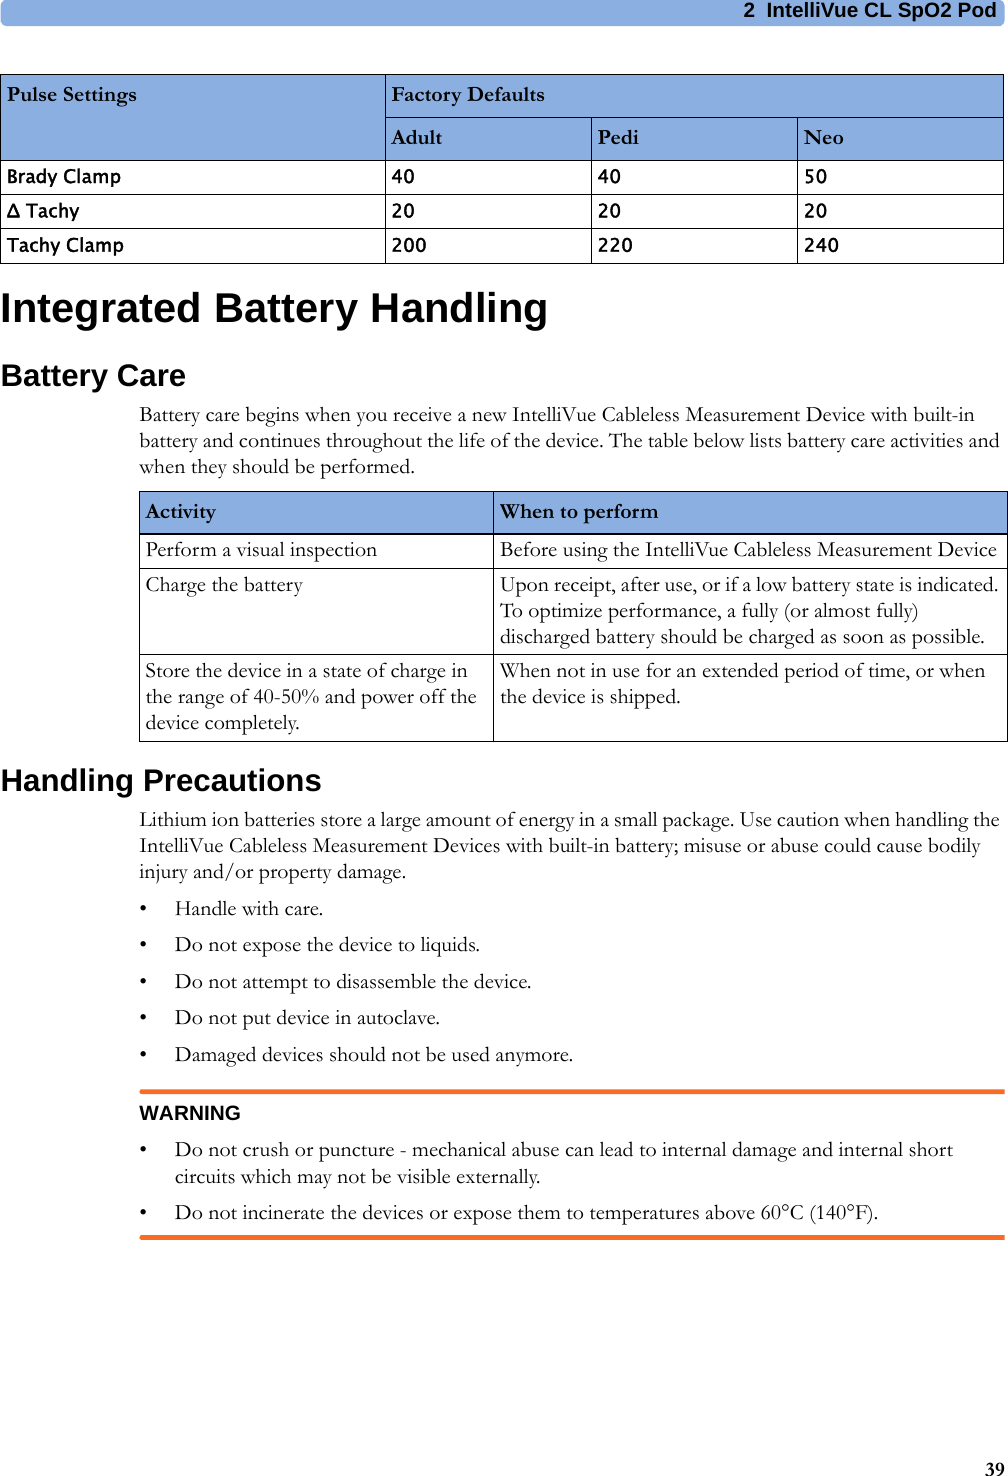
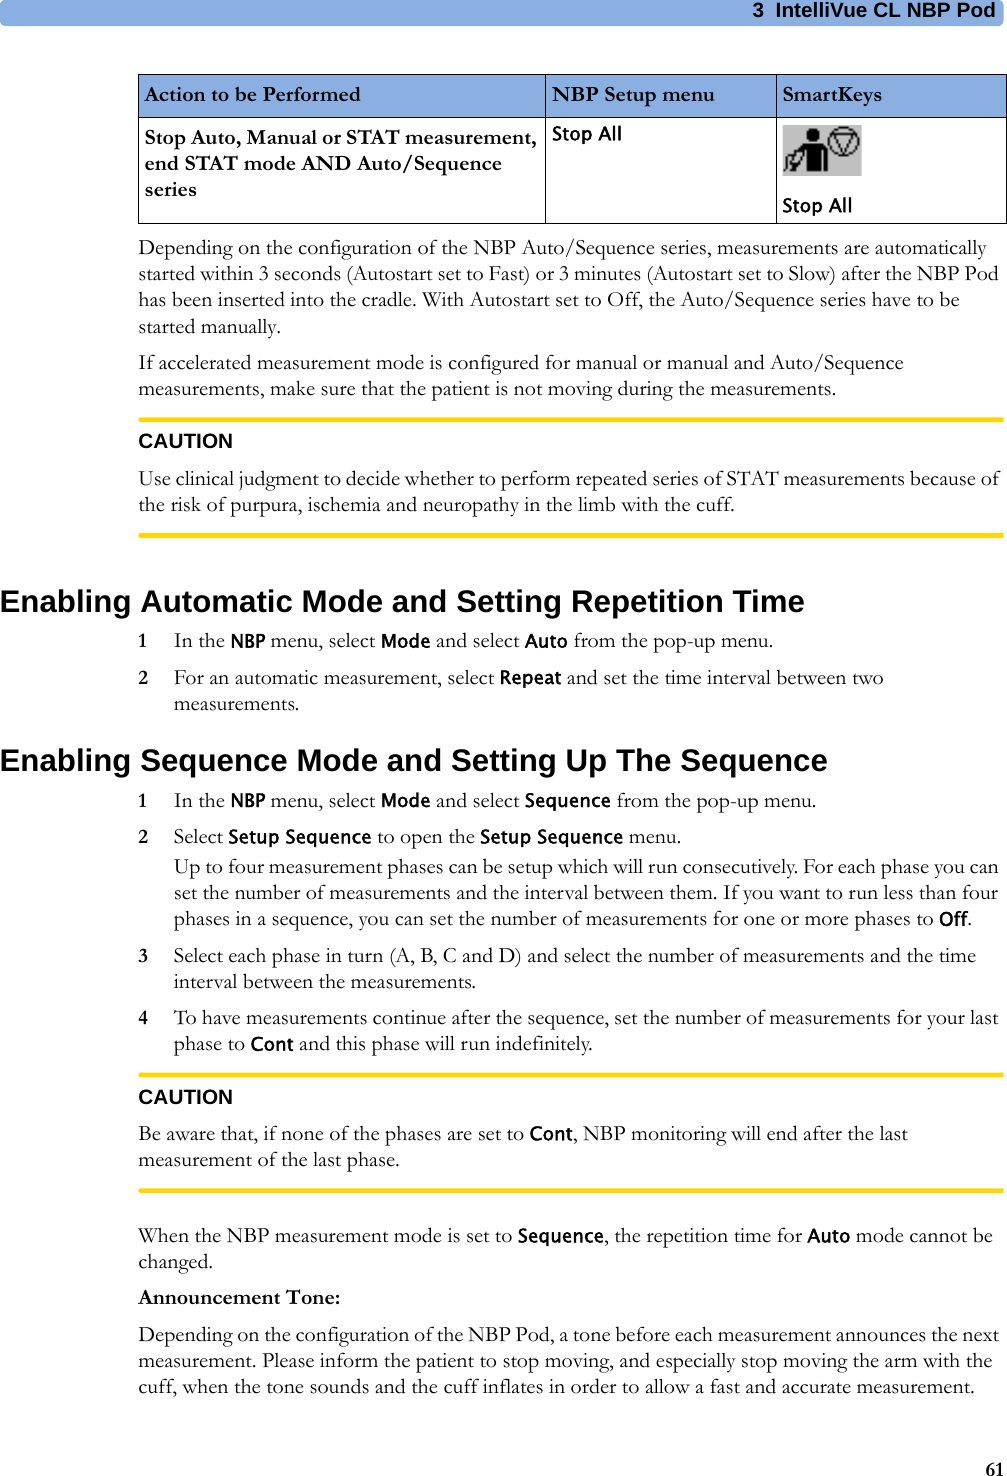
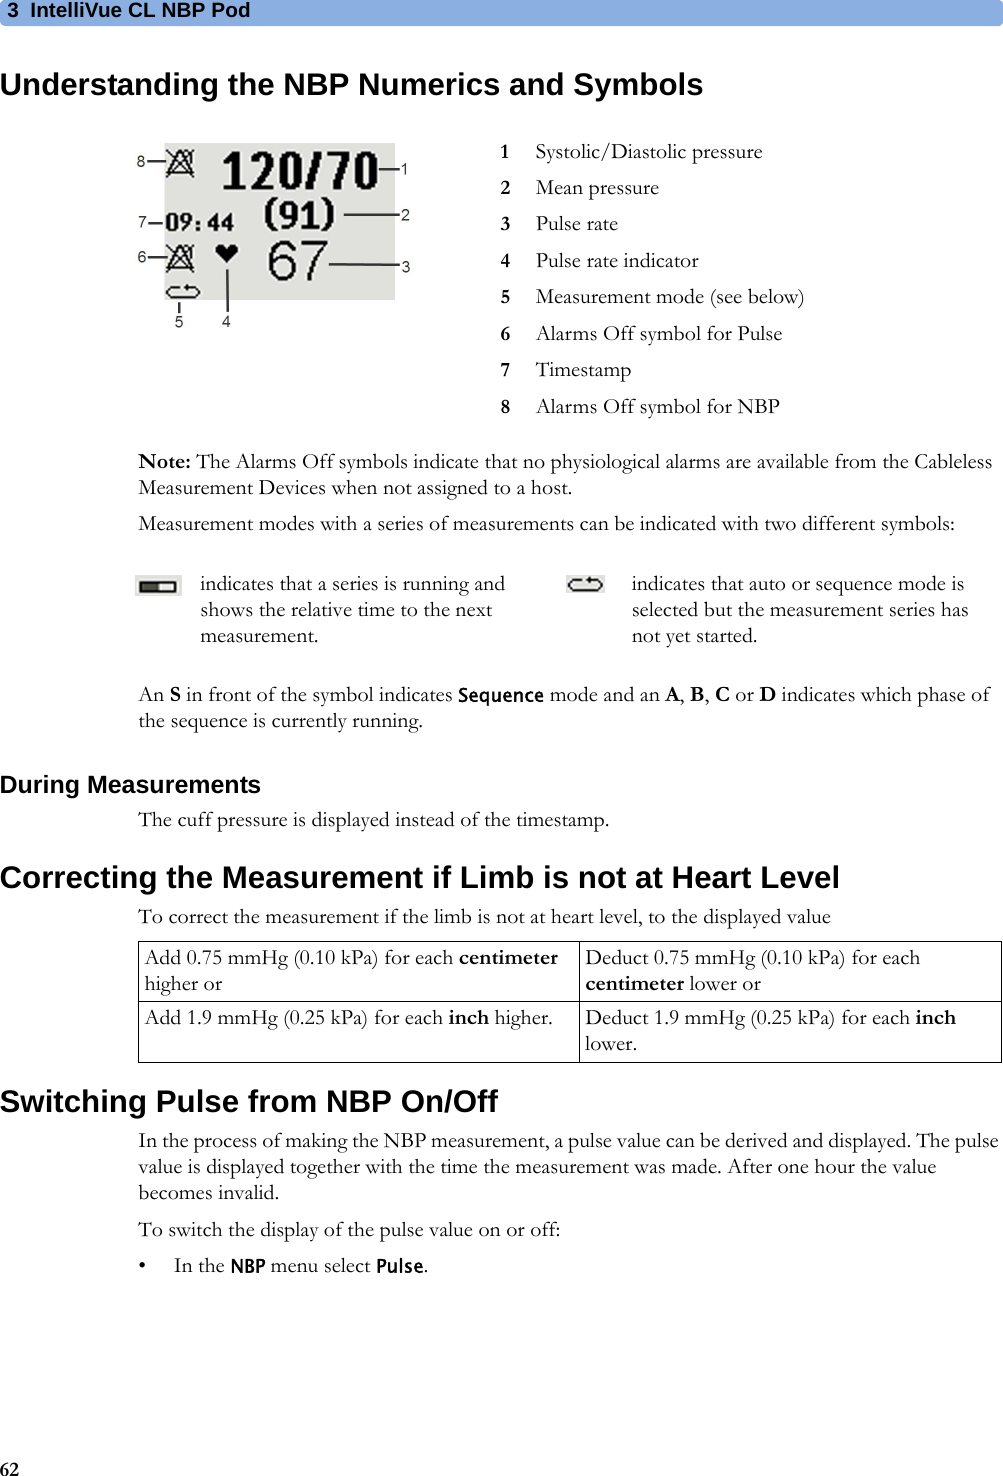
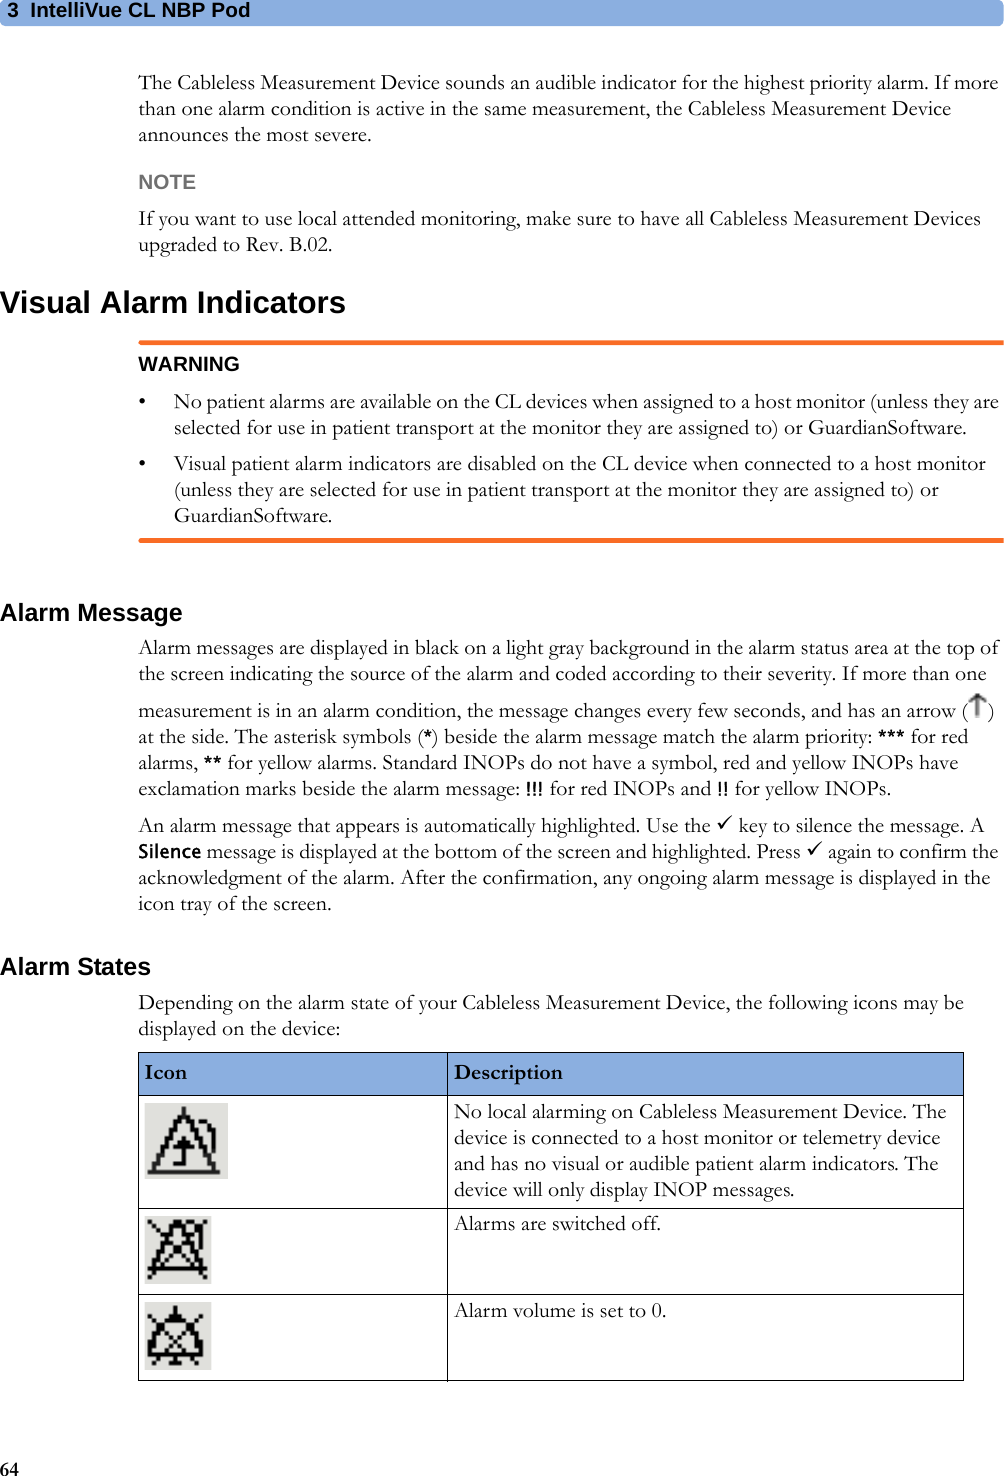
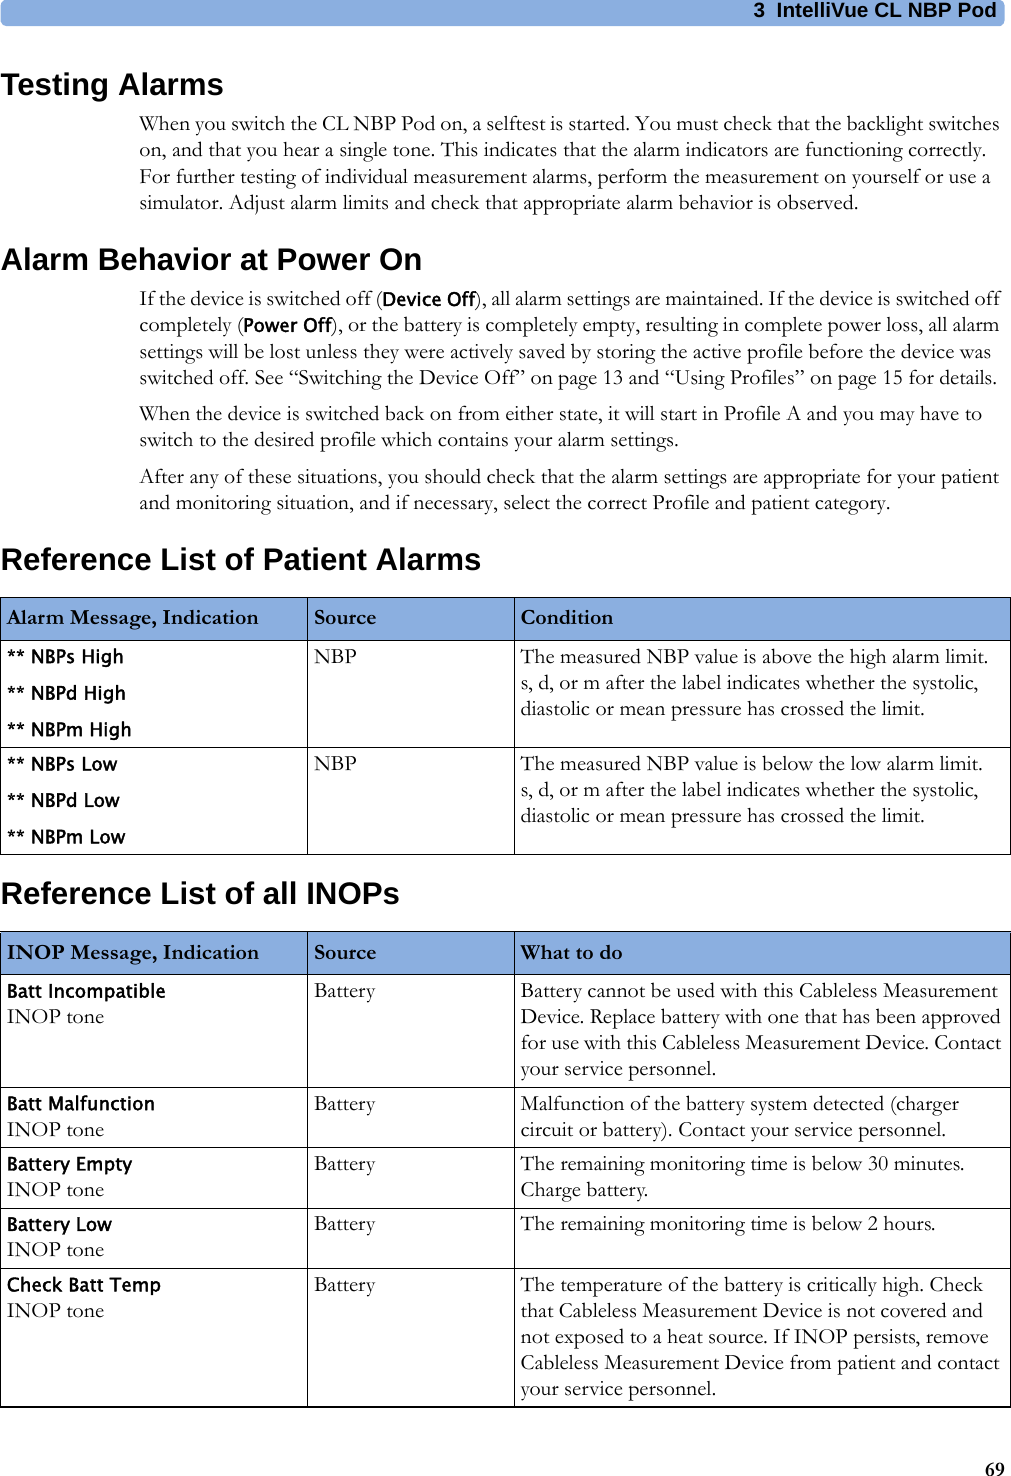
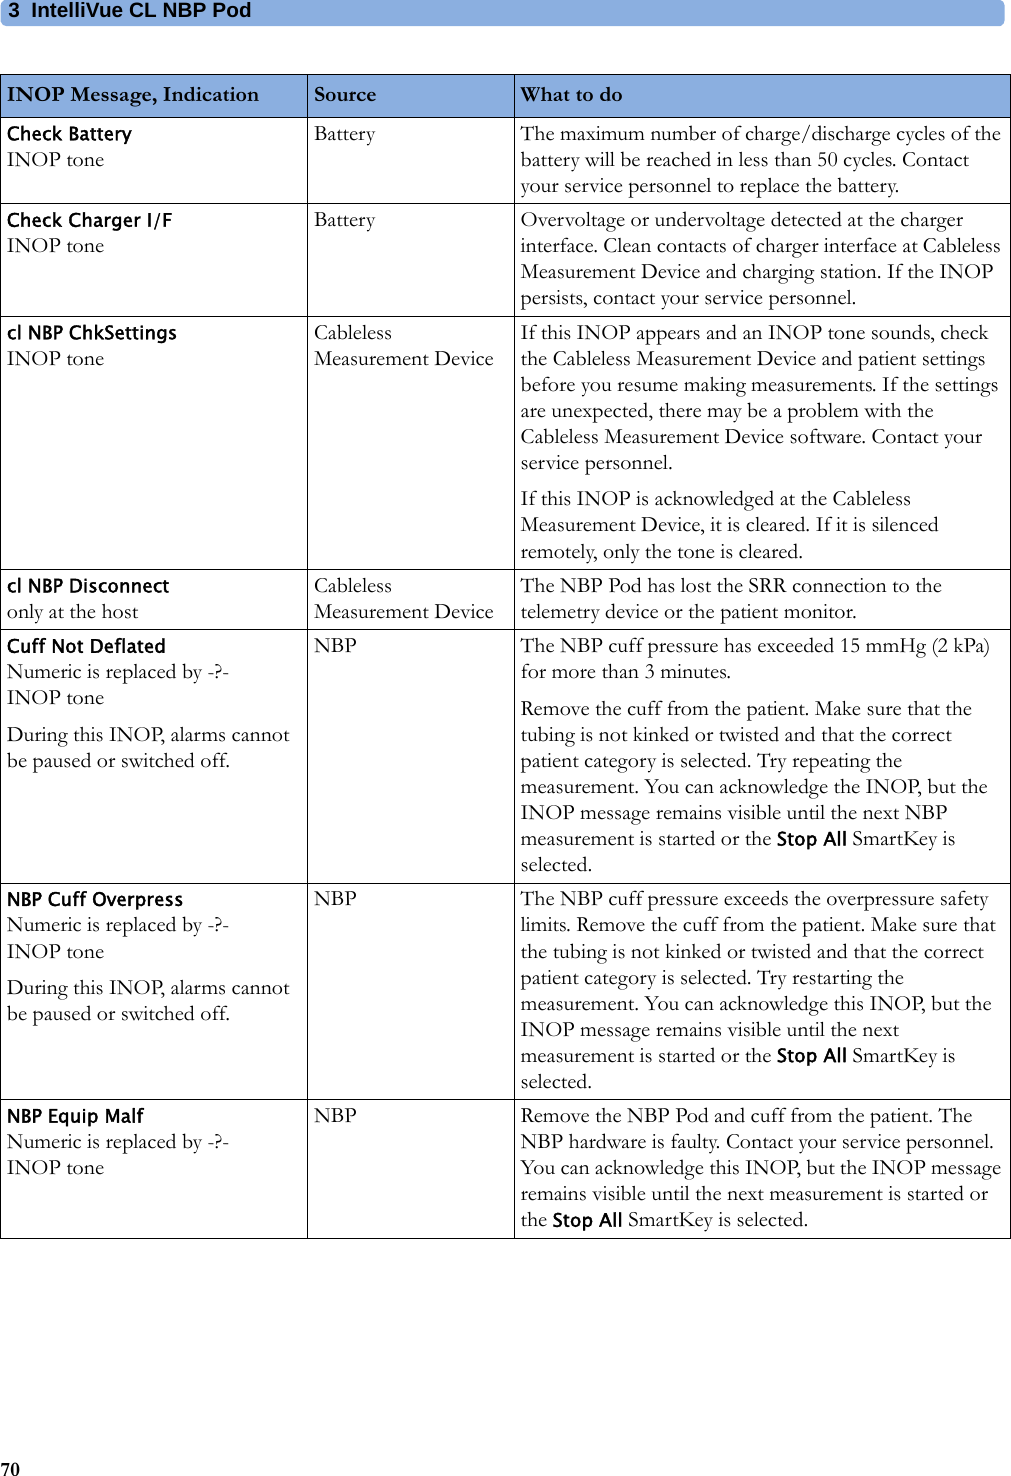
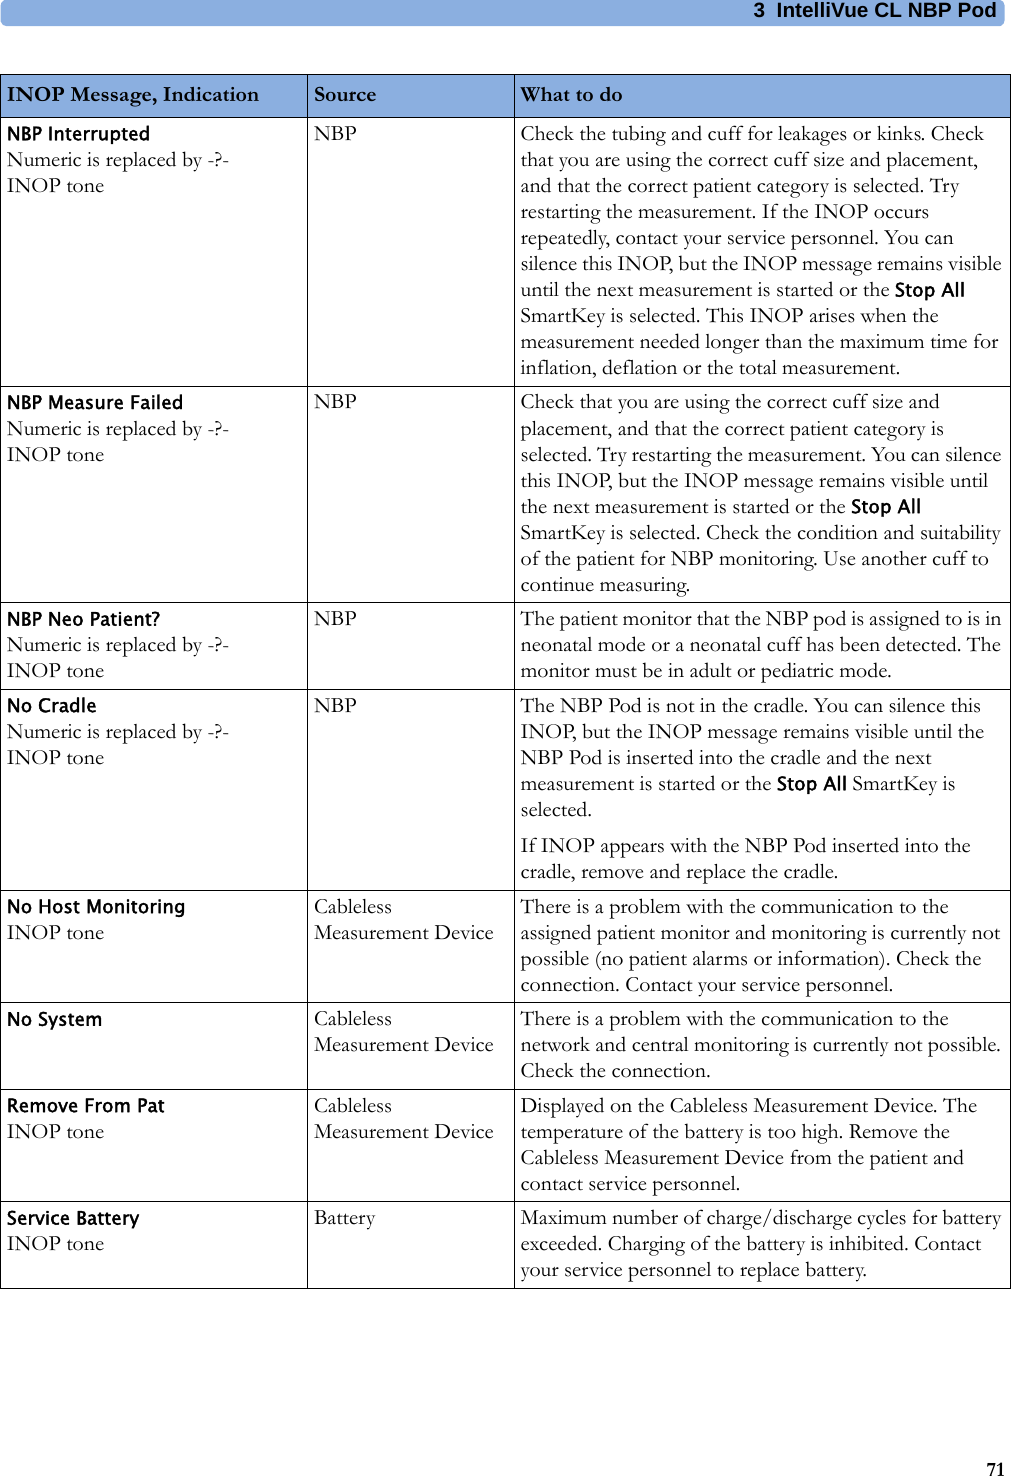
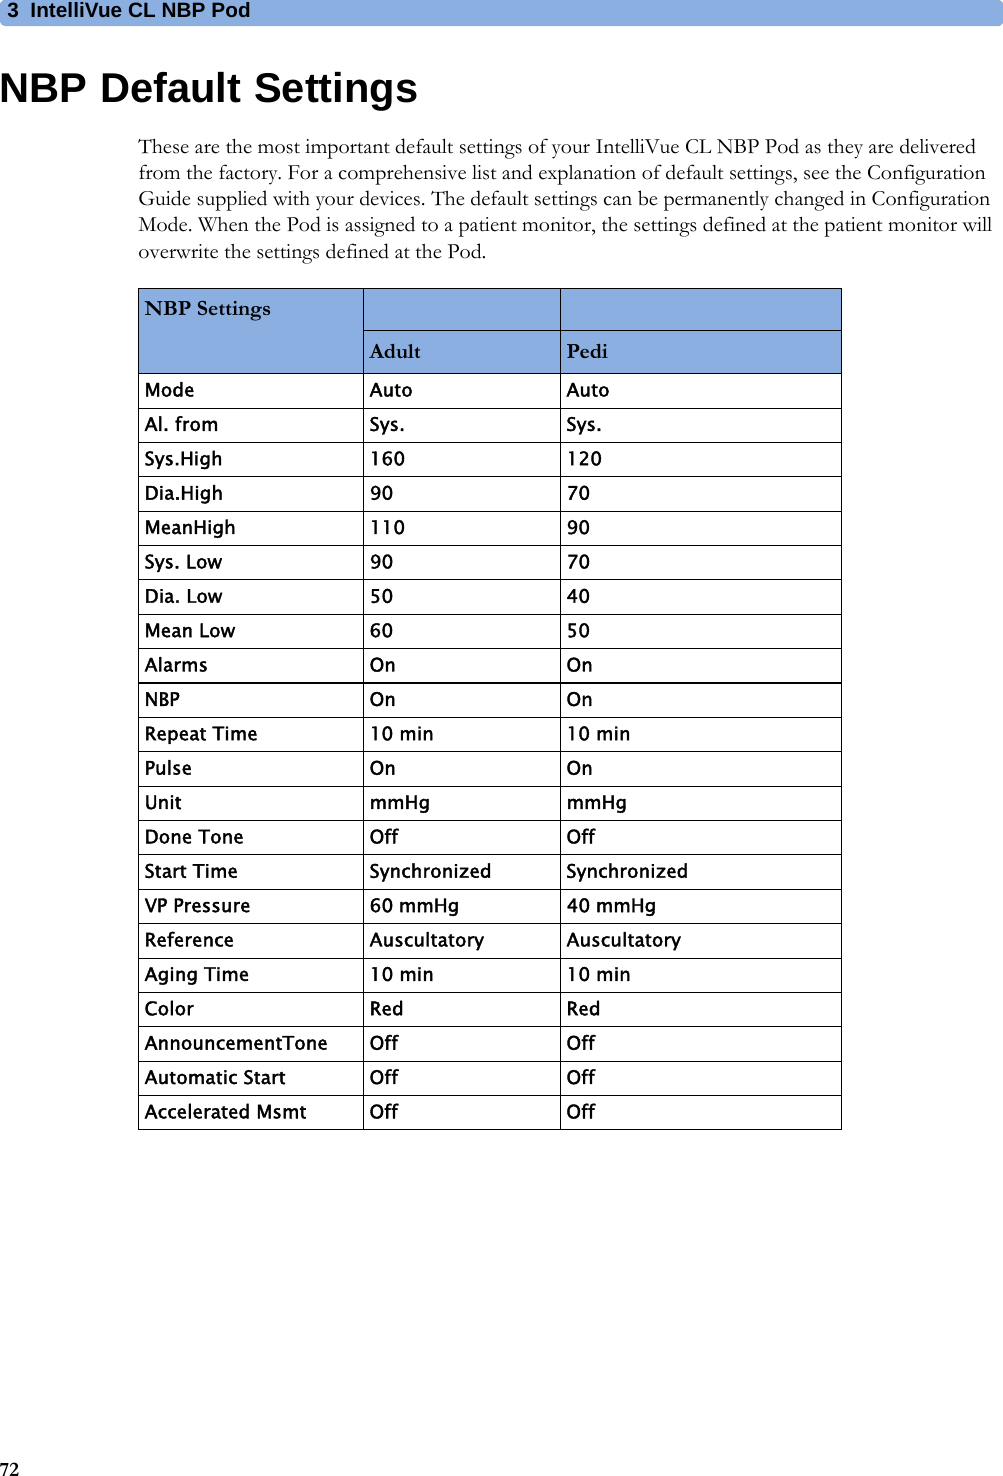
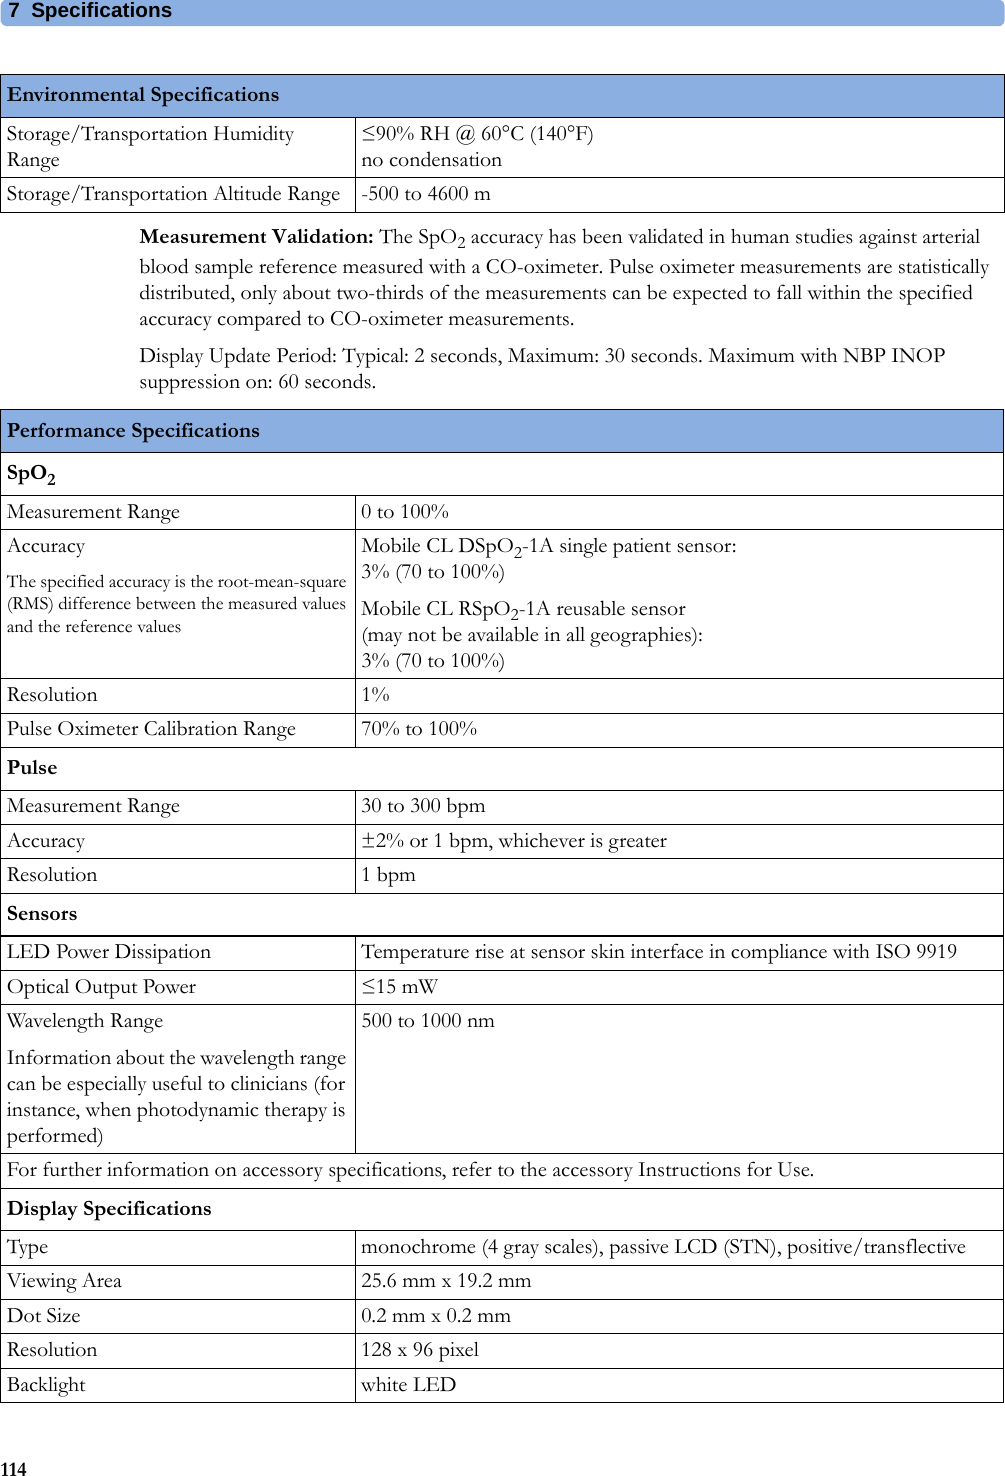
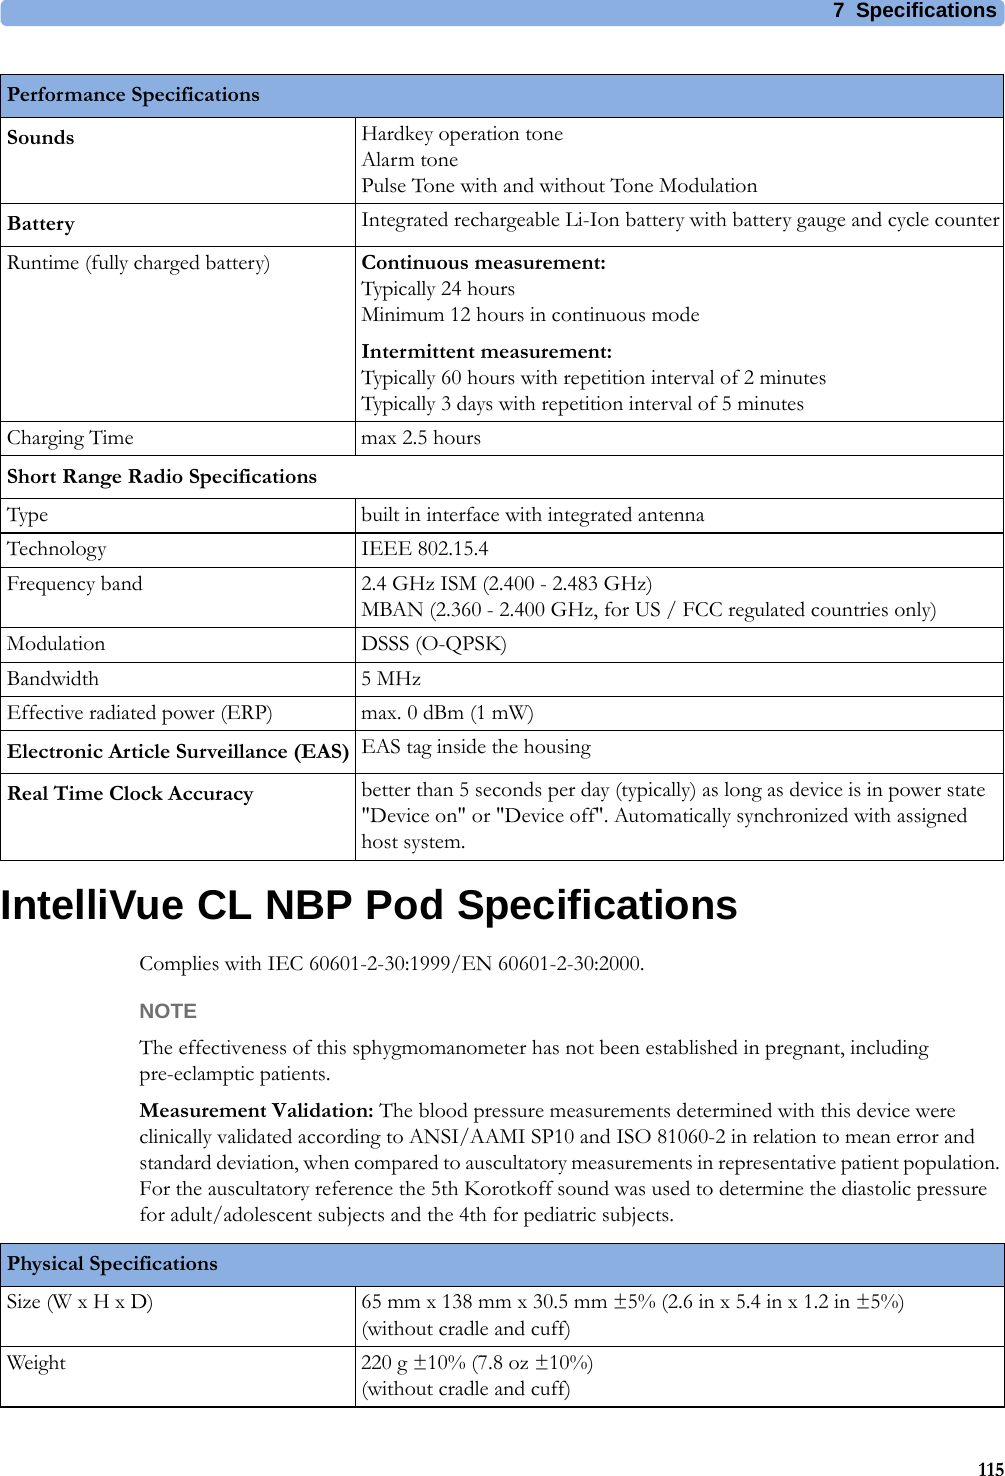
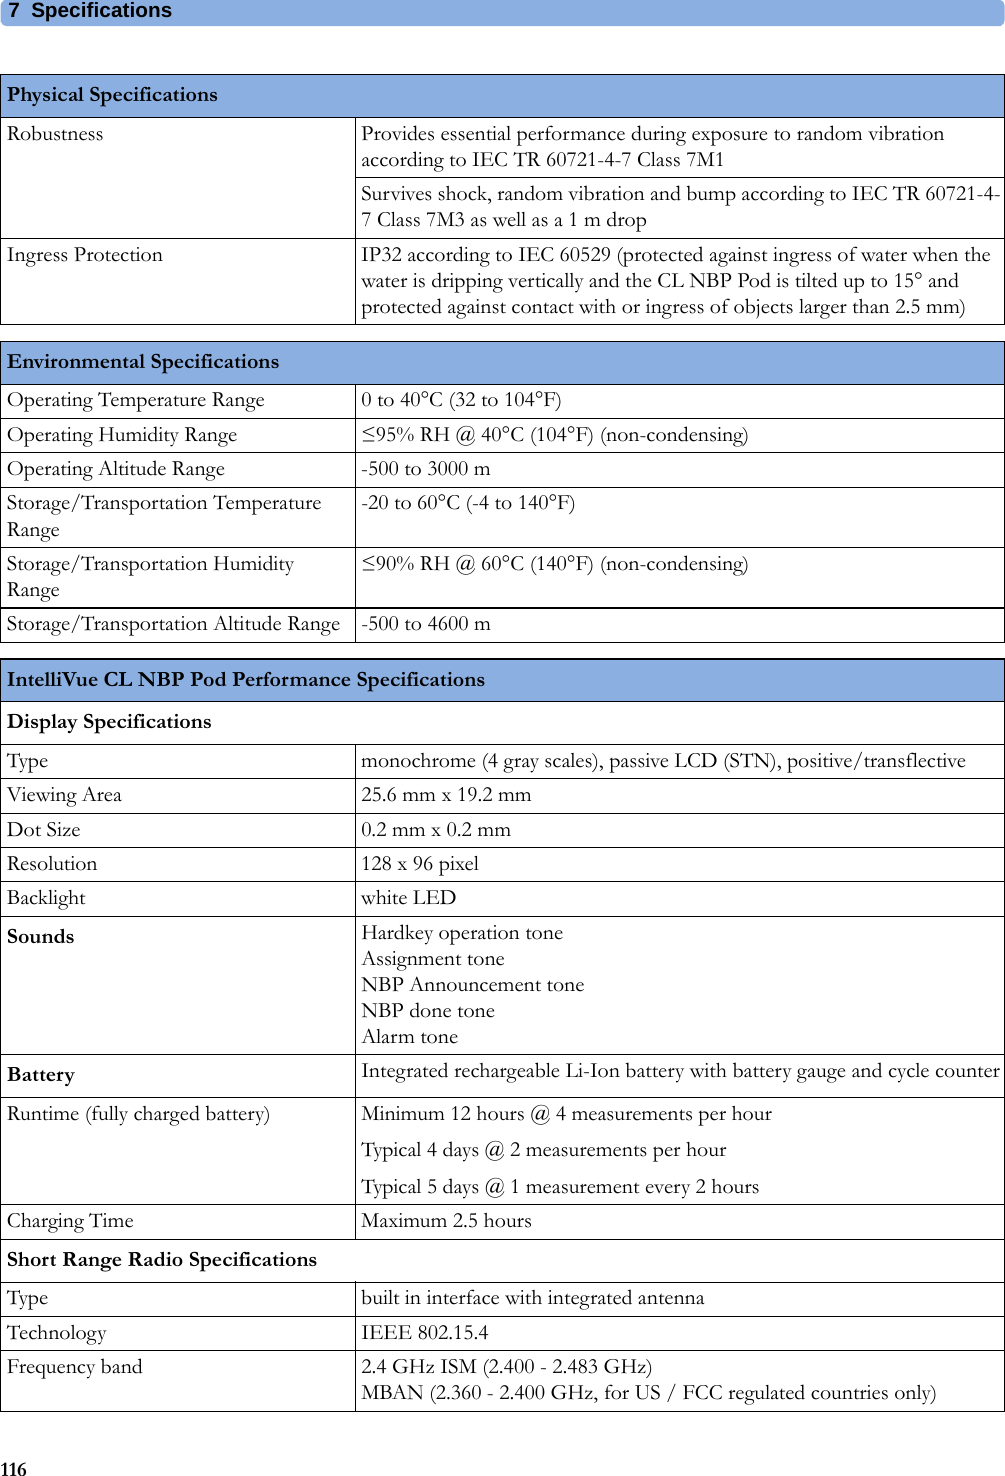
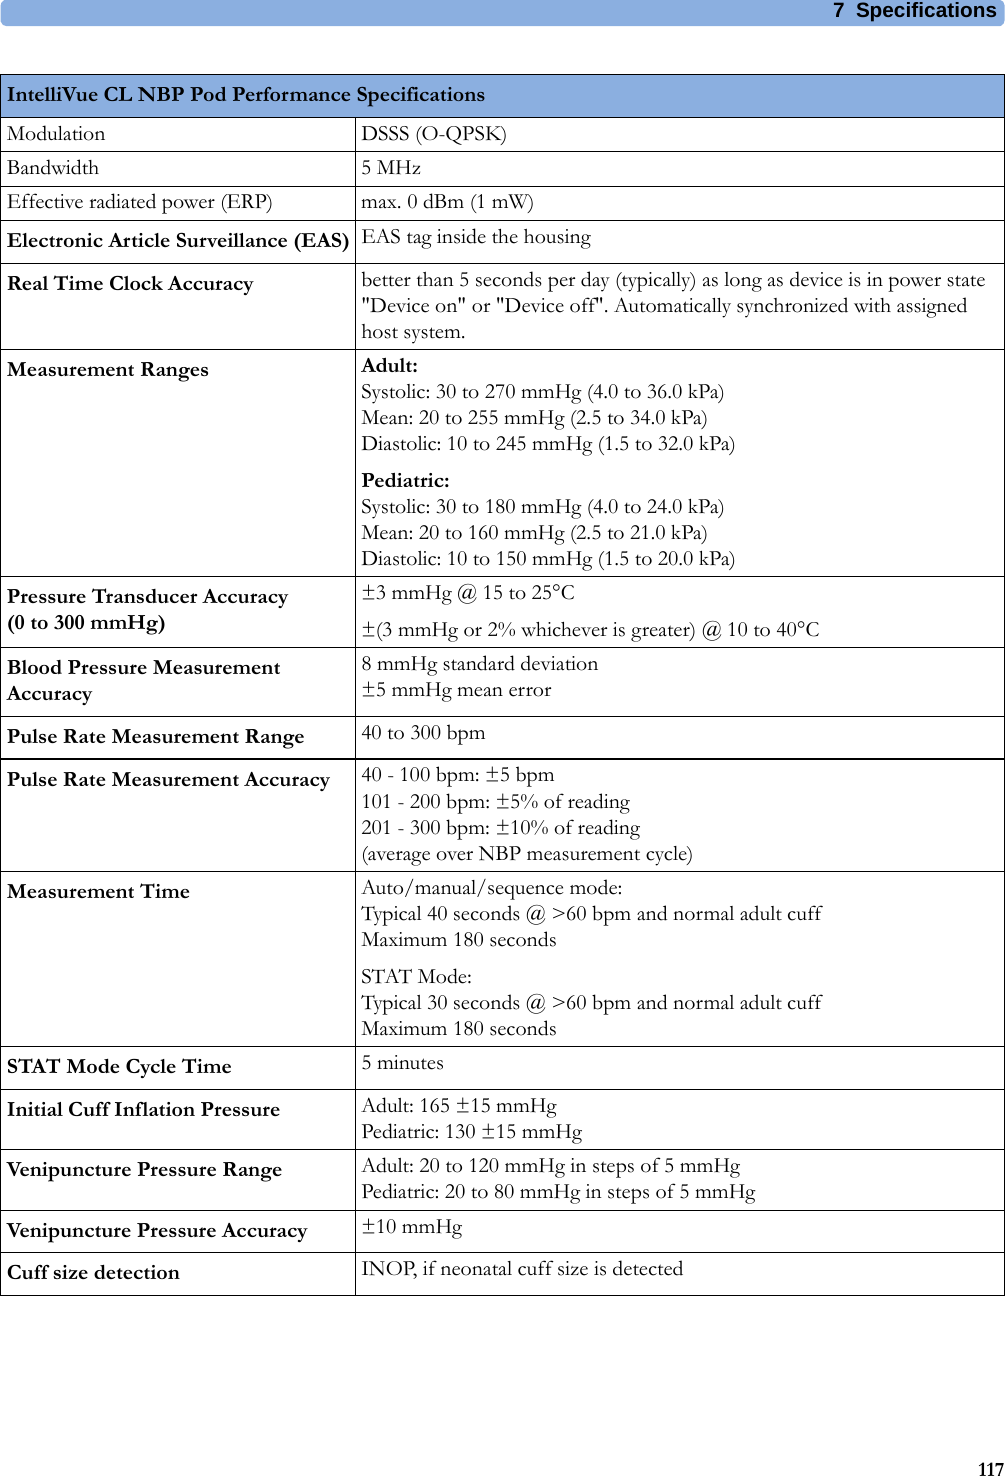
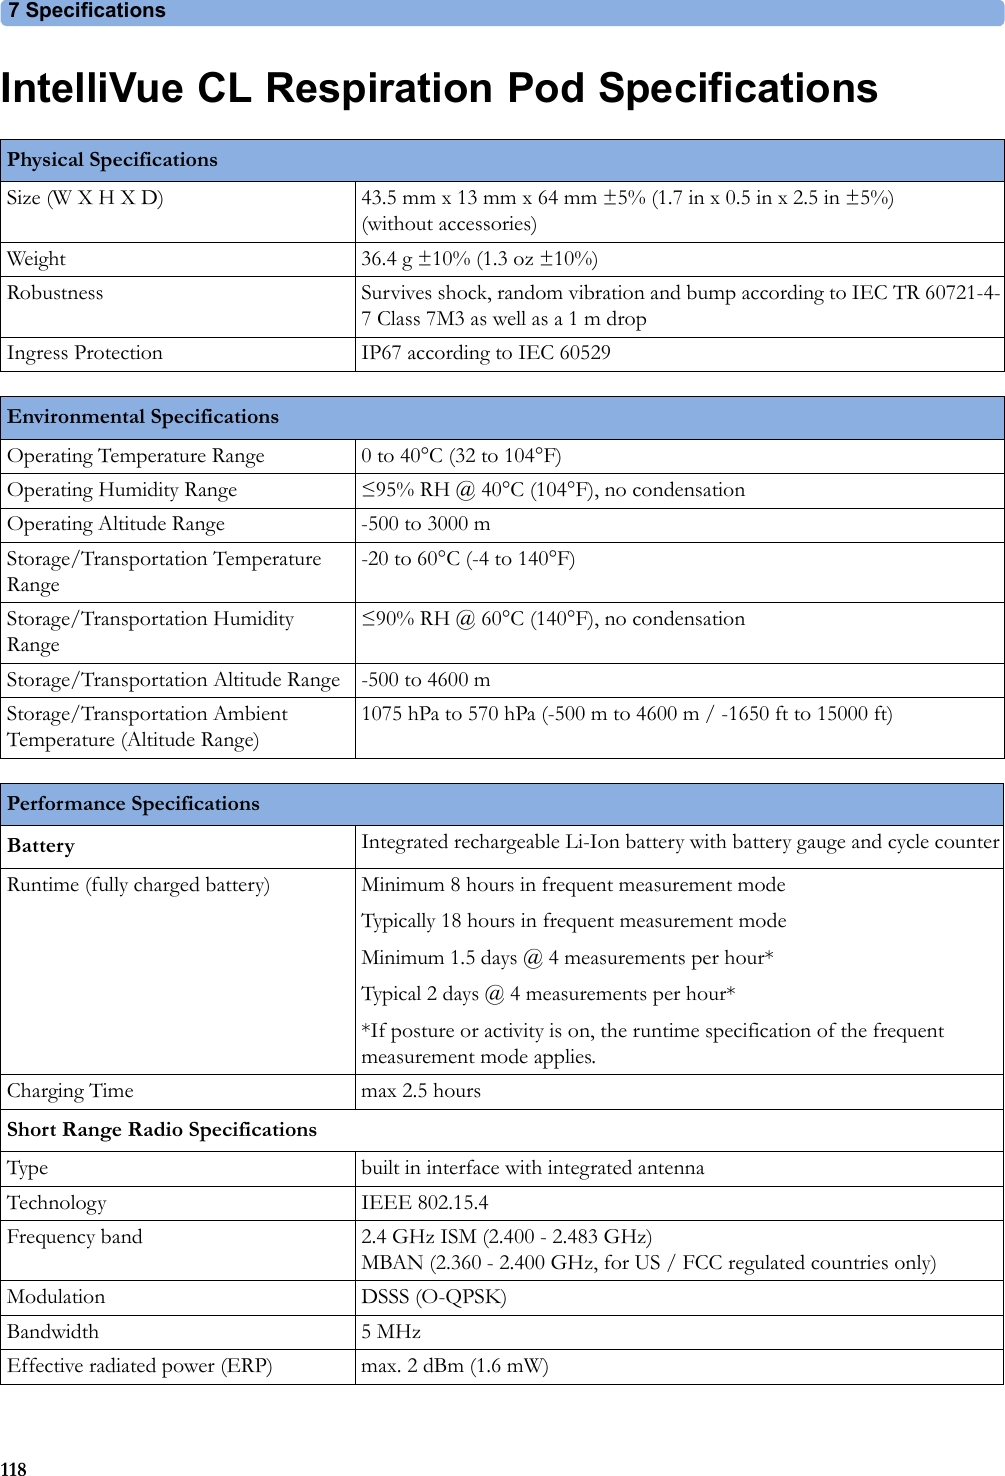
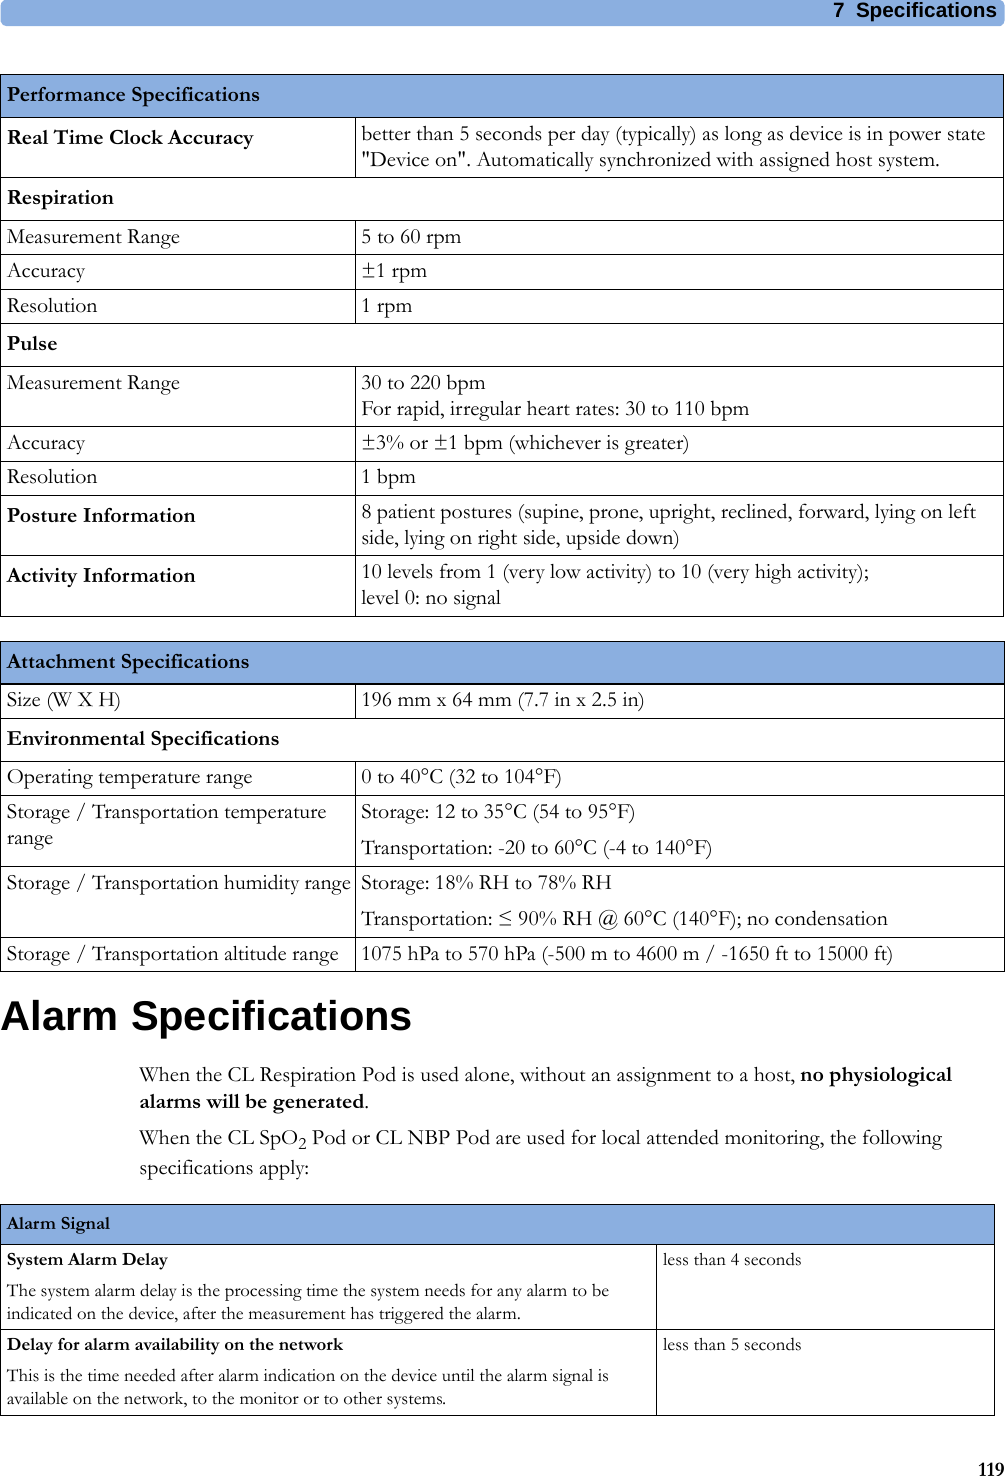
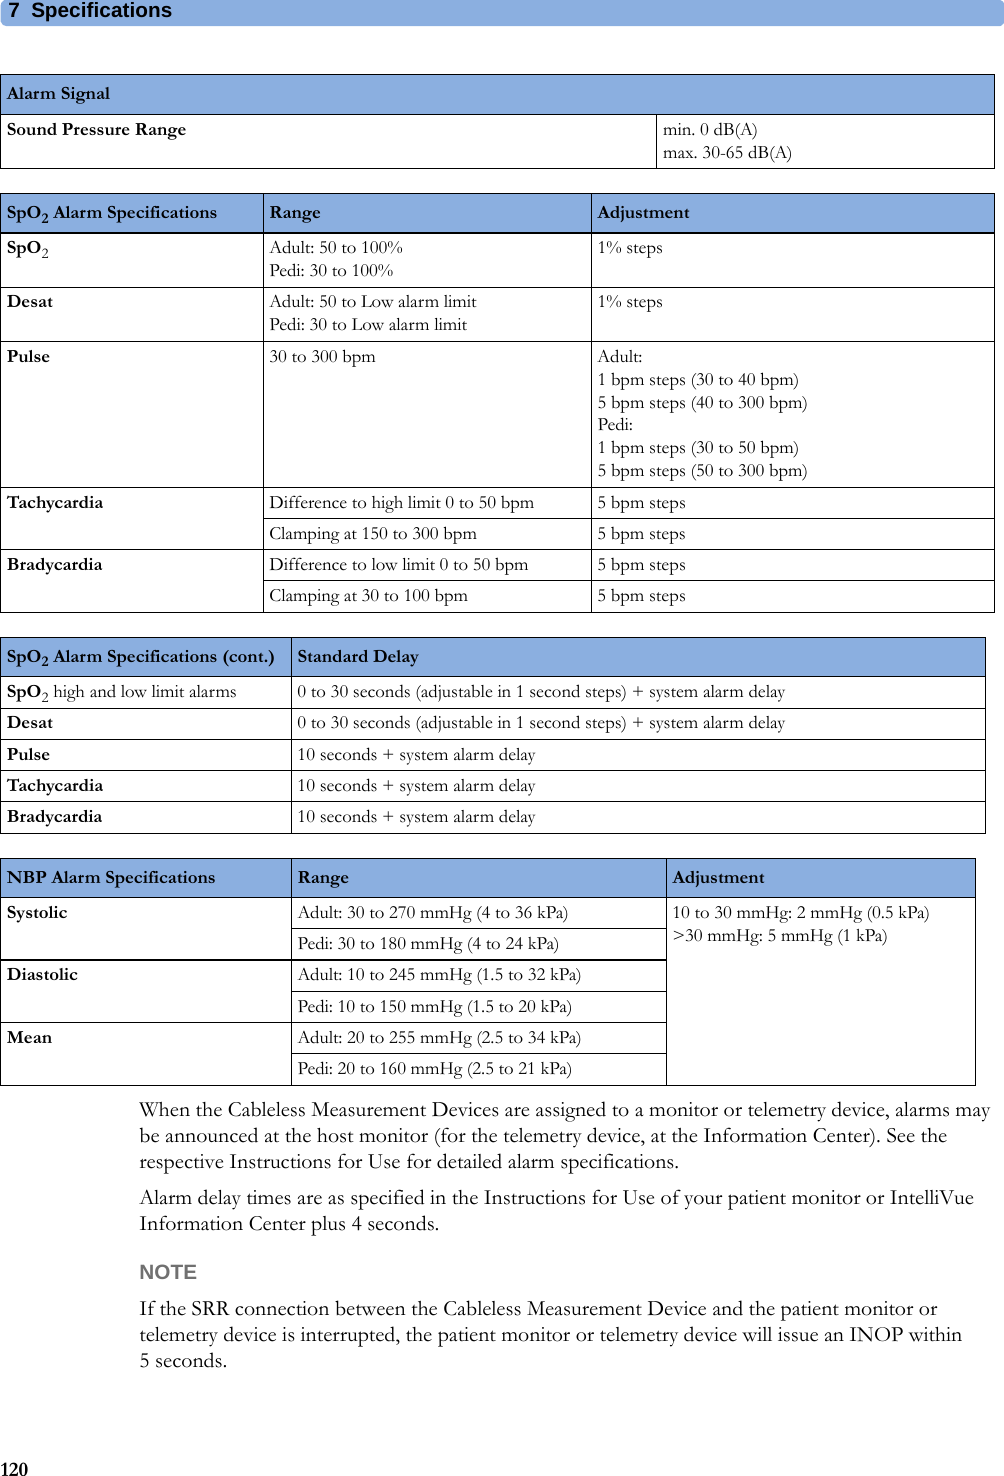
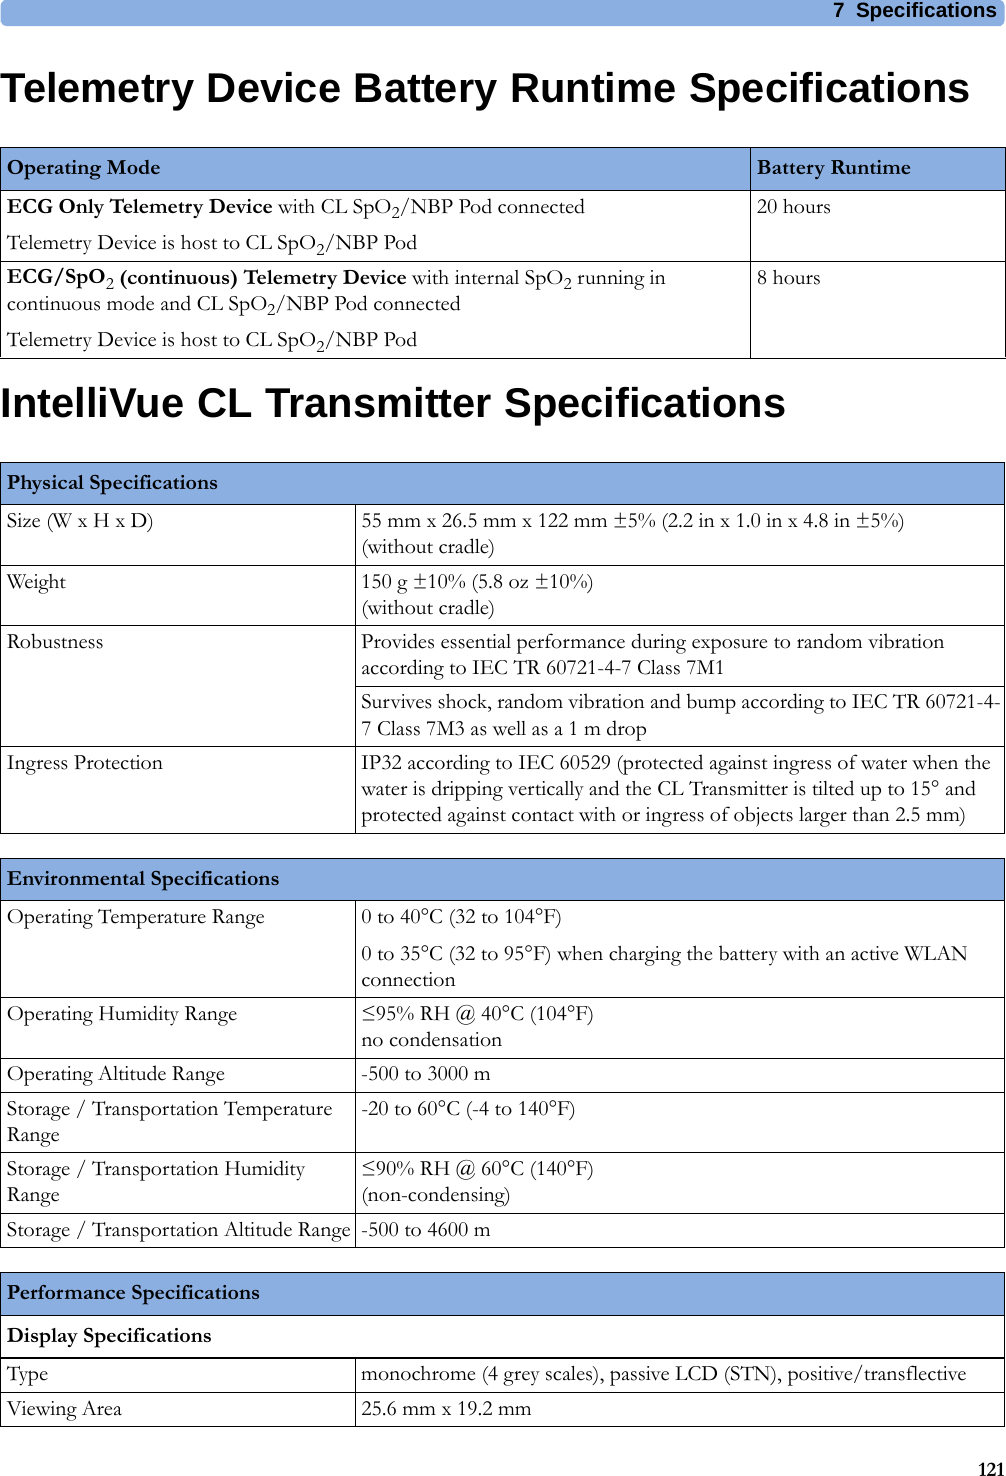
User Manual IntelliVue CL