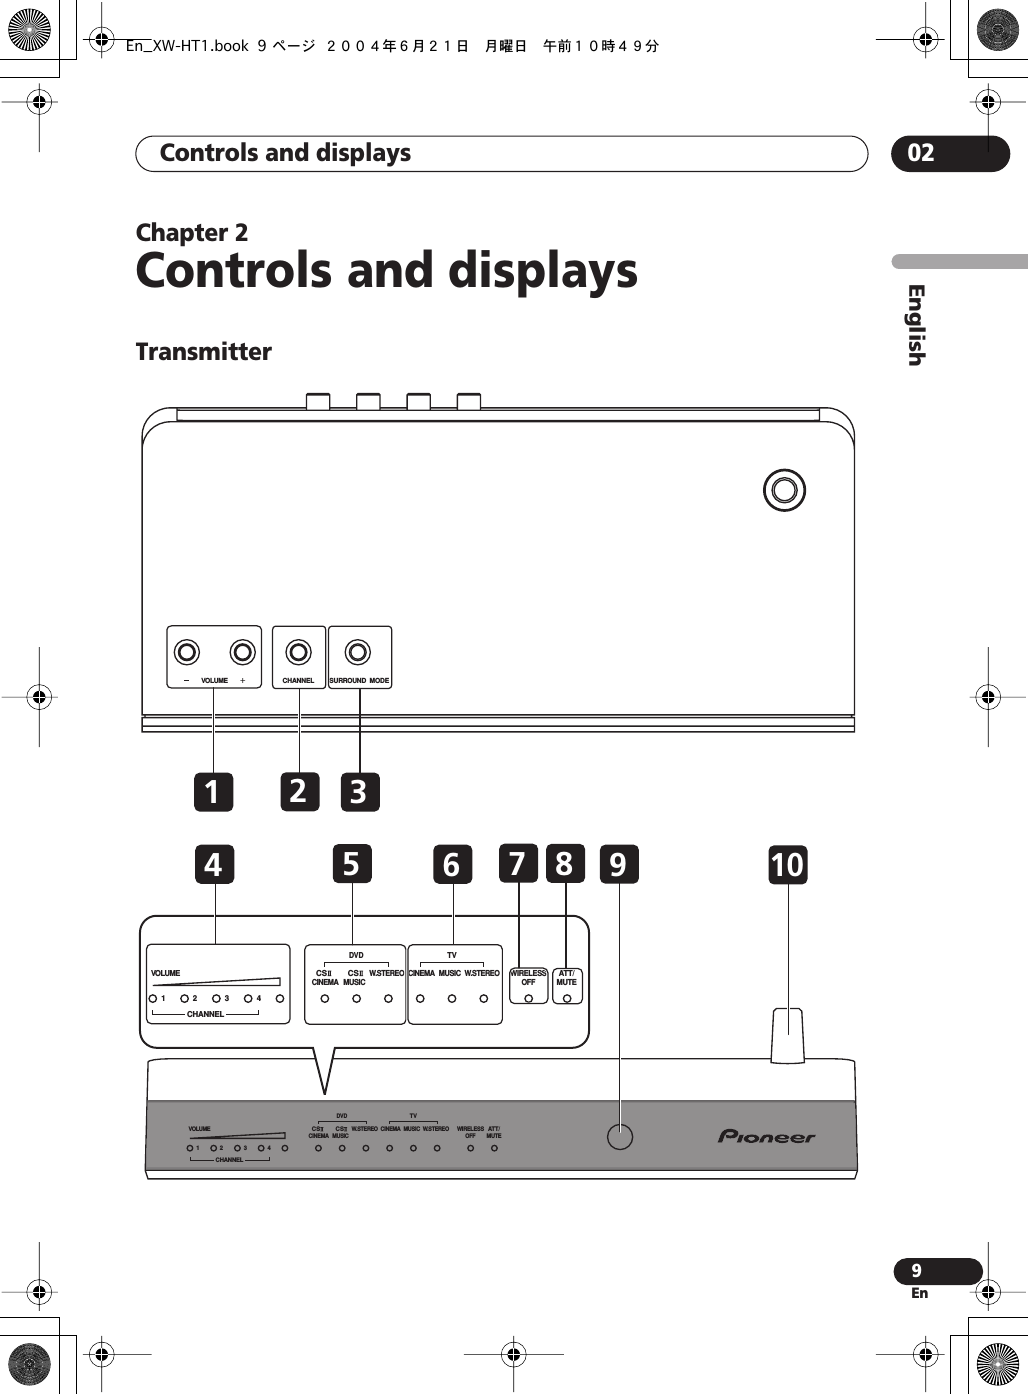
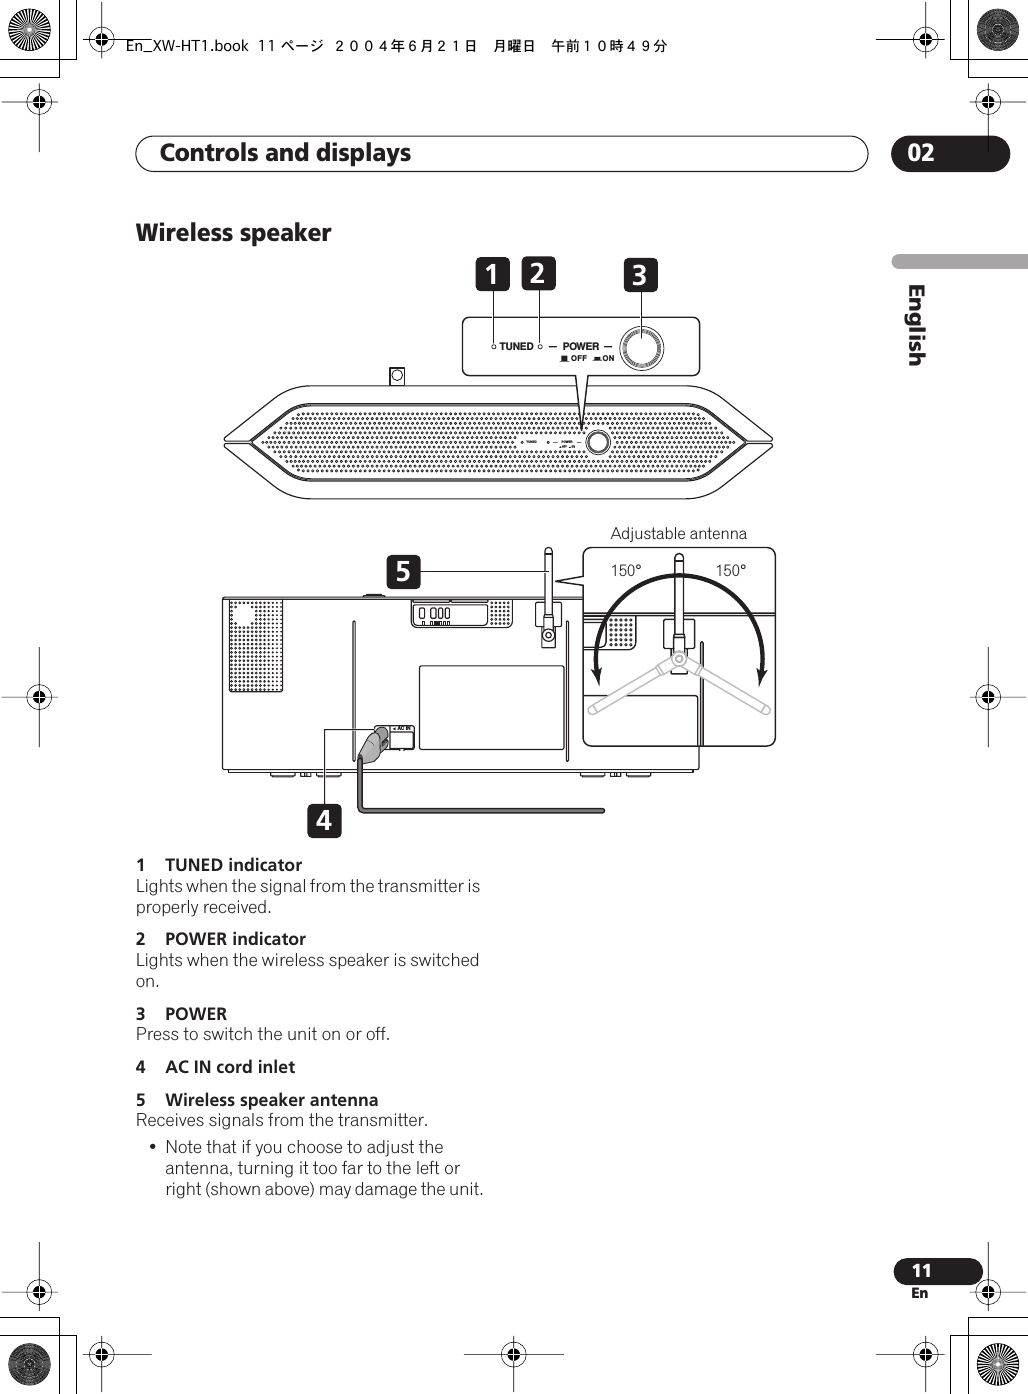
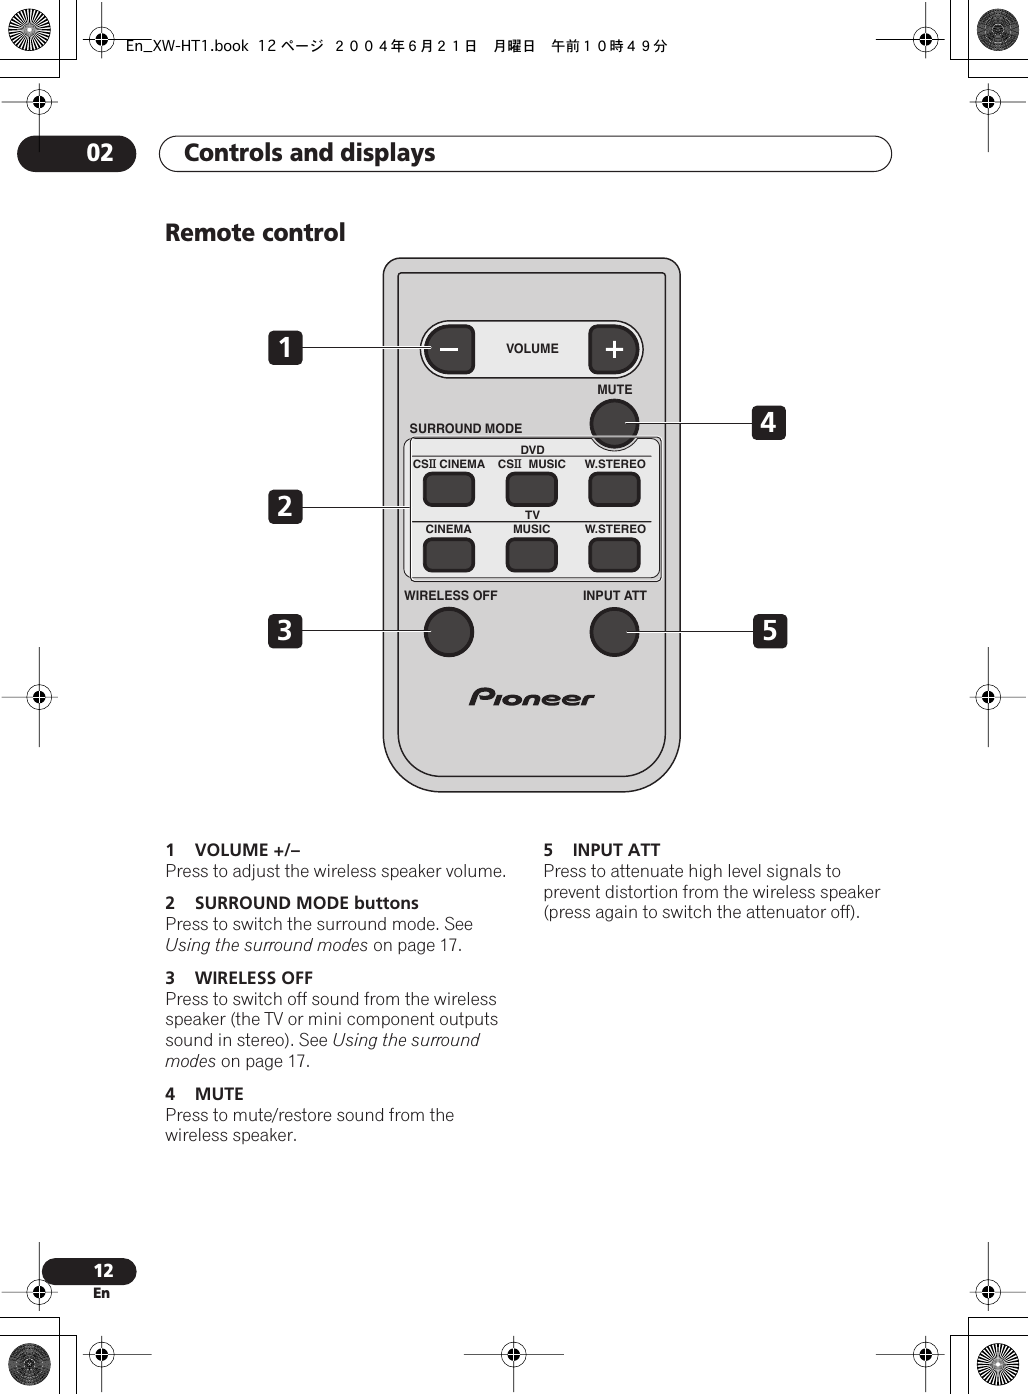
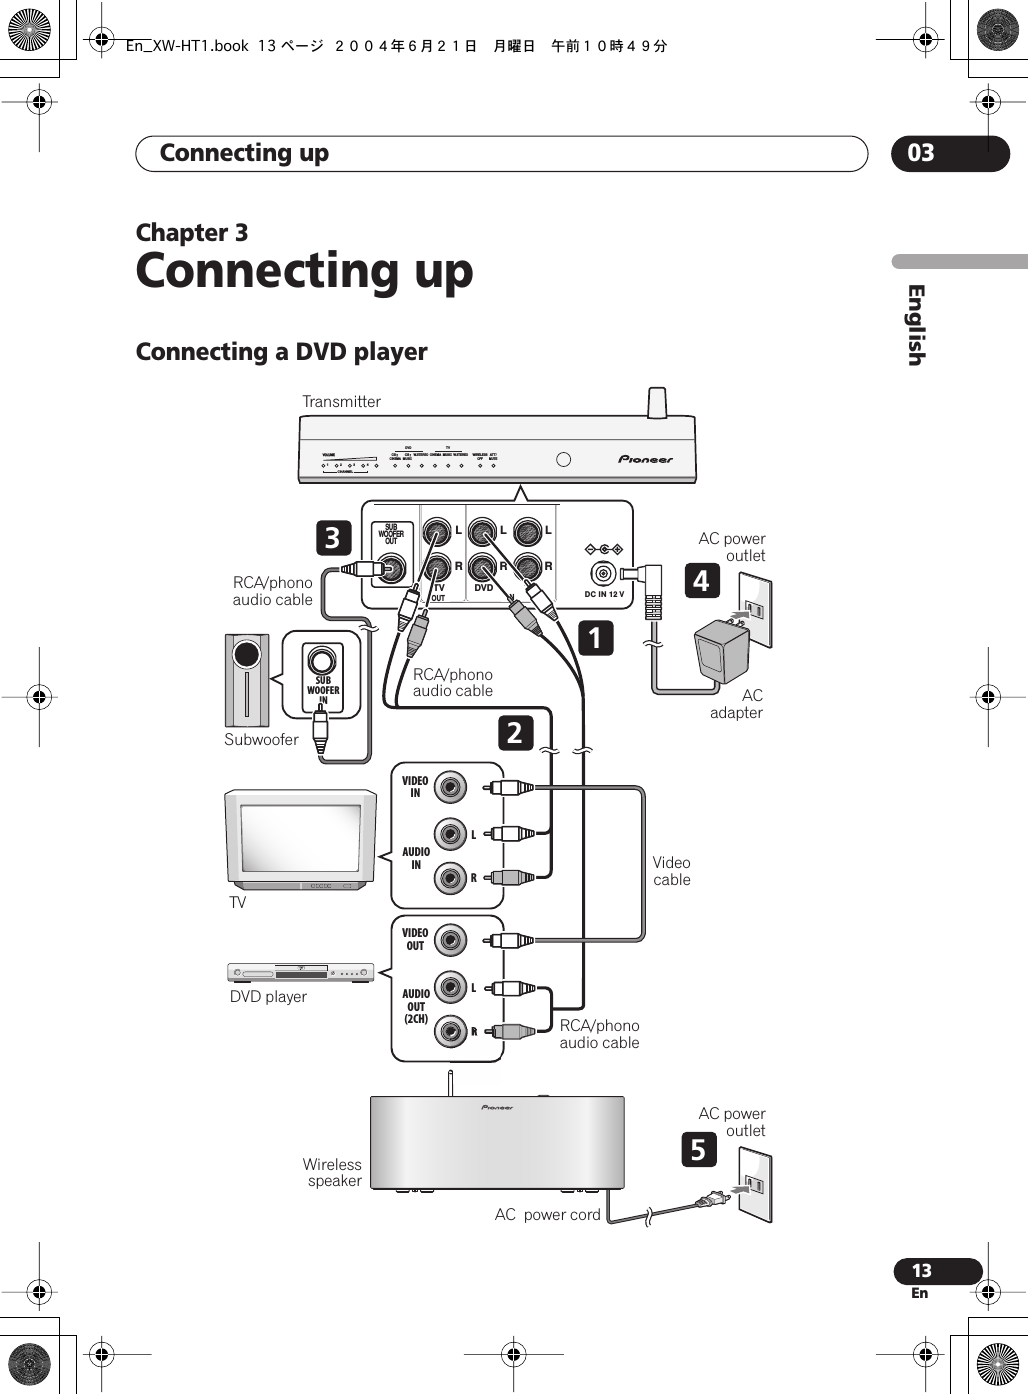
Pioneer T104 Digital wireless speaker transmitter User Manual En XW HT1
Pioneer Corporation Digital wireless speaker transmitter En XW HT1
UserManual.wiki
>
Pioneer
>
T104 User Manual
Users Manual
Navigation menu
Upload a User Manual
Namespaces
Wiki Guide
HTML
PDF
Info
Views
User Manual
Discussion / Help
Navigation
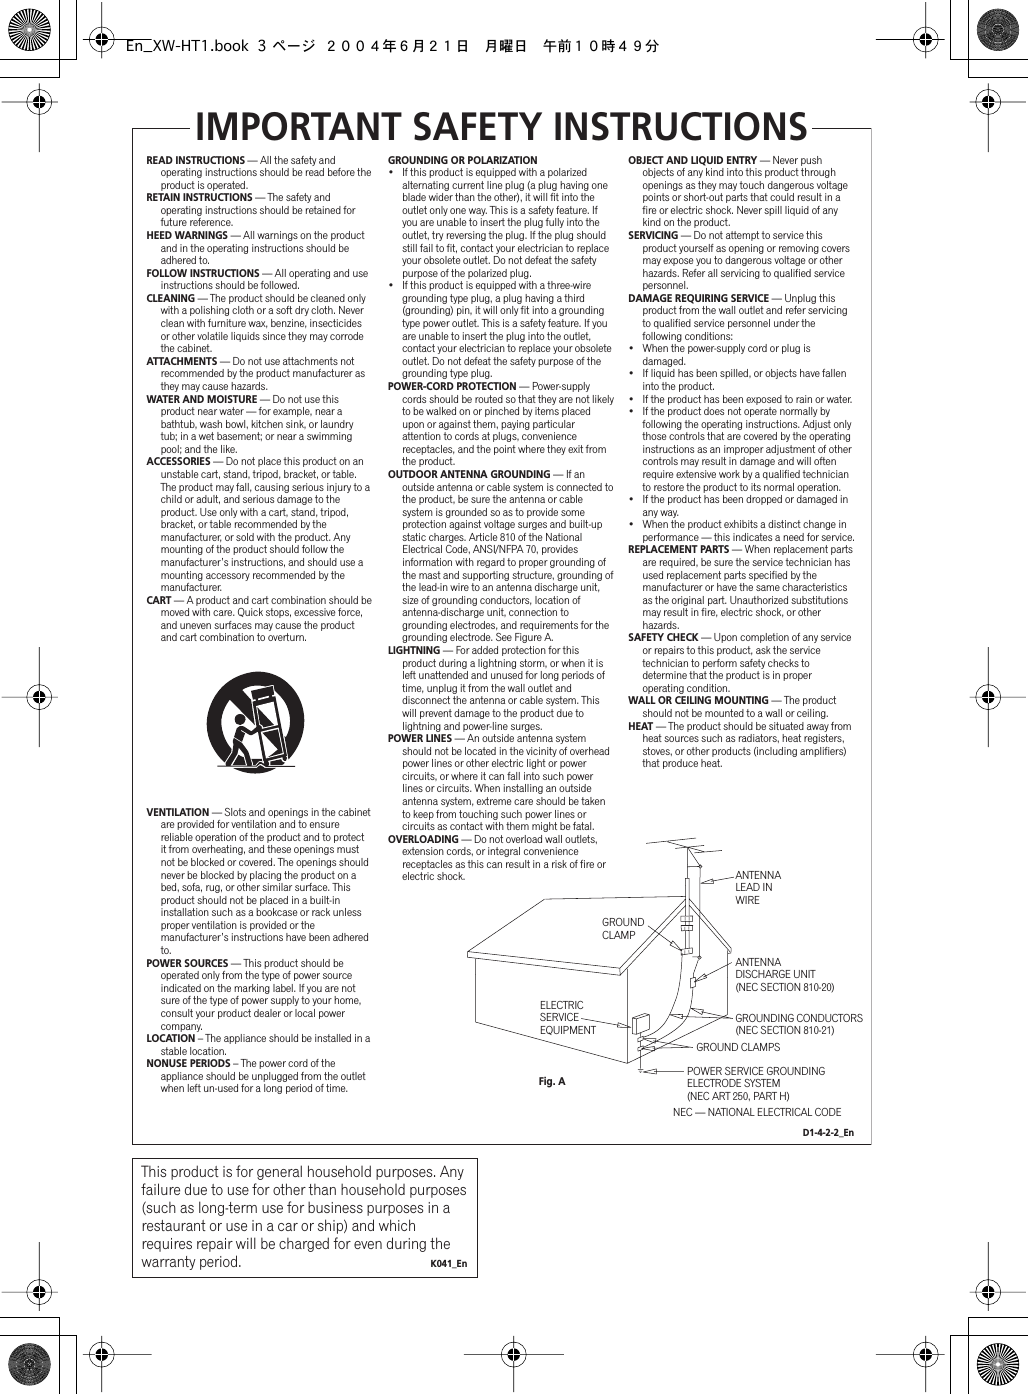
![[For U.S. model] Changes or modifications not expressly approved by the manufacturer (party responsible) for compliance could not void the user's authority to operate the equipment. [For Canadian model] Operation is subject to the following two conditions: (1) this device may not cause interference, and (2) this device must accept any interference, including interference that may cause undesired operation of the device. [Pour le modele Canadien] L'utilisation de l'appareil est soumise aux deux conditions suivantes: (1) il ne provoque pas de brouillage, et (2) il peut supporter tous les brouillages, y compris ceux qui sont en mesure de provoquer une anomalie de fonctionnement de l'appareil. [For Canadian model] To prevent radio interference to the licensed service, this device is intended to be operated indoors and away from windows to provide maximum shielding. Equipment (or its transmit antenna) that is installed outdoors is subject to licensing. [Pour le modèle Canadien] Pour éviter le brouillage radioélectrique des emetteurs ayant une licence, cet appareil doit etre utilisé à l'intérieur des habitations et loin des fenêtres de manière à assurer la protection maximale. Un équipement (ou son antenne d'emission) lorsqu'il est installé à l'extérieur ne peut être utilisé qu'après obtention d'une licence. Power cord caution Handle the power cord by the plug part. Do not pull out the plug by tugging the cord, and never touch the power cord when your hands are wet, as this could cause a short circuit or electric shock. Do not place the unit, a piece of furniture, or other object on the power cord or pinch the cord in any other way. Never make a knot in the cord or tie it with other cords. The power cord should be routed so that they are not likely to be stepped on. A damaged power cord can cause a fire or give you an electric shock. Check the power cord once in a while. If you find it damaged, ask your nearest Pioneer authorized service center or your dealer for a replacement. For safety in operation Do not use the system in the proximity of electronic equipment that requires high-accuracy control or handling of very low-level signals.• The system may affect the electronic equipment, causing malfunction or accident. Examples of such electronic equipment: Hearing aid, cardiac pacemaker, other electrical medical equipment, fire alarm, automatic door, and other automated control equipment. If you use a pacemaker or other electrical medical equipment, consult the manufacturer or dealer to check the effects of radio waves on it.Do not use the system in places where its use is prohibited, for example near aircraft equipment and in hospitals.• The system may affect electronic equipment or electrical medical equipment, causing an accident. Follow the instructions given by the aircraft company or medical institution. Note • We do not assume any liability for the damages incurred due to improper use of the product by the user or third party, malfunction during use, other troubles or use of the product, unless indemnity for damages is admitted by the law.En_XW-HT1.book 4 ページ 2004年6月21日 月曜日 午前10時49分](https://usermanual.wiki/Pioneer/T104/User-Guide-449823-Page-4.png)