Pismolabs Technology P1AC8 Pepwave / Peplink / Pismo Labs Wireless Product User Manual Part 3
Pismo Labs Technology Limited Pepwave / Peplink / Pismo Labs Wireless Product Part 3
Contents
- 1. User Manual Part 1
- 2. User Manual Part 2
- 3. User Manual Part 3
- 4. User Manual Part 4 rev
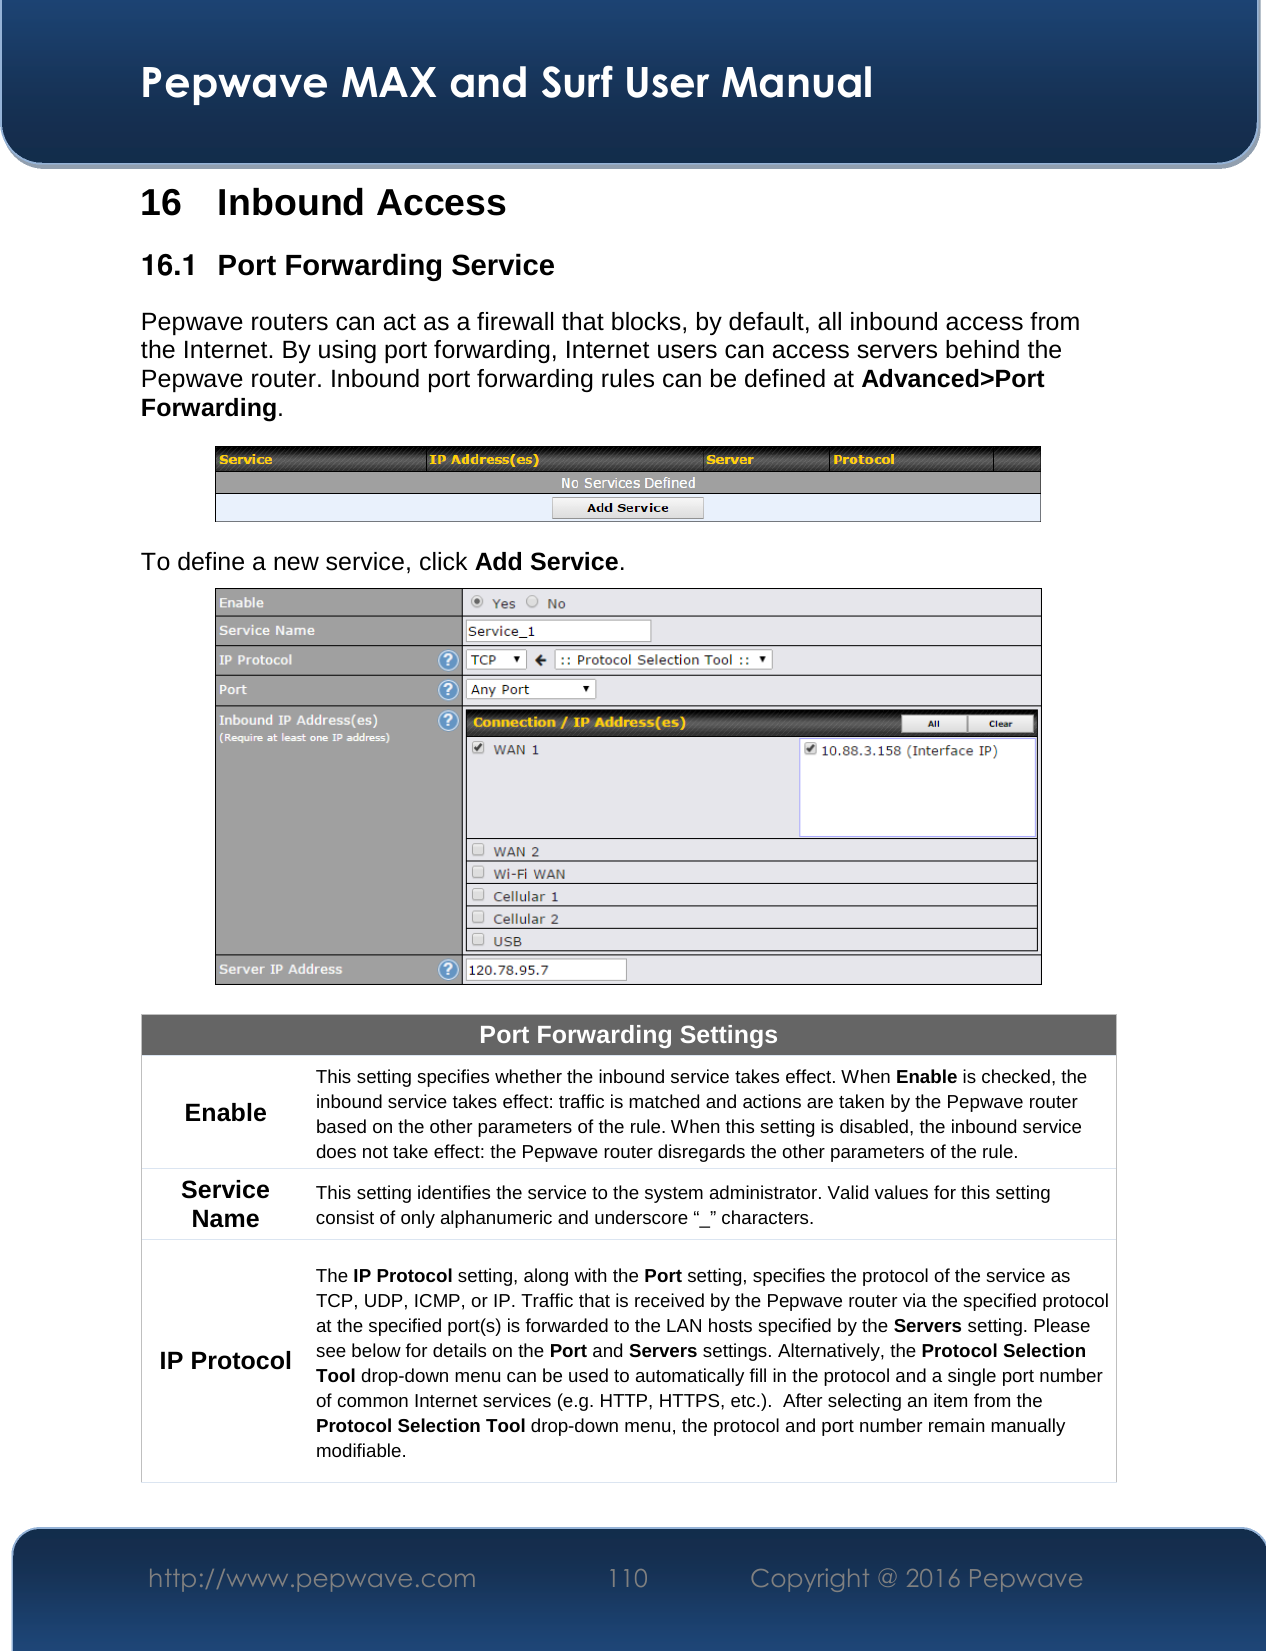
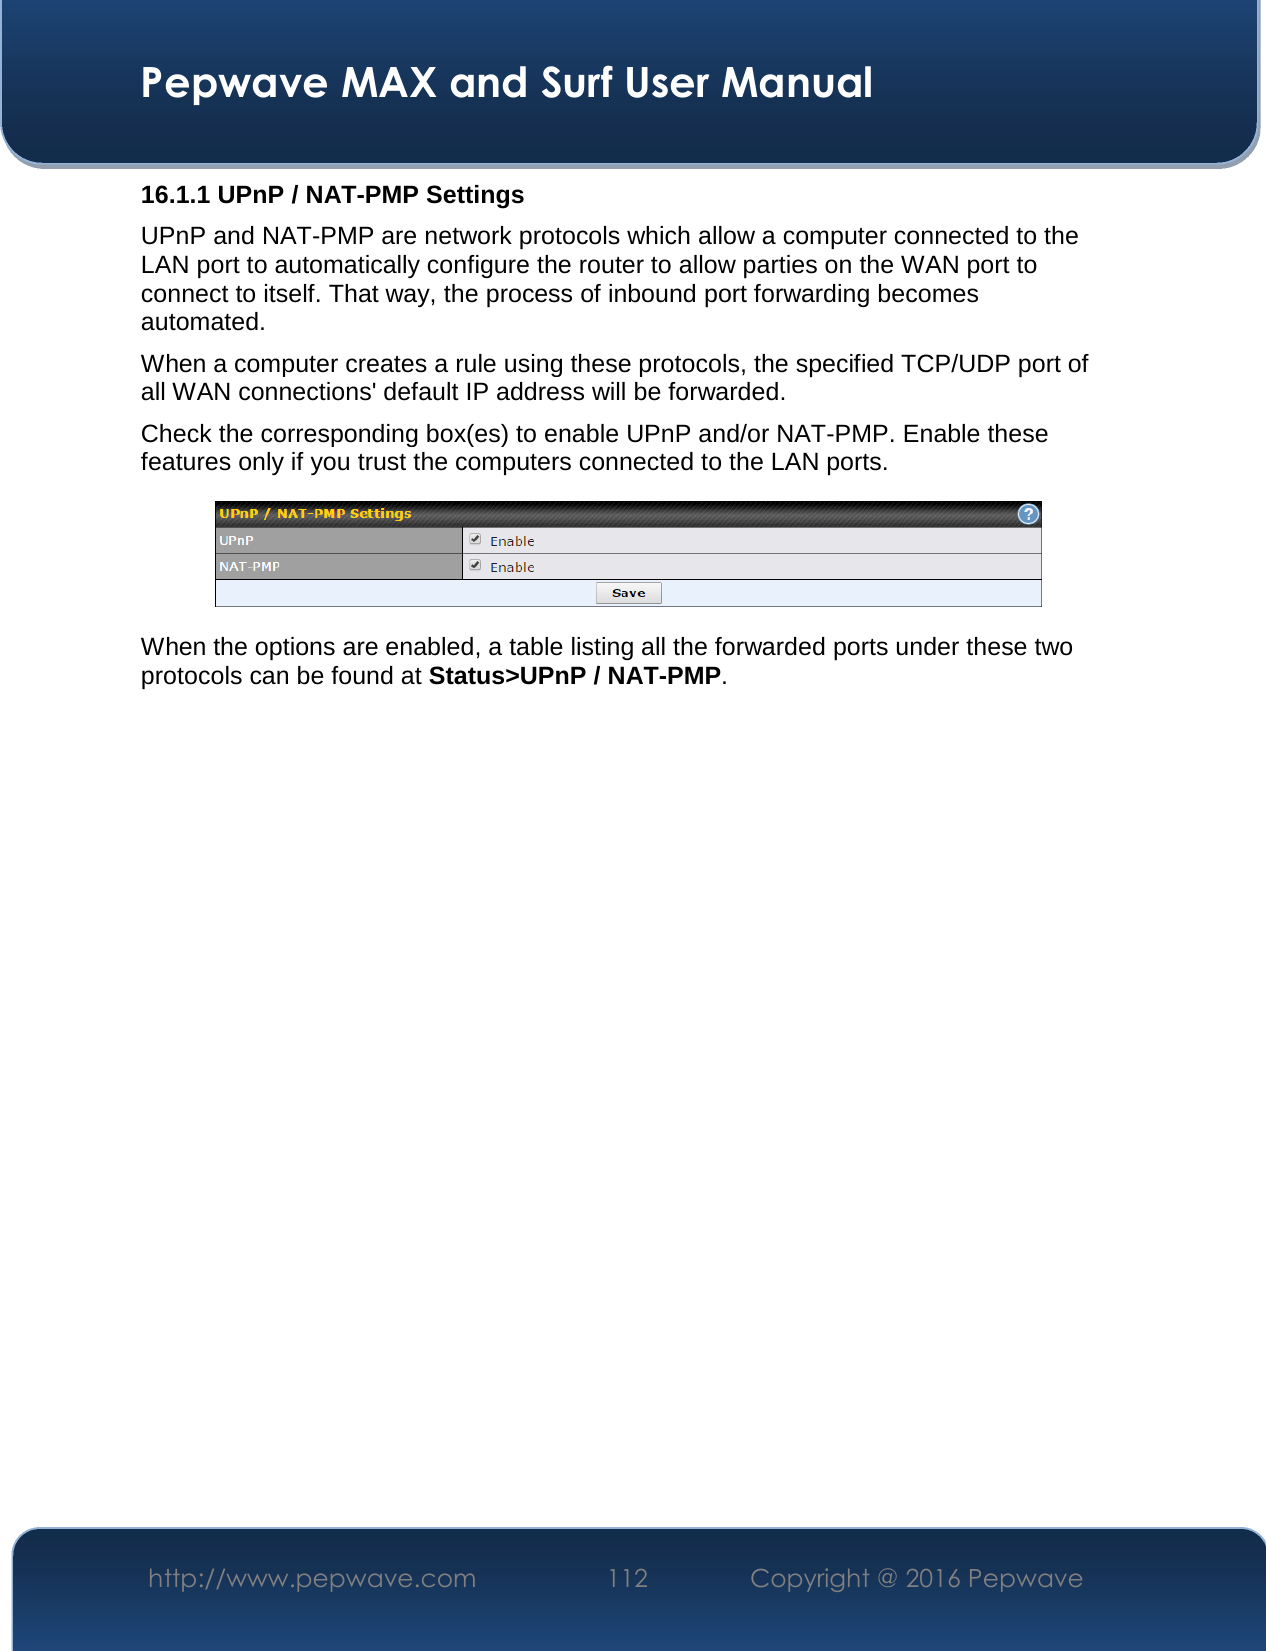
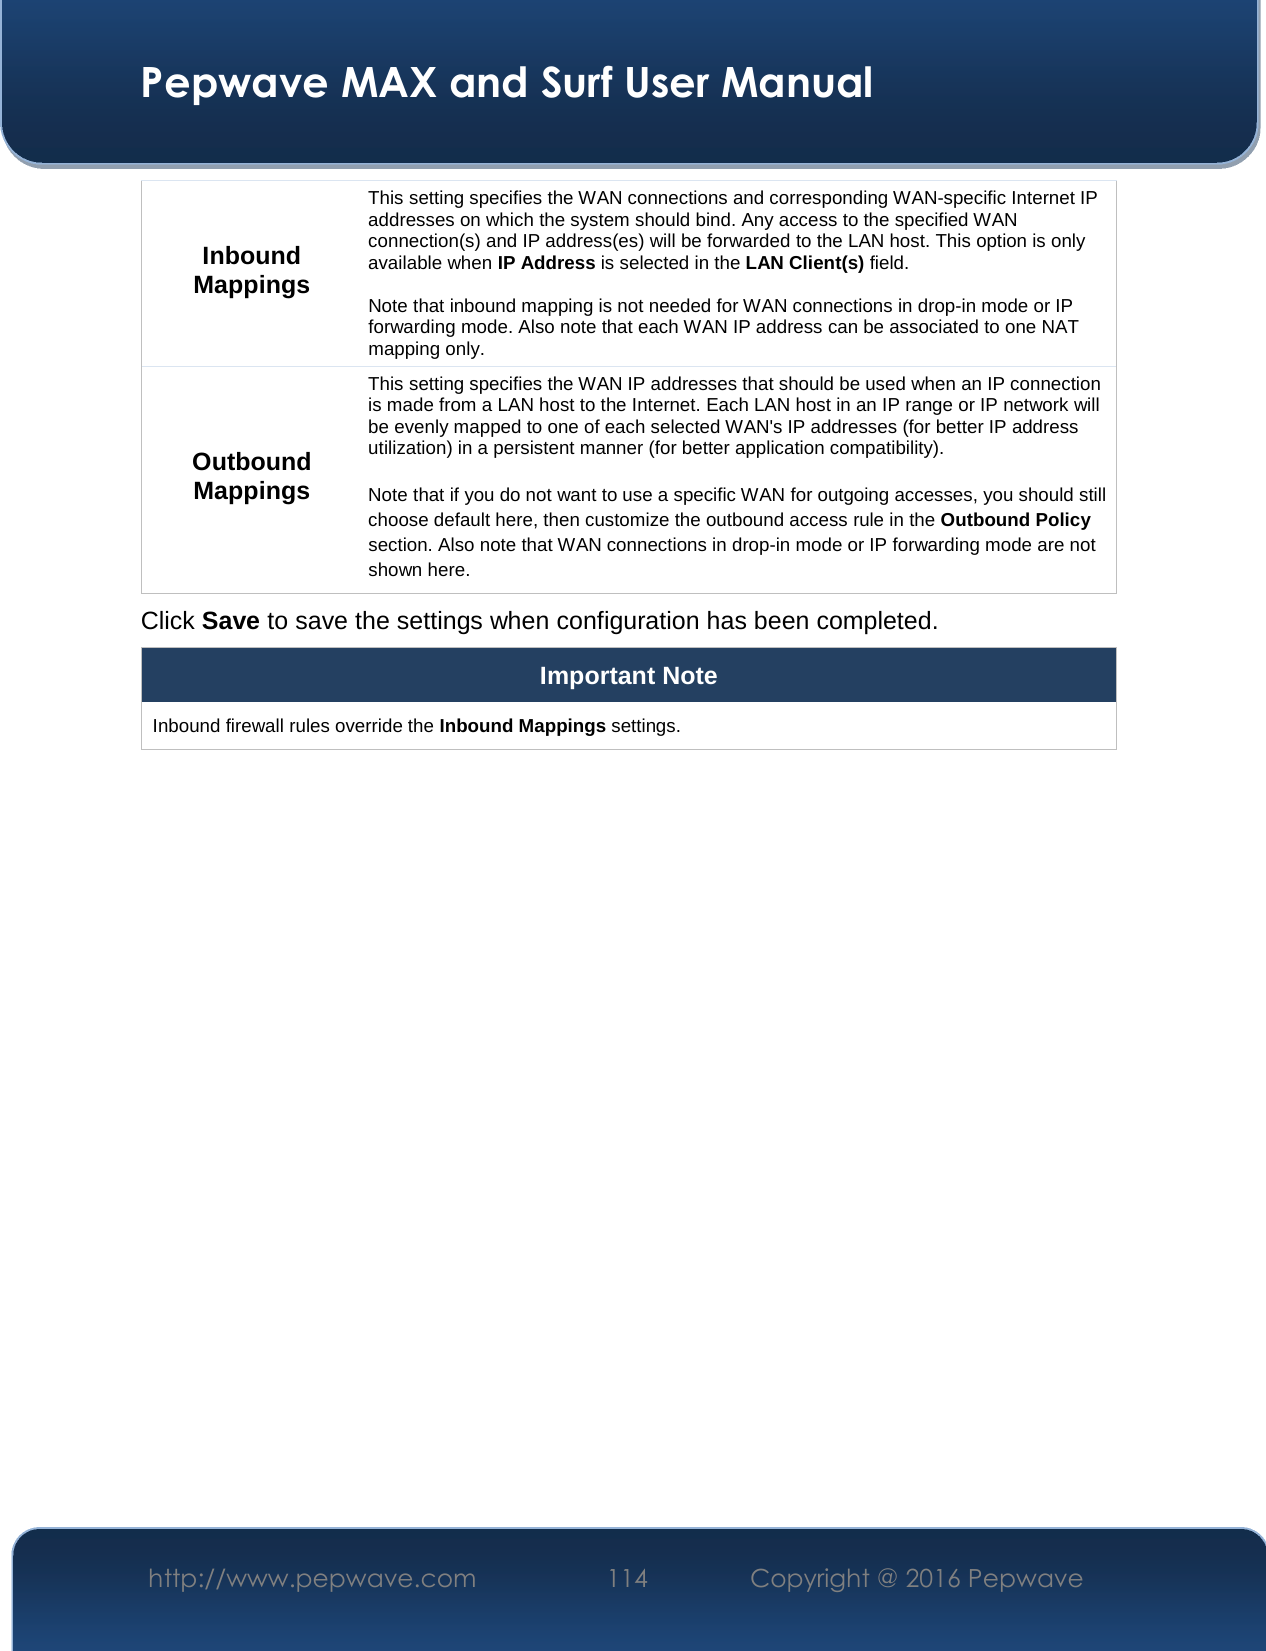
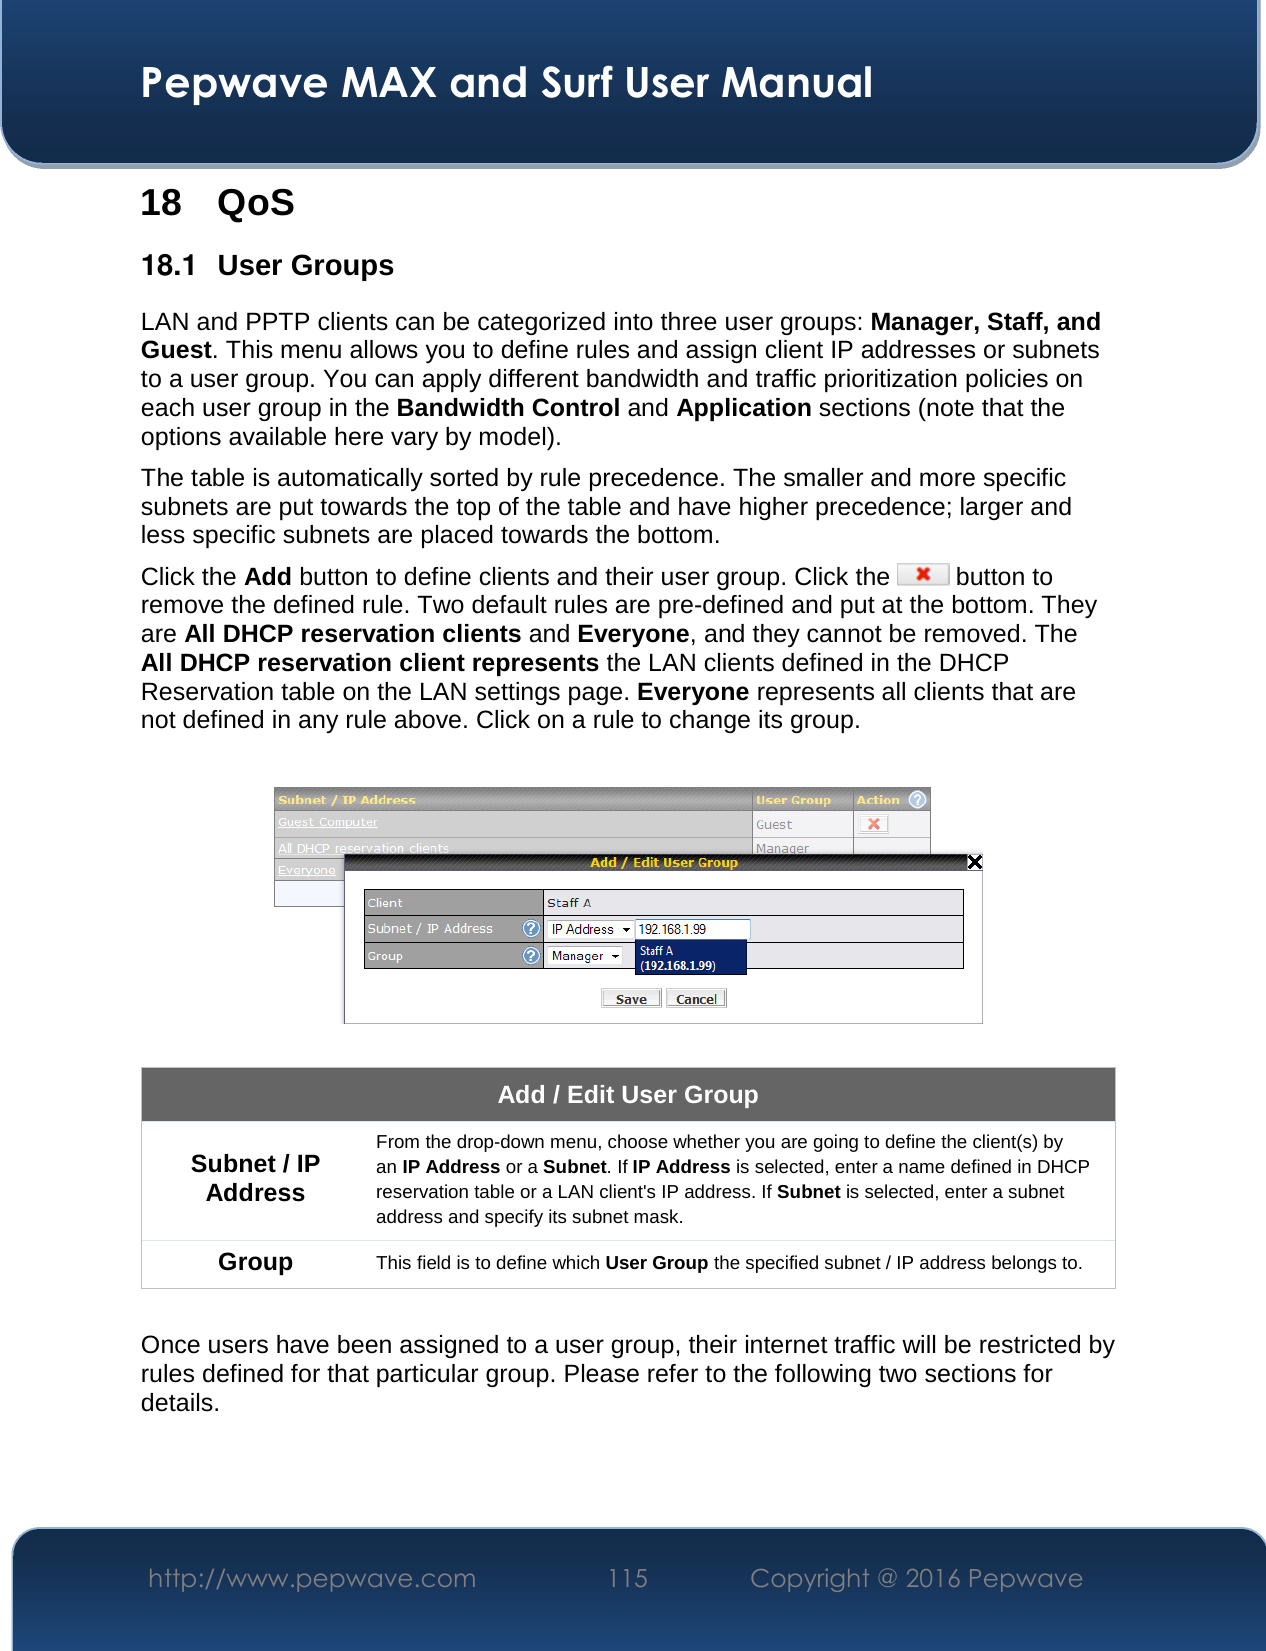
User Manual Part 3